Gift Post #1: Tablet Cover

BAMQG had a gift exchange yesterday for the Winter Extravaganza meeting. I made a tablet cover for Cindy C.

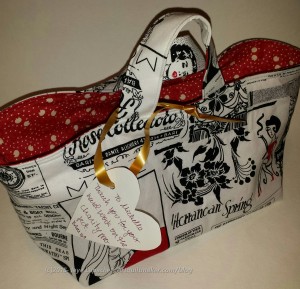
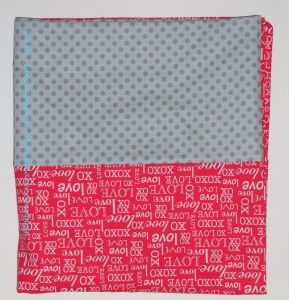
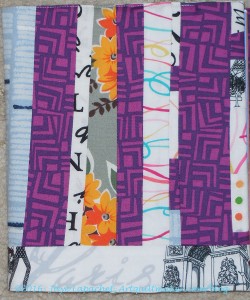
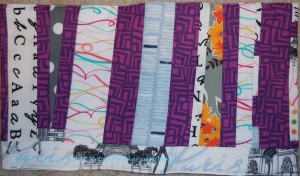
Table Cover - closed
Table Cover – closed

I started it a few months ago, right after the announcement and my giftee assignment.

I found many tablet covers, but finally decided I liked the look of the Sew Mama Sew pattern by Jen Carlton Bailly. In the end I got a tablet cover with which I am pleased and it only took me a day, but, in the end, I didn’t like this pattern.

The tablet cover I needed to make was intended for a modern guild’s swap. I have a lot of the Heather Bailey Pop something fabric – Sugar Pop? Pop Rocks? I don’t remember the name of it. It is modern and so I used it with a Bonnie and Camille Bliss print on the inside.

I searched for a tablet cover pattern, cut the pieces and then let them sit for nearly a month. Bad idea, because I had a hard time finding the pattern on my computer. It was there; I just didn’t remember where I filed it. I also forgot where I was in the making process. Sigh. Not an auspicious start.

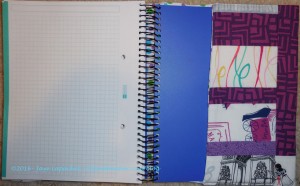
Tablet Cover Pocket
Tablet Cover Pocket

I started out making the pocket as the directions said. I was quite proud of my pocket. The corners are a little wonky, but I was proud of the way I lined up the fabric.

This pattern ended up being somewhat problematic and the problems started when I went to sew the pocket to the cover. The directions weren’t specific on where to sew the pocket and from the pictures, it looked like it was sewn to the inside. I sewed it on and went on with making the rest of the cover.

I used Soft & Stable instead of the recommended interfacing, because it is nice and cushy. I wanted the cover to keep the tablet from getting scratched and the Soft & Stable provides a good cushion. It is not fusible so I sewed the pieces into the seam allowances to keep them in place.

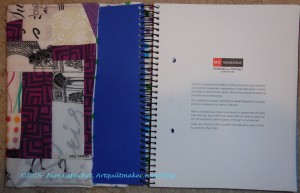
Tablet cover - open with tablet
Tablet cover – open with tablet

Once you get the hang of bagmaking, most bags (and this is essentially a bag) are very similar. I sewed along at a good clip. I slowed down towards the end, because of the strap for the wristlet. I had to translate the webbing directions to using interfacing and fabric directions. I think my wristlet looks ok.

The velcro was also a challenge and I would have put it on before I sewed the lining and the exterior together if I had known how it would fall in the steps. I’d like my velcro to be hidden, which means sew to the lining and the Soft & Stable NOT to the outside. That type of construction is not much more complicated, however you do have to think ahead.

Yes, I read the directions, but without fabric in my hands, it might has well have been gibberish. I’ll do it a different way if I make another one.

As I mentioned above, I sewed the pocket to the inside of the cover. There was no mention of sewing the tablet cover together. Even reading over the steps above and below, I could find no spot that said to sew the cover together so it looked like an envelope, so I did my best when I got to that spot.there were three sections, so it wasn’t difficult and I used monofilament so the stitching wouldn’t show up.

As it turns out, the pocket ended up on the inside. With the opening down.

Since the opening was down so I couldn’t even claim it is a hidden pocket. I am not a good pattern reader, so I went back to be sure and step two does not mention what fabric (outside or lining) I should sew the pocket to. Different fabrics are shown in different pictures. I know it is hard to write tutorials and thankless, as well, but this was not a complete pattern. I am not sure it was tested.

Finished Tablet Cover - open
Finished Tablet Cover – open

I looked at it and thought about it overnight. I decided to take the whole piece apart and resew it so the pocket would be useful. Unsewing monofilament is no picnic, but I am much happier with how my version of this pattern turned out.

The pocket is nice looking IMO, but it covers the matching of the fabric on the actual cover that worked at. Oh well.

Finished Tablet Cover - closed
Finished Tablet Cover – closed

CQFA December 2015 Meeting-Art Walk

Maureen had a great idea, which was to bring all of our challenge and swap pieces, regardless of level of finishing. The idea was show the pieces off in groups. I wasn’t sure how it would all work out, but it turned out to be fantastic.

Lobster Placemat in progress

First, this idea inspired me to work on the Lobster Placemat (for the placemat challenge), which, as I said, had been on my mind for awhile. I really felt some freedom in making this piece. It was fun to work on layering and also to work on a more casual applique piece. I am looking forward to getting back to it and adding some embroidery and other embellishments to it.

I am thinking of using small black fused fabric for the eyes, but may do some fancy embroidery. In order make a good eye with embroidery, I would need to use a satin stitch or something similar and I don’t have much experience with those types of stitches. We’ll see.

Amy's Response to the Pink Flower challenge
Amy’s Response to the Pink Flower challenge

Next, the idea worked out really well. We had some time while we enjoyed the snacks everyone brought and took the time to look at the pieces.  We were able to take our own time as well as informally chatting with others about the pieces.

Amy’s response to my Pink Flower Challenge is fantastic. Her piece looks like a Ruth McDowell piece and I couldn’t get over how great the piece looked. Her work is so amazing. I have seen such growth in her work since the first Primal Green exhibit.

Next, also, we sat down together and, with Amy’s guidance, we went through each piece and  discussed our thoughts on the pieces. We were able to ask questions of the artists as well as explain our thoughts on our own pieces.

Finally, seeing all these pieces together and talking about them with the other members really inspired me to get back to some art quiltmaking. I’ll work on the Lobster Placemat and, perhaps, get back to the Serendipity Lady.

Creative Prompt #341: Icicle

Reno Icicles
Reno Icicles

I couldn’t resist posting this picture, which is a good example of icicles.

icicle lights

Definition: “a hanging, tapering piece of ice formed by the freezing of dripping water. a thin, shiny strip of plastic or foil hung on a Christmas tree for decoration.” (Google)

The Icicle is Blue’s new stylish USB converter and mic preamp combo that allows you to connect any XLR microphone directly into your computer via USB

Icicle Creek Center for the Arts

Icicles, an Emacs library that enhances minibuffer completion, that is, input completion

performance eyewear

Icicle is a PHP library for writing asynchronous code using synchronous coding techniques.

a font

Icicle Ridge Winery is one of the most unique wineries in Washington Wine Country. Located in the foothills of the Cascade Mountains near Leavenworth,, Washington, founder Louie Wagoner and winemaker Don Wood produce hand-crafted, award winning wines that will delight you.

Icicle Farming

Zoomable Icicle

The Icicle Gorge Trail, one of the most popular trails in the Okanogan-Wenatchee National Forest

World of Warcraft spell

The 2015 WCBC Icicle may be your first chance to stretch your legs on a long ride after the long, cold, winter.

a type of hitch knot

Cameron Mahkent, alias Icicle, Jr. is the son of the original Icicle, Jora Mahkent

Wikipedia: “An icicle is a spike of ice formed when water dripping or falling from an object freezes.”

Icicles, an Emacs library that enhances minibuffer completion, that is, input completion.


Post the direct URL (link) where your drawing, doodle, artwork is posted (e.g. your blog, Flickr) in the comments area of this post. I would really like to keep all the artwork together and provide a way for others to see your work and get familiar with your blog or website.

The Creative Prompt Project, also, has a Flickr group, which you can join to  post your responses. I created this spot so those of you without blogs and websites would have a place to post your responses.

We are also talking about this on Twitter and Instagram. Use the hashtag #CPP

Random Update: STB

SBT Prep DONE!
SBT Prep DONE!

I have a couple of Sew Together Bags (SBT) on my list of Projects To Do. I have mentioned before that I find the prep of bags to be daunting. Unlike quilts, you can’t really cut as you go. It is a little frustrating to do that, if nothing else. Still cutting out bunches of pieces is no picnic either. I did a lot of cutting on my trip to Reno and that helped me, not only move forward on projects (even though I can’t show them just yet), but also be inspired to make other projects of the same kind. At the moment, I am just being inspired. I have not yet cut out other projects since I have a couple from that mass prepping session to sew.

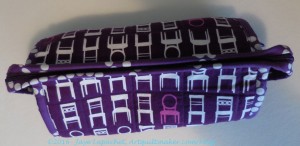
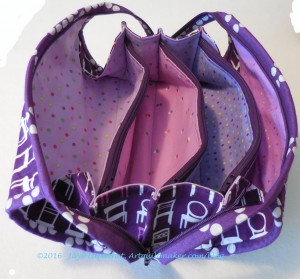
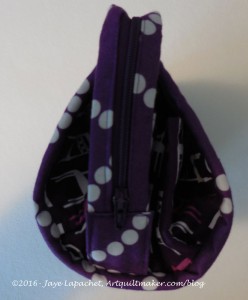
SBT: big zipper section

A few of us on Facebook have, coincidentally, SBTs on our list of to dos and we have been sharing tips and tricks. It is very helpful. One helpful tip was that there was a sew-a-long done by The Quilt Barn a few years ago and it still posted. I had some problems seeing it on my mobile device, but no problem from my computer. It really helps on the first zipper step, which is all the farther I have gotten on the sewing part of the project. Still, it is nice to see the other ladies finish and post their SBTs as well as the progress they are making.

Even More Gift Bags

I didn’t intend to make more gift bags. However,  I cleared off my cutting/work table and found some cuffs waiting to become Christmas pillowcases. I stared at them and finally decided to make them into gift bags instead. I am done with pillowcases for this year, I think.

Formerly cuffs, now gift bags

They are long skinny bags, but what the heck?

The one on the right will fit a gift I have to give on Saturday at the BAMQG gift exchange, which is great. I am sure I will find a use for the other one. Pretty soon I am going to have to do a gift inventory and see what I still have to make or buy. at that time, I will wrap gifts with bags I have handy.

Thinking about gift bags, this reminds me that I have a huge gift to wrap. I don’t think I want to make a gift bag that big that will only be used once, or very occasionally. I might drape some Christmas fabric over it and tie a ribbon around it and call it done. Did I mention I found another stash of Christmas fabric when I was looking for beads for the ATCs?

More Christmas wrapping

I also made a few bags from the leftover lights fabrics. These are so cheerful.

Have you been making gift bags?

CQFA December 2015 Meeting-ATCs

The meeting on Saturday was long and fabulous. I can’t write one post on all that happened. It is too much to include.

We had a short business meeting, then everyone put their challenge and workshop pieces up and we all walked around and looked at them.

Nancy, Virginia, Angela, Jaye (Top left to bottom right)

While this was happening, some of us exchanged ATCs. Virginia, Angela, Nancy and I were the only ones who made ATCs. This was a GREAT batch, though, and I love the ones I received, including one of my own.

I almost never get one of my own, mostly because I don’t make an extra to keep. My own fault, but it is nice to get one once in a while.

I spent part of the day, and most of the evening, Friday making my ATCs. The big piece of ATC backing that I made at the beginning of the year to help make the ATC process progress more quickly has disappeared (sigh), so I had to start at the beginning. Part of this process was clearing off my cutting/worktable. I had things in progress there, which took up space, so I cleared them off, made the backs of the ATCs and then started in on the fronts.

I used scraps, mostly. I also decided to try using some of the sheer ribbon I save from gifts for gift bags as a starting point. I enjoyed using it as it gave the piece a bit of a sparkle, but I think I should have used a darker fabric if I wanted the ribbon to show up more.

Jaye's ATCs in progress
Jaye’s ATCs in progress

I usually make the 4 ATCs as one big piece and then cut them up. It makes for less fiddliness. This time I was smart and left a little bit between each ATC so I had room to cut them apart. You can see the stitching lines around each 2.5″x3.5″ rectangle. This rectangle is my canvas and helps me remember that whatever is between those two lines will not be seen.

That blue thread is very thin and almost looks like a length of single crochets. I carefully placed it next to the stitching where I stitched down the ribbon and sewed it on with a straight stitch. I bought it and a few other colors on a card that had 5 different types of embellishing thread in about 2-3 yard lengths. I use them periodically for ATCs.

In the evening, I added french knots using several blues, greens and purples from the Anna Maria Horner set of Perl Cotton I bought some time ago. I also put beads on each card, using a Bead Soup selection. I love doing the handwork, especially as it gives me something to do when I watch TV that makes me feel like I am making progress. The handwork was a little hard on my hand. I need to think about that next time.

Angela's ATCs
Angela’s ATCs

Angela told me that she took a class from Valerie Goodwin and used the techniques of blending and adding sheers for her ATCs. The sheers are a similarity between Angela’s and my ATCs.

Virginia's ATCs
Virginia’s ATCs

Virginia’s ATCs felt like they were painted on paper, though mine has part of a leaf under, what looks like, a piece of decoupaged tissue paper. There is some stitching as well. Virginia is immensely talented and I am continually in awe of what she makes.

Nancy's ATCs
Nancy’s ATCs

Nancy used a printing press at work for a project and was inspired to come home and do some printing with glass sheets. I really like her designs and kind of wish she would upload them to Spoonflower and make the designs available as fabric.

One of the things I like about ATC swaps is the opportunity to play a little bit. Of course, I could do that all the time, but I don’t. This is a deadline I can use to make a little piece of art.

Finished: Fabric of the Year 2014

Fabric of the Year 2014 - Complete
Fabric of the Year 2014 – Complete

I finished Fabric of the Year 2014 yesterday. I had the quilt done, but took my sweet time in sewing on the sleeve.

It has some similarities to FOTY 2013, namely the light in the middle. I wanted to try to recreate that glowing aspect again.

The back was one of the easiest I have made. Almost no drama, especially since one piece of fabric made almost the entire back. I added the solid so that large motifs didn’t run against each other when I sewed them. I thought it would look too jangly.

Fabric of the Year 2014 Back - Completed
Fabric of the Year 2014 Back – Completed

I liked pieced backs, but am very happy when I don’t have to piece too much.

Lobster Placemat

There was, at some point, a placemat challenge issued at CQFA. I don’t normally do challenges, but an idea popped into my head. It stayed in my head until the May 2014 meeting where Jen did a workshop on “from drawing to art quilt” That workshop was also about line. I took a minute to get my idea down on paper.

Sketchbook book lobster placemat

This past week, since we were having a CQFA art show, I started in on the piece. It is mostly applique’ — well, it is all fusible applique’ at the moment, but I am not finished and I may add some piecing around the edges.

Lobster Placemat in progress

I showed it off at CQFA yesterday during the art walk and people seemed to like it. There was some discussion about next steps. Caroline suggested googly eyes for the eyes, but I am not sure that is the direction I want to go with this piece.
 

December To Do List

I really did make a lot of progress, so I just had to post and crow a bit.

  1. Quilt Christmas table runner
  2. Wash fabric AKA The Great Unwashed-I didn’t wash anything recently, but I have been pressing.
  3. Cut out Anna Maria Horner Multi-tasker tote
  4. Finish sewing Anna Maria Horner Multi-tasker tote -this was a gift I intended to give during Holiday 2013- sigh. Missed 2014 Holiday deadline as well. The bucket part of the bag is done and I just have to add the straps.
  5. Cut out 3 notepad covers for gifts
  6. Finish cutting out Day in the Park backpack variation
  7. Finish cutting out 3rd Petrillo bag
  8. Sew Bon Appetit apron
  9. Cut out Art supplies Sew Together Bag
  10. Sew Art supplies Sew Together Bag
  11. Cut out Art supplies pincushion
  12. Sew Art supplies pincushion
  13. Cut out Purple Sew Together Bag
  14. Sew Purple Sew Together Bag
  15. Cut out Purple pincushion
  16. Sew purple pincushion
  17. Cut out Thanksgiving tablerunner #1
  18. Cut out Thanksgiving tablerunner #2
  19. Cut out Thanksgiving tablerunner #3
  20. Cut out Thanksgiving table mat
  21. **ATCs for CQFA December meeting

**New this time

I did break up some of the steps into cut and sew, which seems to have made the list longer not shorter. Still, it will be better in terms of crossing things off.

To see the 26 Projects Lists, which list quilt WIPS, visit the October 26 Projects update. October’s To Do List has a couple of changes, which is heartening.

Done in 2015:

  • Make stiff bucket or box for TP in second bath
  • Christmas pillowcases
  • 3 Christmas pillowcases (from May list)
  • ATCs for CQFA January Meeting
  • Make binding for Pink T Quilt
  • Make two bags for gifts (January list)
  • Make stiff bucket or box for TP in main bath
  • **More Christmas Pillowcases
  • **ATCs for CQFA October meeting

Other:

  • ATCs for CQFA April Meeting – I think I was sick or skipped this meeting for some reason
  • Fix button on DH’s California shirt – he decided it was fine

Creative Prompt: #340: Pizza

Pizza is what everyone has after Thanksgiving. 😉

Moon in the sky like a big pizza pie….

Pizza Brain – Widely known as the world’s first pizza museum, this Fishtown destination features plenty of pizza-themed memorabilia and serves up tasty brick-oven pies.

Pizza Pizzaazz

Sarah Graley has created Pizza Witch as the very first webcomic for Comic Book Slumber Party!

My MIL always made pizza on Christmas morning. According to family legend, it has all the requirements of a breakfast food. You be the judge.

Chicago style

take and bake

Definition: “Pizza is a flatbread generally topped with tomato sauce and cheese and baked in an oven. It is commonly topped with a selection of meats, vegetables and condiments. The term was first recorded in the 10th century, in a Latin manuscript from Gaeta in Central Italy.[1] The modern pizza was invented in Naples, Italy, and the dish and its variants have since become popular in many areas of the world.[2]

In 2009, upon Italy‘s request, Neapolitan pizza was safeguarded in the European Union as a Traditional Speciality Guaranteed dish.[3][4] The Associazione Verace Pizza Napoletana (the True Neapolitan Pizza Association) is a non-profit organization founded in 1984 with headquarters in Naples. It promotes and protects the “true Neapolitan pizza”.[5]

Pizza is sold fresh, frozen or in portions. Various types of ovens are used to cook them and many varieties exist. Several similar dishes are prepared from ingredients commonly used in pizza preparation, such as calzone and stromboli. It is a popular fast food item.” (Wikipedia)

order a slice

hand tossed pizzas

izza Camp 2015 went down at the Baker Near-Wilderness Settlement in Maple Plain, MN on Saturday September, 12th

pizzeria

programming language

New York Pizza PRoject – A beautifully printed 192-page coffee table photography book featuring New York City’s last authentic pizzerias


Post the direct URL (link) where your drawing, doodle, artwork is posted (e.g. your blog, Flickr) in the comments area of this post. I would really like to keep all the artwork together and provide a way for others to see your work and get familiar with your blog or website.

The Creative Prompt Project, also, has a Flickr group, which you can join to  post your responses. I created this spot so those of you without blogs and websites would have a place to post your responses.

We are also talking about this on Twitter and Instagram. Use the hashtag #CPP

Improv Class Piece

I made major progress on this piece during the weekend before Thanksgiving. I have had a lot to talk about, so posts are getting backed up. For someone who hasn’t had  much of a chance to sew recently, I seem to have a lot of content!

Potential Red & Black Improv Back

I walked around my workroom trying to get comfortable with the blue and green backing. I really tried hard to like it. I tried to convince myself that another color scheme would provide a different look and make a good addition to the piece.

No dice.

I had already cut one piece into two and I still couldn’t like what I saw. The blues just didn’t work with the red and black and I couldn’t do it. I admitted to myself that I wanted to save the large piece of red solid for another project and that cleared the way for progress. I found a piece of American Made Brands red solid on sale and bought it. That kind of freed me up to use the large piece of Kona red for the back, which is what I did.

I spent a whole Sunday piecing the back. I wanted to finish and it took me a long time. I did. I just need to make the binding and then I can take it to Colleen’s to be quilted. I like the way the whole piece came out, but I am glad to get it off my design wall.

The thing is huge and I need to take a photo of both sides outside, but that will have to wait for one of my quilt hangers to return from college.

BAMQG Round Robin – Rhonda

As I mentioned the other day, I had Rhonda’s piece and I worked on it very quickly, then sent it off to Cheryl.

Rhonda's IRR piece - November 21, 2015
Rhonda’s IRR piece – November 21, 2015

When I got it from Rhonda, it was getting to be quite curvy. There is a lot of nice piecing and I did not want to touch the bottom portion (ignore my slippered feet!) as I didn’t want to ruin anything.

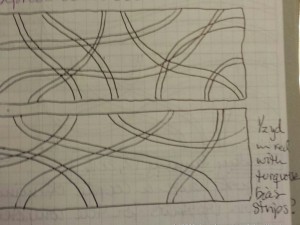
I took a leaf out of the notebook I used in a class at Fort Mason. Sonya Lee Barrington taught a beginning quilt class and one of the techniques I learned was called “Curved Strip Piecing.”

Rhonda's IRR with my signature fabric
Rhonda’s IRR with my signature fabric

I laid the piece over my signature fabric and cut along the edge. I made quick hash marks across the two fabrics and pinned them together. It made it easier to sew the curve, which came out mostly flat. My addition came out super bold. I hope people know they can cut off my signature fabric.

My contribution to Rhonda's IRR
My contribution to Rhonda’s IRR

For the rest of my addition, I used some piecing that was already done. I added some more and then sewed what I made to the piece.

I would have never thought to put half a piece on to someone else’s round robin, but I saw Michelle do it and decided it would fit with my timeframe. Again, I used some curved strip piecing to help make the piece fit.

December 2015: 26 Projects

I am reeling that it is December already. Sheesh!

Finished 2015 Quilt Projects

Finished 2015 non-Quilt Projects

Still WIPs
I still have WIPs. Who doesn’t, after all, but the list is getting a lot smaller.

  1. Aqua-Red SamplerFrances and I finished the Basket block and you can make one as well by looking at the tutorial series. Now I am tasked with doing a tutorial on partial seaming.
  2. The Tarts Come to Tea: I still haven’t worked on this since April 2011, though, it is in a prominent location so I have easy access. I was thinking about how this was veering in the direction of being one of my ‘masterpieces,’ but now that it has languished for so long it just looks old and dated. 🙁
  3. Pointillist Palette #4: Fourth is a series of 6 quilts; needs tiny square patches sewn together. I still haven’t worked on this project either, but I do think about it.
  4. Self Portrait: started in 2006 at a class at Quilting Adventures in Richmond, Virginia. My career counselor breathed new life into this project for me. She asked a simple question and the end result was inspiration for this piece, but I kind of lost steam again after printing images on paper to try out different designs. Lately, I have been feeling like I need to finish this piece as it should be a good reminder to keep in my office.
  5. Under the Sea: class project; like the design, but not the colors. Still a possibility for abandonment. Just can’t seem to pull the trigger.
  6. City Sampler/ Tale of Two Cities blocks
  7. Serendipity Lady Quilt

Ready for Quilting
Wow! Everything on this list is new, as in it was never on the original 26 Projects list.

  1. Christmas table runner: Basted; needs quilting and binding. I am still planning on free motion quilting this myself for practice.
  2. Red and Black Improv Quilt!

In Process
The  ‘In Process’ is used to denote projects on which I am actively working. A project in the ‘UFO’ category means I am stalled. A nicer way of saying UFO is a WIP.

  • English Paper Piecing Project– half hexies
  • Stepping Stones #2 I started out using primarily Bonnie & Camille fabrics Bliss, Ruby, Vintage Modern. I made two test blocks, but wasn’t quite happy with them, so I added a number of other reds and turquoises to the variety to make the piece more scrappy. I ending up deciding against using a solid turquoise for the background.
  • Octagon 9 Patch: still making blocks

Hunting and Gathering

  • Blue Gradation Quilt: cutting 2.5″x4.5″ blue rectangles
  • Blue Lemonade: cutting blue, green, purple 2″ squares
  • Food Quilt #3: cutting food prints
  • Pink Gradation Quilt: cutting 2.5″x4.5″ pink rectangles
  • Spin Wheel: really not started, but supplies gathered. I probably have enough fabrics and just need to decide to start.
  • Stepping Stones #3 using the Macaron pre-cuts from Hoffman. I have all the fabric in pre-cuts and was thinking about it before I went to sleep the other night. It isn’t started, but I am really trying hard not to start it.
  • Windmill quilt: Still hunting and gathering. I am cutting a variety of greys for the background,to preserve the pattern. The pieces are too oddly shaped and I don’t want to lose the pattern in a mass of scraps

What’s on your list?

One More Gift Bag

Red Lights Gift Bag
Red Lights Gift Bag

The other day I talked about making some pillowcases. I had enough fabric left to make one gift bag. I am glad, because I like the fabric. I am happy to have at least a bit of it around the house. I don’t really need more gift bags, but I also don’t want to waste fabric. Gift bags are a good use of smallish pieces of fabric.

I have put a tutorial up, as long time readers will know, that tells you how to make gift bags. Save a tree: make a gift bag.

BAMQG IRR Update

I the original idea for this IRR was to exchange the pieces at the meeting. Our group has been exchanging like crazy for the past two months. I have worked on several as you might remember from the series of blog posts.

I think it was the first time our group had been together since the initial start. We looked at all the pieces and traded them around. Some people changed their boxes to bags for easier mailing. We took the opportunity to exchange IRRs again and we got to see the work that has been done on the various pieces of our IRR exchange.

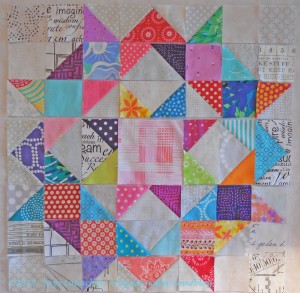
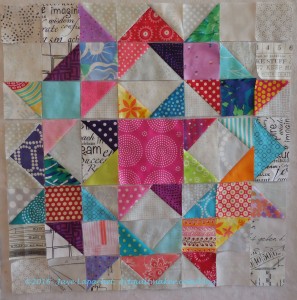
My IRR piece - November 21, 2015
My IRR piece – November 21, 2015

I was thrilled when I saw the work on my own piece. People used the solid turquoise as a background, which was my intention. This gives the whole piece a cohesive look. It is also mostly a square and getting to be quite large. I think I I’d like this piece to be in the bed-sized range.

People have not continued the Flying Geese after the first round or two, which is a little disappointing. There are a lot of rectangles, which I know are much easier than anything else. Hope springs eternal.

Michelle matched the motifs on the pink and blue fabrics in the left middle area beautifully.

Diana's IRR - November 21, 2015
Diana’s IRR – November 21, 2015

I was very pleased with the work I did on Diana’s. I saw that round motif and couldn’t get away from the idea of fussy cutting it. I wanted to make it more elaborate, but I waited until the the morning of the meeting. I made a cutting mistake, which kind of prevented me from doing what I wanted. I am also not sure my skills were up to the task. Diana loved what I did to her piece, which pleased me.

Rhonda's IRR piece - November 21, 2015
Rhonda’s IRR piece – November 21, 2015

Rhonda had her piece at the meeting so I grabbed it. She has tried to jump to another group, but we aren’t letting her go. I am supposed to send her piece to Cheryl after I am done. Other Club Doodlers are clamoring, so we will have to see.