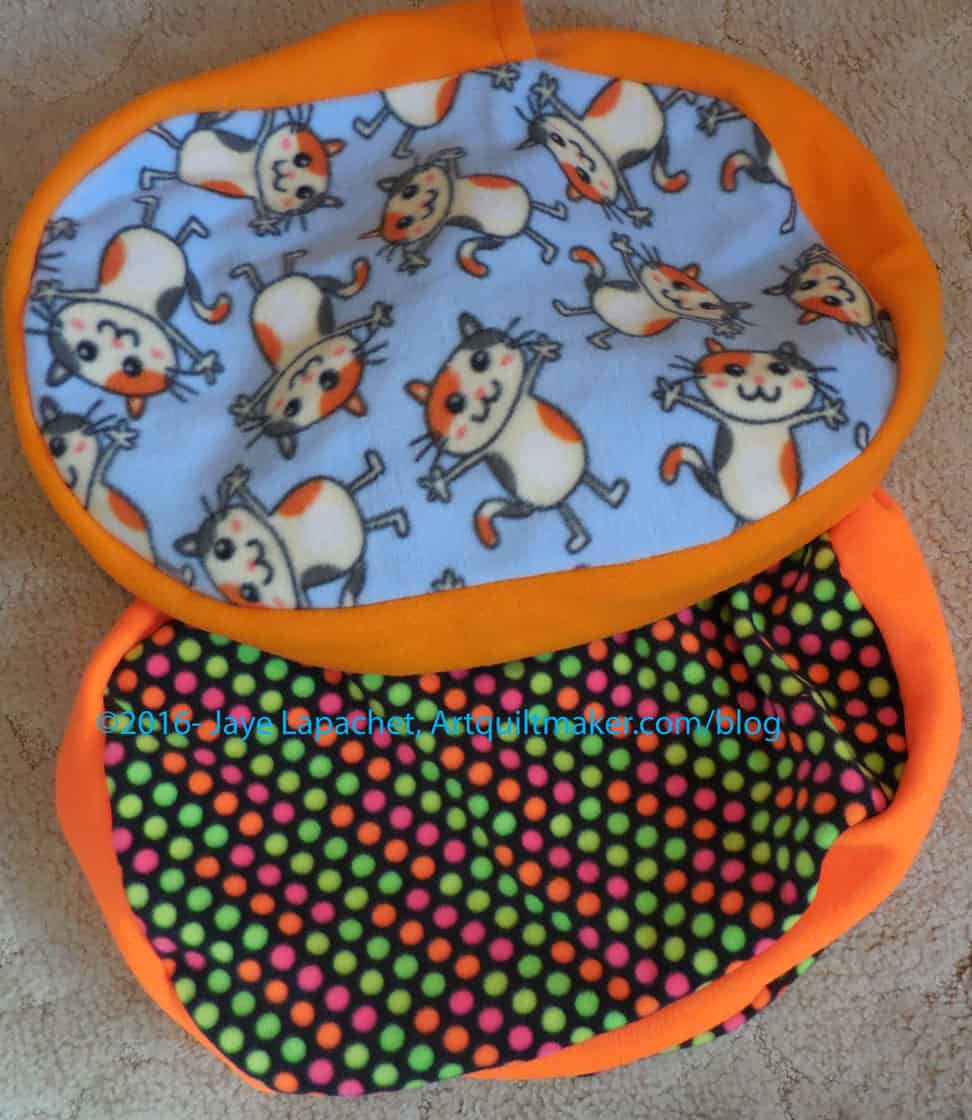
I have had some cat bed fabric waiting to be sewn since the BAMQG April meeting. I finally did it over the weekend, mostly to get the fabric out of my way. My horizontal surfaces are looking kind of full right at the moment.
I didn’t really realize how cute the top fabric was until I laid them down to take a picture. Don’t those cats look happy?
I get to count these as finishes, but I don’t get credit for the fabric since Amanda gave it to me. Oh well.
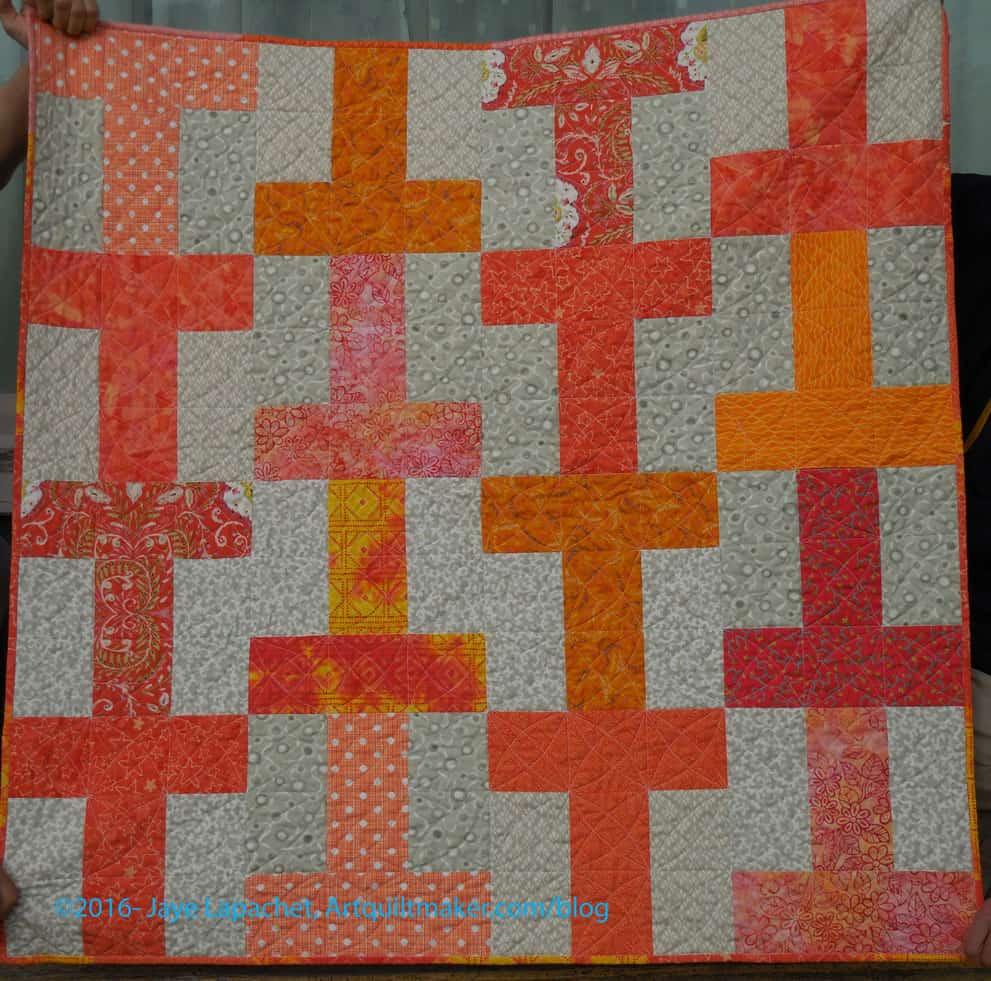
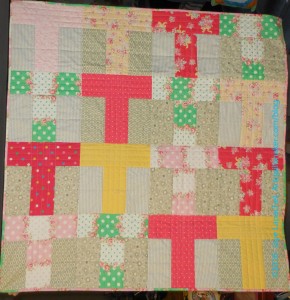
This is the quilt that Gerre and I worked on at her house a few months ago.
She finished it and brought it to Sew Day. I couldn’t believe that she finished quilting it so quickly! I was thrilled. Not just that it was finished, but also that we had another donation quilt to help give someone some comfort.
The oranges worked out really well and while we are working on the circle quilt, I am excited to cut for another T quilt. I am thinking of digging into those green bins and thinning out some of those fabrics. I also saw my nephew’s Wonky 9 Patch quilt over the weekend and think that blue would look great with the orange Ts as well.
I finally made it to a Sew Day at the new BAMQG location.
Gerre emailed me while I was in Portland and asked if I was going. I thought ‘why not?’ and Gerre was willing to sew with me again. Even though the YM is home and lounging around, he is old enough to be alone and didn’t want to come with. Why would he? He would be bored.
It was fantastic! I was thrilled to be there and thrilled to be sewing. Gerre brought the Orange T quilt and it is finished. I have to take some photos and then I will post a finished photo.
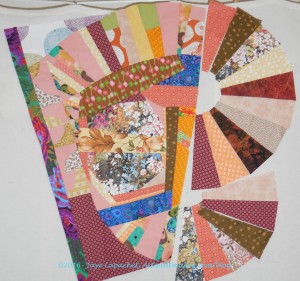
Simply Moderne
We had a great time sewing and chatting and working on our quilt. We had decided to work on a circle quilt as a donation quilt. We got the inspiration from Simply Moderne magazine. I was attracted by the cover and bought an older issue at QuiltCon.
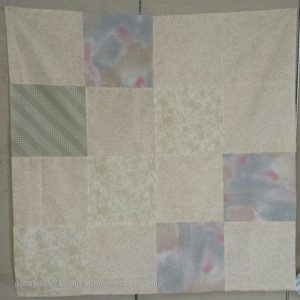
Pushed Neutral Background
We started out by cutting the background pieces in the Pushed Neutral technique I learned from Mary Mashuta 1,000 years ago.
I brought the neutrals and Gerre brought the foreground fabrics, though we didn’t know it would end up that way.
We had talked about using greens, so I brought my green bins along with my beige and brown bin (which thankfully is almost empty). We pulled out the last of my light and tolerable beiges and cut them into 10″ squares and put this together as a background.
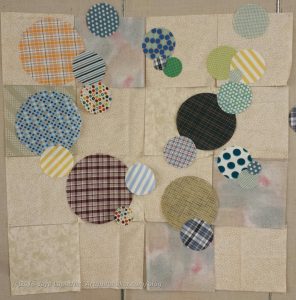
Circle cutting ruler in use!
Gerre then showed me some plaids she had and we decided to use the plaids instead of greens and make a boy quilt. We cut circles using both the Go cutter than Pati brought (with her circle template!) and my newish circle cutting ruler.
I wielded the circle ruler while Gerre took over the Accuquilt Go! I only had my normal 45mm rotary cutter and I think it would have worked better with a smaller cutter. I only have one of those and it was at home, so I did the best I could. I may need a new blade after cutting the circles.
We decided not to have a lot of large circles, because the size of our quilt was smaller than the example we saw in the magazine and we didn’t want the entire surface to be covered.
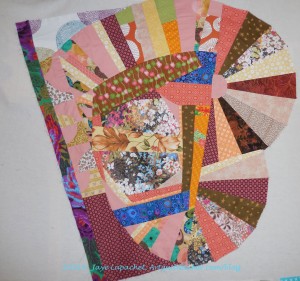
Circles on background
After putting the background together we laid out the circles on the background. I didn’t take a picture of that stage so you have to be satisfied with the photo on the right.
We decided we had to do the quilt in layers so that we could sew around a whole circle and not have to stop and start.
We didn’t bring fusible so we glued the first layer of circles down on the background, pressed it and then Gerre sewed.
Circle donation quilt back
While she sewed, I worked on the pieced background.
The fish and leaf fabric is OLD! The selvedge says “Sykel Enterprises 1993.” I don’t even know if Sykel exists anymore. It is certainly no Moda or Kaufman. I am sure TFQ could tell me where I bought it. 😉
It was in the brown bin and good for a boy quilt. I also had about a yard, which was a great start. It was in two pieces, so I added the strip in the middle. We also cut off a strip so we could see about applique’ing some of the motifs somewhere on the quilt. The center plaids are a couple Gerre brought.
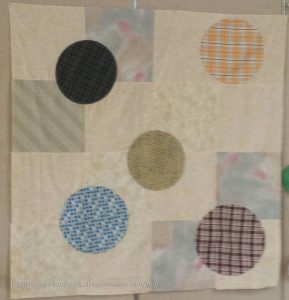
First layer circles sewed
We were able to sew the first layer down. These were the largest circles.
We don’t intend to necessarily go from largest to smallest, but we wanted to start with the largest.
So far, it doesn’t look like much, but the next layer (no photo) looks better.
I know I must be boring you to tears with these donation blocks. Still I have more.
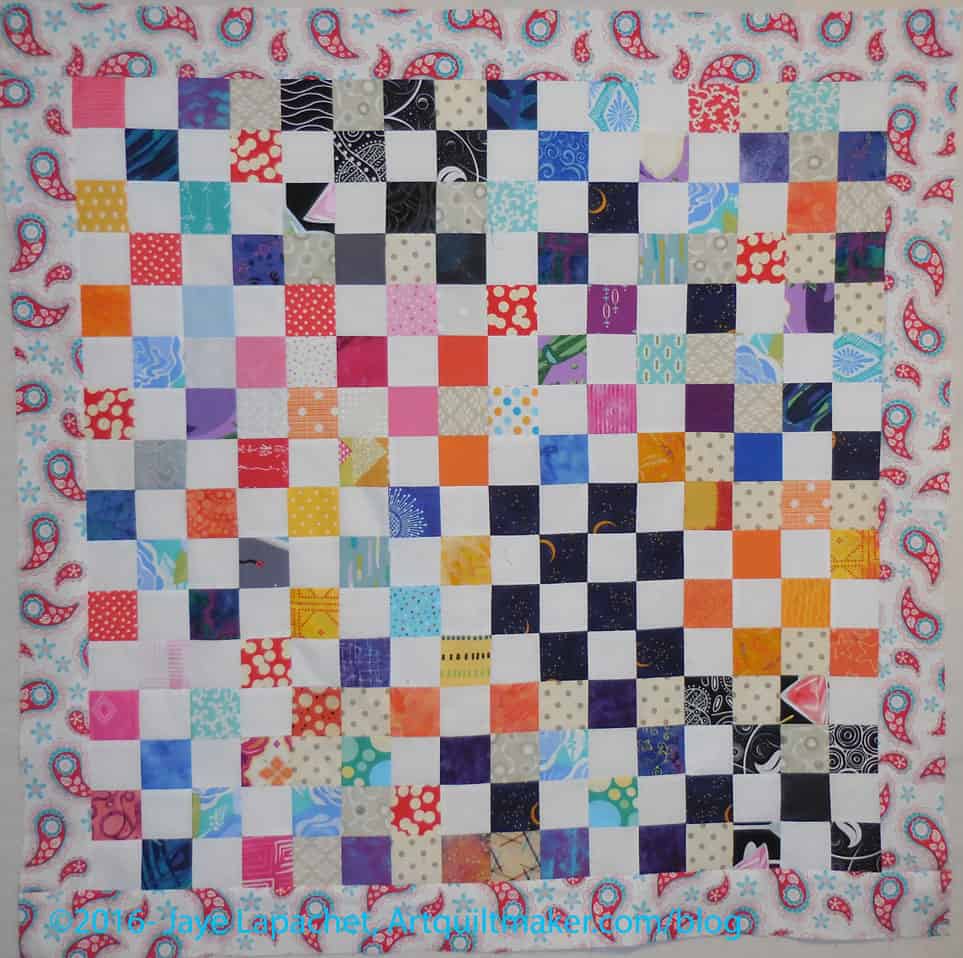
I think it is interesting to put the fabrics together in different ways. I also like the idea of using a bunch of the same fabrics and then combining those blocks with blocks in the same colors. For example, taking that red and white block, making other red and white blocks and combining them all into a top.
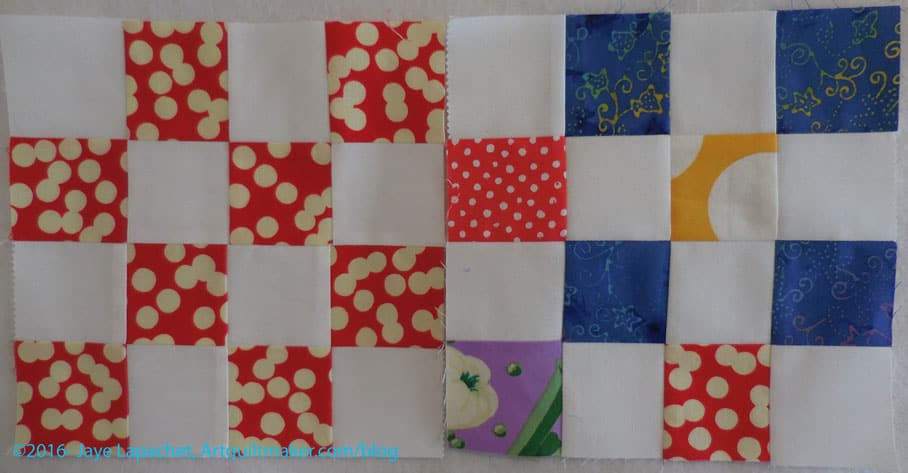
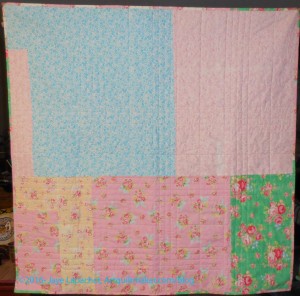
I put the blocks together (as leaders and enders) that I talked about last week into a top. The center is made up from the simple postage stamp/16 patch blocks. As you know I have been working on them for the last few weeks.
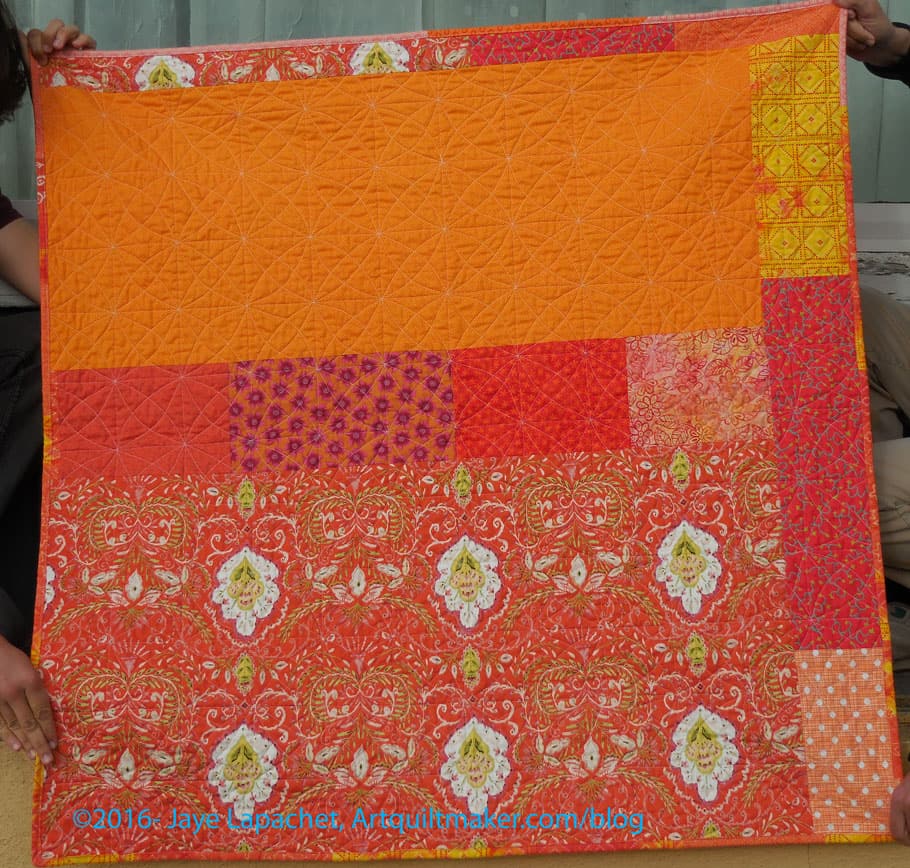
The border is from the Sugar & Spice collection from a few years ago by Amanda Herring of the Quilted Fish. I bought that line and even though it was fine fabric in nice colors, I decided it wasn’t really my style. It made a great addition to this quilt, though.
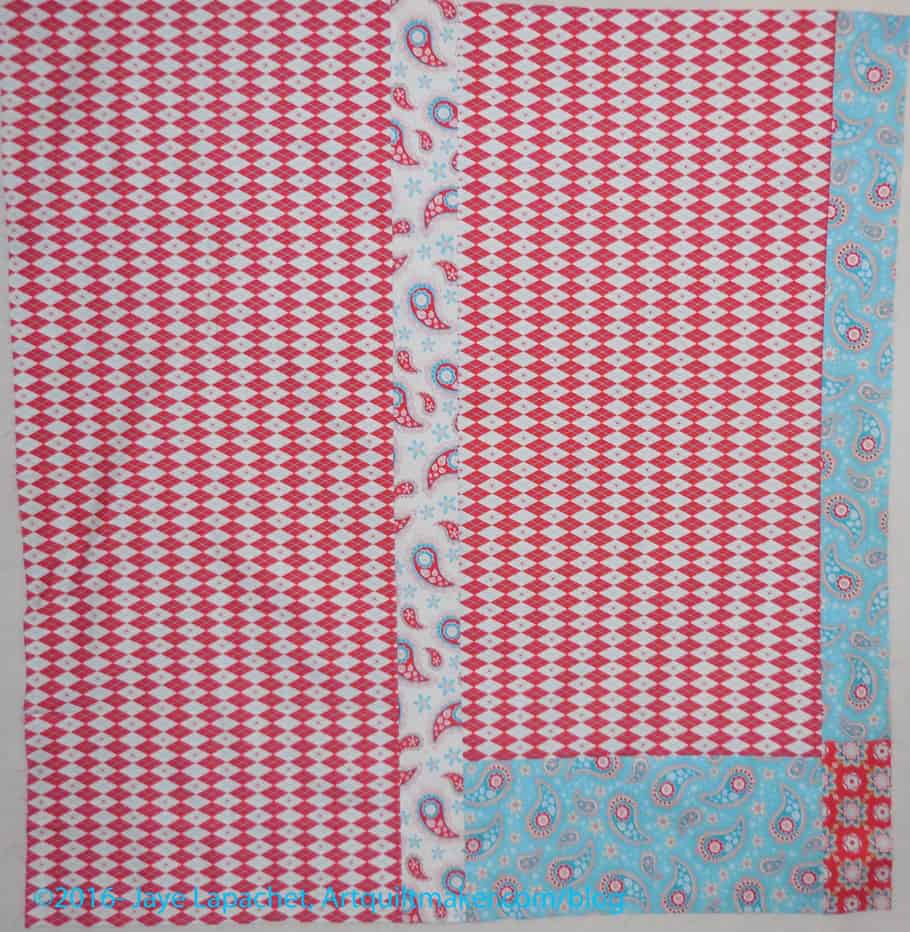
Sugar & Spice back
I saw the group of fabrics in my fabric closet and decided to use the plaid for the back. I needed a bit more to make the back larger, which was when I was inspired to use some of the fabric on the top’s border.
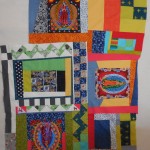
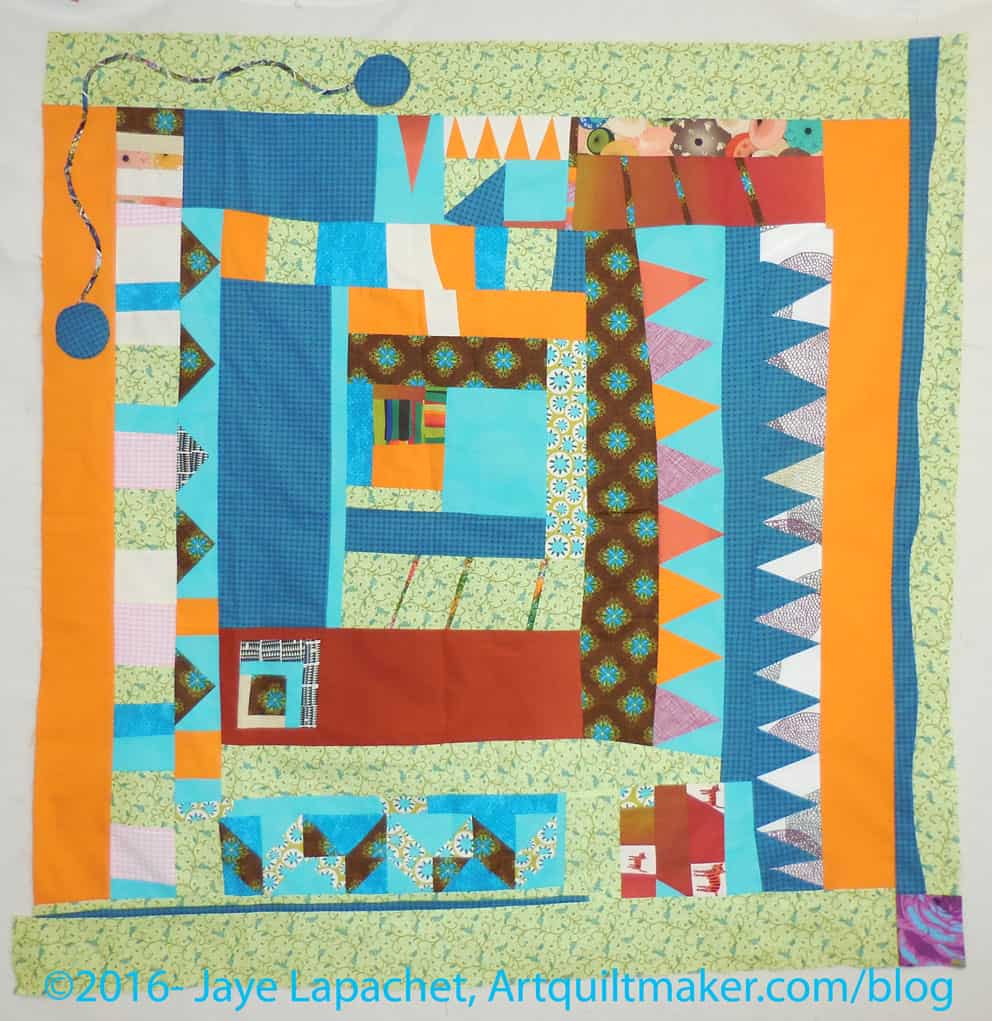
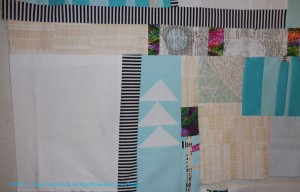
I got two new-to-me round robins last Friday. I didn’t have enough design wall space, so I took them out and looked at them. Different elements caught my attention – the squares in Annemarie’s and the applique’ on Michelle-Nicholle’s.
My addition to Annemarie’s piece – detail
I started with Annemarie’s after I finished the Cutting Corners donation top. I decided to add the other corner to the top left. My corner has the same look at the corner on the right side. I wanted the elements to be related, but not to be derivative. I wanted to use more of the Alison Glass fabric, but there wasn’t any left in the packet.
I looked at it after I had finished the squares. They looked too square. I had to make up some space (see the bottom strips where the blueberry fabric is?), so I added some strips and kept adding until my addition was large enough to fill the space. The strips look more improv than the squares. I can’t blame my hand for the cutting as it is much better. Habit, I guess.
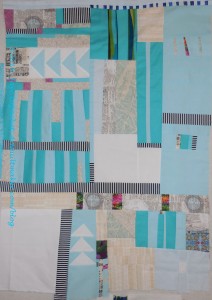
Michelle-Nicholle’s Improv piece -before
Michelle-Nicholle’s was harder, mostly because it had the structure of a very traditional round robin. All the pieces in the round robin are getting quite large and Michelle-Nicholle’s is no exception. It is also, I think, the largest piece on which I have worked. There were also only a few motifs I could use as inspiration, none of which were very exciting to me. More applique’ would have been logical, but I just wasn’t in the mood. It was very difficult to think of an addition. I reached back to my early days of quiltmaking when I learned to do improv curved piecing. I added some of that. It is a simple addition, but effective, I think. I may add something else as my addition does seem like much, nor does it help the next person as a jumping off point.
Michelle-Nicholle’s IRR after -detailMichelle-Nicholle’s IRR after
I talked about some donation blocks I made last week. As I worked on the Cutting Corners Donation Top, I made more of the postage stamp/16 patch blocks using leaders and enders. I love how much I get done when I use that technique!
Charity blocks – April 2016
I now have 12 blocks on the wall. I have a few more to make, but I think that I might as well sew them together to make another top for the Charity Girls.
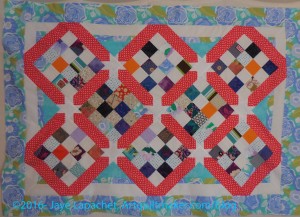
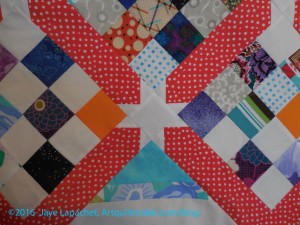
I know I promised I wouldn’t post any more donation quilts “for the time being.” The time being is over and I have another top and back finished. Things are kind of coming together with finishes lately, which is nice.
Cutting Corners Donation Top
I worked on the Cutting Corners Donation top on Saturday. I was able to finish the top, the back and the binding. It occurred to me that I should make a Frankenbatting as well. I haven’t done it yet, but I have time before the meeting.
Cutting Corners Donation Top detal
I know I said I was struggling with the corner pieces last time I talked about this top. I decided to move along by sewing together as much of the top as I could. After putting the entire top together, I found that the corners I had made and discarded actually fit in the corner spot. I was pleased and shocked to see how much the quilt shrunk up when I sewed it together. After all of these years, I shouldn’t be surprised, but I was. It is nice that quiltmaking can still surprise me.
Cutting Corners Donation Back
I definitely like the way this top came out, but I am on fence about the ruler. I am not sure that using the ruler was the easiest way to get to the finish. I will probably try it again with different fabrics.
Yes, this is donation quilt week. I promise this is the last one I have for the time being.
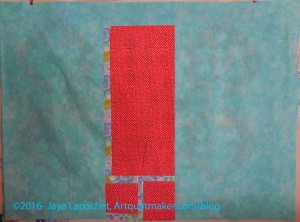
Last August, I talked about the Flower Sugar Donation top. I made the top out of leftover fabric from the Flower Sugar Hexagon (Attack of the Hexies) quilt. Gerre offered to quilt it. I got the finished piece back from her at the BAM meeting. She hadn’t completely done the binding, but had sewed most of it by machine. I had given her a piece of binding that was a bit too short, so I added to it. Then I sewed it the rest of the way on to the quilted piece then spent the time hand stitching the binding down.
Flower Sugar Donation back
I was feeling like a bit of a slacker, so I was glad to get this piece done. It felt like I had FINALLY finished something.
The fabric I used was, again, called Flower Sugar by Lecien. I still have bunches of it left even though I also used it for the back. I warned Gerre that she might be seeing another one with the same fabric.
I also used some Bonnie and Camille greys/taupes for the background pieces. They are from various lines. Compared to the cool greys I am using for the Flying Geese, these background pieces look really, really brown to me.
So, yay! A finished piece. I am so pleased it is a donation top.
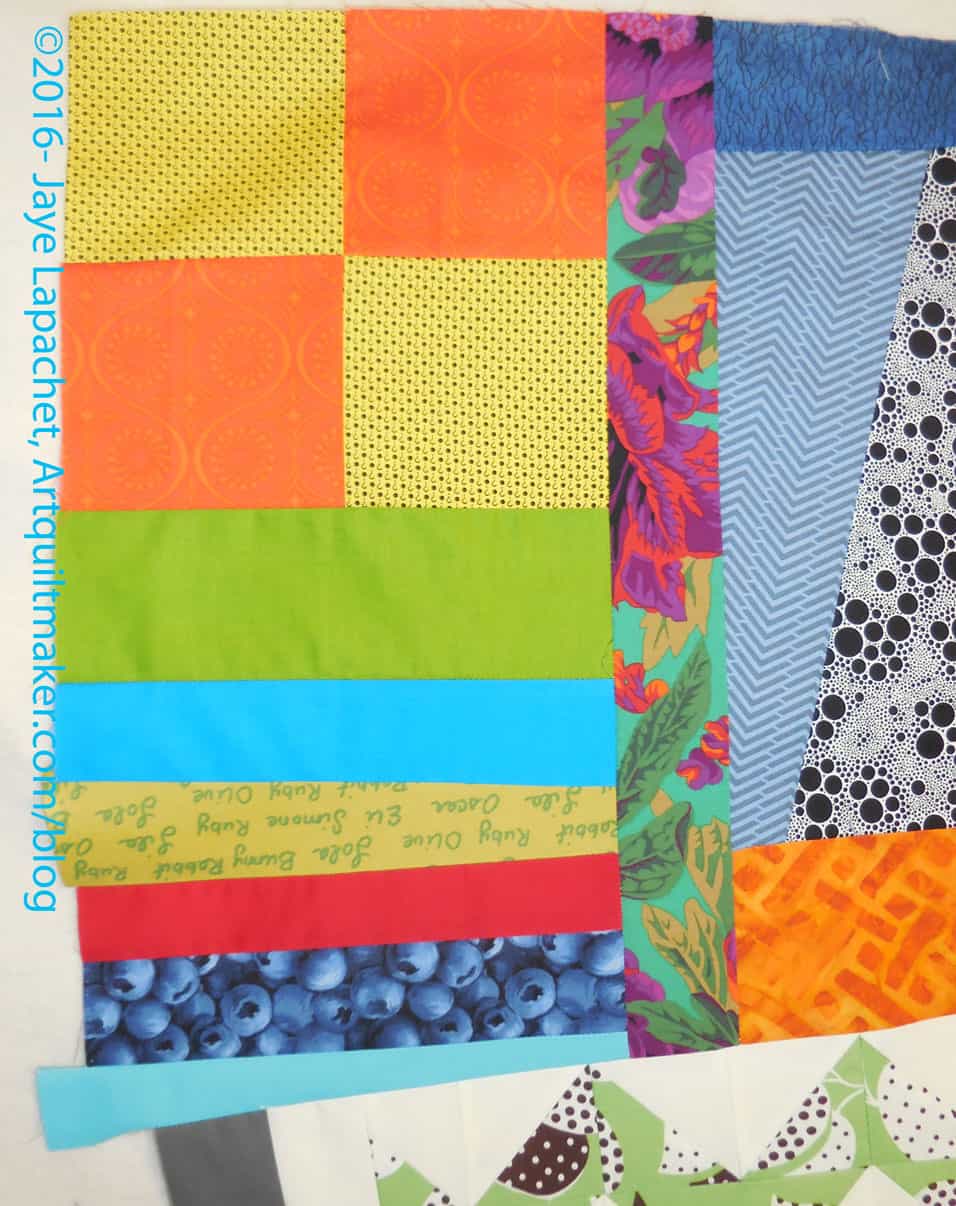
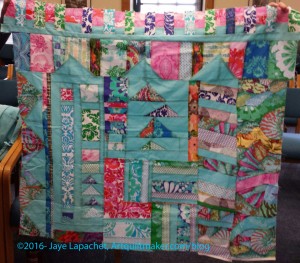
I got a brief glance at my Improv Round Robin piece before Ruth whisked it away to work on.
More of the Philip Jacobs print is showing up and that is creating some interesting results. I do think the piece needs more space, so I will add more solid or, perhaps, someone working on it will add more solid.
I don’t actually have any IRRs right now and I wasn’t at the BAMQG meeting, so I couldn’t take another. I had three in quick succession, with Cheryl’s being the last before my brief hiatus. Ruth‘s and Claire‘s pieces were the other two in the trio.
Michelle and I met at Trader Joe’s again and exchanged IRRs. I took Claire’s to pass along as she wouldn’t be at the meeting either. I headed up to the North Coast again with DH for NSGW/#politicalwifery events and Michelle was headed to Spain. Rhonda was kind enough to take both bags to the meeting for us and I gave them to her at the CQFA meeting.
All of this meant that I had to get Cheryl’s done in time to get it to Rhonda. I had about a day once I figured out all of the timing, so I got down to business.
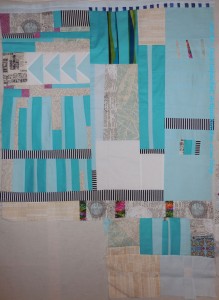
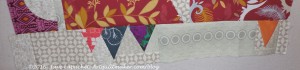
Cheryl’s IRR – before
Cheryl’s piece looked great when I got it and I was loathe to wreck it, but Michelle had added half a row, so that missing section was perfect for me to complete.
Cheryl’s piece is turning out really well. I love it, thus the feelings of avoiding wreckage. I really wanted to use the Paris map fabric, but couldn’t really fit it in once all was said and done.
I walked around with it on my design wall for a few days and decided to add some Flying Geese. Yes, I am still in love with Flying Geese.
I also needed to add my signature fabric, but I didn’t want to add a large patch or strip as I have on other pieces, because I wanted to preserve the mainly white and turquoise color story.
There were a few small strips left over from other piecing, so I pieced a few of those together to make another strip large enough to handle my signature fabric. I wanted something that would look like it fit in.
Cheryl’s IRR – my part
I made some Flying Geese. Since those were the main parts, I started working getting Michelle’s strip completed. I added some white and a strip of the black and white stripe, which came to me after looking at the piece.
After making my piece, I think the white on the edge needs to be corralled, but someone else, or Cheryl, will have to worry about that. I am pleased with how my part came out and I think my signature fabric piece fits in well without overwhelming the whole design.
Cheryl’s IRR – finished with my part
I also think the piece needs some space at the top. The bottom is getting to be quite breezy while the top is looking a little cramped. Not fatally so, but a little. It will be interesting to see what happens.
Yes, they are coming fast and furious! I got two at the last BAMQG meeting, as I mentioned. I was able to work on Claire’s piece during my last free sewing weekend, but I didn’t get to Ruth’s. While having little time to sew on the weekend, I have had to cram the work into bits of time during the week. Of course, I forgot to take a before picture. 🙁 C’est la vie. If you imagine removing my part, that is the before. 😉
There is something that makes me think of a castle. The ‘mountains’ could be points of a tower and the curved sections could be arches.
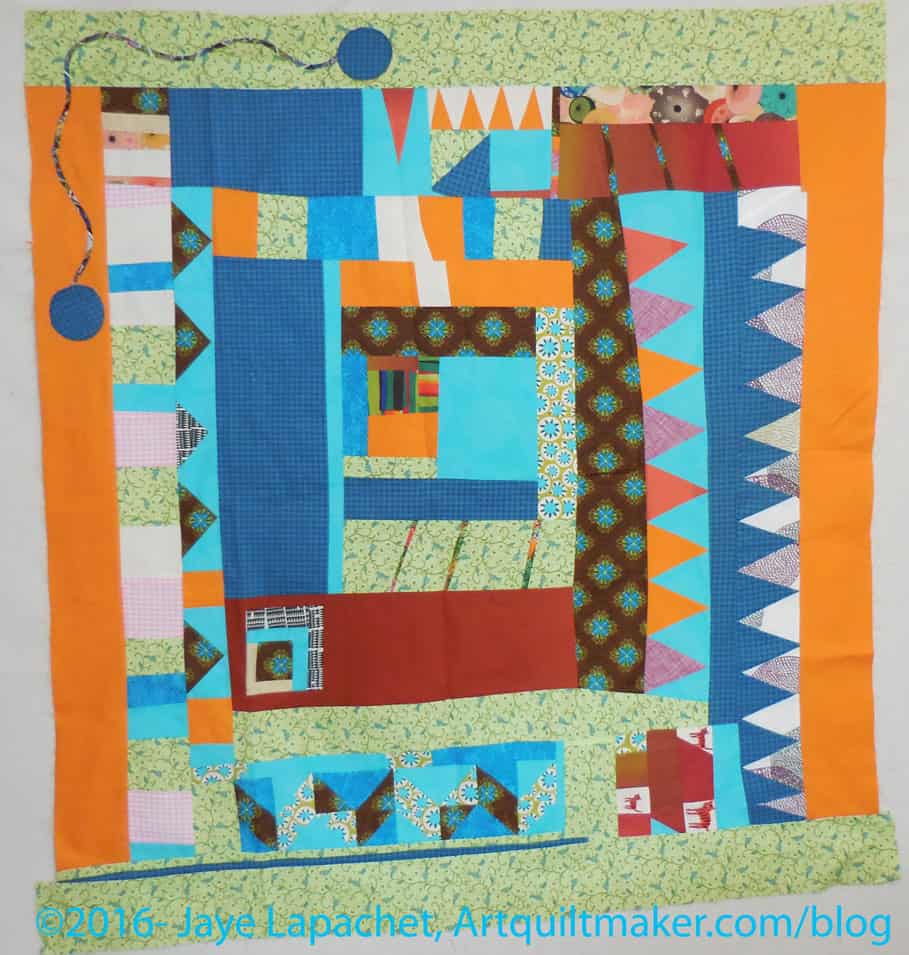
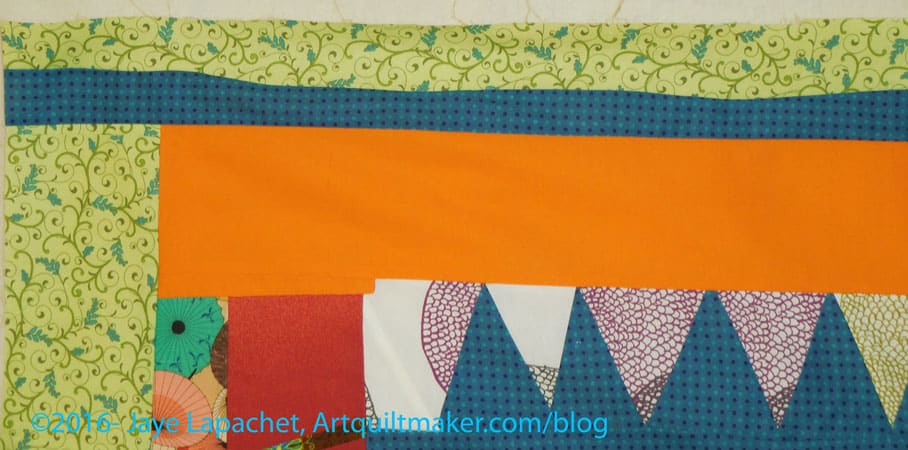
My addition to Ruth’s IRR
Ruth’s piece has a clear color story and large curved center with triangles seem to be a design focus. The piece spoke to me immediately after I put it up on my design wall. I saw the triangles on the top that looked like mountains and decided to add something similar on the bottom.
I had to do some fancy sewing with background around the mountains since I didn’t want to cut off the tips. I think the background looks like Mary Mashuta’s Pushed Neutral concept and I like it.
Next on the IRR list was Claire’s piece. Claire was in my original group so I wanted to make sure I worked on all of those quilts. I received her piece at the January BAMQG meeting.
Claire’s IRR was a challenge. The colors are perfect for Claire, but they are not my colors. Also, many of the fabrics had been used up or smaller pieces were left. This is why the project is called a challenge! I did not let these things discourage me.
I put the piece up on my design wall and tried to see the focal point or the place where Claire started. I couldn’t really tell, so I looked at who had worked on the piece and still couldn’t tell what might have been Claire’s start.
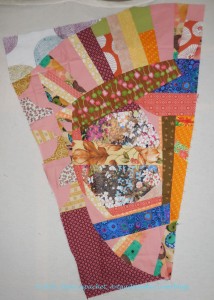
Trying out the Grandmother’s Fan idea
I put the focal point aside and looked at the piece. I saw some good curved lines and thought something like the Grandmother’s Fan block might work. I cut some blades and put them up on the design wall.
I really did try to keep, mostly, to the 20 minute rule. I find that rule to be hard as the pieces get larger. Of course, cutting is still a challenge. Also, the curves on Claire’s were not an easy design element. And, right on cue, life got in the way and the piece sat on my design wall for a week or more.
Claire’s IRR – continuing the curves
As I walked in and out of my workroom I decided I did like the curves. At one point, I adjusted the fans so the existing curves would be continued — or give the illusion of being continued.
In the photo, I tried to point out to you, in a very obnoxious color, what I thought of as ‘continuing the curve’. No, the blades aren’t all the same size, but the curve seems to be the most important in terms of design. I hope the curves I added work with the existing curves to create a focal point.
The bad part is that I didn’t square off the fans. I know I should have, but I just didn’t feel like it. I know I can offer to do it later, if push comes to shove. I am hoping that someone else will square them off down the road.
Claire’s IRR with my addition
I am happy with what I did. I gave the piece to Michelle on Thursday and will look forward to seeing what she does.
You can read all about the meeting from the minutes, which are already up on the Bay Area Modern blog. I am just going to show you photos and include my comments about them.
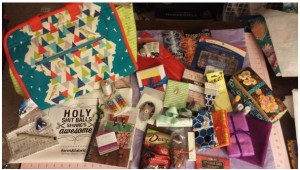
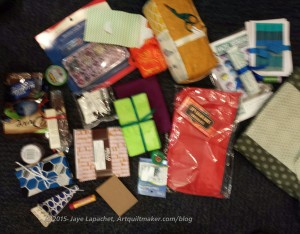
Angela’s Goodies
You saw the One Hour Baskets I made for the Charity Girls. I, mostly, forgot to take photos of the fabulous bags made for the other officers. People did such great jobs on them. Kelly got a Chubby Charmer with a sunshine yellow inside from Amanda. Cheryl received a small handbag (we needed and extra bag for all of her goodies) from Rhonda and Angela got a beautifully structured bag from Gerre, which you can see in the photo (left).
Cheryl’s Treasures
The idea is that everyone brings a small gift for each officer and we will fill up the bag with them. This allows people to manage their own budget or make something, if they are inclined. Not everyone participates, but you can see from the stash above that there was no shortage of fabulous gifties.
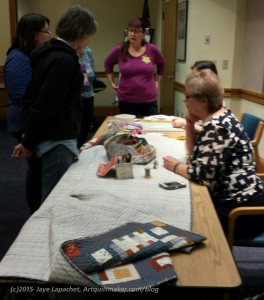
Getting down to business
After the meeting, people brought handwork. As I suspected, I was too busy socializing to get my (yes the one I am I am making for me!) Sew Together Bag cut out. 🙁 Never fear, I am working on it. Others did work on their projects. Ruth is a master at getting down to business.
Lynette cozied up, too and others (Gerre, Molly, Bonnie and Joelle) stood around chatting. I was there for a bit talking to Lynette about her Bionic Bag, which is similar to my Sew Together Bag, but more evolved. Lynette showed the quilt in the front at Show & Tell. It is a great boy quilt. The pattern is Fireside Chat by Blue Nickel Studios. It might be worth checking out for one of the nephews.
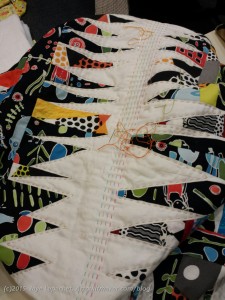
Gerre’s Quilt
Gerre brought the most fantastic quilt. I don’t know the pattern (and am too lazy to look it up) except that she said she made it in a workshop with Freddy Moran. Take a class from Freddy if you can. You won’t regret it!
The fabrics remind me of Jane Sassaman, but the most interesting part is the Big Stitch quilting, which she is doing with 12wt Aurifil. I love that she is using different colors for the quilting. Gerre is not afraid of color and I love her work. Check out a detail.
Donation Quilt
Angela worked on basting a donation quilt, which is bright and cheery.
All in all it was a great meeting. I did want to cut out my project, but that got done and it was great to chat with people.
One tradition the guild has is to assemble gifts for the officers and put them in bags made by volunteers. I wrote a good description of the reasoning in 2014. I talked about augmenting this yesterday with some One Hour Baskets.
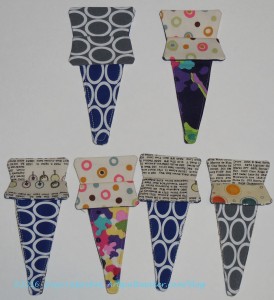
Scissor Sheaths
Scissor Sheaths are covers for your scissors. Often they are made from leather and come with scissor brands such as Gingher. I made some out of fabric using a pattern/guidelines on this blog.
I cut the pieces and parts out a long time ago. Those pieces had been sitting on my cutting table waiting for a few more pieces for the lining and me to Just Do It, as the Nike ad says.
Since I needed some gifts for the officers, it was time and I did it. I think they were popular. I meant to figure out how to put a ribbon or something on them so they can be carried on a chatelaine or lanyard, but I didn’t get to it. I have one left in case I need a quick gift for someone.