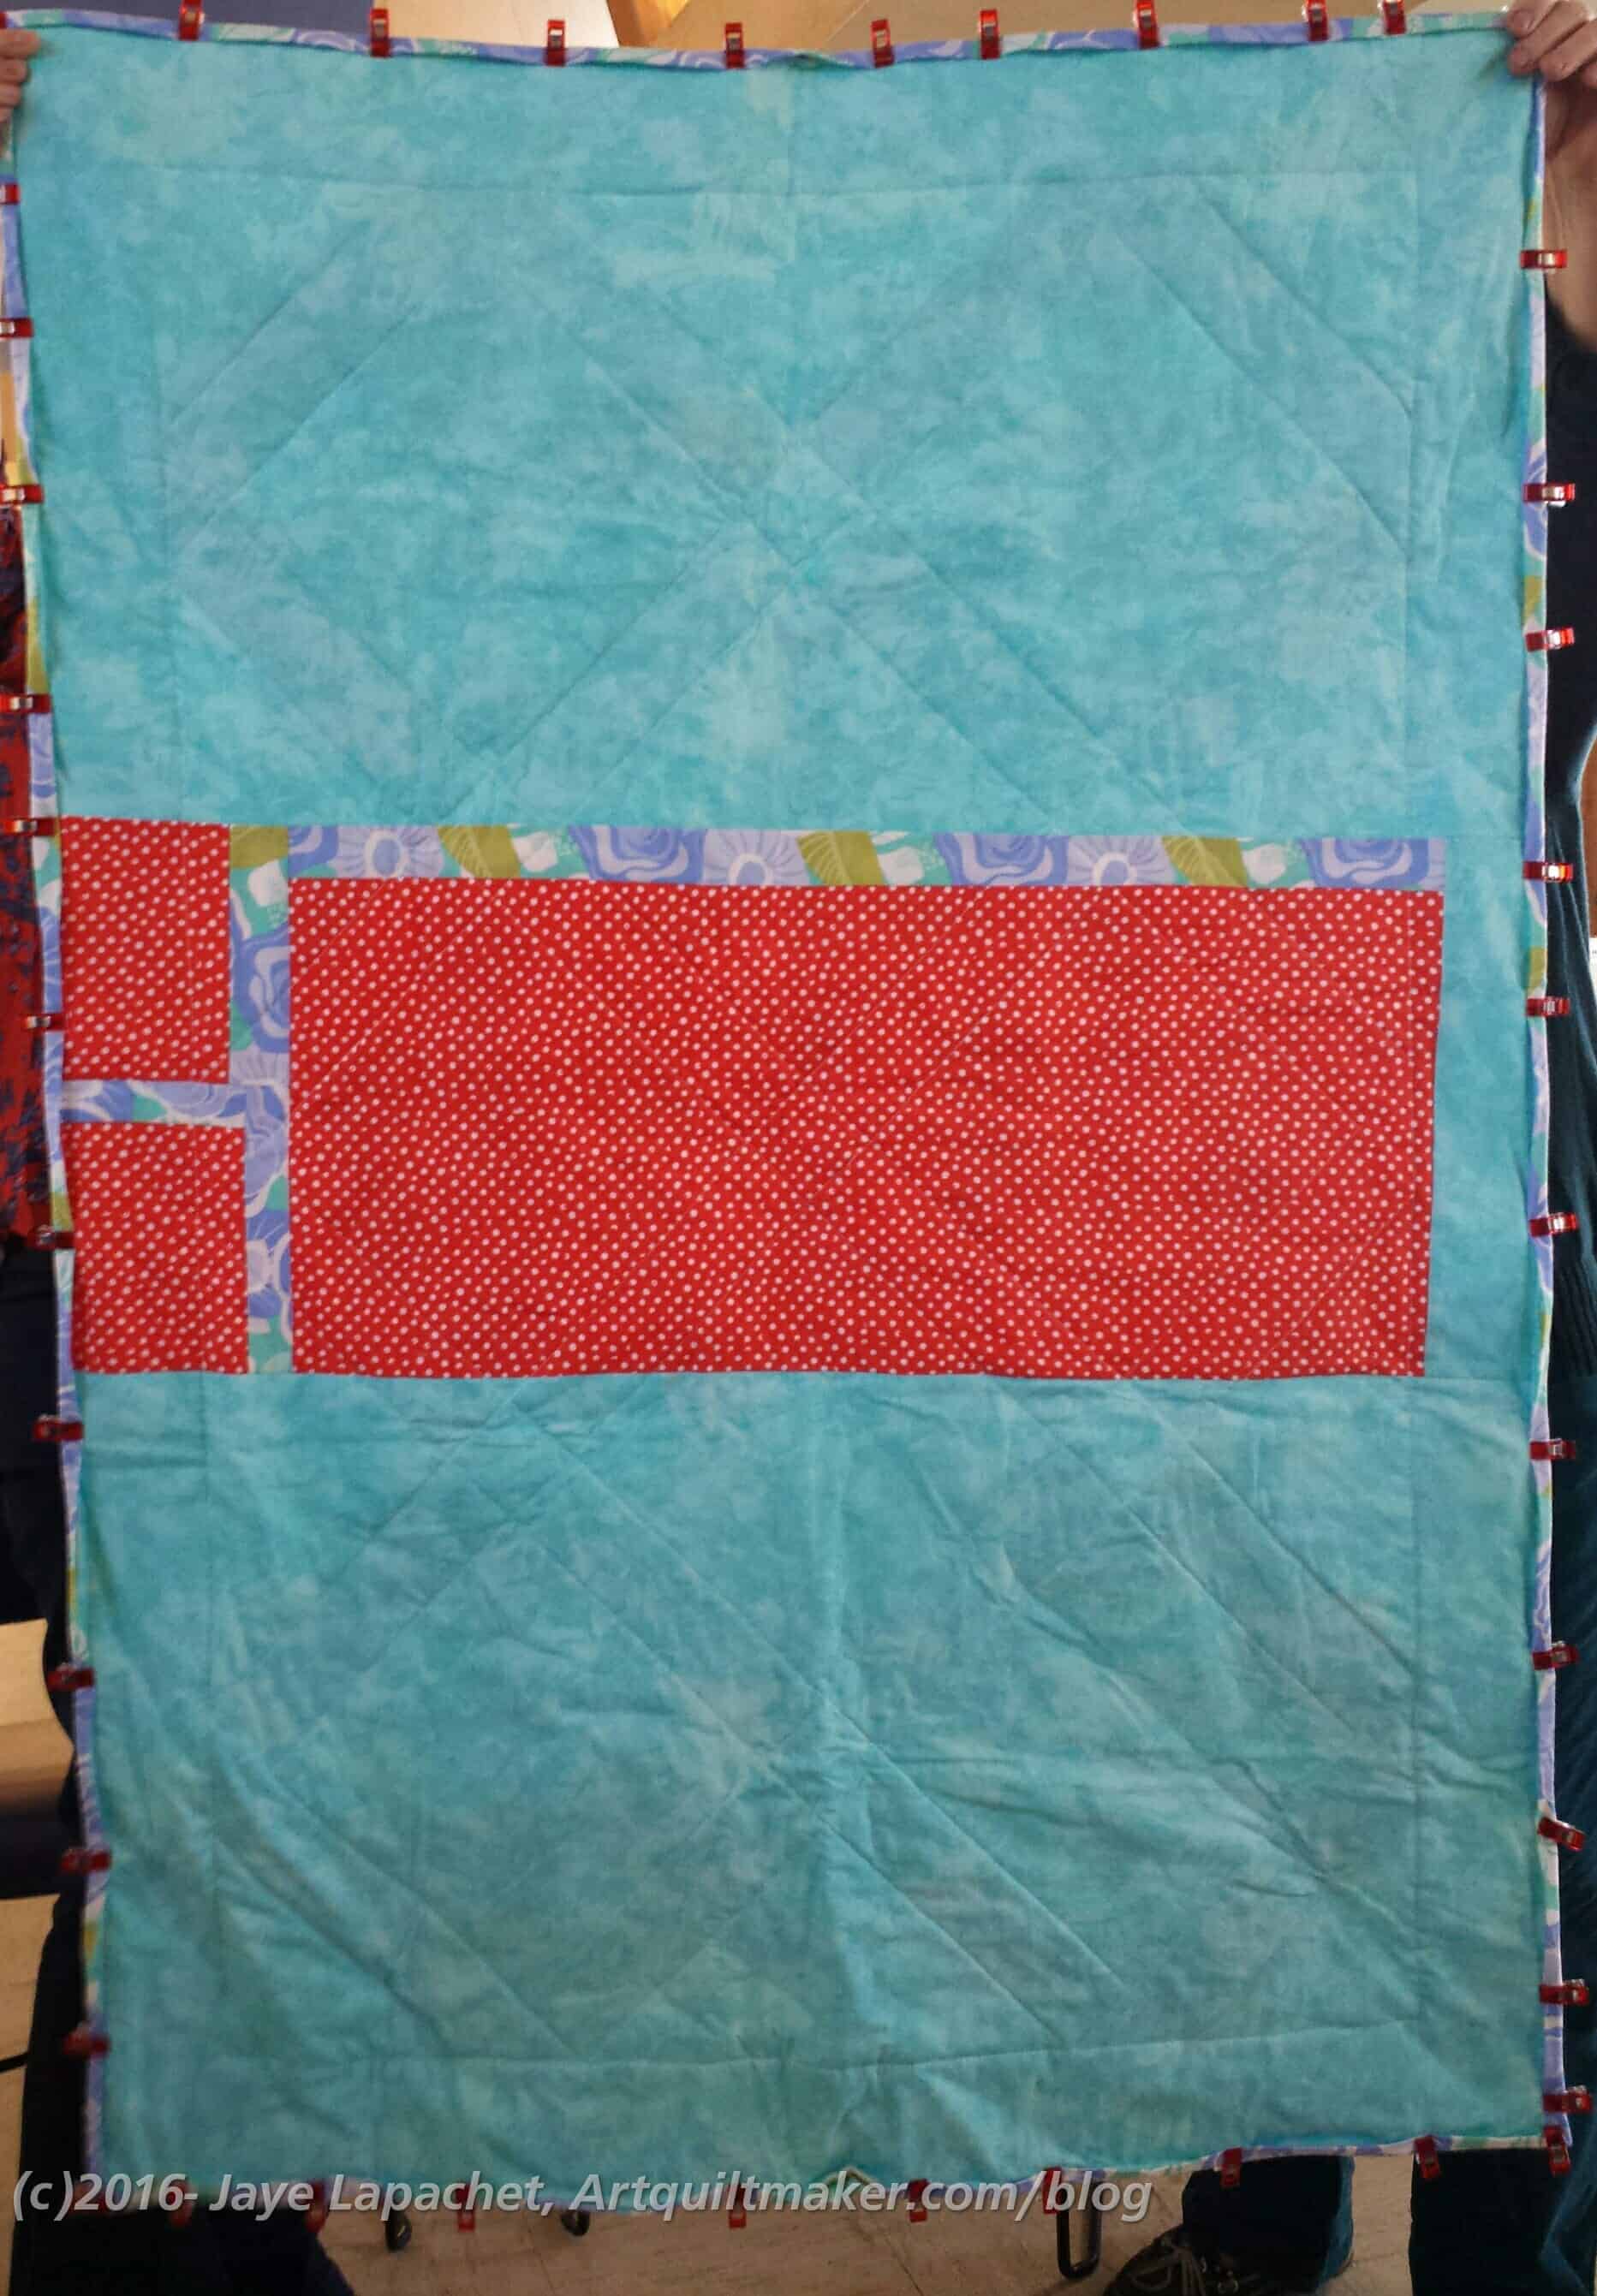
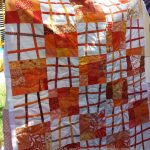
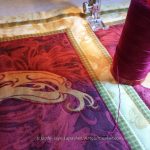
I got a glimpse of my Cutting Corners donation quilt again. Pam is working on finishing it. She quilted it and is now binding it. I know I have said this a thousand times. I love it that I can make something and someone else in the guild will also work on it. It feels like my efforts are not completely mine and somehow more worthy.
Cutting Corners Donation Quilt back
I made this top and back in March. I knew then it wasn’t the most beautiful top, so I am not surprised it took so long for someone to pick it up and finish it. I think I need to try the technique again with more cohesive fabrics.
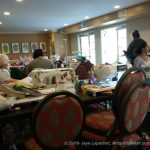
The Winter Extravaganza Palooza swap was yesterday at the BAM meeting. Being the blog editor, I had compiled a giant list of tutorials and patterns a few months ago for inspiration. It is an impressive list, so take a look. 😉
My swap partner wanted a bag, so I pulled out one of the bag patterns I have had sitting around and tried it out. I know I could have used one of the tutorials I just crowed about, but I didn’t. I wanted to plow through some of the bag patterns I have purchased and this was the perfect opportunity.
I wasn’t hopeful that this bag would be successful (unlike me, I know!), so I was pleasantly surprised to find that this bag came out pretty well. The flap is a great opportunity to do some machine embroidery or applique’ or other type of embellishment. I chose some interesting, if black, modern fabrics for the outside, so it wouldn’t show the dirt.
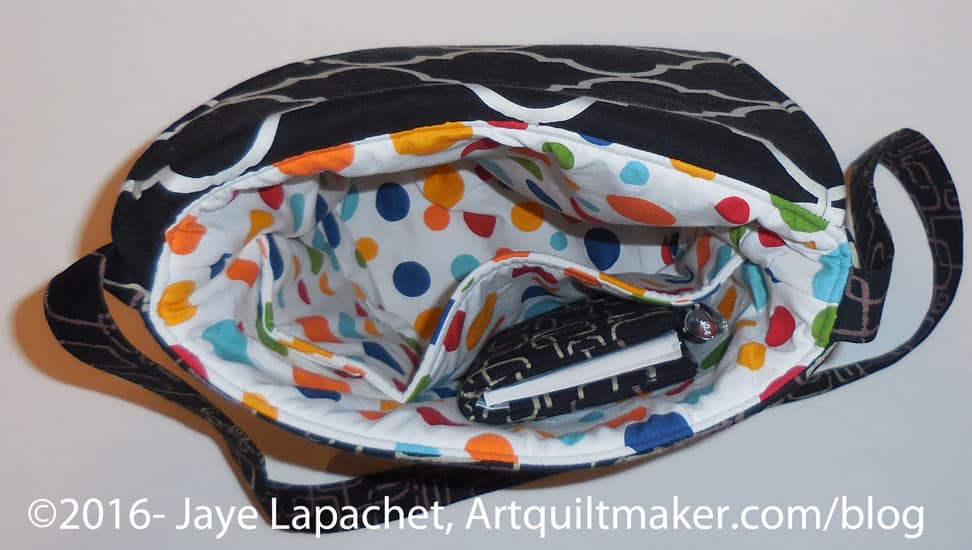
The pattern is Flip Flap bag from Totes by Sandy. The pattern is not 100% clearly written, though the interpretation could have been my problem. I had some trouble with some of the steps, but it all came out in the end. I would have made the lining section much smaller. I did make it a little smaller, knowing from past experience that it didn’t need to be the same size as the outside. I didn’t make it small enough and the inside sags a little. 🙁 I don’t know what the normal reduction is for linings – half inch? a whole inch? I could experiment, but probably won’t.
Flip Flap Bag inside view
I made the inside light so my partner could see her stuff.
I am thinking about making this again, as I think it is a good size. I wonder about adding more pockets. The handbag I use now has a section at the front for cards, lipstick, etc and I wonder if that could be incorporated into this design. Perhaps not with the asymmetrical flap.
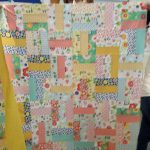
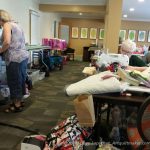
As I have mentioned many times, BAM does a lot of charity work. Peggy and Michelle work hard to make it fun. Right before the retreat, the guild was the fortunate recipient of a bonanza of fabric. It wasn’t ugly, crappy fabric that people often try to offload. It was relatively new yardage as well as pre-cuts. There were charm packs, large and small jelly rolls and layer cakes.
BAM Retreat Charity Quilt (Joelle)
BAM Retreat Charity Quilt (Kelly O!)
BAM Retreat Charity Quilt (Annemarie)
BAM Retreat Charity Quilt (Joelle)
BAM Retreat Charity Quilt (Mary C)
BAM Retreat Charity Quilt (Mary C)
As a result a lot of new charity quilts were put together at the retreat. The above is a small sampling. They are generally smaller, but so bright and cheerful! Peggy was pushing the Disappearing 9 Patch pattern, so a few of those showed up using the charm squares.
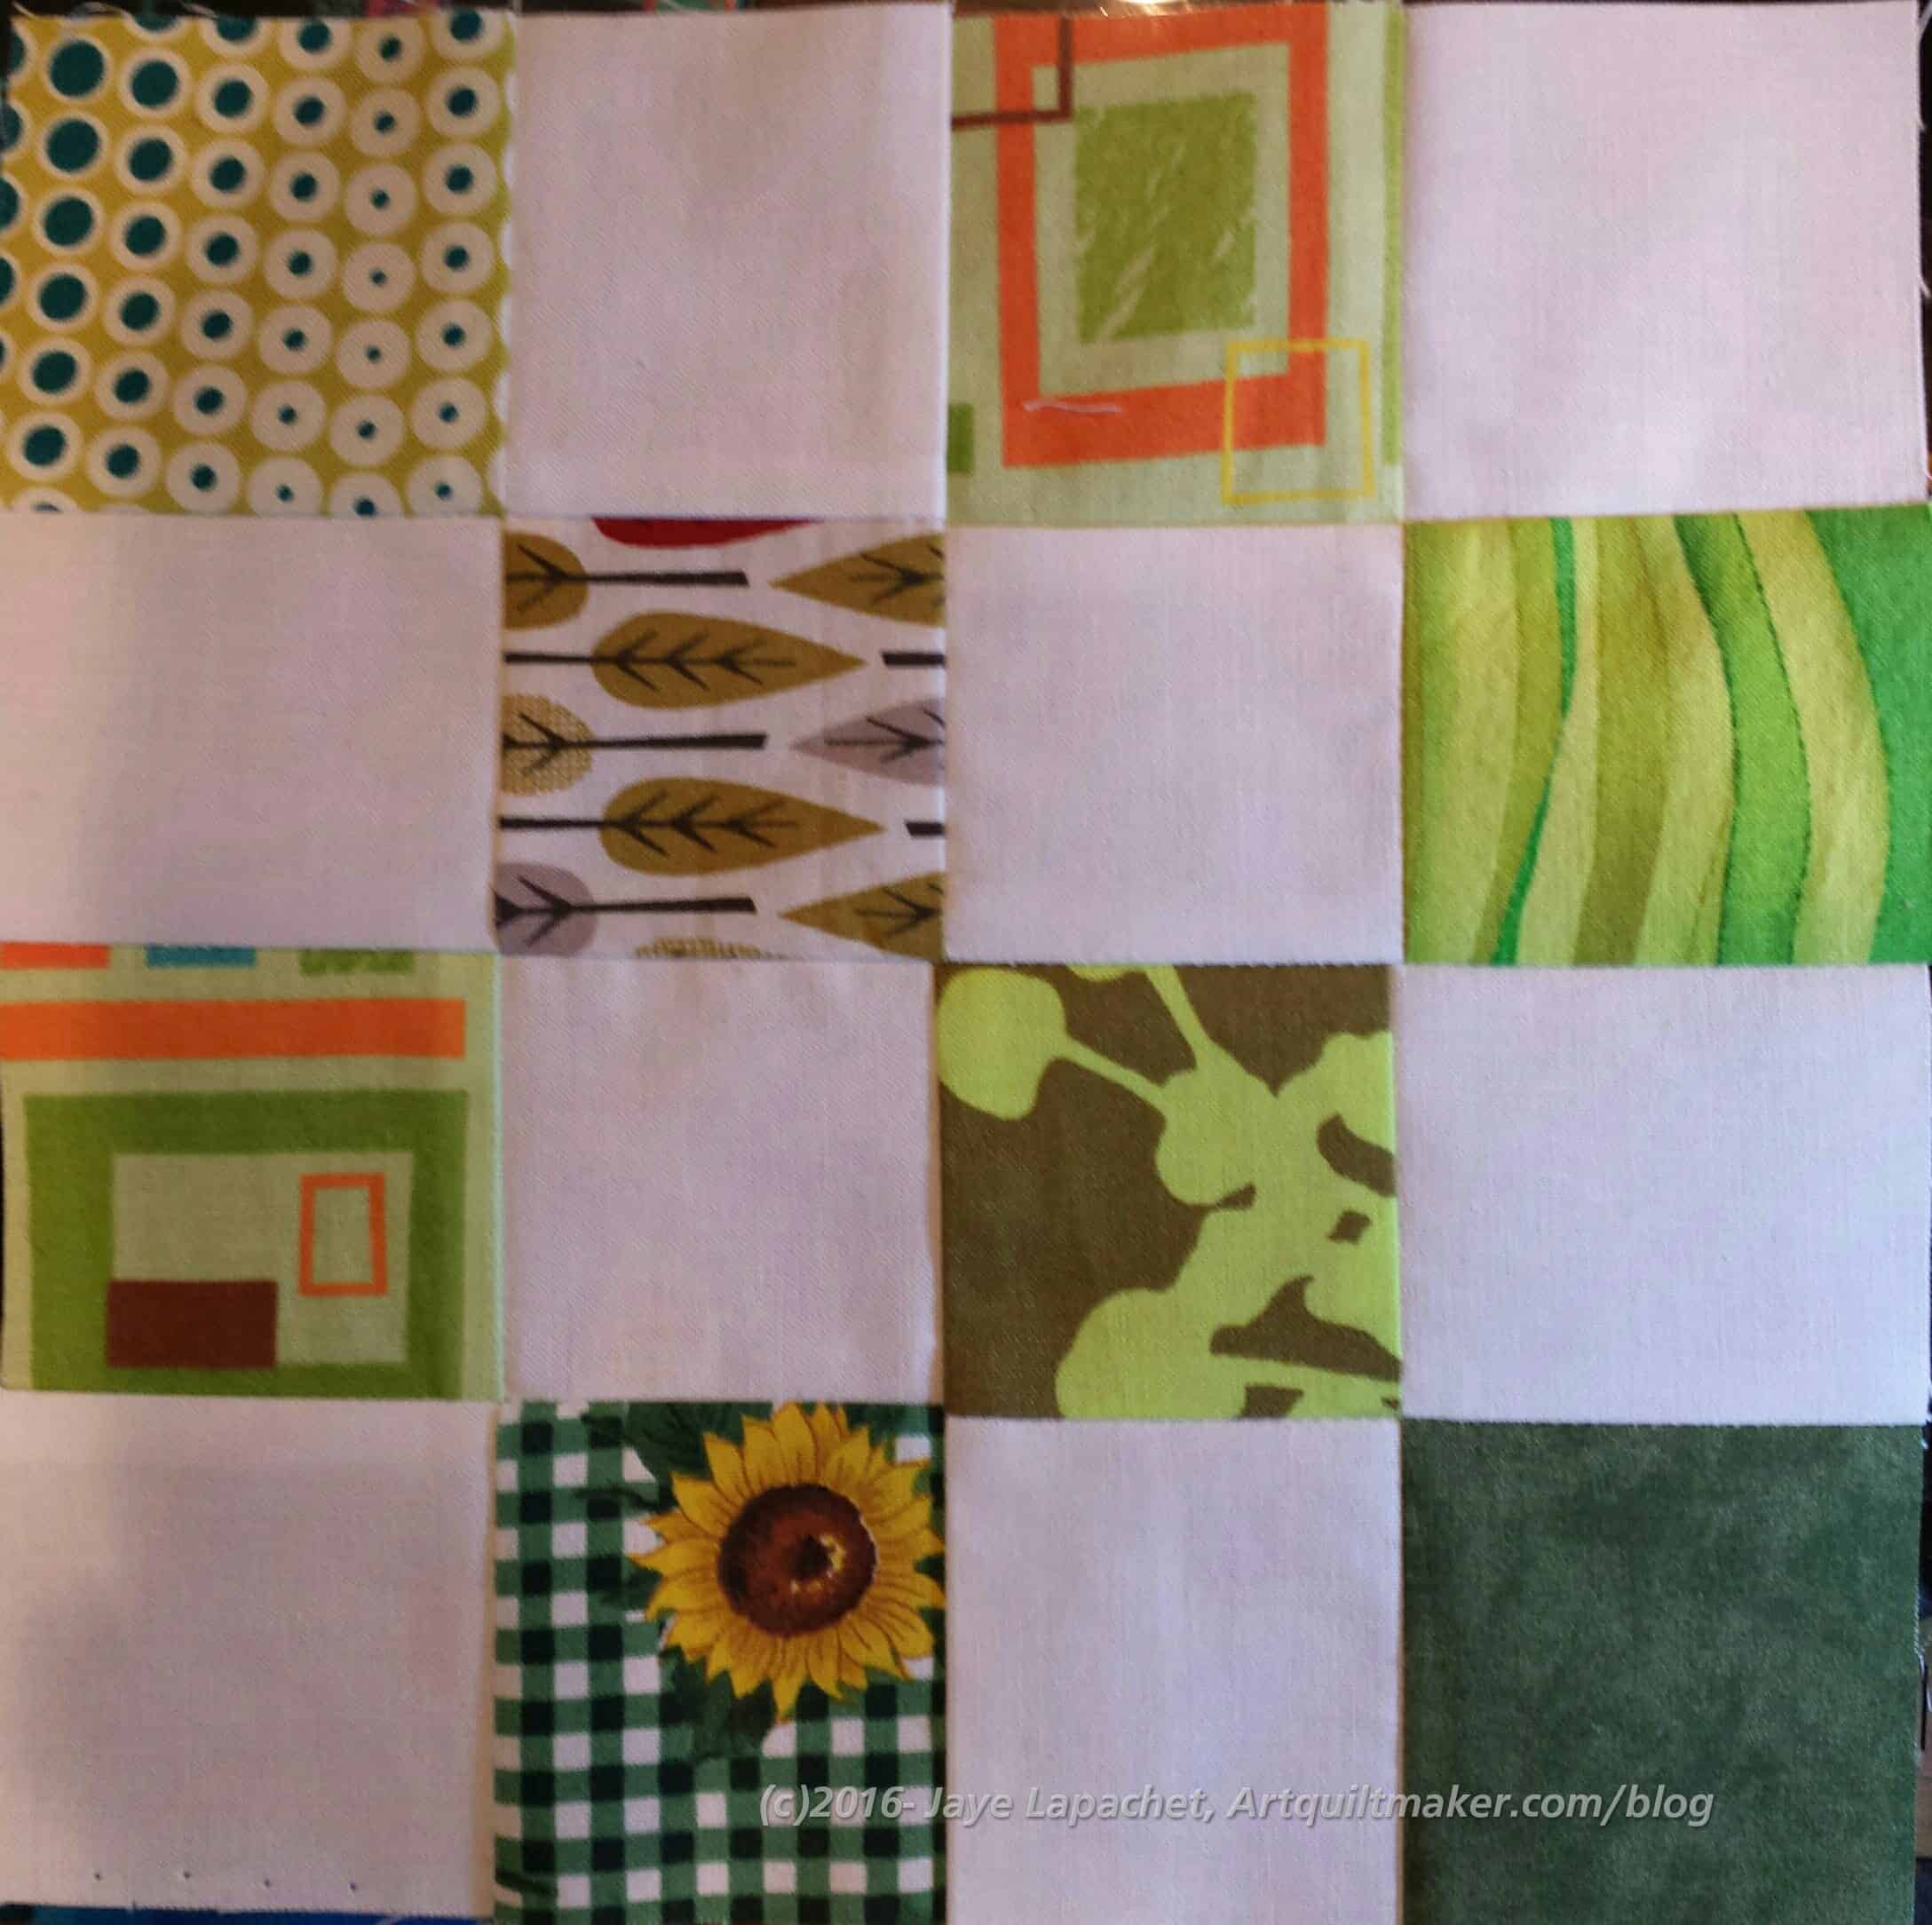
Retreat Charity Block
My pathetic effort to the charity endeavor was one block. the Charity Girls had the regular postage stamp kits available, so I took one when I needed some leaders and enders for my City Sampler blocks and made the block.
As discussed a couple of days ago, I went on the BAM Retreat. I didn’t just have boatloads of fun and eat until I was sick, I also made some valuable progress.
Tablerunner
The Thanksgiving tablerunners have been hanging over my head. Thanksgiving is now 1.5 months away and the hanging became more like the Sword of Damocles than an item on my to do list. I am pleased to say that the two remaining have been quilted. I still need to make and apply the binding, but the quilting part is done. I didn’t get to the tablemat, but I am pleased with my progress.
One thing I did on the pumpkin tablerunner was use Aurifloss (12 wt thread). I used it in the machine with 50 wt Aurifil in the bobbin. There was more breakage than I normally experience with Aurifil. I really like the effect and was pleased that the 50 wt did not show through to the top. I didn’t have to adjust the tension.
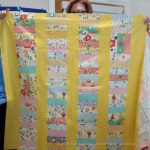
City Sampler / Tale of Two Cities Blocks
City Sampler / Tale of Two Cities Blocks
City Sampler / Tale of Two Cities Blocks
I also made a few blocks for the Tula Pink City Sampler/ Tale of Two Cities project. The blocks were a good break from quilting, which I needed after I completed the quilting on the first tablerunner. Julie joined the #100blocks100days challenge on Instagram and, while I have not joined, it is inspiring me to work on them. Also, she is now ahead of me on making blocks! I need to get myself in gear. Michelle S was a good support for this project at the retreat.
I also FINALLY started the Valori Wells Little Cell Phone Wallet pattern. I really, REALLY need something to carry my phone and hotel key when I am wearing dresses with no pockets. REALLY. Since the project was small, it seemed like a good time to work on it. I had some trouble with the directions, which should be no surprise. I did get a good working sample by the time I left the retreat. It isn’t one that I will use for various reasons. I’ll write more about this pattern in another post.
While my descriptions might not seem like a lot, I was busy and working hard the whole time. I am pleased with my progress and will be really pleased when I can finish these various projects and cross them off my list.
We are going to take a break from the quilt class and talk about quilt retreats. I may slow down the quilt class just a little to catch you up on some progress I have been making.
I just got back from a quilt retreat. BAM went to Sunnyvale together, had a lot of fun, ate some food, got to know each other better and worked on our projects for 2.5 days. We did a lot and a lot happened, so I might write multiple posts.
It was a great retreat and I had a great time. I felt like I got back in the swing of sewing, at least a little. The Peacock Quilt is still on the design wall taunting me.
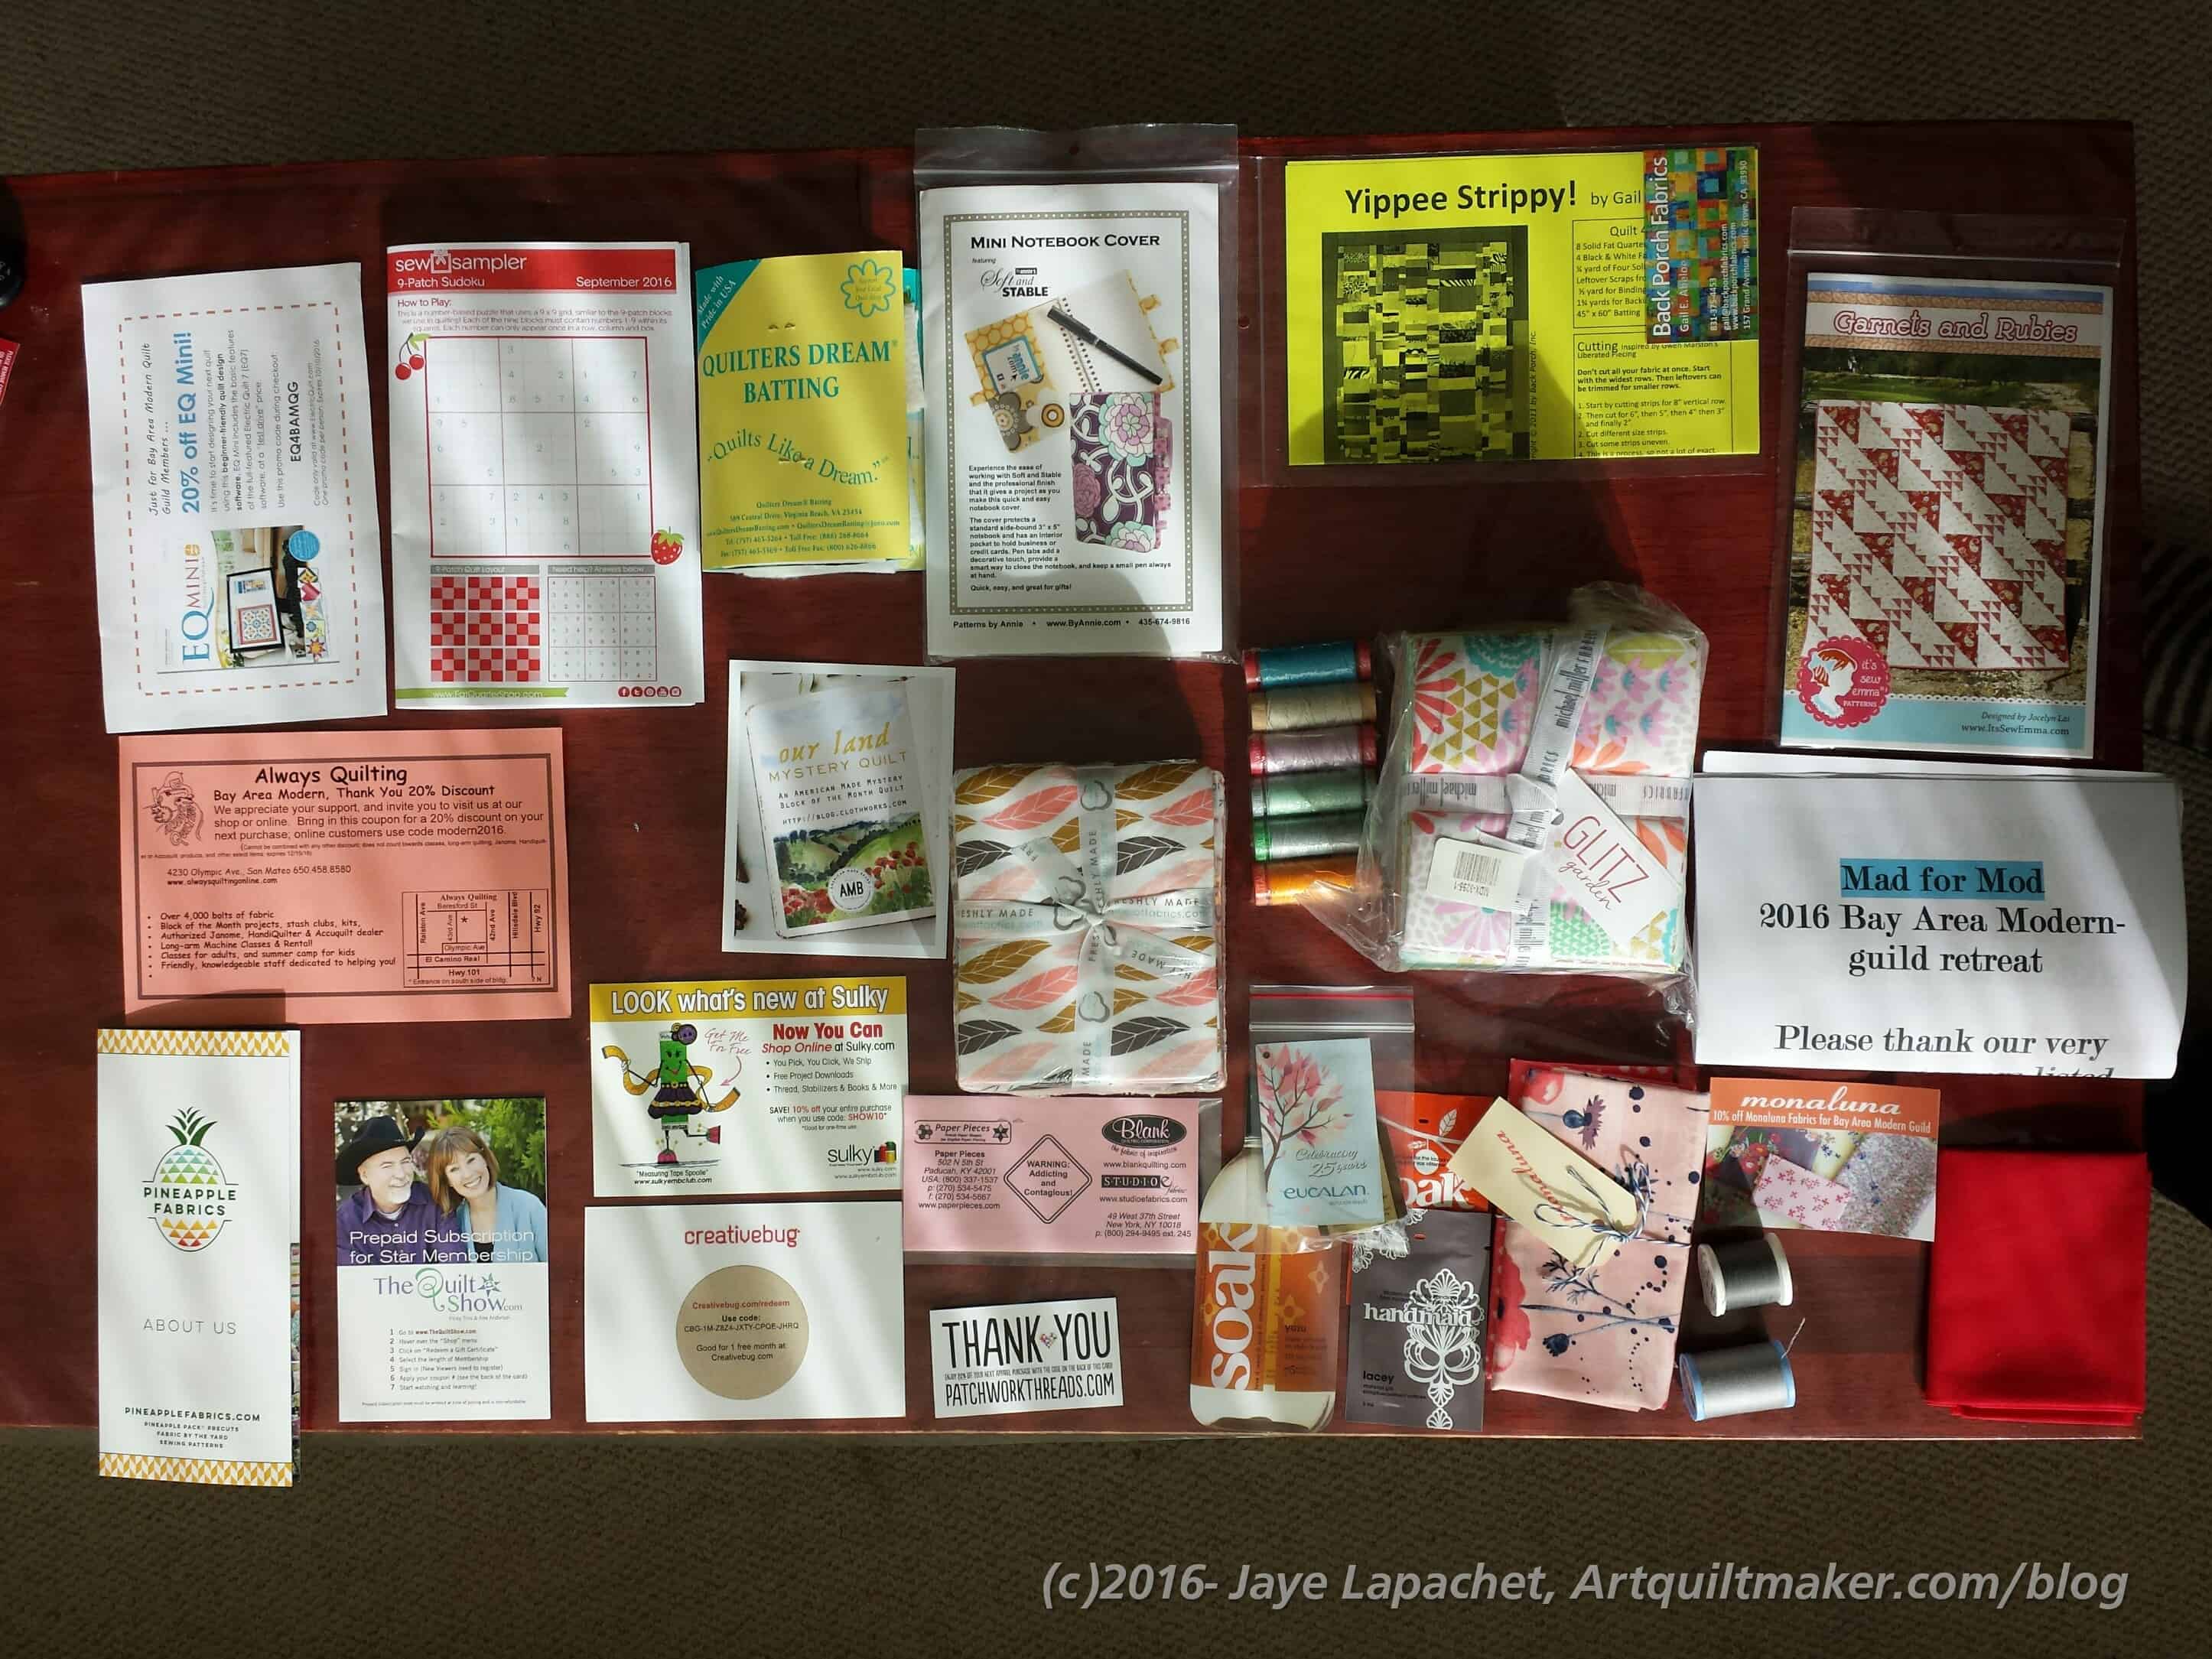
Mad for Mod 2016 Sponsors
First, the sponsors were fantastic. You wouldn’t believe the gift bags that we got. I finally took everything out and looked at it when I got home and felt like the bag was magic. More and more kept coming out. I was very pleased with what I got, though I didn’t expect such a gift bag.
BAM Retreat Goodies
Not only were there actual things in the gift bags, but also a lot of codes for discounts and free quilt trials. I received two FQ packs of fabric as well as a pack of Aurifloss, a number of patterns, some other thread and many new things to try out. Amy, the vendor chair, worked hard and did a fantastic job.
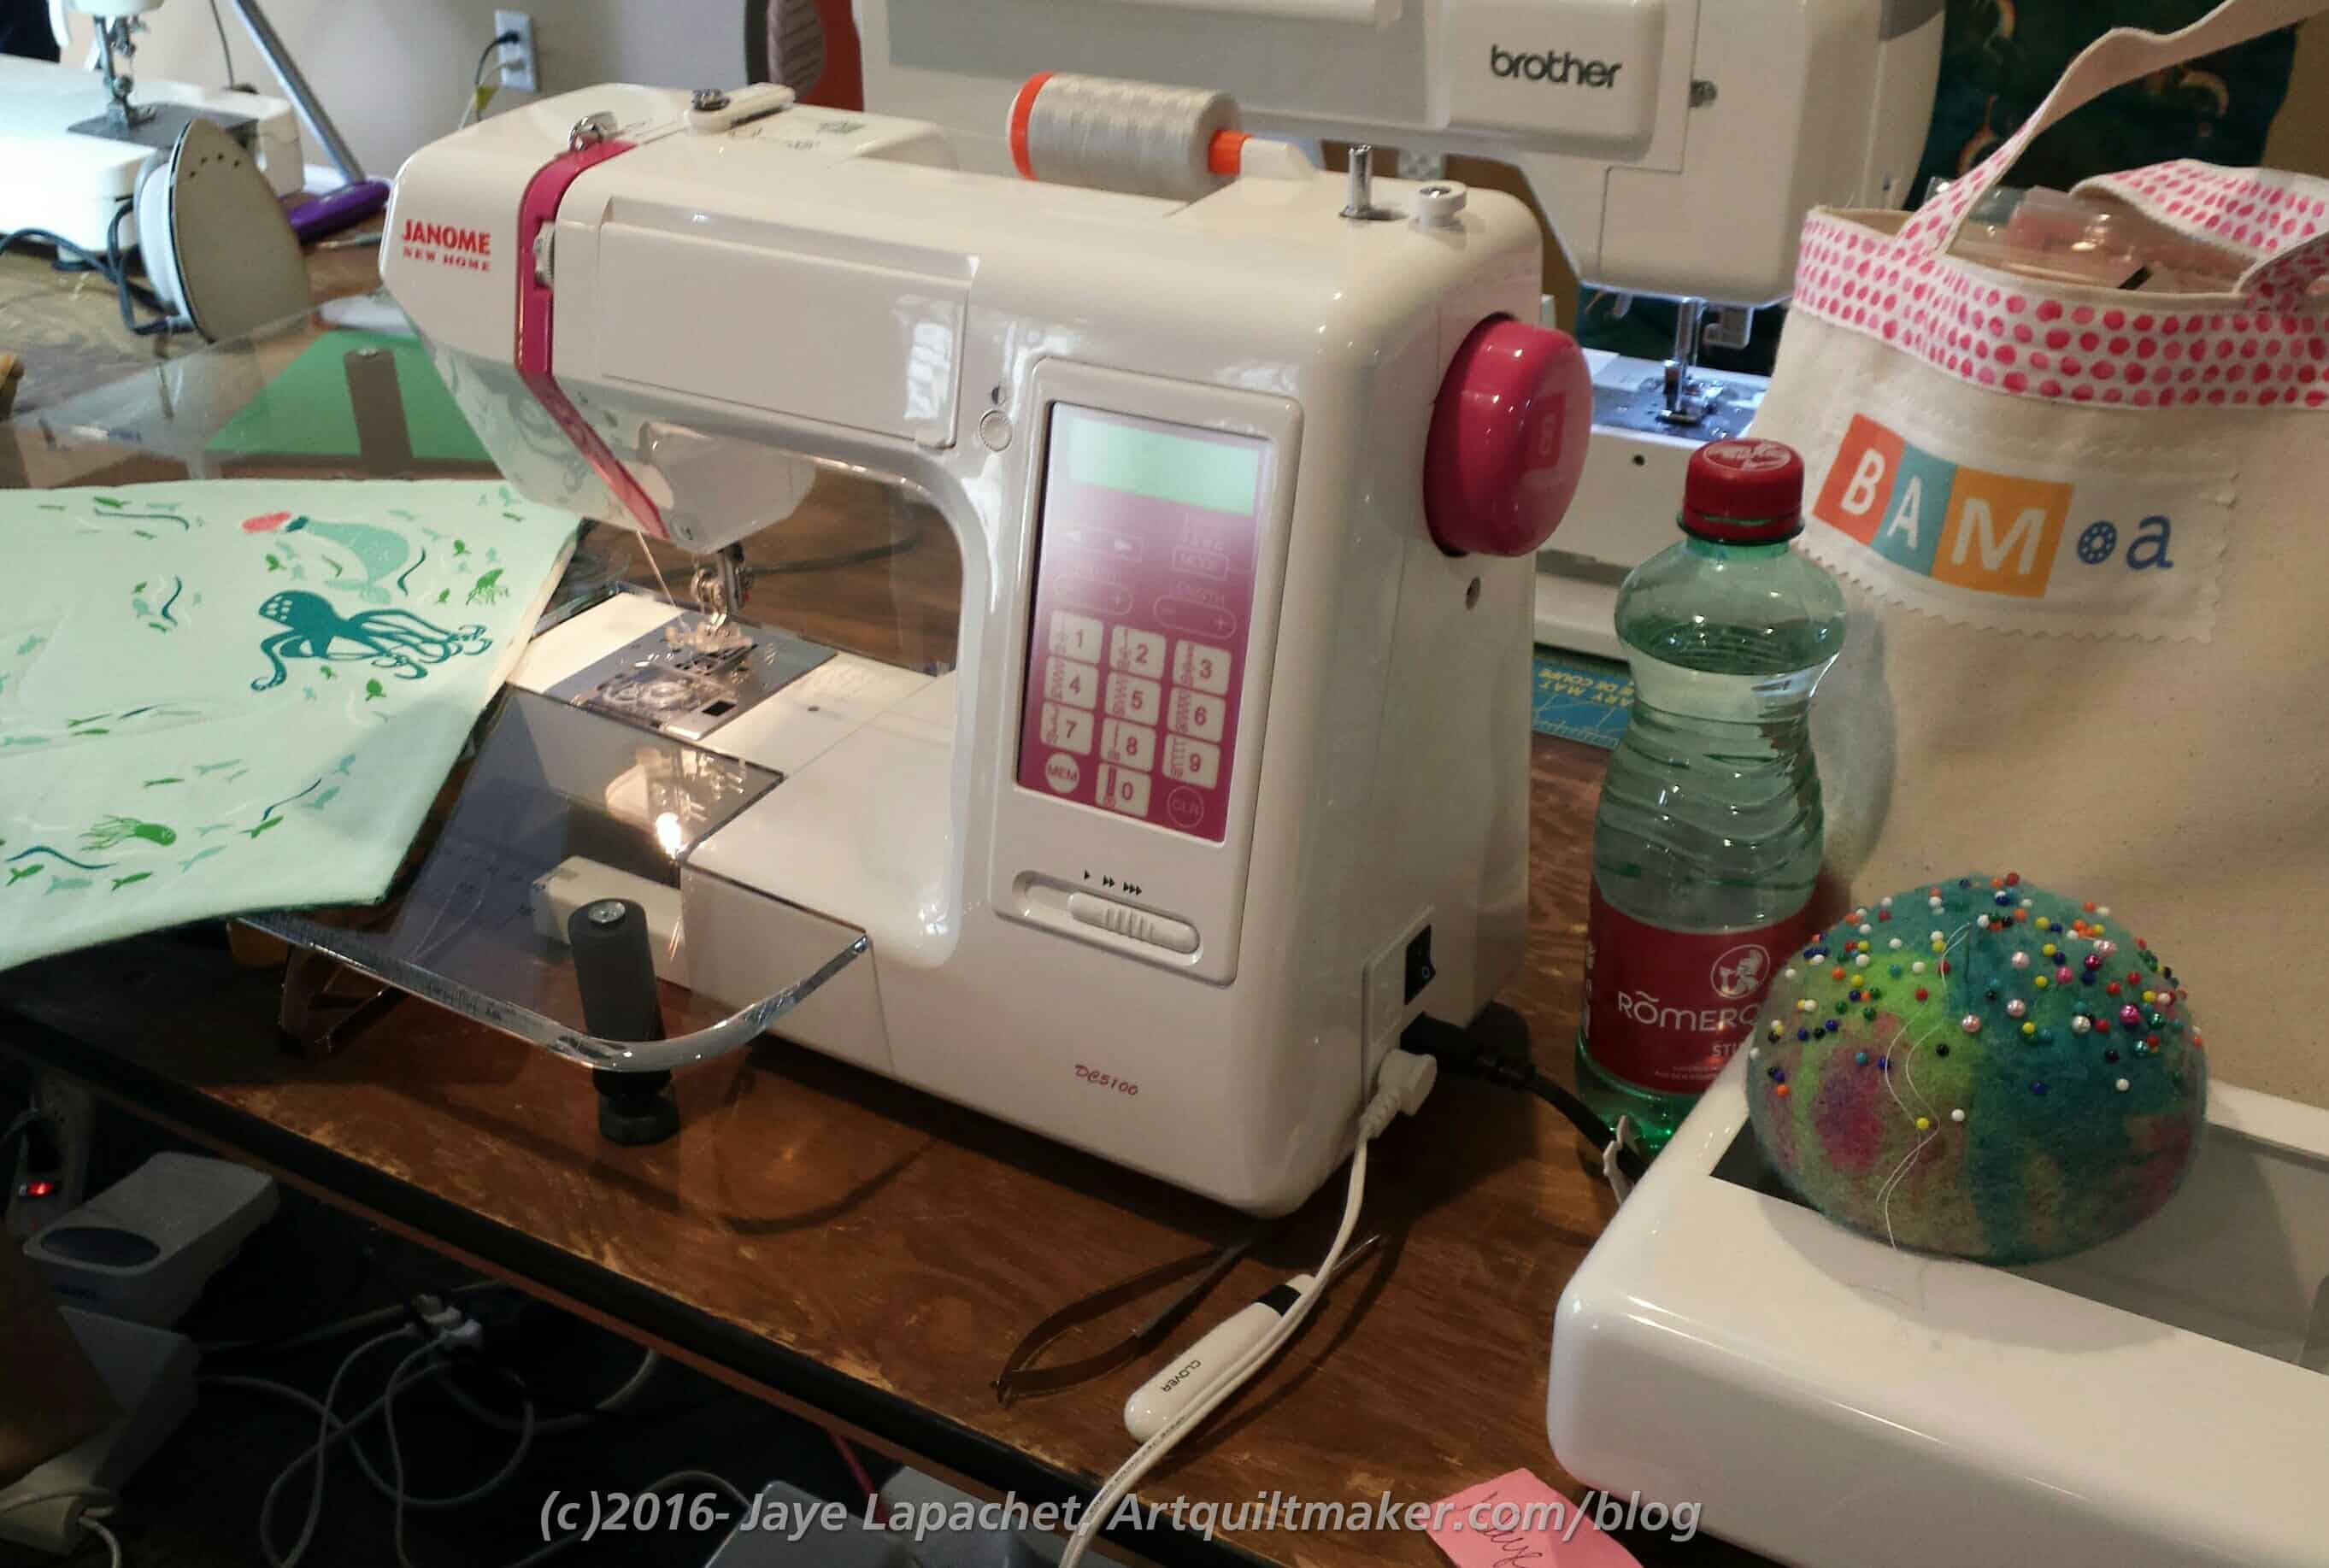
BAM Retreat Sewing Space
My sewing space was small, but adequate. We knew in advance that we would only have a small amount of space so I planned accordingly.
BAM Retreat Sewing Space
The rest of the room was a regular conference room, but there were French doors that led out to a small grassy area, so we had plenty of natural light as well as fresh air and a nice spot to have cocktail hour. 😉
BAM Retreat Cocktail Hour
Meals were included, which didn’t work out super well for me, though I think everyone else enjoyed them. My stomach was still a bit off from my trip and from being sick, so I am blaming those things rather than the caterer. We also had cocktail hour on Friday and Saturday. I didn’t drink, but the snacks were well labeled GF and tasty.
Although I came home on Wednesday and left again right away on Friday, I was glad I attended the retreat. I think it was hard on my poor DH, but perhaps coming home and leaving again two days later gave him a taste of what he had been missing. 😉
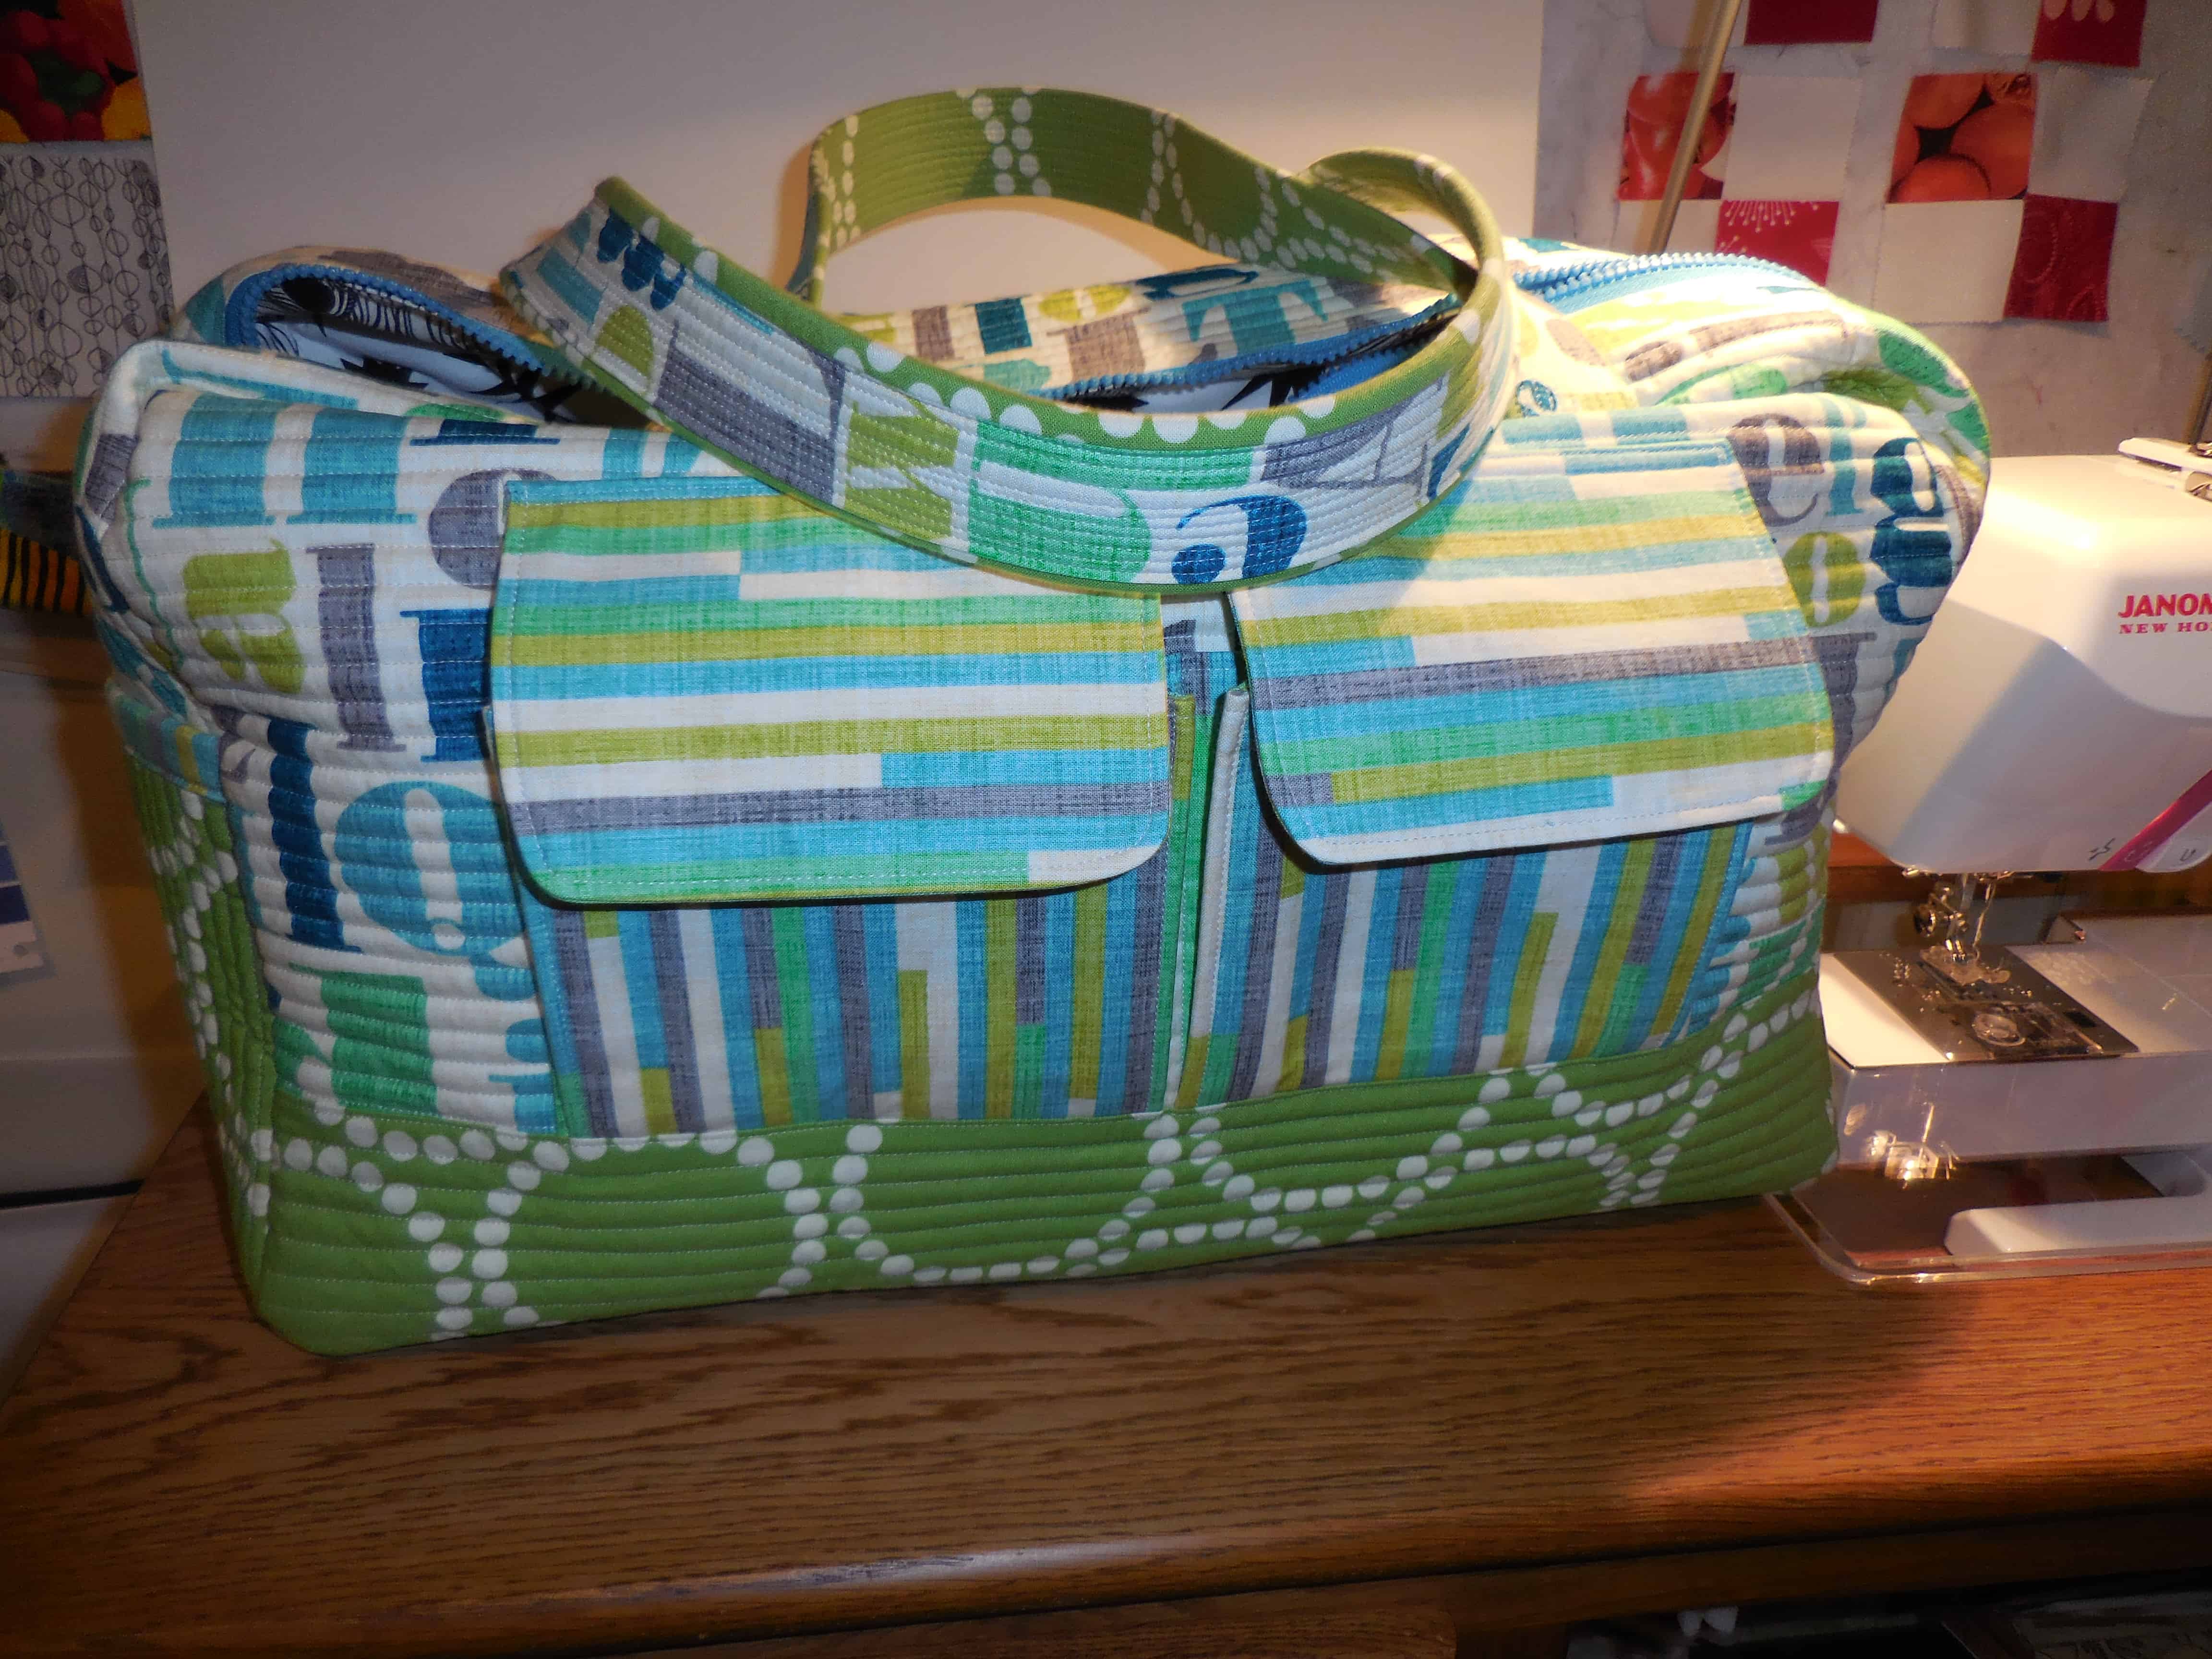
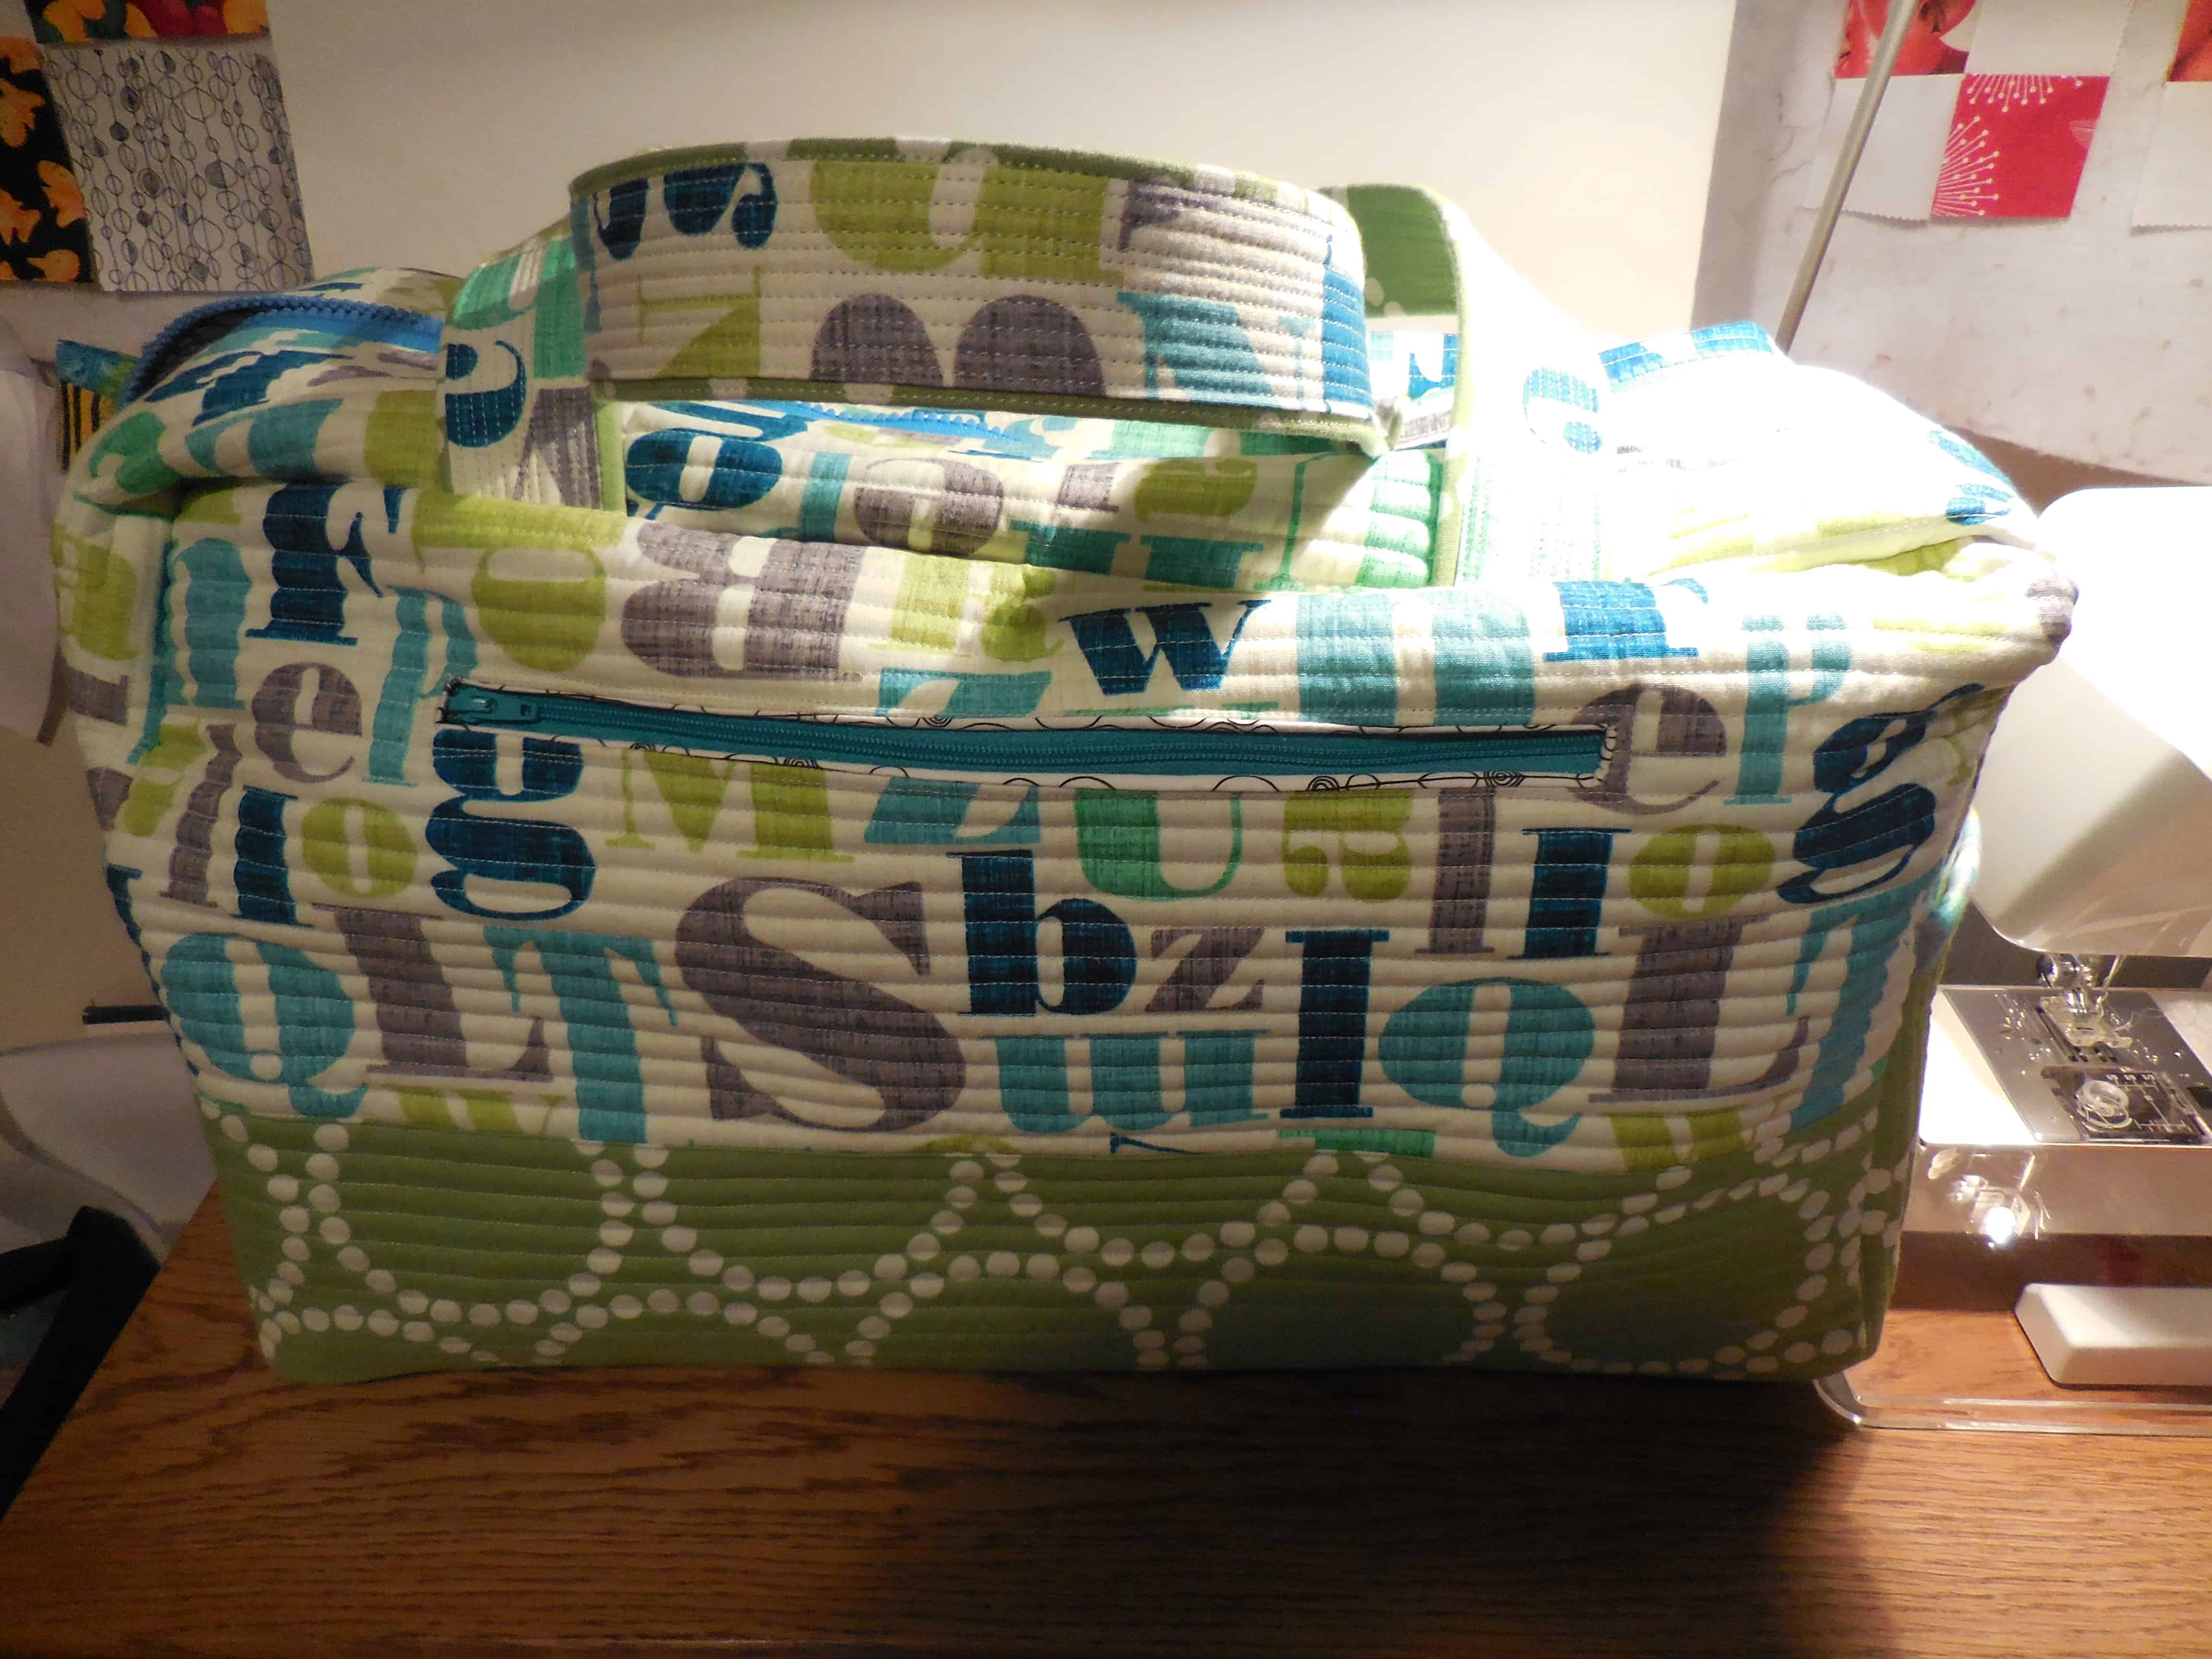
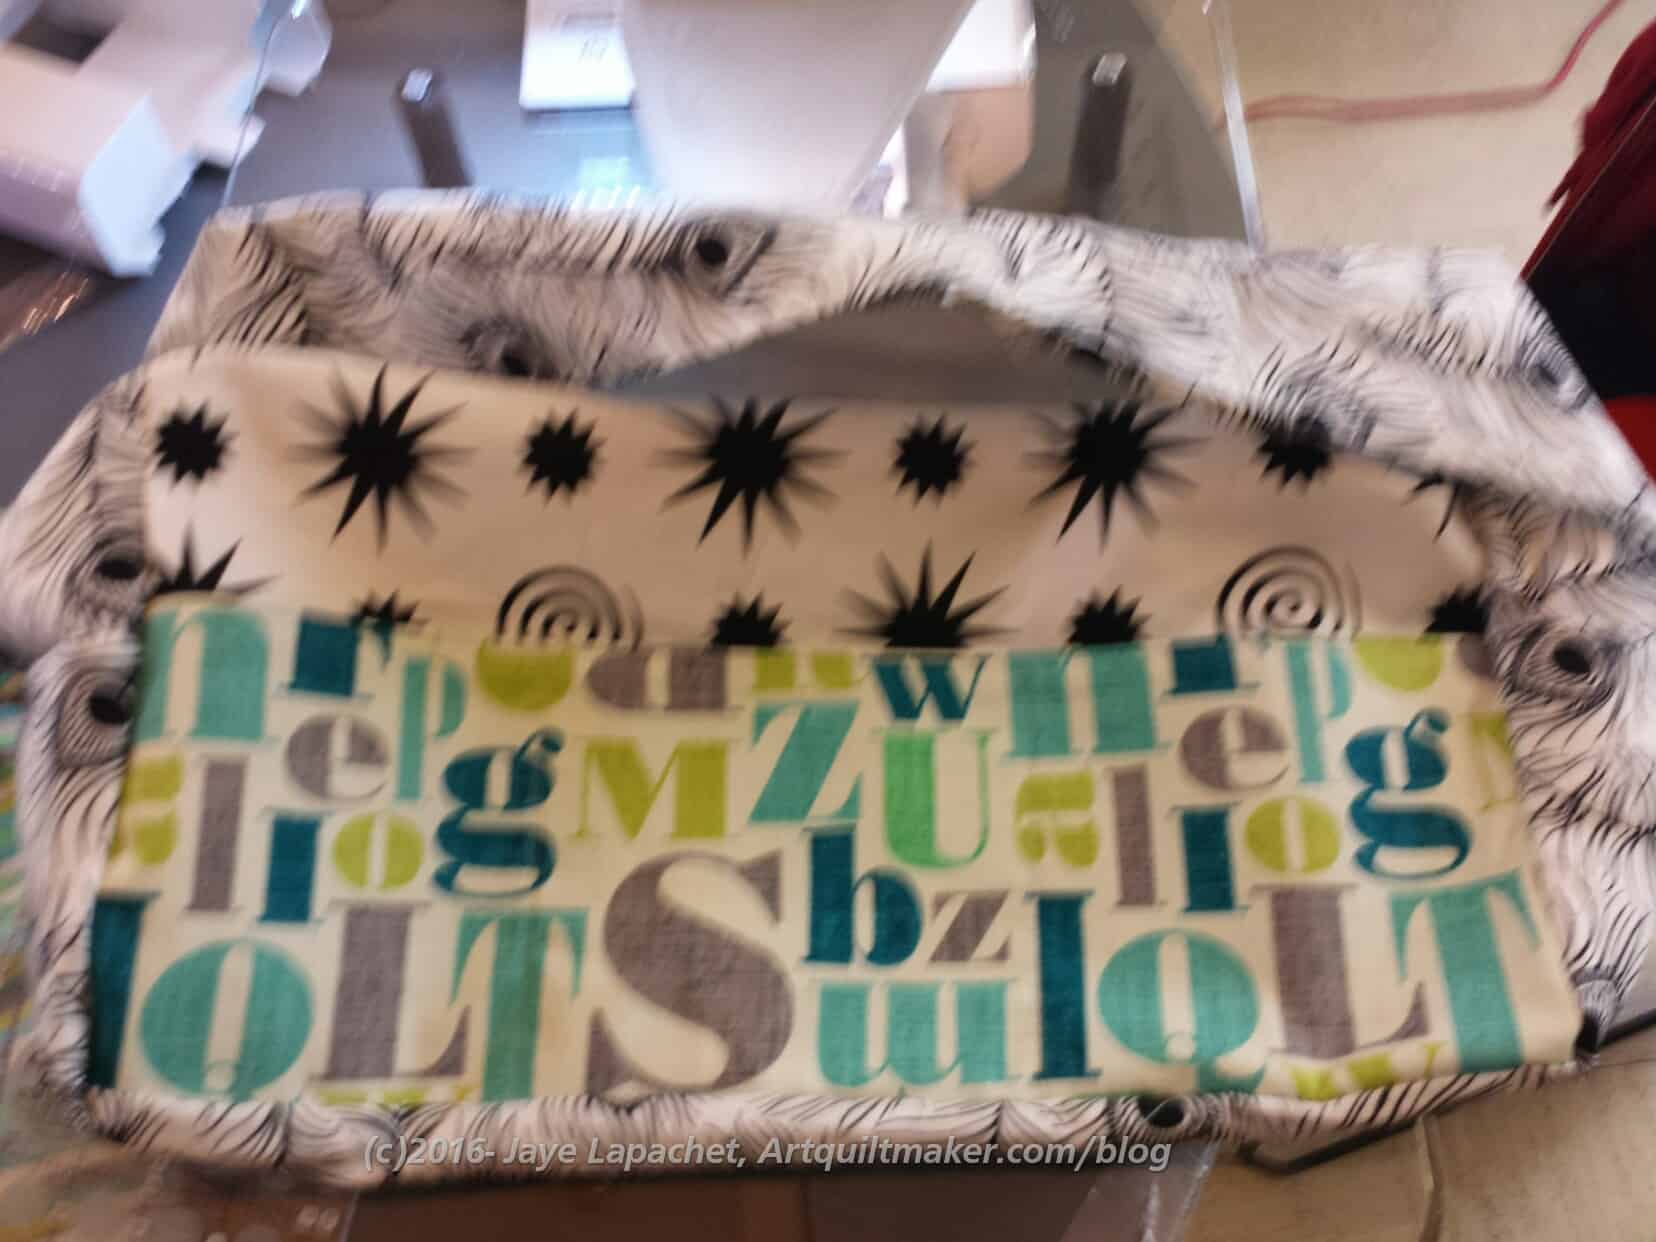
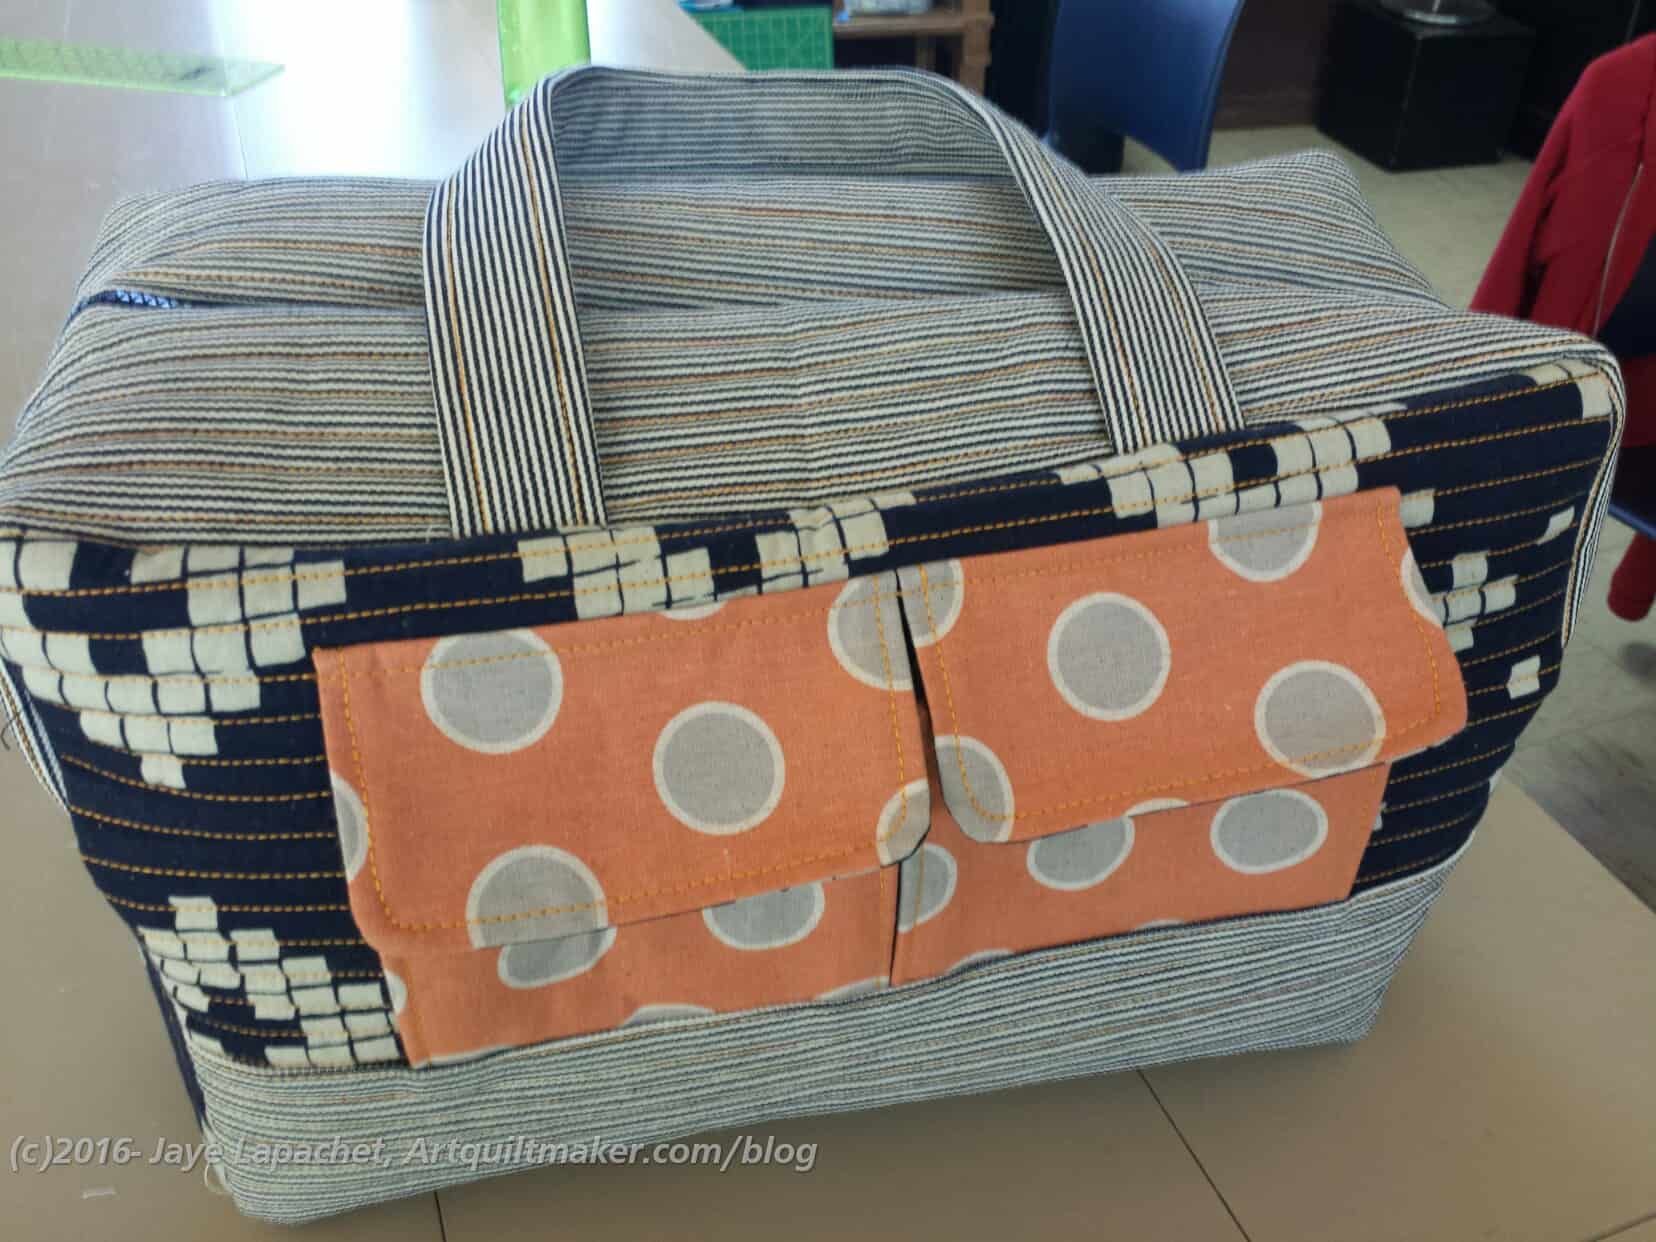
I spent the Sunday after the workshop finishing the Cargo Duffle.
I really, sincerely disliked all the prep work, but was thrilled to see how this bag turned out. it has substance. I was going to give it away, but I am keeping it. I really like the fabrics I chose, even though I chose the green because I thought I would give it away. I love that text fabric.
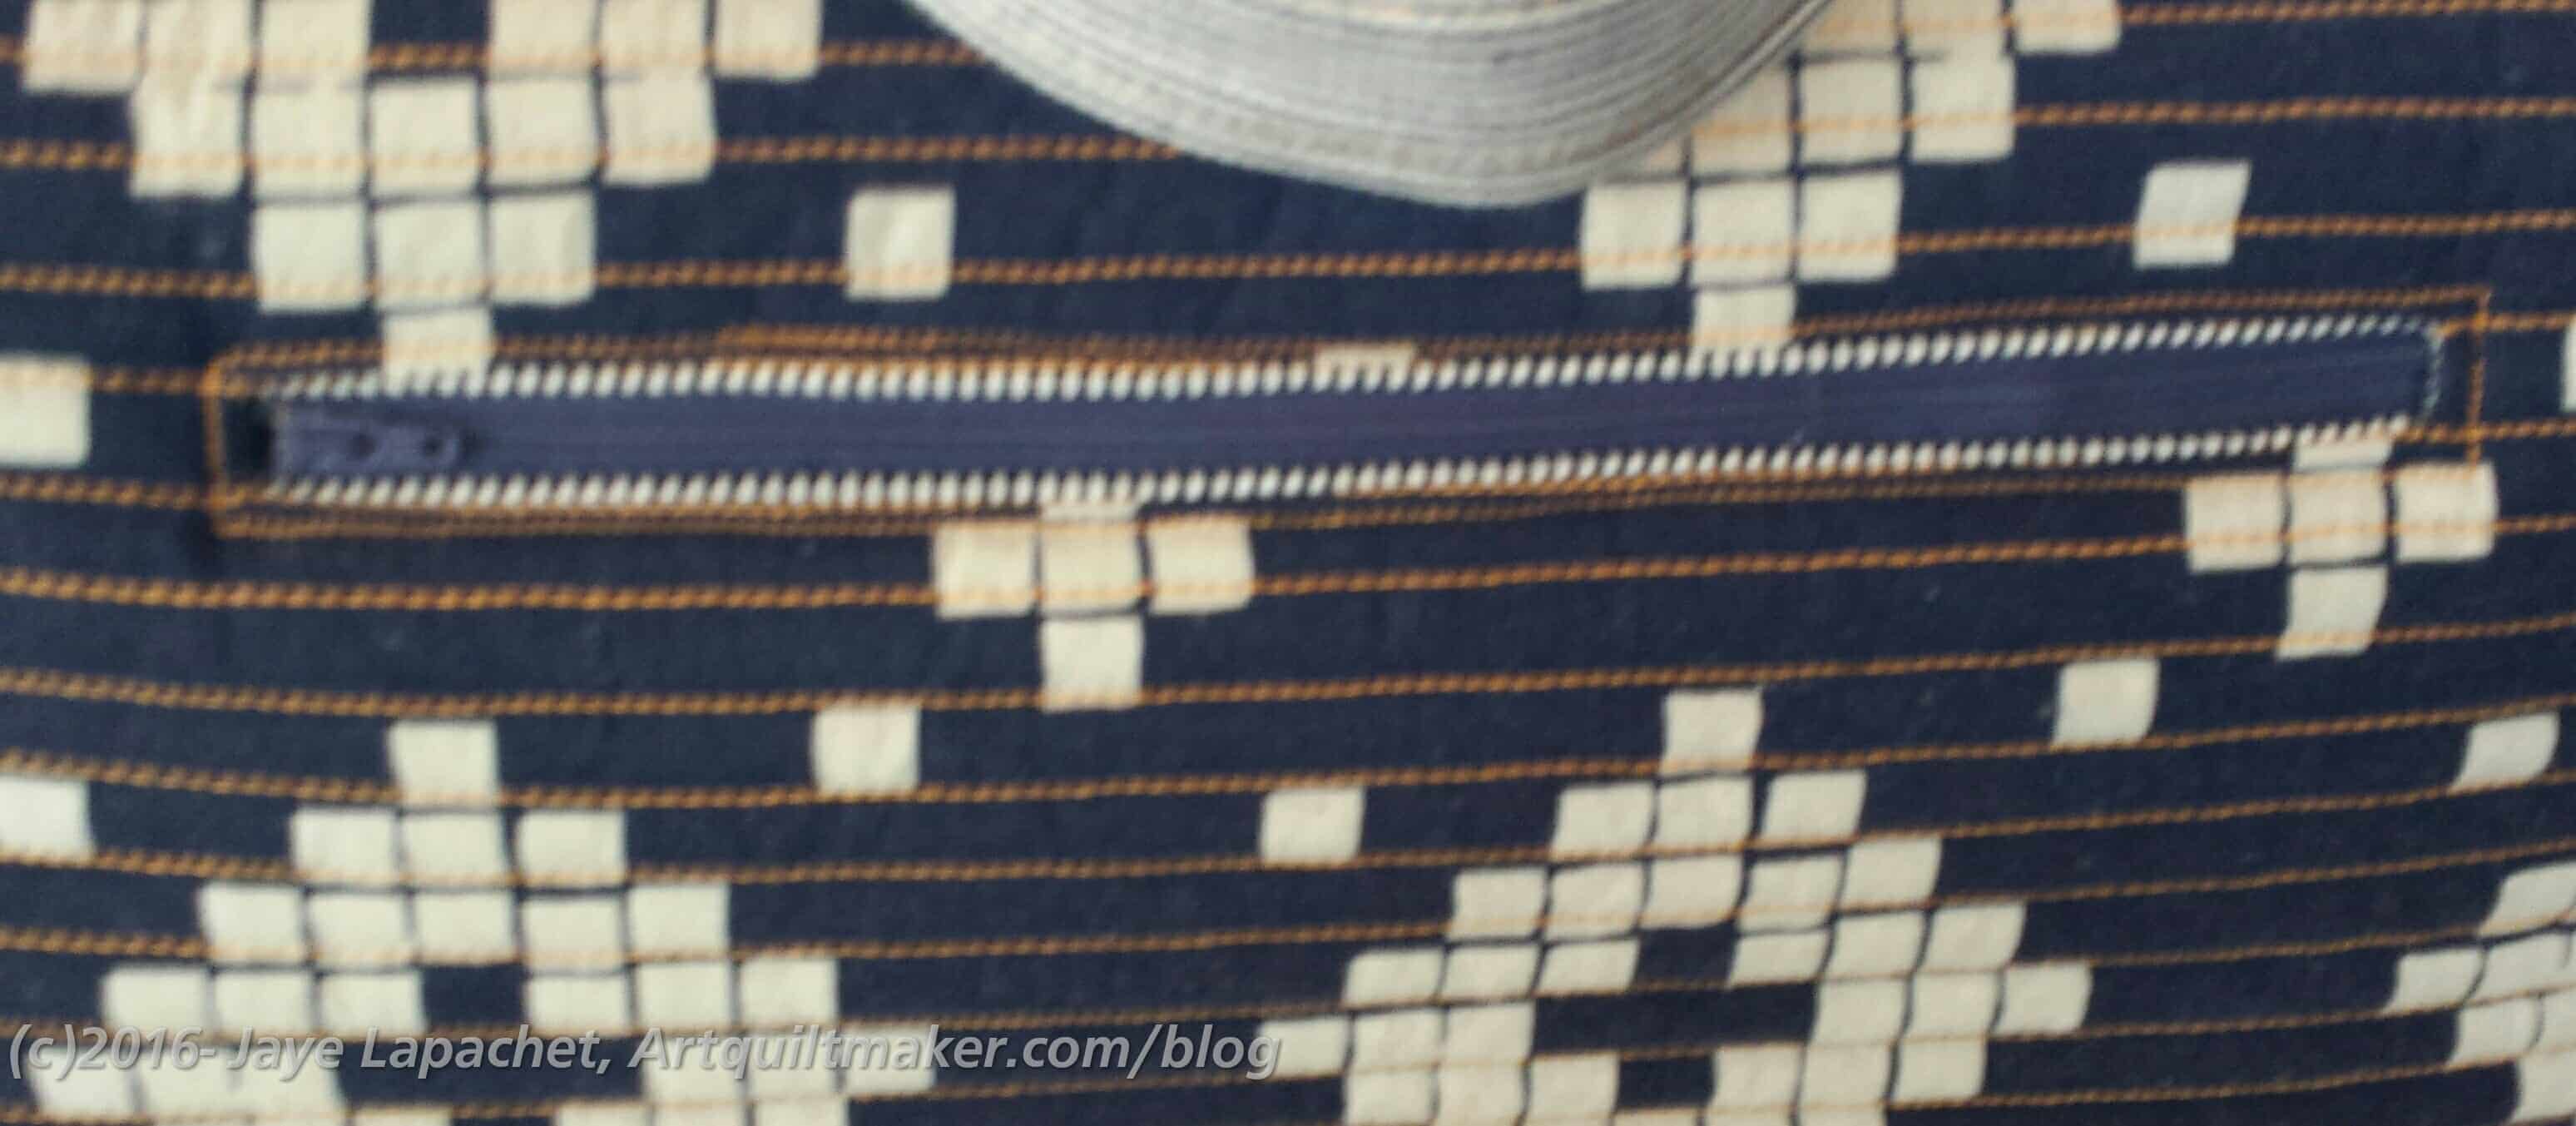
Cargo Duffle – Finished (interior zipper pocket)
I am also thinking of making another one. I know. I know. I am crazy, but I keep thinking about how I would make a second one differently. I want to see if I can do it again better. ALSO, I do have to make a bag for one of the guild officers.
For example, after cutting out the straps, I would just sew them. After cutting out the pockets, I would sew them to the lining. I think it would be less confusing. Yes, I would still have to quilt a bunch of pieces and panels,, but I think it would be easier. It might not have worked when I didn’t know how to make the bag, but now that I have an idea, I think it would work better for me.
I am behind in posting, but I also don’t want to bore you by posting on one project or topic day after day.
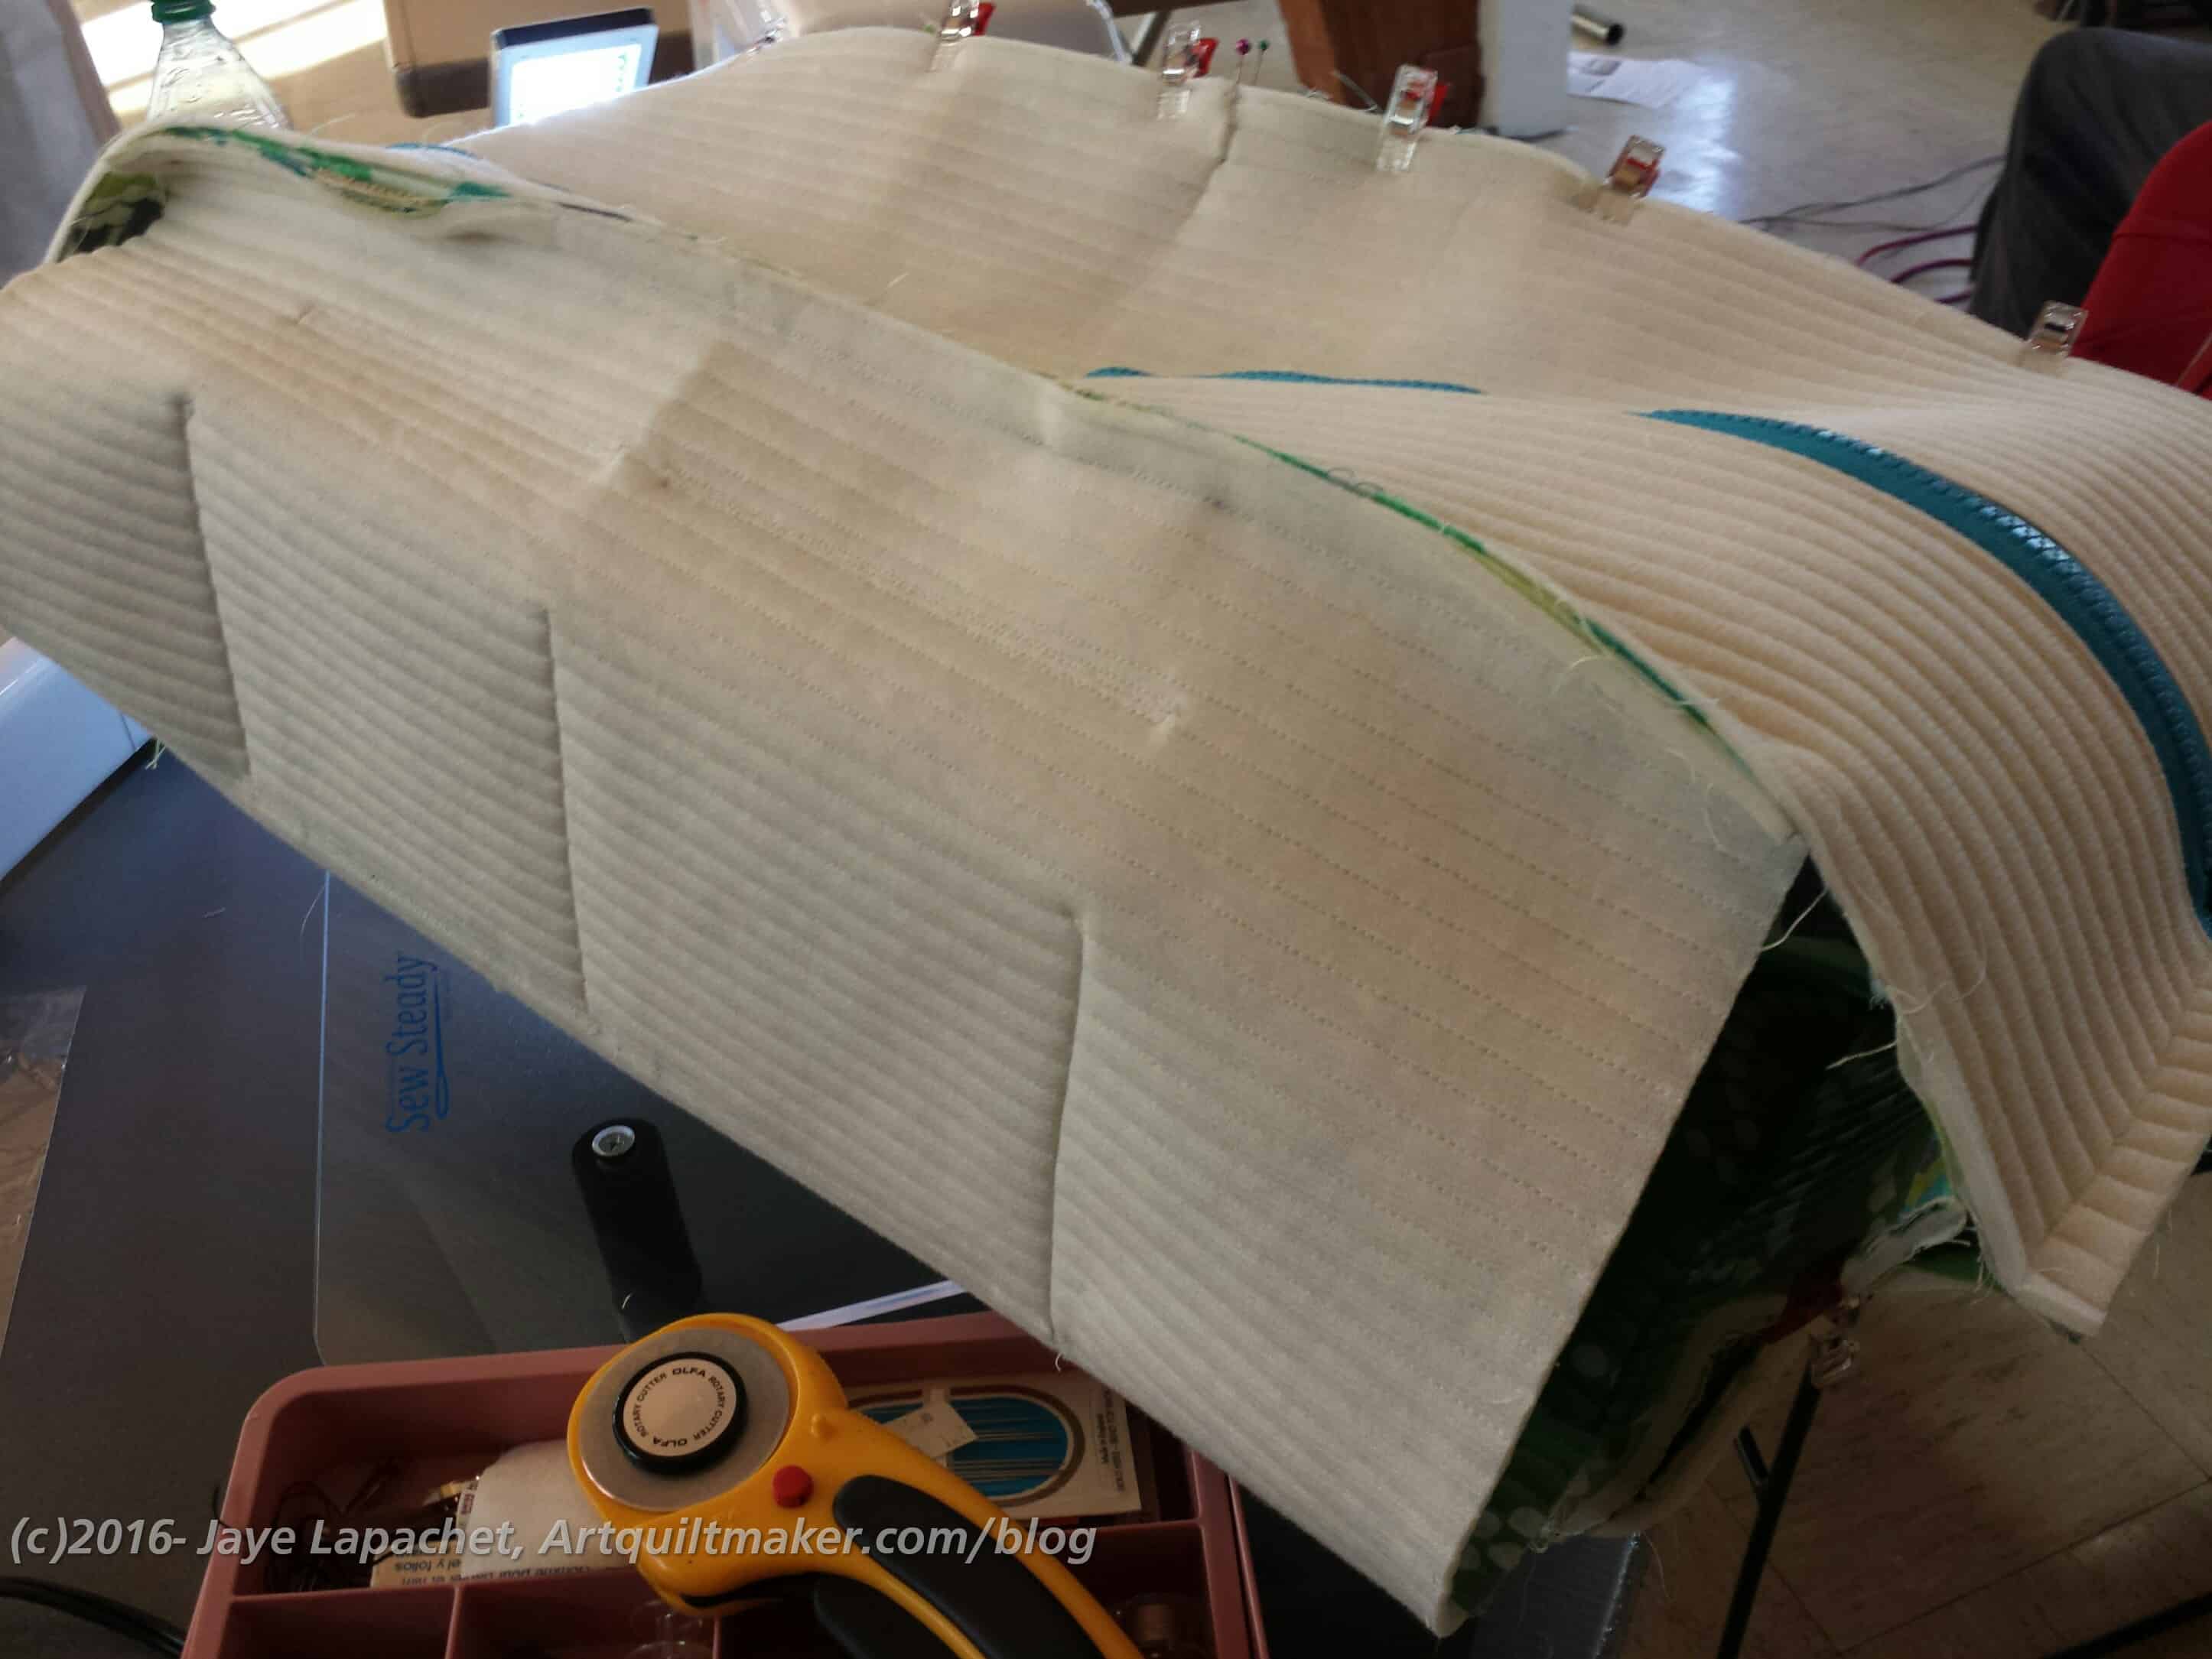
You know that I have been prepping for the Cargo Duffle. It seemed interminable, but paid off. On the first Saturday in August I went to the BAMQG workshop and worked on assembling the Cargo Duffle. I arrived in good time after only getting a little lost*. 😉
Gerre arrived right after I did and we quickly decided to sit together in the back of the room. That way we could have a whole table to ourselves. There was a bit of table shortage because their day camp program was using the long rectangular tables we like. We ended up with two tables, mostly because I decided we needed a separate table on which to layout all the pieces we had prepped. It is always great to work with Gerre. On the day of the workshop, I was on edge (not sure why – a lot going on, maybe) and she kept talking me down off the ledge. I reciprocated the favor by keeping her calm when parts of the bags weren’t going as planned.
It was also good to see that some people had done less of their homework than I did, not to be mean to them; it just reduced my stress a bit.
We started out with the slip pockets and my first problem was with what pieces needed to be used. Jaime helped and once I got that problem sorted, the “which piece was which” problem sorted itself out. Even though I had all the pieces labeled, with this bit of help, I had a frame of reference.
Seeing what other people were doing and having access to a teacher also made me calm down quite a bit.
Cargo Duffle lining with interior slip pockets
My first huge accomplishment was finishing the lining. Yes, I finished the interior slip pocket and the interior zipper pocket, which help to make up the lining, but seeing a real 3D item made from all that prep work me very happy.
I made mistakes and had to rip, which I am sure others were doing as well, even though I didn’t see them. I also had to change the way the main zipper worked, which Gerre talked me through. I may post the steps for you later. Not sure, but stay tuned.
Sewing Cargo Duffle Exterior Together
Still, it was a super long day and I didn’t finish completely, but made really good progress. By the end of the day I only had to sew the rest of the exterior together and then insert the lining. I really don’t have a lot to complete and feel like I accomplished quite a bit by the time the day was over. Do I wish I had finished? Yes, of course, but I have to be happy with what I was able to do.
Gerre’s Finished Cargo Duffle
Gerre’s Finished Cargo Duffle
Gerre’s Finished Cargo Duffle
Gerre’s Finished Cargo Duffle
Gerre finished her bag and it looks great! Cheryl, Amanda and Karen all finished their bags as well.
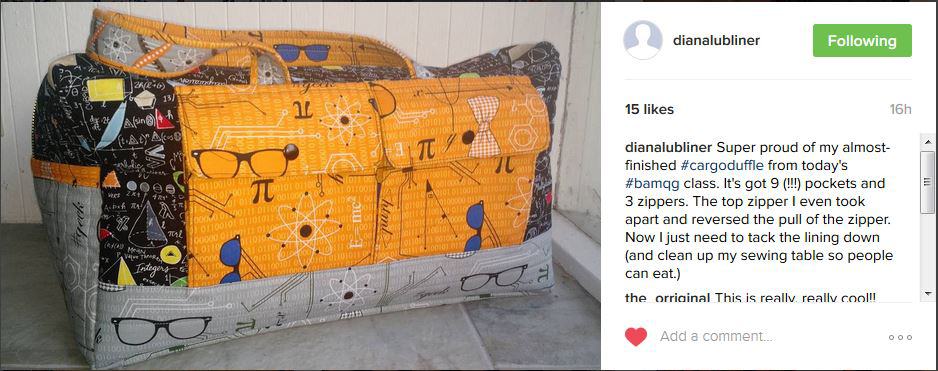
Diana is so close to finishing hers. I love her fabrics.
*I don’t normally get lost a lot, but I seem to always get lost on the mid-Peninsula and in the South Bay. I go there quite a lot and still don’t have a visual map in my mind. Someday, maybe.
I had a great time at the Sew Day yesterday and really got a lot done!
Gerre & Jaye work area
It was a small crowd and I was the second person there! That was shocking since I have to go far to get there, but it was a great opportunity to chat with Mary a little and get to know her better. The tables were all there since camp is over, but they were sticky and dirty, so we spent some time cleaning them. We also set up a few tables and the cutting table. By the time we were satisfied we were still the only people there. We both started to sew and continued to chat. Bang on 11am, others rolled in and the party really got started. 😉
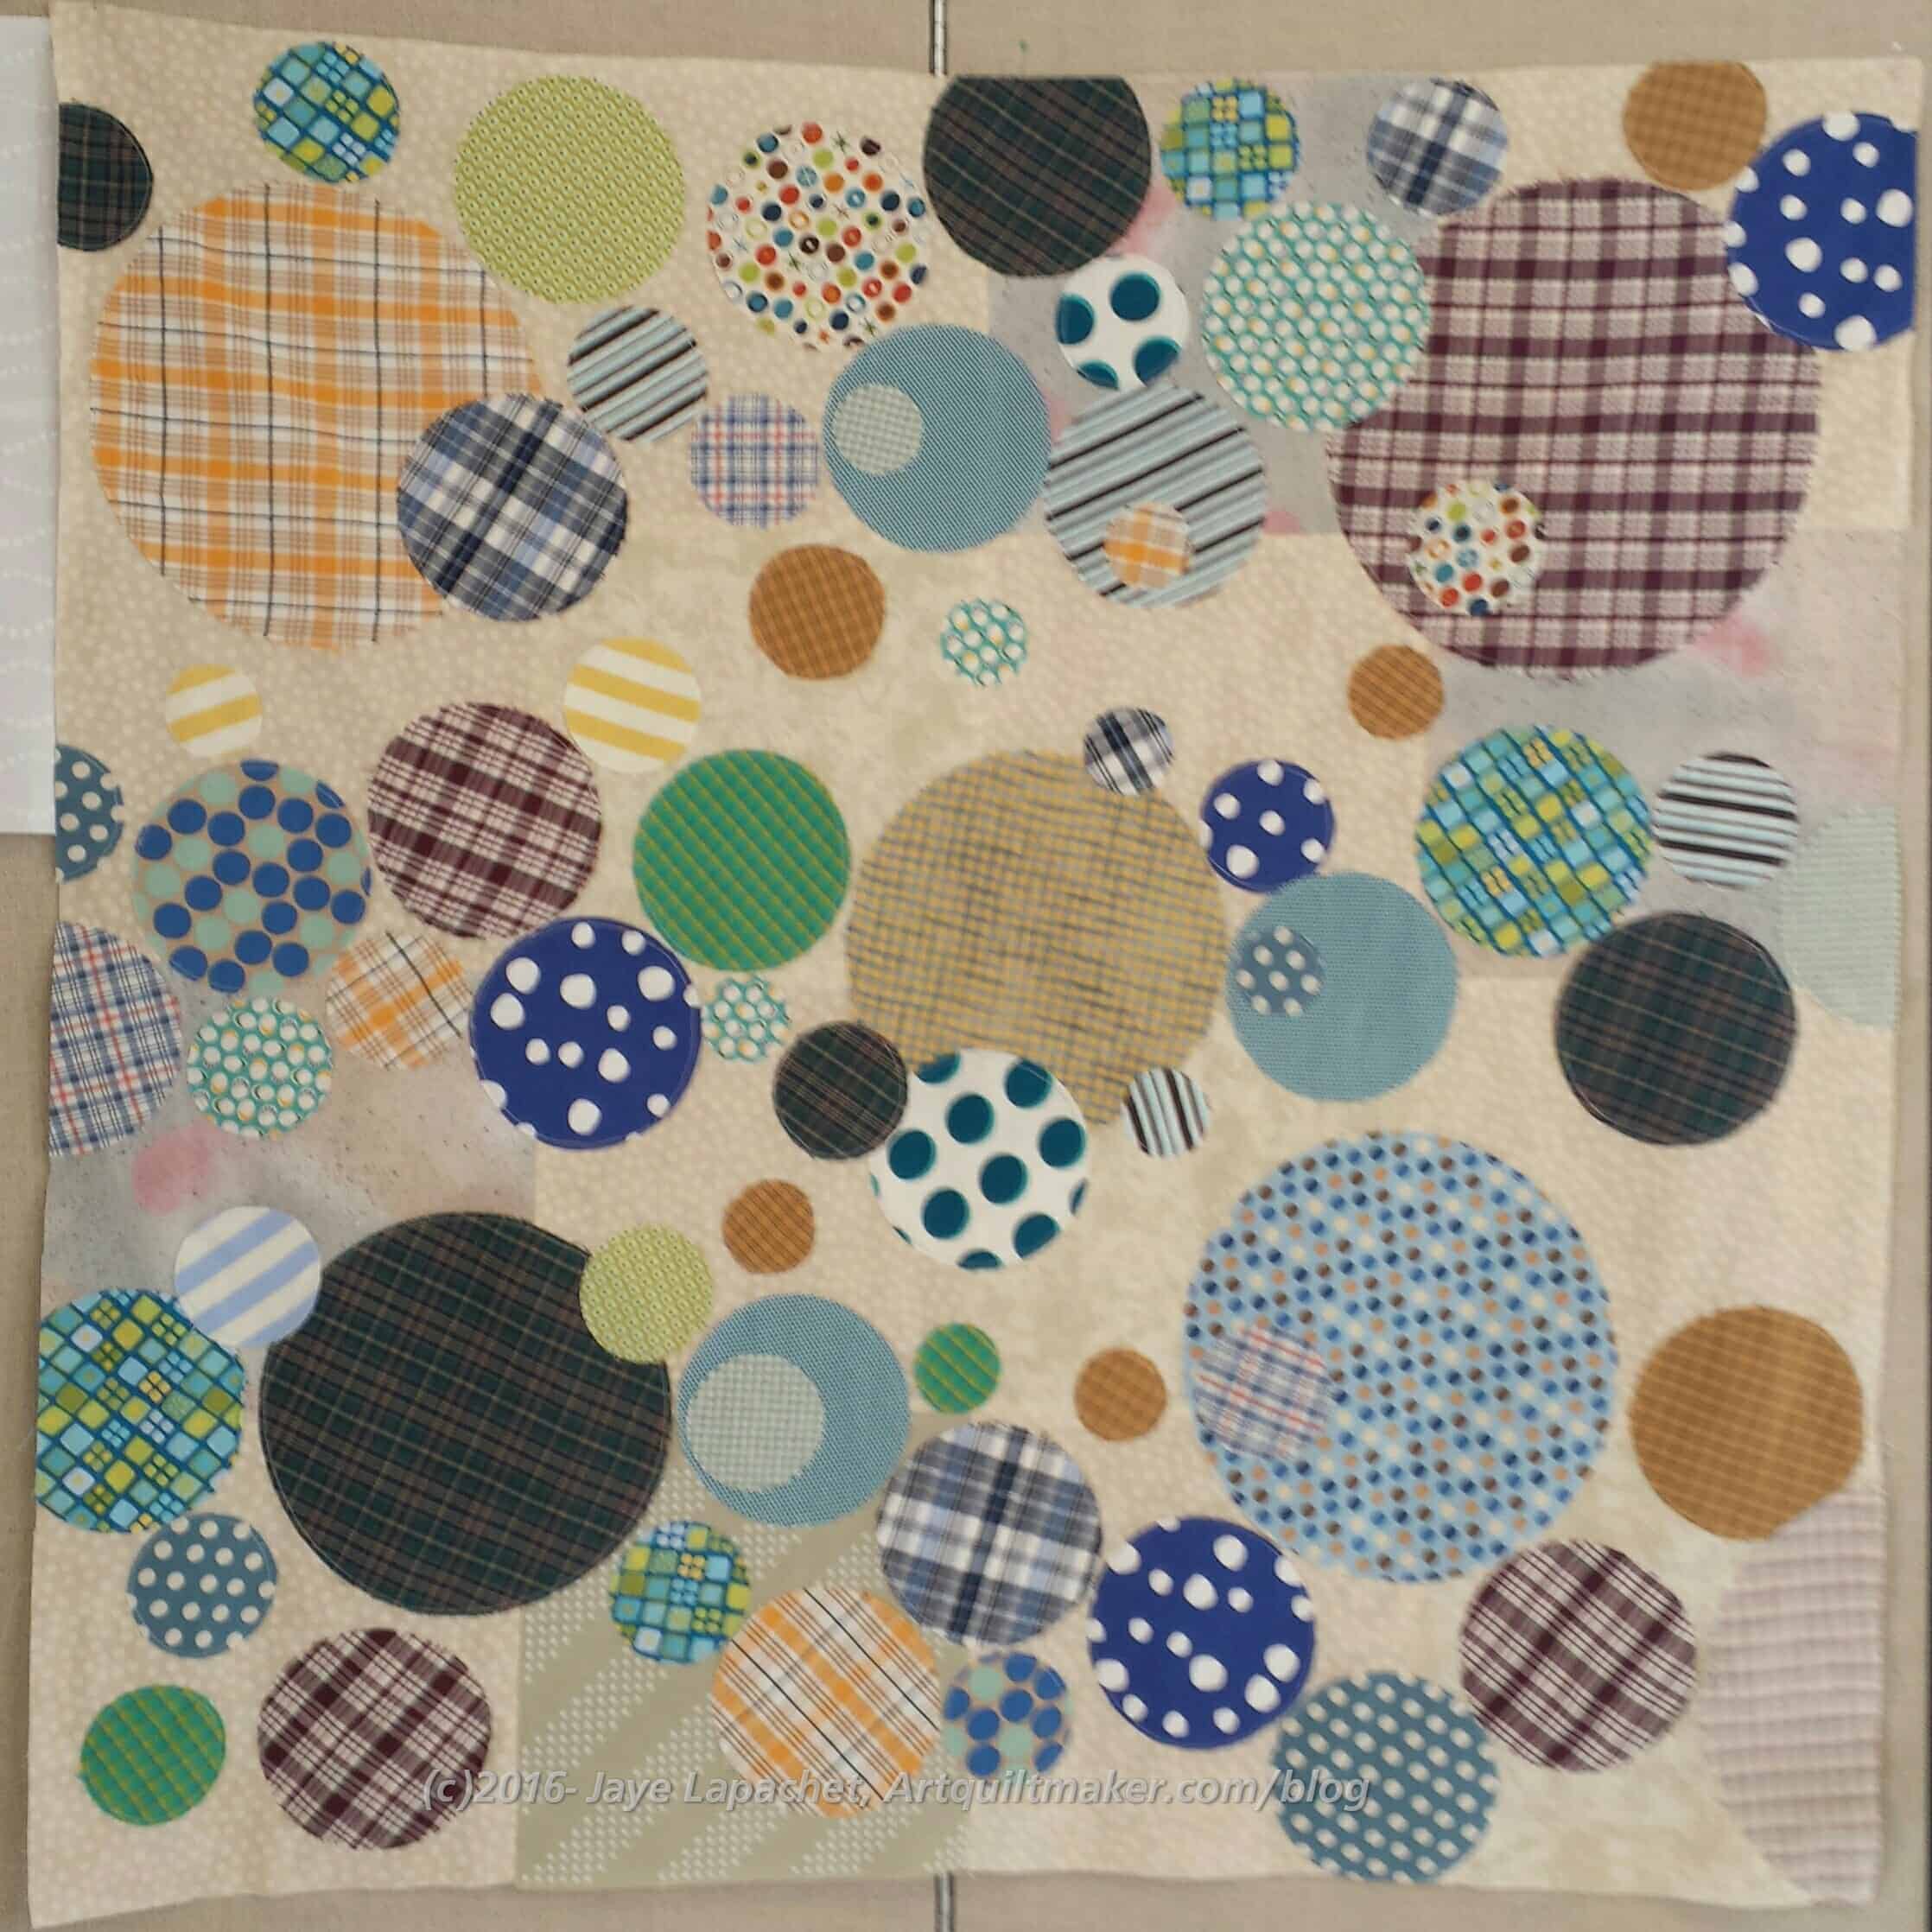
I decided that I would work on projects that were hanging around. First up was the Circles Charity Quilt. Gerre and I started working on it at the May Sew Day. MAY!!! I can’t believe it has been 4 months.
Circles Charity Quilt
I had worked on it a few times after Gerre gave it to me, but it was hanging around not getting done, so I decided I would work on that even if it took me all day. It turned out that I only had a little more to do. I had about 6 circles to applique’, tying off threads and trimming. It didn’t take me very long at all. I pressed it and gave it back to Gerre who will quilt it or give it to the guild to quilt. I am really pleased with how it turned out.
My “reward” was to work on the Petrillo bag that I cut about 15 years ago. Not really, I cut it out, maybe, a year and half ago. It has been on my to do list forever and it was time to sew it, so I started. I don’t know why I waited because the bag started to look like a bag before I left. I was short some supplies, so I skipped a couple of steps, but did as much as I could in the time I had and really made some progress. I am really kicking myself or not getting to this bag sooner and having it take up space in one of my Chubby Charmers.
BAMQG Pulse Quilt Prep
BAMQG Pulse Quilt Basting
Angela basted one of the Pulse quilts the guild made. She is getting ready to quilt it. She was a rock star. She just got on with it and pretty soon the whole quilt was basted. I knew she would be working on it so I checked the Orlando Modern Quilt Guild website to see how they were progressing. They are really making progress. The creativity used in creating the layouts is wonderful. They have a lot of quilts completed and more in progress. I am so glad I was able to contribute.
Lizzie’s IRR – before
Mary worked on the Improv Round Robin project. She had Lizzie’s piece.
Susan worked on her Cargo Duffle and was able to finish that. Patti was sewing doll clothes for her granddaughters.
Karen was working on another quilt in her series of art quilts related to Black Lives Matter.
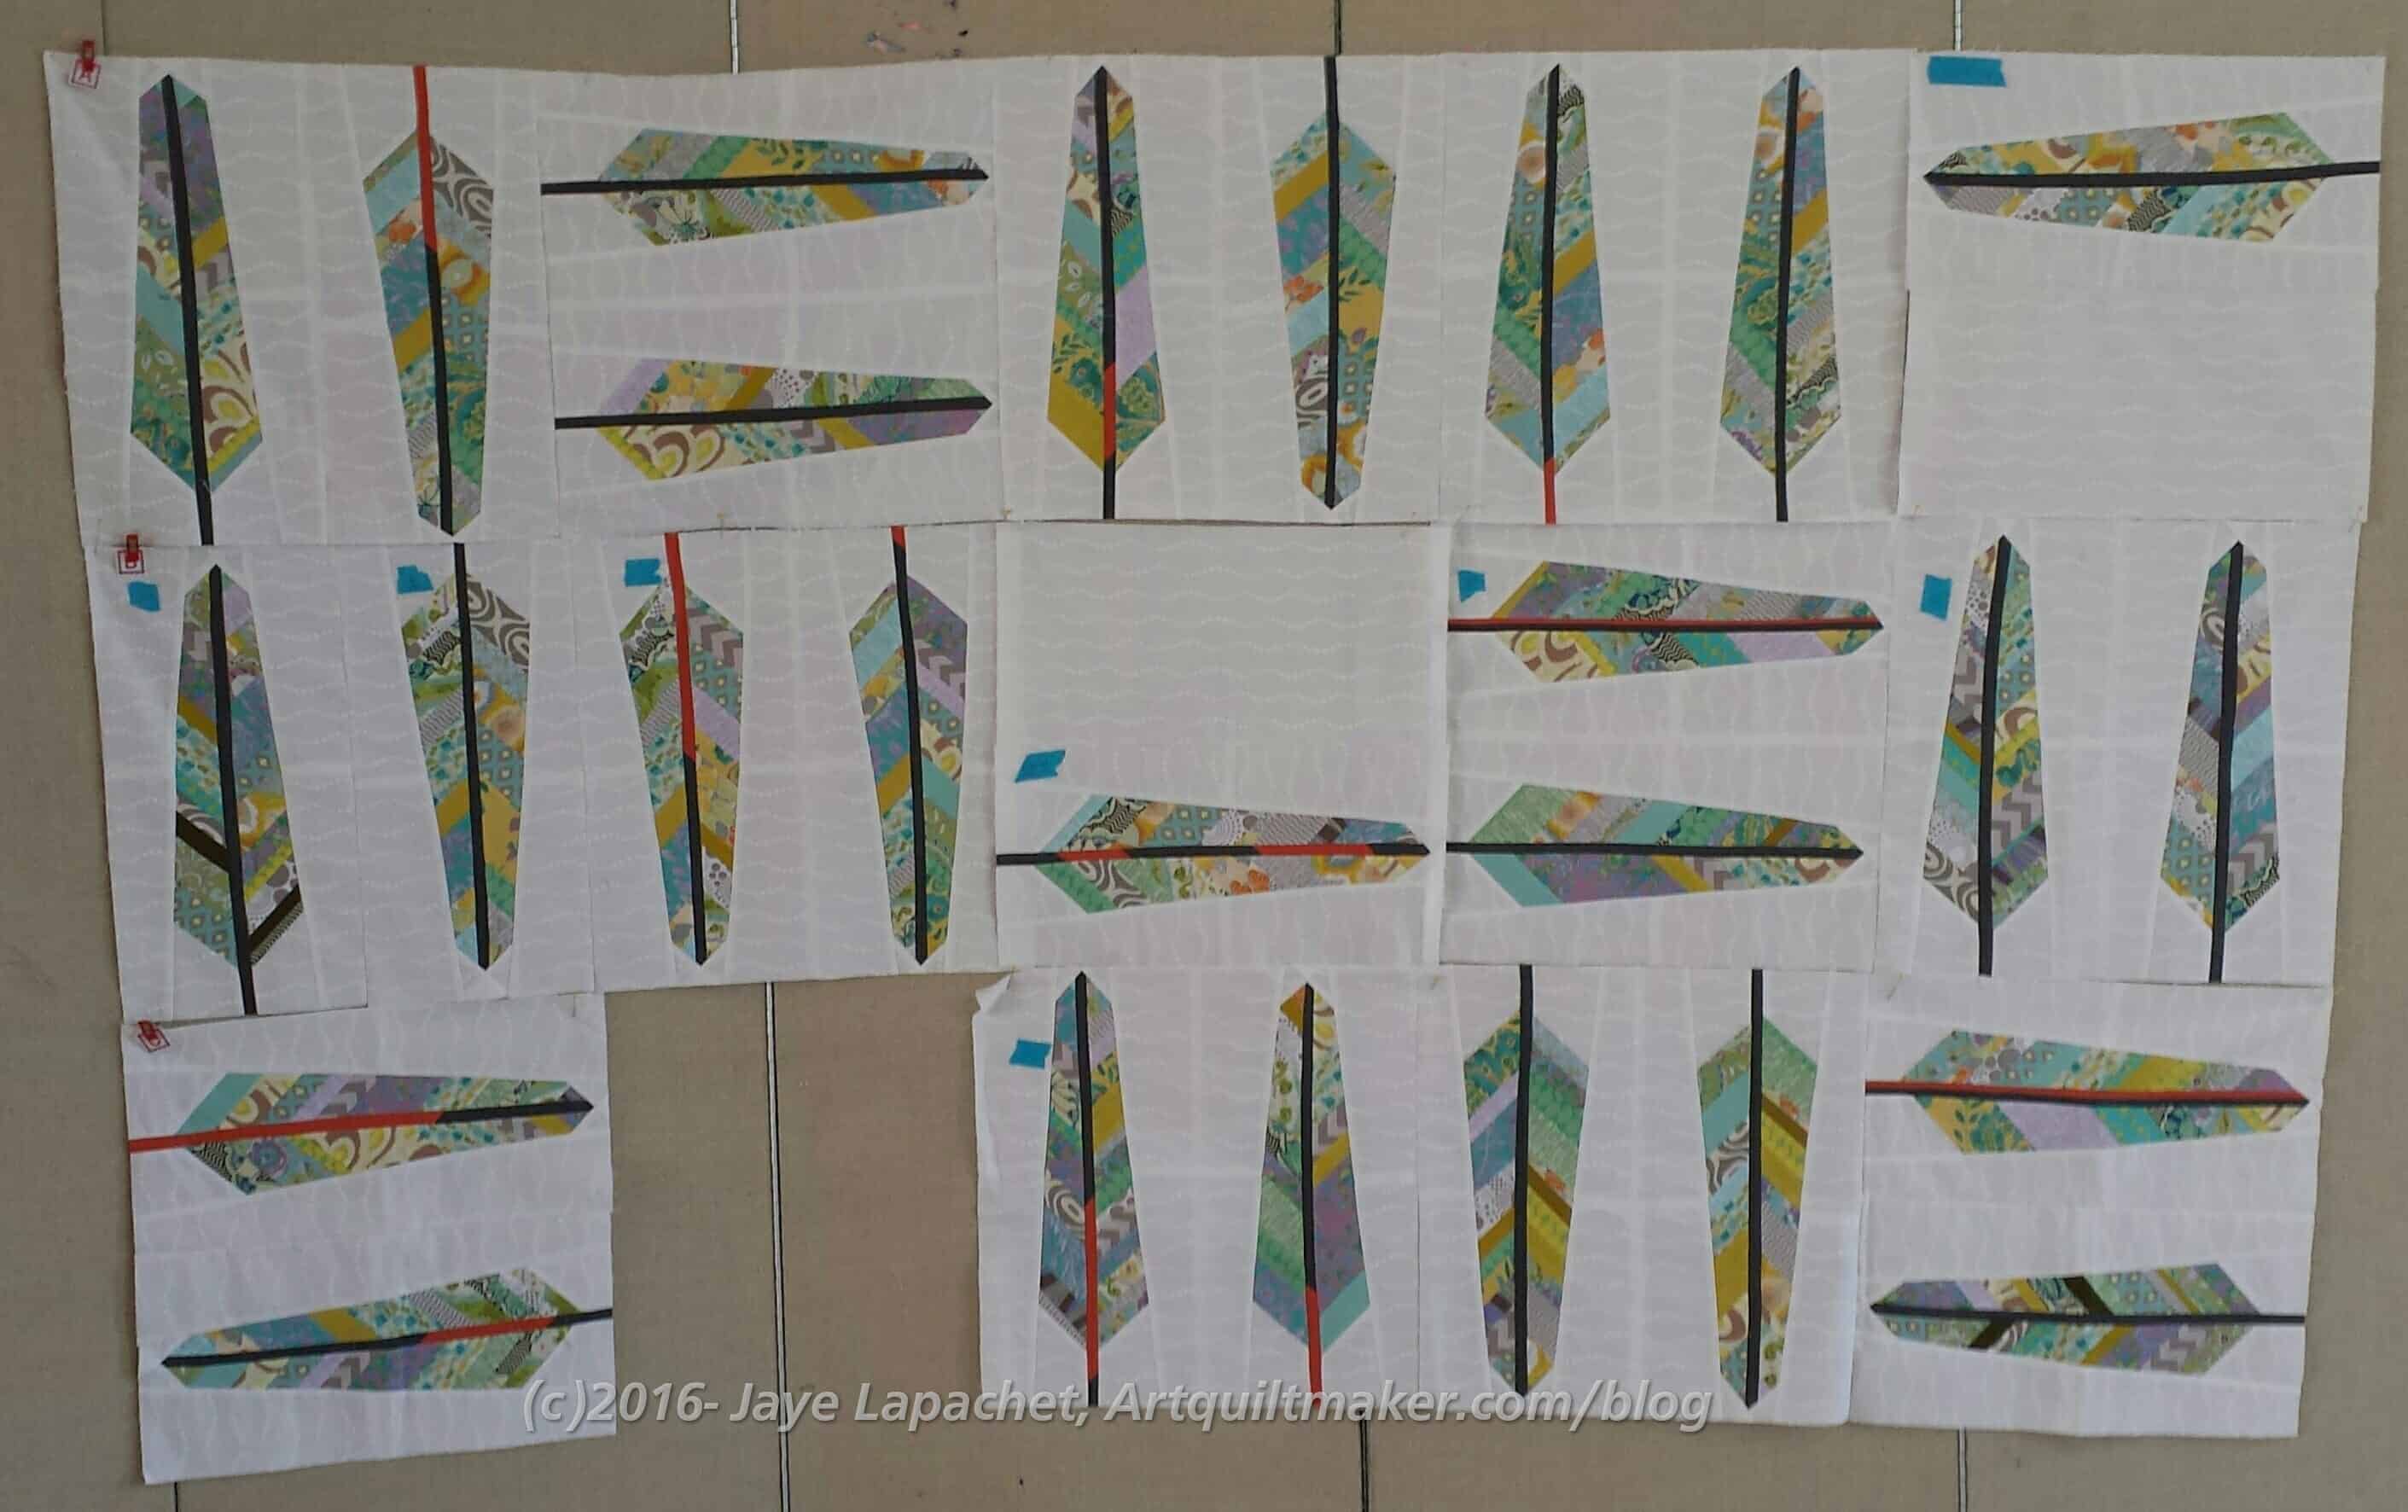
Gerre’s Feathers
Gerre pulled out some AMH feather blocks and was putting them together. She is pretty close as all the blocks are done and just has to finish sewing the rows. This is one of her earlier quilts and I love it.
One fun thing is that we talked about sewing – tips, tricks, techniques, hacks. Someone is thinking of making Sew Together Bags, so we discussed making them just as functional, but a bit easier. All in all, it was a great day and I really enjoyed myself.
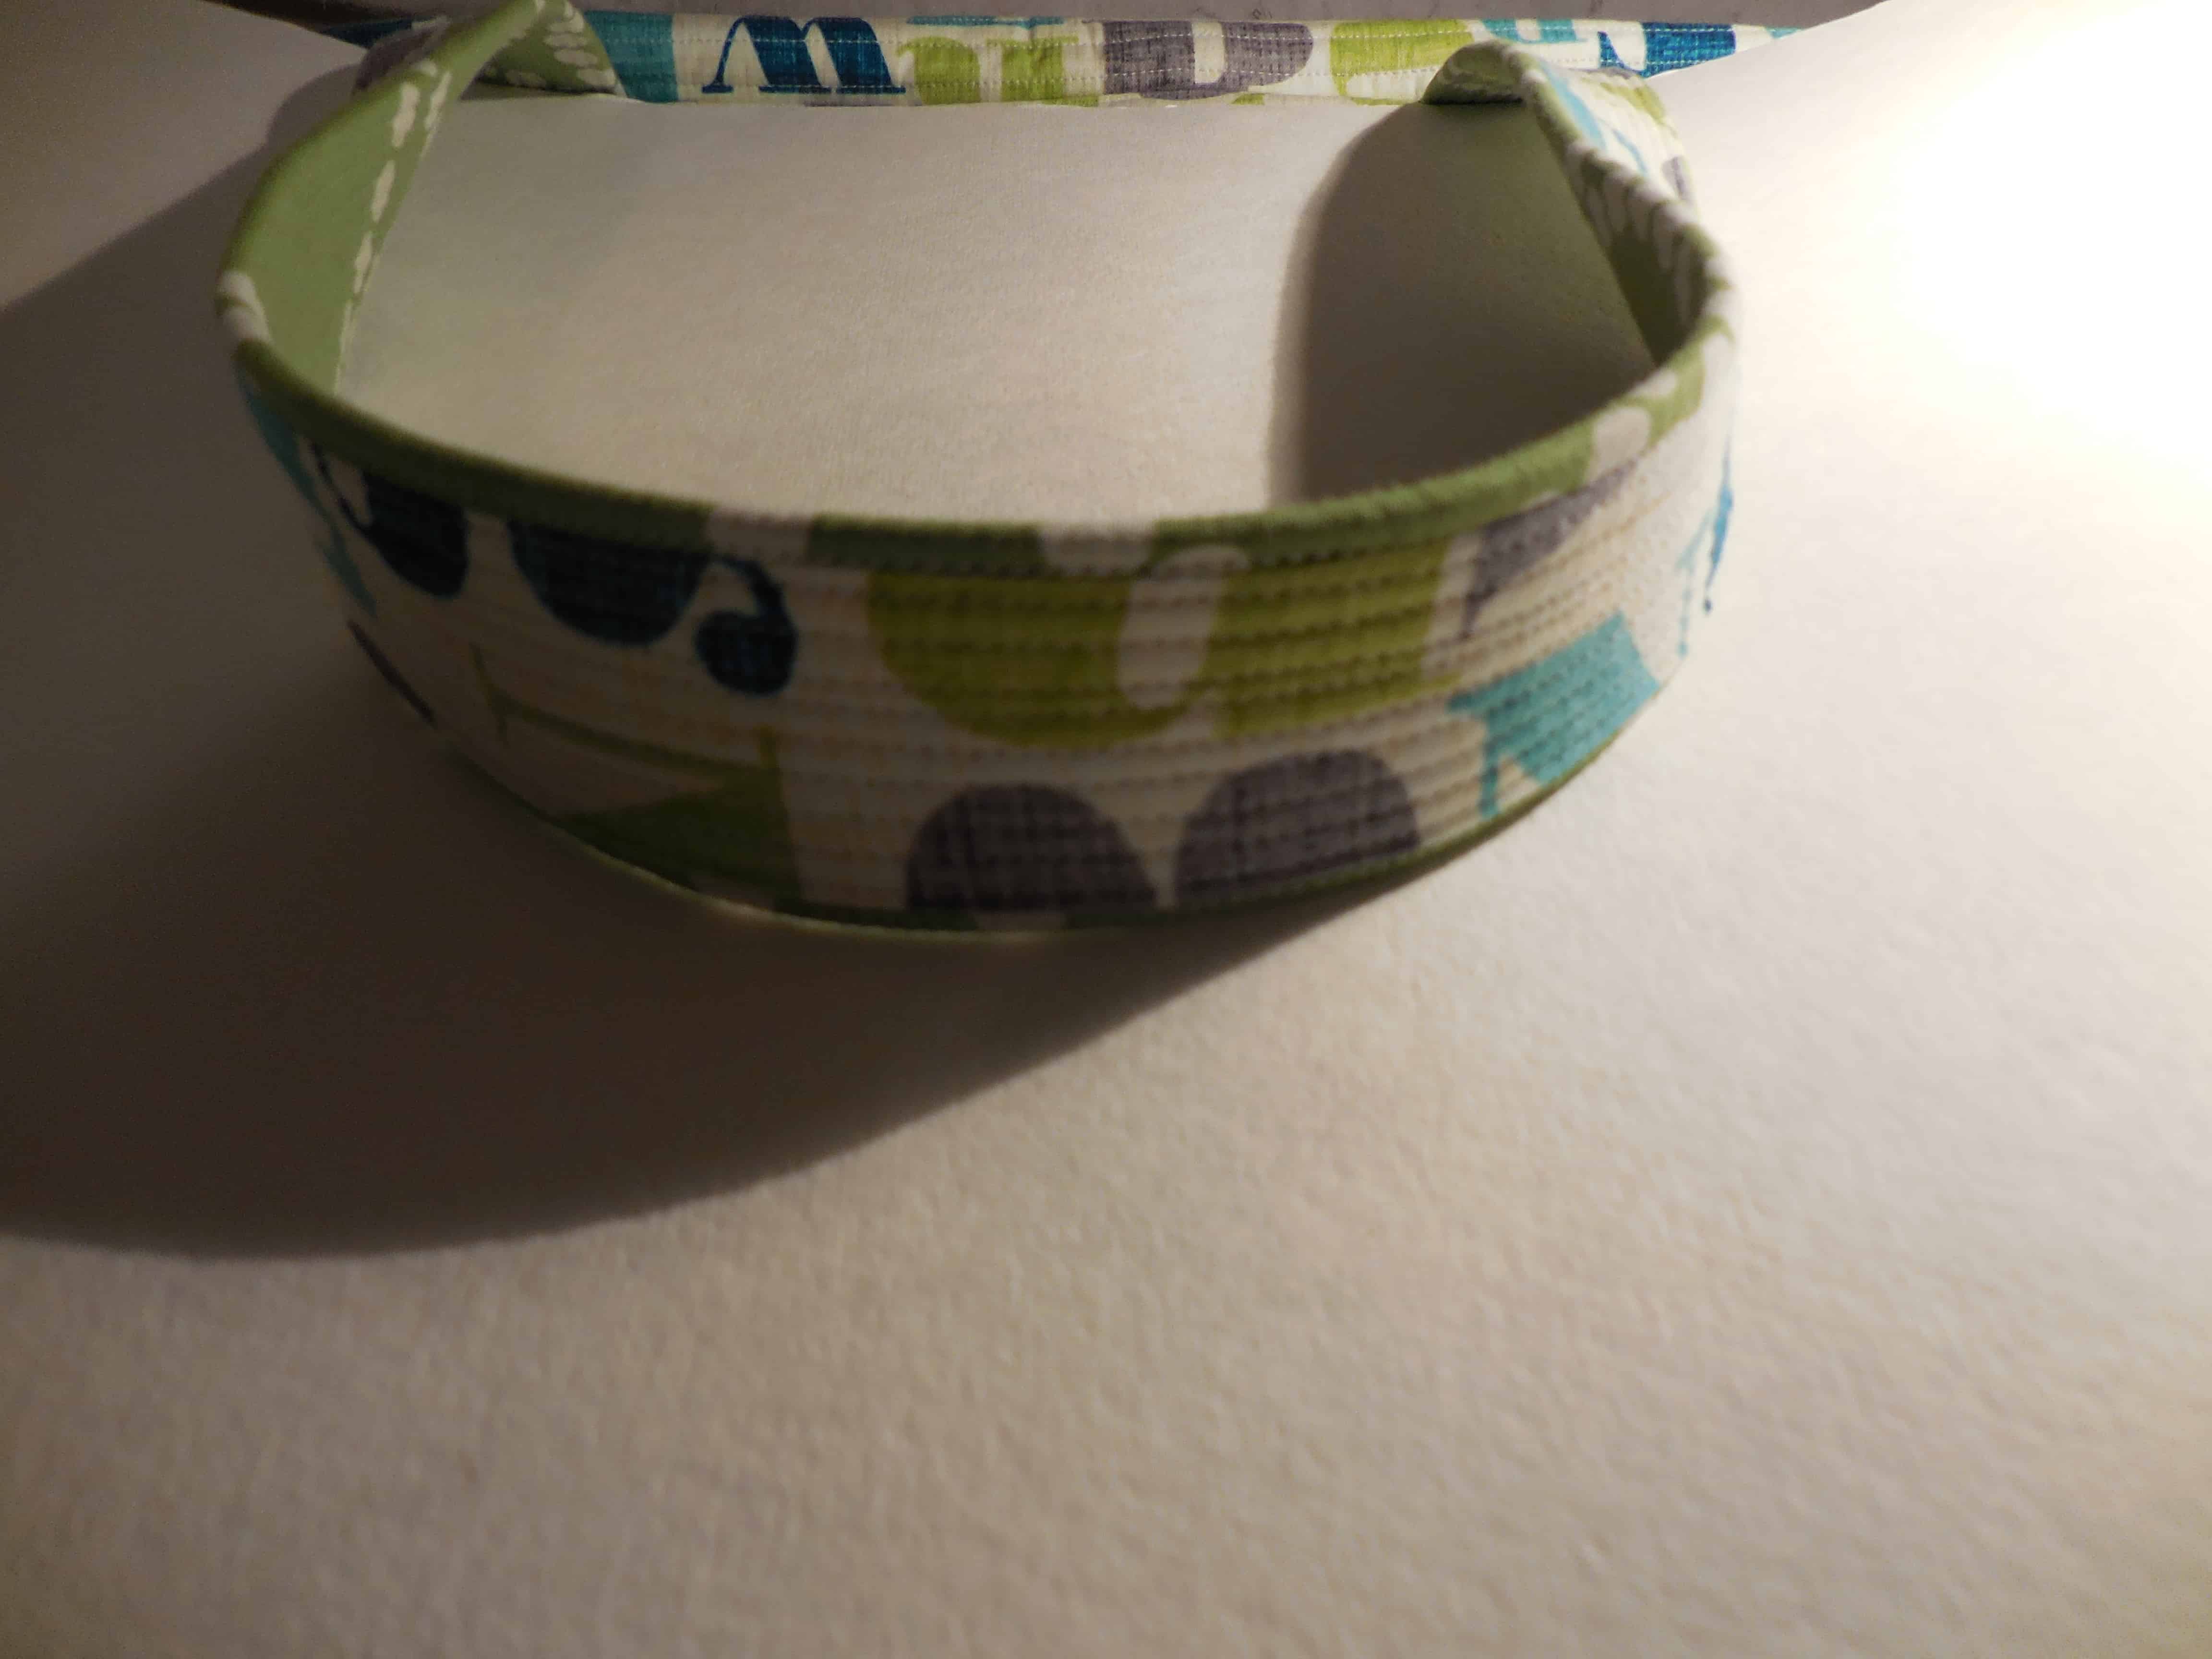
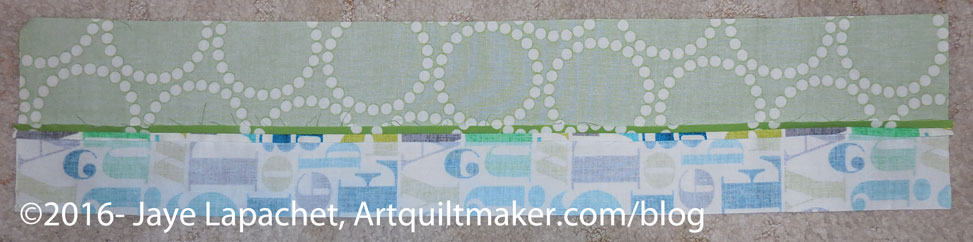
As you know I have been working on the homework for the Noodlehead Cargo Duffle*. This is one of the most difficult bags I have ever made, including the Liesl Backpack, though I think the directions are the problem and not the actual bag. Also, there is a lot of prep and, as you know, I like to get straight to the sewing. As I have said, the directions are too brief for me.
In this case, I couldn’t understand the directions for making the handles. I looked at them several times until I decided just to try what they said and see if that worked. I did what the directions said, though they didn’t make sense, and the directions actually worked! Me or the directions? You decide.
Since I think the pattern instructions just need a bit of explanation for those of us who need to know more why in their patterns, I wrote up a tutorial.
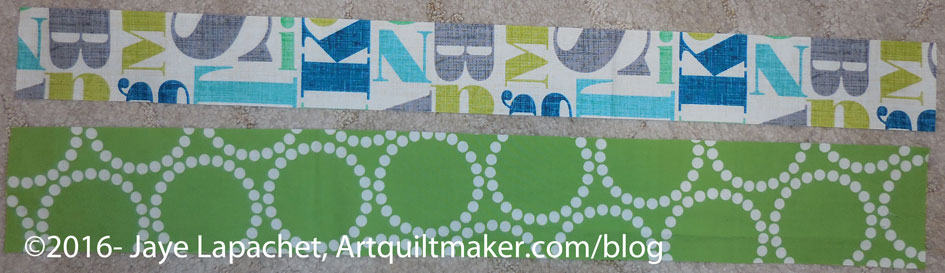
Cut strips according to the directions or according to your needs. I made mine a little longer as I wanted to have more carrying options.
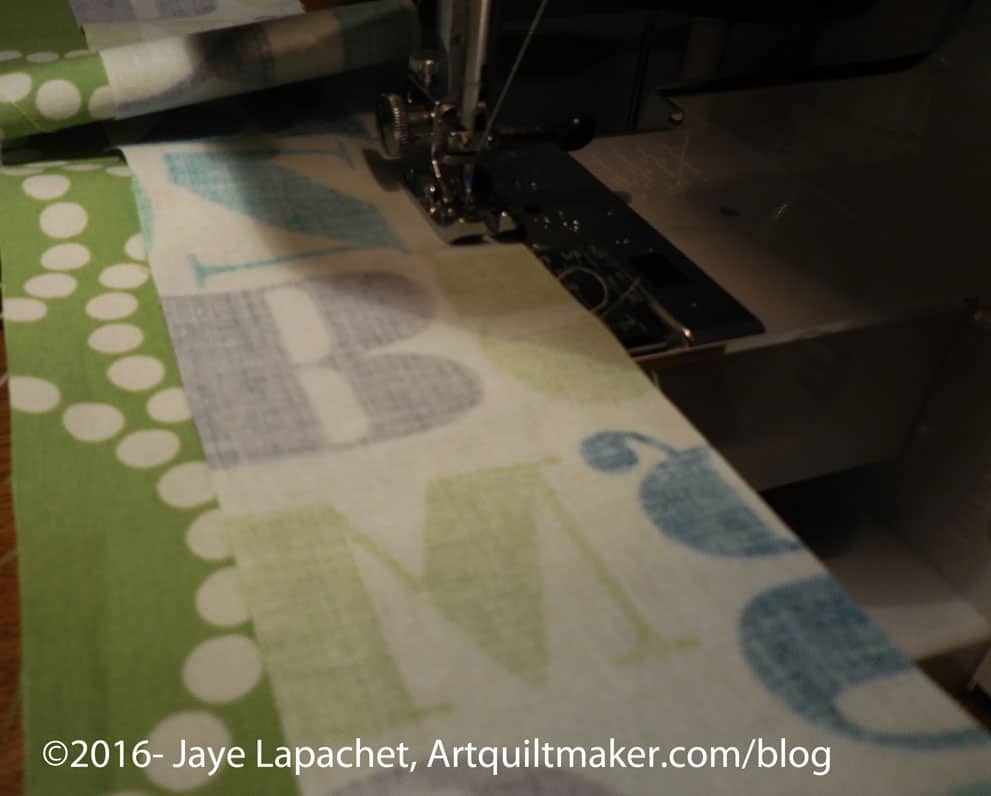
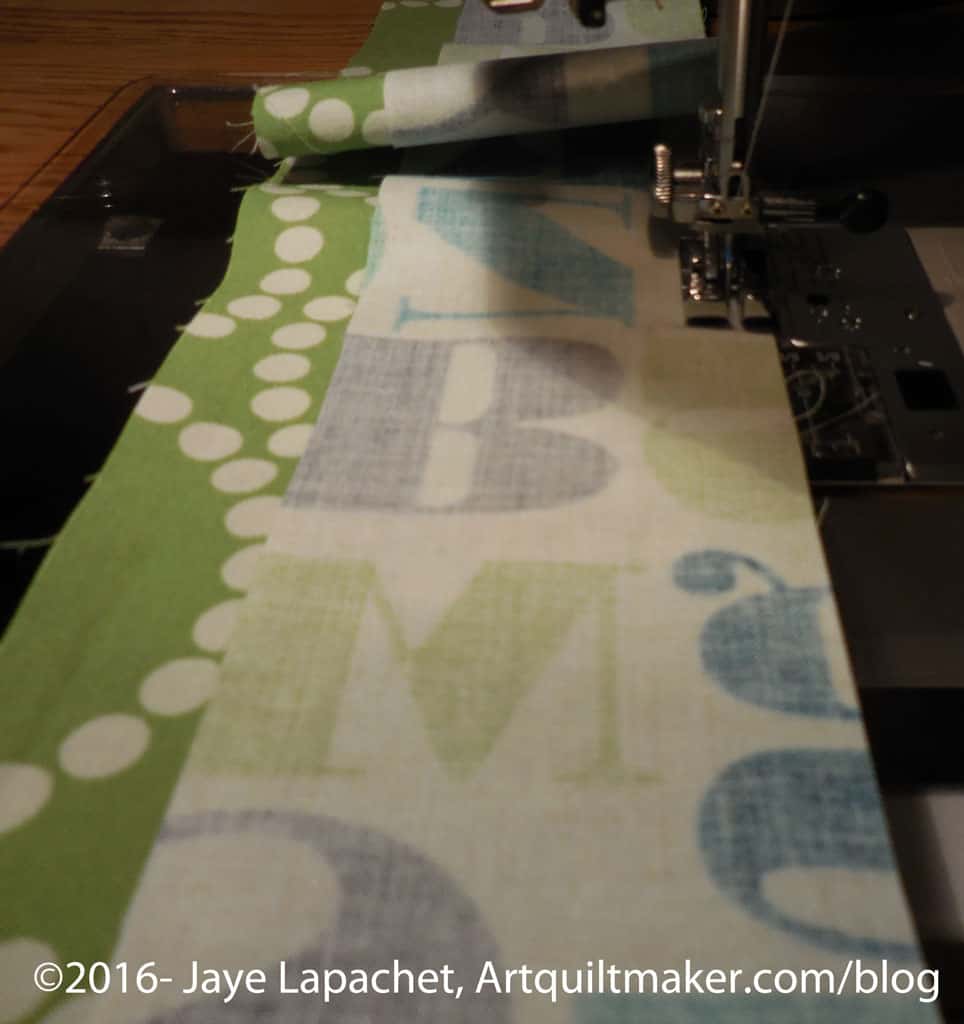
Sew strips together
Sew strips together
2. Sew strips together. They are not the same width so they will not line up, width-wise, exactly.
Handles – press seams open
3. Press seams open. This is not critical and if you don’t want to, press how you like. I press seams open on handles, because I want to reduce bulk. You get a lot of bulk in handles, especially if you add some kind of filler like cotton webbing, which I used in these straps, or Soft & Stable or any other kind of interfacing. Pressing the seams reduces bulk.
Optional: At this point you can add some ShapeFlex to the handles to add strength. If you add ShapeFlex, cut a piece that covers both strips and covers the seam. It will add strength to the seam.
Handles tutorial – Fold raw edge towards the center
4. Fold the long side of the raw edges towards the center seam. I folded the Pearl Bracelets green piece first, but where you start doesn’t really matter, I don’t think.
5. Press fabric so there is a crease in the fold.
Handles – fold towards center
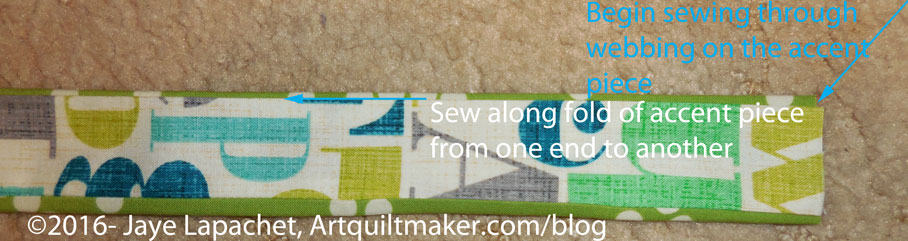
6. Next, fold the second long side, raw edge towards the center seam (yes, it is slightly off center, which is part of what confused me). This is the fabric (text fabric) with the smaller width.
7. Make sure to line both raw edges up with seam you just pressed open. Each different fabric will be a different folded width.
7. Press just folded fabric so there is a crease in the fold.
Handles tutorial – fold narrower fabric up
8. Fold the fabric with the smaller width (mine is the alphabet fabric) up towards the wider fabric (green Pearl Bracelets). There will be some green showing, which is what you want.
9. Press so you have crisp folds. Some of the wider fabric (green Pearl Bracelets, in my case) will show. This detail makes an accent.
10. Now unfold and add your cotton webbing or other stiffener. I used 1/5″ cotton webbing. I had never used this and was pleased at how well my machine sewed through it.
11. Refold so the cotton webbing does not show.
Handles tutorial – densely sew long way
12. Quilt lines lengthwise, approximately 3/8″ apart, starting with the open seam. This will make the handle is very dense with quilting and add to the strength.
Ta da! You have very nice handles that will be sturdy enough to carry a heavy bag.
Ruth, being the super intelligent woman she is provided a link after I had figured out how to make these handles. I did search, but didn’t come up with the tutorial. I hope you like my instructions for the Cargo Duffle handles, which will, with any luck, come up in search results for others who try to make the Cargo Duffle.
*I really don’t know if the project includes the spelling ‘duffel’ or ‘duffle’. I am going with ‘duffle’ as that is what the dictionary says. You may want to search both, if you do any Google searching in order to get all the results.
The BAMQG meeting was last Saturday. Mike and Jaime brought the Pulse tops we all worked, and they sewed together, on at the last meeting. I was thrilled to see them. Both Jaime and Mike are very talented quiltmakers and they did a great job, quickly, with blocks contributed by members.
BAMQG Pulse Quilt by Jaime
Jaime created a simple setting with a bit of sashing between the blocks. The sashing sets off the colors and fabrics of the blocks, which was a great idea. It is also looks very bright. A couple of my blocks are towards the bottom. Angela is going to quilt this quilt.
BAMQG Pulse Quilt by Mike
Mike infused some additional meaning into his design, which made me tear up. He left some blank spaces to remind us of those killed in the shooting. Great idea, but sad he had to think of it. Mike has a longarm and will quilt his quilt and send it off. I think a couple of my blocks made it into this quilt as well.
Pulse Quilt Wallhanging by Mike
Finally, Mike made a quilt for himself and his partner. This commemorates the losses, but also the contribution of the first responders. I really appreciate Mike remembering them. I am not sure I think beyond them just going in and doing their job, but I can’t believe they are not affected.
The Orlando Modern Quilt Guild is posting blocks and quilts they have received. There are a great variety of really interesting designs. The guild also posted a lot of information about the efforts in the minutes of their July meeting. I was pleased to hear they already have 48 finished quilts and 600 blocks. their process for distributing received blocks is genius. The information also gives readers an idea of how you can still help.
Kathy M, quilt writer for ChicagoNow, writes about and shows the process of making her Pulse Quilt. I love the design.
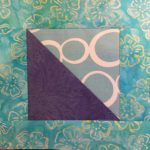
My Improv Round Robin has returned. Ruth had it for a couple of months because I wasn’t at the meeting last month and she wasn’t sure whether to pass it along.
She added the bottom part with the curves. It is an interesting addition.
I am trying to decide whether to try and get more people to work on it or whether I should just do some work of my own and finish it. I have some thoughts:
It needs some space around the edges. The outside top and right side might need some of the turquoise solid to provide some breathing room.
It is definitely not square and I need to figure out what to do about that, if anything.
I want to add more Flying Geese, which I will do myself. Perhaps I will add them on the right.
I am surprised that more people did continue the Flying Geese motif. The time constraints were daunting, however, so I understand.
I was pretty excited to get back to BAM to see my pals. I only missed the May meeting, but it felt like an eternity. I finally had some things to show. You, of course, have seen them all, but I showed:
My SIL came along. She hasn’t been a member of a guild in awhile, if ever, but I dragged her along. She said she had a good time, which made me happy.
June Charity Sew Day quilt
More details about the meeting can be found on the BAM blog.
I missed the Charity Sew Day due to Political Wifery, but some of the quilts they made were shown. Michelle B. designed the pattern and they sewed the quilts together using the quilt-as-you-go technique. This was a brilliant idea as it made the quilting after the piecing unnecessary.
Claire’s innovative quilt
Show and Tell was fabulous as well. Joy-Lily has finished her 100 quilts project. Not all are quilted, but she has a nice variety of pieces. Zoe brought her tiny baby and the black and white playmat she is making. I loved them both! Claire set a bunch of blocks together in a really unique and innovative fashion.
I know it isn’t true, but I feel like I haven’t sewed at all after seeing all the great stuff people brought.
Jaime will be leading a workshop on making the Noodlehead Cargo Duffle. She has made a few and has made some changes to the pattern including more pockets. I signed up because I admire Jaime’s bag making skills.
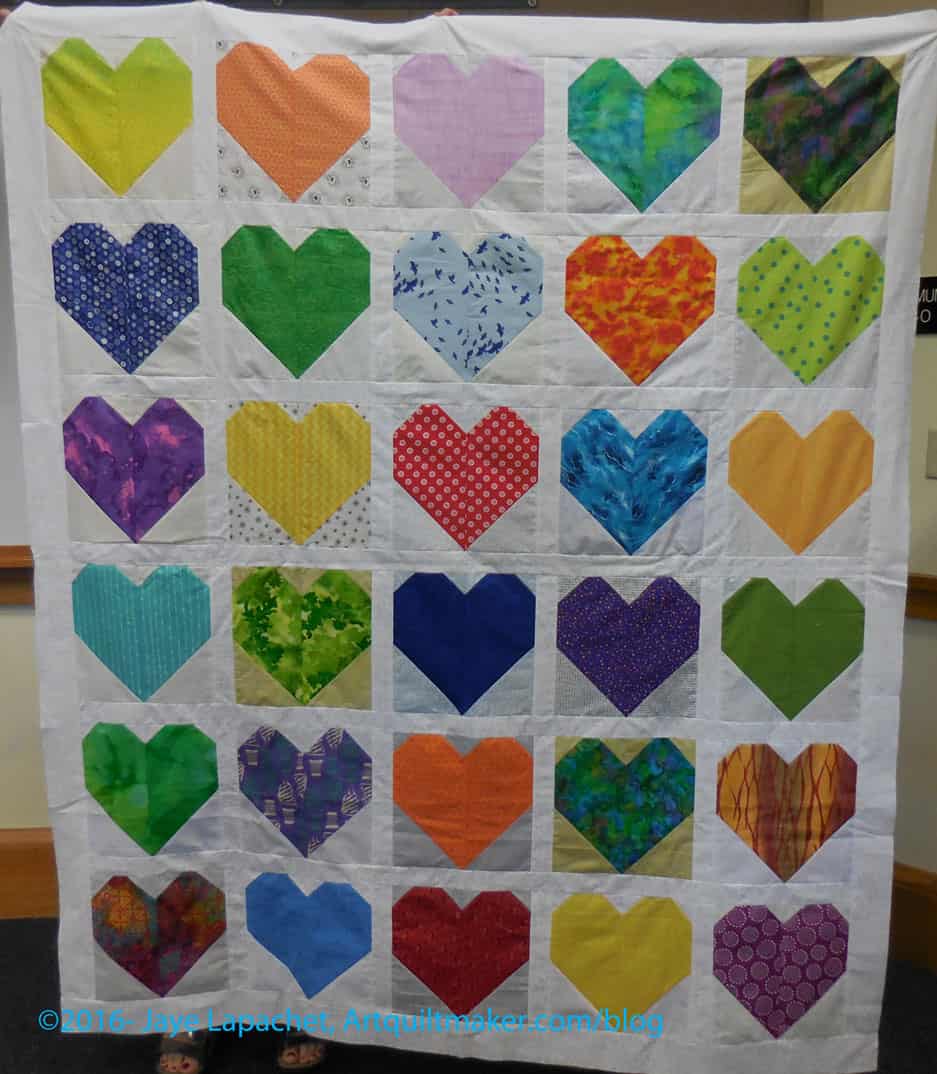
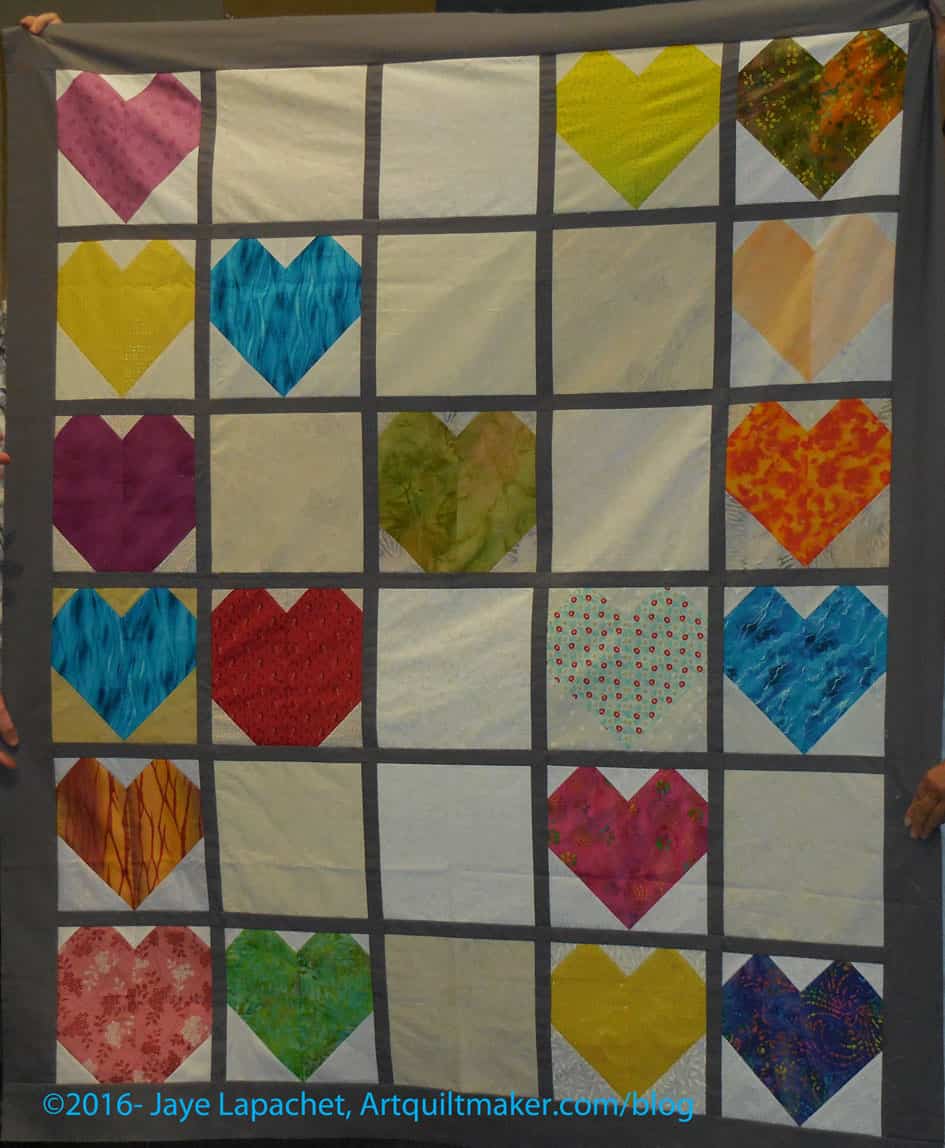
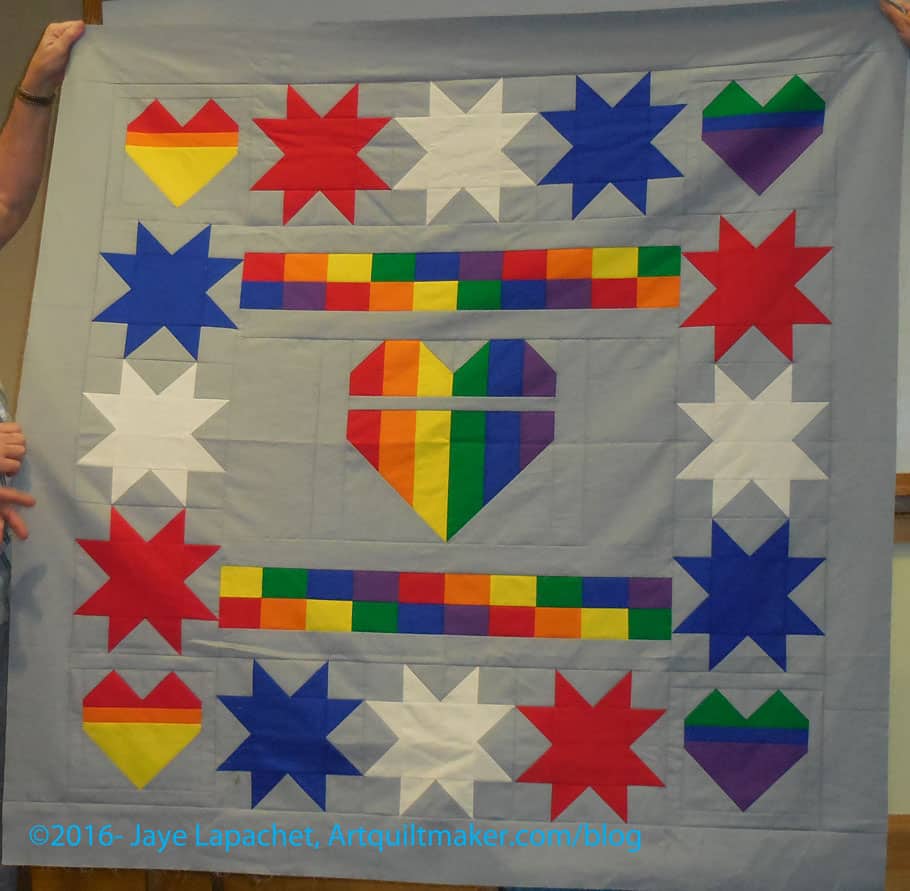
We both helped work on the Hearts for Orlando blocks, which I wrote a bit about yesterday. You can see the full details at the BAM blog.
I dropped Cityscape off with my SIL who is the new owner after the meeting. I think she liked it.
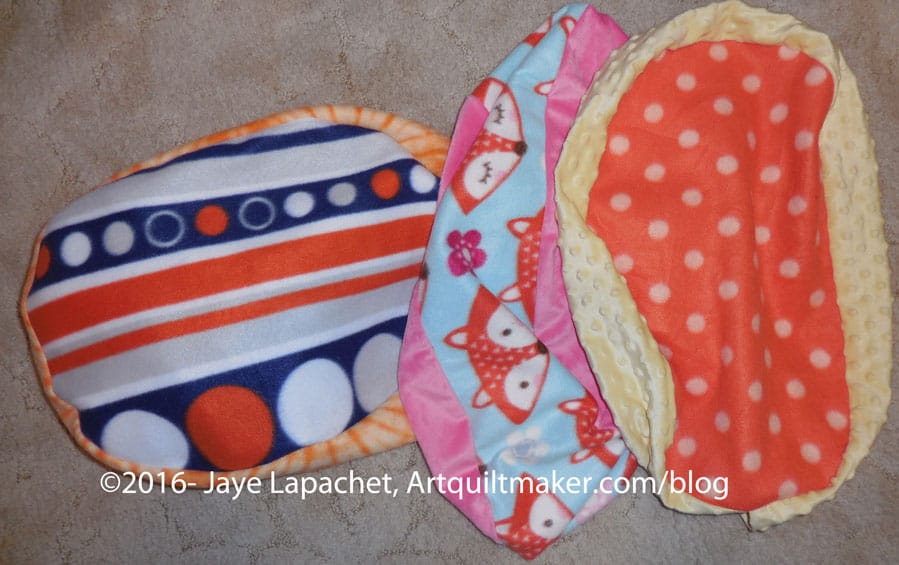
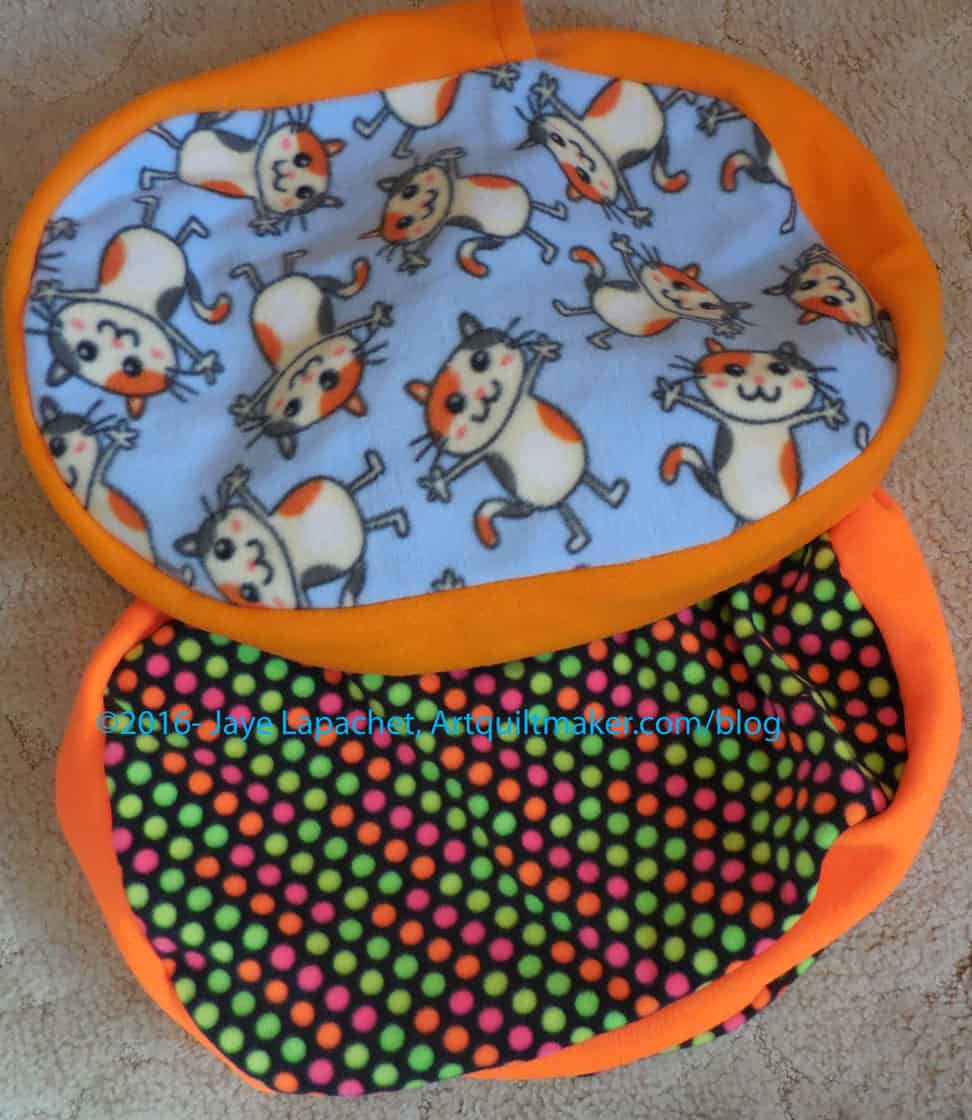
I have had some cat bed fabric waiting to be sewn since the BAMQG April meeting. I finally did it over the weekend, mostly to get the fabric out of my way. My horizontal surfaces are looking kind of full right at the moment.
I didn’t really realize how cute the top fabric was until I laid them down to take a picture. Don’t those cats look happy?
I get to count these as finishes, but I don’t get credit for the fabric since Amanda gave it to me. Oh well.
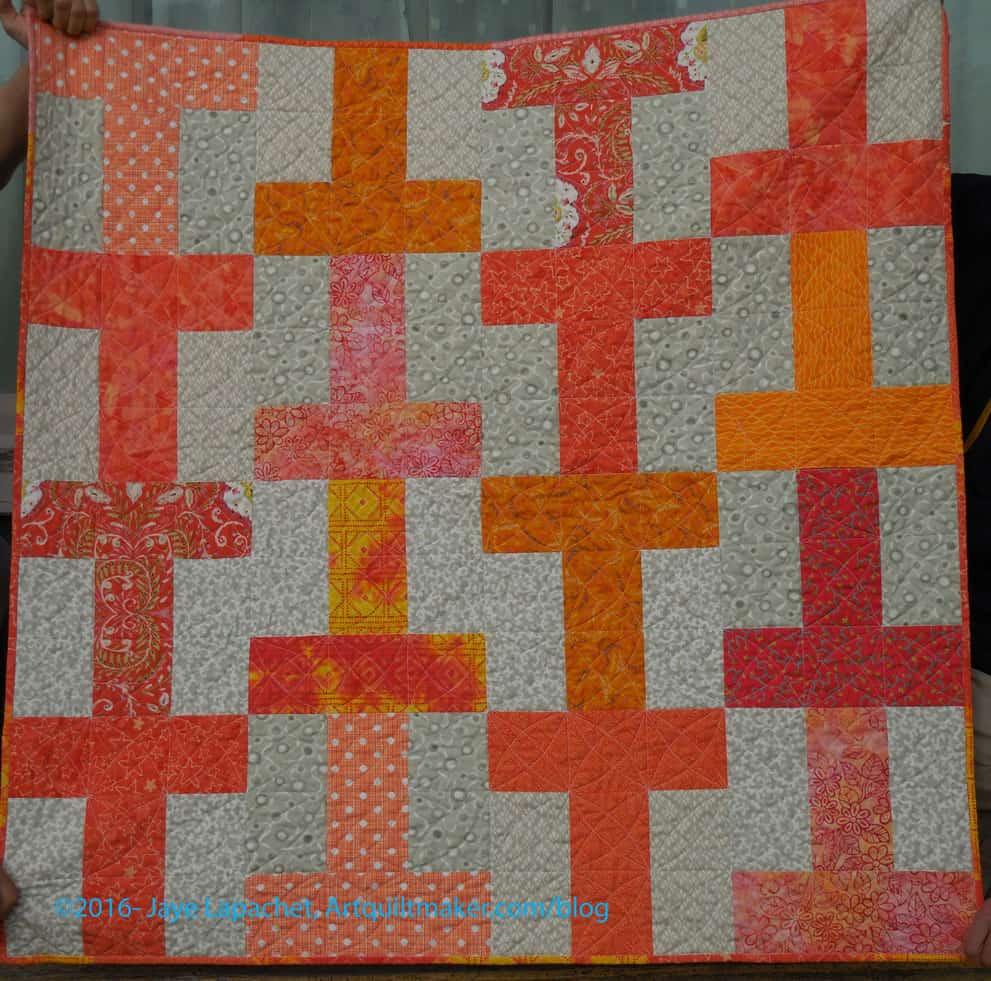
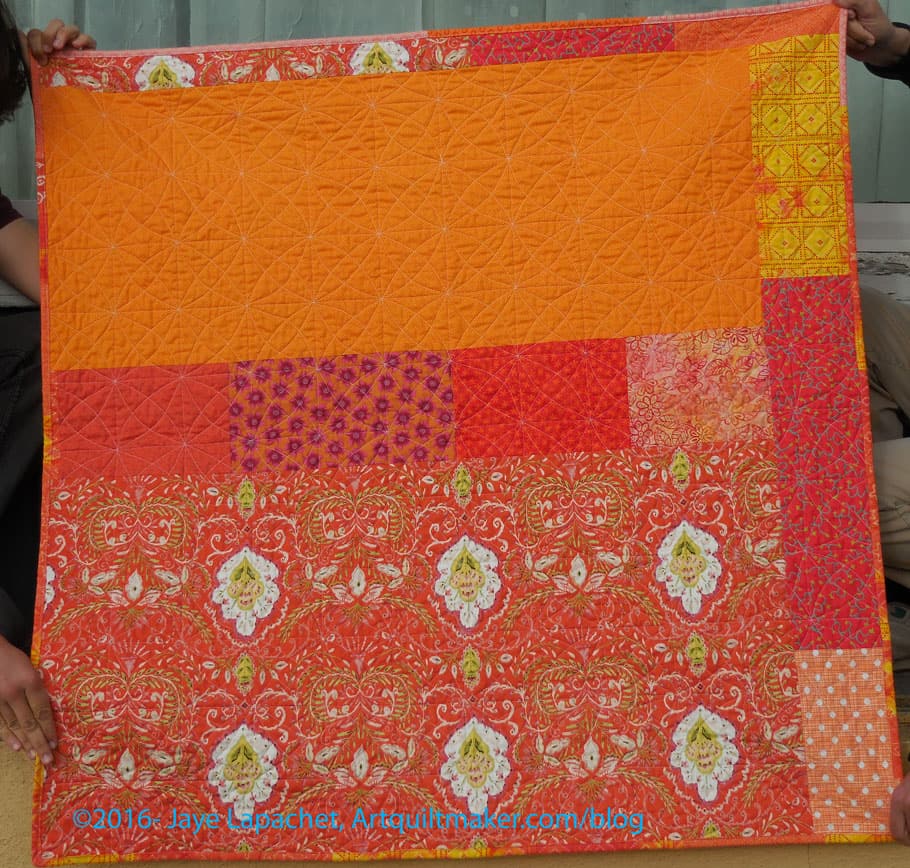
This is the quilt that Gerre and I worked on at her house a few months ago.
She finished it and brought it to Sew Day. I couldn’t believe that she finished quilting it so quickly! I was thrilled. Not just that it was finished, but also that we had another donation quilt to help give someone some comfort.
The oranges worked out really well and while we are working on the circle quilt, I am excited to cut for another T quilt. I am thinking of digging into those green bins and thinning out some of those fabrics. I also saw my nephew’s Wonky 9 Patch quilt over the weekend and think that blue would look great with the orange Ts as well.