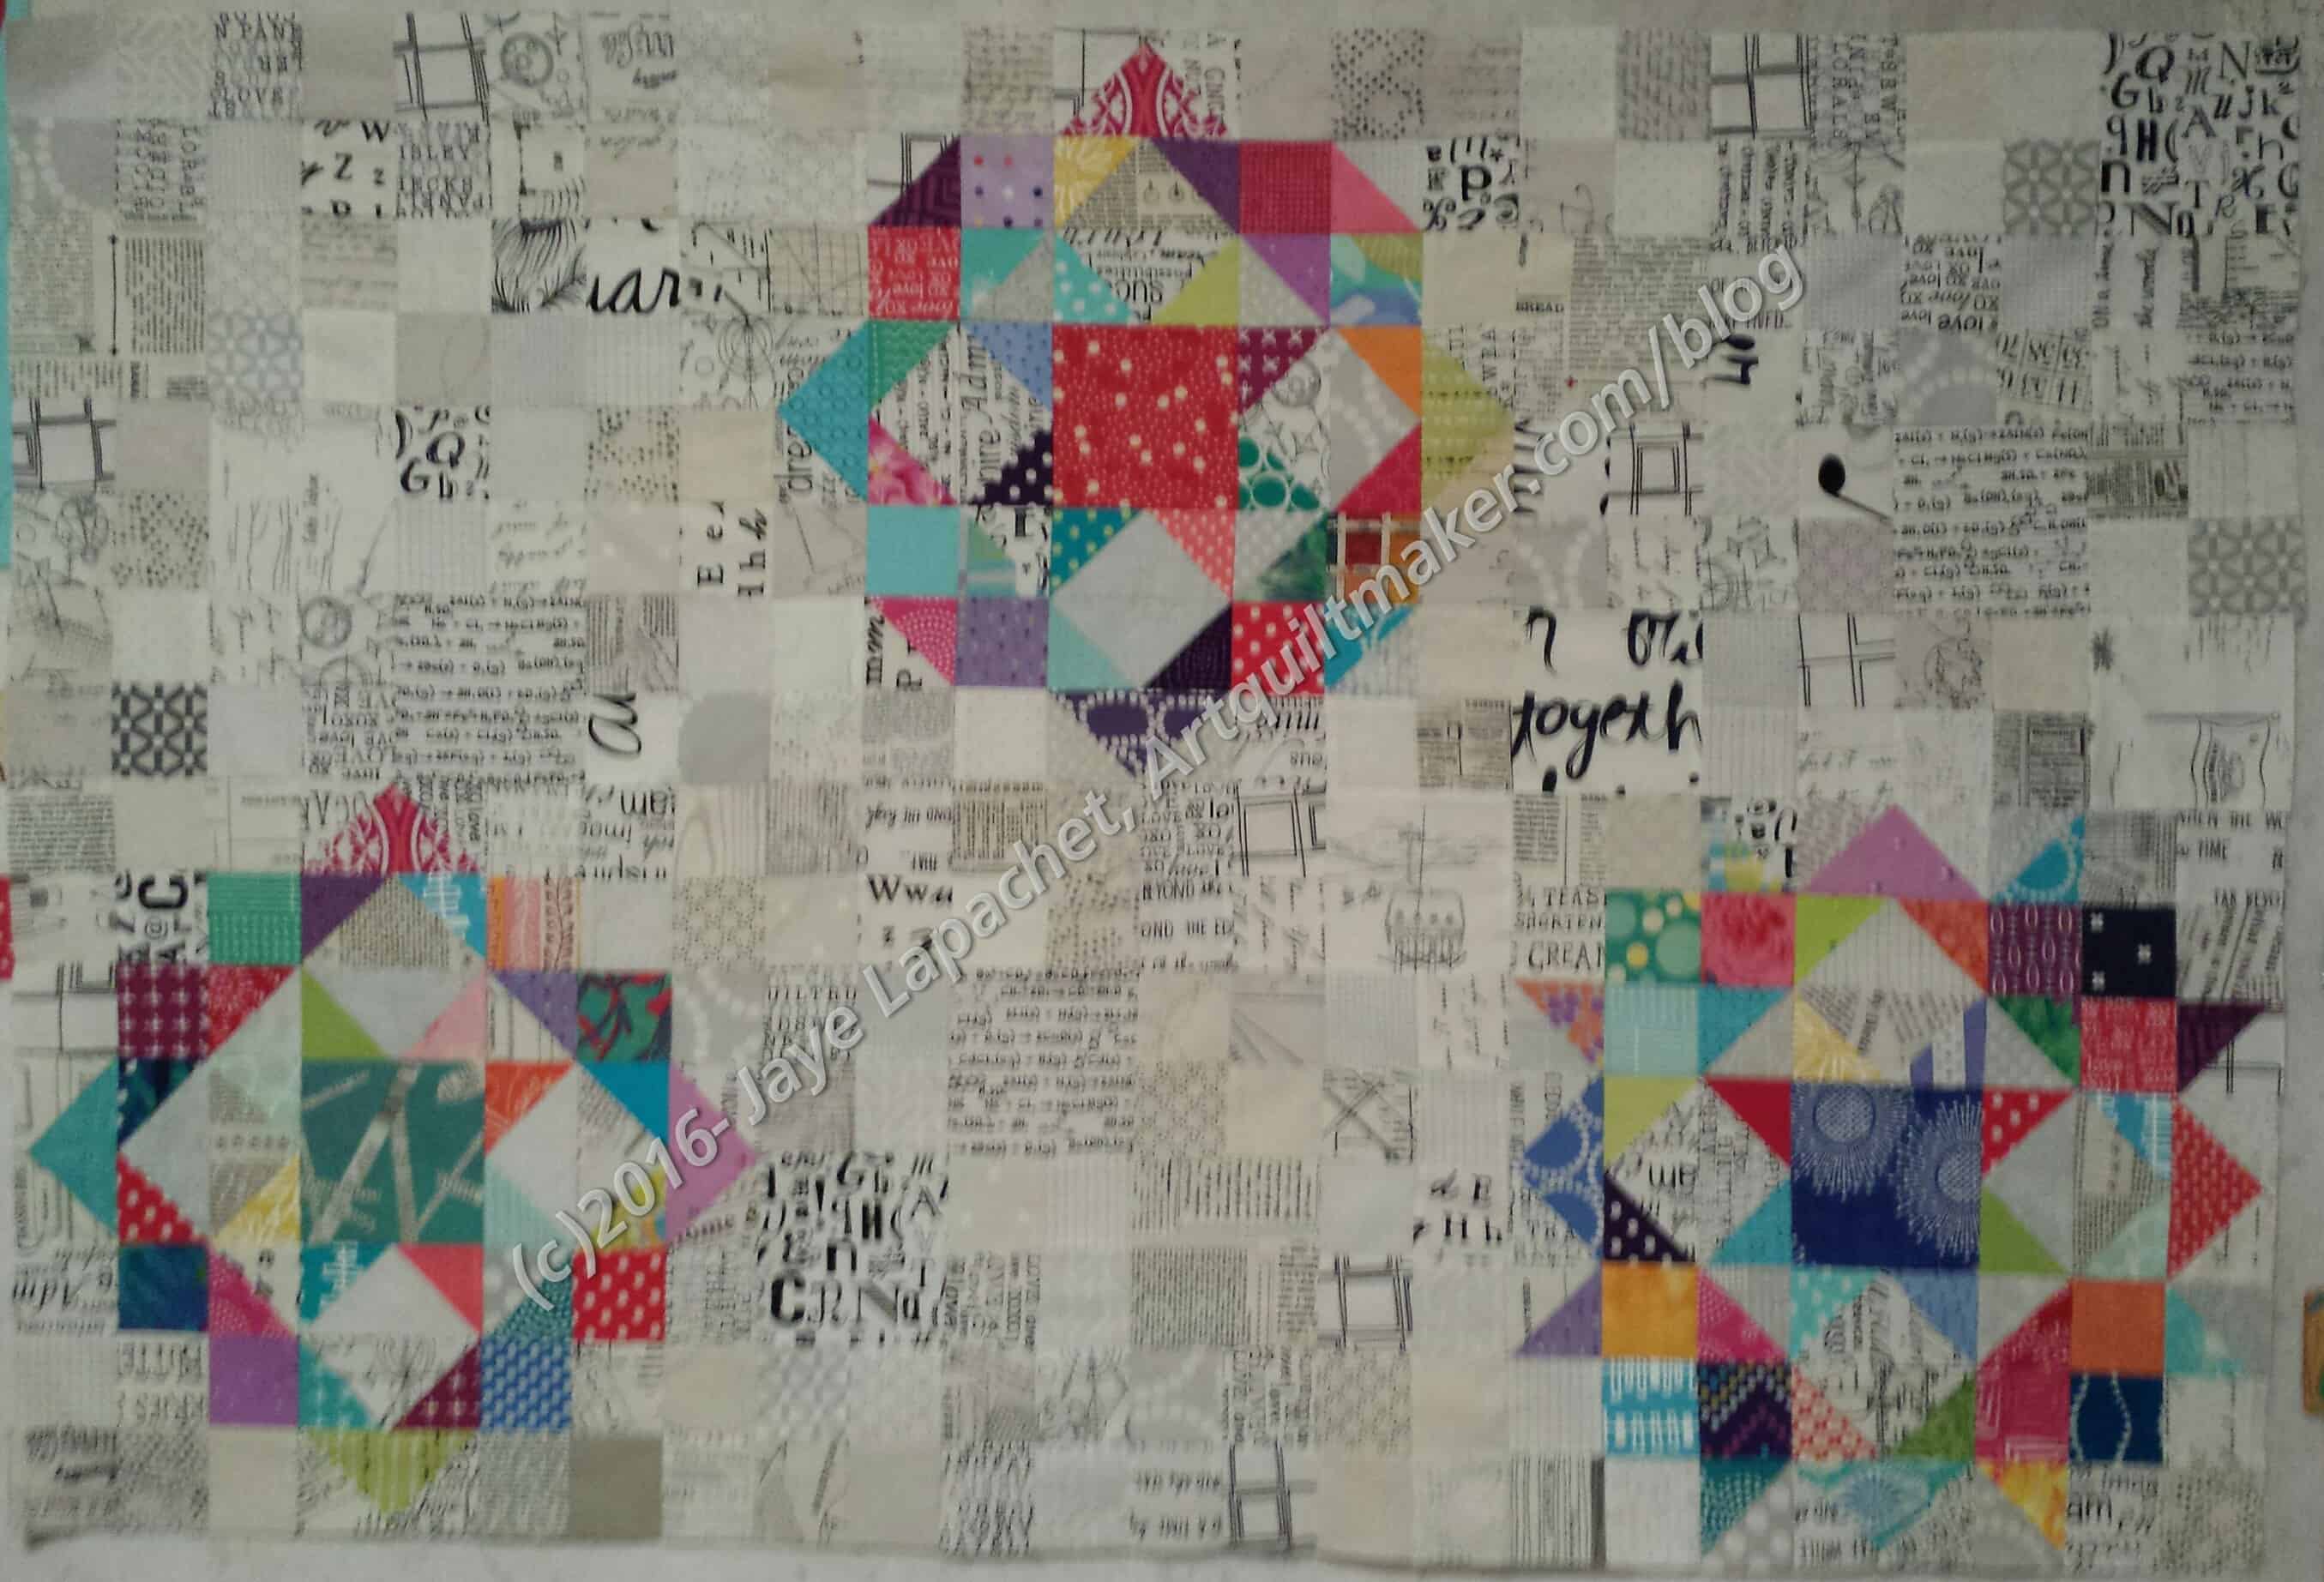
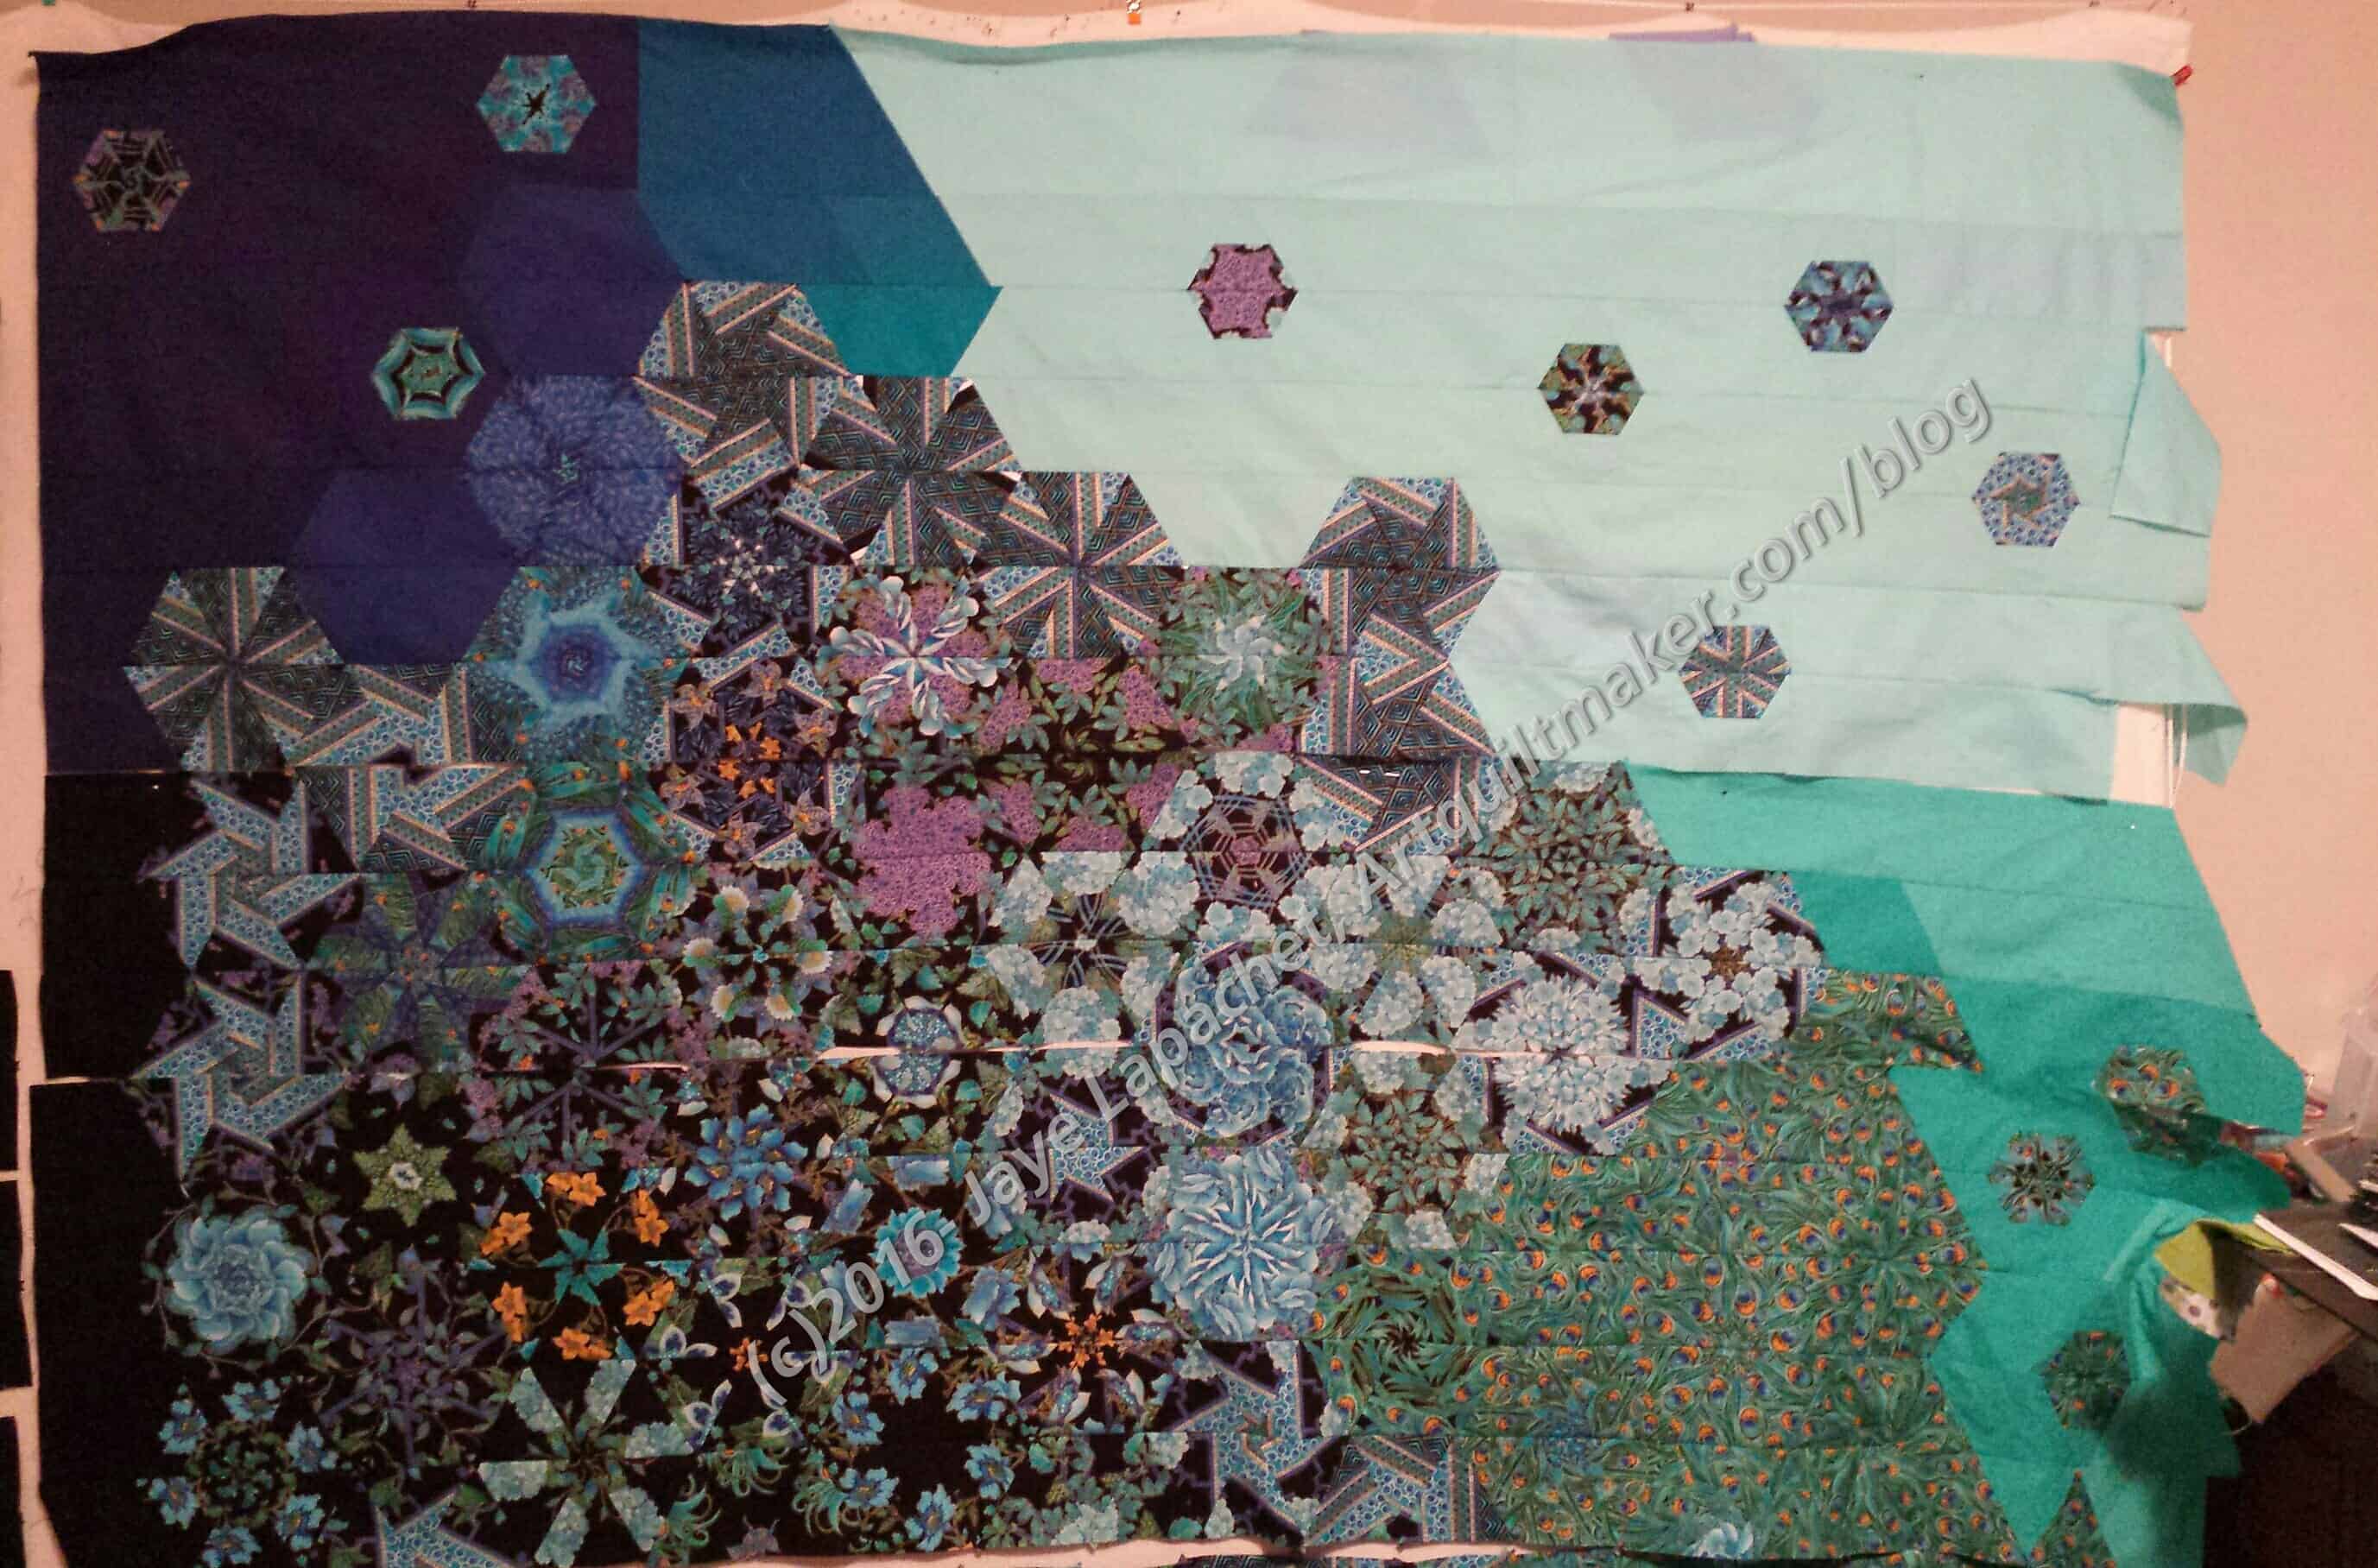
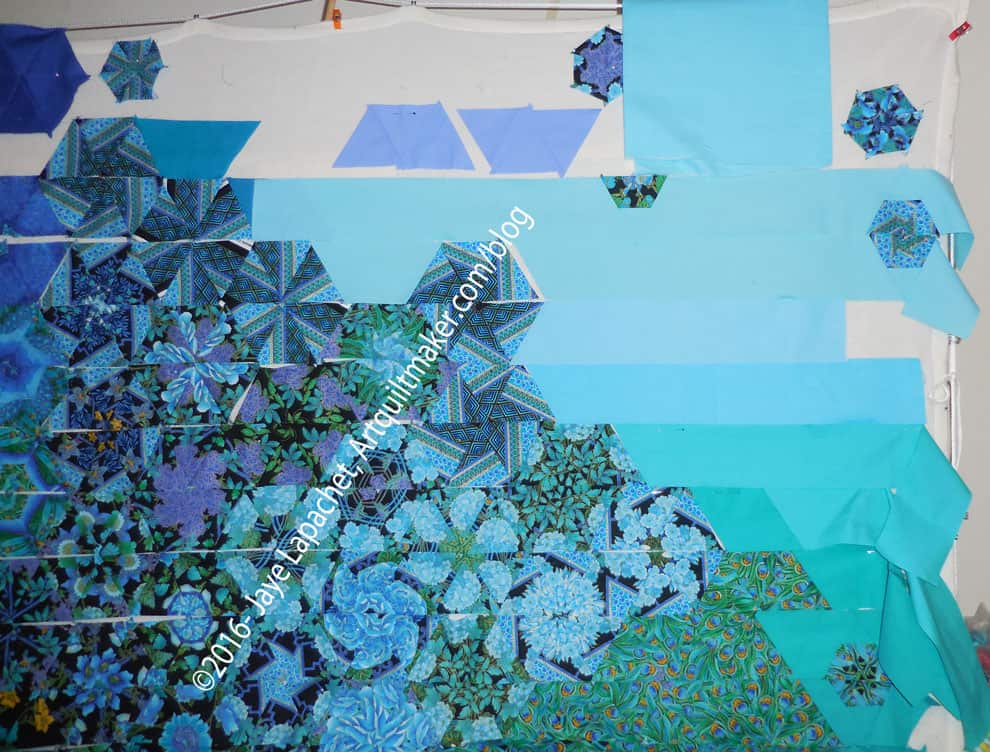
This is big. Fortunately, I know and can accept the width. It doesn’t mean that it is small. It isn’t. Even this partial section is big. It is 80″ wide* as you see it. I will be 112″ wide when I sew the last four blocks to the top section.
This is a perfect example of me not making small quilts.
*Thus the wonky photo. I am not tall enough to take the photo, don’t have a large enough floor or design wall.
Hard on the heels of the Peacock was a deadline for the Carpenter’s Wheel. Since I had started thinking of the background for each block in terms of low volume prints, there was a lot of text fabric included.When the text Challenge was announced at my modern guild, I immediately thought of this piece. It wasn’t exactly made specifically for this challenge, but it fit the theme and the blocks were just hanging around, so Text challenge quilt it was.
That meant that I had to get some of it done before the big reveal, which was Saturday. I couldn’t be there due to #politicalwifery. Still, I had options for showing it.
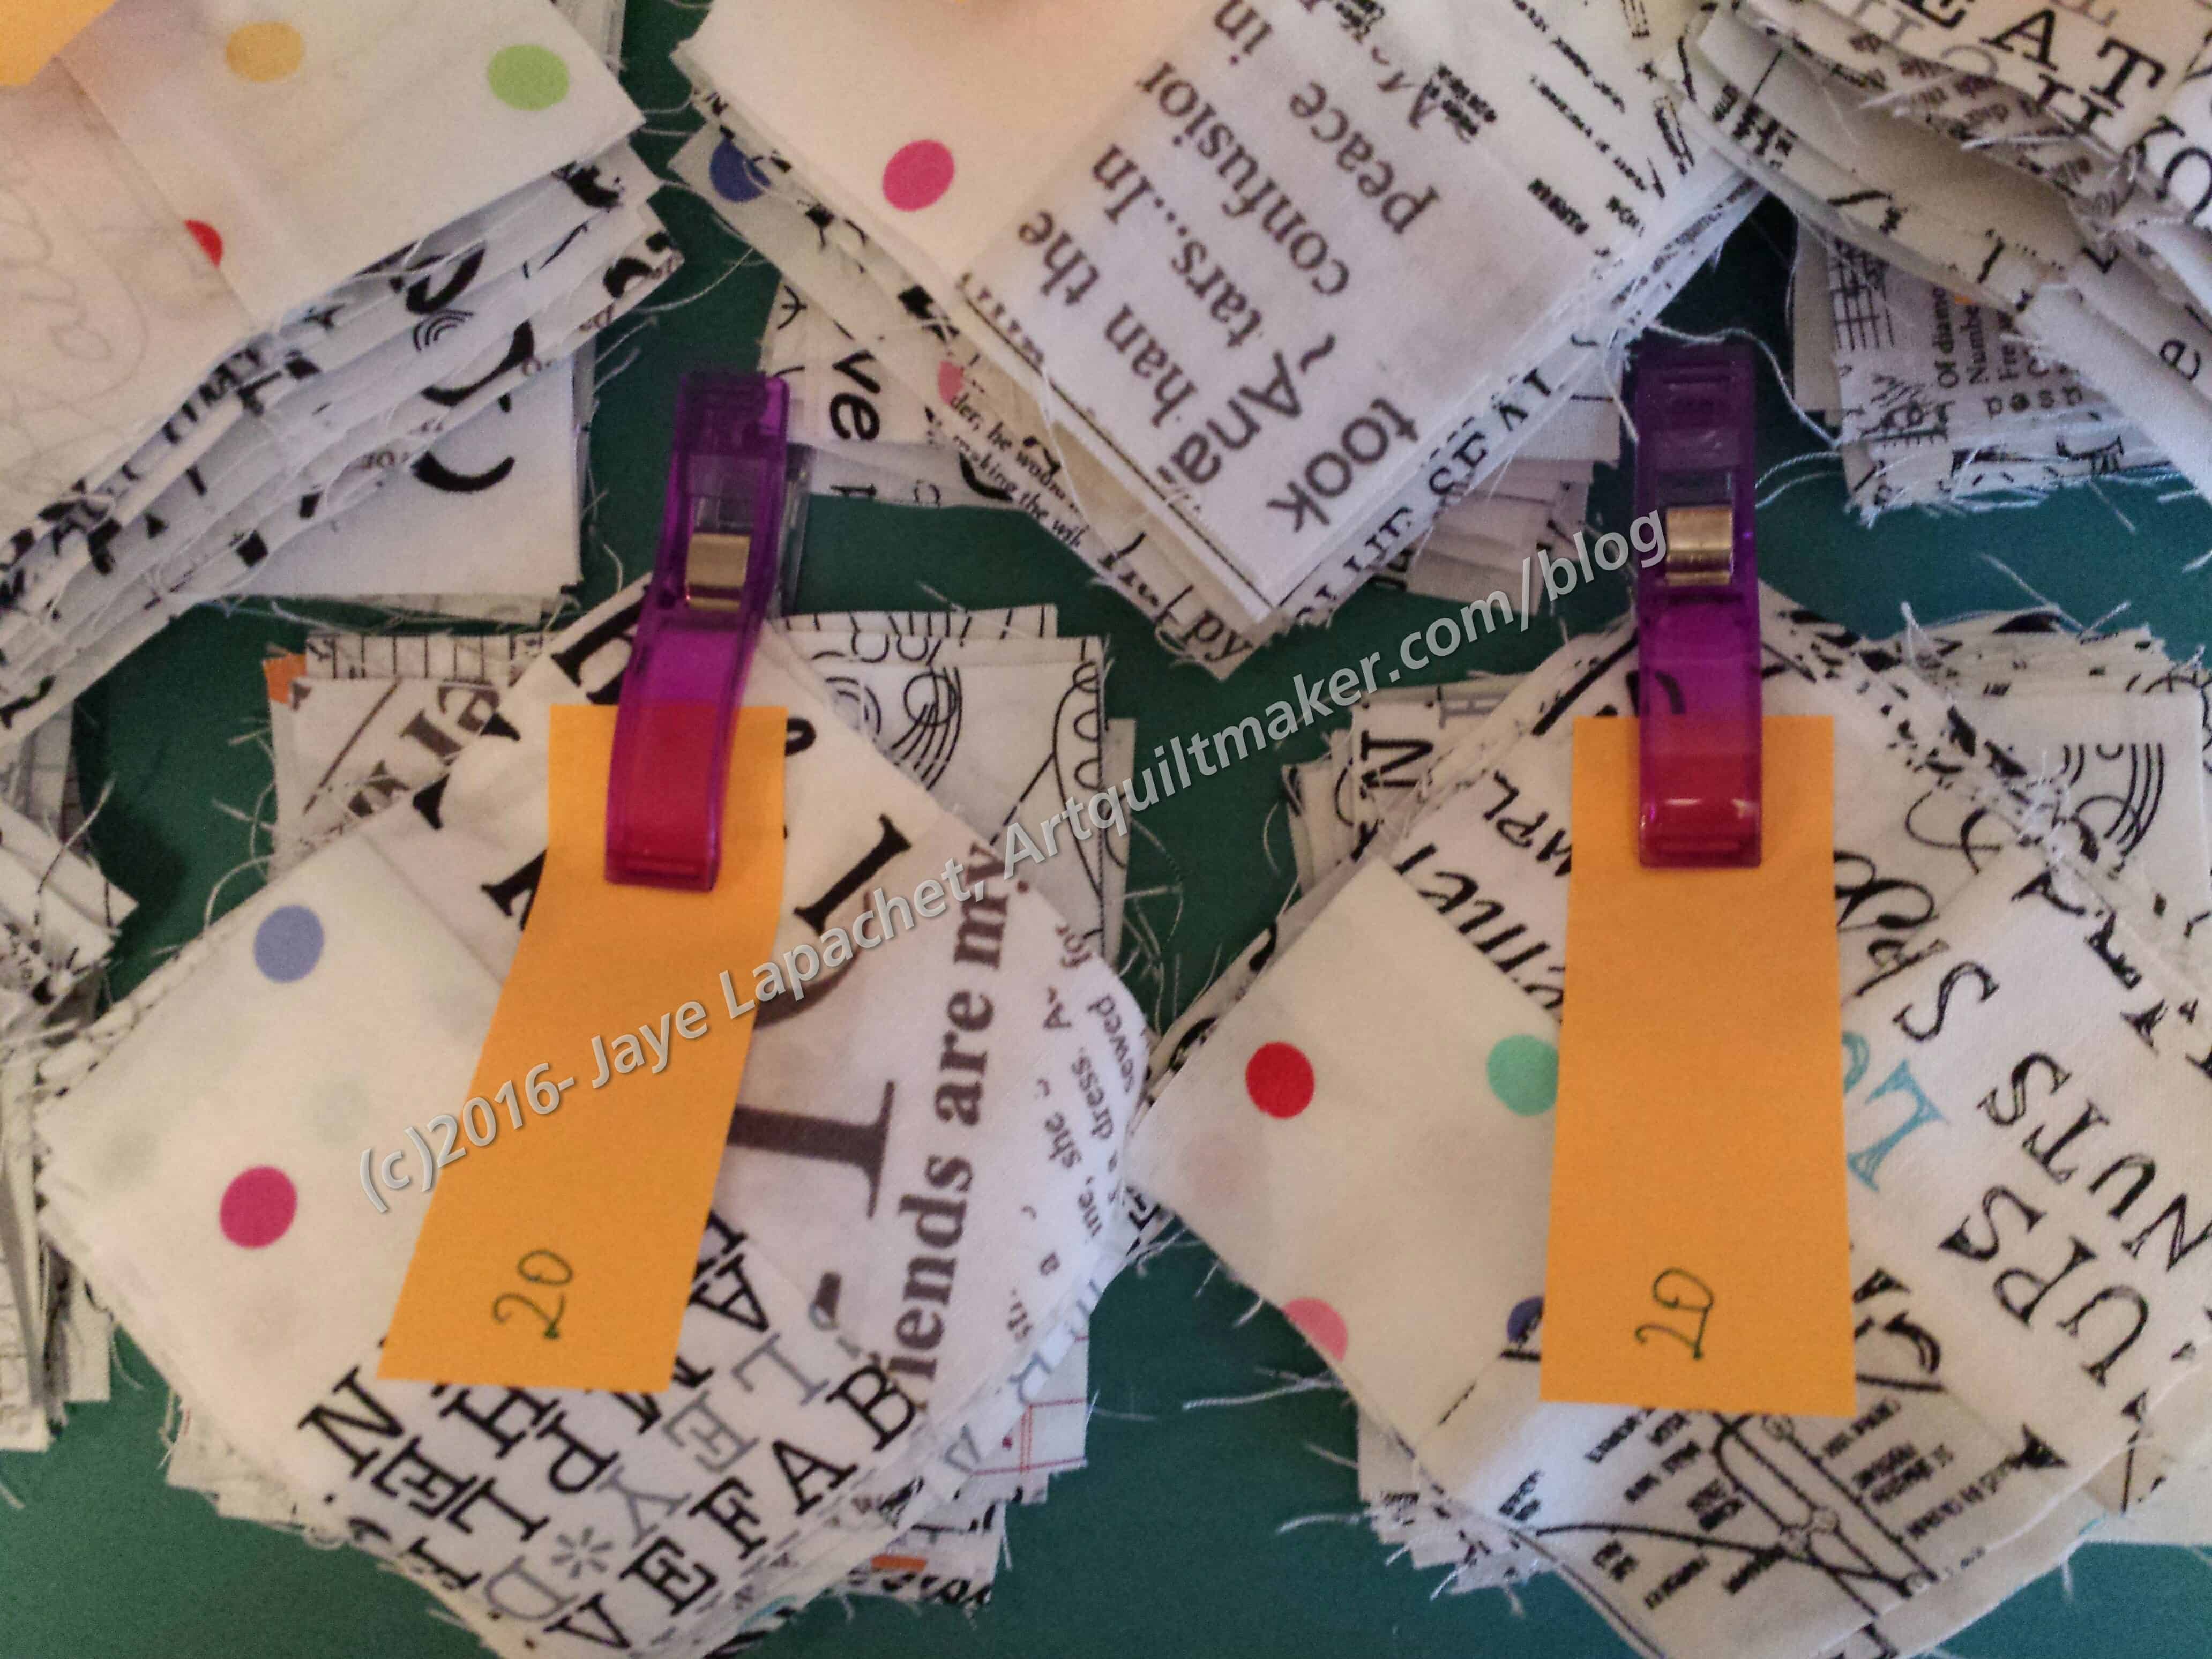
I used some mini charms, which I bought in Oregon, to get the ball rolling, but picked up other text fabrics along the way as well. A few weeks ago, I spent some quality time with the Accuquilt and the 2.5 inch die cutting, what I hoped were, enough squares to make 3 background blocks.
Carpenter’s Wheel – Feb 2017
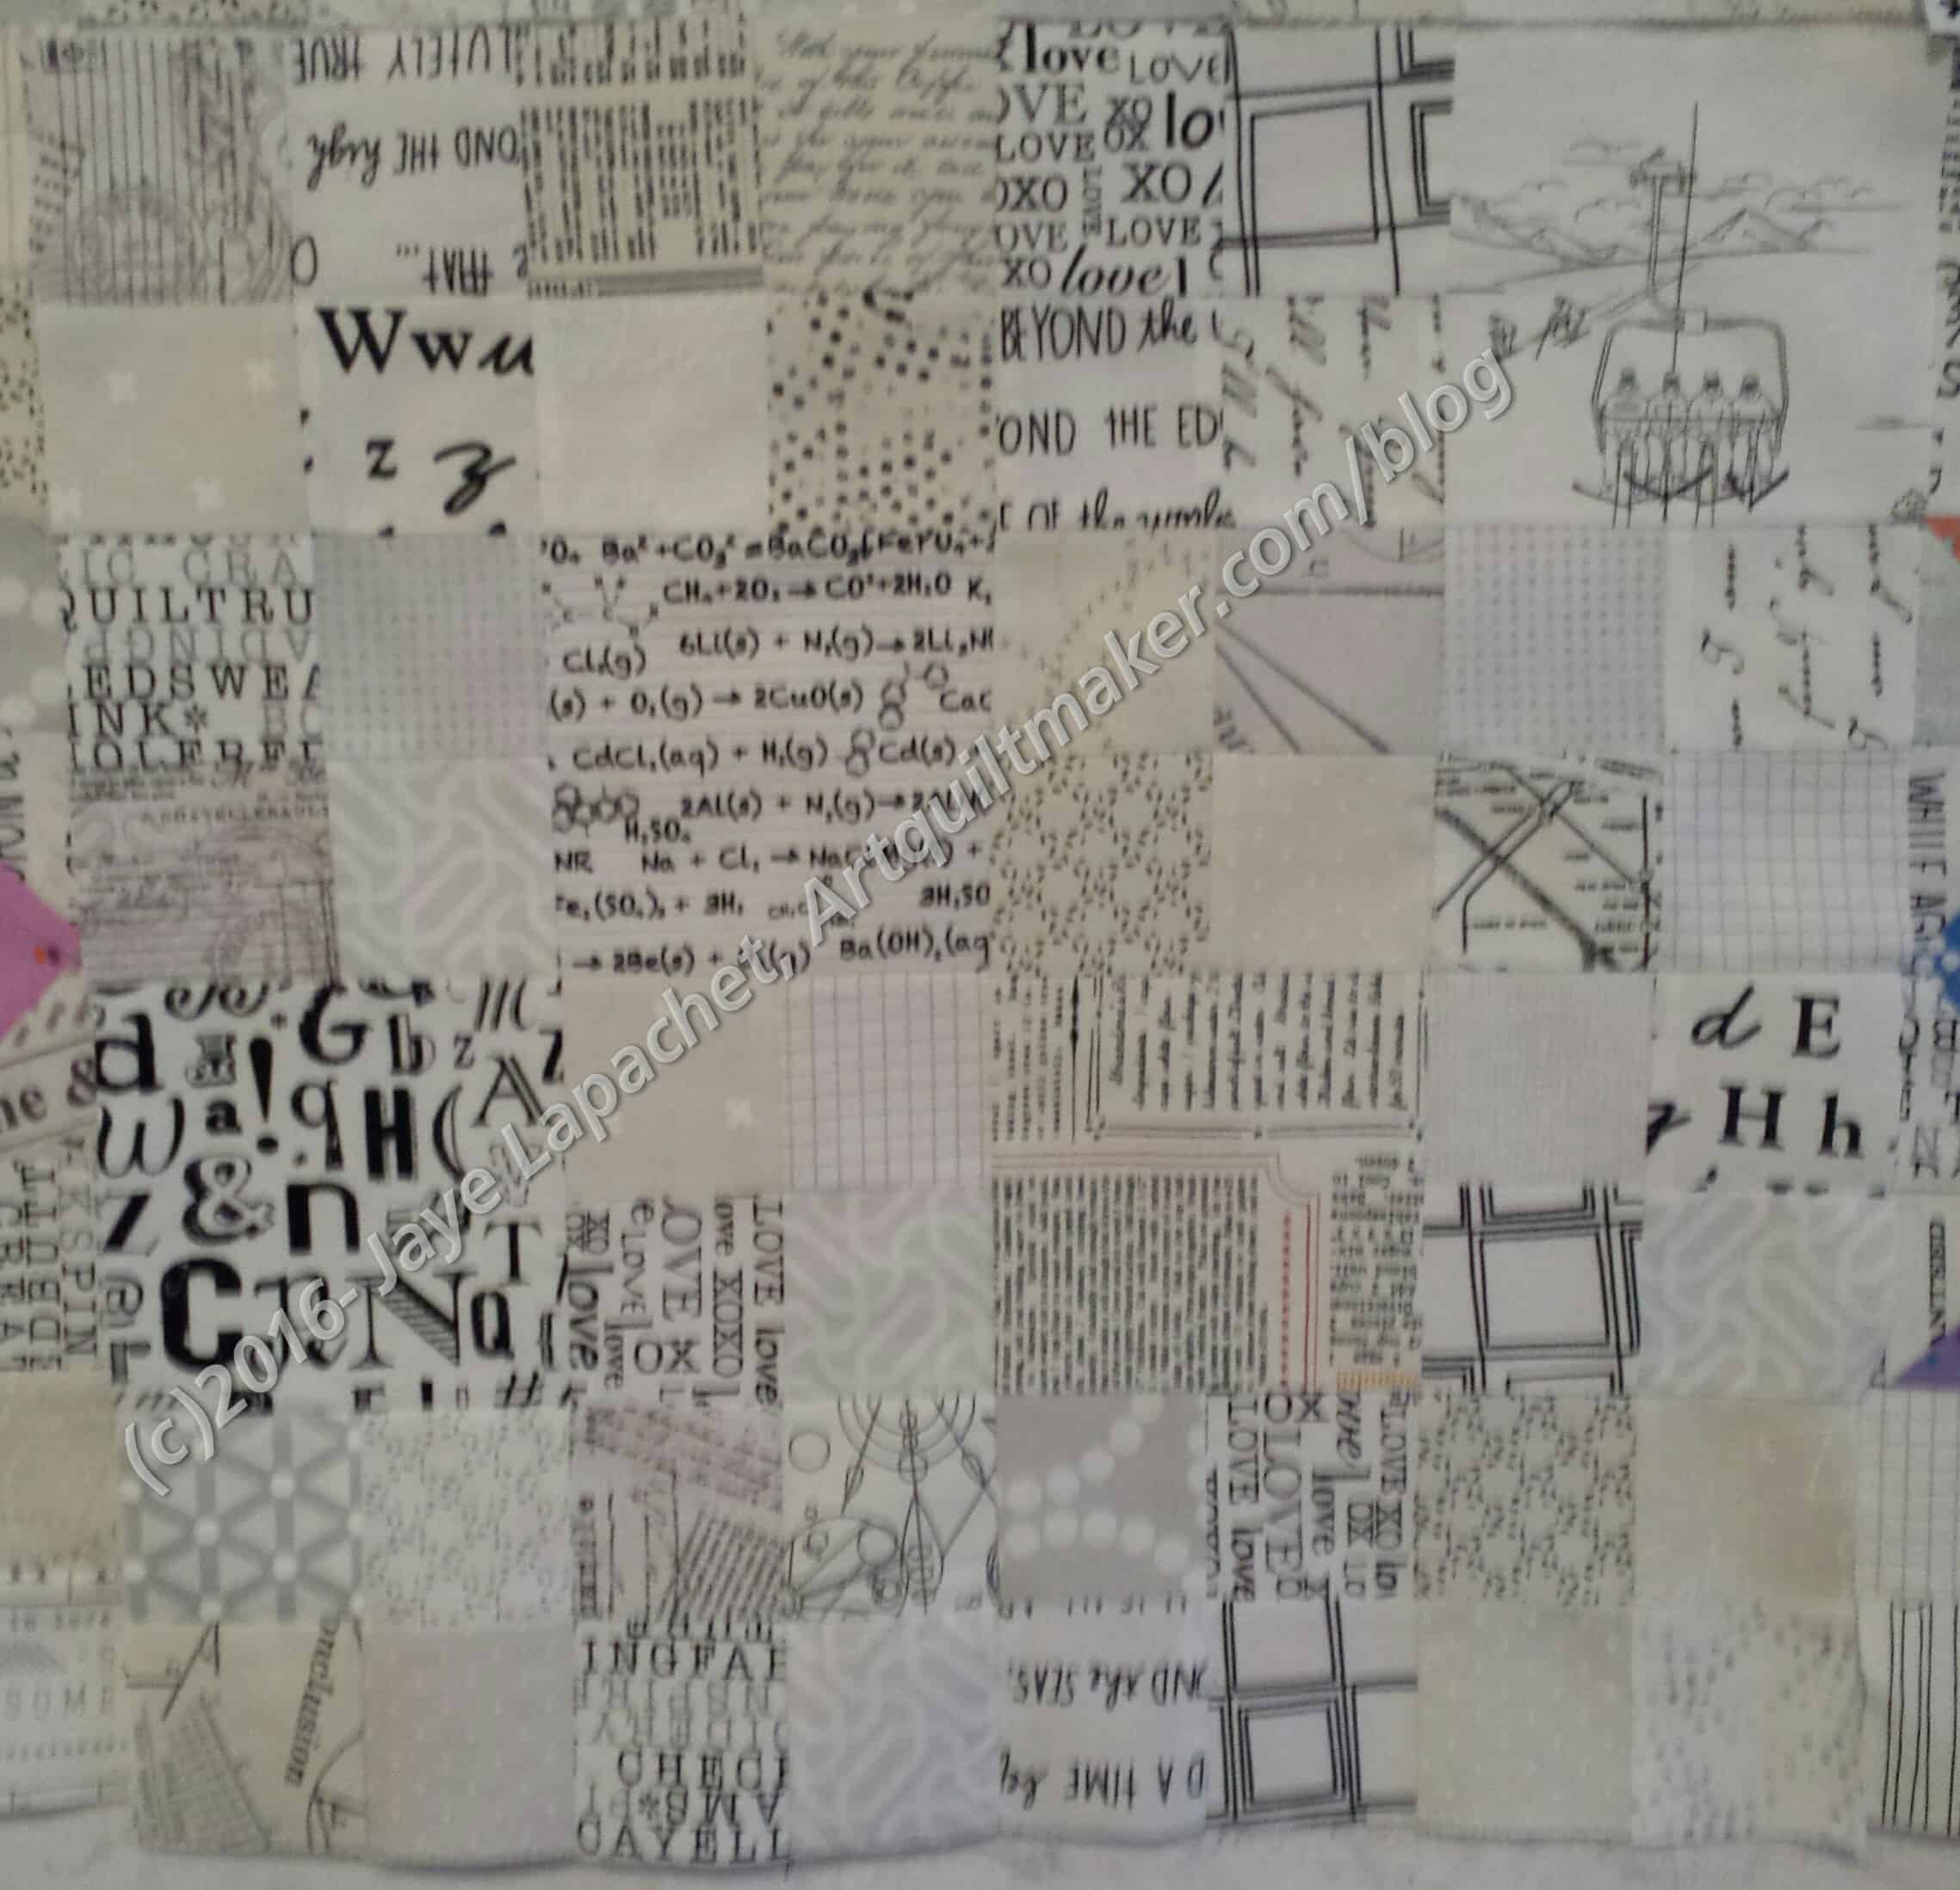
I refused to compromise my vision, which started with the layouts I worked on in the spring of last year. I wanted some good texture int he background, so multiple squares, rather than big squares of fabric it was to be. I began using the 2.5 inch squares as leaders and enders as I finished the back for The Peacock. I made a stack of 4 patches, which later turned into 3 background squares.
Carpenter’s Wheel background block
I wanted to see how 4 inch squares would look mixed in. I chose the fabrics carefully and fussy cut in some cases. I thought they fit in and didn’t scream, so I used a couple in each block. This make the piecing go a little faster and add a little relief to the background.
I had to sew into the evening on Thursday in order to give it to my SIL on Friday to take to the meeting. I succeeded and still got to spend time with DH. I have gotten some very nice comments on Instagram and hope, even if unfinished, it is well received at guild.
I am trying out a new concept for the Carpenter’s Wheel blocks. It is not a completely new concept because the idea comes from the layouts I tried back in April when I was playing with layouts.
I still like the circle layout and am moving in that direction. As mentioned, I wouldn’t put the two blocks in the middle.
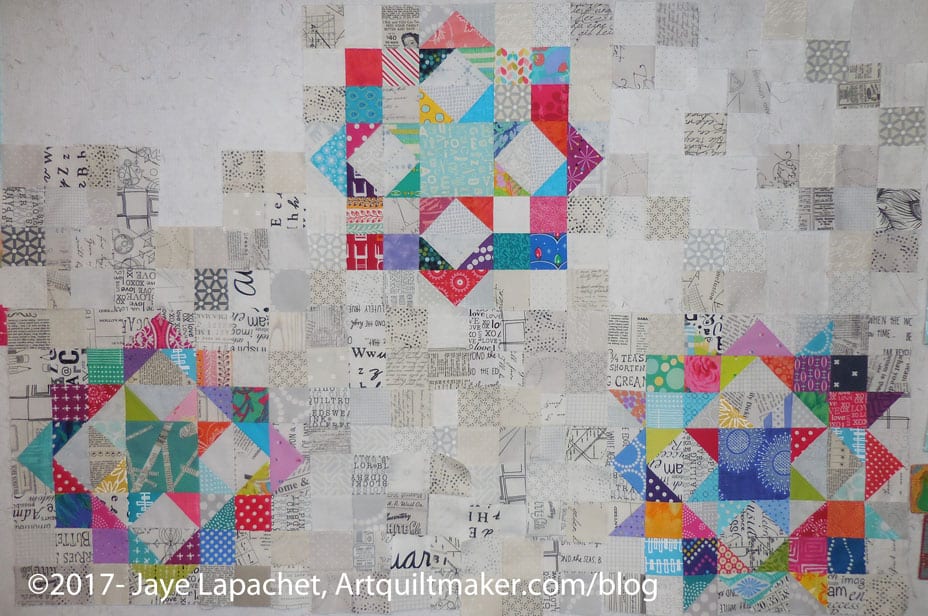
I was relieved and pleased to see, when I put the blocks up on the wall, that the foreground pieces were not overwhelmed by the background. The Carpenter’s Wheels stand out well. I do think I need to cut some larger pieces to mix in. It will take me a thousand years to sew so many 2.5″ squares together and I think larger squares would add interest. I’ll have to try it out and see, of course.
I hope to get these 6 sections sewn together so SIL can take the piece to the meeting. I have a lot of work to do to get there, so we will see.
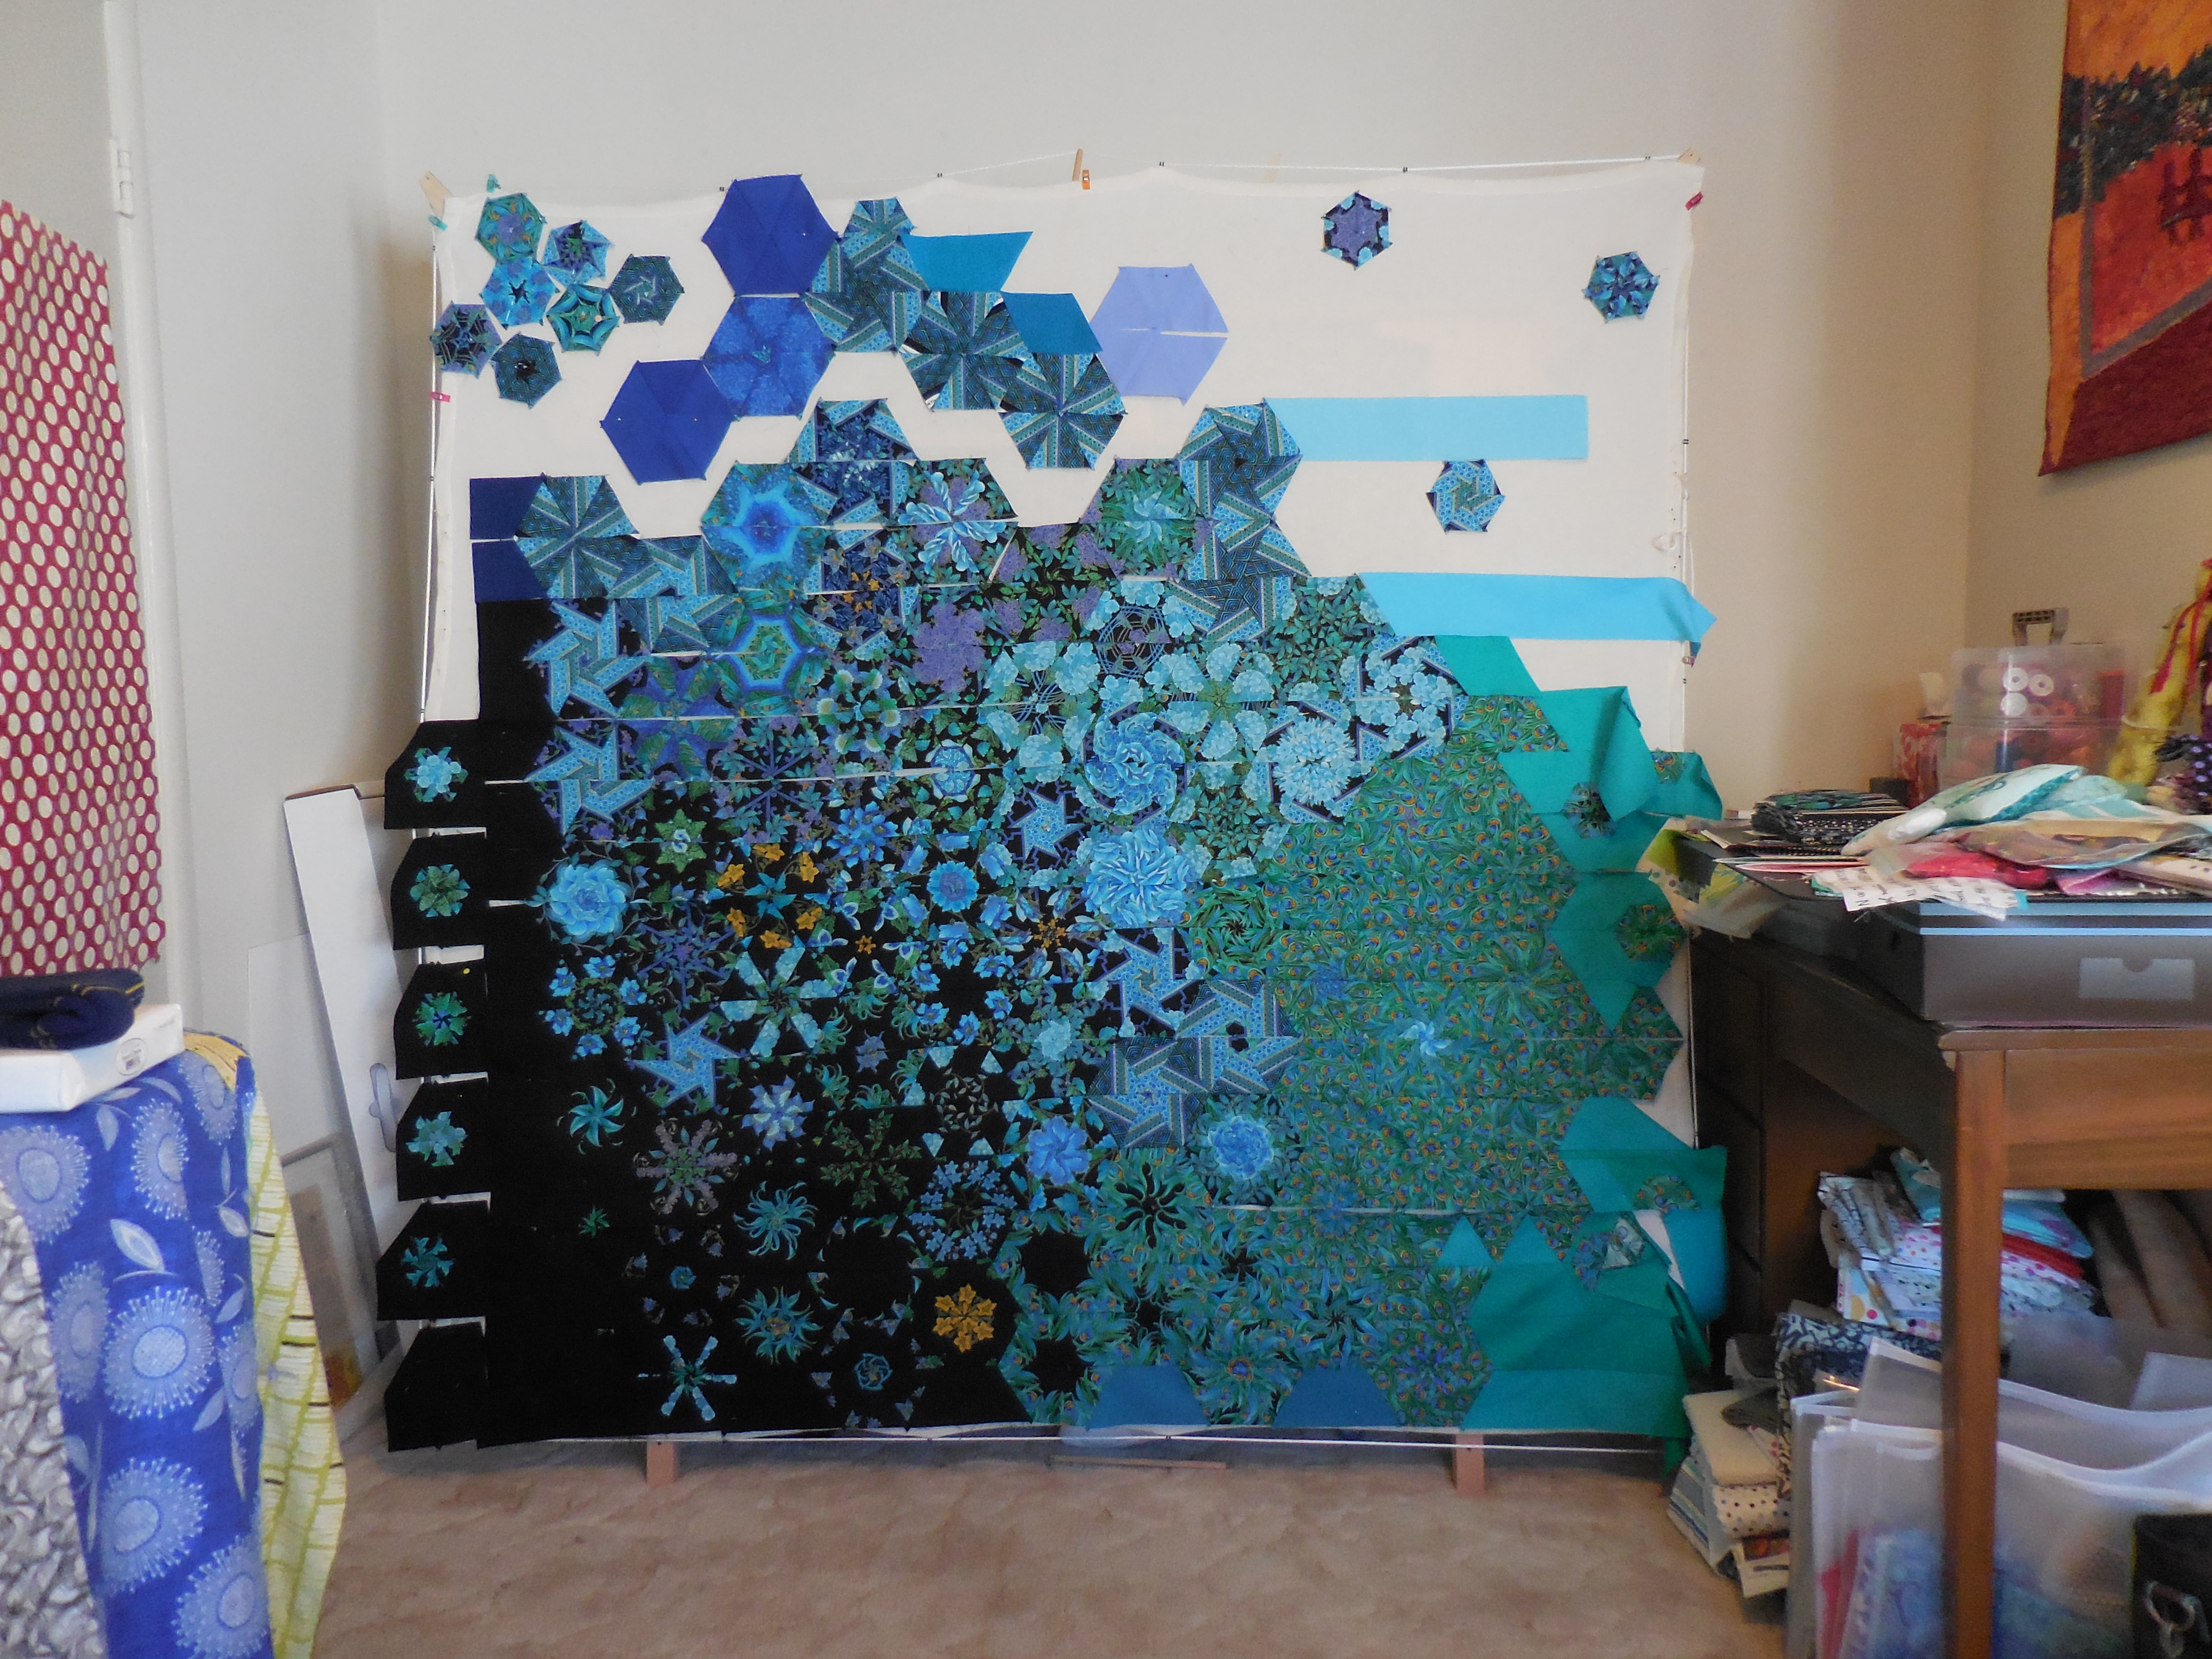
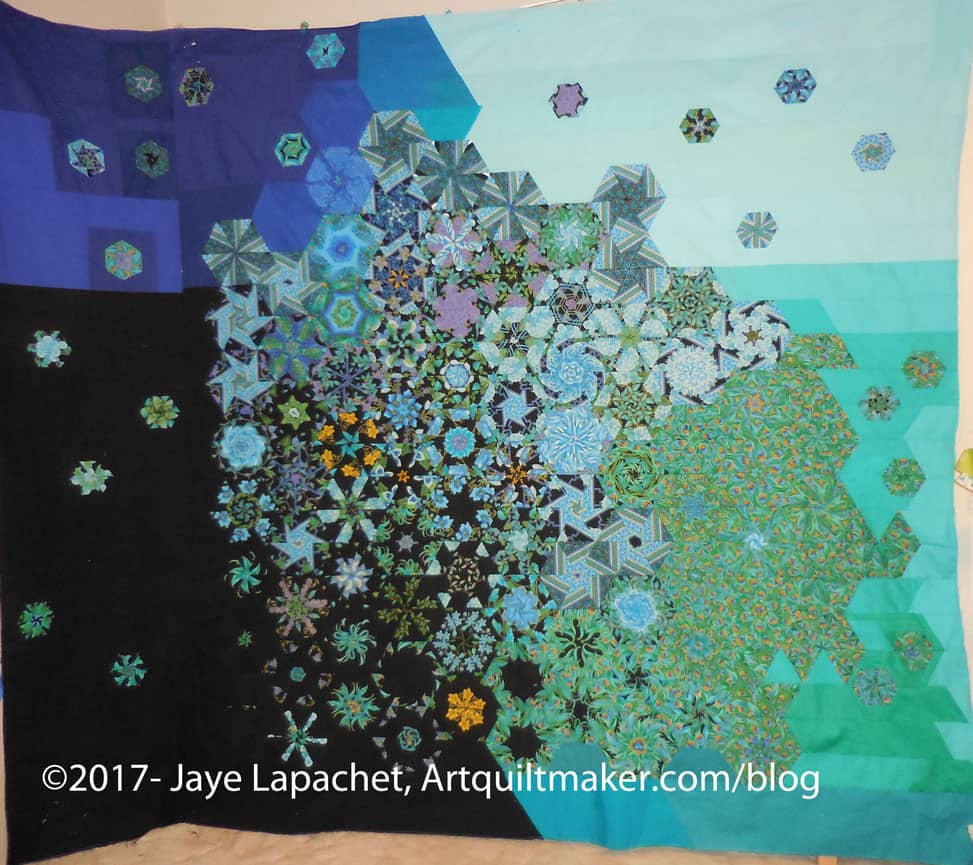
I finally finished the Peacock top. The photo looks a little odd, because my design wall isn’t large enough for the whole top so it is bent around the corner and taped to the fabric closet door. Still, done is done albeit large.
I also finished the back this past weekend. I knew it would take awhile so I started after I returned from the CQFA meeting and the BAM Sew Day. I spent about 4 hours and got about half of it done. The rest of it took me all day on Sunday. I thought about this and decided that the smaller the pieces I have to work with the more time the back takes. I had used most of the large-ish pieces on Saturday, so I was left with rather small pieces. I thought I would be annoyed, but I sewed, actually, quite happily on the back.
I needed to get it done before the CQFA Retreat, because someone wanted to buy my design wall. That didn’t work out so my Pind design wall is available for sale, if you are interested. It works great and is in great shape; it just isn’t large enough for me. Let me know if you are interested.
Yesterday, after returning from a somewhat intense #politicalwifery weekend, I spent some time with The Peacock.
The short version is that I finished the left part of the top. There a couple of long seams I need to sew to other long seams, but I am saving them until the end.
Now I can work on the right side in peace. The first small hexies I added need a lot of attention. I was able to put the 3 rows together after that. I am waiting to see how long the rows with small hexies will be before I trim or add to other rows. At the moment
I have been thinking about the Carpenter’s Wheel blocks lately. As you know, I made two more blocks recently in order to lay the blocks out in a circle effect.
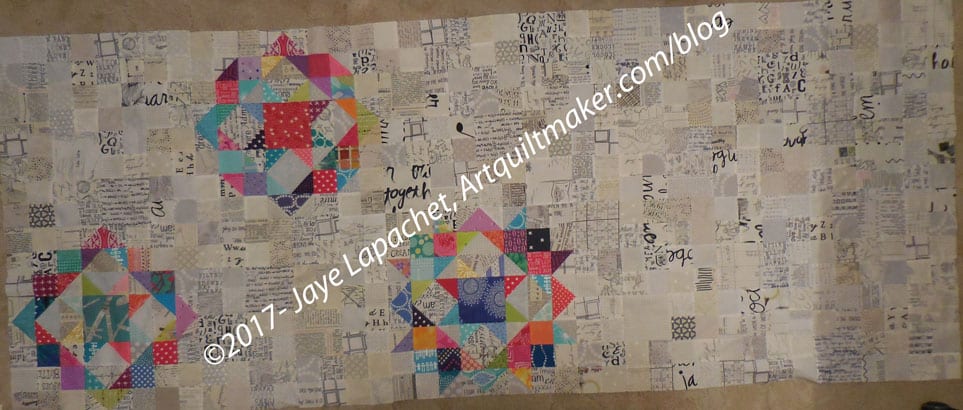
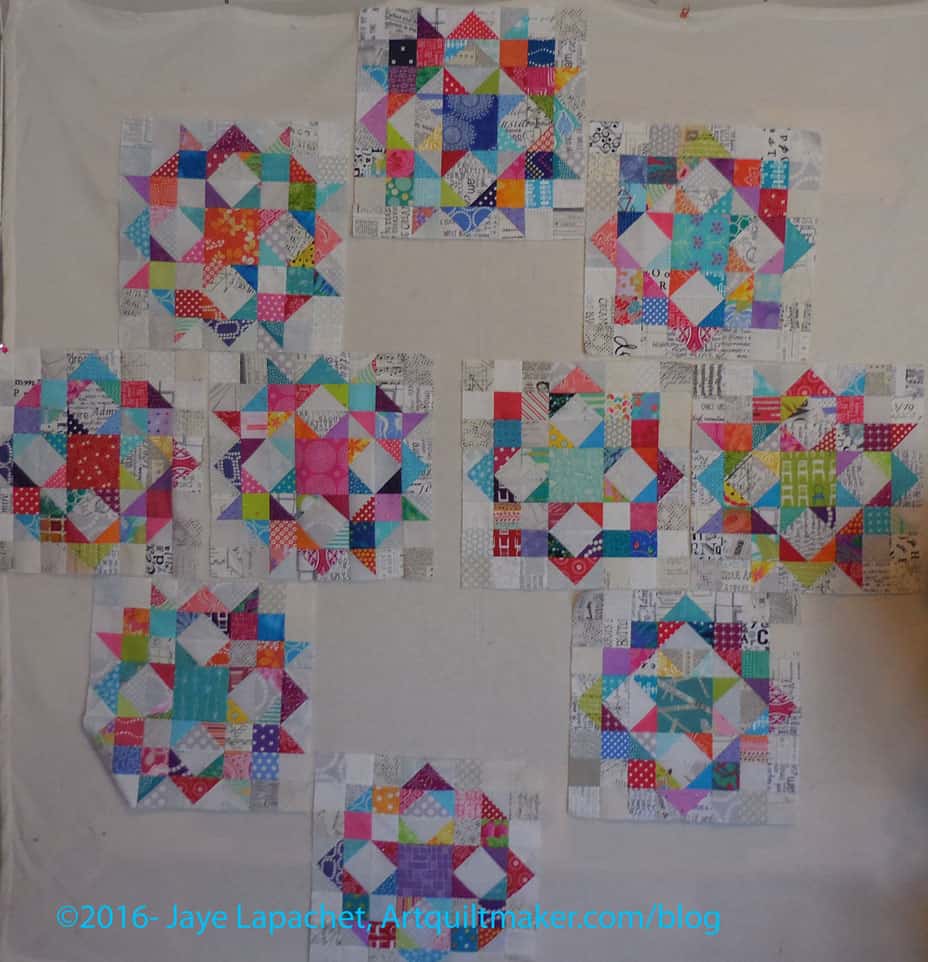
I laid out the blocks on the floor (design wall is full) and the photo left shows the top of a layout. I am not sure about it-imagine adding 7 more blocks. It will make a very large quilt. I also don’t really want to fill the blank spaces with 2.5″ squares. It would make an interesting background, but would also make me crazy sewing. I could use larger squares or even different sized squares to add interest. The small size, however, makes the wording less prominent, however. I don’t want some giant word to end up in the middle of the quilt.
Carpenter’s Wheel Layout #8
After taking this photo, I went back and looked at my other layouts. I like this one the best. The only thing I have to decide is whether to put the two blocks in those blank spaces or to make the circle bigger.
I sewed a few seams last night and think I made some progress that sent me over the edge into less decision making and more rote sewing. I think.
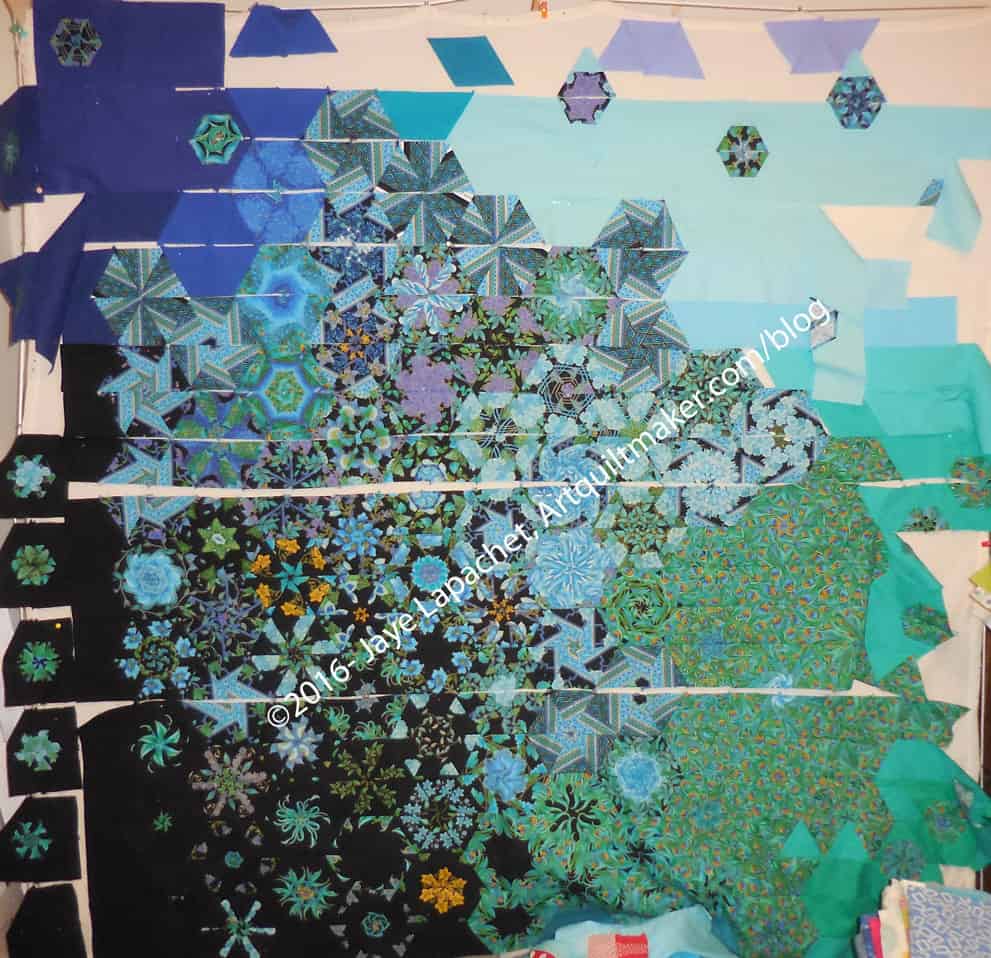
The Peacock – full piece, January 2017
The Peacock – 1/18/2017
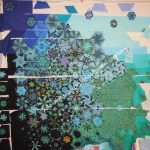
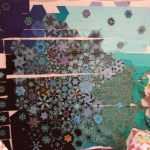
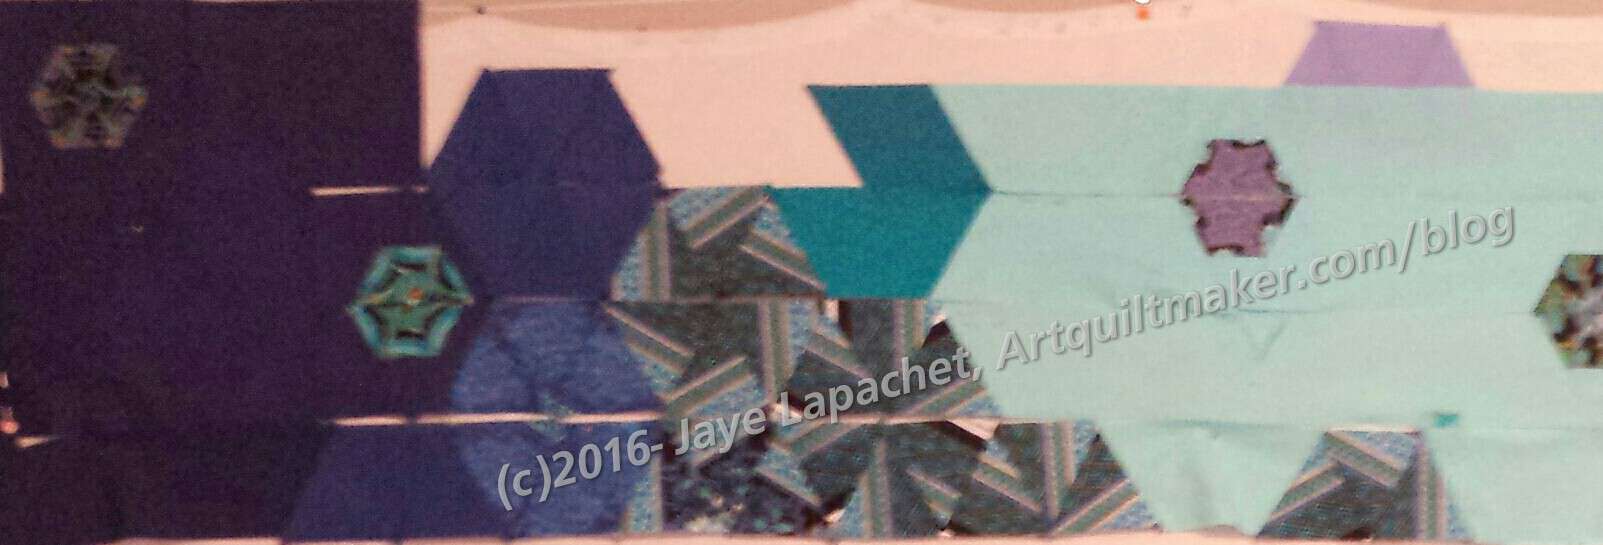
I need to get past the small hexies to get to the point where I can finish the top background. On the left is the piece from Monday -earlier this week and the right is the most recent incarnation. I have added one strip, but this required lining up the small hexies with their bottom halves on the row below. It doesn’t seem like a lot, but it is easy to get them out of alignment.
The Peacock – top left
Next, I have to finish that row, which means deciding if I will keep the blue half hexie (far left) or replace it with a regular strip. Some of that depends on how much of which dark fabrics I have left. Working with solids in this project reminded me why I don’t like to buy just FQs.
I spent several hours over the weekend working on the Peacock. I was determined to make progress and I did! I am pleased with the progress that I made. Several hard decisions were made and lots of sewing was completed.
The Peacock – top right
I spent a lot of time on Saturday making the smaller hexagons large enough to fit into the rows of the piece. During this joy I kept asking myself whose bright idea it was to add the smaller hexagons to the piece. They take more time and are a bit fiddly. Most of those I worked on will be on the darker side of the top of the piece. I will scatter them around and up to the top. A few will go on the lighter side.
The Peacock – full piece, January 2017
Including this, I am marching up to the top of the piece. I am a row away from having full strips to piece into the top and I can’t wait.
I took some time to piece the rows together on the bottom. These are just long and awful seams. I can’t do any chunking on this piece, which is a pain. I want to finish the left side including the small hexagons with black backgrounds in a border type treatment and then move the entire piece over towards the left so I can work on the right.
I’d love to tell you tomorrow I have the top finished, but I think that would be too optimistic. I plan to work more on it today and, hopefully, make some good progress.
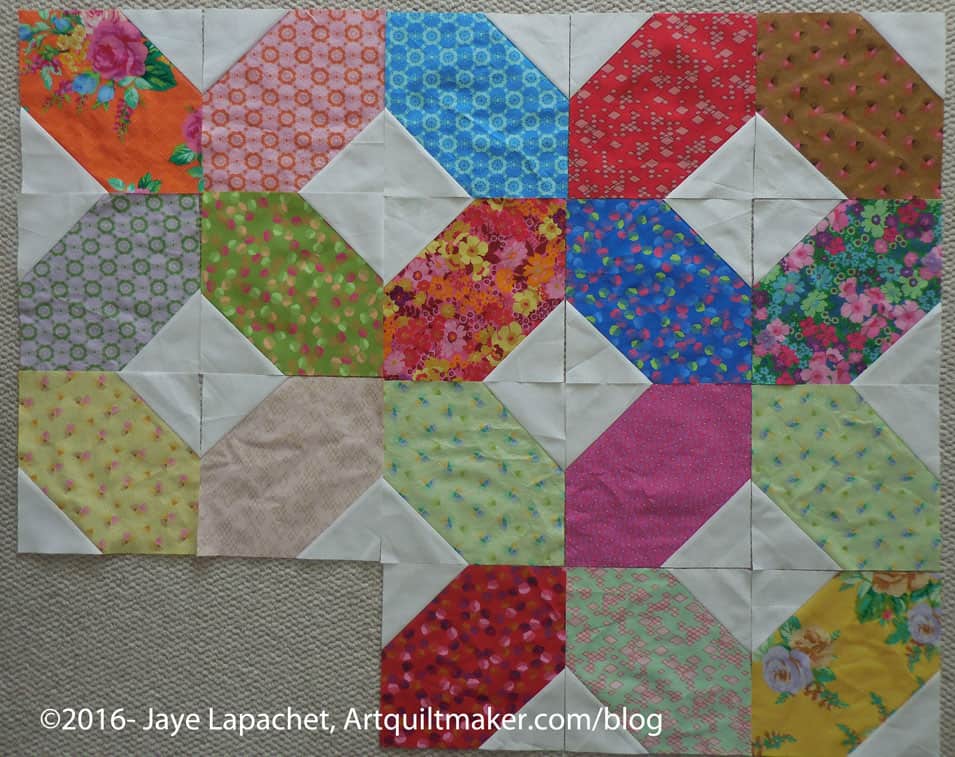
I starting working on another donation quilt, this time in yellow, pink and peachy-orange. It now has a yellow vibe, so I am calling it Yellow #2, as part of the series of yellow donation quilts, which I started in 2012.
That last sentence is totally pretentious and you can call me out on it. I did seriously start another donation quilt in yellow, pink and peachy-orange and am naming it #2 to distinguish from the first one I made in 2012.
Yellow Donation quilt #2
I am not very far along, but making progress. I started to put the blocks together even though I don’t have enough to make a whole top yet. I am not sure why I started to put it together before having all of the blocks, but I did.
The four block section I have put together is covered, on the left, by another block waiting to be integrated. My design wall overfloweth.
I am doing the En Provence Mystery Quilt. I have just finished step 1. I am very pleased with the four patches I have made. I have part of step 2 finished, and have some Spikes to cut. I am dreadfully behind, but I don’t care. I saw the reveal on January 1 and am pleased to say that I like the quilt design. It is always kind of a crapshoot when you don’t know what the quilt will look like. Not that there is any shortage of fabric. Some people have already finished theirs and have shown their versions, which is great for me, so I can compare different color schemes. I am happy to pick out colors as I start each step. So far, I have sort of stuck to Bonnie’s suggestions, but I am not going with the purple she includes. Just not my thing. I don’t hate purple, but I think this quilt will stay here so I want something that will work in my house.
This project is part of the reason why I feel like I am treading quilt water. Many steps forward and no finishes.
It has been hard to get going again on the Peacock. I don’t know why. I think it required contemplation and I really have just had snatches of time here and there over the past few weeks. Some projects require concentration and no progress is made without the time and mindspace for concentration.
The problem is that this piece is taking up space on my design wall and until I finish, I can’t make any other progress. Yes, I could take this piece off the design wall, but that would be a huge mess and I am pretty sure I would never get back to it. Not worth the trouble.
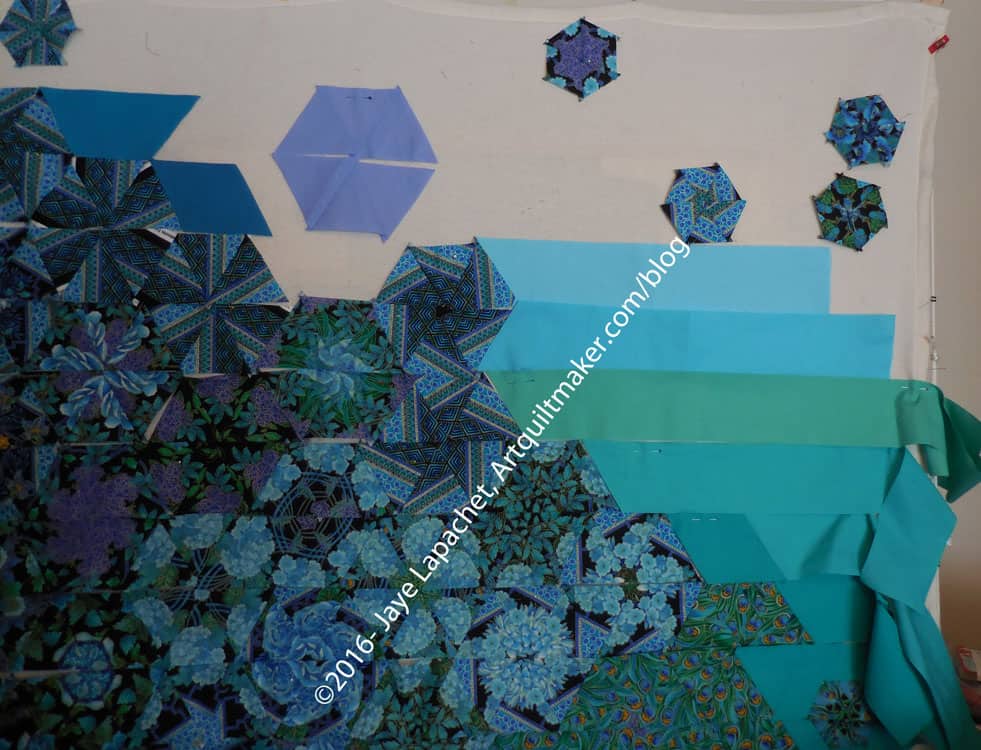
Peacock – 1/1/2017
As you may remember, I gathered some solids and they have been laying around waiting for my attention. Sunday, after #politicalwifery was the day. I cut and placed some strips of solids as background onto the design wall and I am pretty pleased with the results so far. I have some very light blues, but I don’t know that I will get to them as at some point in the not to distant sewing, the very darks I am using on the left will meet the lights on the right and I have to figure out that transition. There will be an angle involved for sure. Perhaps the lavender as well?
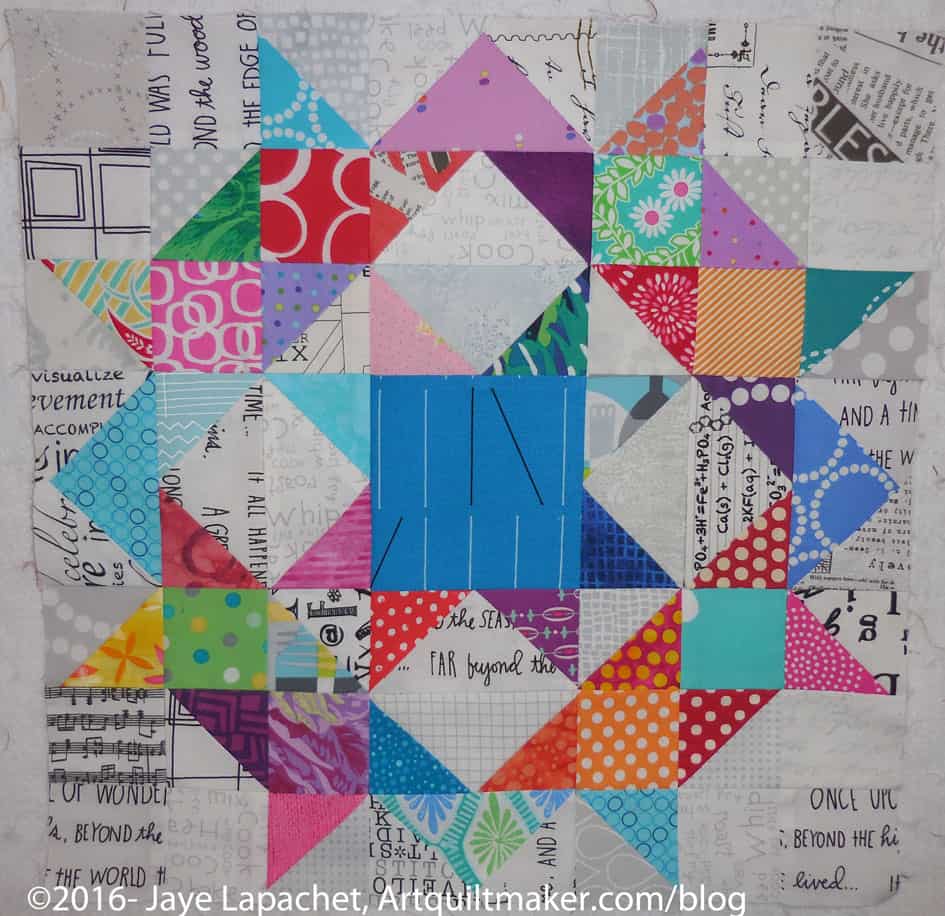
I am hoping that this is the last Carpenter’s Wheel block. My fingers are crossed because it would be nice to finish something AND I want to turn this in for the BAMQG challenge.
As I may have mentioned, I have an idea for the layout and I’d like to get to it. Of course, I have to get the Peacock off the design wall.
I started in on Carpenter’s Wheels again. I finished n.13 over the weekend in the frenzy of sewing I did to heal myself from the shopping marathon we did on Sunday*.
I was able to finish this one without much extra making of parts, but n.14 needed a few new Flying Geese and some low volume fabrics.
I was inspired to do so by Karen, the Challenges chair at BAMQG. Her last challenge as chair has to do with putting words on a quilt. The Carpenter’s Wheel blocks have text fabric included, so I am going to try to get the top done before February. I know I started this out as an experiment in low volume fabrics and it will still be that.
Carpenter’s Wheel Layout #8
I want to do the round layout. I don’t want those two blocks in the middle, thus I needed two more blocks, which I am in the process of making. The new blocks won’t be unique layout like the others, but I think the layout of the entire quilt will be somewhat unique and I am excited about it.
* Shopping is terrible, but this trip wasn’t completely terrible. DH made me pancakes for breakfast. He and I were able to spend the day together. We also accomplished a lot of niggling little tasks that comprise the holiday season. It feels good to cross things off the list. As soon as I said I had had enough, we finished up and packed it in. No arguments from DH. Finally, I ended up with 18k steps. That is almost a Disneyland day. Who would have thought?
Push has really come to shove on this project. I have to decide how to arrange the solids in the upper right hand corner. I have some strips cut and some ideas percolating, but this is where my design and construction style can run into problems.
I think the blues I have on the right will have to move up and I will have to use one that is darker to blend the dark-medium green more to the blues higher up.
There is a very strong diagonal line made from the greens on the middle right. I may need to figure out a way to smudge it as it is quite prominent.
As you can see, on the left, I also made the dark small hexies. They are not placed in their final location, but they will be towards the bottom left when all is said and done. As I have said 500 times, I need a larger design wall. Although, I fear if I have a larger design wall, my quilts will become larger.
I have thought about the lozenge shape for awhile. The most recent instance of writing about it that I could find was last year when I wrote about seeing the shape crop up everywhere. I thought I had put it on my dream projects or future projects list, but I don’t see it there.
Anyway, I took the Mostly Manor Layer Cake that I bought with Julie and one of the Northcott white charm packs and got to work sewing the charm squares on to the Layer cake squares.
Lozenge quilt, first look
The work is easy and this is a leaders and enders project, but it is coming out ok. I hope I notice when it is finished.
I decided to split the lozenges in half on the diagonal and sew them back together with other fabric halves. I think it will be more interesting.
I am not a huge fan of the fabric. I think I mostly liked the large roses prints. Still, it should be a fun experiment. I’ll have to figure out what to do with it as I don’t need it laying around. I have a possible idea, but we will have to see.


 I am hoping that this is the last Carpenter’s Wheel block. My fingers are crossed because it would be nice to finish something AND I want to turn this in for the BAMQG challenge.