Field Day Ready to Quilt!

Yes, I finished piecing the back and making the binding over the weekend. I have three projects to take to the quilter today and I am very pleased about that. I am very pleased to get these projects off my plate for awhile and can move ahead to something else.

Field Day Top Finished

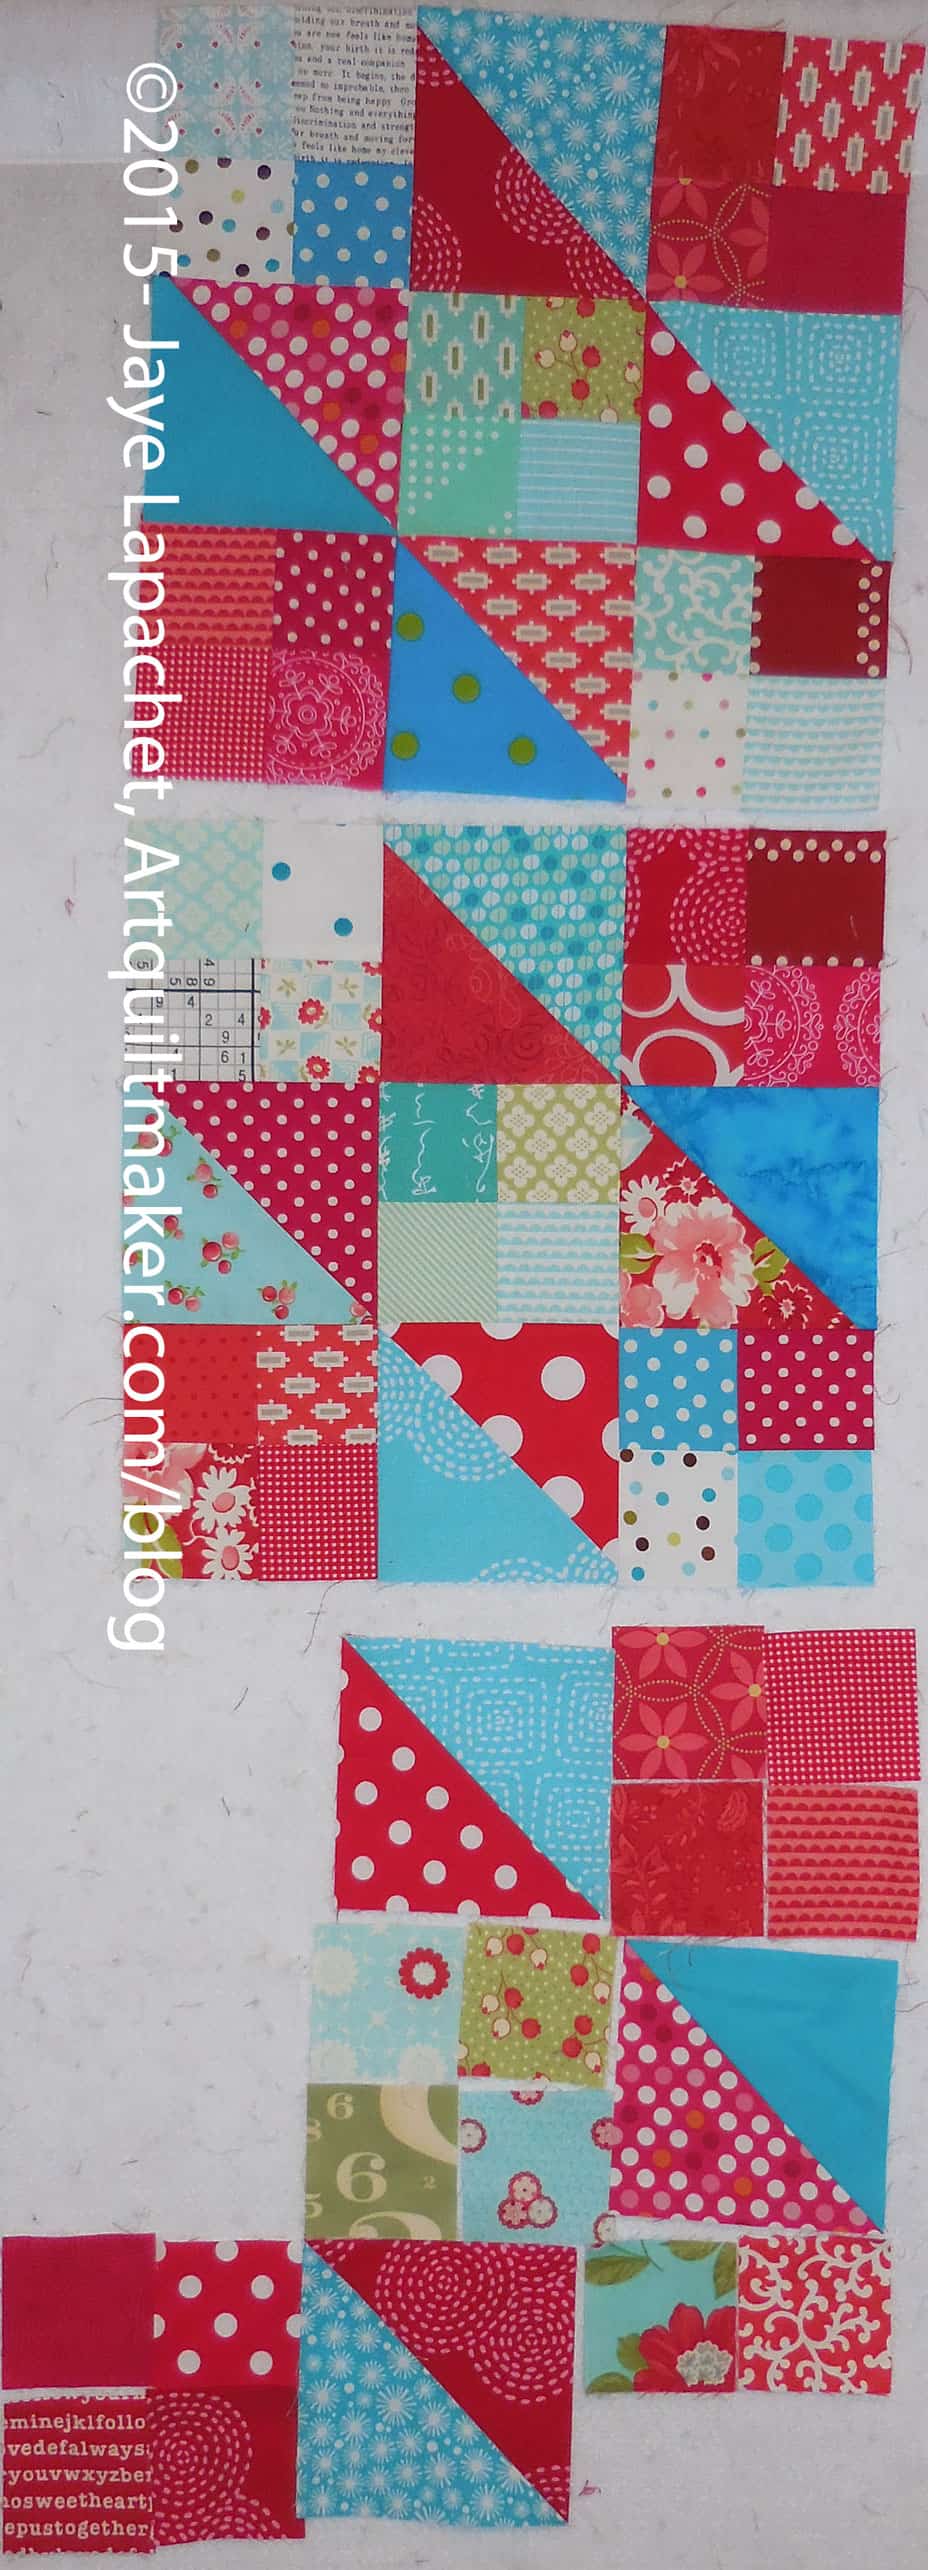
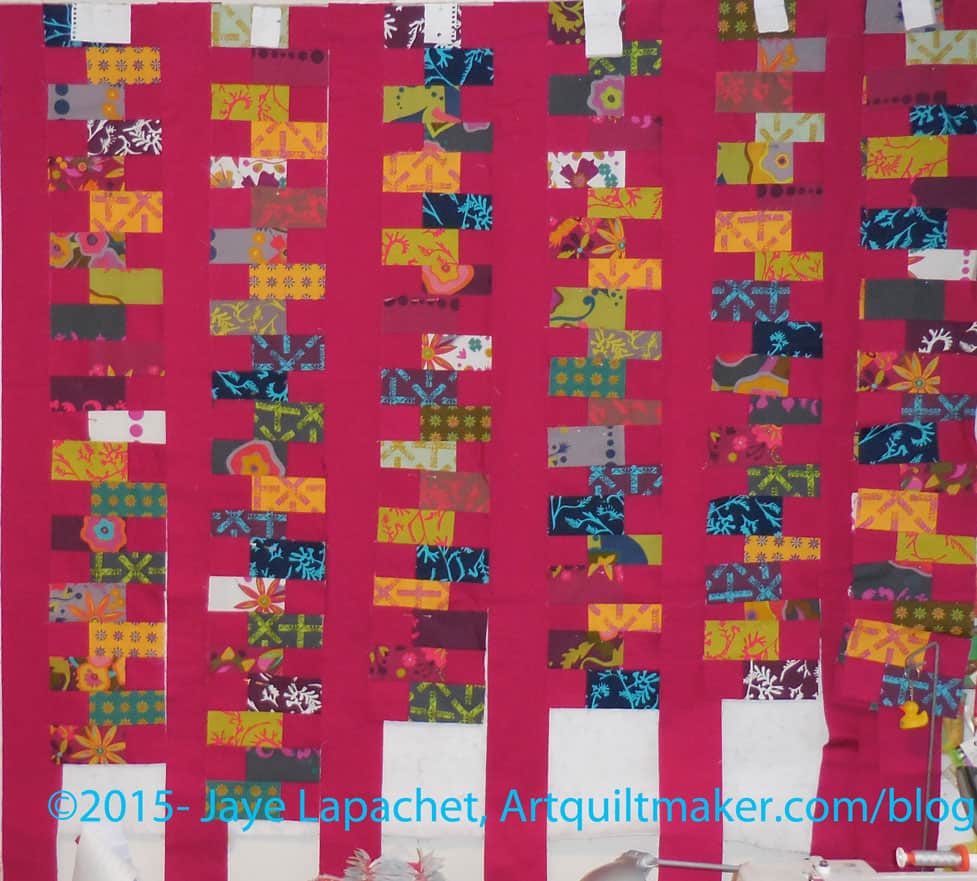
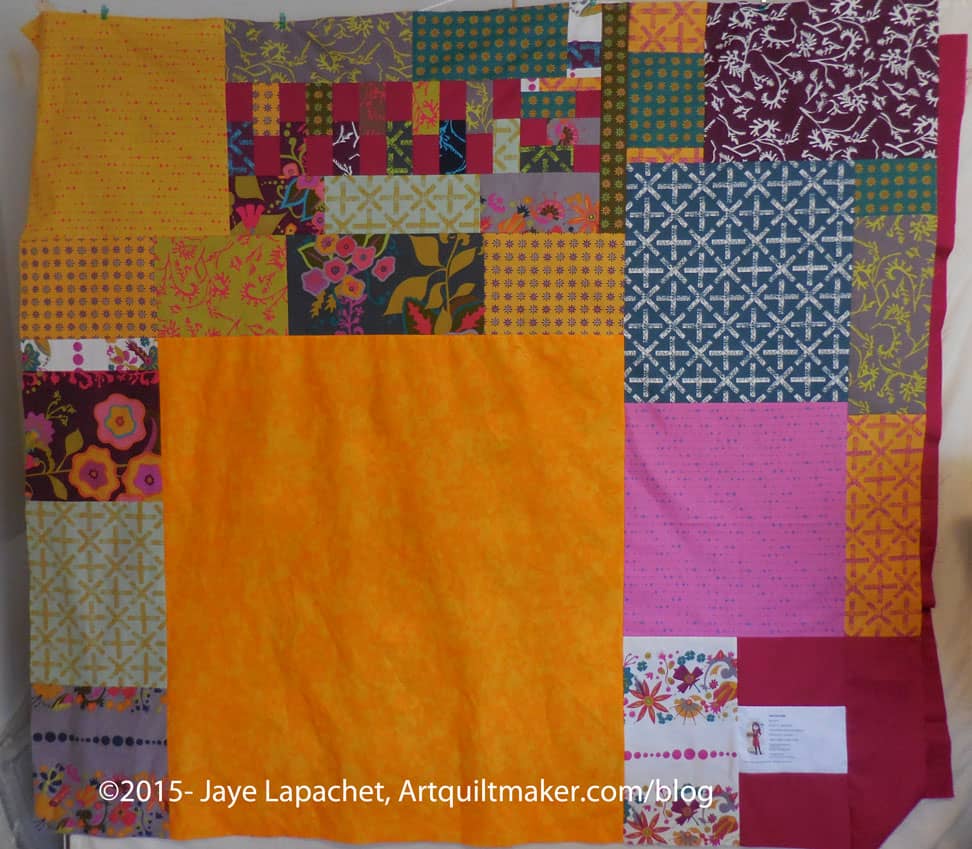
I had thought to put a gold border in between the Sangria borders, but once I put the Sangria on the top and bottom, I thought the top looked finished and I was happy enough to leave it as is.

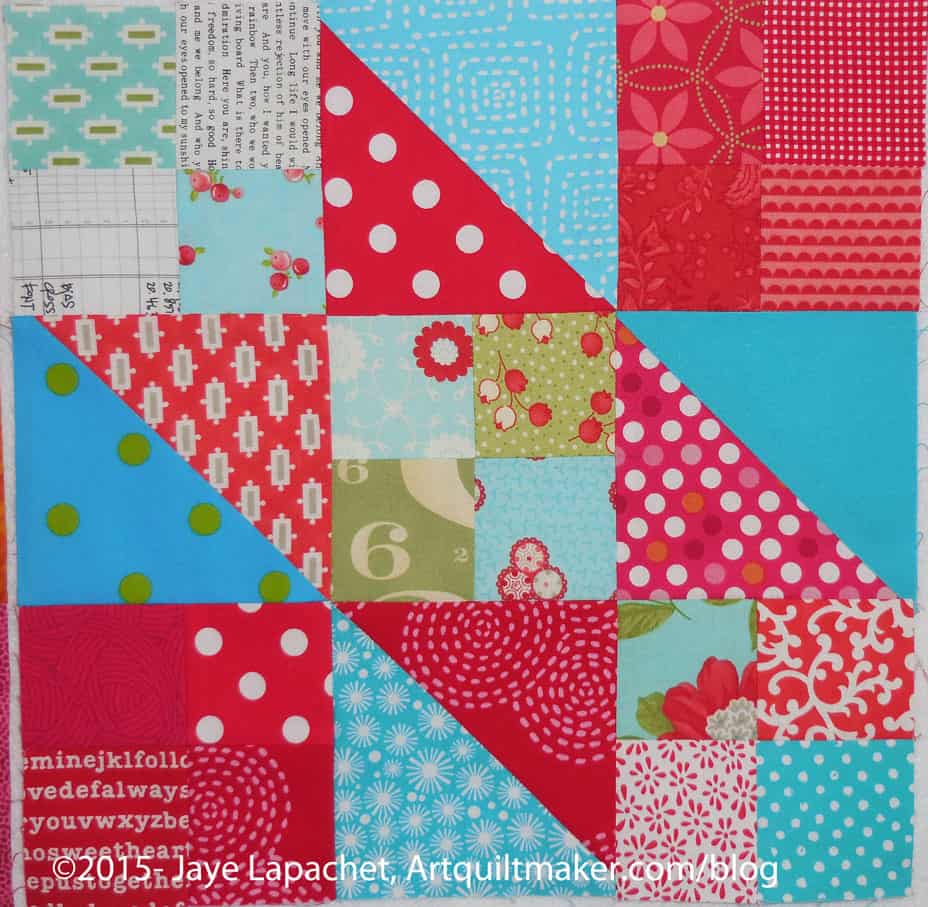
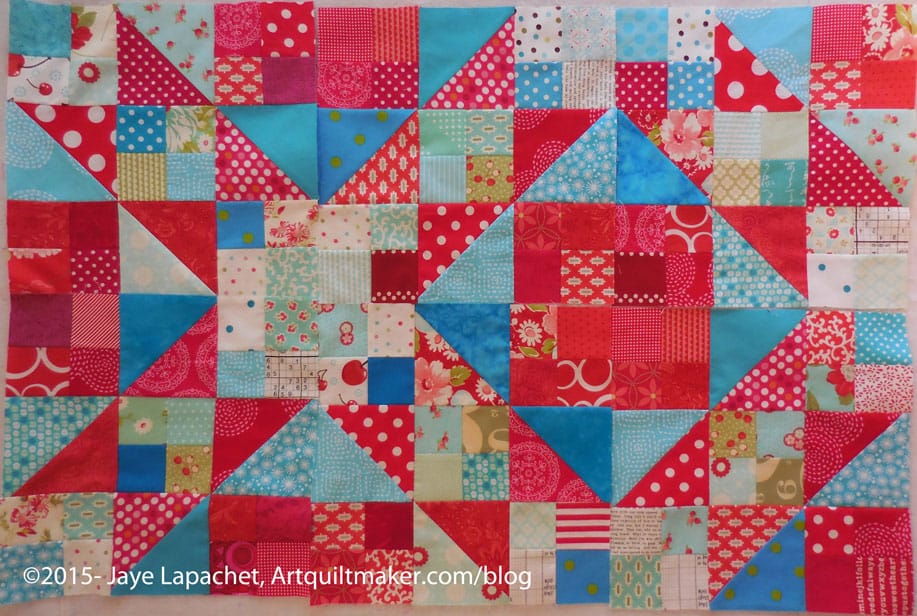
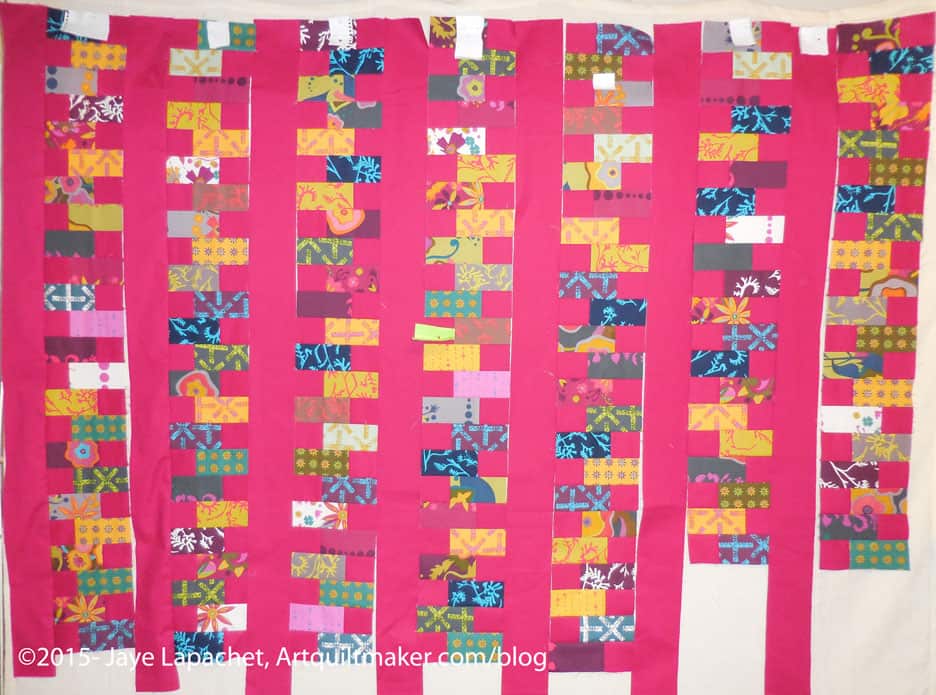
The ‘coins’ float, which is a little odd, but I kind of like the look.

I had a goal for Saturday to get the whole piece ready for the quilter. As I mentioned, I am taking two projects over and to take a third would be an added bonus.

Field Day Back Finished

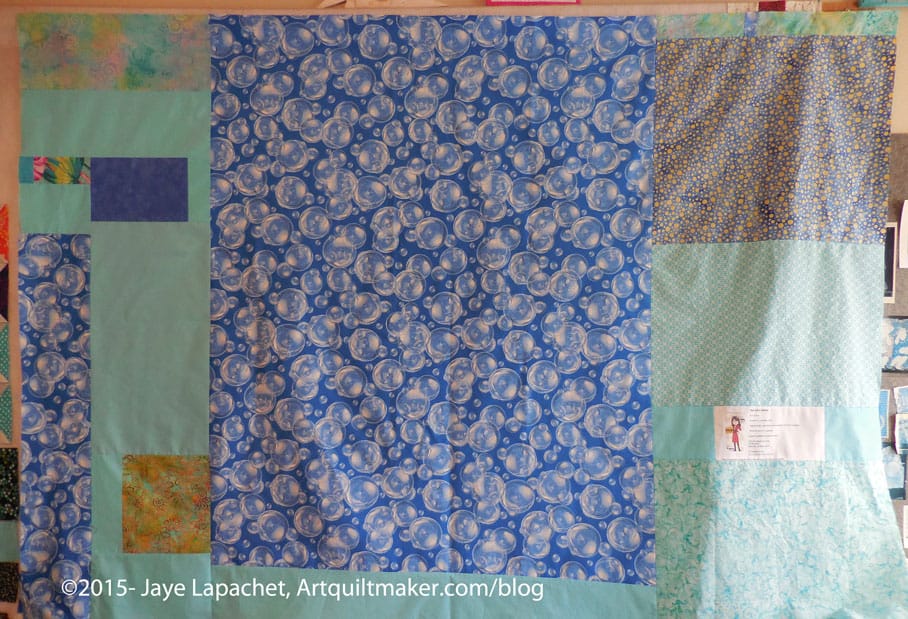
I was able to achieve my goal in the nick of time. We had plans with friends on Saturday evening so I only had about 3 hours to get the piece ready. The back, as usual took me a long time, even though I used a large piece and I used up some of the leftover fat quarters.

Now I can take the third, so BONUS!

Field Day Zipper Top Near…

Field Day Top Sans Borders

I finally almost finished the Field Day Zipper top. I thought this would be the end, but I decided after looking at what I have that I wanted to add a top and bottom border. Or borders, perhaps? Making visual decisions visually

It feels like the piecing  took forever. It didn’t really take forever, because the last post, which was probably the last time I worked on it, was just June 15.

I talked about the colors and how I was afraid they would be a struggle to work with. They were a struggle. This project turned into a struggle on a number of levels. As I suspected, the colors are a little more muted than colors with which I really enjoy working. Also, the pattern, which I LOVE was just a struggle to put together. You’d think that putting a bunch of squares and rectangles together would be easy. Normally, it is, but I think I must have cut some of the pieces off grain, because the entire top was a PITA to put together. It was rippling and I have been fighting the entire time to get it to bend to my will.

Also, something about the measurements was off. Perhaps I cut something wrong or who knows? The rows did not exactly line up. I am ok with it, but still annoyed.

You’ll probably see another post about this next week once I finish the whole thing.

Box Full of Letters Back

I finally feel like I made some real progress over the weekend. I finished 2 backs, 2 bindings and almost finished a top. I spent some time on Friday sewing, which I don’t normally do and that helped a lot.

Box Full of Letters Back

The first item I finished was the Box Full of Letters back. I pecked away at it for about a week, which made it seem like it took forever. That was a frustrating feeling, because the piece is not very big. I finally finished it on Friday and that was a good feeling!

I always try to use large pieces, but somehow I end up with some fiddly piecing. I resolve not to do it again, but there it is.

I also sewed around the edge of the top to stabilize it as there will be no border and made the binding. The whole package is ready to go to the quilter. Hooray!

Box Full of Letters Top - Finished
Box Full of Letters Top – Finished

Box Full of Letters Top FINISHED!!!

Box Full of Letters Top - Finished
Box Full of Letters Top – Finished

Yes! I finished something! Not much of something, but something. It is even vaguely Fourth of July related – in color at least.

The Box Full of Letters top is finished and I am really pleased with how it looks.

I wanted the envelopes to look like they were flying away and I think I achieved that look.

BFOL Top Layout

Layout - First Pass
Layout – First Pass

I finally had a large chunk of time to make some good progress on a few projects over the weekend. Yay!

I made really good progress on the Box Full of Letters top. I think I will have a top soon.

As I said before the straight layout of blocks was too boring and it felt too confined or compressed to me. I suppose the ‘modern’ movement is affecting me, because I wanted these little envelopes to breathe a bit as well. I hadn’t any idea what I was going to do with them until I started to put them up on the wall. I had seen a quilt where the blocks were arranged on the diagonal kind of like a rocket taking off.

Yes, I arranged the colors and fabrics as I went along, but not too much.

BFOL - almost done
BFOL – almost done

After I got all the blocks up on the wall in the arrangement above, I looked at them for awhile, moving a few around and trying to imagine the final effect. I decided to go for it and began sewing. I sewed for probably 10 hours on Saturday, which is what happens when I am sew-deprived and finally get some time. I thought I would finish the top on Sunday, but I didn’t quite. I only have a few seams left.

I am more pleased with this piece than I had been. After quilting, I think I will just put a binding on it and leave it without borders.

A Few More Stepping Stones

SS Block June 2015
SS Block June 2015

I thought it had been an eternity since I wrote about this project, but it turns out it has only been about 10 days. June has flown by at mach 10 so I can’t really keep track. Since that last post, I have made at least one more  block.

I am liking the blocks better, especially since I am able to see them all on the design wall together. They look ok separately, but the secondary design really explodes into wonderfulness when I put them all together.

I have about 7 blocks now and the urgency of laying them on the bed to see how many more blocks I need to make is becoming more urgent. Why I can’t grab the blocks and walk downstairs with them is a mystery.

6 Blocks Together
6 Blocks Together

The group of 6 blocks together looks really nice. (6 makes for a more even picture than 7.) I am glad I was strict with myself on the colors, because I think it is looking good. There is a rogue red patch, which I don’t understand, but I probably will just leave it.

As usual, despite the wide variety of fabrics, I still feel like I don’t have enough to make the piece look scrappy enough. I probably need to get over myself.


Flying Geese Again

Flying Geese June 2015

I have received more Flying Geese and I have made a few more as well. My last update was May 23 and this group doesn’t seem like enough, but it has to be. I am pretty sure I am not behind.

My geese have been a tough group to make. I am having problems with the measurements on the rulers I am using. I don’t know why the directions say to make the small squares one size and then the geese cannot be trimmed to the proper size. I was in a panic and a rush, so I sent them to TFQ anyway. I know she can handle the smaller seam allowance and I will make a few extras down the road.

Still, I am annoyed at the measurements.

Yes, I am cutting the squares larger now, but I have a whole bunch of squares that are just slightly too small. It is very irritating.

Attack of the ‘Progresses’

Field Day Top in process - June 2015
Field Day Top in process – June 2015

While I haven’t spent a lot of time at the machine, I seem to have made quite a large amount of progress. I would say that the Field Day top is almost done. I screamed through some piecing last Sunday (not the Sunday that just passed) and was shocked to see how much I had gotten done.

I have a couple of things to decide about this top:

  1. Do I sew top and bottom borders of the Sangria on this piece?
  2. Should I get some of the Goldenrod and put a thin border around the outside and then another border of Sangria?

The other problem is the last row. It was doubled up on top of row 7 and I don’t know if was intended to be row 8 or half of row 7? If it was to be half of row 7, then I added more coins where now it is much, much too long for a row. I may cut it in half to make row 7 long enough or add more to it and make the quilt wider.

If I make the piece wider, it is going to be a weird shape and I don’t know if I want to inflict that on someone.

Hey! Remember Me?

I haven’t posted about this Stepping Stones project since February, mostly because I haven’t really worked on it until recently. And ‘worked’ is a generous description of my efforts. I have been pushing red and turquoise through the machine as leaders and enders in between Field Day and the Food quilt.

Voila!

Stepping Stones June 2015

More blocks.

Progress. And so it goes.

I plan to be a little more precise as I make the blocks so I don’t end up with a weird shaped quilt. Sometime I’ll drag the already completed blocks downstairs and lay them out on the bed so see where I am. I haven’t done that yet, though. 8 blocks does not a quilt make, but they are large blocks and we have a small bed, so I don’t imagine I will have very many more center blocks to make.

I made these two top blocks as leaders and enders when I was working on the borders of the Food Quilt #2. The bottom one is, as you can clearly see, still in progress. I do take my time picking out the fabrics to include.

Improv Again

I don’t remember exactly when it was, last Friday, I think, but I had a brief window of time before I had to go do something else for someone. The grief at the implications of my BIL’s loss were starting to creep into my brain in the quiet and threatening to overwhelm me.

4 'A' Blocks
4 ‘A’ Blocks

I turned to the Improv pieces I had worked on at the workshop. They were sewn together as you see (left photo), but I wasn’t happy with them, so I unstitched them and began to rework them.

Tina’s idea (from Little Blue Cottage) is that there should be a lot of negative space in the center. Because I like the interplay of the strong pattern, I wanted the blacks and whites to act as the negative space and the red to act as the foreground.

This isn’t a terrible idea, but it wasn’t working with this layout. I looked at it a lot, trying to like it – or at least be okay with the center. The reality was that I didn’t like it. I wasn’t achieving anything near what I was imagining, thus the ripping.

Big, fat Improv
Big, fat Improv

The ripping really didn’t take long, but it did allow my mind time to wander, which is not what I wanted. After ripping, I began adding more neutrals to the ‘legs’. The photo (right) is what the pieces look like right now. I have not sewn the four blocks together yet. I haven’t decided if I am done with the ‘A’ blocks yet.

I think I will definitely add some more red to the outside. I also think that a few more neutrals is in order. It needs to sit a bit.

Windowframe layout
Windowframe layout

I wandered around it for awhile and then began to wonder whether I should reverse the blocks and arrange them the way Tina intended the pattern to be arranged. I think the neutral part of the blocks look too skinny again when arranged with the red in the middle. It isn’t terrible, though.

I think the ultimate path is to make some of the ‘B’ blocks and see what happens once I have more to look at.


Food Quilt #2 Top

I had the class and so much stuff to catch up on over the weekend that I didn’t have a lot of time to sew. I decided that I wanted to make progress on something. Not just a few blocks, but some real progress.

Food Quilt.

I knew I could make progress on it because I was pretty close to having the top done after the retreat.

Food Quilt #2 Top - June 2015
Food Quilt #2 Top – June 2015

I got on it and the top is together with borders, though it took me a few hours on Monday to get the whole top done, but next stop: Food Quilt back.

The holdup at the retreat was that I forgot black to use for borders. I had plenty of black at home, so I waited until this week to do it.

After putting on the black inner border and the piano key food border, I decided I wanted a black border on the outside to contain all that food. I am pleased with the way it came out.

Food Quilt Holders
Food Quilt Holders

I caught a quick glimpse of the boys as they prepared to be quilt holders for me. This is what it looks like when they are acting as my quilt holders. I have learned just to wait for them to play around. It is fun to watch. I mean, you have to have fun in normal life, right?

You might remember that  made a Food Quilt for the Young Man. This is a graduation gift for the Young Man’s friend. I kind of like the idea of them having similar quilts. It is like there will be a connection through these quilts. Sentimental, I know. It won’t be finished for his graduation, but I can send it to him at college and he can see the top.

Quilt Inspiration (30 Something)

This is like a bonus week. I keep thinking that it should be June already, but Memorial Day weekend was so early and the week preceding Memorial Day was so crazy that normal life barely registered. So BONUS!

American Patchwork & Quilting magazine

I saw this quilt on a magazine I bought (**Disclaimer: yes, I bought this willingly and with my own money, it is not a review copy). It is called 30 Something (Thirty Something???) I LOVE this quilt on the front and have to put it in my queue to make. I like the different shapes and the way the pieces are set and then make the blocks.

I wouldn’t make in those soft 1930s fabrics, but I would make it scrappy. I am still thrilled with the bright scraps and dots I used for Scrapitude. I think I would use my bright scraps again.

It is so odd when a quilt grabs my attention like this one did. I can look at 100 quilts, yawn and move on, but then one grabs me and I can’t get it out of my head. It isn’t even the fabrics that I like. How can I look at this quilt and imagine it in brights and dots? I look at other quilt projects on magazines and can’t imagine them made any other way–with any other fabric. This quilt is different.

The brain is very odd.

What do you think?

thirty Something quilt

Going for Broke with Peacocks

Enchanted Plume panel by Timeless Treasures

I decided to make the peacock One Block Wonder project. I was really on the fence, as you may have gathered from my previous posts, about making it. I talked about some of my concerns in the last post and had decided not to make it. Things change.

There were a couple of things that made me decide to do it. 1) I was able to find the Timeless Treasure panel on a website. 2) I saw Maureen’s blocks and 3) I really like the colors in this panel.

I was easily able to buy the panel from Miller’s Dry Goods, which I found unexpectedly after doing a simple Google search. The line is fairly new so I wasn’t expecting that it would be available yet. I am still interested in the group of solids shown with the panel, but they are not as important. I think they might make a good addition to the quilt, but I don’t know what the final quilt will look like, which means I don’t know how they would fit in so we’ll have to see.

Maureen read one of my previous posts and brought her One Block Wonder blocks, as well as a piece of the original fabric to show me at the retreat. I didn’t even know she had worked on a One Block Wonder and was very pleased to see what she had done. Pam’s class using a panel seems very different from using fabric, but there are quite a few similarities as well. I was pleased to see how different Maureen’s blocks looked from each other and she confirmed that it is fairly easy to avoid ending up with the same blocks, which adds to the variety of the quilt. We encouraged her to work on her OBW quilt, but she worked on other projects. I would love to see what she does with those blocks.

I do like the colors of the panel. There is no cream, as there was in the other yardage I considered, which is a bonus. I am annoyed at cream backgrounds lately. They look dirty to me.

Maureen assured me, as did looking at her blocks, that the black would not overwhelm the piece. There is plenty of blue, especially turquoise (!!!), in the panel as well.

This is a limited collection for Timeless Treasures and I only bought the panel. If it doesn’t work out, the effort will make a great donation quilt.

Field Day Update

Field Day Post Retreat

The Field Day Zipper takes on a new view once it is on the design wall. So does my workroom. I need to get this piece sewn together and OFF the wall as it really sucks the light out of an, otherwise, fairly bright room.

This is such a weird concept to me and I spent some timing thinking about it. No, it is not directly related to the making of this piece, but it affects my work in general.

First, sadly, my workroom is still life sucking beige. (Why is a question for a long evening and a bottle of your favorite libation.) The ugly and light sucking nature of the color, if you can call life sucking beige a color, means that all the other colors I work with in that room look different. Also the light has to work a lot harder and I have to be careful to move bits of the projects to other parts of the house. It isn’t a perfect system, but it is working to a certain extent.

Anyway, I still have not put up my new design wall, but I did put FDZ up on the smaller design wall (~4.5′ x 7′). It doesn’t all fit as you saw in Design Wall Monday, but it will fit better once I sew some more of the parts together.

The other thing, unrelated to color, about this project is that seam allowance is affecting the size more than I anticipated. When I laid the piece out, the strips of Sangria were roughly equivalent to the ‘coin’ segments. As I began sewing the coins together into vertical strips, I lost many inches. I added a couple of coins to the first couple of rows to see what would happen and how many coins I would need. I could just cut off the solid strips, but I want the piece to be the length of the Sangria strips. I am going to sew more of the vertical strips together and then see what I need to do.

I am desperate to get back to this project — or really any project. I haven’t been able to sew at all in the past week and am feeling the effects.

Flying Geese Exchange Update

Flying Geese - Mid May 2015
Flying Geese – Mid May 2015

Before I revamped my design wall, I reorganized the Flying Geese from my exchange with TFQ and took a good picture of them.

Yes, the mistakes are still in there, but they won’t be on the front of the finished piece.

It is kind of fun to see how bright and cheerful they are. Even the grey does not make the group look depressing.

Looking at them this way makes me see all the red and pinky-red I, especially, have used. I think I need to work with some cool colors for awhile.

Looking at them also made me want to sew them together instantly. I don’t have enough to make anything (and I had no time), so I refrained. Still, I think the end product will be one I enjoy when I do sew them together, whenever that is.