Something Just Wasn’t Right

I know I said that I finished the back of Thoughts on Dots last weekend (weekend before???), but something kept bothering the back of my mind. I keept looking at the back and finally decided that the beige pieces on the inside needed to be on the outside, so I would not have to cut through the piecing that I did on the label when I trimmed the quilt after quilting.

Initially I thought I would unpick the beige piece next to the label (above) and sew it on the outside, but St. JCN suggested that I just cut it and then sew it back on as it would take less time. She, of course, was correct. It was easier, but I had to fill in the edge of one side as it was uneven. That took a bit of time, but eventually I got it done. After a brief worry about the back being way too big for the top and which meant facing cutting the piecing after quilting anyway, I finished the back both IRL and in my mind. This means that that mentally I can move on to the back for the Nosegay.


Bottom right (but photo is oriented sideways)


Bottom left (but, again, photo is oriented sideways)


Top left


Top right

The quilt is too big for the room, so I couldn’t lay the whole thing out, but, hopefully, you get the idea.

Nearly Done! HOORAY!!!!

In between many other tasks related to house, children and work, I am thrilled to say that I have finished the back of Thoughts on Dots. I really buckled down and took every spare moment to work on it. HOORAY!!!!!!

The back is even larger than the top, which made it harder to photograph, but here is an image anyway.

The squares are the reject dot squares which I did not use in the top. The lavendar and beige square in your upper right hand corner is the label. I decided to use the beige for three reasons:
1) I did not want to piece together 100 FQs of dots;
2) I had large-ish pieces of beige (bought them at a time when I thought I might use them as backgrounds); and
3) I decided I did not want to take away from the front. I wanted it to be clear that the front was the main showcase.

I did piece the back, because I have a enough fabric to do so and because I wanted it to be unique. I do see the attraction of buying 107″ wide fabric and just sewing one seam to make the back, however.


Above is a detail of the top of the back.

Above are a couple of details of the other side of the top including the label. Take the term “detail” with a grain of salt!

I made the label by creating a Word document and then print the ‘document’ on fabric.


Above shows the only problem. I think that I may have to take off the beige piece on which I have drawn a line, because it is too wide. I think it would work better if I put it on the outside. That way, I can trim the back after it gets quilted. I don’t want to hack of part of the block that has the label in it or any of the squares. I know it is just the back, but I still want it to look good. I don’t remember right at the moment whether I pieced that beige as all one piece or if I will have to unsew multiple pieces.

And finally, below, here is a better (not great, but better) image of Thoughts on Dots:
Part of the day’s chores involved moving furniture form one room to another. While my workroom does not look fantastic and I lost some shelf space, I do have floor space, once again. YAY! I was able spread the quilt top out on the floor. It nearly fits. Unfortunately, I didn’t actually fit in the room so the image is still a bit wonky. Hopefully, however, faithful readers, you get a beter idea of how cheerful it is.

The Center is Not the Center

It occurred to me this morning that I seem to be working with patterns that create not obvious secondary patterns. Spiky Stars was the first (that I can identify), the Pineapple and now the Cross Block.


In Spiky Stars, the center of the blocks seems to be where the X of color is. Perhaps, in and artistic sense it is. However, in a technical sense (making the block), where the legs of two colors join is the center of the block. See below:

I have made an effort to outline the block in PSP, but Deirdre and DebR are more proficient, but you will get the idea.

The Pineapples are the same way.

It is a little difficult to see the secondary pattern at this point in the process. It is not the black square, which is actually the center of the block. The secondary pattern will become dominant as I make more blocks and as I put the corners on each block.

And now the Cross Block:

I wonder if this phenomenon has some deep subconscious psychological meaning or if it is a message from the depths of my mind? I think I am just trying to create interest. Worth pondering, I suppose.

Quiltmaking is a Journey Not a Destination


I found this quilt somewhere, drafted the block and am now trying to decide if there is a color layout scheme that I prefer. I don’t remember where I saw the quilt, which is a shame because I would like to document it better than “I don’t remember.”

There are two color layouts for the Cross Block quilt that appeal to me:

I like this one because the circles really stand out and you can really see the fabric. I don’t like the way I would have to plan out a bunch of the fabrics in advance (like Spiky Stars, which worked out well in the end). The other thing that bothers me is the half blocks on the edge. On one hand, they look unfinished. On the other hand they could comprise a self bordering technique border, again like Spiky Stars, that is so effective.


In the option above, the blocks would be a lot easier to piece. The crosses really stand out, which is nice, in a way. It looks a lot less interesting than the one above…a lot more regular.

So, does this count as another project or a way to get some more sewing done when I am not at the machine? Quiltmaking is a journey and not a destination, so does it matter?

The Pineapples Progress

I have made some progress on the Pineapples. I am working on them in between everything else so I don’t feel guilty about starting a new project. Yeah, yeah, I know guilt is not productive. Above is the first bits of the second two blocks.

I have made more progress on the second two blocks. I am about 3 rows away from finishing. One thing I did differently in the last few rows is add new backgrounds. the size and spacing are different from the background fabrics I have been using. We will see how they turn out and if you think they scream “INAPPROPRIATE.”

I also added some fabrics with smaller dots. In these photos they look like tone-on-tones. We will see if I use them again.

First two Pineapple Blocks Finished

Learning to do something new makes the first two blocks or parts of a project practice. For this project, and, yes, it is now on the project list, I am pretty pleased with these two blocks. The blocks are fairly flat, there is no paper to rip or muslin to quilt through.

I spent some time yesterday putting the last two rows on as well as the corners. I may have to remove the corners and put others on, as they need to be a bit bigger, but we will see.

I am very pleased with how the fabrics look together.

I am still cutting strips, which is a drag, but I will be happy when I have piece of all of my dots cut.

Pineapple Class Review

The class was great.

I had enough dots, but could have used more.

The Pineapple Ruler is totally worth the money.

The above photo shows how to place the ruler to cut the pieces. No foundation.

Here are the blocks that I made:


This is how my one block looked after a couple of rows.

This is how my two blocks look now. I have two more rounds to go: I have to put some strips on the corners and one triangle on each corner then each block is done. I should have cut the strips in advance, so I would have had more sewing time, but I didn’t have the time, so the point is moot.


This is the teacher’s, Katrina Lampken, quilt. She did a nice job teaching. She a little background on the Pineapple block. She talked about different ways of making it and why she liked this method. Then we got started. She was able to answer all of the questions. She was really mild mannered, but go her point across. It was a great day.

These are some of the other student’s work:


Sue

Barbara from San Ramon (we were dot sisters)

Laura worked with gradations

Make Visual Decisions Visually: Serendipity Puzzle

That is a quote (without the Serendipity Puzzle part) from Lorraine Torrence. It is a great ‘rule’ to remember, at least for me. I find that the picture in my mind’s eye often looks better in my mind’s eye.

To that end, I cut some sashing pieces to try and figure out if I was on the right track.


This example was my original idea for the sashing. I am not fond of it, but it is also not terrible. It looks busy and is not restful. Not sure if this quilt can be considered restful in general, but I certainly don’t want to add to the excitement. I may have to sew some pieces together to make sure this is not the right sashing design before I decide.


To me, this screams “look at the cross.” I think the contrast between the light background and dark sashing does not add to the overall design.


Think, so far, this is the best, which surprised me. It gives some space to each block so you can see the design and alleviates some of the busy-ness. I would put pieces of the three different lights instead of just the blue on white.

What is the Difference?

I experimented with pressing on two of the blocks. One I pressed towards the white (example: top) and one I pressed towards the color (example: bottom). I think it is hard to tell the difference online, but in person, if you look, you can tell that the color pops forward more on the bottom one. Ruth McDowell talks about this in her classes and her Piecing book. I don’t think it is relevant for this piece, but it is an interesting exercise.

Real Progress on Thoughts on Dots

After the CQFA meeting today, I came home, eschewed the work nagging in the back of my mind and worked on Thoughts on Dots. Earlier this week, I started to sew the squares into pairs. Today I kept on sewing – four patches, groups of two four patches until I was finished with the main part.

Above: The main part nearly sewn. The big problem I had was that the squares were not the same size. Part of it could be the ruler that I used at St. JCN’s. However, St. JCN said that the fabric was stretching as it went through the feed dogs. It was getting really bad as sewed the four patches together. Finally, I decided to take a page out of St. JCN’s book and trim the squares. Nobody will sue me for changing the size of the blocks. I changed my rotary blade and very carefully measured and trimmed the 4 patches. The larger pieces went together better after that, but I noticed as the same pieces went through the sewing machine a third or fourth time that they started to stretch again. While it is possible that my feeding of the pieces through the machine or my pressing had something to do with the stretching, I doubt it as I was trying hard to be very careful.

This is the second time that I am doubting my machine. I guess I need to take it in for a service. I can use the Gem while the 9K is on vacation, but I think it is time for me to really consider a new machine. 10 years is long enough for one machine and it has seen some hard use.

Above: Detail of the main part nearly sewn together.


Above: Finally, I got the entire main section done. I call it the main section, because I need to piece the entire top in sections. Since I plan for this piece to be a cuddle quilt, I think it will be relatively large. My design wall isn’t big enough to do the whole piece at once. Pay attention to the bottom two rows, which are still unsewn in this picture.

The above photo shows the former bottom two rows at the top of the quilt. They will still be on the bottom of the top section (far above photos), but on top of this new section, which is shown directly above. These are new squares that I threw up on the design so I could arrange the bottom part. The rule is that I am not allowed to move the top two rows as they have to coordinate with both the section above and the section below. I know they coordinate with the section above as they are, but since I can no longer see that section, I have to leave them as is to ensure I don’t make any egregious color errors.

I didn’t think I would make changes right away, but even before I got all the squares up on the wall, I began moving squares away from their fellows of the same color and removing squares that were too dull or didn’t look right. The immediate problem is that the colors in this section seem darker to me. I think I will have to remove some of the darker colors and put in more pink, add some more of the fabrics with the white backgrounds in order to make it more sherbet-y.

There are colors/fabrics that I like, but may not make it into the final piece. One example is the blue 60s dot (left hand side 3rd from the bottom, two from the left.)

I like the weird spiral dot smack in the middle, but it may be too different to include on the front of this piece.

On the back, I may make columns of the leftover squares and alternate them with plain rows – like a row quilt. It would be good not to let those already cut squares go to waste.

I was thinking about binding today and may add a thin rectangular border of various fabrics and pull it to the back rather than making a regular binding. We will see.

No Need for Geranium Dishsoap Today!!!

The sun out and the sky is blue. It is still long-sleeve cool, but the sun being out makes all the difference in my mood. This is the second day! Is the rain gone? I don’t think so, but perhaps we will get a few days of spring before the descent into fogbound summer. Whatever the weather drama, I am determined to be grateful for the sun we get and appreciate it while it is here. If it rains tomorrow, so what? It is sunny now! YAY!

I look out for eyes wherever I go for Pamelala. This one was found in the Starbuck’s right in my neighborhood!. I don’t why I never saw it before. I go to that Starbuck’s at least twice a month. I saw it and then had it on my to do list for, what seemed like, months to go back and photograph the eye. I finally did yesterday. It is a nice eye and I like the way it is in the teapot.

This is the arrangement that I laid out, serendipitiously, before the three additional blocks were added. I was thinking that I would need to do something more interesting than a 4×4 or 5×5 square arrangment. This layout just put itself up on the wall. I would fill in the blanks needed to make the thing square with blank blocks. I refuse to make a weird shaped quilt to give to someone. I don’t think I will need this arrangement now as SLB is taking some of the blank leftover blocks down to SoCal to have other people decorate at another shower. We’ll see how they end up before I decide.

Another Little Exercise in Color/Pattern Arrangement

I got these squares from Hancock’s of Paducah. They are the fabrics which comprise Moda’s Poetry Collection by April Cornell. Again, I liked the fabrics, but they are the kind of fabrics that might just sit in my palette if I bought any yardage. Thus, the squares provided a good solution for me to work with the fabrics on a limited basis.

I have been having fun rearranging them. There is a wide variety, but the patterns on the fabric are the same. There are just different colorways. As a result it has been challenging. I don’t want all the same colors together, nor do I want all the same patterns next to each other. I would like the various patterns and colors spaced evenly and pleasingly over the piece. If I am not there yet, I am close.

Another challenge is that there are a couple of prints that stand out if they are near each other, like the dots (of which I did buy yardage). These patterns demand to be far from each other. If not, they scream “what moron put us so close together?” and they produce a lot of grumbling. There are also motifs which are different, but very similar in scale. This means that, from far away, I am looking at two fabrics in four colorways that look the same. I don’t think I can avoid having some of them together and my only option is to make sure that the colorways next to each other provide as much contrast as possible within the limits of the fabric group.

One reason, I like doing this sort of work is that it is easy. I don’t have to cut or press until I sew. I can arrange and rearrange forever with very little physical energy, yet there are some rules. Granted they are self-imposed, but all puzzles have rules. Also, it seems like it is good for my brain. I feel as though my brain is working when I am rearranging.

Once this one is sewed together, I will have three squares pieces. I haven’t the foggiest of what I will do with them. I still think table runners are in my future, but we will see. If nothing else, they will be good machine quilting practice.

BTW, Pamelala has a blog. It doesn’t look like she updates it very often, but the art she has up there is great! Her assemblage art is fantastic. She isn’t doing it anymore, so grab a piece while you can, especially since she is becoming famous for her quilts now.

Mr. B’s Rectangles et al.

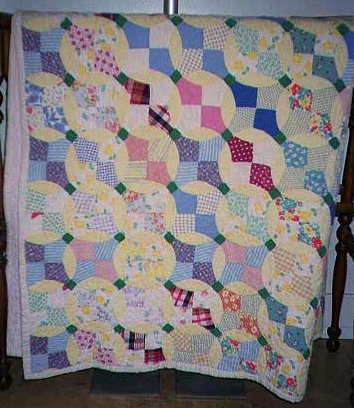
In the post about Sewing Accomplishments, I talked about some squares that I sewed together. They were, as I mentioned, a pack of squares from the Benartex squares club.

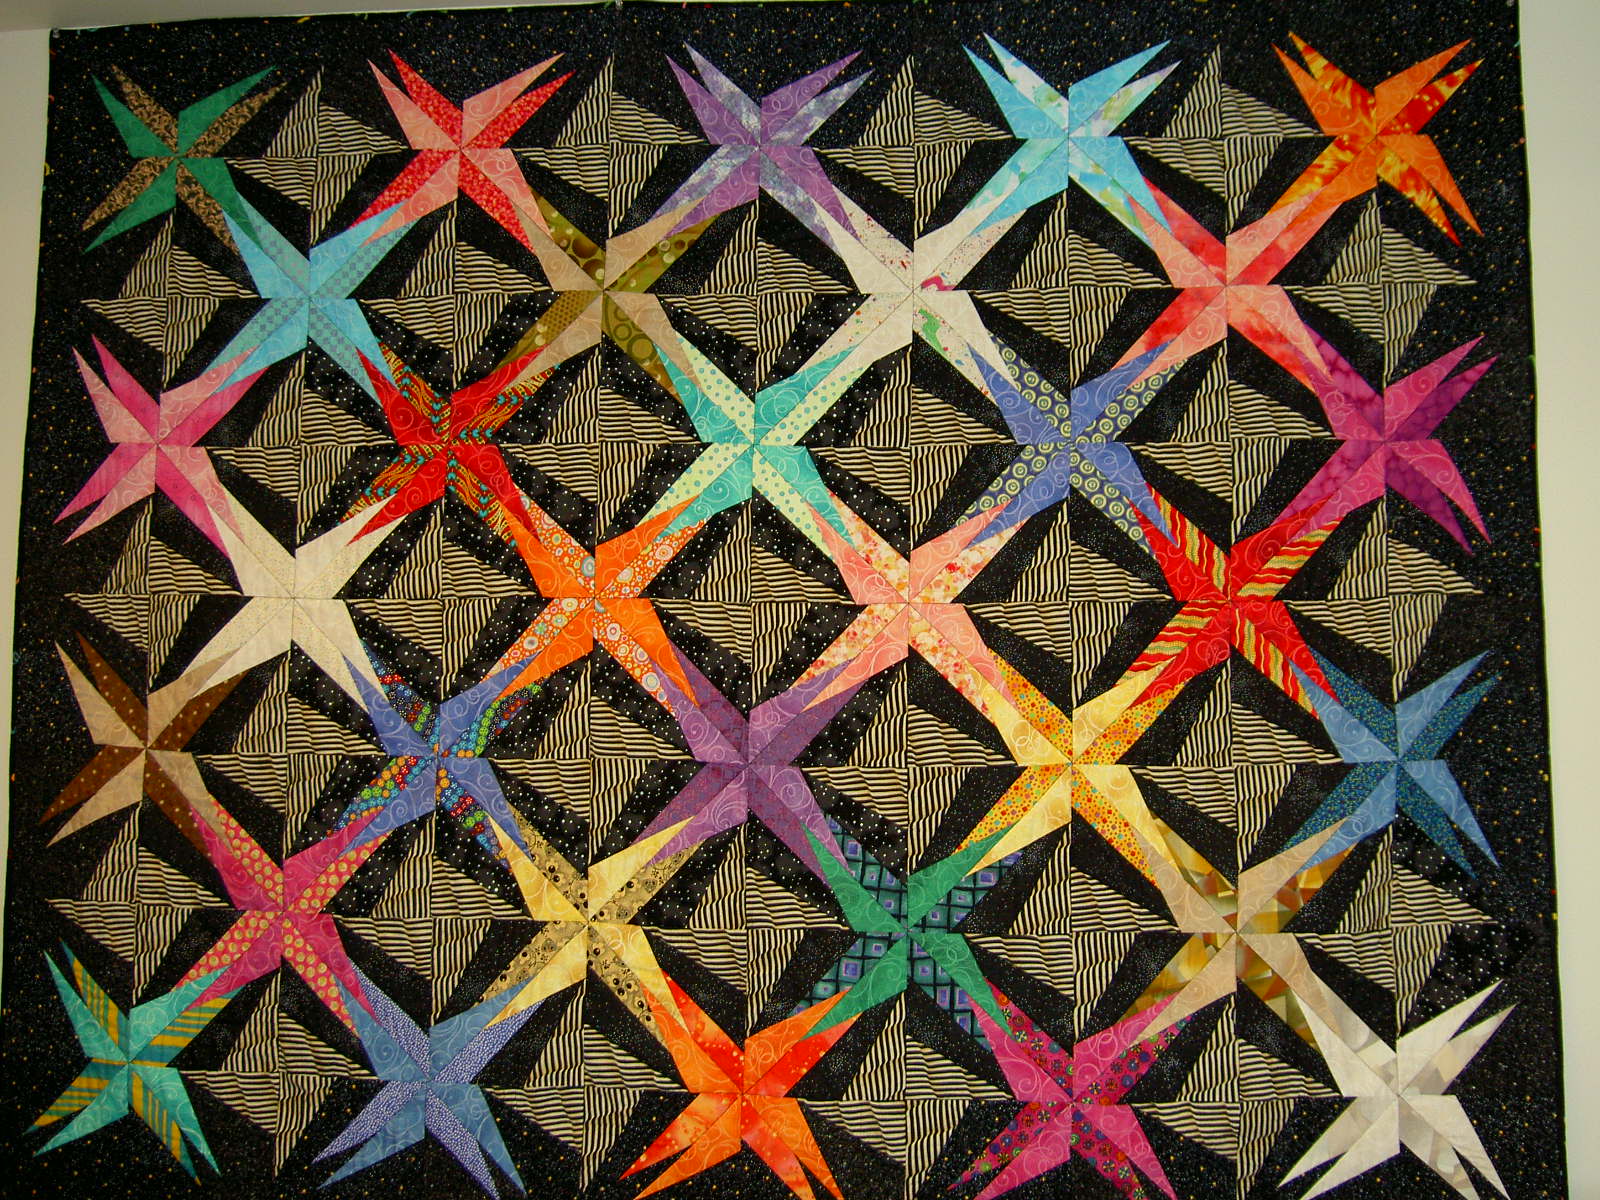
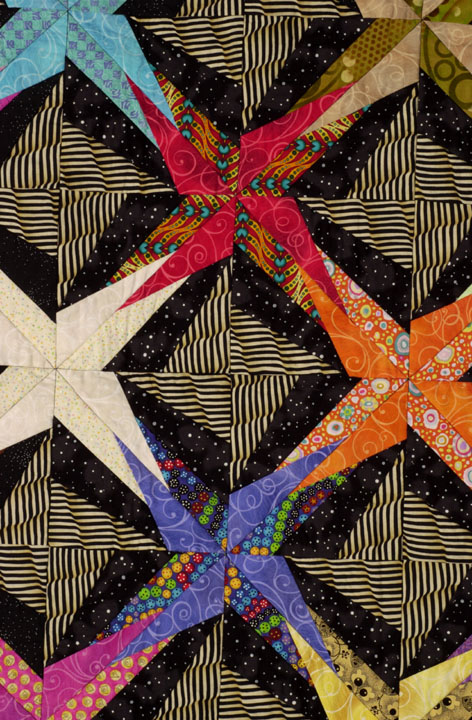
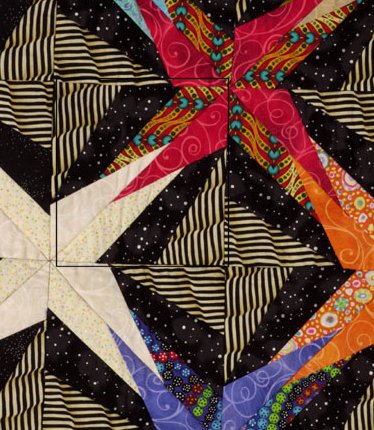
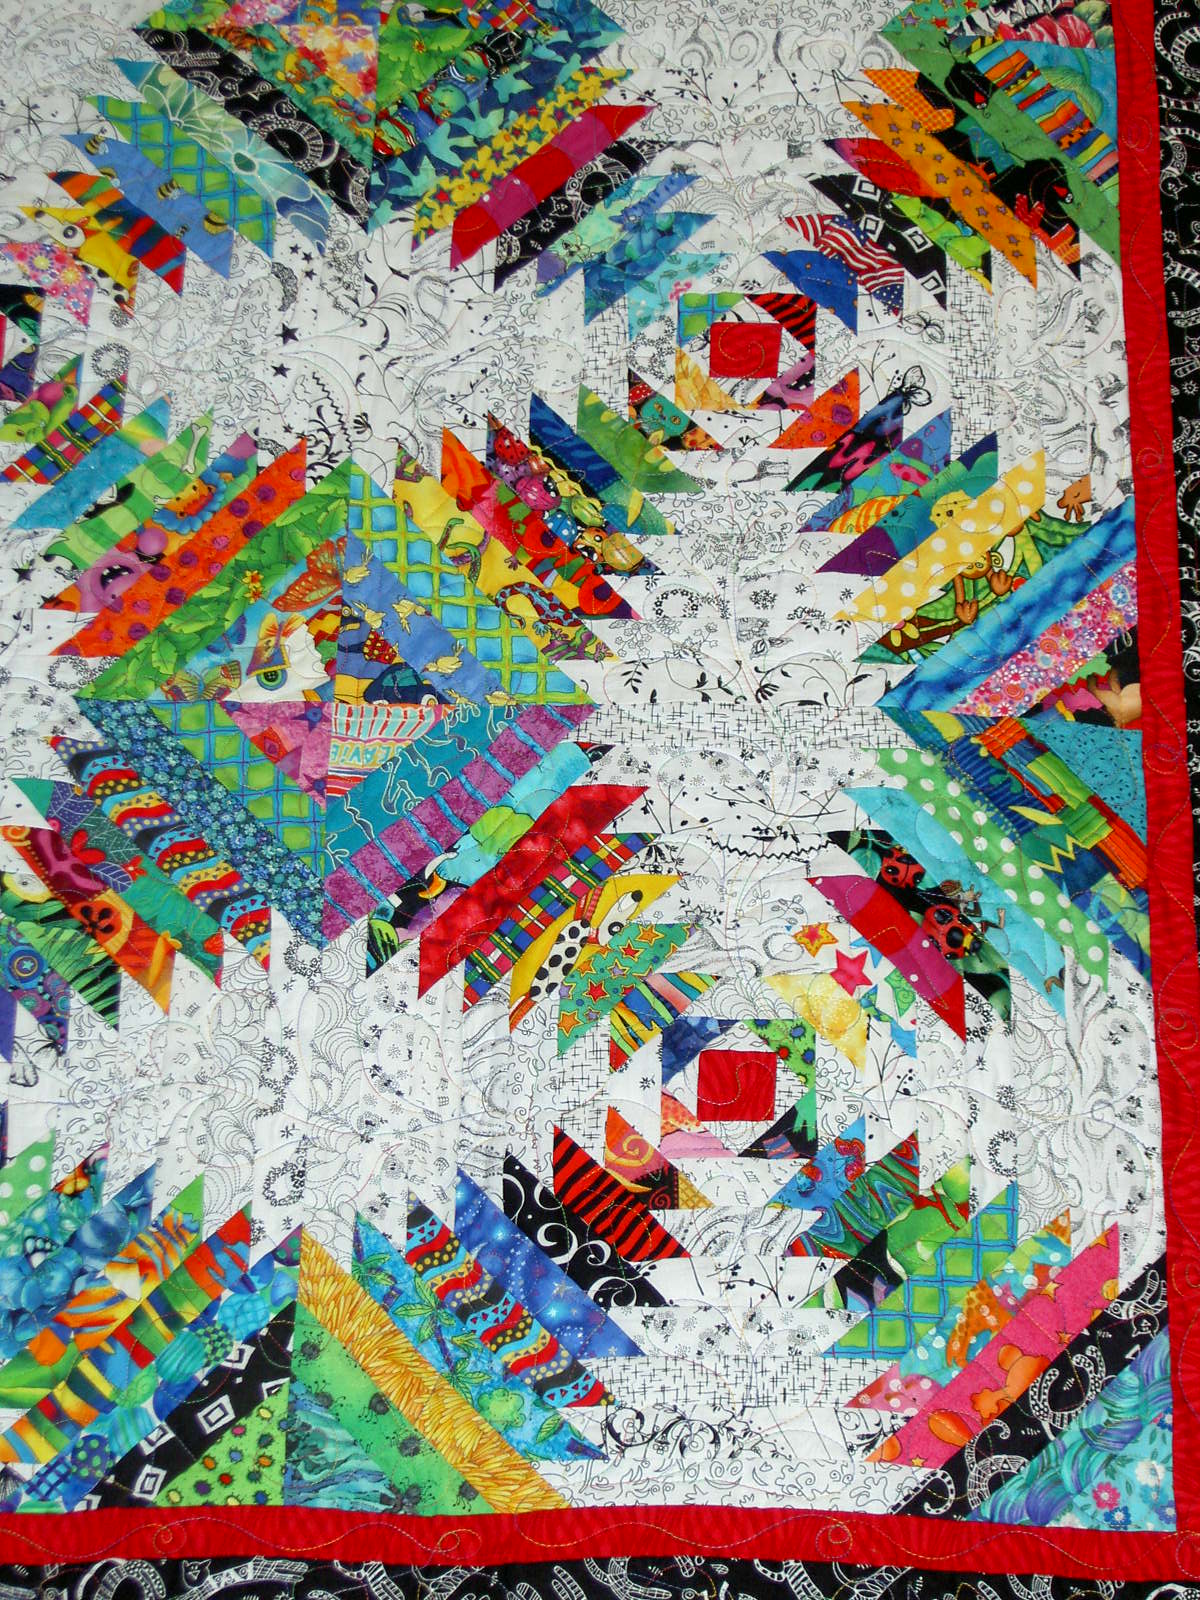
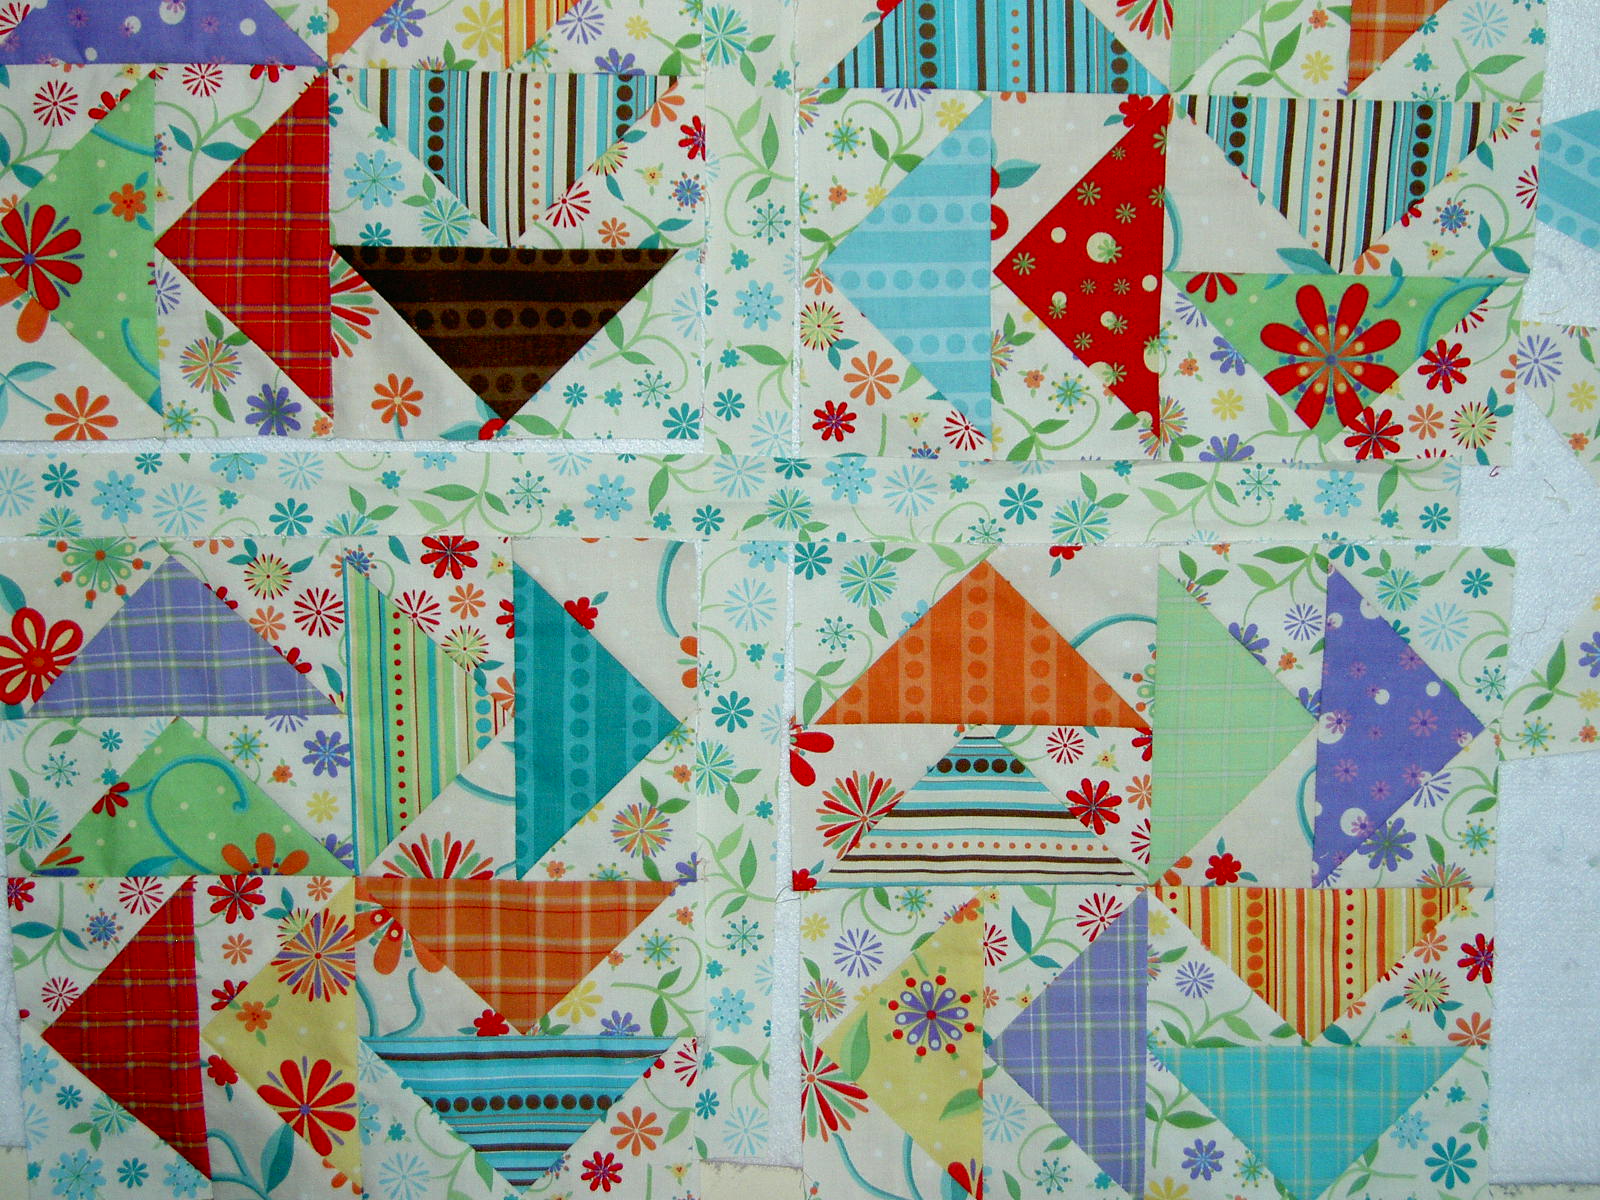
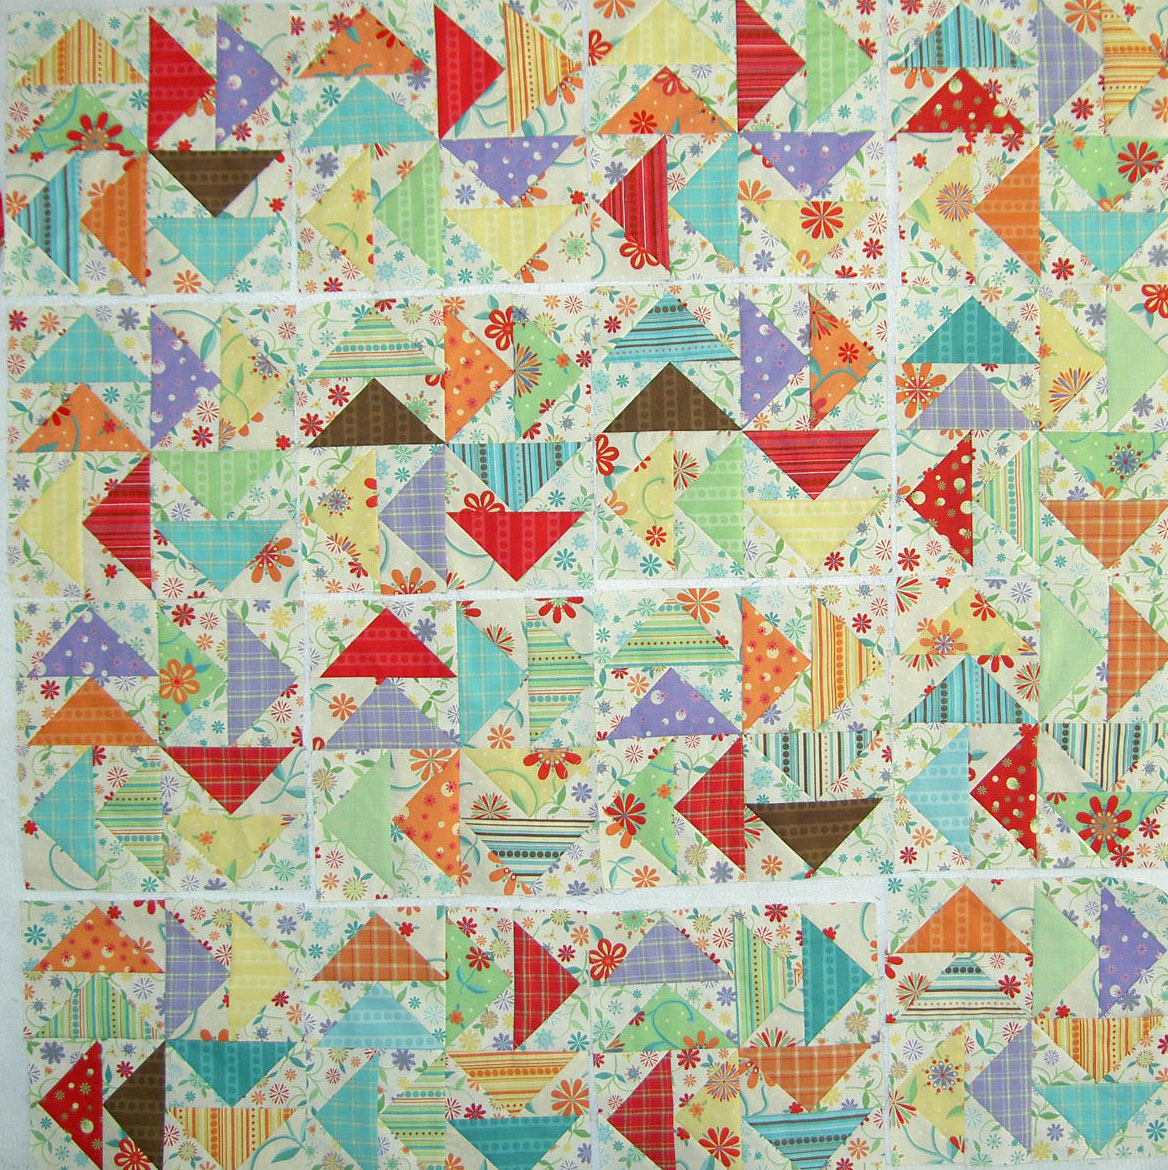
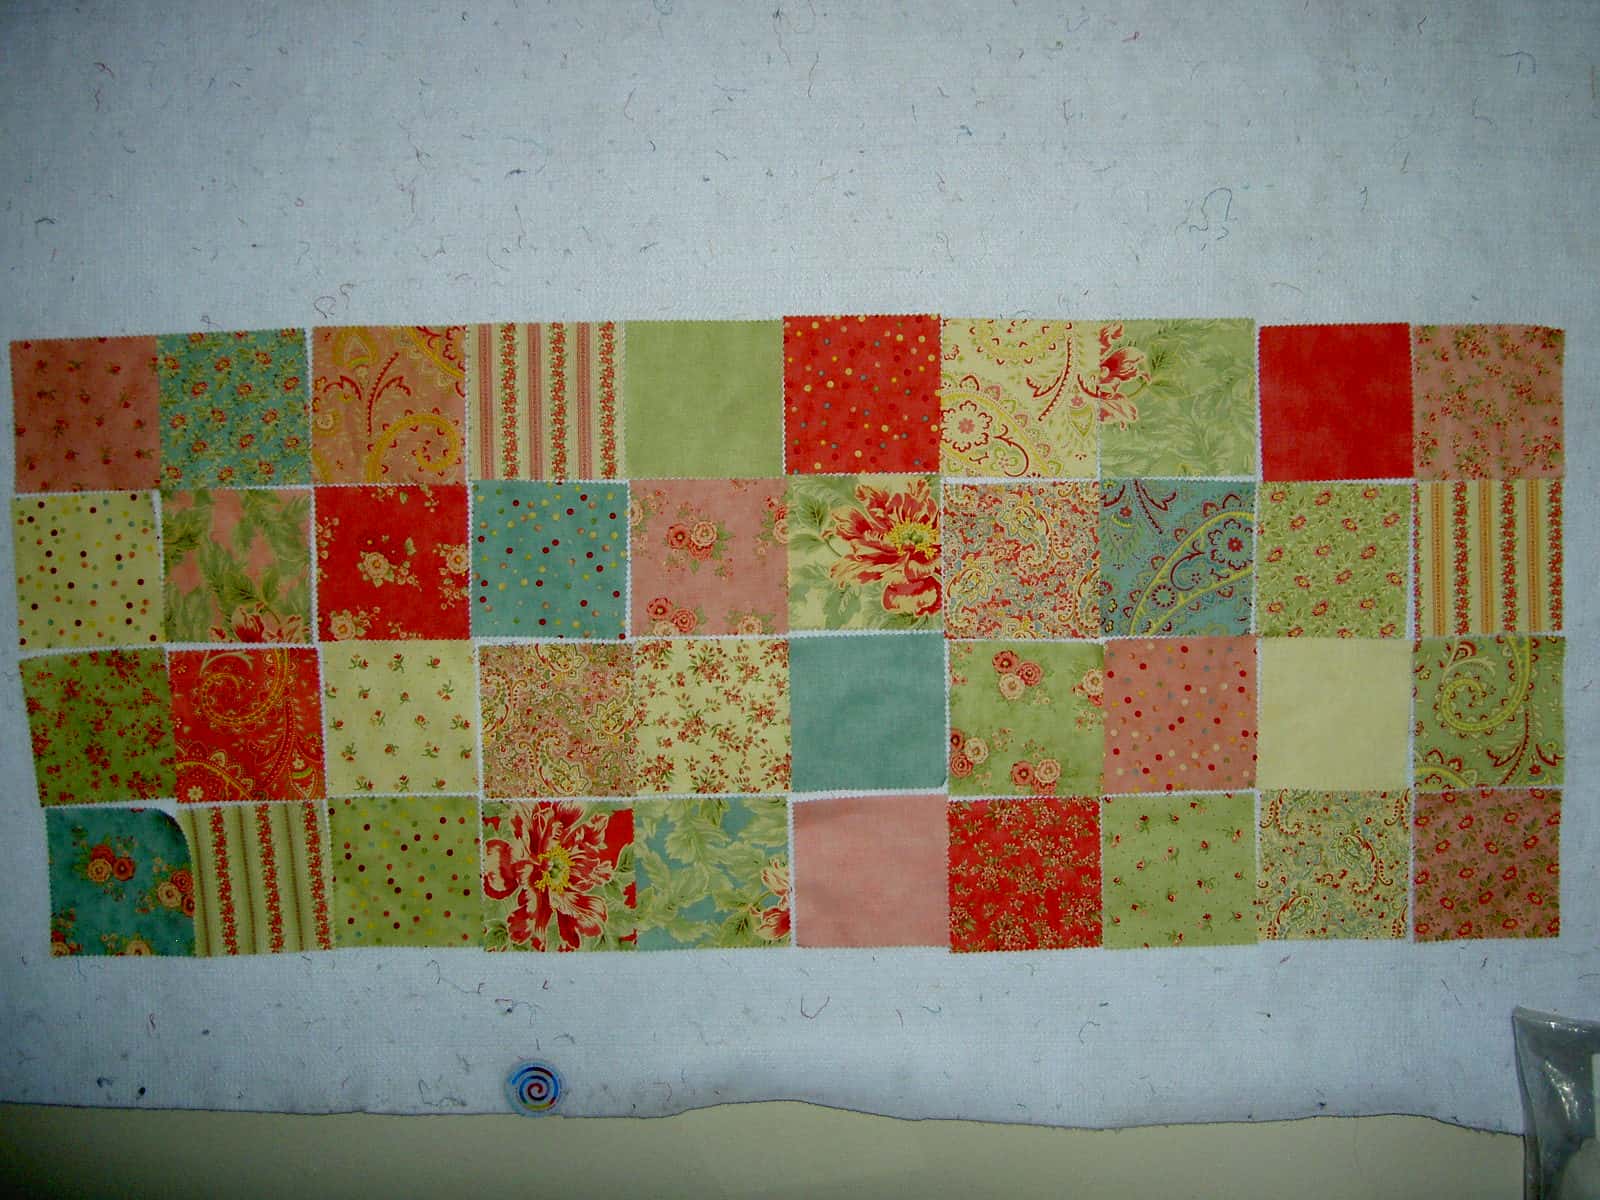
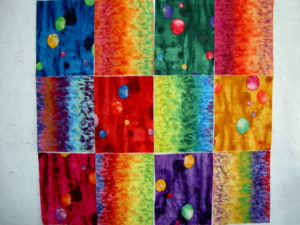
I got a different set of rectangles sometime previously, which I found Friday in the pile of the great unwashed (fabric). I washed them along with other fabrics and just sewed them together today. (Photo is prior to sewing them, but I used the same arrangement).

I probably wouldn’t use these types of fabrics, so this was a good solution. I thought that it might be a good beginning for a quilt for one of the older nieces or nephews, but it is an odd shape and those children are so large now that they are adults (or approaching adulthood) that I am not sure what would look good with it. I am not a tie-dye sort of person, so don’t think that I have much that would go with the fabrics. I do have many tone-on-tones, so I may be able to find something. I took down the piece after sewing the squares together and will let it percolate for awhile. In this case, sewing the squares together was a way of getting pieces that were really too small for anything else to cease being annoyingly in my way.

This squares thing is very interesting to me. It satisfies a need in me to see an entire line of fabric, yet doesn’t make a big investment in fabric that I probably wouldn’t use in large quantities. I do have an appreciation for most types and colors of fabrics (though baby poop brown still proves to be difficult), but I don’t usually want them all in large quantities…. or any quantities for that matter. This means that the fabric squares are a good choice.

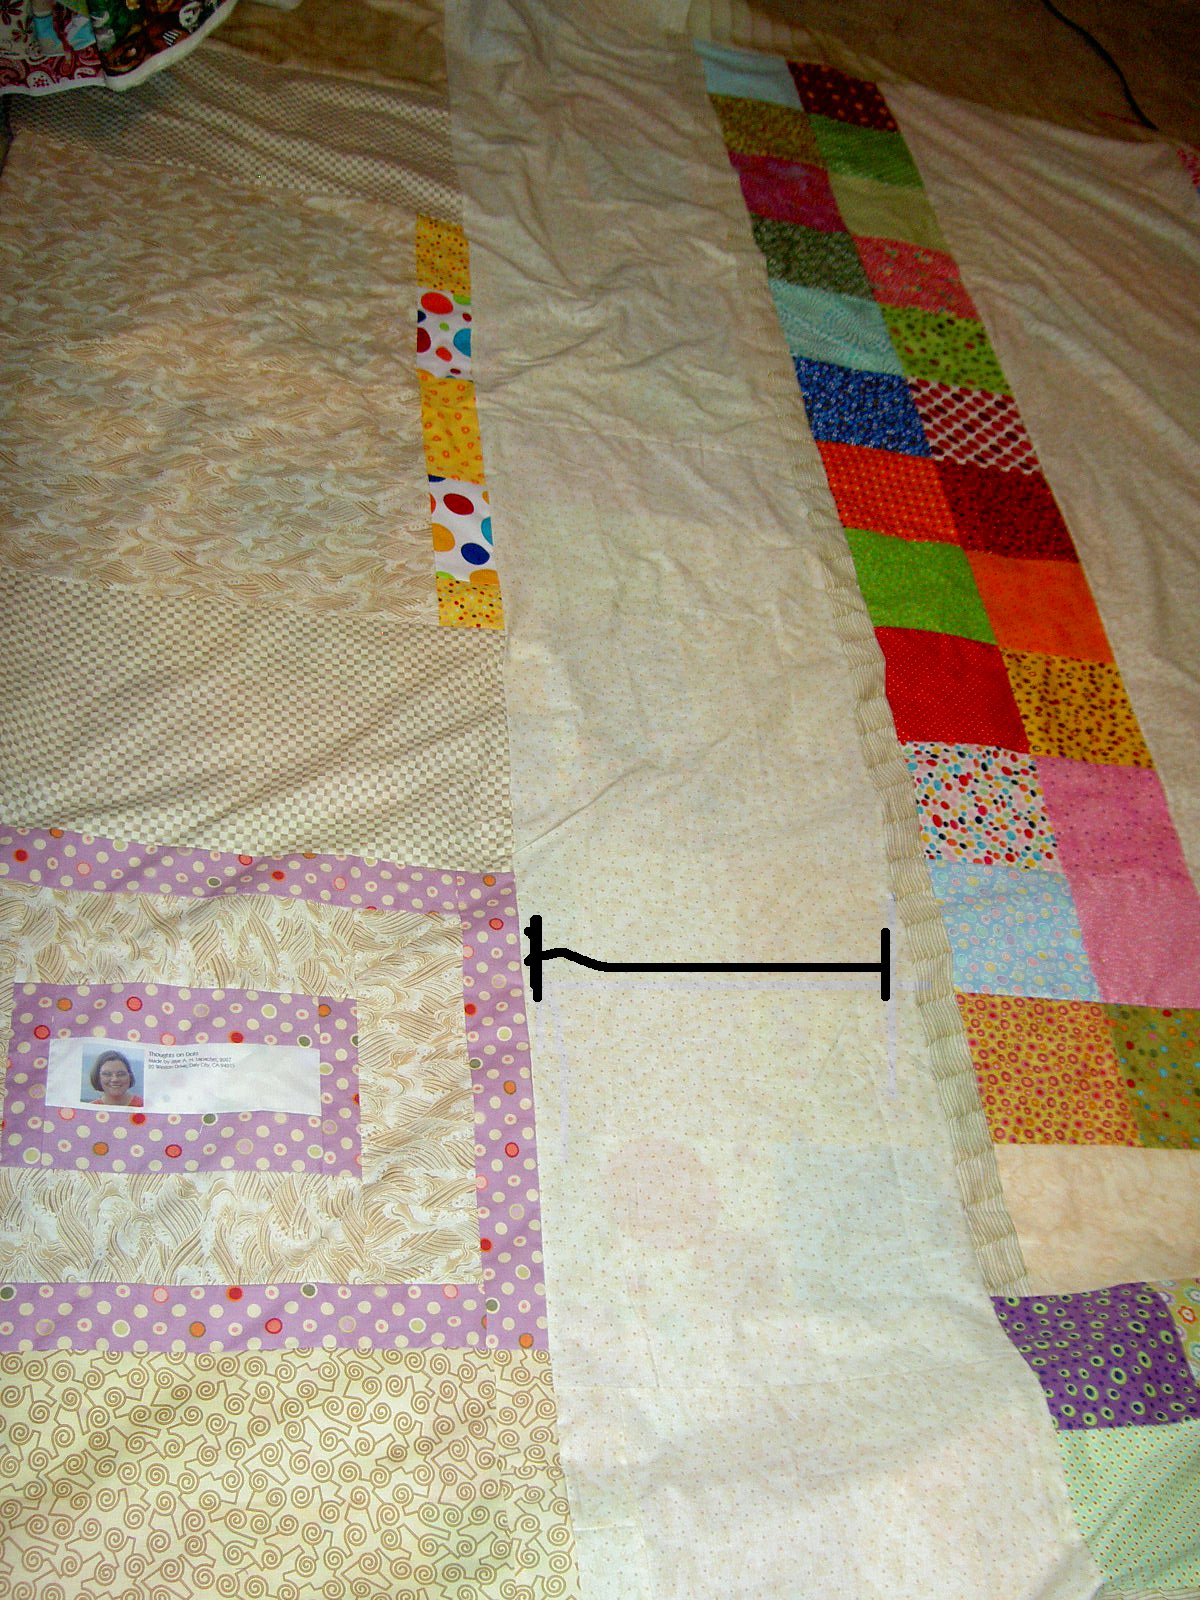
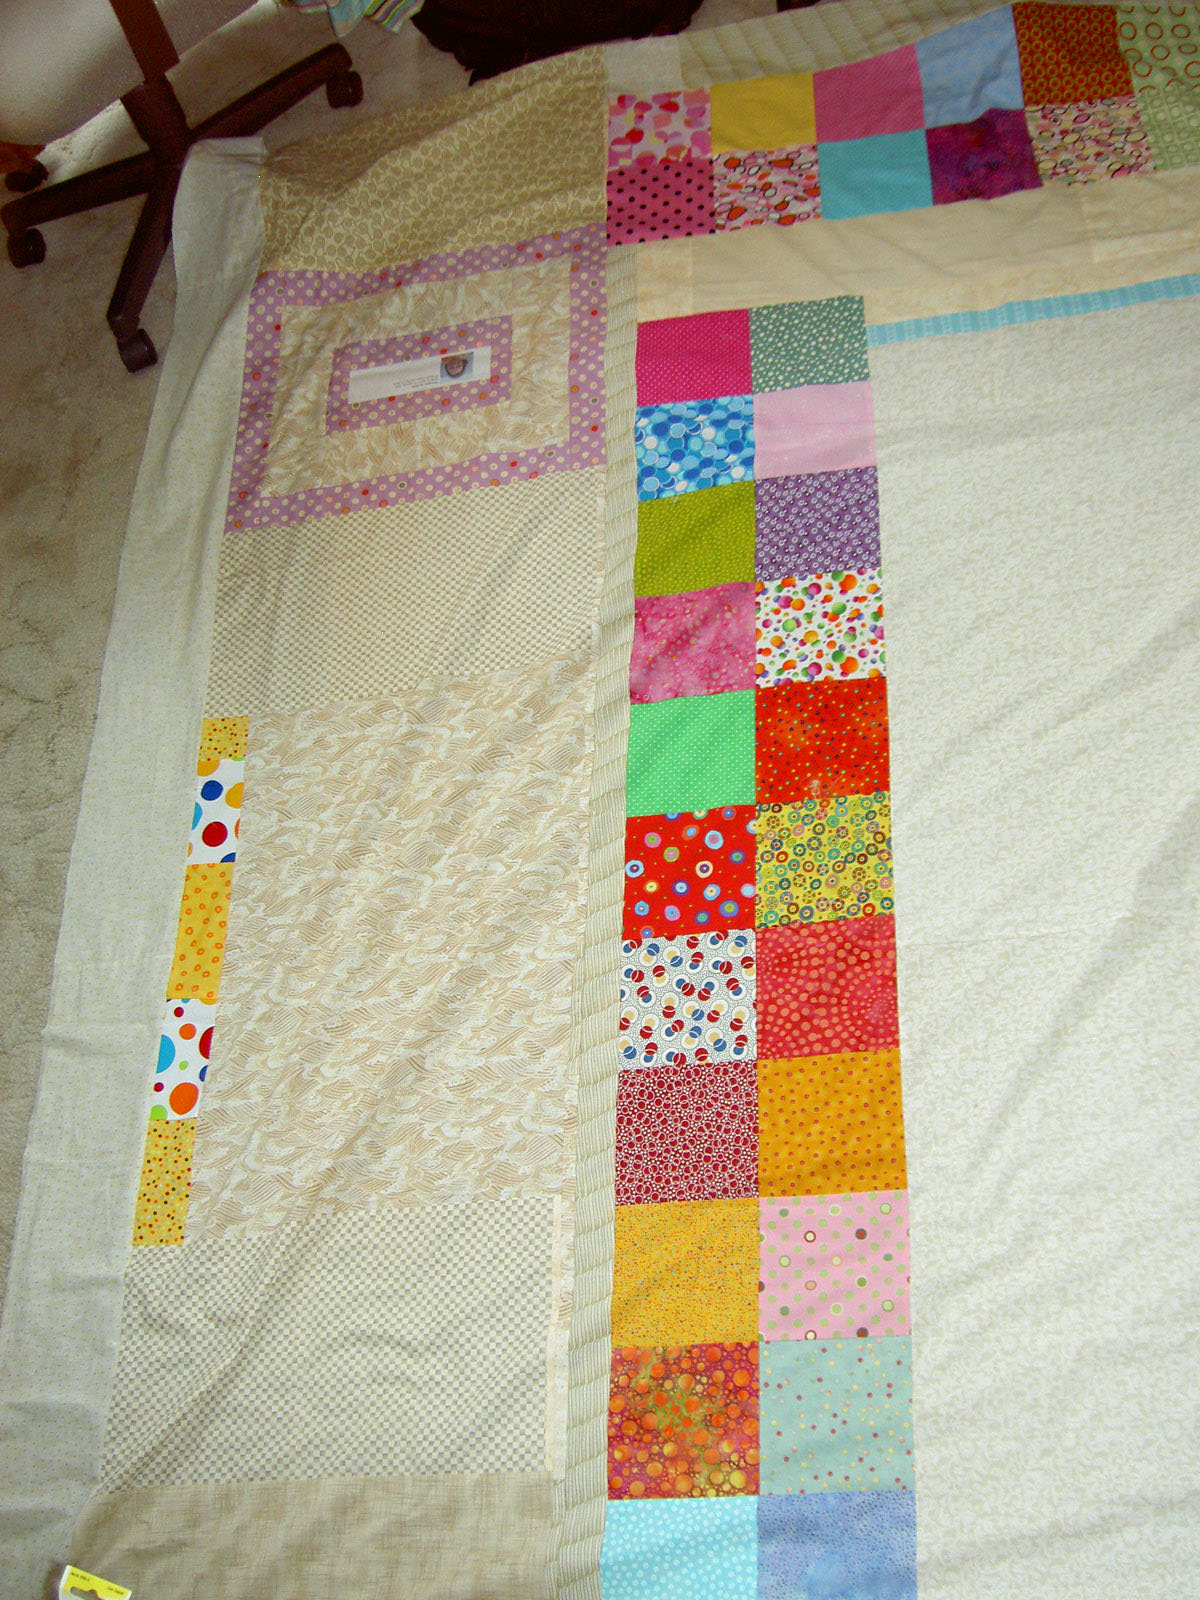
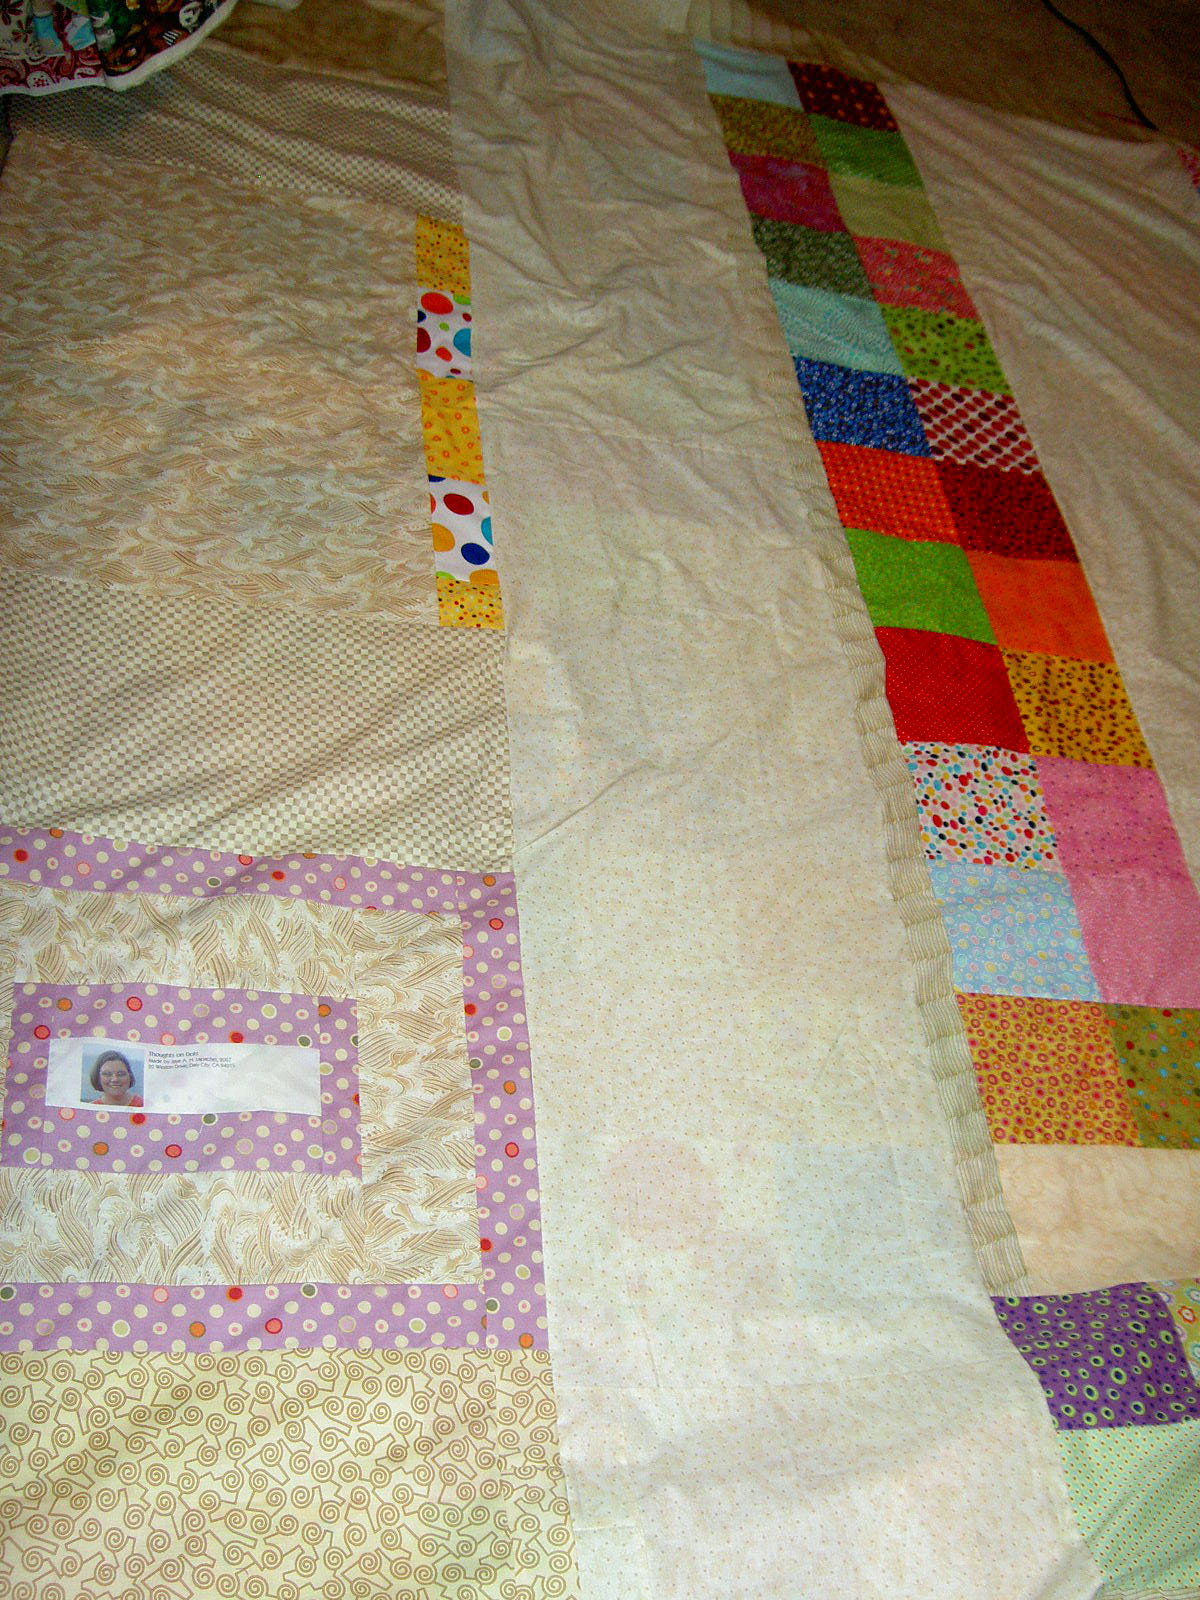
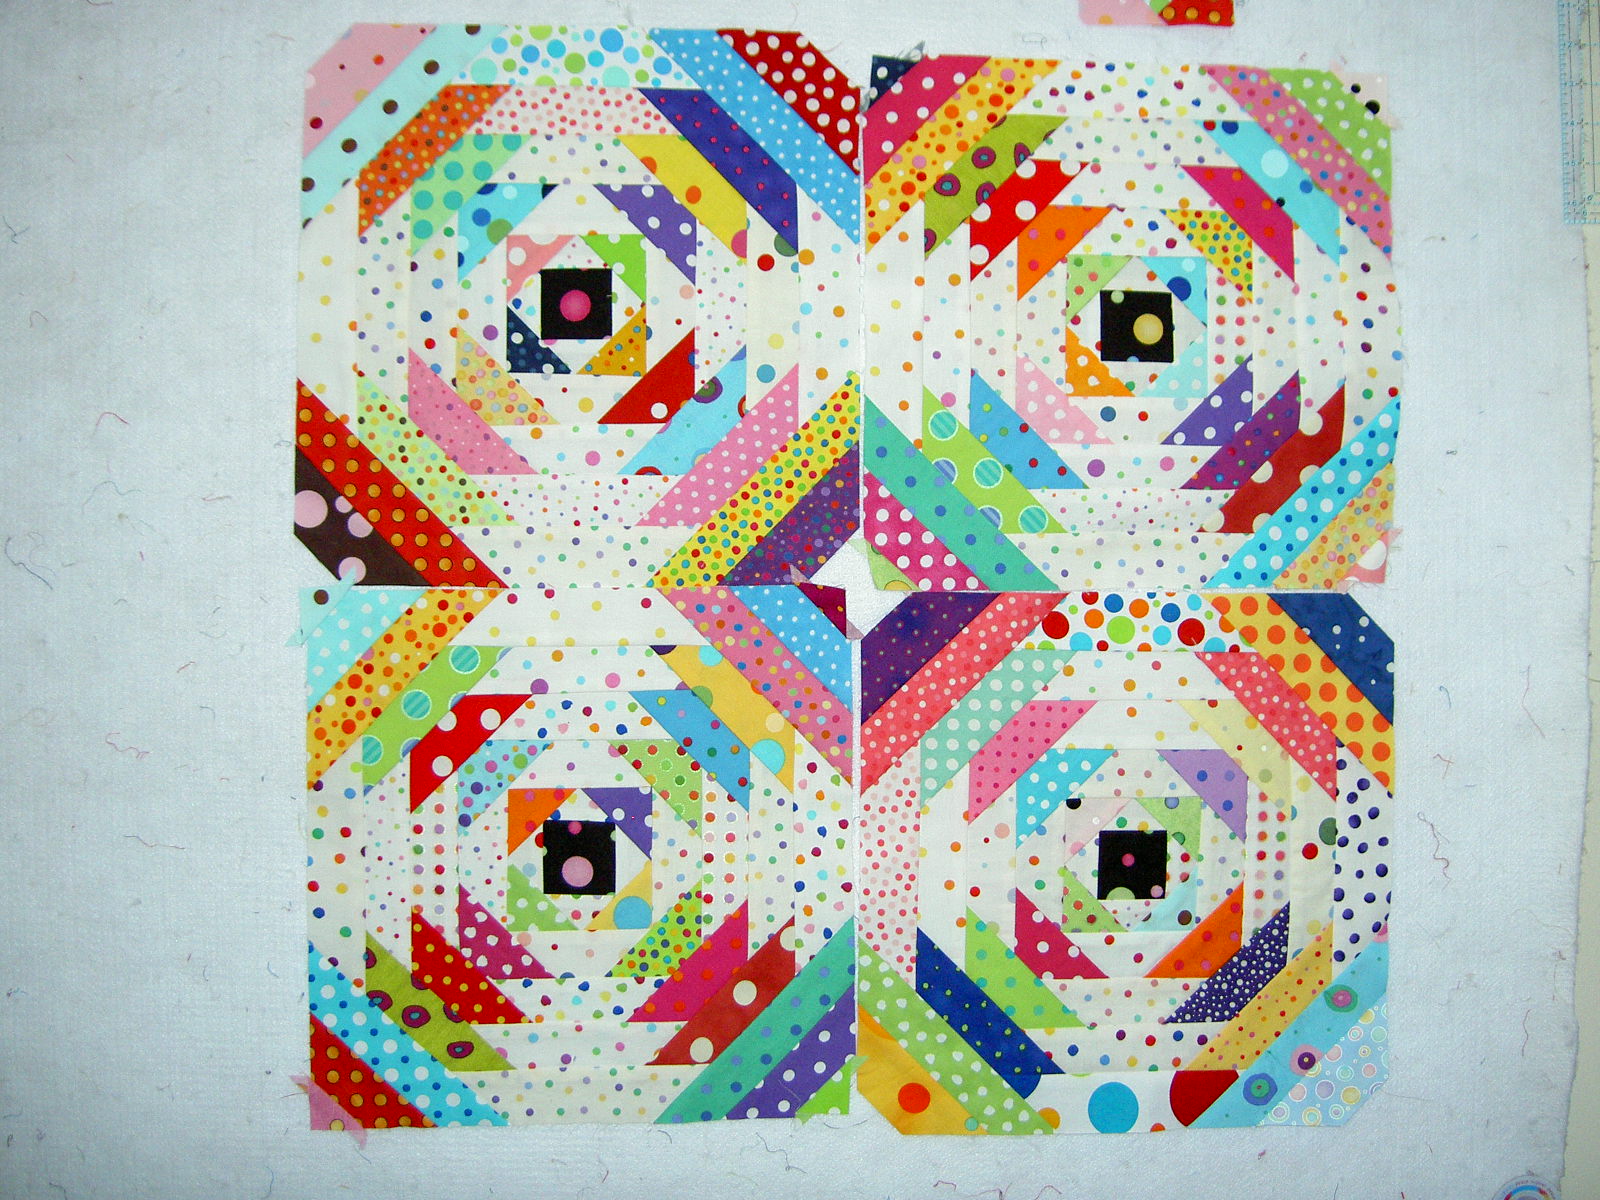
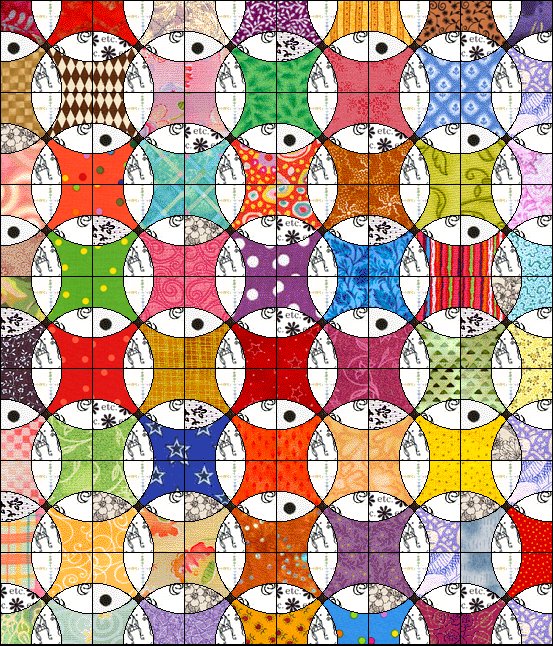
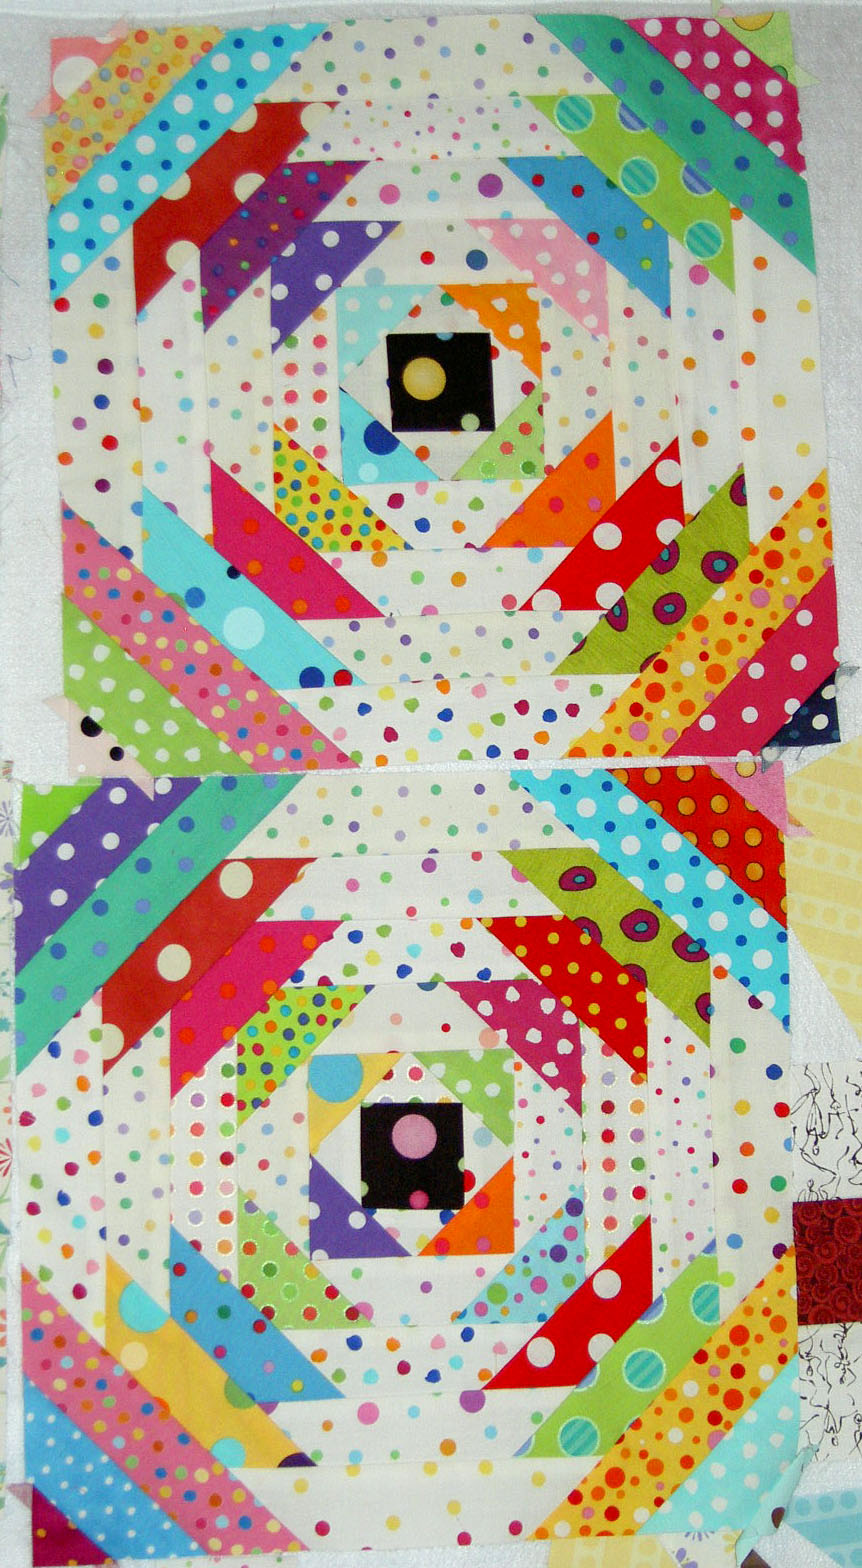
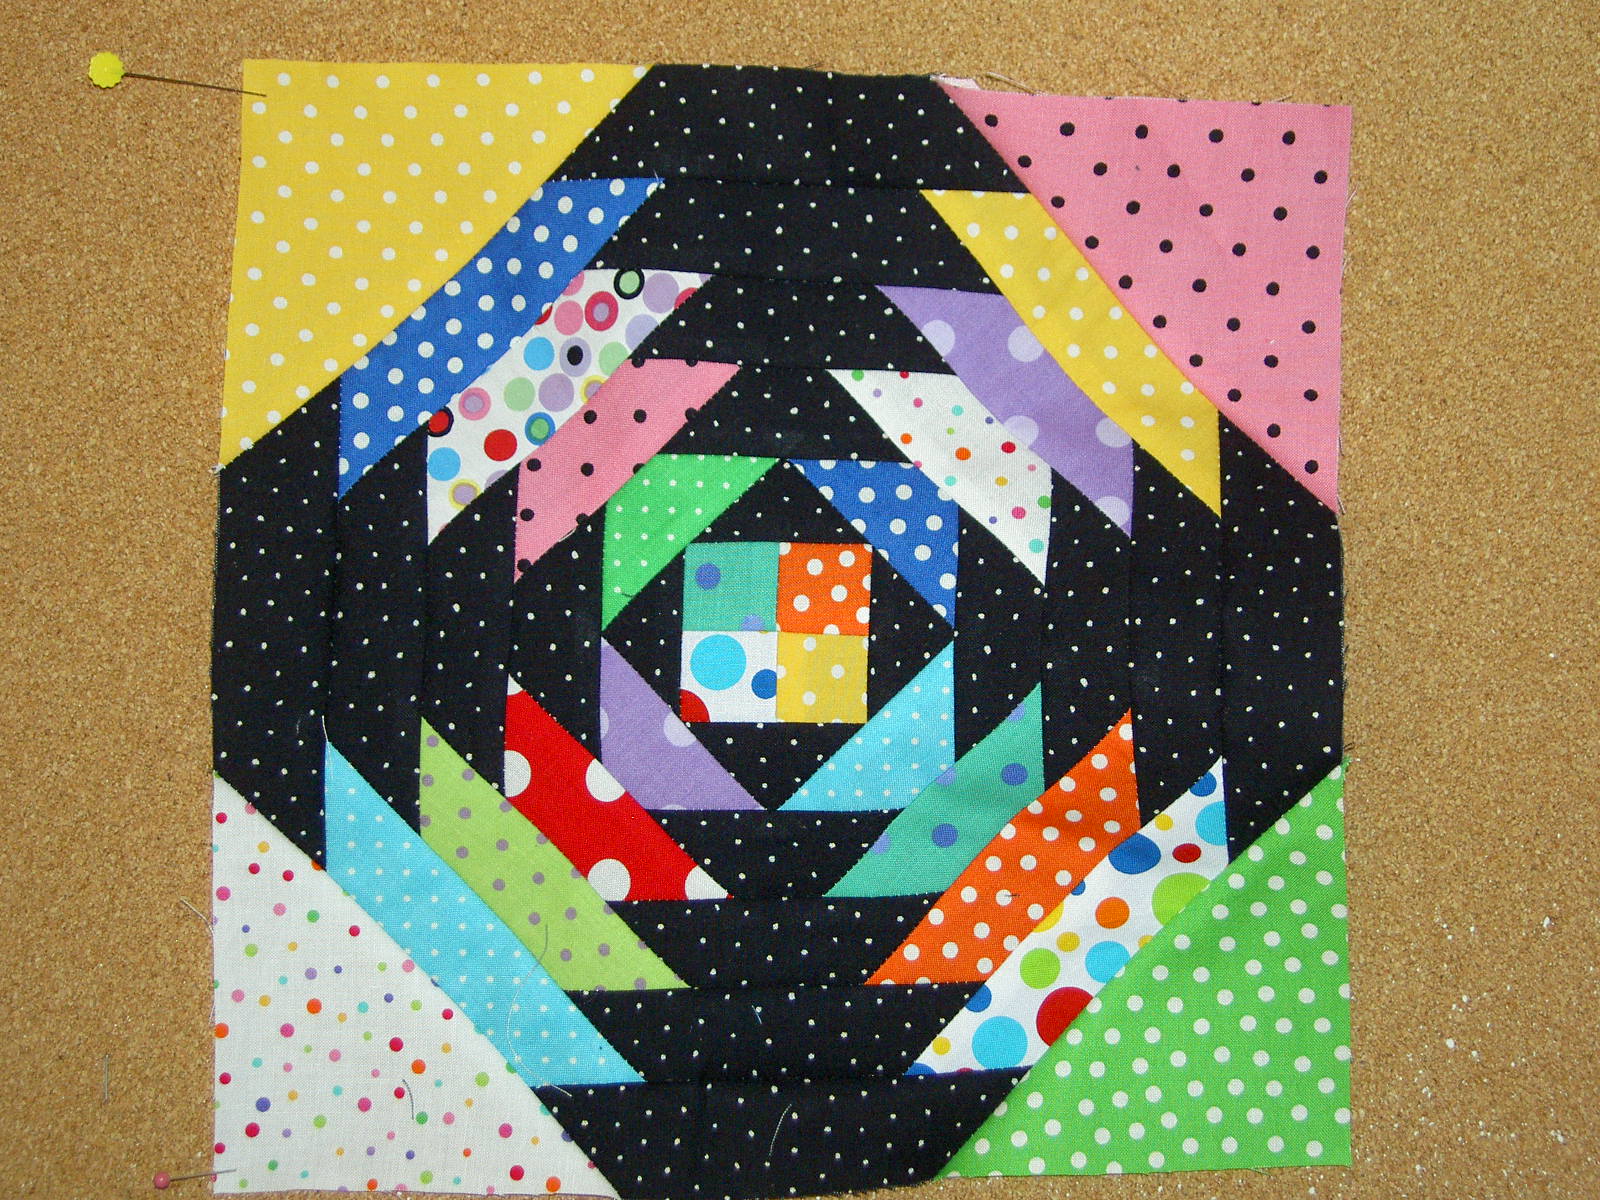
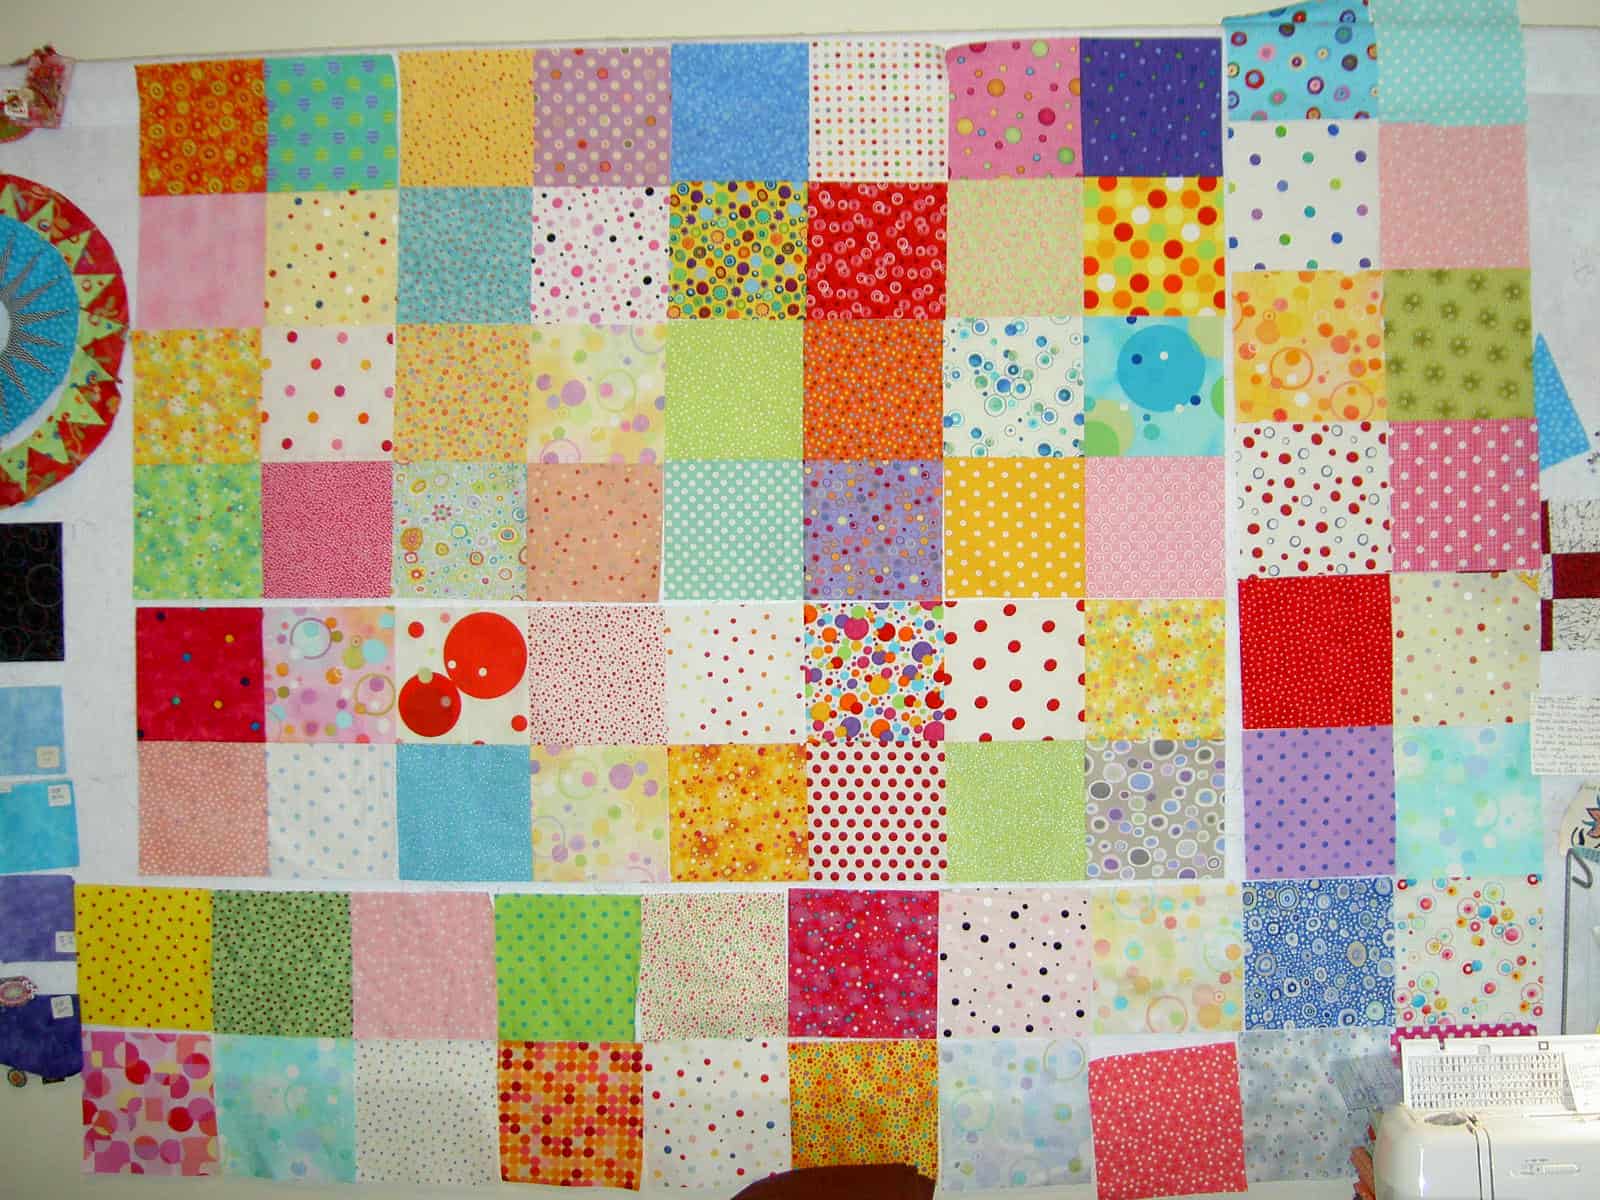
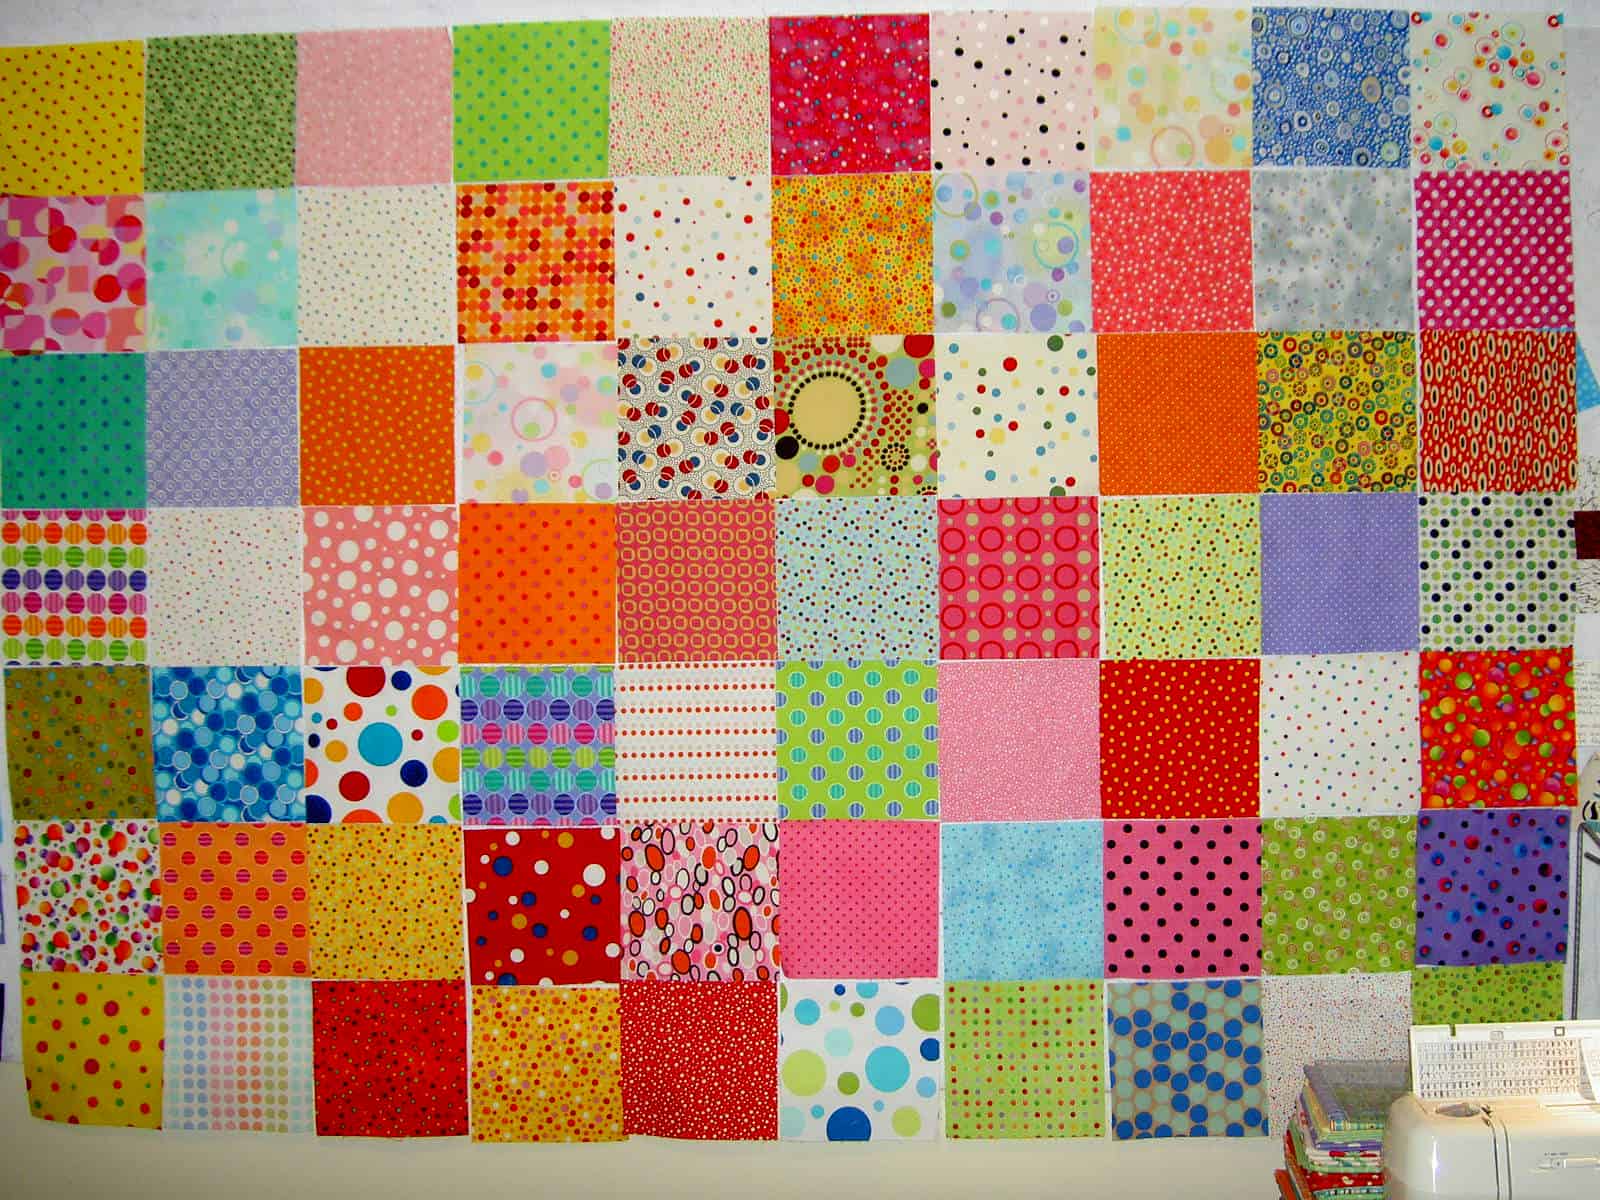
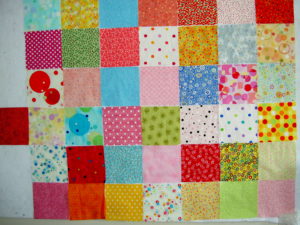
I cut some more squares for Thoughts on Dots. I also ejected some squares from the piece. I went back to that heavy/light method of choosing fabrics and ejected the two fabrics (the blue Terry Mangat fabric and the dark-ish green) that I had identified as iffy a few postings ago. They were both in the third row of that previous posting.

TFQ pointed out that some of the reds are not reading as dots. I have to think about if I care how the fabrics look from both far and near or if I want different looks depending on how far you are from the quilt, e.g. as you come closer you see different things. I said that a feeling of heavy and light was important, but in this case color is as well. I think that some of the reds don’t read as dots, because the dots are too light. I have to think about whether the reds become black holes of doom now that the very darks are gone. It is definitely an interesting exercise.

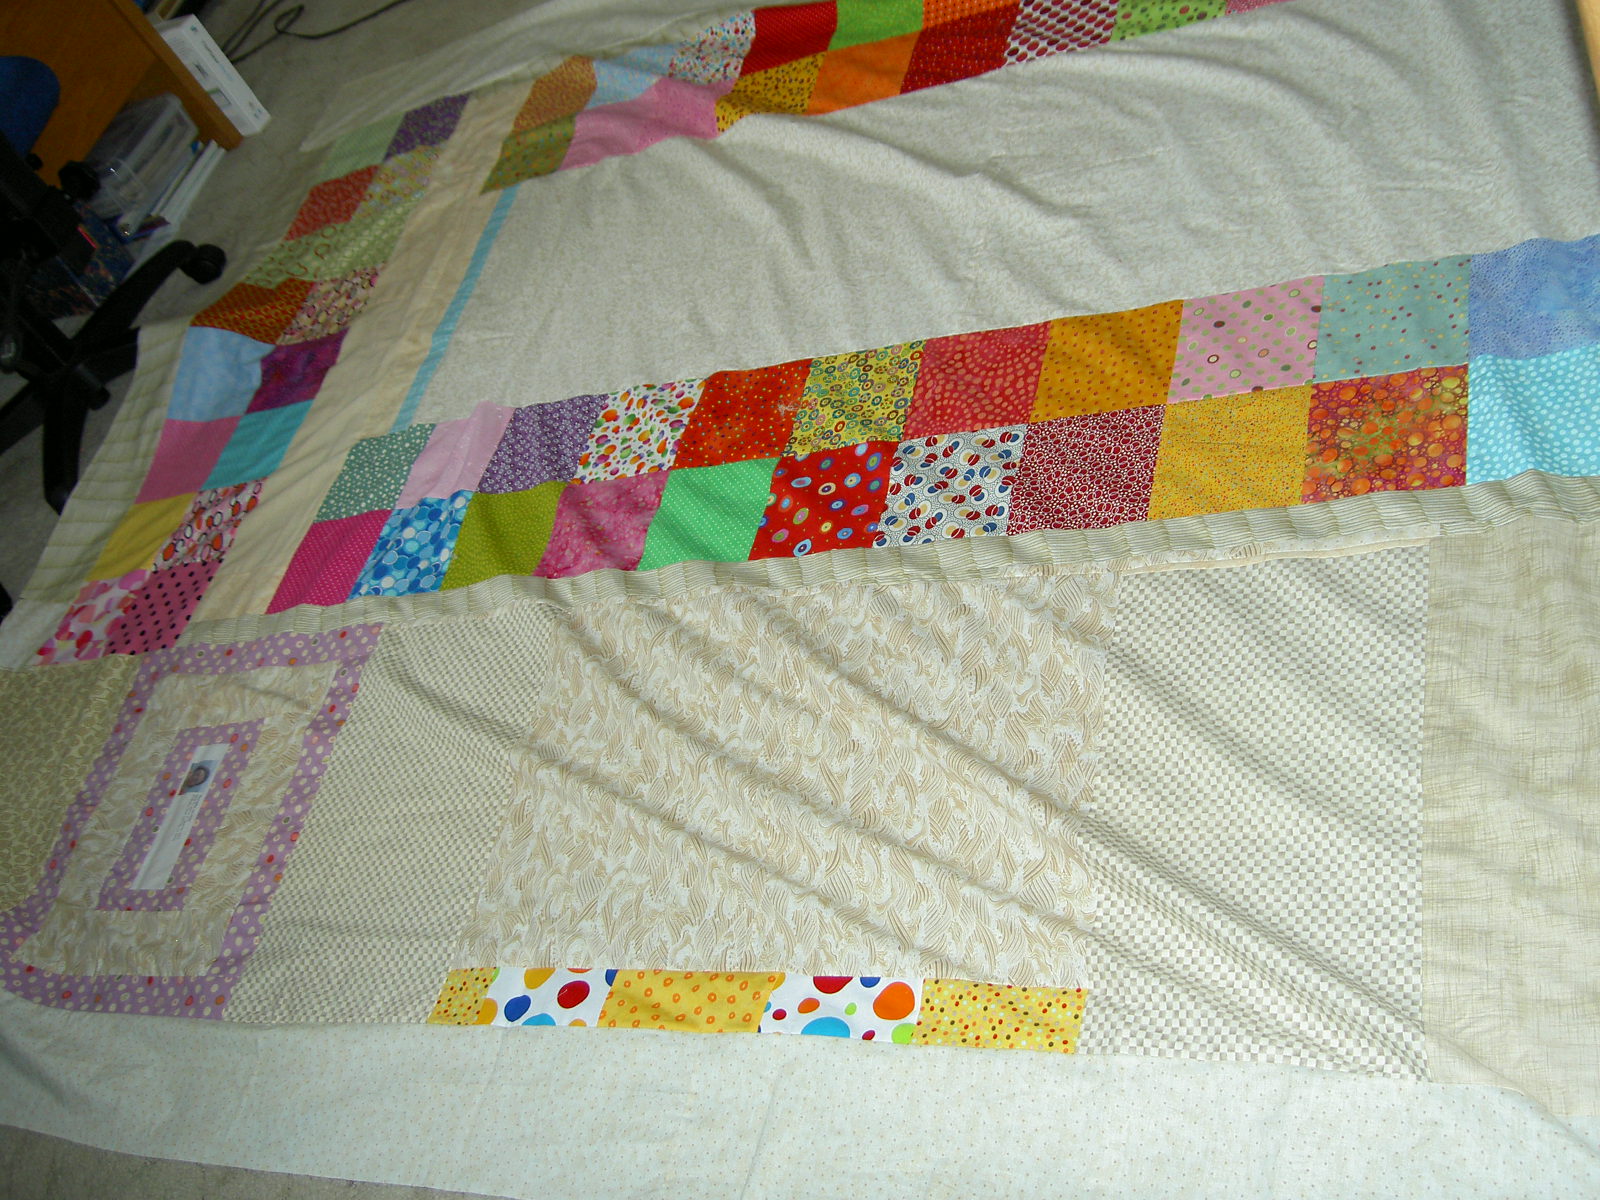
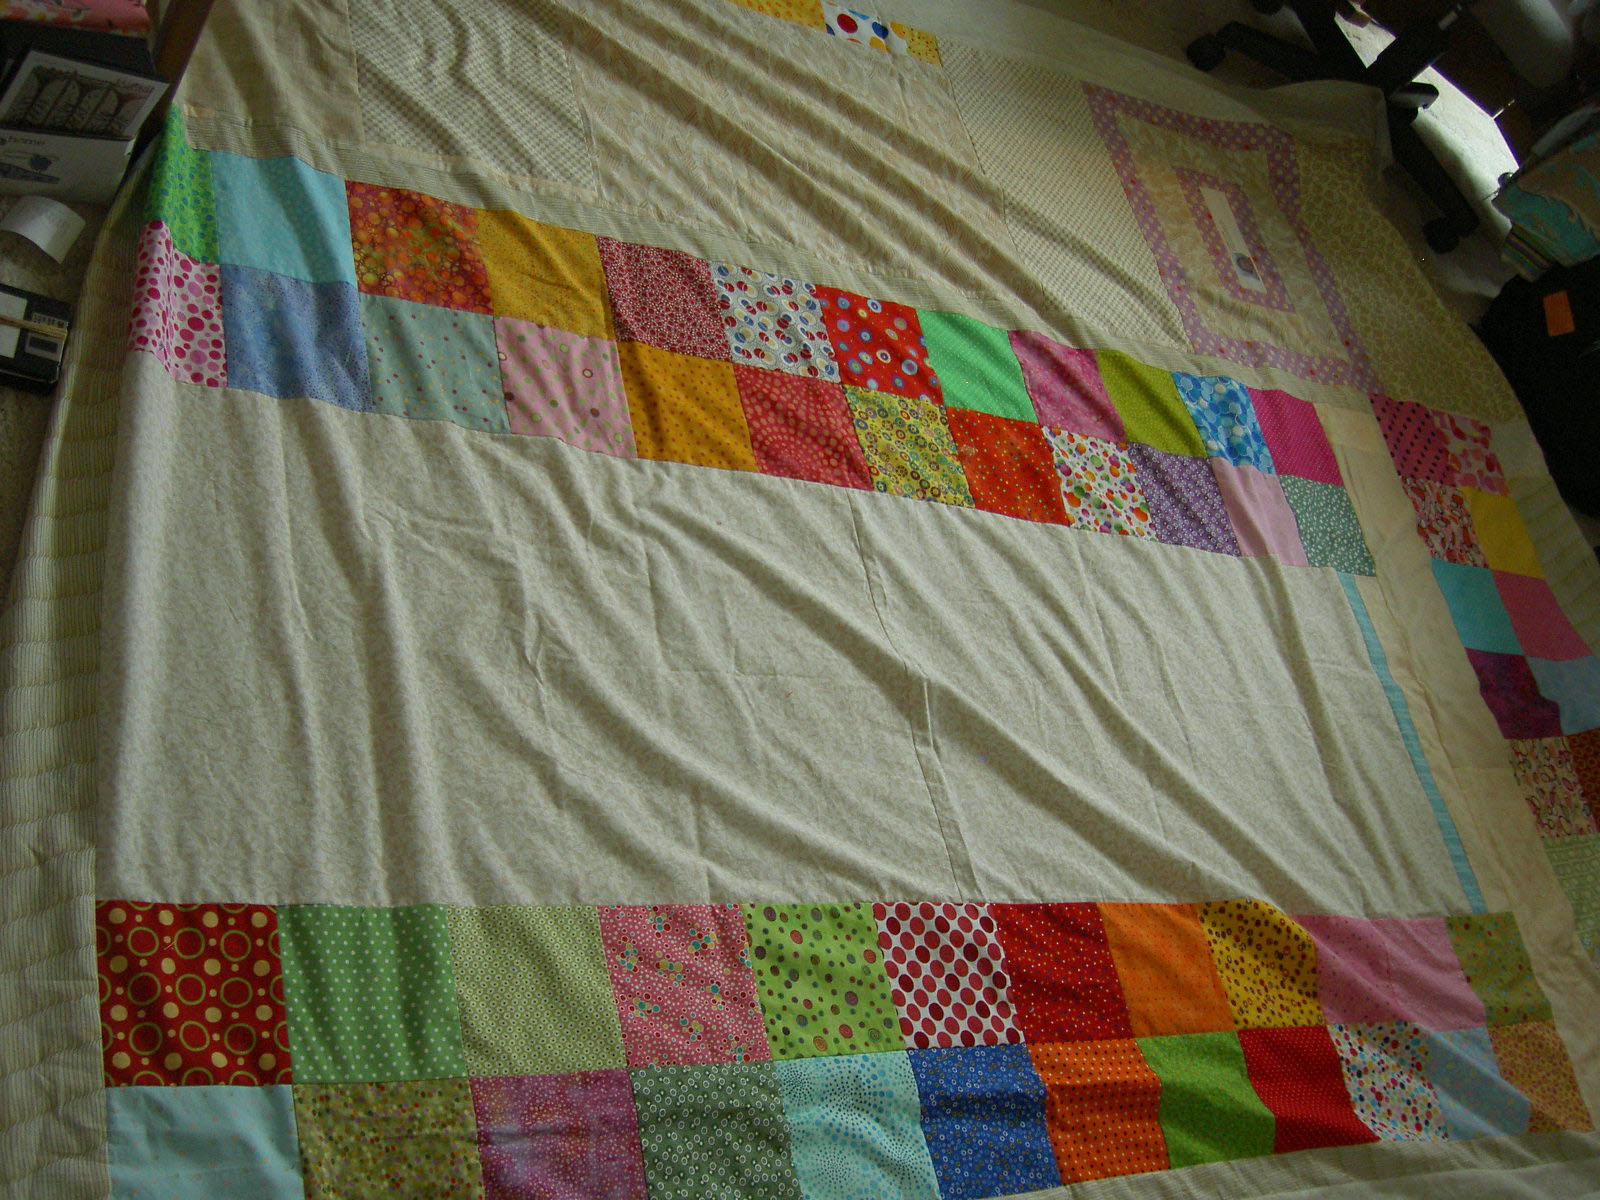
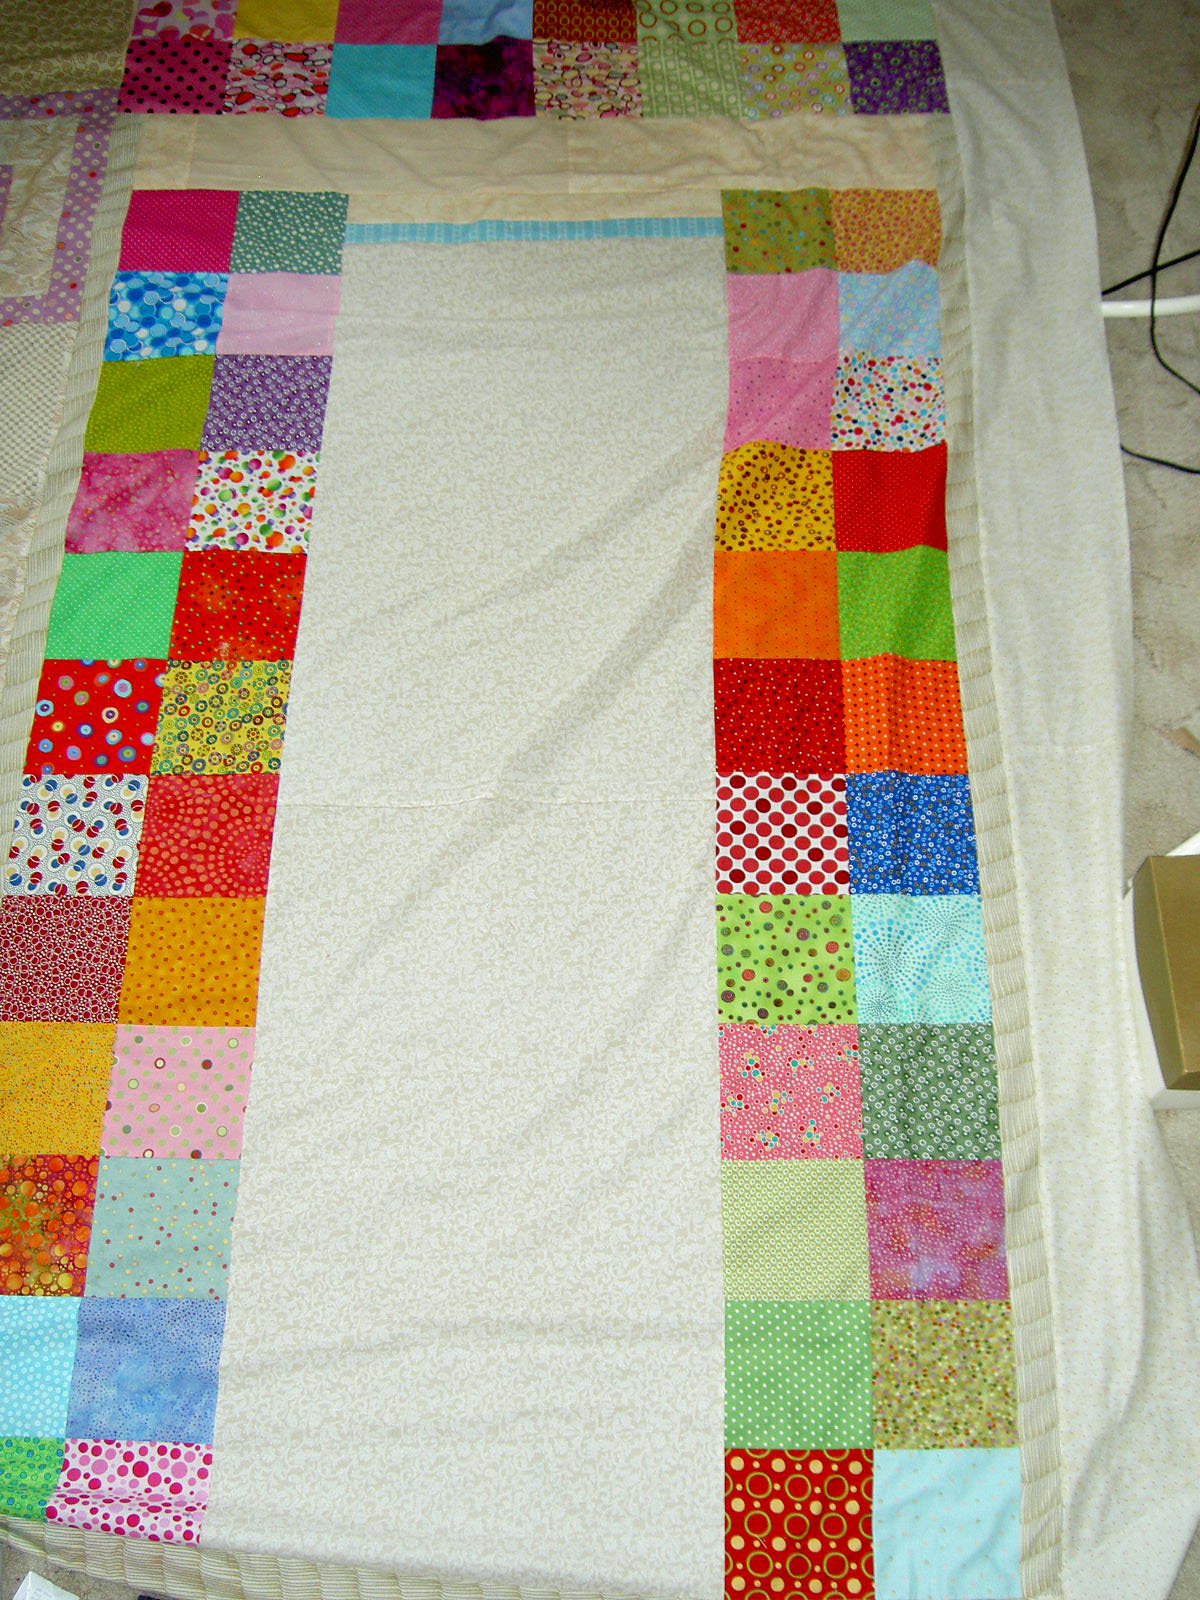
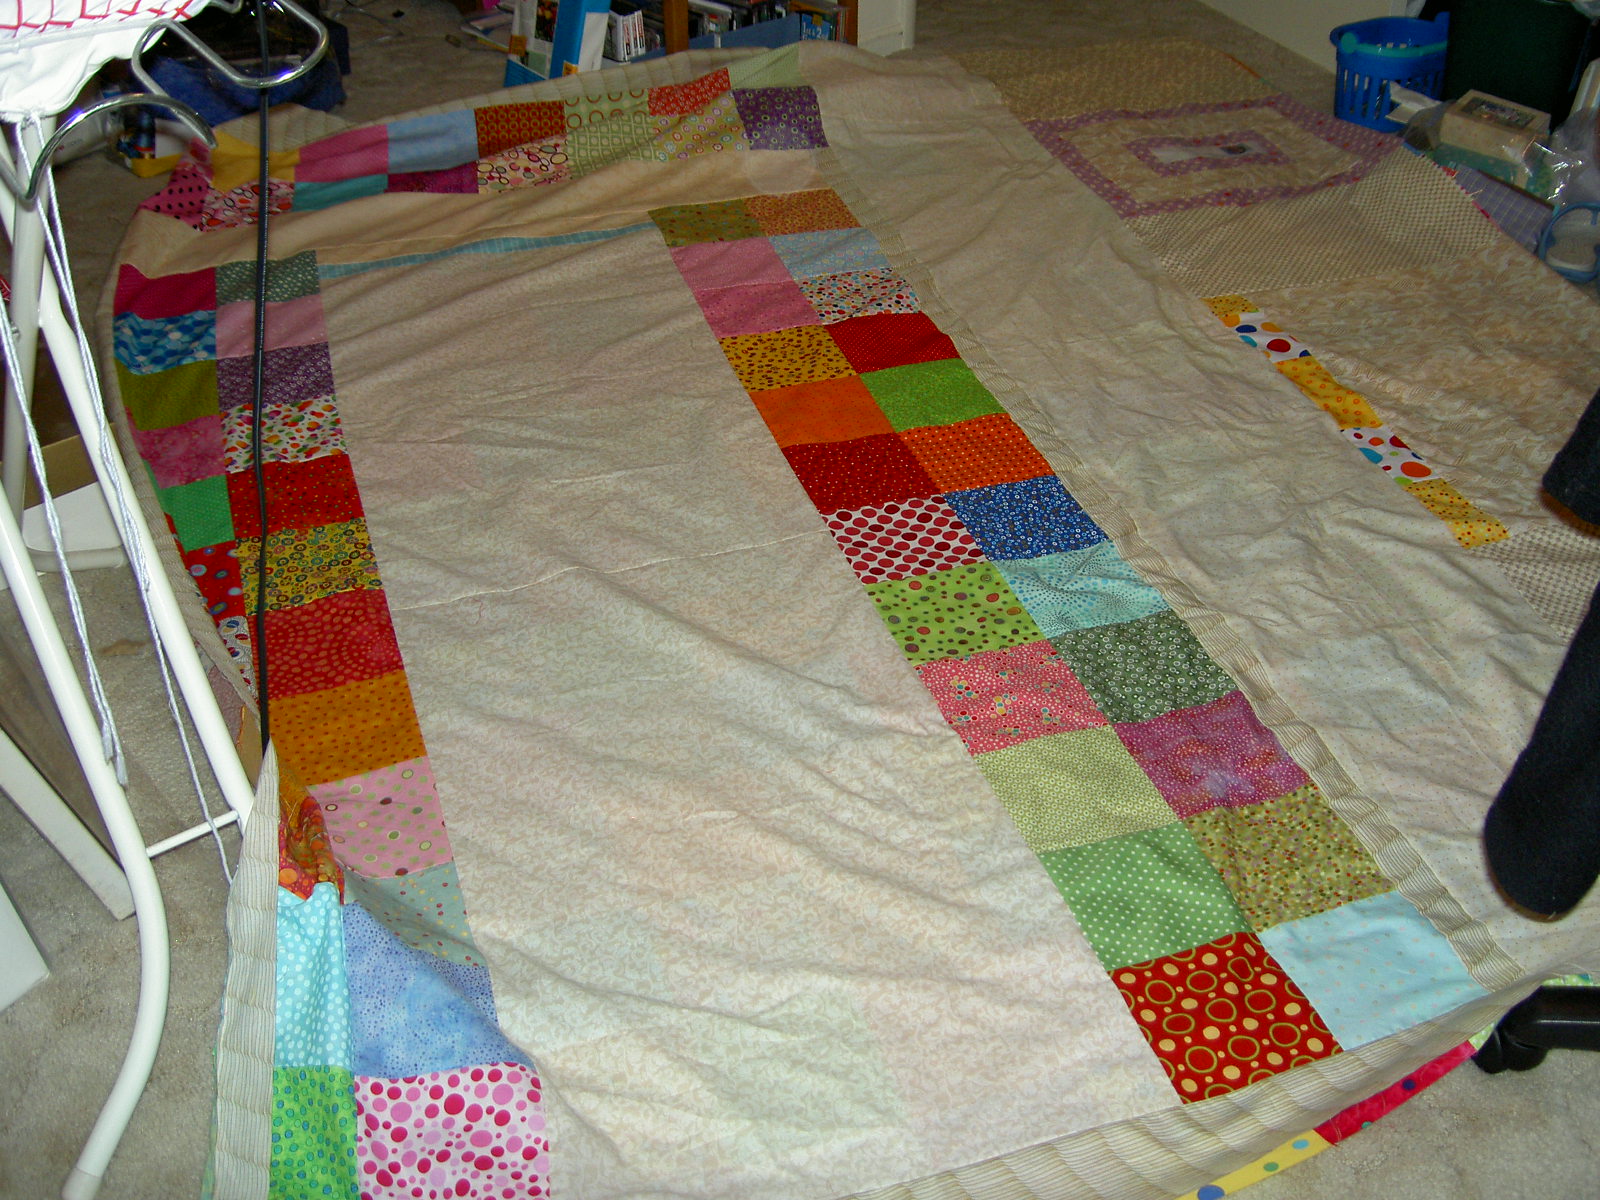
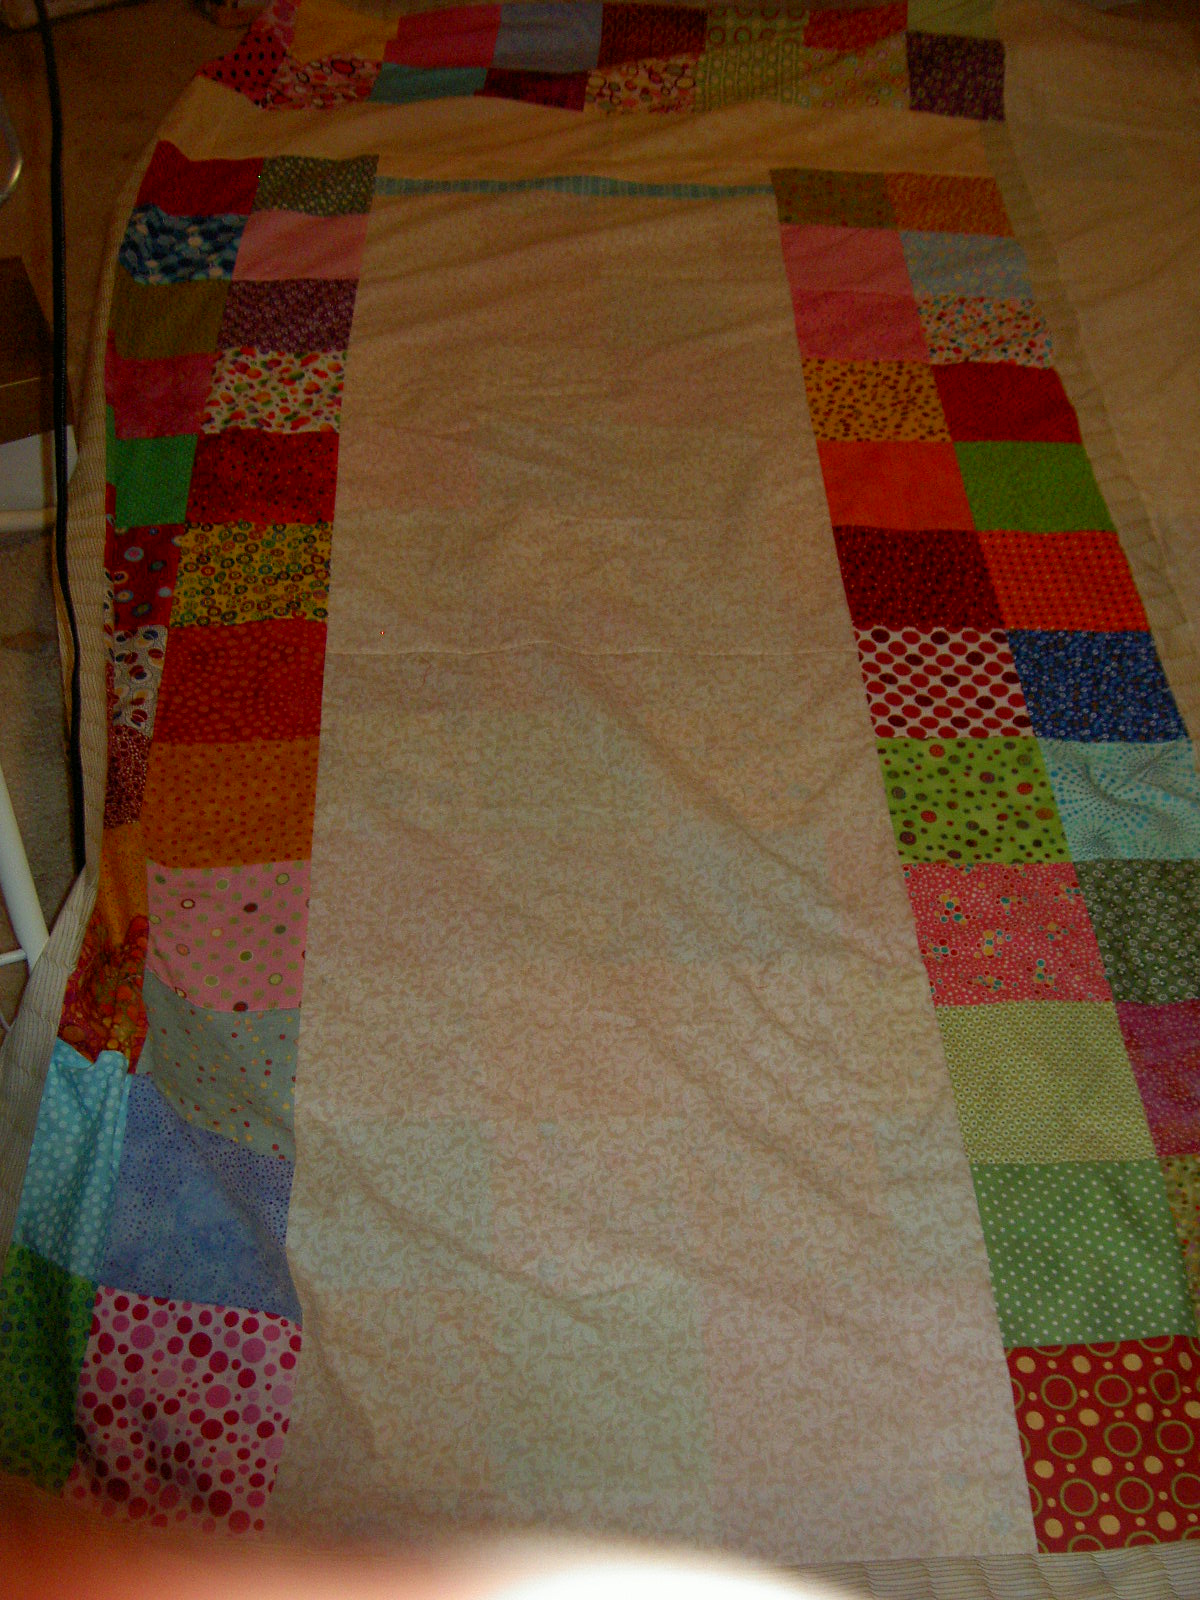
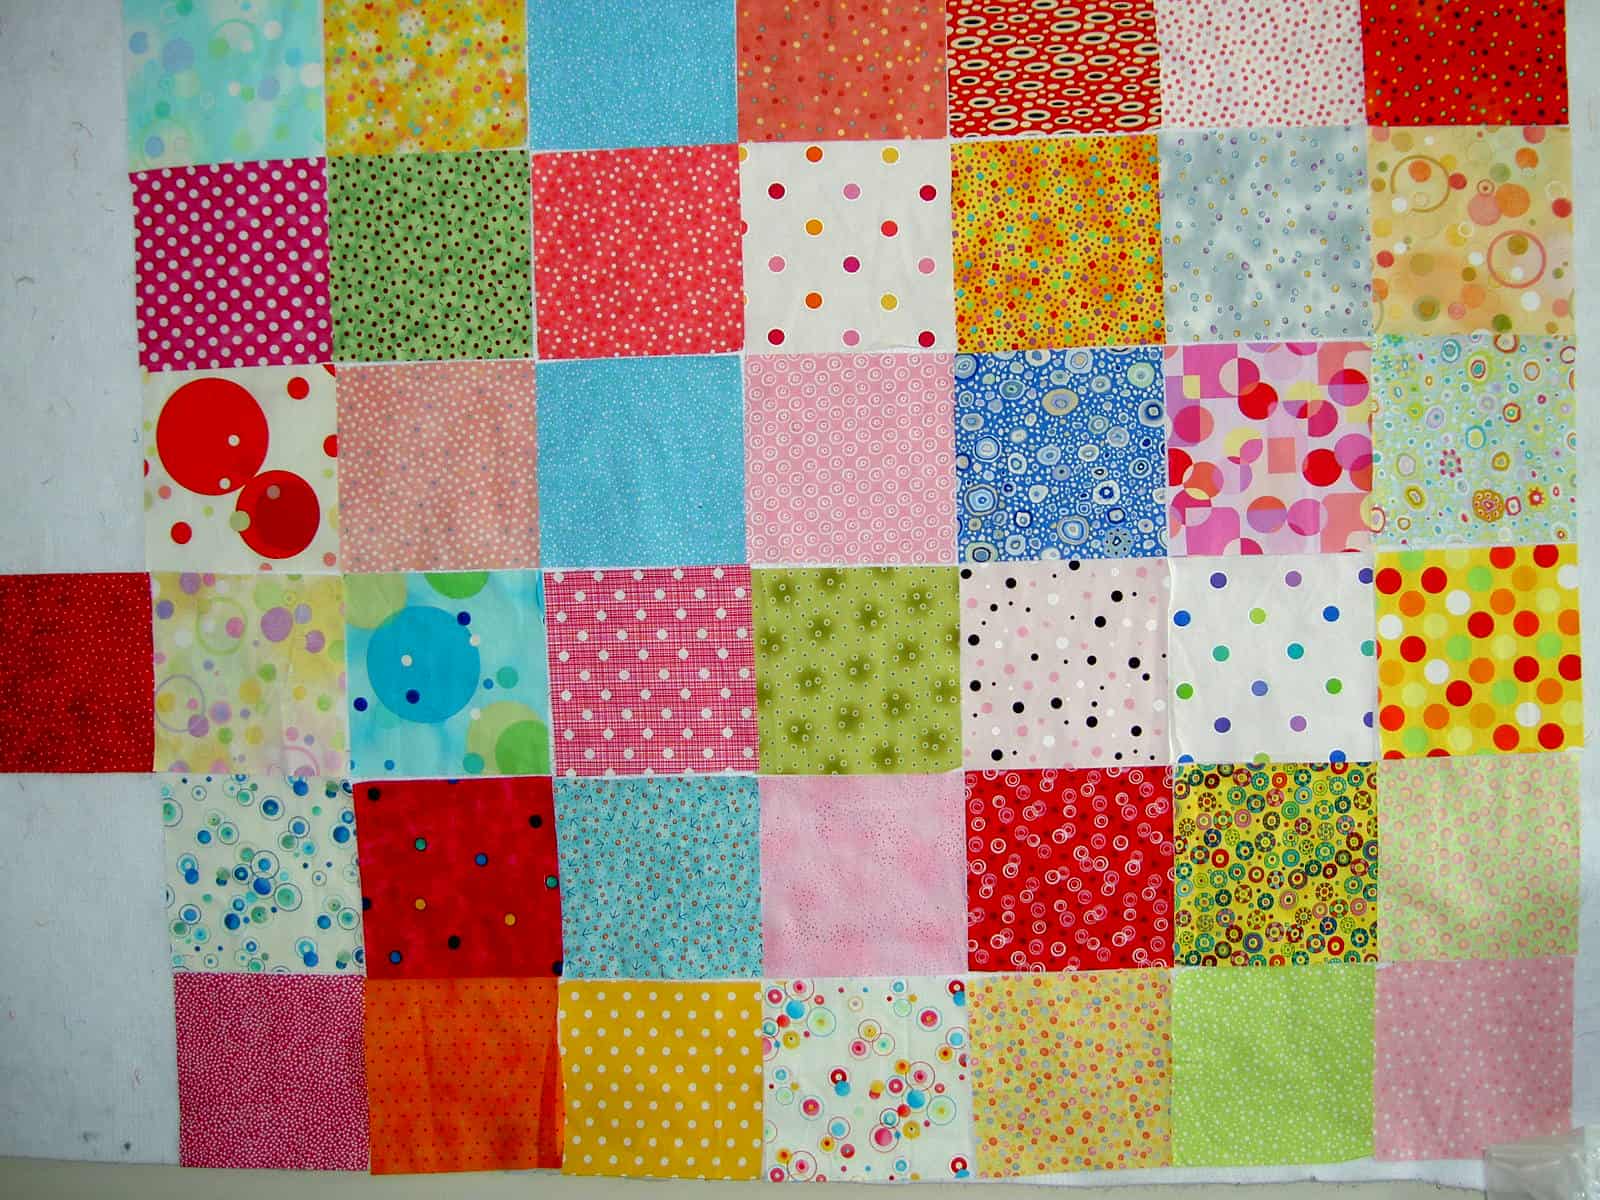
In arranging the squares this time, I tried putting a pink or yellow square in every other spot. In doing this type of arrangement, I realized that I need some violet. I had to remind myself that I have not even scratched the surface of the dots that I own and will get to the violets soon. I also need some more yellows. I am not sure I like this arrangement, but will work through its possibilities until I decide it works or doesn’t work.

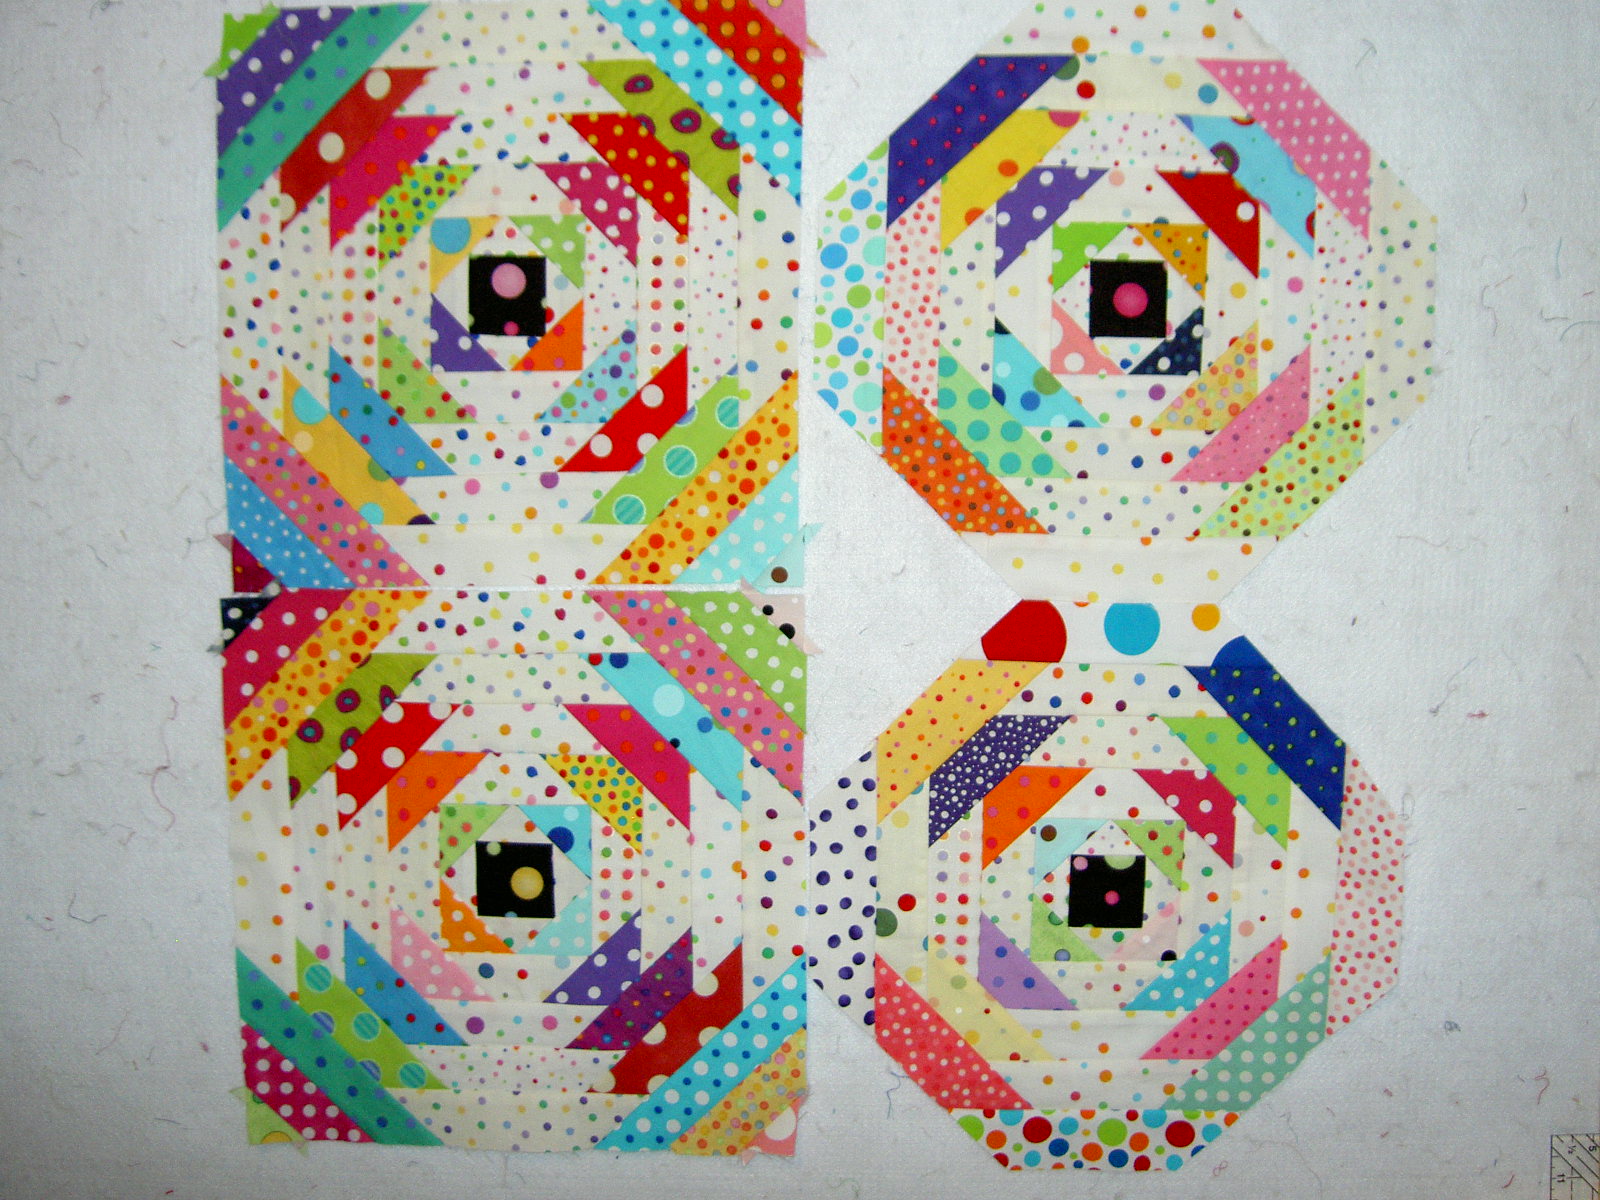
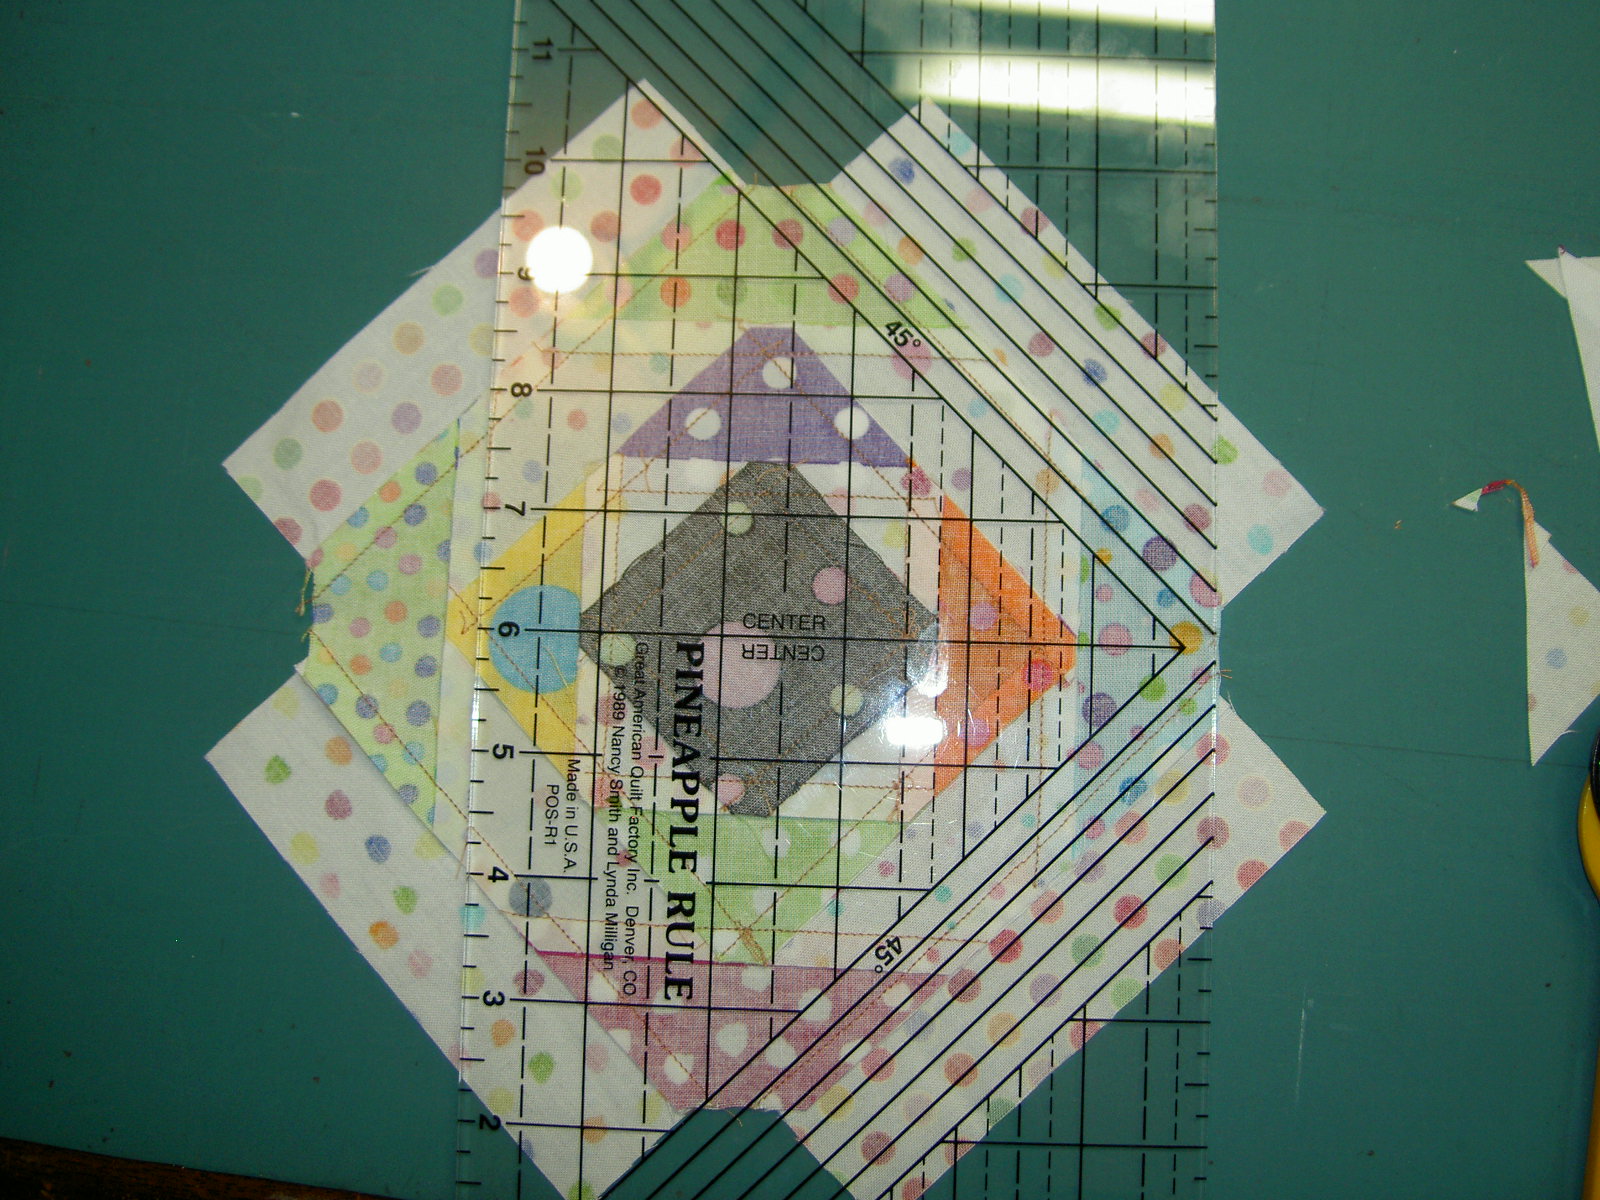
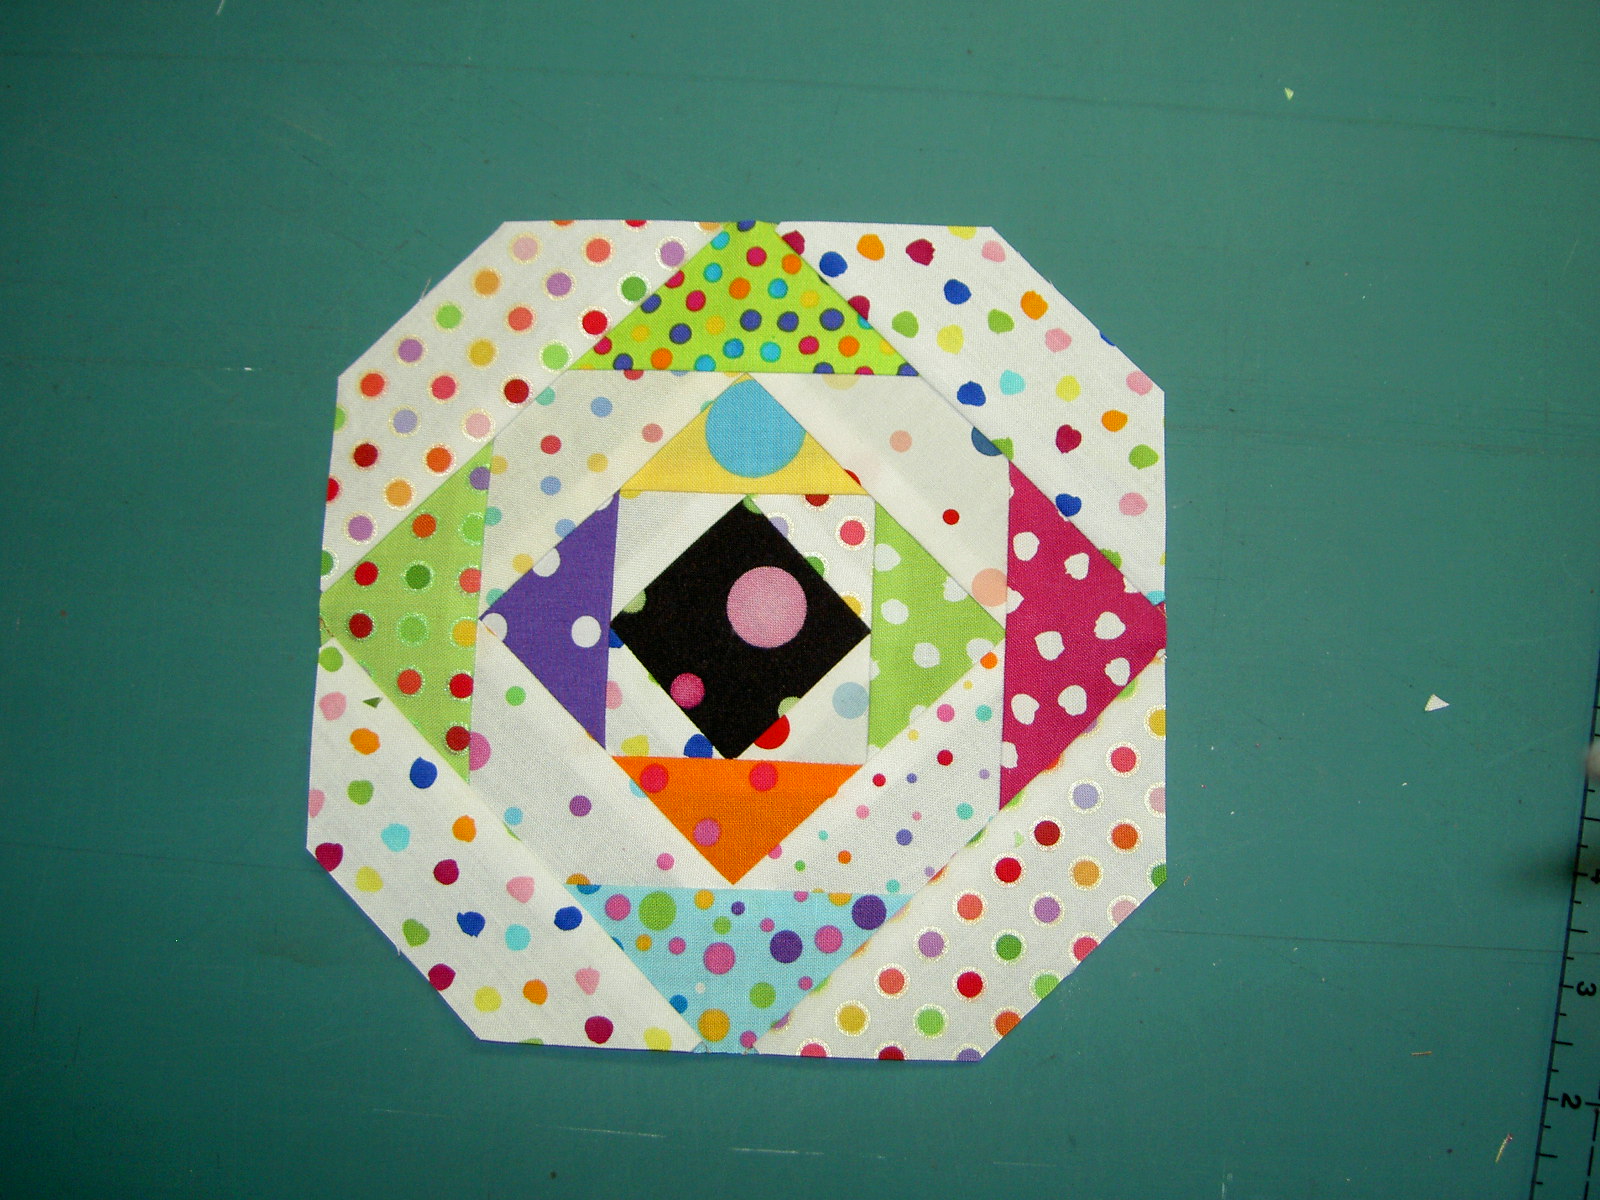
One of the joys I am finding with these dots and with the size of the squares is the playfulness. I find that I am not agonizing about blocks going together because I am only working with squares.

The other thing that occurred to me is that I want this quilt to be larger than my design wall. I intend to wrap up in it when the weather is ugly and I need a boost. The question, then, becomes do I sew the squares that I have together, take them off the wall and do the next section? OR Do I take a photo of the squares and then take them off the wall recreating the piece from photos once I am ready to sew. The former would be fun and provide an element of surprise, but runs the risk of some major color disasters. The latter is very safe.

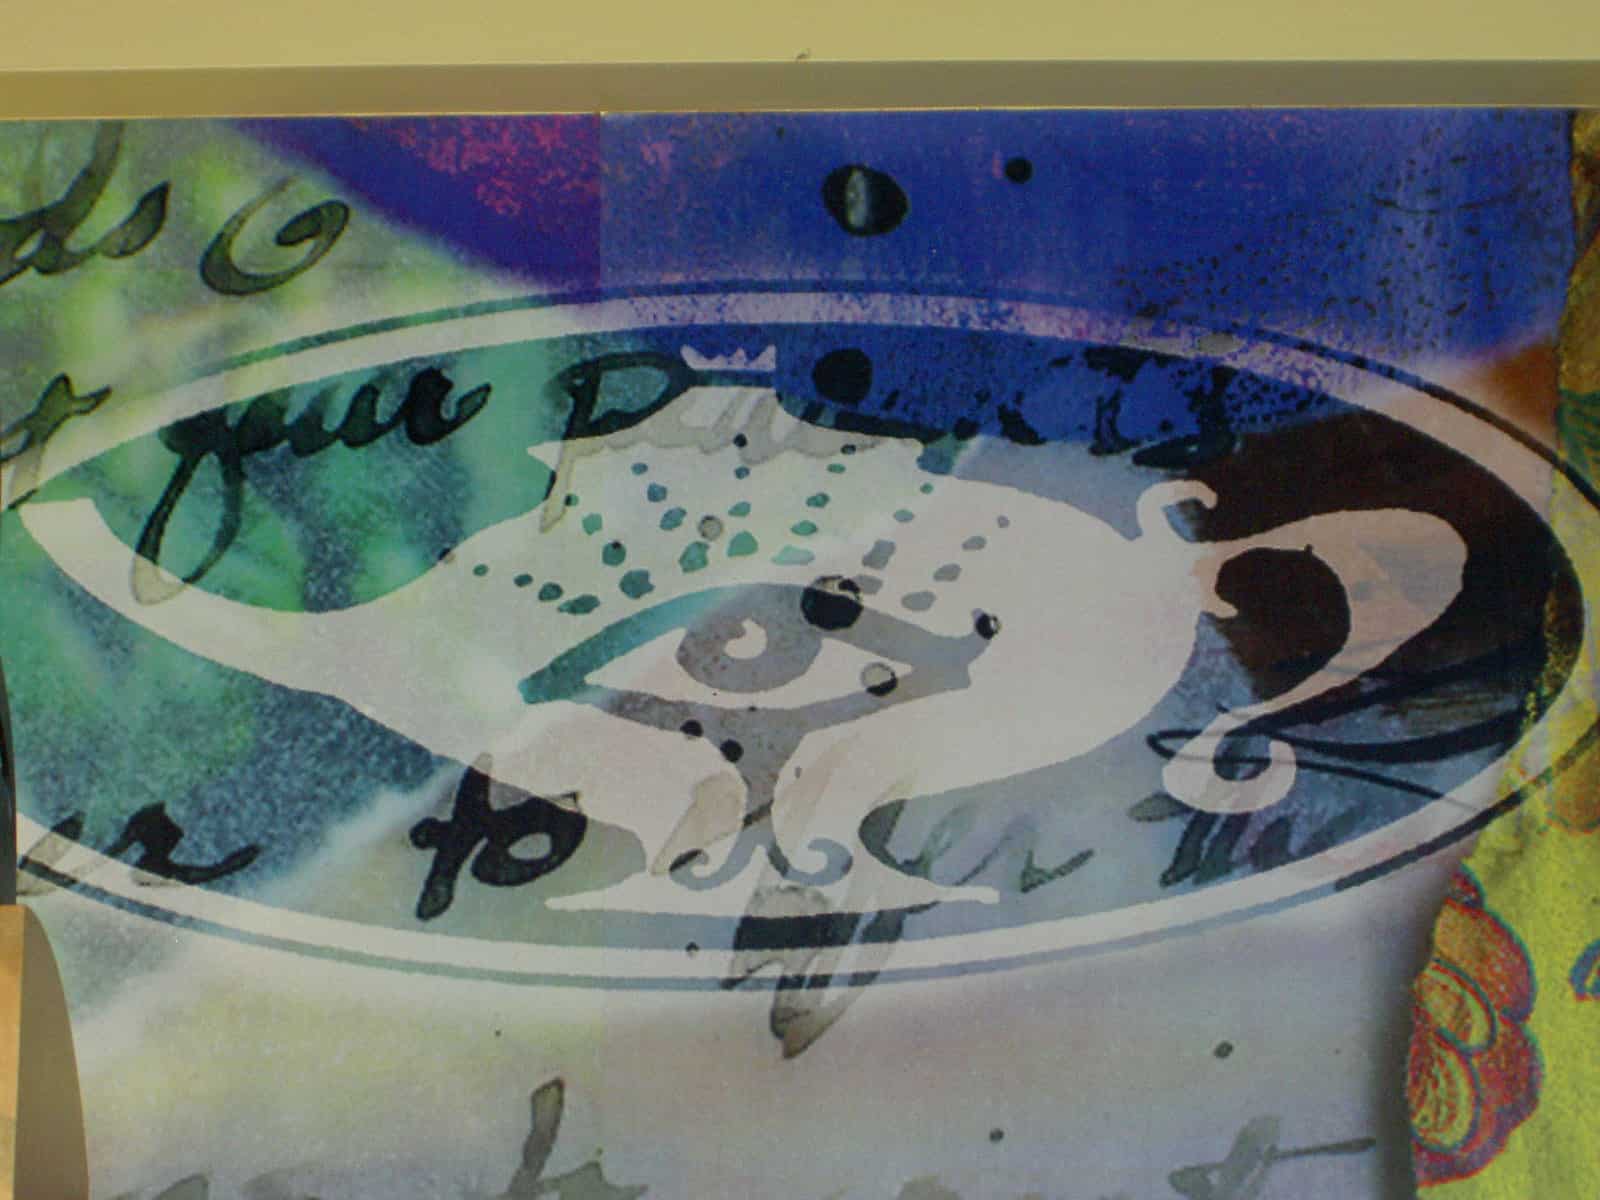
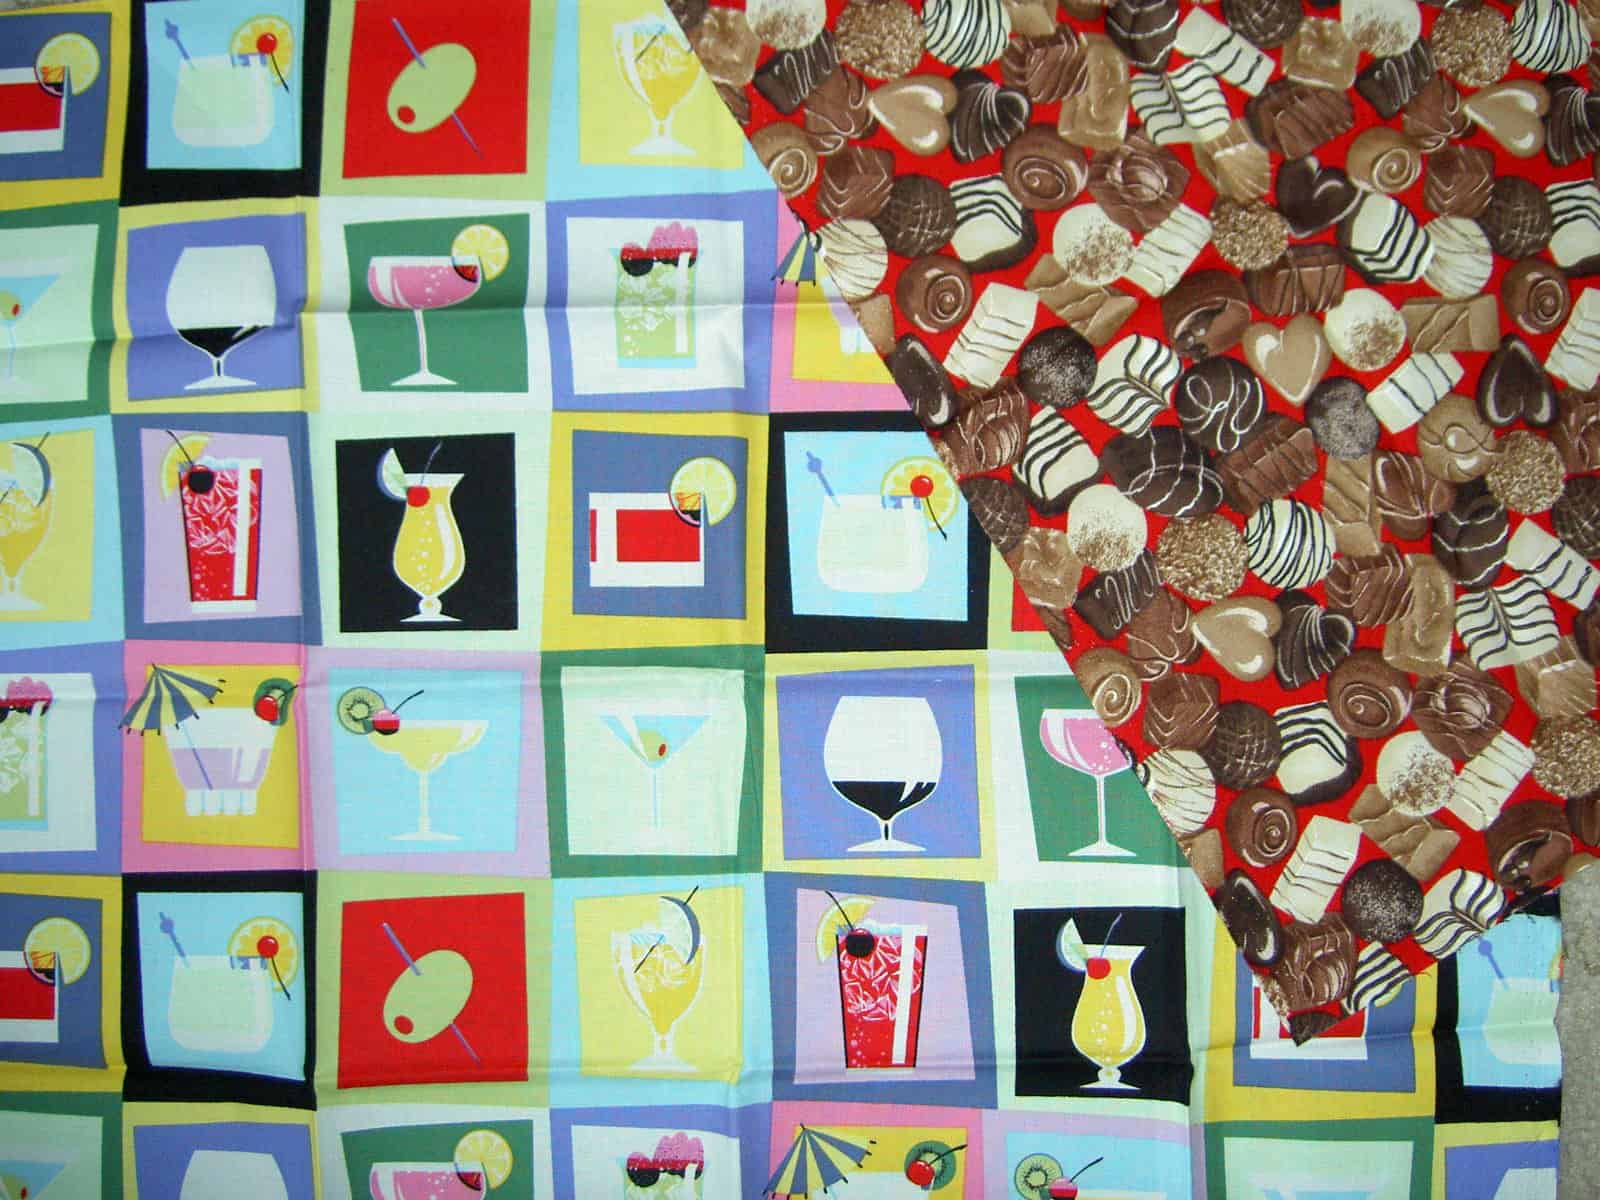
Finally, I was getting another load of the great unwashed ready to be redeemed and saw these two fabrics end up near each other. It occurred to me that these are the two things to which women resort to escape. Drugs, I suppose, are another, but alcohol and chocolate are much easier to procure and also legal. I think that these two fabrics have provided inspiration for another of the Women’s Work series (currently only a series of one!). I have lots of perfect fabrics and ideas, but not many completed quilts. I had better get busy.