I spent some time away sewing this past week with Friend Julie. I didn’t get to sew as much as I thought I would because I had some social and professional obligations to conduct as well. Still, I made progress and that is a good thing.
As mentioned the other day, I started the Undercover Maker Mat along with the sew-a-long going on @Lillyellasworld. Julie worked on it, too, and spurred me along. I always feel discombobulated when I sew somewhere else, but I got myself together and started working on the pockets.
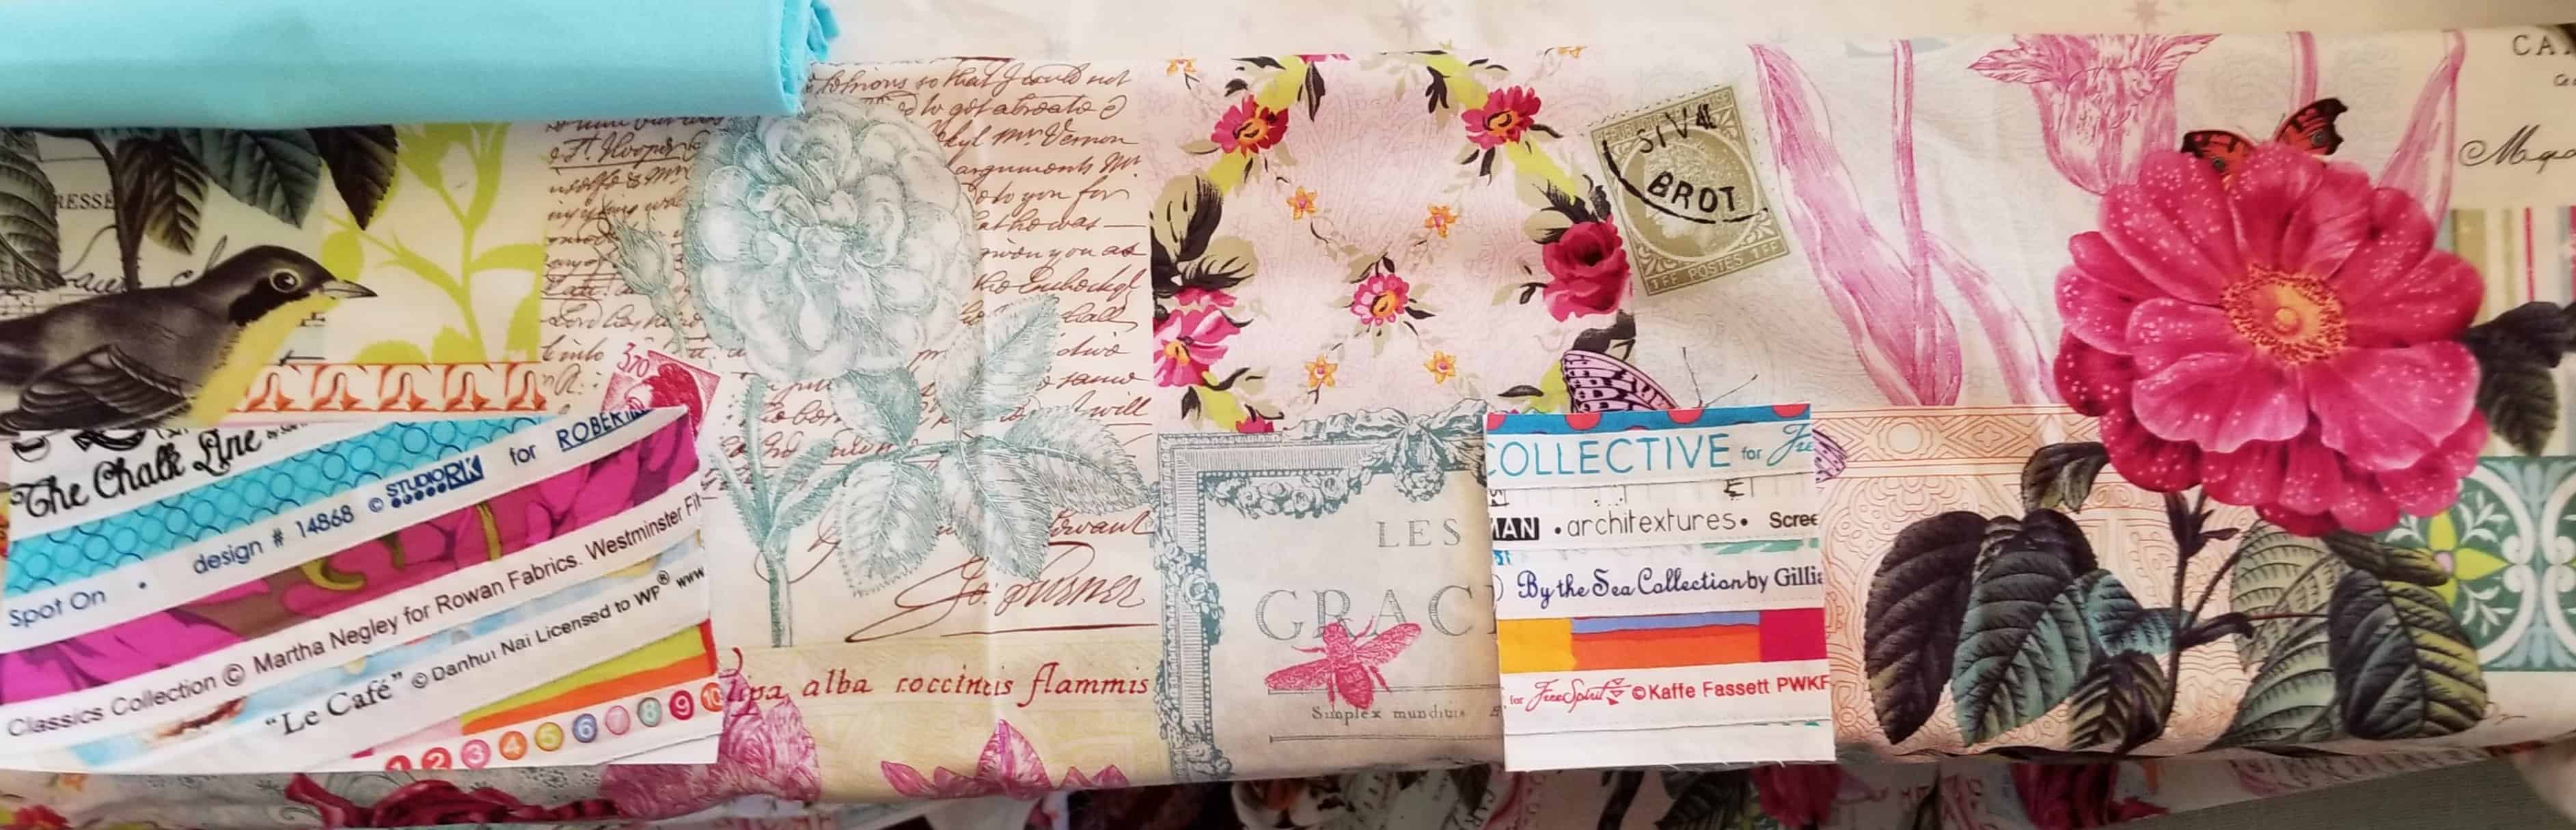
Undercover Maker Mat fabric tryouts
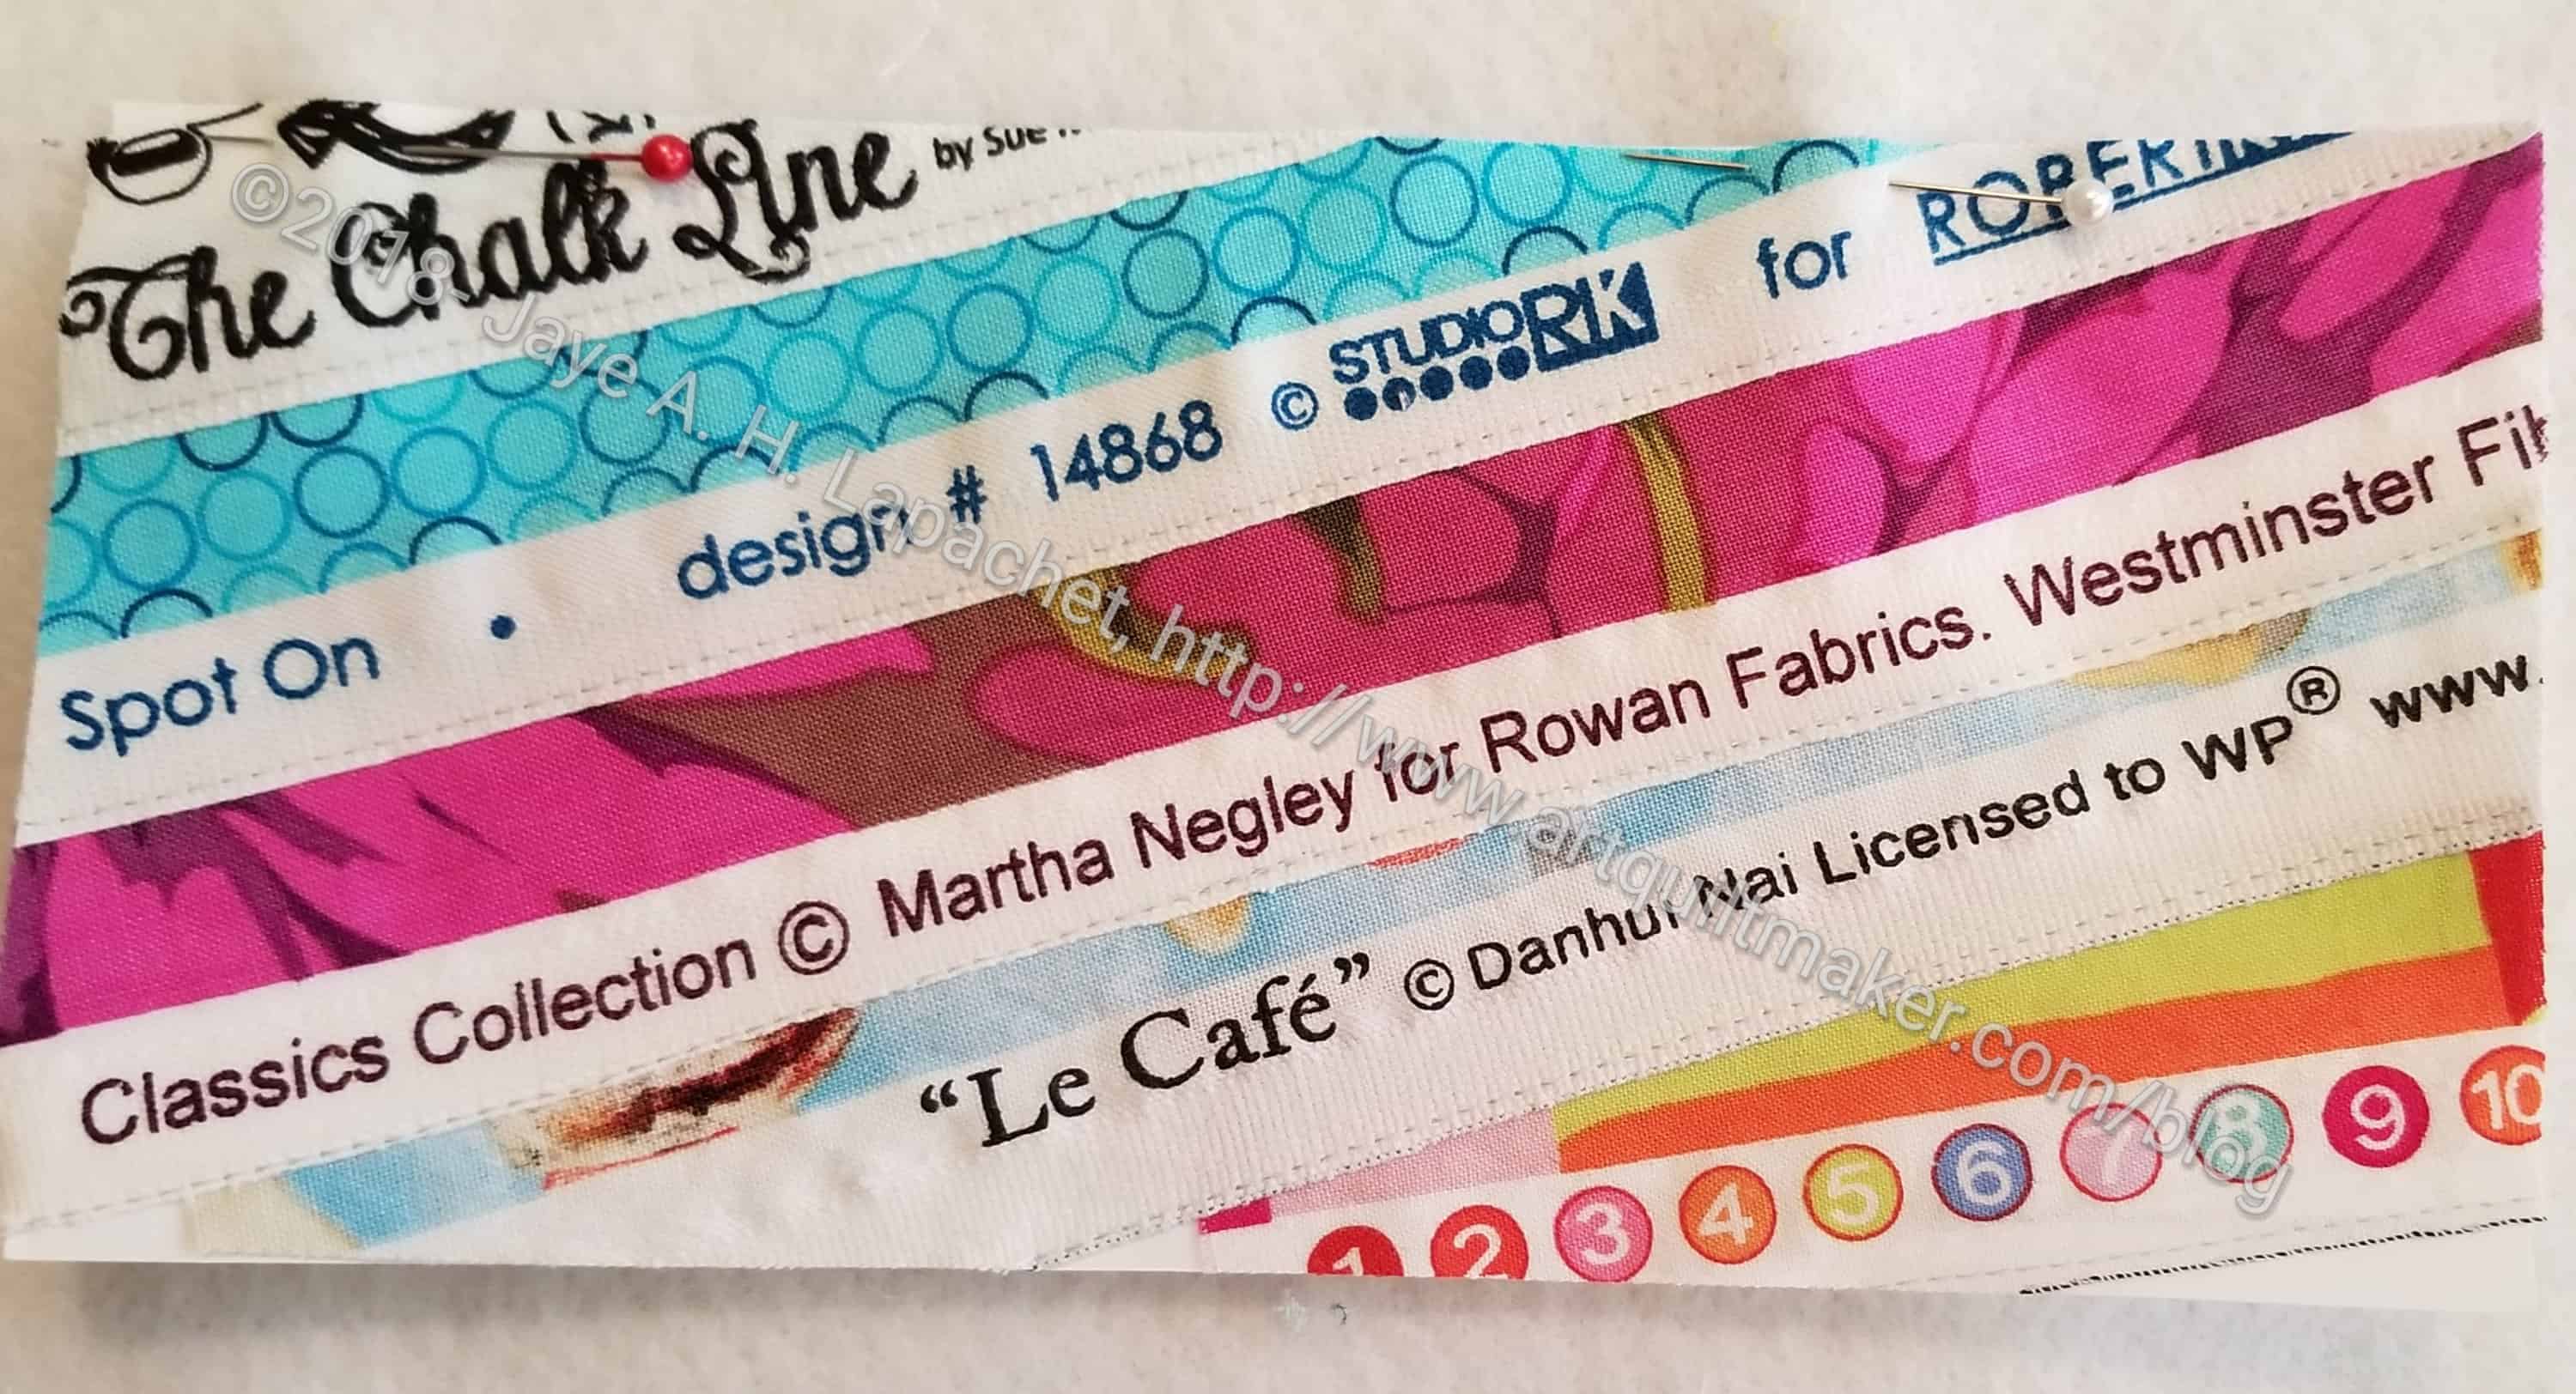
I had dome some work on them, but hadn’t finished the big pocket piece. I threw in a bunch of fabrics, so I would have some options if what I thought would work didn’t end up working. That was a good idea as I had to play around with fabrics until I got a combination I liked. My first group of fabrics is shown above. Somehow I found it to be too light or too much of the Michael Miller London Portfolio fabric. I also wasn’t sure about the turquoise binding.
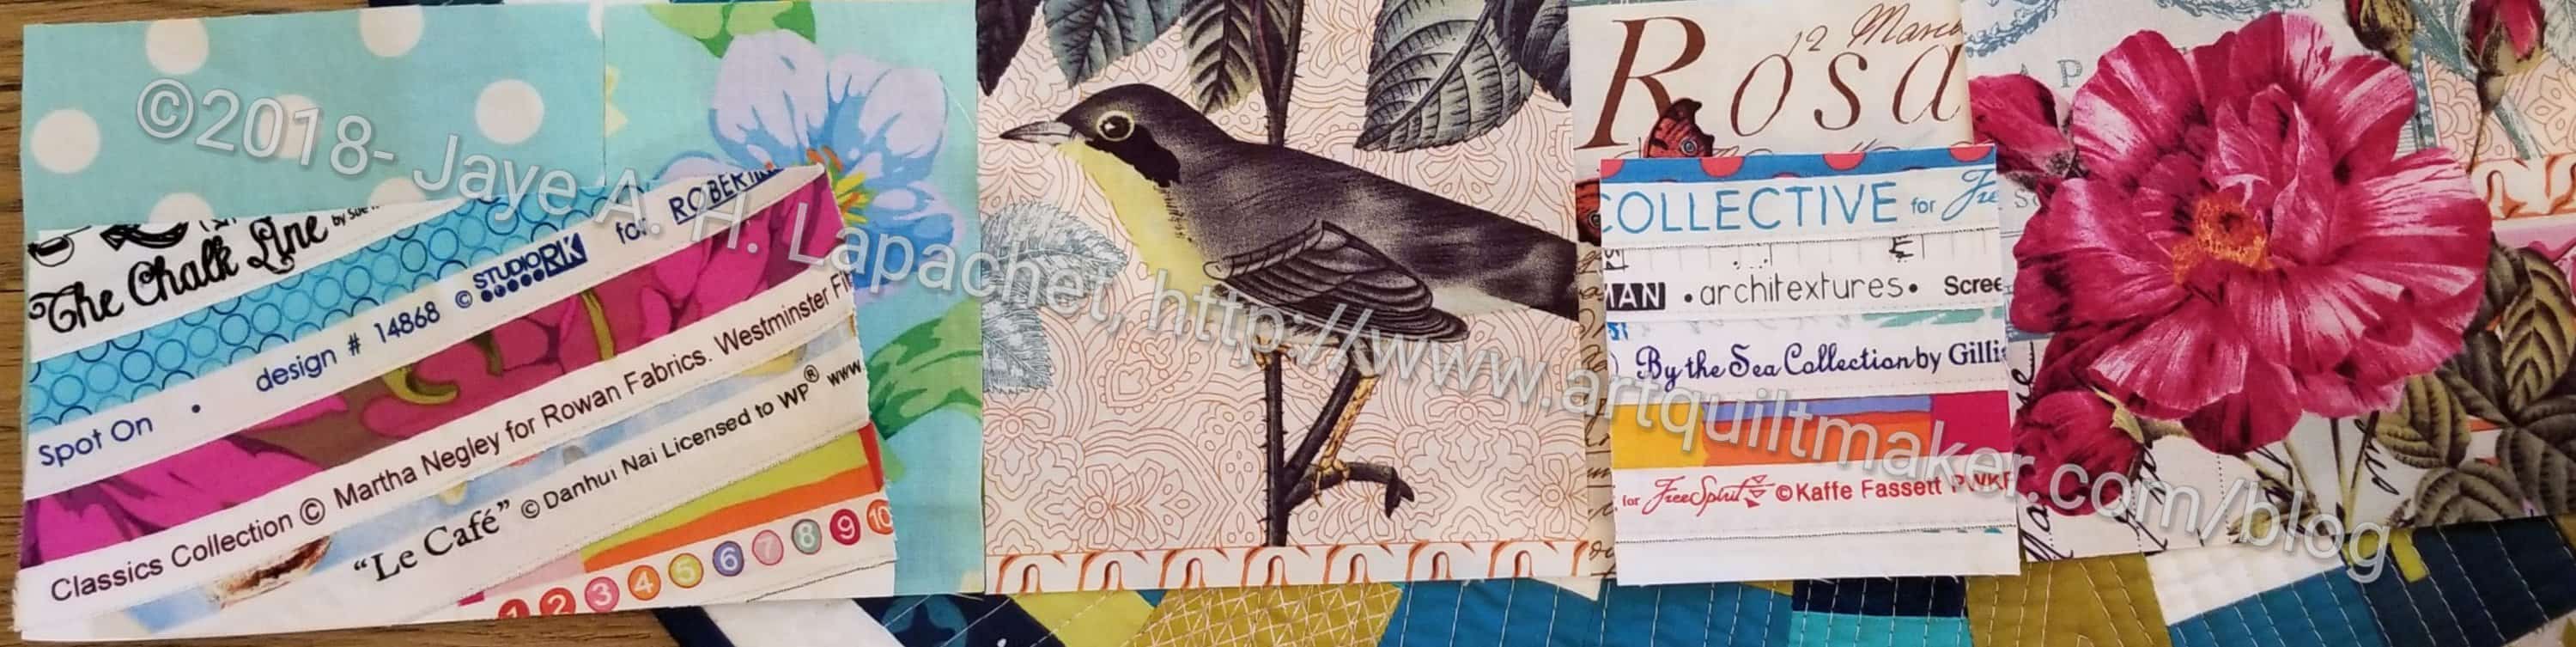
Test group of fabric for Undercover Maker Mat
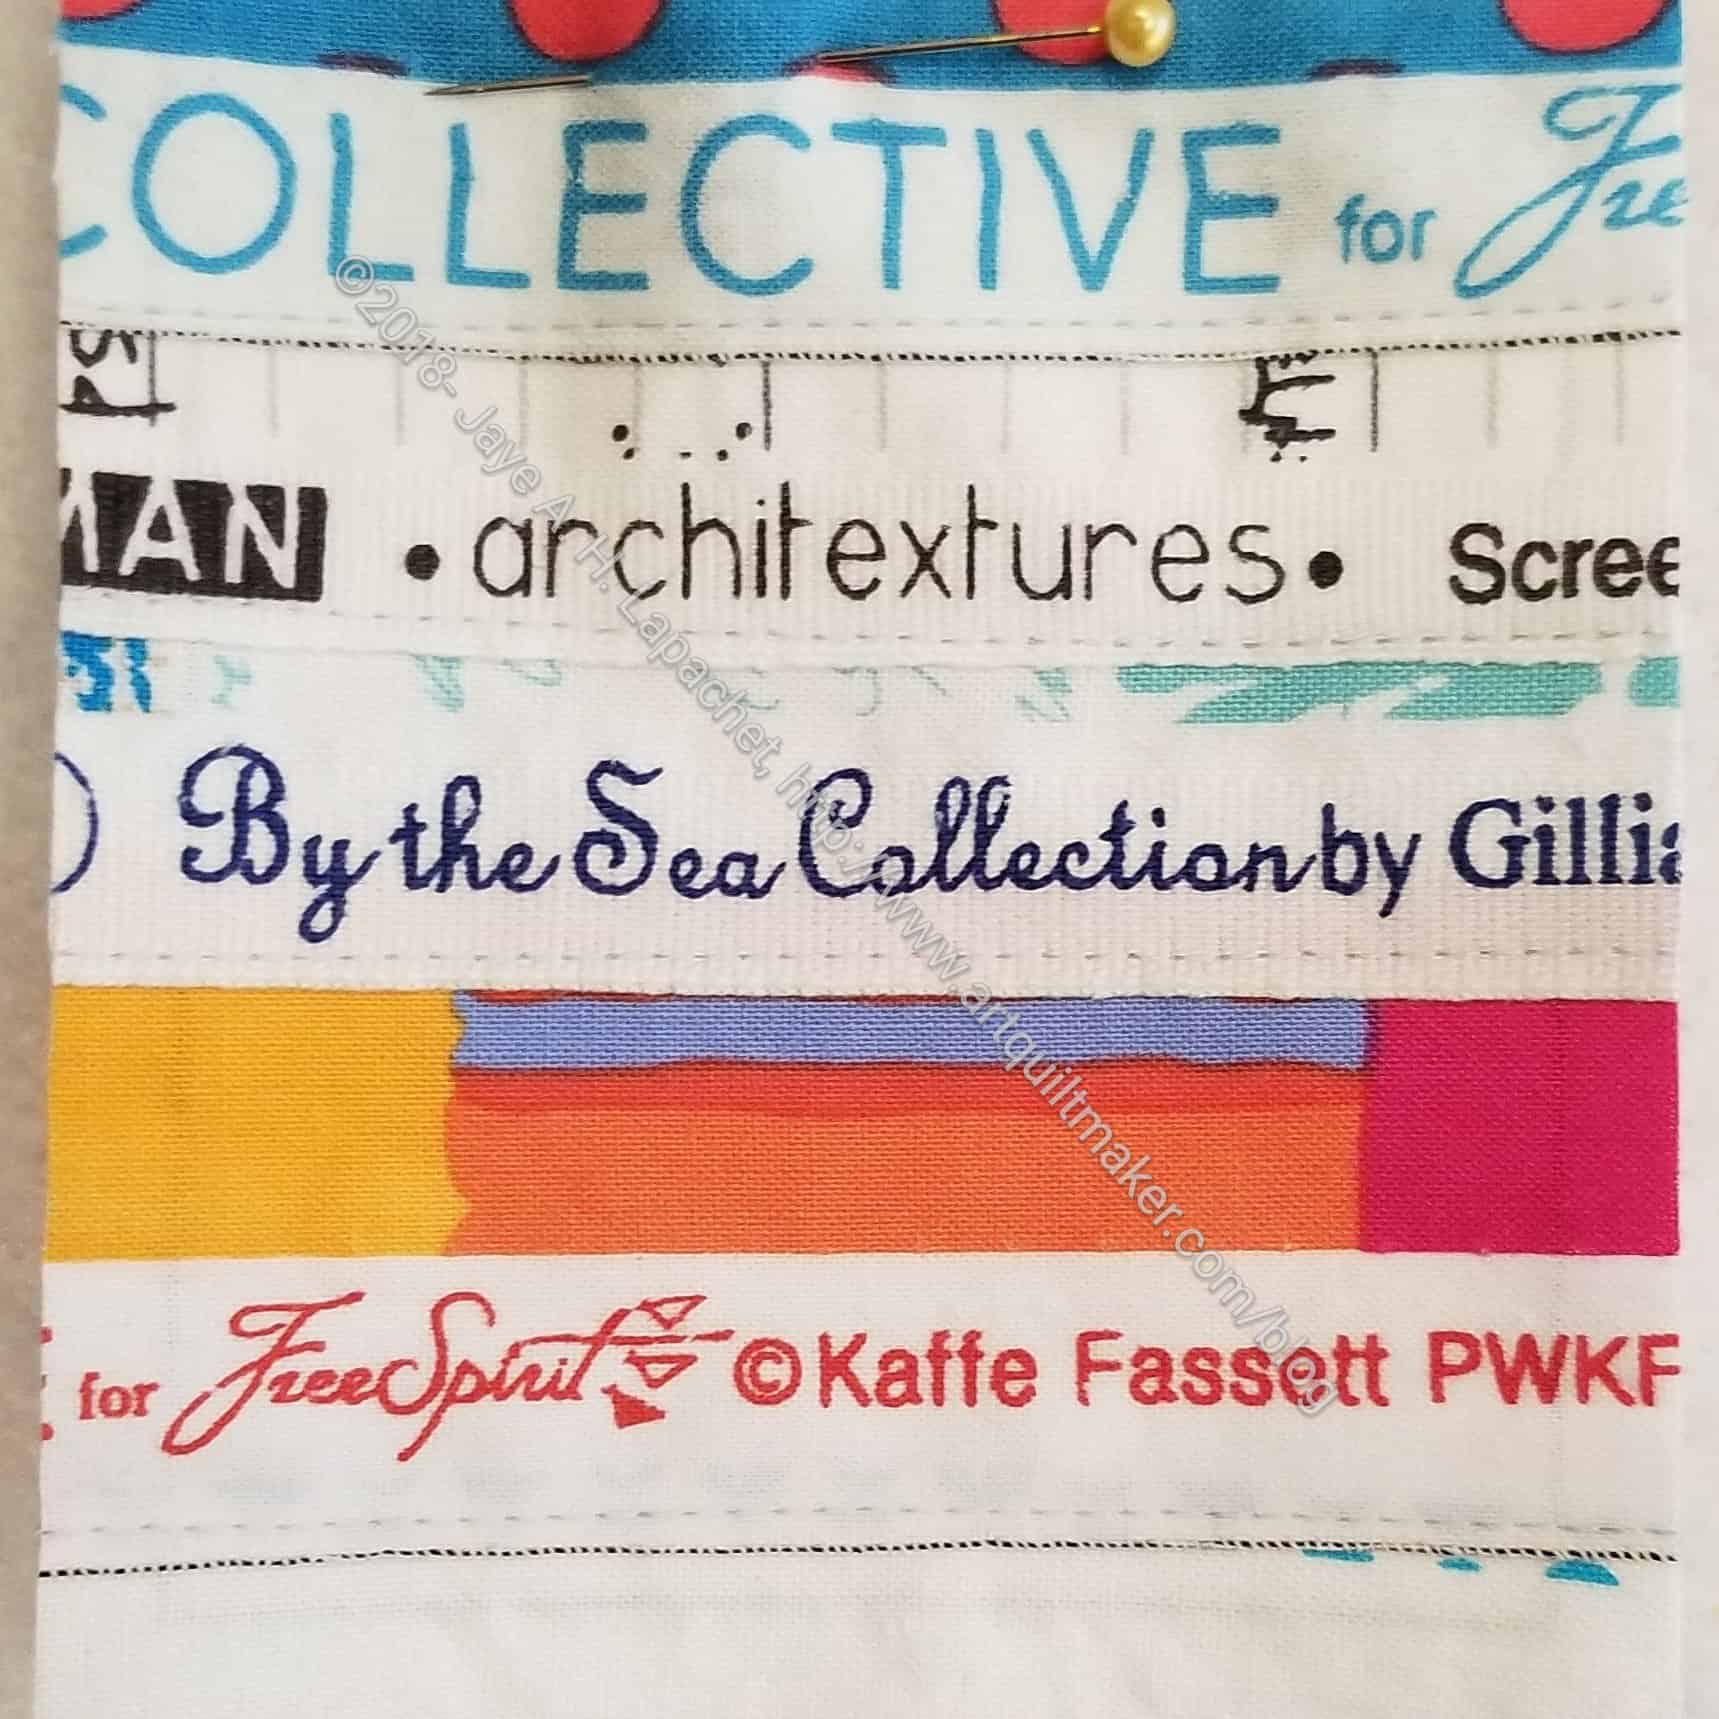
I decided on the above combination. It has a good amount of London Portfolio, but some dots and Martha Negley as well. I did not make the foundation pieced center. I forgot to make it at home and don’t really like foundation piecing anyway, so it was easy to decide to fussy cut instead.
Kathleen’s Undercover Maker Mat
I was surprised that Kathleen knew the pattern, but she had made one and was using it for her longarm head. I shouldn’t be surprised She knows and makes all of the most popular modern patterns. She used some really nice fabrics.
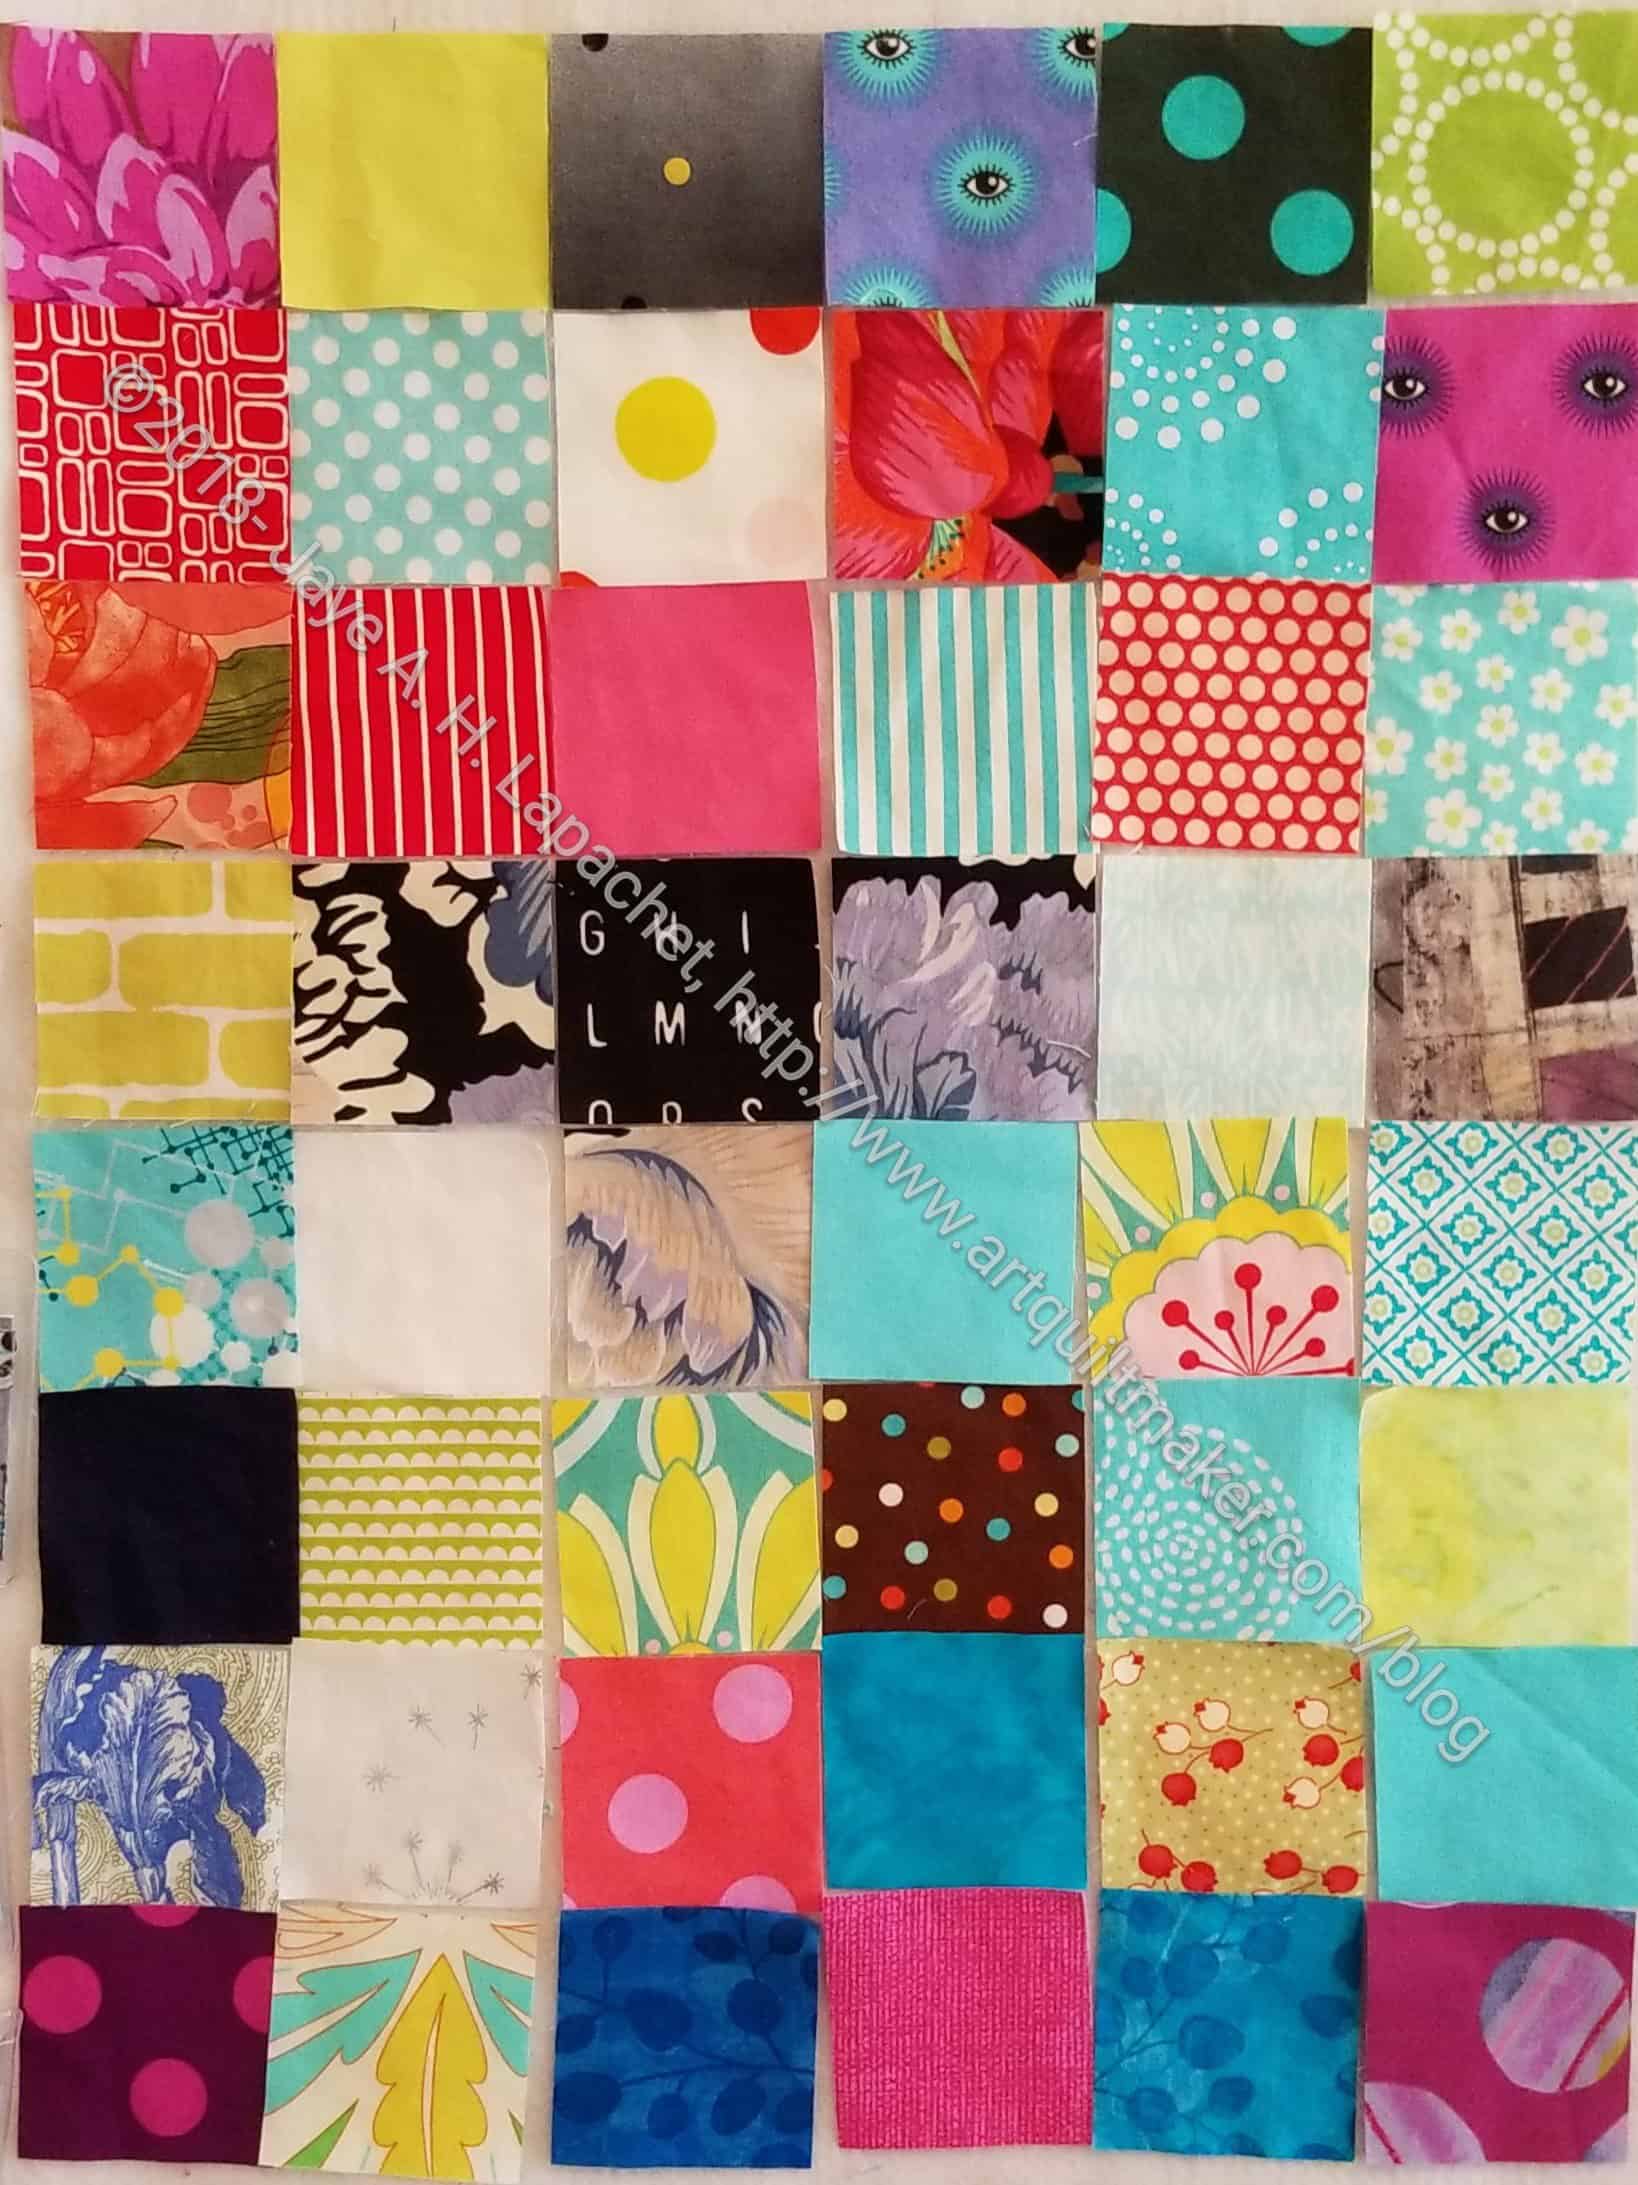
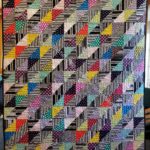
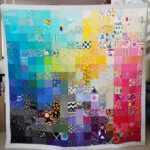
I finally got enough squares to make an interesting post for you. The last time I posted was in August, so not horrific, but long enough. I am not cutting up fabric and the pace I should be. I keep just piecing.
You’ll notice the MetroScape fabrics mostly missing. I am waiting to finish the top before I cut up many squares, because I’d rather have those fabrics missing from FOTY 2018 than not be able to finish the MetroScape quilt. I think I’ll have plenty.
As mentioned the other day, Nicole over at Lillyella’s World is leading a Sew-a-long making the Undercover Maker Mat. I’ll be heading out for a few days of sewing next week, so I wanted to get a few of the fiddly bits done and lessen the amount of stuff I needed to bring.
Undercover Maker Mat small pocket
I started making the selvedege pockets. I am not sure I wanted to use selvedges, but the pockets on the sample look really cute. I thought I would try it out. I can always cut some fabric and use that if I decide I don’t like it.
I am still on the fence about selvedges. They can be pretty and fun, but I don’t see myself making a selvedge quilt or using them in a large way. Small touches, yes.
For the small pocket, I tried to pick selvedges that I really liked or meant something to me. I also wanted a little bit of color. I don’t know what I will get when I sew the pocket into the whole piece.
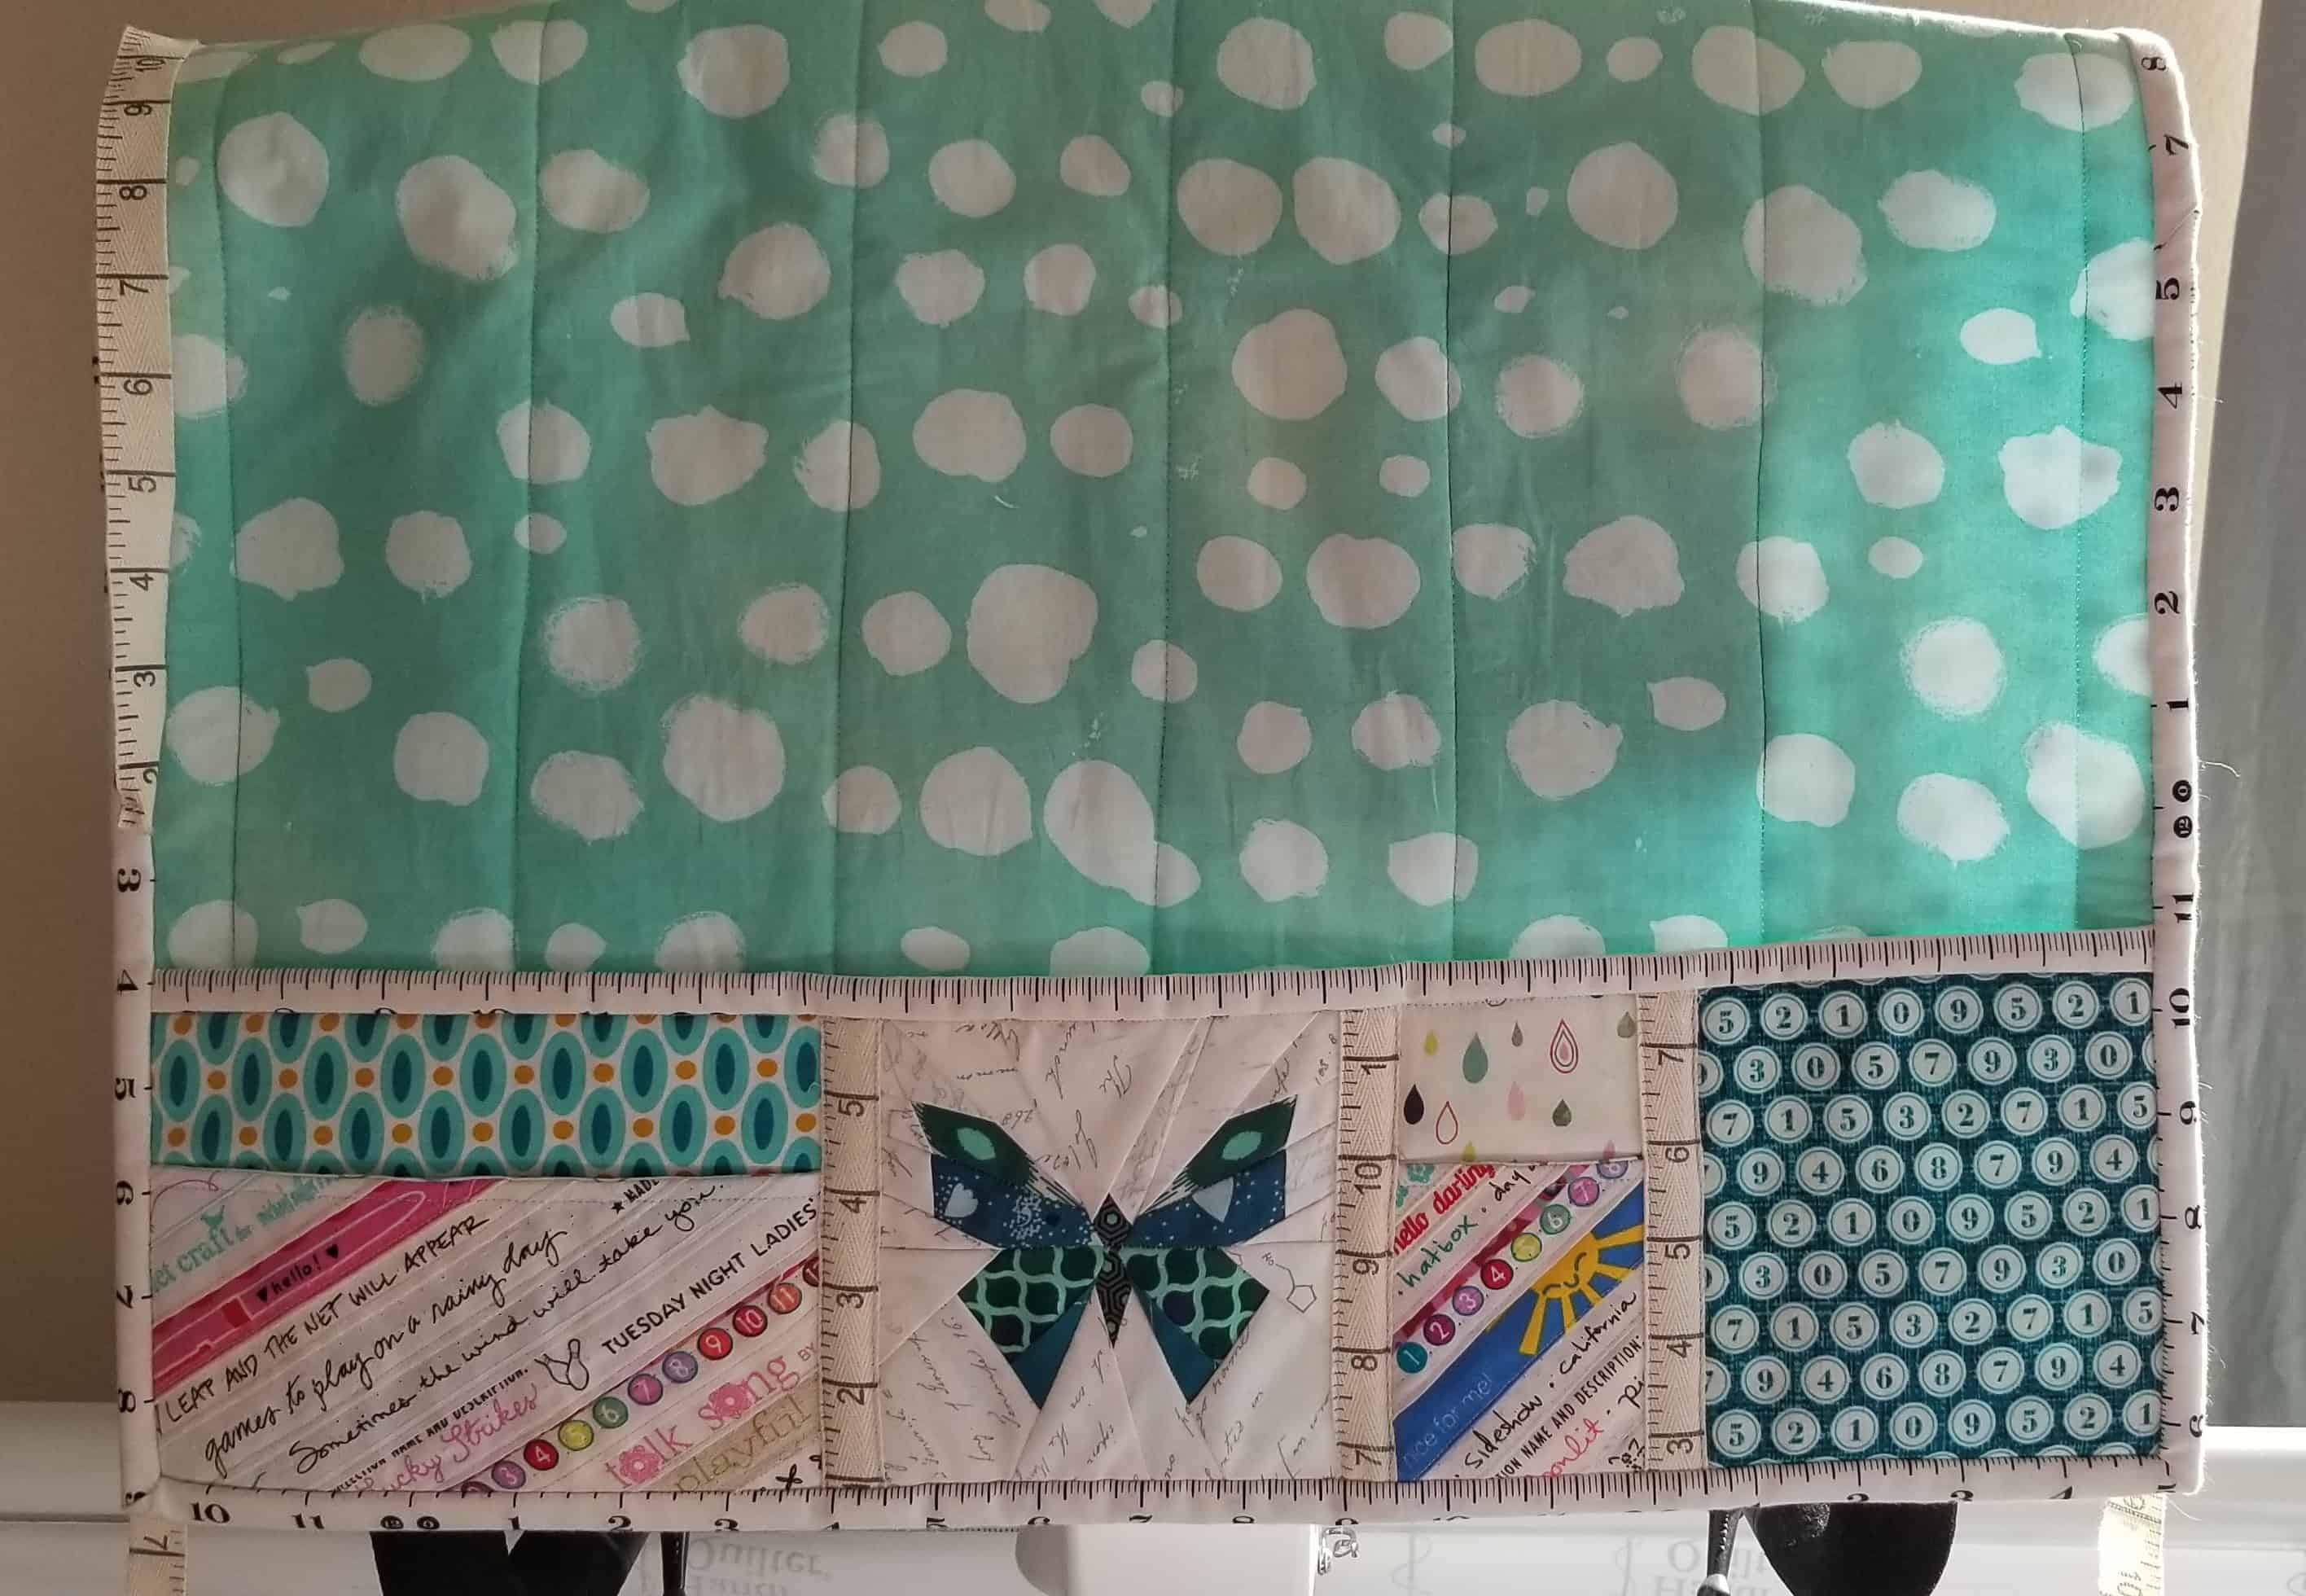
Undercover Maker Mat large pocket
For the large pocket, I followed the directions and put the selvedges on the diagonal.
Now both pockets are on the design wall and I am looking at them. I want to make sure I like them both.
The other thing is the size. I think I need to make mine a little bigger, because my machine is 19 inches wide. I think it would better just slightly bigger. I am thinking about how to do that.
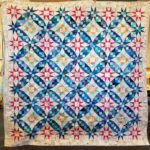
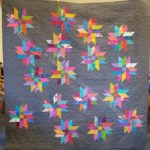
I haven’t talked about this project in a long time. I have been working on bunches of EPP stars. It wasn’t until last week that I actually put some of them together in groups and then attached them to my big piece.
I also laid the whole piece out on the bed and found that I have to double the size to make it even begin to fit our bed. I am feeling a little daunted by that effort with all of the other hand projects I have. Still, my friend Faye said that I have to think about this project as a long term, slow project.
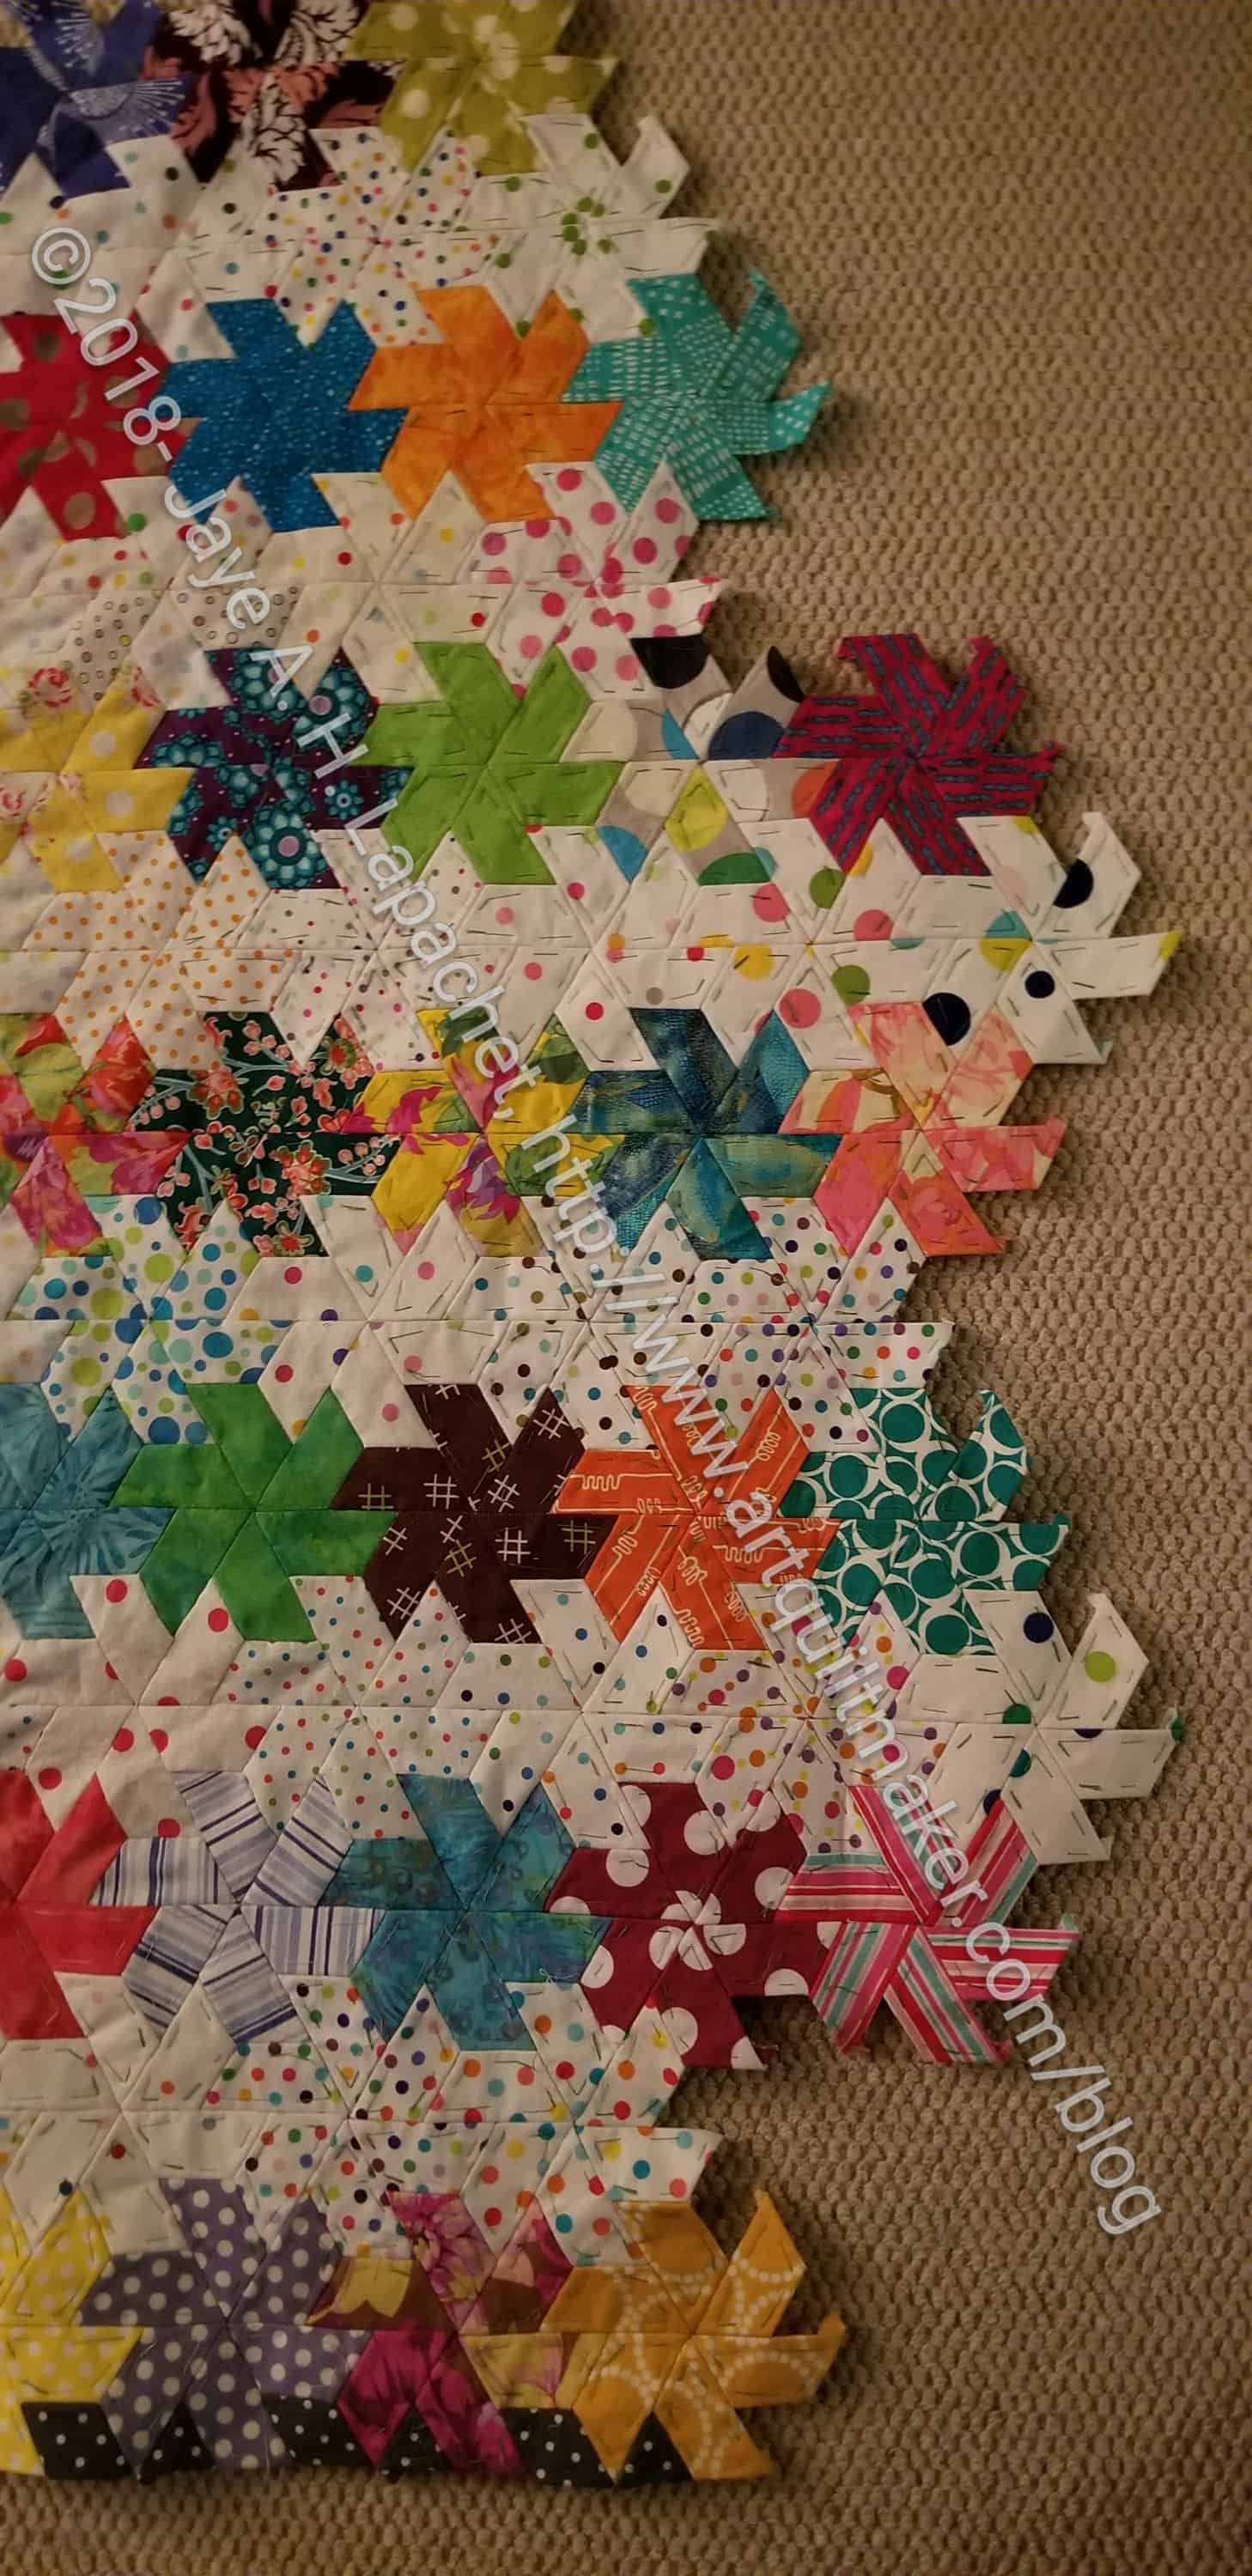
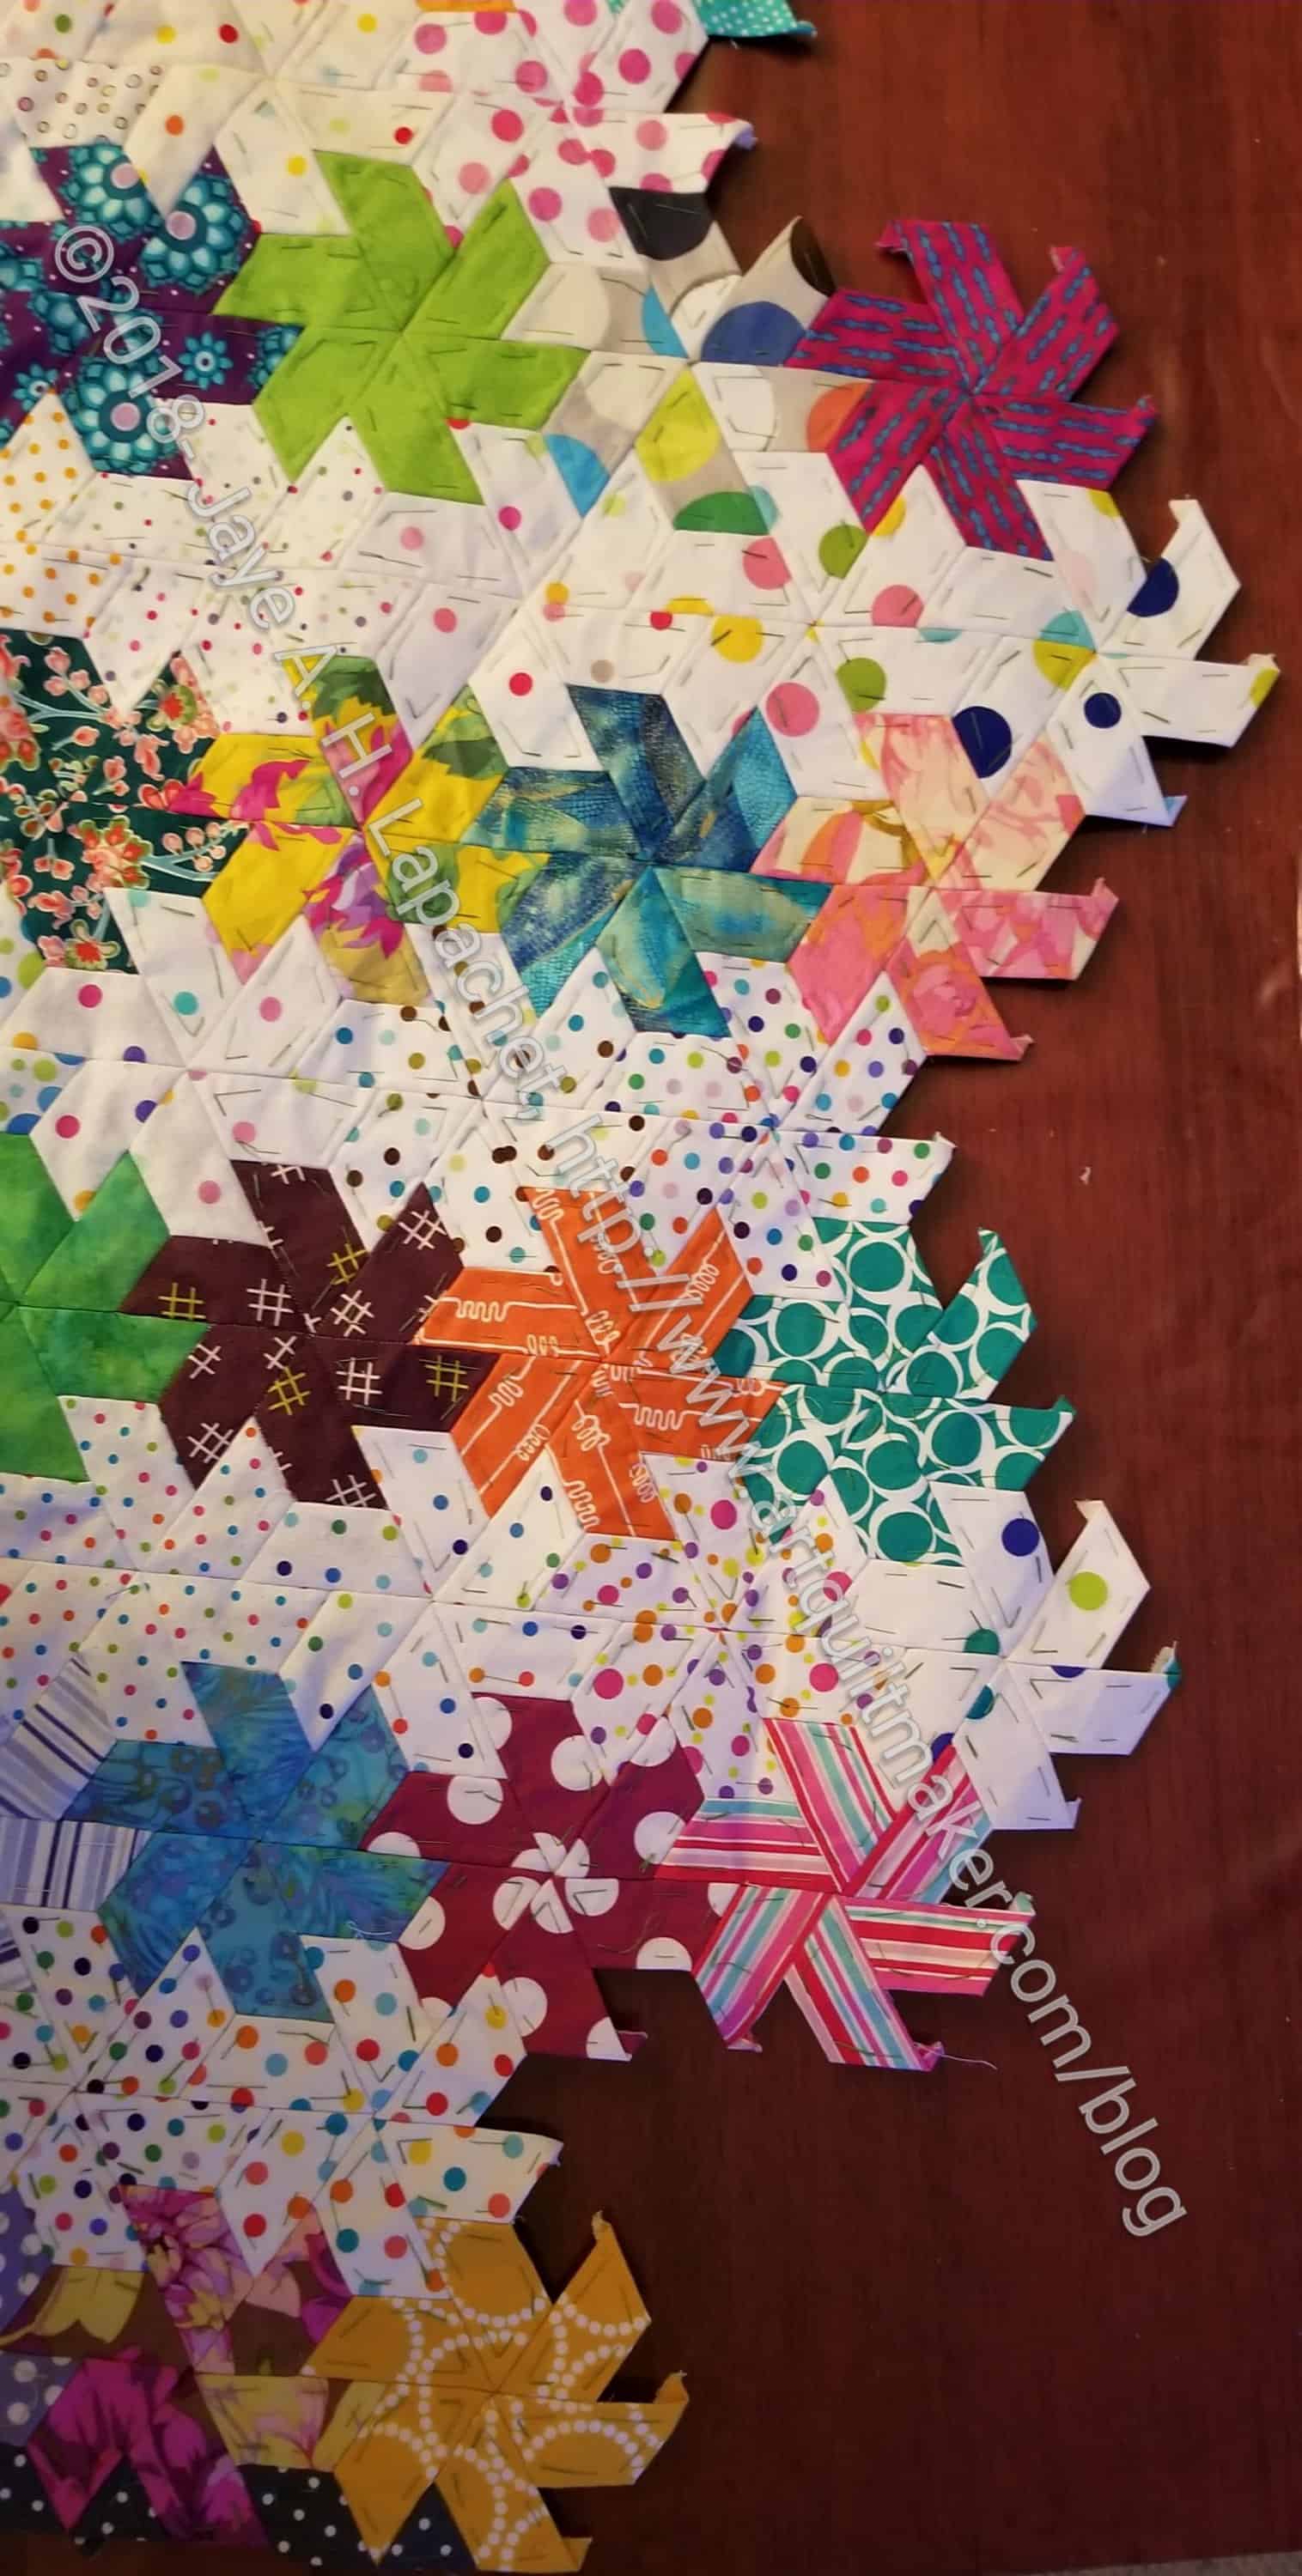
Hexie Stars -Big Piece detail
There is a certain amount of satisfaction in getting even a few bits of this top done. When I add 4 stars to the larger piece, it feels good. It feels like I am making progress.
This is another project where I find that there are not enough colors in the rainbow. I guess I’ll have to think of it as a design challenge.
I am making progress. Going on Retreat helped, but it’s still frustratingly slow. I have to appreciate that I am still able to make some kind of progress. I also have to think about what speed would NOT be frustratingly slow.
Finished 2018 Quilt Projects
After lamenting last month that I hadn’t finished any quilts, I was able to add two finished quilts to my list this month.
Finished 2018 Quilt Projects
I am still at five quilts in 8 months. I know that Colleen has three, but I would still really like to have more off my UFO list. They don’t magically get done. I know the key is not to add anymore to my UFO list.
In Process
The ‘In Process’ is used to denote projects on which I am actively working or are on the design wall waiting for me to stitch. I try not to put away projects, because that will ensure I never work on them
MetroScape is a new project, as you have read. I needed something new to give me a little bit of a new perspective. I have four blocks finished and am preparing to start the 5th. The pattern calls for 12 blocks. I might make more, but we will see since the blocks are 19 inches. It is fun, I love the fabric and I am getting great feedback on it.
English Paper Piecing Project– half hexies – I have made a couple of dozen stars, especially the background stars. I started adding the grey diamonds to one edge to form the border.
Sealife Quilt-let – reading for binding. I need to make the binding then sew it on.
Still WIPs
I still have WIPs. Who doesn’t, after all? A project in the ‘UFO’ category means I am stalled. A nicer way of saying UFO is a WIP. The list is a lot shorter and the projects are newer, for the most part.
City Sampler – blocks all made. The long term goal is to sash the blocks and put the top together. In the meantime, due to some seam allowance issues, some of the blocks are smaller than others, so I will have to adjust them in some way – either ripping and resewing, adding a piece or two to the block, or with sashing. I am just waiting until the mood strikes. My continuing sticking point is that I just need to deal with the problems. I did have an inkling of fixing them on Thursday, so perhaps the project is closer to the surface than I thought.
FOTY 2017 – pieces cut. Need to layout and start piecing. No new progress.
Handbag Sampler – this is the forgotten project. The blocks were teaching samples when I taught a sampler class the time before I started writing the quilt class sampler tutorials. I found one block recently, but otherwise I actually don’t know exactly where the blocks are hiding. I have an idea and still have to crawl up in the far reaches of my fabric closet soon and see if I can find them. I haven’t even found a picture of all the blocks. Sad.
Lobster – I still have more stitching to do and then I need to quilt it.
Pies and Points from 2016 Victoria Findlay Wolfe class. Julie and I had a playdate towards the beginning of April. I brought this piece with me so I could cut more elements (Julie has a Sizzix). I lost my excitement about this piece and will have to get it back. I had to move this to the WIPs area.
Pointillist Palette #4: Fourth is a series of 6 quilts; needs tiny square patches sewn together. No progress.
Under the Sea: class project; like the design and am happier with the colors. I worked on it a couple of nights during Craft Night and am nearing the end of the stitching.
Black and Red quilt – This came about because of two other projects. I made a whole bunch of bias tape as part of my failed attempt at doing the Mighty Lucky Club a few years ago. Another part of the inspiration came from my class with Tina of Little Blue Cottage fame. This was going to be for a nephew, but I think it will be for one of my SILs and BILs. I have rectangles cut and some bias tape ready. My next step is to sew the bias tape to the rectangles like pickup sticks. I don’t have any photos of this, so you’ll have to trust me.
Small Projects in Process
Most of my progress involves thinking or just cutting.
All Rolled Up Tote – part of Crafty Gemini Organizer Club. I started cutting out the pieces yesterday at Sew Day and finished at home. It is ready to sew.
White on black dots cell phone wallet – need to find the fabric and cut out the pieces
Solid black cell phone wallet – need to find the fabric and cut out the pieces
Chubby Charmer with Good Fortune charm pack – gift; not started.
4-Zip Organizer – part of Crafty Gemini Organizer Club. It is on my list, but I haven’t actually started
Retreat Organizer – another project from the Crafty Gemini Organizer Club, also on my list, but not yet started
Ultimate Project Organizer – another project from the Crafty Gemini Organizer Club, also on my list, but not yet started
Ready for Quilting
Aqua-Red Sampler –This is ready for quilting, but I haven’t had the time to take it to Colleen yet. I’d like to get at least one more top finished before I head over there.
In Quilting Process
Stepping Stones #2 – I took this to Colleen on my way to Sisters in July.
BAMaQG IRR –The sandwich has been basted. I machine quilted a couple of lines to stabilize it. I am making slow progress on hand quilting it using Big Stitch.
Theoretically, the Tarts Come to Tea is in the quilting process, though I haven’t worked on it in a while.
Binding
nothing at this time
Hunting and Gathering
30 Something: I continue to cut 1.5 inch squares. I am pretty sure I have the 800 I need, but I am not ready to sew them together yet, so whenever I have a chance to cut more I cut more. It will give me choice when the time comes. I looked at whether I could start piecing this, but I found I need to cut some other sizes. I need to get those sizes on the cutting sheet and get busy. I need over 600 of a size something like 1.75×3.75. I’ll have to think up a new name for this quilt, too, since I am not using 1930s fabrics.
Blue Gradation Quilt: cutting 2.5 inch x 4.5 inch blue rectangles. It has to end sometime. I wasn’t sure I was ready to put this together, but I think I might be. I might do a couple of gradation quilts in a row just to get the practice.
Blue Lemonade: cutting blue, green, purple 2 inch squares. I used a lot of these squares for En Provence, so I am slowly cutting more.
FOTY 2018: I have started cutting 2.5 inch squares for the 2018 version.
Pink Gradation Quilt: cutting 2.5 inch x 4.5 inch pink rectangles
Spin Wheel: really not started, but supplies gathered. I might have to cut some more background fabrics. I probably have enough fabrics and just need to decide to start.
Windmill quilt: Still hunting and gathering. I am supposed to be cutting a variety of greys for the background, which required the purchase of a new template. Cutting is very therapeutic, so I should try and do it when I have a few minutes.
Other
Stepping Stones #3 using the Macaron pre-cuts from Hoffman. I have all the fabric in pre-cuts and am just waiting for space (and desire) in my schedule.
Gross usage is just over 152 yards. My net is at about 61 yards. I would still be ecstatic if I could make it to 100 yards NET used by the end of the year. I didn’t think such a feat would be possible, but I might be wrong. I do have a quilt out at the quilter and one ready to be quilted. If I finish all of those by the end of the year that could make my net number jump up, but 100 yards is a lot. It is good to have goals!
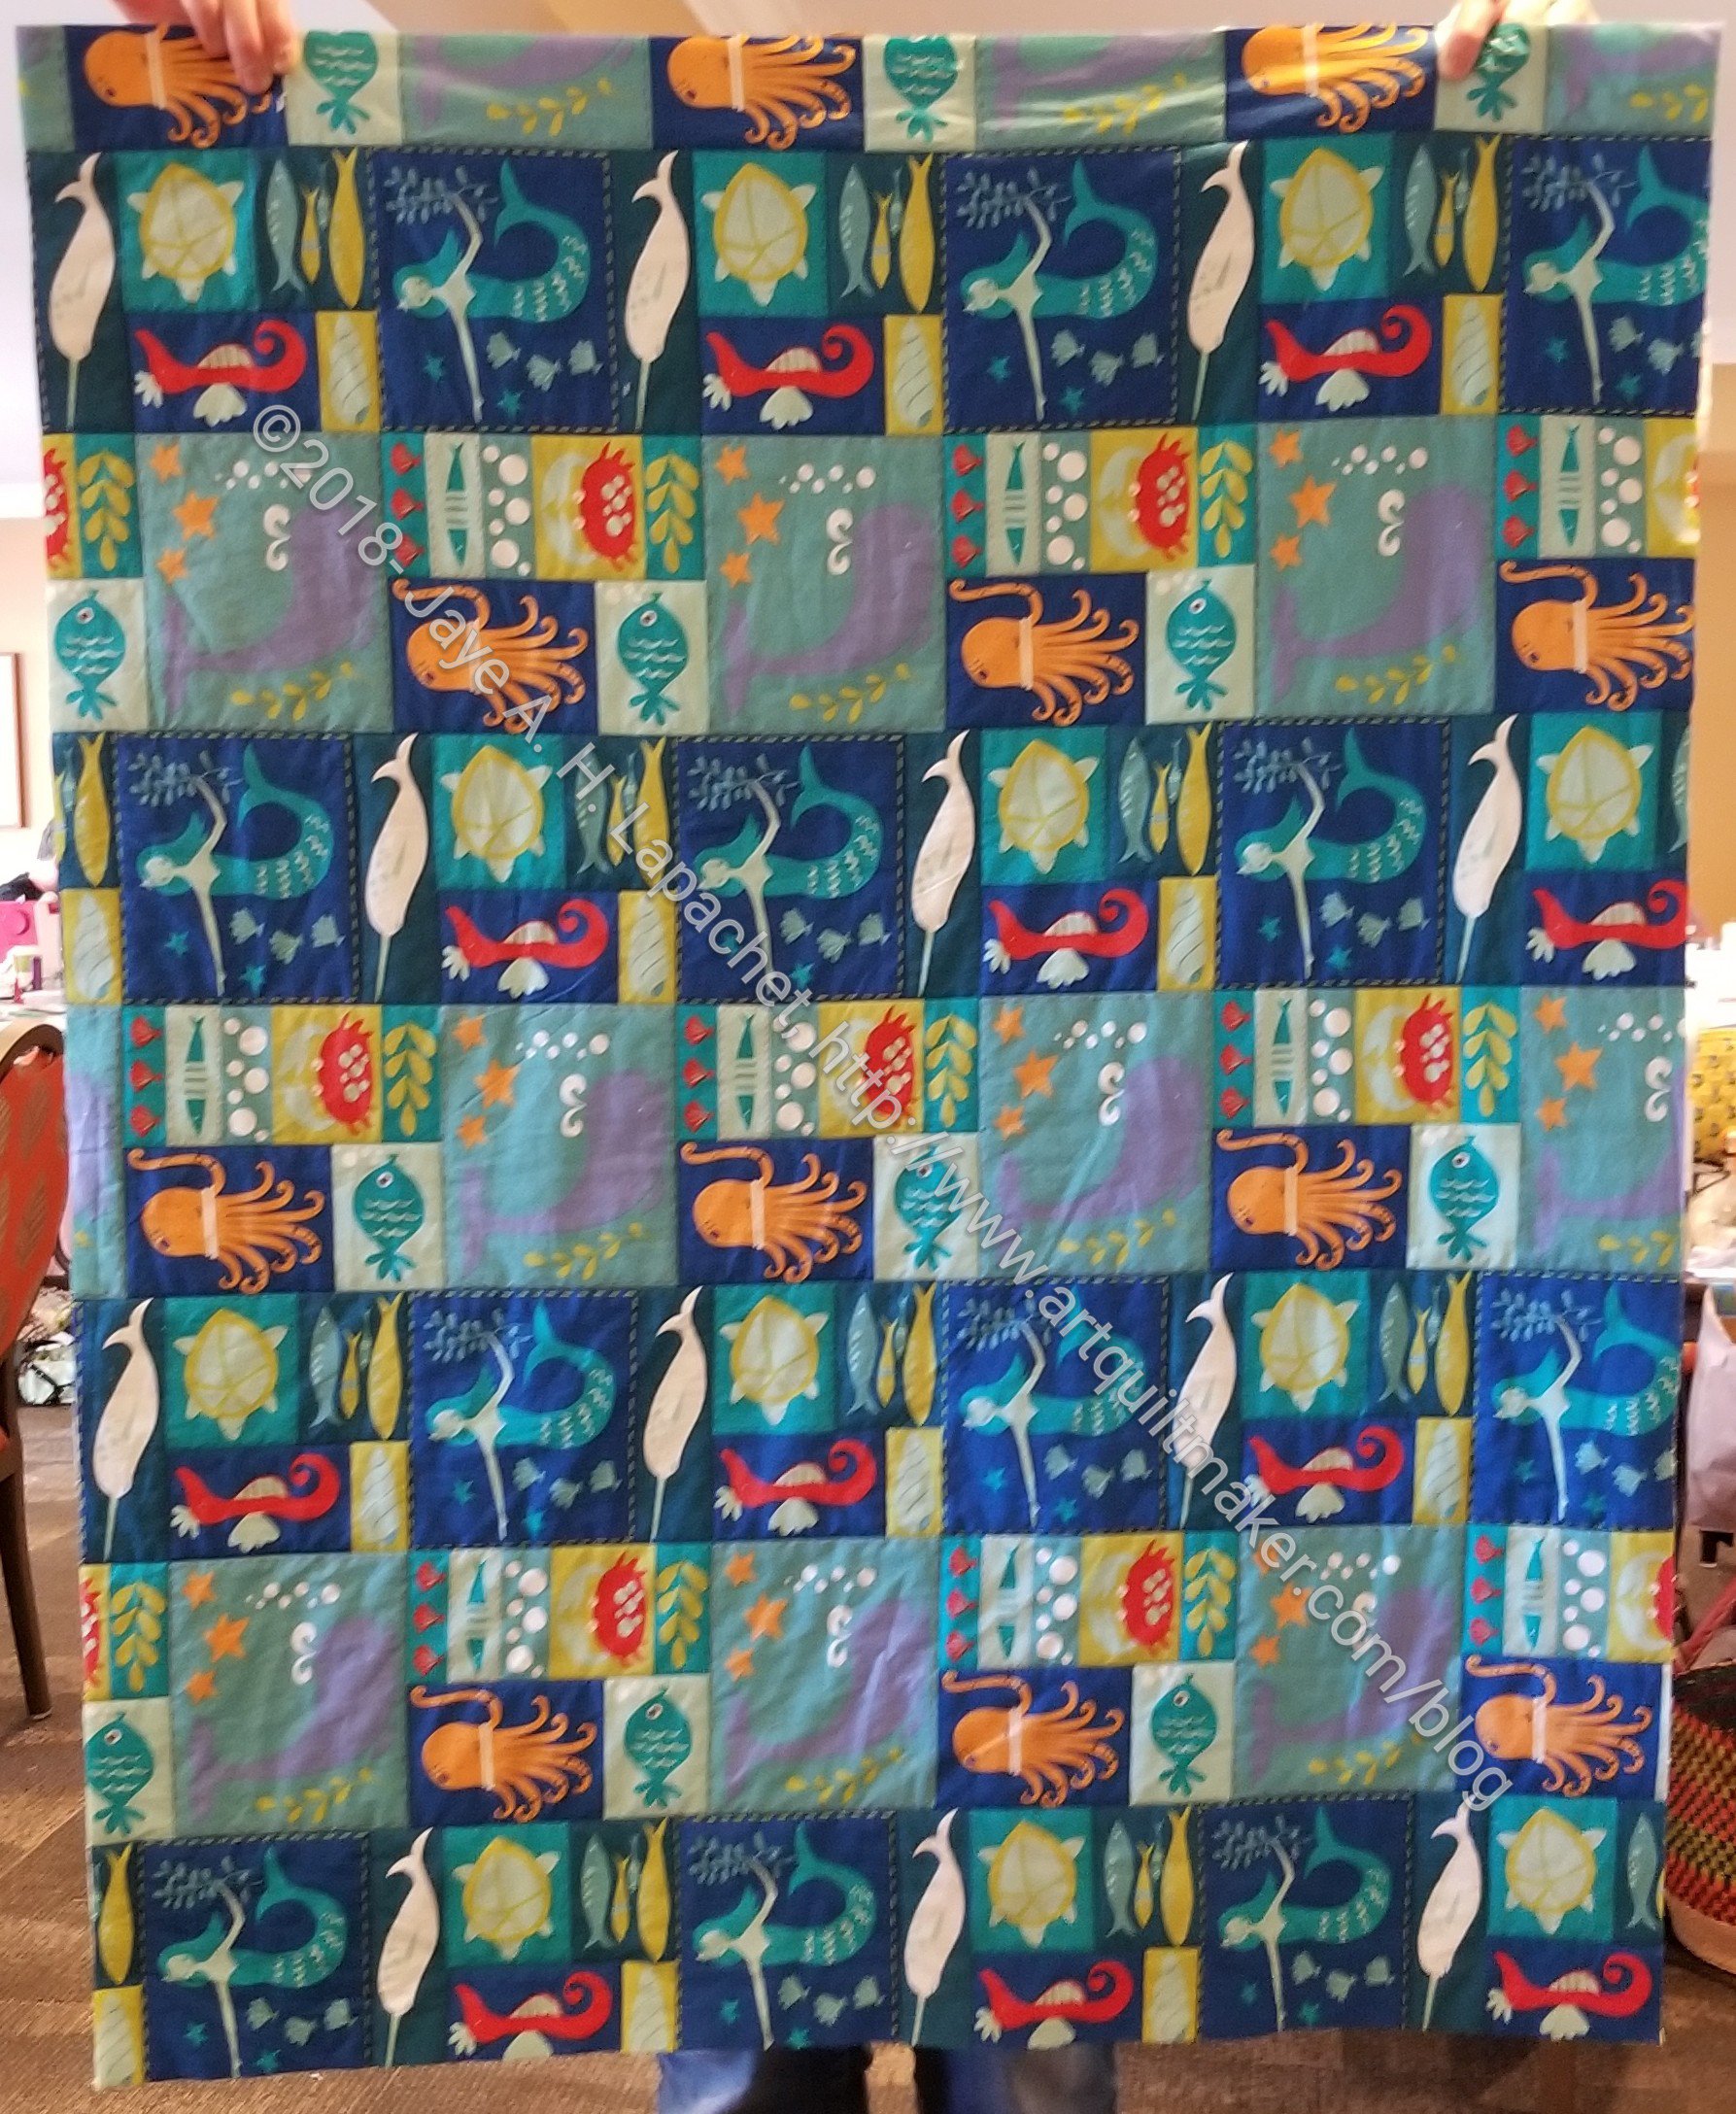
This Sealife quilt-let started as a piece of fabric I bought at PIQF. Perhaps I bought it last year?
I bought this piece of fabric to make a quilt for my friend’s grandchild. Since I was giving his granddaughter the BAMaQG Color Round Robin, I couldn’t very well leave her older brother out. I wasn’t up for a full on boy quilt and this piece of fabric seemed to be a good compromise.
I call this a quilt-let, because there is no piecing. I don’t know if there is another name for this type of work, so quilt-let it is.
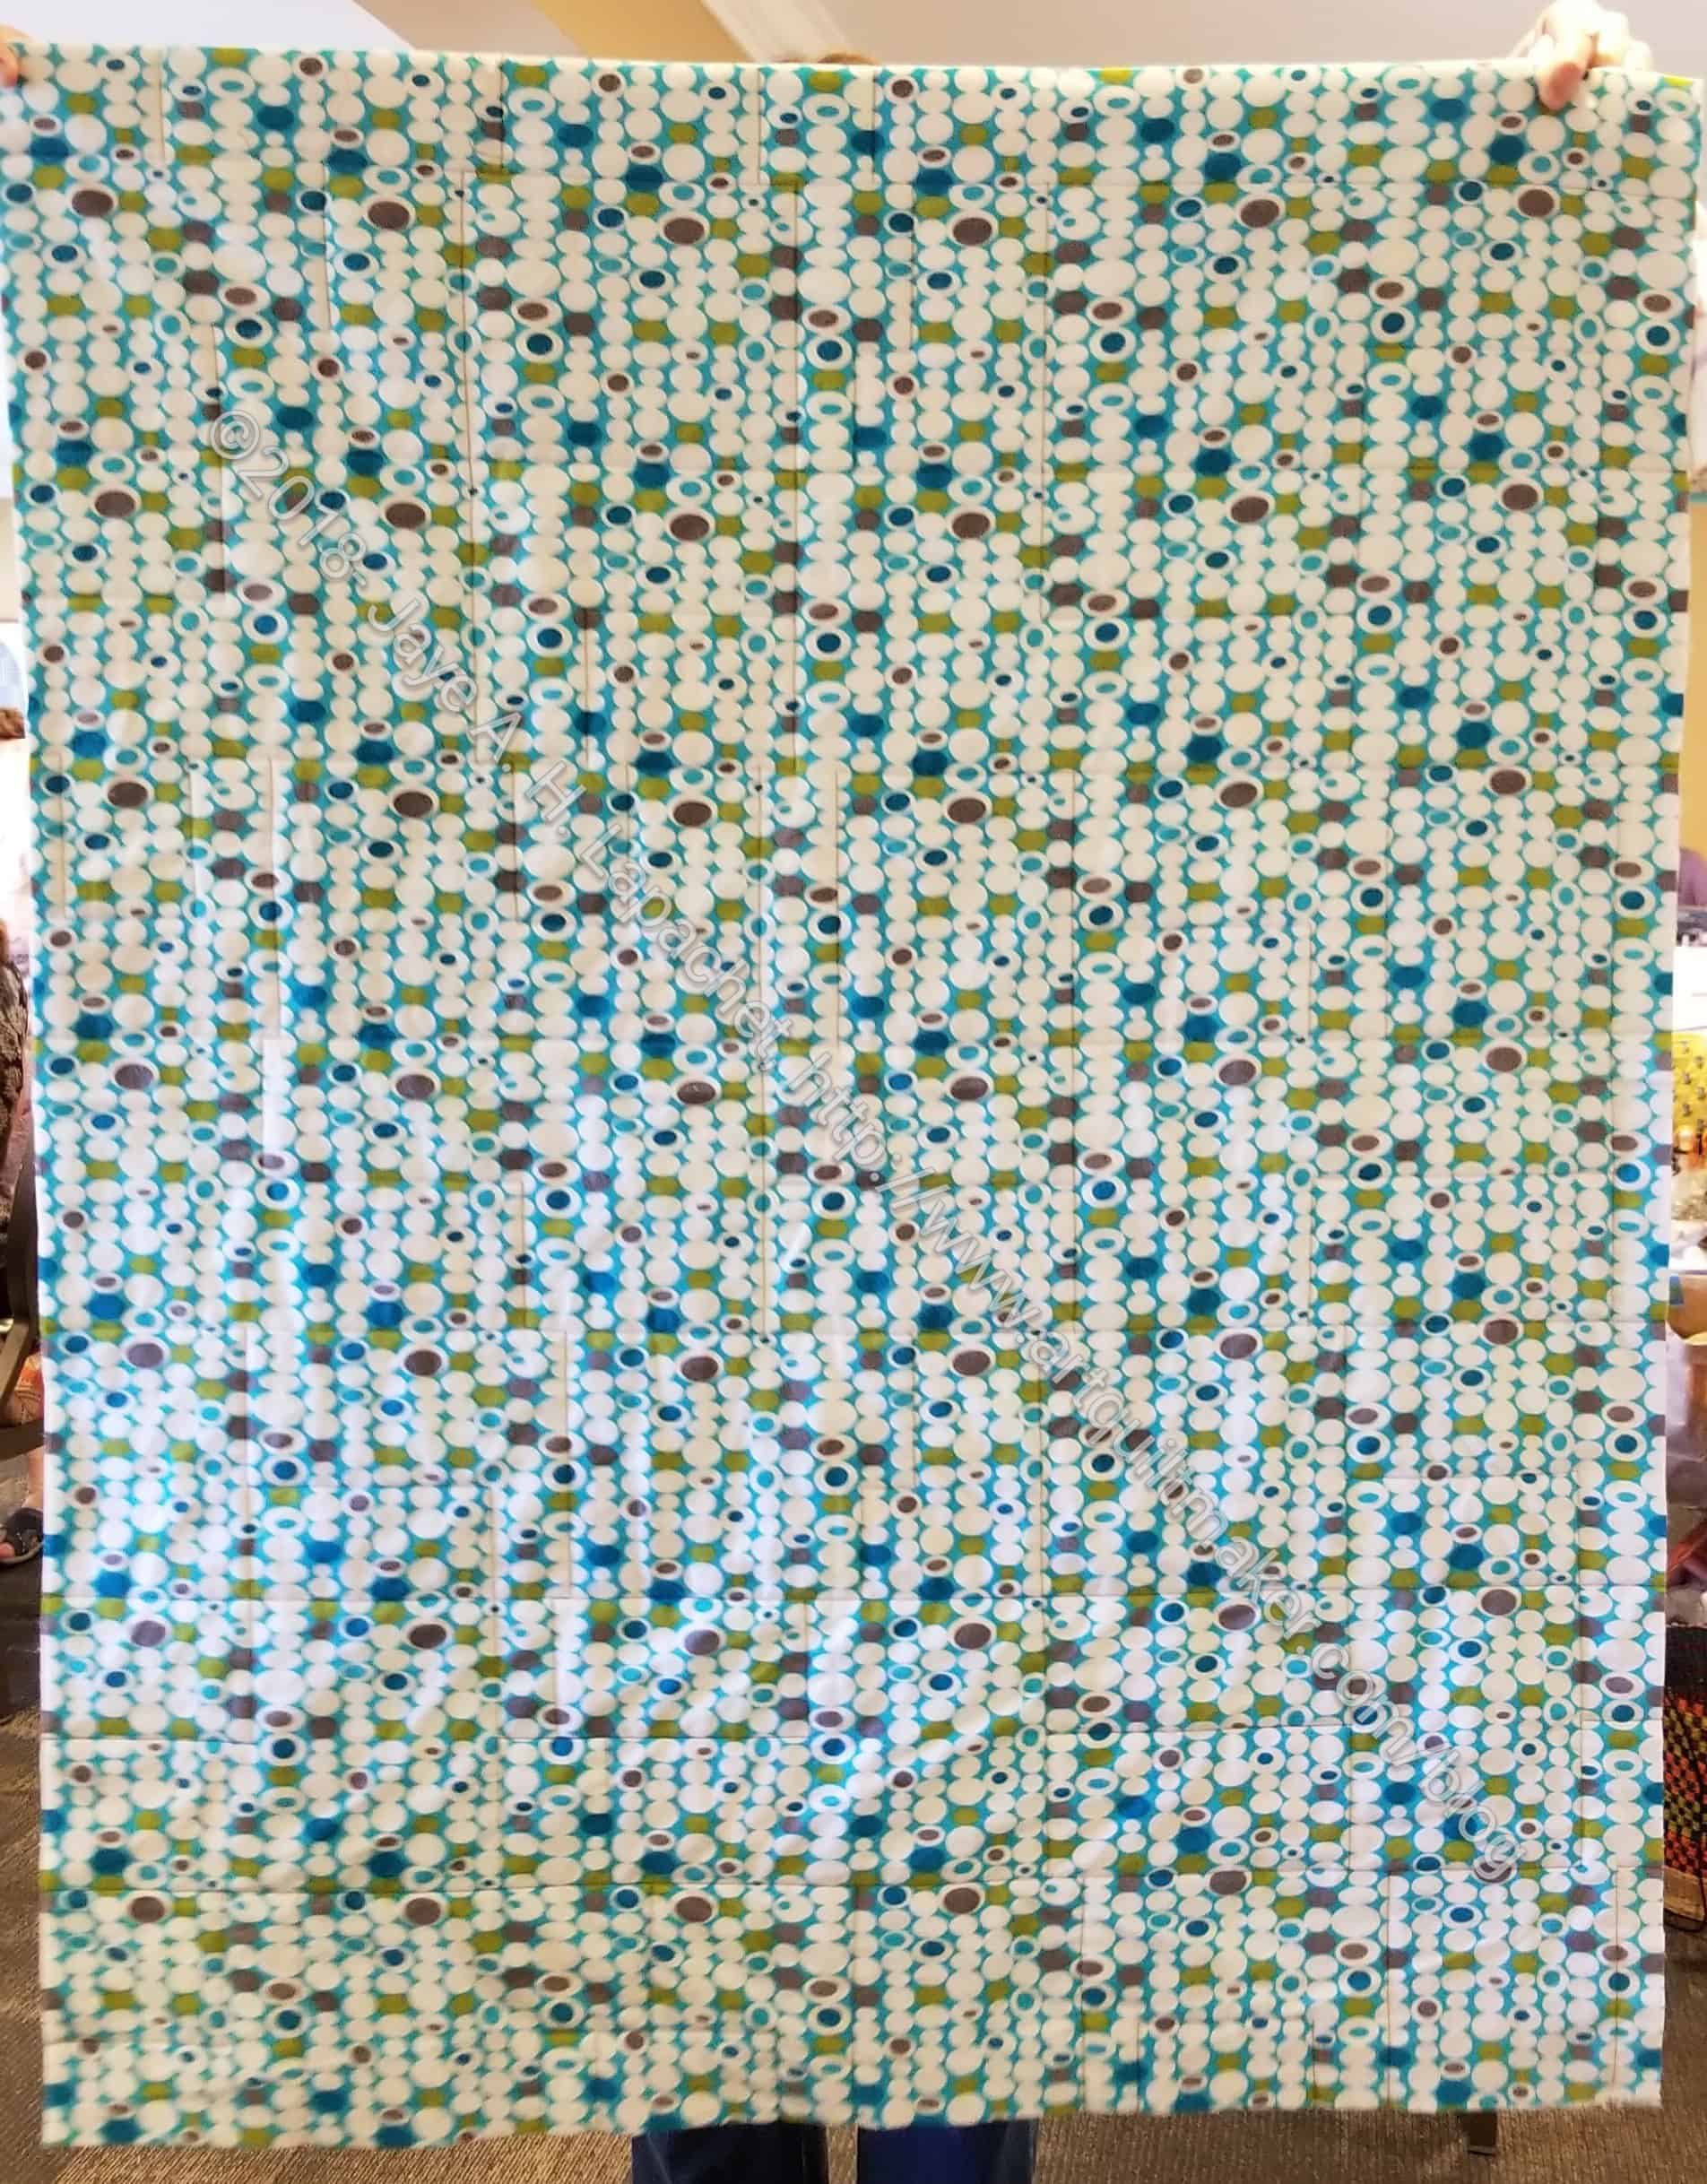
Sealife quilt-let back
After basting it in my hotel room on Friday night, I spent most of Saturday quilting the piece using some flannel for the back. I used the lines on the fabric to guide my quilting.
I have to make a binding and sew that on. I didn’t bring fabric to do that so that is a task for another day.
I am not sure this project was on any of my project lists, which means I can’t cross it off. Still, the fabric has been laying around my workroom and now it will be finished so and off to its new home.
I should have started a new project sooner then I wouldn’t have felt so bad. I started on the next block and I really like it.
I’m still sticking to dots in the outer section of the block. I haven’t decided if I will try the stripes. The thought of matching stripes makes me a bit crazy.
MetroScape block 2 in process
I worked on this block at the retreat, too, and made good progress. Having a nice piecing project to work on is awesome.
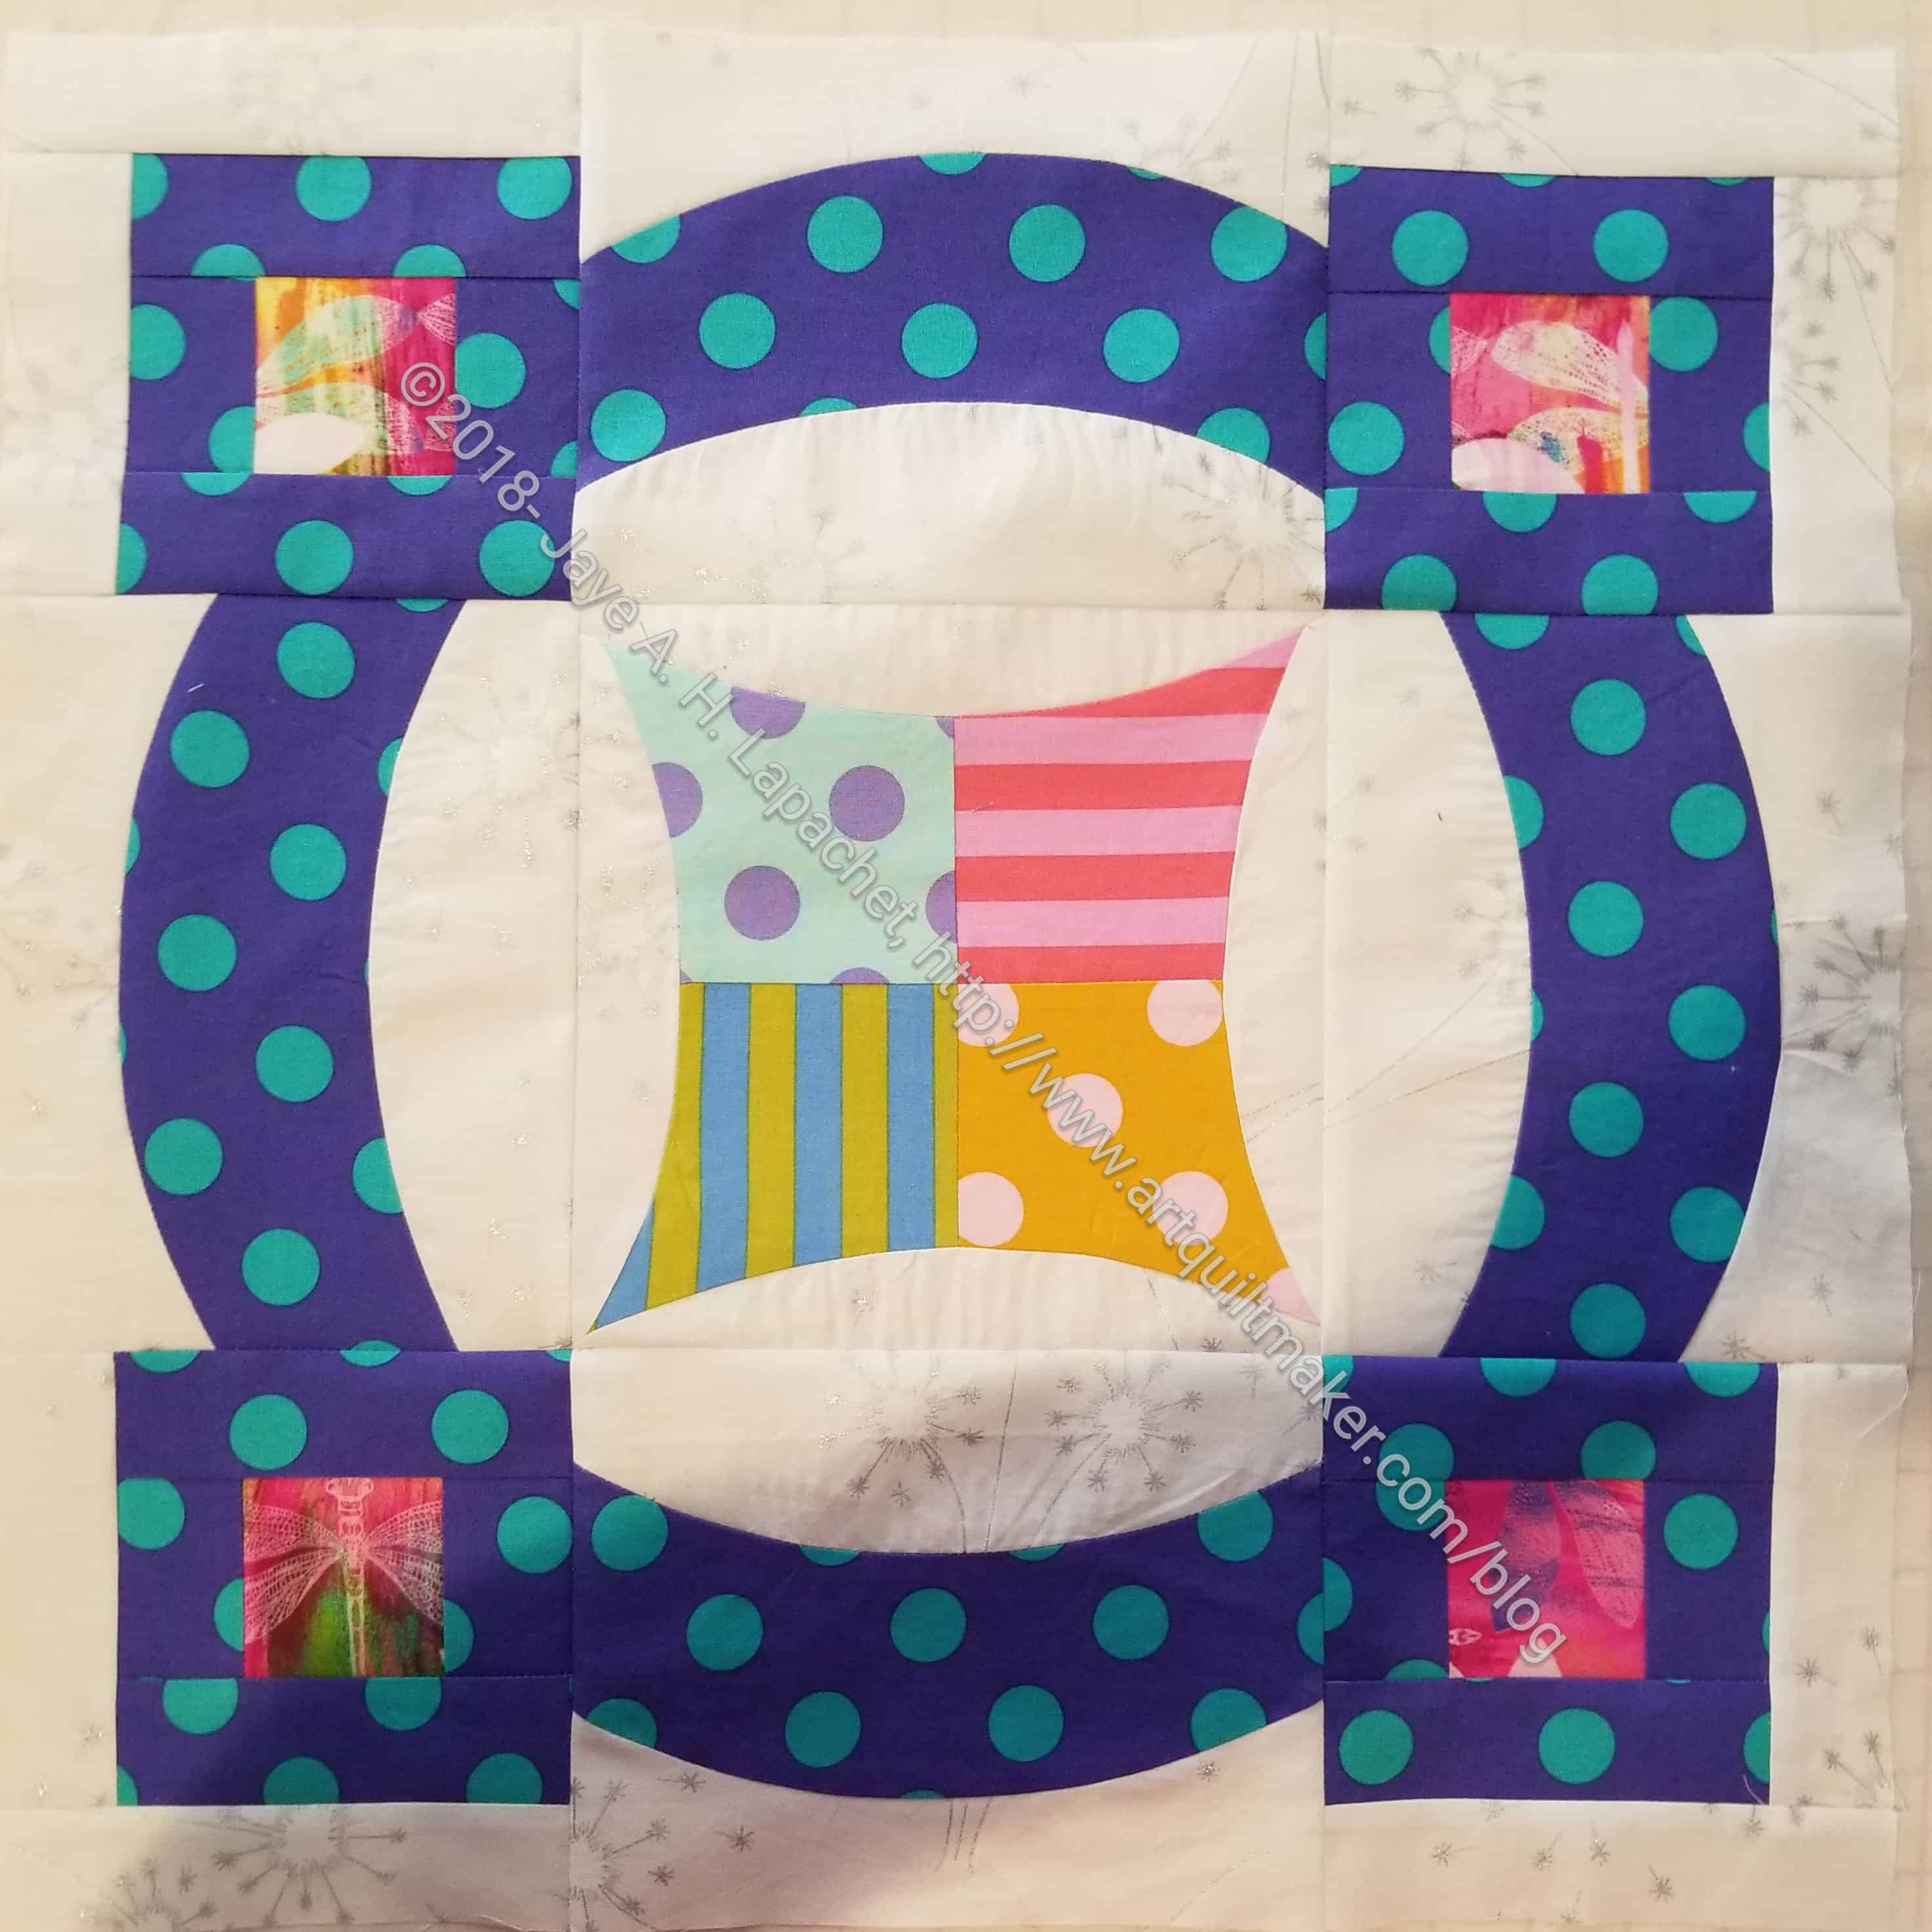
MetroScape Block n.2
I did finish the block yesterday and am pleased with the way it came out.
I wondered about whether I would enjoy making this block after finding the ruler and the pattern the other day.
It has a lot of curves, which can be problematic in general. I also had to use a special ruler. Sometime special rulers create great effects and sometimes they are a disaster.
I started out easy with 4 blocks that create the center. All of the center blocks will be dots and stripes. Sewing four squares together was easy.
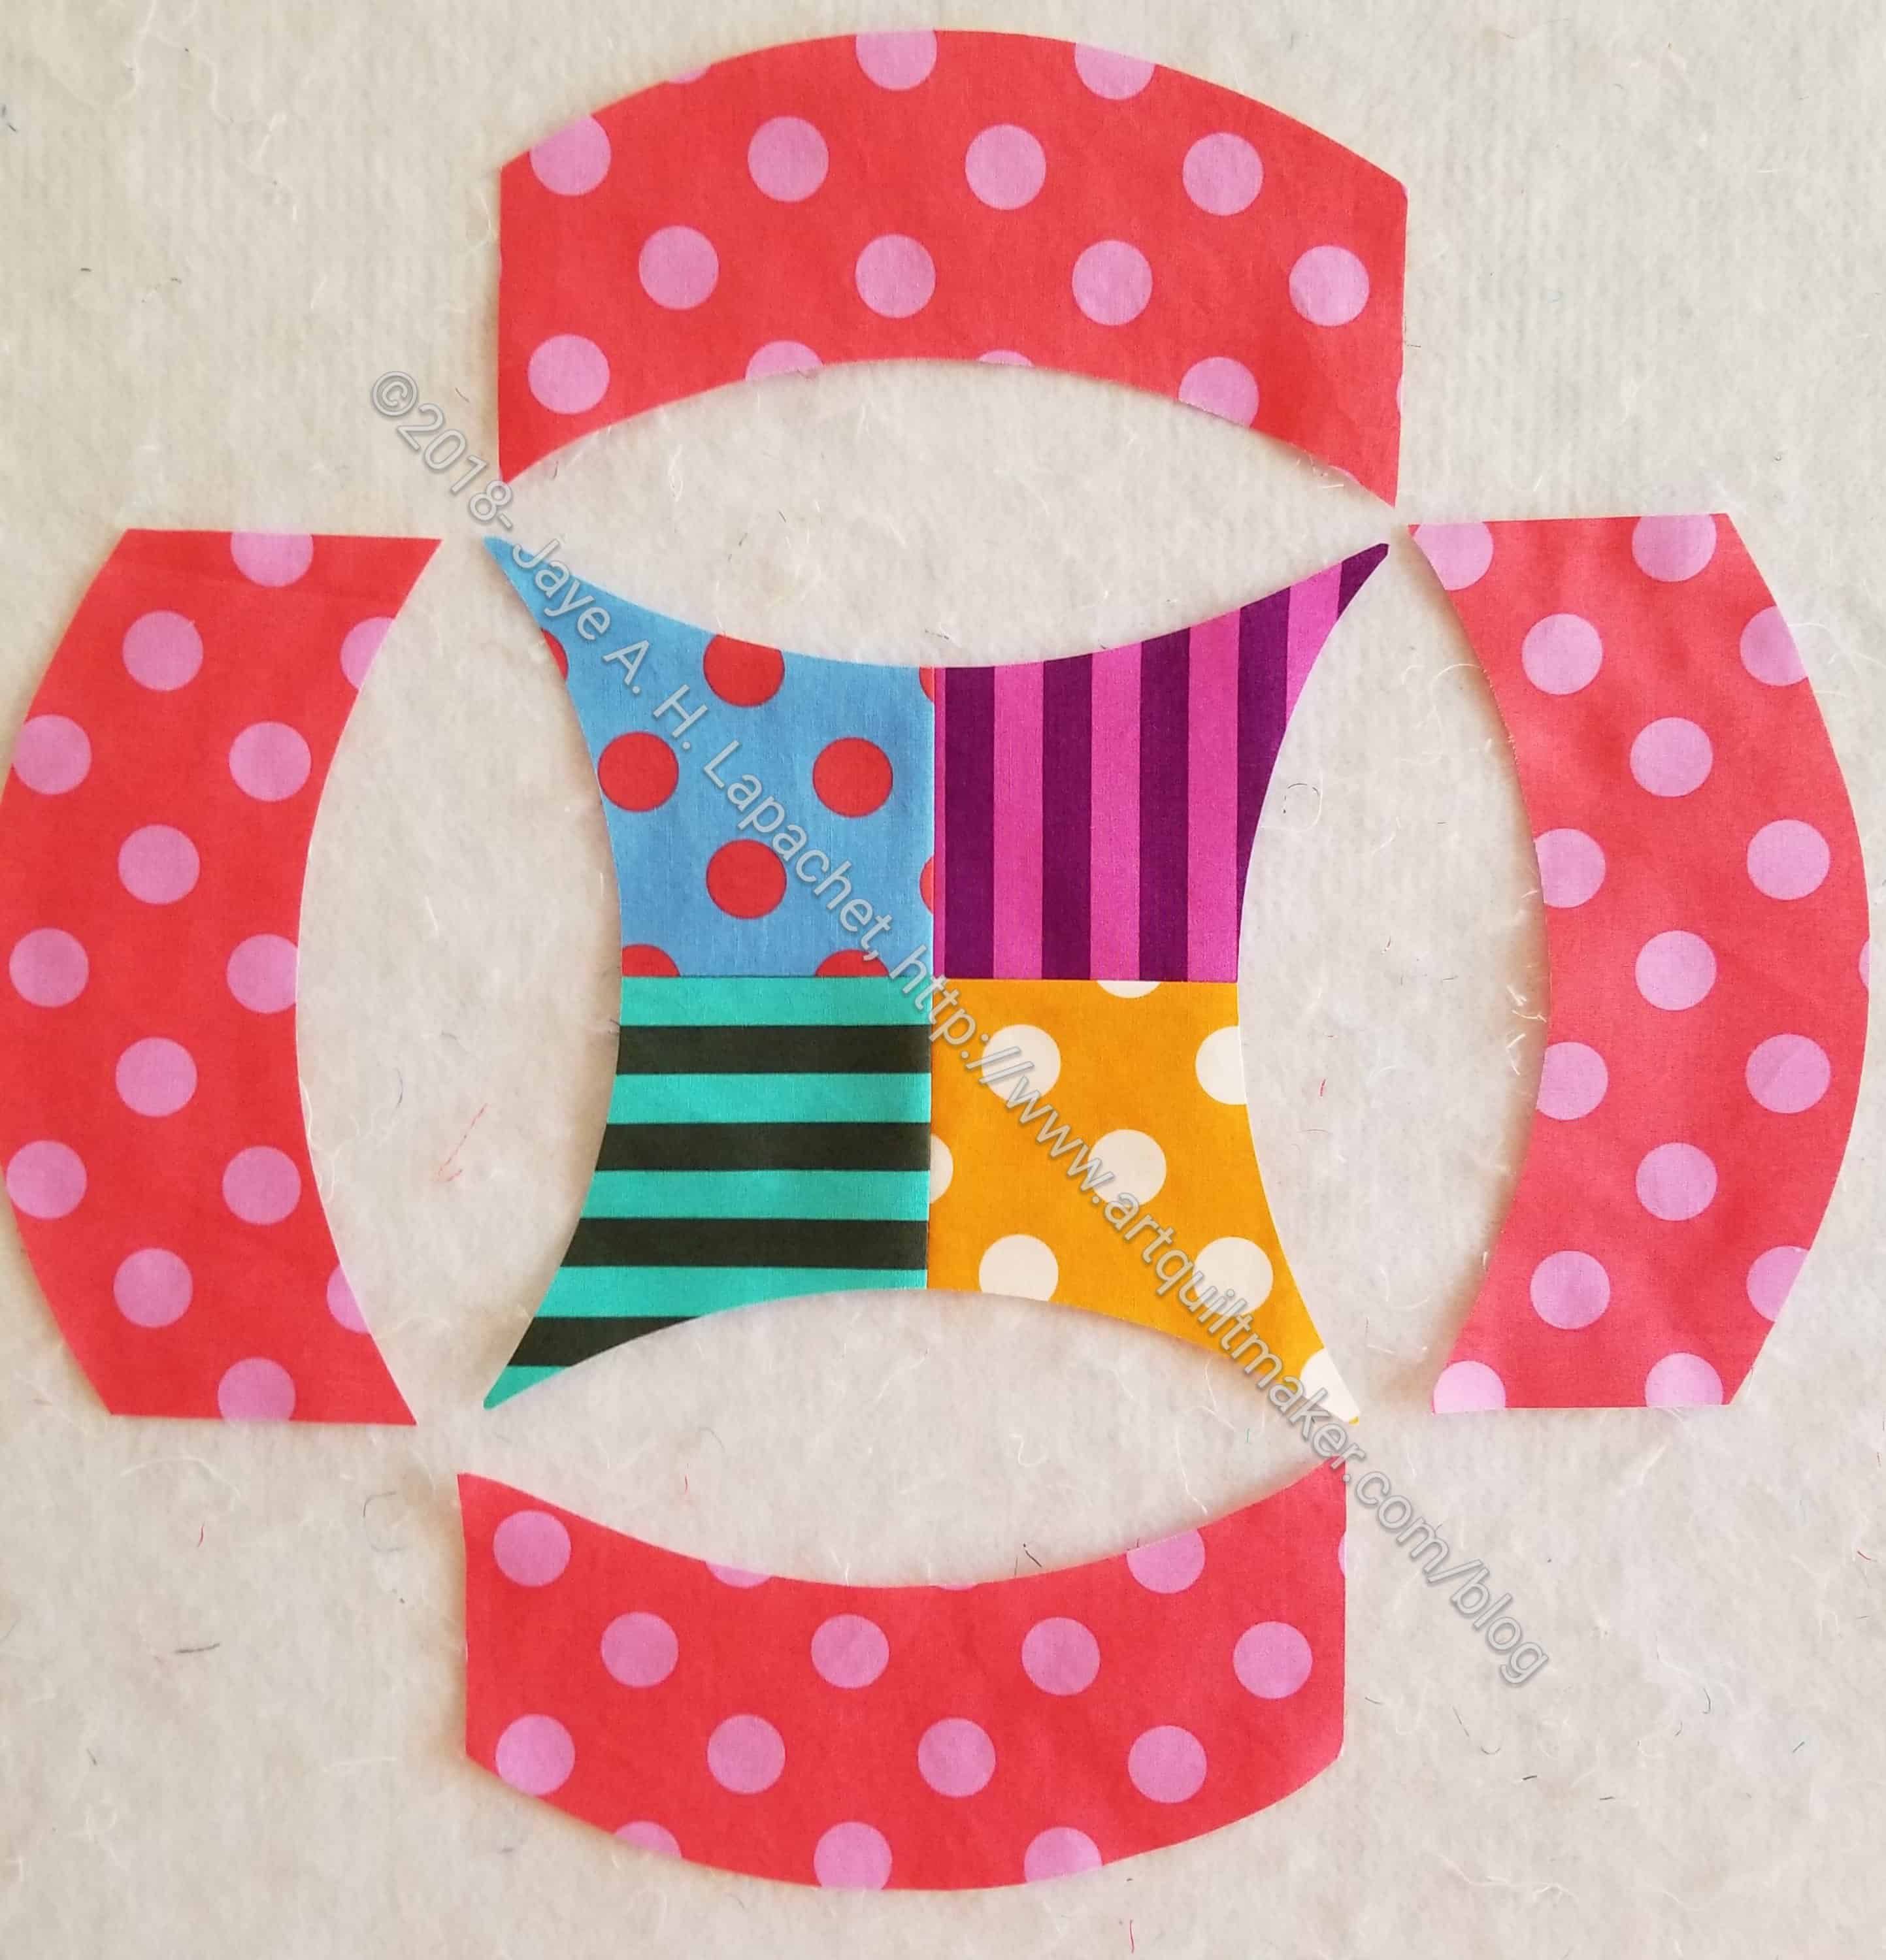
MetroScape curves
I dove in and started cutting curves. I had some issues but it was mostly operator error. Cutting the first block took me a long time as I attempted to navigate the pattern and fabric choices.
I am planning on using dots on the outer part of the block, but I don’t know if I will have enough dots to differentiate the blocks enough. I am scared of trying to line up the stripes, but I might try one block with stripes to see how it looks.
I did realize that the pattern is called MetroSCOPE not MetroScape. Well, I am going with MetroScape regardless. I don’t have a better name and it kind of reminds me of landscape.
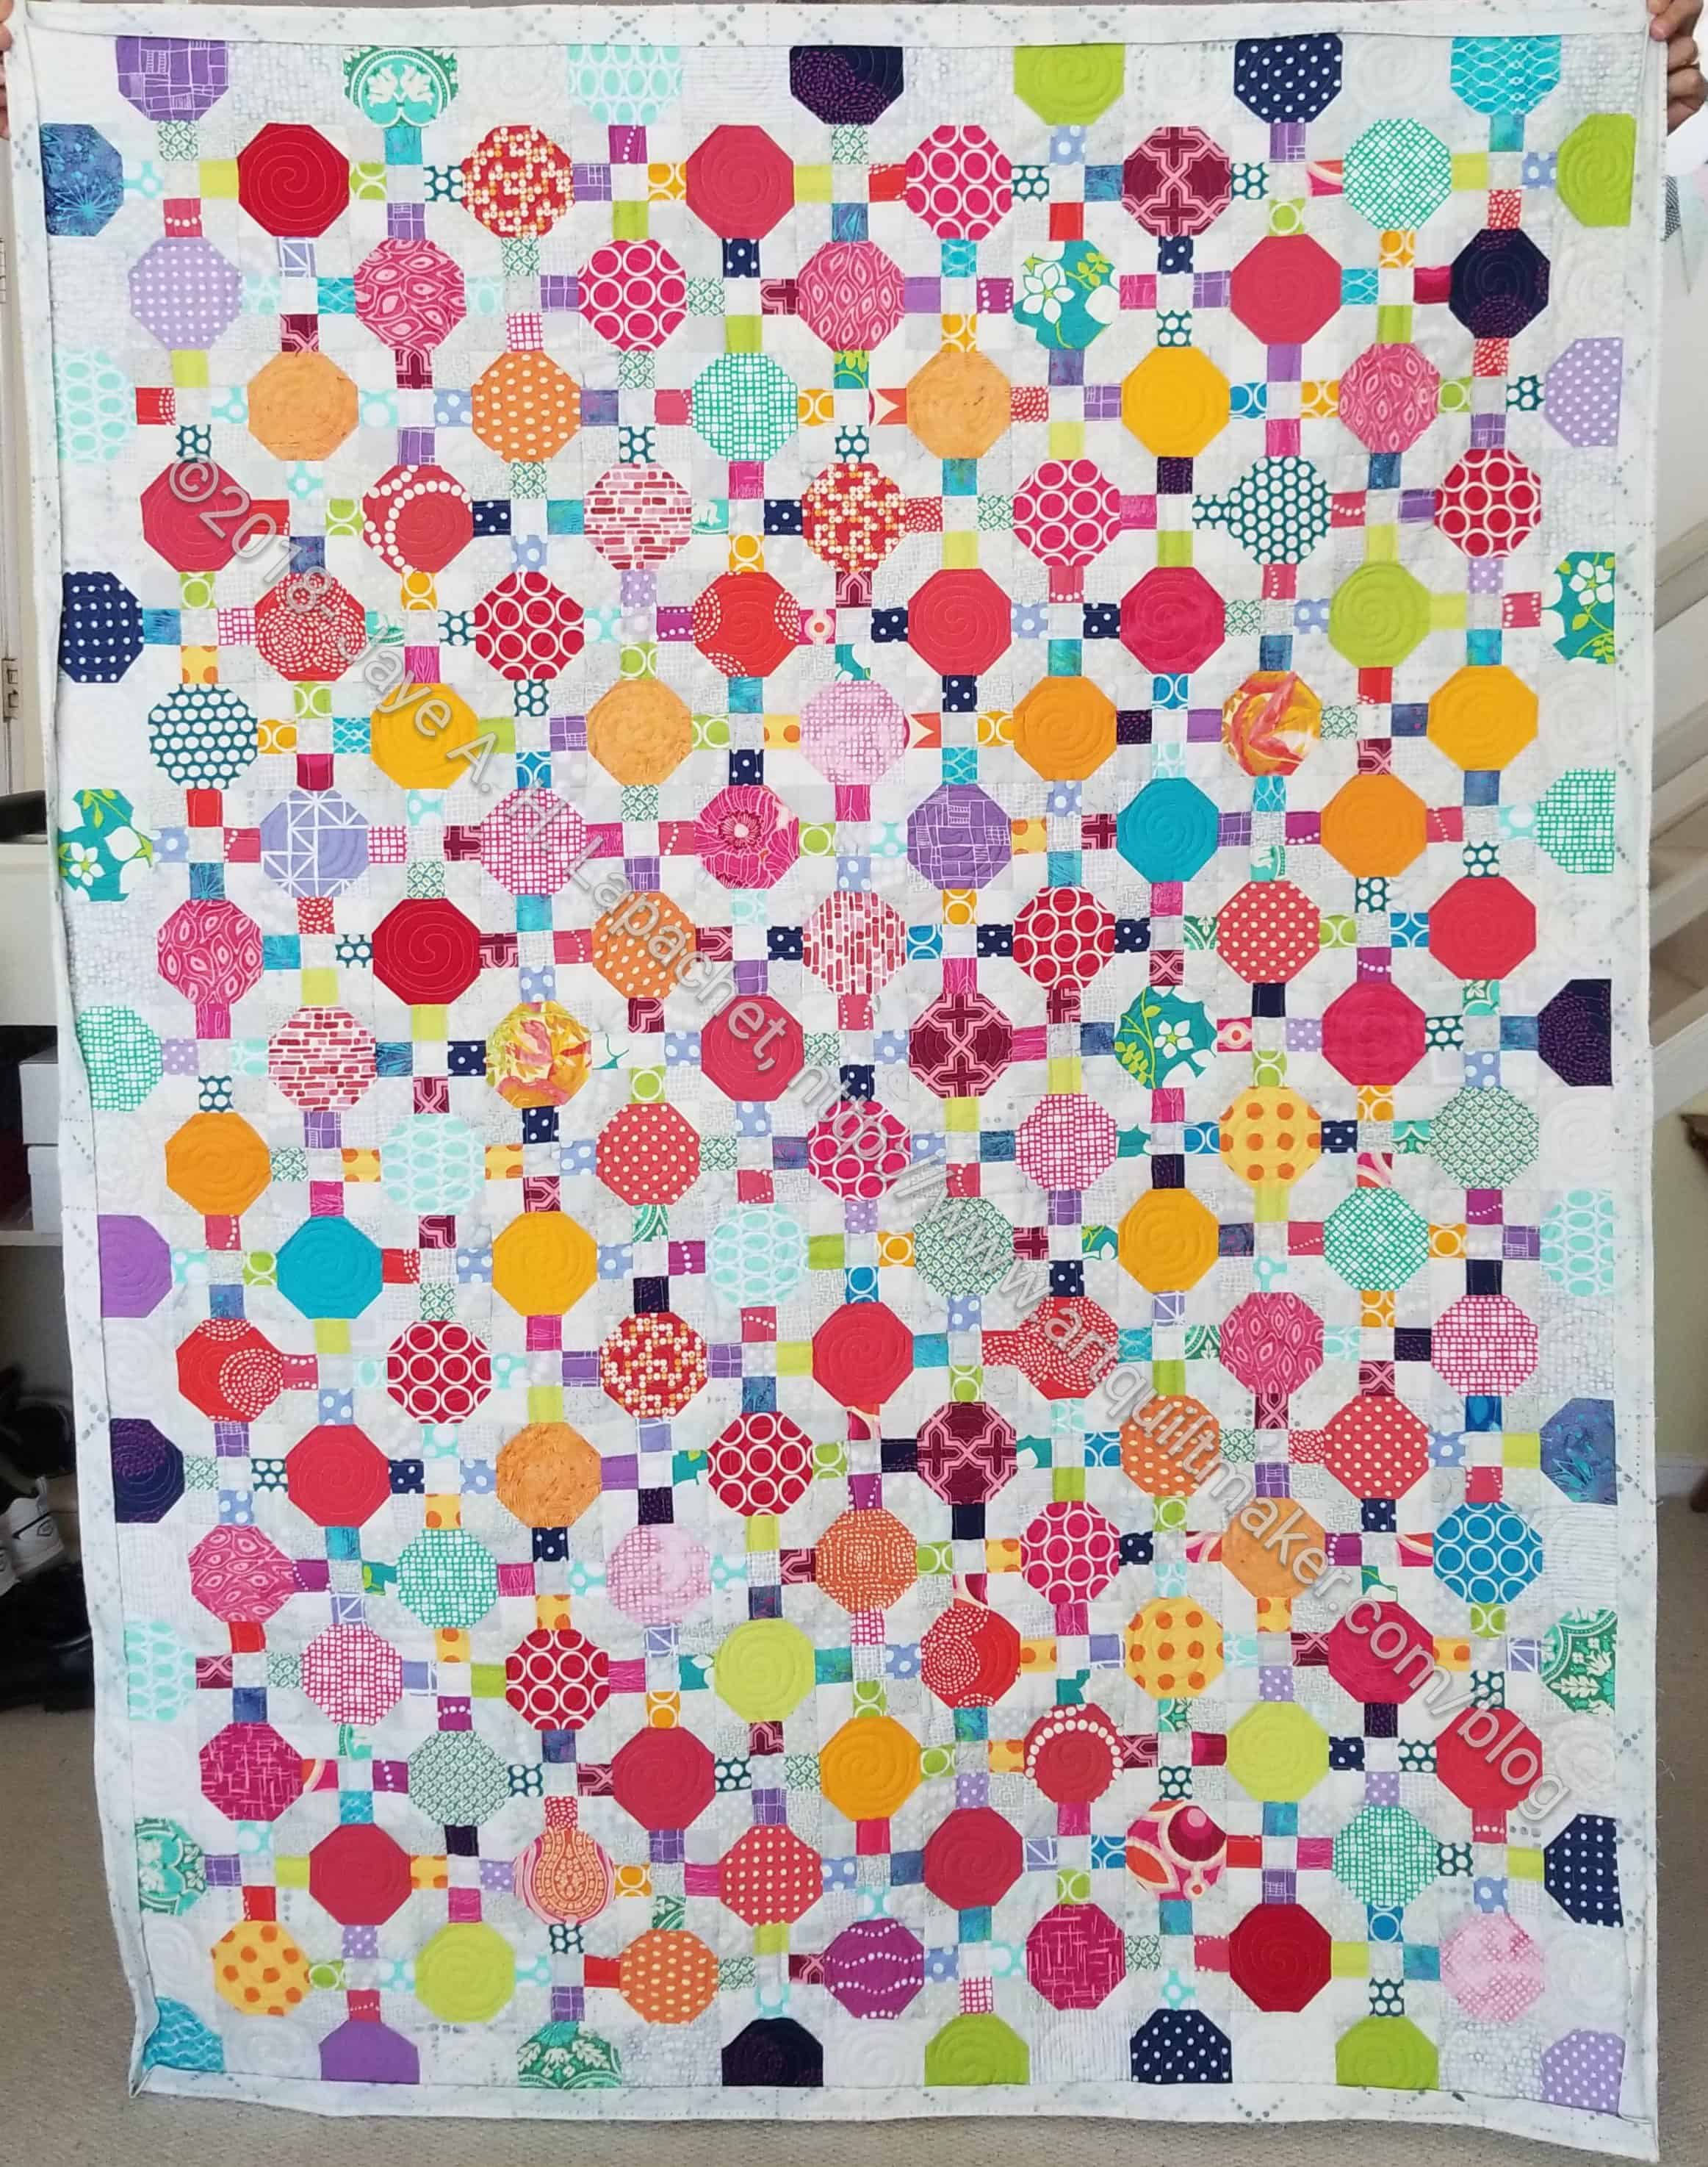
It was back in May that I finished preparing the Octagon 9 Patch for quilting and July when I took it to Colleen. The child has returned and the quilting looks fabulous. There is something about not seeing a quilt for awhile that makes it that much nicer. Also, being almost finished is wonderful, too.
Sadly, Colleen hurt her hand and she didn’t get to the Stepping Stones before she did it. I don’t know how badly, but I know she isn’t quilting for awhile. Hopefully, not too long. I am continuing to sew! (as you probably noticed)
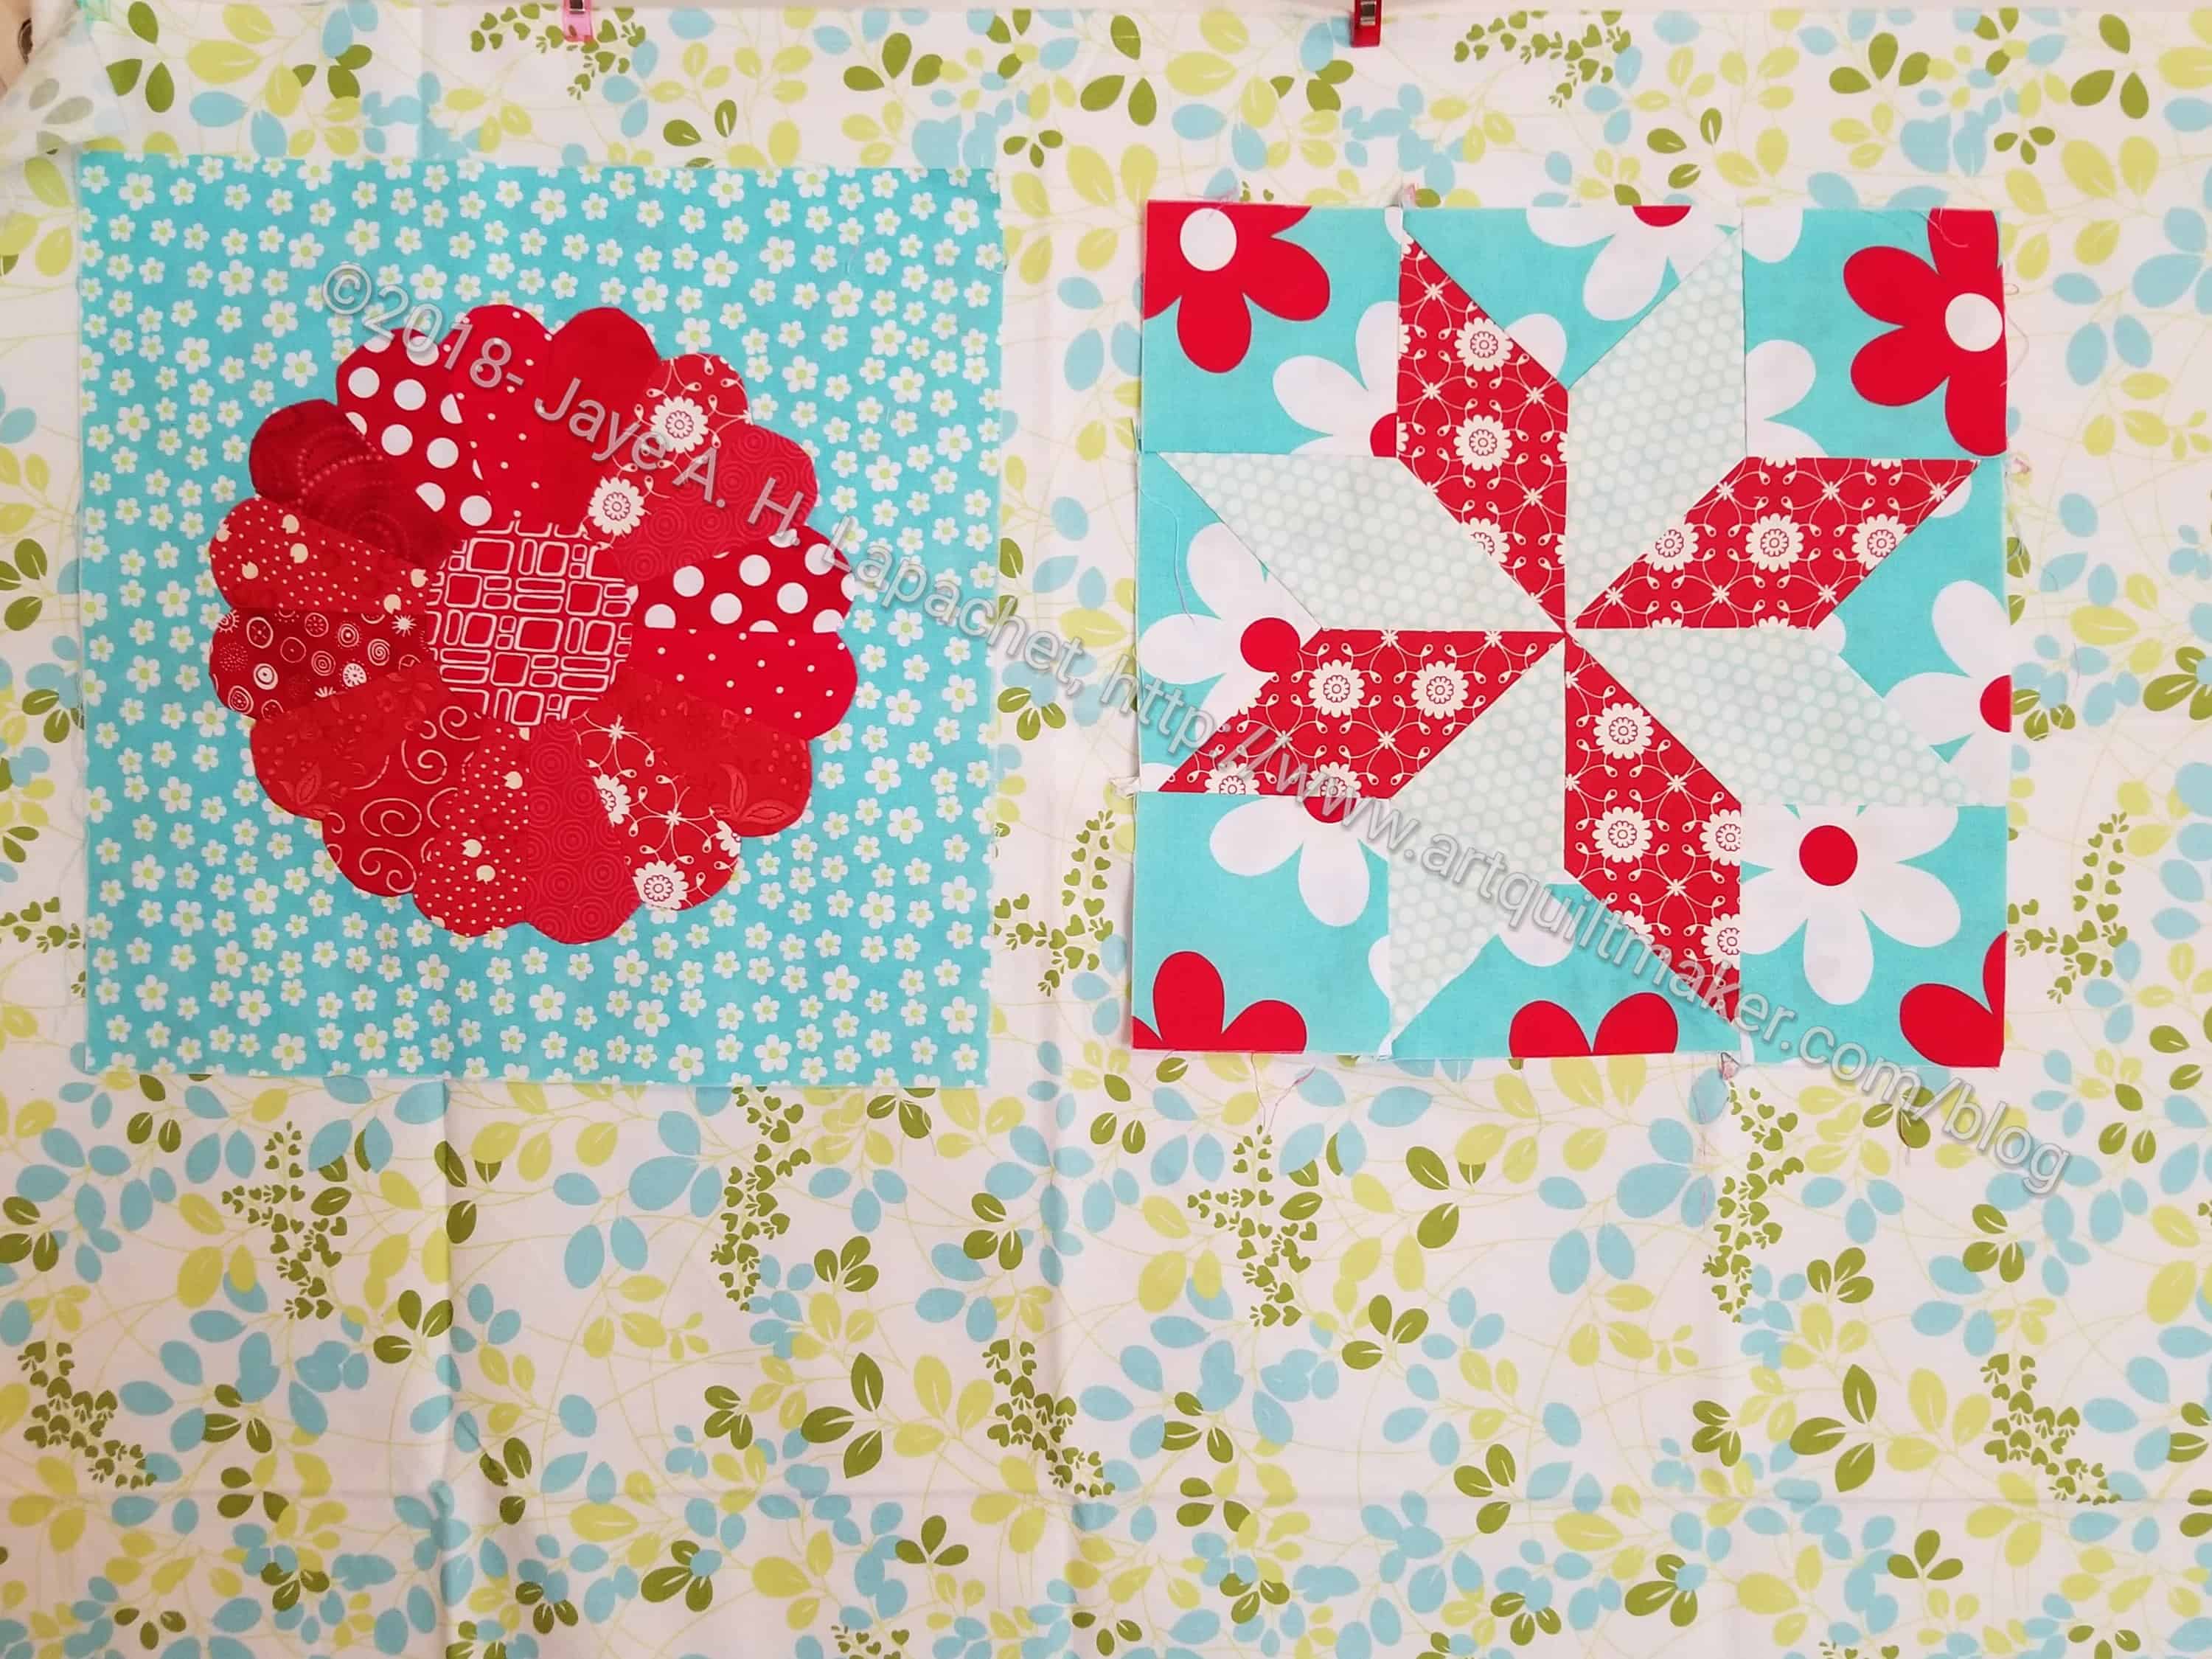
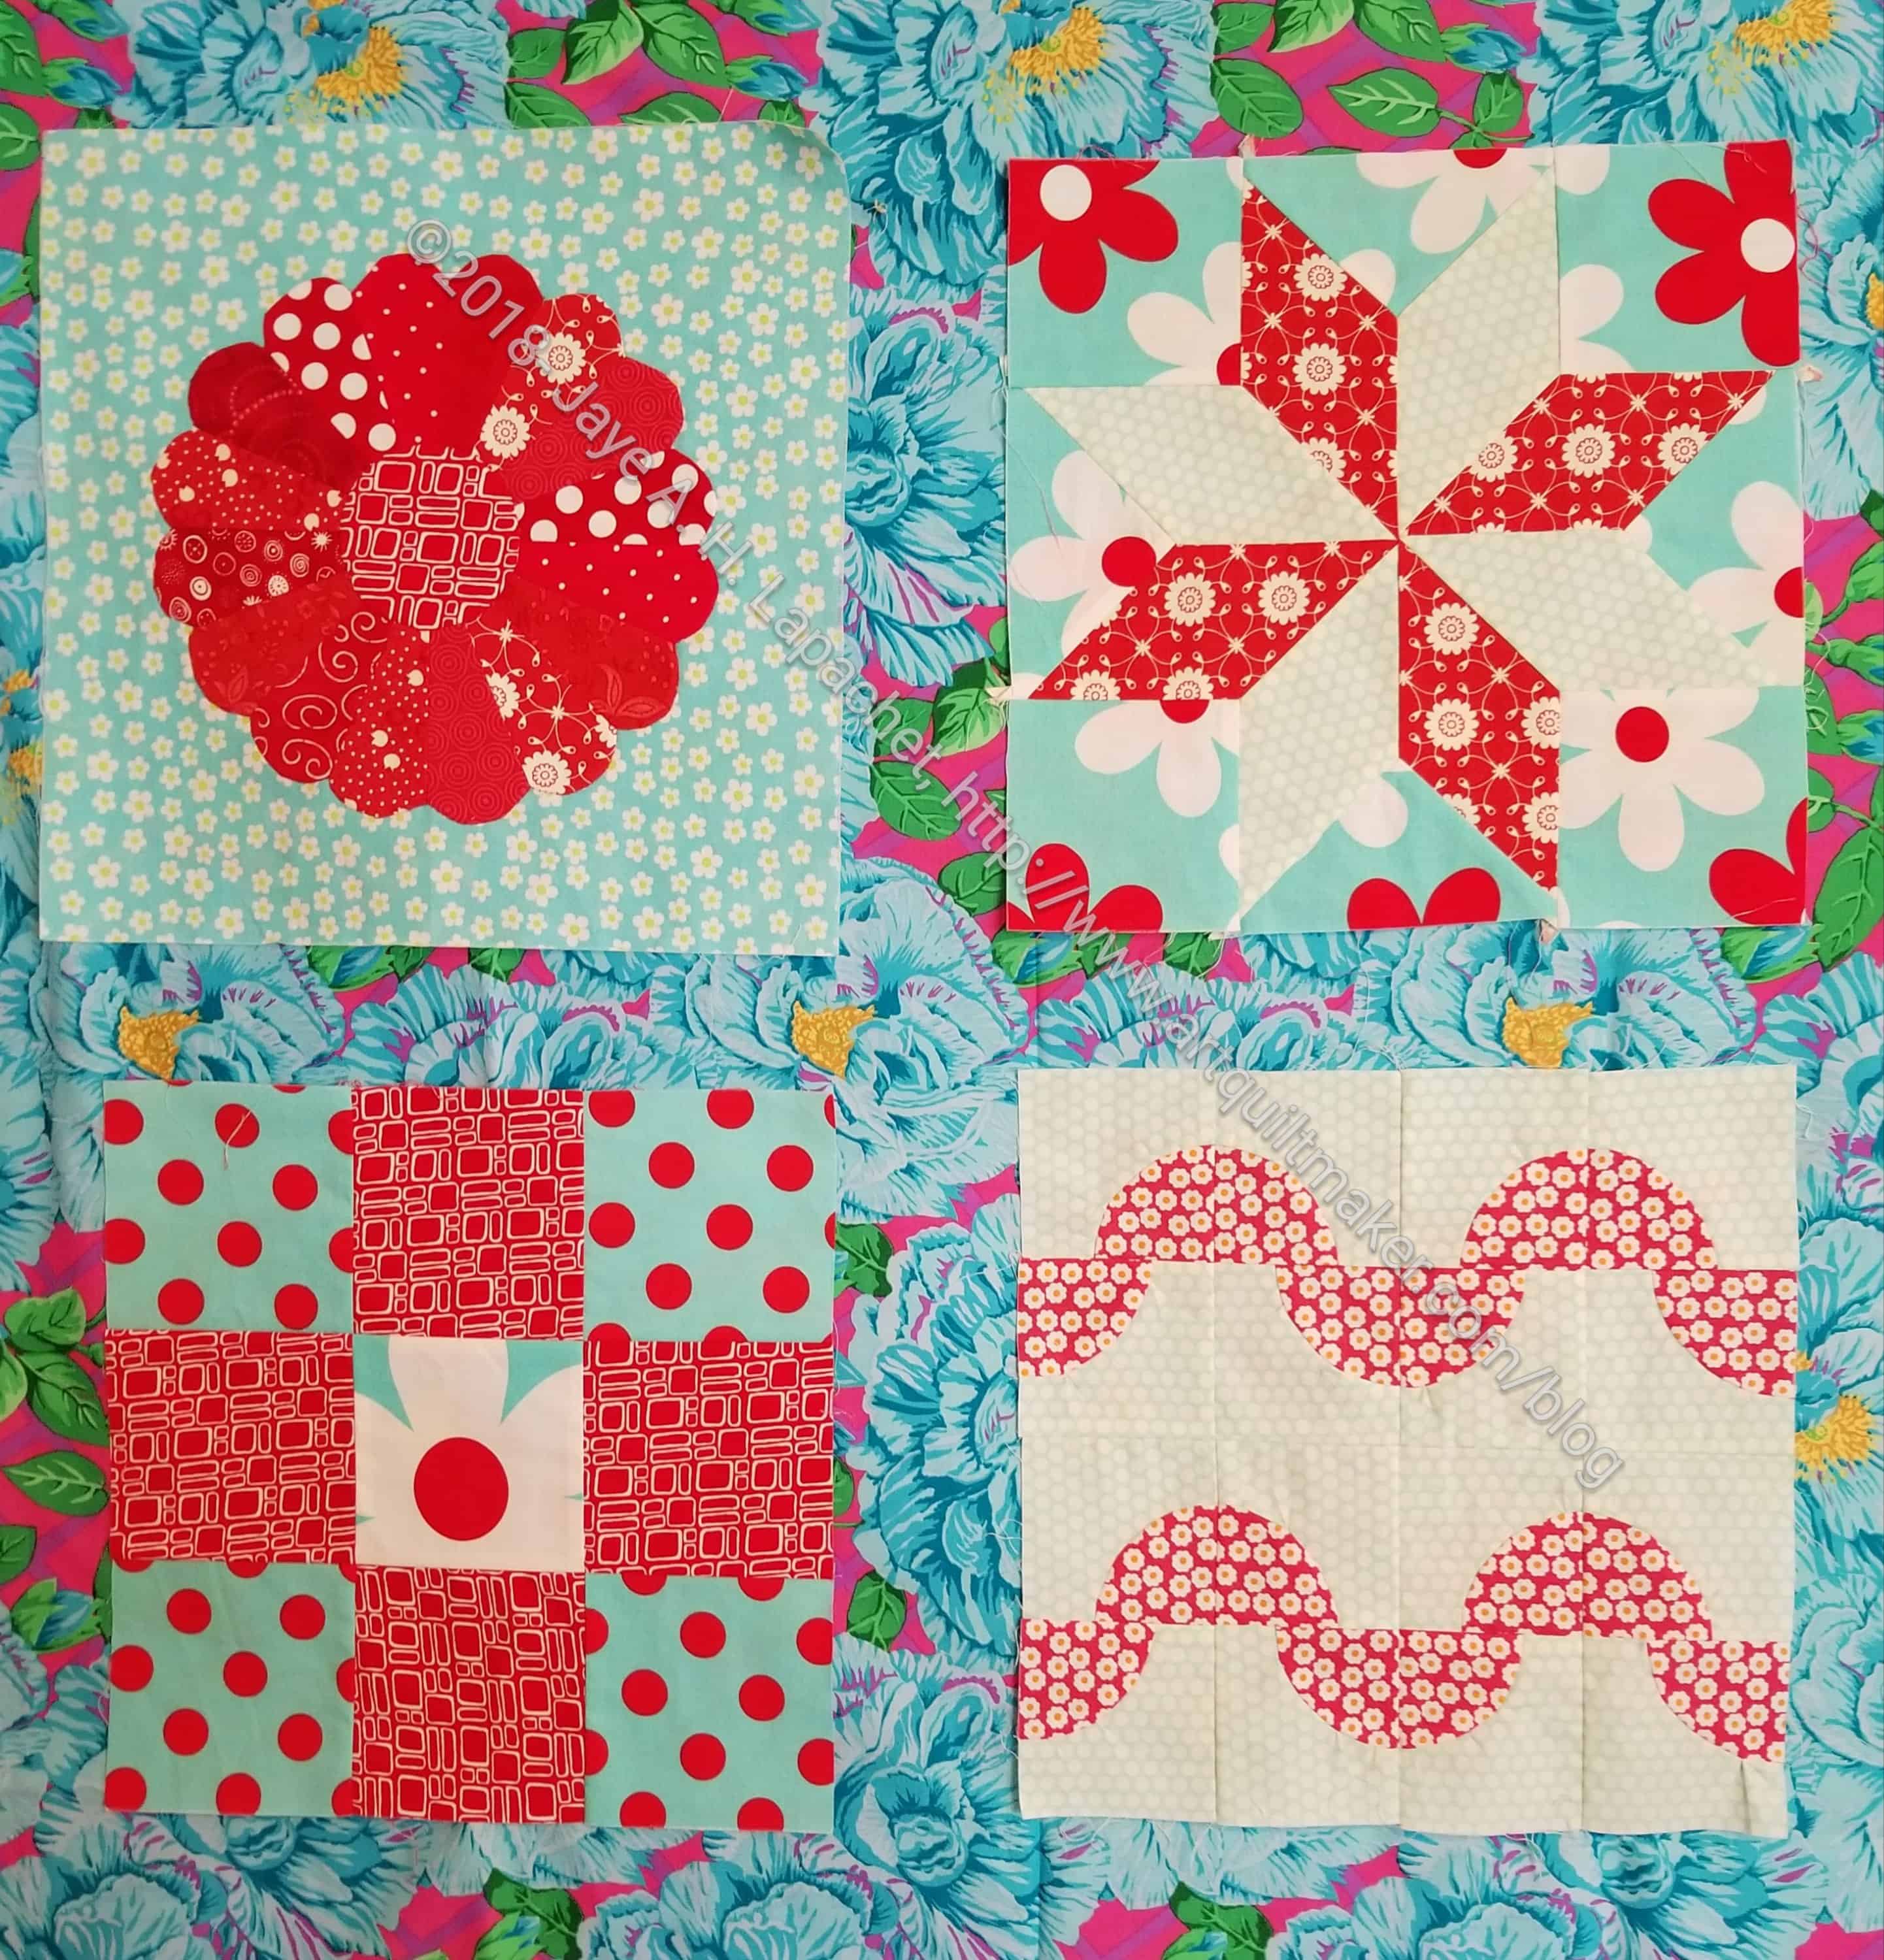
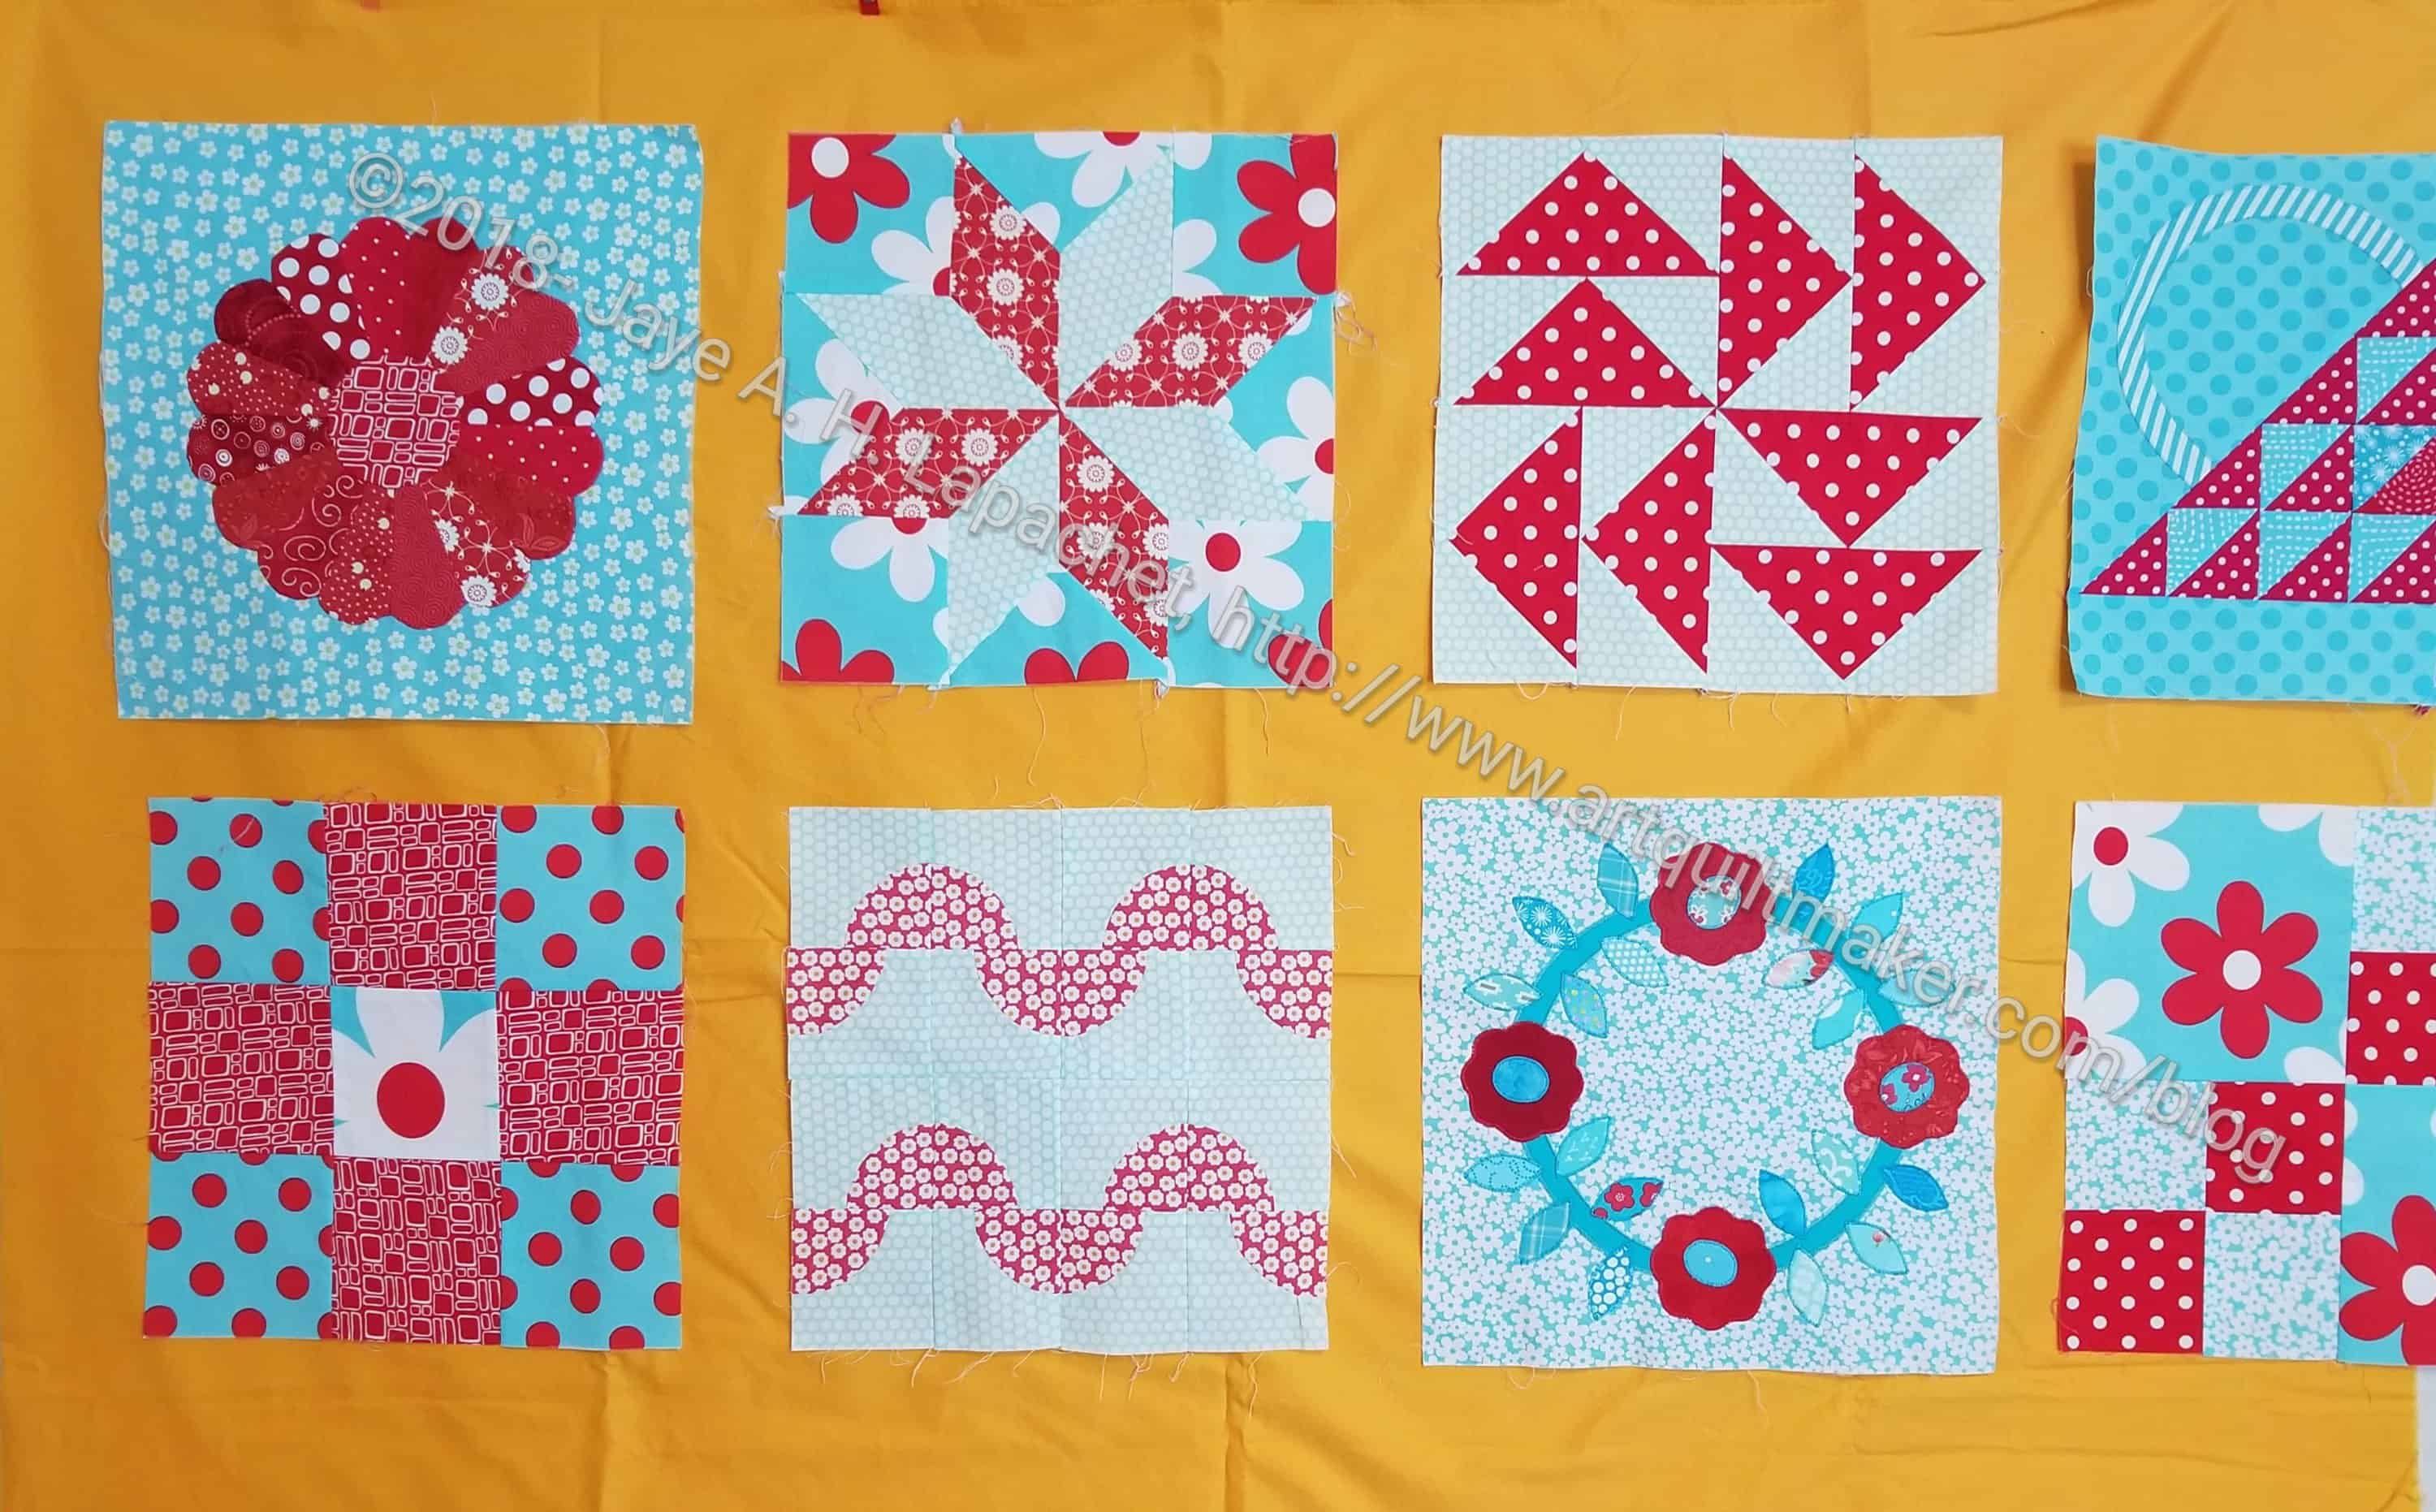
I worked hard last week on the Aqua-Red Sampler and got the top and back finished. WHEW! I didn’t fight with it as much as I had over the past month, but it wasn’t all peaches and roses either.
I probably would have made the white border thinner, if I had it to do other again, but I am not ripping it out. I think it works.
I ended up choosing the solid border, mostly because I didn’t have enough of the daisy fabric and I didn’t want to fiddle and fight to make it fit. I am pleased with it.
I worked hard on the Aqua-Red Sampler quilt over the weekend. It was great to have a nice long weekend. I made a lot of progress and will be glad to get this quilt out of my hair.
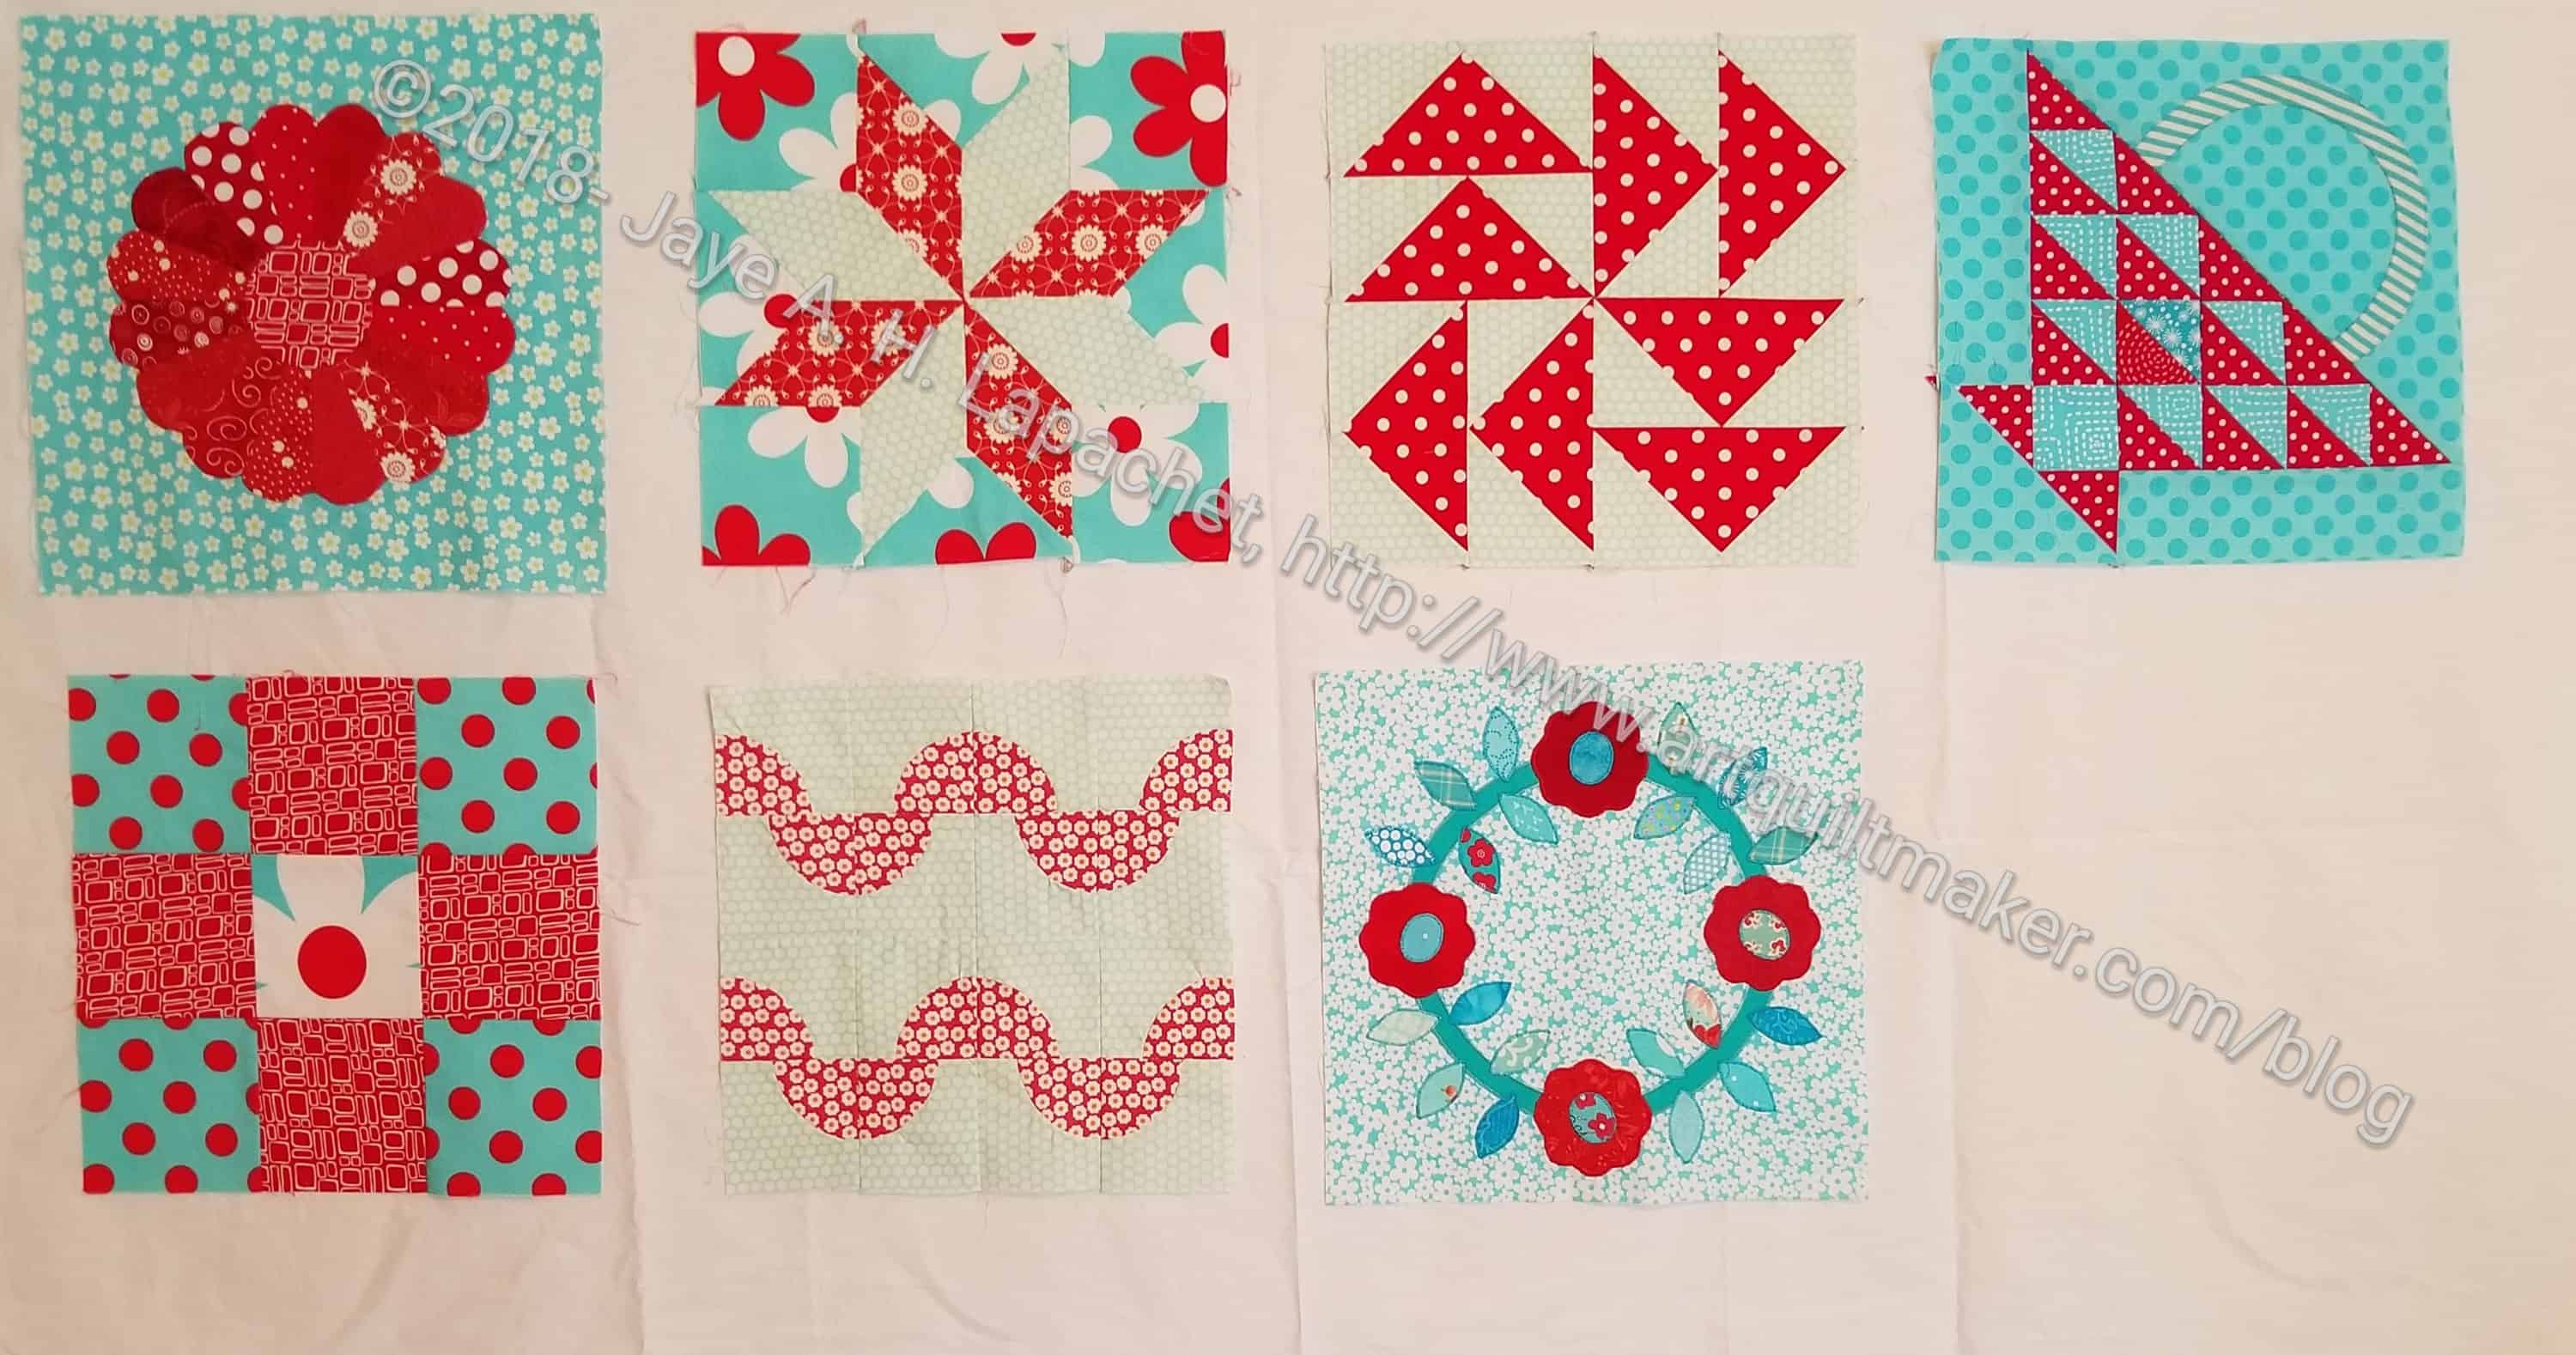
You will notice that I rearranged the blocks since my last layout. I also did not include the Cathedral Window block. It was just too thick. I have another test block from this quilt and I think I will make a pillow from the two of them.
I made a new block and needed to rearrange the blocks because of the colors. I didn’t want all the big red dots and daisy fabrics lumped together in one area. This quilt has been one problem after another and I hope that the borders will cut me some slack.
I found a bright white (Pure Elements Snow, which is different from Kona Snow) that picked up and highlighted the other bright whites in the blocks. I tried not to include too much cream where possible. I’m not sure about the width of that white border (2.5 inches). I may rip it off and make it smaller. That is not my first choice.
I thought the daisy fabric would be exciting, but I would have to struggle with making sure I used every scrap if I can’t find the rest of the stash of it that I know I have somewhere. The solid turquoise would be a solid choice. By that I mean that it would work, it would probably hold in all that is going on in the quilt.
I am making progress. It’s frustratingly slow. At least I am making some kind of progress.
Finished 2018 Quilt Projects
I am still at five quilts in 8 months. I know that Colleen has three, but I would still really like to have more off my UFO list. They don’t magically get done. I know the key is not to add anymore to my UFO list.
Terrain quilt – SIL and I made the top and back and Tim quilted it. He put the binding on at March’s Sew Day
In Process
The ‘In Process’ is used to denote projects on which I am actively working or pretending to stitch. I try not to put away projects, because that will ensure I never work on them
Aqua-Red Sampler –This is on the design wall. I finished the last block, then decided it wouldn’t work. I have been fighting to get this quilt together, but I hope when you read this, it will be close to finished.
Pies and Points from 2016 Victoria Findlay Wolfe class. Julie and I had a playdate towards the beginning of April. I brought this piece with me so I could cut more elements (Julie has a Sizzix). I am more excited about this piece now. I thought I had done more, but I couldn’t find more than 2.5 sewn together pieces.
English Paper Piecing Project– half hexies – I have added about five stars. I also found some grey (did I buy it for this project or on spec?) that will be perfect for the border. Remember last time when I said I couldn’t find the diamond papers? I gave up and bought more. I haven’t actuallly made a border yet, but I have all of the supplies. I bought a template to go with the diamond papers. Joann at Paper Pieces was very helpful.
Still WIPs
I still have WIPs. Who doesn’t, after all? A project in the ‘UFO’ category means I am stalled. A nicer way of saying UFO is a WIP. The list is a lot shorter and the projects are newer, for the most part.
City Sampler – blocks all made. The long term goal is to sash the blocks and put the top together. In the meantime, due to some seam allowance issues, some of the blocks are smaller than others, so I will have to adjust them in some way – either ripping and resewing, adding a piece or two to the block, or with sashing. I edfinish measuring all of the blocks so I can move on. My new sticking point is that I just need to deal with the problems. Sigh.
FOTY 2017 – pieces cut. Need to layout and start piecing. No new progress.
Handbag Sampler – this is a project about which I had forgotten. The blocks were teaching samples when I taught a sampler class the time before I started writing the quilt class sampler tutorials. I found one block recently, but otherwise I actually don’t know exactly where the blocks are hiding. I have an idea and will crawl up in the far reaches of my fabric closet soon and see if I can find them. I haven’t even found a picture of all the blocks.
Lobster – I still have more stitching to do and then I need to quilt it.
Pointillist Palette #4: Fourth is a series of 6 quilts; needs tiny square patches sewn together. No progress.
Under the Sea: class project; like the design and am happier with the colors. I worked on it a couple of nights during Craft Night and am nearing the end of the stitching.
Black and Red quilt – This came about because of two other projects. I made a whole bunch of bias tape as part of my failed attempt at doing the Mighty Lucky Club a few years ago. Another part of the inspiration came from my class with Tina of Little Blue Cottage fame. This was going to be for a nephew, but I think it will be for one of my SILs and BILs. I have rectangles cut and some bias tape ready. My next step is to sew the bias tape to the rectangles like pickup sticks. I don’t have any photos of this, so you’ll have to trust me.
Small Projects in Process
Most of my progress involves thinking or just cutting.
All Rolled Up Tote – part of Crafty Gemini Organizer Club. I started cutting out the pieces yesterday at Sew Day. I made some progress, though I didn’t get it all cut out.
White on black dots cell phone wallet – need to find the fabric and cut out the pieces
Solid black cell phone wallet – need to find the fabric and cut out the pieces
Chubby Charmer with Good Fortune charm pack – gift
4-Zip Organizer – part of Crafty Gemini Organizer Club. It is on my list, but I haven’t actually started
Retreat Organizer – another project from the Crafty Gemini Organizer Club, also on my list, but not yet started
Ultimate Project Organizer – another project from the Crafty Gemini Organizer Club, also on my list, but not yet started
Octagon 9 Patch: I took this to Colleen on my way to Sisters in July.
Stepping Stones #2 – I took this to Colleen on my way to Sisters in July.
BAMaQG IRR –The sandwich has been basted. I machine quilted a couple of lines to stabilize it. I am making slow progress on hand quilting it using Big Stitch.
Theoretically, the Tarts Come to Tea is in the quilting process, though I haven’t worked on it in a while. See above.
Binding
nothing at the moment
Hunting and Gathering
30 Something: I continue to cut 1.5 inch squares. I am pretty sure I have the 800 I need, but I am not ready to sew them together yet, so whenever I have a chance to cut more I cut more. It will give me choice when the time comes. I’ll have to think up a new name for this quilt, too. My next step is to figure out if I need to cut other sizes of squares and switch from cutting 1.5 inch squares to cutting the new size.
Blue Gradation Quilt: cutting 2.5 inch x 4.5 inch blue rectangles. It has to end sometime. I wasn’t sure I was ready to put this together, but I think I might be. I might do a couple of gradation quilts in a row just to get the practice.
Blue Lemonade: cutting blue, green, purple 2 inch squares. I used a lot of these squares for En Provence, so I am slowly cutting more.
FOTY 2018: I have started cutting 2.5 inch squares for the 2018 version.
Pink Gradation Quilt: cutting 2.5 inch x 4.5 inch pink rectangles
Spin Wheel: really not started, but supplies gathered. I might have to cut some more background fabrics. I probably have enough fabrics and just need to decide to start.
Windmill quilt: Still hunting and gathering. I am supposed to be cutting a variety of greys for the background, which required the purchase of a new template. Cutting is very therapeutic, so I should try and do it when I have a few minutes.
Other
Stepping Stones #3 using the Macaron pre-cuts from Hoffman. I have all the fabric in pre-cuts and am just waiting for space (and desire) in my schedule.
I bought some fabric at Sisters and the Tula Pink dots and stripes after Sisters, so I am down significantly on net usage. Still gross usage is just over 130 yards. My net 40 yards. I would still be ecstatic if I could make it to 100 yards NET used by the end of the year, but I don’t think that is possible. I do have three quilts out at the quilter that could make my net number jump up, but 100 yards is a lot. It is good to have goals!
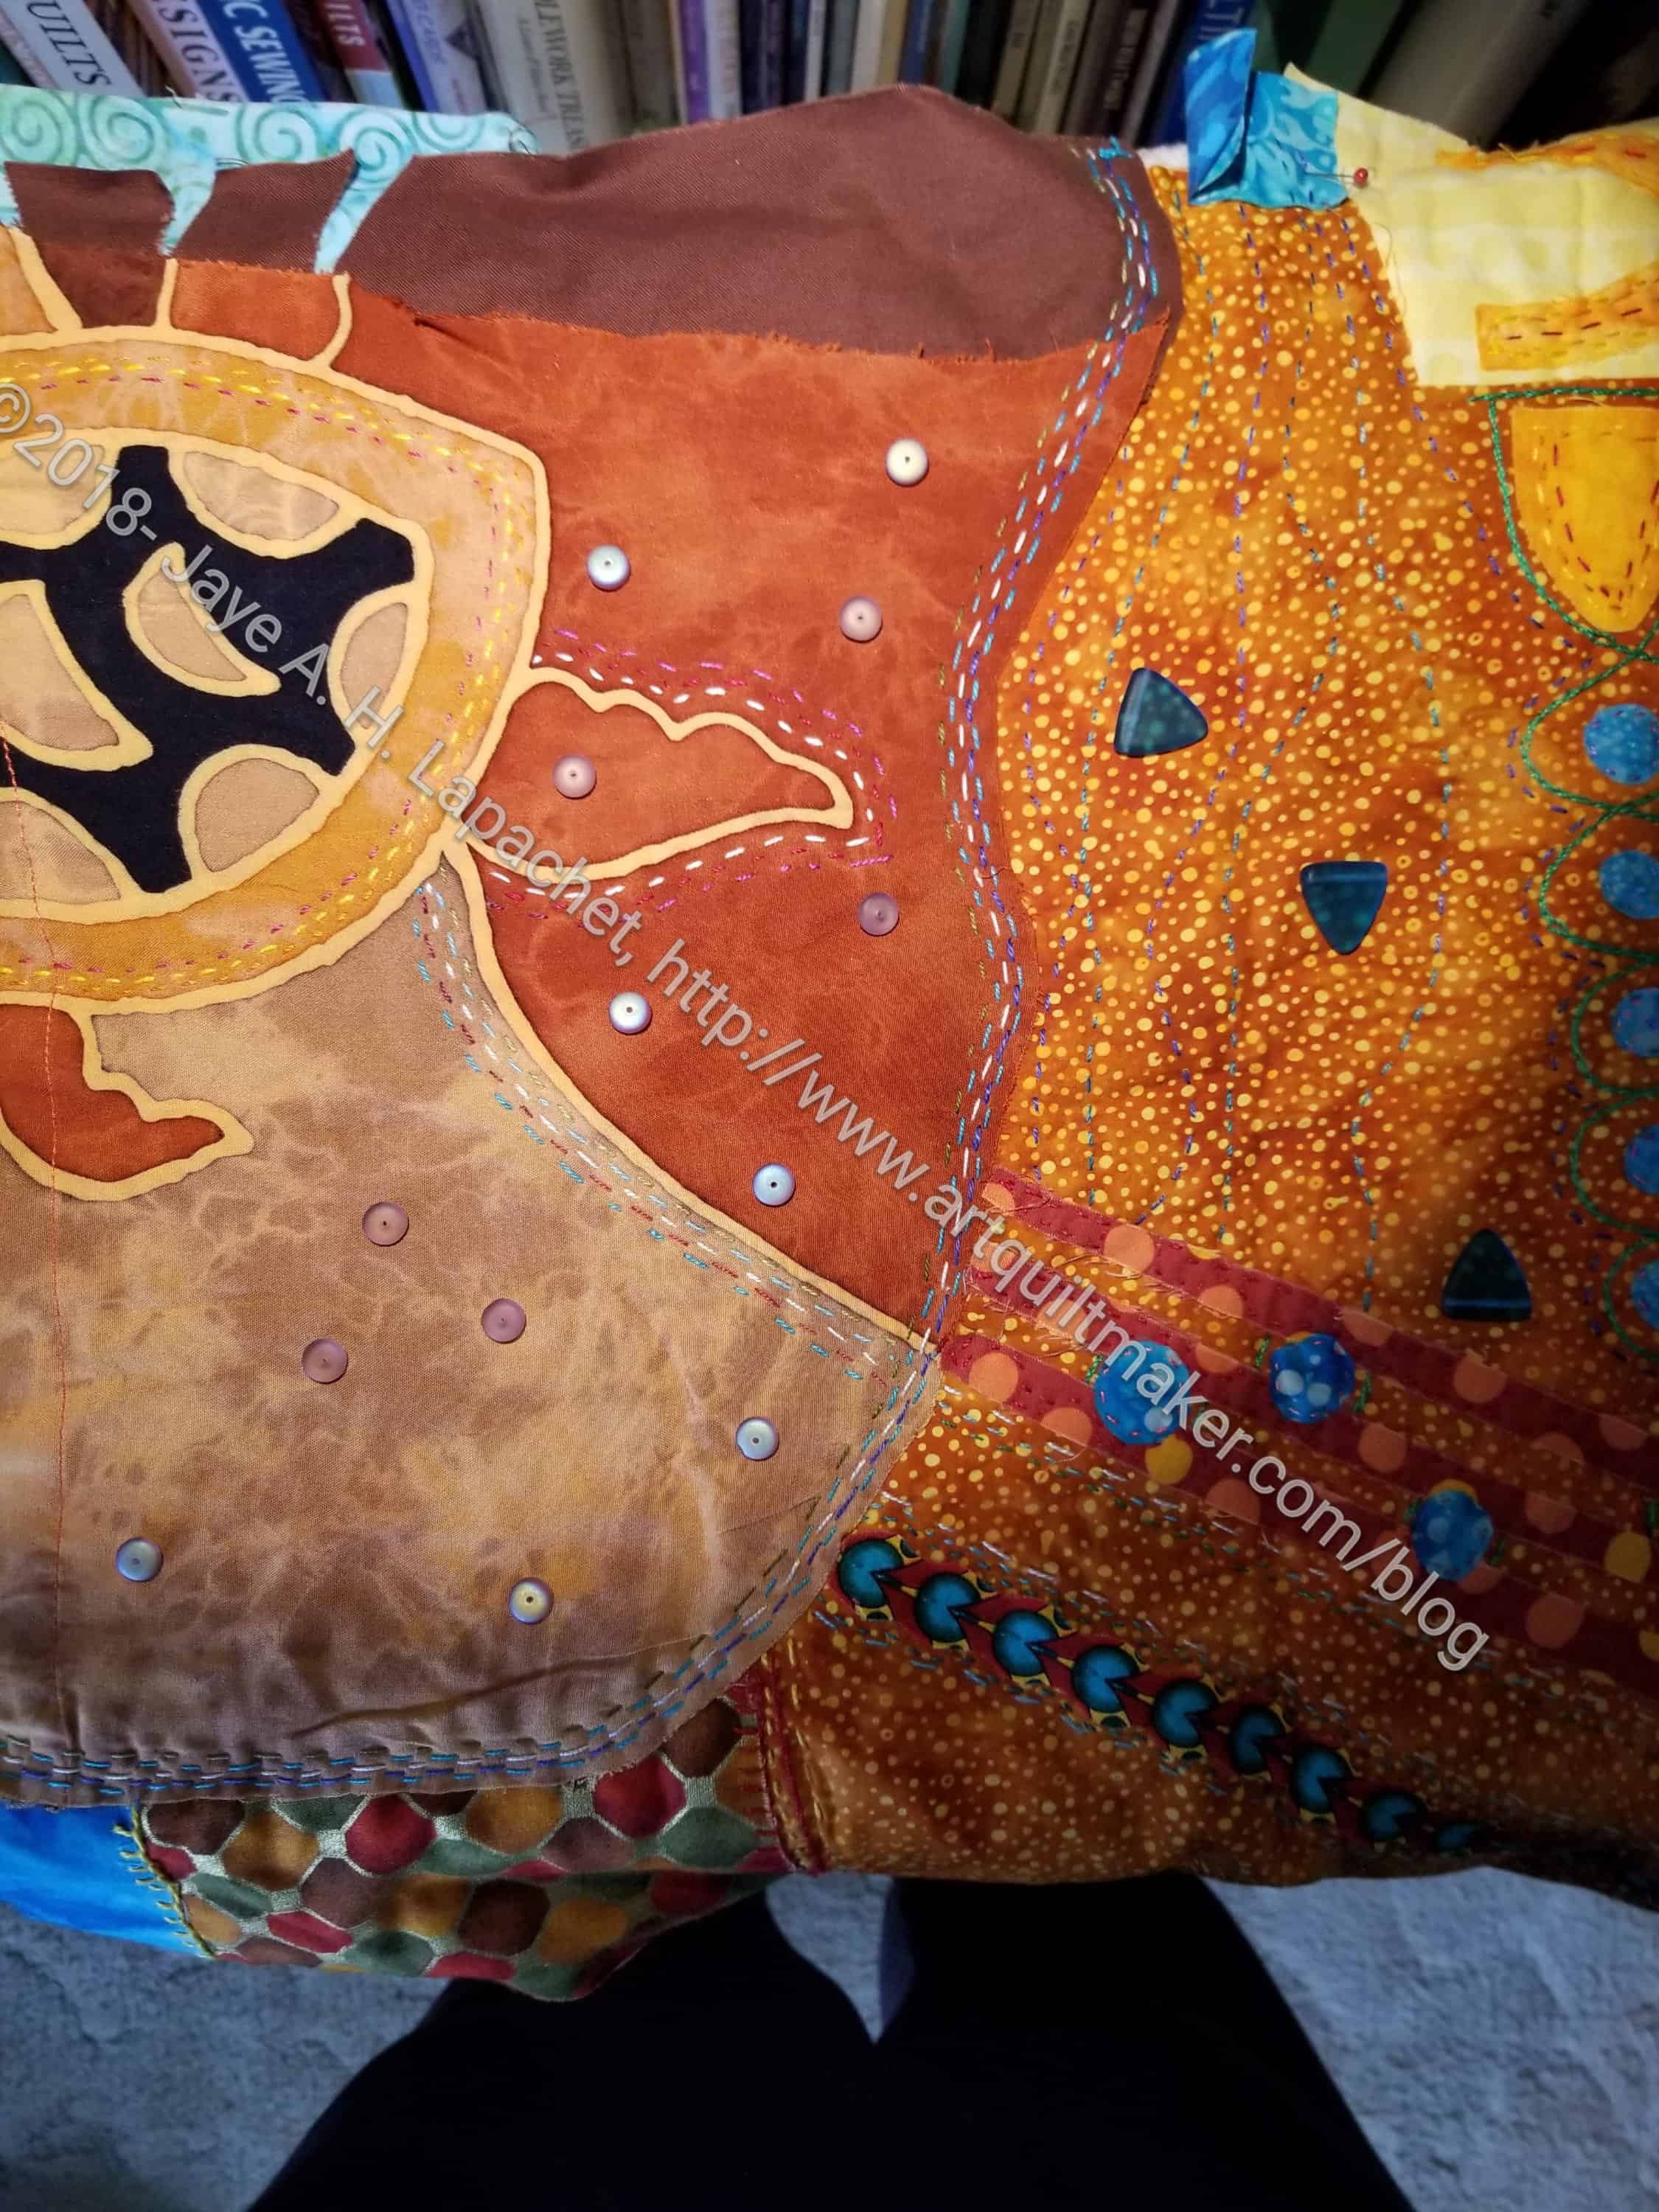
I am determined to finish this piece soon. I want to enter it in the fair in the embellishment category. I also want it finished. It won’t give me much in the way of used up fabric on my spreadsheet, but it will be off the To Do list and that is good.
Making visual decisions visually
After working on it last week, I thought it was done. It wasn’t done. It needed some beads. So, I laid some out to see how they would look. I thought they looked nice so I worked on it again at Craft Night on Monday.
As part of the Sampler Quilt Class and other tutorials I have on this site, I want to add one about putting a quilt together. I thought it would be good to include information about sashing at the same time. Since I have been using this quilt to write the Sampler quilt posts, I thought I would use it to create the latest tutorial.
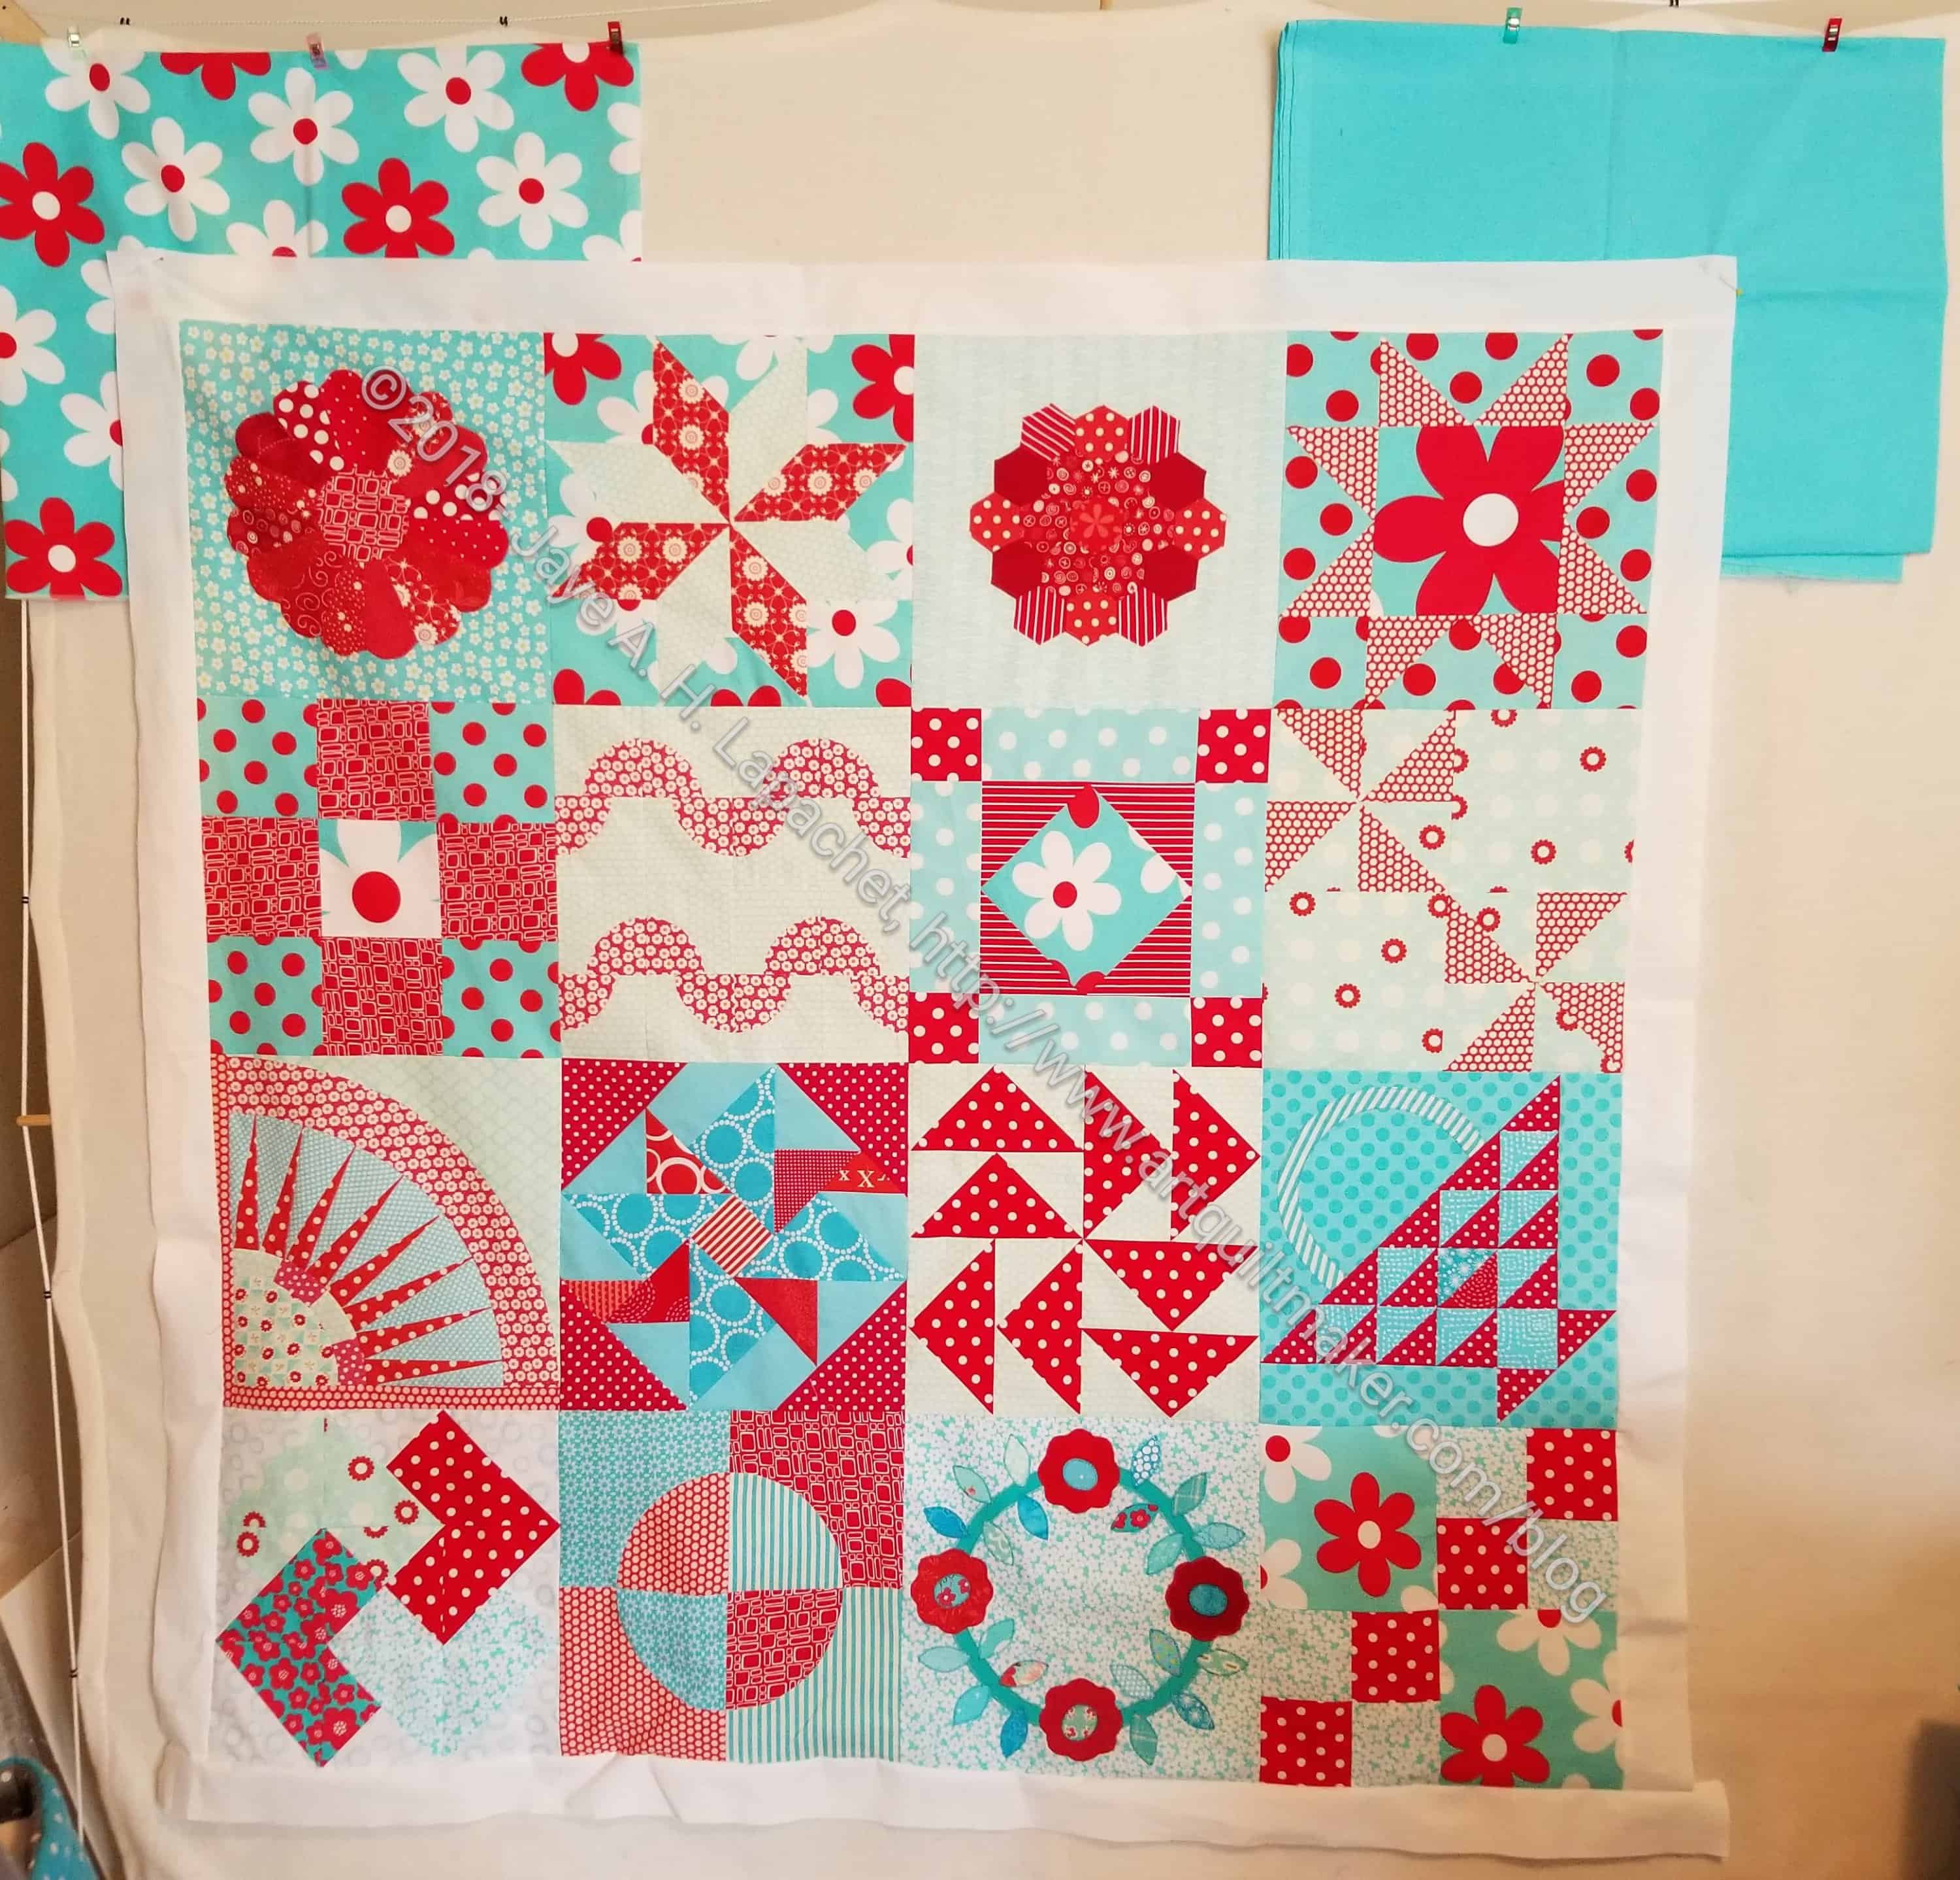
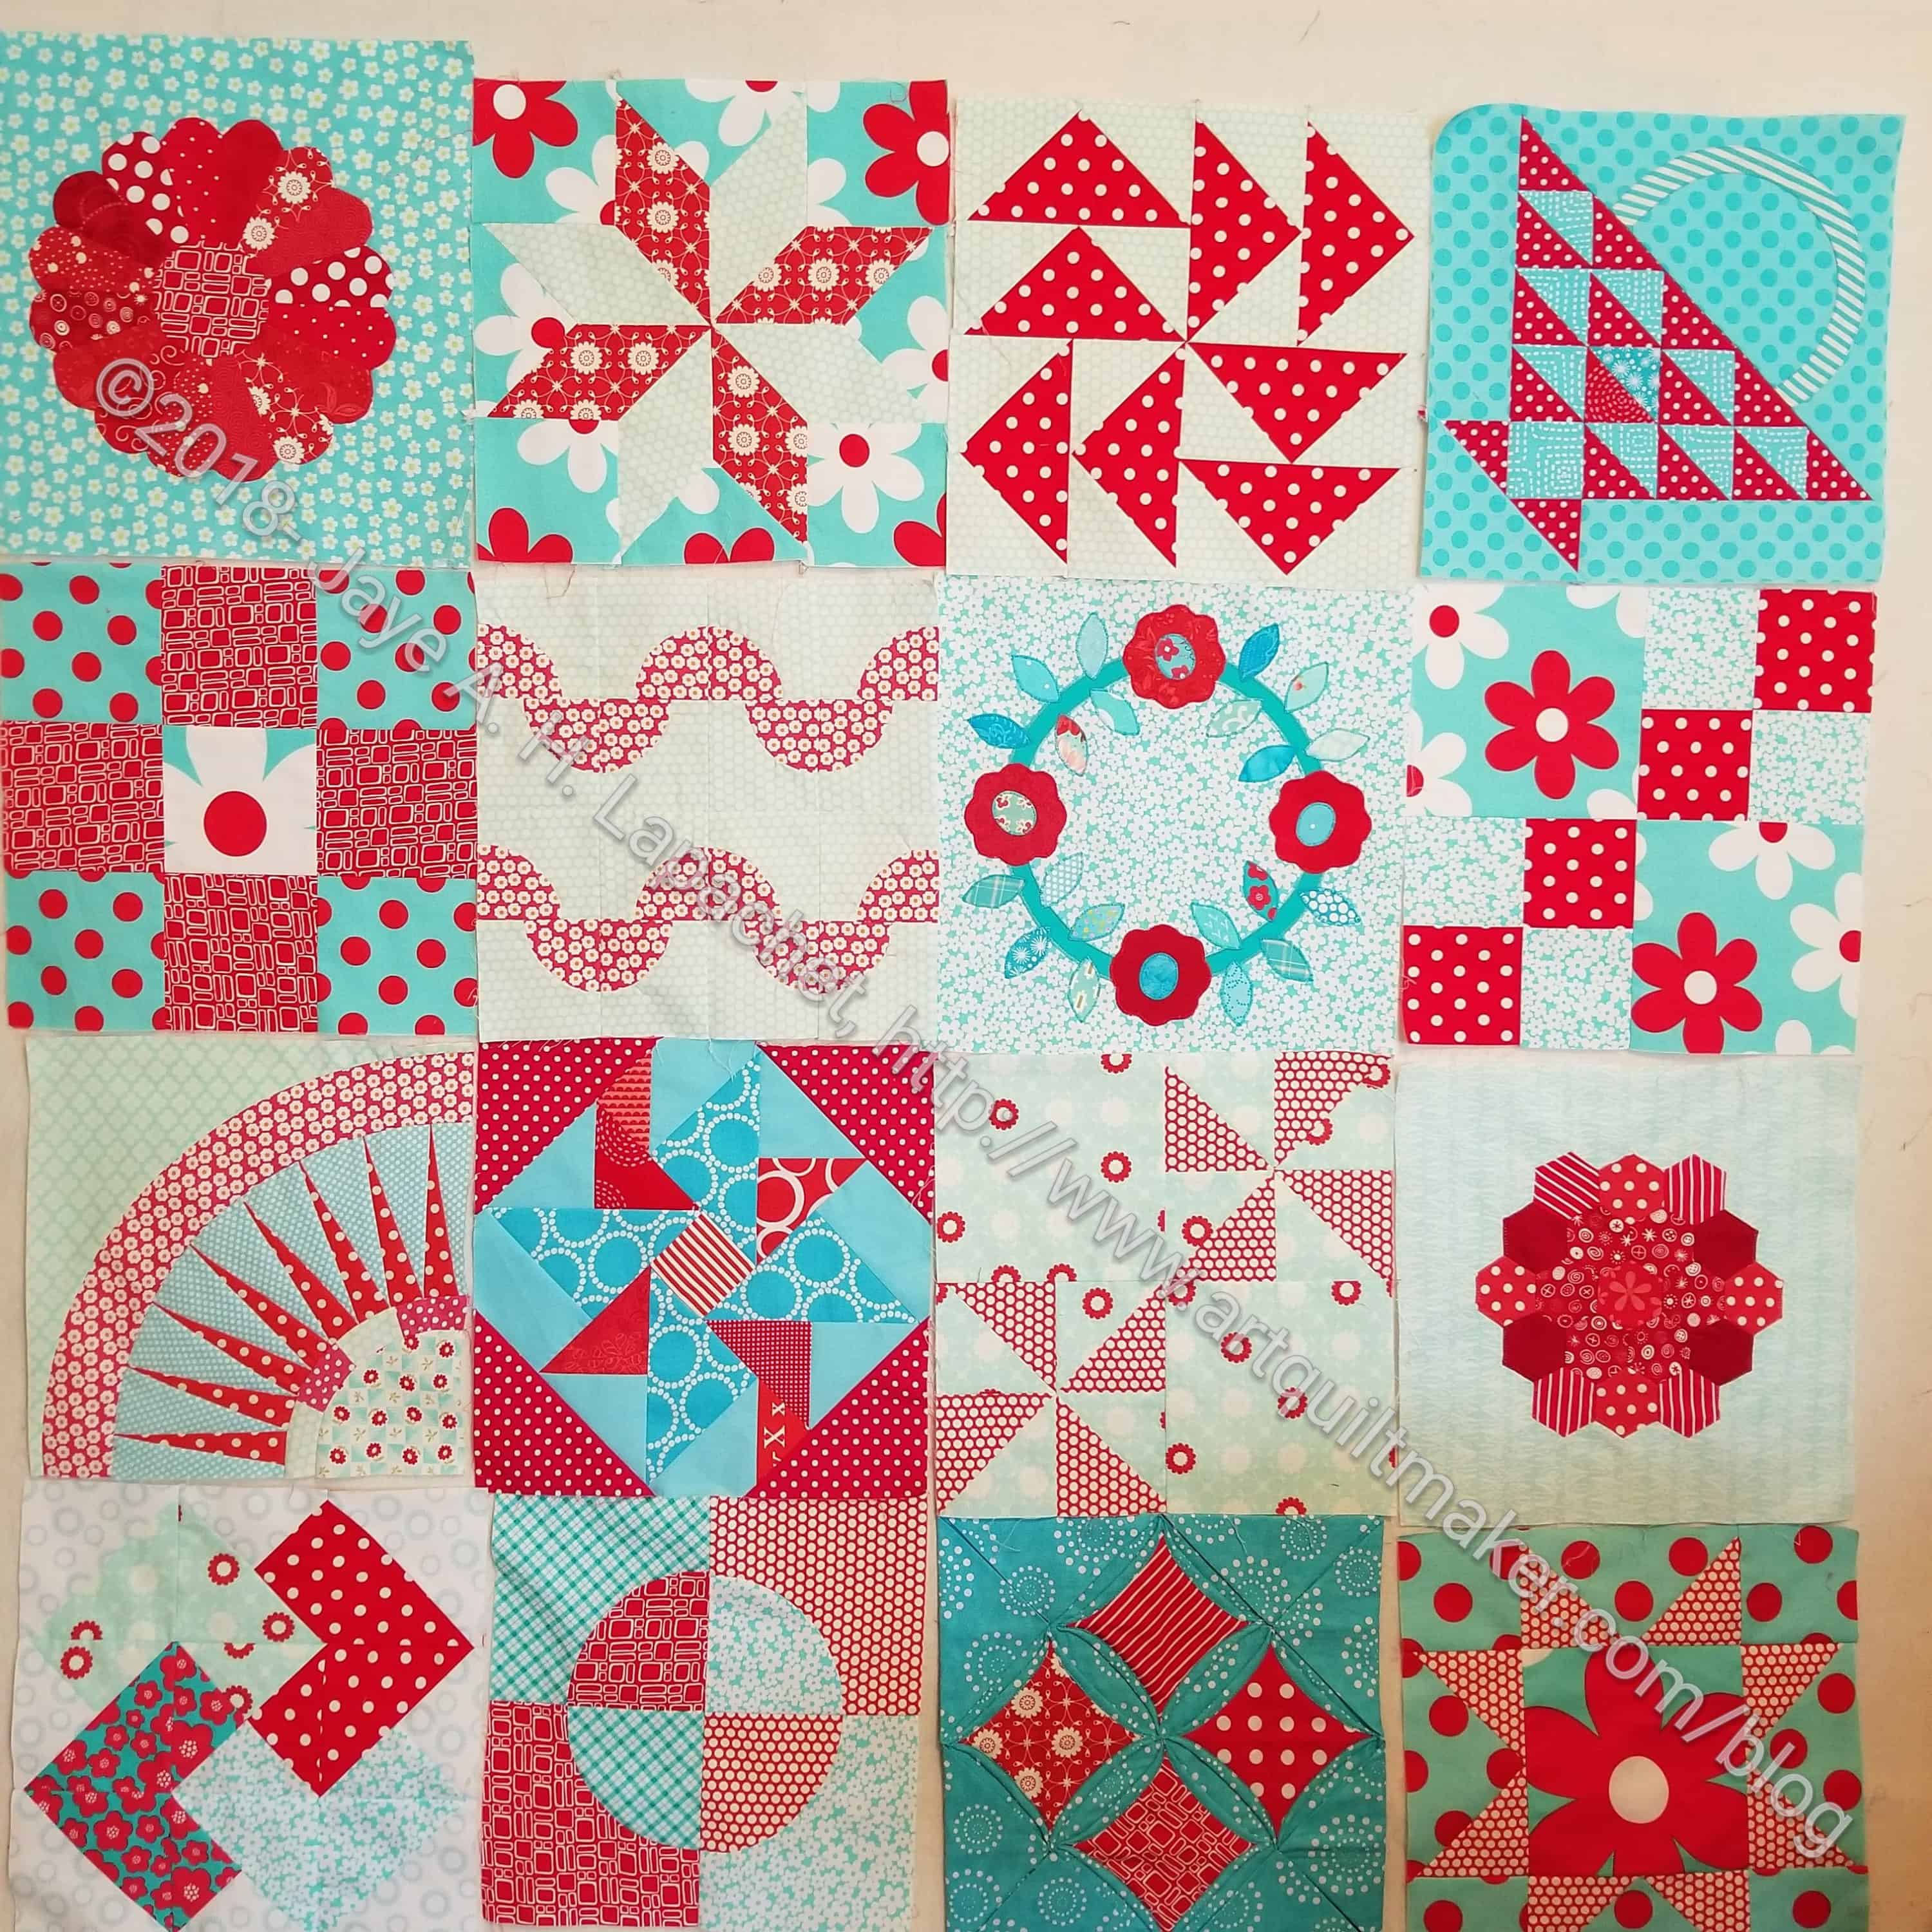
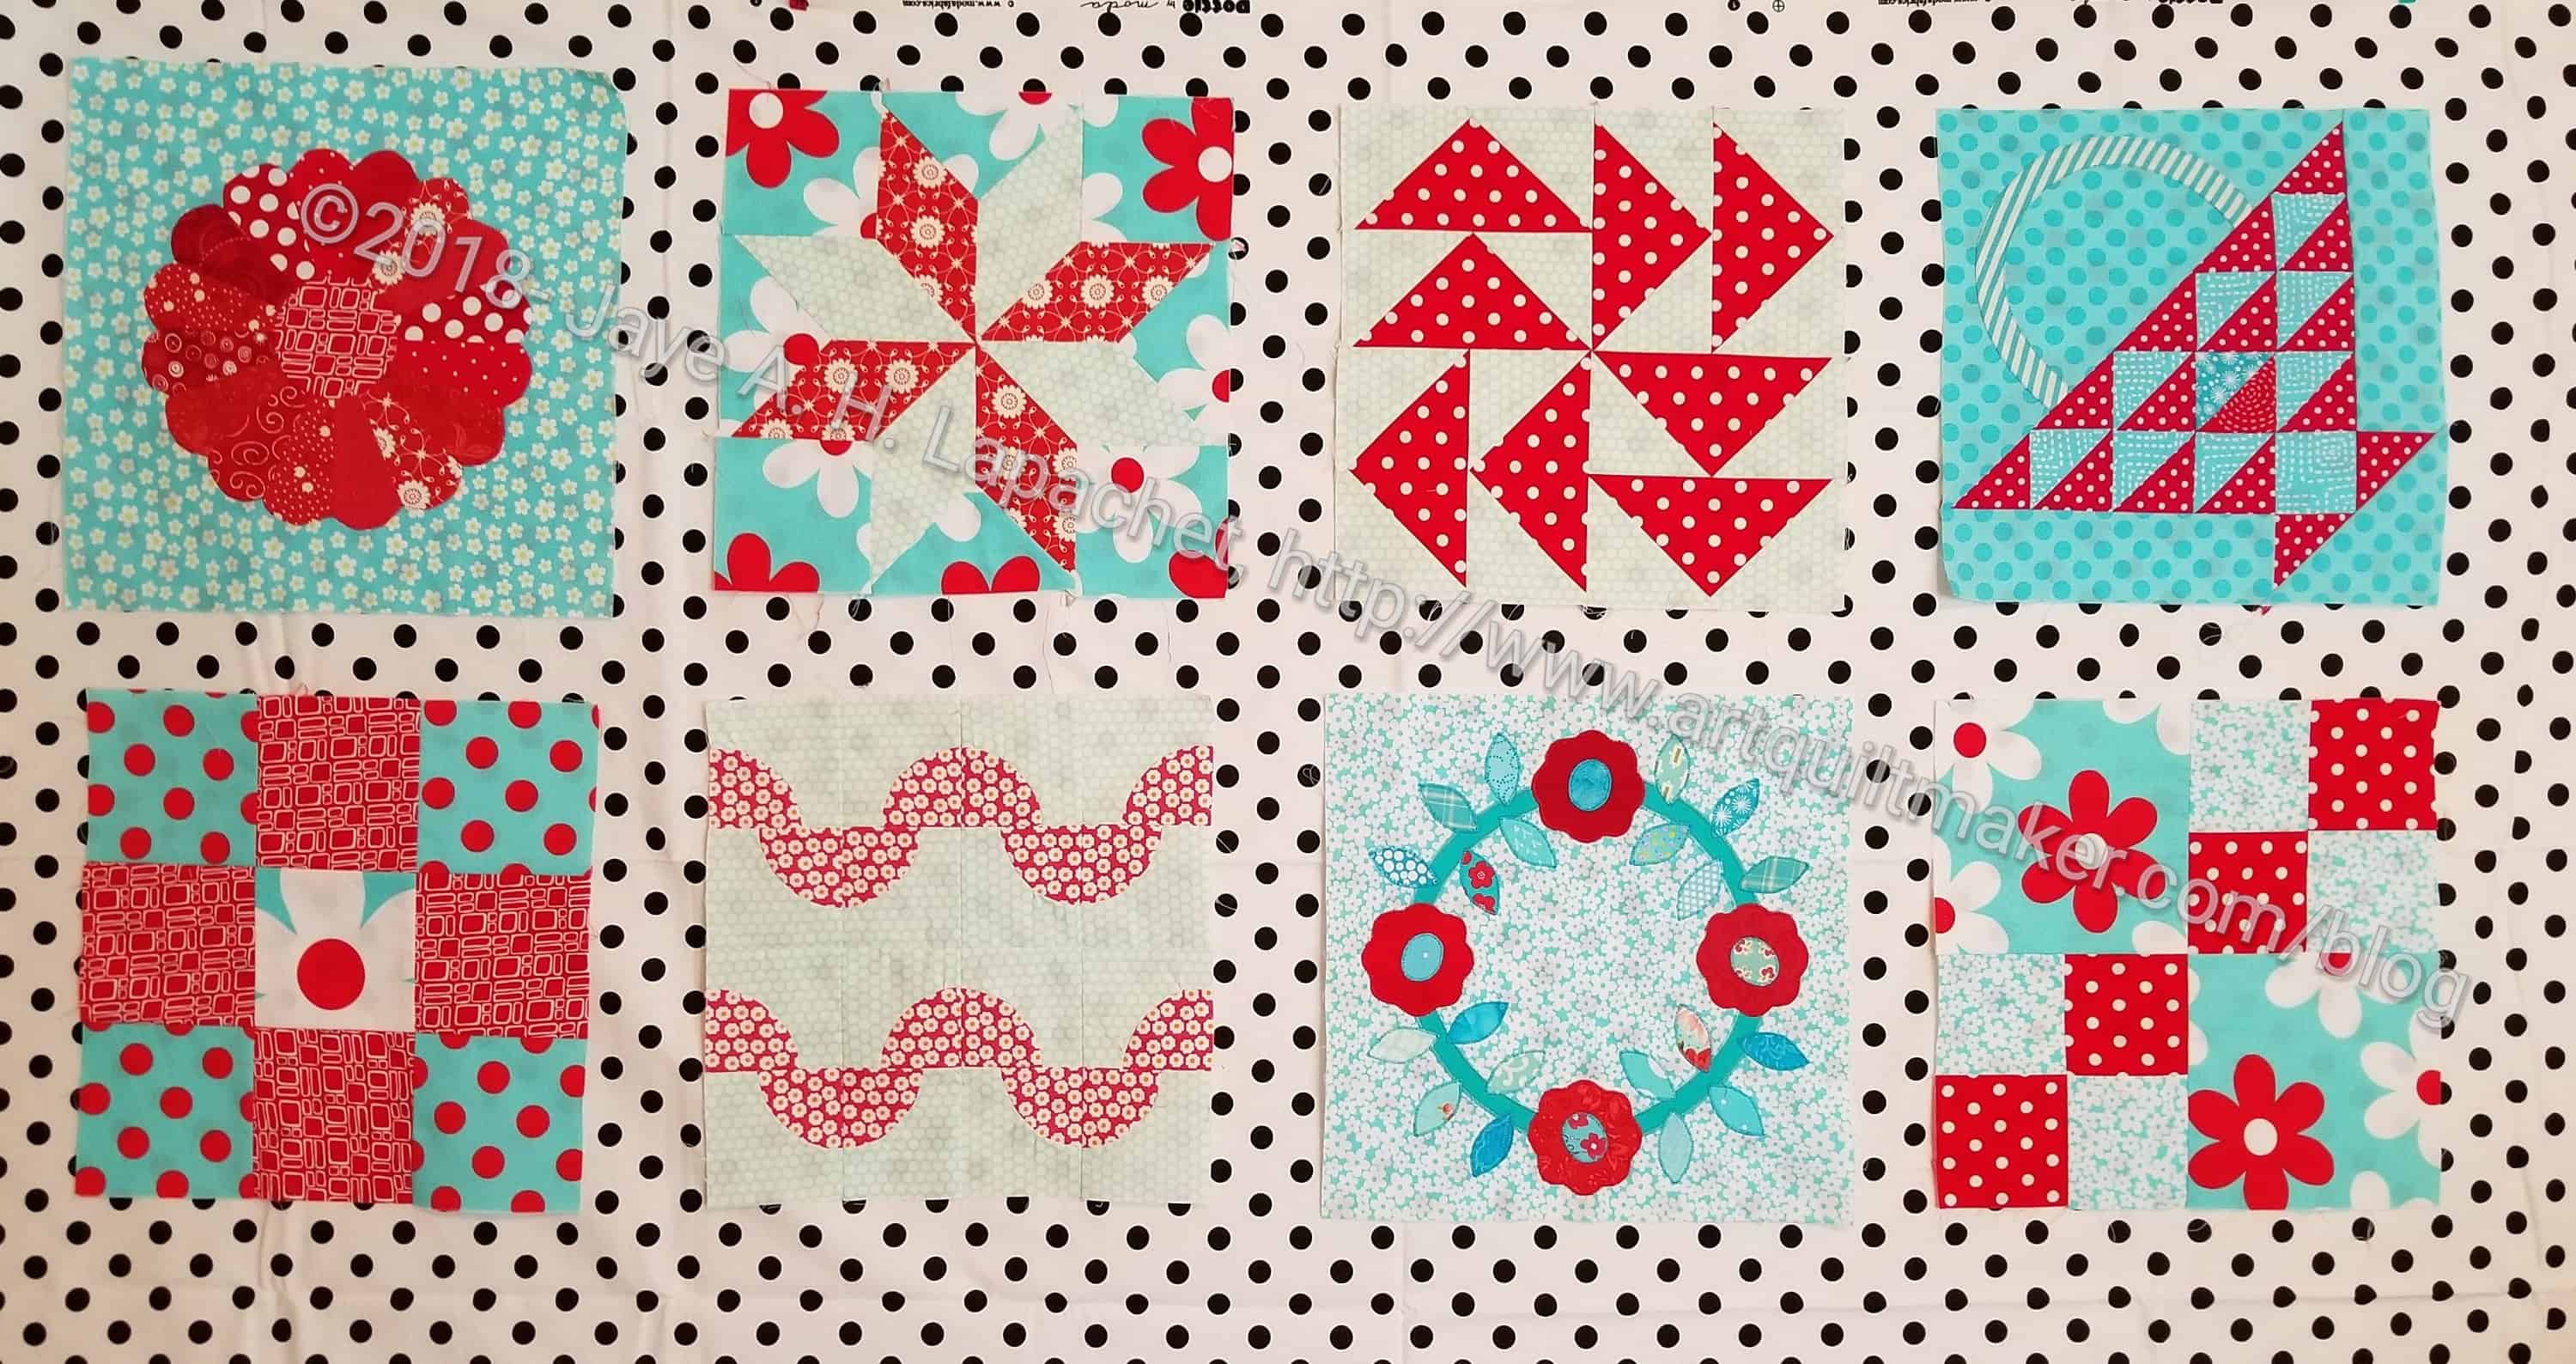
Process can be a difficult mistress (boy toy??) and she had both fangs and talons out for me on Sunday. I really wanted to just piece a bunch of stuff together, so I took Who Am I? off the design wall and started checking out sashing options for the Aqua-Red Sampler. I thought this would be a relatively easy task and I would be sewing in no time.
HA! I should never think that.
I started off thinking that the version above with no sashing just wasn’t quite right. I have a stack of fabrics that I keep for backs and sashing (larger pieces) so I started to look through them and try them out.
I always use Lorraine Torrence’s rule to “make visual decisions visually”. Well, when I do that I usually get good results. When I don’t, I ruin the quilt.
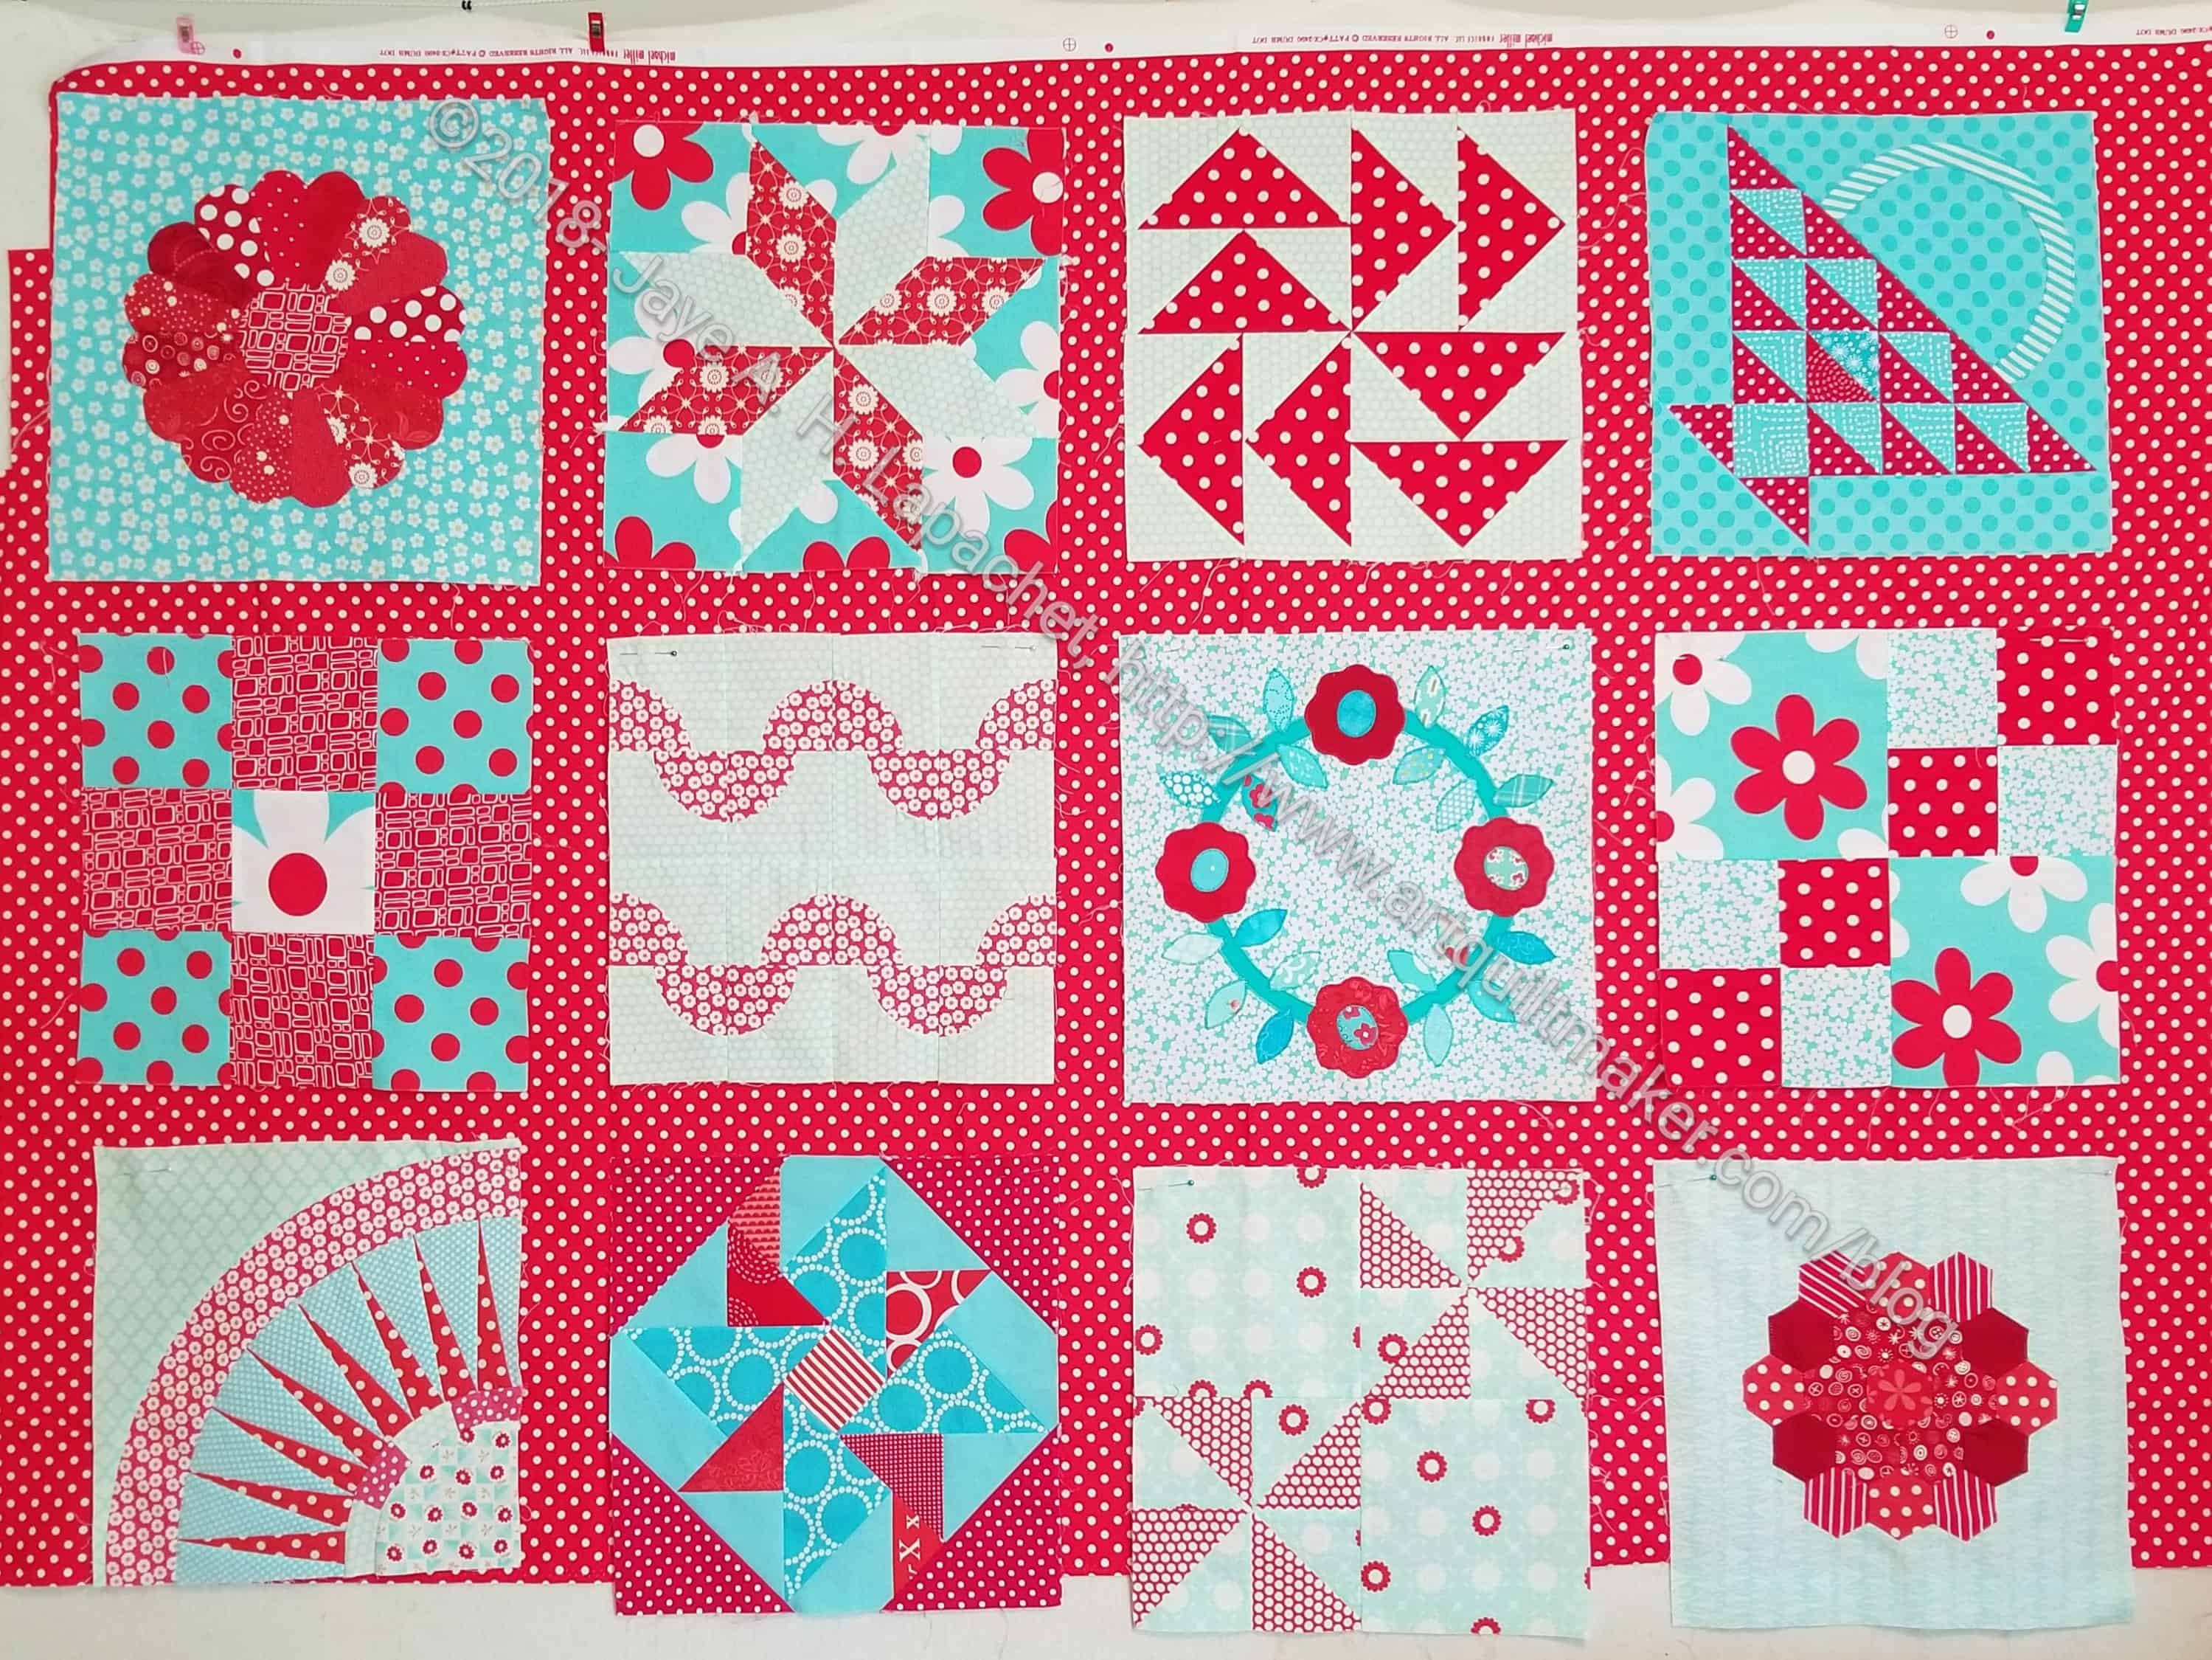
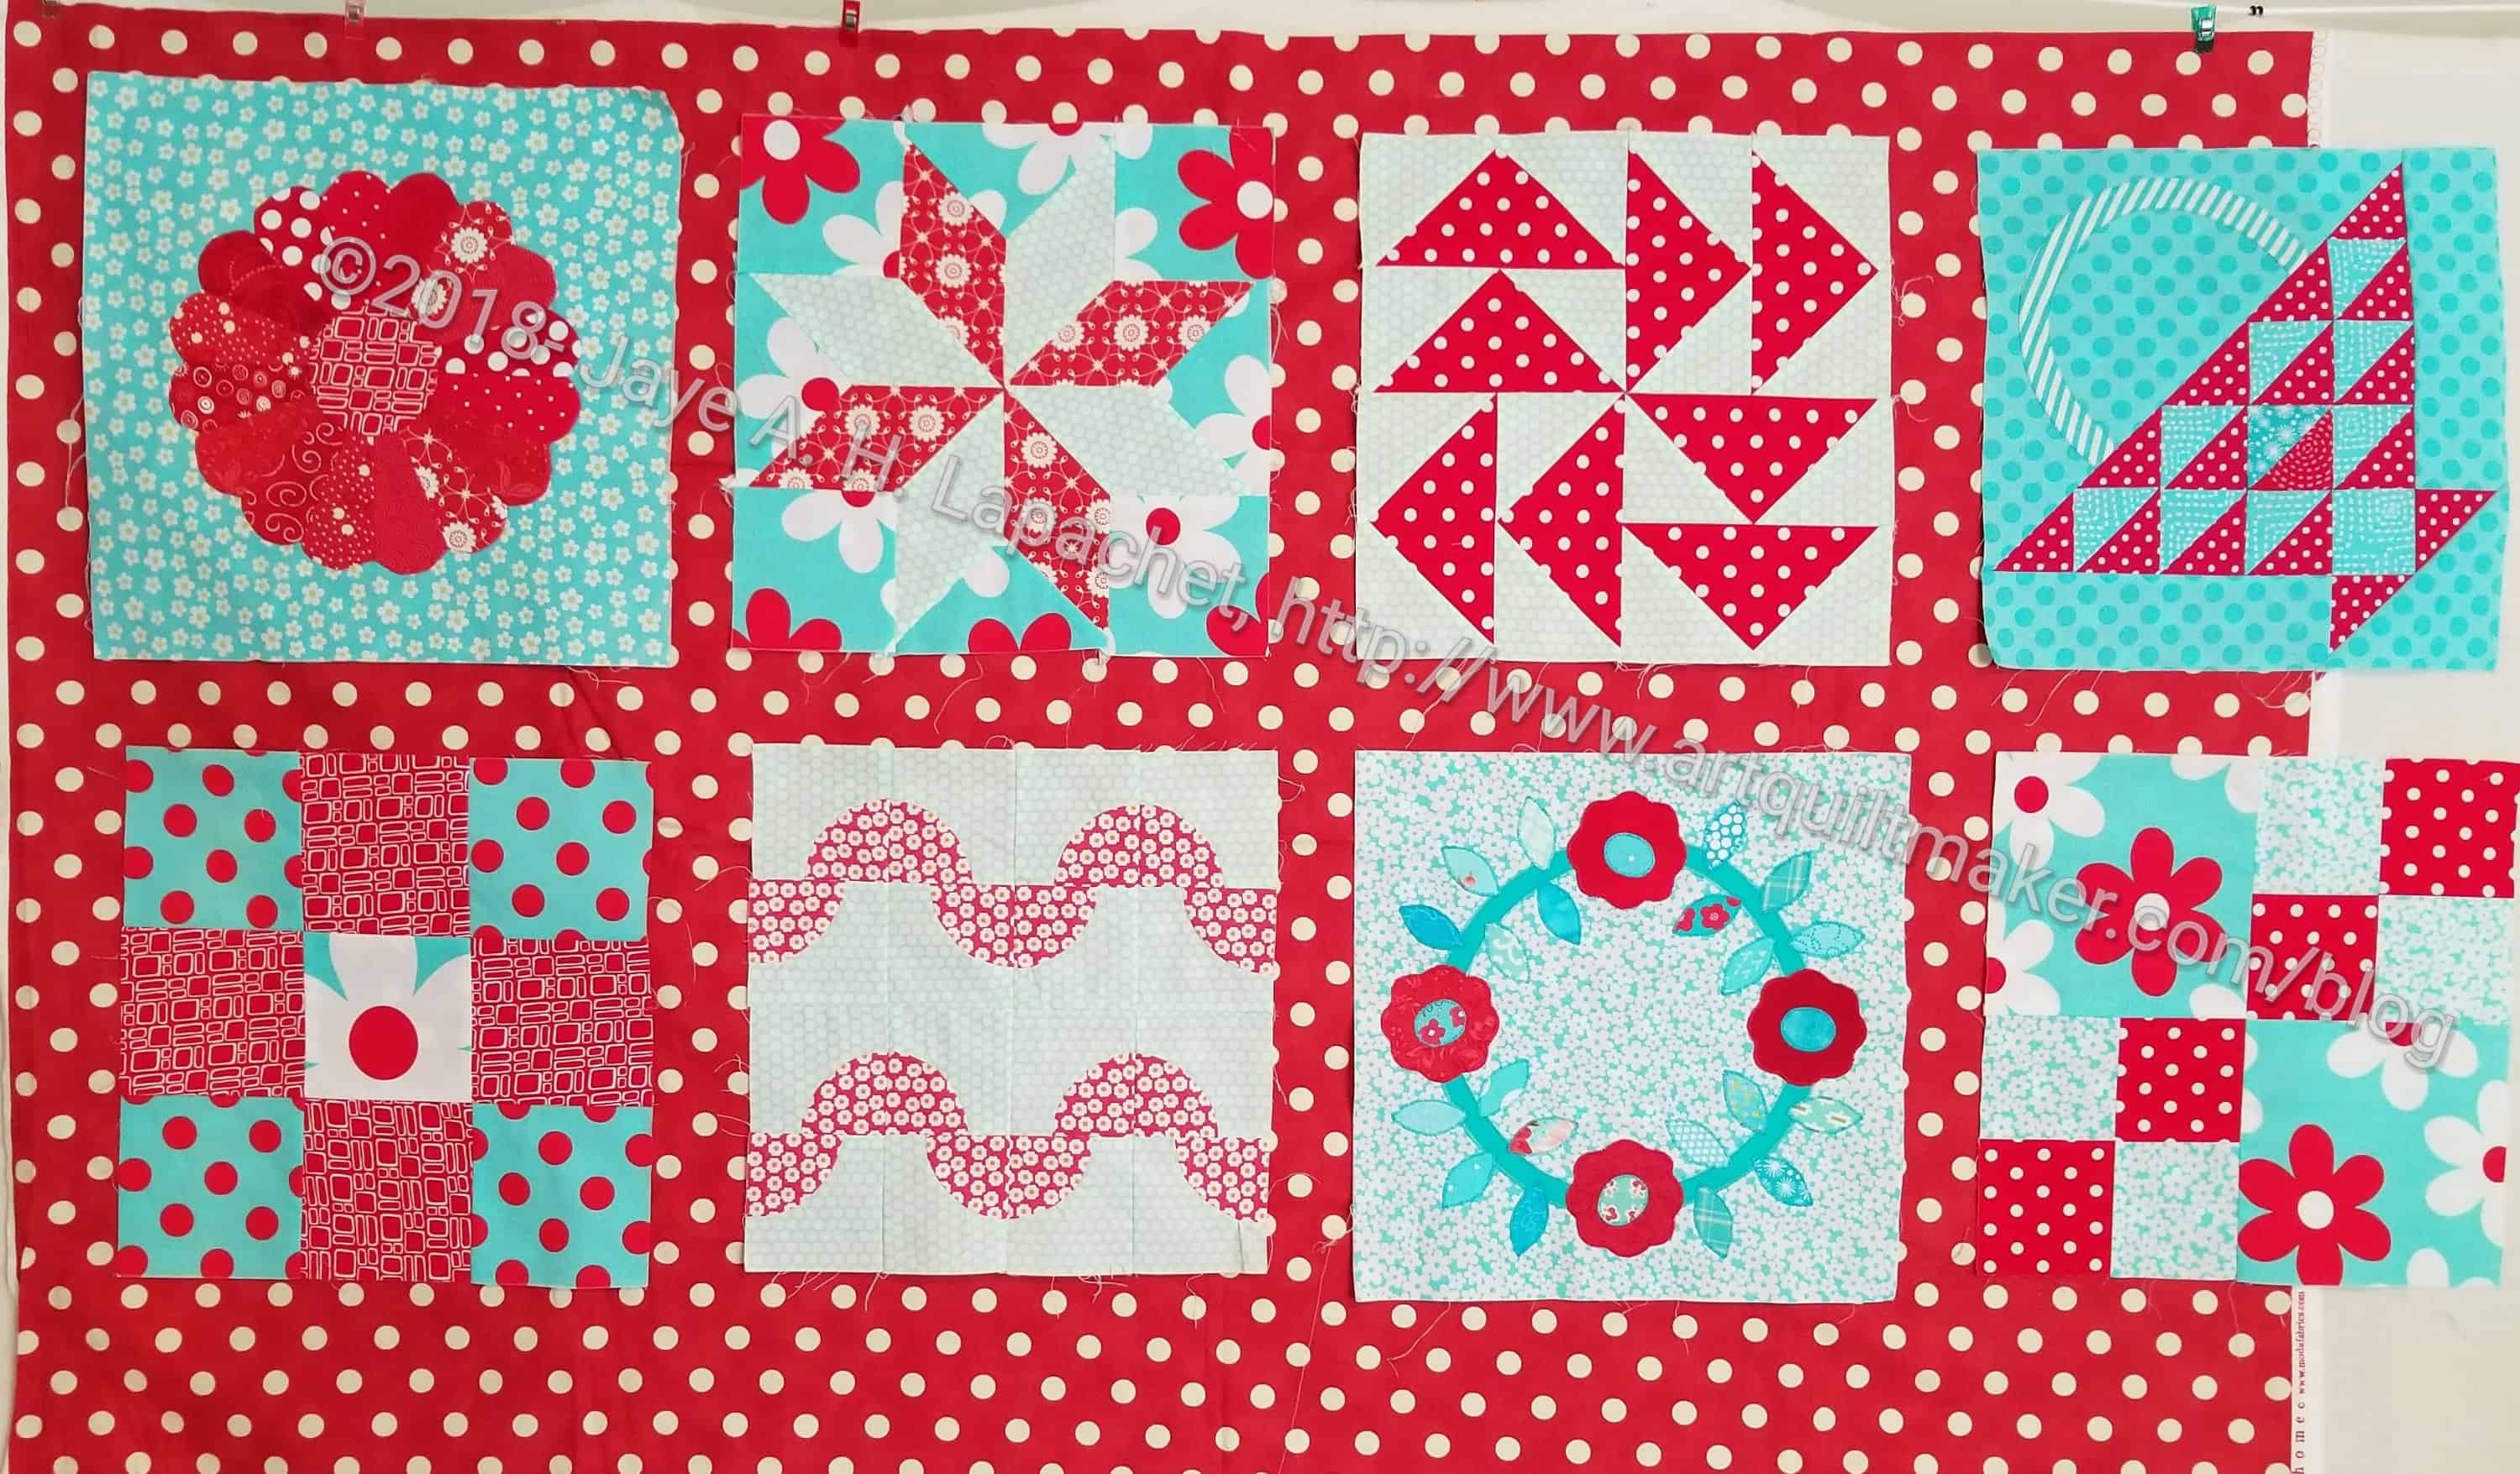
Sample Sashing n.1
I pulled out the most likely option and pinned some blocks up on my design wall (2 layers of fabric don’t stick). You can see how optimistic I was that this would work based on the number of blocks I put up. It isn’t terrible, but I didn’t like the way the red was interacting with some of the reds in the blocks.
Sample Sashing n.2
I thought maybe some blue and I have a nice turquoise solid that I got out. Not terrible, but nowhere near great either. The blocks with the lighter blue backgrounds stick out like sore thumbs and the blocks with the medium blue backgrounds wash out. I wasn’t daunted yet.
Sample Sashing n.3
I thought maybe I should introduce a new color. I know I wanted this to be a, basically, two color quilt, but I started to think, perhaps, that there was no way to keep that dream alive with the two colors I had chosen. I thought about the green in Stepping Stones n.2 and I picked out a nice floral without flowers that included that green plus the blue.
Hideous.
Sample Sashing n.4
I couldn’t yank that fabric off the design wall fast enough. It made me think of my man, Phil, though. I tried one of his prints. Also hideous. Well, not hideous, but it really didn’t work. The blue was wrong. The pink was wrong. It looked messy and slapped together.
Sample Sashing n.5
I decided to try some white. It wouldn’t be my first choice because it is too predictable, but I was starting to feel desperate. Just a little. The white is wrong, too. I am not sure why, but it doesn’t add anything. It was too white as well, as if THAT makes any sense.
Sample Sashing n.6
Since I liked the dots and was still thinking the white might just too white, so I pulled out a different dot and tried to like it. It isn’t terrible. It does add a bit to the whole piece, but the black dots just aren’t right. There is none of that fabric in the whole piece. I put it aside as a possibility.
Sample Sashing n.7
Still thinking dots would work, I pulled out a different red dot print. The red wasn’t exactly the shade I would have chosen if I had all the fabric in the world, but the dots were larger and that was promising. Also, not terrible, but also not exactly right.
By this time, I was starting to feel disheartened and needed some input so I posted to Instagram to get some feedback. People were very kind and had some good ideas.
Sample Sashing n.8
One person suggested navy, which might work, but I don’t like navy much and don’t have any navy fabric – yardage, at least. I might have some scraps. Amanda suggested yellow. I had a nice sunshine-y orange, which I just thought I would try to see. Not terrible, but not right either. It came across as gold in the photos (even the one above, I think). You remember the hunt for yellow in which I engaged for the basket quilt? I really didn’t want to go out and buy fabric. I really felt I had to have something that would work.
Sample Sashing n.9
I found some cherry fabric, again by my man, Phil, and thought I would try it. The first Philip Jacobs option was still on my mind. I wasn’t ready to give up on him again. This fabric is actually okay. I think ‘okay’ is a step above ‘not terrible’. Still it didn’t scream YES! at me.
Much more sighing went on.
Sample Sashing n.10
My last option for the day was a grey. I was not hopeful. I really wanted to sew and I had used most of my sewing time on an unsuccessful attempt to choose some sashing.It didn’t work. It doesn’t look much better than the white
I gave up and went to sew the latest donation quilt. I am starting to think this quilt does not want sashing and I’ll have to make the tutorial with another quilt.