Finishing the Sheffield took longer than I expected. I thought I was done, then I had to make the false bottom, and add a label and…
No problem. I really enjoyed finishing it. REALLY! I realized that I have been anxious to get through the final assembly of recent bags, because that was the time when I fought with my machine. I didn’t even realize I was fighting with my machine until I used the new machine to put this bag together.
Sheffield: open wide design
The Sheffield has been on my list to make for a long time. Since I made Gerre hers, I wanted to make one for myself. The open wide design of this bag is very appealing.
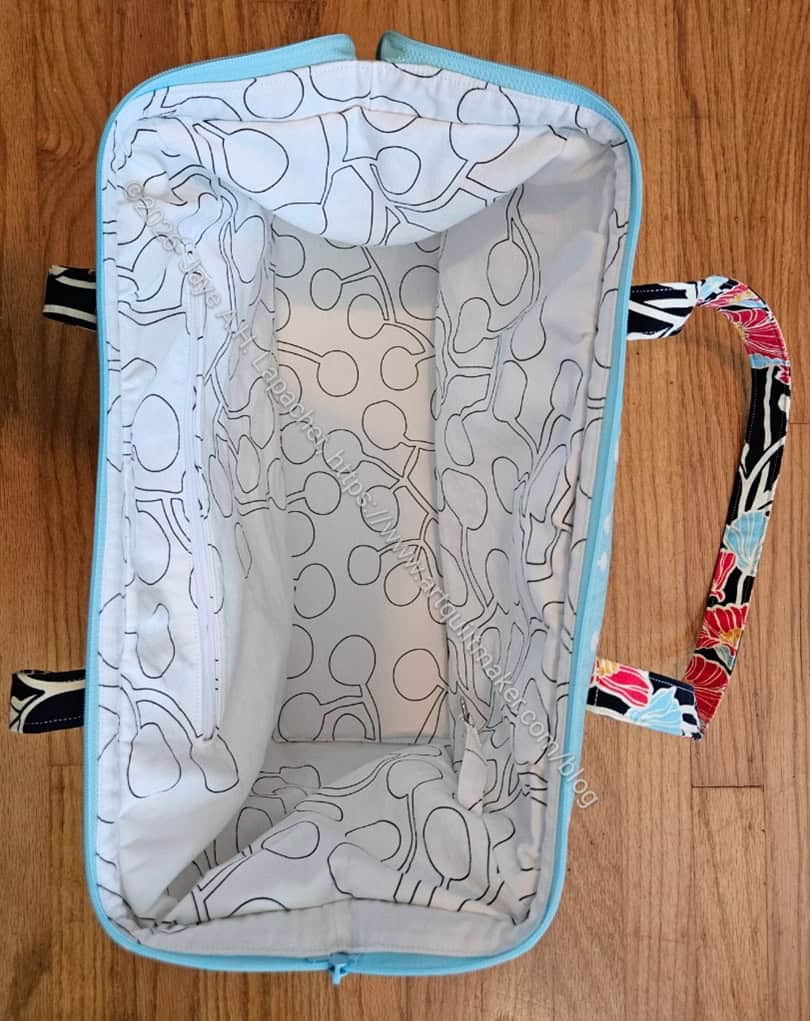
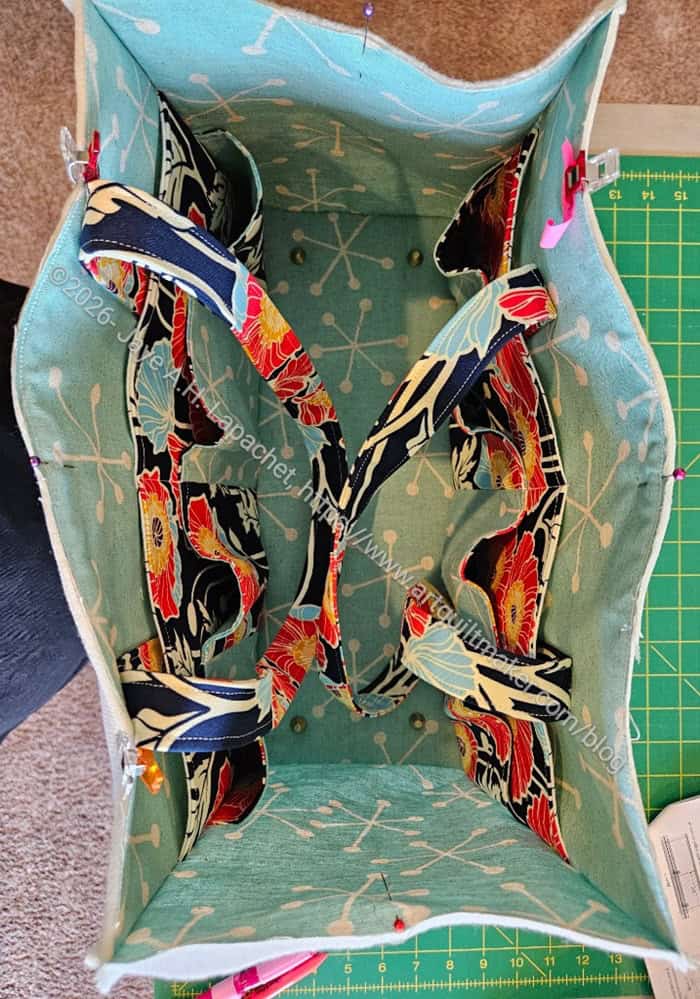
The interior is made from an IKEA lightweight canvas I picked up from the free table. My lining is a little saggy baggy, despite the larger seam allowance. The lining will not fly out since I used my hard won knowledge (thanks, Lynette) of anchoring the lining to the exterior. One issue I had is that the pattern pieces for this bag are not square. They are trapezoids. I think something might have happened, because the pieces are trapezoids, when I was sewing the lining together that made them larger than I would have liked. I don’t know.
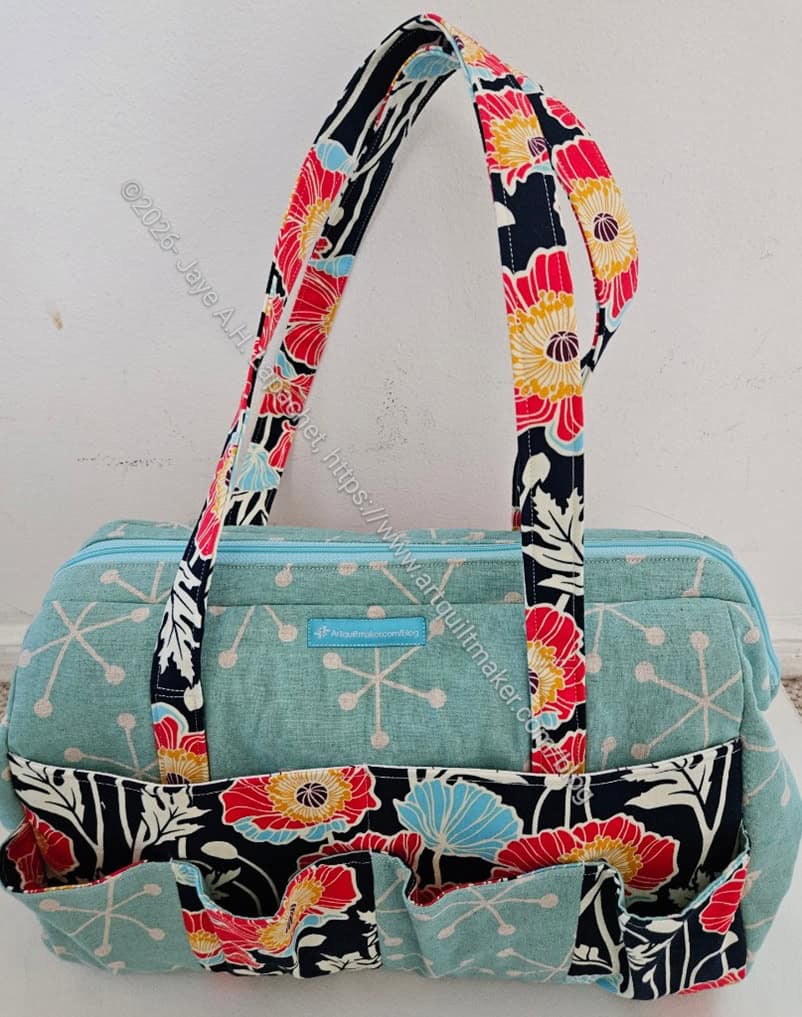
Finished: Sheffield back
I finished most of the exterior pieces while visiting MaryM.
I did the final assembly at home after adding a leash and an interior zipper pocket. I wanted to add a slip pocket,but forgot in my excitement.
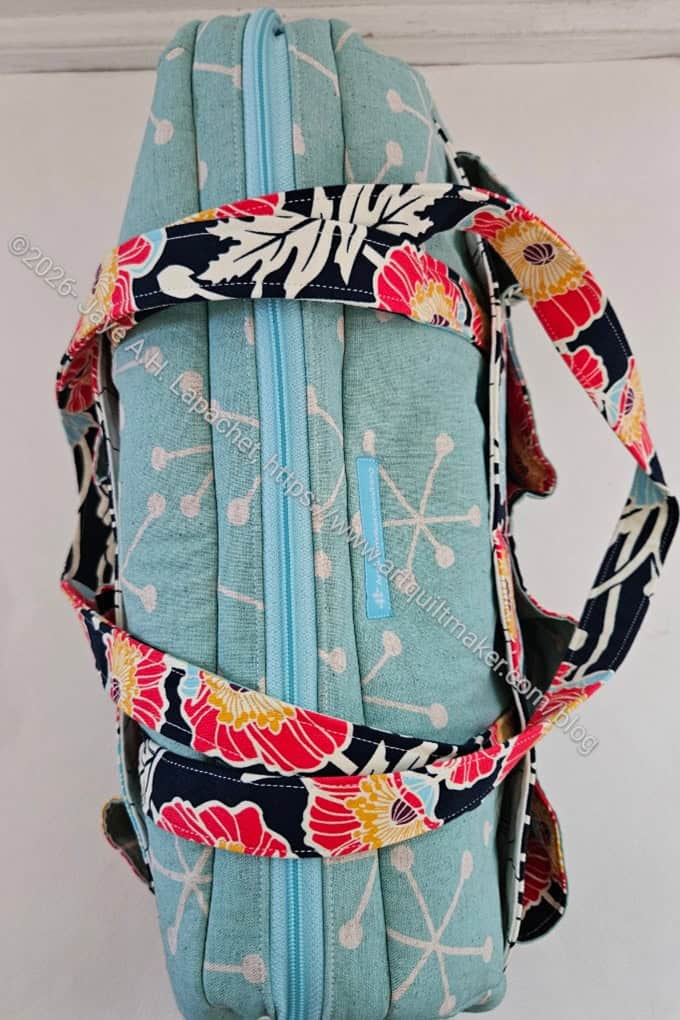
The handles on this bag are larger than the those indicated in the pattern. Sara has makers position the handles a half inch up from the bottom. This is so the handles clear the seam allowance. Beyond reducing bulk, I am not sure why. I would like to say I will try putting the handles in the bottom seam on my next one, but I am not sure I will make another one.
Finished: Sheffield top
I think I could have put the poppy fabric on the frame casing. I think it would have added a finish or border to the top of the bag.
Cutting for the frame pocket was confusing. I have to look at the directions again to see where the cutting went wrong. I wanted to have the exterior match the exterior and same for the interior. I ended up with extra lining pieces.
For now I am just excited about the bag. I don’t know for sure how I iwll use it. I am thinking about putting all of my metal tools in in: KAMsnaps, Snap Setter, awl, hammer, etc. If there is space, I could add in webbing as well.
The Sheffield is a joy to work on! I can’t tell you how much easier it is to work on a bag when I don’t have to fight with my machine. I didn’t even realize, really, that I was fighting with my machine.
To make this bag, I changed feet and needle plates pretty frequently, but it really helps use different feet.
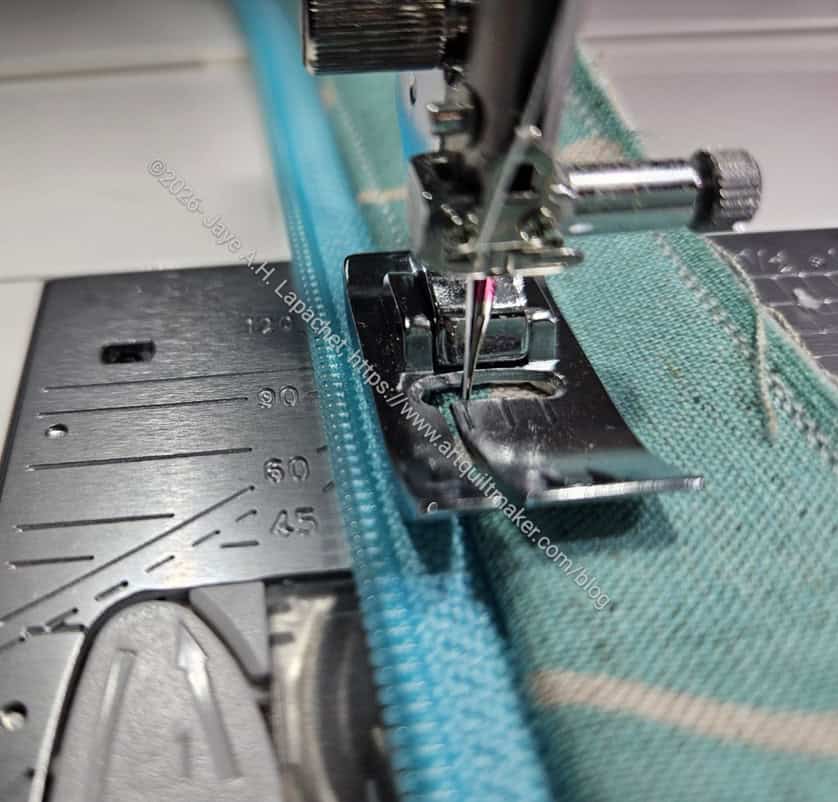
Top stitching thick layers
I used the Bi-level foot to stitch the top stitching on the frame case and that was a breeze. I never used the Bi-level foot before, but now it is one that seems to be coming out of the box often. I am not sure why I didn’t use one before. Maybe I didn’t have one?
Anyway, I was amazed and pleased with how straight the stitching was using this foot. There are a lot of layers the machine is punching through in the photo above and I got good stitch quality, no broken needles or stuttering. Of course, I wasn’t being the demon speed sewist either. I sewed pretty slowly on this section.
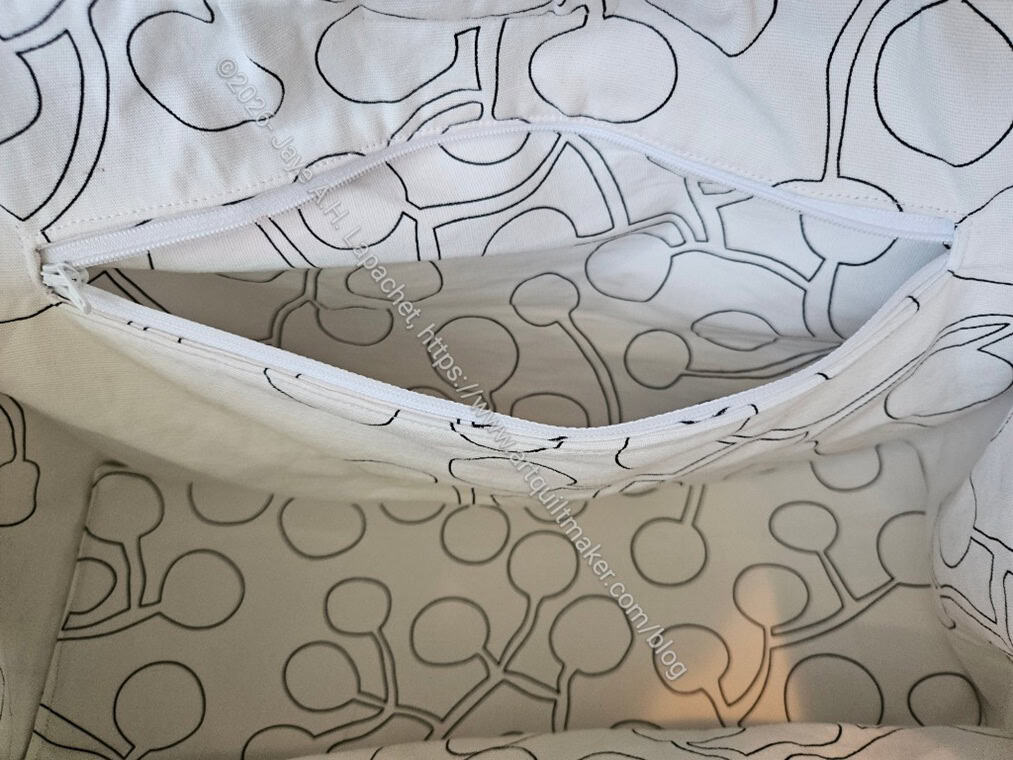
Sheffield internal zipper pocket
I decided to add an internal zipper pocket, which is not part of the pattern.I didn’t have any trouble making it. I learned a bit from the second interior zipper pocket on the Pandora Charisma and that experience helped.
I also wanted to turn the bag through that zipper pocket, which is a technique that Tim taught me. I had to think about it for awhile, because I wasn’t sure if any bag could be turned that way. I didn’t come to any conclusion, so I just went for it. It worked out fine. I like this method, because it means that nobody can see where the bag was turned unless someone digs into the pocket.
I am not sure why I wanted a zipper pocket, but I did. I also added a leash, which I do for all of my bags.
Anchoring the lining
Finally, my next step is anchoring the lining to the exterior. I have started but need to finish.
Making a Sheffield bag for me has been on my list for a long time. Since it is #6 for the BAMUFO challenge, it is time to work on it. In case you are confused #6 was selected for this month’s project on which to work. I needed to get busy.
The Sheffield is another Sew Sweetness bag. It has an open wide zippered top and is NOT part of the Minikins series. It is a stand-alone pattern. I made one for Gerre (the purple one above) a few years ago.
I put it on my UFO list, because I knew I could finish it within the 30 day window. I was surprised to find I had started to cut pieces for it. They were in my bag fabric bin with the metal frame. That means it truly was a UFO!
After setup at Mary’s house and making a couple of small projects, I got to work on the Sheffield. I was sad not to be using my new machine, but was happy that Mary had a second machine I could use. Not having to haul a machine in our stuffed car was great. She has a Babylock Crescendo, which I have used before. It is a high end machine, which was fine to work on.
Before I could sew the Sheffield, I had to cut the rest of the pieces. As with most bags, there were a lot of pieces, thus a lot of cutting. The handles and the slip pockets were already cut. Apparently, I had already made the choice to make the handles slightly longer than the pattern suggests. Once I finished cutting, I was able to get started with the preparation of the various elements.
One new thing I did was add purse feet. This was my first time. They are listed as optional in the pattern. Since I had some, I decided it was time to use them. The ones I had were Clover Nancy Zieman Bag Feet in Satin Bronze**
BTW, isn’t ‘purse feet’ a funny phrase? All sorts of hilarious images appear in my brain when I say ‘purse feet’!
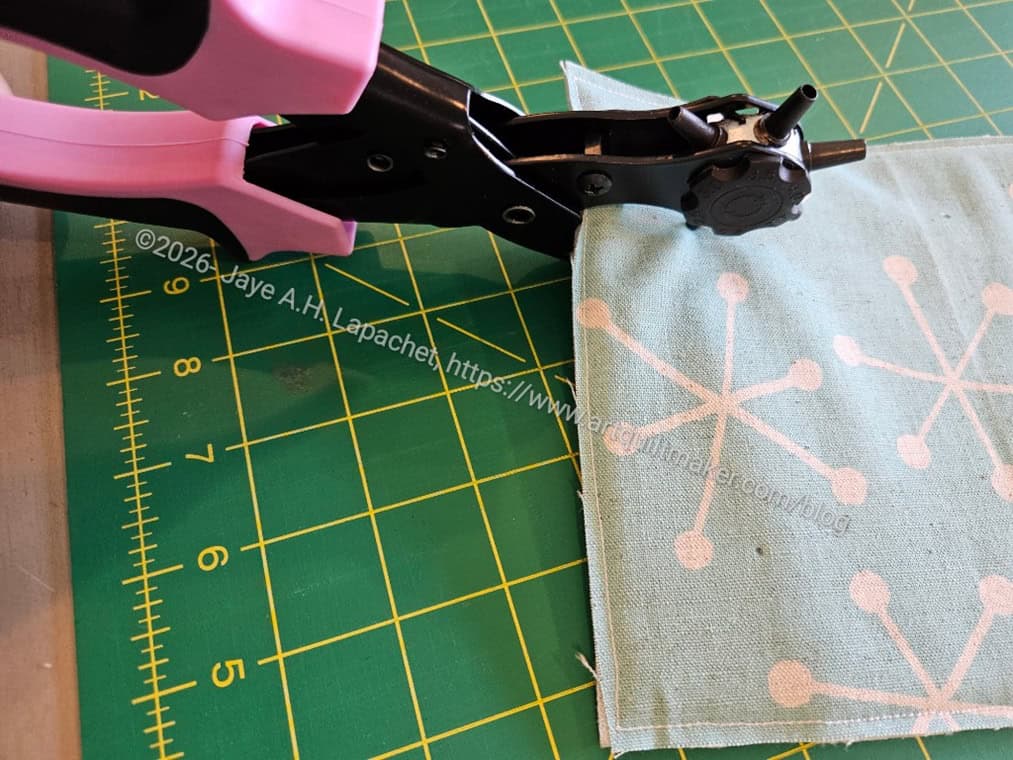
Installing purse feet
I brought my ProMaster leather punch** (hole maker) along for the trip. I like this tool. It made punching through two layers of canvas and a layer of foam pretty easy. Since I forgot to bring mine, I borrowed some pliers from Mary’s DH, who is a master wood craftsman. The purse feet are installed by shoving two metal flanges through the hole, putting a metal washer over the two and bending the flanges down as flat as possible.
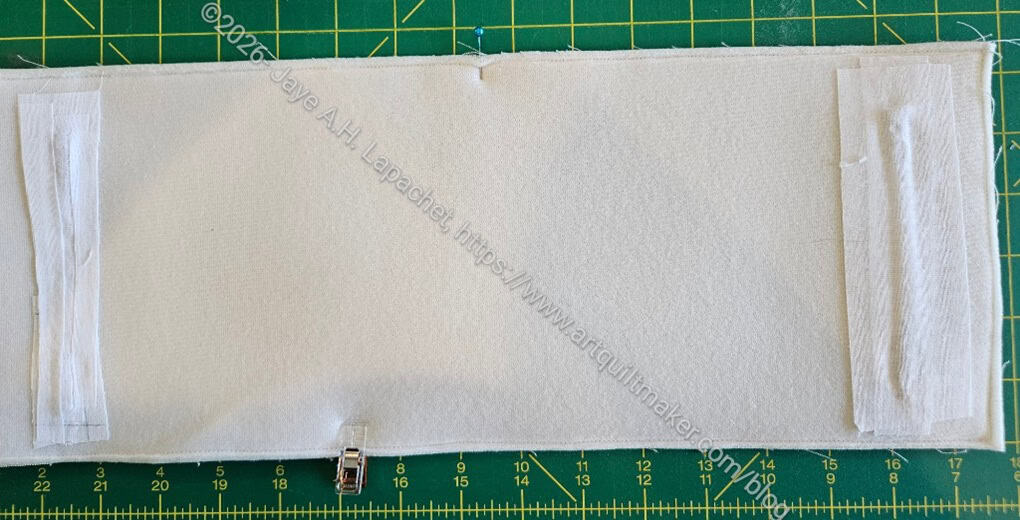
Safety first! SF101 covers purse feet flanges
After I installed them I put a couple of layers of SF101 over the folded flanges to keep them from catching on the lining fabric.
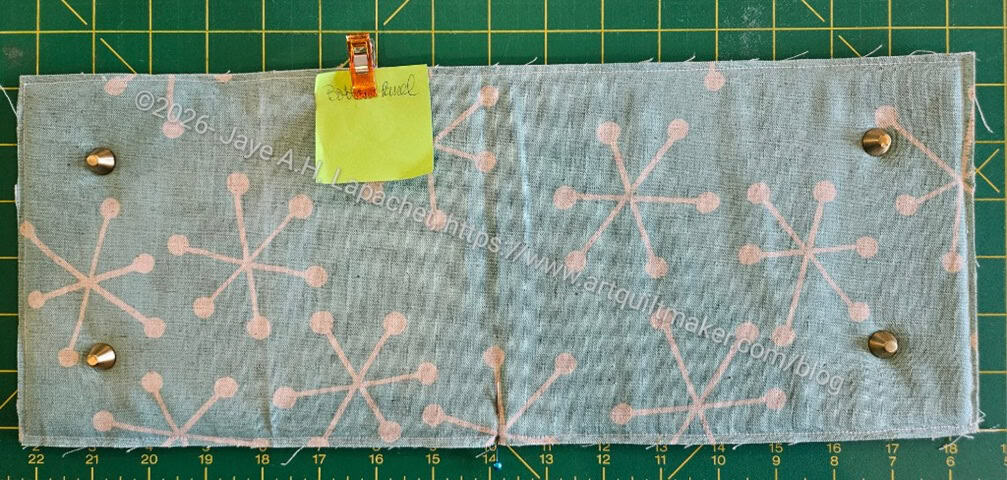
Sheffield bottom with purse feet
There were only four, which surprised me. I always thought purse feet came in sets of five so you could put one in the middle of the bottom to keep the center off of dirty surfaces, but no, the pack I had came with four. I may add some Odicoat** to the bottom. We’ll see.
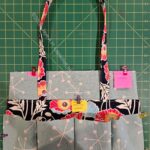
I had sort of decided not to add the gathered pockets on the outside, then changed my mind and added them at the last minute. I tried out different looks to see how I wanted them to feature.
Sheffield exterior option 1
Sheffield exterior option 2
I finally decided to alternate the fabrics. I didn’t like the look of the all blue gathered pockets. I really wanted to see the Poppy fabric. I had cut the slip pockets out of the Poppy fabric when I thought I wouldn’t use gathered pockets, because I wanted be able to admire that fabric. Using only the blue would cover up too much of it. Using only the Poppy fabric was too jarring and confusing so I eliminated that option right away.
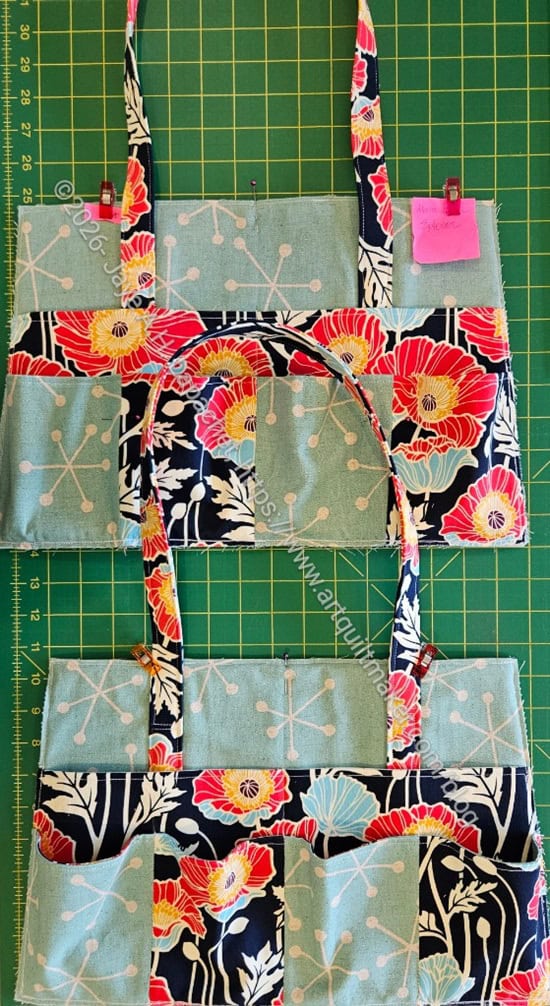
Sheffield – finished exterior mains
The main exterior panels came out well with my choices.
This isn’t a particularly difficult bag, but I felt like I needed to sew slowly and make sure I was doing everything correctly.
After finishing the main exteriors, I was able to put the exterior together.
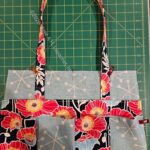
Poppy Sheffield for me- exterior
I decided after I had made good progress that I wanted to put some pockets on the inside as well as a leash, so I stopped work on it. I didn’t have the hardware with me and we had already been to Green’s, the place to buy hardware near Mary’s house. Since I had hardware at home, I decided to finish it at home.
This is farther along than I have gotten in the 6 years (SIX YEARS – WHAT?!?!?) since I made Gerre’s. I am pleased with how it looks and pleased with my progress.
I am getting quite the collection of tools and might need to make another one of these to store those. Or maybe I will use this one to store tools such as my my ProMaster leather punch**, KAMsnaps, awl, Snap Setter, etc.
**Obviously, you should shop at local quilt shops and small businesses. However, if you are too busy or can’t find what you need there, I use Amazon affiliate links and may be paid for your purchase of an item when you click on an item’s link in my post. There is no additional cost to you for clicking or purchasing items I recommend. I appreciate your clicks and purchases as it helps support this website.
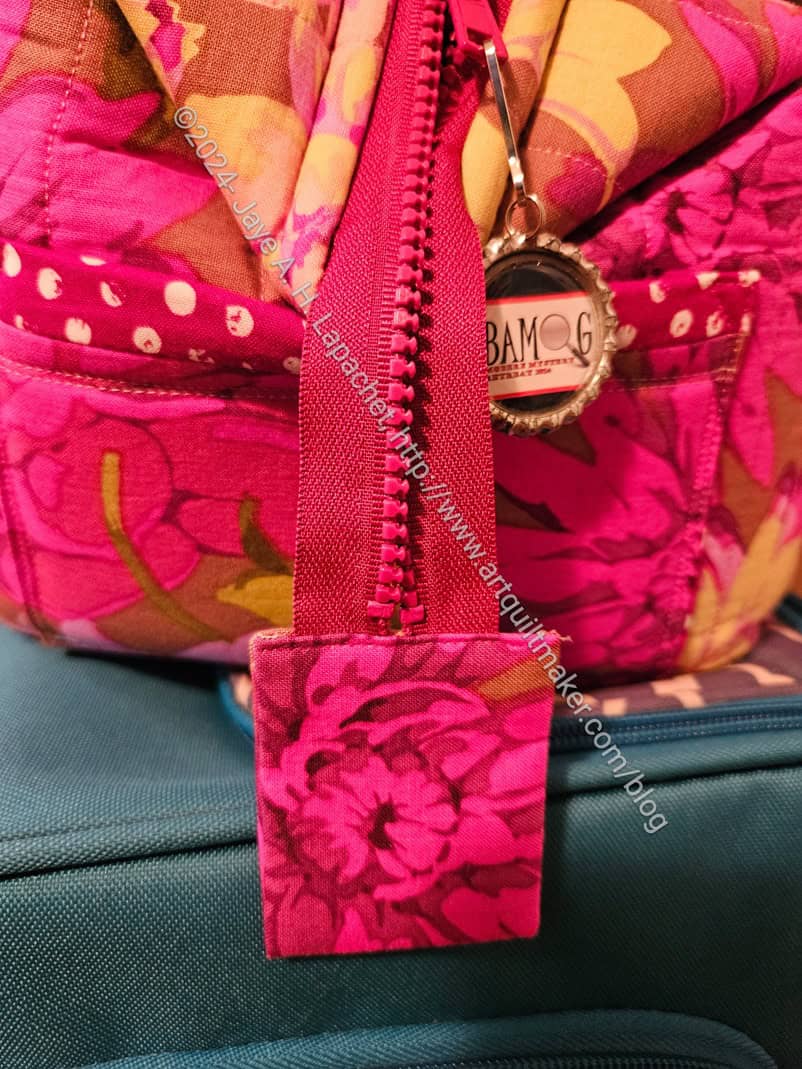
I know I finished this tote YEARS ago, but I see it every day. It sits next to my desk with the zipper end hanging over.
QI Tool Tote zipper end
I know I fixed this end before, but it is still bugging me. I either need to fix the zipper again or turn the bag around so I don’t see the zipper end all the time.
I don’t like how big the zipper tab is. I like my zipper tabs to be as wide as the zipper.
In this case, I have done a nice job of fussy cutting, but the size still bugs me.
I made a Sheffield Tote for Gerre as a gift in 2020. I make gifts because I want people to know I am thinking about them. I do know that what I think is great may not be great for someone else, but I don’t have hard feelings when someone doesn’t use a gift I made for them.
Alternatively, I am super thrilled when I see a gift being used. This ‘t the first time I have seen Gerre bring it. She says she uses it all the time. Whenever we sit near each other I see it packed with supplies. It makes me so happy that it is a useful tote.
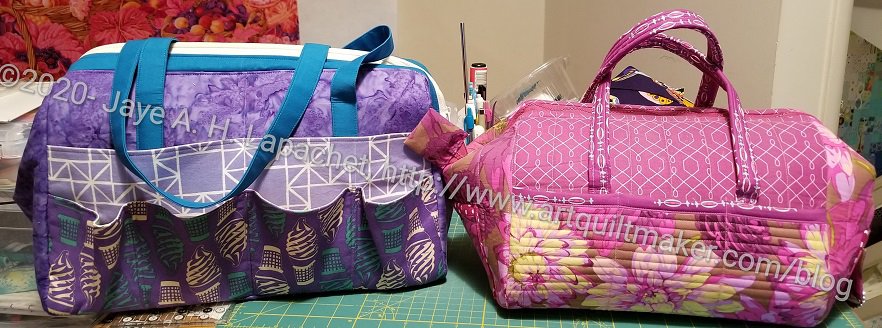
After thinking about the two tool totes, I decided to compare them. I already talked a little about them in the Gift Post, but I think showing photos would help you decide which you want to make. I made the Quilts Illustrated pattern in 2018. I use it for my bag making supplies. It is handy to keep them all in one place.
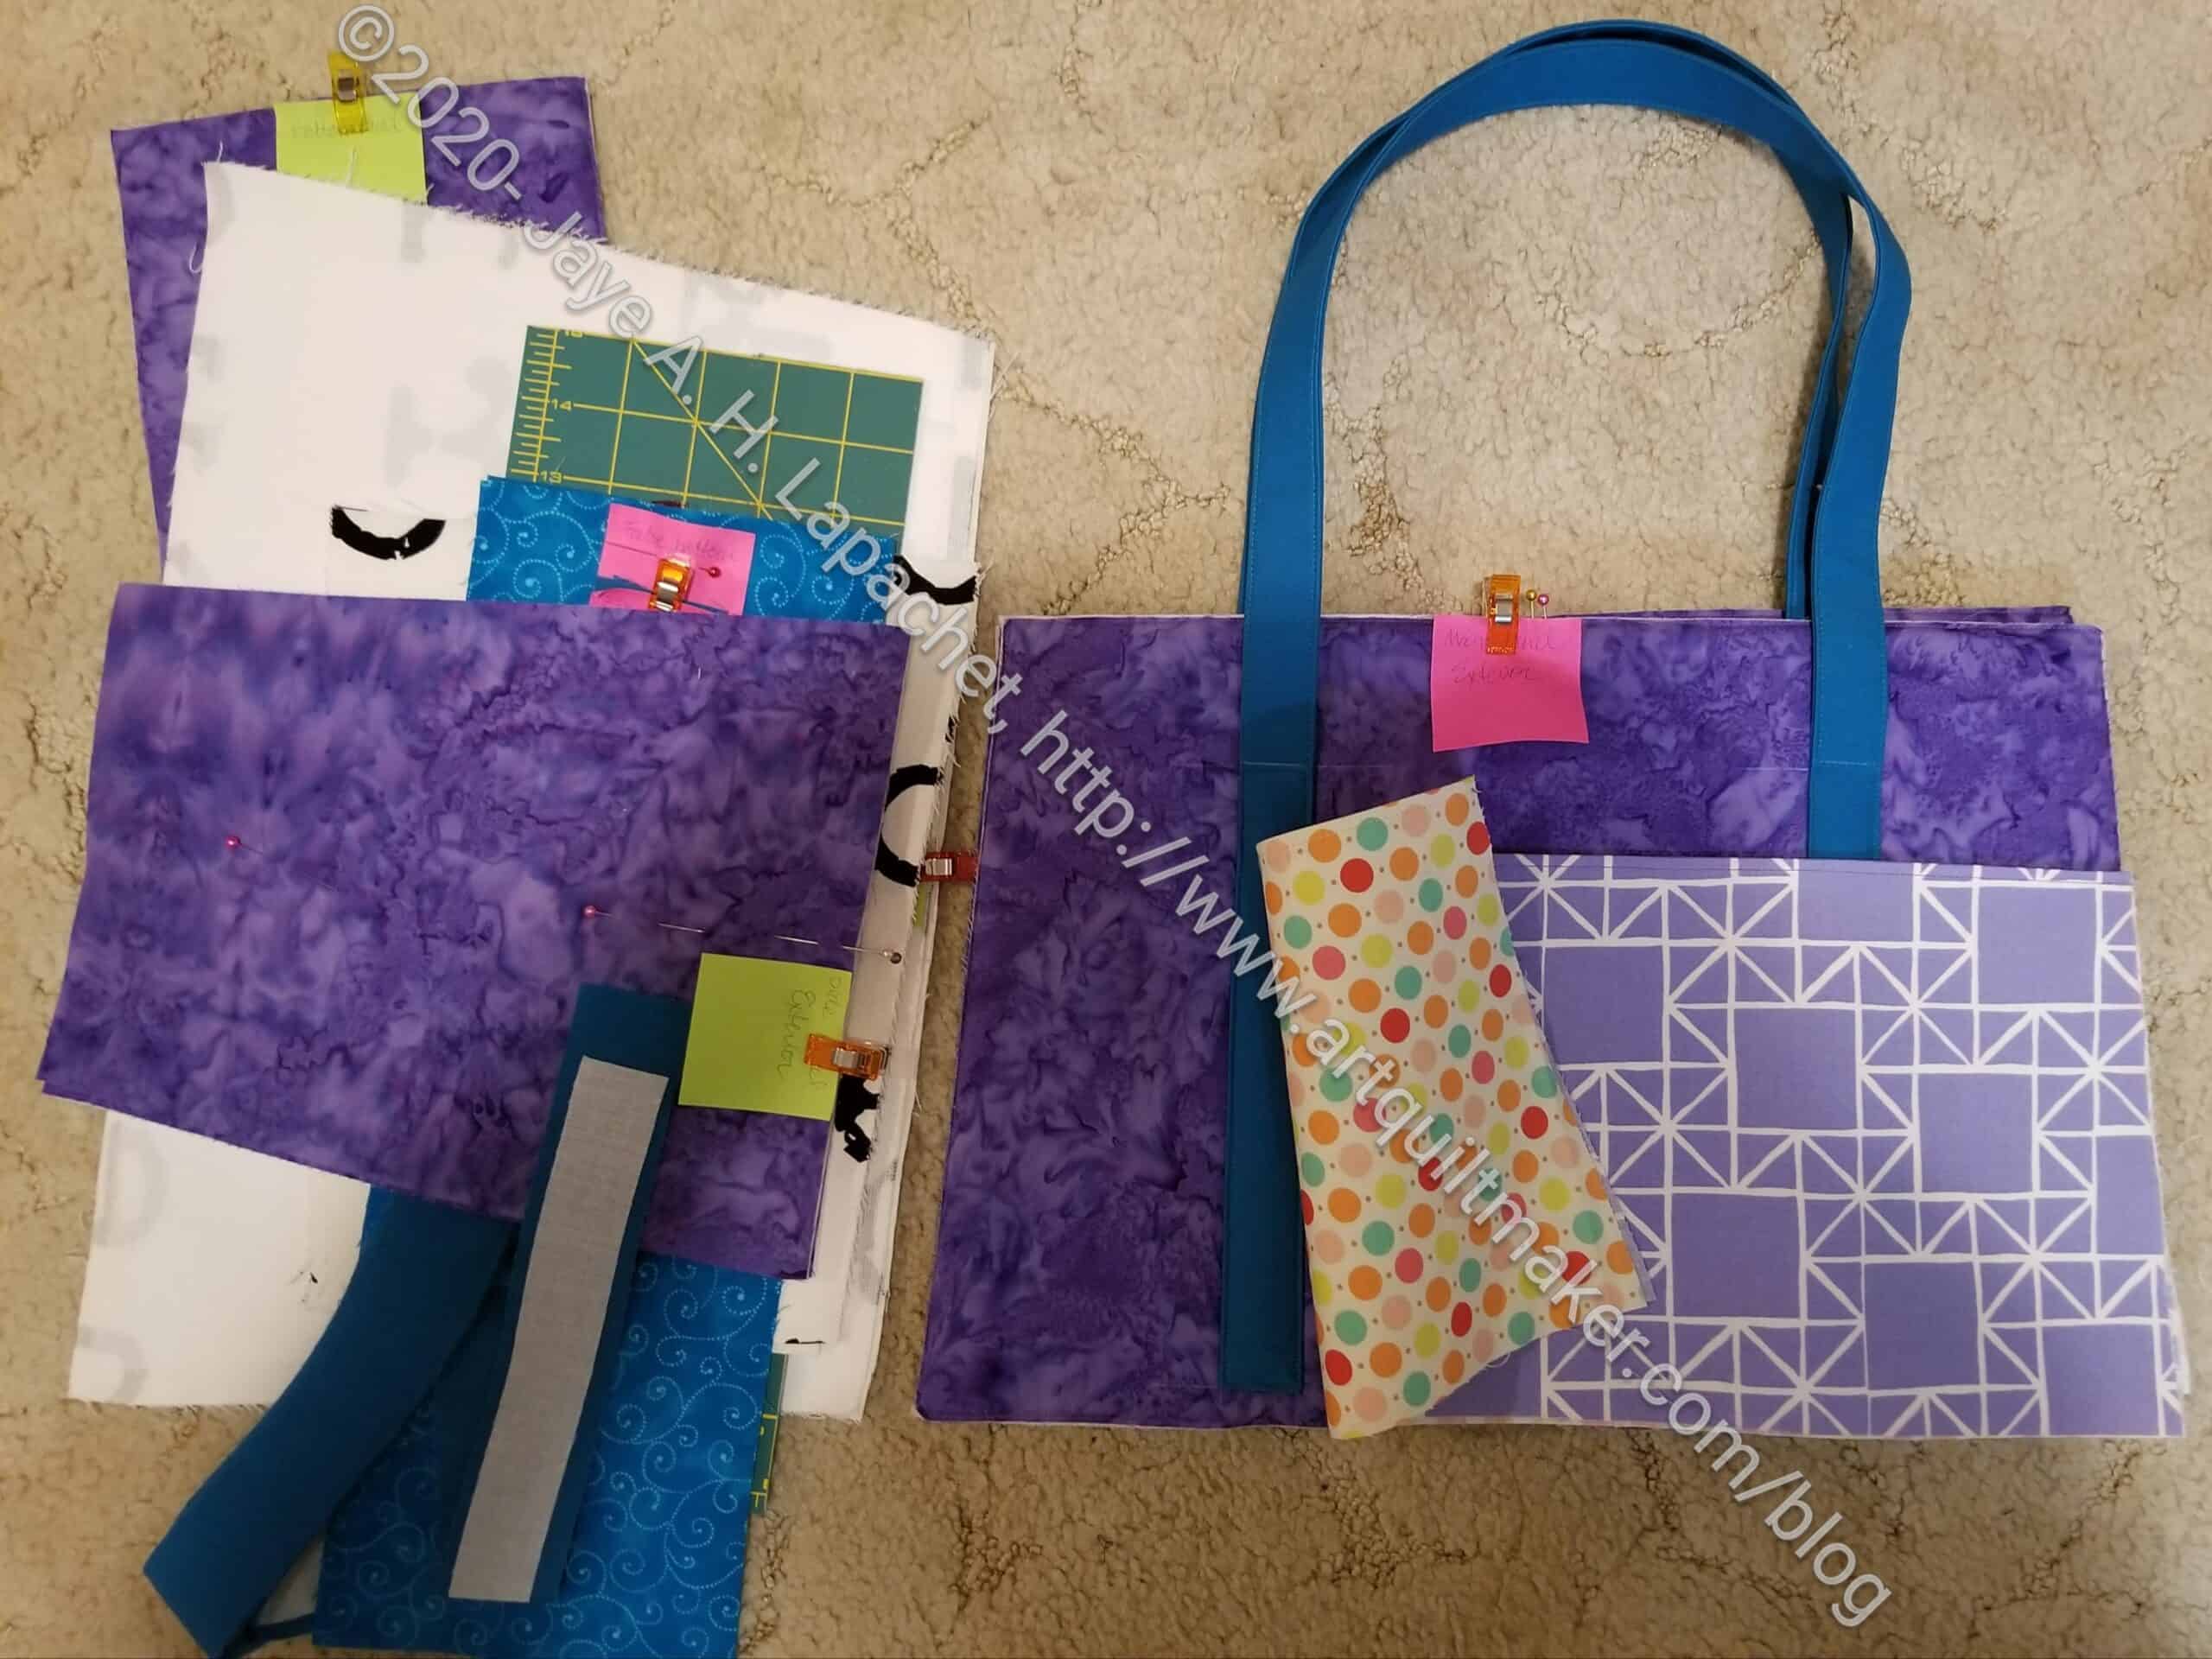
Sheffield Tool Bag v. Quilts Illustrated Tool Tote
As you can see from the photo above, the overall shape of both bags is substantially similar. The Sheffield Tote is larger than the QI Tool Tote. The Sheffield also has some 3D pockets in addition to the slip pockets on the outside. These additional pockets provide extra storage, though I wonder if the items in those pockets would fall out in transit?
The other thing I notice is that the handles are different. They are different widths and made from different techniques. I picked up the QI Tool Tote the other day and found it heavy. With all of my bagmaking hardware and supplies, it would be. That made me worried about the handles breaking. I think if I made the QI version again, I would make the handles wider.
That being said, I have not filled the Sheffield Tool Bag so I don’t know how it will feel with items inside. I do like the padded version of the handles (see tutorial – you can add these to any bag) for a bag like this and will add them next time I made the Sheffield.
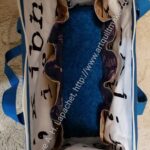
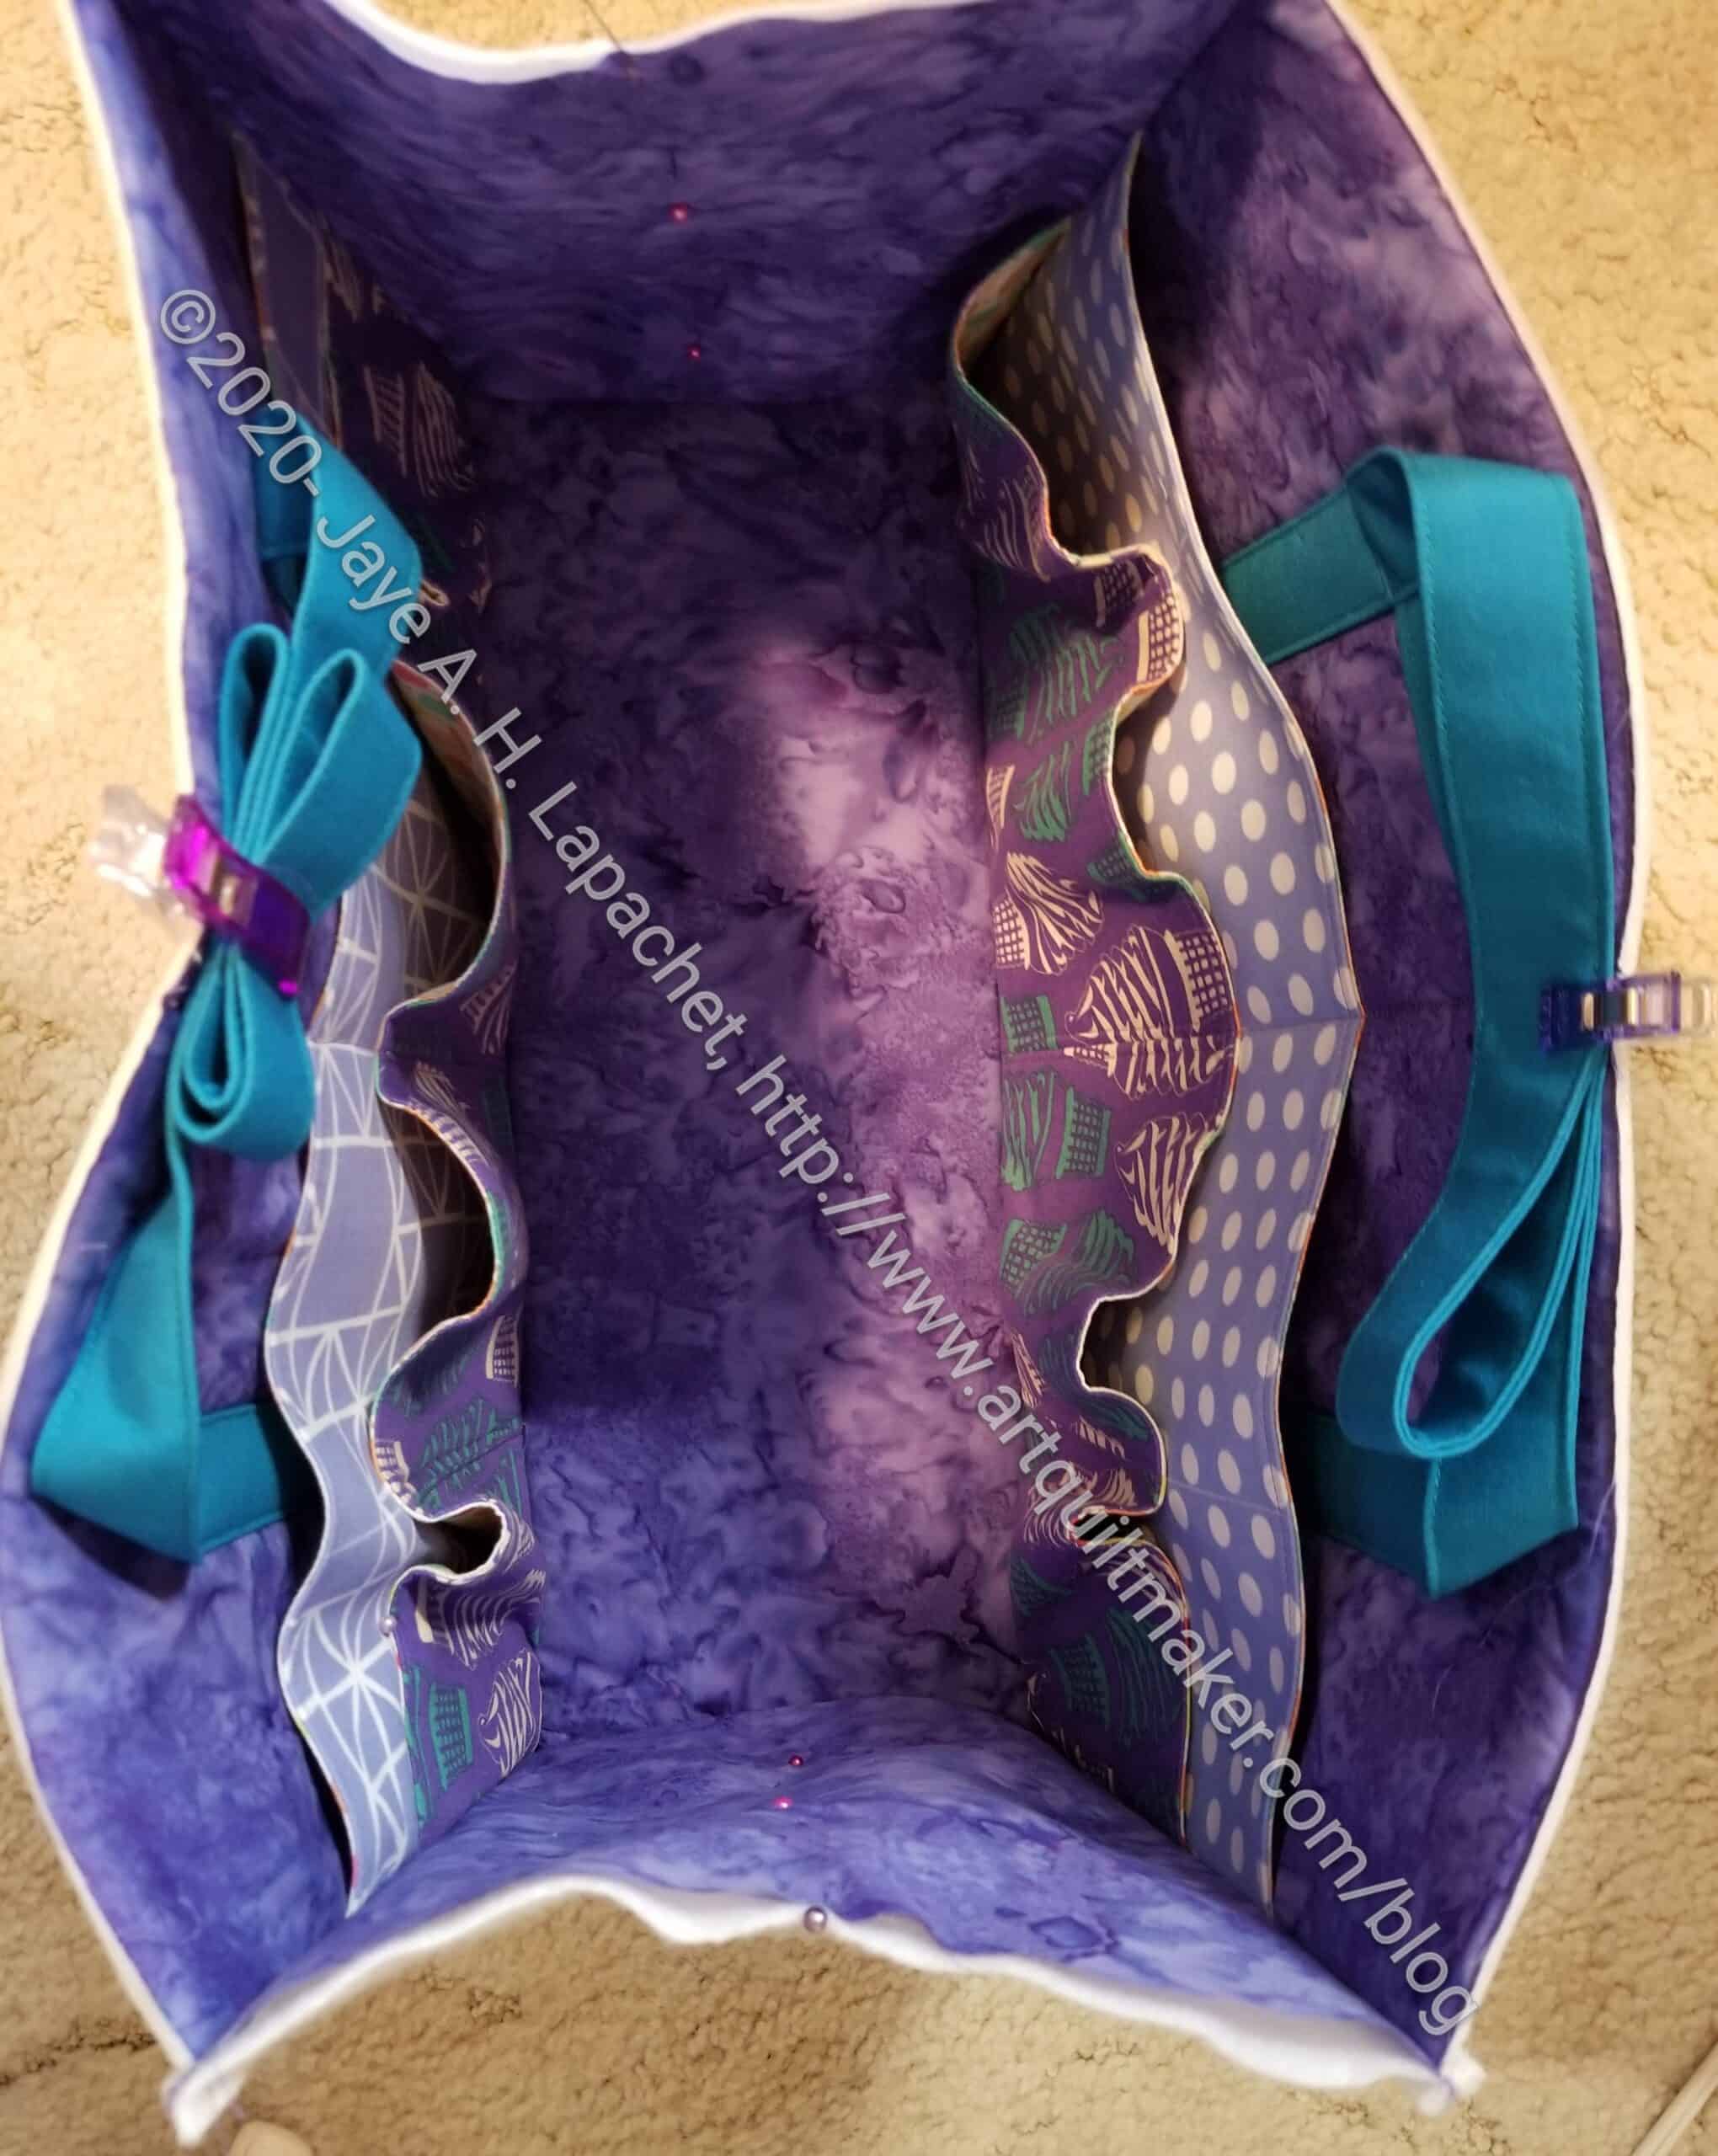
Sheffield Tool Tote – inside
Tool Tote: big mouth opening
The other thing I like about these bags is the frame. I haven’t made a lot of bags with frames, but the wide mouth aspect, enabled by the frame, on both bags is awesome. The maker can see into the entirety of both bags.
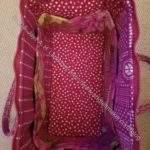
Again, the pockets are different. The Sheffield has more 3D pockets on the inside while the QI Tool Tote has slip pockets, including some on the ends. In a way I like the slip pockets better. I can see making a smaller slip pocket for the second pocket on the outside of the Sheffield instead of the 3D pockets. I might also make slip pockets for the inside of the Sheffield.
There is a lot of scope for imagination, as Anne Shirley would say, in this style of bag. I encourage you to try it out.
As I said earlier this month, I finished the Sheffield Tool Bag the week before Christmas.
I am usually pretty pleased with the Sew Sweetness patterns, but I found this one particularly easy to put together. The ease of putting together this bag was in direct contrast to my memory of putting the Quilt Illustrated Tool Tote together.
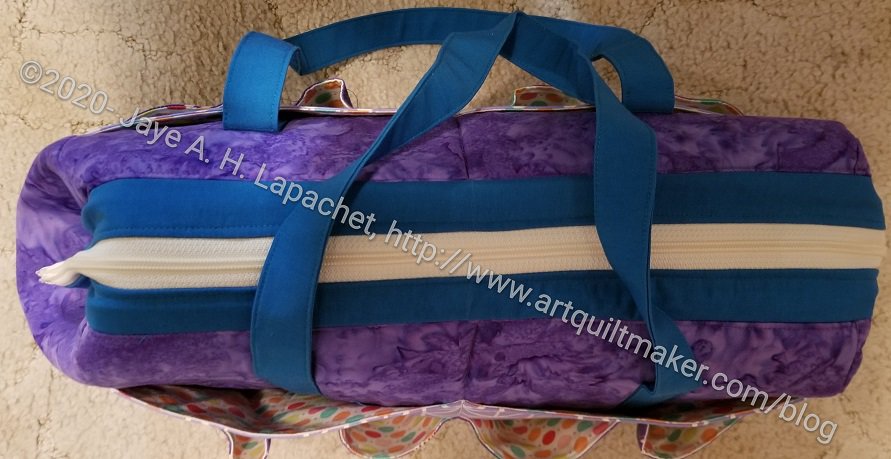
Sheffield Tool Tote – top
I found two tricky parts and the zipper was involved with both. First was the zipper panel and the video remedied my confusion. The second was the other/non-zipper tab end of the zipper and I am not sure how to remedied that beyond using a matching thread to the zipper and hoping for the best. I’d like to put a zipper tab on instead of folding over the ends of the zipper on that one end. I’ll think about that for future versions. I’d like to make another one of these bags.
On the bright side, I feel like I finally got the concept of ‘veering the zipper’. I talked more about this during the making of the Pink & Green Cotton Candy pouch. There is something about the way it was presented in the Sheffield Tool Bag video that fixed the concept in my head. Yay!!
It has a different feel than the Quilt Illustrated Tool Tote, though I believe the supplies were similar. I haven’t checked the Quilt Illustrated pattern recently, however, and I know I quilted the outside of the QI Tool Tote, though that is an option for the Sew Sweetness pattern as well.
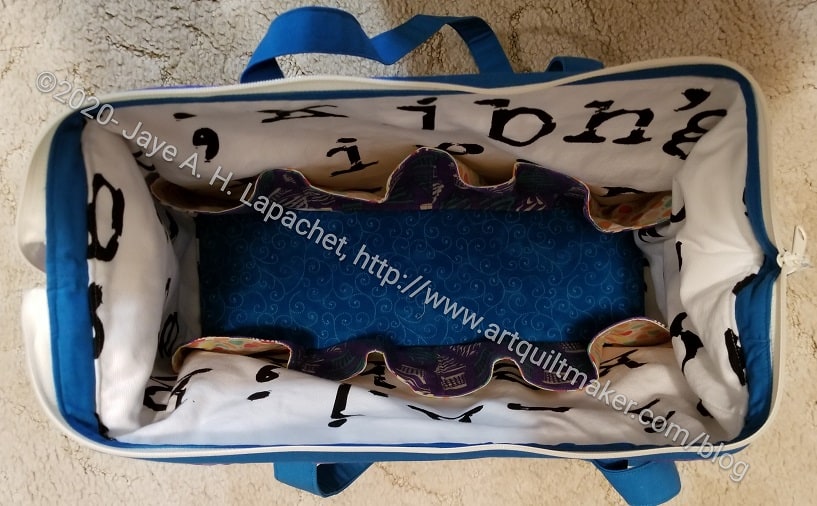
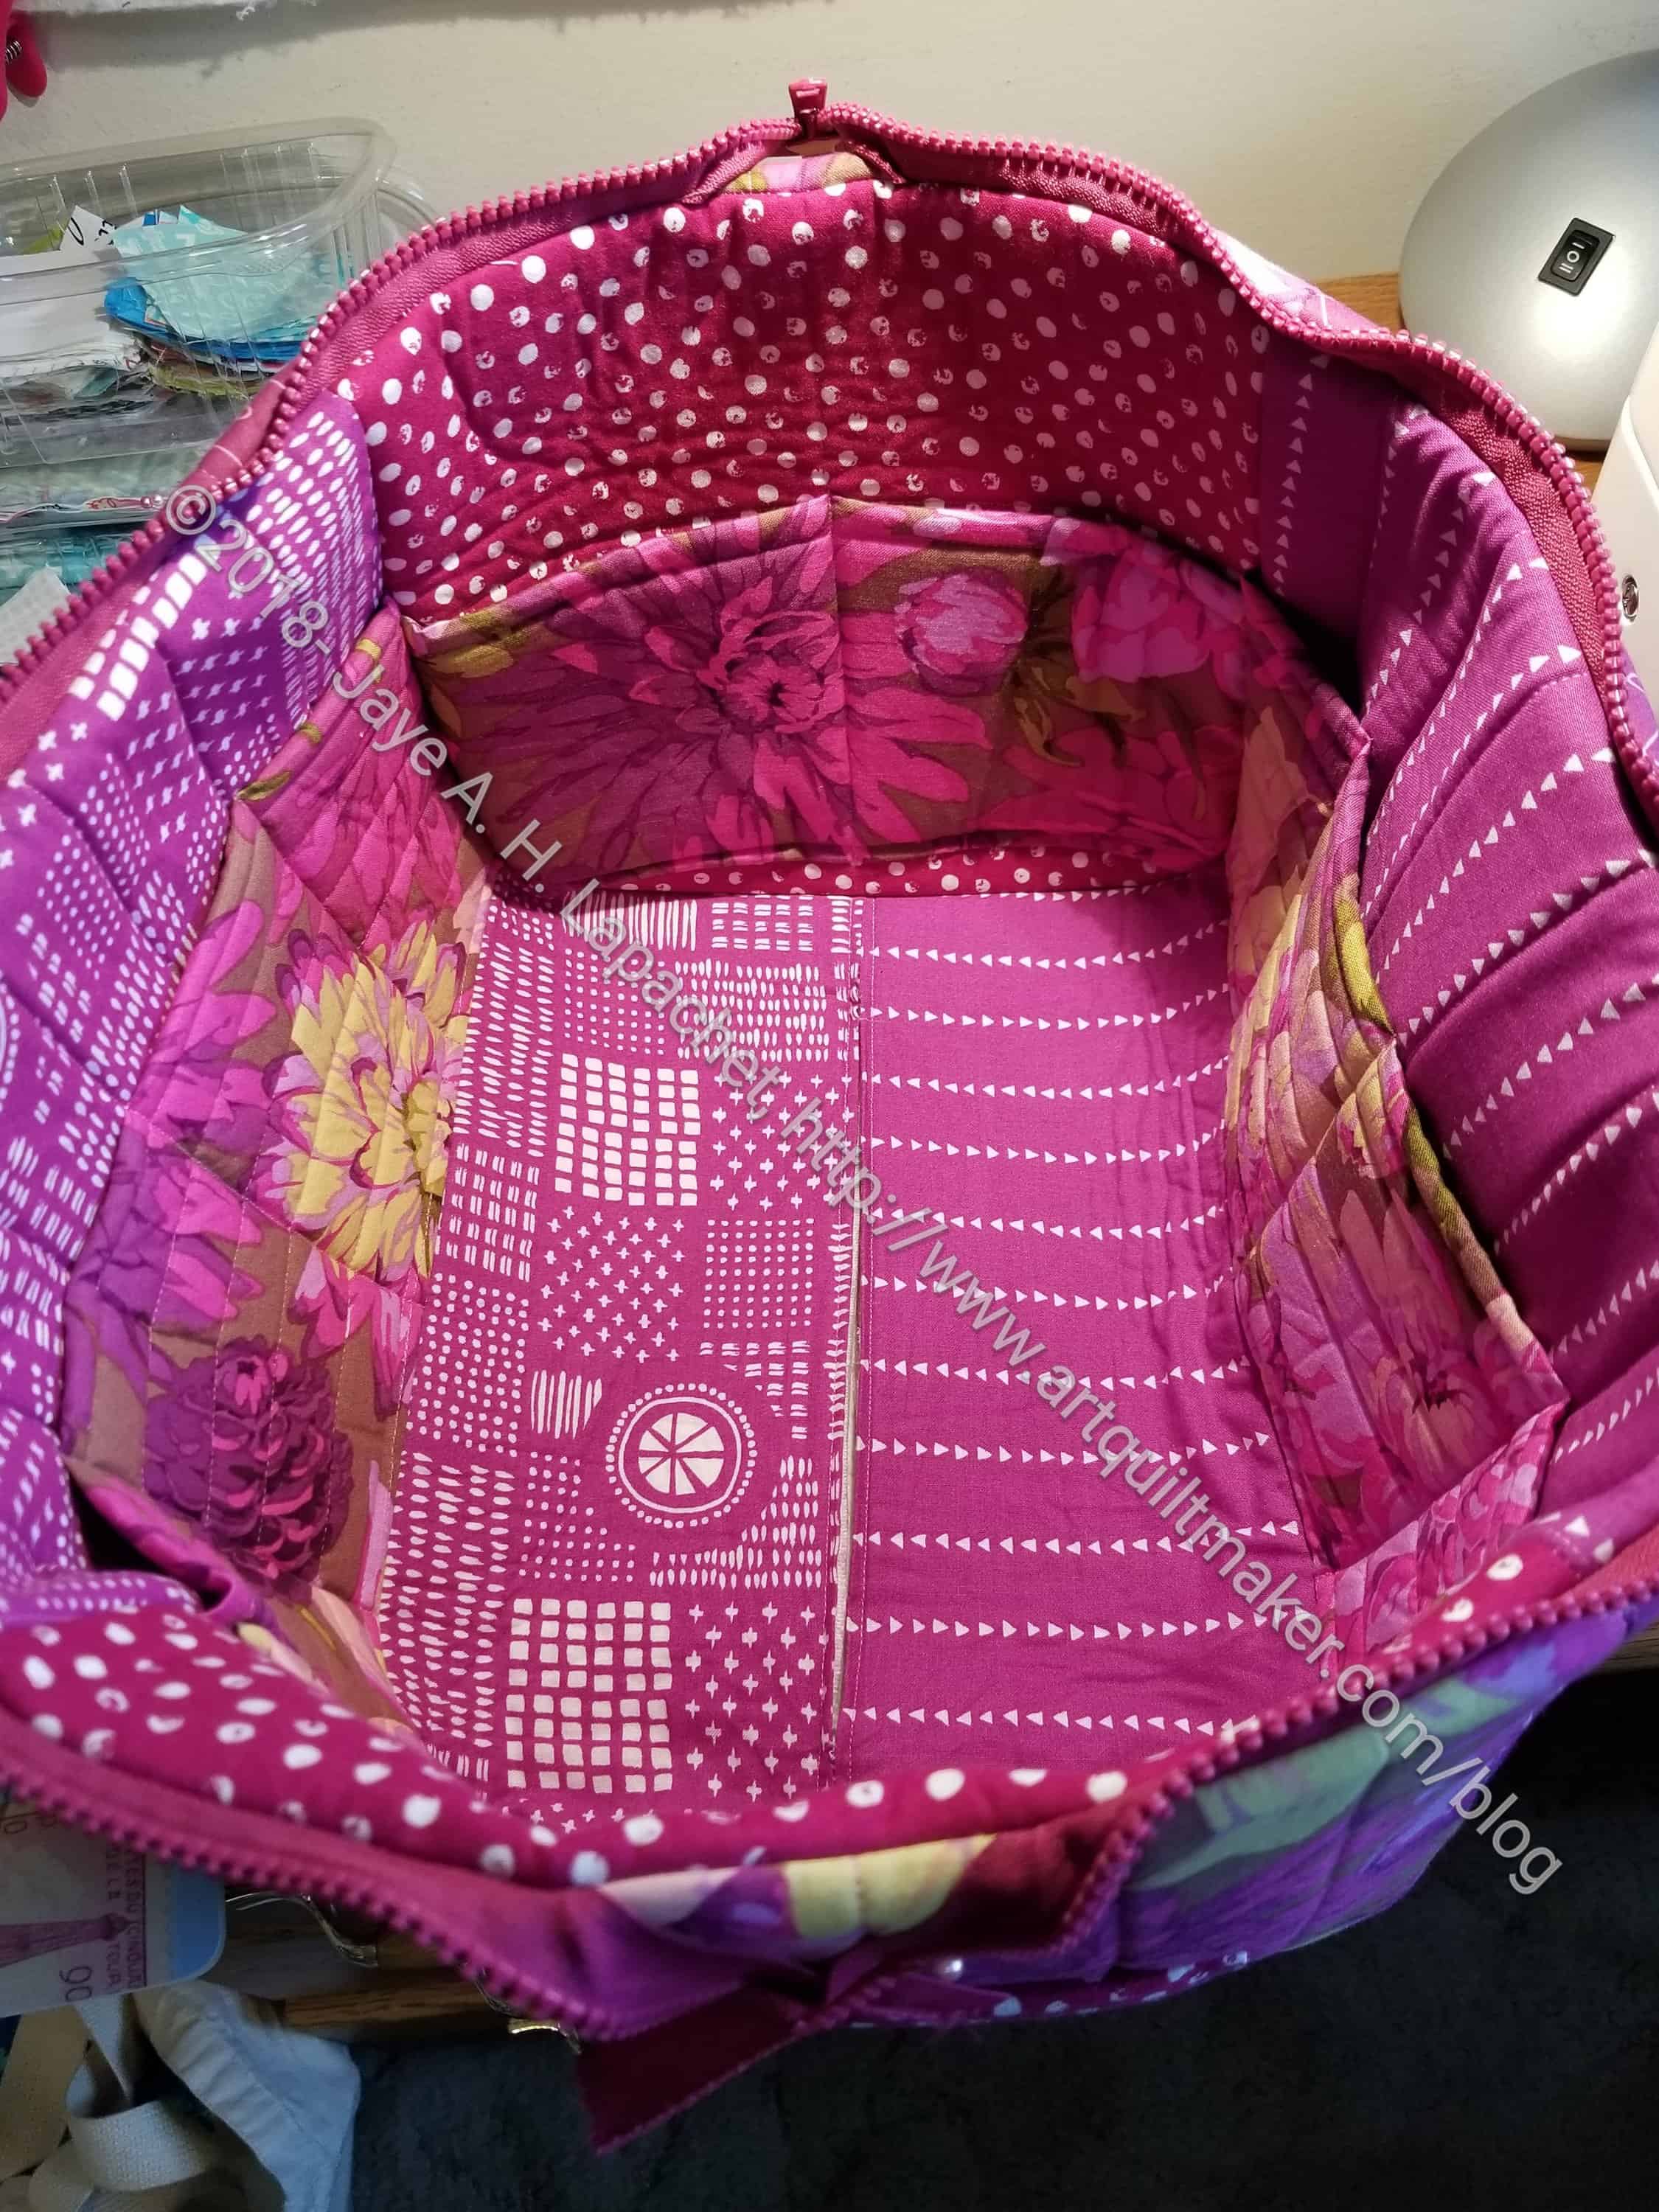
Sheffield Tool Tote – inside
I am particularly fond of the inside. Despite being canvas and VERY loosely woven, I love the design motifs of the fabric I used for the lining.
Now that I know where all the pieces are going to be used, I would make different fabric choices for future versions. Still, I believe the white fabric makes the inside light enough to see all of the supplies (and stuff) that would go inside.
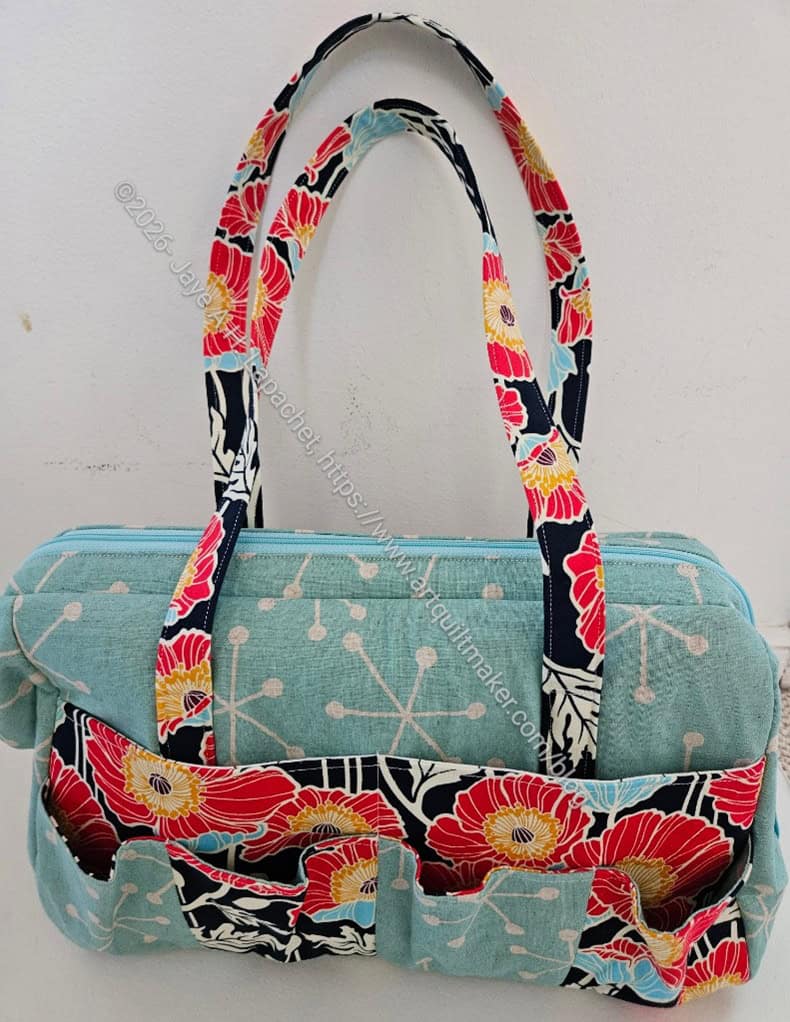
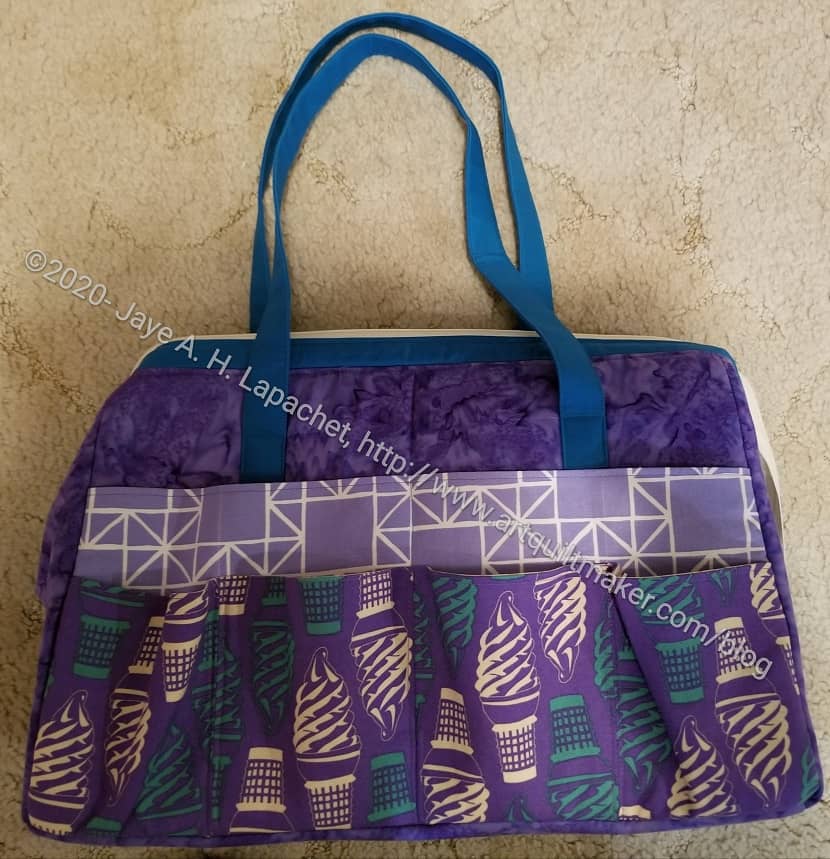
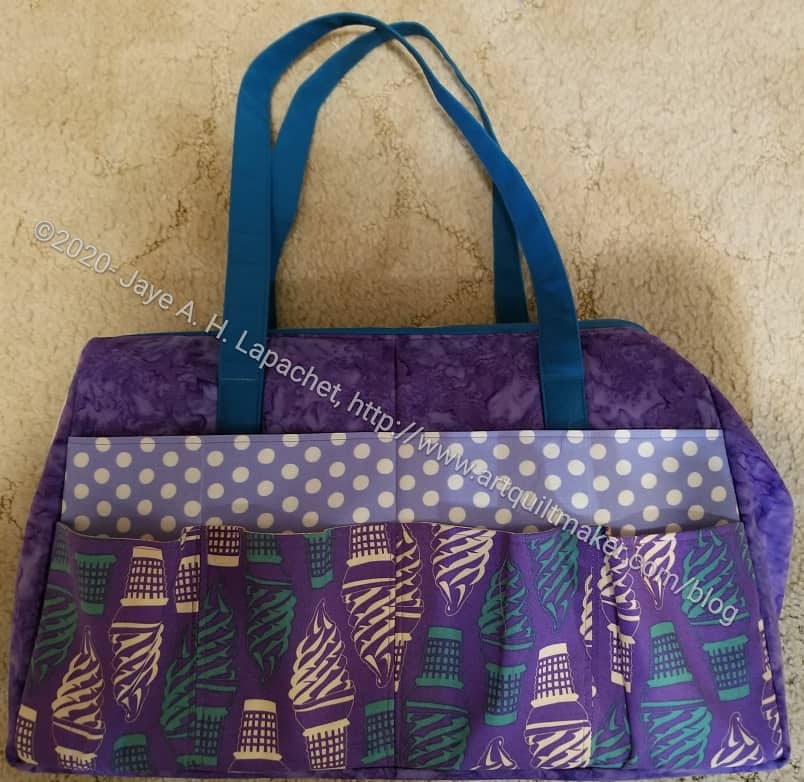
Sheffield Tool Tote – front
I didn’t have enough fabric for the slip pockets to be the same on both sides of the bag, so I used similar colors, but different fabrics. I think they look ok. The ice cream fabric was used so that it goes with the Classmates tote I made last year.
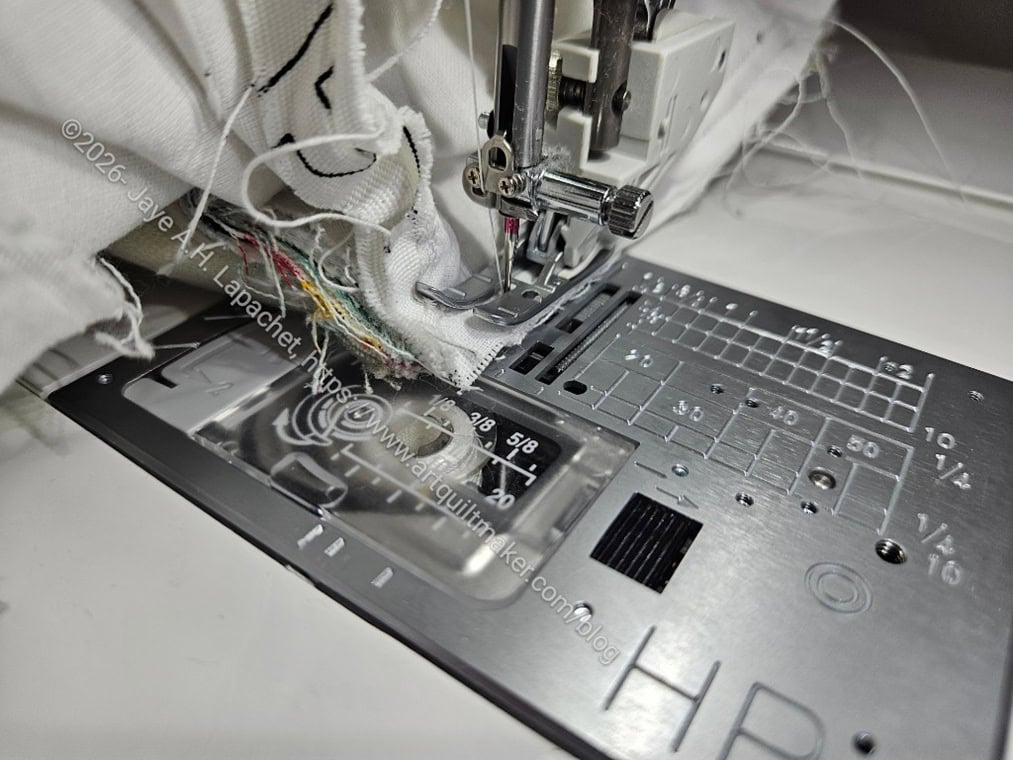
I made good progress on Sunday on the Sheffield Bag. There was very little ripping until I got to the zipper installation, which was all ripping all the time.
I have the handles clipped so they are out of the way. You can see a good view of the various pockets. I think the pocket construction on the gathered pockets would be much easier than the similar pockets on the Oslo Craft Bag. If I make the Oslo Craft Bag again, I will use this pocket construction.
I am kind of on a Sew Sweetness binge lately, aren’t I? Oslo Craft Bag, Sidewinder Pouches and the Sheffield Bag all within a month. I do have quite a few of her patterns and feel like I need to make my way through them.
I started cutting out the Sheffield Tool Tote last week during Sew Happy Hour. I really got busy on it Friday, which is when I finished the cutting and, then, yesterday I started the sewing. Cutting out projects really makes me feel like I am getting nowhere so making pockets and the exterior made me feel like I was making progress.
This is a pretty structured bag by Sew Sweetness. It is similar to the Quilts Illustrated Tool Tote I made a few years ago (?). I bought it as part of the His, Hers and Furs bundle when that bundle was on sale (no affiliation). This is the first project I have made from that bundle.
I finally finished the Tool Tote. Now I can just stare at it wondering, a little, what I was thinking.
Looking at in this photo, it looks great, but I am not sure about actually using it. The Tupperware box I have used forever works fine for tools and is hard. How would I fit this thing into my travel system? On the other hand, it has handles and handles are always a good thing.
Tool Tote: Zipper Tab with Soft & Stable
I was almost finished the other day, but I put the zipper tabs on and they just looked terrible. Using Soft & Stable in a zipper tab is a dumb idea. I wouldn’t have known it was a dumb idea unless I had done it, though.
The photo of the zipper tab makes the thing look fine. It isn’t fine, though; it didn’t stay together and on the back the top hem was popping out and looking awful. I also went around the whole thing 3-4 times and couldn’t quite match up the stitching as the whole bag was attached to the zipper tab. The whole thing was a mess.
Tool Tote with new zipper tabs
I ripped off the Soft & Stable zipper tabs and made some new ones with ShapeFlex instead. It worked like a charm and the zipper tabs look a lot better. I changed the fabric used and that helped make the tabs look better as well.
If you make this bag, definitely make it with fabric for the zipper tabs matching the outside pocket.
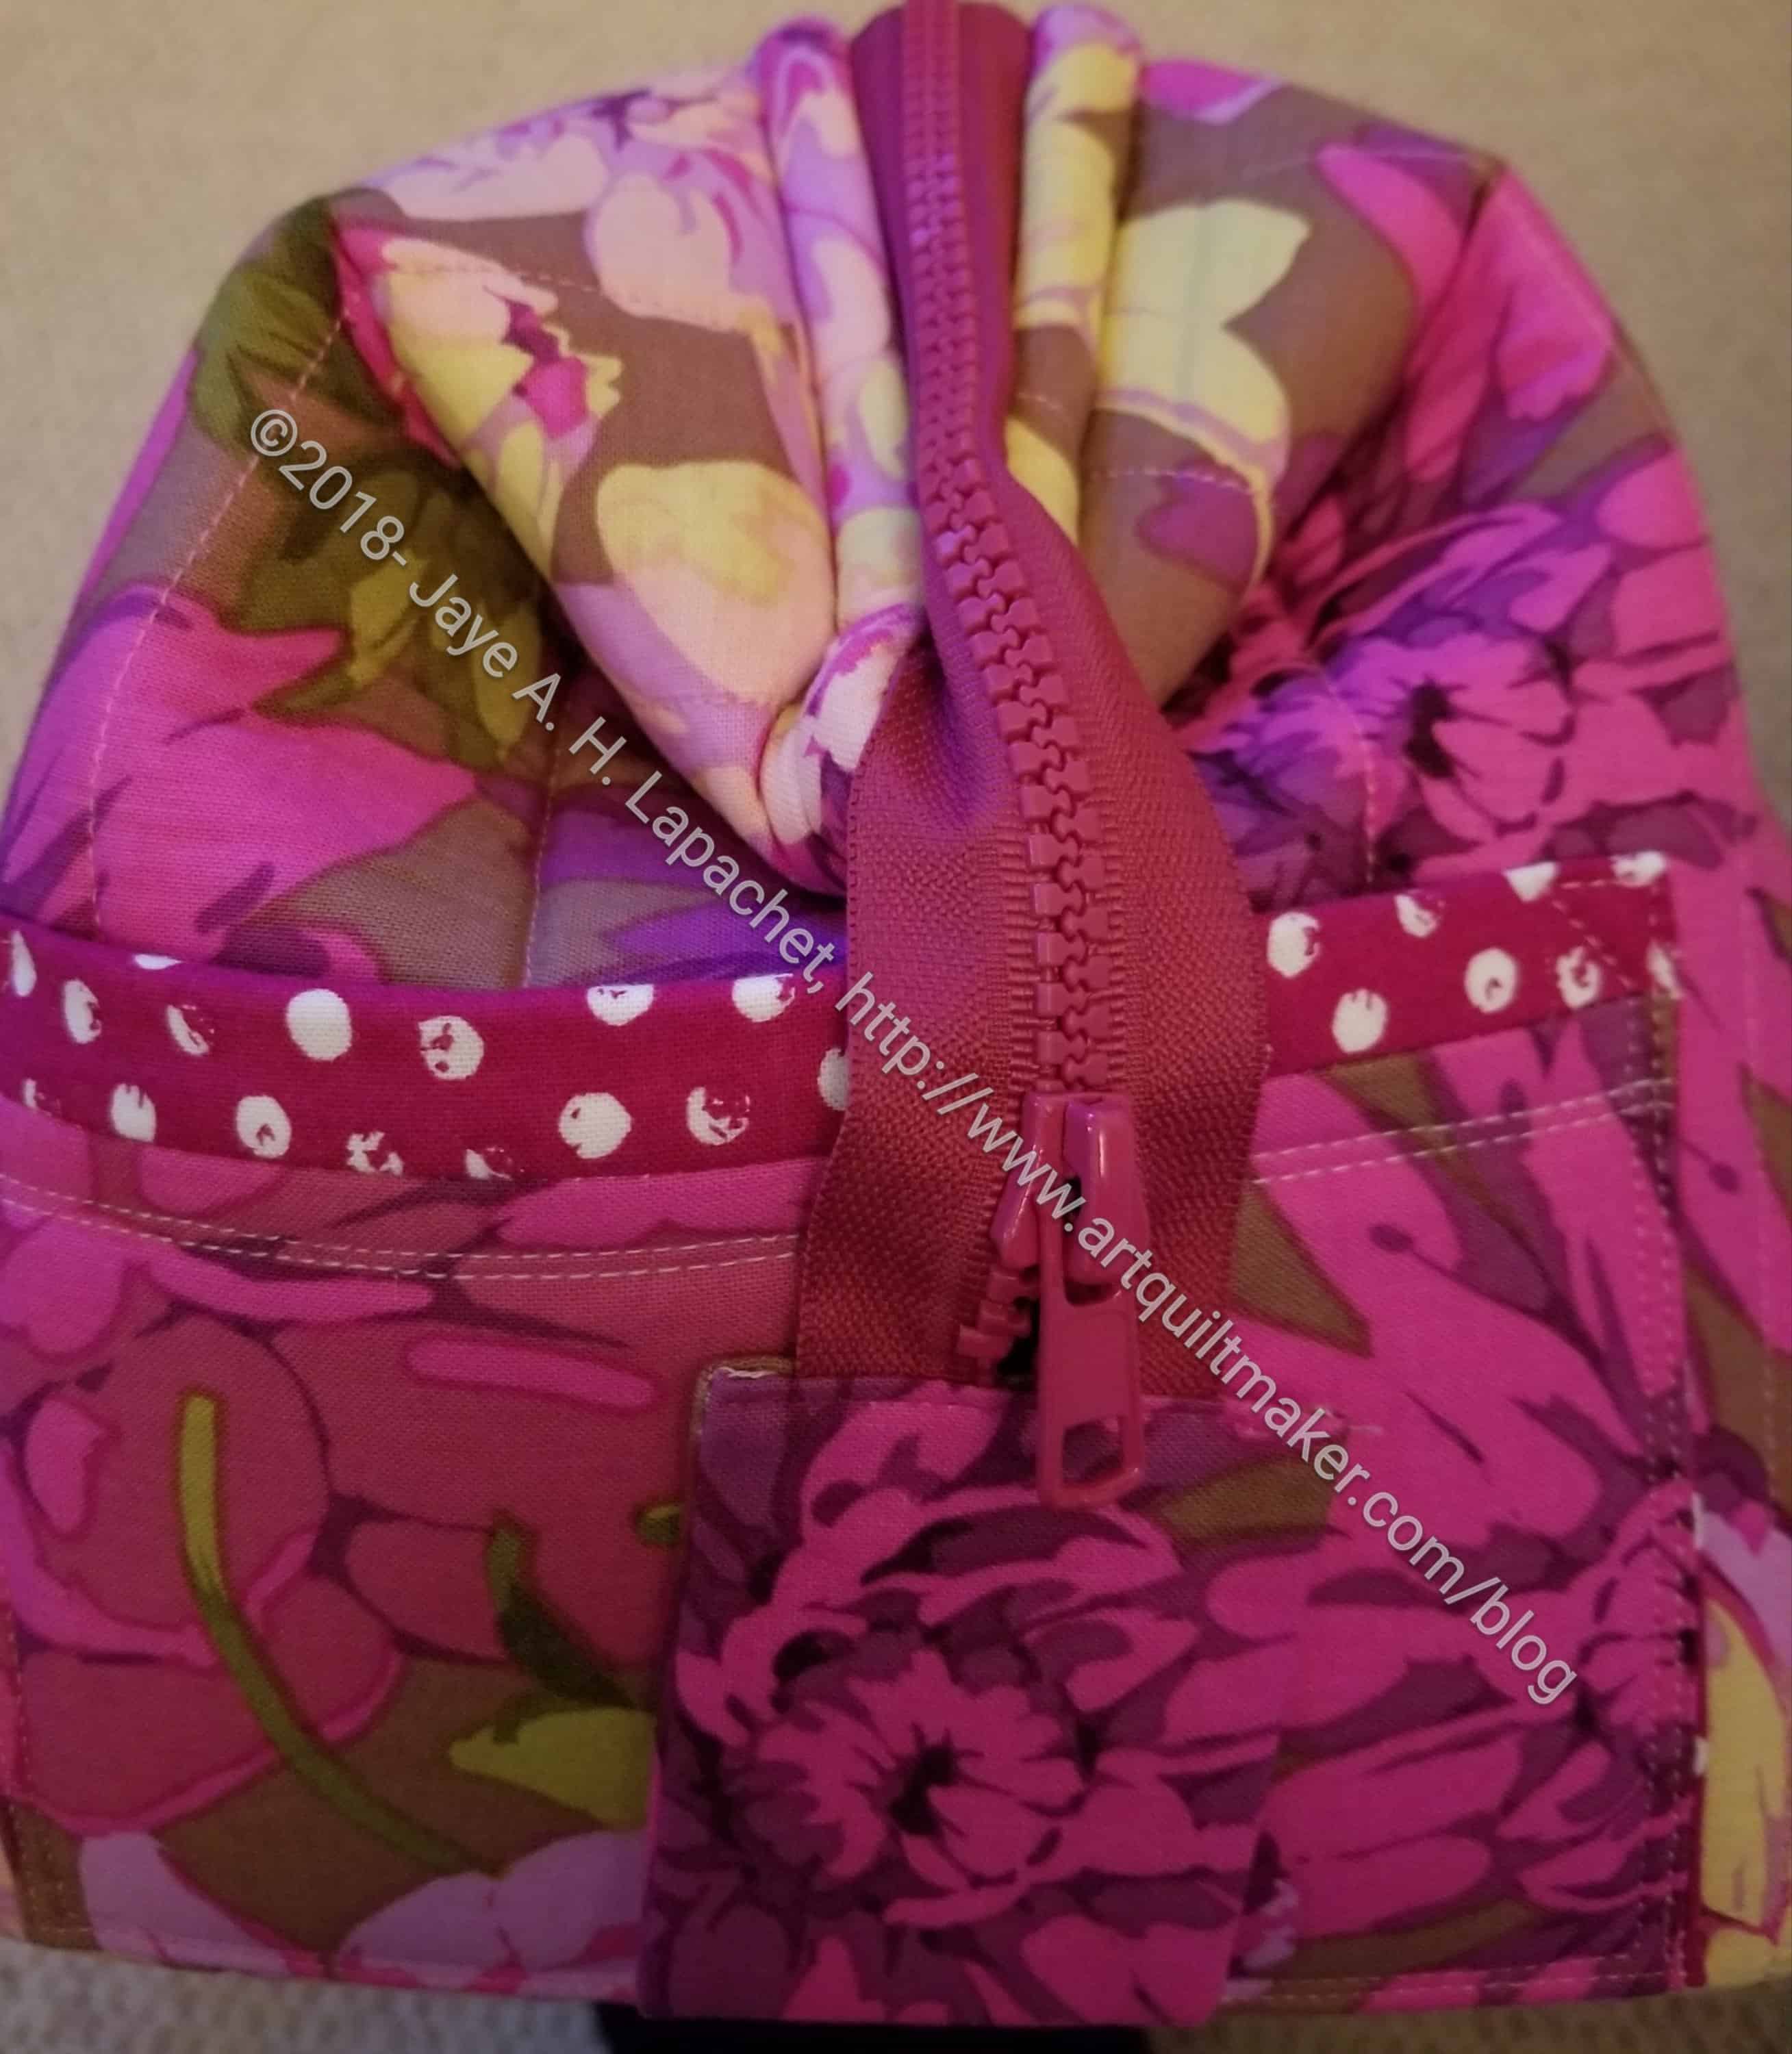
Tool Tote: big mouth opening
I had big plans to make a bunch of these, because of the Big Mouth design. I really like the way it opens up all the way, so you can see all of your stuff. It was a hassle to make and I didn’t think the directions were great. They were very chatty and friendly, but not very useful. I think I might be ruined by the Crafty Gemini style of learning. I do know that if I make more I will get better at making them.
As I said, I am not sure what to do with it. I could get another set of tools and fill the thing and keep it with my guild stuff. Not sure if really need that.
This tote has been moving around my workroom half made. Over the weekend, after finishing the Ends n.5 donation top and back, I got back to the Tool Tote. I am nearly done.
The inside and the outside were both made, but I had to put them together and install the zipper.
I just kind of got to it and began. It is hard to pick up after three weeks, but I just did it.
Weird Zipper Ending – Tool Tote
Fortunately, I have done a lot of zippers this year already with two SewTogether Bags, the BAM Pillow Swap, the Zip Away Organizer, the Roadtrip Bag, the Walking Foot Wow Pillow cover, my Sew Together Bag (for embroidery), and the Merit Hexie pillow, so I have plenty of zipper experience. It turned out that this zipper was no problem. I had no trouble with this zipper. I barely even registered that it was zipper installation. I didn’t really like the way the endings looked. I didn’t understand the ending – there wasn’t enough explanation for me. It worked, but I thought for sure I would have to rip.
Tool Tote – zipper in
It looked pretty good once I did the sewing. I think I didn’t think about it too much and that worked for this project.
I kept testing the zipper all the time and it kept working. It doesn’t look like the picture, but it works. We’ll see if it works when it has stuff in it.
The directions on this project aren’t as good as I would like. I thought that this pattern would be a good one for gifts, but the directions are a challenge. I can’t decide if I want to make other ones or if it is just too much hassle.
I was so thrilled with the cutting of the Tool Tote the other day that reporting today is kind of depressing.
The good news is that I am making progress. The bad news is that I am having trouble with the directions. This is a weakness of mine as I have mentioned, so I am willing to take some of the blame. However, I had Gerre try and help me interpret one step and she agreed that she thought something was missing.
As the pattern suggests, I emailed the designer and have not heard back. It is a sort of holiday week so she may not be at work.
Regardless, I will finish this bag. I know enough about bag making to make up some parts, if necessary. It won’t be done by this weekend, which is a shame, but can’t be helped.
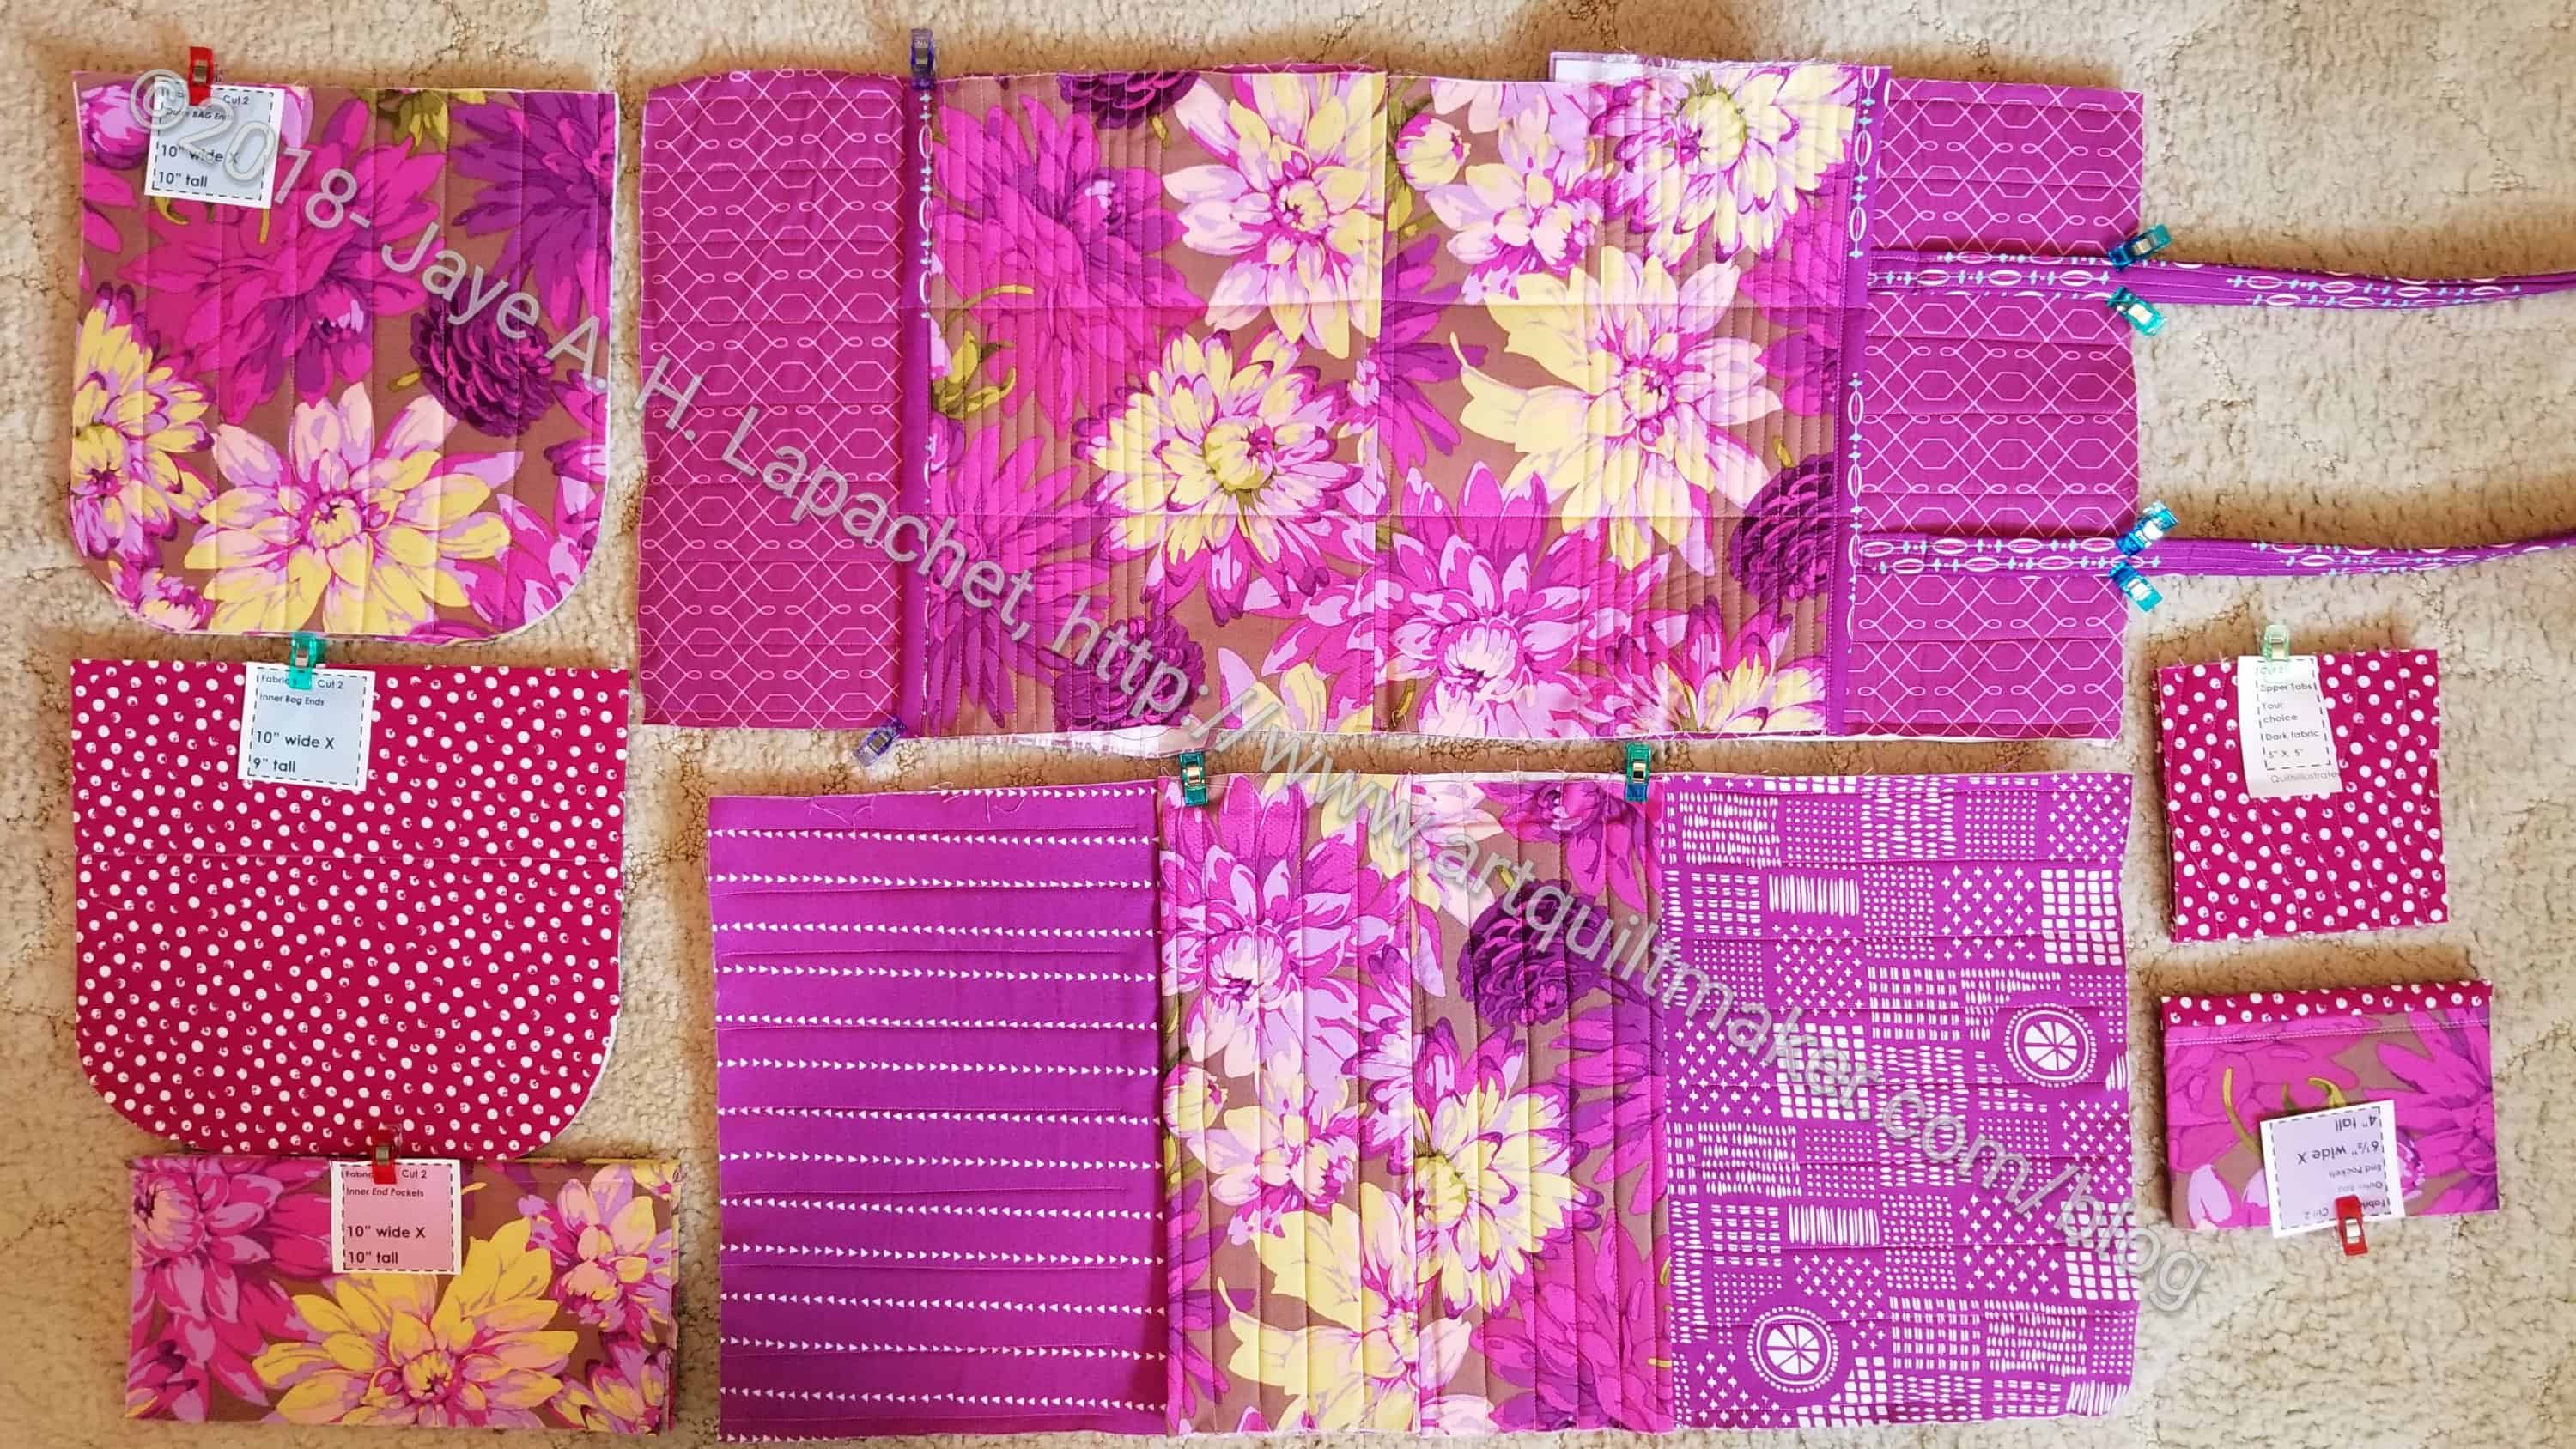
In the photo above, you can see the pieces with their little tags as well as the work that I have done. Quilting on all the pieces is complete, though I would have made the pieces bigger, quilted and then trimmed, if I had been thinking. Some of the pockets are sewn on. Handles are partially sewn (this is the problem step).