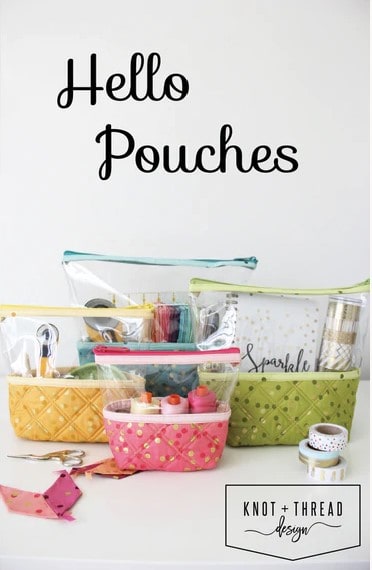
After finishing the A Place for Everything bag, I decided to work on something fast. Angela and I had been discussing various pouches, including the Hello Pouches from Knot and Thread Design. I bought this pattern at Ocean Waves quilt shop a few weeks before the coronavirus lockdown.
The website and the model I saw in a shop really excited me. I love the look and the way the vinyl is combined with the fabric.
I haven’t made anything from their patterns before, so it was an adventure and an opportunity to find a new designer.
Hello Pouch for me
Sadly, I do not like the pattern. You may have a different experience and I urge you to keep an open min. Remember: I am *bad* at reading directions and that could have affected my experience. All that being said, the two I made look ok.
First, I thought the pattern was incomplete. One of the first things I noticed is that the finished size wasn’t anywhere on the pattern. There are yardage requirements and then a second section of yardage requirements if you are using ombre fabric. This is where finished sizes should be.
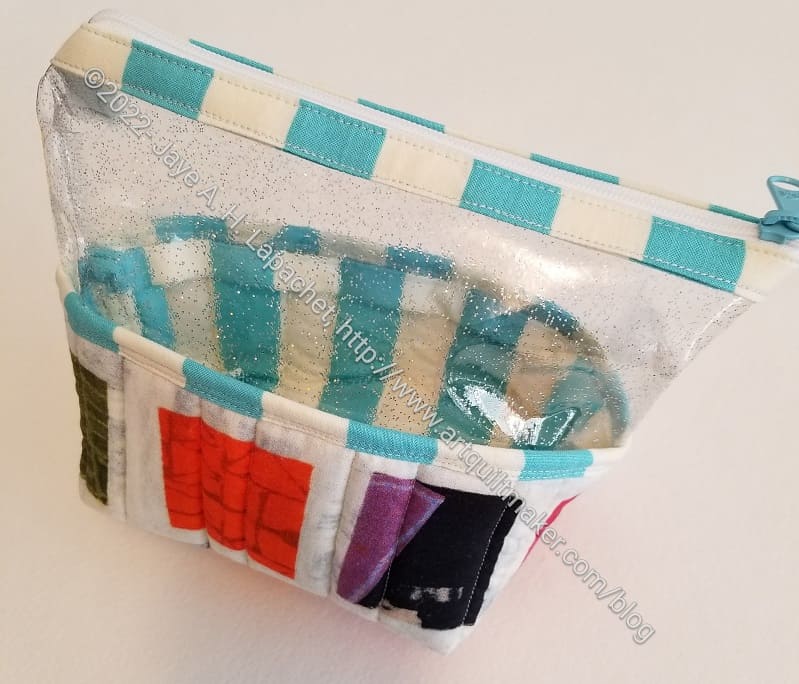
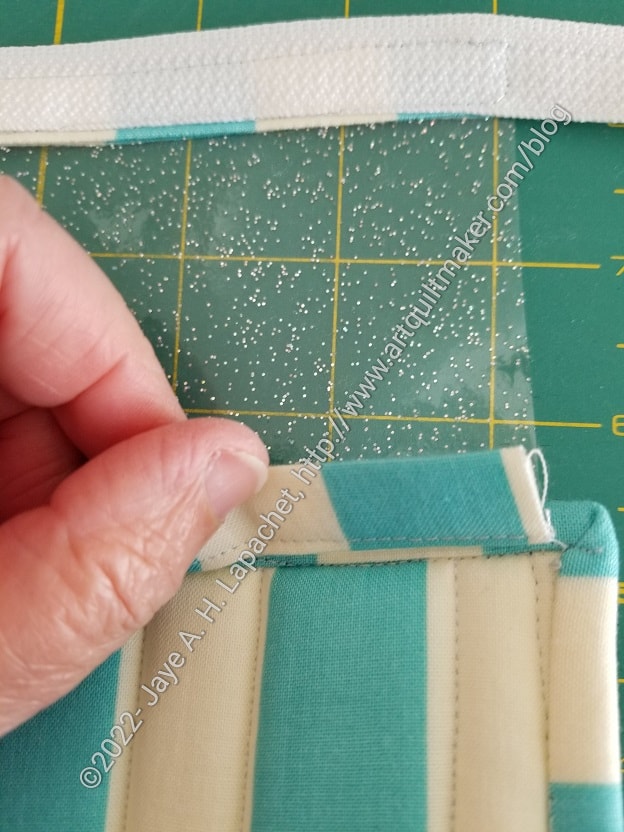
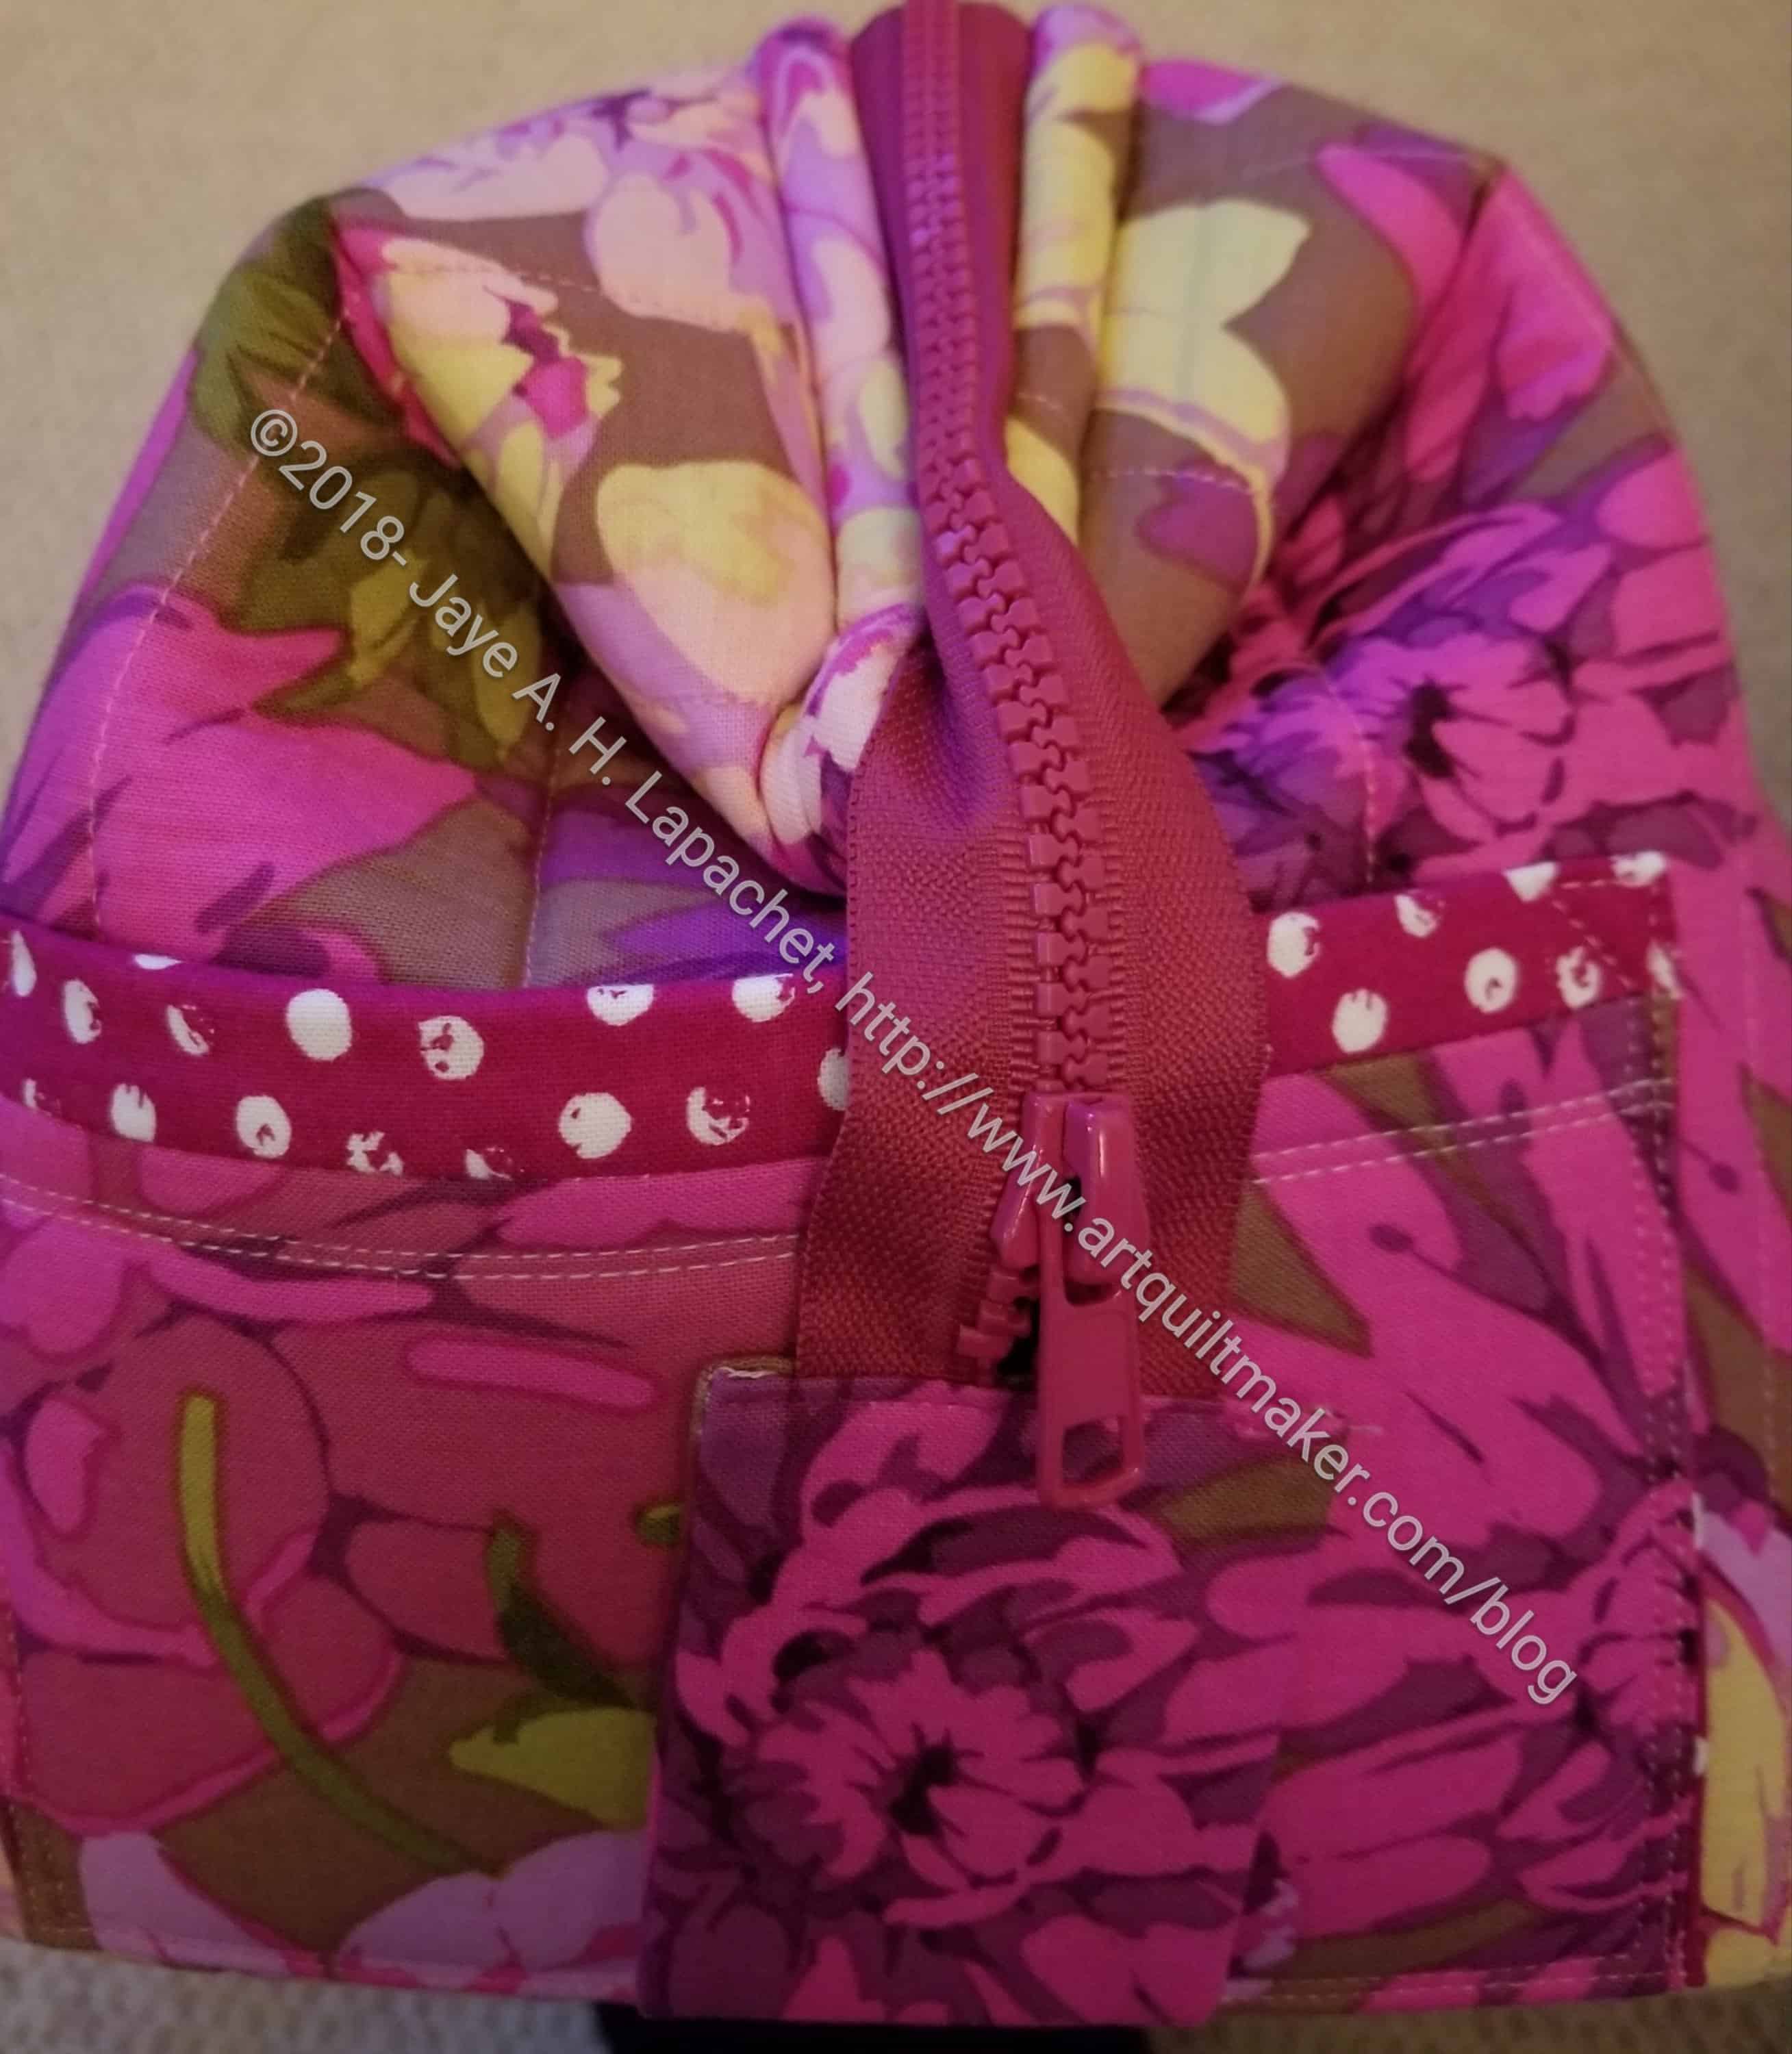
The pattern doesn’t say anything about finishing the side seam with fabric. It talks about sewing it closed, but that looks unfinished in my opinion. You can see what I mean by looking at an IG photo. It also affects the way the end of the zipper sits on the bag. I faithfully followed the directions for covering the top and bottom of the vinyl and could have easily done something with the sides at the same time. I didn’t think of it. I am thinking about whether or not to cover it with a piece of binding or some straight of grain fabric.
Also, the pattern does not say how to finish the end of the zipper beyond stitching. Mine is fraying so I have to do something. Since I still have to finish the side seam, I can include the zipper. The pattern doesn’t show a clear picture of the side seam or zipper, so I can’t really see what they have done.
Second, I didn’t like the way it was put together. I felt there was too much work to get a pouch done and some parts made the pouch hard to put together.
One of the first instructions is to quilt the panel that will eventually bottom. The pieces are necessarily cut larger, but 2 inches larger seemed like a waste of fabric and Soft & Stable. Next, the designer has you bind the quilted bottom. This creates a later problem with super thick pieces that need to be sewn and cut. I think a lining could have been created for the bottom and the quilting could have been omitted.
Hello Pouch flaps
The method they use requires sewing over existing lines of stitching. It probably something I need to practice, but this technique never looks good on my bags. Also, binding most of the pieces means that there are flaps of fabric everywhere waiting to get caught on some of the contents at some point.
I could have stitched them down, but that means going over other stitching. See above.
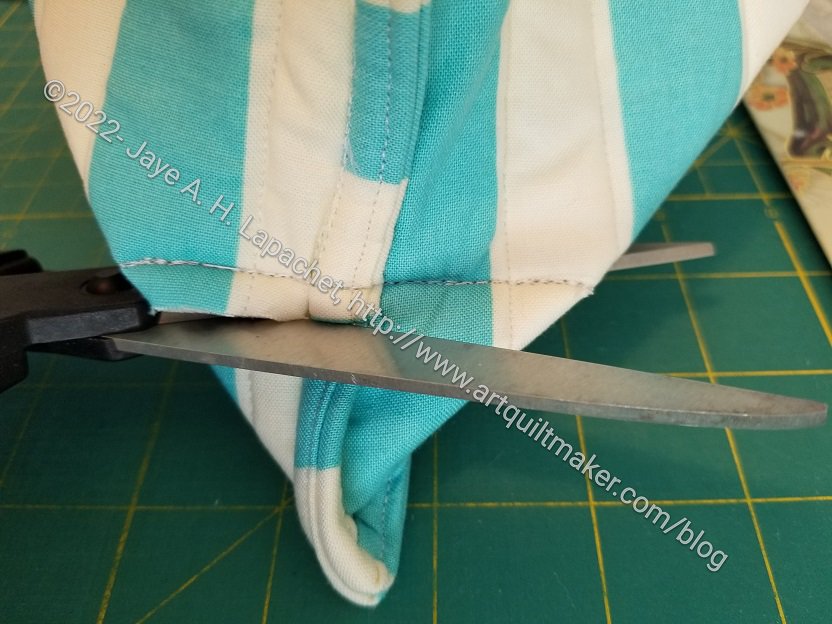
Boxing corners 🙁
The pattern requires boxing corners. The placement of the sewing line across the flattened corner is difficult to get precise, because of the thickness. If I make this pouch again, I would keep the pouch flat, cut a square out of the corner, then sew. The Jane Market Tote is put together this way and it makes more sense.
I made two at once. One was supposed to be a gift. I am not sure I want to give it as a gift, though I will send it regardless. I’ll get some feedback and have a good discussion.
I want to say some good things about this pattern, so I won’t just be a negative Nellie:
I like the half vinyl, half fabric of the design
They have a clever technique for the zipper. You can get two pouches out of one zipper
The pouch will stand up nicely (if I could get the corners to box properly)
I did look for corrections on the website, but didn’t see any. After analyzing my perceived deficiencies of the pattern in this review, I am tempted to try making this pouch again using some of my experience and thoughts on how it could be different. I looked on Instagram and most of the pouches there look a lot better than mine, which means I could have not understood the directions properly. They do show the pouches from the best angle, of course, and I do see that some of them have the zipper problem that I have.
I finally finished the Tool Tote. Now I can just stare at it wondering, a little, what I was thinking.
Looking at in this photo, it looks great, but I am not sure about actually using it. The Tupperware box I have used forever works fine for tools and is hard. How would I fit this thing into my travel system? On the other hand, it has handles and handles are always a good thing.
Tool Tote: Zipper Tab with Soft & Stable
I was almost finished the other day, but I put the zipper tabs on and they just looked terrible. Using Soft & Stable in a zipper tab is a dumb idea. I wouldn’t have known it was a dumb idea unless I had done it, though.
The photo of the zipper tab makes the thing look fine. It isn’t fine, though; it didn’t stay together and on the back the top hem was popping out and looking awful. I also went around the whole thing 3-4 times and couldn’t quite match up the stitching as the whole bag was attached to the zipper tab. The whole thing was a mess.
Tool Tote with new zipper tabs
I ripped off the Soft & Stable zipper tabs and made some new ones with ShapeFlex instead. It worked like a charm and the zipper tabs look a lot better. I changed the fabric used and that helped make the tabs look better as well.
If you make this bag, definitely make it with fabric for the zipper tabs matching the outside pocket.
Tool Tote: big mouth opening
I had big plans to make a bunch of these, because of the Big Mouth design. I really like the way it opens up all the way, so you can see all of your stuff. It was a hassle to make and I didn’t think the directions were great. They were very chatty and friendly, but not very useful. I think I might be ruined by the Crafty Gemini style of learning. I do know that if I make more I will get better at making them.
As I said, I am not sure what to do with it. I could get another set of tools and fill the thing and keep it with my guild stuff. Not sure if really need that.
Nota bene: Clearly, I have to make sure I have two extra days worth of posts ready to publish before I go on a trip. I returned on Wednesday night from Phoenix, but have been so busy the past two days that I didn’t finish either this post or the ColorPlay postI had planned to post Thursday and Friday. The ColorPlay post will show up eventually and you have something to look forward to reading.
Boxcar Tote Complete
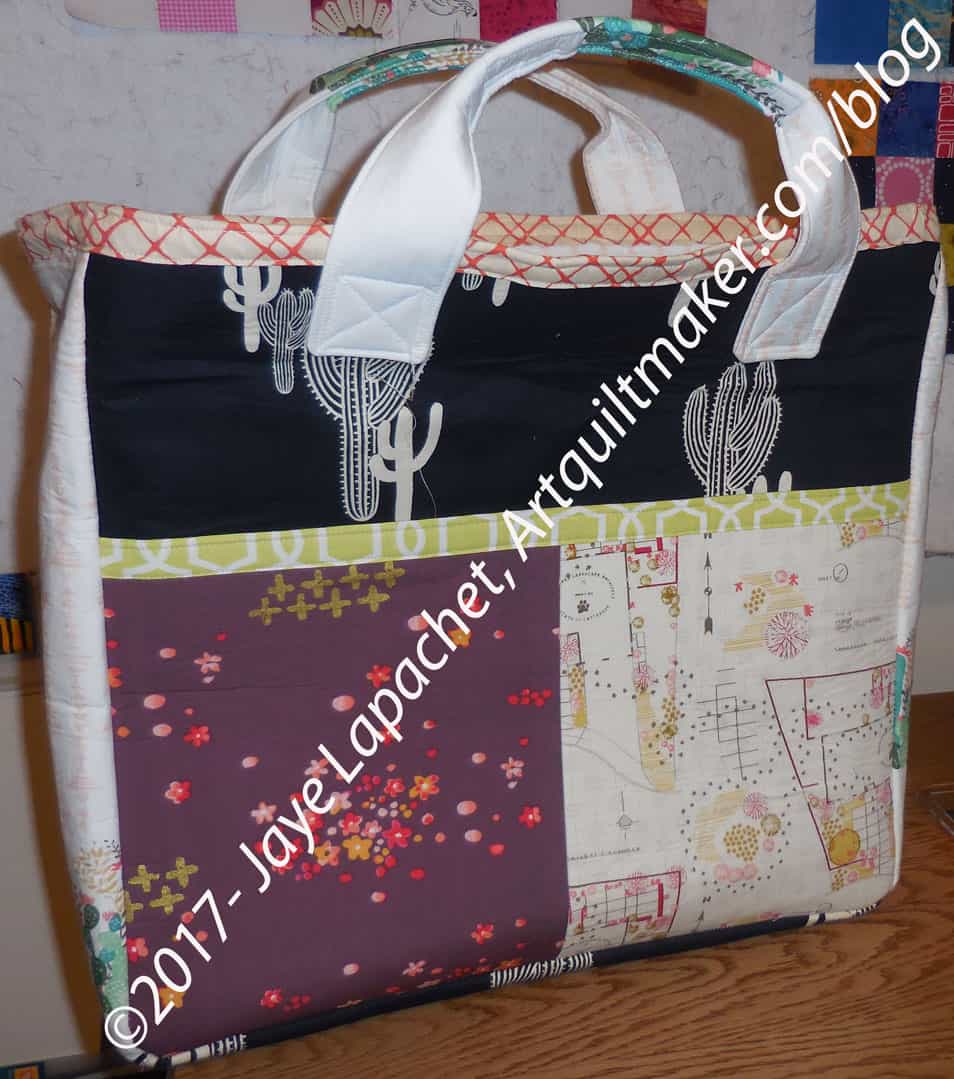
The Boxcar Tote is finished. I bought this pattern from Hawthorne Threads and was pretty excited about the size and shape.
It is a good grocery bag size, though I do think it might be better used as more of a beach bag, carrying swimsuits and towels rather than heavy gallons of milk. It doesn’t have any cell phone pockets or key leashes, so those might be additions to consider later.
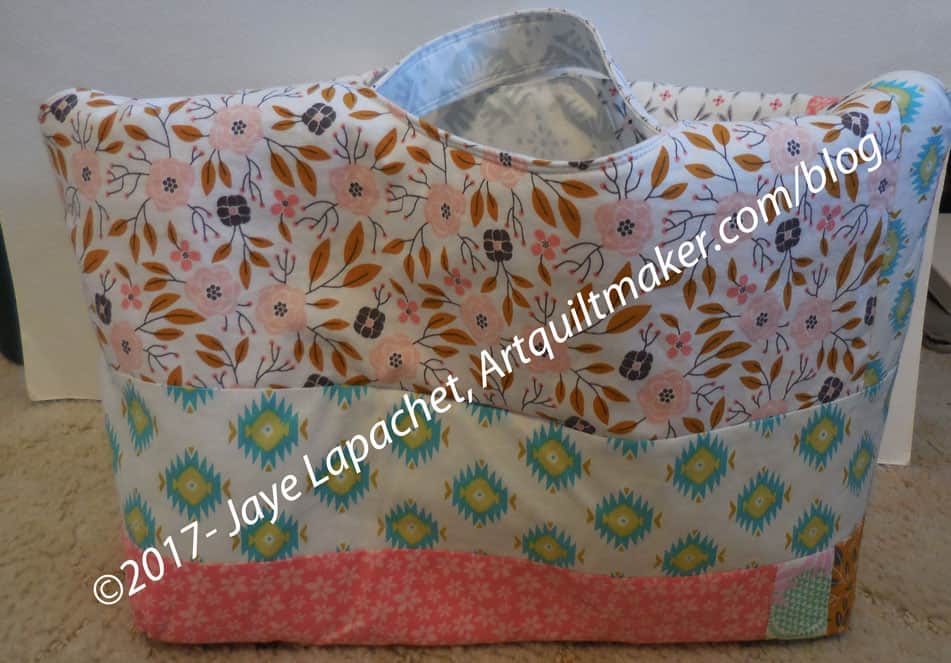
Boxcar Tote inside detail
The finished product has two pockets on the outside, one on each side and four pockets on the inside. The pattern pieces were the same, but I divided the inside pockets into two. They might be a little too slim to be useful, but a tablet or clipboard could fit very well.
The white background cactus fabric is a Hawthorne Threads designed fabric. I chose the various cactus motifs because the friends for which it was made now live in Tucson.
Frankly, I am not happy with the outcome. I found the pattern to be well written enough. It is straightforward and clear. I think my inexperience with Decor Bond as well as using a machine with a small throat were both the main parts of my challenges. I almost never give up on a project, but putting the top trim and handles on almost made me give up the whole enterprise. The only reason I didn’t was because I had bought the cactus fabric especially for my friends.
I really like the shape and size of the Boxcar Tote and thought this was a bag that I might want to make as gifts multiple times. I made a huge effort to follow the directions exactly, so I could really get a feel for the pattern. I did get the feeling that the designer may not have much experience with pattern designing for bags. I am not sure why (except for the construction of the bottom), but that was my impression. I do want to try it again with Soft & Stable.
I had several problems:
Construction of main part of bag
Decor Bond interfacing
Construction of handles
application of handles
application of binding
First, the construction of the main bag was in 5 pieces. This means that the bottom was separate. This is an awkward way to construct a bag IMO, because I never feel like the corners are very secure. When I turned the lining right side out I saw severe strain on the corners so I reinforced the stitching again.
If I make this bag again, I might try to cut the two sides and the bottom piece out as one. I would have to figure out a way to differentiate the bottom from the sides, but that might help with my construction issues.
Reinforcing the stitching was really hard because I was using my small machine. I really like this machine as it is a workhorse and has a great stitch, but the throat is really small. Since the bag parts were already together, I had no choice but to struggle through trying to cram it through the harp. The Decor Bond isn’t very flexible in the scrunching up kind of way, so it was a huge challenge and my stitching, frankly, sucked.
I didn’t think much about the Decor Bond when I started. I was excited to try a new interfacing and even more excited when I realized how stiff it was. I knew that the bag would stand up quite well using this interfacing.
The first problem I had with Decor Bond was that after fusing it to my fabric, it refused to stay in place. It didn’t come away from the fabric, but kind of wrinkled up the fabric fused to it as I continued to put the bag together. As I said above, the Decor Bond isn’t very flexible in the scrunching up kind of way. This means that as I had the whole bag put together, topstitching the top binding was nearly impossible. I had to keep stopping and starting and moving the bag slightly. There is very little give so I realized that the shape of the Decor Bond is the shape you will end up with.
As I progressed on the bag, I also realized that I would be sewing through multiple layers of the Decor Bond. Fortunately, my machine was ok going through it, but getting the layers under the needle was the problem. A really big problem. Even when I got the pieces under the needle, they would shift and move and really make it hard for me to sew. Part of this was also the inflexibility of the interfacing.
I don’t want to imply that this interfacing is hard like a tabletop. It did bend and flex, but not, as I said, in a scrunching up sort of way. This also caused the machine to stop feeding and stitch in place when the pieces hit the wall and got stuck.
Boxcar Tote Handles
Using the Decor Bond for the handles was a bad idea IMO. Again, I am not an expert Decor Bond user, but they took me about an hour and many tools to turn.
Yes, just to turn!
The Decor Bond was so thick and in such a small space that the turning was more difficult than any other time I have turned handles.
In the photo, left, you can see the wrinklyness of the fabric fused to the Decor Bond that I described above. Yes, I followed the directions.
The good part is that the handles are sturdy.
The worst parts were the application of the handles to the bag and the top stitching of the binding to the edge.
Boxcar Tote handle detail
The pattern showed placement and the standard box/ X-cross configuration of stitching. I could not maneuver the bag enough to get a straight stitch straight across the part of the handle to be sewn to the bag. Part of it was that my machine harp is small and the other part was the that Decor Bond was not very foldable. So, the top stitching on of the handles looks really crappy. 🙁
My final shame is the binding. I am not a huge fan of binding the tops of bags. It is a lot of work and doesn’t always look good if you are trying to stitch it on after the bag is assembled. Part of my problem was that the two sections (Outside bag and lining) were equally stiff and the tops didn’t line up. I had to force them to line up and it was not a good outcome for the bag. I meant to use a larger seam allowance for the lining and forgot. I could have trimmed the top of the lining, but was afraid. I should have done it.
To be fair to the designer, Alexis Abegg of Greenbee Patterns, I looked up some websites that talked about the pattern. The Crafty Planner is also a visual and verbal learner, like me. Her version looks fantastic. I do think she used something else besides Decor Bond, perhaps Soft & Stable.
Nisha Williams made the tote from a kit and wrote about it on the Craftsy blog. I was relieved to see that she had the same sort of challenges with the handles that I had.
I searched the Greenbee blog and did not find any information on this tote. There is no word cloud, so I couldn’t click on totes or bags or anything and try and find it from there. 🙁 The On Holiday Bag they share in their most recent post (2-17-2017) has the same general shape and the same sort of handles.
The recipient loved it, which was great. I really hope it doesn’t fall apart.
I thought I would write a little more about this pattern as it is a pretty good pattern and has interesting construction techniques.
The bag pattern is included in a book called Make it Take It by Krista Hennebury. The bag is a cover girl and is what attracted me to the book.
I had a gift to make and thought this would be a perfect opportunity to try the pattern. I made the Little Patchwork the first and was a little disappointed at how little it was. I hadn’t planned to make both, but I needed a larger tote for my gift. From the photos in the book, I thought the little tote was more of the large tote size and the Big Patchwork Tote was larger – almost the size of a Chubby Charmer.
Big Patchwork Tote – 2
The pattern calls for patchwork sides and gives instructions for making a strip set. Fortunately, the pattern also gives the desired final size of the strip set, so the maker can cut the piece from one piece of fabric, if desired. This dimension also allows one to use something like mosaic piecing techniques if strips are undesired. Since I am using a fat quarter stack for this project, I didn’t have pieces large enough for the strips. I pieced strips together and used those. You can see that in the photo above if you look for vertical strips. I recommend piecing the desired fabrics together well in advance of the deadline for this bag as that takes a lot of time.
I used fusible fleece on the small bag and Soft and Stable on the larger bag. Both work, but I found the fusible fleece to be easier to deal with. Of course, if I had remembered to attach the Soft and Stable before I put the bag together, that would have made a difference. 😉 In the future, if I plan to use Soft and Stable, I will attach it (in the ditch stitching, perhaps) to the exterior before I put the bag together.
The interesting part is how the bag goes together. Instead of putting the exterior inside the interior, right sides together and sewing around the top, as the maker does in most bags, this one asks the maker to fold and press the interior and exterior in half and layer them. It is an interesting method that seems to work, though is hard to understand until you do it.
The problems with this bag are: no pockets, no closure. Considering the method of construction, I am trying to figure out if I can add a pocket or sew-in magnets as closures.
All in all this bag has an interesting shape and lot of room for creativity in making the exterior. I encourage you to buy the book and try it.
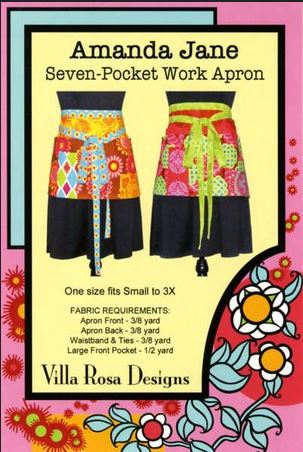
These had been on my list for a long time. I bought this pattern and two kits when we were on the North Coast in February. Making the aprons, which I think of as Cafe’ Aprons, has been on my list since then. I had washed and ironed the fabric and then moved the fabric carefully around my workroom for a couple of months. I finally got myself together to make them last week. I think my list, which has seen little movement in recent months, has been nudging me.
Apron Pattern
The pattern is on a little card, about the size of a postcard. I like the marketing idea, especially when I see a variety of these Villa Rosa Designs cards in stores on a rack. They are like candy and I want to buy 12. The idea is genius – one card, one project. Clever. Cheap possibilities. The size of the card, however, in terms of following the directions makes it very hard to read. I guess I am getting old, but I was squinting at the directions quite a bit.
The size also does not allow for very much explanation and several times I had to sit down, read the directions over and over, a little at a time, imagining the steps in my mind before I could take the next step. I can’t blame it completely on the size of the card. I am bad at following directions. This was especially true for the tie. Once I understood the directions, it was simple, but a photo would have been very helpful.
I see, now, also in small print, that Boutique Patterns has posted a page of tips and tricks regarding this pattern. The straps are covered on this page, so I should have looked; it would have been helpful. Once I figured out the straps, I liked the way they were attached to the apron.
As an aside, I liked how they show the apron, as made from the directions, looks on two different sized models. If I were making it for a more statuesque friend, I would definitely make the Apron front and backs taller than 13″ called for in the directions.
Bright Cafe’ Apron
When I finally made them I made three, one right after the other. I like to get accessories like this right and the only way I can do it is to go over the steps in fabric until I have the process down in my mind. I bought the kits to make a couple of gifts and the first one didn’t come out well, because I missed a crucial part of the pattern. I don’t think I want to give it as a gift, but we will see.
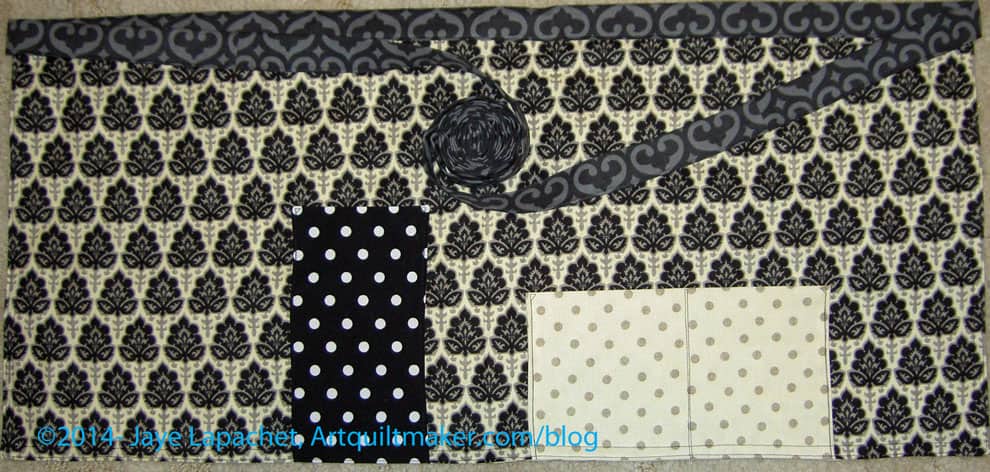
Little Black Dress 2 Cafe’ Apron
I think that this is a fairly easy pattern to modify slightly, as described above or in terms of pockets. I thought the small horizontal pocket was kind of a dumb size so I made it larger. I also didn’t hem the pockets, but doubled them in size, folded the fabric in half and sewed them closed. This made each pocket fully lined. That kind of pocket is easier to make than doing the hems. Less chance of burning my fingers on the iron, too. I thought that not having the wrong side of the fabric showing and having everything fully lined made the apron nicer.
Little Black Dress Cafe’ Apron
I wasn’t that happy with the kits I bought. I loved the fabric, of course, but there wasn’t enough for the Apron back and the fabric for the large pocket was not wide enough. Fortunately, I have plenty of fabric around and was able to fill in the gaps. It could be that this was explained to me when I bought the kits and I forgot.
I think this apron would be a nice quick gift for quilt or cooking friends. It is more of a work apron than a hostess apron, but would work for a variety of crafts as well as not-too-messy-cooking.
Sara of Sew Sweetness kindly asked me to participate in her Purse Palooza, as I have mentioned. Today is my day. Find my review on the Sew Sweetness blog TODAY! Go leave a comment so Sara knows how popular I am. 😉
A Day in the Park Backpack
I decided to, finally, make and review A Day in the Park Backpack Tote by Liesl Gibson. It is a few years old and I was relieved to see the pattern is still available at the Oliver+S website. I was pretty excited when I bought the pattern and I didn’t want you to get excited and then not be able to buy it. Also, it is about time I made it.
One of the reasons I bought the pattern in the first place is that I liked the verticality of this bag. Vertical bags are good for commuting as they don’t hit people when you walk up the stairs from the train. The size ended up being good-not so large that I would hurt my shoulder, but a nice size for commuting with a snack, a book, and a few odds and ends. Lunch wouldn’t fit unless it was bills in your wallet. 😉
First off, the look of this pattern reminded me of the Vogue and McCall’s patterns we buy to make clothes. I am not surprised as Liesl Gibson designs children’s clothes. I don’t think she has created many bags or small accessories.
The pattern is in a paper envelope with newsprint instructions. The pattern pieces are printed on tissue-type paper. I am always a little scared of the tissue paper patterns as I am afraid they will rip and be useless. I find it interesting how pattern expectations (plastic envelope with folded 8.5″ sheets inside) have changed since I bought this pattern.
Sara suggested a couple of ideas to get the review started. I don’t have any problem finding things to say, but I thought these were good ideas, so I will include them. Sara asked:
What fabric/supplies were needed to make the bag?
What did you think of the illustrations and instructions?
Did you make any modifications to the pattern?
What Difficulty Level did you think this pattern was at?
Fabric and Supplies
There is a complete fabric and supply list that includes 11 items. You will use all of them if you make the bag as directed. I didn’t find this to be a bag you can decide to make at 11pm on Saturday night and finish to take to brunch with friends on Sunday morning. There are some specialty hardware items that I don’t keep around. I made a special trip to Britex to purchase most of them and Britex is not open at 11pm on Saturday night. 😉 I am sure they are also available online.
I found it difficult to find the O rings required for the pattern. I ended up buying two key rings that were on sale at Joann just in case. After visiting 3 stores and multiple online sites, I ended up using them. They were a little small so make sure you buy O rings on the large end of the spectrum described on the package instructions.
O Ring Option
I found this package in the beading aisle at Michael’s, which was another option. I didn’t really want to buy 20 O rings, though. I don’t plan on making 10 of these bags.
In the finishing process, DH was helping me with the rivets. I told him about the O ring problem and he suggested a hardware store. He said Home Depot and Lowe’s are more home improvement and don’t have much hardware, but a real old fashioned type hardware store where you can buy individual pieces of metal thingy-ma-bobs might be a good source. I’ll have to check it out. I have heard of other quiltmakers finding supplies at hardware stores, but I never think of it.
Additional Supplies I Used
Aurifil 2250, a red, for the top stitching.
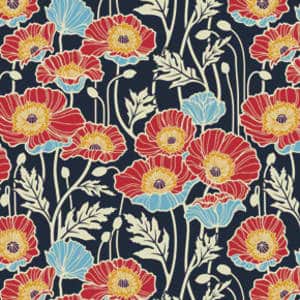
Free Spirit/Joel Dewberry Notting Hill Midnight Poppies (this is home dec weight)
Soft & Stable (instead of the canvas for the interfacing)
Good Morning by Me and My Sister for Moda (same fabric I used in the Star Sampler) for the lining
Pellon #100R Vinyl Fuse for the base
Shape Flex fusible interfacing
Saral paper to transfer markings from pattern to fabric. You might need two colors if you use a light and a dark. I wrote a post about Saral Paper that gives more information.
Directions
My first thought about the directions were that they were long and confusing. I always think that, though, because it is hard for me to read through the directions of something and understand what they mean until I start working through the steps. I am much better at figuring things out or being shown techniques BUT the former strategy doesn’t work for bags and the latter wasn’t available.
In the end, I thought there were a few things that could have been improved on the directions, but, in general, the directions were good.
There is a nice little chart that tells what to cut out of which fabric. In the chart, they list Primary Fabric, Contrast Fabric, Lining, Canvas. One immediate problem was that I didn’t know what pieces of the bag were going to be made out of which fabric. The section titled “Materials Needed” cleared that up a bit, but I was still unsure how the canvas (used for stabilizer) would be used until I read much further down the directions. I would have liked more of an explanation of the whys and wherefores of the fabric/supplies choices as well as a list of possible substitutes. For example, I would have liked to have known why the designer chose canvas rather than another kind of stabilizer. Look and feel? Weight? Availability? Cost?
It occurred to me that the pattern might not have been appropriate places for the whys I needed, so I went to Flickr and searched for “A Day in the Park” backpack. I found a Flickr group of these bags. You can get a good idea of the placement from the random photos and the photos in the group. I got a better idea of what pieces belonged in which fabrics. Hooray for Flickr! Nota bene: Please note that I said a better ideanot that I knew exactly. There was some variation in the way pieces and fabrics were referenced, or, at least, in the way I understood them to be referenced. I would like to see the different supplies referred to in the same way on all of the pieces, the chart, the supply list and the instructions.
I didn’t find much on the Oliver+S blog through web searches, but there was a post about why she created the pattern (sewing class). I did see that shops who are teaching classes could, at the time (don’t know about now), purchase packs of the hardware along with the pattern. While that would not have worked for me, I could have called to see if the packs were available for purchase by non-wholesale customers.
I also saw one forum post, which had some helpful information about making the straps. I didn’t explore to see if there were more posts.
Joel Dewberry Notting Hill Pristine Poppy (midnight)
Once I decided which fabric to use (Joel Dewberry Notting Hill Midnight Poppies, home dec weight), and after I washed it, I got started on the cutting. The cutting was a bit daunting, like the Petrillo Bag, simply because there are a lot of pieces involved. [Nota bene: when I cut out the second one, I cut the main fabric, then the lining and stabilizer fabrics that went with that main fabric piece and the cutting seemed less daunting.] I persevered and found the chart of how much of each fabric, etc. to cut to be very helpful. I was able to use it as a check to ensure I had enough of everything cut properly.
Making the Petrillo Bag was still fresh in my mind, so I decided use some of the supplies from that project. Since I didn’t have the canvas and don’t like floopy bags, I decided to use Soft & Stable instead of the canvas. I knew I was taking a risk. I usually like to make things as per the instructions the first time through, then start making changes if I make the bag again. I have enough bag making experience and I wasn’t doing anything completely crazy, so I decided it wouldn’t be completely crazy to use Soft & Stable.
The other thing I did was use iron-on vinyl for the base. I have been wanting to do it for the bottom of bags for awhile and this was a good opportunity. Pam did it first and gave me courage. The Base pieces on the A Day in the Park Backpack tote were small, so it was a good test. They came out pretty well, but, mid-process, the vinyl was stickier than I expected. I used Pellon #100R Vinyl Fuse. I used an applique pressing sheet on my ironing board and the vinyl release paper on the top. If I had been able to find my second applique’ pressing sheet, I would have used that on top. Nothing came off on my iron. Remember to cut the Base piece a little large, apply the vinyl, then trim the fabric with vinyl to the size of the pattern. This will avoid any issues with shrinkage.
I lined all of my lining pieces with Shape Flex fusible interfacing,to help prevent floop. Floop is bad on the lining also, because it means that the inside pockets aren’t strong enough to hold your stuff, and pens, etc can flip out of your bag. I felt that having iron-on interfacing would work fine and give the pieces some added body. It also saved me time and used a product I already had on hand.
I also didn’t want to baste all of the pieces I needed to cut. I used the WonderClips to help prevent the need to baste. They are too thick to sew over, but keep all the layers together with no problem.
I don’t think the main fabric really needed interfacing since I was using home dec weight fabric, but I put it on anyway. I haven’t used a lot of home dec fabric, so I was not 100% confident. As I said, there is very little out on the web about this pattern so I didn’t have a lot of information and experience to choose from when looking at what other people did. FreeSpirit and Joel Dewberry both replied to my question about washing the home dec fabric, which was GREAT!
Instructions
I thought the instructions were detailed enough. The way the pattern is written makes it clear that there is a certain level of knowledge expected. I would make several bags, including something as complicated as the Petrillo Bag before tackling this bag. In the blog post I referenced above, this pattern is designated as an advanced beginner pattern. I think that is optimistic. Not to discourage beginners, but there are a lot of steps, a lot of supplies, including a zipper, and sewing through many, many layers. I’ll defer to Liesl Gibson, but would categorize this pattern as Intermediate.
The instructions were a little hard to follow. I think they needed a bit more testing by random makers with a variety of intermediate to advanced experience. The more I got done, the easier it was to navigate through the pattern, but the designer should revise it for consistency with terminology and add some additional explanation, especially at the beginning.
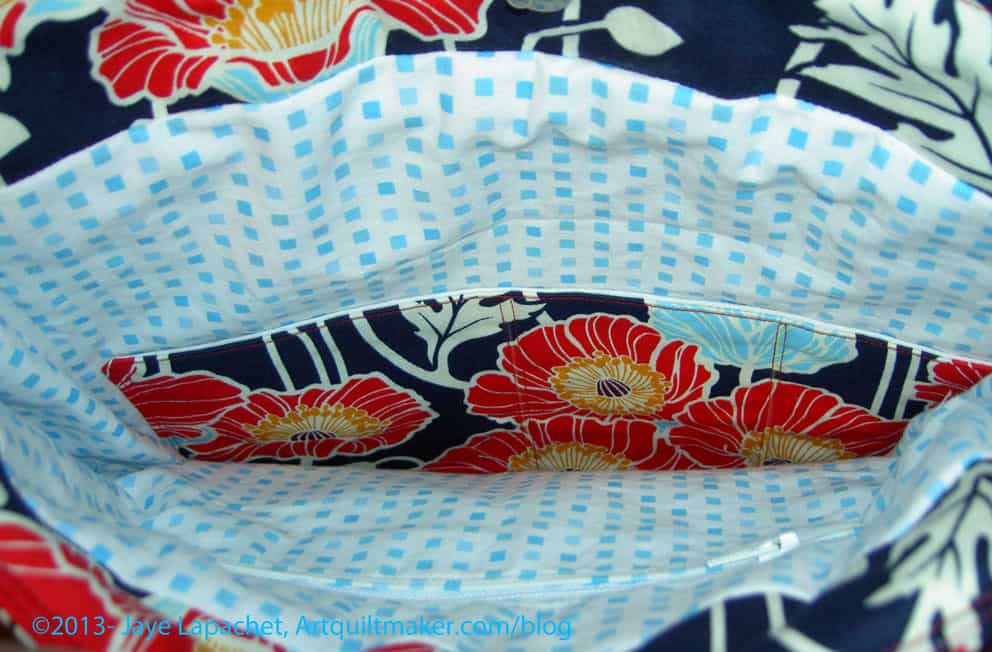
Inside A Day in the Park Backpack Tote
The instructions didn’t say how to put in a zipper (I don’t necessarily think they should), so make sure you know how to do that before starting the bag. Instead of making a zipper pocket, you could make two of the lining panels with the appliqued pocket. I do think that the directions for the appliqued pocket don’t tell the maker how to apply it in a nice way. The finishing isn’t very nice looking and I went around the pocket twice to make sure that it stayed on, if I put something heavy in it.
The fabric I used for the interior wouldn’t necessarily be my first choice again. I like it, but it frays. Definitely use a light colored fabric for the inside of your bags when making your own. A light colored lining makes it much easier to find things in the bottom of your bag. I am using a black on white for the second version.
Finished A Day in the Park Backpack Tote
I am pleased with how the bag came out.
Things I Liked
No errors in the pattern
Shape of bag
The directions on how to make the zipper pocket. It came out really well
If I Made this Bag Again
I would try it with the canvas as the stabilizer
I would eliminate the facing and magnetic closure at the top and add a flap instead
I would add a larger pocket, such as a file folder pocket on the back
I would add a messenger bag type strap and not make the backpack straps
I would use a slightly larger seam allowance on the lining as cutting it per the instructions make it a bit large for the size of the outside of the bag. Alternatively, I could cut the pieces a little bit smaller
Leave a larger opening in the lining to turn the bag, especially if I used the Soft & Stable again. The Soft & Stable takes up more space and was kind of a problem to turn using the opening size indicated in the pattern
The lining bottom is made of two pieces sewed in the middle. I would try to cut one entire piece rather than two pieces. It is the lining, so who really cares, but I think it would look better and be one less step
Modifications to Materials
Iron-on interfacing (Shape Flex) instead of basting on interfacing
Soft & Stable instead of canvas
WonderClips instead of basting
I have already started a new version of this bag with the modifications described above. I am not very far along, so stay tuned.
Thanks to Sara for inviting me to join Purse Palooza. I really appreciated the opportunity to make a bag that had been on my list for awhile and write about it. Check out the other bags that will be shown in the next two weeks.
If I didn’t think Anna Maria Horner was a goddess already, I do now. I spent the day on Sunday, minus a short chauffeuring task, with the Multi-tasker Tote (AMH MTT), a recent pattern from Ms. Horner. As I suspected, I did have trouble understanding the directions. It is the way I learn and not completely about the directions. I do think there were a few tiny parts that could have been clarified just a little bit more. I know they have a certain number of pages they can use to create a pattern and have to worry about font, enough photos, etc, so I really am not going to complain too much.
In all fairness, I think making 20 or 30 of the Eco Market Totes gave me a feel for what should be going on in the tote making process. Doing a multitude of those totes and making little changes in the pattern made me understand the bones of tote-making. The AMH MTT is much different than the EMT, but in the end they are totes and their goal is to carry things.
Multi Tasker Tote Pattern
In general, however, this is an amazing pattern. The way it goes together looks completely mysterious one minute and the next minute it is gorgeous and elegant. I was completely blown away, because it made me think about tote bags in a new way. I don’t think it is a beginner pattern, however I would say that any intermediate sewist who has a few tote bags under her belt could use this pattern to make a bag.
AMH MTT in progress, detail
In the above photo, you can see the bit that is folded over to accommodate the straps, including my lovely top stitching. 😉 I haven’t finished the straps yet, so there is another photo of this project to which you can look forward!
AMH MTT, Step #8
One of the steps I had trouble with was step #8. I really couldn’t figure out what the directions were trying to accomplish. Finally, I realized that she wanted me to sew the bottom of the pocket together! To accomplish that I had to pop the pocket (pattern piece is called pocket panel) out a certain way. When you do orient the section correctly, the whole thing looks like the section above.
Box corners
Remember I mentioned the gusset tutorial in the Bag Bazaar book? I didn’t have a chance to try it out. I found AMH’s directions to be stellar. You press a crease into the side of your bag, then you line up the bottom seam with that crease and you have a perfect triangle. I drew a line (not part of the directions), because of my A type personality. Perfect box bottom. I did it before I realized what was happening and was amazed at the results.
I love the fabrics that I chose for the current tote, individually. I am not happy with the two of them in combination in this project. Too many flowers, I think, which means that none of them stand out. Yes, I will be making another! As I mentioned in a previous post and as you can see from the photos, I used the Denyse Schmidt fabrics as a trial run.
MTT #2 Bag Fabric
My biggest challenge with this project is the requirement of Pellon Peltex Double-Sided Fusible Ultra Firm Stabilizer #72. I didn’t have any in my fabric closet, which didn’t worry me. I sewed and fused two pieces of Timtex together and the put Steam-a-Seam 2 on the outside and fused it to the bag. Having a stiff bottom is GREAT! It makes the thing stand up and much less floopy. Using my jerry-rigged method, I could easily see where something already stiff and fusible would be a lot easier. I searched the web and found it by the yard for $10+. I also found a bolt of it for $99+. Huh! I can’t make another of these using my jerry-rigged method, because I am out of SAS2. I have to decide whether to get a bolt (seems like overkill) or pay, what seems like, and exorbitant price for a yard. Anyone of you have any perspective on the price of Pellon Peltex Double-Sided Fusible Ultra Firm Stabilizer #72?
Kristin LaFlamme reviewed this pattern on her blog as well. It is a very complete review. She mentions a couple of the inconsequential typos I also saw and does some interesting things using recycled materials. Her rendition of the pattern makes me think about adding additional pockets to the outside. Adding a pocket to the outside would be especially successful when I don’t have a focus fabric (as shown on the pattern above) or fabric suitable for broderie perse.