We found a list of Oregon quilt shops ** on the web and used it quite a bit. Mom was really good at directing me to the various shops. I think I have a bit of DH in me (he has trained me, more likely) after all these years of traveling together. I tend to stay in the car far too long whereas mom needs to get out and walk around. I have to say that getting out of the car was easier when we did it more often. I didn’t feel like I needed a crowbar to get myself out of the car.
There are a lot of quilt shops on the Southern Oregon coast! It is amazing that every hour or so you can get out and take a look around a quilt shop.
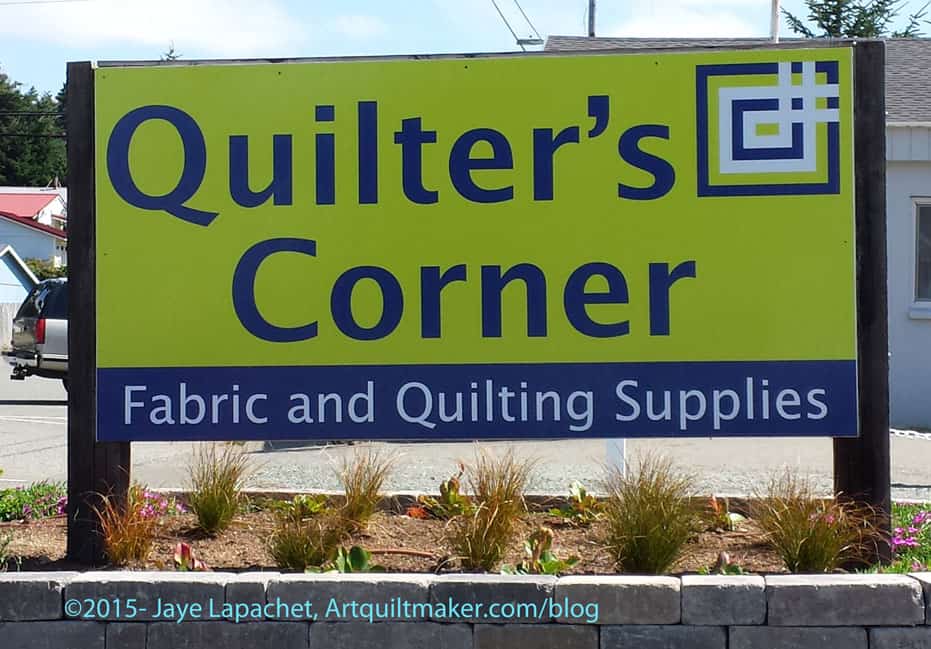
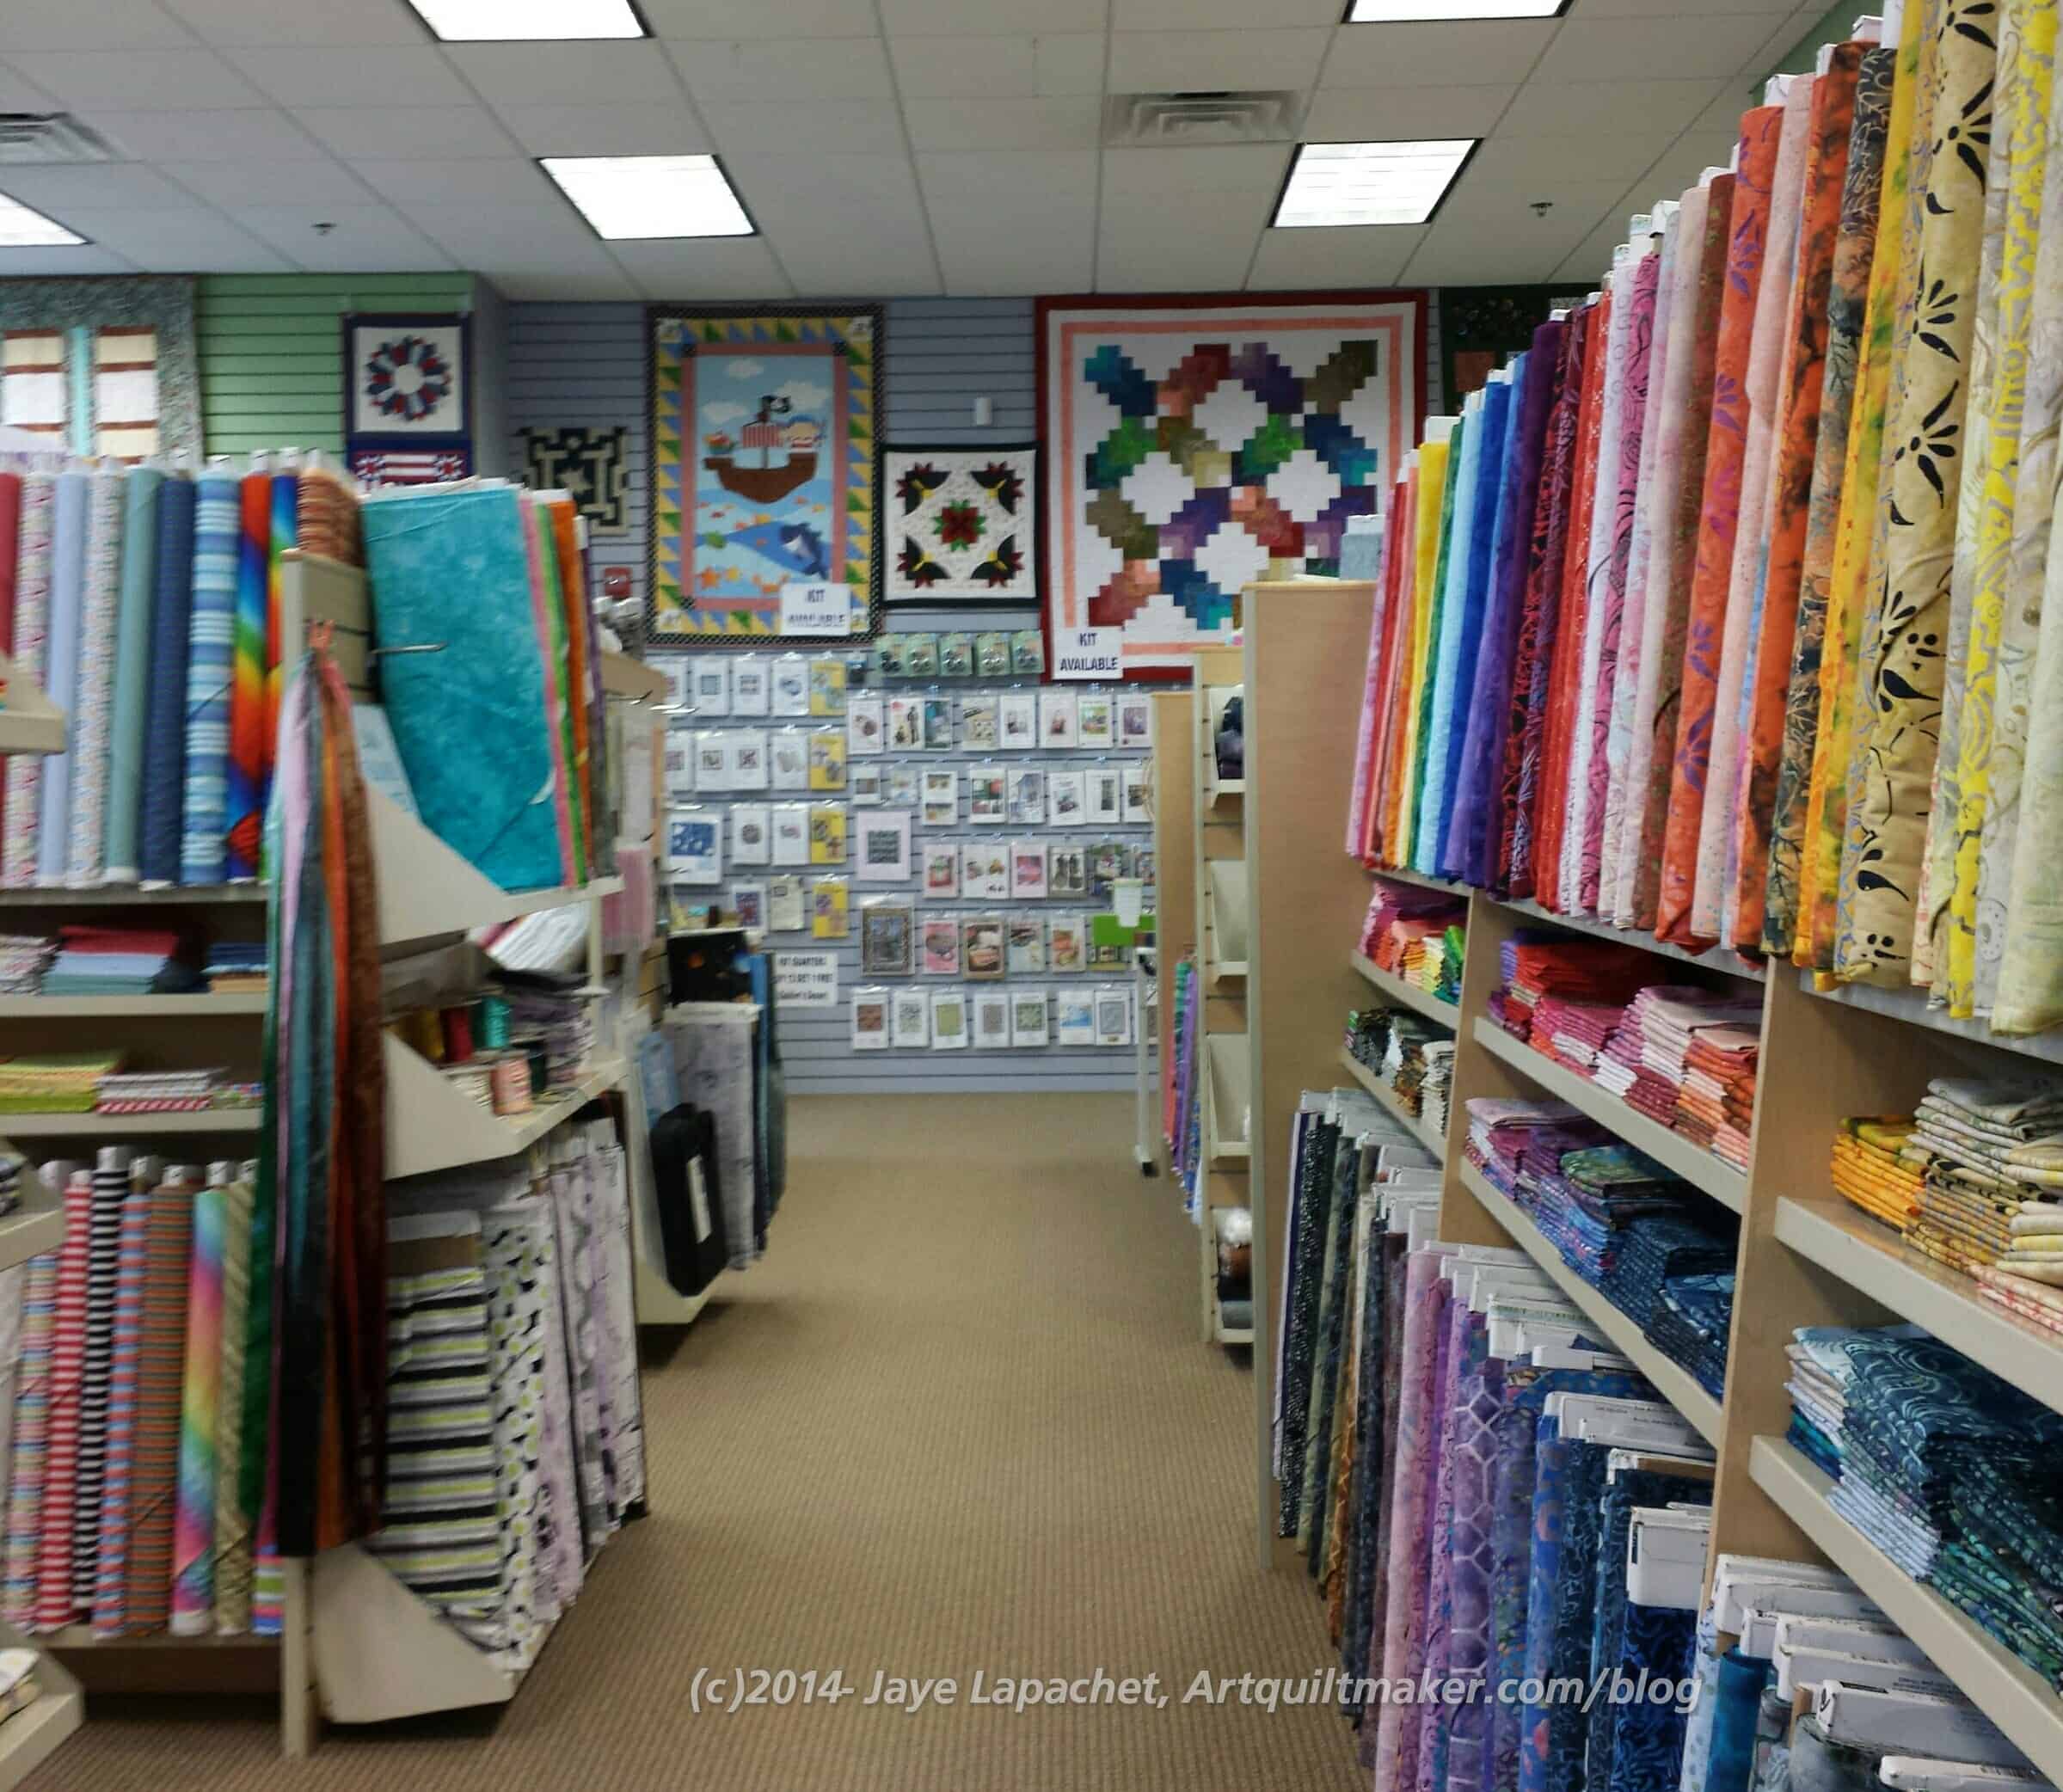
Quilter’s Corner – no life sucking beige
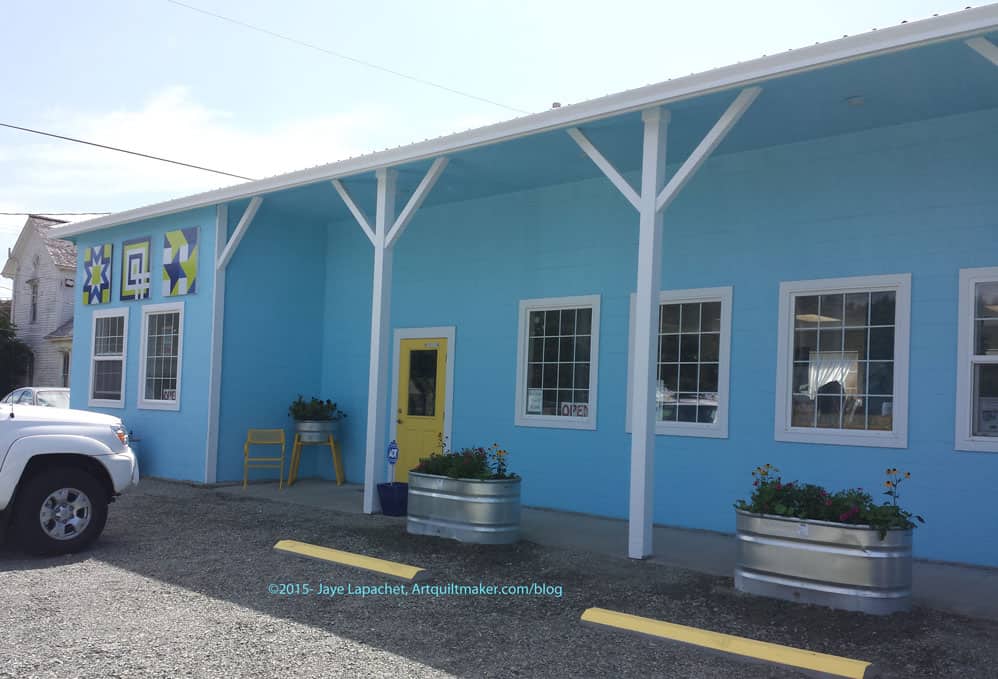
Quilter’s Corner was bright and cheerful. I love the paint on the outside of the shop. I am not particularly fond of the color on its own, but with the white, yellow and stainless steel flower tubs, it really works. It looks so welcoming and cheerful.
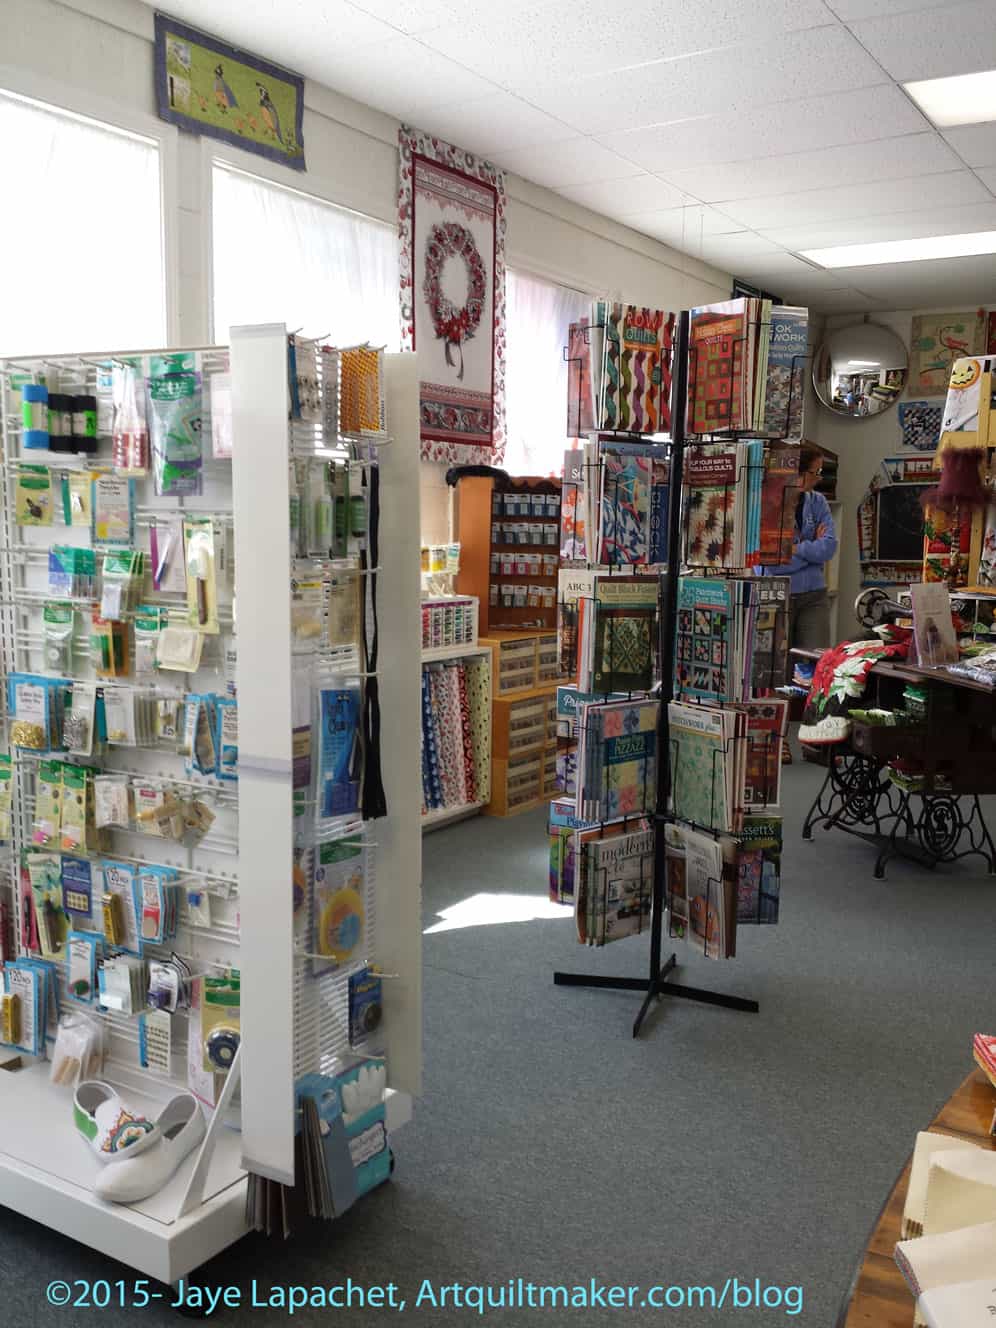
The inside of the shop was bright and cheerful as well. The people were friendly. They had a great selection of notions and fabric.
Quilter’s Corner batiks wall
To the left when we walked in was a wall of batiks. There were a lot of bright and cheerful, clear colors.
I think the light along the southern Oregon coast must be similar to the light we have at home, because I didn’t see a lot of country/Civil War themed shops. Most of the shops had bright and cheerful colors. Granted, we did not visit most of the shops on the list.
Quilter’s Corner notions etc
You know I love looking at notions and this shop, as I mentioned, had a lot of interesting notions. I had seen, that morning, a post on Instagram from Moda Fabrics about a finger light for handstitching. Before I left I had been working on the Food Quilt #2 binding, and stitching black on black was hard to see, so I was interested. They were on my mind when I was checking out. There was a basket of the lights on the counter, so I picked out one for me and one for my mom. It is so awesome that I didn’t have to hunt around for weeks for one to try. They were only $2 and the counter lady said she liked them. DH has been out of town so I haven’t been sitting with him and stitching, but I will give a full report on this little light later.
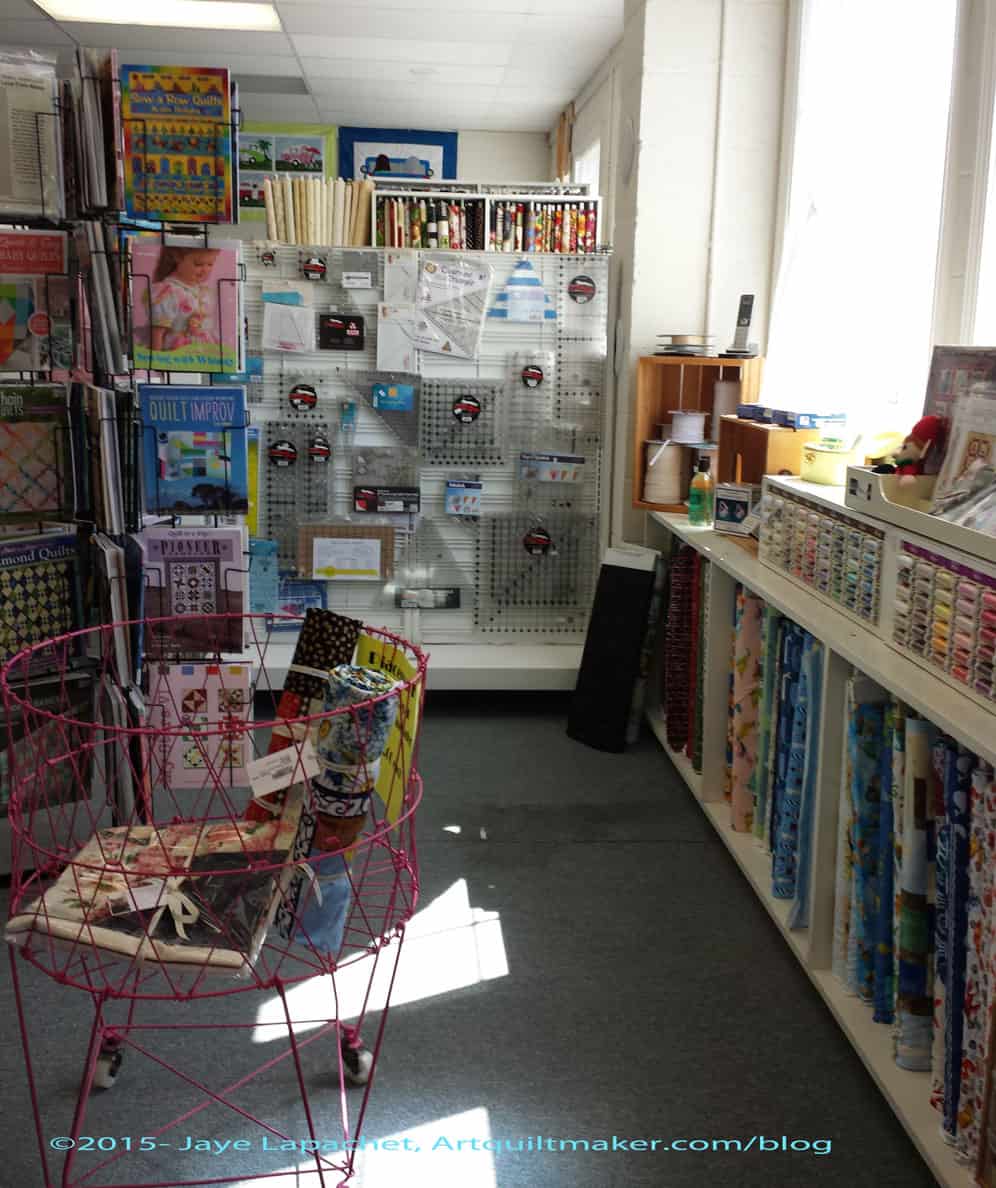
Quilter’s Corner books etc
There is a certain ruler for which I am looking. I don’t know if it exists, but it is about 5″ or 6″ x 12″. I looked at all the shops we visited, but haven’t yet found exactly the ruler for which I am looking. They had a good selection of rulers at this shop. I spent some time looking at them and really wanting to get back to the sewing machine. I envy OzzyPip for taking her machine with her on her trips. Of course, I would not have had time to machine sew on this trip. I did have some handwork with me, but as I drove most of the time, I didn’t work on the project (EPP). Not making much progress there.
Quilter’s Corner fabrics
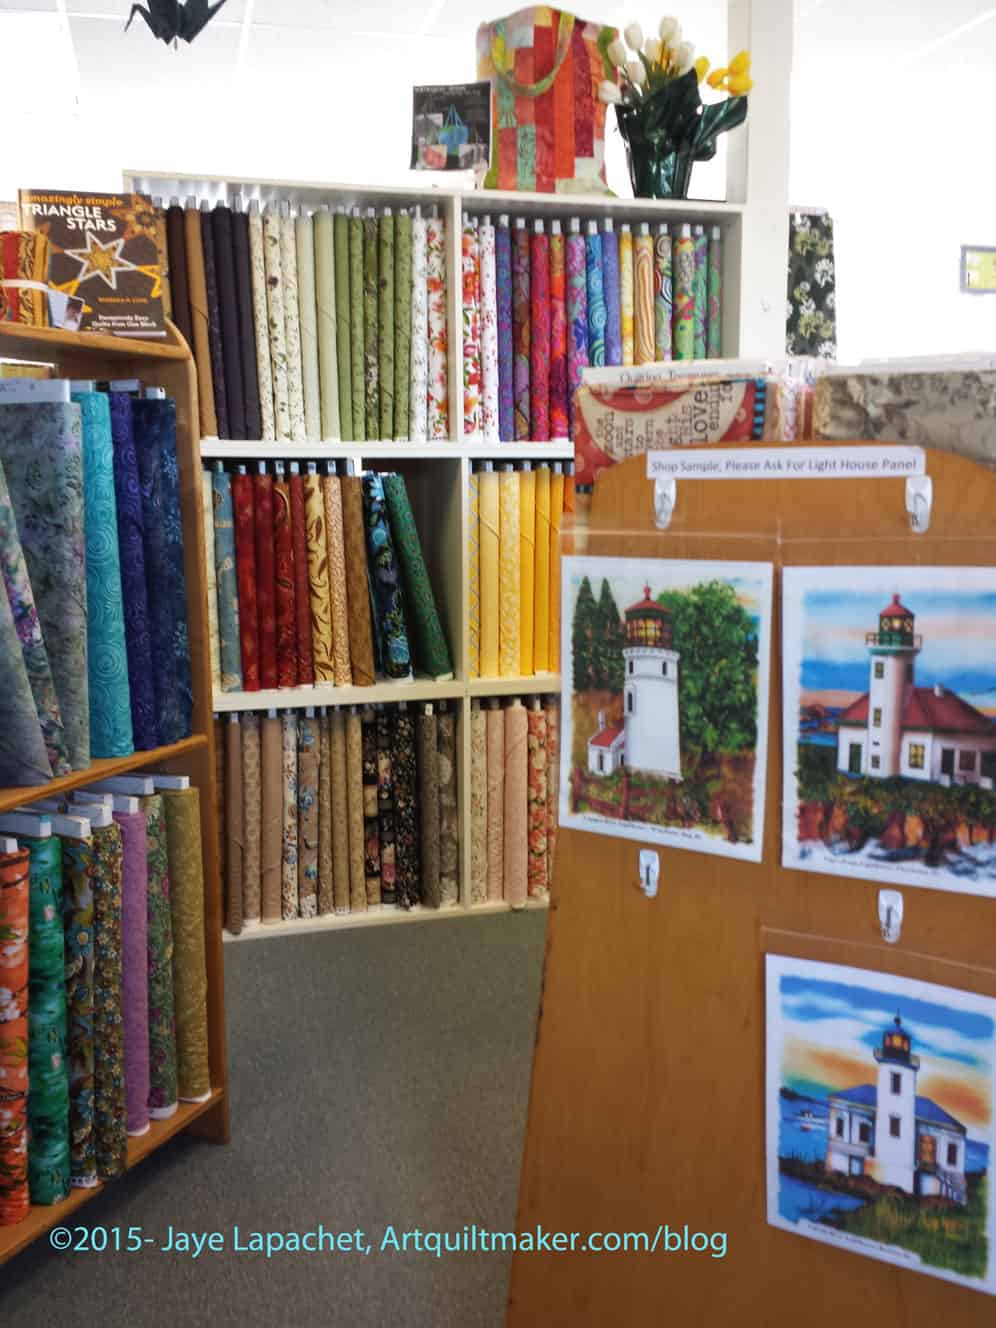
One thing I noticed in a lot of these shops was the sea theme. They didn’t have it all over the shop, but had a section of fabrics with a sea theme or panels (such as the lighthouse panels you see, right). I didn’t buy any of these, but it made me think of the Michael Miller Ocean fabric I bought a few years ago. I think these must be for tourist quiltmakers who come and want a little something to remember their trip.
I also saw the nationwide row by row challenge in full force in many of these Oregon shops. Daisy mentioned this challenge experience in one of her recent podcasts. The theme there is something about the sea and each shop had a pattern for a row. These were free, but they also had kitted up the pattern with fabrics and those seem to run around $15.
I am not one for challenges, but I do like the idea of getting different rows from different shops and putting the rows together in your own way. It seems like a very neighborly thing to do, especially if people were doing it together. I could have collected a lot of rows on this trip, but, again, not my thing.
Quilter’s Corner fabric displays
The shop really had a lot packed into a little space and they still had the opportunity for displays using antiques like the sewing machine. Sometimes I feel like such displays are taking away valuable space from fabric, but I didn’t in this case.
After we had been there for a few minutes other ladies started to trickle in. We found out that the local quilt group was coming to meet and 30 ladies would be there in about 30 minutes. We didn’t rush, but since we were almost done anyway we finished up and got out so someone else could have our parking space. I do like it when quilt shops offer space to quilt groups. It is worth their while as, in this particular instance, several ladies handed over bolts of fabric to be cut and bought fat quarters for an exchange they were having.
I never cease to be amazed at how different quilt shops can look. This shop is well worth a stop if you are heading to the Oregon Coast.
Location: 335 7th St, Port Orford, OR 97465
(541) 332-0502
**Nota bene: both shops on this list in Tualatin are closed, as in no longer exist.
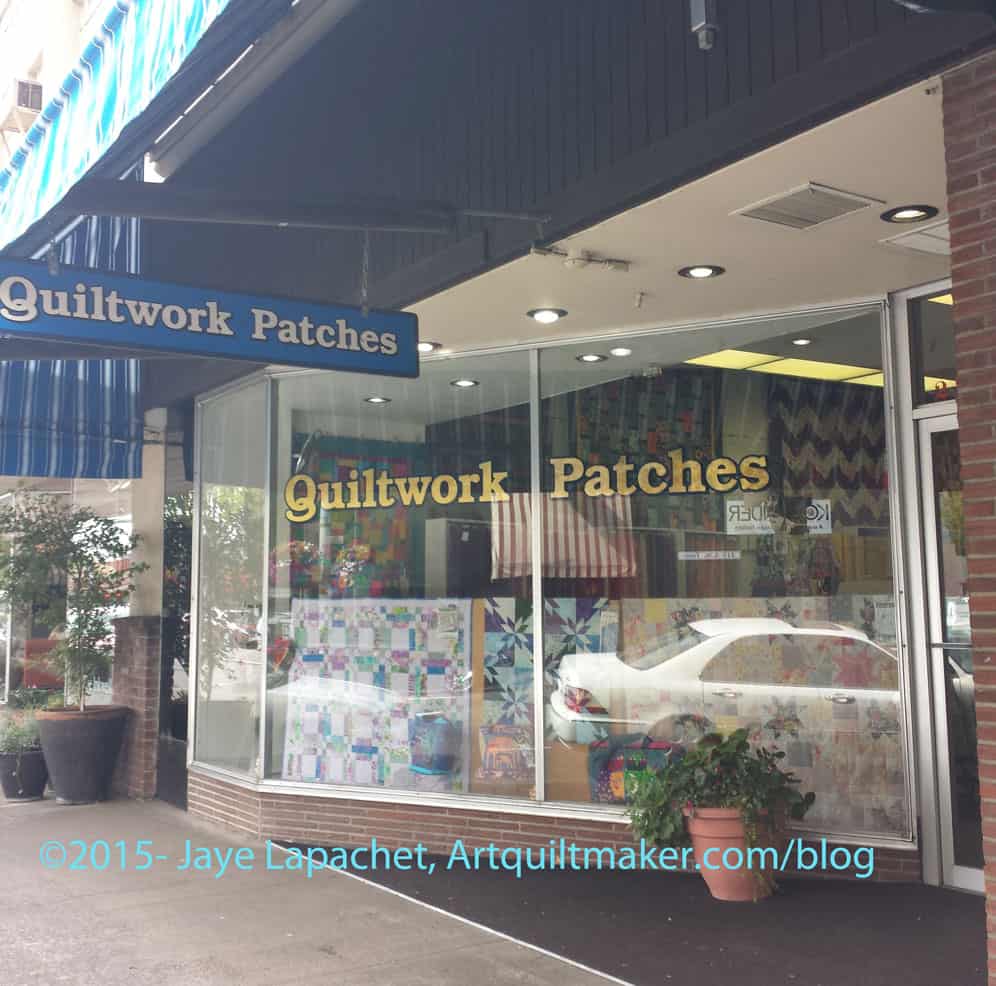
I stopped in Corvallis, Oregon on my way home at a shop called Quiltwork Patches. This wasn’t the largest store I visited, but it was one with a very good selection of fabric etc. Their excellent selection of fabric also included colorways that I hadn’t seen. They had some of the latest Moda charm packs and mini charm packs and really great selection of sale fabrics.
The ladies in the shop were friendly, but not too pushy, so I felt ok looking around, which was great, because I wasn’t feeling that well*.
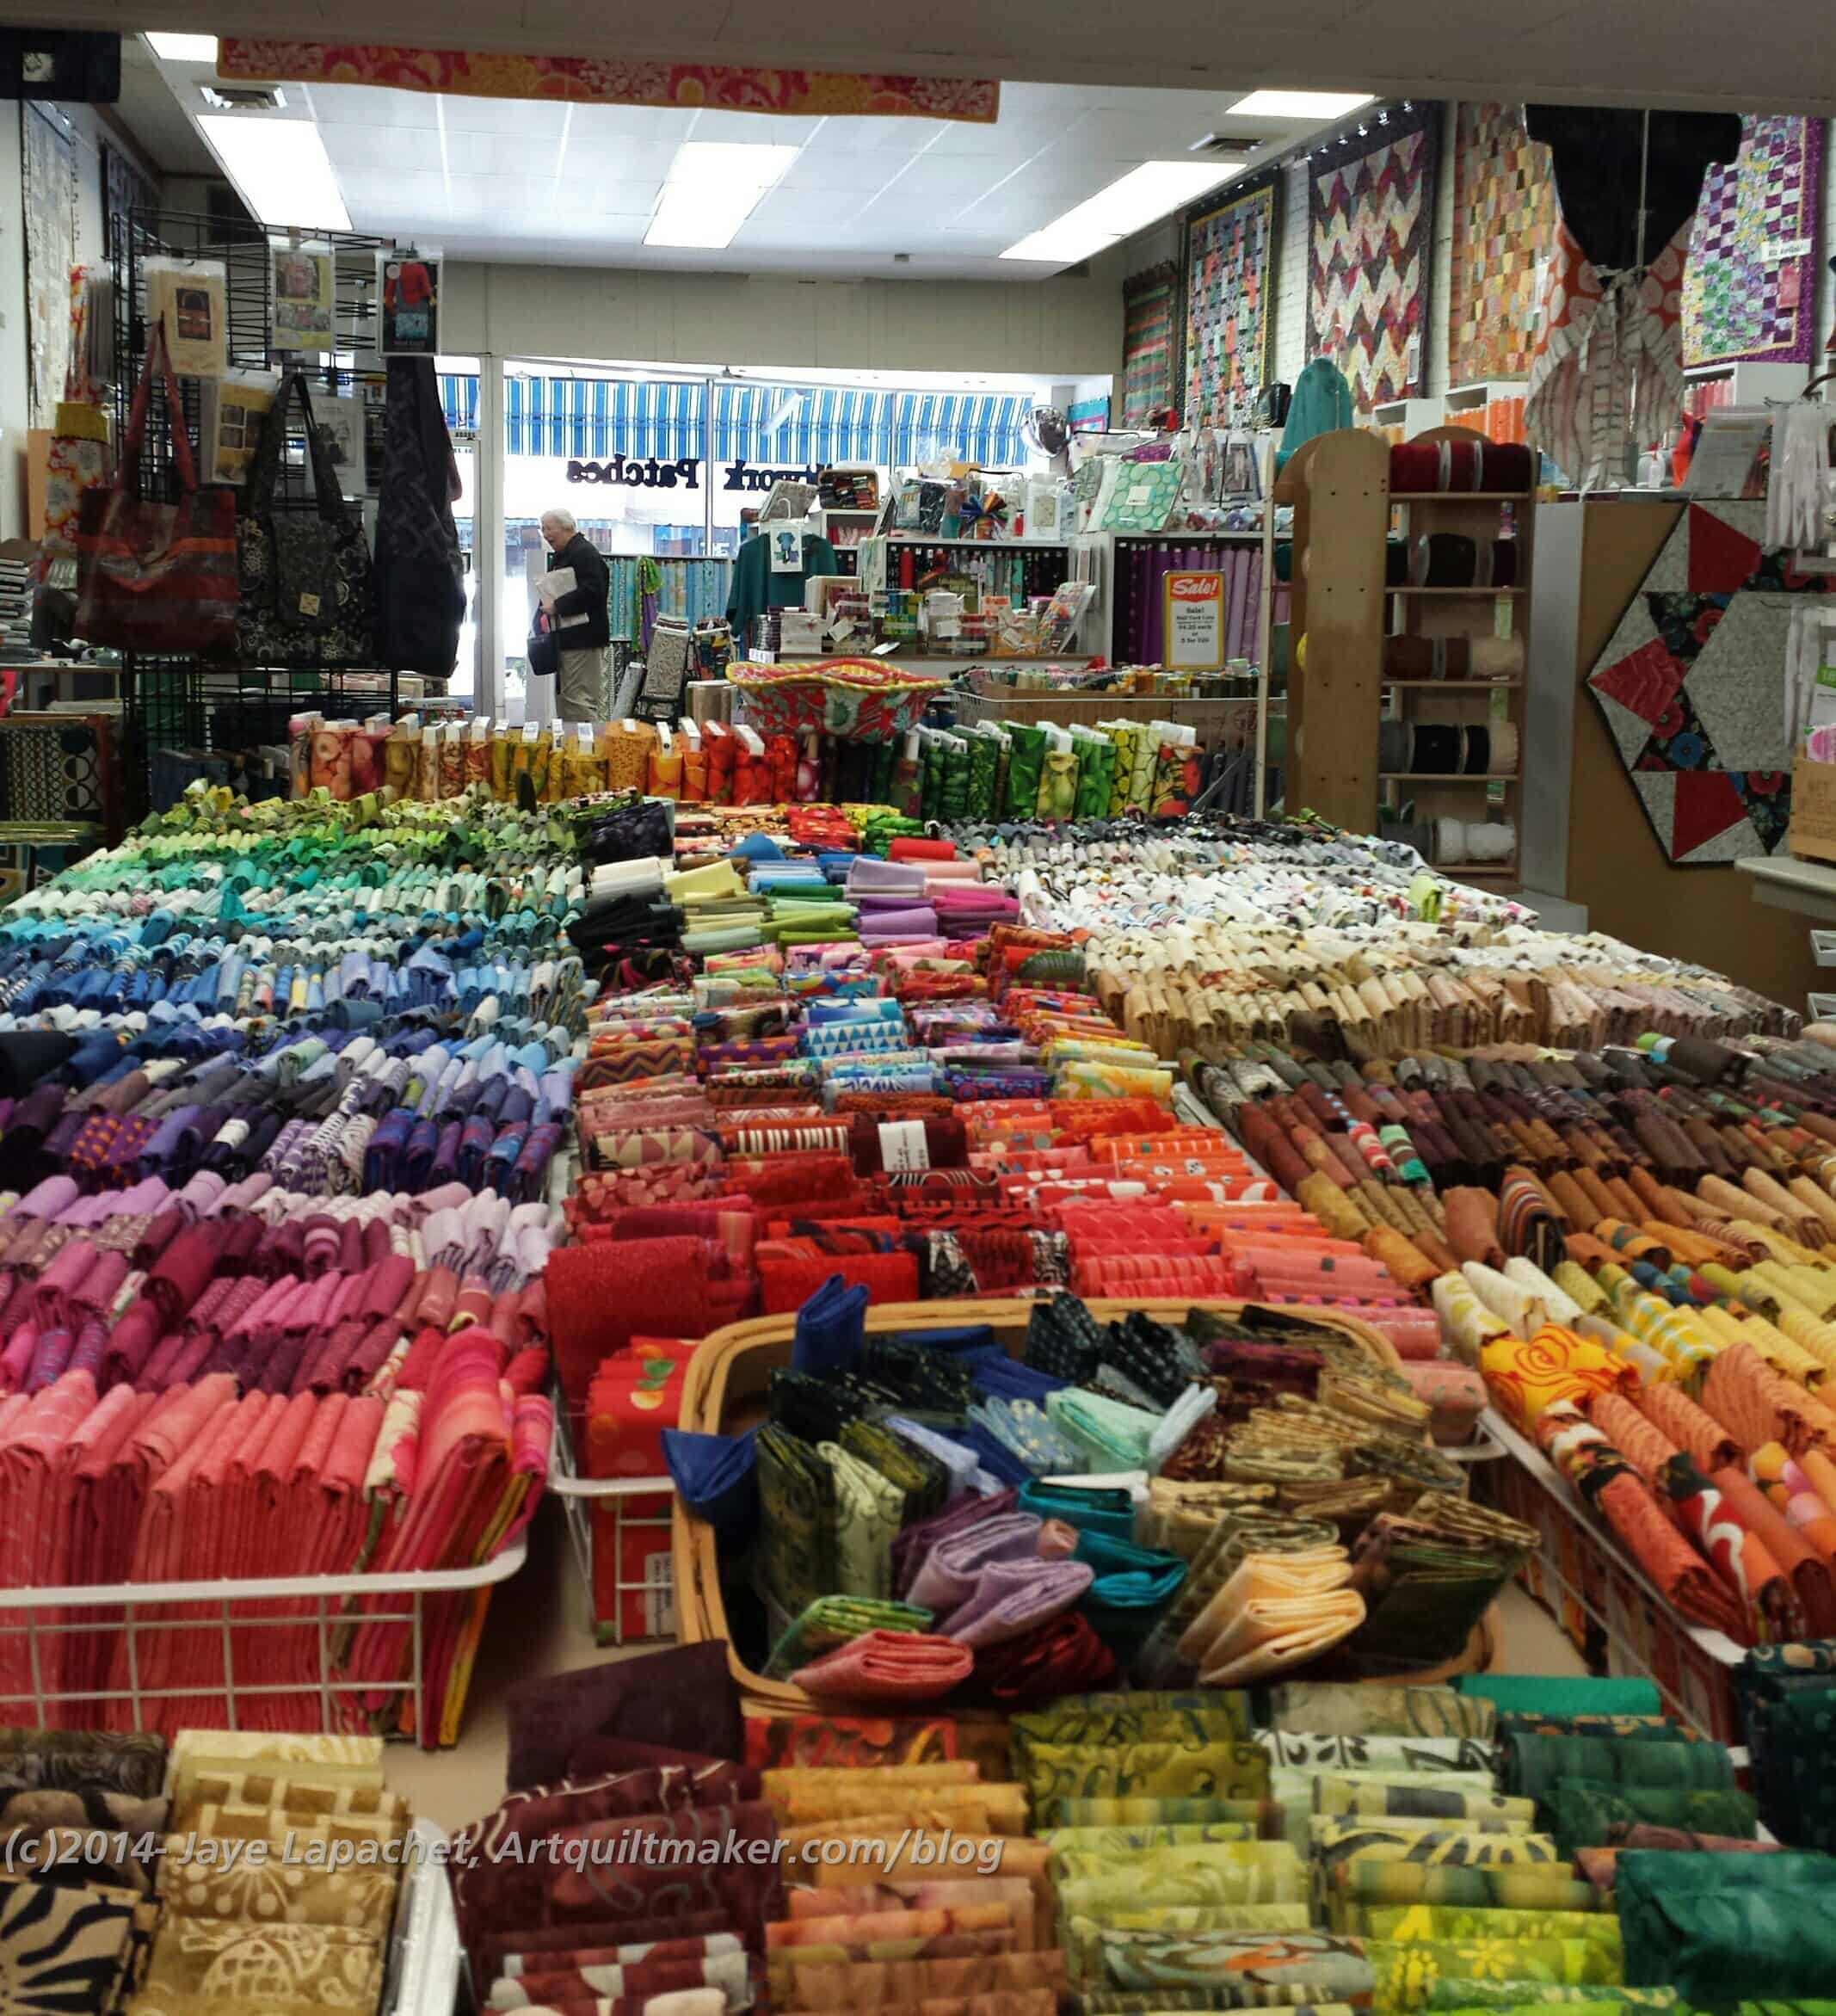
There was a ton of fabric in this shop and half of it was sale fabric. The other part was really different, as I mentioned.
Quiltwork Patches front to back of the store
I liked the displays as well. They weren’t too cutesy and didn’t get in the way of the fabric. The displays facilitated the display of the fabric.
This was the first time I really liked those little benches in a quilt store. They, again, facilitated the display rather than overwhelming the display.
Quiltwork Patches back to front of store
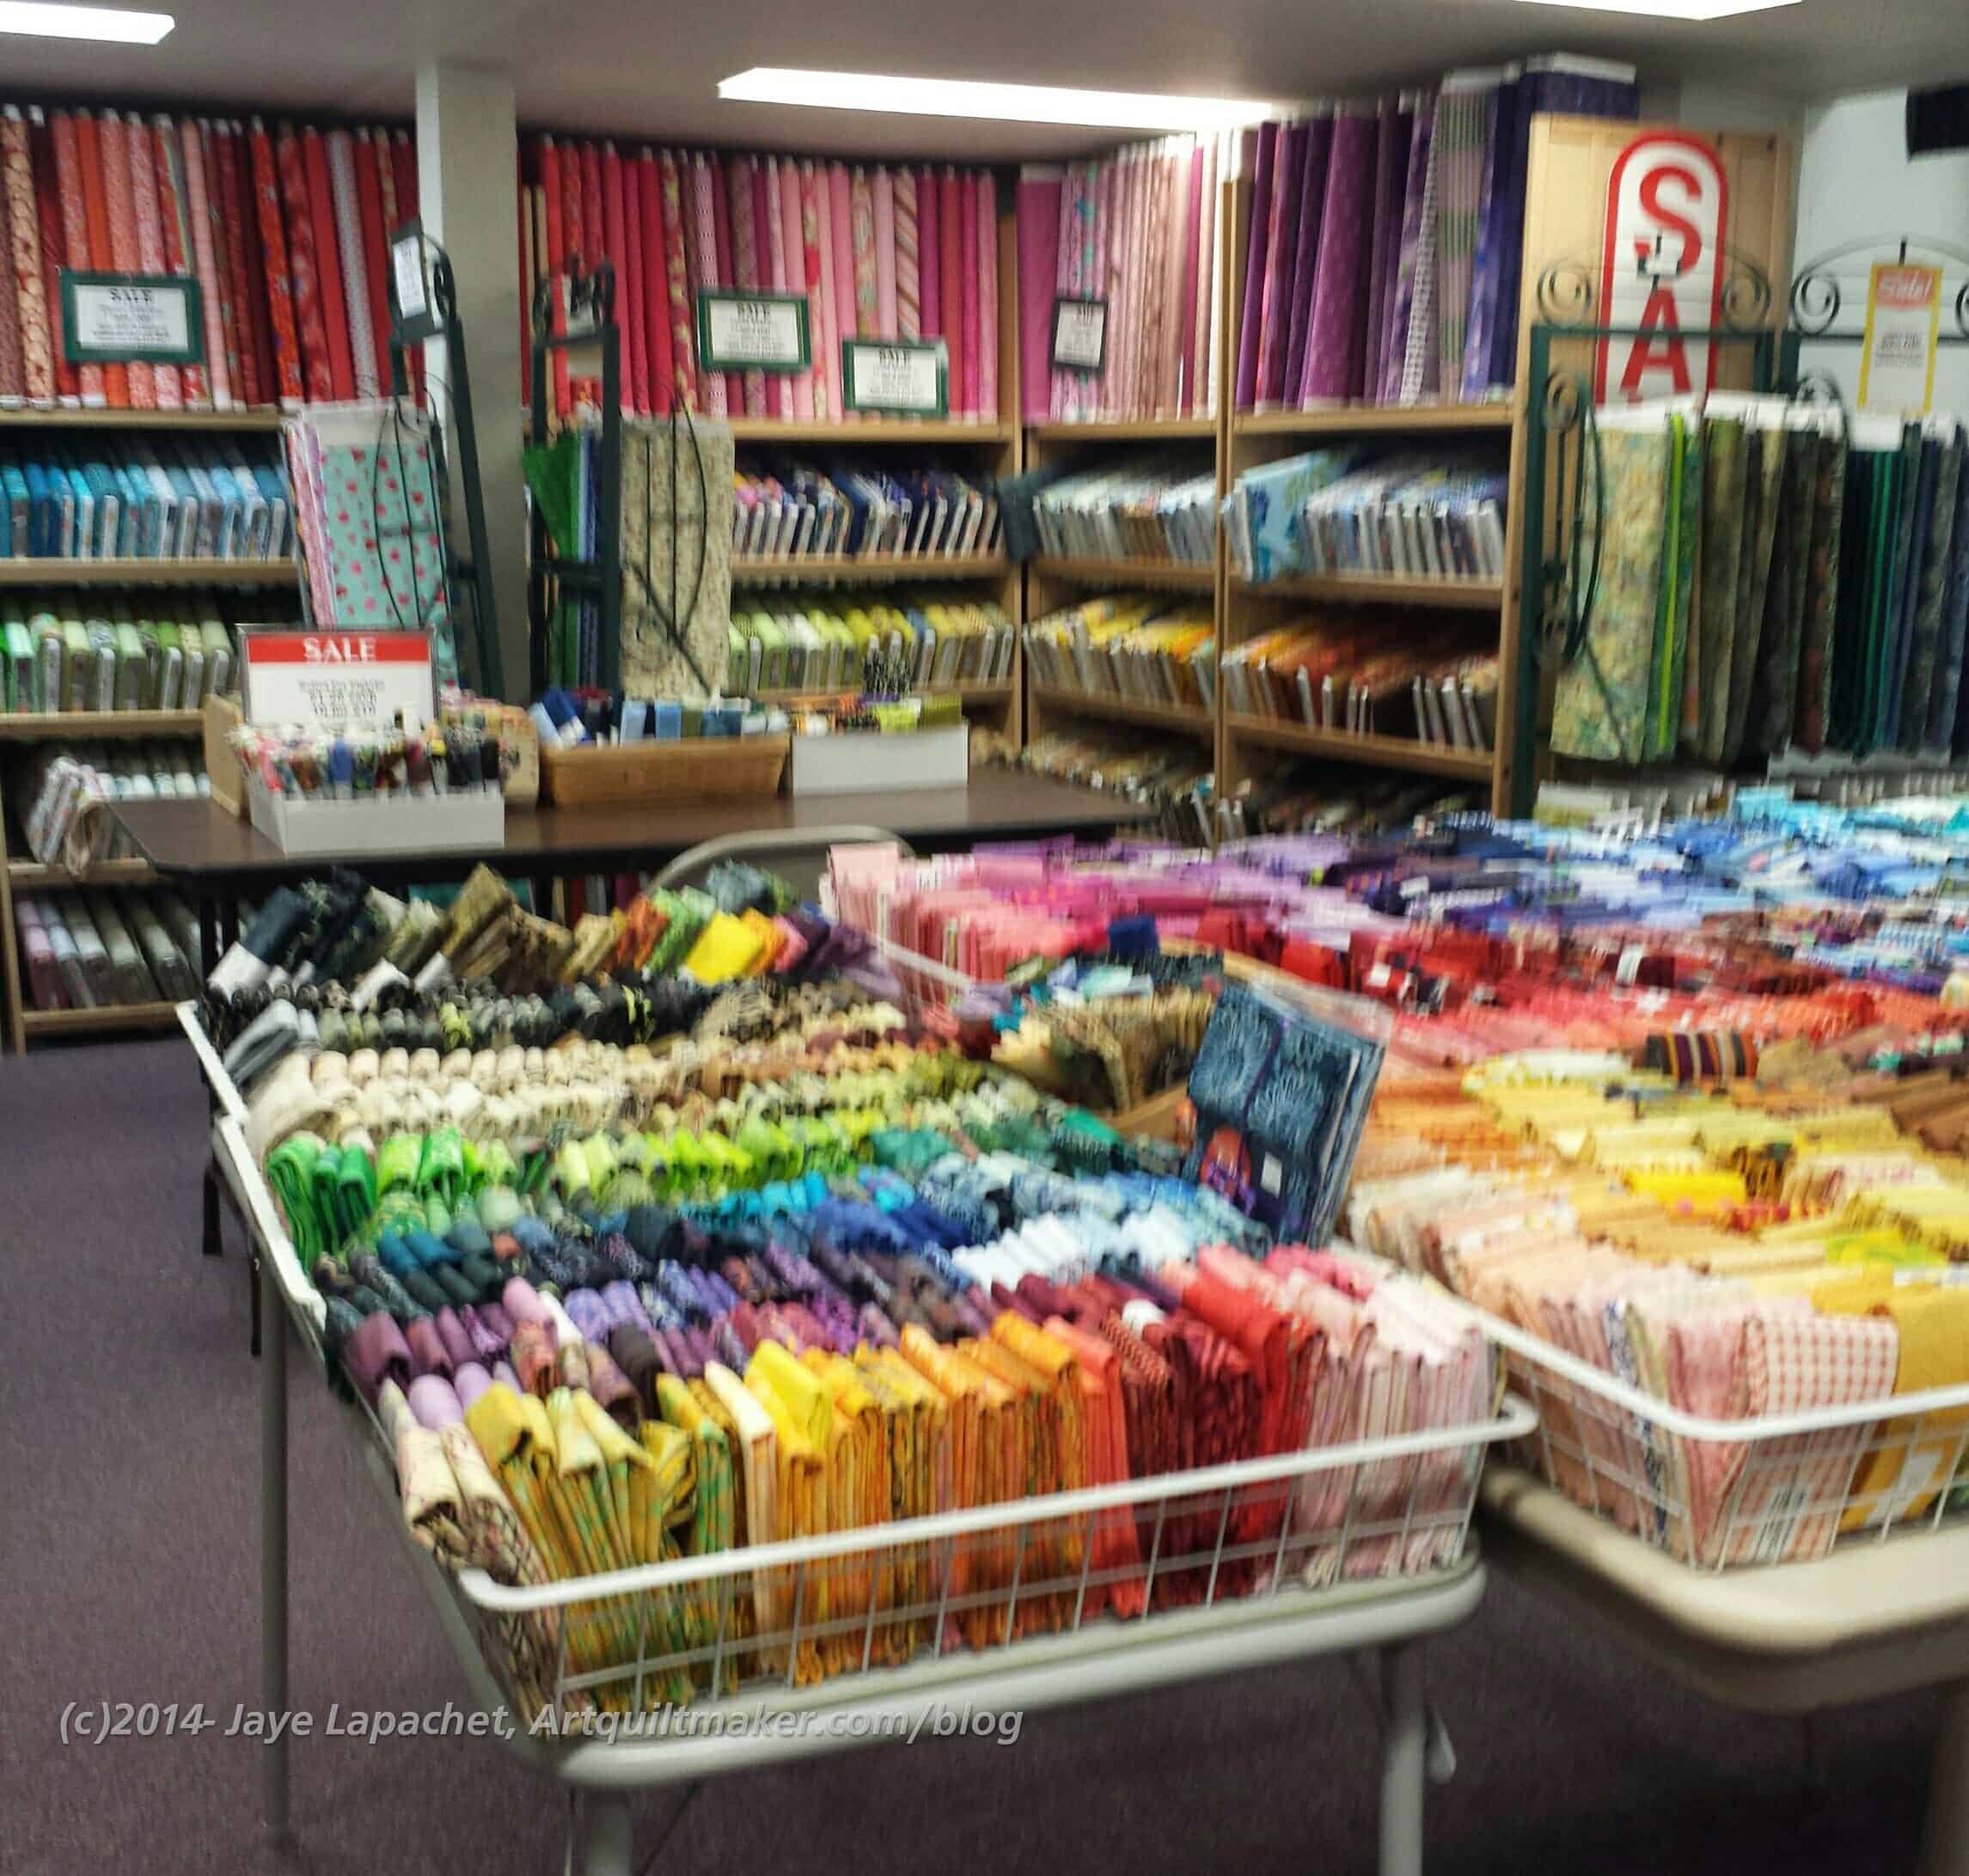
Quiltwork Patches FQs and Sale Fabric
If this looks like a lot of fabric, it is because there was a lot of fabric in this store. Their website says 4000 bolts and I believe it.
Quiltwork Patches across the front of the store
Location:
212 SW 3rd St, Corvallis, OR 97333
(541) 752-4820
I kept catching Mom in my photos!
*Nota bene: Mom and I ended up with what we think was food poisoning. We can’t figure out where we got it, but I was sicker than she and it was unpleasant.
If you have been playing along you know that I was in Portland (Oregon) with my DH over the weekend dropping our Y.M. off at college. It was a whirlwind adventure filled with moving in, then 2 days of orientation, some picking up the slack and then letting him go off on his new adventure living somewhere else and fending for himself. Sending children off to college is weird! One day they live with you and you are telling them to pick up their socks and the next day they live somewhere else.
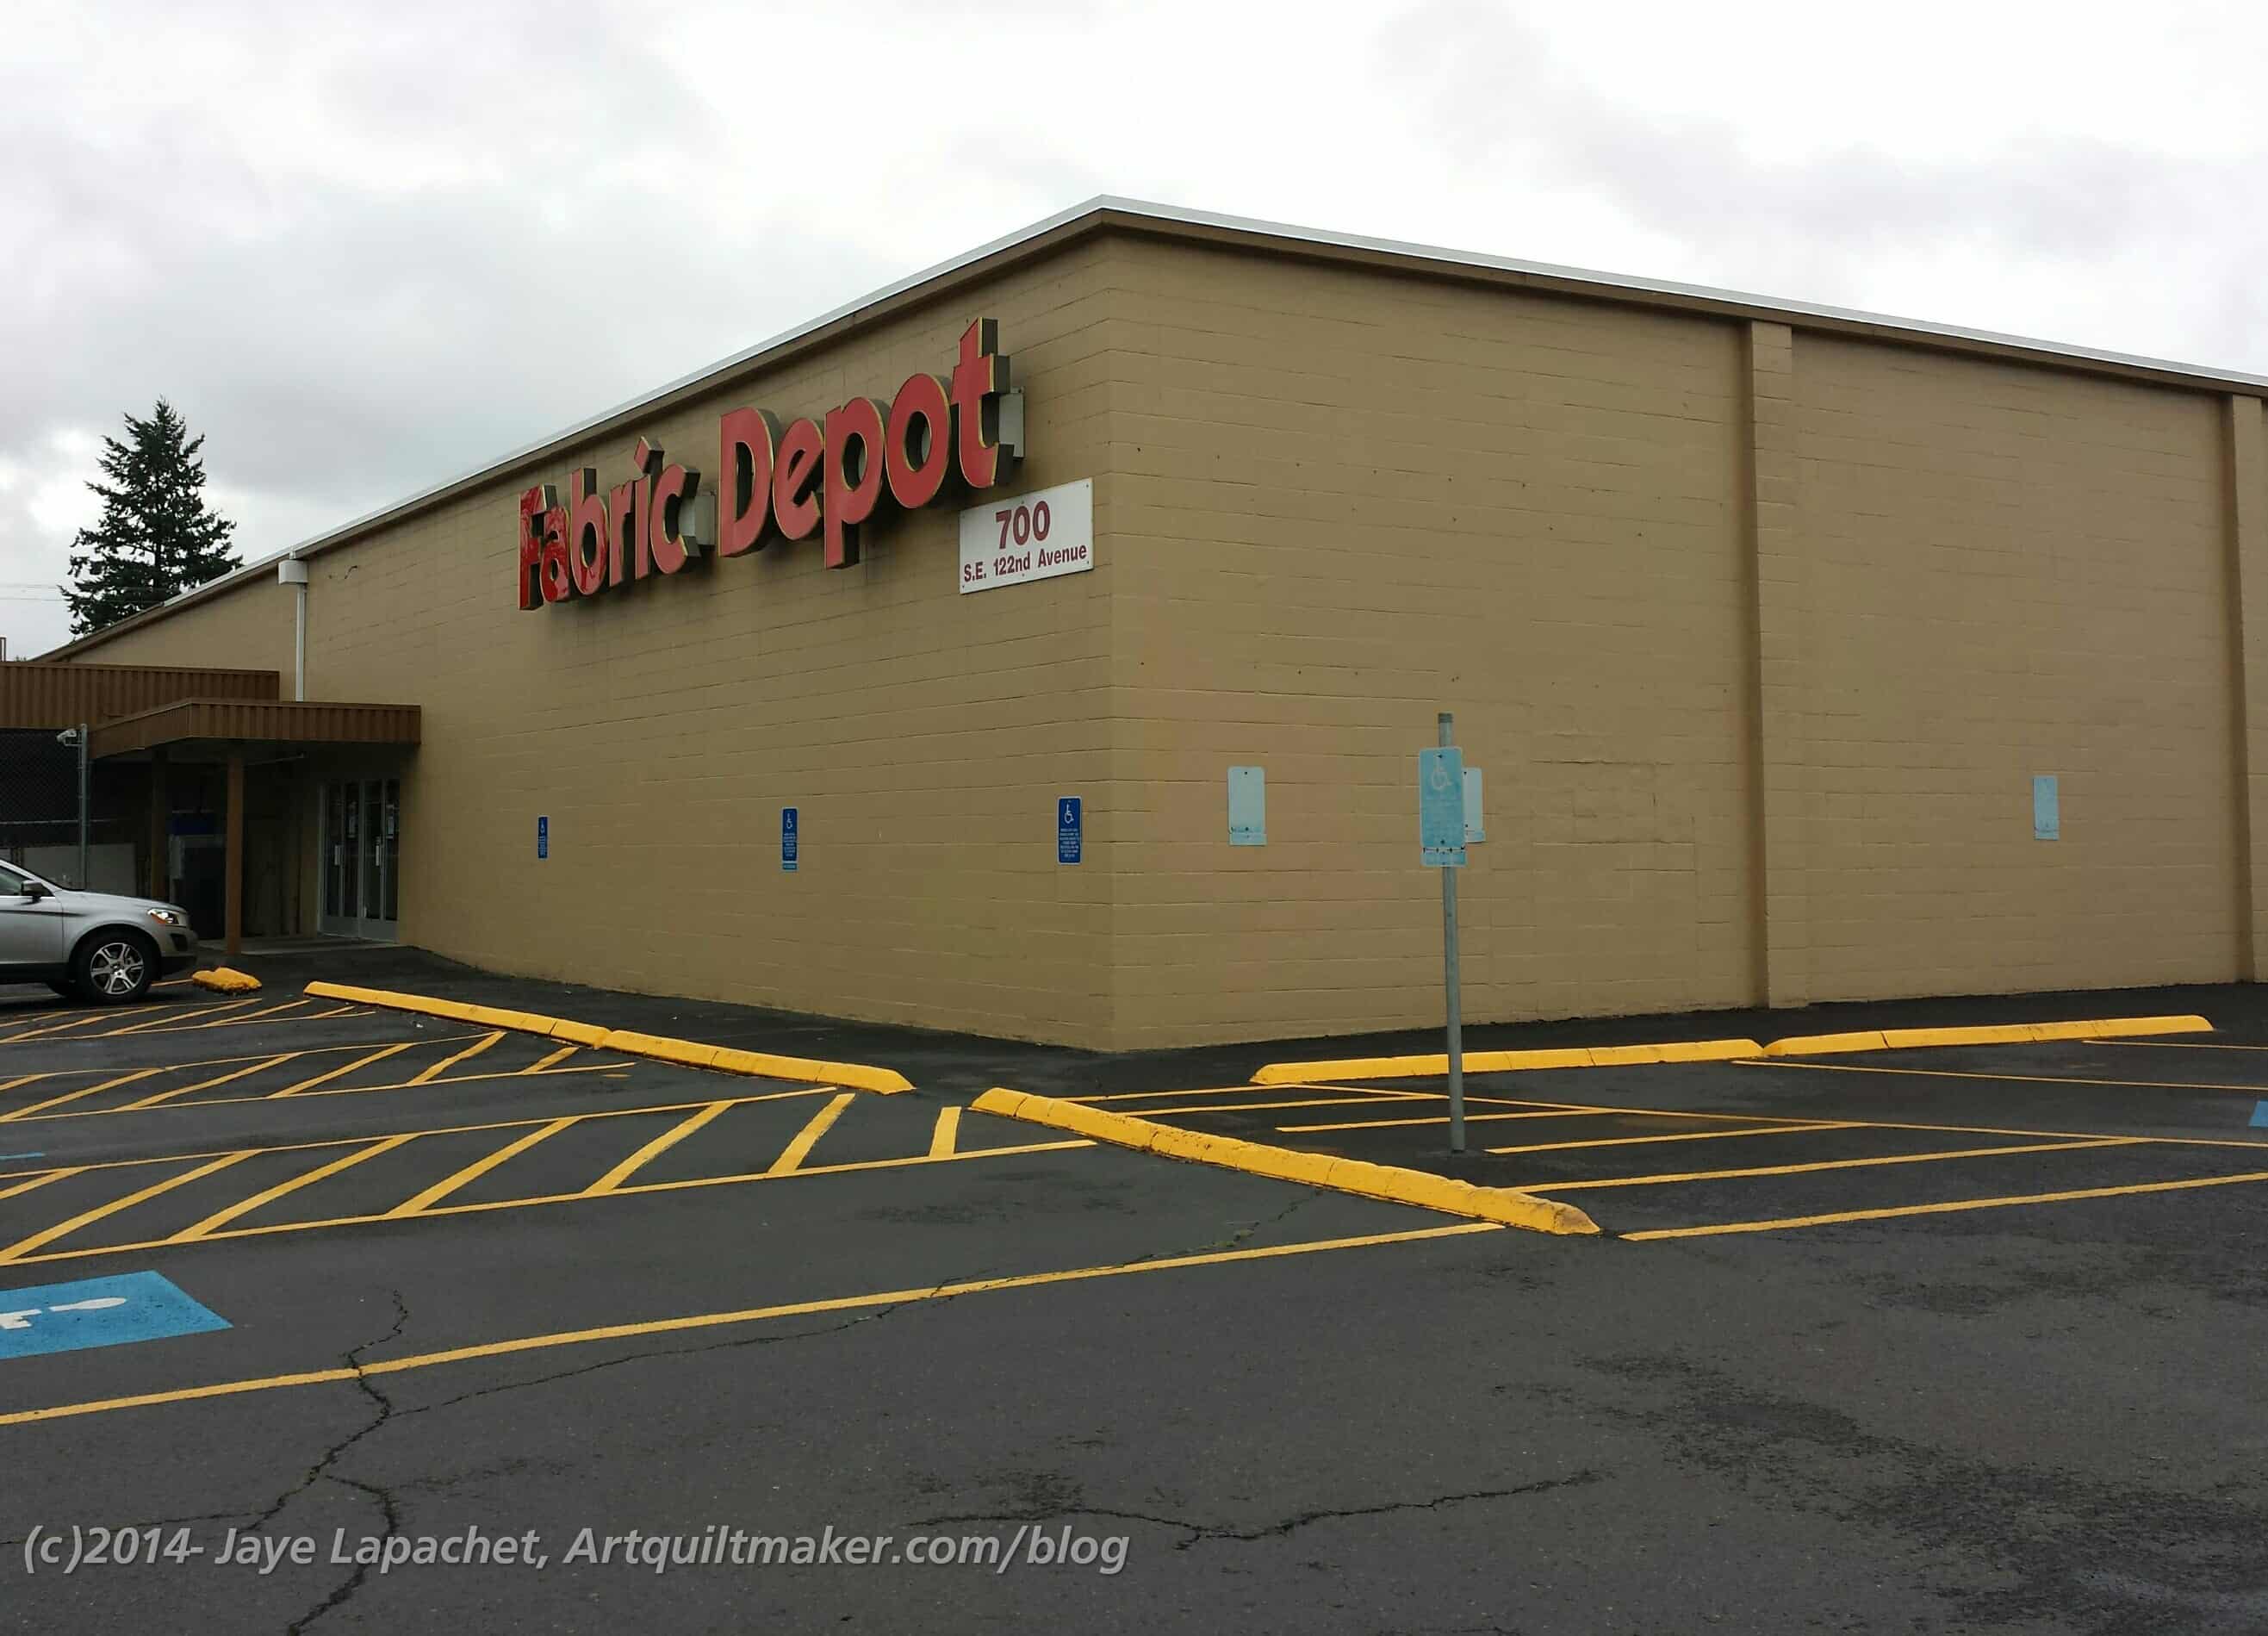
Fabric Depot, Portland, Oregon
My mom flew up to drive back with me and while I was waiting to pick her up at the airport, I went to a shop that Tanesha mentioned, in one of her podcasts, called Fabric Depot.
OMG! This place is so enormous, I couldn’t even, while I was in the store, understand how large it was. Conservatively it was the size of 3 Safeways. I think. It was so big that I couldn’t even begin to think about seeing everything. Truly. I am not exaggerating.
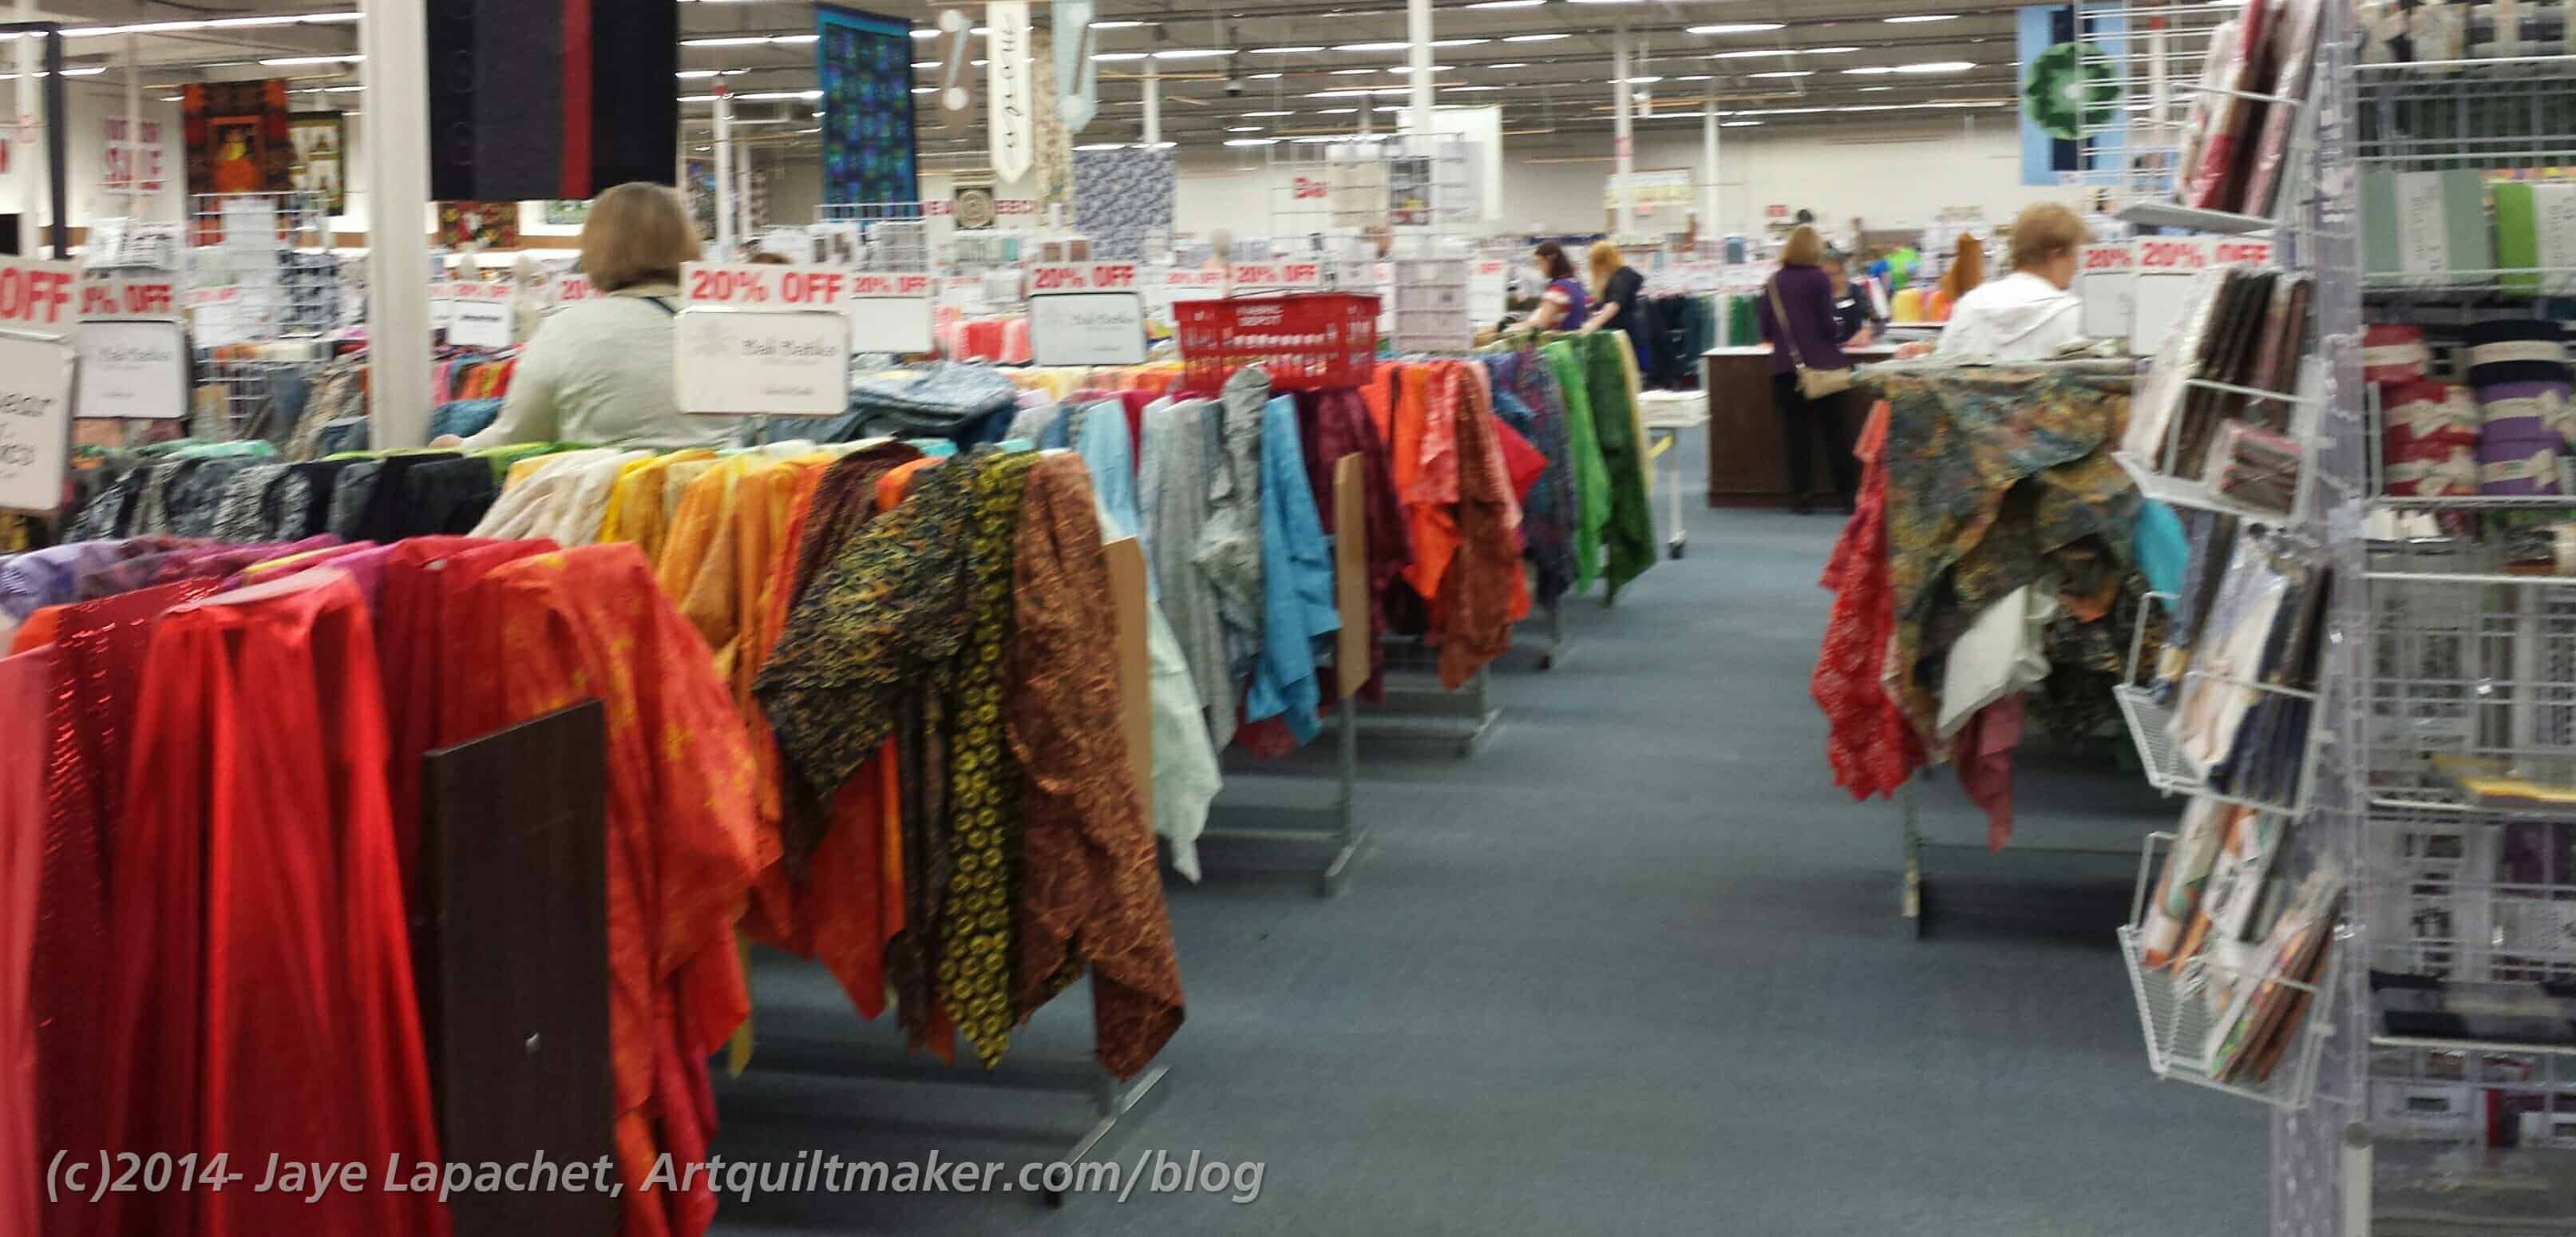
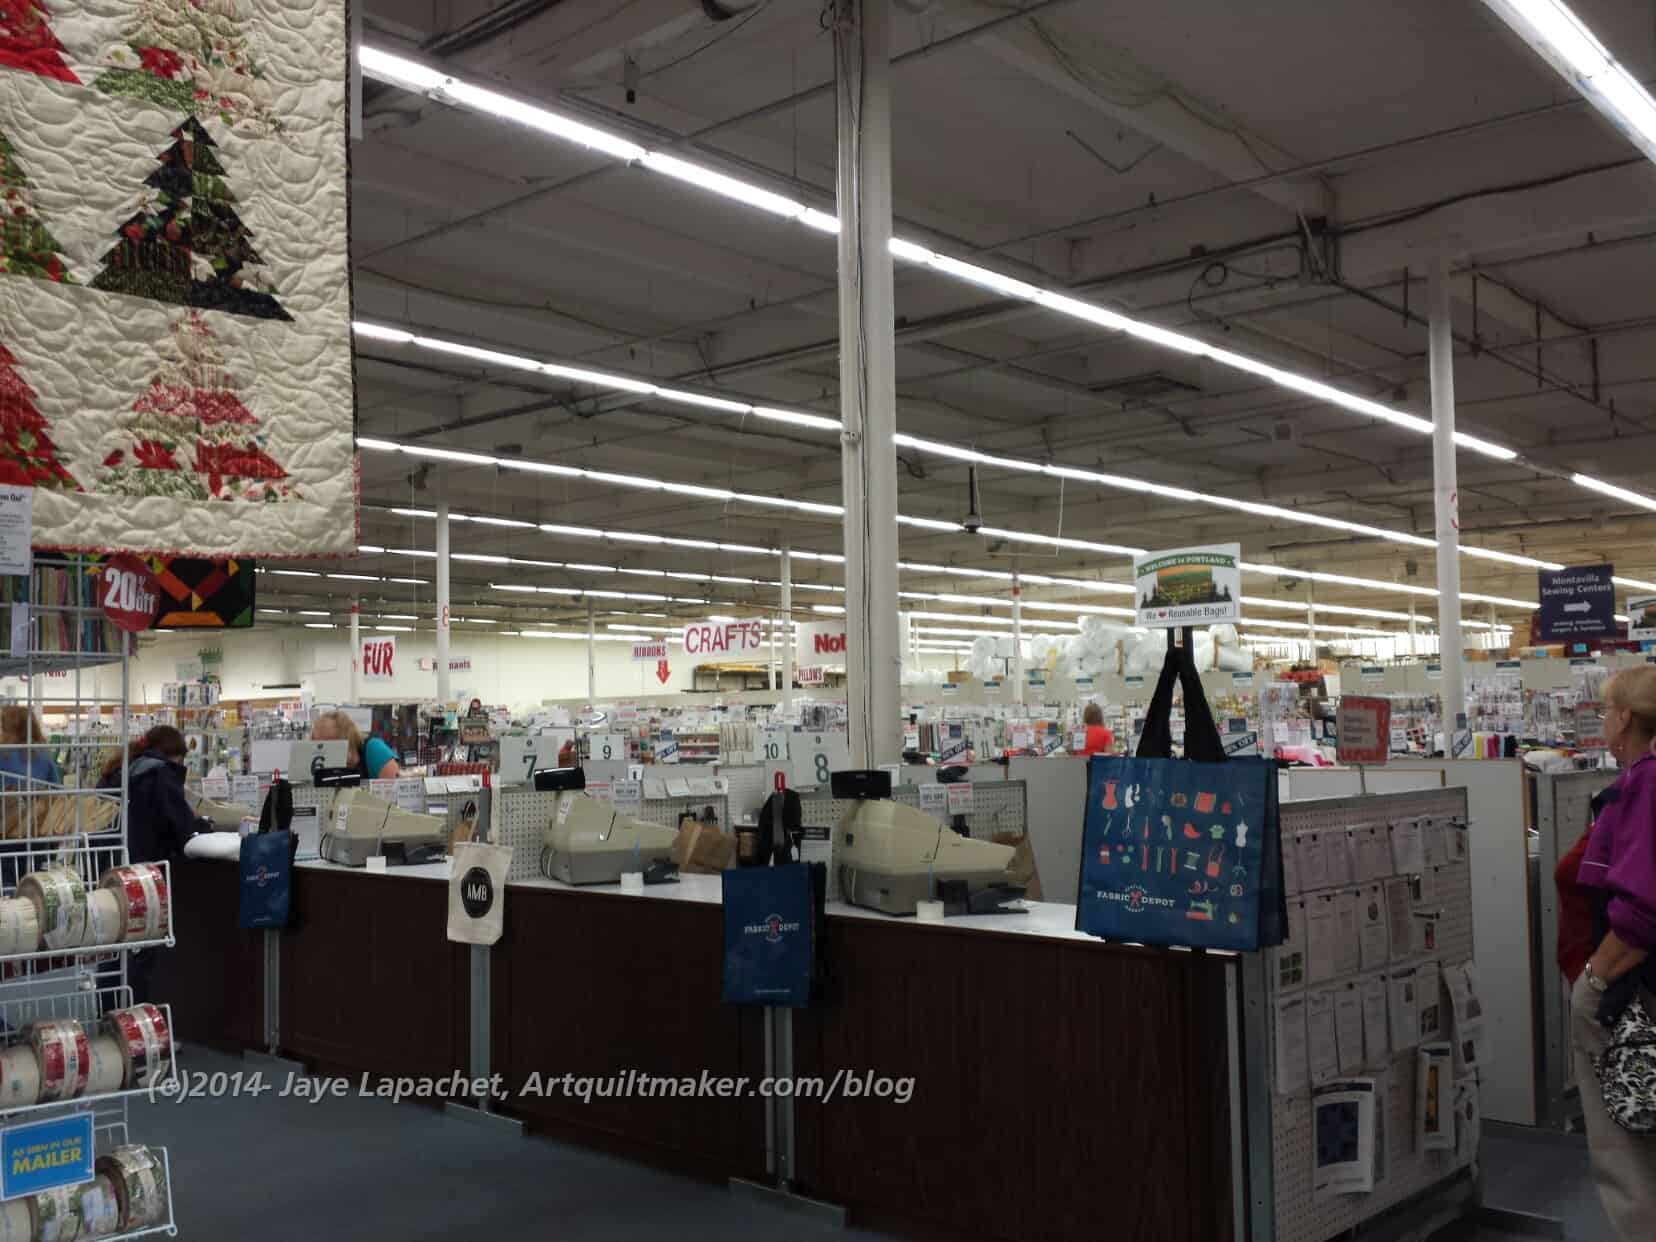
Truly enormousTruly enormousTruly enormous
The three pictures above are the view from where I was standing when I walked in and got past the husband area. The three pictures show the vastness of the space. It is a store you have to go to with a bag lunch and plan out to look at one corner, then go back that next week with the same idea in mind.
They had everything new that I have been hearing about. I saw April Rosenthal’s Meadowbrook line, which I thought I would buy, but I ended up not buying any. They had charm packs and layer cakes, but I didn’t like it enough to have the desire to make something with it.
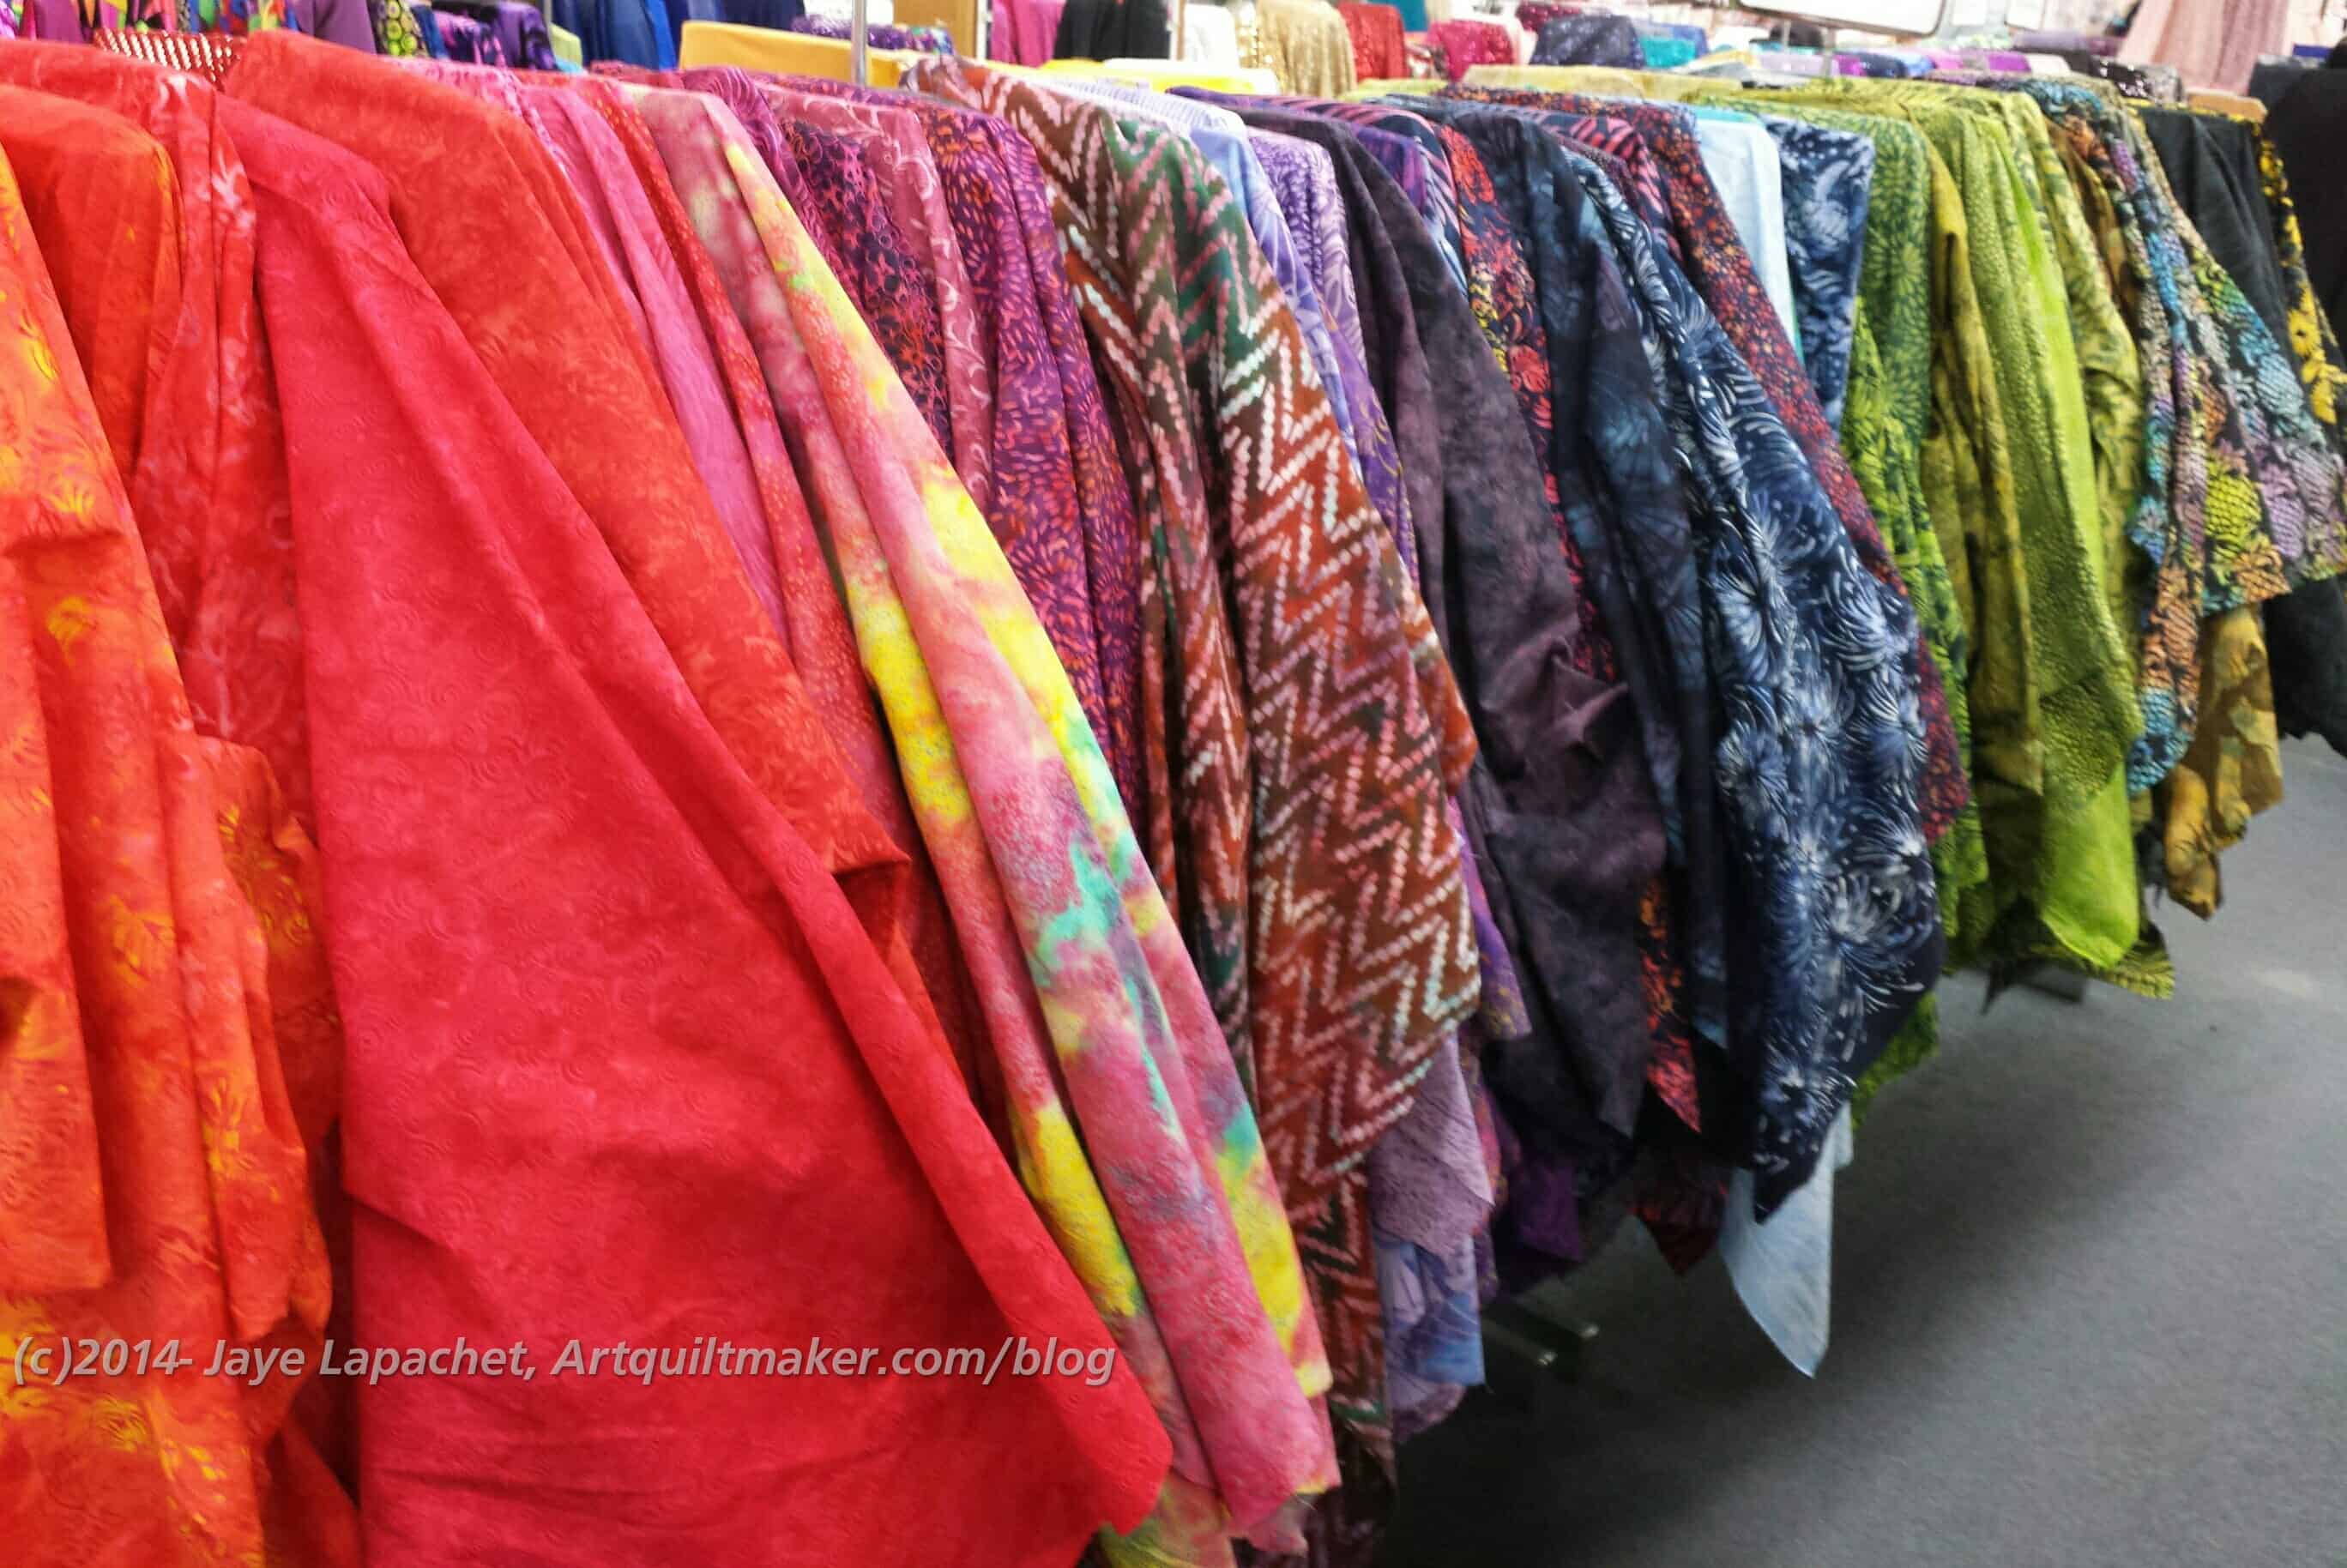
Draping fabric
The other thing I noticed is that they drape the fabric like House of Fabrics, etc used to do. It is a great idea, because you can really see a lot of the motifs on the fabric.
The fabric shown left is a row of batiks. There were about 10 rows of batiks that I saw.
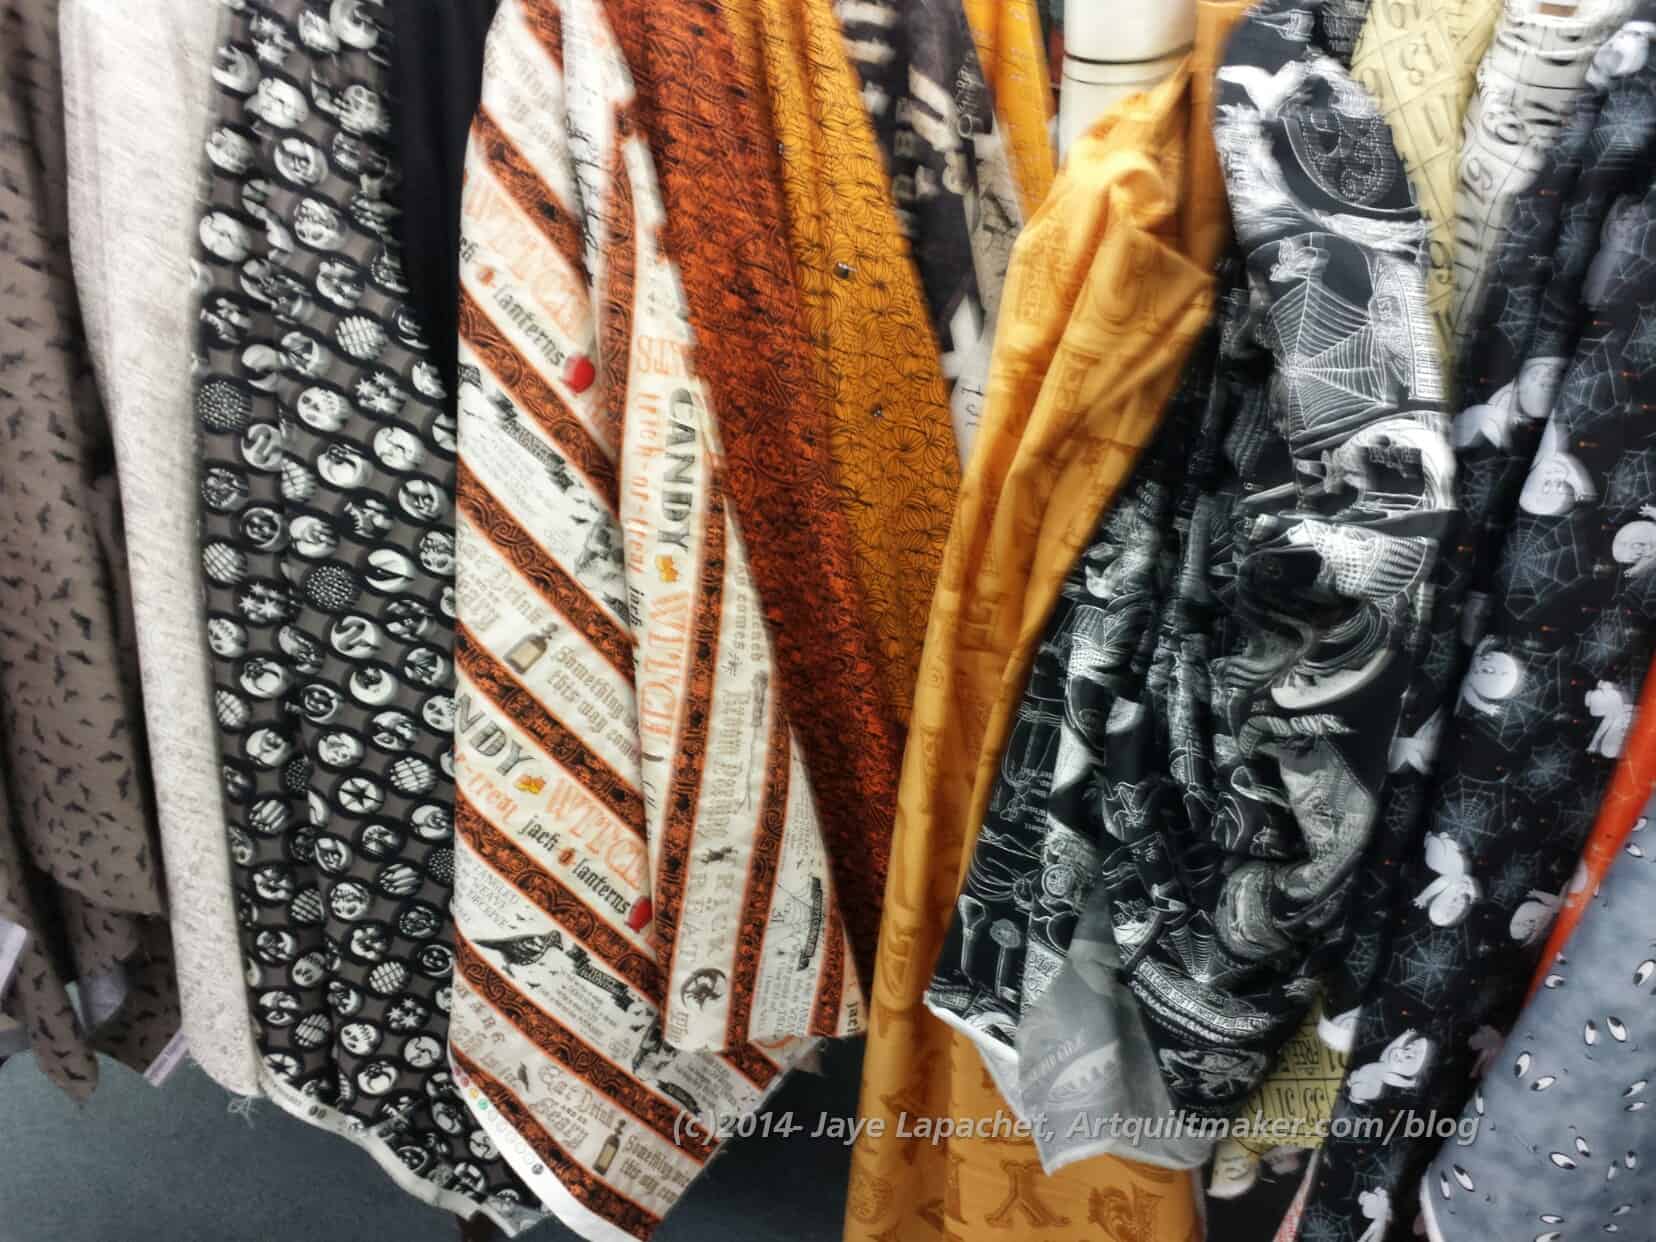
Hallowe’en fabrics
Julie would be thrilled with the Hallowe’en selection they had. I never saw so many interesting Hallowe’en fabrics! I bought some panels to make the Young Man and his two (yes, TWO, count ’em two!) college roommates Hallowe’en pillowcases. I already made the YM a Hallowe’en pillowcase, but hopefully he will change his sheets more than once in October.
There was a little boy with a 4 week old puppy walking around the store showing off his puppy. He wanted everyone to pat the puppy. I got to pat the puppy twice. The boy was about 4. OMG! They were both so cute.
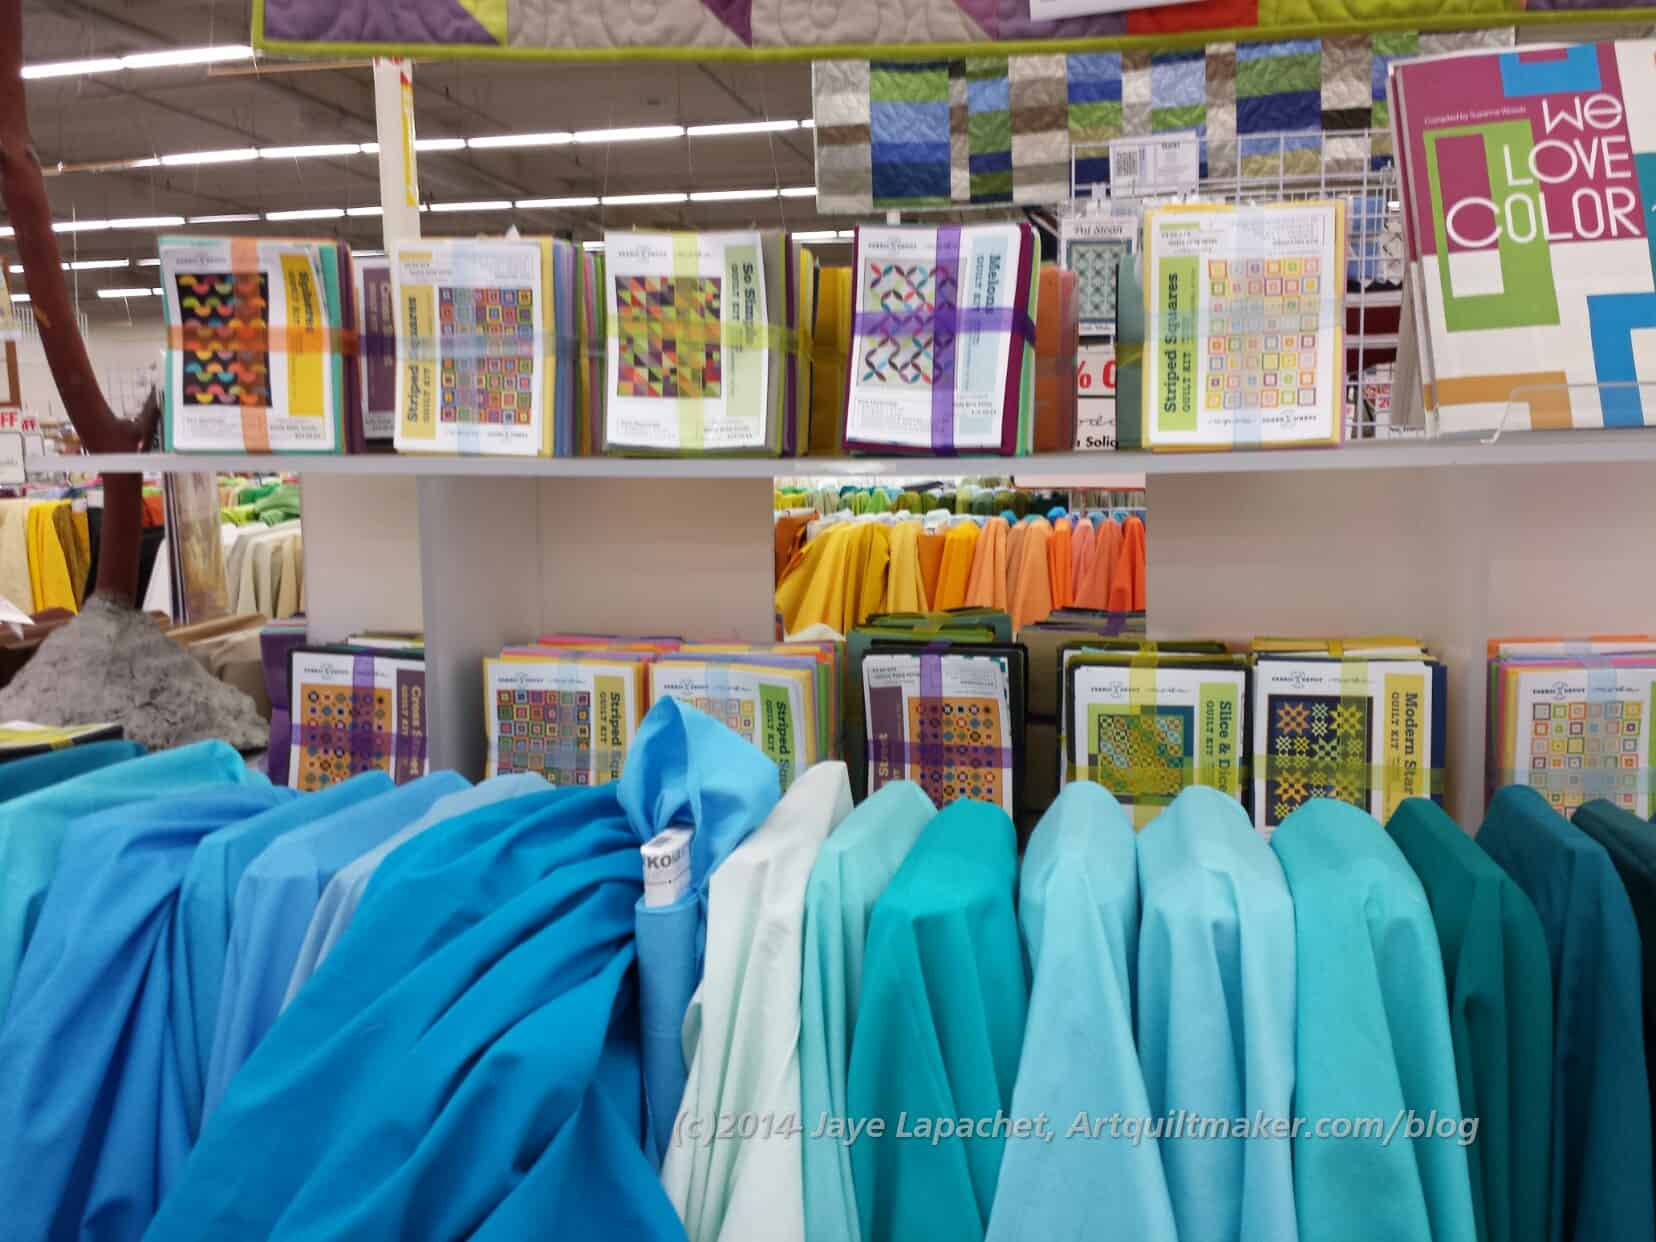
Color Kits
In addition to a zillion pre-cuts, they also kits made up from their own designs or from local designers.
There were a lot of different ideas in this area and they all used solids.
The store had an excellent selection of solids. They had the ubiquitous Moda Bella solids as well as the Kona Solids. They also had the Michael Miller Cotton Couture solids and a few of the American Made Brands solids. It was great to see such a selection of solids.
There were also packs of solid colors with color related patterns prepackaged and ready to grab and go.
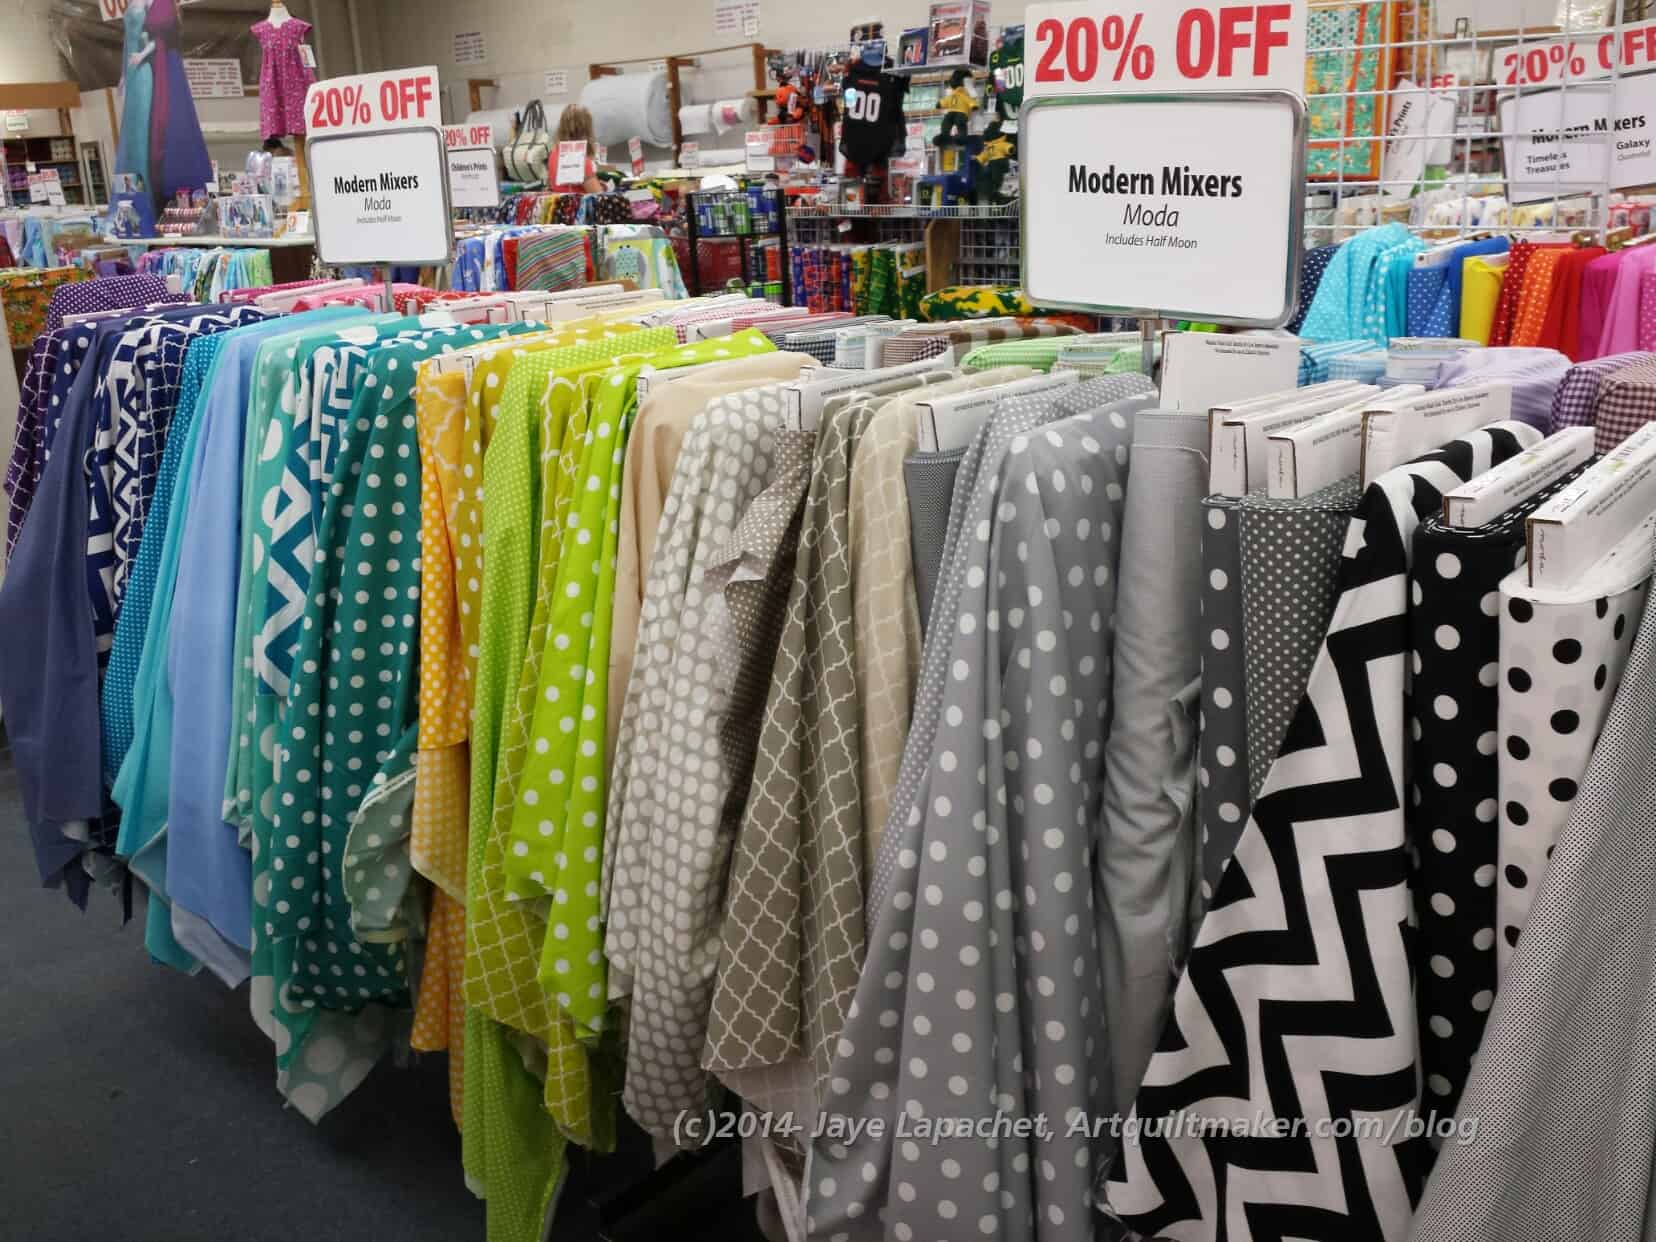
Moda Modern Mixers
I saw a group of fabrics called Modern Mixers. I love the name of these fabrics and wanted them all. They reminded me of Half Moon Modern (and that I have to find something to do with those fabrics!). There may have been some that were in the Half Moon Modern group.
I did buy a couple for some more Political Wifery/work outfits.
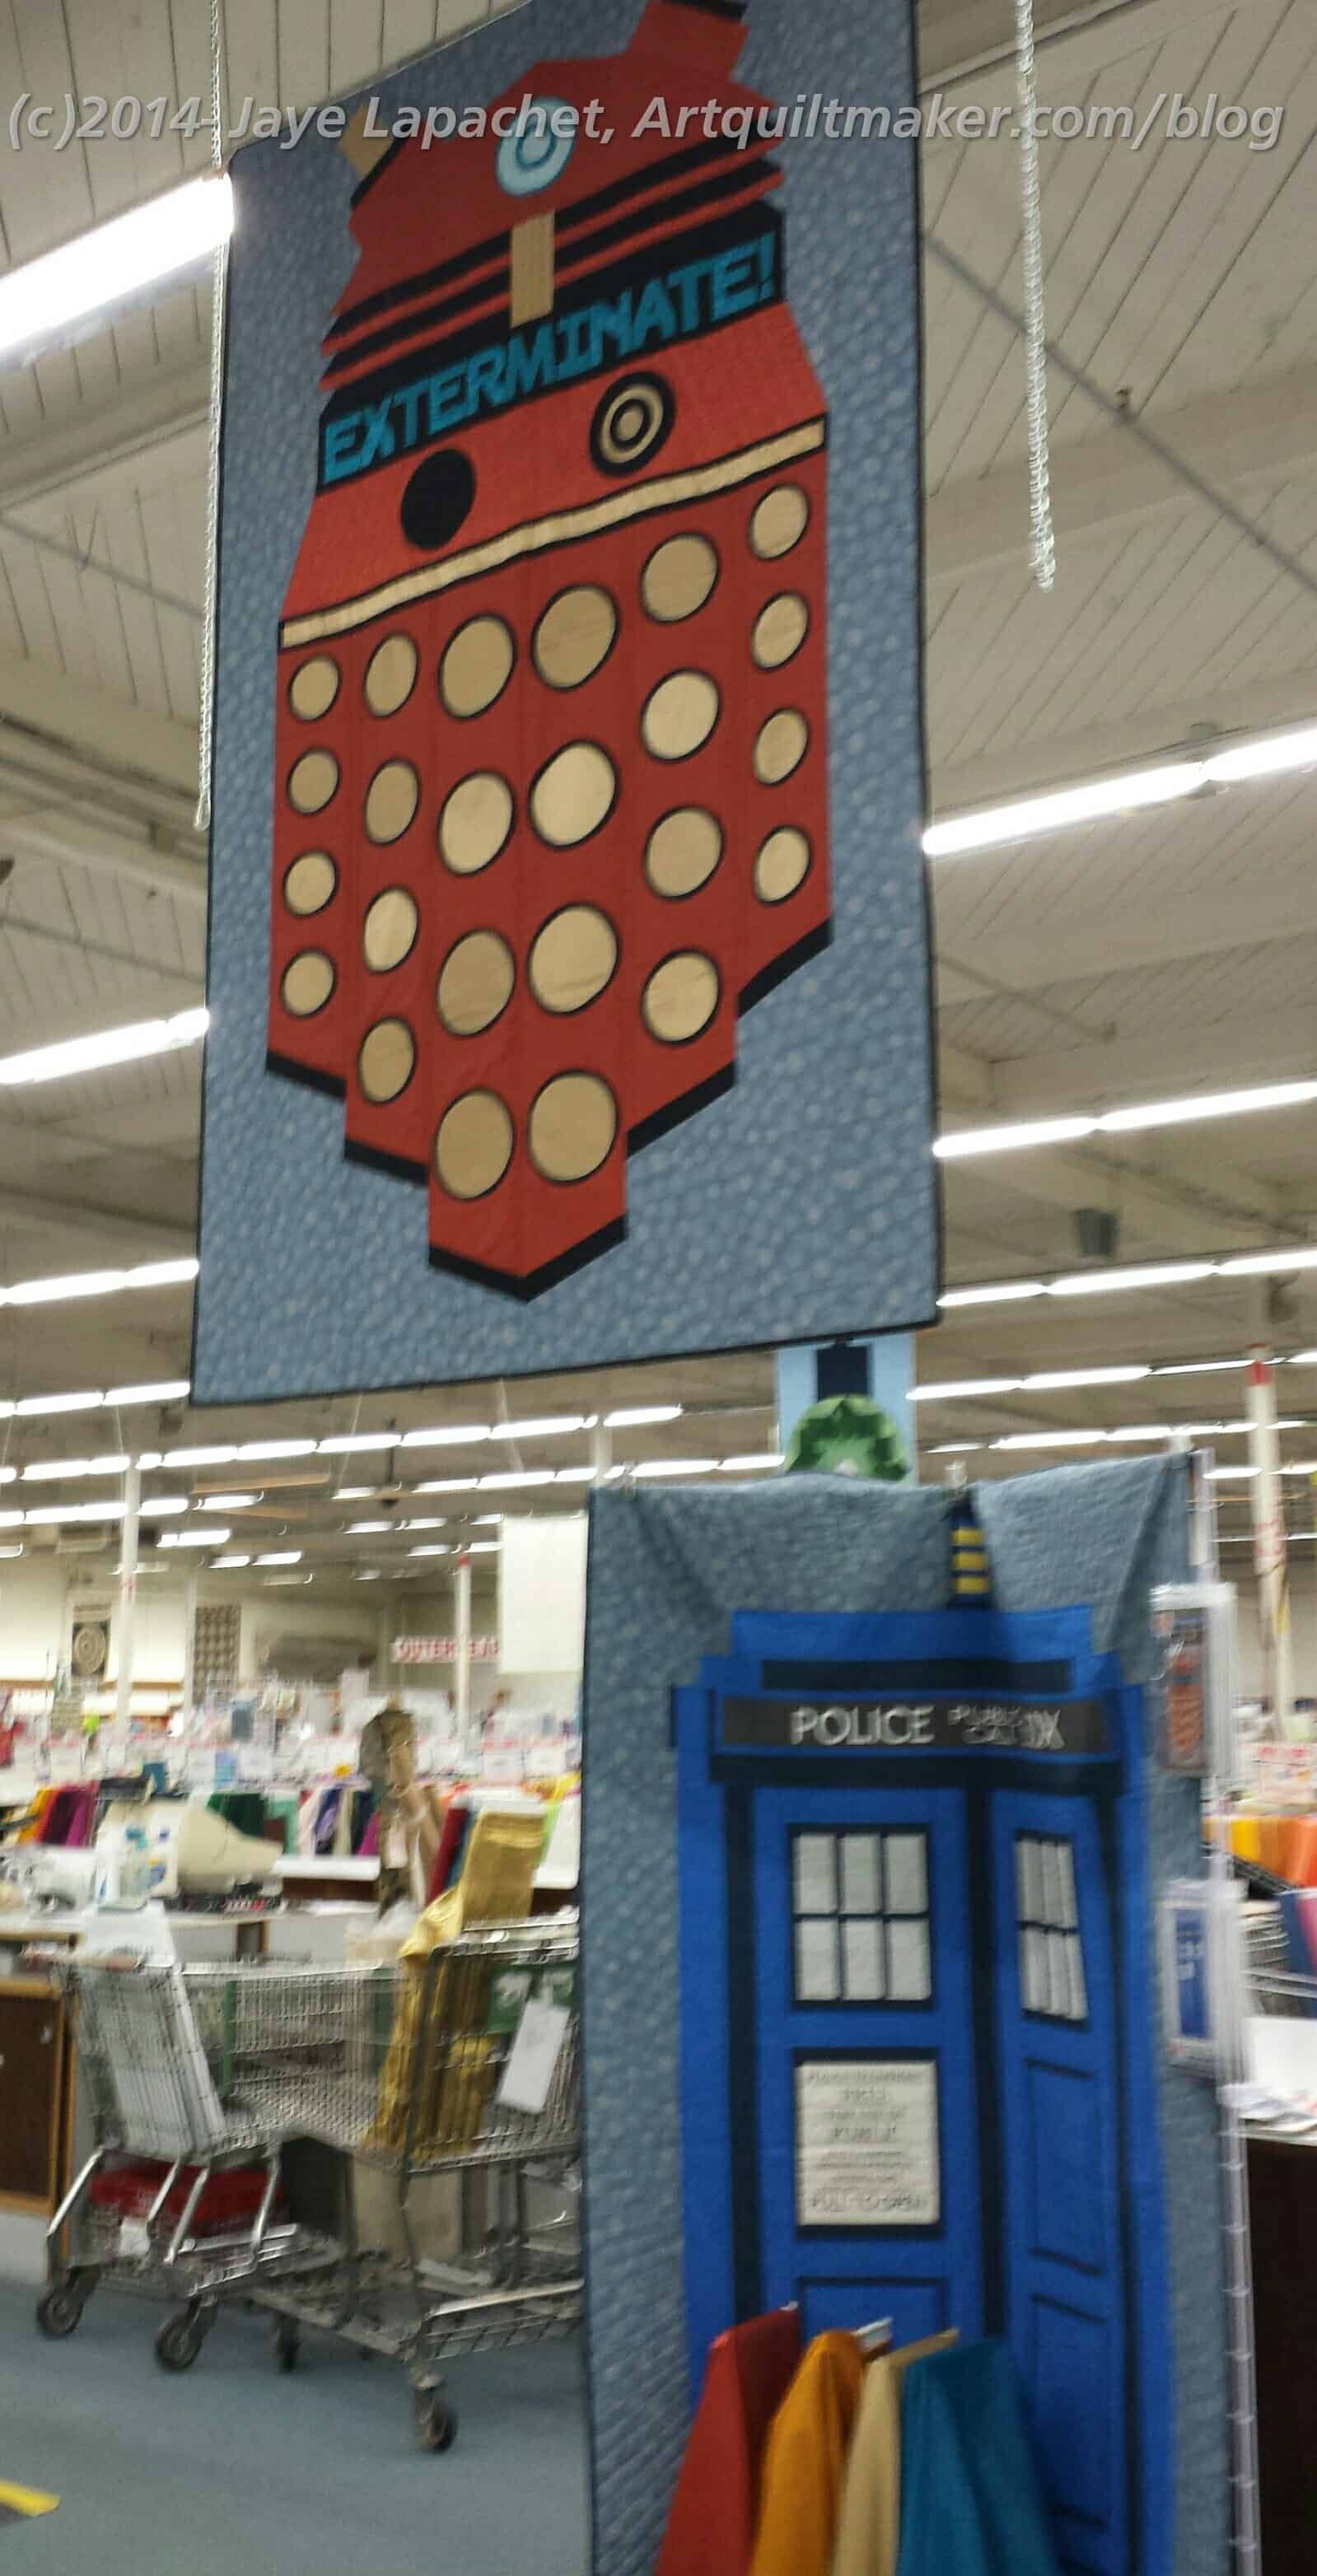
The store also had some great displays. I loved the quilts they had hanging up including one from Dr. Who.
Dr. Who etc Display QuiltsFabric Depot Display Quilts
I have noticed the Jack’s Chain pattern (above quilt with green background) showing up in shops and on the web lately. I have loved that pattern since I saw it in the Cotton Patch a thousand years ago. Perhaps it is time to make it?
Fabric Depot Purchases
I didn’t have a lot of time, but it is probably good since I would have spent more money. I bought a few things, mostly they are earmarked for projects. Fabric Depot had a great selection of zippers, which were on sale. I took the opportunity to stock up on a few for dresses so I don’t have to go rushing around when I need them.
The store was definitely worth a visit and I will go there again when I am in Portland another time.
Last weekend, I went with DH to Southern California for the NSGW SoCal Weekend. They have it every year and this is the first I have attended. I think it was the first time for DH as well. The official events were two dedications, an initiation and a banquet with a local councilman as a speaker. We also went to a luncheon celebrating the $55,000 that the Natives donated this past year to St. John’s Hospital to help the treatment and research of cranio-facial anomalies such as Cleft Palate. This is part of the money we raised at the Hospitality Suites with the NSGW embroidered pillows. DH also took the opportunity to audit the books of two parlors (chapters).
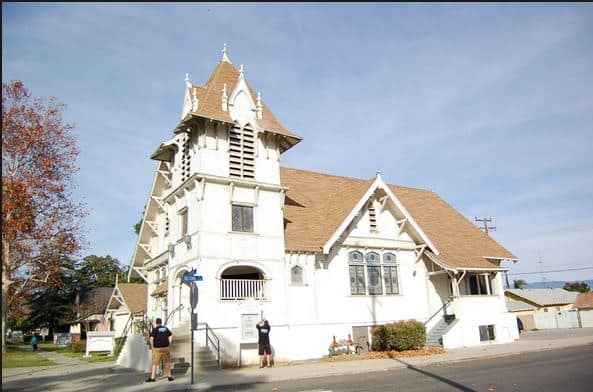
Rialto Womens Club
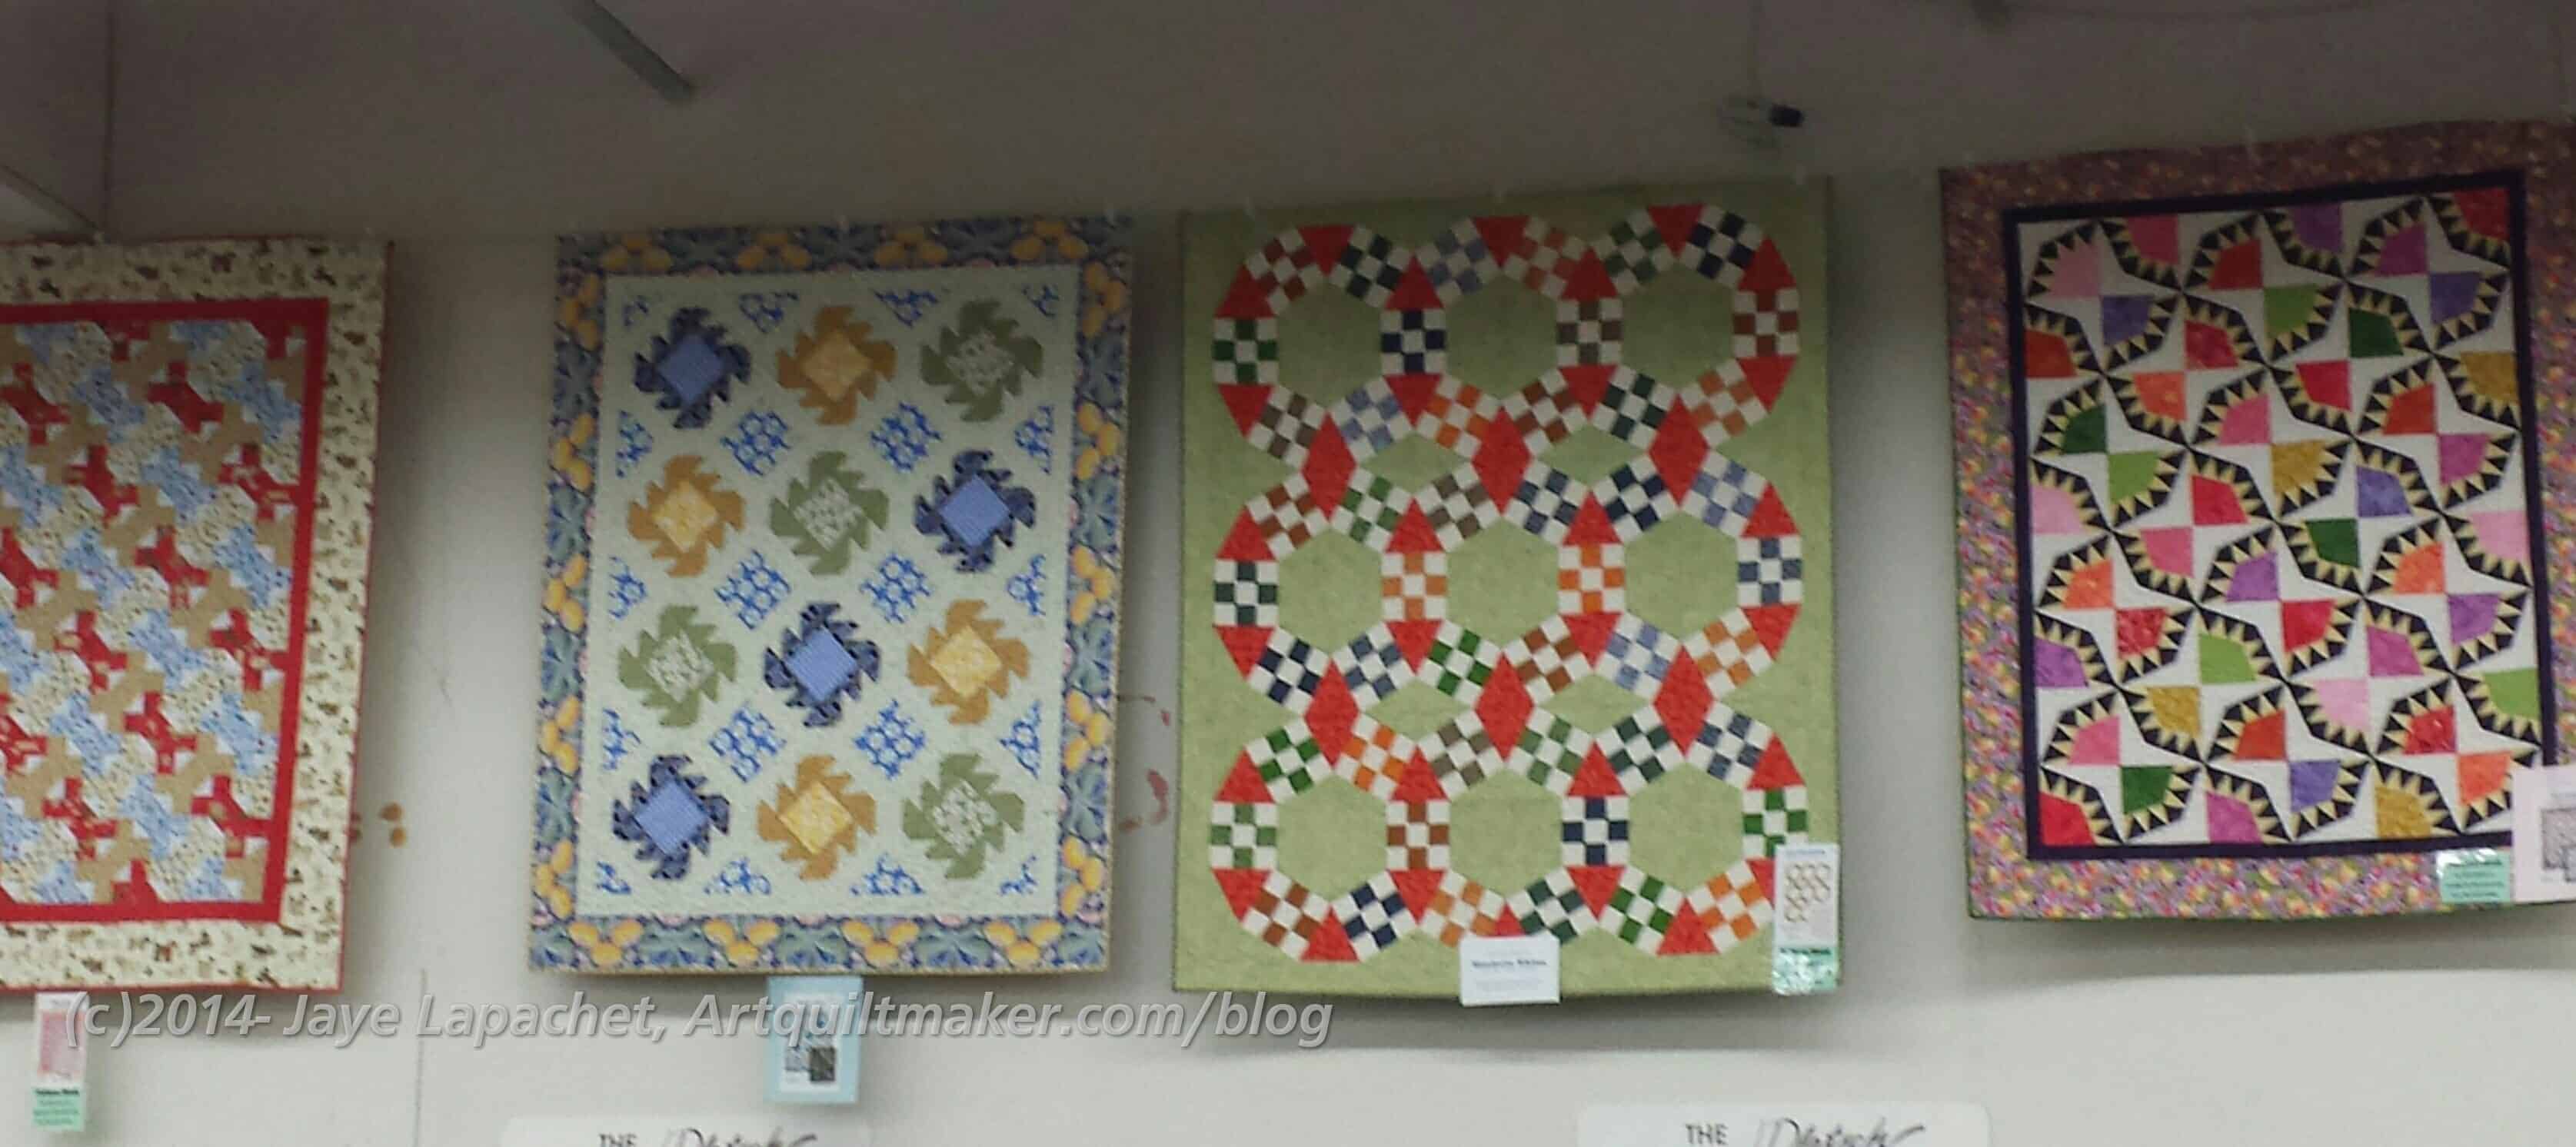
The Order dedicated the Rialto Women’s Club and the Rialto Historical Society. After the dedication was over we took some time to look at the historical society’s collection. Of course, I was interested in the quilts.
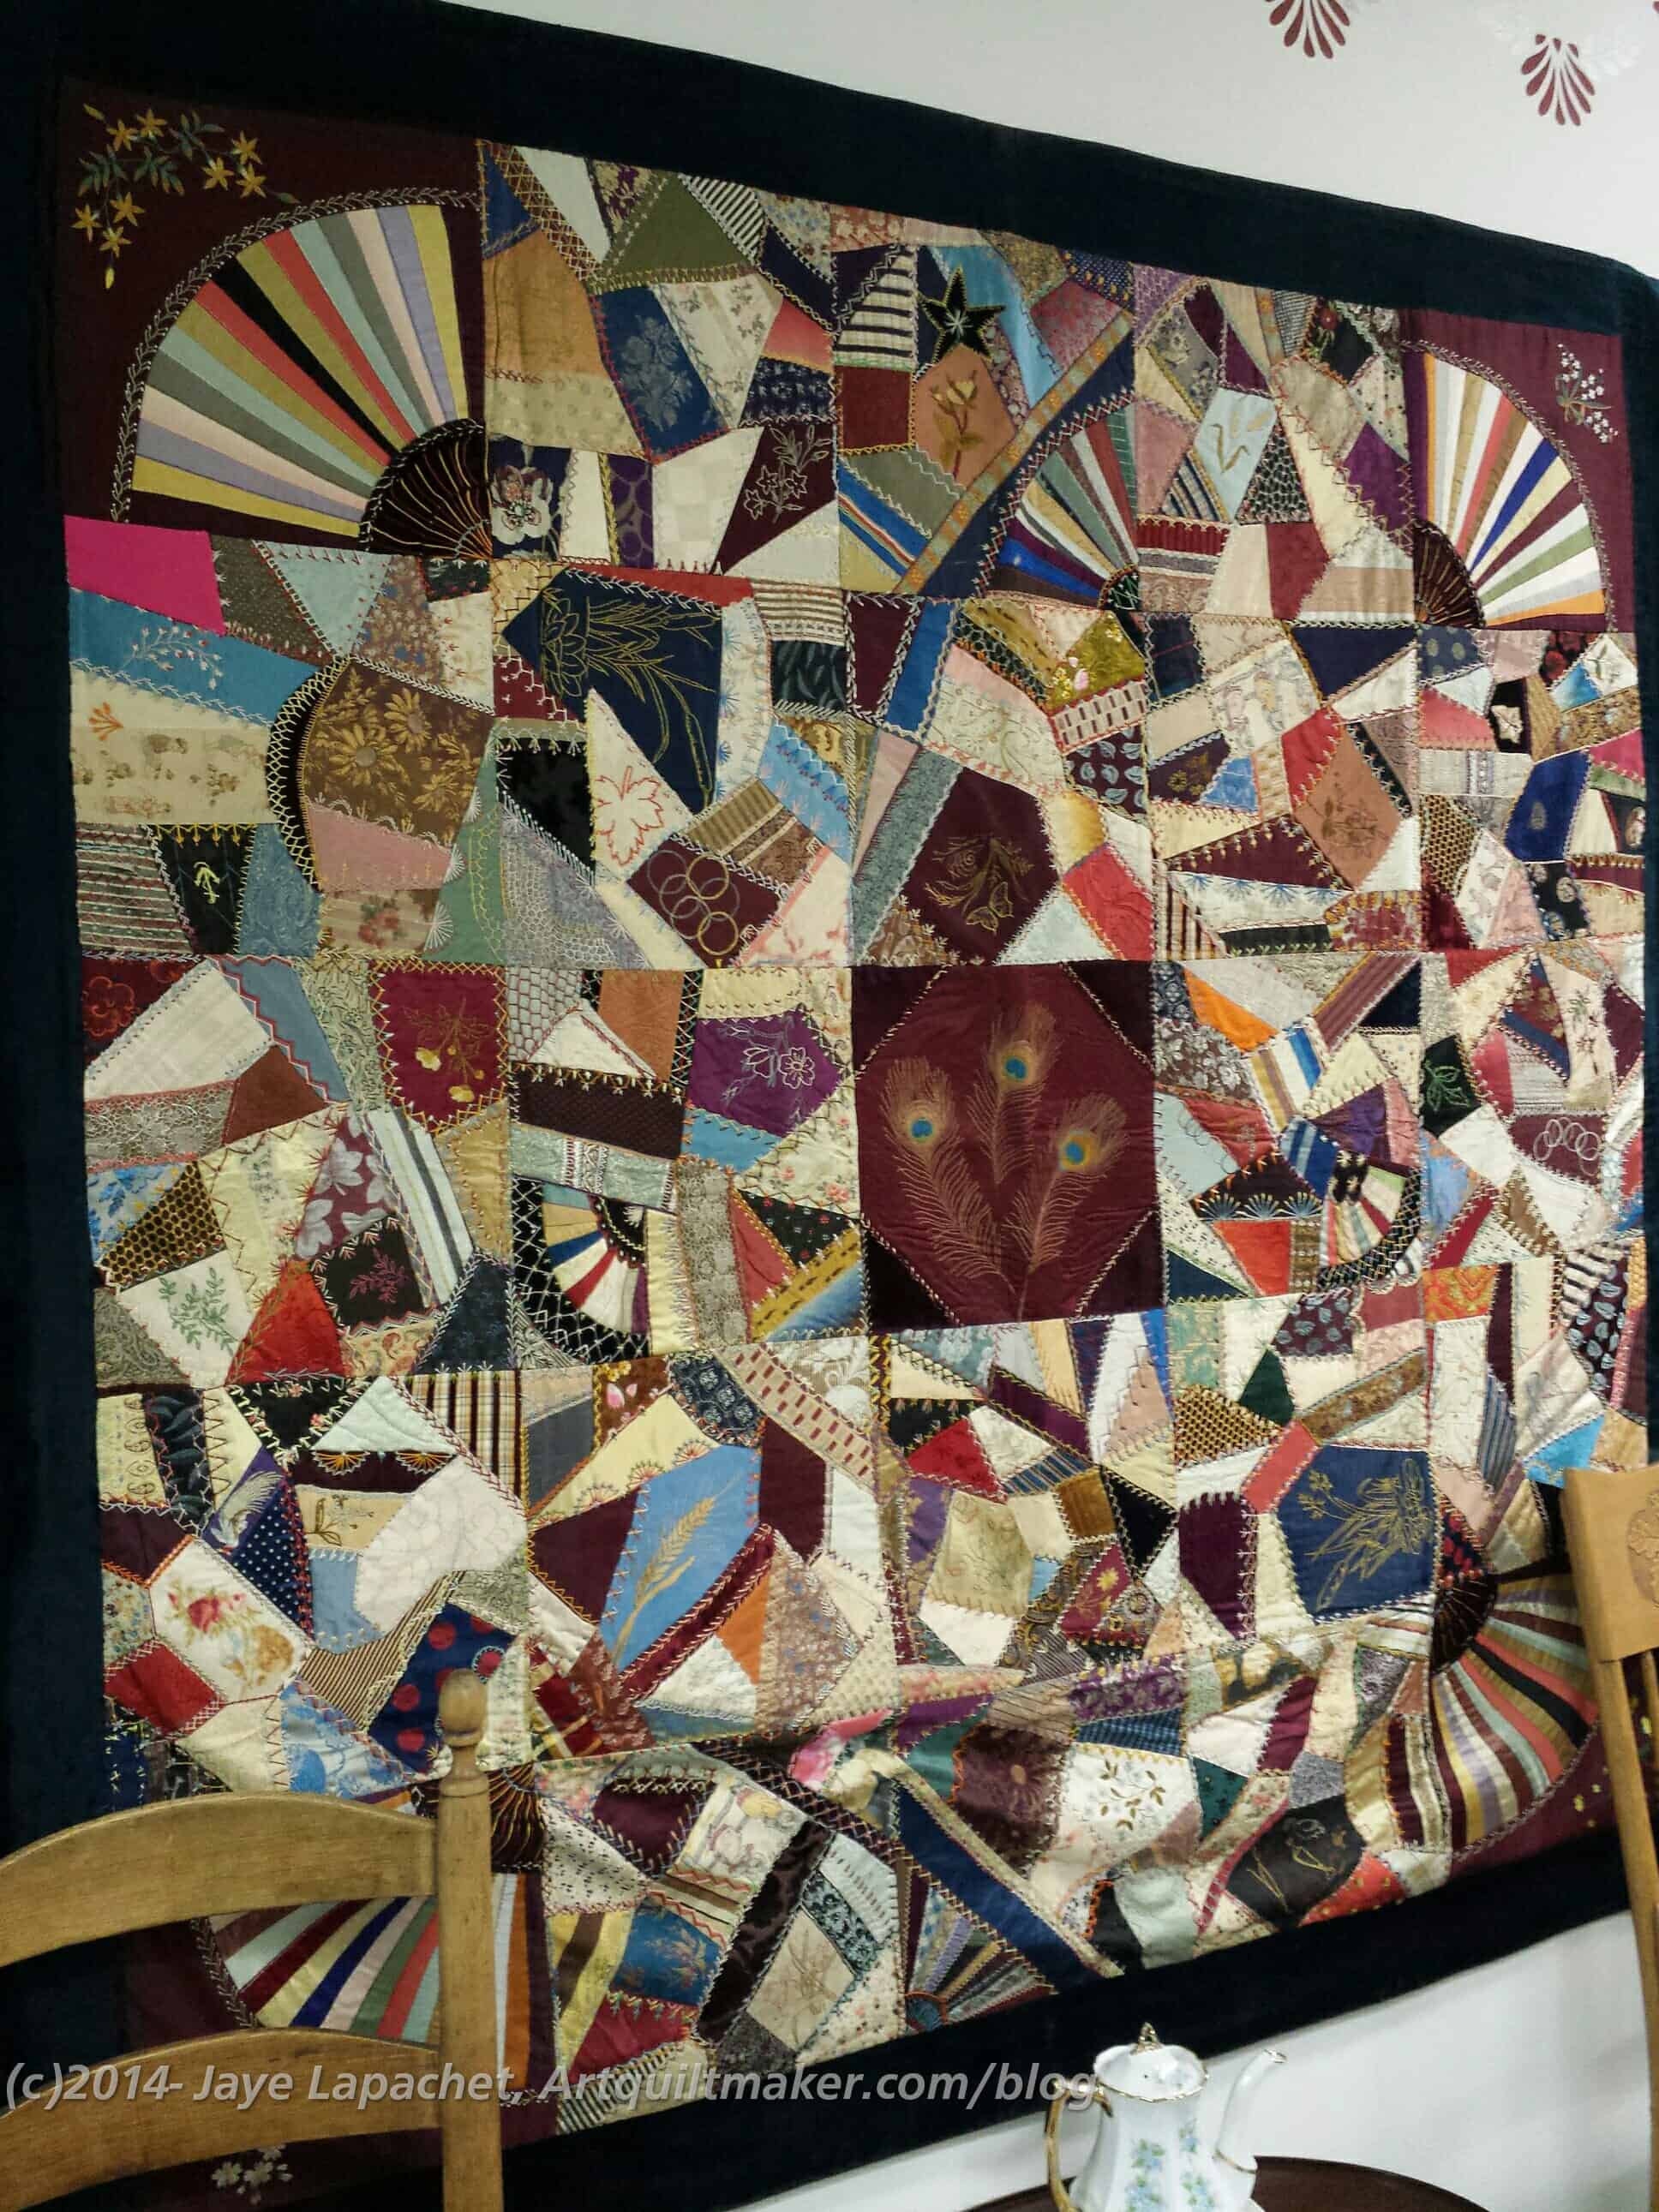
There were a number of crazy quilts, one was in very fine condition and displayed very well on a covered board (for stability) and hung on the wall.
RHS Crazy Quilt
I really couldn’t believe what excellent condition this quilt was in. I don’t know if it had been restored or not. I suspect it had, because there was no damage at all and you know that the silks of that time were full of lead and thus very prone to disintegrating.
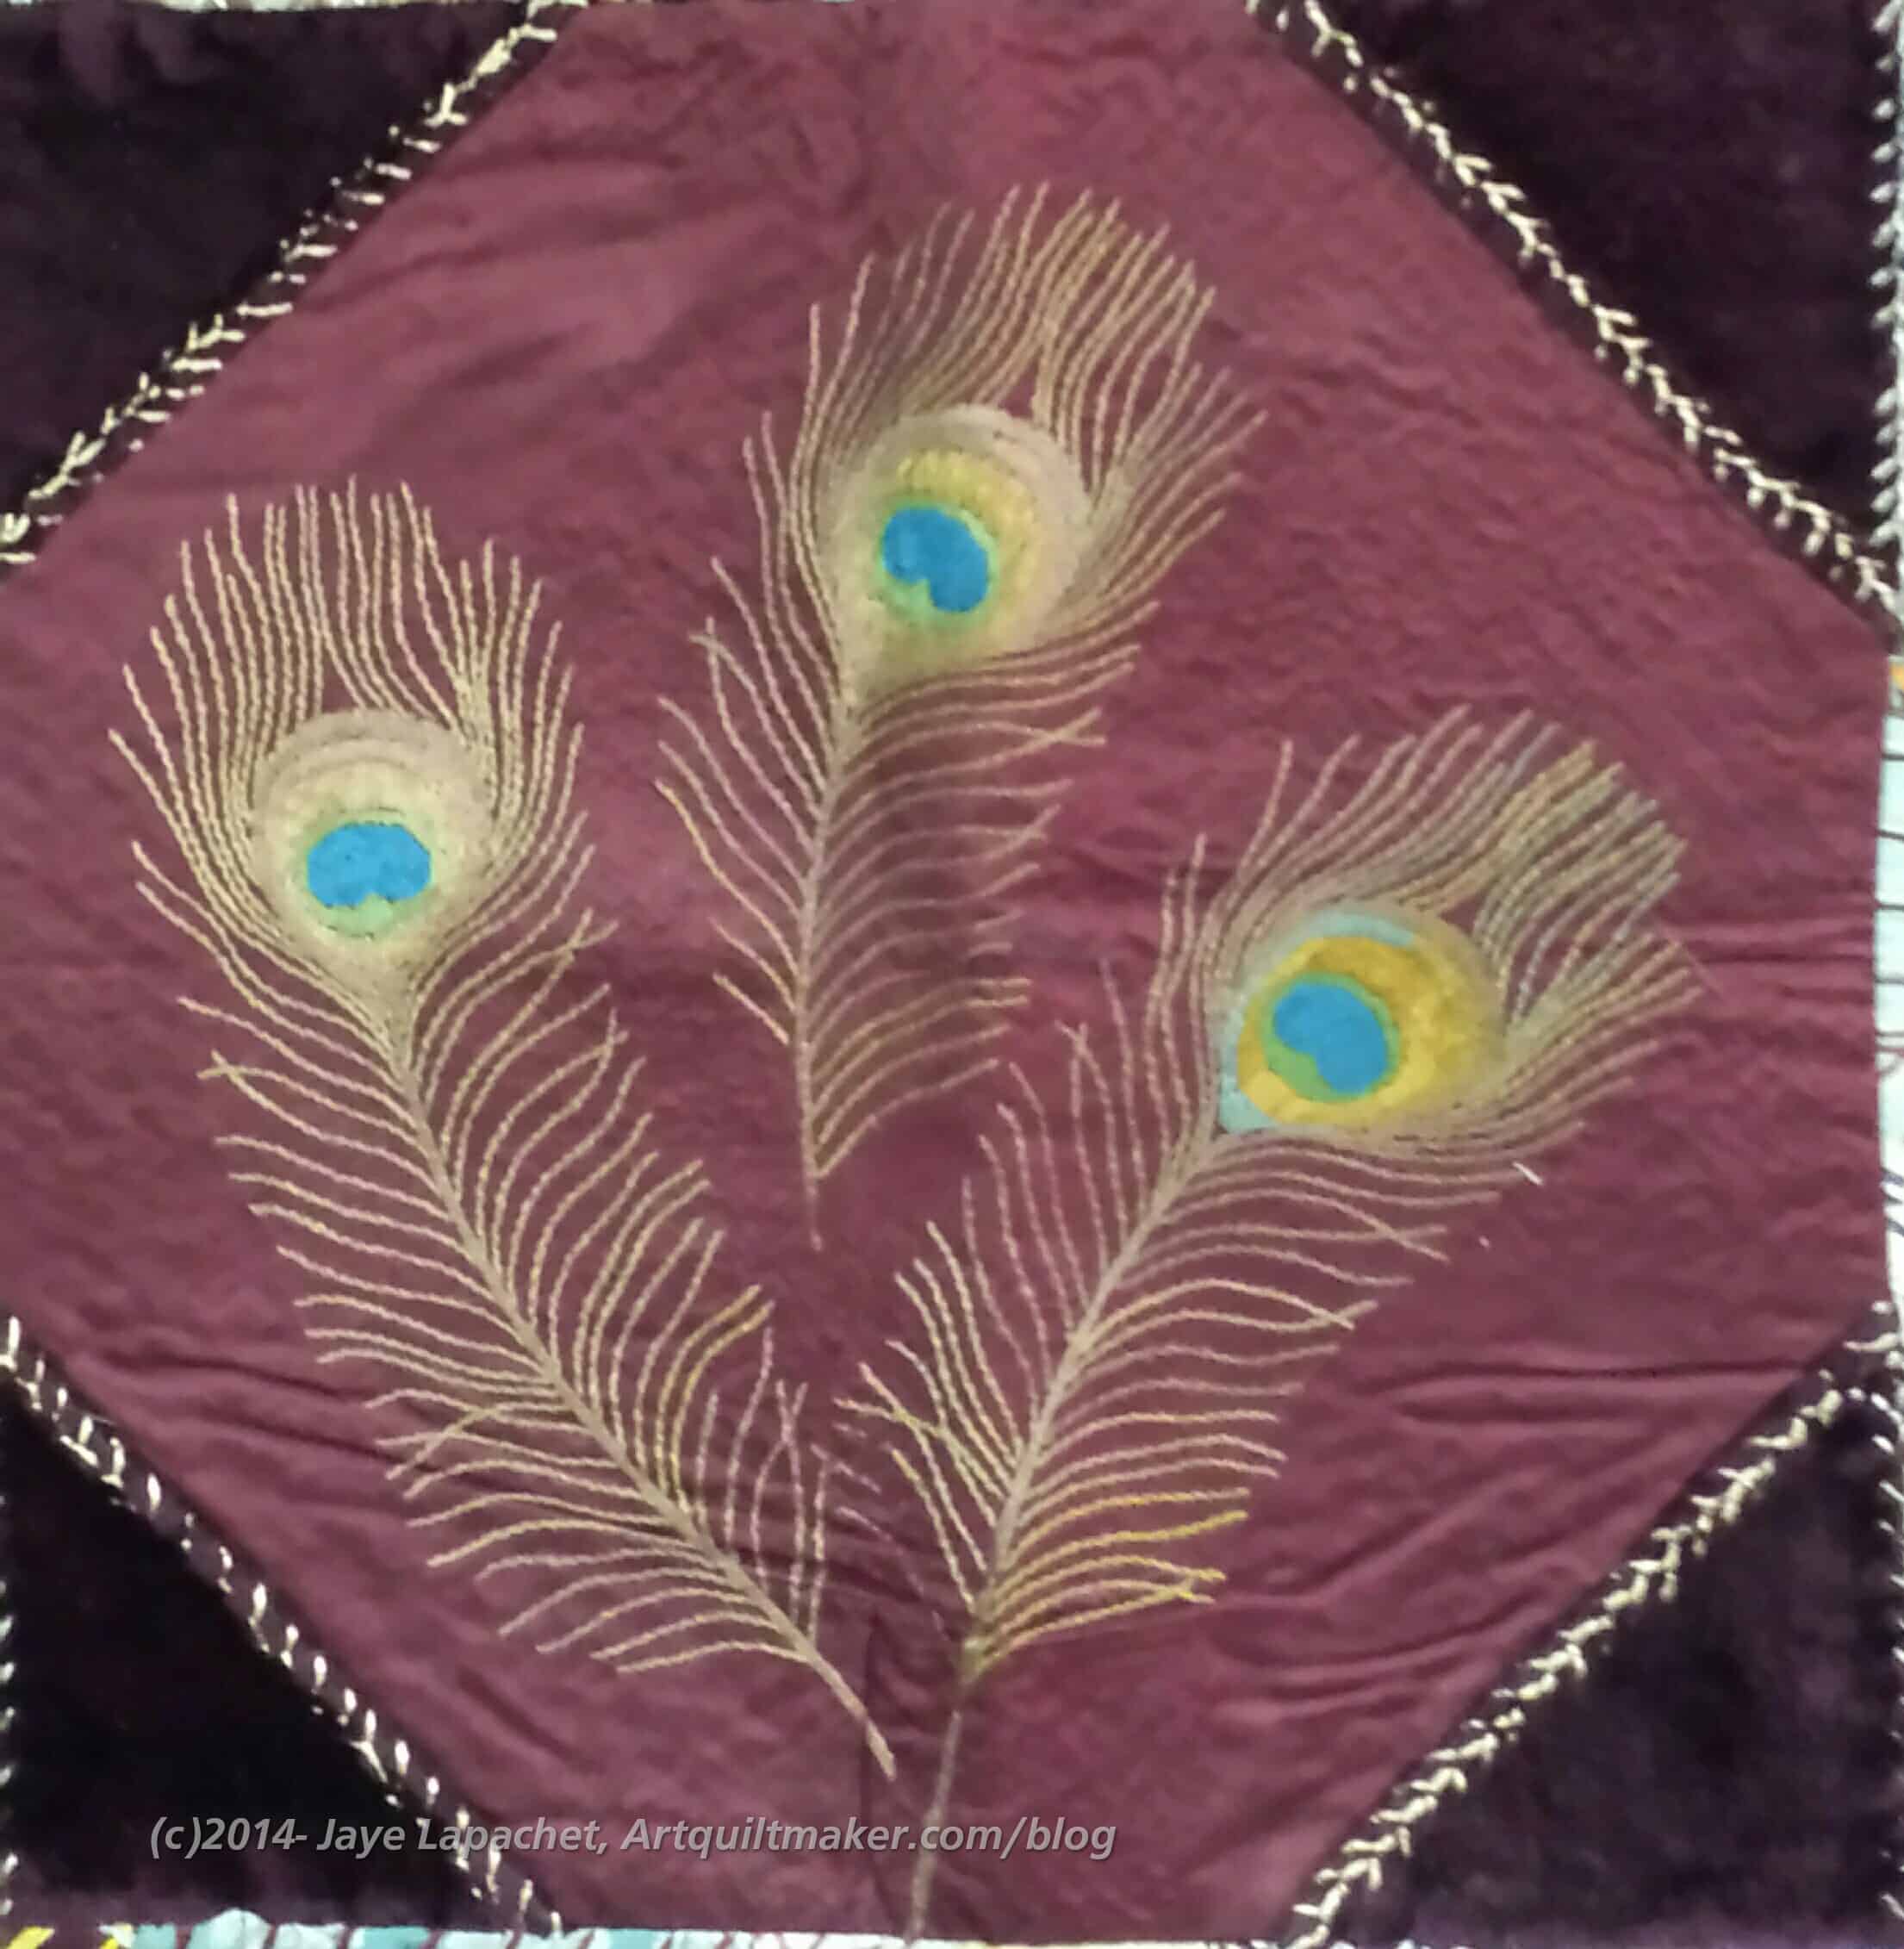
Peacock Cemter
I really liked the center. I HAVE to be in a peacock mode. I don’t even like peacocks. I like the idea of peacocks, but the real ones, while beautiful, make a lot of noise and are messy. Their feathers are wonderful, though, and this embroidered center is one of the most beautiful pieces I have seen. I think the complex simplicity of the design is the genius.
I kind of wish I had taken a more closeup photo so I could see the stitching of the center. I didn’t think of it at the time. It is possible that I will go there again and can look then.
RHS quilt
There were a number of other quilts. One caught DH’s eye. I really need to make him a quilt of his own as he just makes due with any random quilt on the couch.
I haven’t looked up the name, but I think it is some kind of propeller design. It is made from tumblers and I think it would be a very interesting piecing challenge.
The others I saw were all made into curtains and that was kind of sad. They weren’t especially interesting, but they were old and looked finely pieced. I suppose being made into curtains is better than being cut up into softies.
I was in Boston for the Special Libraries Association conference. On my last day in Boston, I walked over to a fabric store called Grey’s Fabric and Notions. I had looked at their website and saw a number of blog posts on garment making including lingerie, so I was on the fence about visiting.
Building with interesting colored windows
My conference buddy encouraged me so we walked over there together. We got there off of Summer, A Street, 4th and finally Harrison.
Summer Street was a main road and to get to A Street we had to go down a set of metal stairs to the street below. It was kind of like the Stockton Tunnel street madness here in SF. The neighborhood looked yup and coming, but also very much in transition.
It was a bit of a long walk, but we enjoyed it. We took pictures of interesting architecture and things we don’t see at home or interested us. The neighborhood is definitely changing.
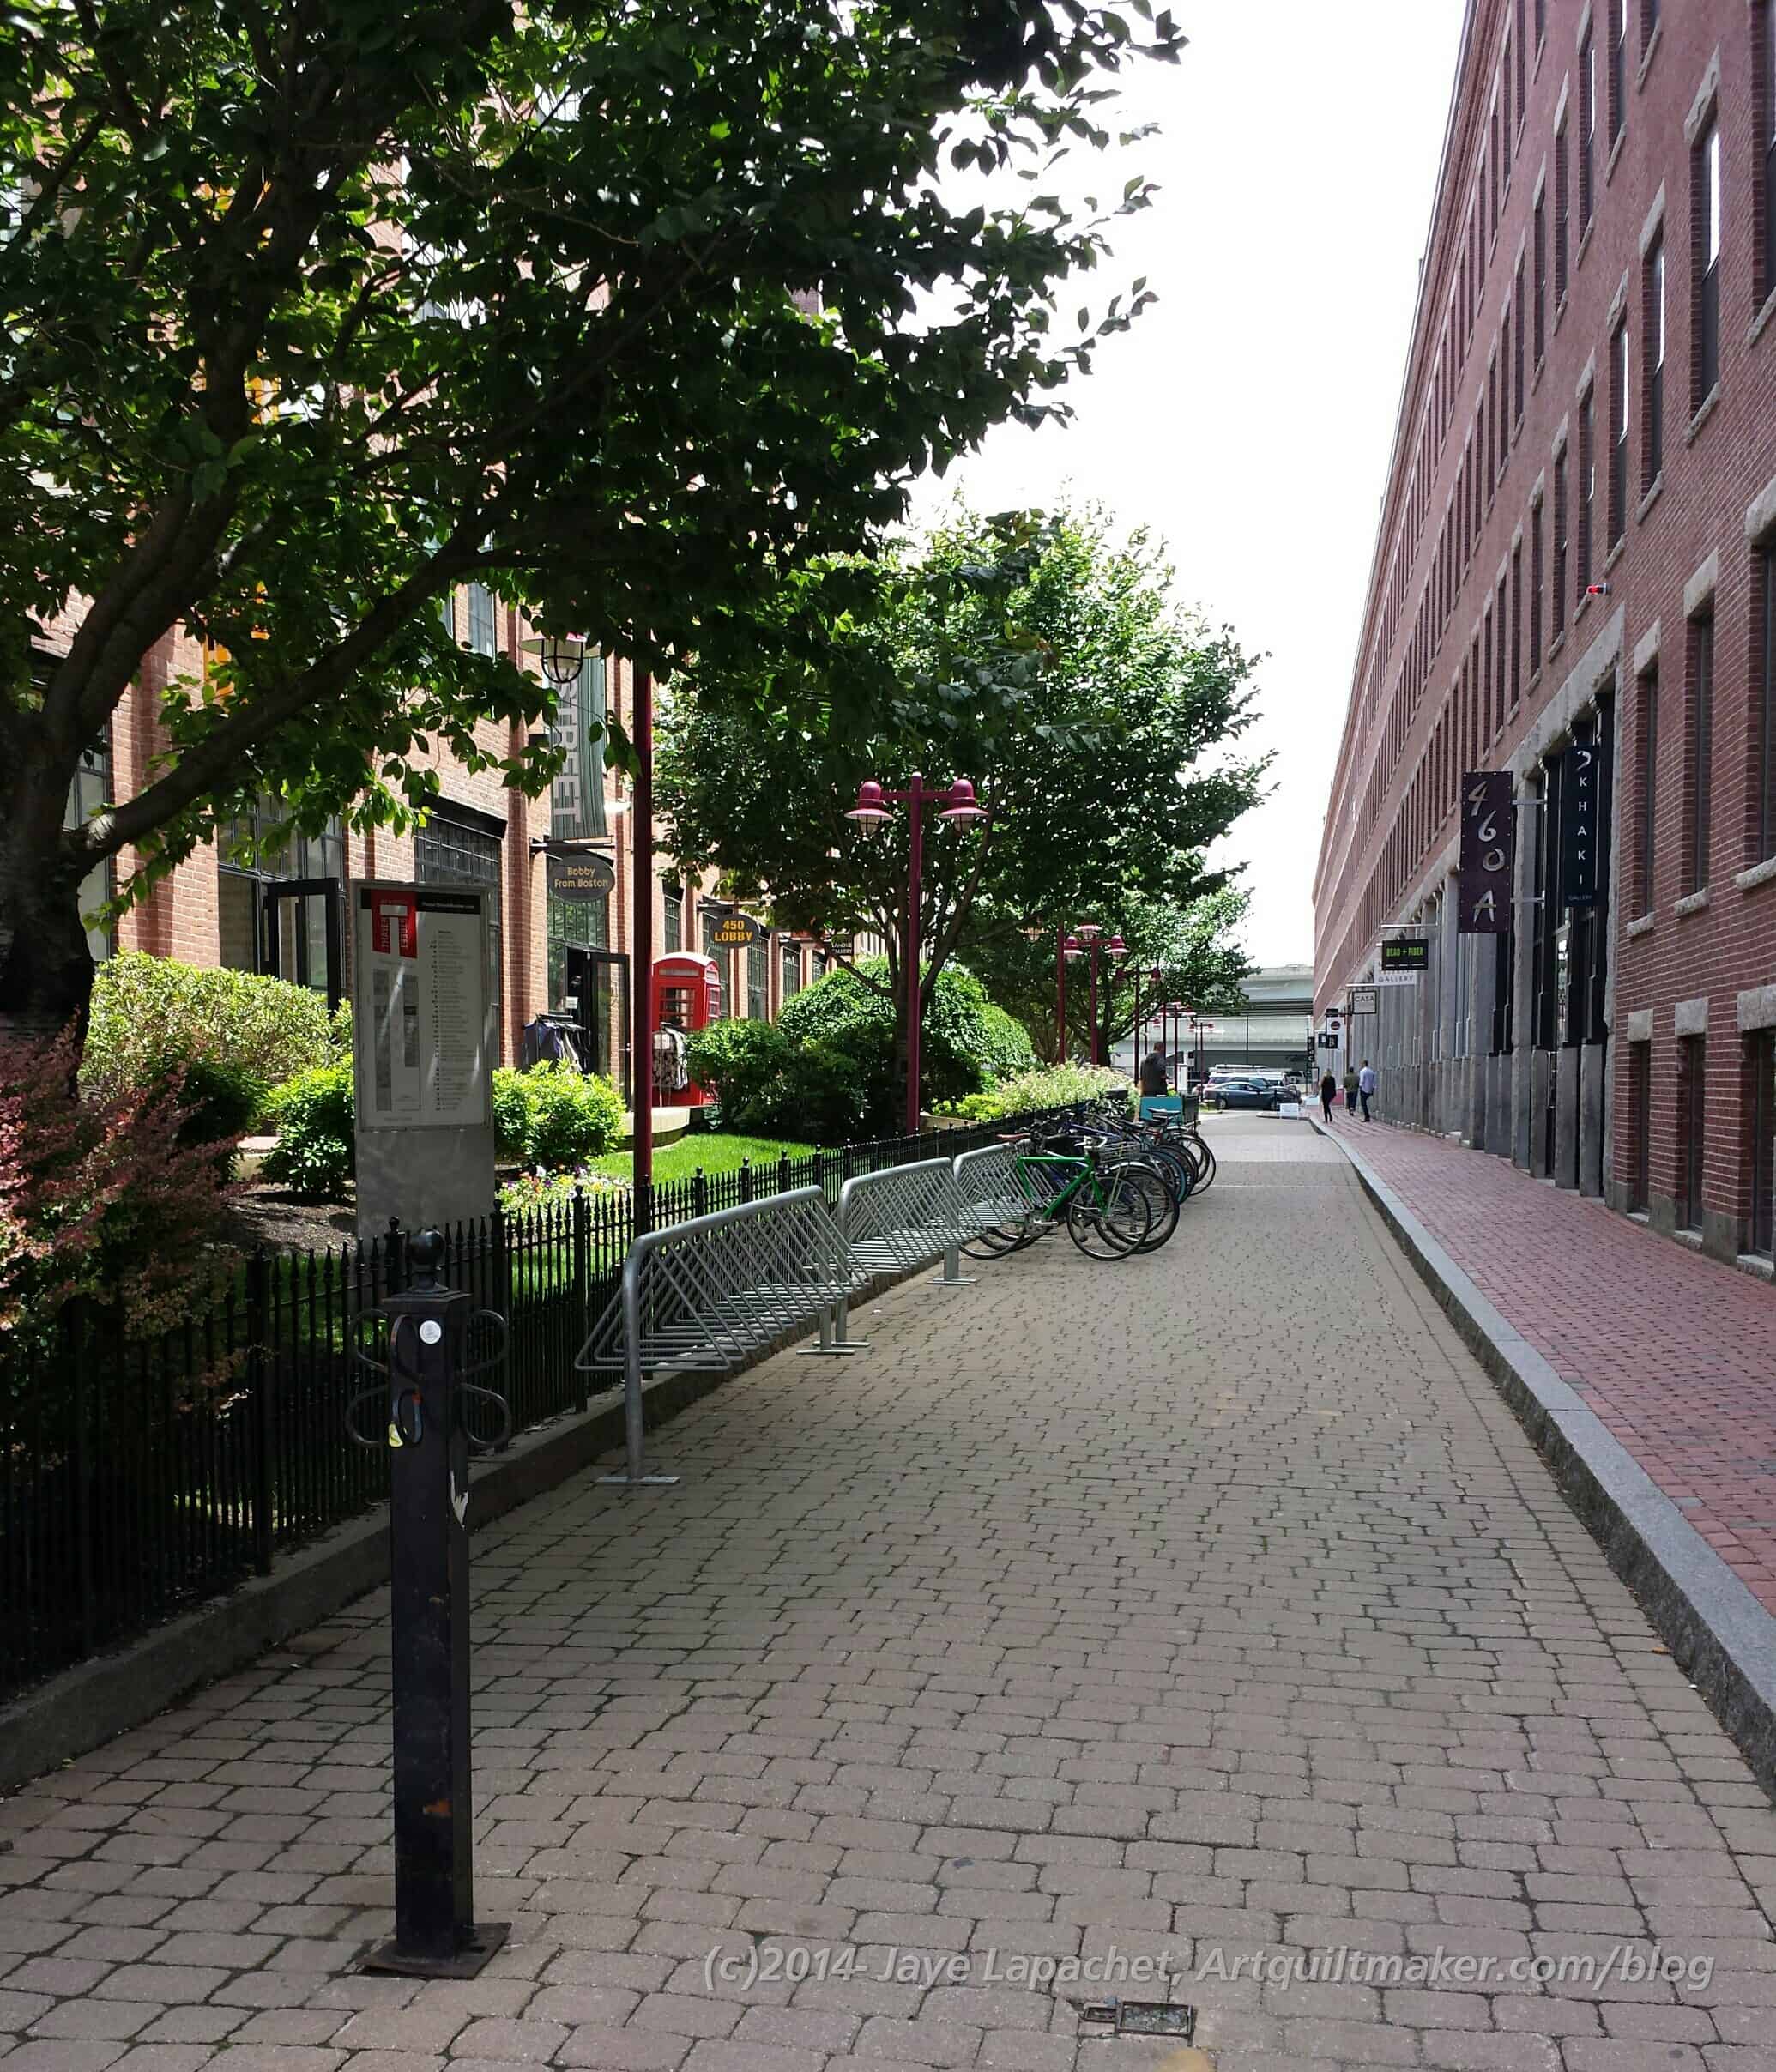
Pretty alley housing Grey’s Fabrics
Grey’s was a little hard to find, but worth the trip and in a charming little alley with other art galleries and creative spaces, including a bead and fiber store.
The store itself is great. It is a good size without being huge. They had plenty of quilt fabric; a very respectable selection and I liked what they had. I indulged in a couple of pieces. One will be a dress for a future NSGW event. They had a fair selection of Philip Jacobs (my man!!!), considering the size of the store. They also had notions, patterns, embroidery floss and a lot of gift items.
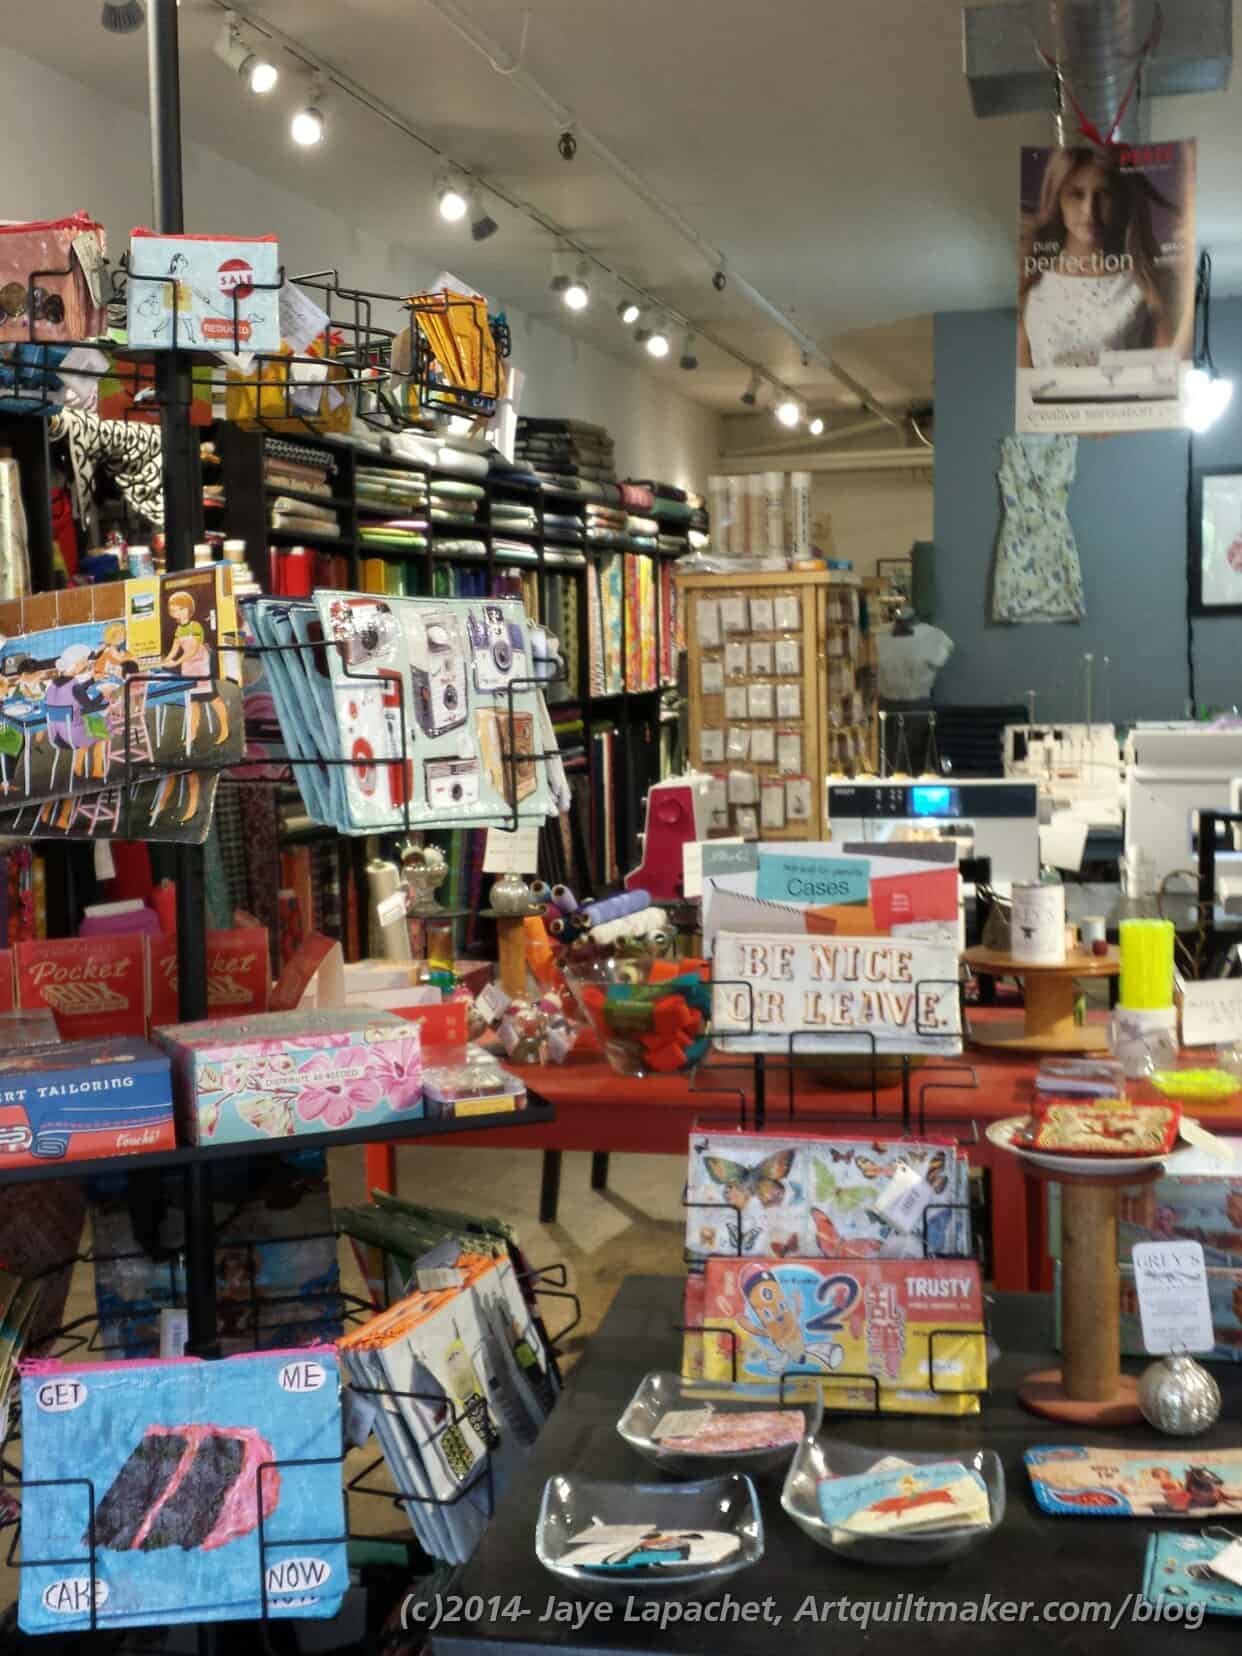
Front of Grey’s
One thing I really liked was the table in the front with lots of little things, including gifts. If that “Be Nice or Leave” pouch had been a sign I would have bought it. I need to tape such a sign to my forehead.
I bought a piece of flannel to make future receiving blankets. Ashley, the store manager, introduced me to double gauze, which she said fluffs up a little after it is washed. It came up after I told her about the receiving blankets I make as gifts for babies. The double gauze, apparently, makes very soft receiving blankets. I didn’t buy any, though it might be good for lighter weight receiving blankets. They have an online shop and it is made by Cotton + Steel so I maybe able to find it locally as well.
The store had lots and LOTS of the independent pattern company garment patterns, such as Colette. I was tempted by one, but restrained myself because I want to look at the Vogue patterns before I buy any other patterns.
The other thing I saw that I liked were the Sublime Stitching embroidery patterns. Of course, I have heard about them and seen them online, but I have never seen them in person. There was one called Sexy Librarian that would make a great raffle prize for my library association, if made up into a pillow or something.
All in all, visiting Grey’s was a worthwhile activity and I would visit again. I wish it was near my house as I would love to take classes there.
You can find Grey’s Fabric and Notions at:
450 Harrison Ave, Boston, MA 02118
(617) 338-4739
Last Sunday I wrote about the inspiration that could be found in the indoor pool at Hearst Castle. OMG! I love the colors in that indoor pool! Although, I have to admit, it should come as no surprise to you.
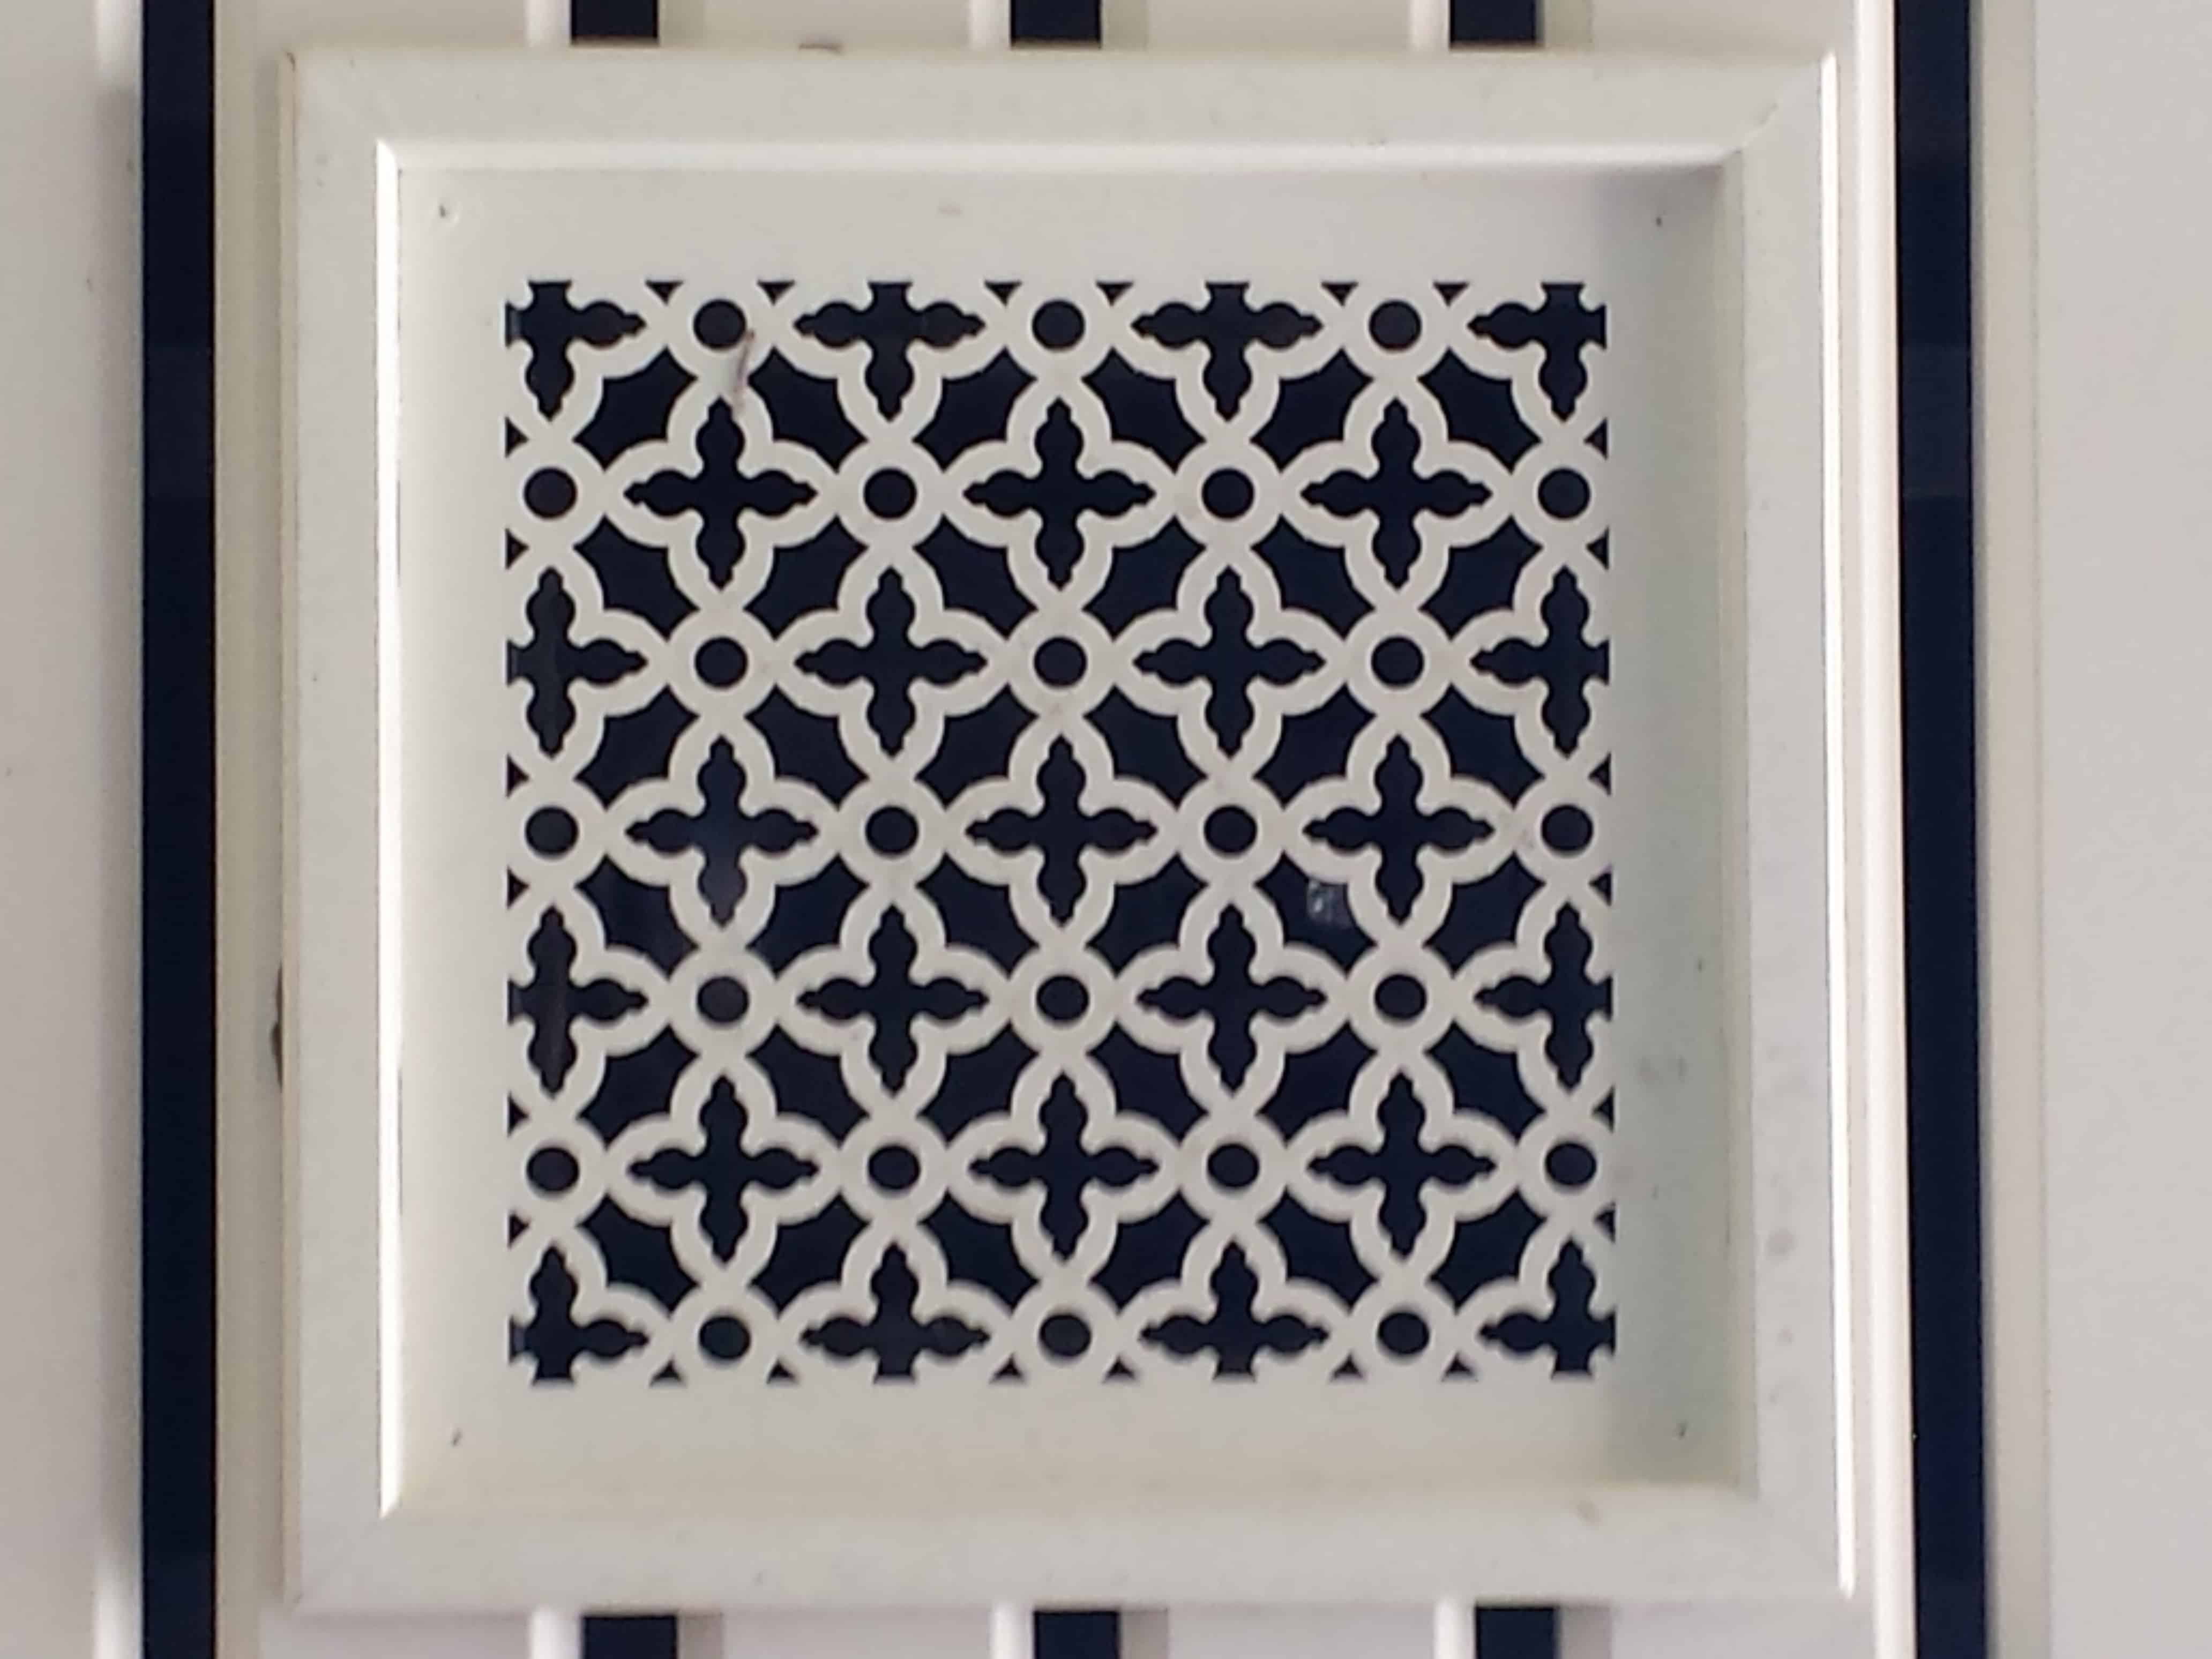
There is a lot of other tile around the estate. As I have said about 100,000,000,000 times, I love tiles and mosaics. Some of these were some of the most inspirational I have ever seen., including being inspired for quiltmaking designs.
The photo to the left would be an interesting baby quilt. The circles could incorporate fusible or machine applique’. The center could be redesigned a little bit to be more geometric and pieced.
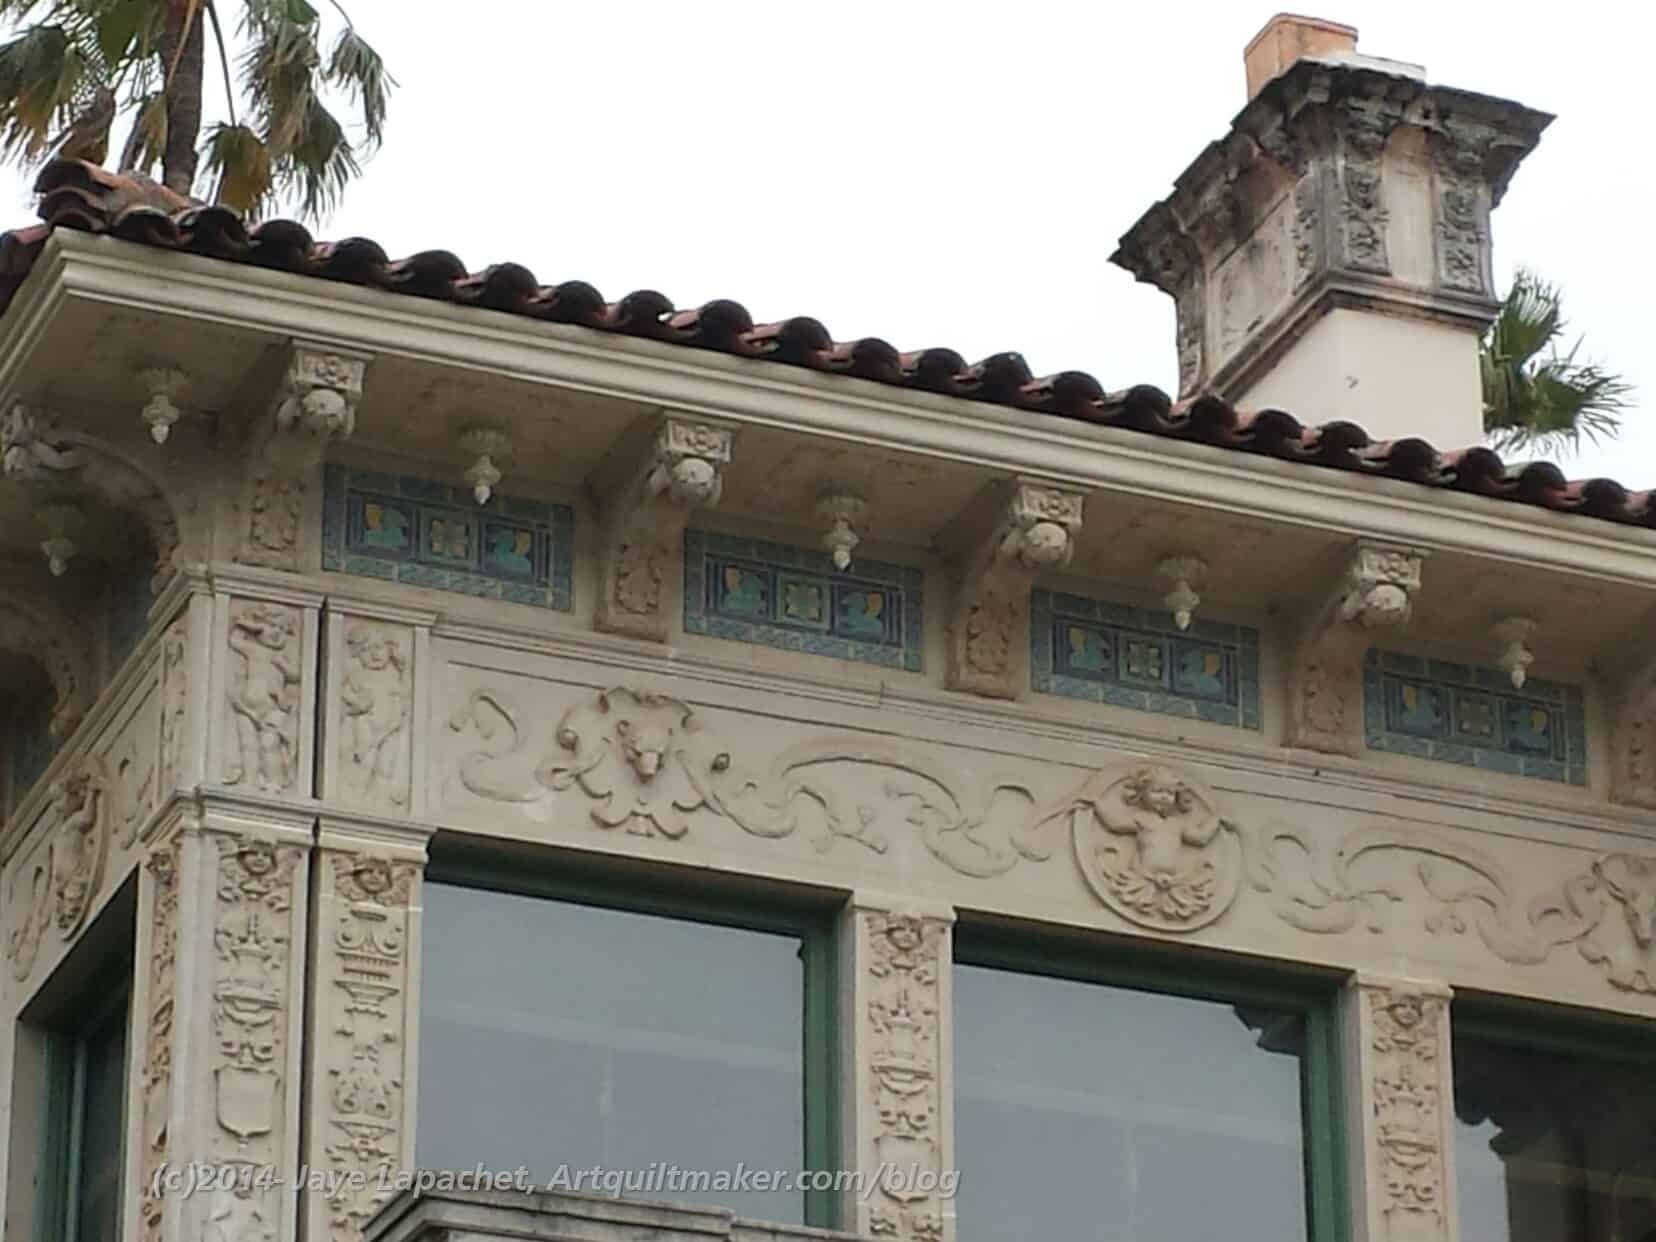
Cottage tile at roofline
Each of the cottages had tile at the roofline. Those tiles were different colors and had different motifs. I could only see the tiles in the photo (left) by taking the photo with the zoom at ‘extreme’
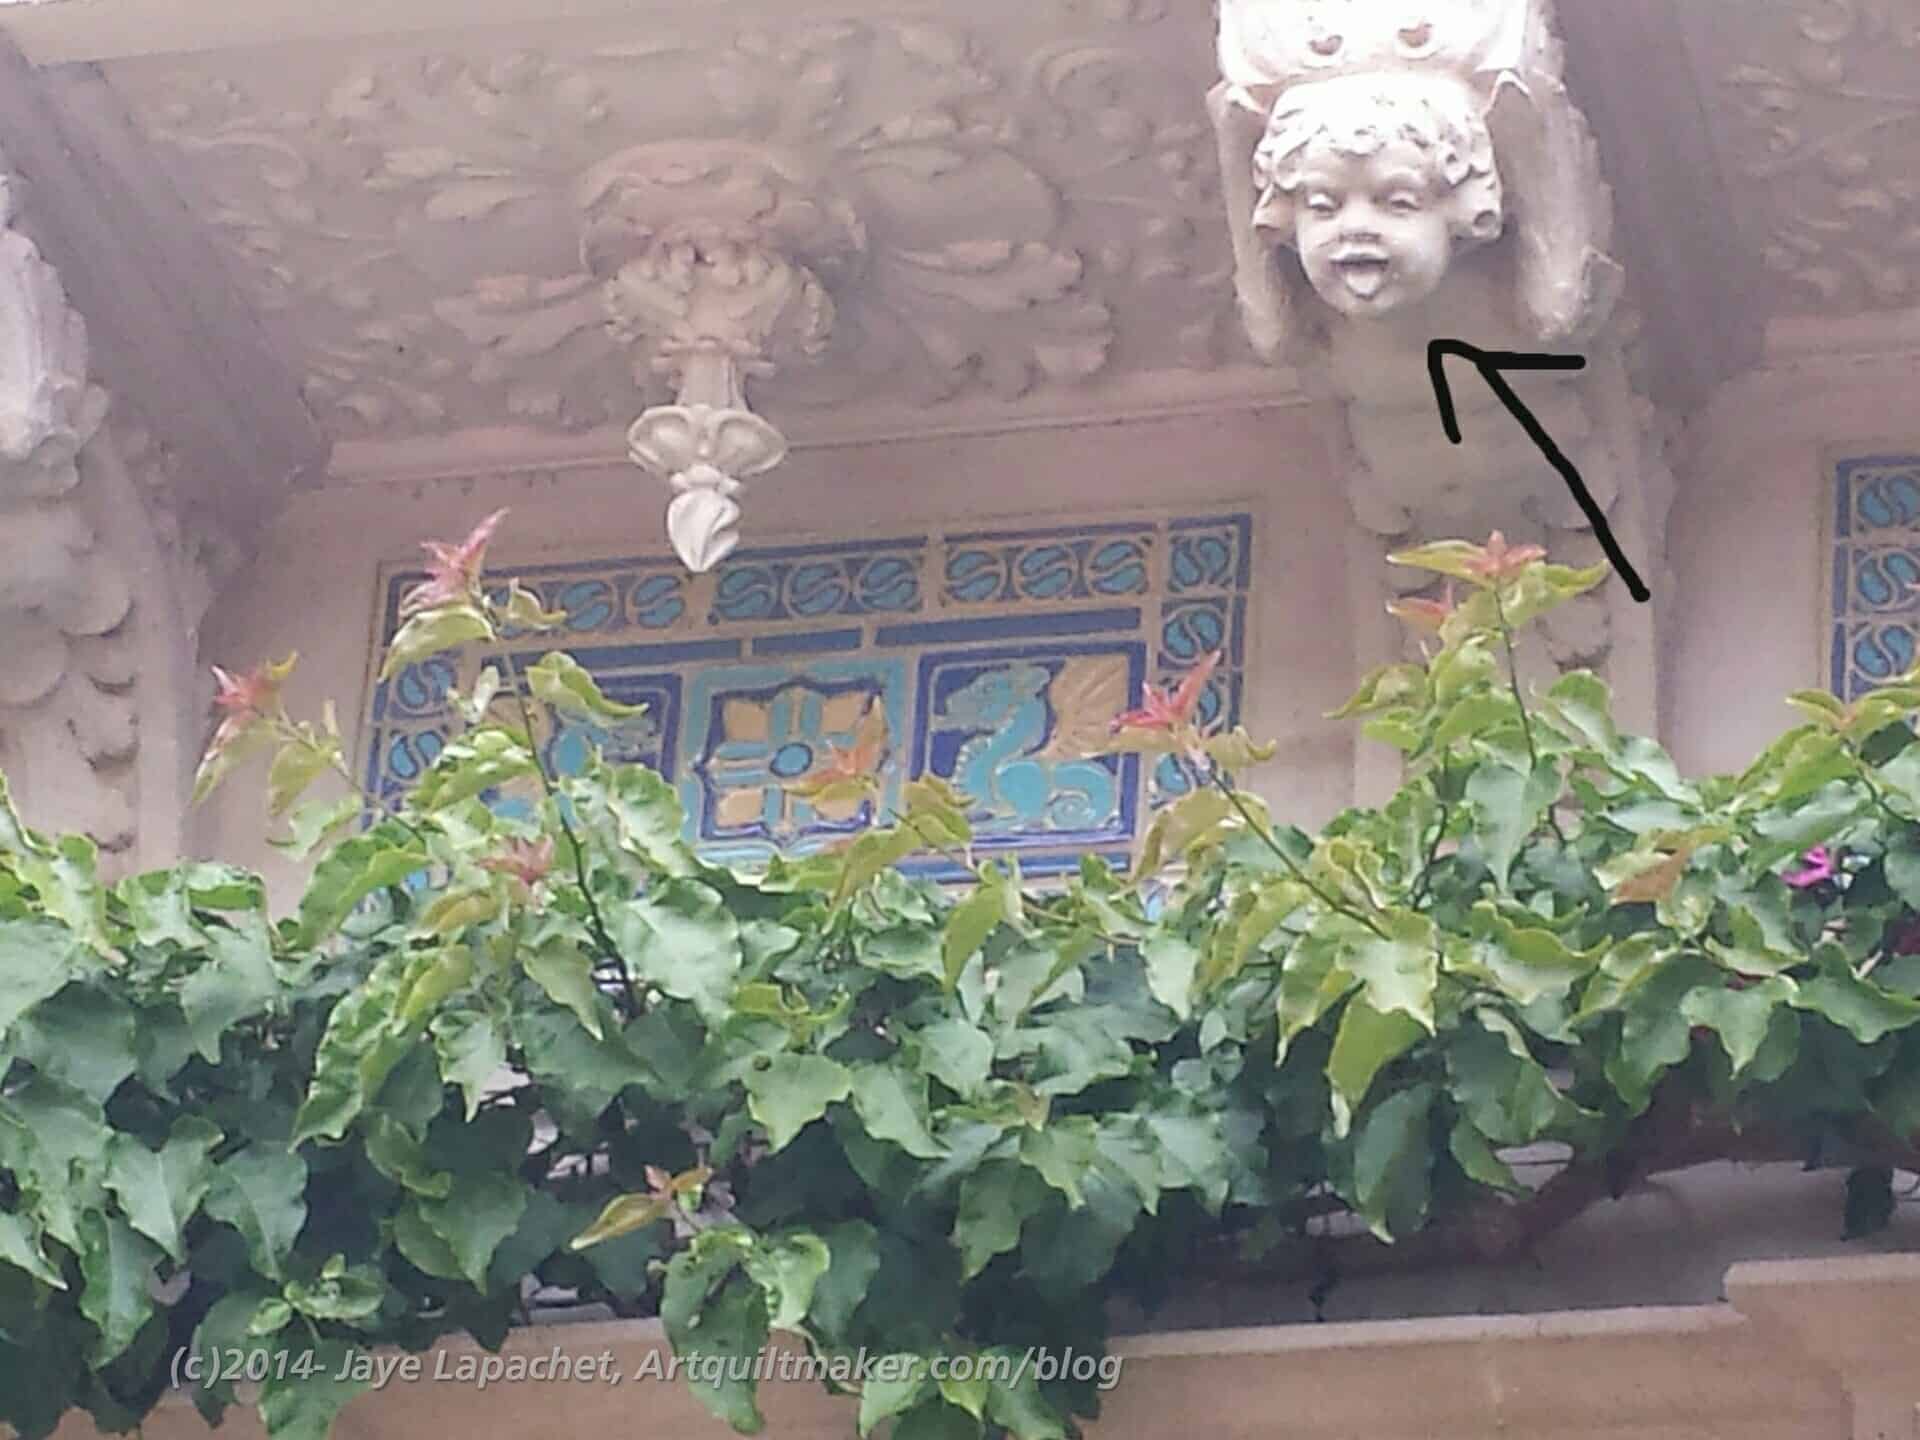
The bonus was the plasterwork (not sure of the technique) on this particular cottage. I love the ceiling decoration, but I also like the gargoyles. They are more funny than scary. All of them were just a bit different, but equally hilarious.
Cottage Bas Relief
I like the idea of the roof tiles. I think it adds a bit of interest to the rooflines. I think it would add something to those cookie cutter townhomes and apartments most large cities are putting up around public transport.
Anyway, the Hearst estate is a wonderful source of fabulous inspiration. If you have an opportunity to visit, don’t hesitate.
There was so much inspiration at Hearst Castle that one post wouldn’t do. The previous post was mostly about the outside of the castle. One of the most beautiful parts of the estate was the indoor pool. It didn’t have the feel of indoors or outdoors.
The bottom of the pool is gorgeous. The colors are rich and strong even through the water. Yes, turquoise is a favorite color, but that blue is hard not to like. Coupled with the green, it is a very special color combination It is definitely worth trying to replicate in a quilt. A very different two color quilt?
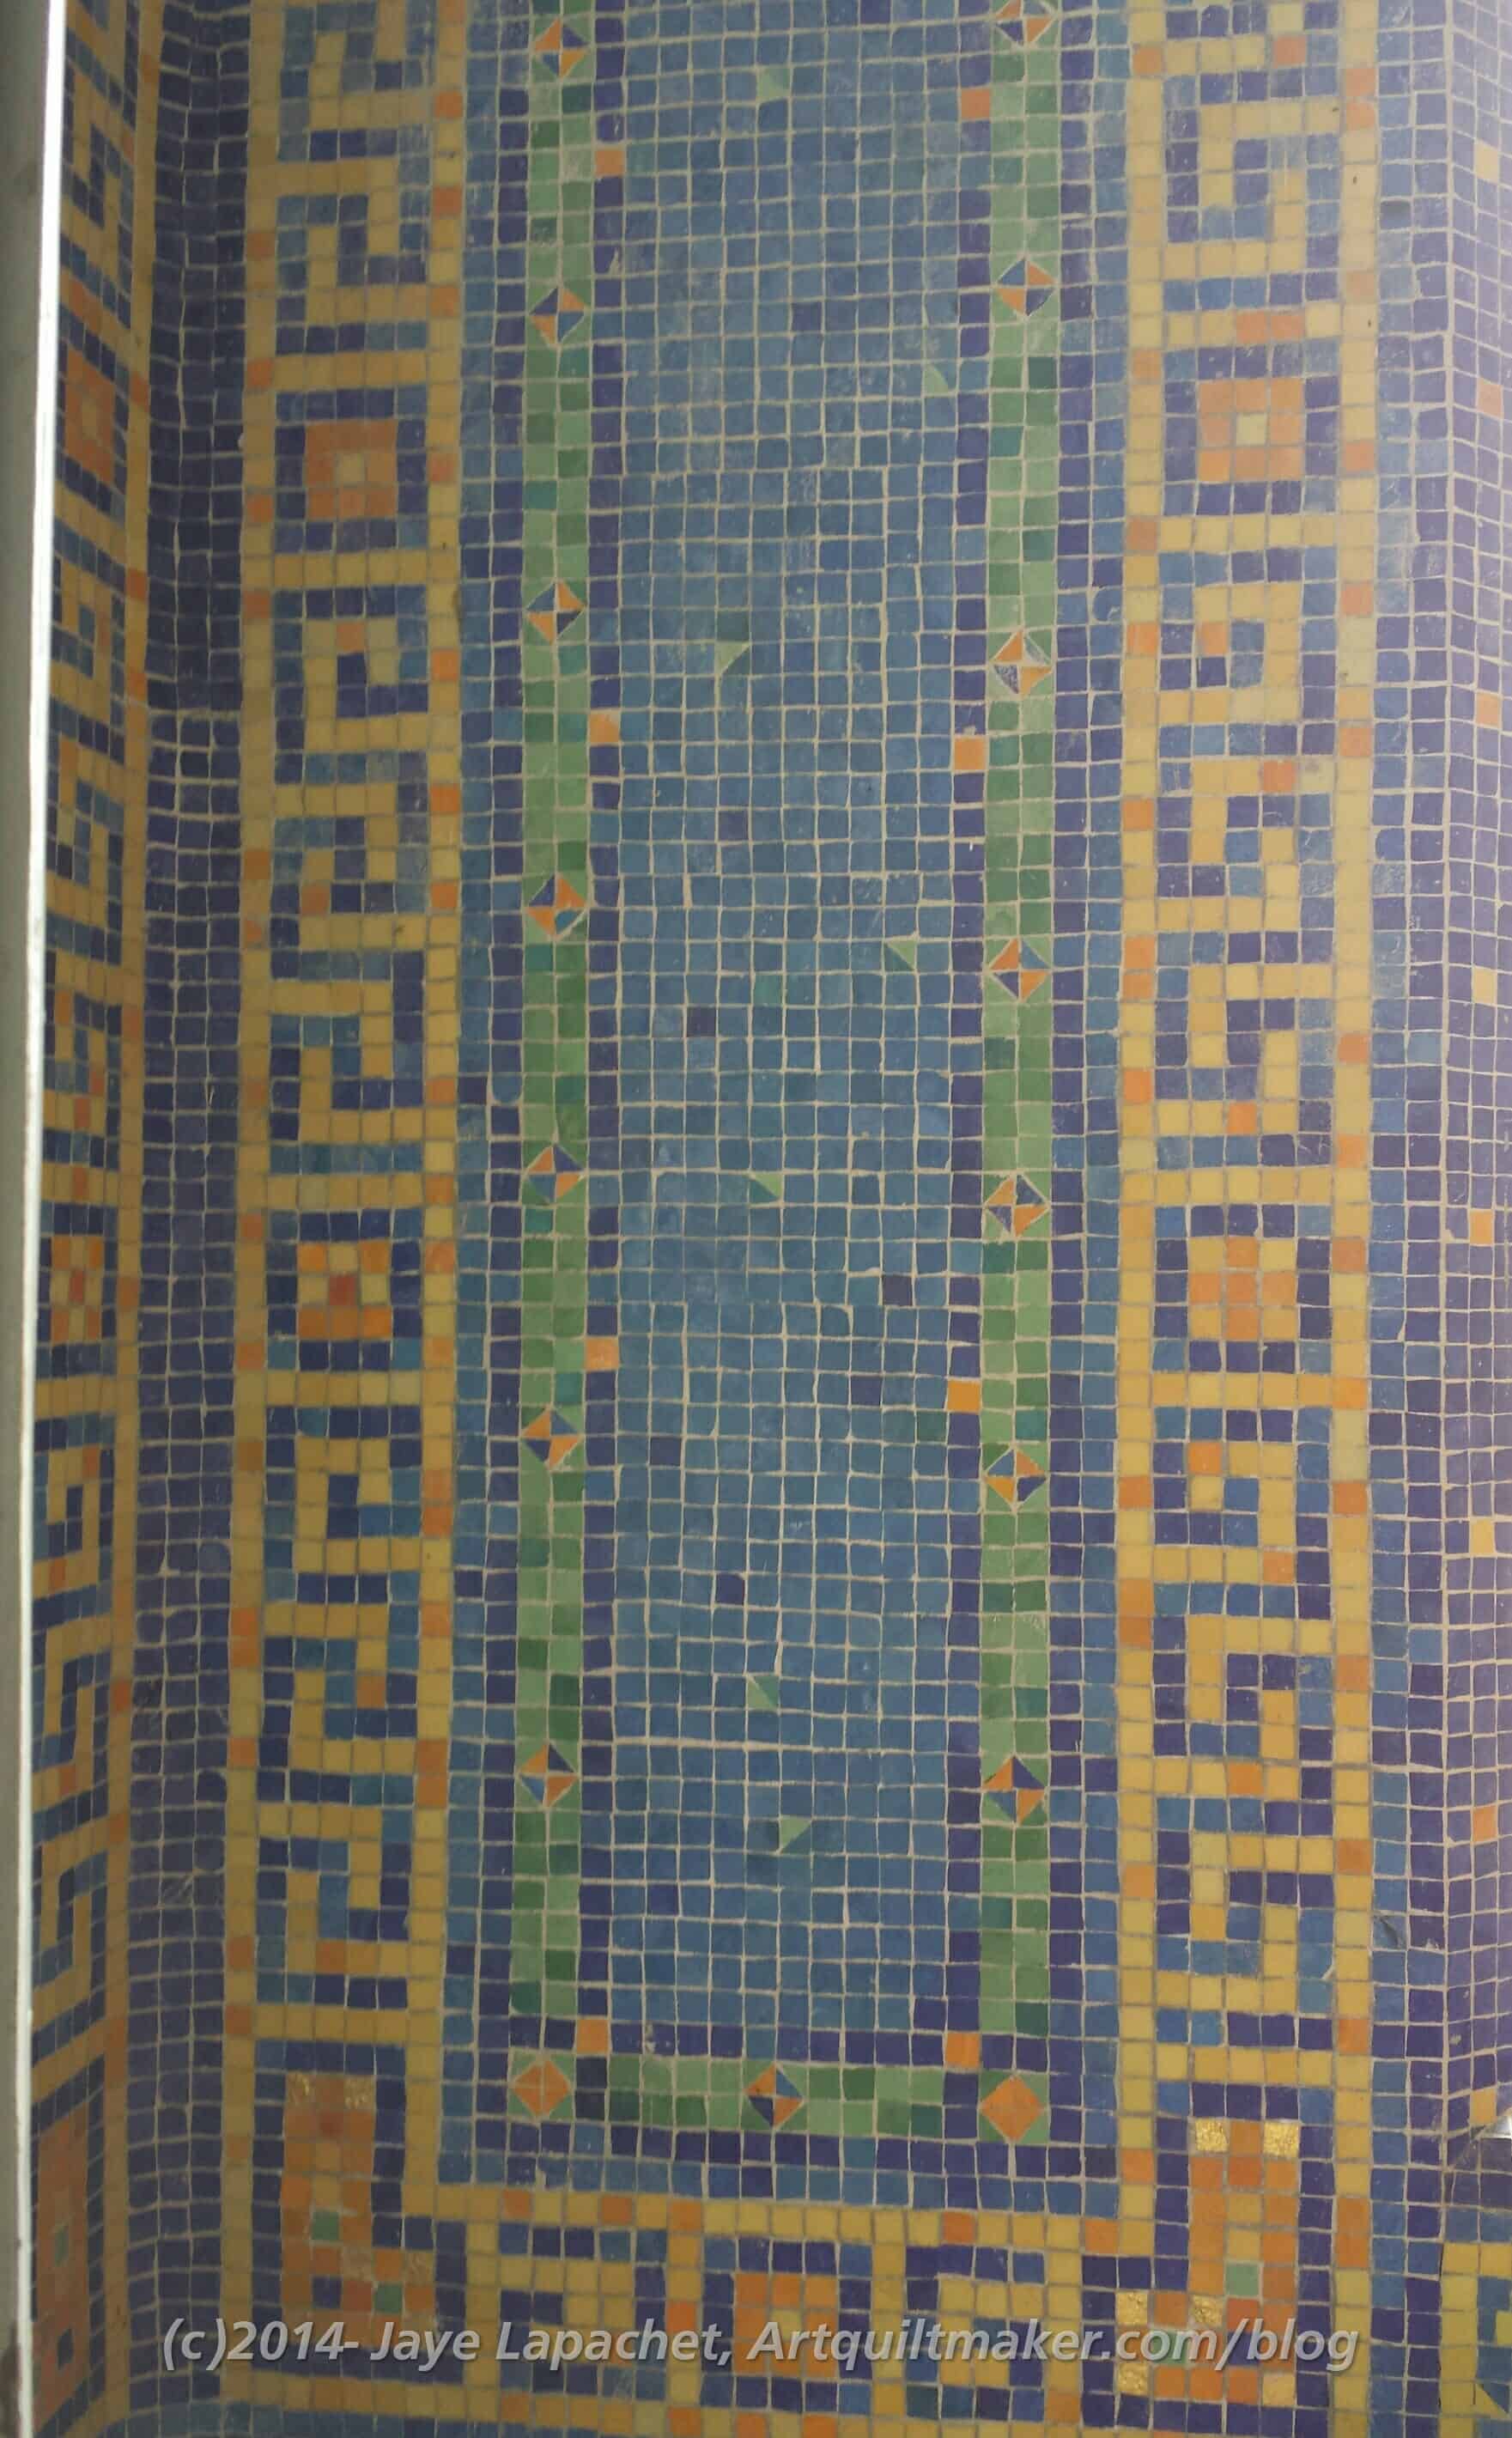
Wall tile in indoor pool
While the bottom of the pool is awesome, the walls are fantastic, too. In fact the entire inside of the building is covered in mosaic tile.
Wouldn’t the rectangular design to the right make a fantastic quilt with no additional designing? Start saving your 1″ squares!
The outer borders, however, would also make fantastic borders. See the squares spaced at regular intervals? I think tile artisans have the same problem we do with spacing and the math around borders. The squares on the sides as well as the L shaped corners look great, but also help deal with the math. I am sure the tile people Mr. Hearst employed were perfect and this was the design, but for mere mortals like me and my quilts, the ideas would be really helpful.
The colors are really great, too. Blue and green, of course, since it is an indoor pool, but the yellow doesn’t overpower the rest. Perhaps it is more gold?? I also see a few different colors of yellow tiles. That probably helps, too. Scrap tiling/quilting?
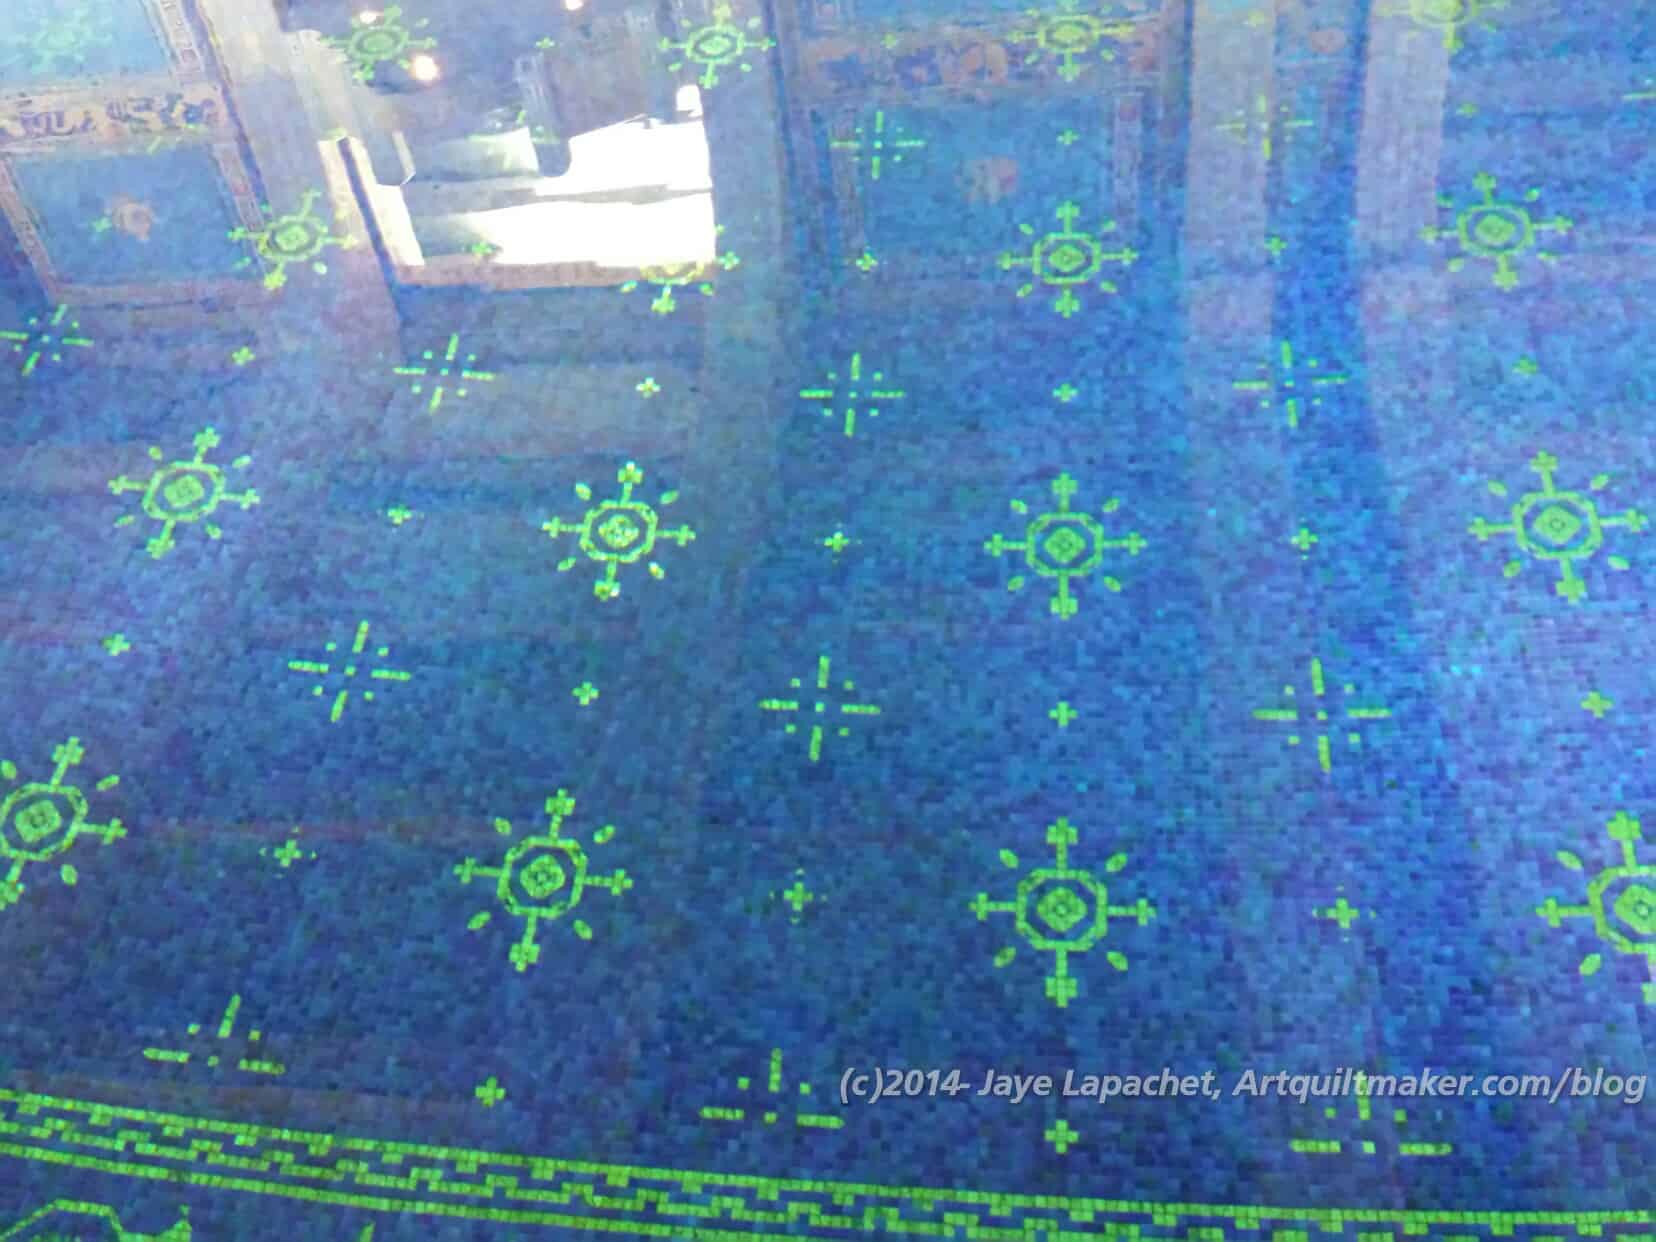
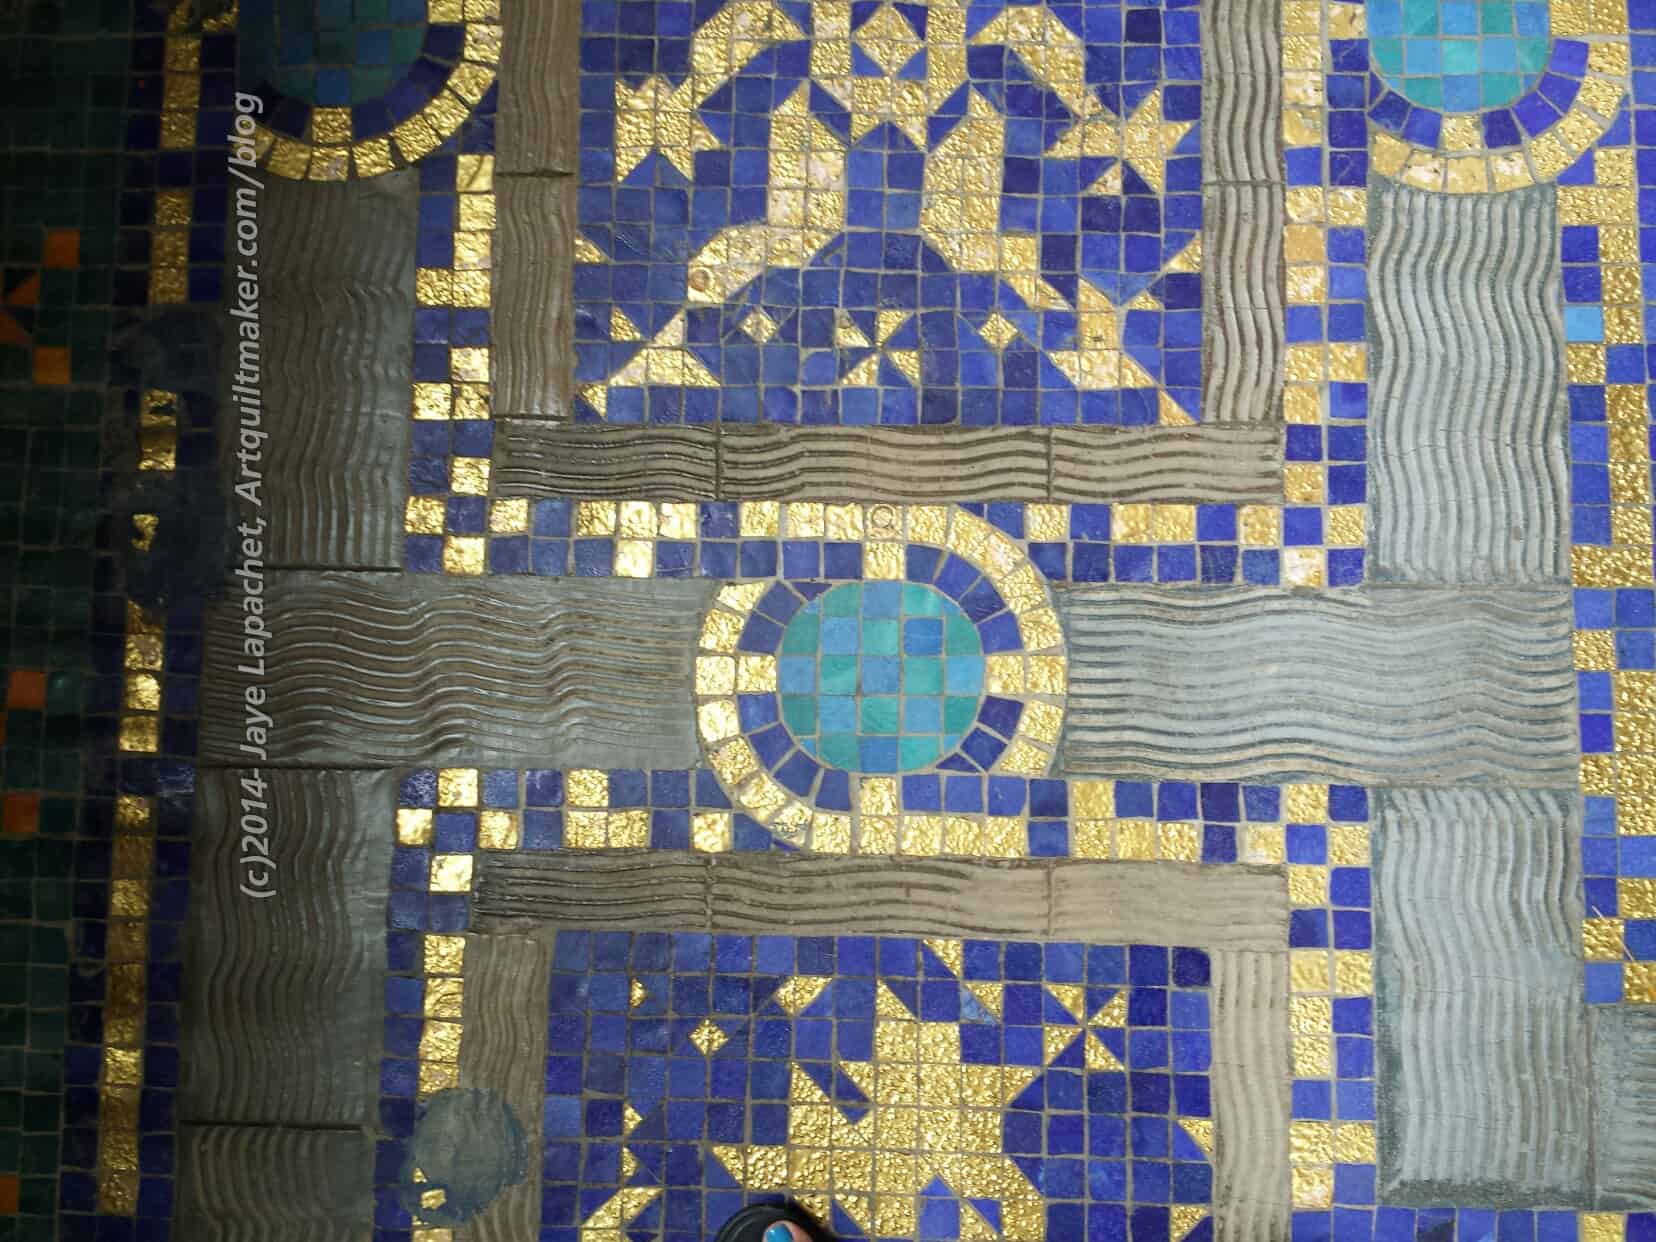
Floor tile designs – indoor pool
My favorite part of the indoor pool area was right when I walked in. The photo (right) is flooring! Yes, I walked on it. Look at that gold! Look at those circles! Amazing.
I think what caught my attention first was the blue and gold. They are the colors of my alma mater, so they always grab me. On second look, I saw the design and was even more enchanted. Don’t the figures look like animals?
I also see some pinwheels and nine patches. I just love tile.
Last week was Grand Parlor, which took place in San Luis Obispo. Wednesday of the week was ‘Playday’. I signed up for a tour of Hearst Castle and DH went off to nap, play Pidro and whatever.
Hearst Castle
I had been to Hearst Castle before, twice, I think, but it had been many years. I remembered a lot, but I am more into details now.
The place is full of inspiration. Unbelievable art in all forms wherever you look and cannot be escaped. A lot of it is not really my style, but *I* don’t have to live there. 😉 Regardless, it is amazing collection of art, which is probably the understatement of the century.
Mary with infant Jesus
I always thought that William Randolph Hearst went to Europe and just bought up everything in sight. This time, the tour guide said that he bought everything out of art catalogs that were sent to him from New York. Who knows what is true?
One of the oldest pieces at the estate is a statue of Mary and an infant Jesus. It is outside the main front door. There is something about it that I really liked. The Baroque or Gothic look to the overall section is a bit much for me. Still without the trimmings, I like the Mary and Infant Jesus statue.
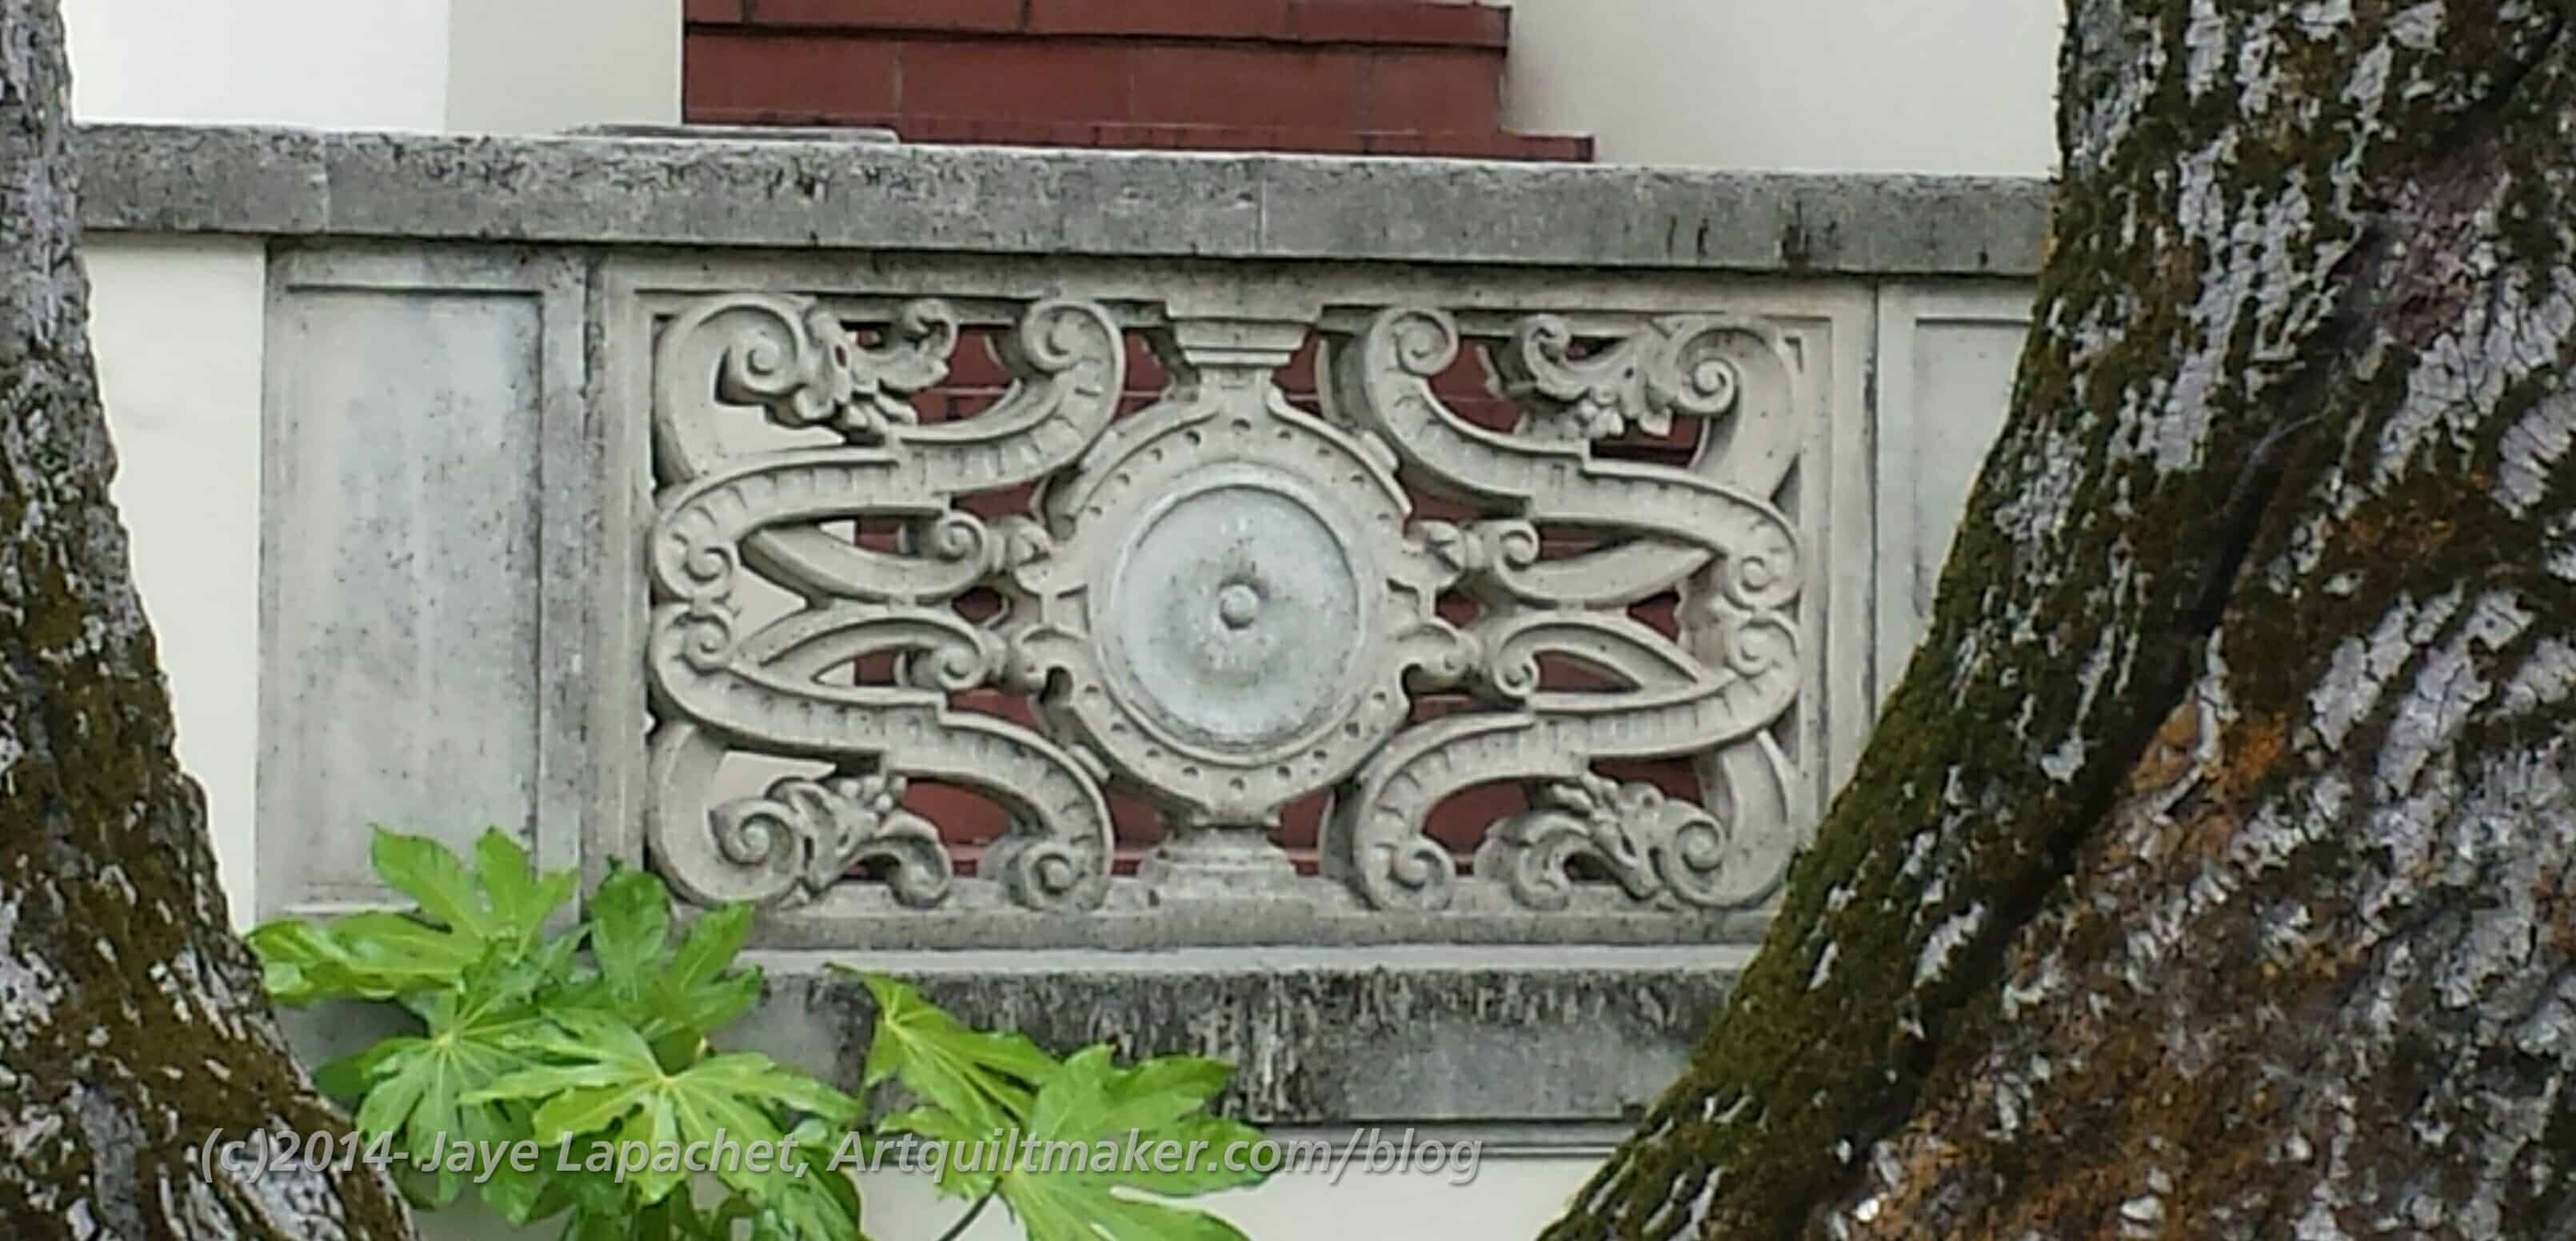
Balustrade
One of the things I like about architecture is the inspiration it provides to quiltmaking. The balustrade (a railing supported by balusters, especially an ornamental parapet on a balcony, bridge, or terrace) has a complex design, but it can also be used as inspiration for a quilting design. Imagine this – or a version of this – as a quilting design in a large open space.
Cottage Bas Relief
I really like the detail of the area below the roofline of the cottage. I know that this is a multi-millionaire’s guest accommodations, but why can’t modern housing and infrastructure type buildings have any detail like this? I think it would make the surroundings in cities much more interesting and easier to live in.
It was a great trip and there is so much more to show you. Better though, would be for you to go and visit the Castle yourself.
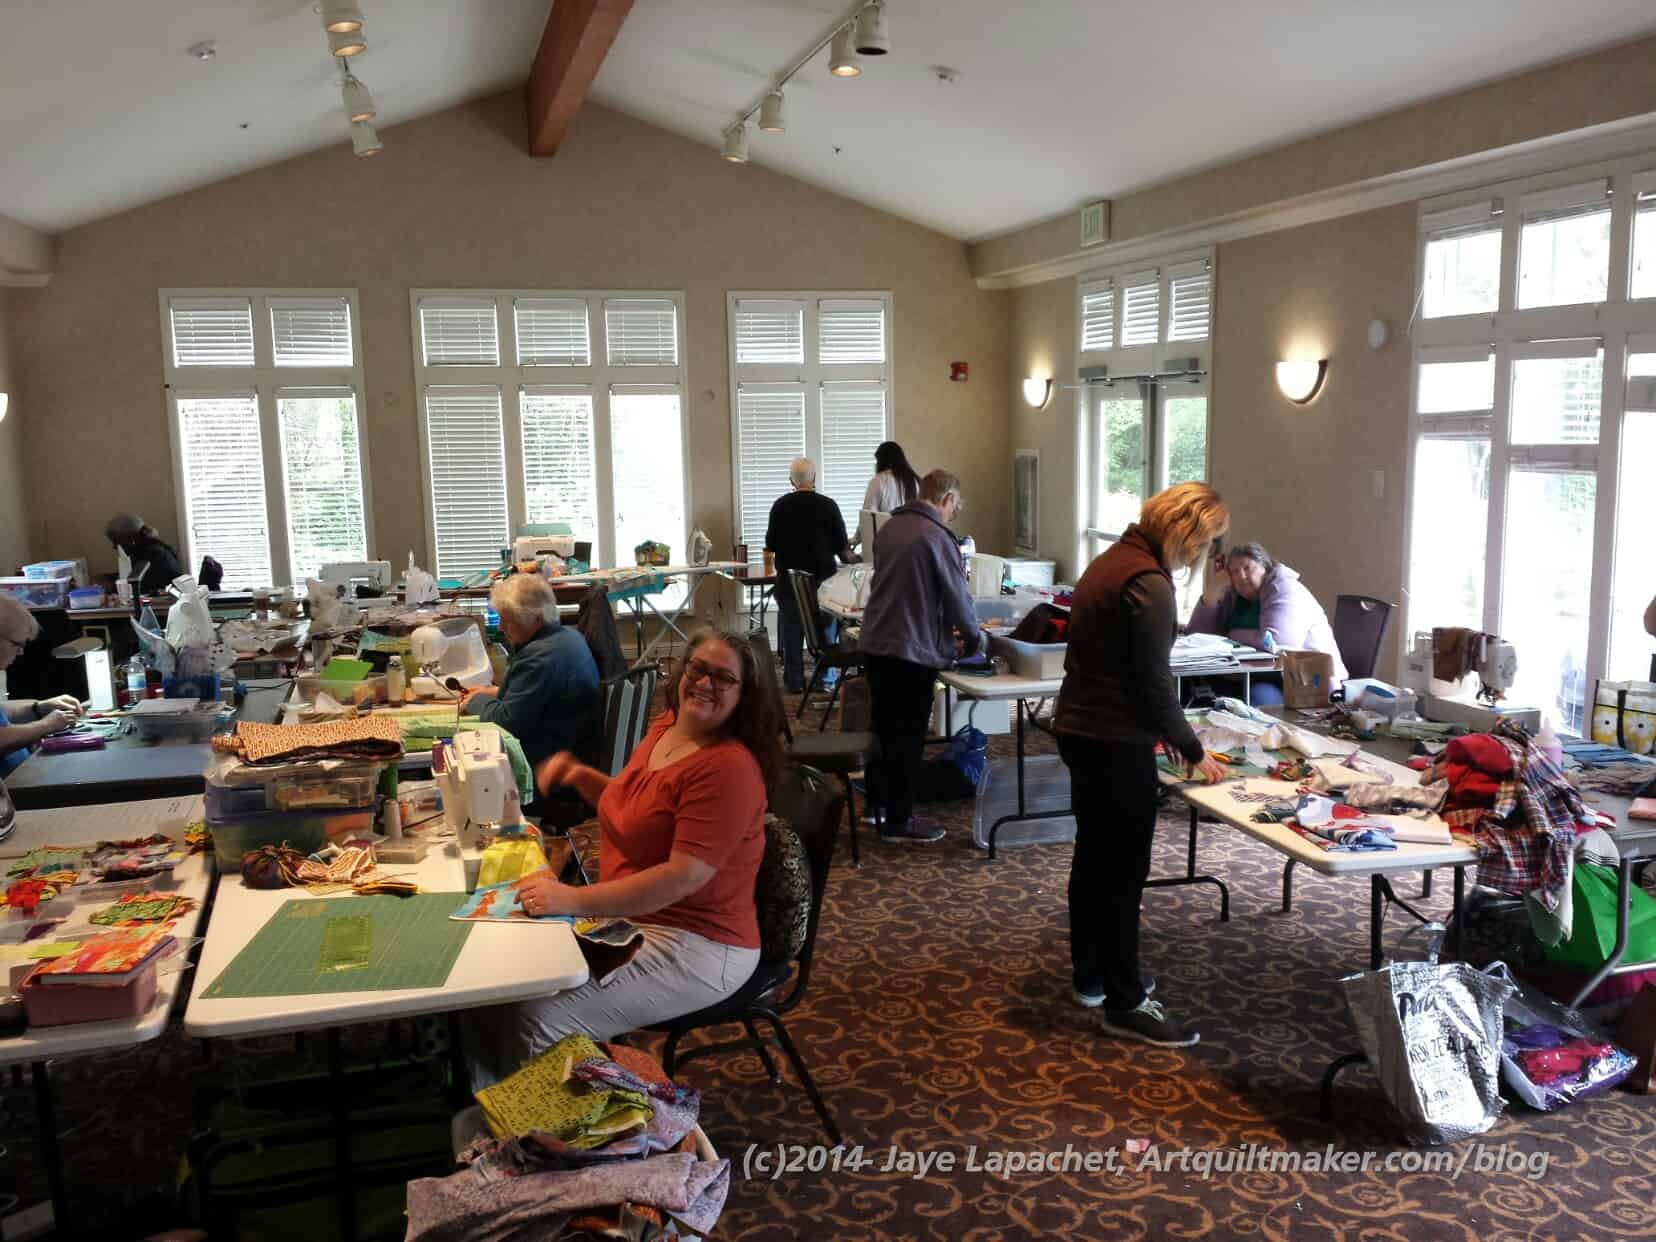
It has been awhile since I was able to attend a CQFA Retreat – 2 years, I think. I was so thrilled to be able to attend the current retreat, which was held over Mother’s Day weekend. Isn’t that a great Mother’s Day gift?? As a bonus, I sewed so much!
I feel like I really made some good progress on projects that were languishing:
First of all, I, pretty much, threw projects and parts into project bags starting about a week before the retreat. This helped me not forget critical fabric and supplies. The only thing I forgot was a lamp and my sewing machine’s light kept me from going blind.
Next, I made sure I had plenty of blocks and parts that would make good leaders and enders. Using the leaders and enders technique, I made 20+ Nine Patches for the octagon 9 Patch on which I have been working and 27 (!!!) Box Full of Letters blocks. In addition to significant progress on two projects, I am pleased with the progress I made on the leaders on the leaders and enders projects.
Oliso ironing surface
The other thing I did was try out the Oliso iron I bought. I finally dragged out the June Tailor ironing surface I bought for the Dale Fleming Circle class as well. It was a little different because you don’t set it up on its end, it just pops up away from the ironing surface. Also, the steam and basic functionality are a little different. Friend Julie tried it also (we shared a table and a mini ironing surface) and gave me her feedback as well.
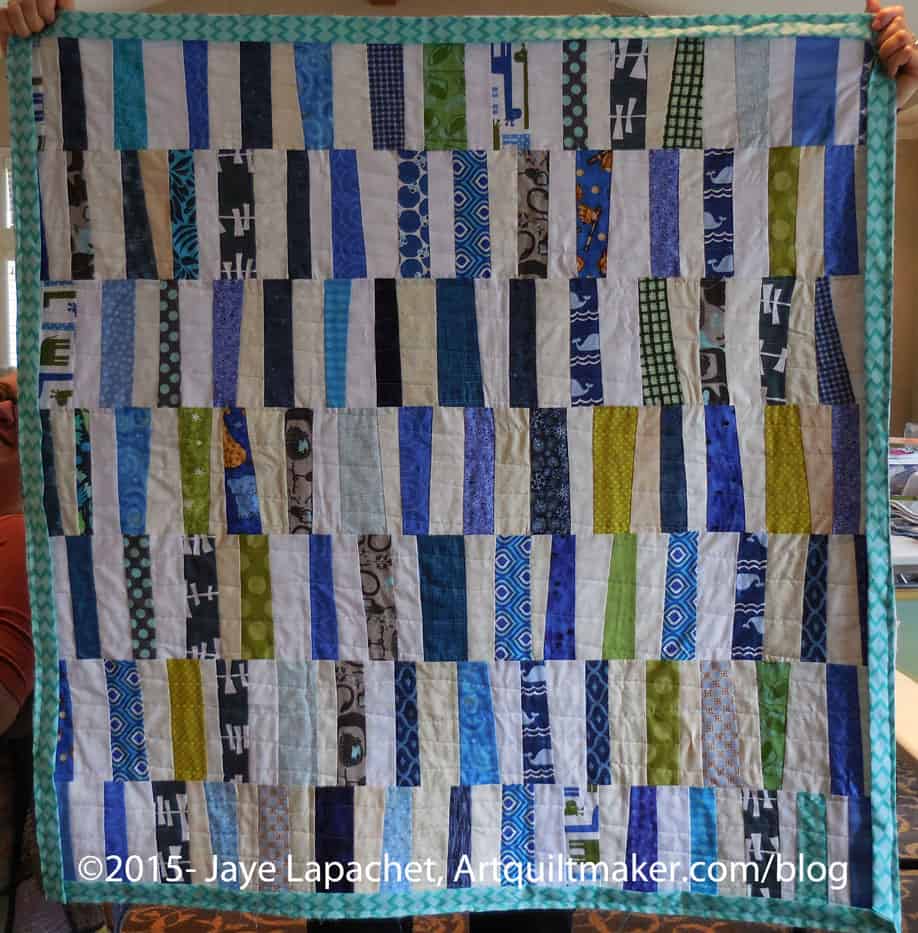
Sue’s Baby Quilt
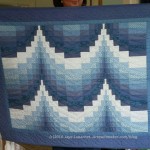
People made great projects. Bron and Sue were working on baby quilts for friends. I liked the ideas they had and may use the ideas for donation quilts.
Sue’s (left photo) quilt is made from strips and a background. She said she cut strips and then sewed them together in rows. She said she used different widths of strips and I think that gives the piece a lot of movement. Lucky kid, I say.
In thinking of different ways to make this quilt, I could use strips, cutting them as I cut into new yardage. I would save up strips until I had enough and then get Gerre to quilt it. 😉
The other thing I could do it rummage through my scraps and get pieces large enough to do something similar. My mind is reeling.
I didn’t get a photo of Bron’s quilt, sadly, but what she did is wacky sew pieces together, then she cut the pieces into squares and sewed them together with sashing into a baby quilt. She used a white dot on yellow for the binding, which I loved! It would be a good scrap project.
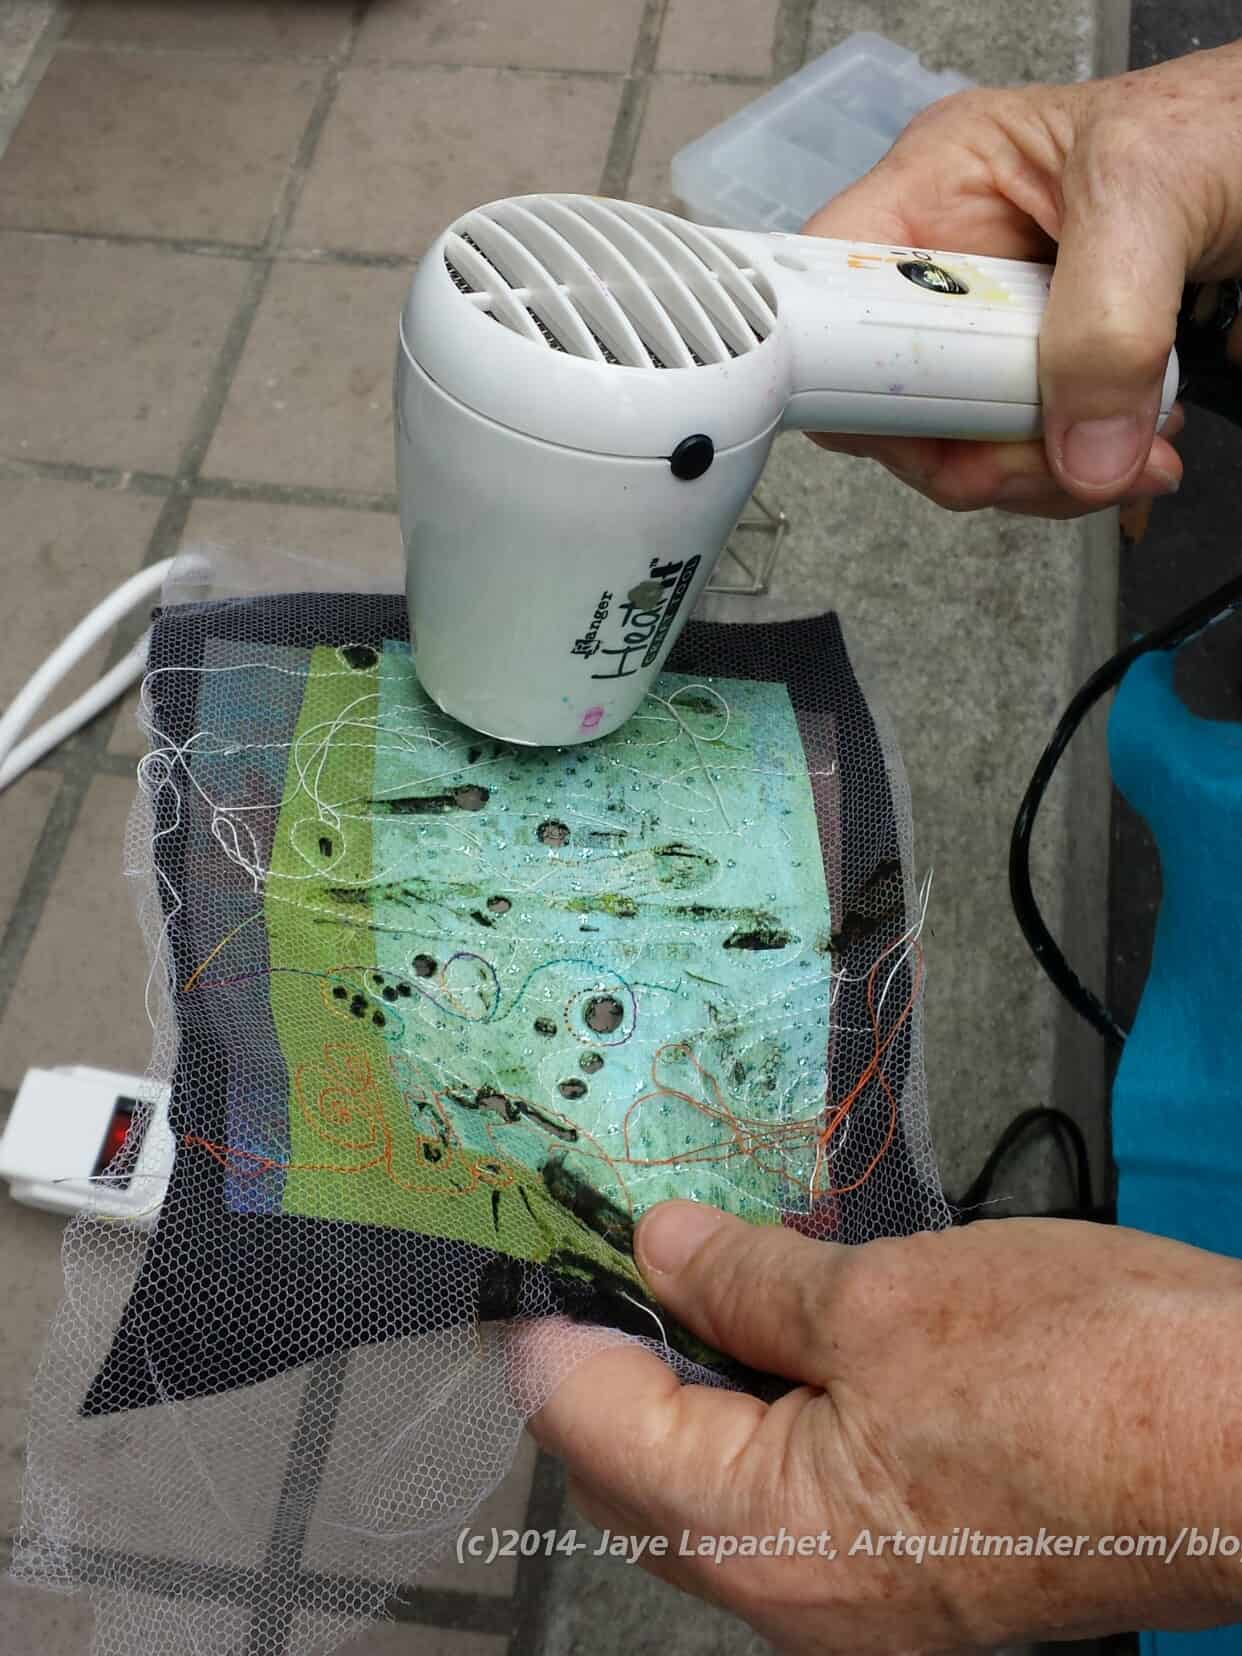
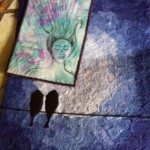
Gerre’s art quiltGerre burning her quilt
Gerre was working on an amazing art quilt. She put layers of fabric together with tulle on top, then quilted it then BURNED it! It was awesome.
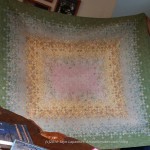
Reva worked on a flower quilt.
Angela was doing some improv piecing based on a piece she started in a class.
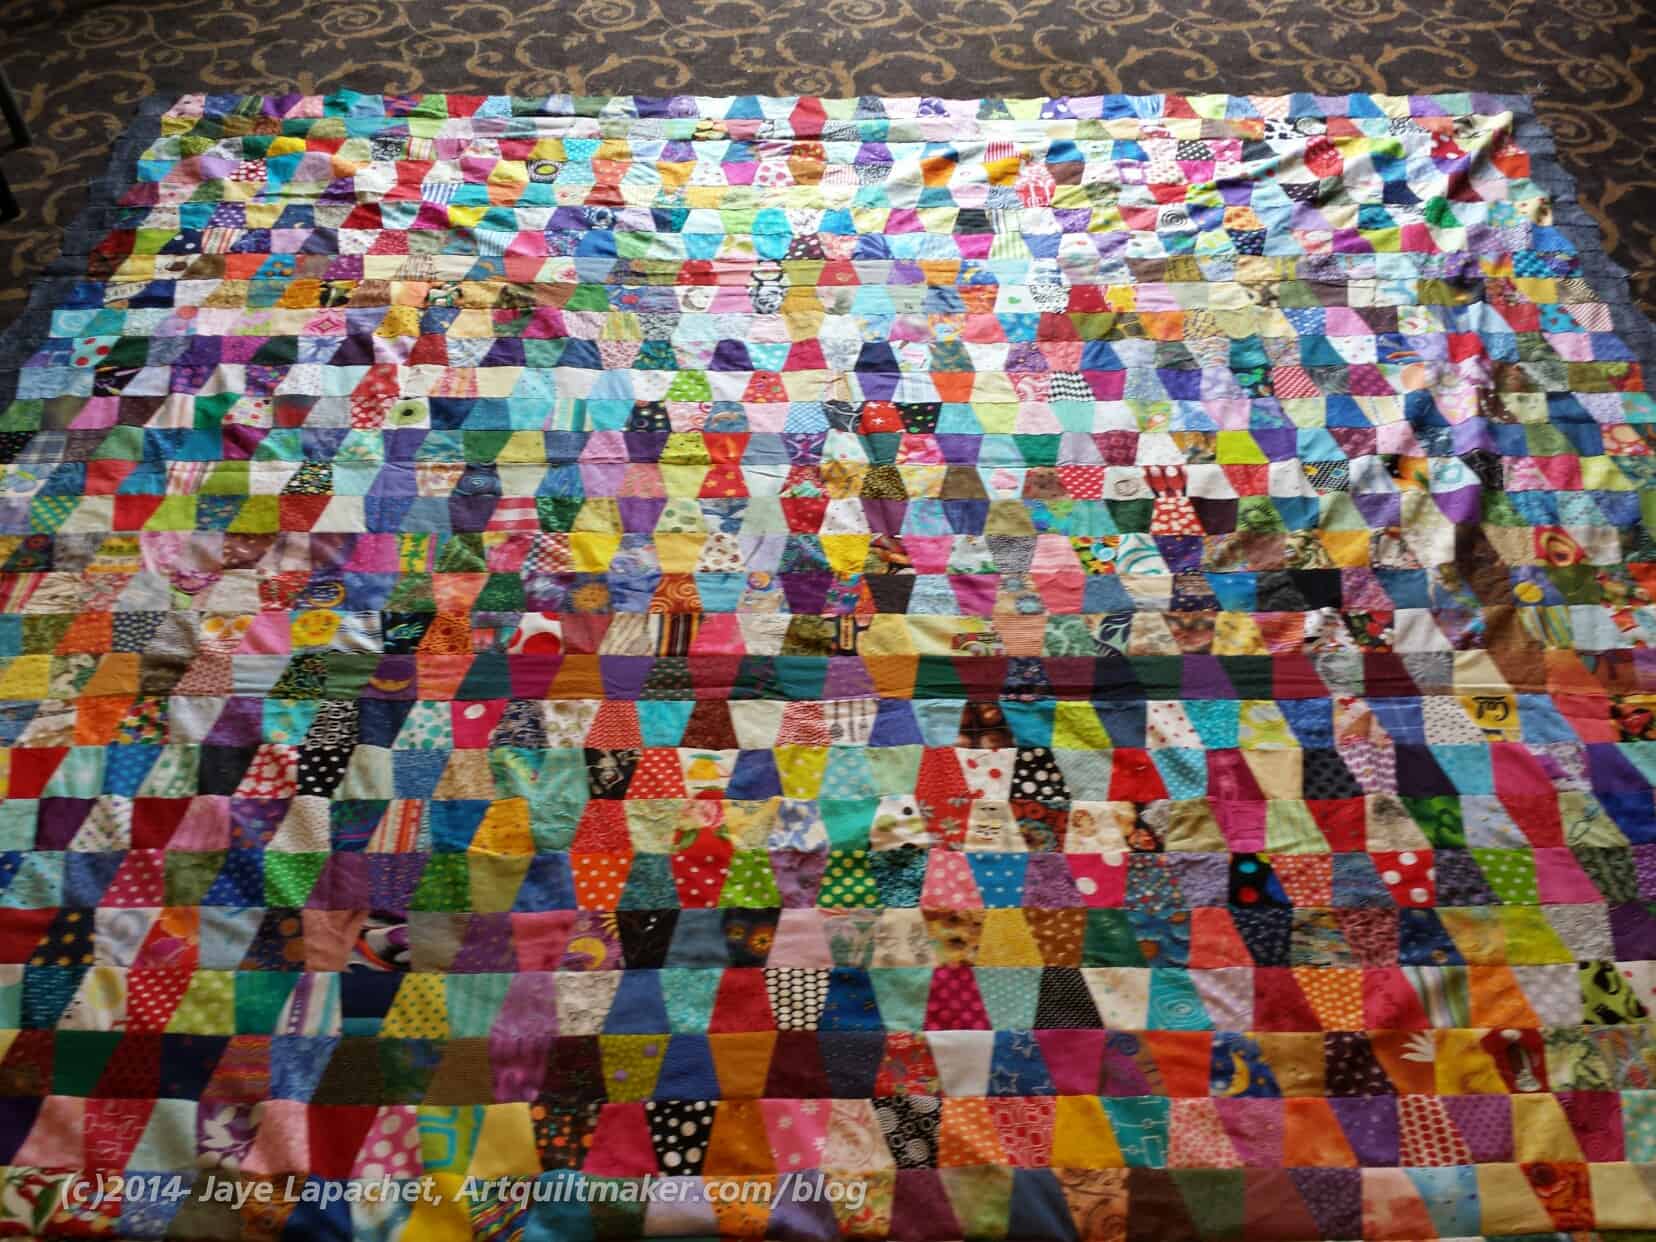
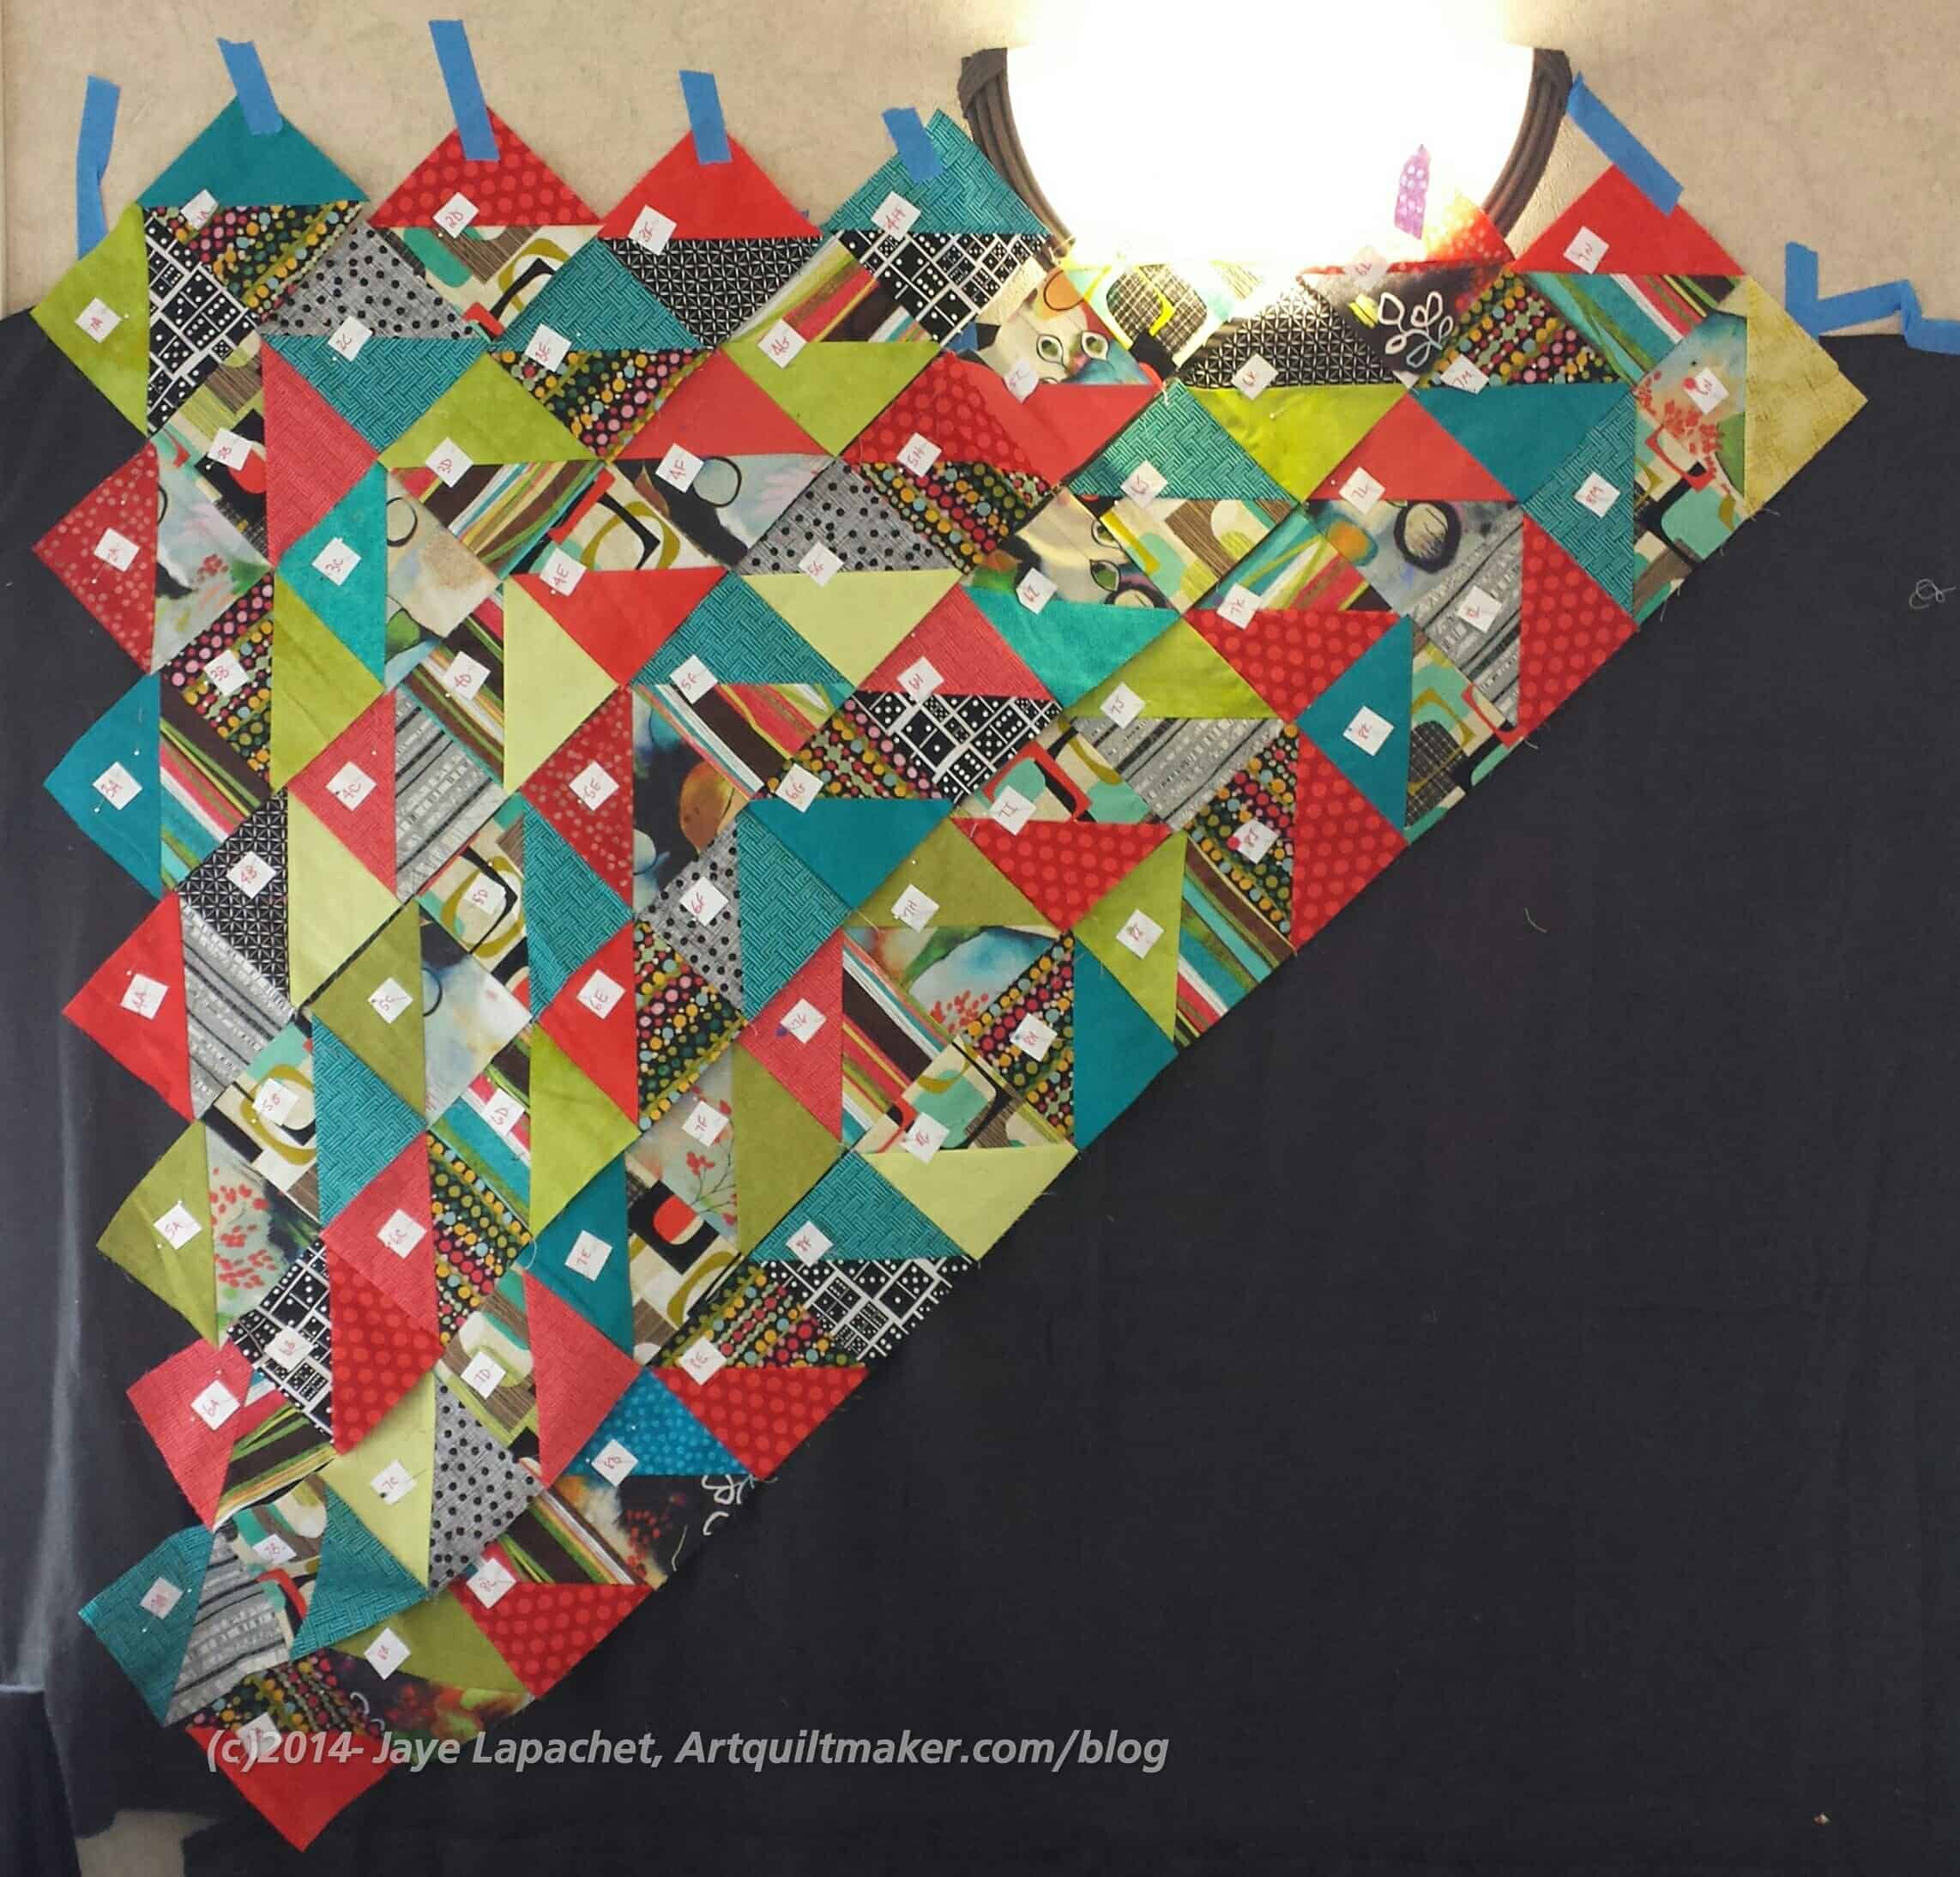
Julie’s Tumbler
Julie worked on 3 or 4 pieces, including a self portrait and a couple of pieces she started in China. She also sewed rows to her tumbler quilt top, which is nearing completion. It was so great to see her so productive as well.
Rhonda worked on handwork all weekend, including an applique’ project inspired by Kevin Kosbab. She showed me the Valdani Pearl Cotton collection she bought from MassDrop, the temptress! I love Valdani Pearl cotton. I may have to start another quilt like Beach Town. Or just pick a project on which I can embroider. Hhmm.
Maureen’s Mid-Century Modern
Maureen worked on a piece that I thought was made from a pre-cut, but she picked all the fabrics herself. I really think that she should put pre-cuts together for Moda. Her piece looked like a mid-Century modern quilt or painting.
Maureen worked on a plaid piece as well. She found the fabrics at FabMo and turned them into improv blocks which she was playing with when we all had to leave.
Dolores was working on dolls from a class she took with Susan Else as well as the piece from the online class she is taking.
Caroline made pillowcases and worked on a crazy paper piecing project. I think the one section she worked on had 58 pieces!!!
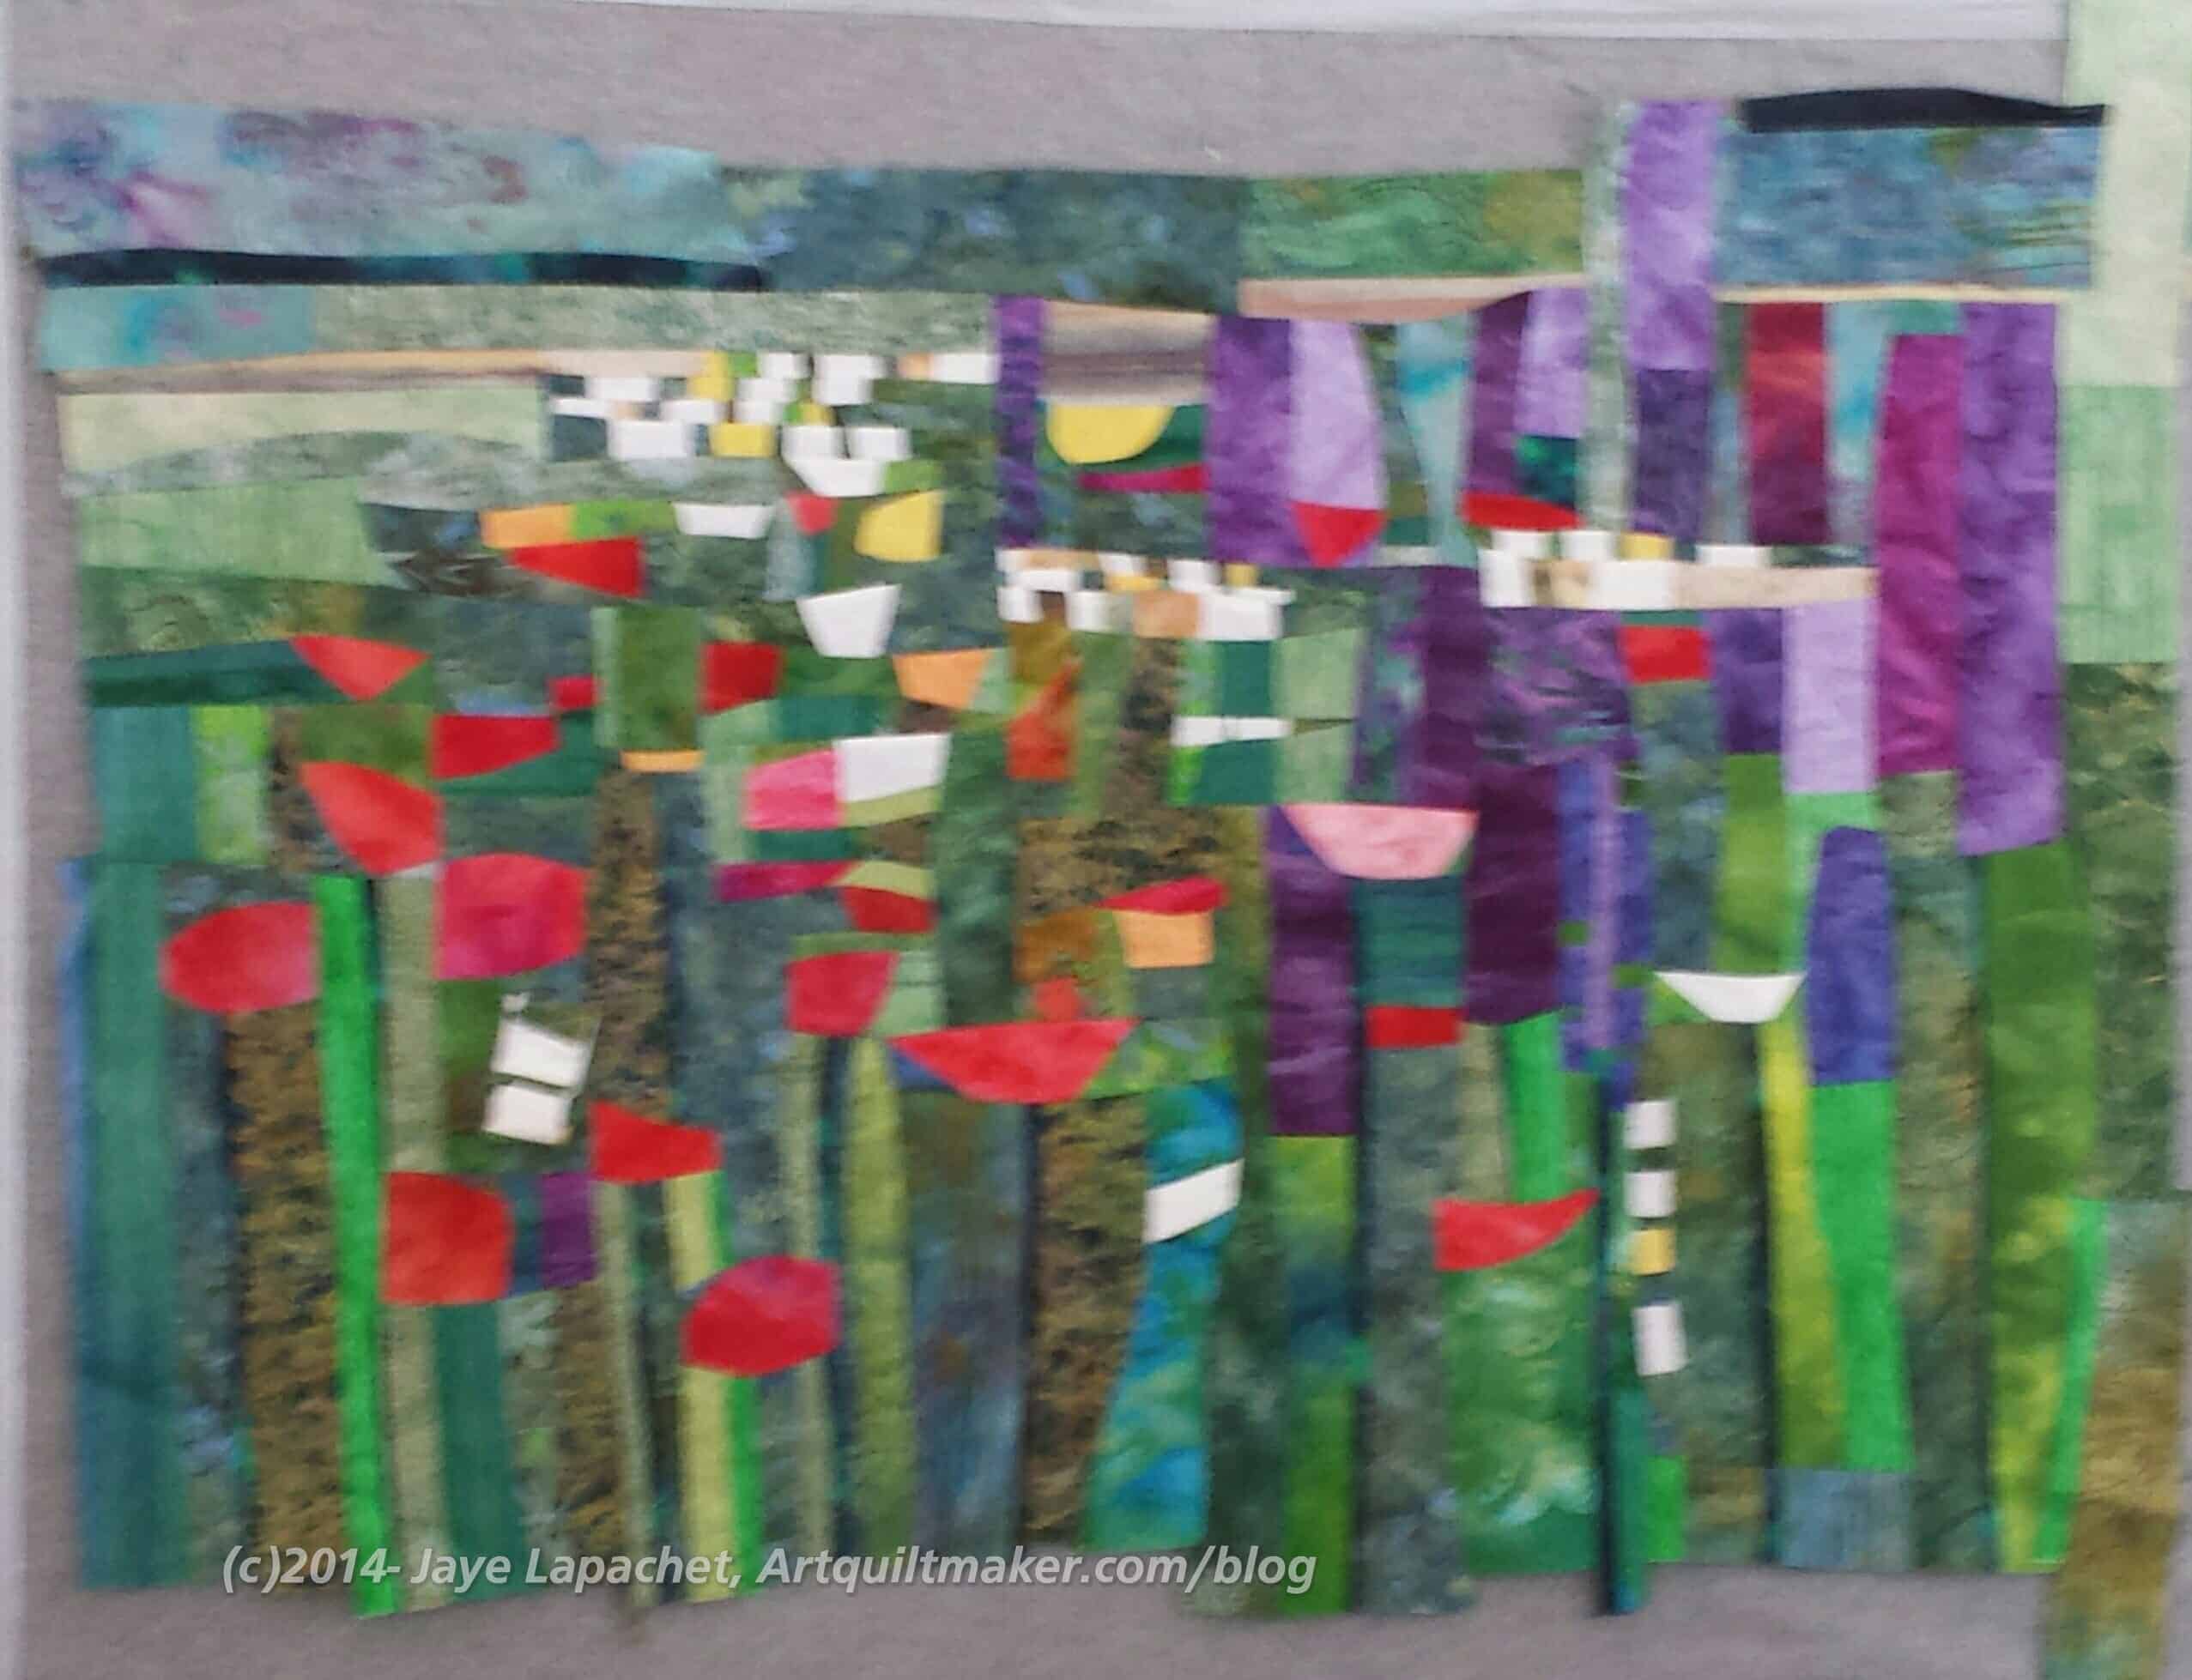
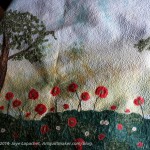
Amy’s Landscape
Amy was working on a kind of landscape with flowers. I loved it!
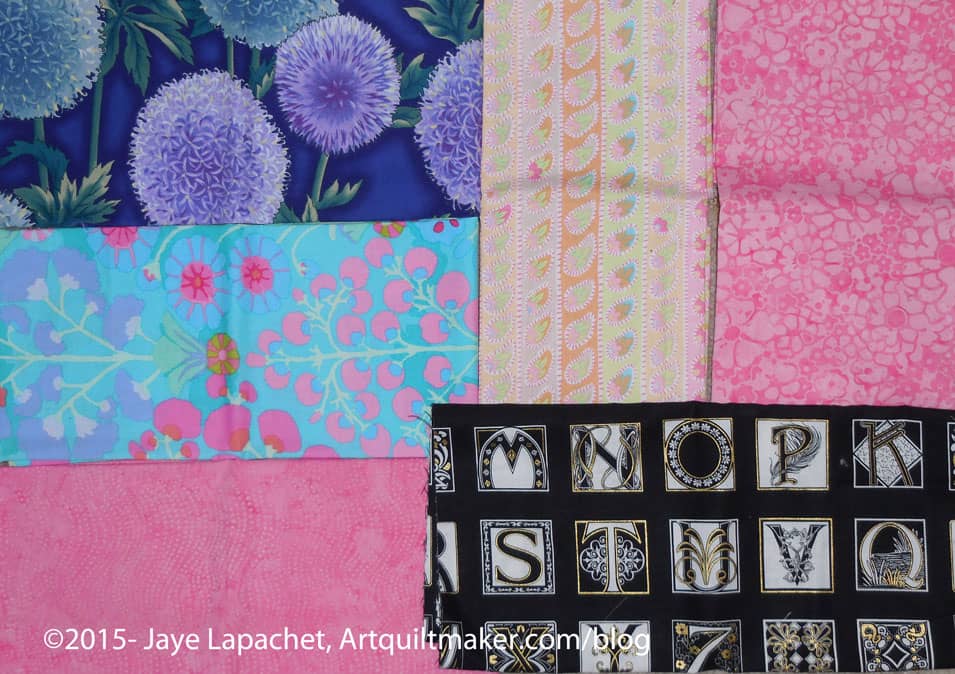
There was also a “free stuff table” and I picked up a couple of pieces of fabric. There was something about the colors and imagery that attracted me. There were a couple of pieces of Kaffe Fassett and some others. I tried to exercise restraint. It was difficult, but I seem to have succeeded. The purple dandelions were kind of a surprise, but they will come in handy somewhere.
CQFA Retreat Free Fabric
In addition to the sewing, it was great to see other people’s projects and chat with my friends. There was never enough time to find out everything I want to know about other people’s process or what is going on in their lives. I didn’t take nearly enough photos and wanted more time to sew.
Still I am glad I got the time I did, especially at this time of year. I felt like I was really productive and that feels good. I need to sew more.
One of the bonuses of living in California is that Disneyland is no more than a day’s drive away. When I was a kid, it was a couple of hours away and I was fortunate enough to have parents who took us there every year.
At some point, I was old enough to refuse to ride the roller coasters and I became okay with visiting the Haunted Mansion. I have been on all of the rides and seen most of the shows. I still enjoy the park and its attractions, but now I look at the details gain inspiration from them.
Seahorse detail
I have some bits and pieces that are supposed to be part of a challenge for CQFA. I didn’t know what do with them until I saw the seahorse on top of King Triton’s Carousel. KTC is really in California Adventure (a poor stepsister to Disneyland, but great details as well).
I like the stylized motif. The large nose (bill? beak??) and the very unrealistic outline, which is not cartoonish.
When I saw this, my idea was to applique’ a seahorse to a piece of fabric and then use the fusible pieces as a kind of border – clustered in a corner or something.
It was very high up, so this is the best picture I could get even using my extreme zoom.
Grate
I thought of Kelly when I saw this grate (yes, I look at everything), because she is an excellent quilter. I posted it on Twitter and asked how people would make it. Predictably I got the gamut of responses. One interesting response, from Dan Rouse, was EPP, which I didn’t think of! I am not sure how that would work, but I am enjoying thinking about it.
I am pretty sure I have seen some fabric with this sort of motif. I may even have some.
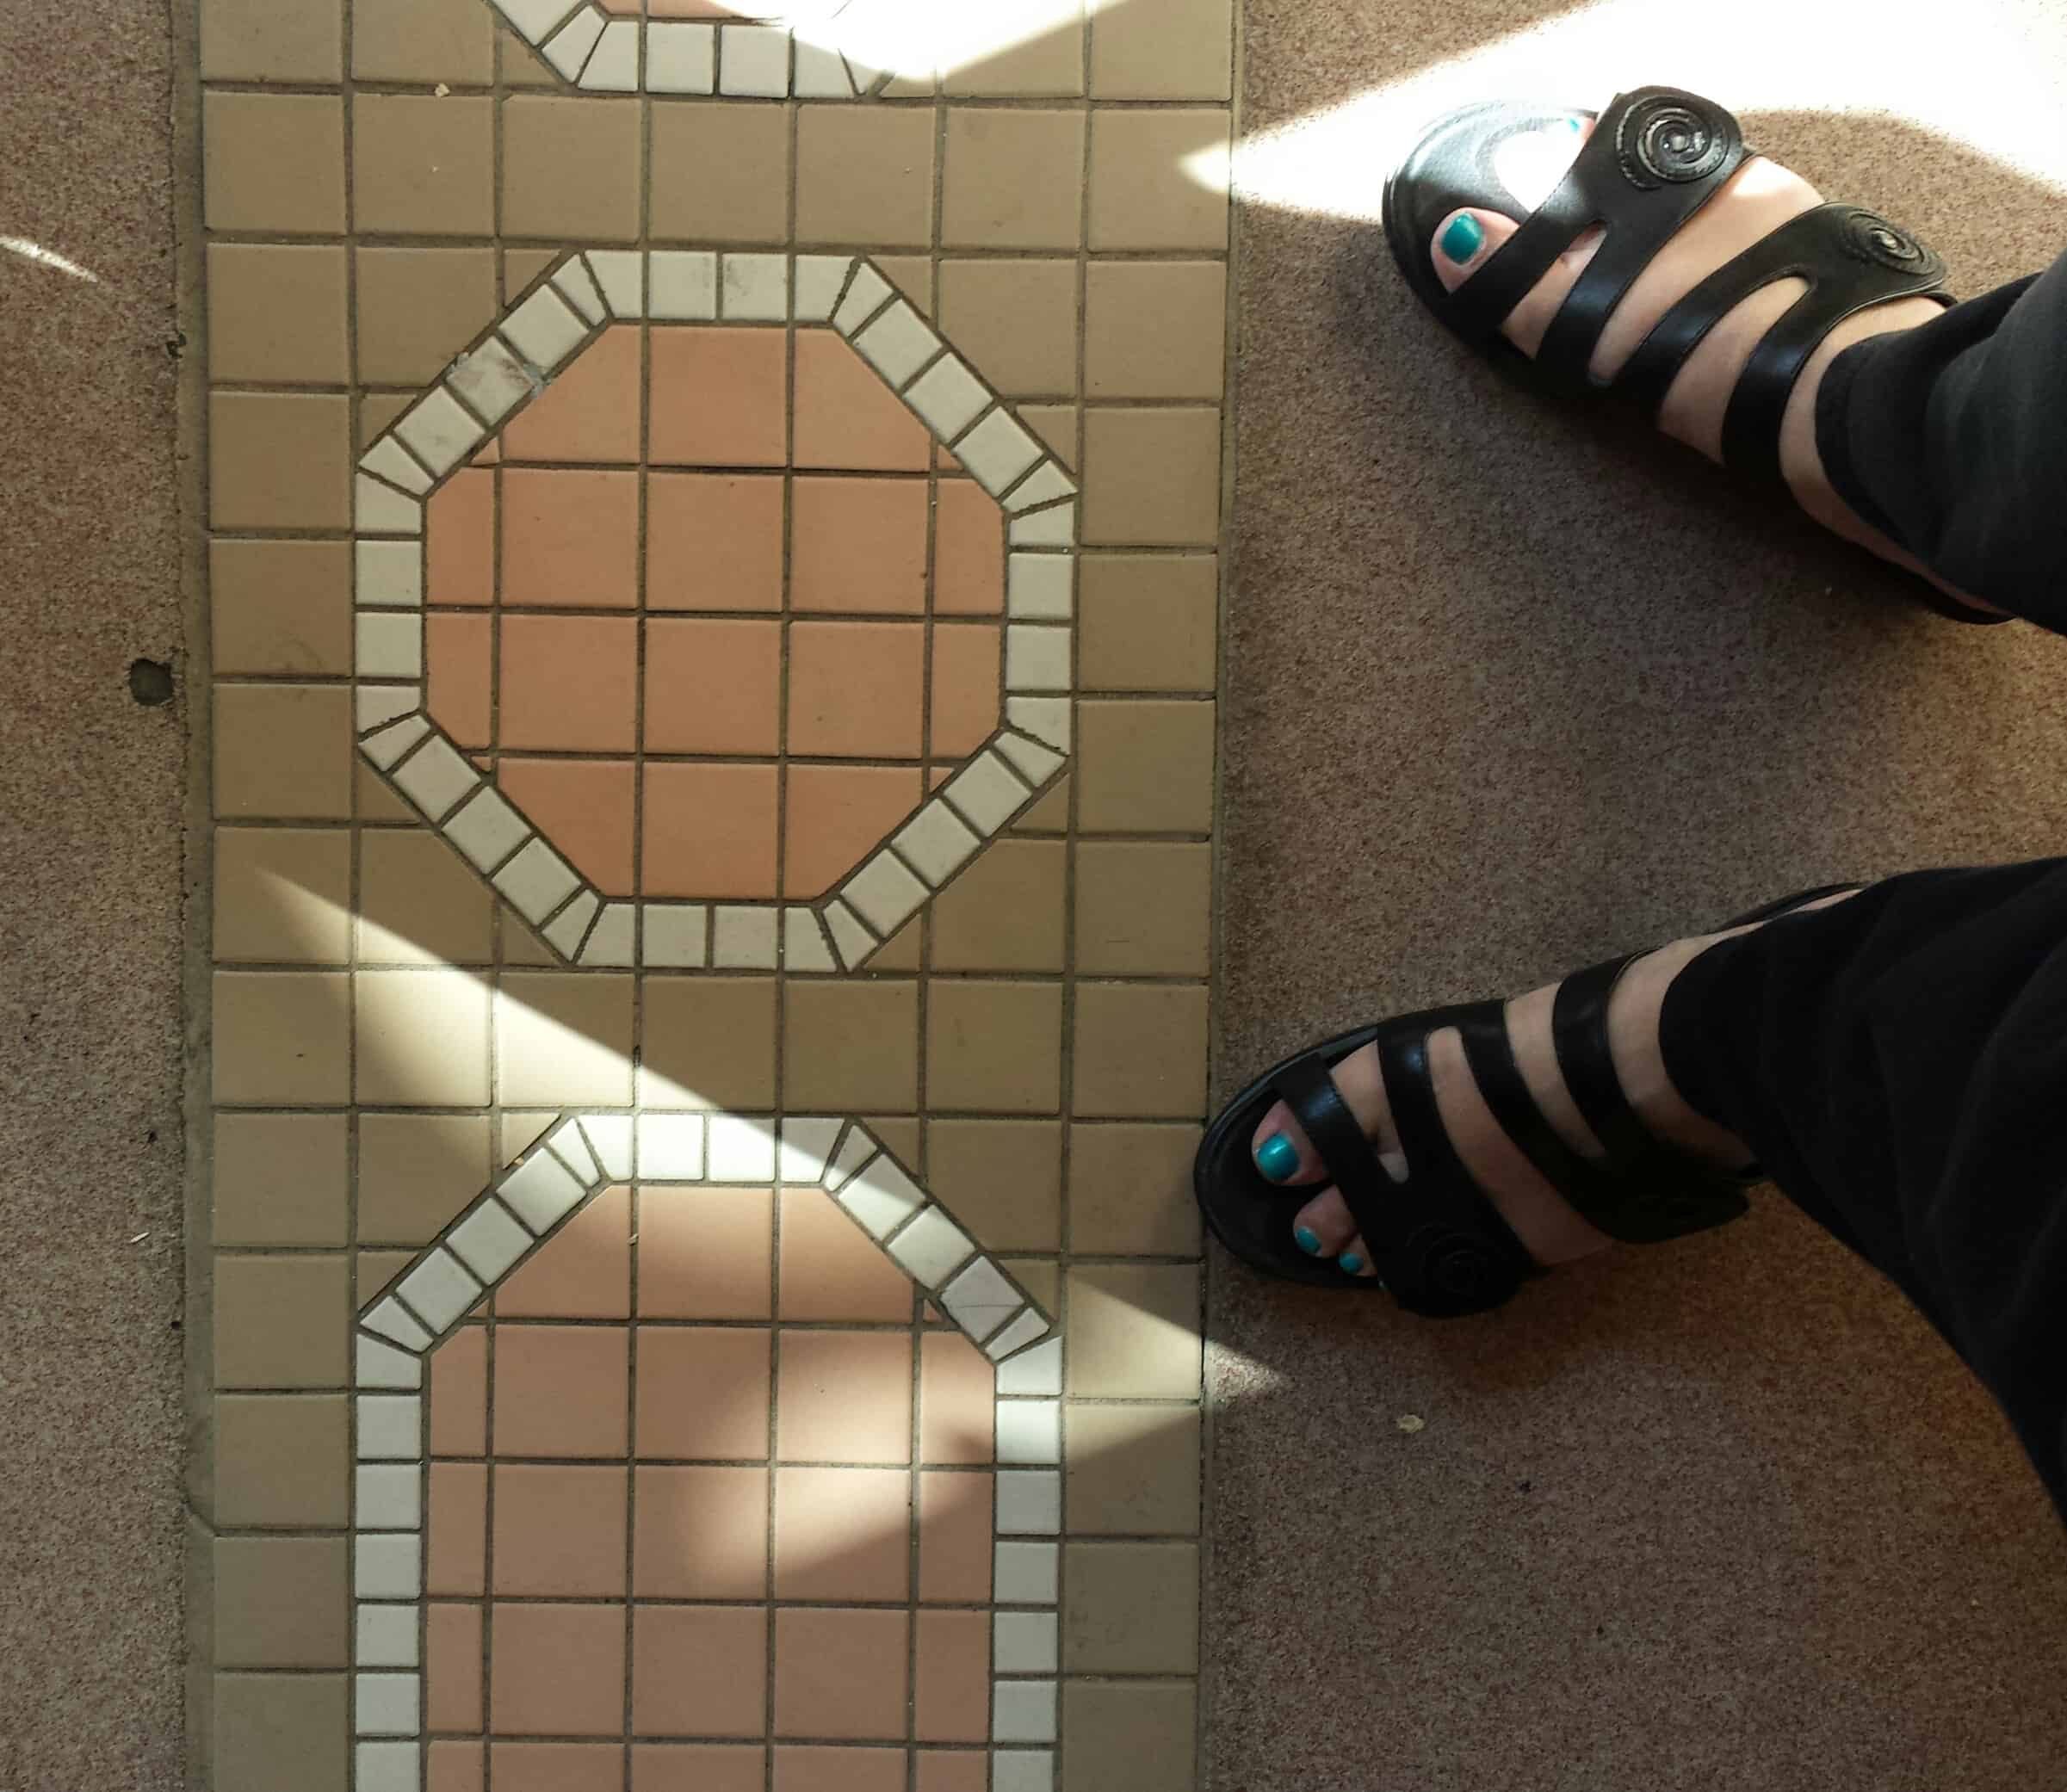
Floor detail, Midway Mania
With the O9P quilt, I am on the octagon/snowball bandwagon. I saw this motif on the floor at Midway Mania (fun attraction, by the way) and am determined to put this on the list of borders to make. Alternatively, it would make a good row quilt using vertical rows.
I would make the pieces inside the octagon larger, perhaps a nine patch so that the portions of patches were not so small. The octagon border would also have bigger pieces OR one piece per side. I would have to see what looked better. Seams, you know.
I would also not break up the corners outside of the octagon (that would make the octagon into a square). It would just be one triangle. It would be an interesting challenge.
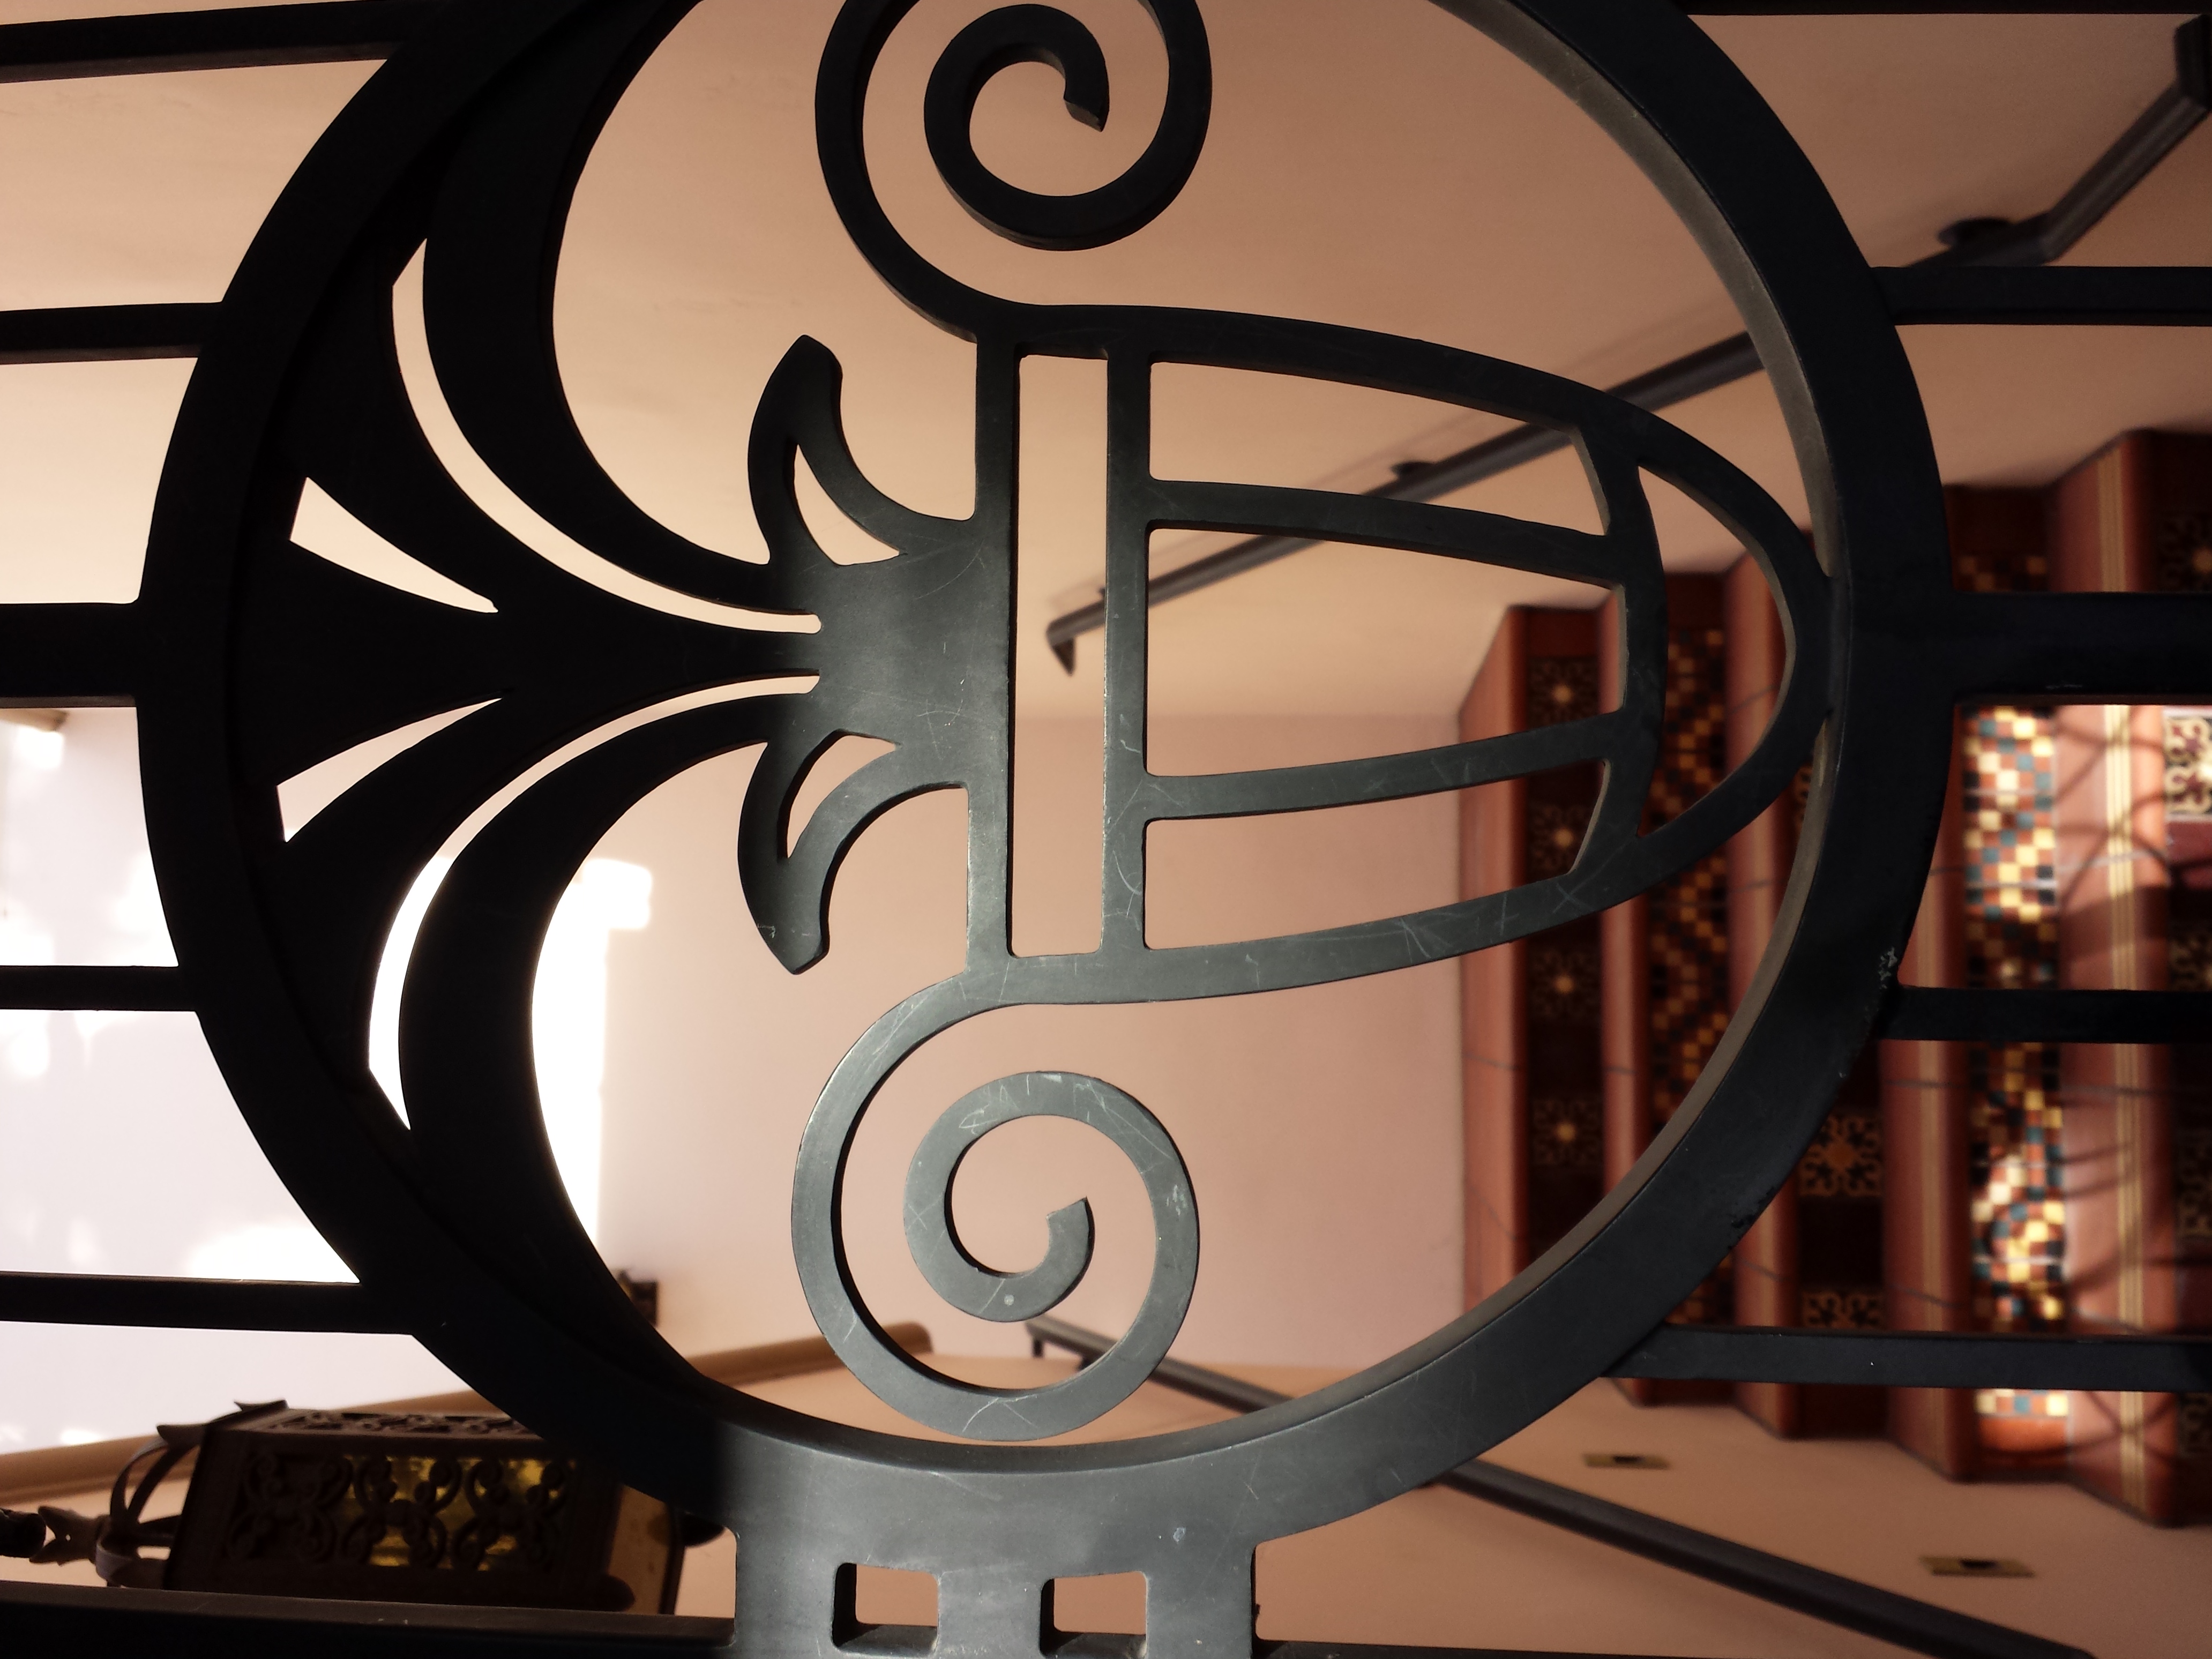
Buena Vista Street Vase
This vase was a quick drive by photo. I saw it as we walked by at a leisurely pace and didn’t take a photo. Then we were fighting our way through the parade crowd and I knew I wouldn’t have another chance, so I got ready and took the photo as I was walking by. I slowed down, but didn’t stop lest I be run over.
It is a good outline motif and could be appliqued. I see some piecing opportunities for the vase itself, though I would not want to piece the spiral handles.
I would have to think about the circle. I think it adds a lot to the motif as a whole, but would I want to applique’ it?
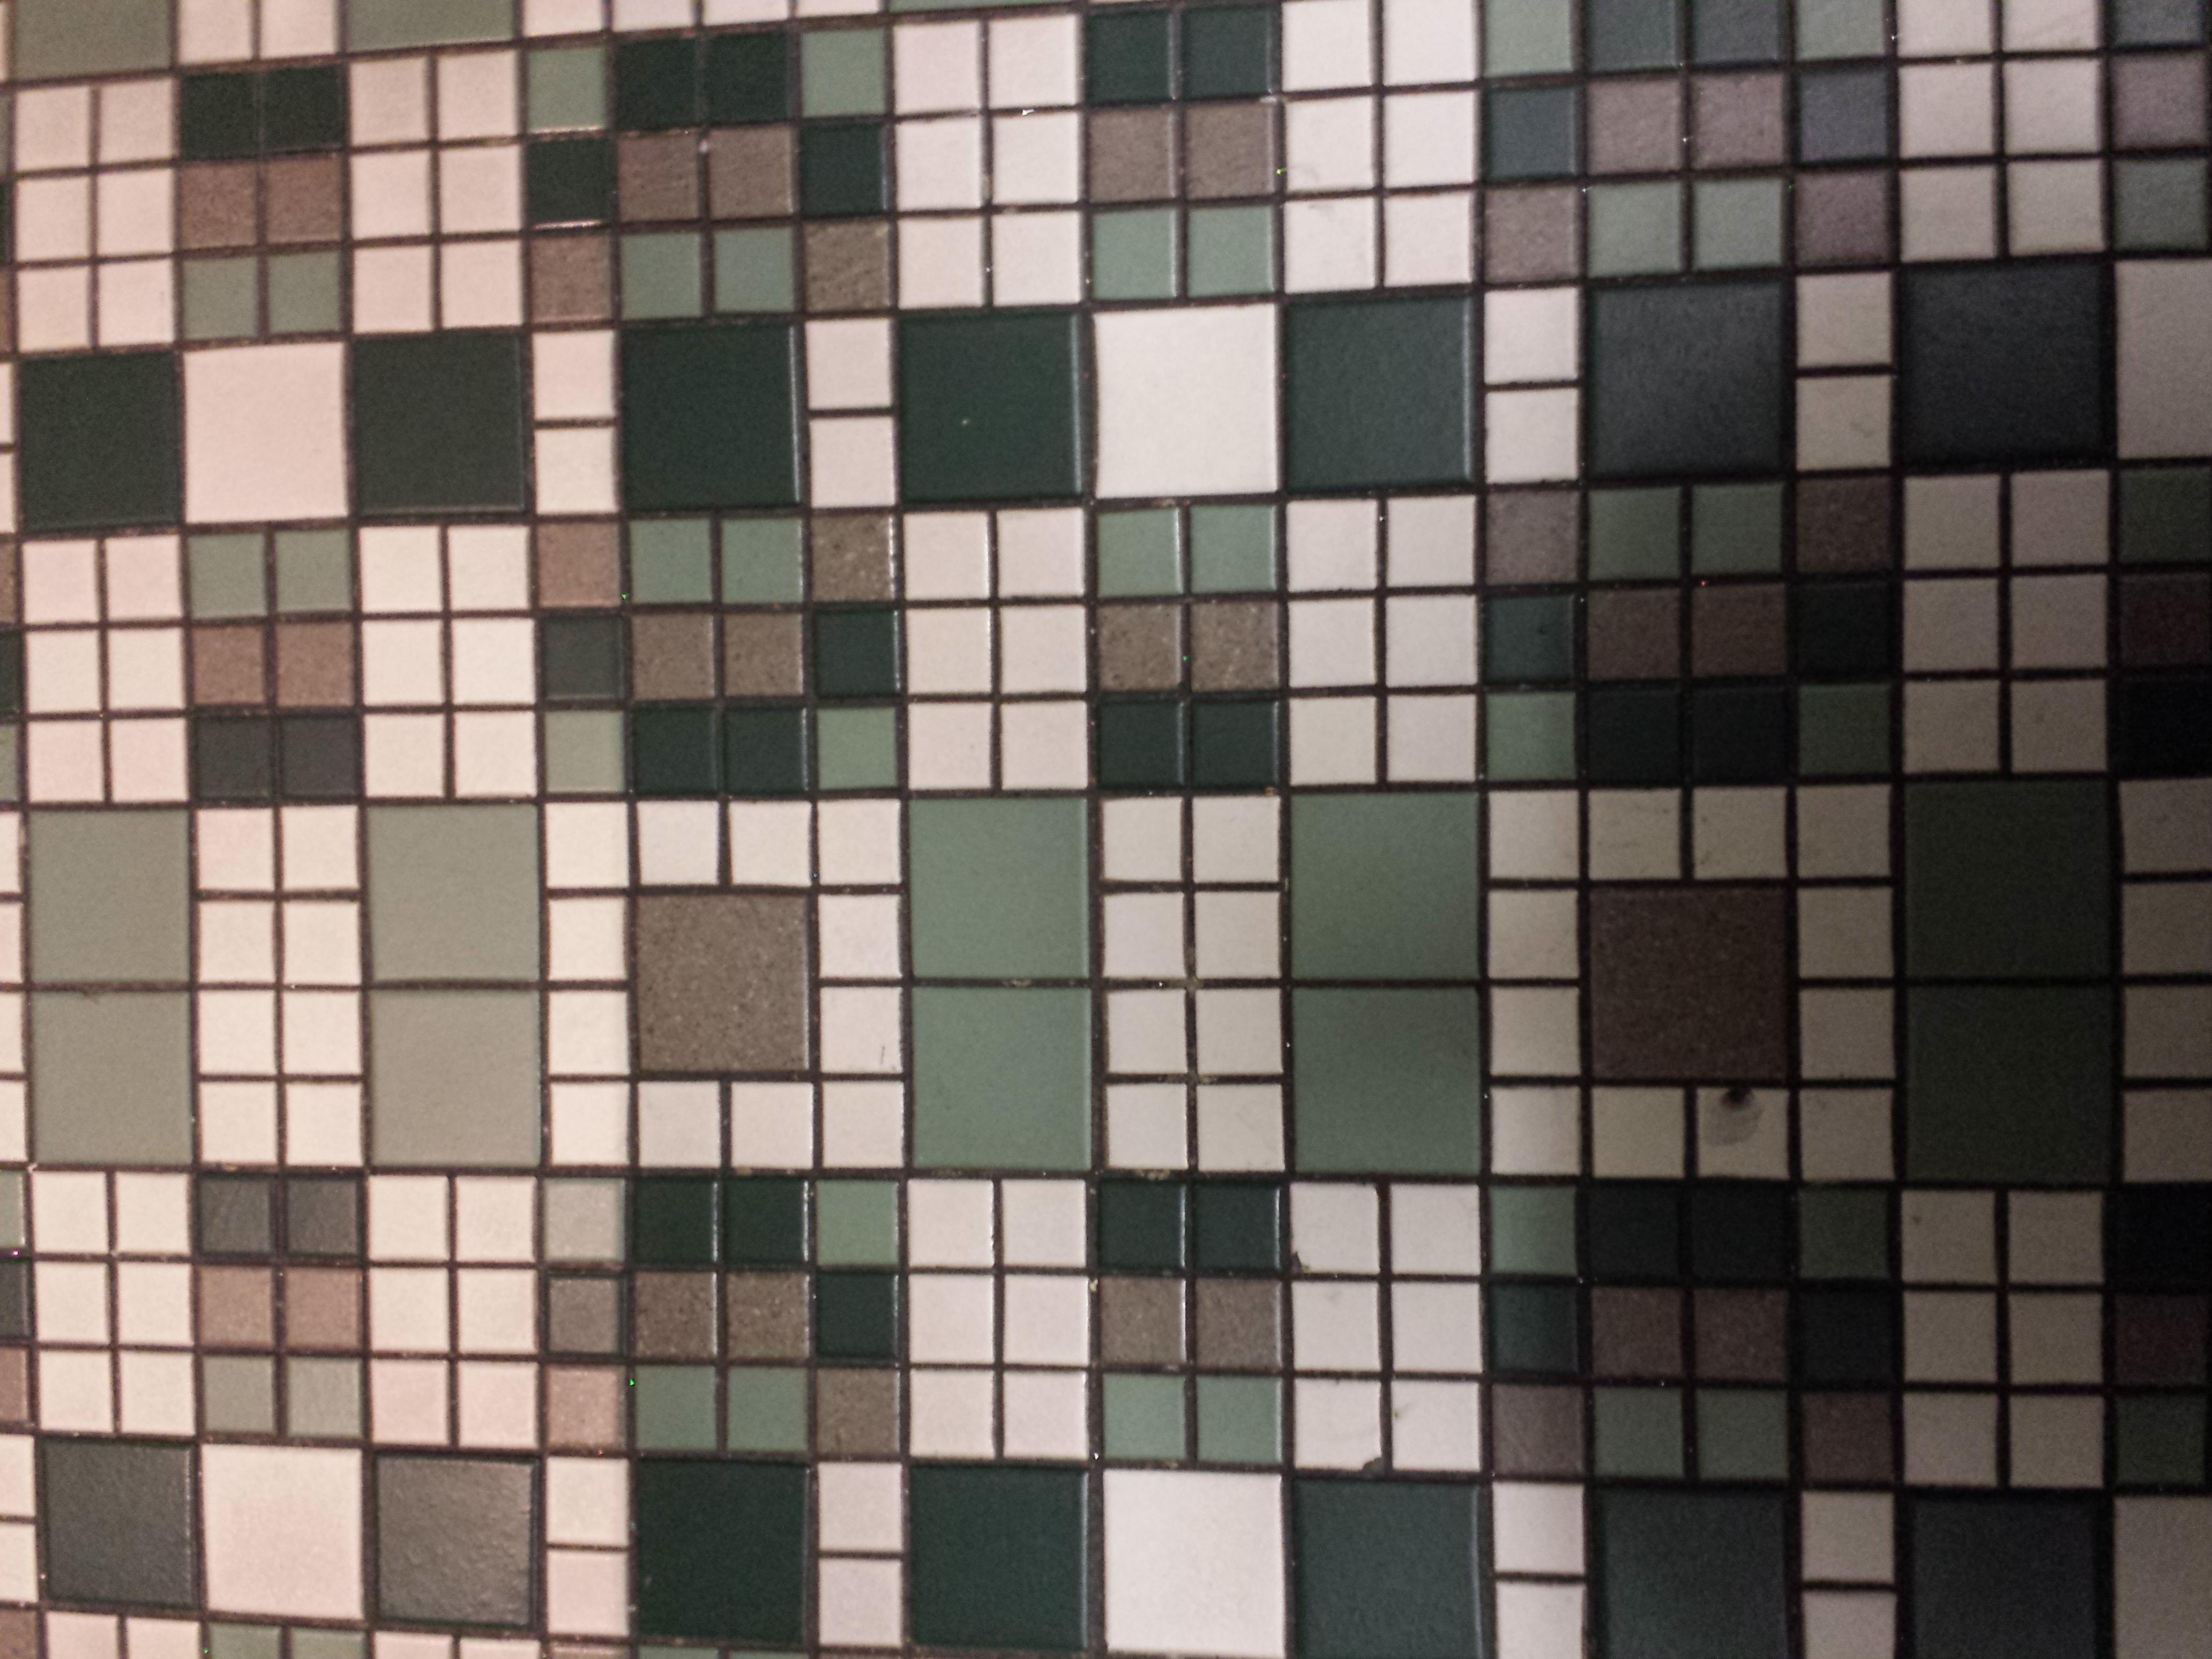
Tile Floor
Finally, I cannot leave you without some tile. This tile motif was a floor, again in CA Adventure and it looks like it would be an interesting and not to difficult baby quilt pattern.
Well, I called this post Disneyland Inspiration when all of the motifs were from California Adventure. I really don’t think of CA as a separate place so I will leave it and you to enjoy the inspiration.
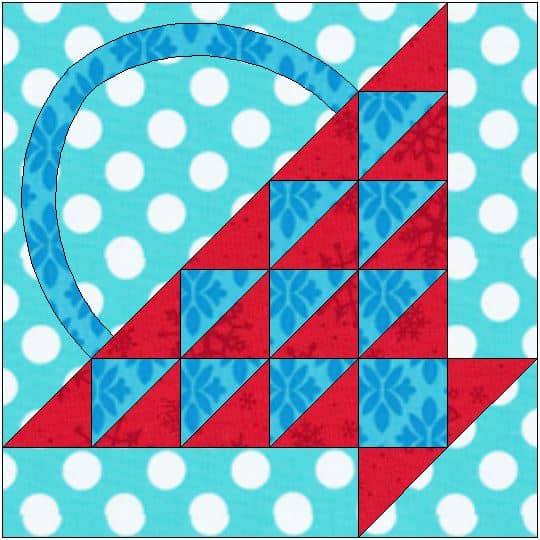
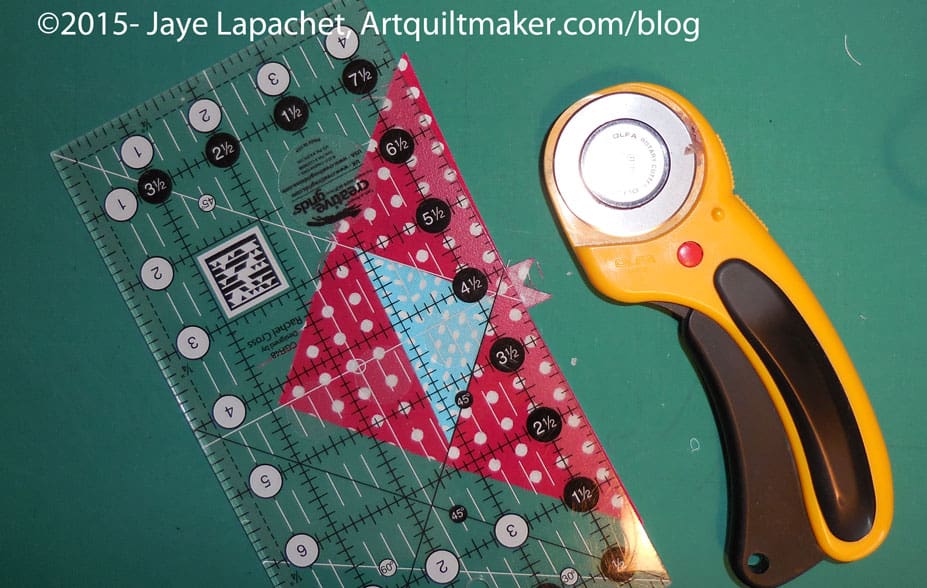
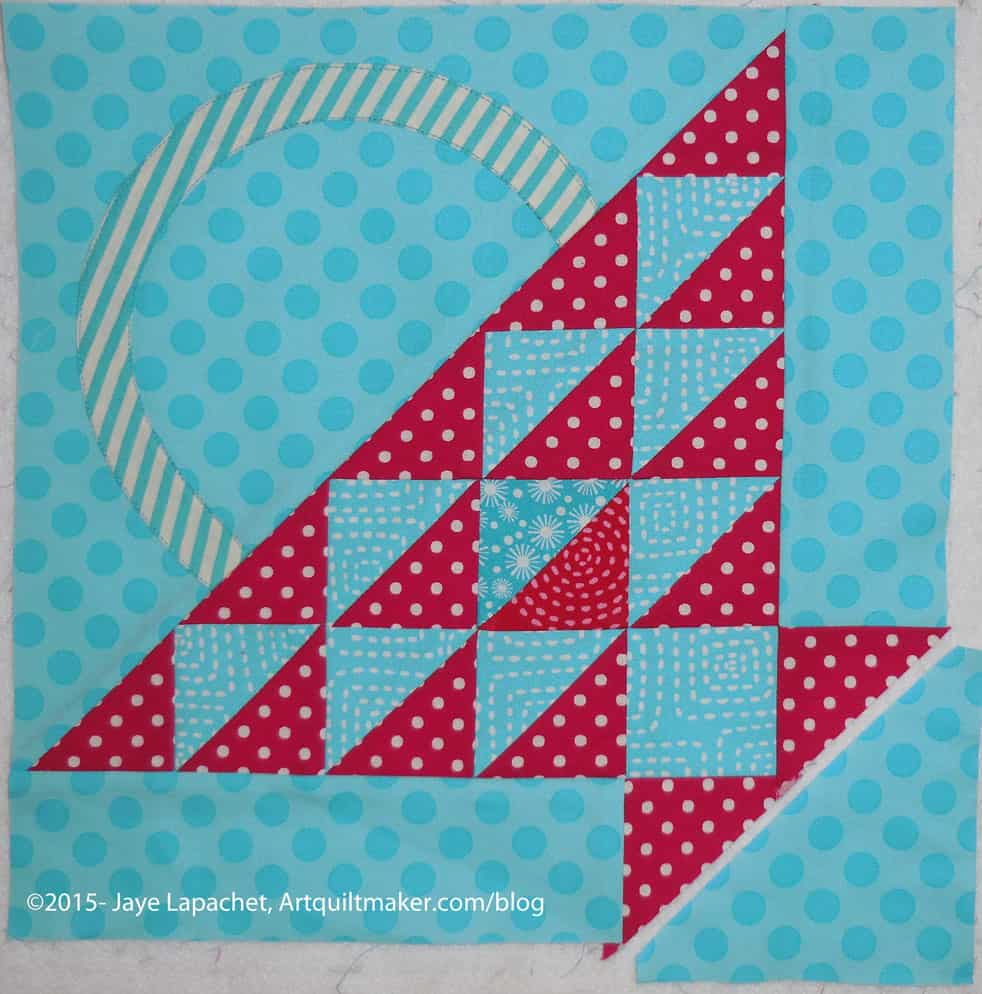
As mentioned in part 1, above is the current block in our Sampler Quilt Class. These directions are for machine sewing your Flower Basket and include a little applique’. The applique’ can be done by machine or hand.
Are you playing along? If you are just starting, below is the complete supply list. You won’t need everything for this step, but you will need to start with part 1 and that part requires more supplies. Also, note, there are a LOT of photos in this tutorial.
These directions use a quarter inch seam allowance. Check your seam allowance before you begin. If you don’t know how to do that, there are resources available, including one from Connecting Threads and Craftsy. You can search the web for others if you don’t like these tutorials.
You will be directed to use the Triangle Technique. Make sure you have the chart as well as the instructions handy.
Respect the bias.
After working through part 1, you have already chosen your fabrics, made your templates and cut your pieces. You are ready to sew.
Sewing
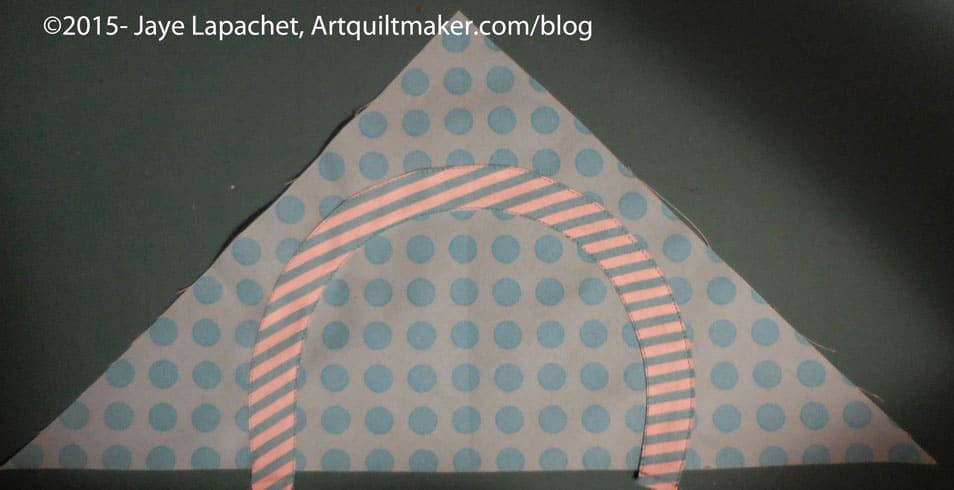
Carefully stitch along the hypotenuse of the large background triangle, about 1/8″ from the edge, to stabilize it. This stitching will be covered up when you stitch the handle part of the block to the basket part of the block.
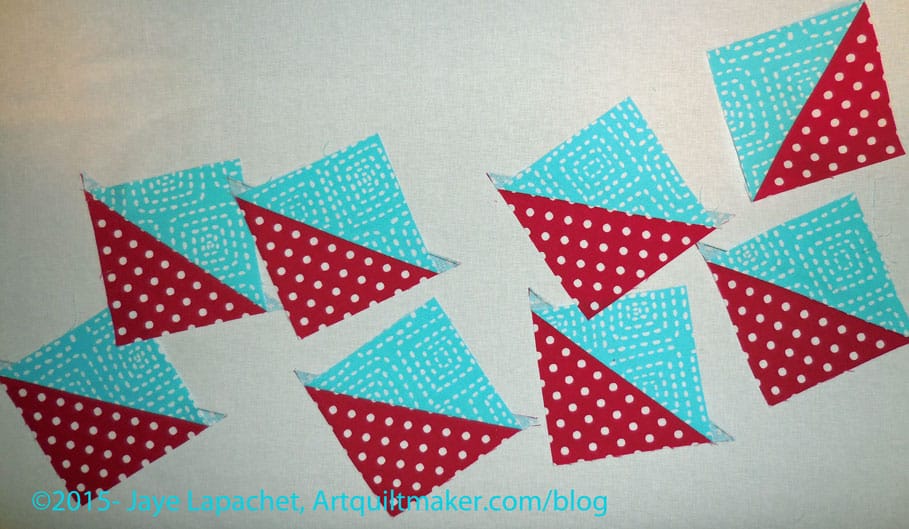
Triangle Technique
Use the Triangle Technique to make your half square triangles. Make sure you have the chart available to confirm sizes. A brief overview is:
Draw an X from corner to corner diagonally on the wrong side of each of your 6.25″ x 6.25″ squares.
Place them right sides together and sew 1/4″ on each side of the diagonal lines.
Nota bene: If I had wanted to pin I would have pinned far away from any of the diagonal lines.
Now you have a piece with four seams forming an X.
Next cut the ‘Plus’ of your sewn piece. This means that you are cutting horizontally down the middle and vertically down the middle.
Line up your ruler with the edge of the fabric and the point in the middle where the two lines forming the X come together.
Cut vertically.
Do NOT move your fabric.
Reposition your ruler and then cut the piece horizontally.
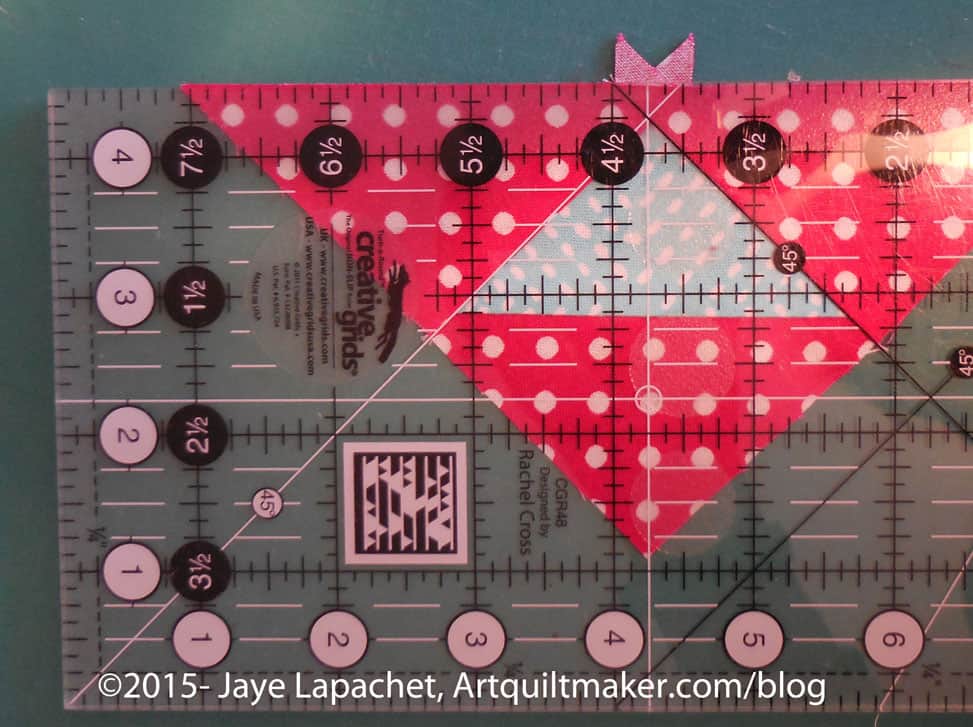
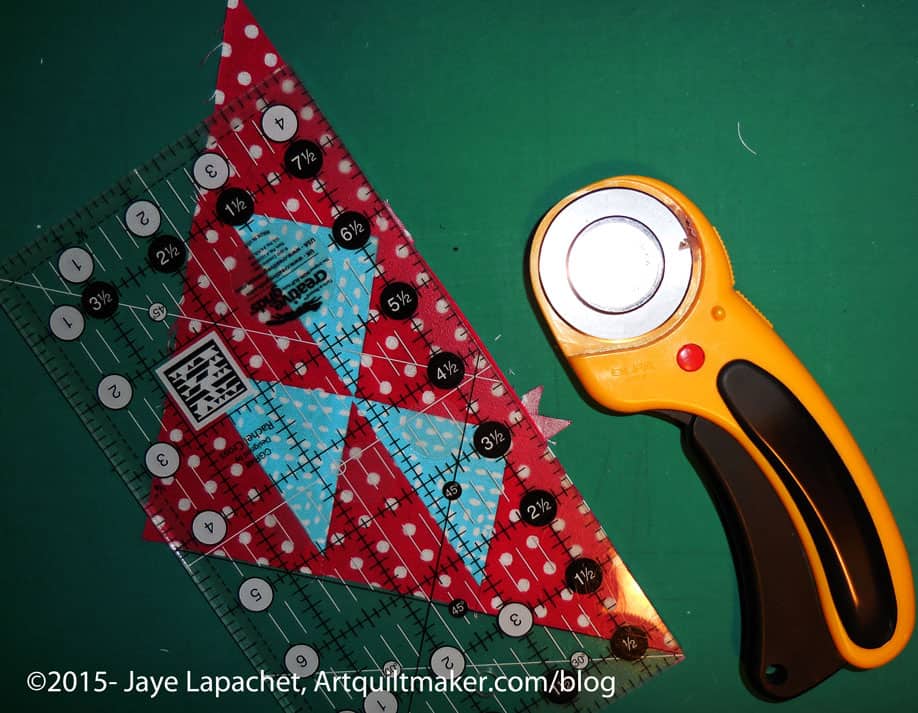
The result is 8-2.5″ half square triangles. The above are actually a thread or two larger than 2.5″, which leaves the perfect opportunity for trimming to make them an absolutely perfect 2.5″.
Trim your HSTs to an absolutely perfect 2.5″.
Now you have 8 beautiful HSTs.
Of course, you can use whatever technique you like to make the half square triangles.
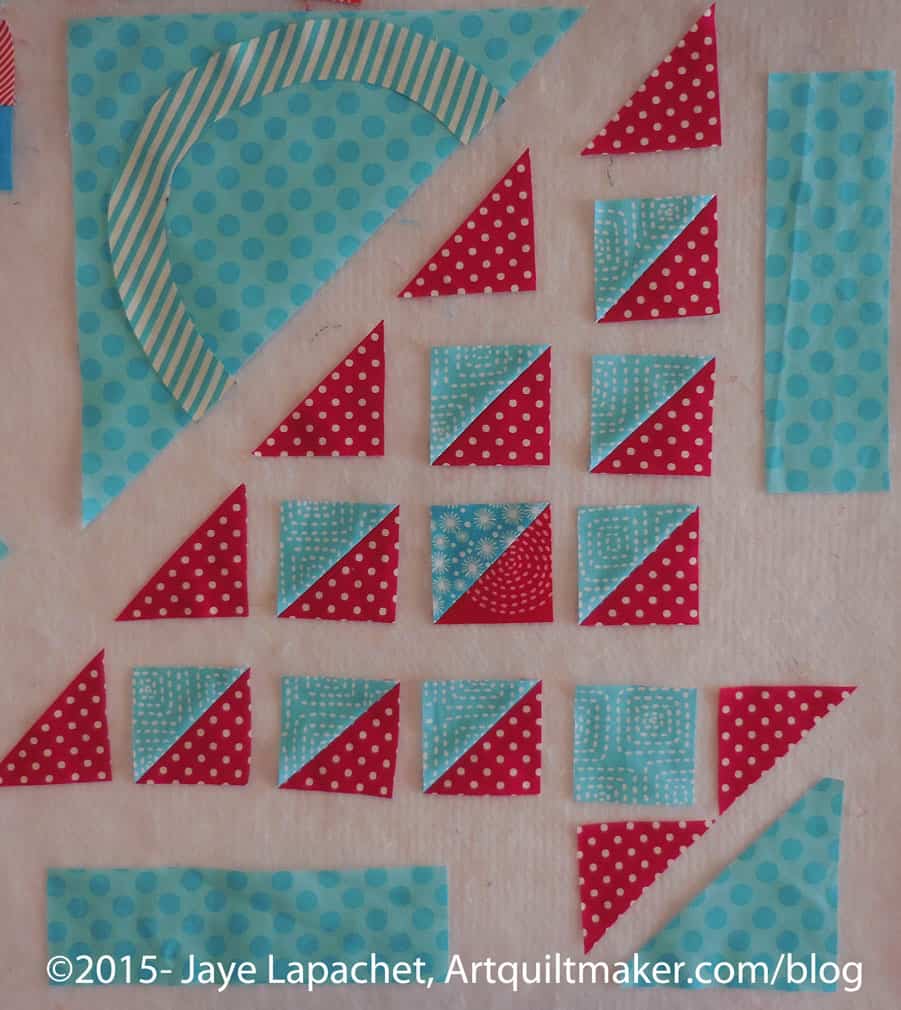
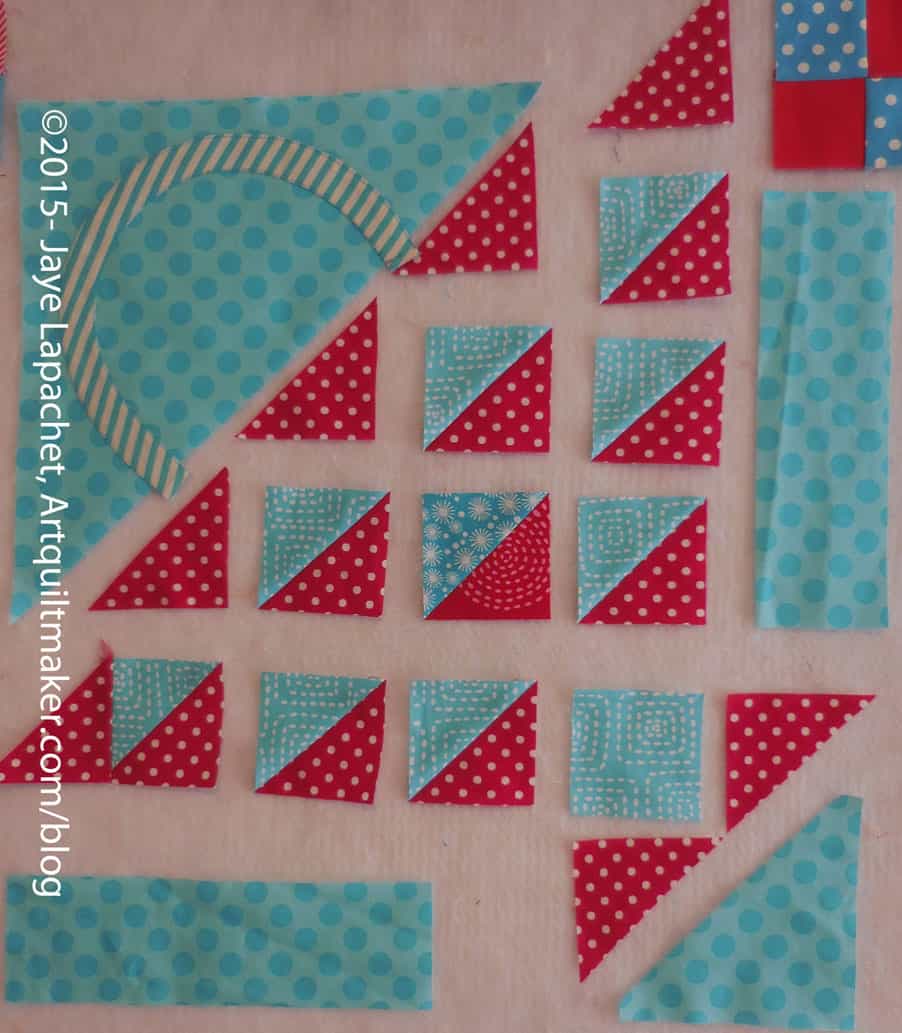
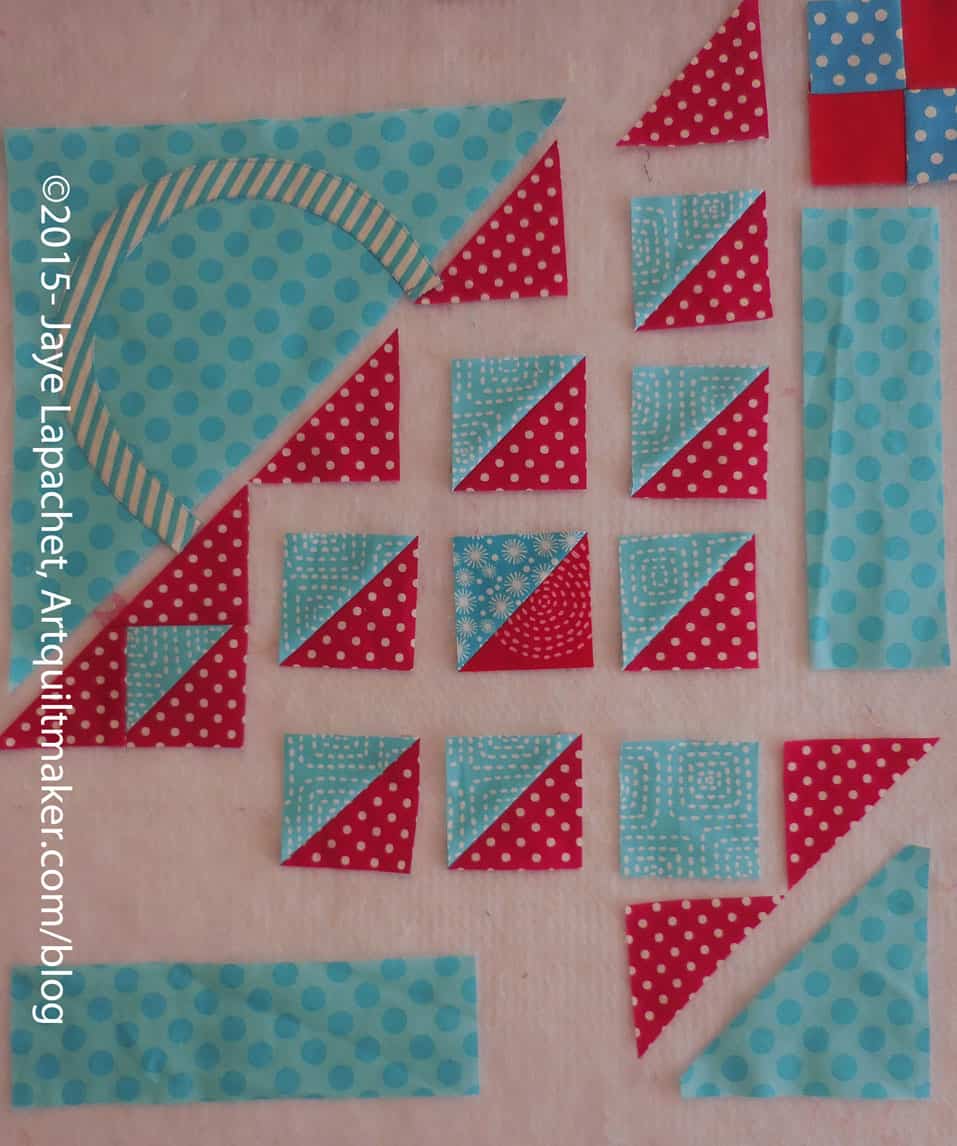
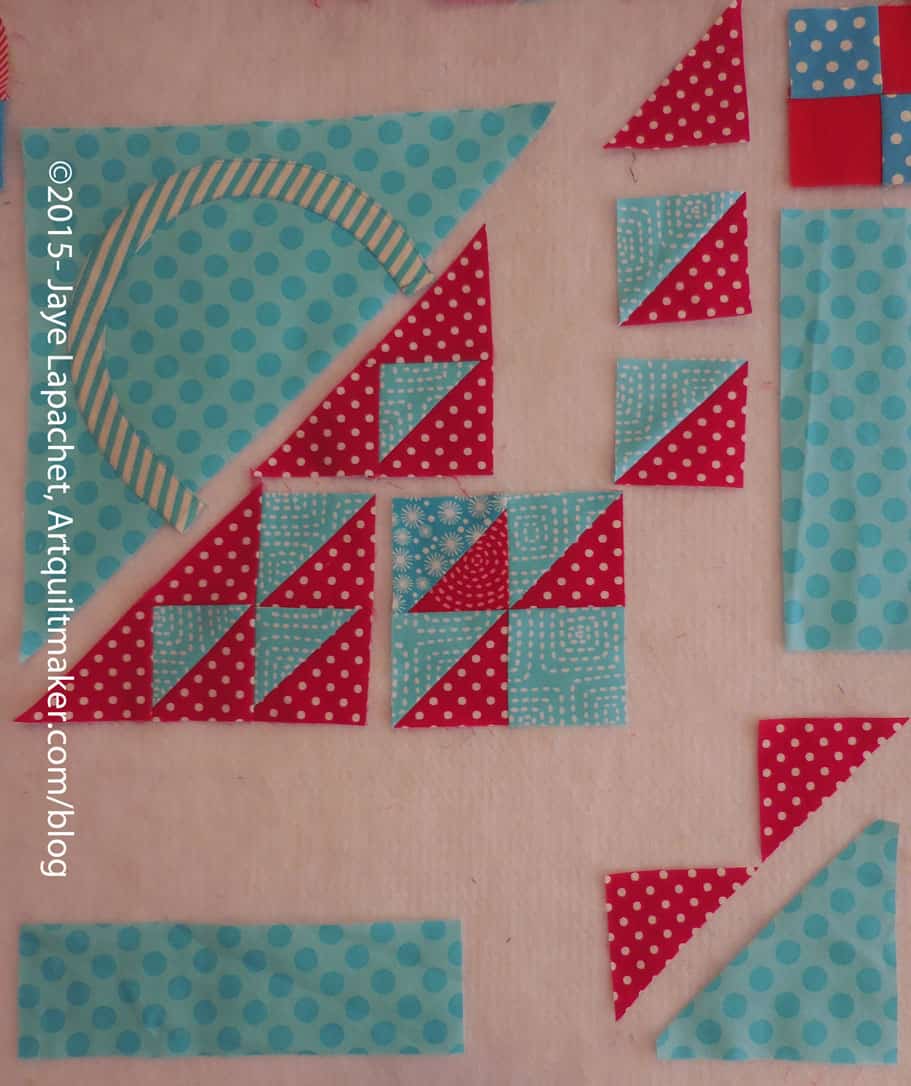
Layout and Assembly
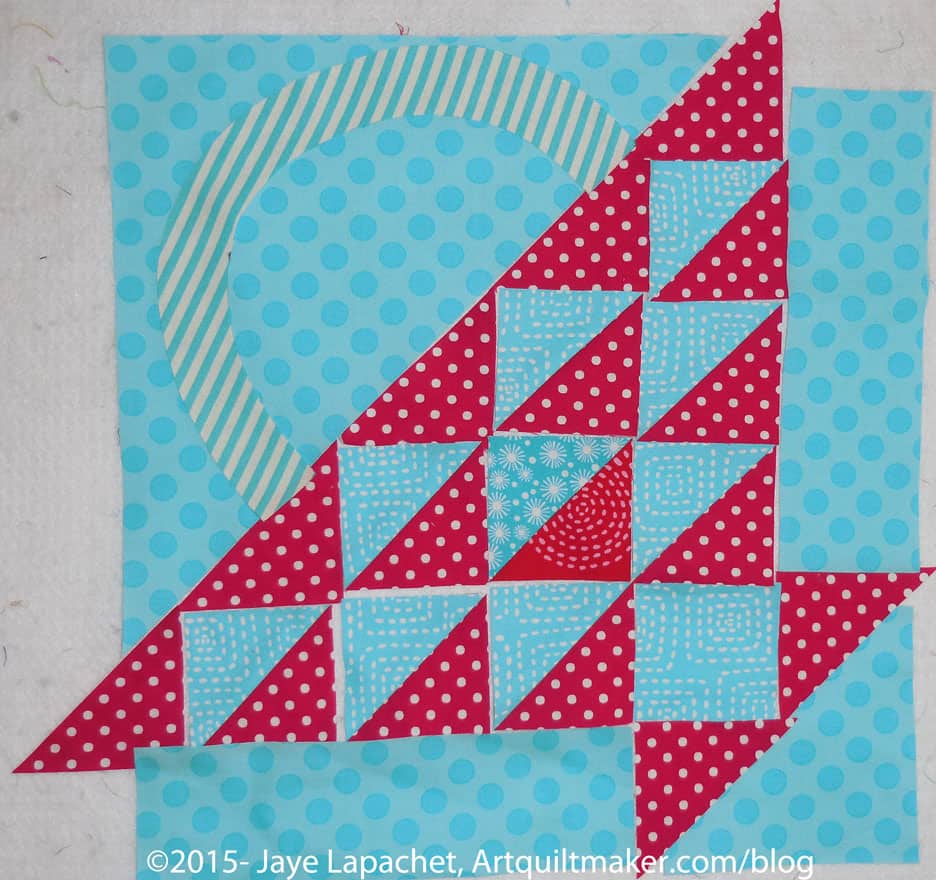
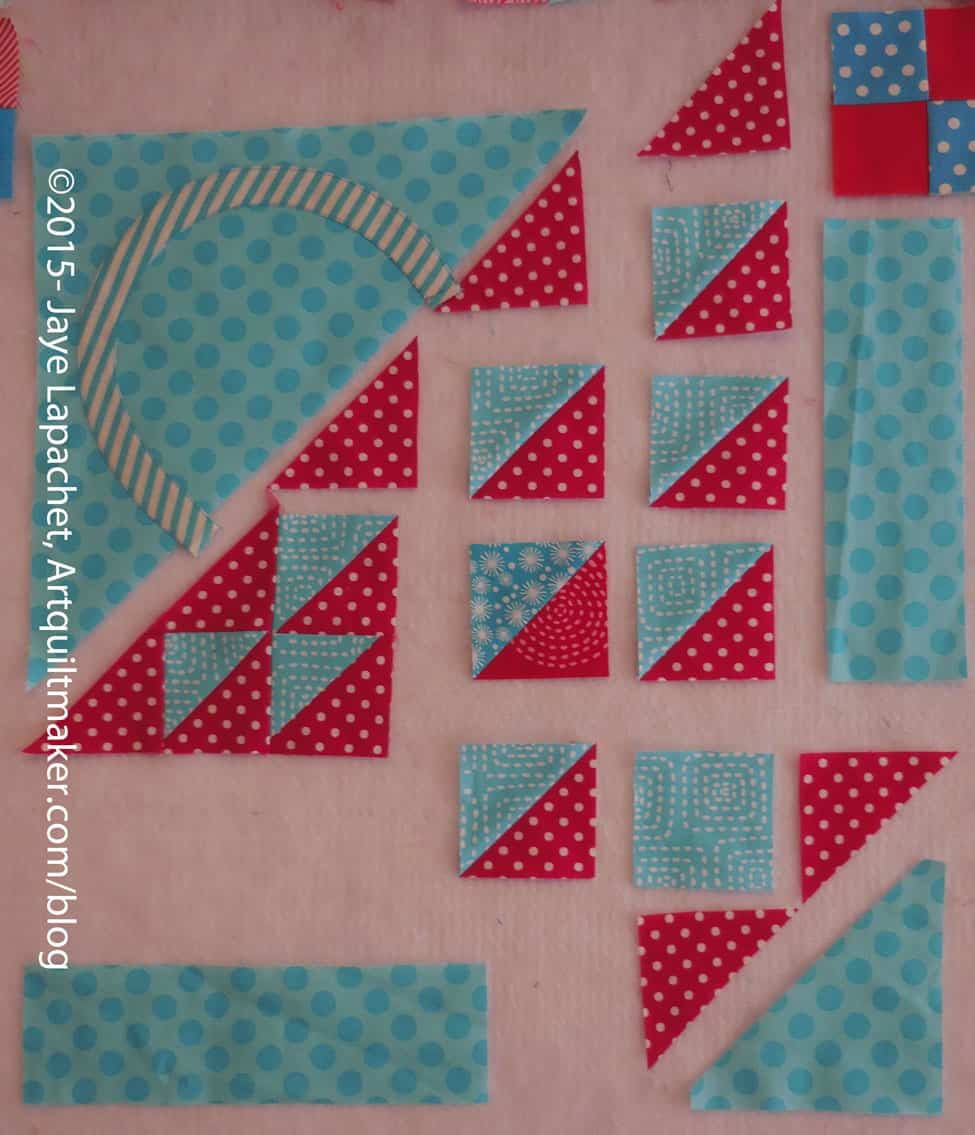
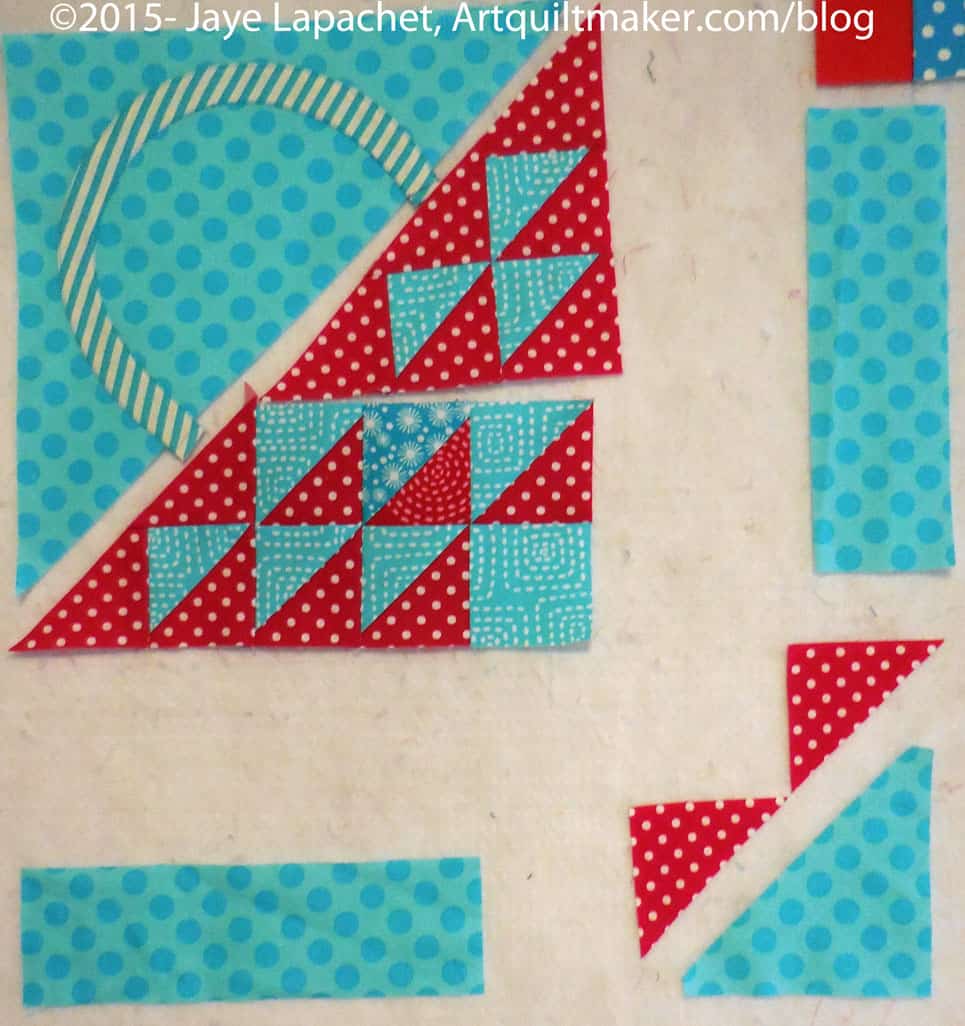
Pieces cut and ready to sew
Now that you have cut all of your pieces, lay them out on your sandpaper board, or put them up on your design wall. It is great to be able to see where all the pieces belong and adjust any pieces that need adjusting before you sew.
Sew Handle to Background
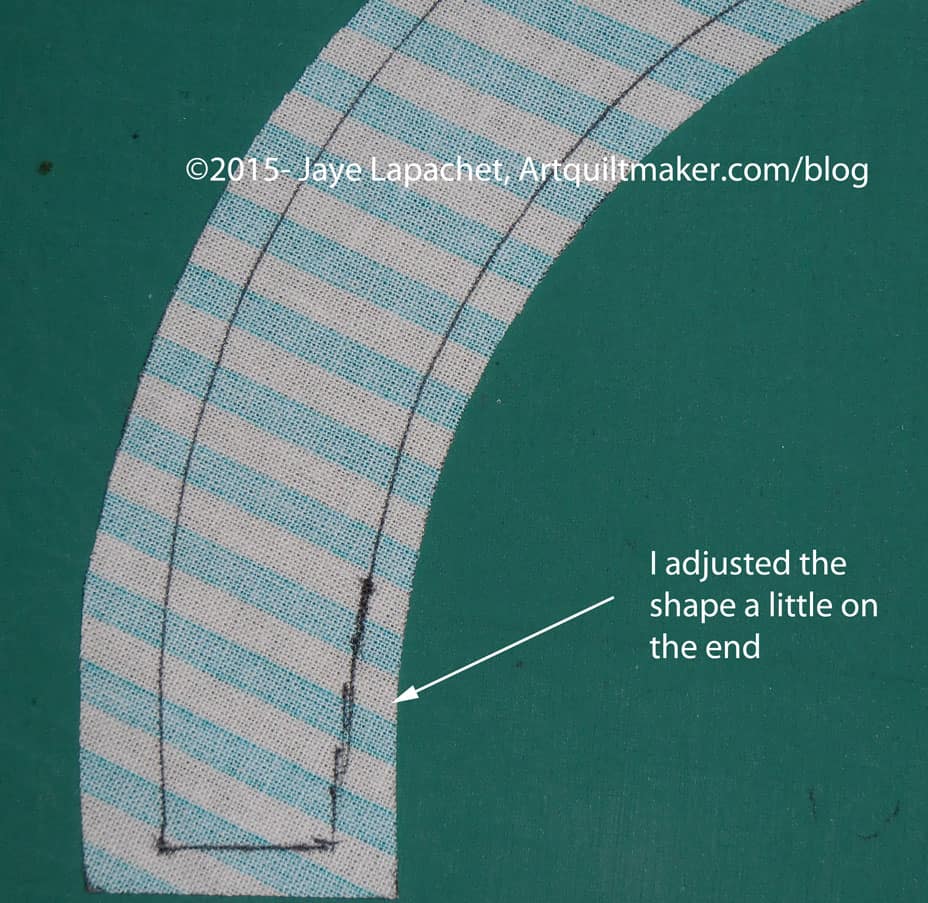
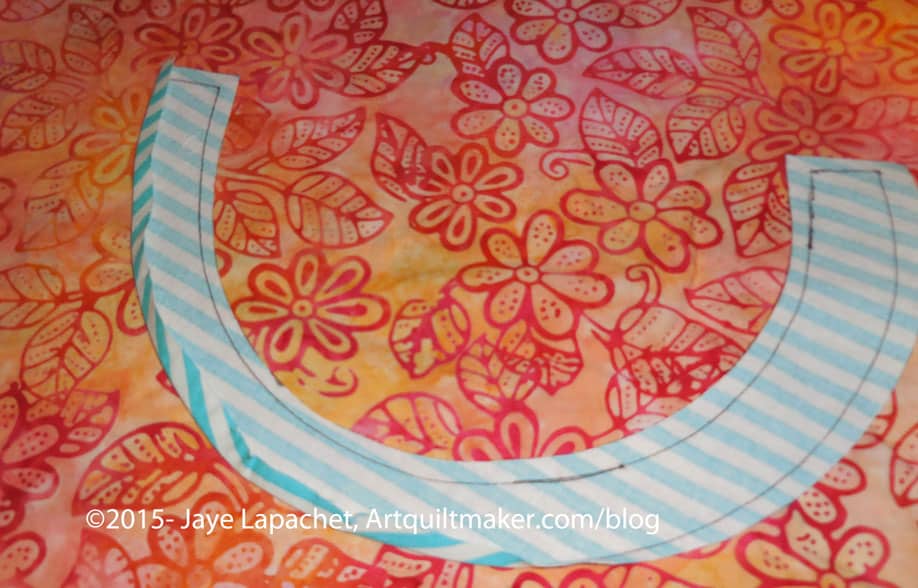
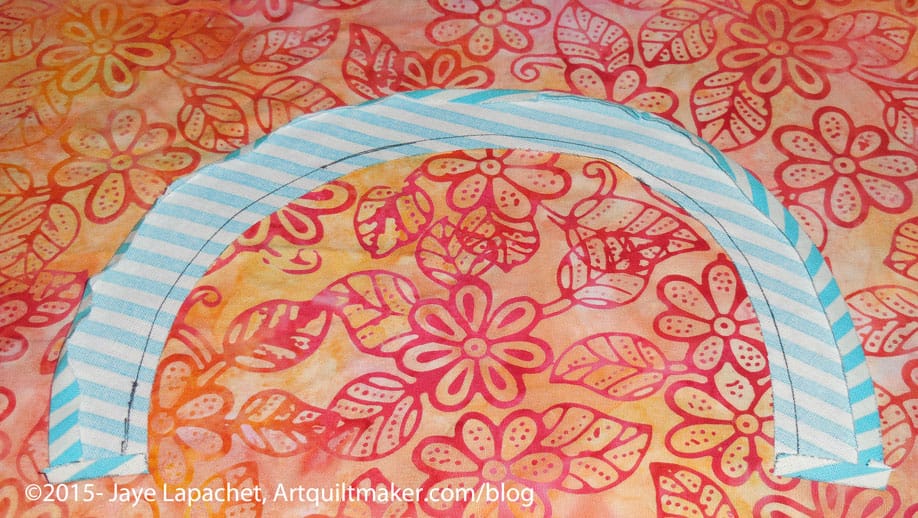
Template on Handle, ready to traceTraced & Adjusted
Because I decided to use the method described below, I made another handle template with NO seam allowance. I placed it on the handle I had cut from the striped fabric carefully so there was an even seam allowance on all sides. Then I traced around it with my thin black pen. I thought the template was a little wide at the end so I adjusted the line a bit to make the seam allowance larger.
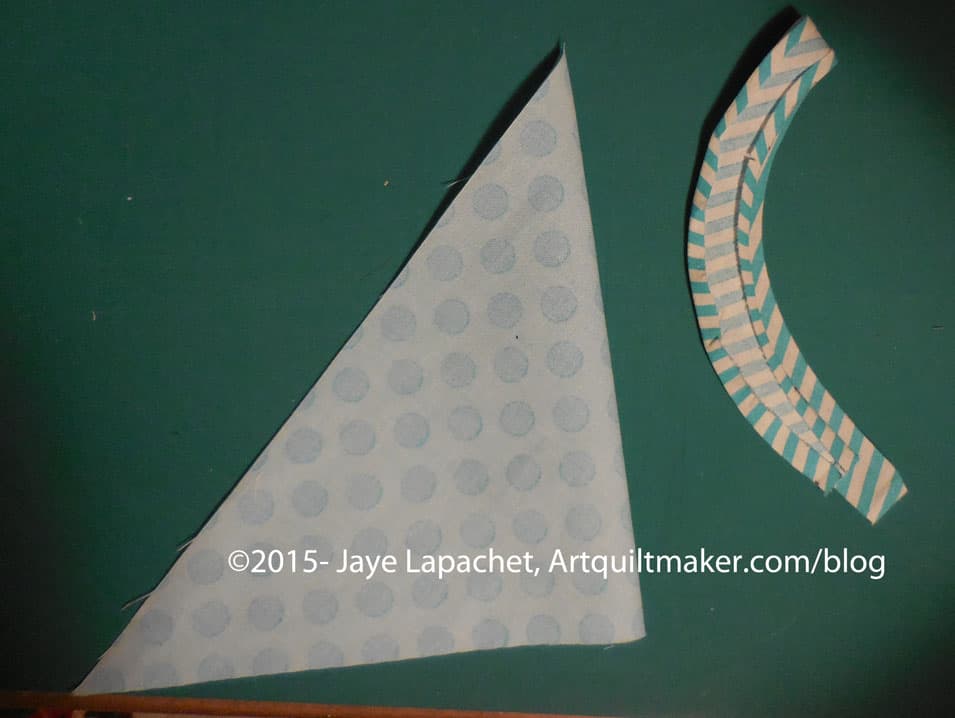
Handle & Background Triangle Cut, Laid OutPieces Laid Out
My pieces looked a little weird-not the right size, etc when I laid them out. Have no fear! They will improve.
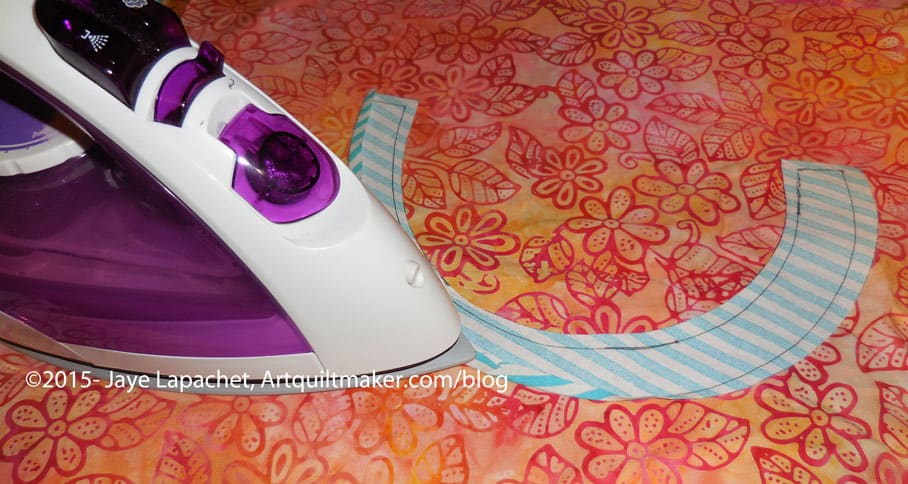
Press seam allowance underPress with hot iron
I was using my stiletto to adjust the seam allowance, but it was impossible to hold the stiletto, the camera and the iron all at once. Press carefully, so as not to distort your pieces.
Watch out for corners
Pay attention to the corners. The layers of fabric will want to pooch in weird directions. This is where one of those mini irons might come in handy. I used my regular iron and a stiletto, so I know those tools work.
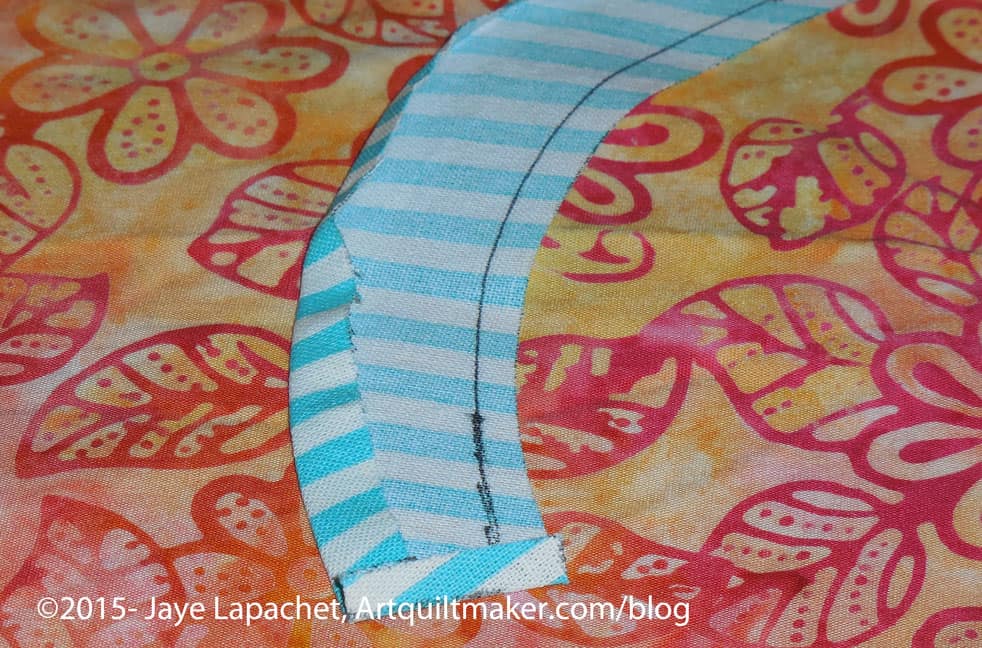
Press seam allowance on handle under
Take your handle and press the the seam allowance under on both sides of the piece. Press so that the drawn line is on the inside of the handle and is covered by the piece once the handle is sewn.
<Nota bene: the orange fabric was selected for good contrast so that the steps would show up well>
Finger press patches in half
Fold the handle in half with wrong sides together and finger press on the midpoint. Unfold.
Fold your large triangle in half with right sides together and finger press. Unfold and layout.
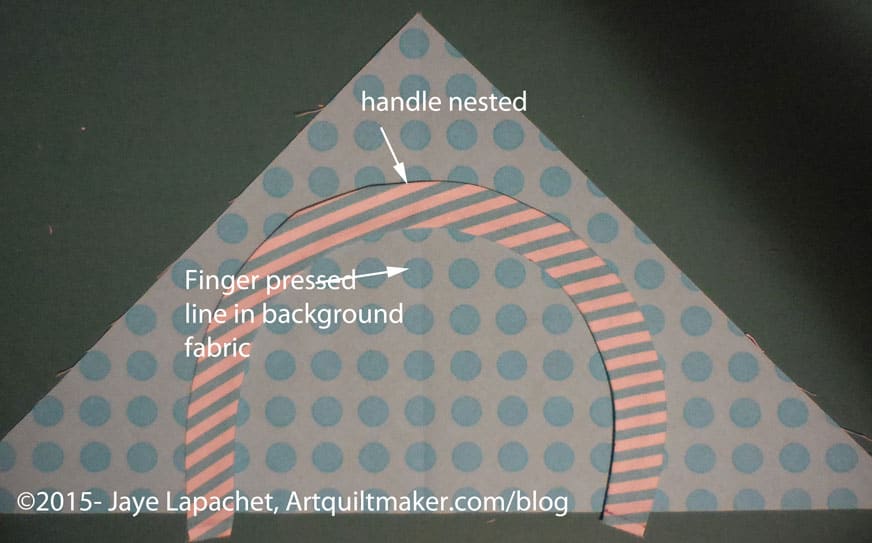
Nesting handle & background
Nest the handle into the triangle with the right sides up.
Line up the bottom edges of the handle with the hypotenuse of the background triangle. If the handle ends are a little over, it will be fine. You can trim them later.
Eyeball your piece to make sure everything looks good and even.
Pin the handle to the background down the center of the handle. Remove the pins as you sew. Try not to sew over them.
Using a lot of pins will help keep the handle in place as you sew
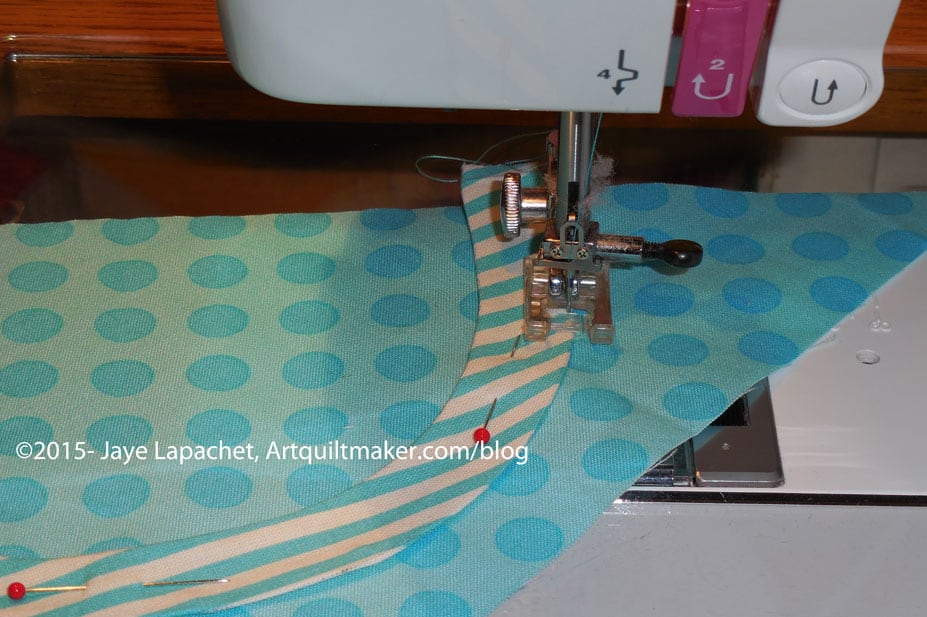
Sew carefully
Sew slowly and carefully along the drawn line around the curve. I chose a matching thread, an applique’ foot and a topstitch/sharp needle.
You will either need to hand applique’ the other side down or using a machine stitch that suits you.
You could sew both sides down with a straight stitch, like I did. There are many options.
Optional: You can satin stitch (see the Machine Applique’ tutorial) or blanket stitch or use some other decorative stitch to machine sew the handle to the background triangle piece. If you use one of these stitches, you may need some tearaway stabilizer
Optional 2: you can hand applique’ the handle to the background triangle.
Handle sewn to background with straight seam
Once the handle is sewn you are ready to move to the woven part of the basket.
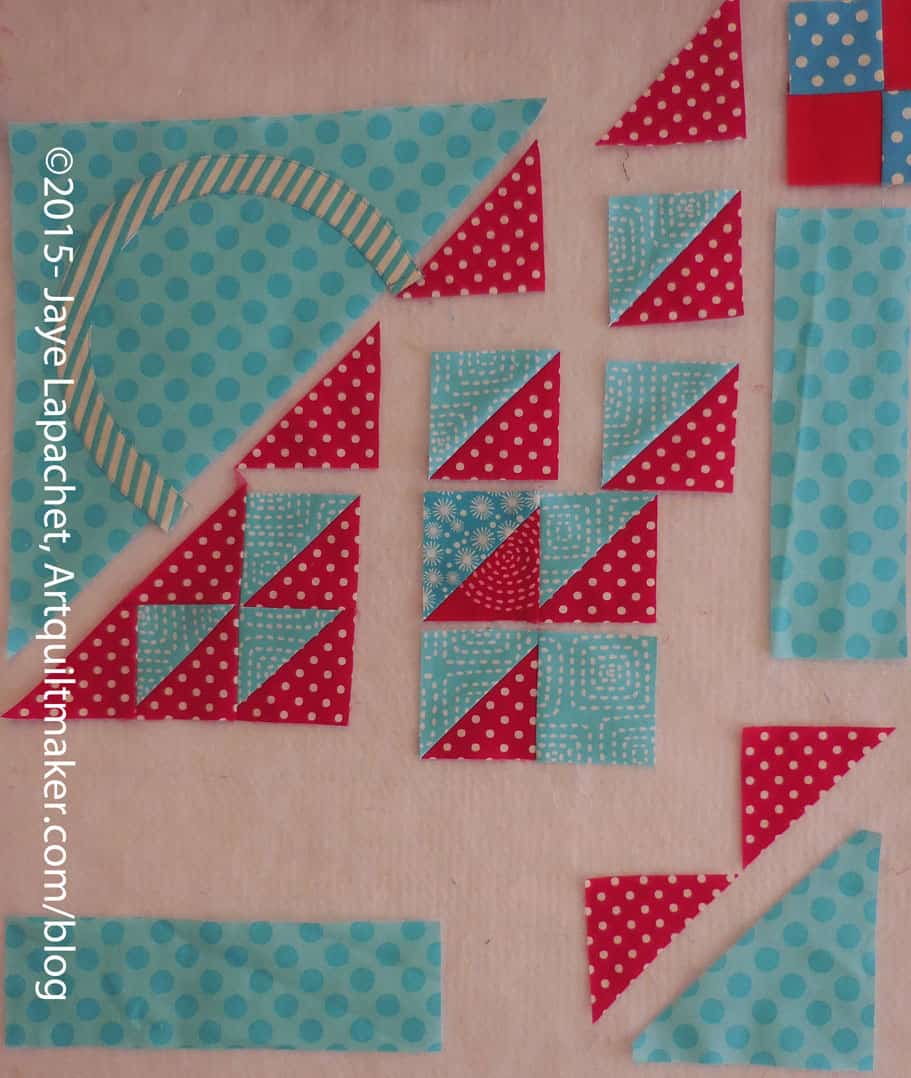
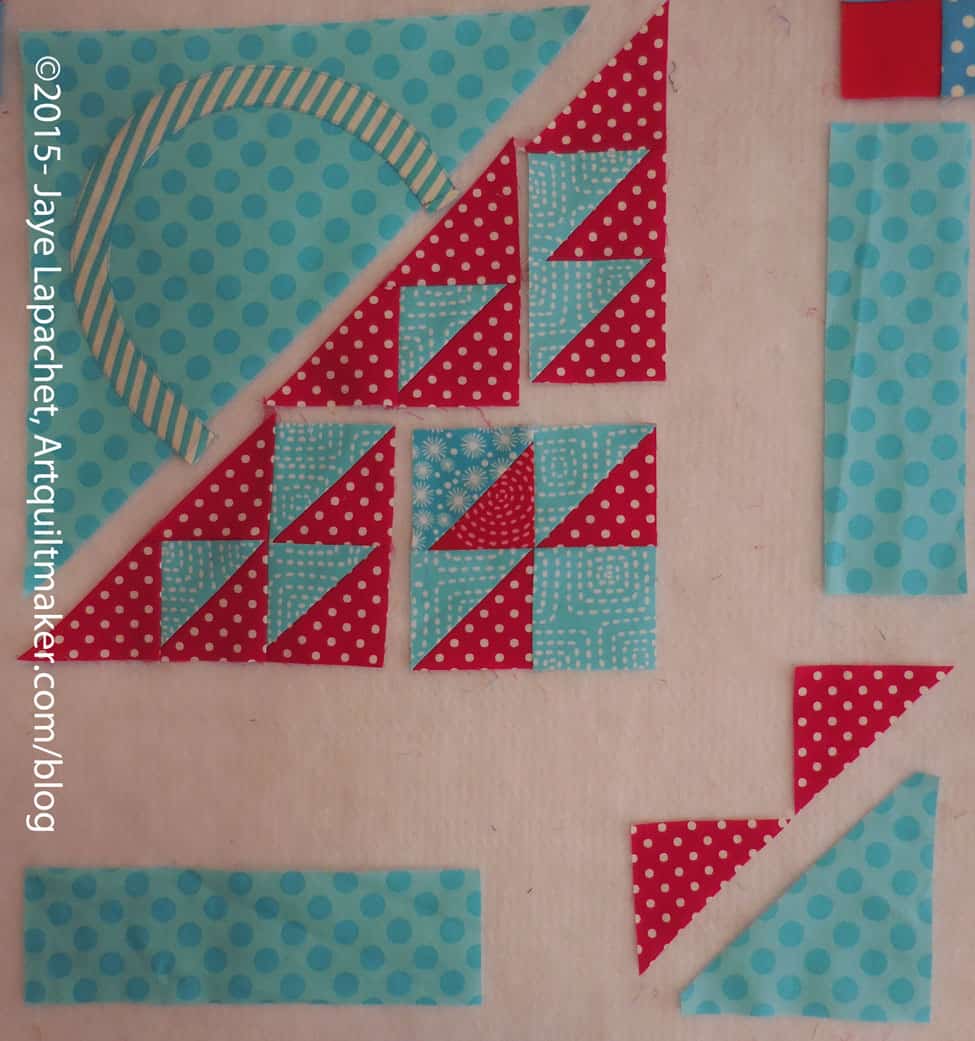
Basket Sewing Layout
Sew Basket Together
The block can be broken down into two pieces: the top half with the handle and the bottom half with the basket.
The two colored HSTs are supposed to give the illusion of a woven basket.
Trim off dog ears
Trim off dog ears from the A,B-HST/1 combo.
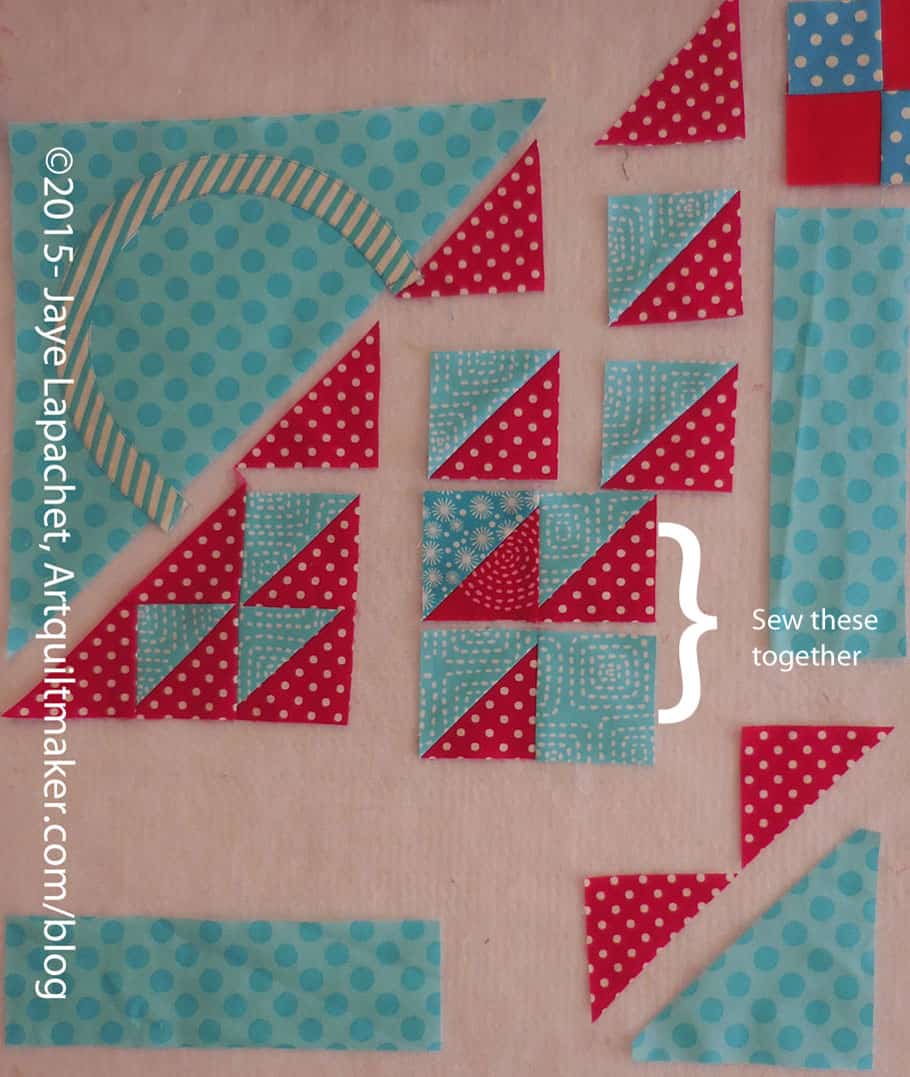
Sew Basket parts together
Sew HST/2 to HST/5. Press towards HST/5.
Using the diagram above to confirm placement, sew your A,B-HST/1 combo to your HST/2-HST/5 combo. Press towards the red.
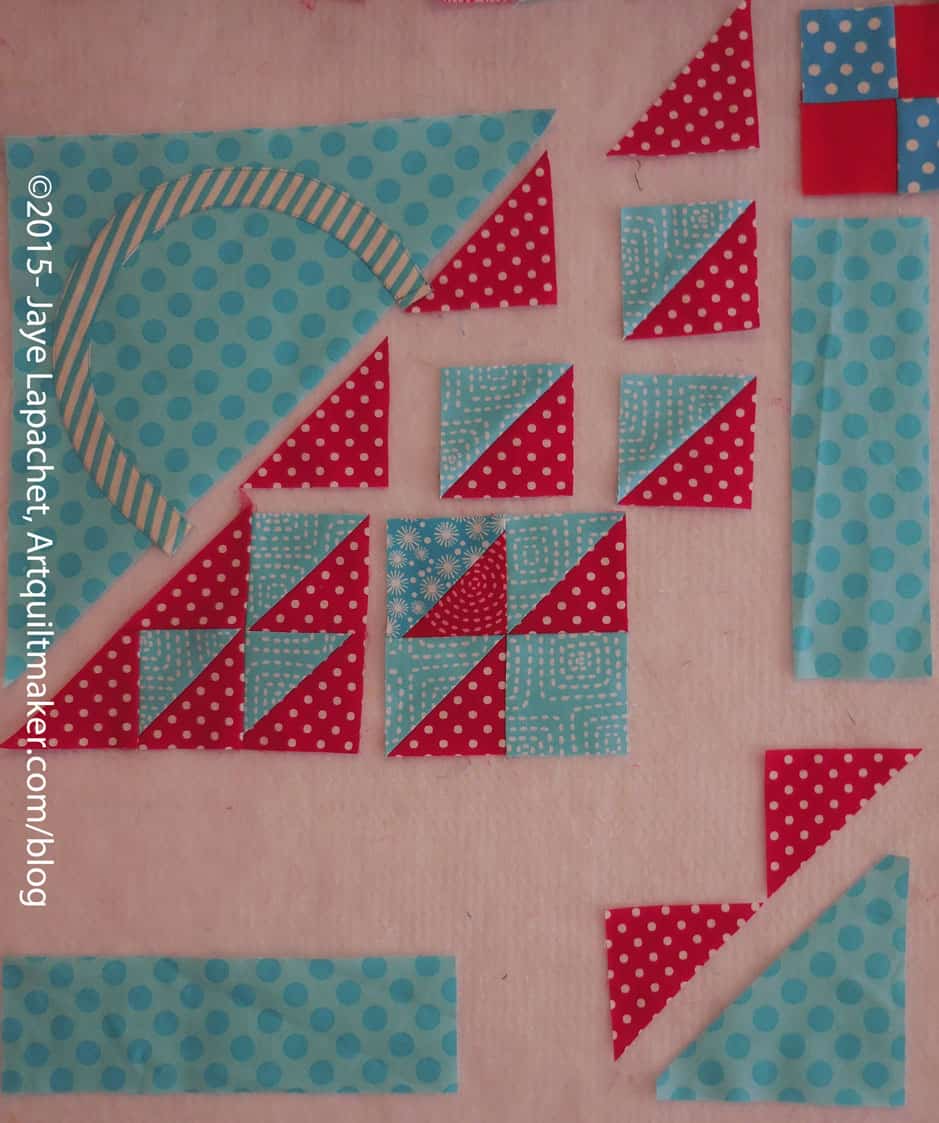
Sew basket parts together
Sew HST/8 to Square 10. Press towards the Square 10.
Sew HST/6 to HST/9. Press towards the red part of the HST.
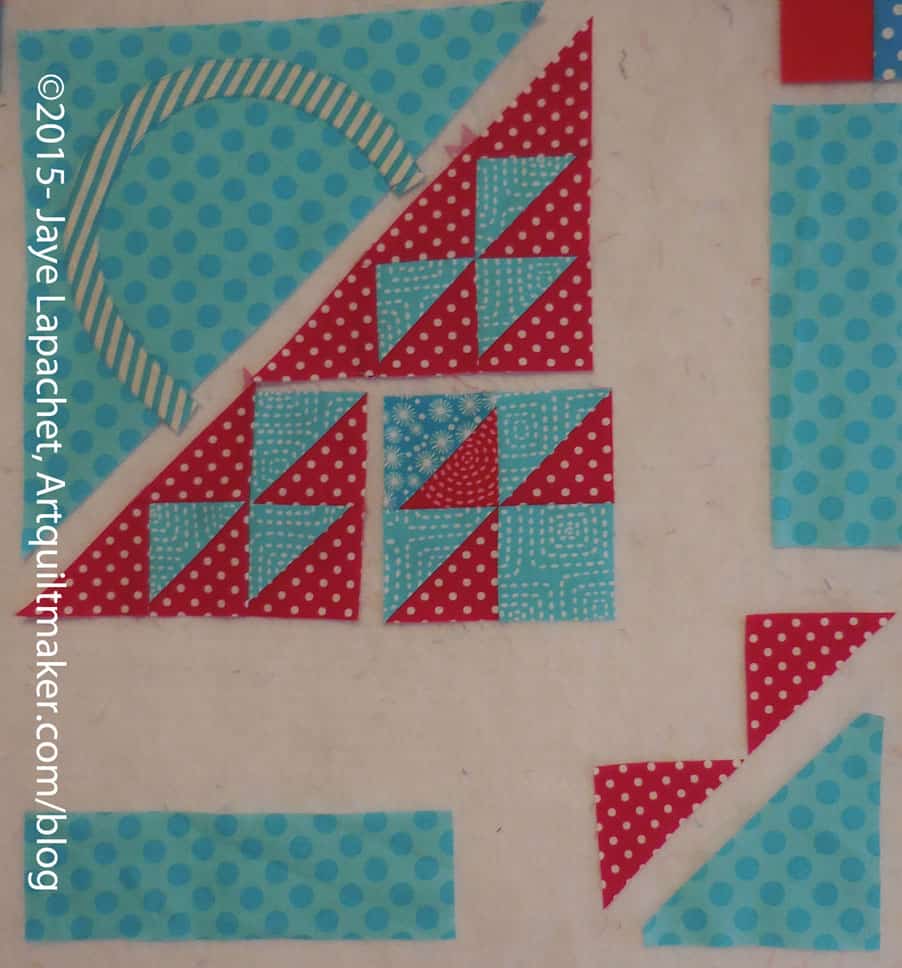
Sew 2 sets of woven basket parts togetherSew basket parts together
Using the diagram above to confirm placement, sew your HST/6-HST/9 combo to your HST/8-Square/10 combo. Press towards the HST/6-HST/9 combo.
Sew Triangle to HSTs
Using the diagram above to confirm placement, sew C to HST/3. Press towards the red.
Sew triangle D to C-HST/3 combo
Using the diagram above to confirm placement, sew D to your C-HST/3 combo. Press towards D.
Trim your dog ears
Trim your dog ears.
Sew HST/4 to HST/7. Press towards HST/7, making sure your seams will nest with the seams you have already pressed.
Sew parts of the basket together
Sew HST/4-HST/7 together and then sew the HST/4-HST/7 combo to E. Press towards E.
Four sections of the Basket
Using the diagram above for placement, sew your HST/4-HST/7-E combo to your C-D-HST/3 combo. Press.
Trim dog ears.
Sew 2 Sections together
Sew your A,B-HST/1-HST/2 segment to the HST/6-HST/9 segment.
Trim Your Dog Ears
Trim your dog ears!
Sew last two segments
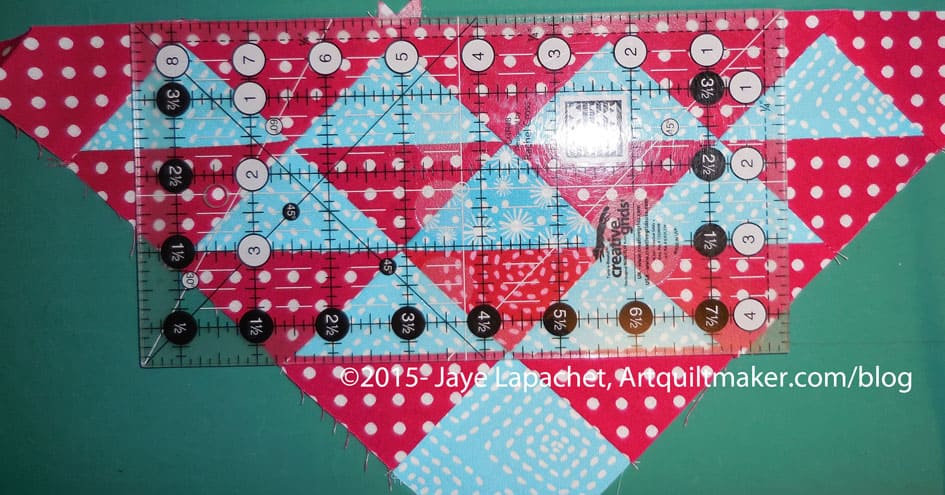
Sew the last two segments of the basket part together. You may have to re-press some seams.
I didn’t move the borders the whole time I worked on the quilt See how much the basket part shrank? That is seam allowances for you!
Trim the dog ears
Trim the dog ears, if you haven’t already.
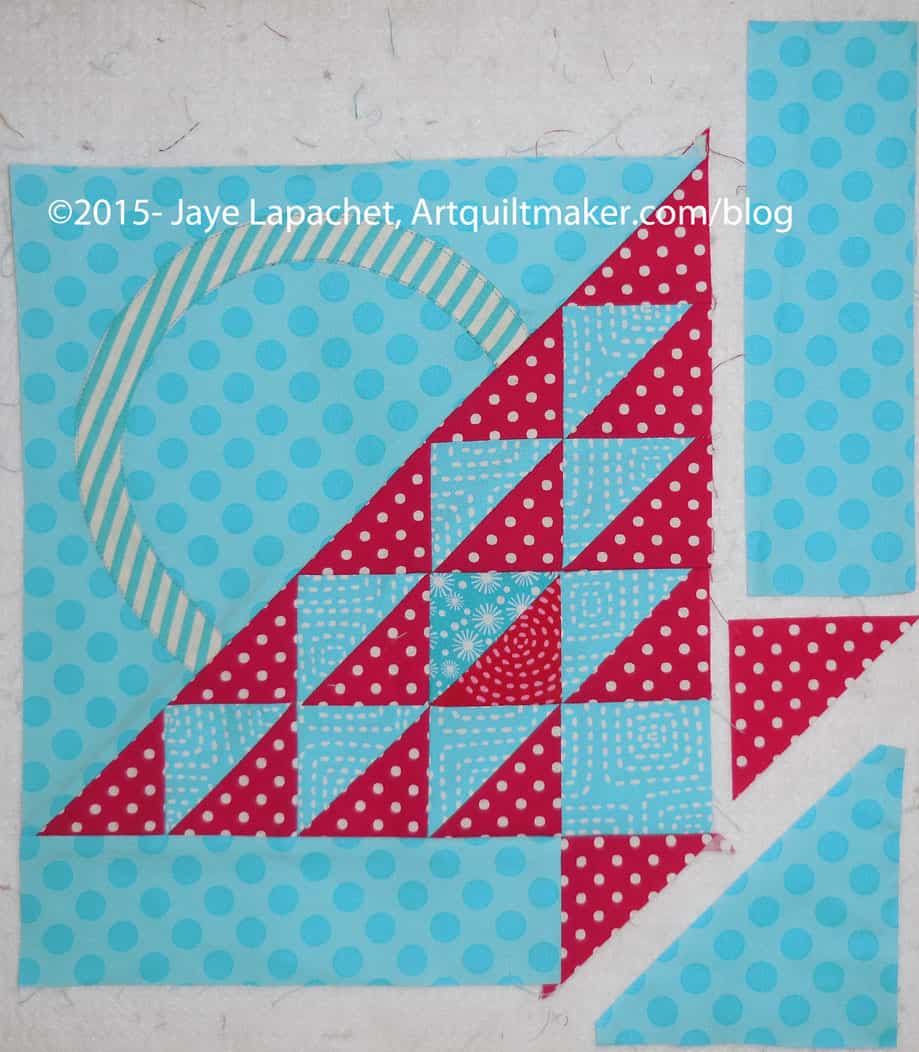
Sew 2 halves together
Now you have two halves of the basket. Sew the woven part to the handle part by placing the woven part on top of the handle part, lining them up and then sewing carefully. You can fold the two sections in half, bisecting the handle, to match them up if you think that you need to trim the handle portion later.
Ready to sew last borders
Now you are ready to sew on the borders.
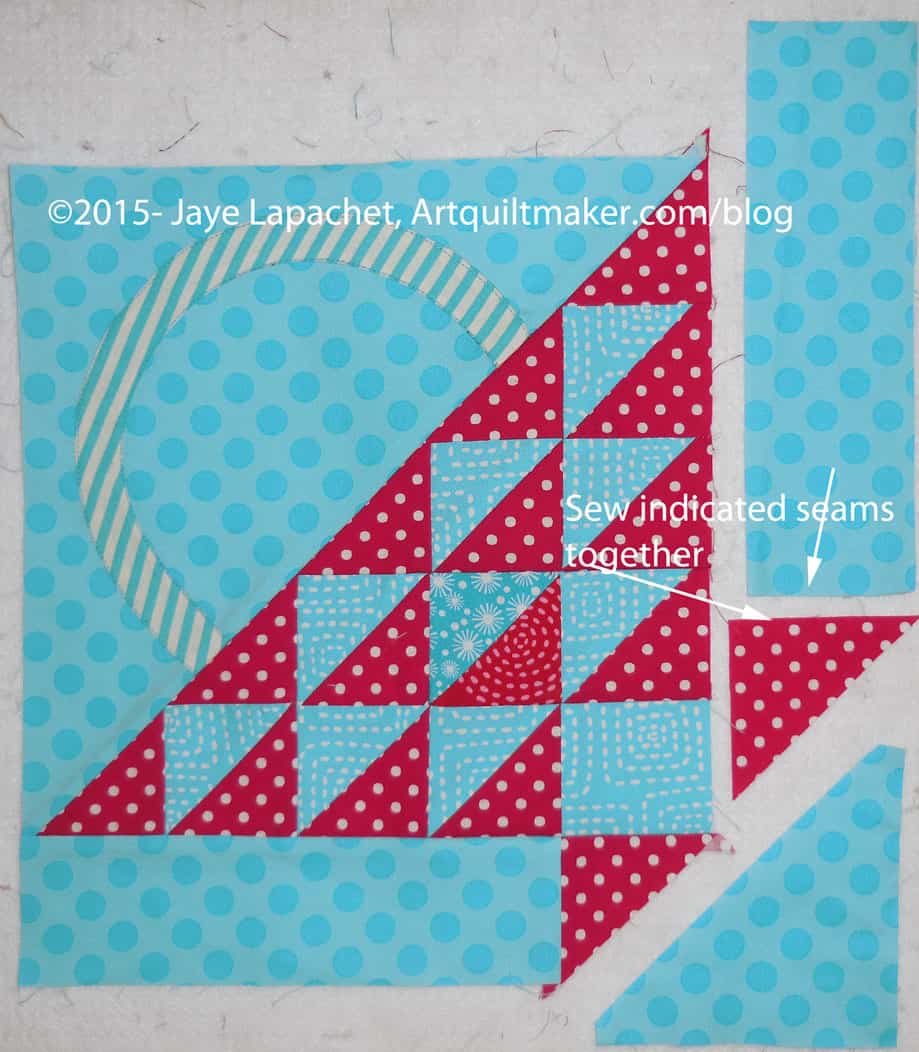
Sew triangle to borderSew triangle to border with words
Sew the B2-G background section by placing the red triangle (G) face down on top of background piece B2 and sew the short end of the background to the triangle, as shown in the picture.
Sew on background B2/Triangle-G
Take the basket piece that you sewed together above and place the B2-G background section on top of the basket section. Line up the red triangle’s seam from the B2-G background section with the HST/8-Square 10 section. You want the seams to match, so pin. Press towards background piece B2.
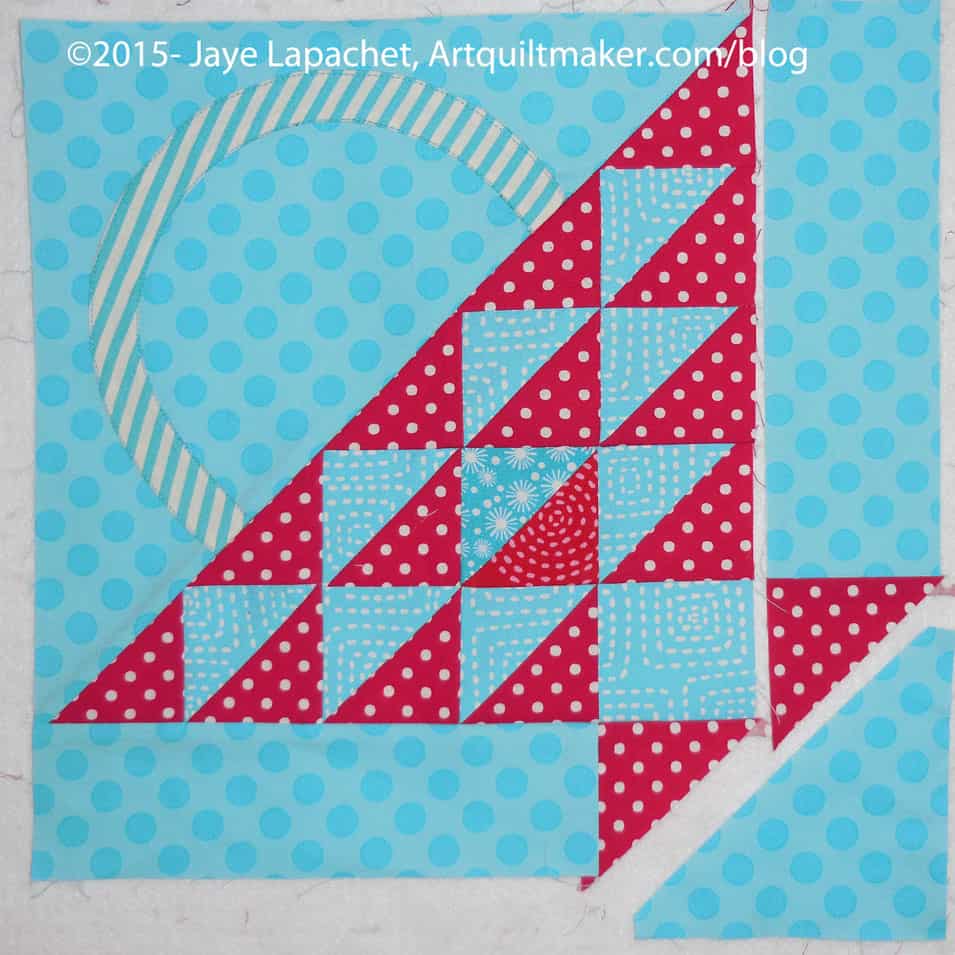
Only one more border to go.
Take the basket piece that you sewed together above and place the B1-F background section on top of the basket section. Line up the red triangle’s seam from the B1-F background section with the HST/9-Square 10 section. You want the seams to match, so pin. Press towards background piece B1.
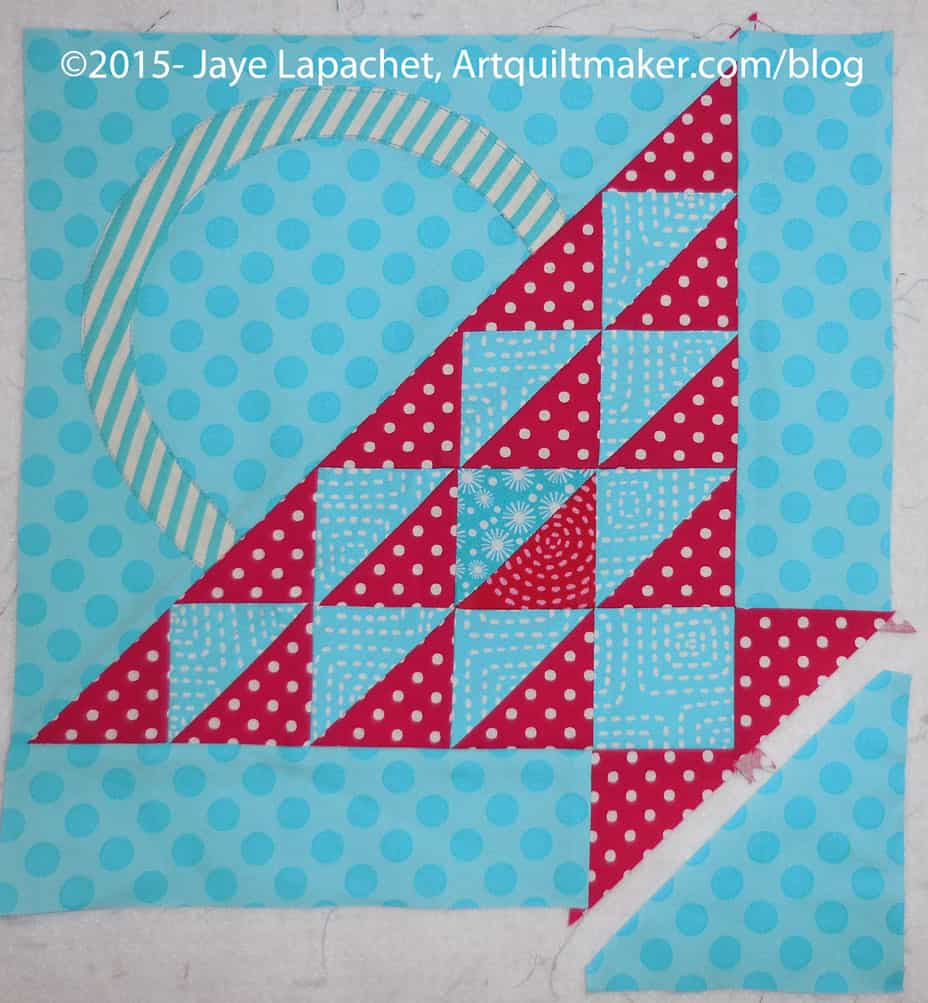
Sew on Final Triangle
Now you are ready to sew the last piece.
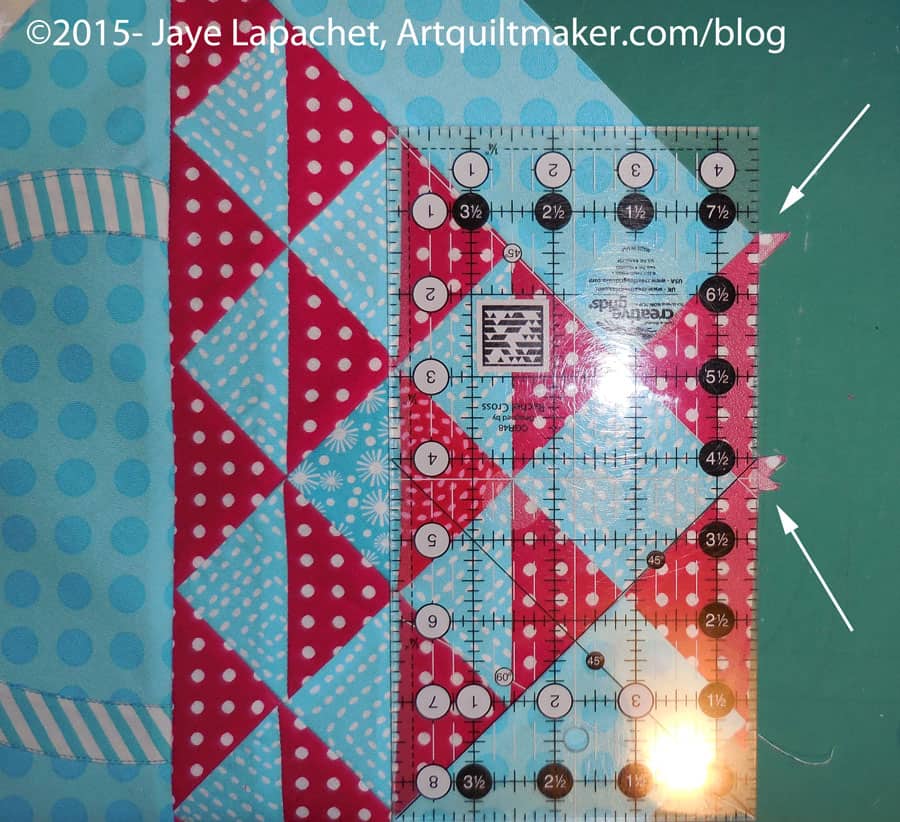
Trim dog ears
Trim dog ears.
Basket almost complete
Your basket is almost complete.
Line up triangle with borders
Complete your basket half by sewing background piece B3 to the basket. You have already snipped off the corners so you just have to line up the triangle piece with the borders already sewn to the block. Press towards the background piece B3.
Your half is complete.
Take the top half of the basket, the piece with the handle, and carefully sew it to the basket half.
Last weekend we headed up to the North Coast again for an annual NSGW event. Normally there is an event Friday evening, an event in the late morning on Saturday and a big dinner on Saturday night. This year the Saturday late morning event fell through, so DH and I had the whole day until 5pm to spend together. It was nice. Not having the normal day-to-day to deal with for a little while makes spending time together quite enjoyable.
We took the opportunity to spend some time in the Eureka/Arcata area. The Young Man got accepted to Humboldt State so we went to take a look at it. We did offer to pay for him to come with us and he decided to go visit his grandma and grandpa instead. We tortured him by sending him a bunch of photos of various parts of the campus in a running commentary.
After the campus visit, we had lunch at The Lost Coast Brewery and it was AWESOME! They had gluten free buns, so I took the opportunity to have my first French Dip in, probably, 15 years. It wasn’t as good as I remember a French Dip being, but I still enjoyed it. The restaurant had fun decorations, too. There was a pulley system with a giant spider at the end of it and when the door opened and closed the spider when up and down. They also had a number of paper mache animals hanging from the ceiling. It was a little loud, though.
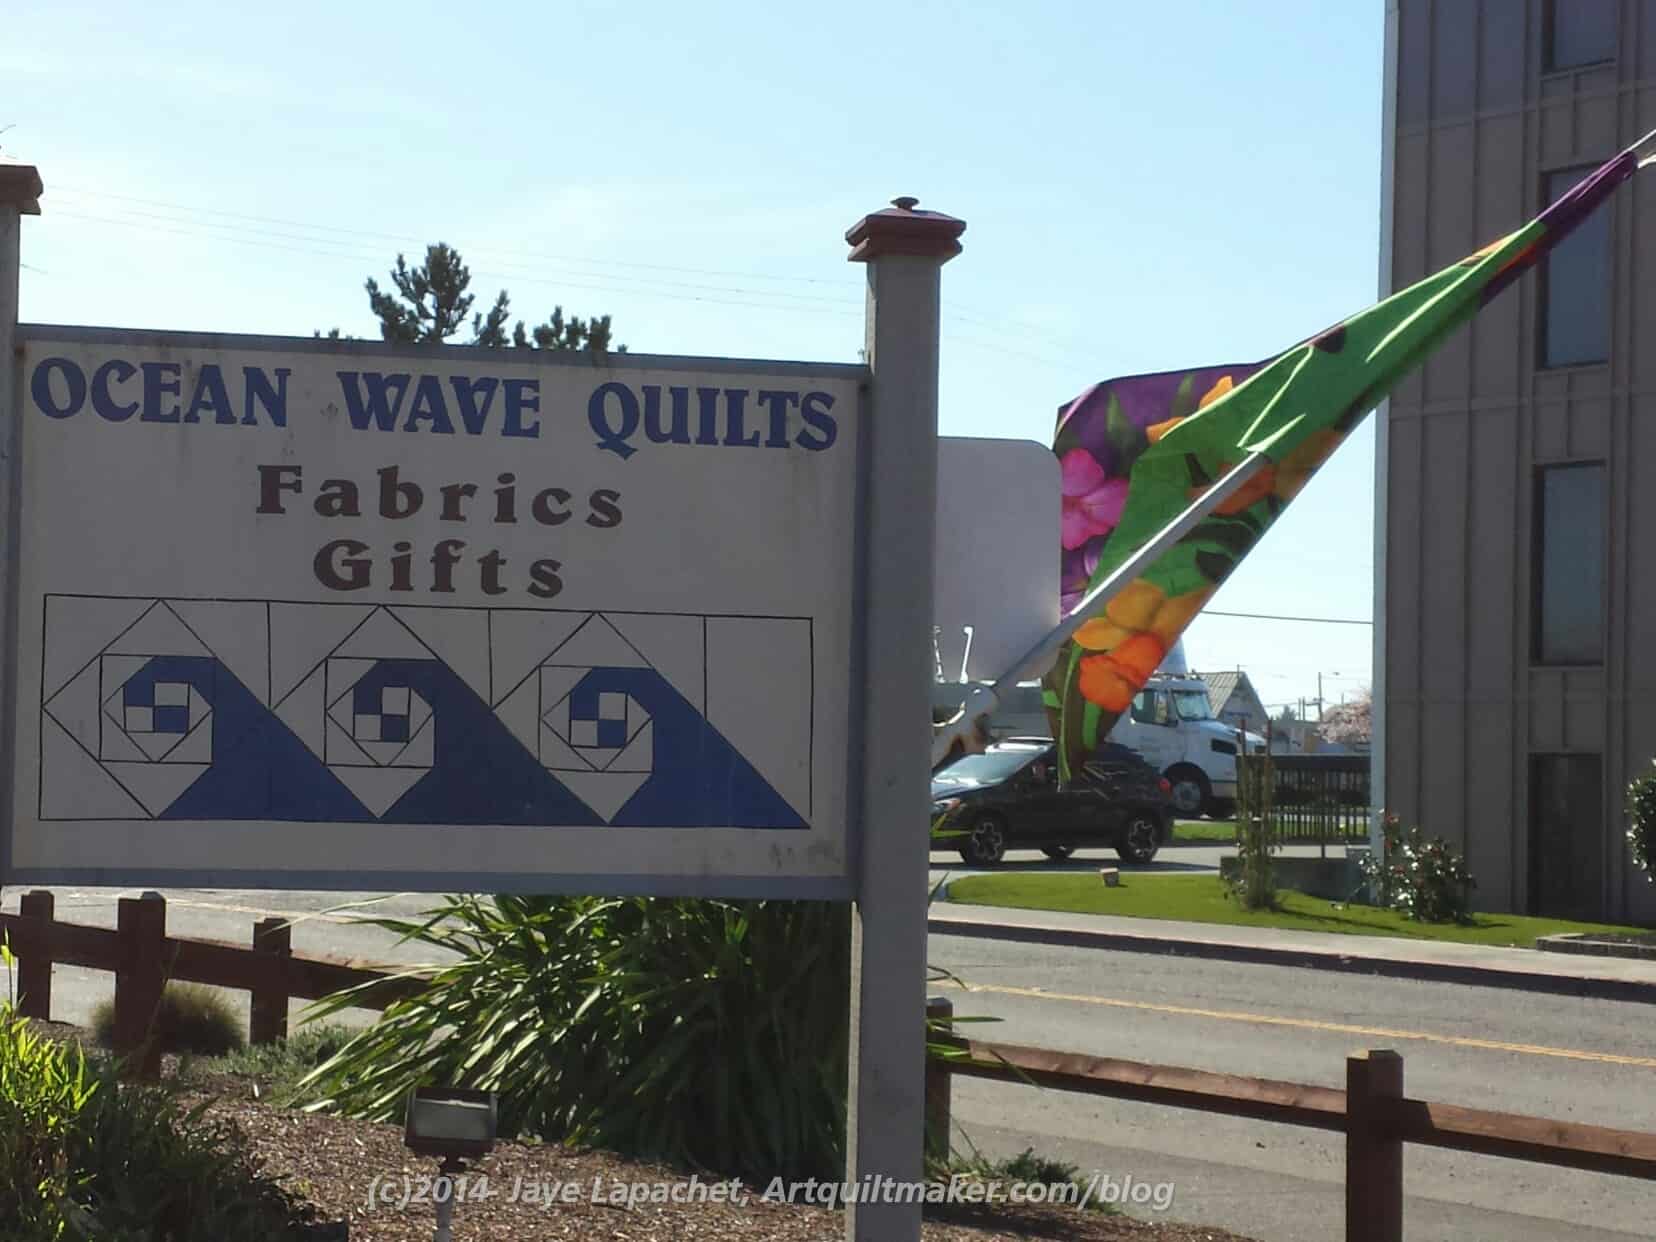
Ocean Waves Quilts
After lunch we headed up to Ocean Wave Quilts. DH actually came into the store with me. I really like it when he comes in with me. I told him to pick out some shirt fabric, but he didn’t see any that he liked enough to buy. He was interested in everything and looked around. I didn’t buy much as I really don’t need anything. I just bought a couple of fabrics for projects in process and some of the new rainbow Wonder Clips. I bought the latter because they are so fabulous. I think I spent around $23. You might remember my posts from last year?
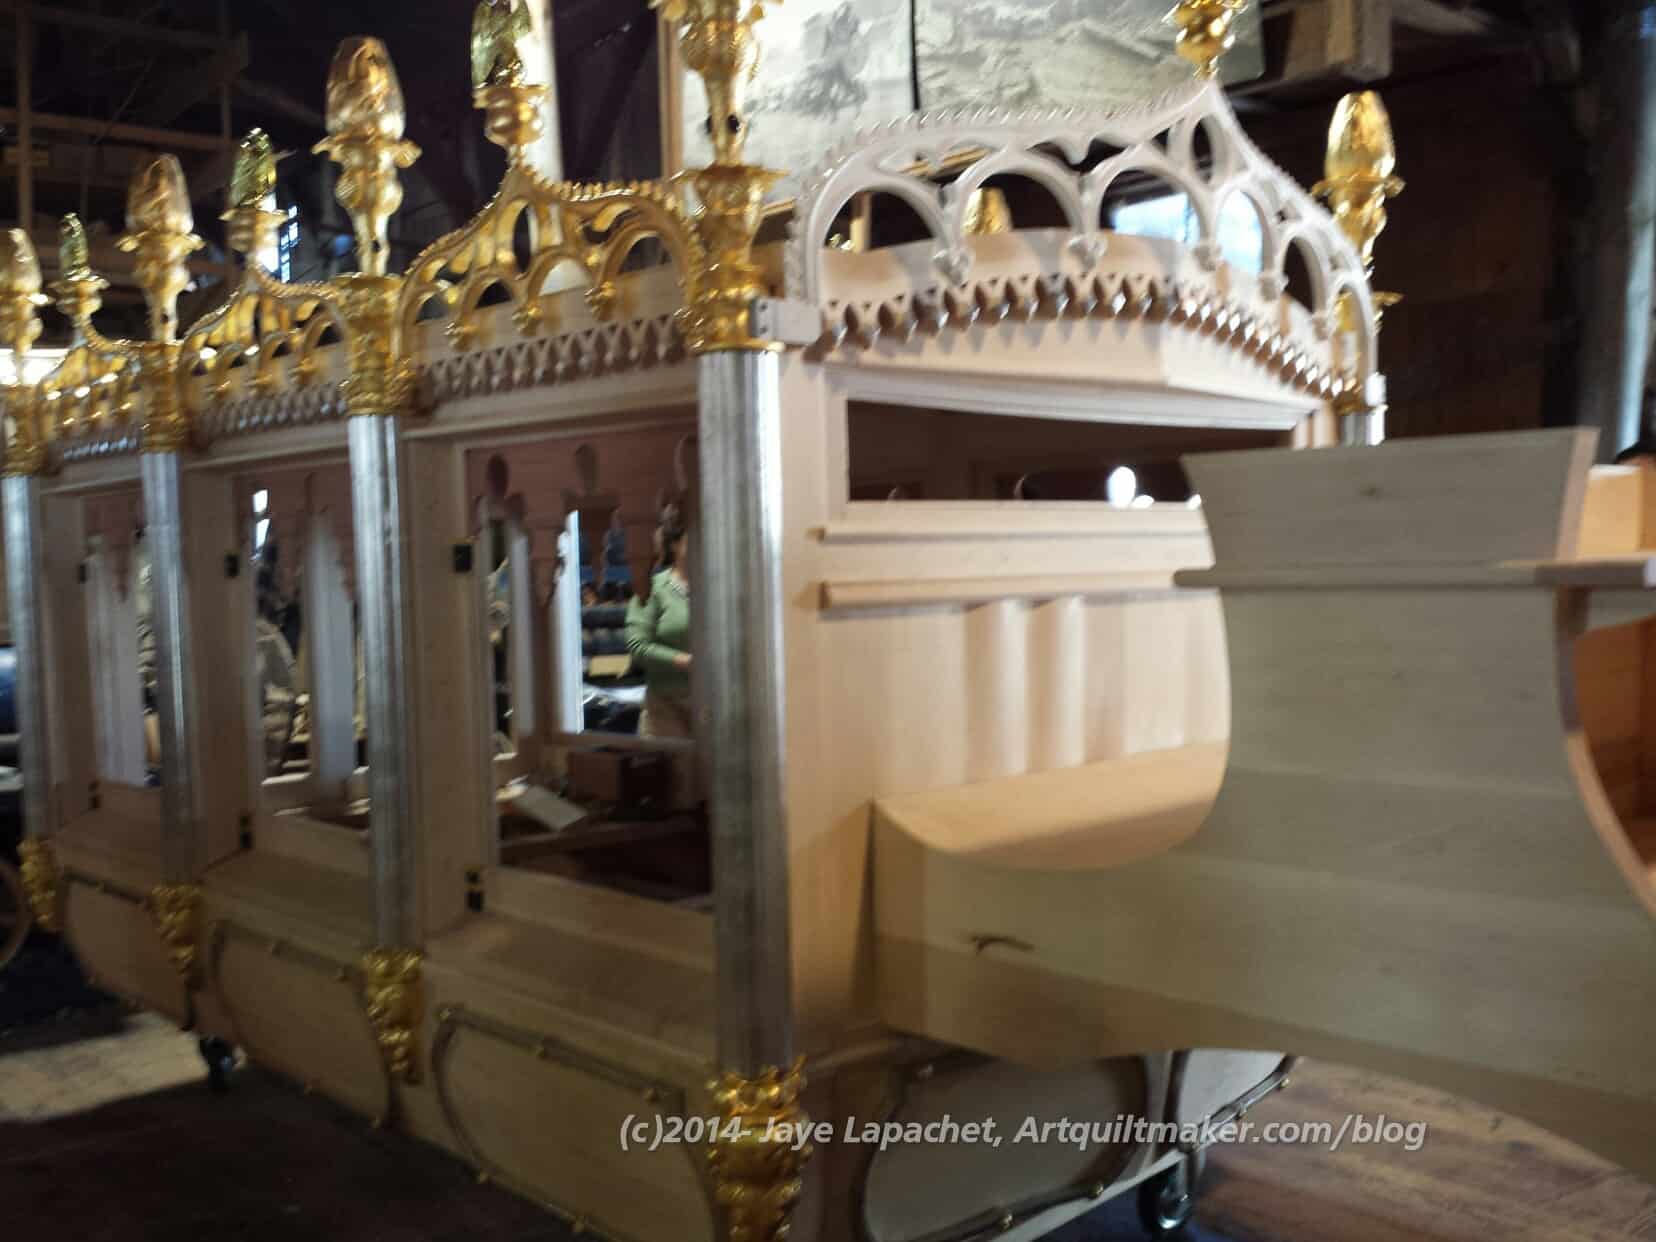
Lincoln’s Hearse full view
Not too far from Ocean Waves is the Blue Ox Millworks. Over the weekend they had an open house to show off a replica of Abraham Lincoln’s hearse that they are building. Creepy, I know.
Next year (I think) is the 100th anniversary of Lincoln’s death. I don’t know what it is about death anniversaries… Media hype?
The original hearse was destroyed in a fire in about 1870. For some reason that I don’t know since didn’t read in the article very carefully, the Blue Ox is making the replica. Their shop has some amazing tools and fabulously HUGE work tables. I think safety was good in terms of the machinery, but the place felt old and messy and dilapidated. Still, I like the idea of a place that can replicate Victorian ornamentation and where woodworking is a valued art and craft.
Still DH was interested and he slogged through the quilt store with me, so we went. Also, it is historical, and probably once in a lifetime opportunity. I have to remember to tell SIL#2 not to go near the place with her husband. He will be working in that shop and they will be living in Eureka in a heartbeat if he hears about it.
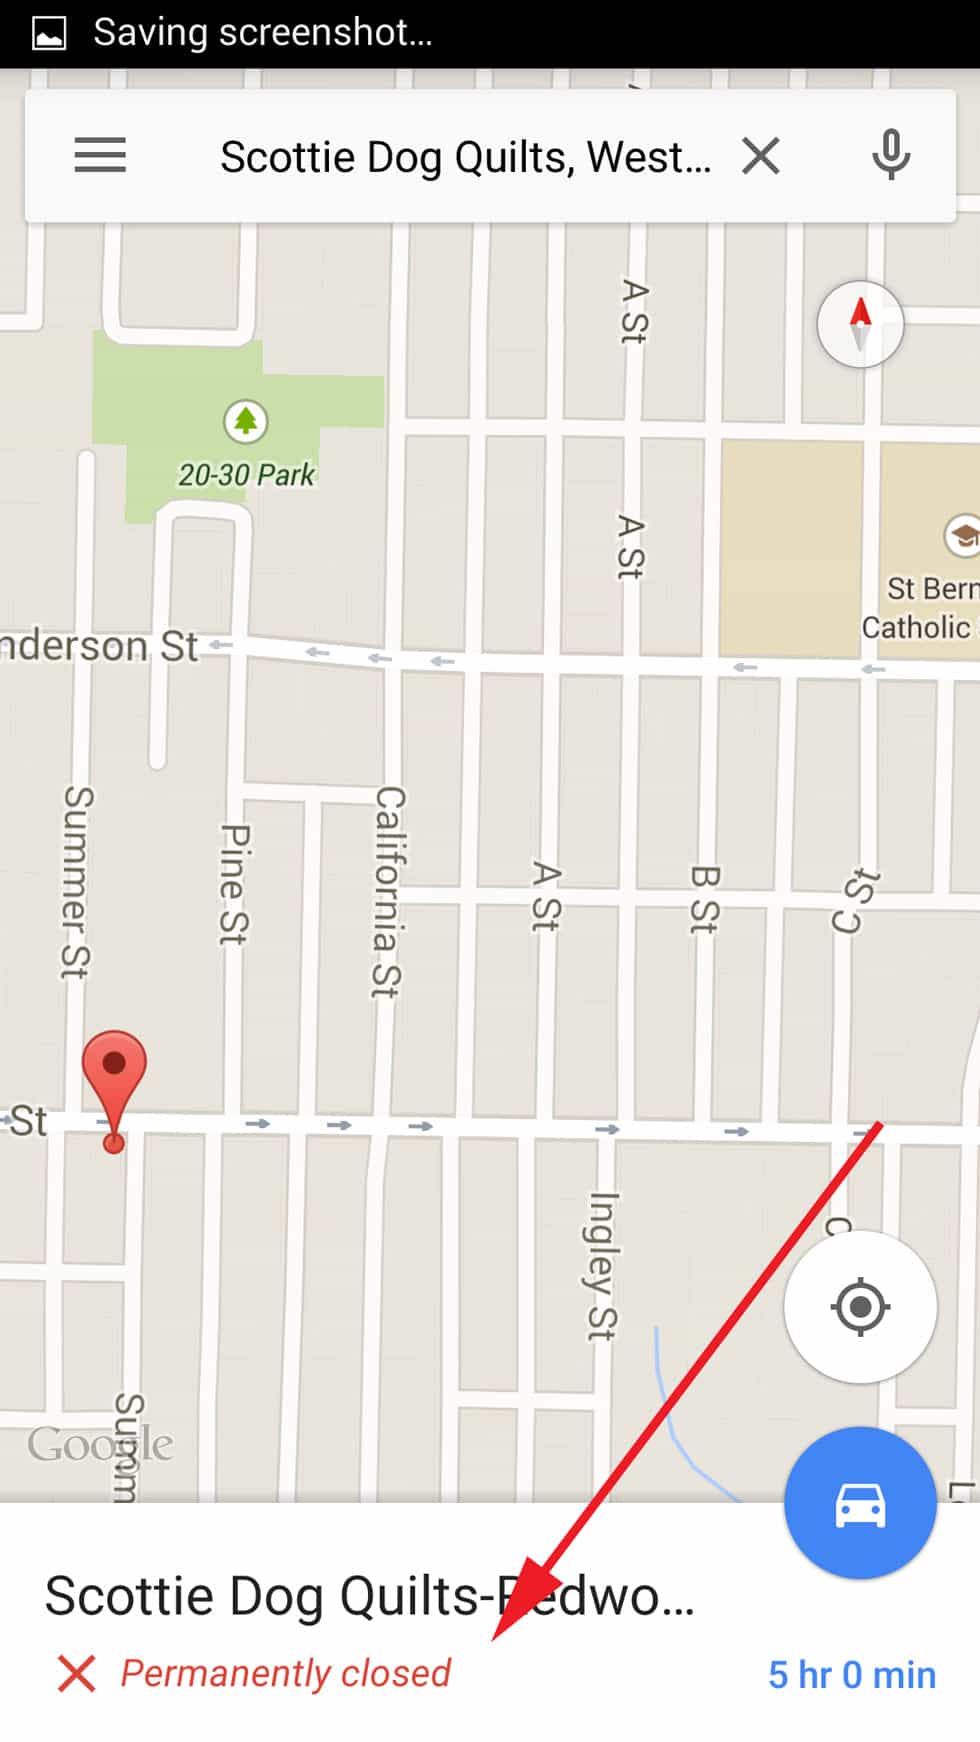
Google notice
We also went to Scottie Dog Quilts. Shockingly, the shop is closed, as in no longer containing anything much less fabric and notions. The property looks abandoned. I finally saw a small note in Google (mobile) that said ‘permanently closed’. I didn’t notice that before. I didn’t really believe it because the website looks completely normal. Finally, I tracked down what was going on on Brenda Lou’s blog. She said that they closed the retail shop last June! So, we drove on and didn’t stop. I hadn’t researched any other quilt shops and one had to be enough for this trip.
I took a quilt look at Google when we returned to the hotel and found Bunny Hop Quilt Shop also in Eureka. We drove pretty close to it, but not right by. It only has a Facebook page, but looks like a real place. If we head up there next year, I will look into quilt shops more exactly.
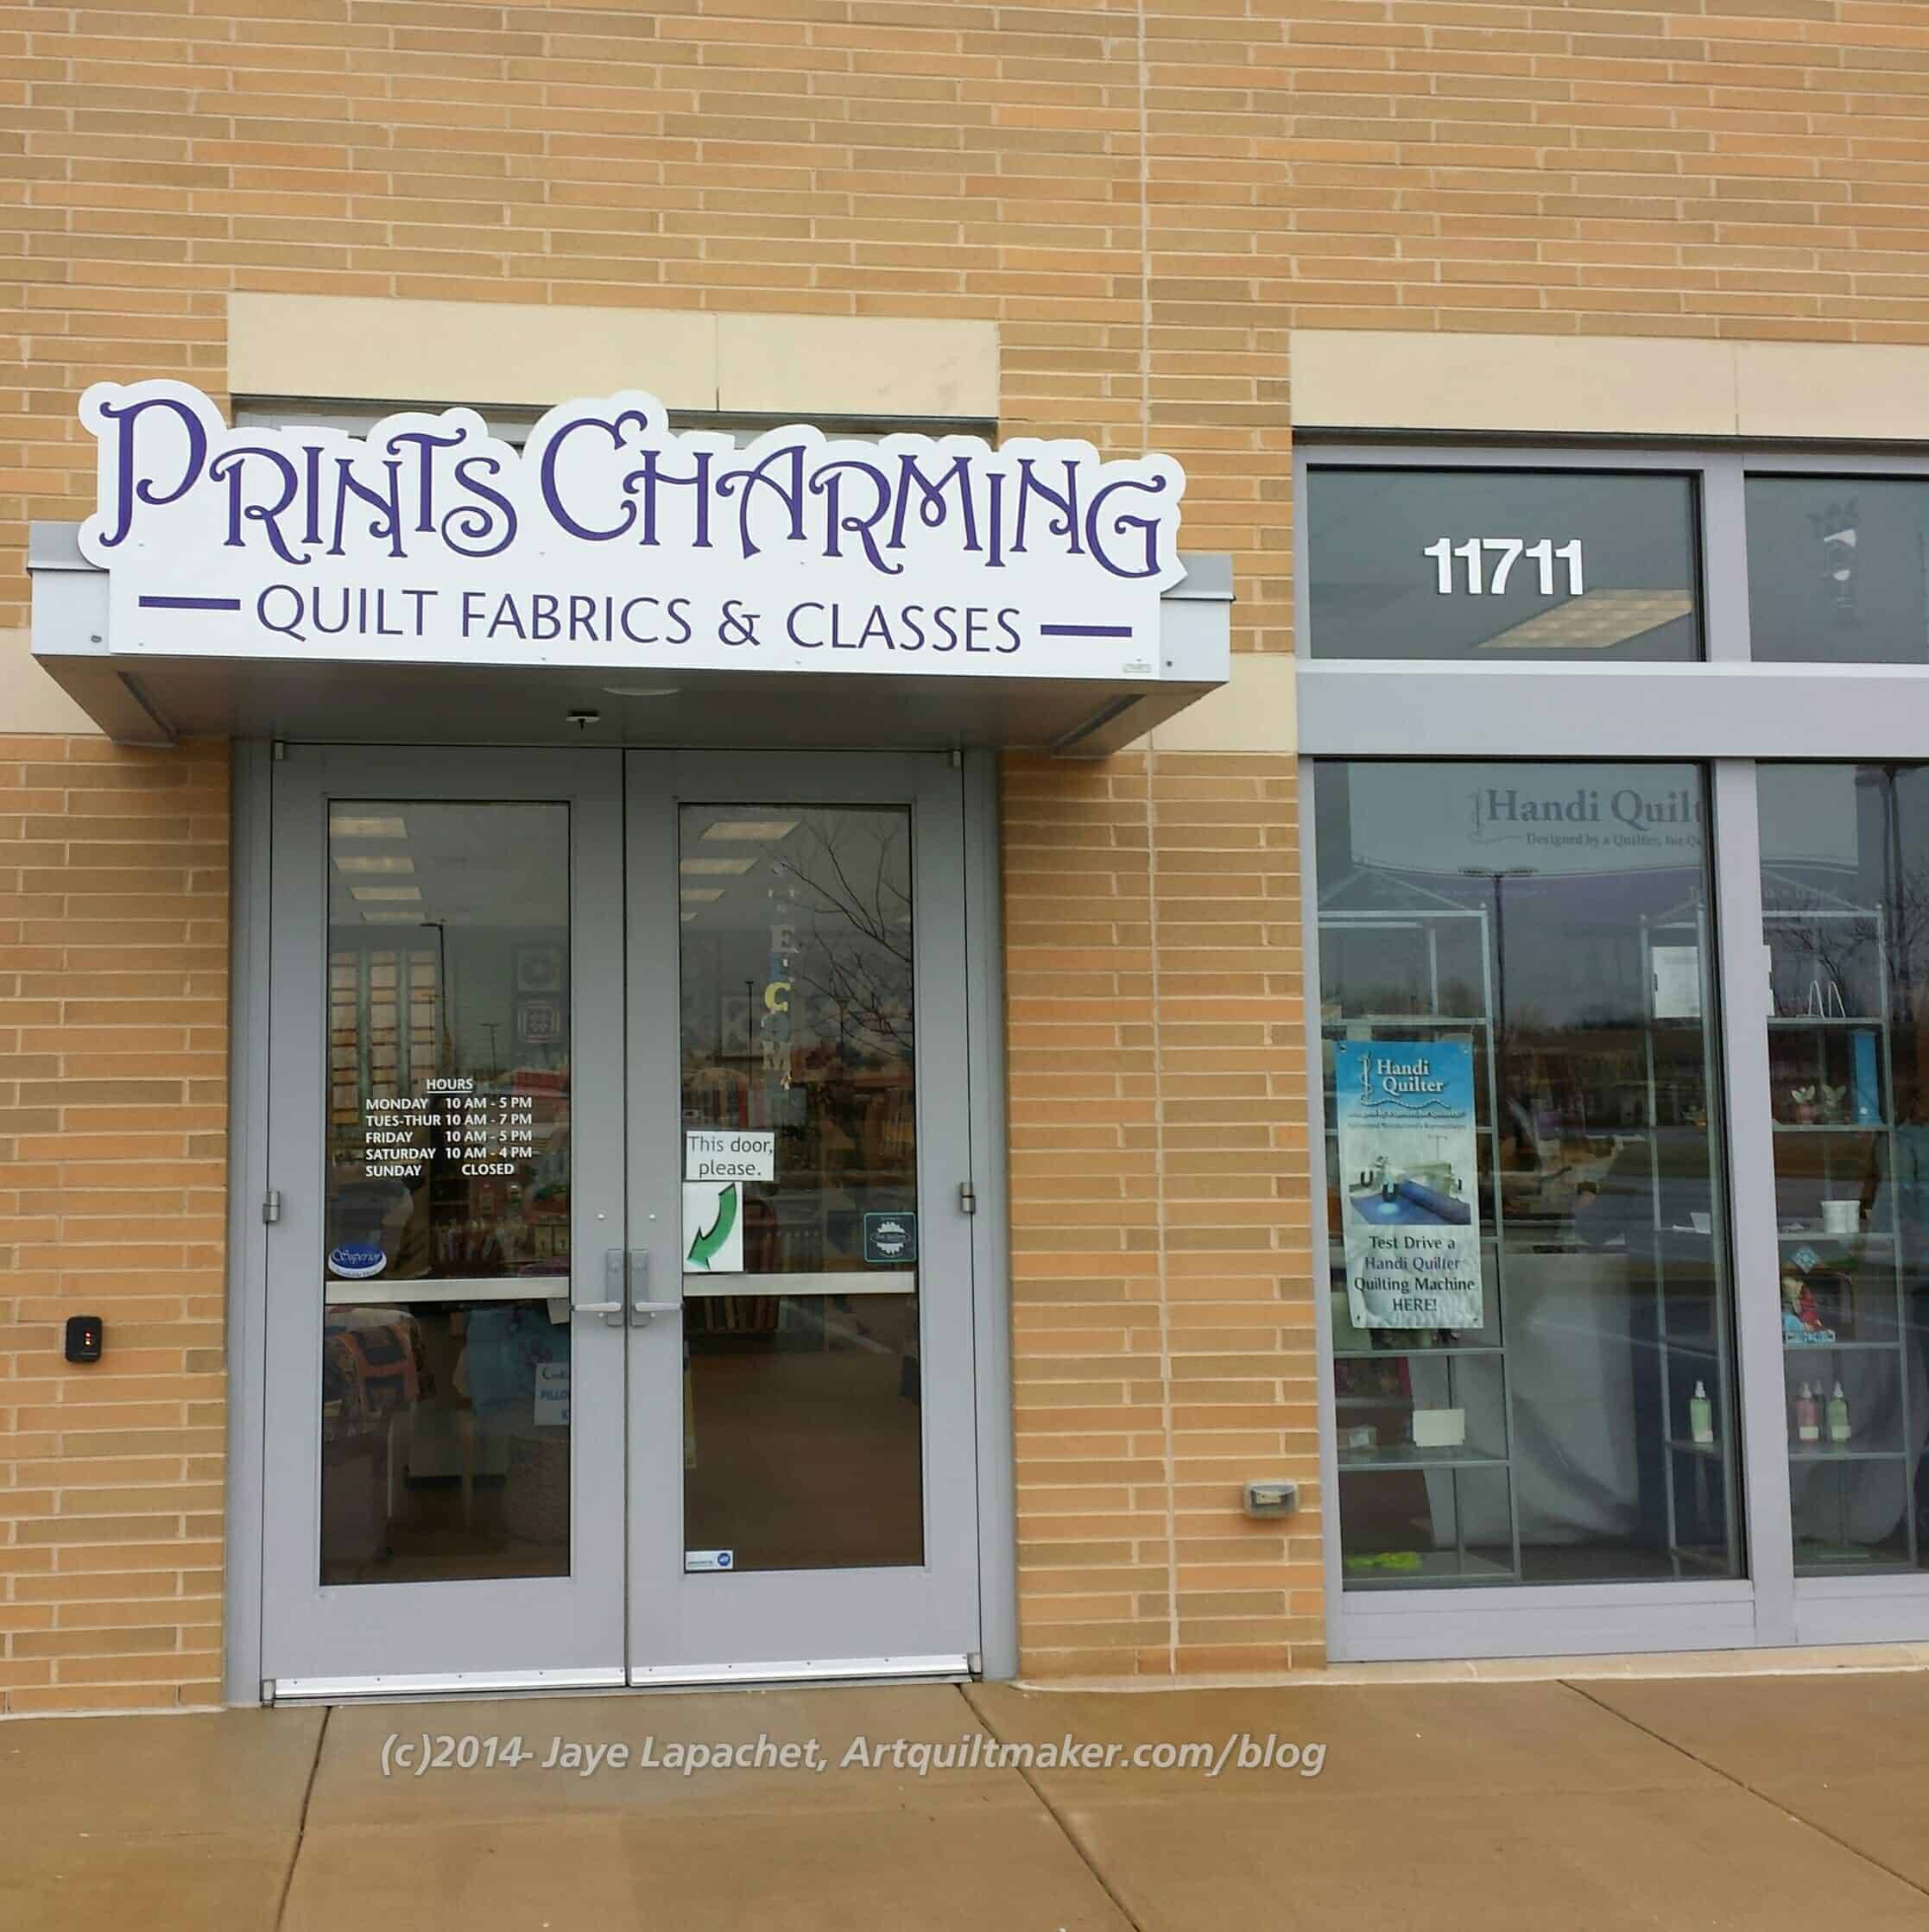
I really am a most demanding houseguest. All I want to do is sew or look at fabric and quilt shops when I travel. Fortunately, my SIL was willing and able to feed my frenzy. She came and picked me up on Saturday morning from the hotel in Baltimore and then we headed back to her house to sew. On the way we stopped at a new shop, Prints Charming.
I liked this shop. In general, I thought the feel was good. They had a lot of nice fabrics in my style and colors. They had a good assortment of tools, notions, patterns and books and a longarm that people could rent. The shop is in a new mall, so the building is brand,spanking new and that adds to the feeling of fresh and clean.
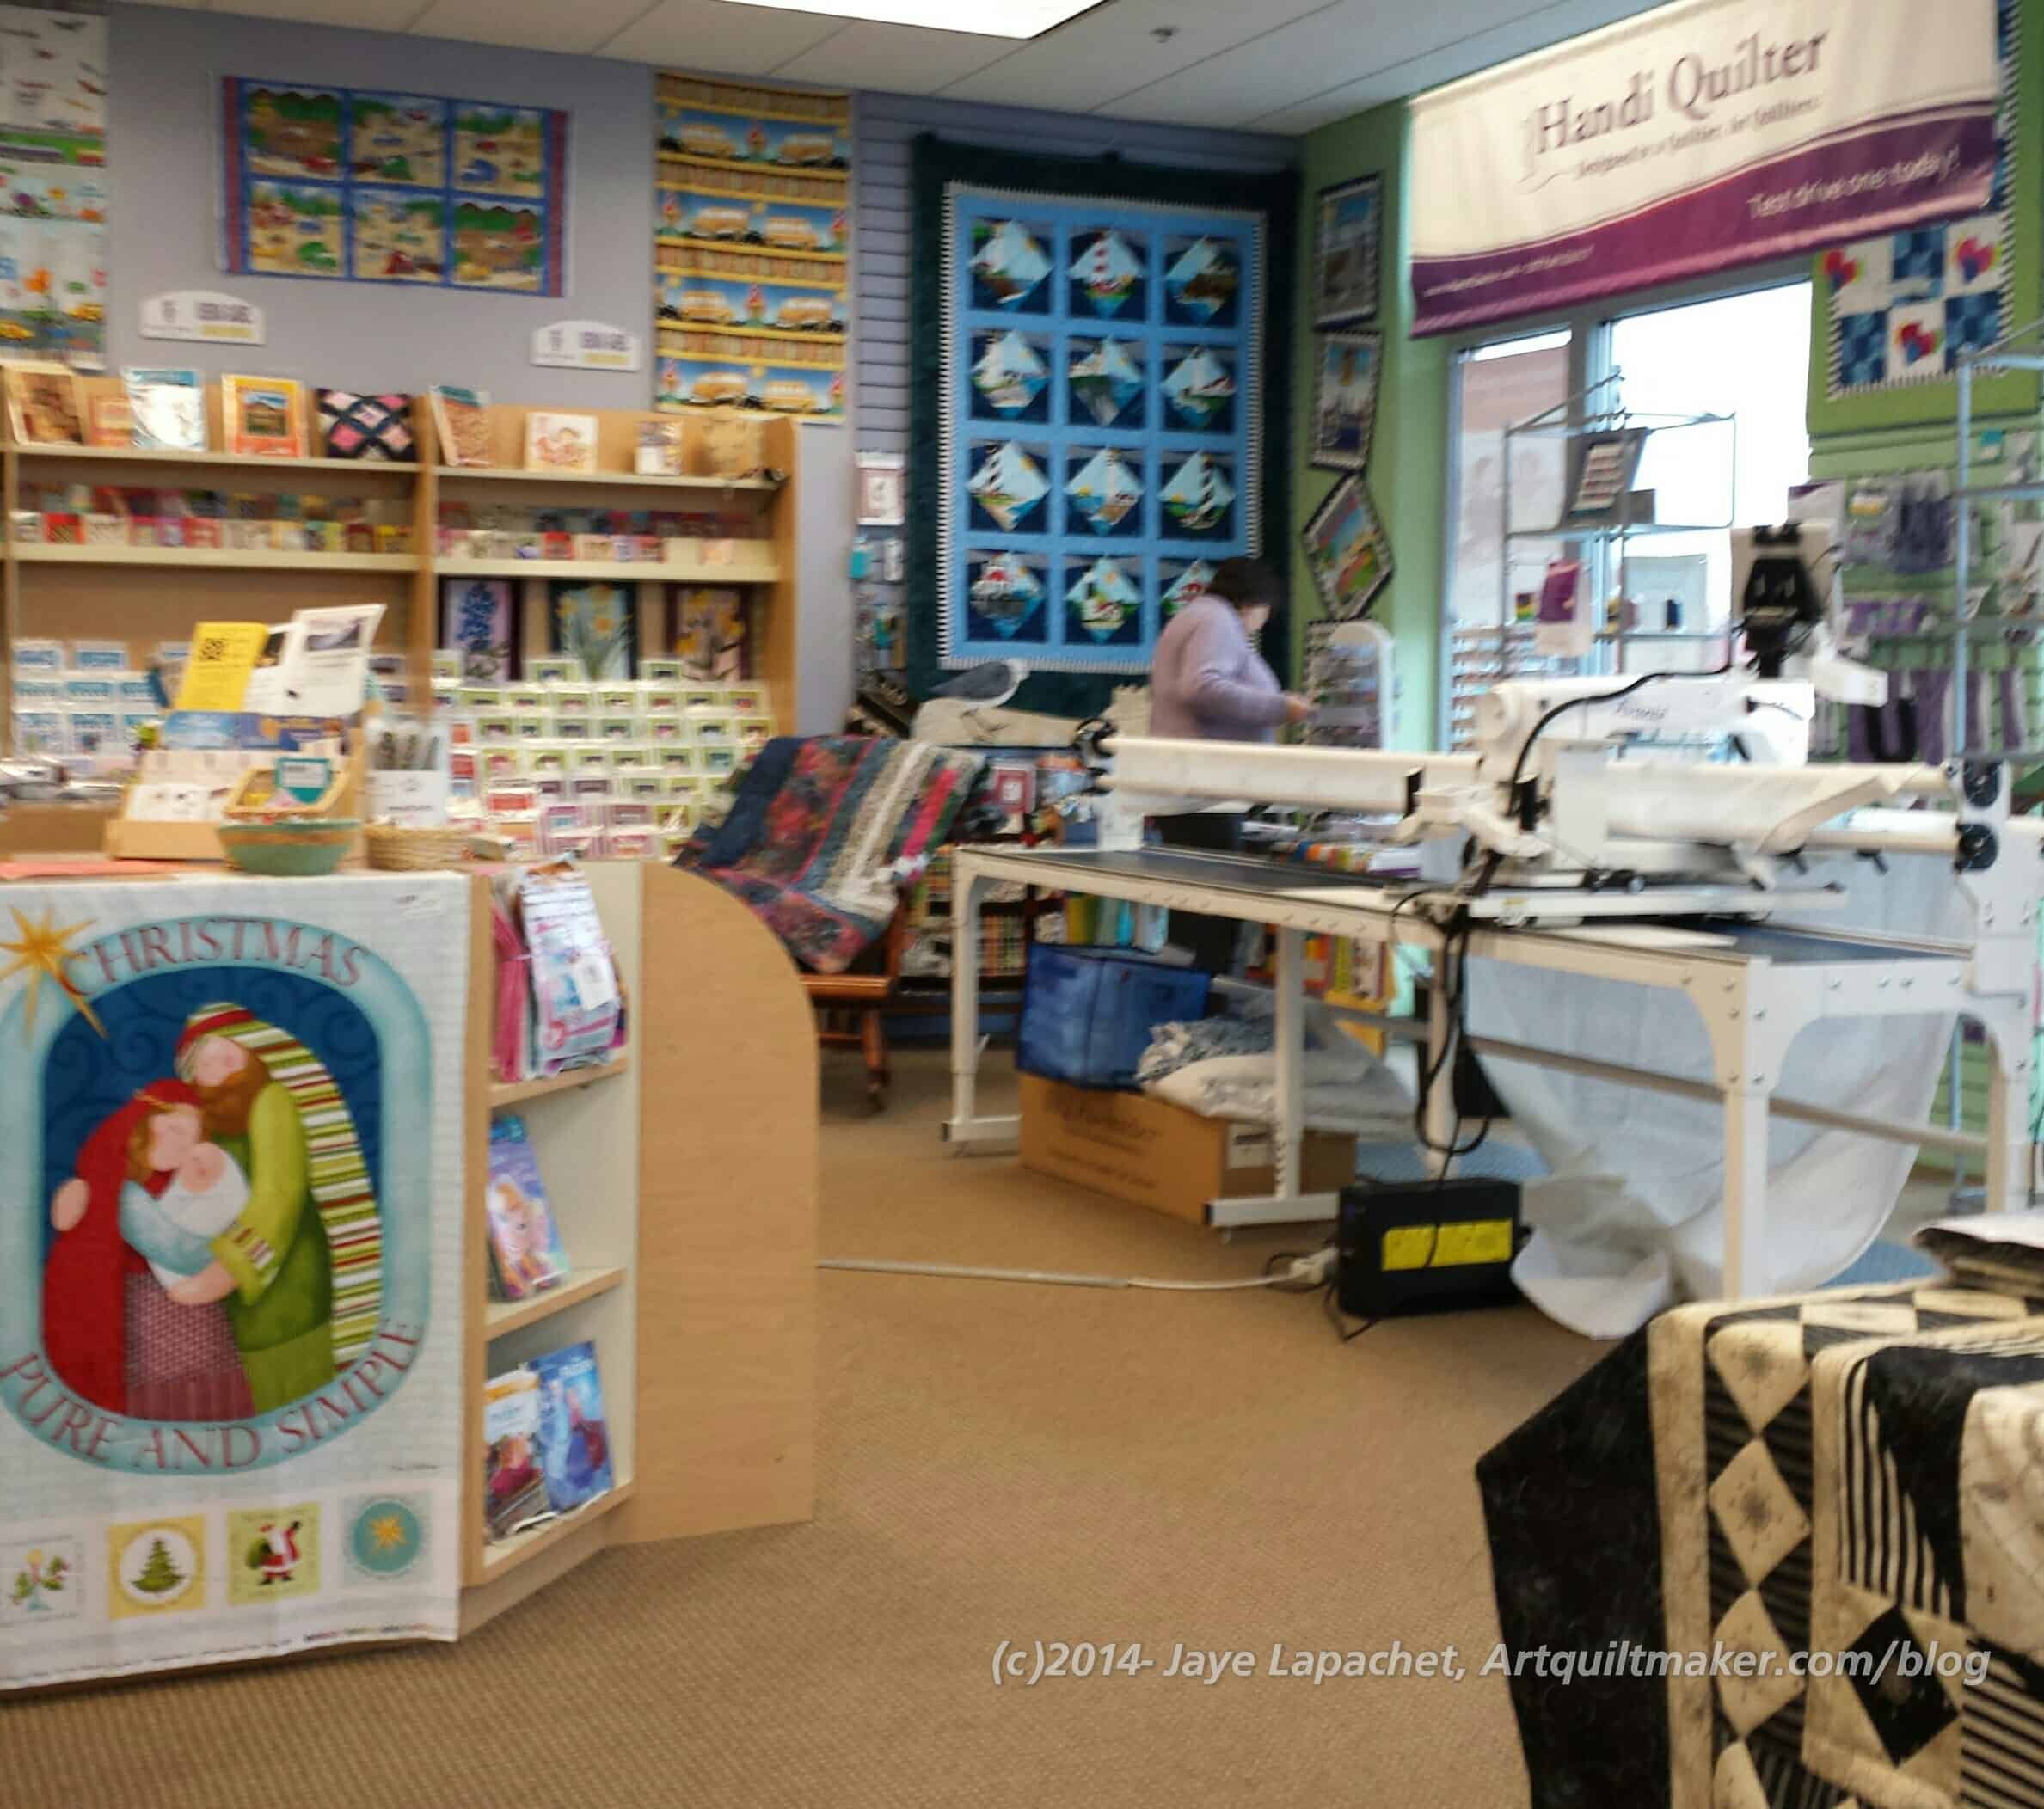
Prints Charming front of shop
In the corner near the window is a lighthouse quilt that we also saw at Patches in Mt. Airy. There is a sea theme that pervades quilt shops in Maryland. They are on the Atlantic and seafaring, as well as various Navy related activities go on there, so it makes sense. Plus the whole crab thing.
Anyway, that lighthouse quilt is interesting (not interesting enough for me to make, but interesting) and I enjoyed seeing two different versions. I liked the one at PC fine, but I thought the background used in the Patches version added more interest. In the front of the shop photo, you can see the longarm (Handiquilter, perhaps?) and some of the patterns and books. If you are working at the longarm, you have your back to the front window of the shop, which is seen in the top photo.
The shop still had some of their Christmas stuff out. Mostly it was panels around the counter. Good idea to start early, if you are planning Christmas gifts IMO.
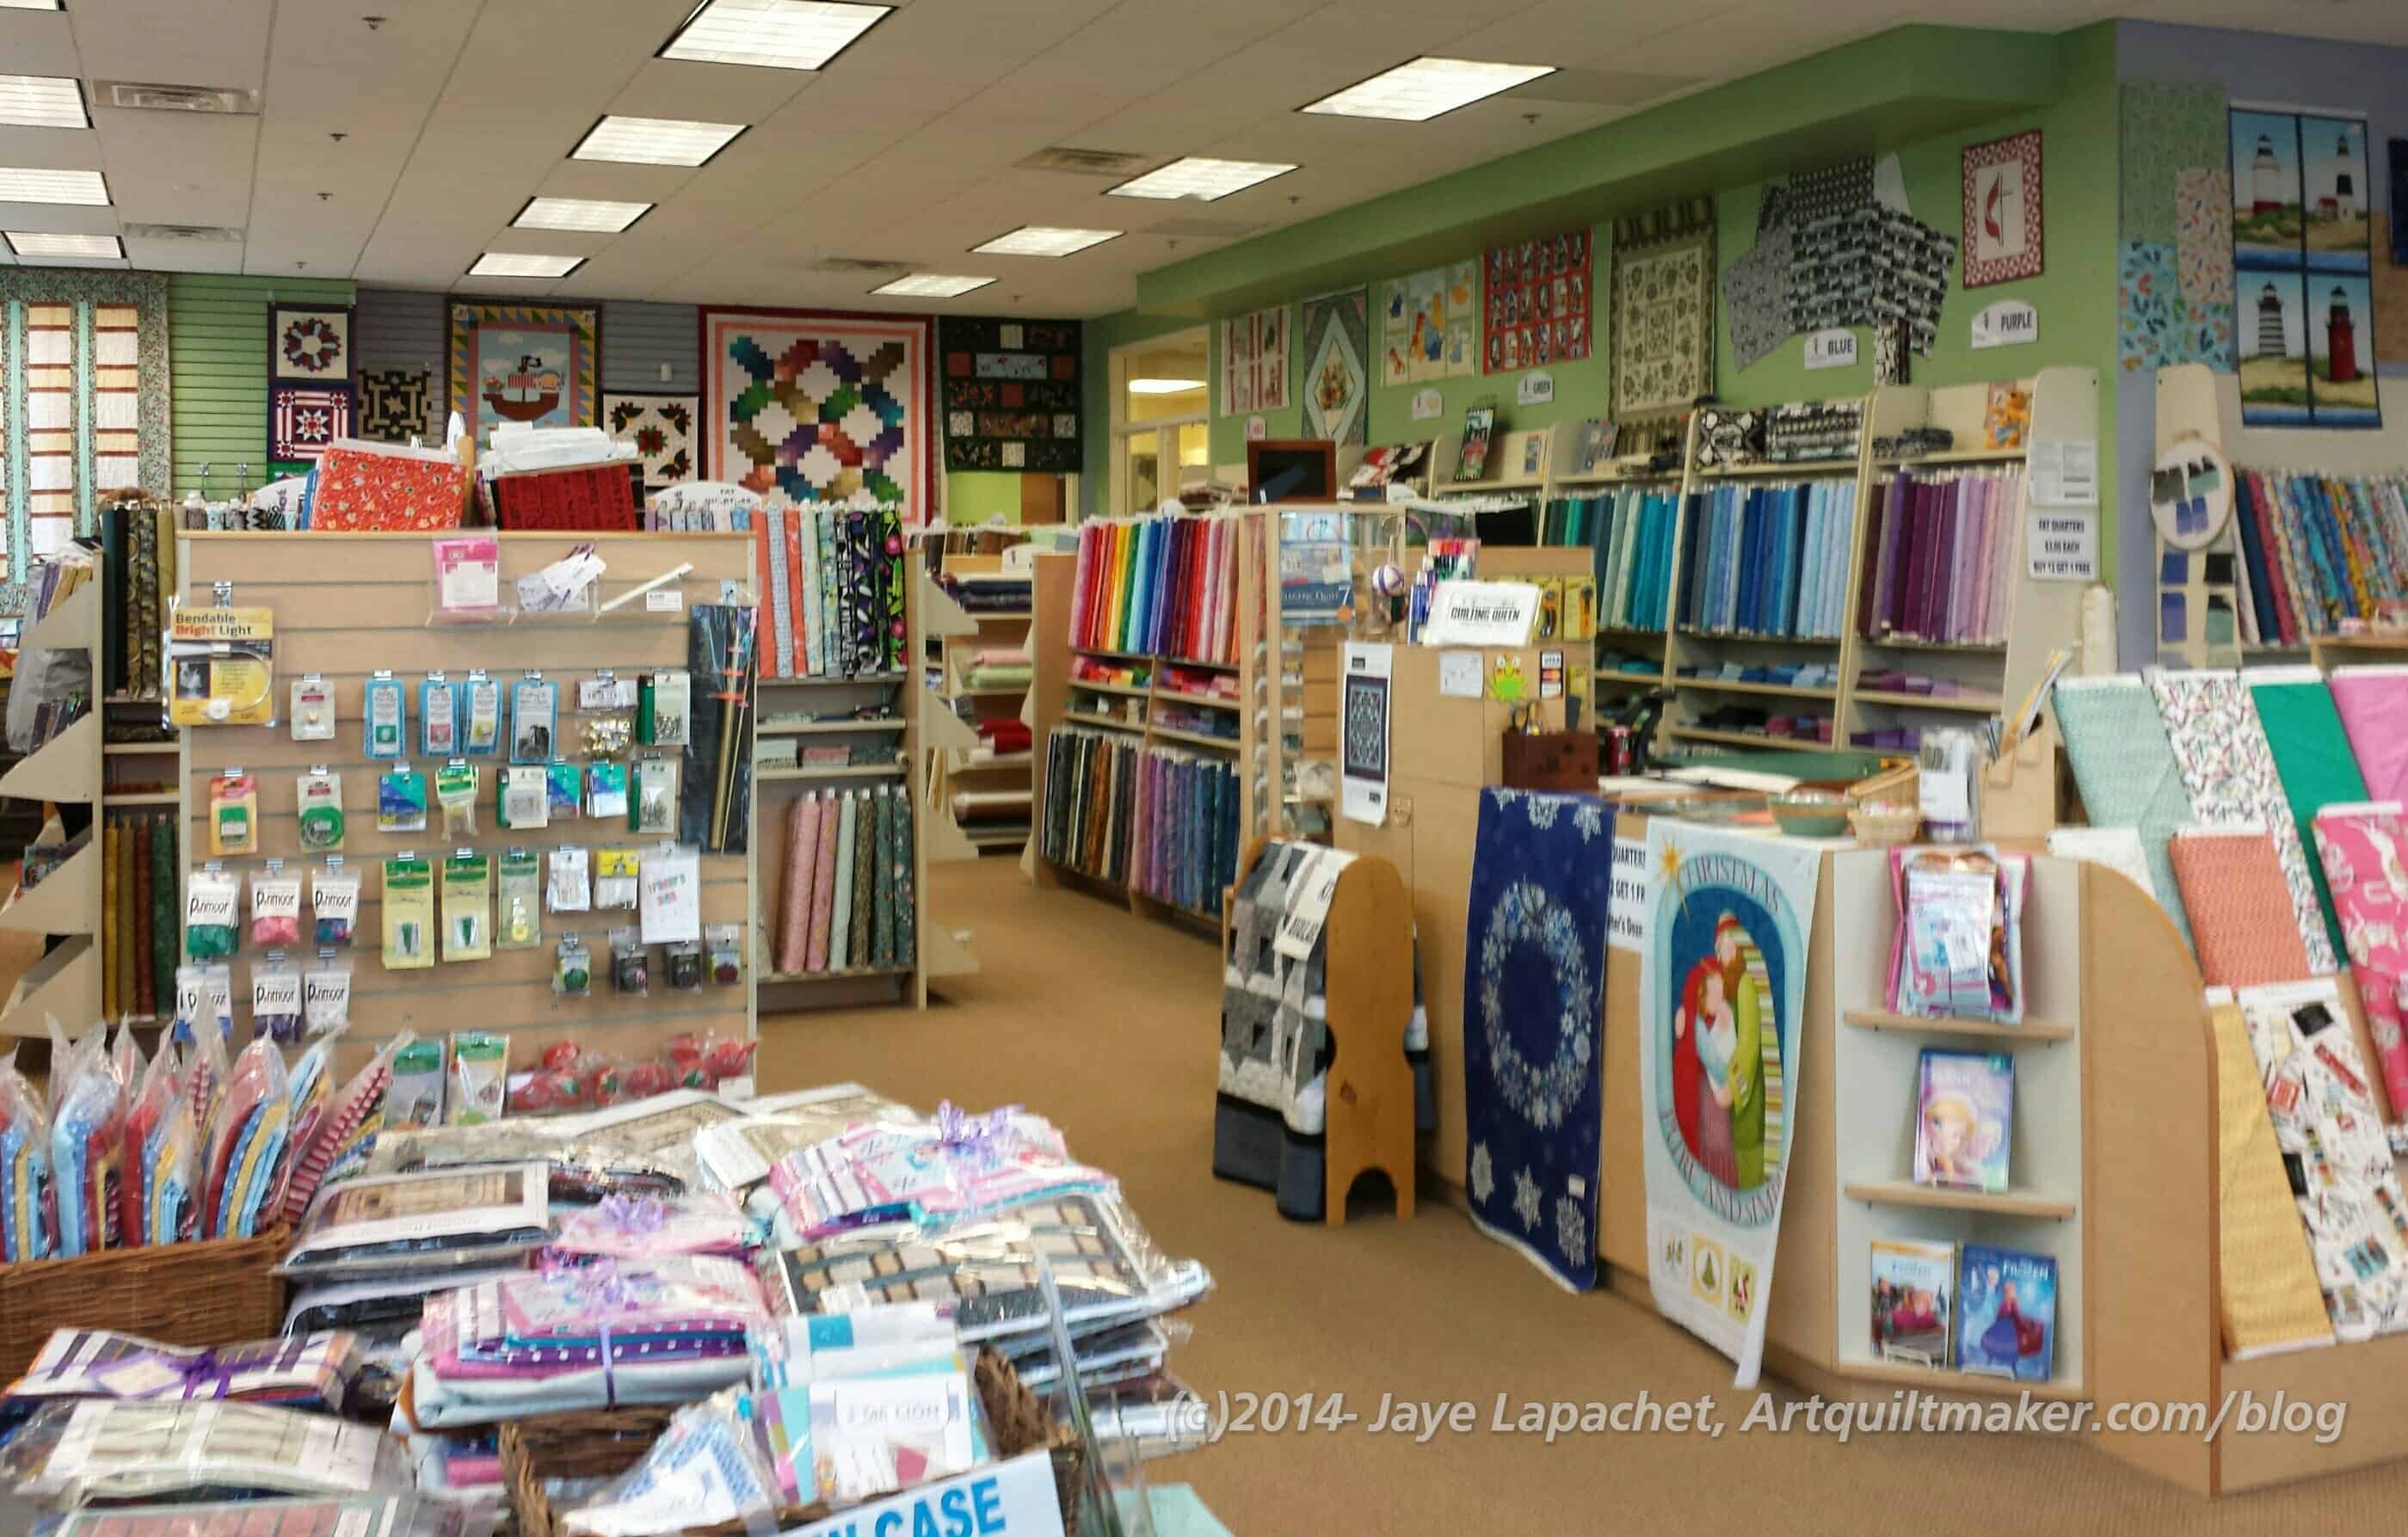
Prints Charming: front to back of shop
I stood near the longarm, kind of in front of the main door, to take this photo, which looks to the back of the shop. The table in the bottom left of the photo has kits and panel kits.
I am kind of interested in this resurgence of panel quilts. I got a panel when I bought some Kate Spain Christmas fabric, but I didn’t think that much of it. You might recall that I didn’t want to waste it, so I put it on the back of the Frosted Stars Leftovers Quilt. I have seen some really pretty panels lately. There was a peacock one that was very tempting. I don’t really begrudge people for wanting a quick quilt and using a panel. I think it is interesting and wonder if there is an AQSG article about it?
I didn’t get a good photo of their featured, new fabric, which you can see part of in the middle right (above). They had great fabrics in that section. I found a paintbox print that I plan to use for a set of gifts. (famous last words, right?).
Prints Charming Back of Shop
I really liked the self made jelly rolls and pre-cuts that Capital Quilts had. The colors were just so fantastic. Prints Charming had a nice array of the kind shops buy from Moda as well. I am always so tempted by the small cute little bundles of pre-cuts, but I rarely use them so I let the shop keep their Jelly Rolls.
The area shown in the picture with the pre-cuts was in a bit of disarray. it wasn’t terrible, just not as tidy as the rest of the store, which was VERY tidy. One of the ladies said that they needed, desperately, to get rid of something and clean up that area. I can’t fault them. Every space (house, shop, cubicle) has a junk drawer. 😉
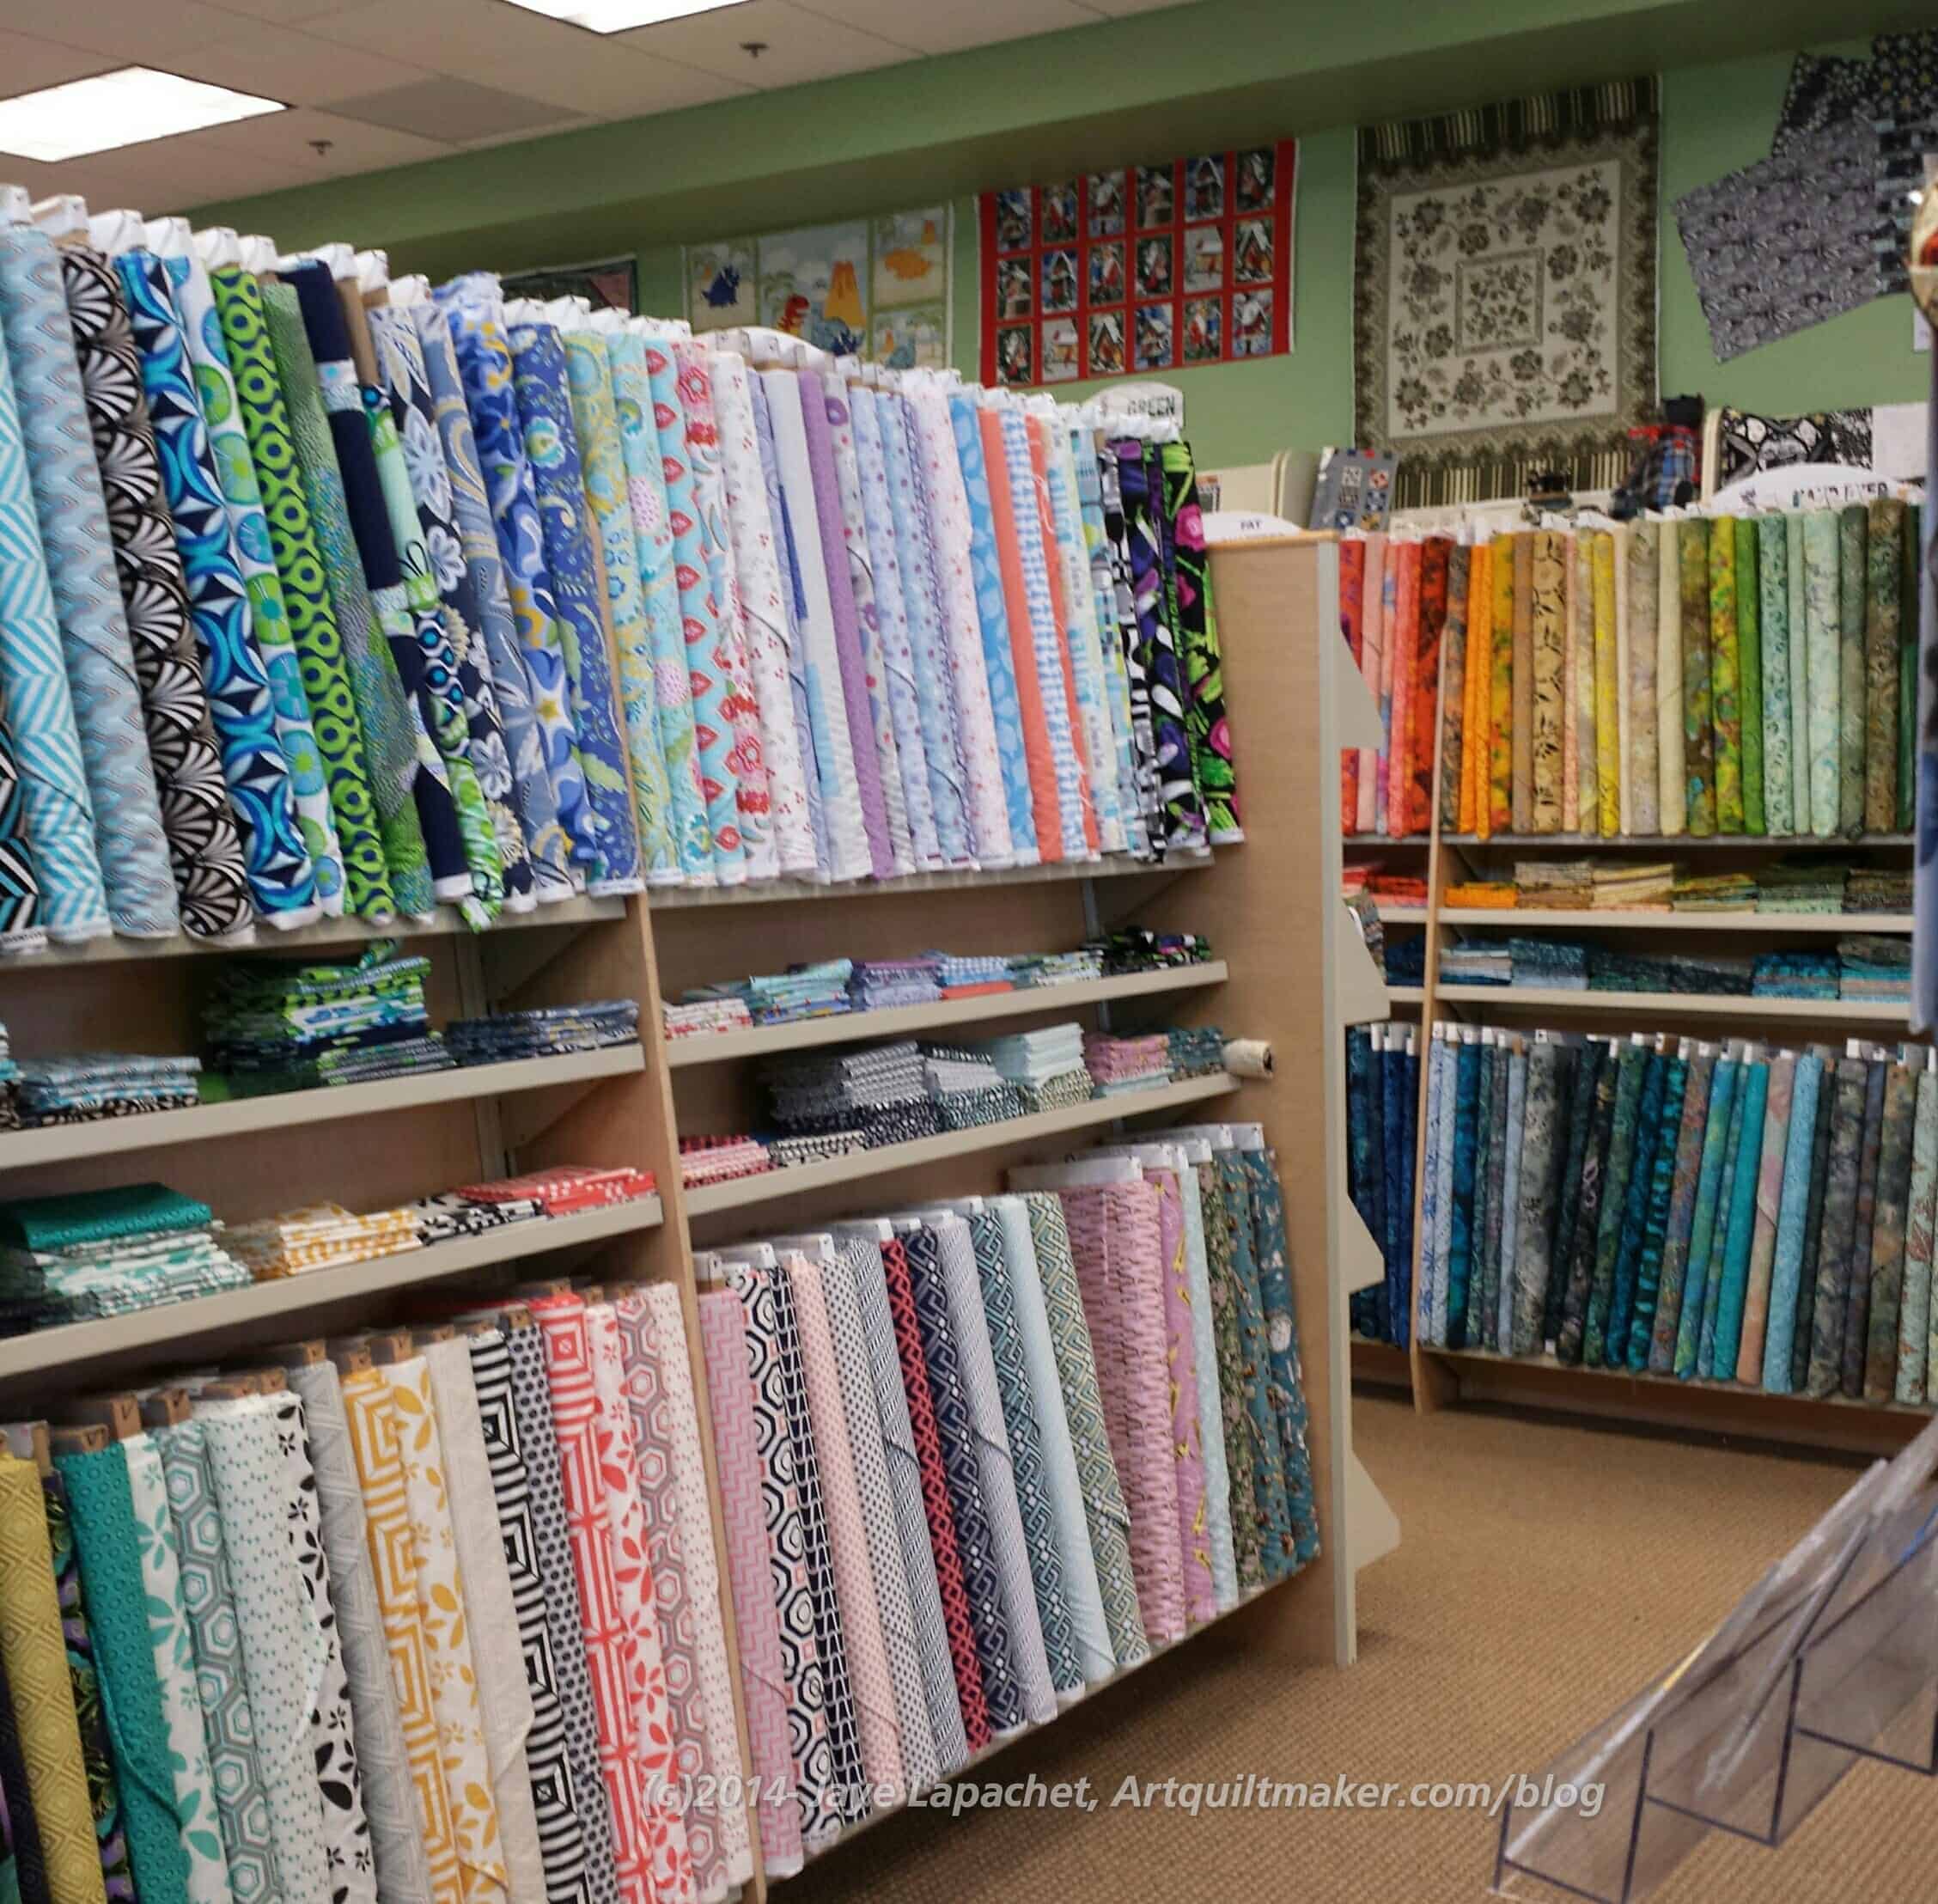
Prints Charming: Fabric
I guess what I want in a quilt shop is fabric. We have already established that I don’t need more fabric, but I do enjoy having a wide variety of colors and patterns from which to choose.
Prints Charming had a good amount of fabric. Not only did the have a good number of bolts, but they also had a wide variety: 2 brands of solids (not American Made Brands), batiks, novelty, tone-on-tones, flannels, modern, baby/kid fabrics, some 30s, I think and a section of nautical/ocean fabric.
I didn’t ask about whether they cut fat quarters. They had plenty out. I thought the range of colors they had tended towards brighter rather than muted, though I did see a small section of browns. I don’t know if there were other Civil War-colored prints there as I zoomed right by after looking at a coffee print.
One fabric we found was an architectural drawing of boat plans. SIL bought enough to make a shirt for her DH. We discussed cutting it out, but decided we had better finish the other shirts first.
Prints Charming: looking towards the back
I also noticed that they had a lot of examples and class samples hanging in the shop. I thought the hanging quilts made the shop look warm and friendly.
You can see some of the class samples on the back wall. That is their pattern section as well.
Back by the patterns were two more exits and another cutting table. One exit (right) led to a nice clean restroom and connected the shop in some way (I didn’t explore) to the condos above. Can you imagine having a quilt shop right downstairs? I would love it and be totally doomed. DOOMED!
If you are heading to Maryland, I would recommend a visit to this shop. I found some nice stuff to buy and I am sure you would as well. (says your personal Temptress!)
There is a lot of creativity happening in Maryland. No, I am not surprised.
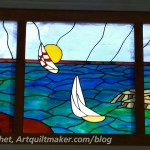
Rick’s Leaded Glass
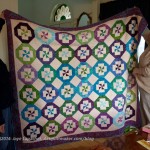
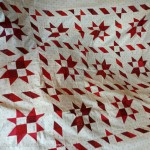
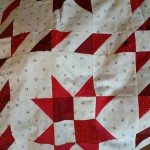
Cathy’s Swoon
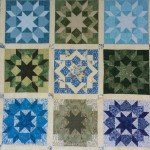
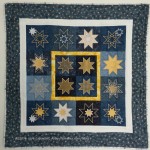
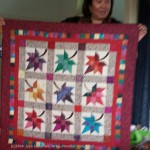
Cathy’s Embroidered Star Quilt
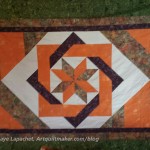
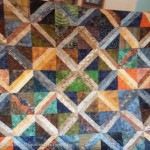
Torie’s Disappearing Pinwheels
Torie
Torie
Tanesha
Tanesha
Tanesha
Tanesha
Tanesha
Tanesha
Tanesha
Tanesha
Tanesha
Tanesha
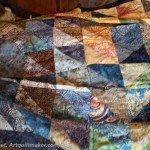
Torie – Fraternal Twins Quilt
Torie – Fraternal Twins Quilt
Torie
Navy Retirement Pillow
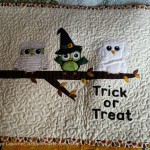
I have to say that I was really inspired by everything I saw. I love Tanesha’s mummy owls. I love the way Torie uses batiks. I really enjoy the way Rick has incorporated leaded glass panels into his house to make the house unique.
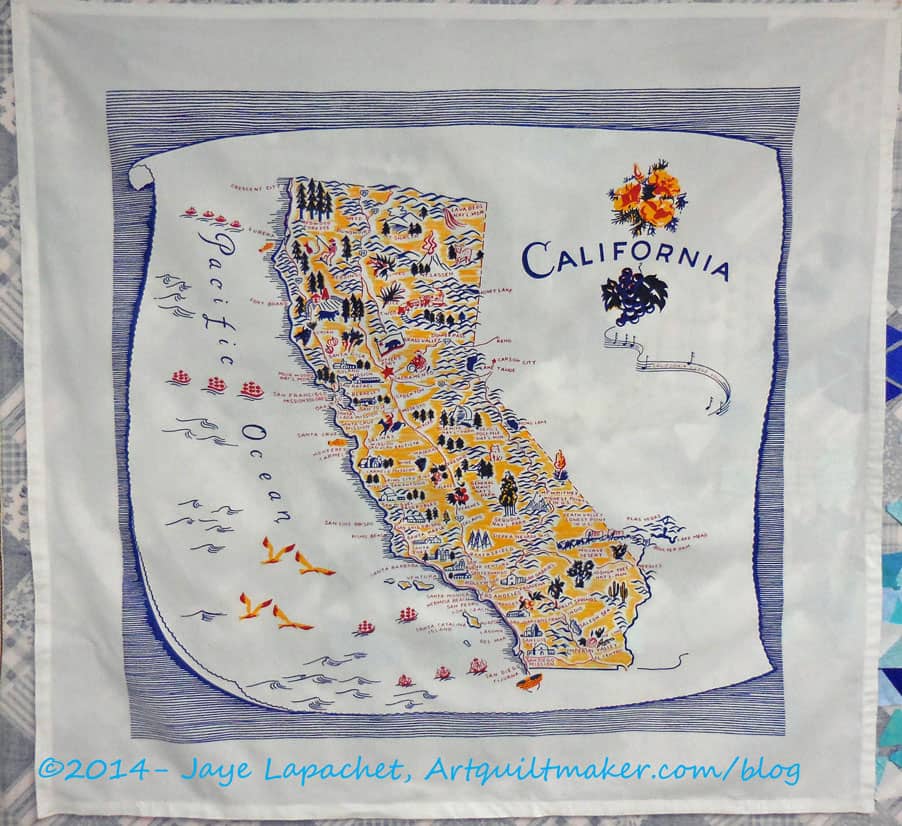
As I mentioned in the previous post, we made shirts for DH and BIL#3 (I have to give designations now since there are multiple BILs involved). As you have heard both are involved in the Native Sons of the Golden West. Over the course of a few months, I found two different types of California themed fabric and bought it. I knew I was heading to Maryland and SIL#2 is almost always game for the crazy ideas I have.
My idea was to make two shirts out of each fabric. We started with the tablecloths. They were available on eQuilter. Mrs. K saw them and emailed me about them. I bought the last three. As I said in the previous post from Sunday, we had to fussy cut in order to get the most out of the motifs on the fabric and to have enough fabric to make two shirts.
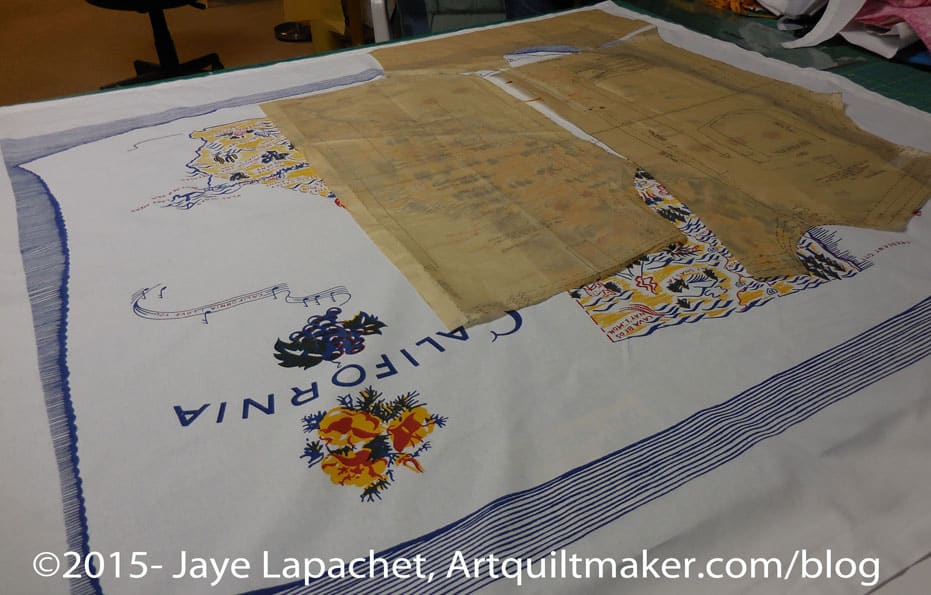
Pattern Layout
The first order of business was to lay out the pattern pieces on the tablecloths (yes, we washed them) and cut out the pieces. We tried to get the most pieces out of tablecloth #1 to ensure we had as much of the motifs on each shirt as we could and as we were nervous we wouldn’t have enough fabric.
While we were laying out the pattern pieces, a story appeared. Not a story with a murder and a romance, but a story about California. One of the shirts we decided tended towards water and boats and the other land. We couldn’t use all the motifs for each shirt. It was kind of a shame we couldn’t fit the California motif into both shirts. It just wouldn’t work. I kind of wish I had bought four tablecloths, but I know there were only three left.
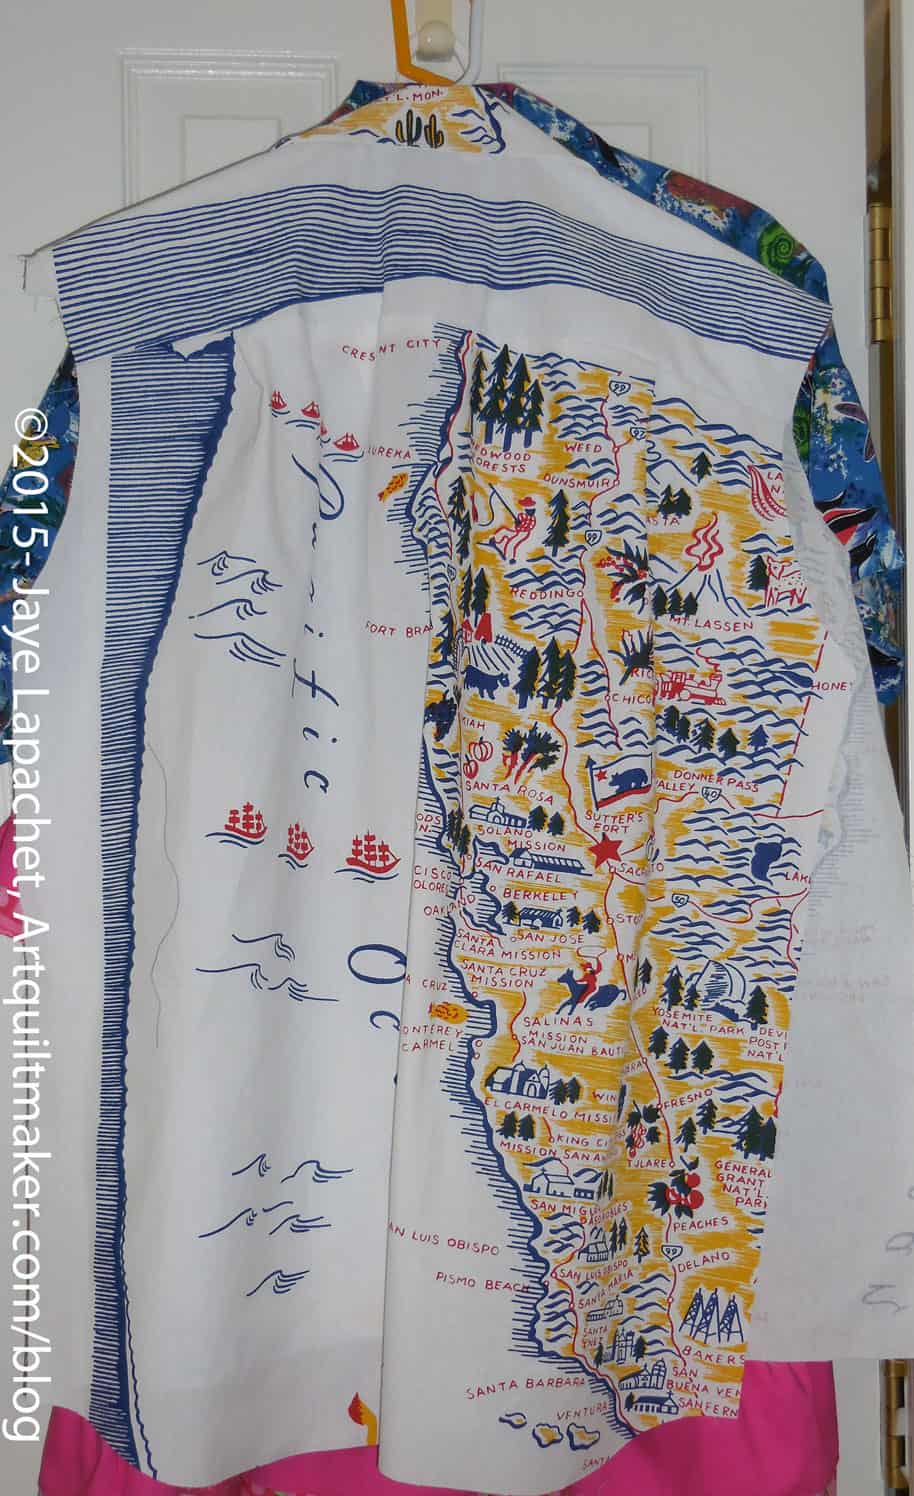
Tablecloth in process
We decided not to do all of the shirts at the same time and we focused on the tablecloth shirts. We sewed and pressed and marked. By the time I went to my work conference, we had two shirts done in including the buttons.
We were pretty thrilled with the way the tablecloth shirts came out. Would we have wanted them to have more of the California map on them? Yes. Would we have preferred it if the lines around the border could have been made symmetrical? Yes. It wasn’t possible yet we are very happy with how they came out.
There were a lot of design challenges with these shirts, but I think that the design challenges made this project fun and the shirts unique.
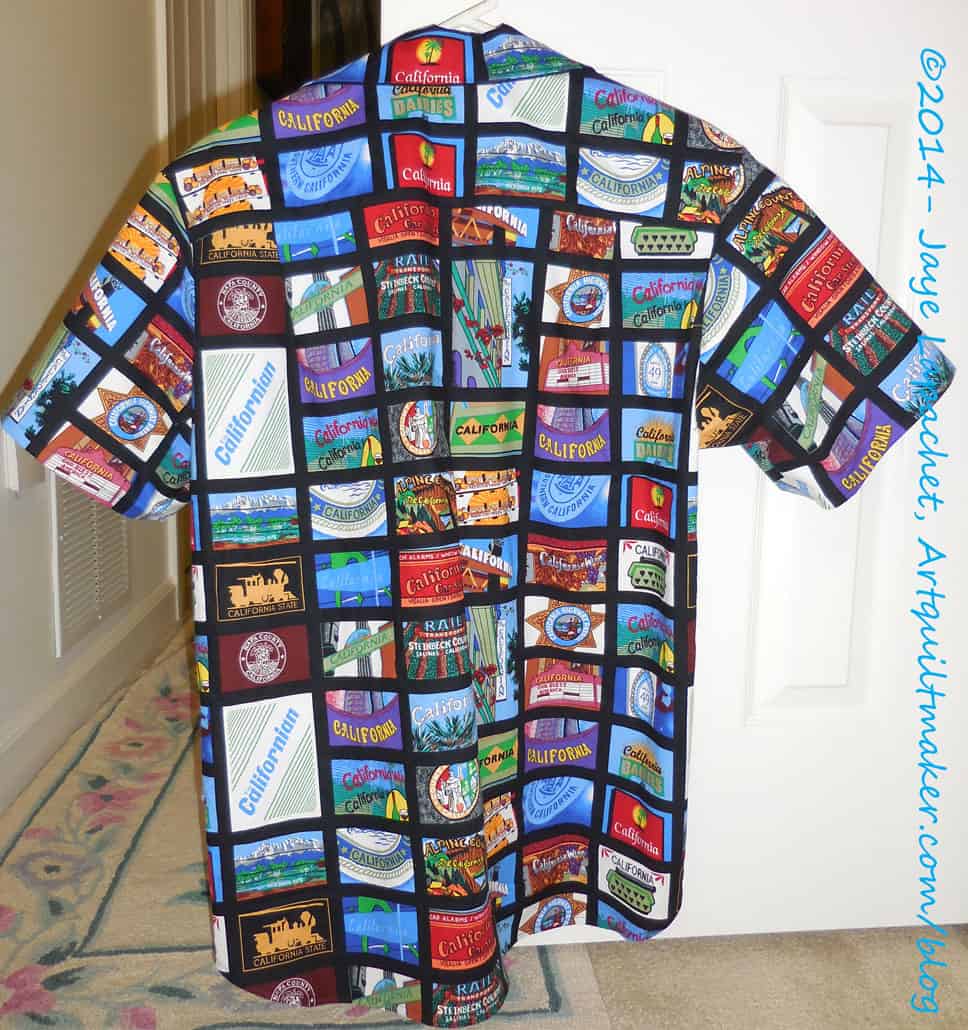
Black NSGW Shirt for Paul
SIL got me on the garment sewing bandwagon by making me sew the entire third shirt myself. She was there to guide and be my marking slave, but I did all the cutting and sewing.
We were able to finish that except for the buttons.
I came back on Saturday and we blew through the last shirt. I cut out the pattern (only one piece wrong this time) and then SIL took the lead and I took slave position again. We got it done, though we are both skeptical that it is a three hour shirt as the pattern advertises.
I have made a few garments before, but the patterns seem very complicated and I am not a confident garment maker. Working on Shirt #3 and alongside SIL on the others really helped boost my confidence. I won’t be making ballgowns anytime soon, but I might try an easy dress from a pattern I bought. Or remember that skirt?