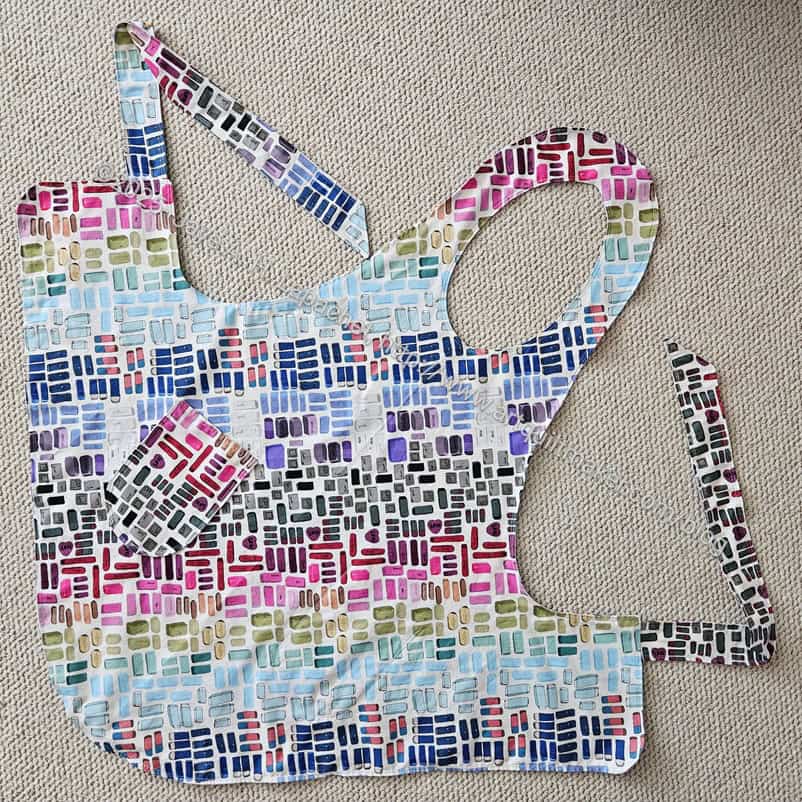
The Arthouse apron is finally finished! I know you are surprised, because I didn’t tell you that I had started it. Sorry about that. I have been thinking about it for awhile and push finally came to shove. I needed to get it done.
I bought the fabric for this apron, at least one side of it, not that long ago. I bought the eraser fabric recently on a whim. I thought it would be a better, more appropriately themed choice for the Arthouse.
Arthouse Apron – painting side
This is a fairly quick project. I cut it out at the October 4 Sew Day and I was able to finish it over the weekend, so I could bring it with me to Portland.
Aside from forgetting to put the pockets on until I had the outside sewn, the project was not a problem.
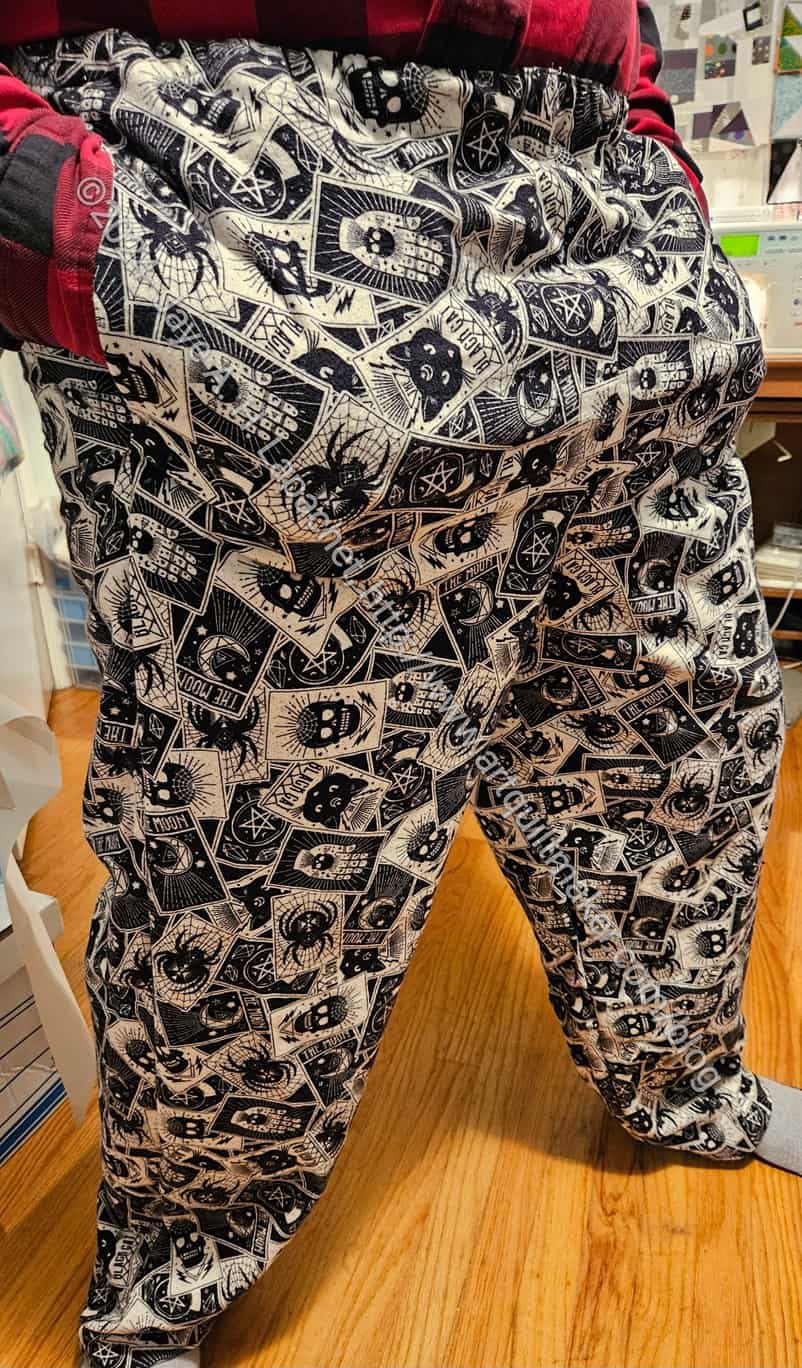
Before Christmas, I went to Mary’s again and we worked on this bathrobe. It wasn’t a complete bathrobe Christmas, but two people got them. That is about all the garments I can manage even with Mary’s excellent assistance.
This is a different pattern than the Tarot bathrobe. It has a flat collar instead of a shawl collar.
I bought this fabric awhile ago, sort of by accident. I was trying to replenish my stock of the dark grey version of this fabric and ended up with the light grey background. I like it, but Mom has put the stop sign up for more bags. I didn’t want to start a whole new set with this fabric anyway. I decided a bathrobe would be good. It used up most of the fabric.
As you know, I often get stuck somewhere on garments and my confidence drains away. Mary has been great about helping me. This time I was able to rip out some seams for one of her projects and also cut out a Classmates Tote for her to sew later. It was a good exchange for me, at least.
YM & Mom in their bathrobes
I was able to take a photo of both bathrobes and their people.
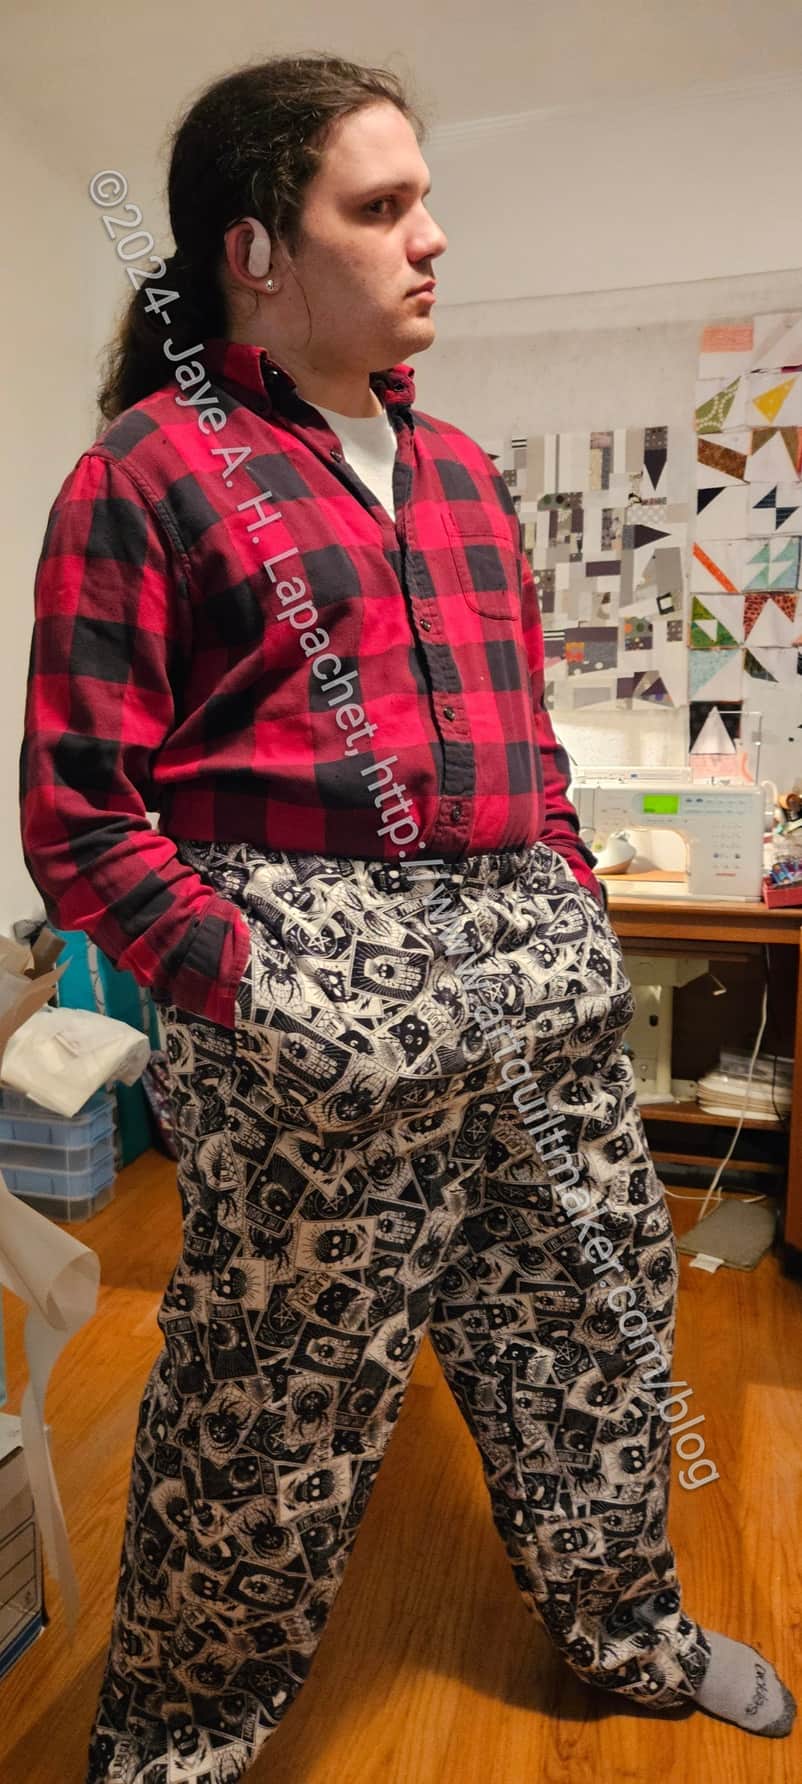
You might remember the pajama pants that the YM made when he was visiting in the spring. Right after he left I was given a robe pattern. Carrie suggested the YM might want to use the pattern to make a matching robe. I decided that I would make him a robe for Christmas. I went out and bought more of the fabric (Tarot flannel from Joann) and started it in October while I was in Portland. I got stuck and put it all away. I needed more fabric, though I thought I had originally bought enough. This is what happens to me when I try to sew garments! Also, I used the pattern Carrie gave me rather than the pattern I used a long time ago to make a robe for my SIL#4. I must have given it away.
Anyway, I got help from MaryC. She basically finished the robe for me in about 2 hours while I entertained her. She is a master garment maker and I always appreciate her help.
In my job there is a concept called ‘MVP’. It means minimum viable product, which is part of an iteration process that promotes getting something out and eschewing perfection. In the quilt world, I like to say ‘there is always more fabric’.
I finished my Sun Hat. It is a MVP.
Sun Hat (Heather Handmade) – side view
I thought I had done everything properly. I was unsure about my progress, so I had Mary C help me at a recent Sew Day. I redid the brim piece after leaving the seams out meant the brim was too big for the crown. Still, there was so much adjusting and redoing that the hat just doesn’t look right. The side parts of the crown fold in too much on the top and I had to ease in the size when I sewed the pieces together.
It didn’t come out as well as I had hoped, but it isn’t terrible and someone will wear it and like it. I want to try again. I bought the Sew Hungry Hippie Bardot hat pattern. I haven’t started it yet, but may try to get it done soon.
I took the pieces with me to Sew Day on a whim and actually made some progress. Mary C helped me to measure my head to confirm I actually have a teen head. I do!
Once that was established, which I admit was holding me back from making progress, I decided to cut out the pieces and get them ready to sew.
I made one change. Instead of cutting out four pieces for the brim and sewing two together I left that piece whole. It will look like a donut. I did check the directions and think it will be fine – I think it will save me a couple of seams and keep the pattern of the fabric intact. I have plenty of fabric, so if it doesn’t work then I can do something else.
I forgot the interfacing I planned to use so that will be a project for another day.
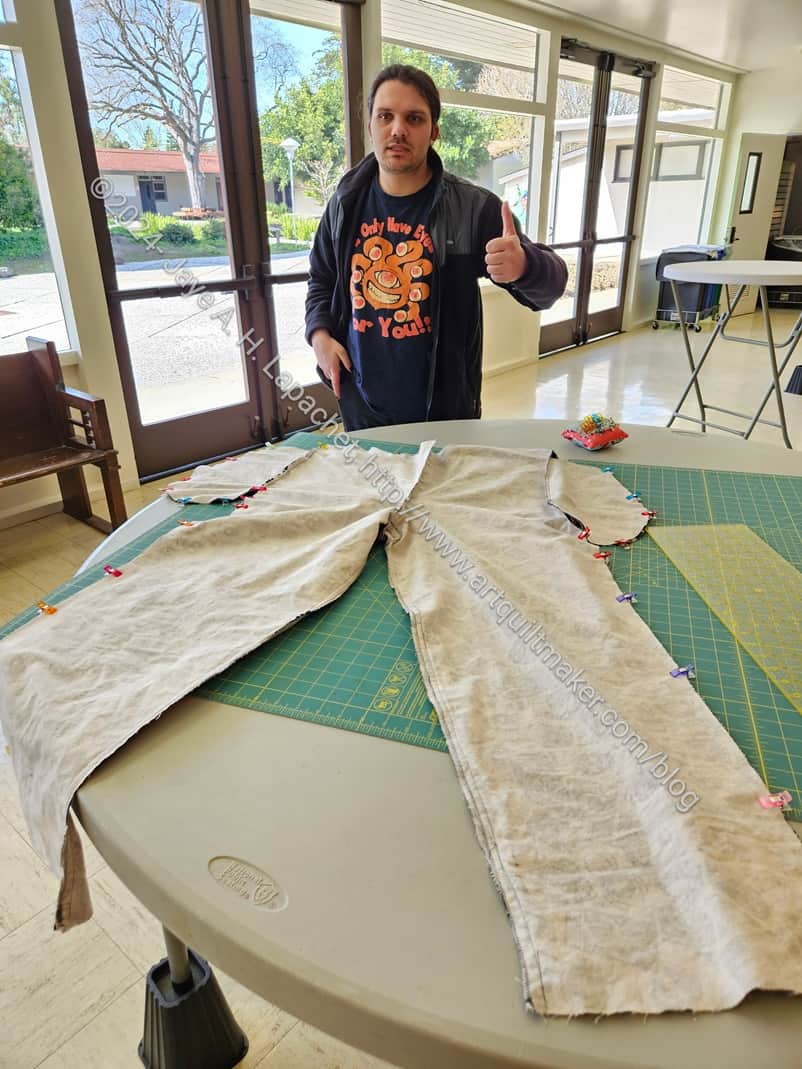
At the last minute, or nearly the last minute, before the YM went home, he finished his PJ pants. I provided a little help.
We only had to do the casing for the elastic, and the hem, but it still took a couple of hours. He did a lot better at sewing this time. His stitch lines were a lot straighter than last time, so he didn’t have to rip anything out.
There were a couple of details in the pattern instructions I didn’t understand, but I think we made the finishing work.
Having to finish before he went home stressed him out a little, but I just kept supporting him and reeling him back from the stress abyss.
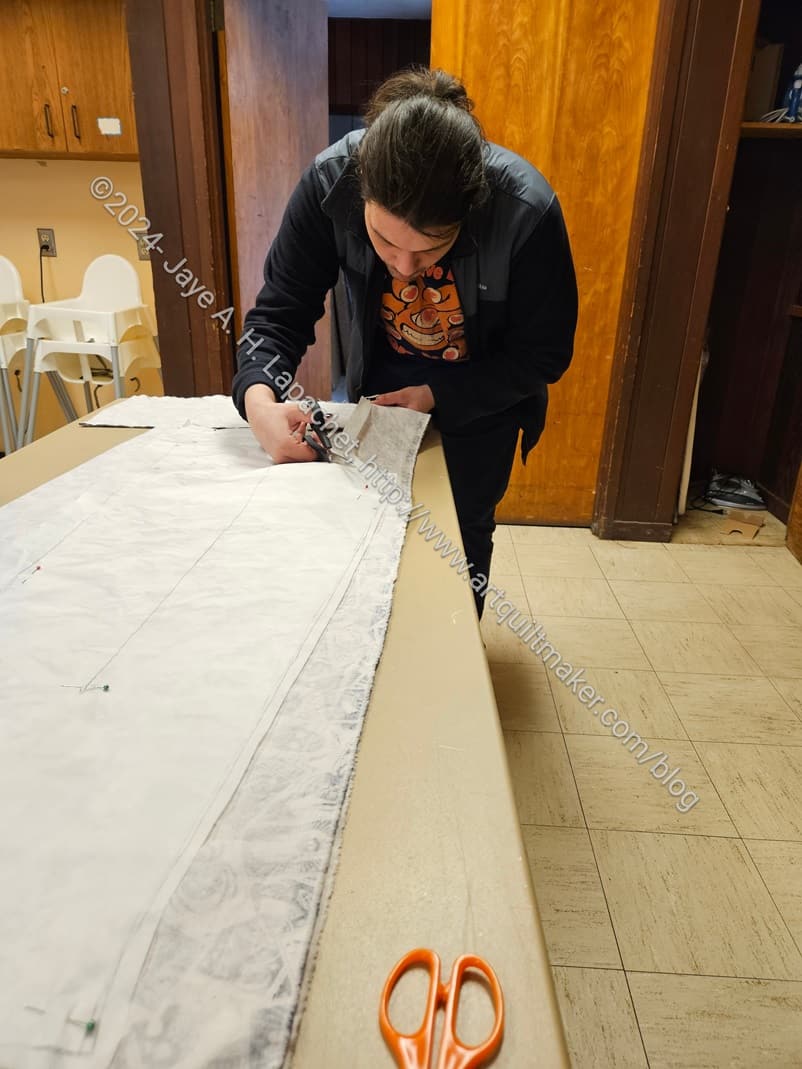
At Sew Day the other week, I spent the time helping the YM start some PJ Pants. I know you are ROTFL when you think of me and garment sewing. Have no fear, I was under complete supervision.
I was thrilled, and kind of surprised, that the YM was willing to go to Sew Day with me.
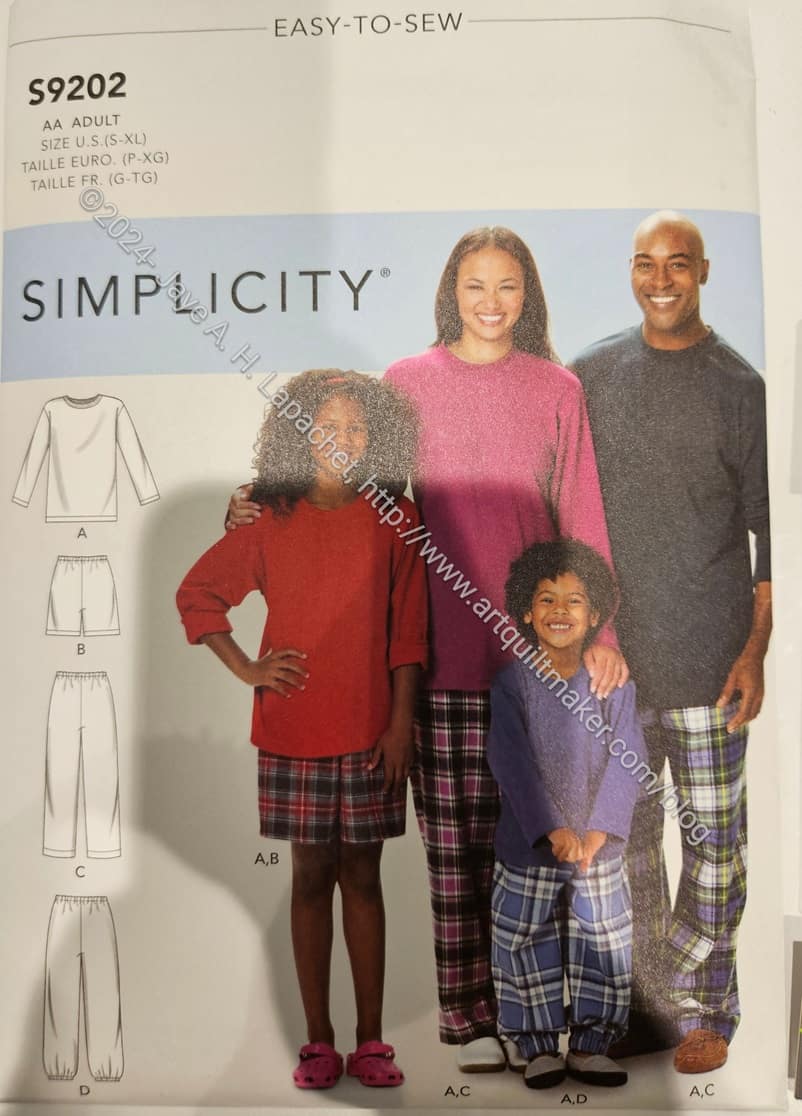
PJ Pants pattern
He is in town working during the week, but comes over on the weekends. He wants to learn to make clothes better, especially costumes for events like Sakura-Con. I am not a great garment maker, but I thought I could handle this pattern, if Mary was there to answer questions. SIL #2 was also available for consultation. Sew Day was a great opportunity to work with him.
Mary C had told me that PJ pants were a good starting project. I couldn’t get the pattern she suggested, but I got one that was marked as ‘Easy to Sew’.
When she saw it, she was pleased. She told me that the pattern she has is really old and that this one would do fine. WHEW! There are three pattern pieces total. As a bonus, the pants have pockets.
YM prepping the pattern and fabric
Mary started out helping the YM, but I took over partway through as she was doing some handwork. I didn’t think it was fair to make her keep getting up.
There was a table set up near the kitchen and Mary suggested he work there. It was actually perfect, because it gave him plenty of room to work. As a bonus, I could get steps in walking back and forth.
He made a pattern with tracing paper first and did all the prep. He was surprised at how long the prep takes. I was reminded of my complaints about cutting out bags. Like mother like son, I guess.
YM Sewing pajama pants
He eventually got to sewing. My promise that the prep was worth it all came true then as the pants went together very quickly.
I brought my travel sewing machine with us. I was afraid he wouldn’t get to sewing and it would have been a waste, but he did get to the sewing part.
He needs practice, because some of his seam lines wandered a bit, but the more he sewed, the better he got.
YM and his almost pj pants
He almost got the fabric to look like pants by the end of Sew Day. You can see in the photo that the outer seem is just clipped. They do look like pants, though.
He sewed the outer seam and zigzagged all the seams the next day. We only have to do the elastic in the waist and hem the bottom and he will have pants.
I suggested that he make a few pair to get into the groove. I explained to him how I like to make a bag pattern a few times to get the feel of it. I don’t know if he will do it, but he didn’t dismiss the idea out of hand.
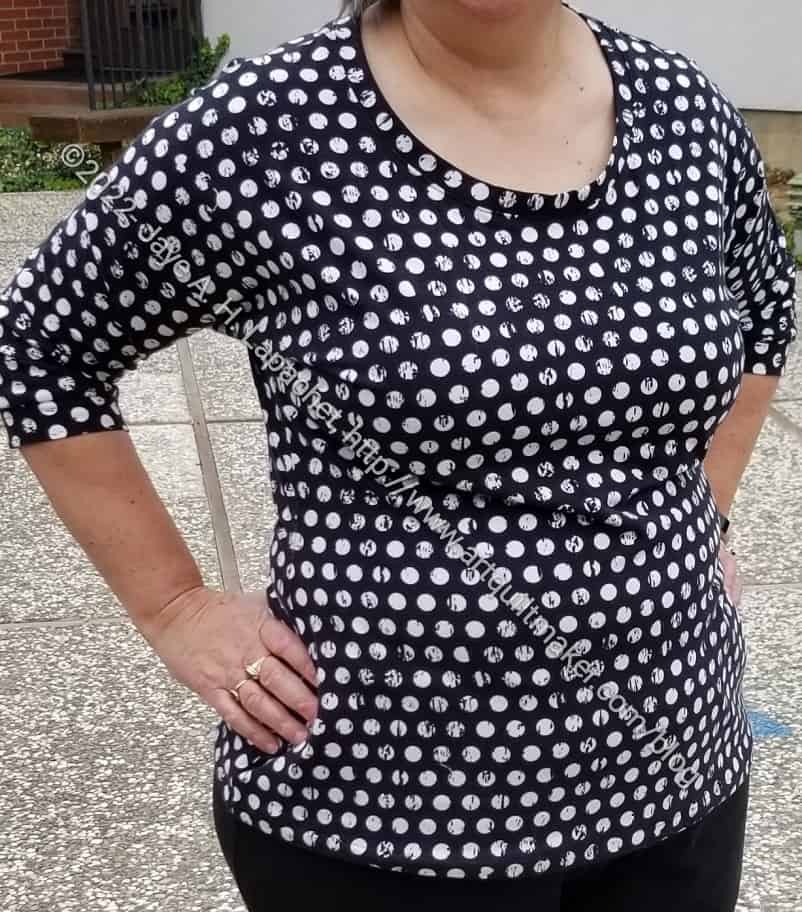
I finally finished the Westchester Top. Really Mary C. finished it for me. I went to her house with the full intention of having her tell me what to do then doing it. She was able to finish most of it very quickly.
One problem I had is that I couldn’t find the directions. I think I must have made a folder for the project and left it somewhere (or hidden it) in my workroom. I’d like to find it and see if the directions are included in the hard copy pattern or if the directions are in the video course only.
I knew the course was in my account, but on my phone, I could only see the hack parts of the course. Fortunately, Mary knew what to do and just serged the whole top, the put the neck and armbands on. She top stitched some of it and I top stitched the rest at home.
I think the top came out pretty well. I have a pattern that fits. I would make the neckline higher if I made this again.
This is a free pattern from Crafty Gemini. You do have to print and tape together the pattern pieces. I bought the hard copy pattern so I wouldn’t have to do that (laziness and printer ink).
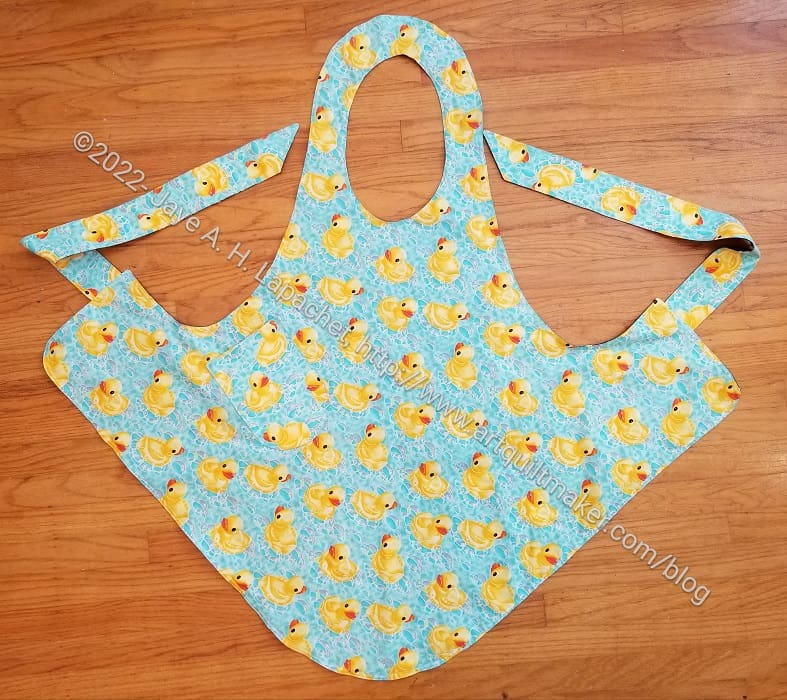
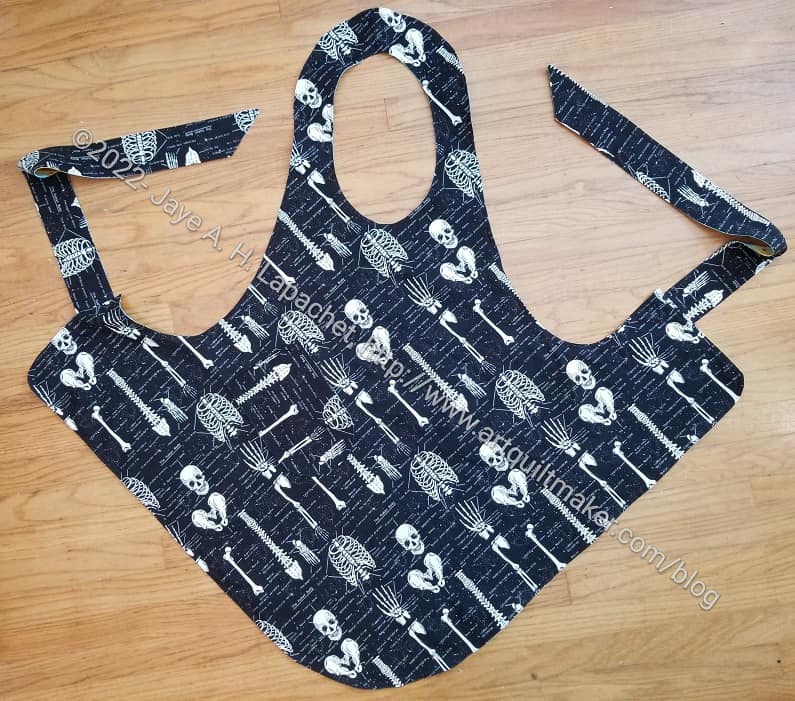
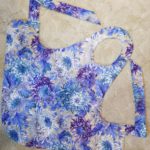
I finished another Flapper apron over the weekend. I call this the Duck Bones apron because one side has rubber duckies and the other bones. This will be for the YM’s partner. She is on a pathology course and really liked it when I included the bones fabric in a bag I made for her for Christmas.
Duck Bones Apron
The bone fabric is a favorite of various recipients. I have an alert on a shop site so whenever it comes in I buy 3 yards and decide what to make. I have enough left to make more pillowcases, which is probably a good idea for my SIL. Who uses only two pillowcases?
I have made several of these over the past few years and still like the way they turn out. The last one I made was for my mom, I think.
I made two of these at a time. The second one is still in progress. No, it isn’t Christmas or a birthday, but I had them on my mind, so I decided to make them.
I have been adjusting the neck hole a little, but left it the original size this time. I don’t remember why I adjusted it originally. I think the fabric looks really nice in apron form.
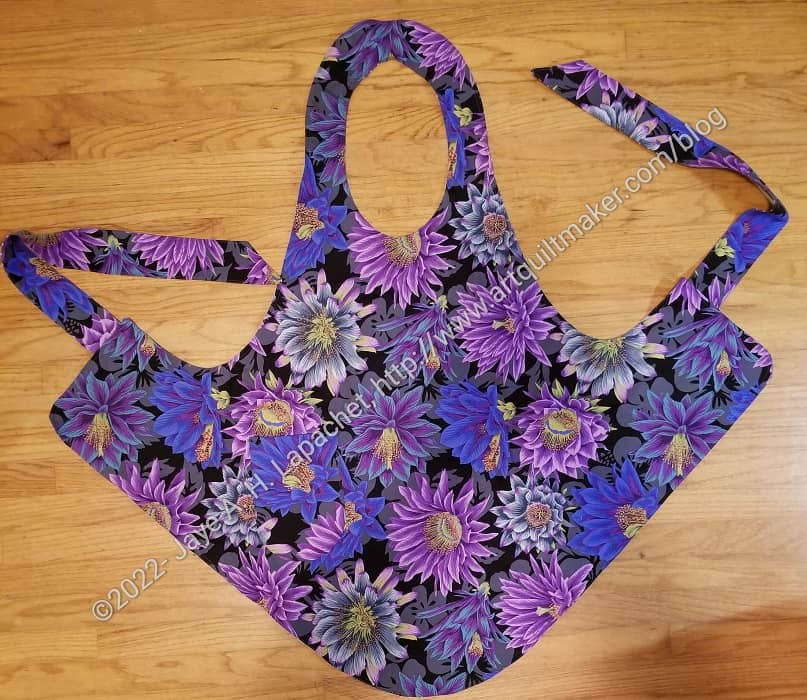
Yes, I used some of my precious Philip Jacobs fabric, but why not? It isn’t like there is a shortage at my house.
This is the pattern you can use with a yard of fabric. The pattern is called Flapper Apron from the Decades of Style pattern company. I bought it in 2018 when I was out shopping with Amanda. The clever part of this pattern is that you cut the pattern out on the bias. The biggest attraction is that you only *need* one yard of fabric to make it. I usually make the apron reversible, which takes 2 yards. As mentioned before, I like to give myself a little breathing room with 1.25 yards on each side. Still, the pattern is designed for one yard of fabric.
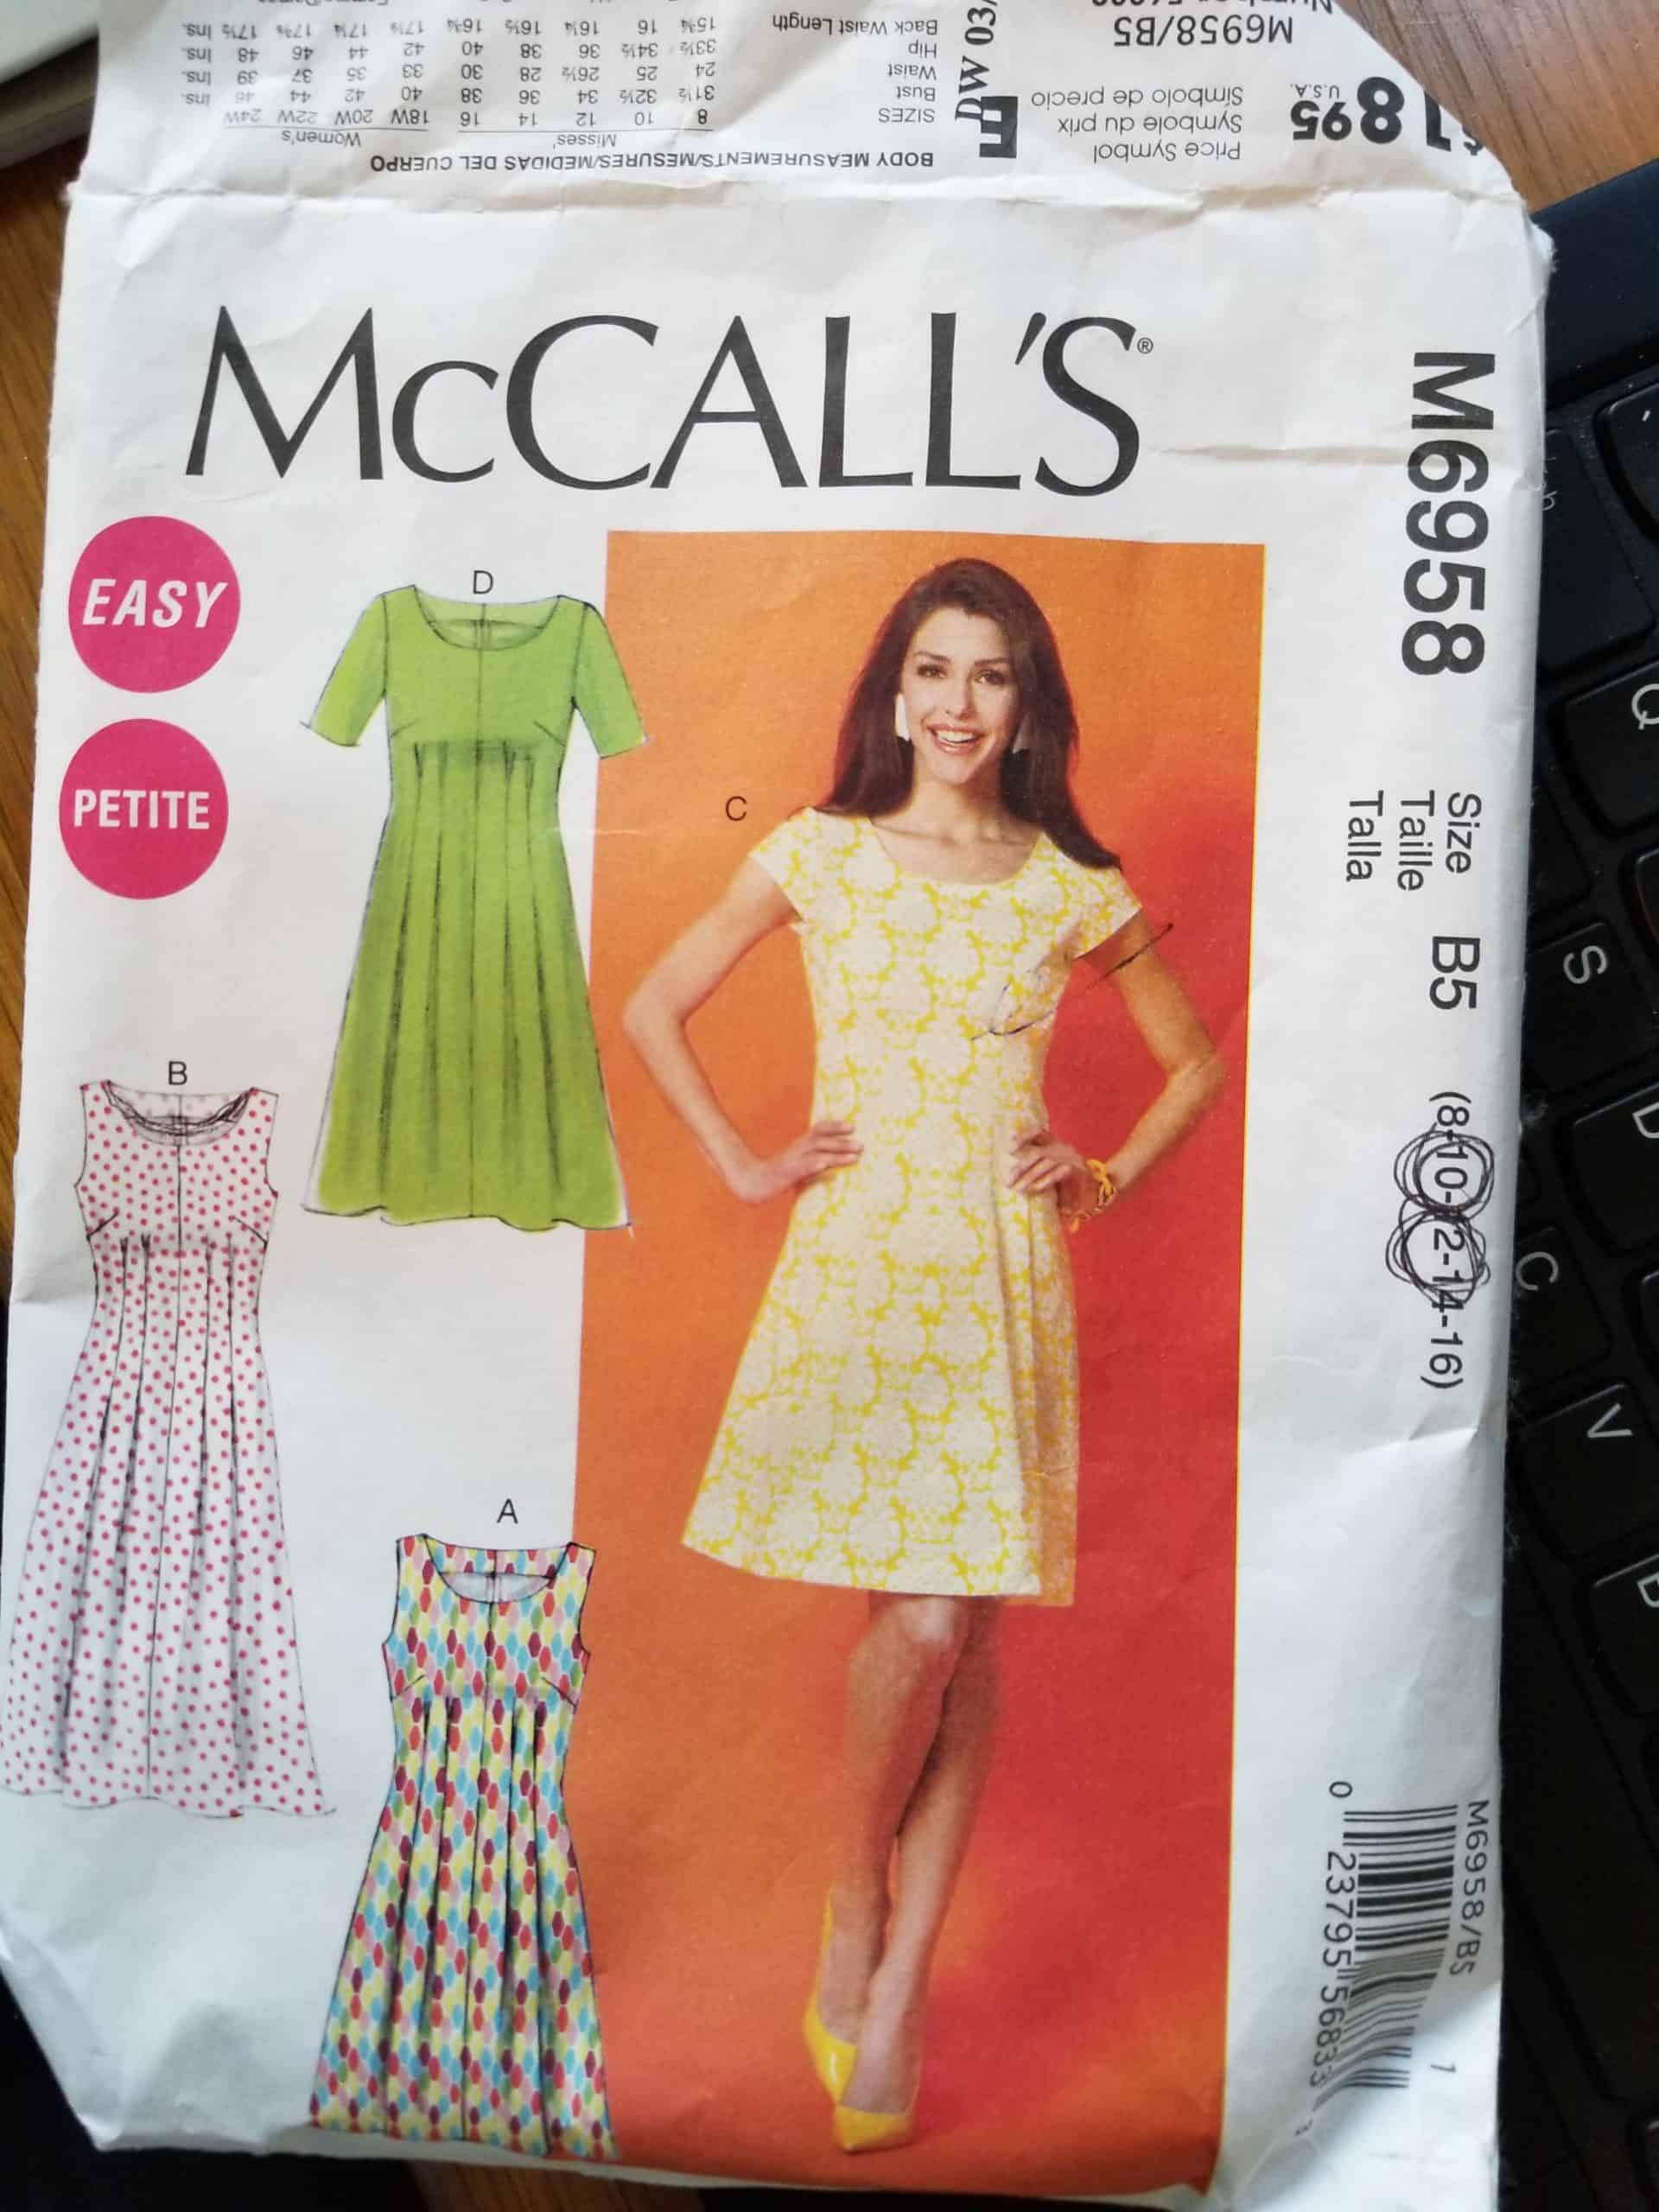
In 2015, I was in the thick of preparing myself for DH’s organization’s Grand Parlor, where he would be installed as a Grand officer. In that post, I talked about the Marbella dress pattern and getting the dresses made.
I know some of you followed our adventures as we traveled around the state as DH moved through the offices of the organization. One thing i did not do was post about the other dress style that I had made. I went searching for photos of the dresses yesterday and was shocked that I had never posted any.
McCall’s Dress Pattern
The pattern is McCall’s M6958. I have no idea if it is still available or still available under that number when you read this. As i write this in 2020, it is available.
I bought the pattern, because I thought I would be making the dresses and I needed something easy and flattering. As it turned out, I found a dressmaker and didn’t have to make any of the dresses.
The bad part of this pattern is that it has no pockets. I made the Little Cell Phone Wallet pattern** by Valorie Wells so I would have a pocket for cell phone and hotel room key. I thought the cell phone wallet would make up for the lack of pockets.
The good part of the dress pattern is that it has a flat front, which is pretty flattering. Most of the ones I had made had the cap sleeves.
Hem of McCall’s Dress
To fill out this post, I looked through all the photos I have of the last 8 years of Native Sons events. I found one picture of me in one of the dresses. You can see that I routinely wear it with leggings.
I wear the dresses often. Also, Grand Parlor is coming around again and I’ll probably bring 1-2 along to wear. I think they all need a good press and starch/Mary Ellen’s Best Press**. I might as well do it myself since the dry cleaner is closed.
**I use affiliate links and may be paid for your purchase of an item when you click on an item link in my post. There is no additional cost to you for clicking or purchasing items I recommend. I appreciate your clicks and purchases as it helps support this blog.
I finished the Flapper Apron for my mom. This is the project I started at Sew Day with Gerre and then worked on at the most recent BAM Sew Day.
I spent a few hours on Sunday finishing it up. Now I can show it at the BAM meeting in a few weeks and give it to my mom after she returns from Portland.
This is a pattern you can use with a yard of fabric. You cut the pattern out on the bias. The biggest attraction is that you only *need* one yard of fabric to make it. I usually make the apron reversible, which takes 2 yards. I like to give myself a little breathing room with 1.25 yards on each side. Still, the pattern is designed for one yard of fabric.
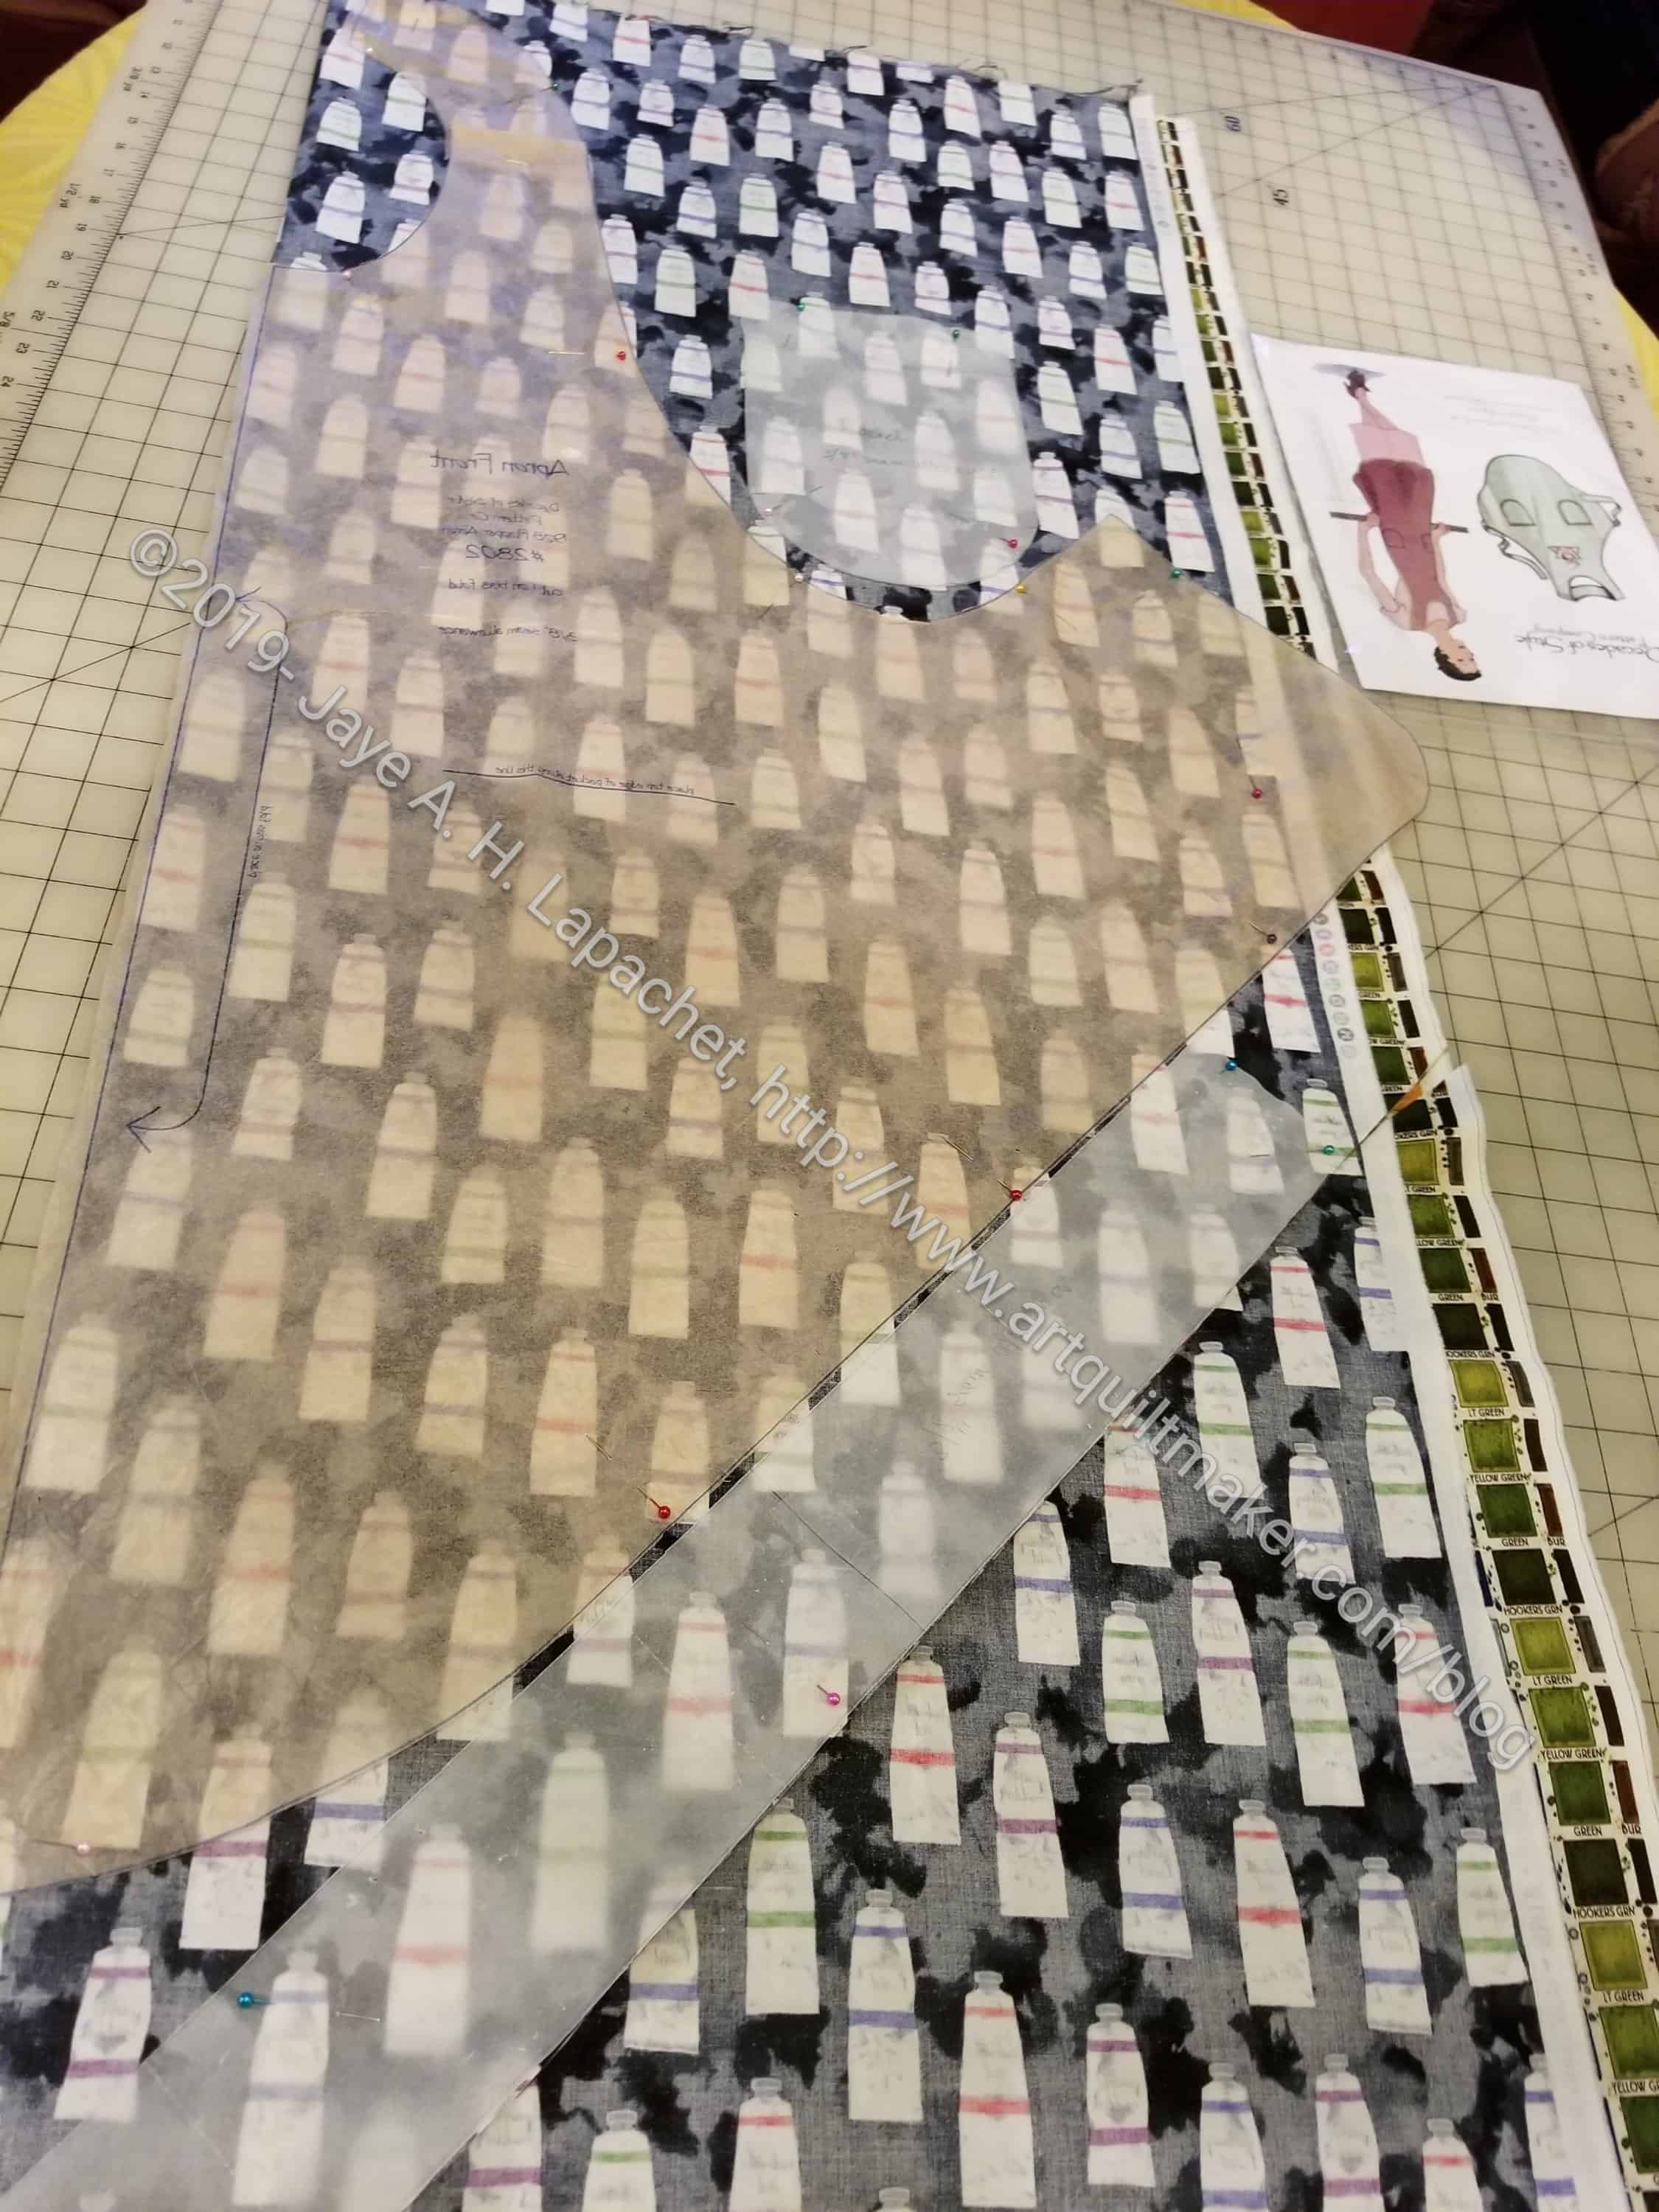
Paint Tube Flapper Apron – reverse side
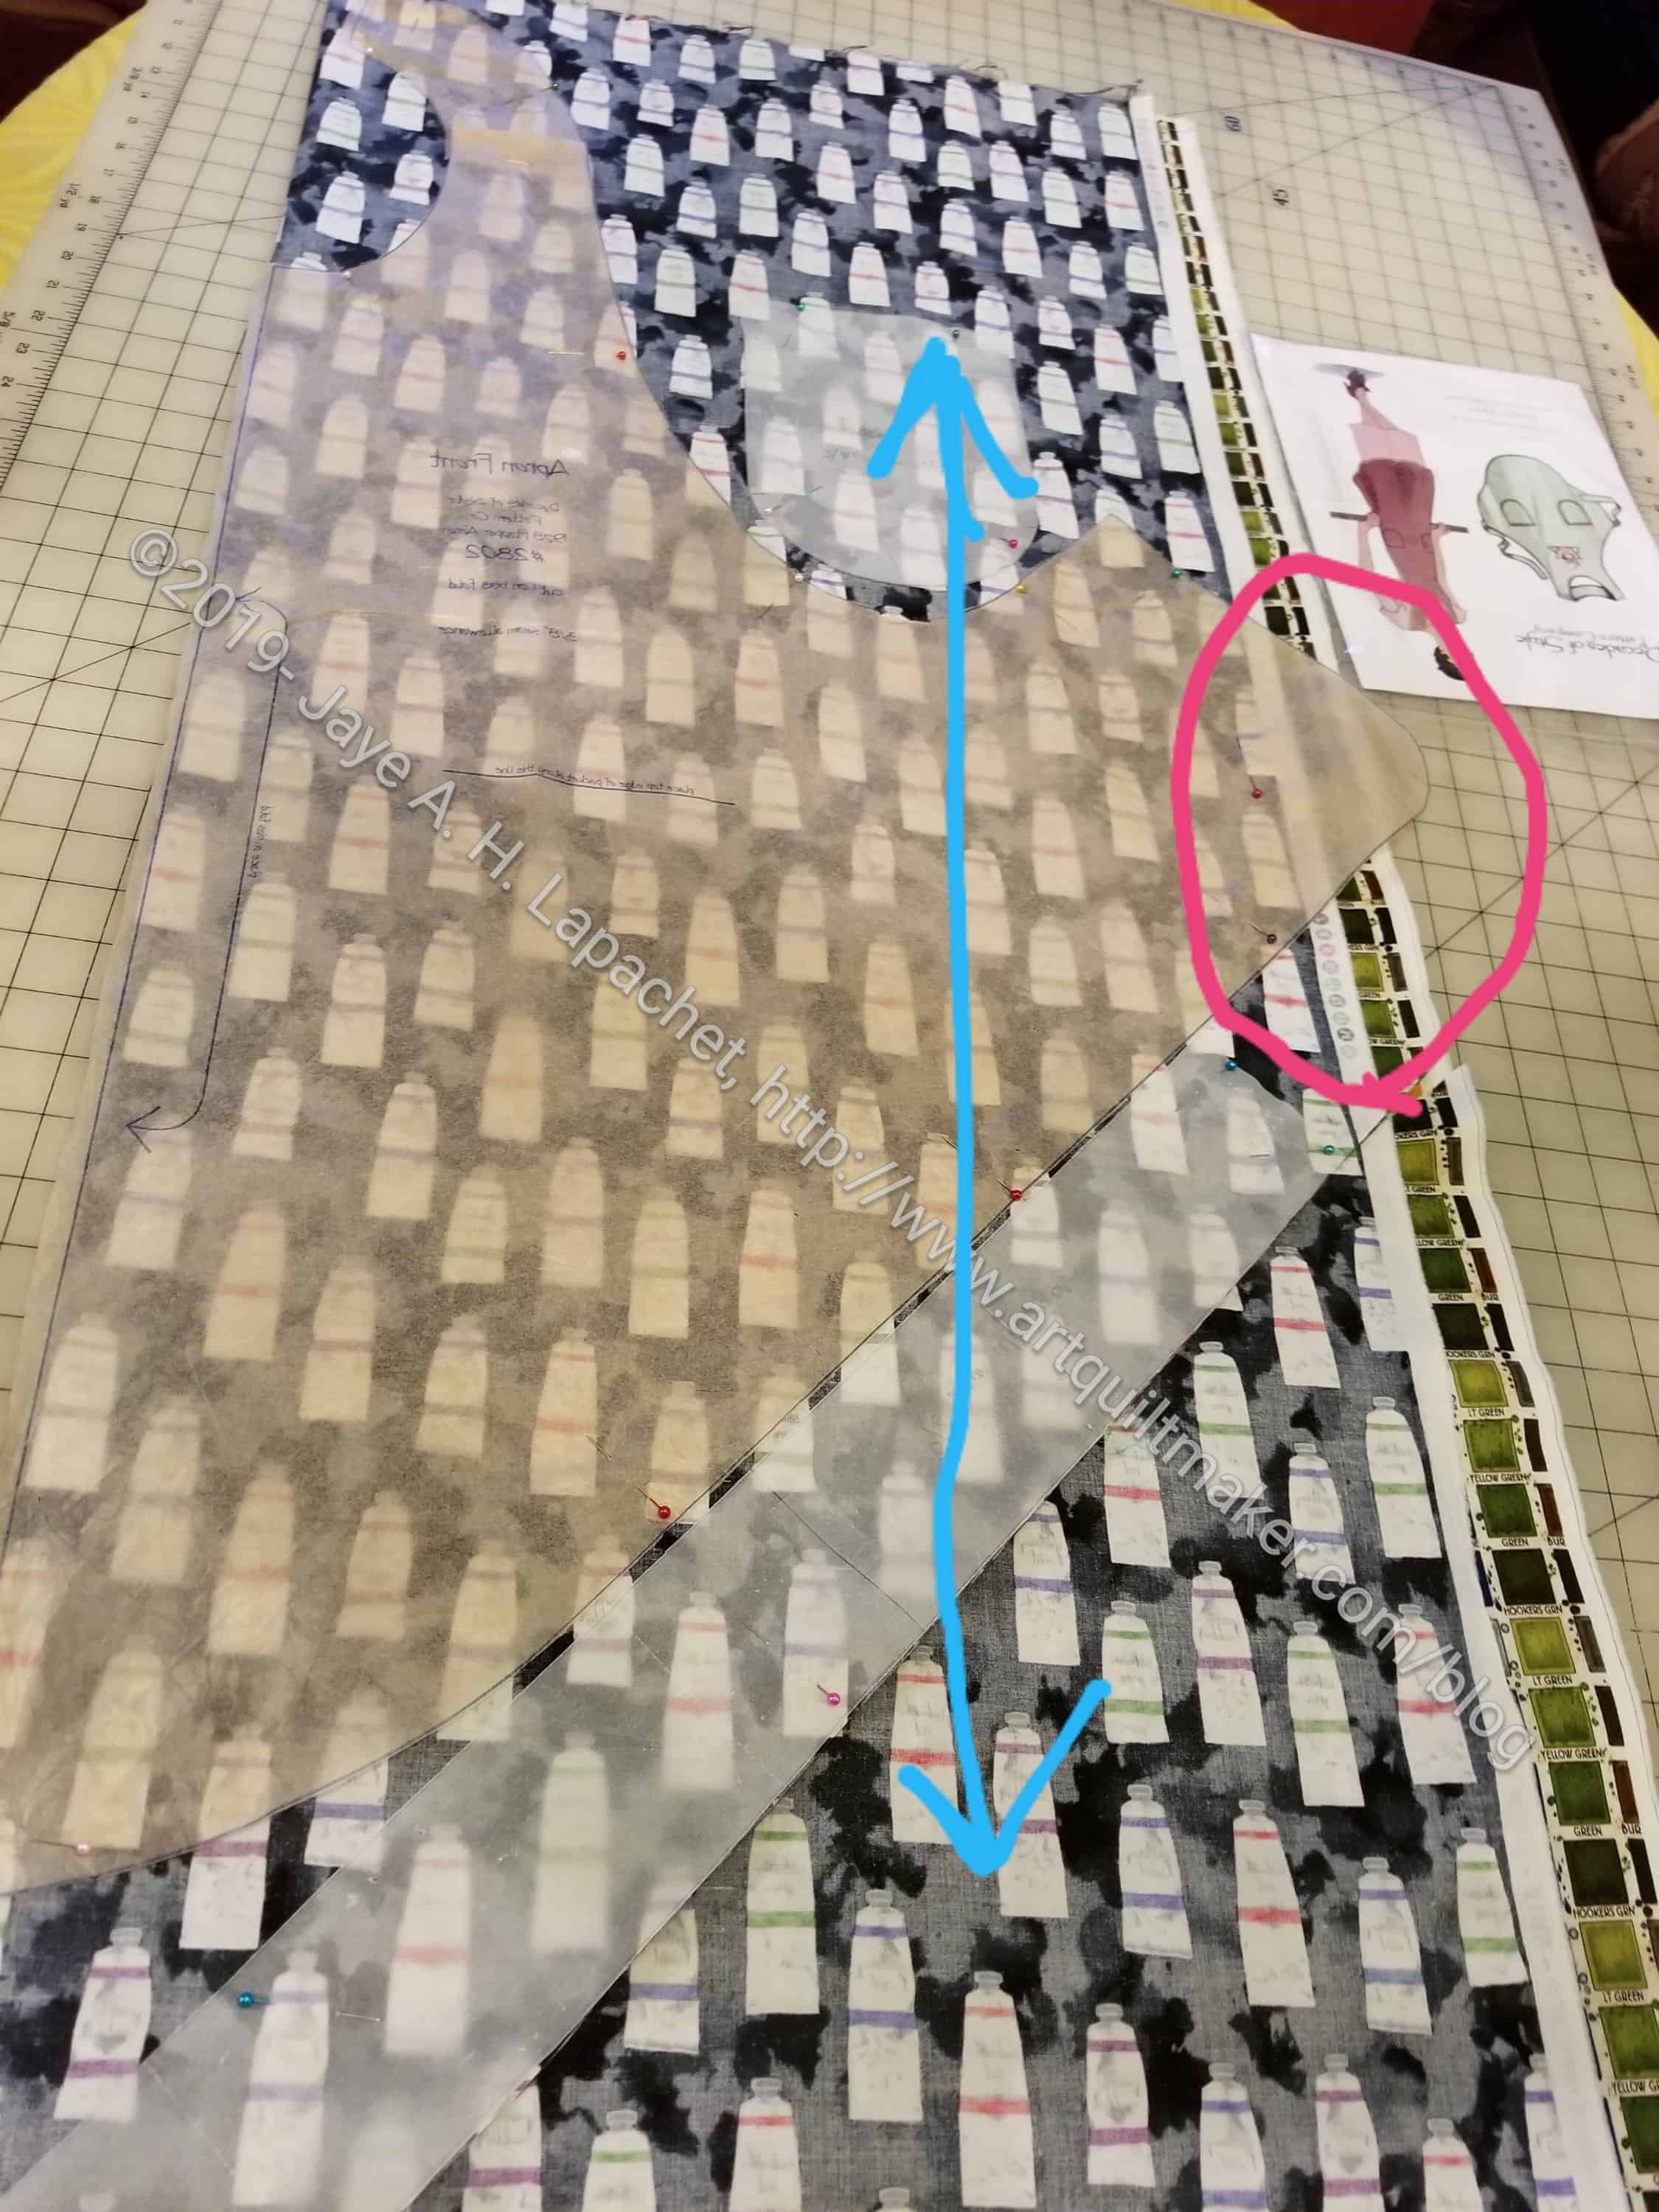
The pattern directions say nothing about directional fabric. When I made my youngest SIL’s apron the fabric was directional. I decided not to pay attention to the fabric motif and just made the apron. The motif is at an angle, but SIL didn’t complain. On my mom’s version, I wanted the paint tubes to go up and down. Gerre helped me look at the different options for cutting it out. I was concerned about the bias, but since this is an apron, I decided not to care too much.
I did notice when I was finishing it that the edges are all, now, on the bias. For an apron, who cares? For other types of garments, I wouldn’t make this choice. Also, I top stitched all around the edge, so the bias shouldn’t be an issue.
Read about this pattern on the first post I wrote about it. Long term readers will know that I have made several of these aprons. You can see all the aprons I have made, including several from this pattern, using the tag.
The other day I went and sewed with Gerre. A number of small projects and small elements on larger projects, have been bugging me. I brought a number of those things with me and made good progress.
Flapper Apron for Mom-preparing to cut
One project was the Flapper Apron I promised to make for my mom. This is a real garment sewing project, so I had to lay out the tissue and prepare to cut.
One of the things I like about this pattern is that you can lay the fabric out, folded on the bias, lay the pattern pieces out and cut them all from 1 yard of fabric. If you want a reversible apron, you need two yards. Still that is a lot of bang for your fabric buck.
Gerre and I tried a lot of different things to get the paint tubes on the fabric to line up straight on the fabric. We couldn’t figure it out. We decided that since it was an apron, it would probably be ok to not cut it on the bias. If have more fabric if I need to remake it. I am doing it this way so the motifs are oriented properly.
Sadly, there was no information on the pattern focusing directional fabric. The directions are complete, but brief.
Flapper Apron for Mom-preparing to cut with challenges
Folding the fabric lengthwise parallel with the selvedge posed some challenges. One challenge is that the whole piece is on the straight of the grain. I figured that, since it is an apron, it will probably be fine. I did put the tie on the bias to enhance tying. The motifs will not be straight, but I think that will be fine.
The larger problem is that the folded fabric is not wide enough for the whole pattern. I plan to add some small pieces on, matching as best I can.
Every time I type ‘apron’ it comes out as aprong. I am not sure why, but it may mean that I need to stop making aprons.
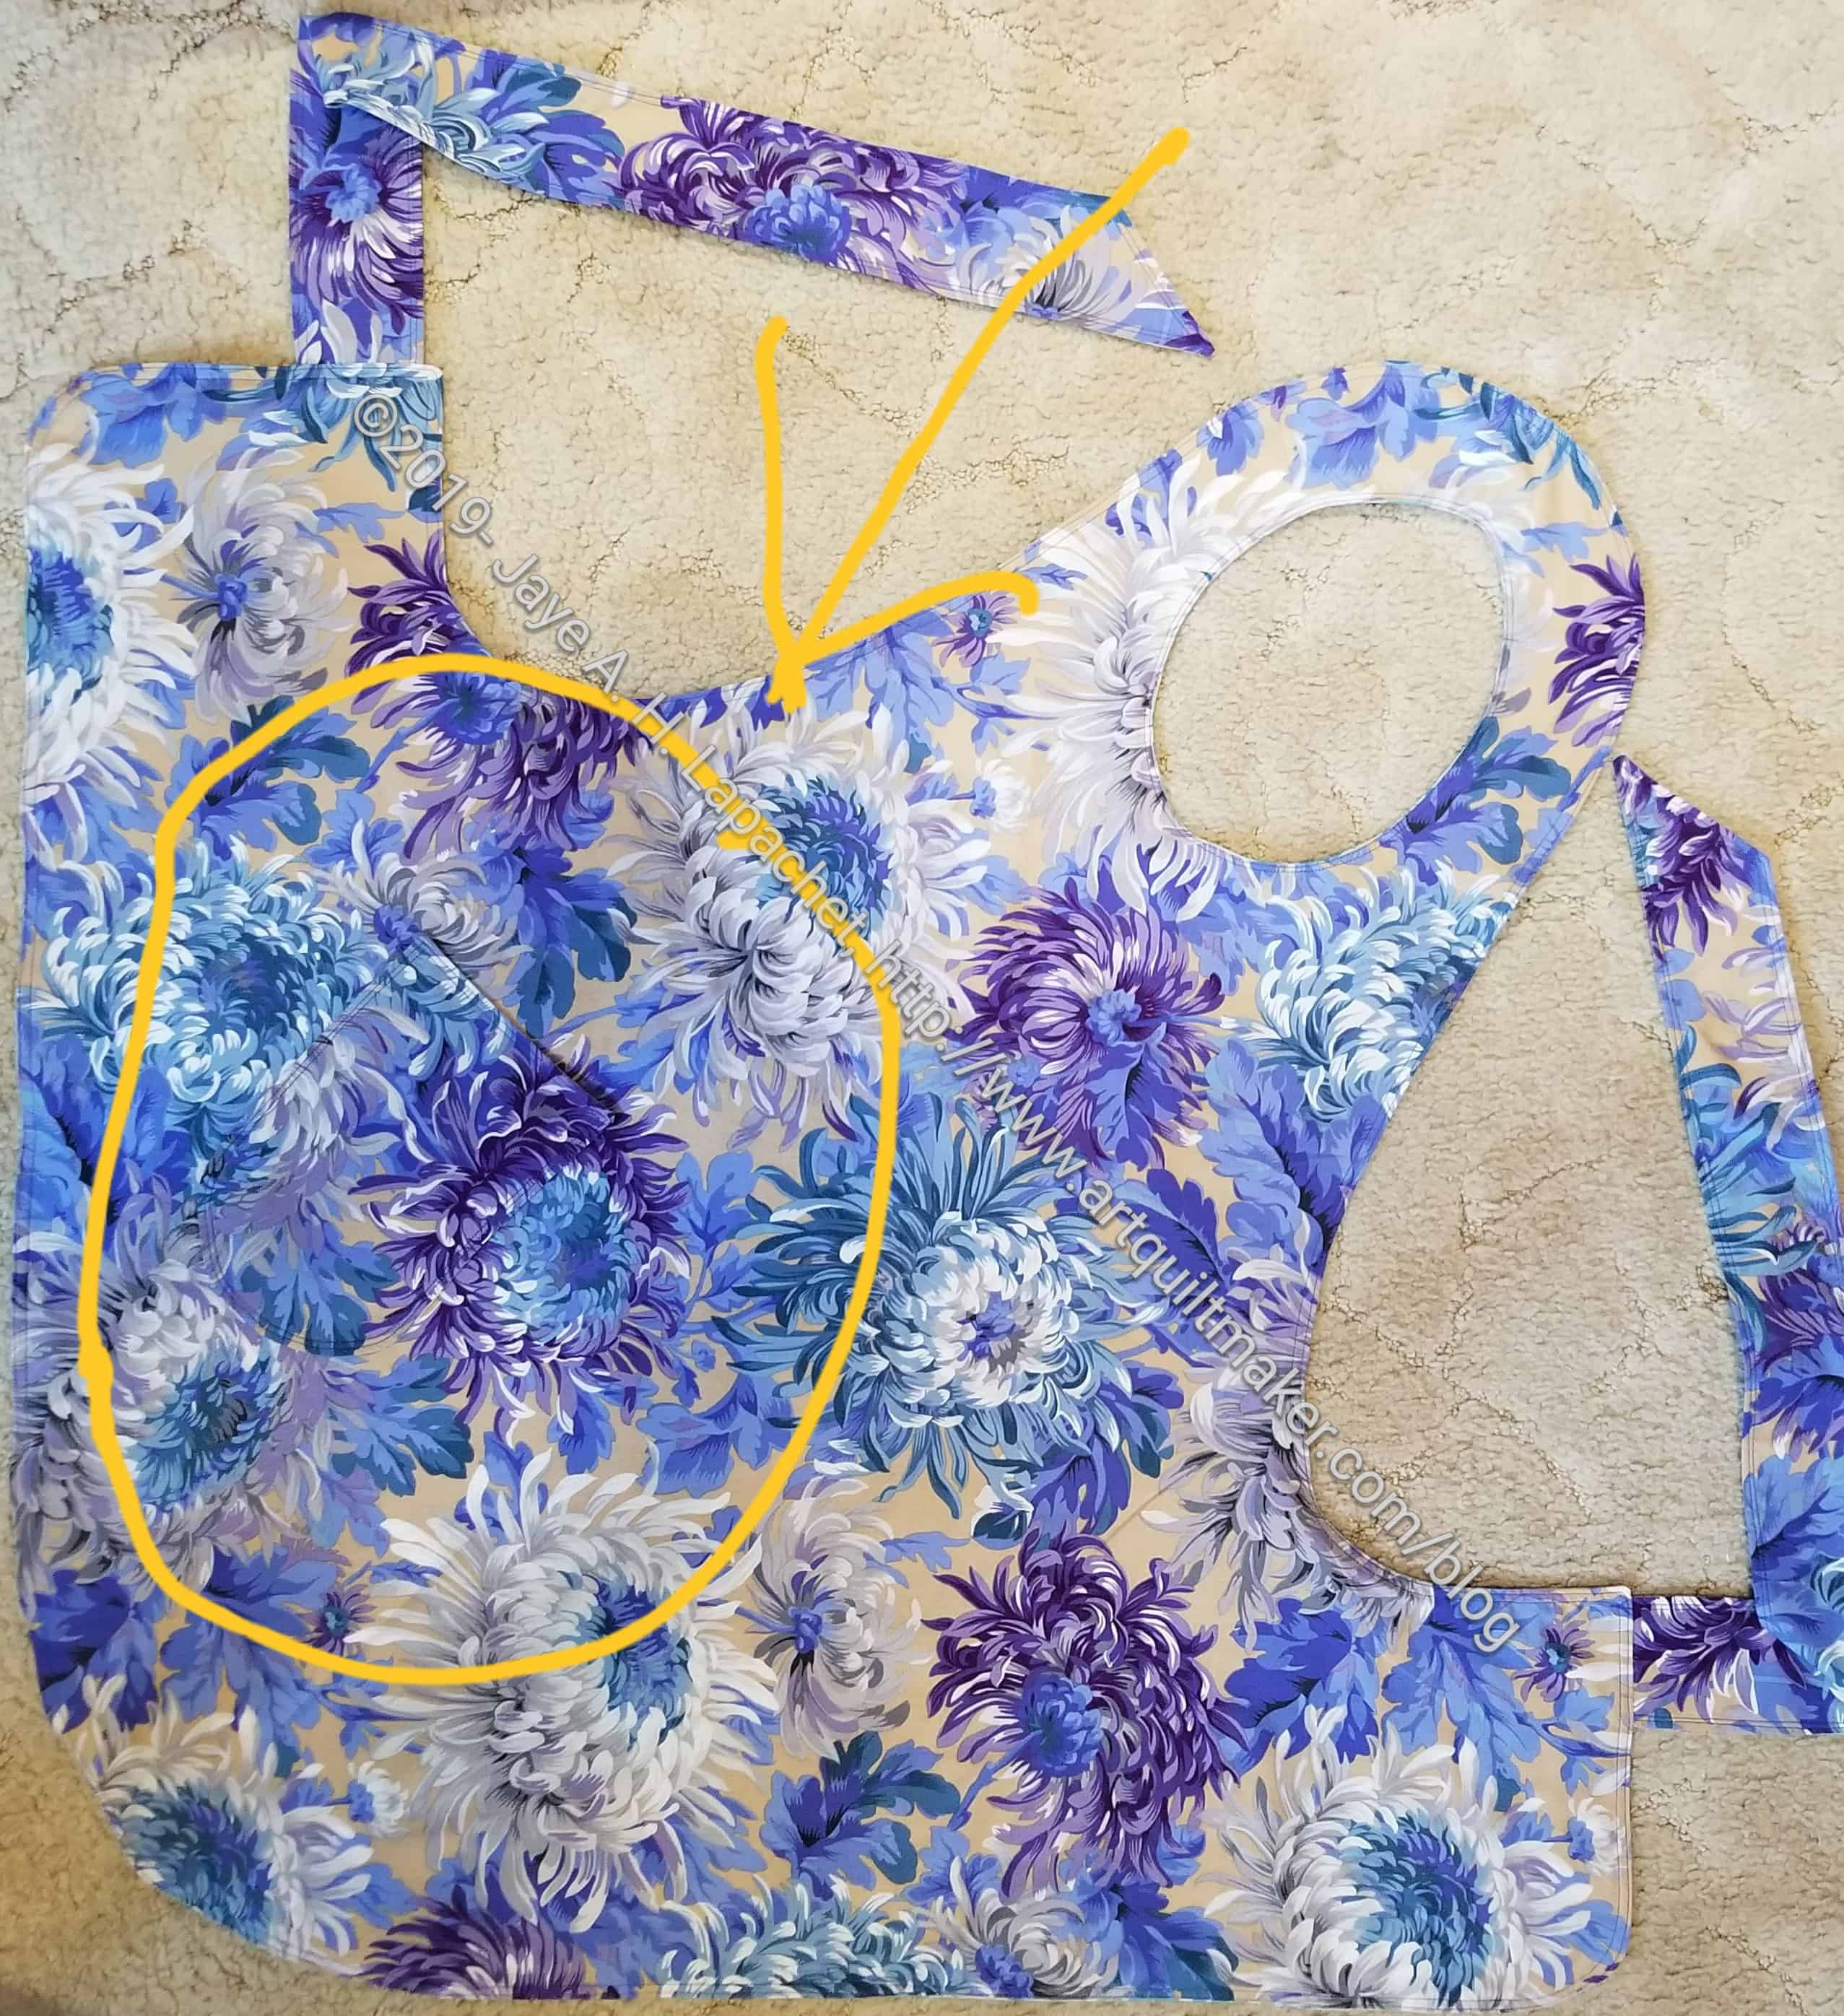
Flapper apron – Chrysanthemum side
Flapper apron – Butterfly side
I finally finished my Flapper apron. I have been using the Church Ladies apron I made awhile ago, though it is not perfect. I don’t like the interfacing in the handles, because it makes them hard to tie. I also don’t like the construction.
I made a Flapper apron for myself awhile ago. The neckline was too long and gaped, so I didn’t like it for myself. It was the one I put in the Fair last year and was well sewn. It couldn’t compete against the tailored blazer in the same category (ERGH!!!), but I still did my best. I never wore it so I sent it off to a friend who admired it. Why not? She loves it.
I adjusted the pattern a little bit on this newest version and the neckline is much better. Not as long, so it doesn’t gape.
Flapper apron – pocket detail
When I put the pockets on, I was pleased to see that I had matched up one of the Chrysanthemums! I didn’t do it on purpose, but am so pleased. I know the pocket blends into the fabric, so enlarge the photo to see my triumph. 🙂
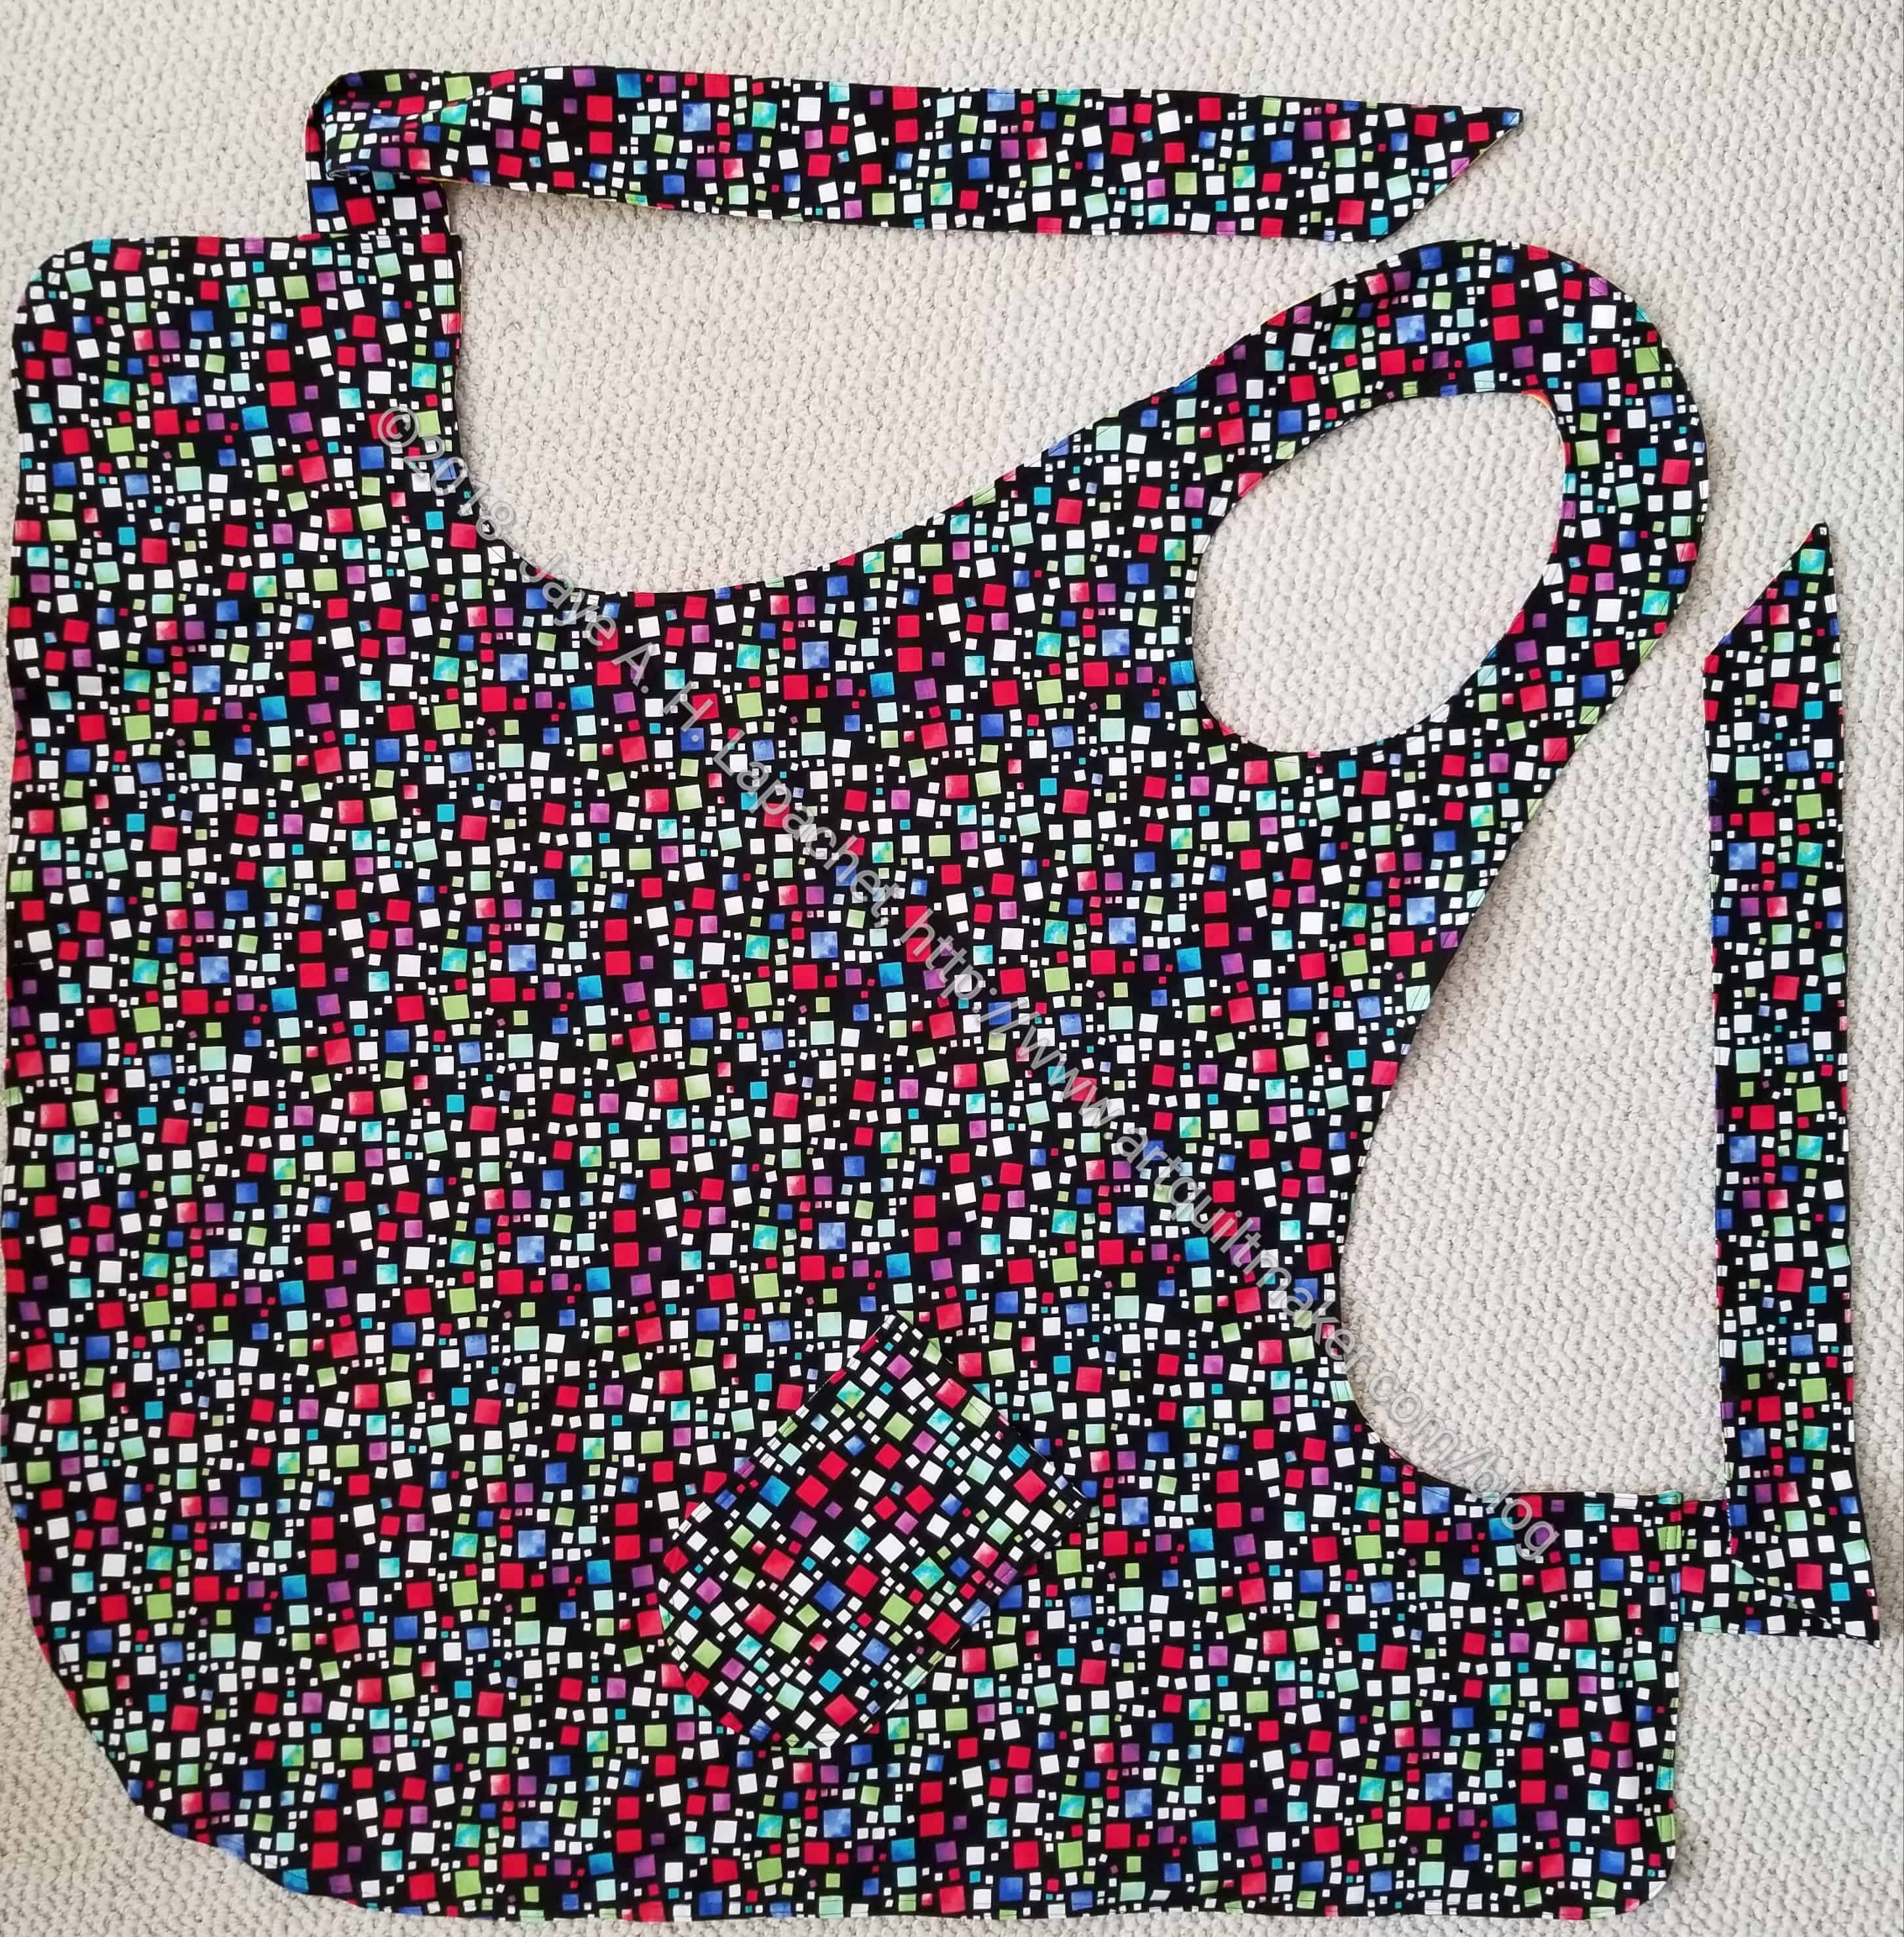
This is the last apron I made from the marathon of cutting I did at Sew Day way back in August.
It took me time to make them all, but repetition is good for projects like this.
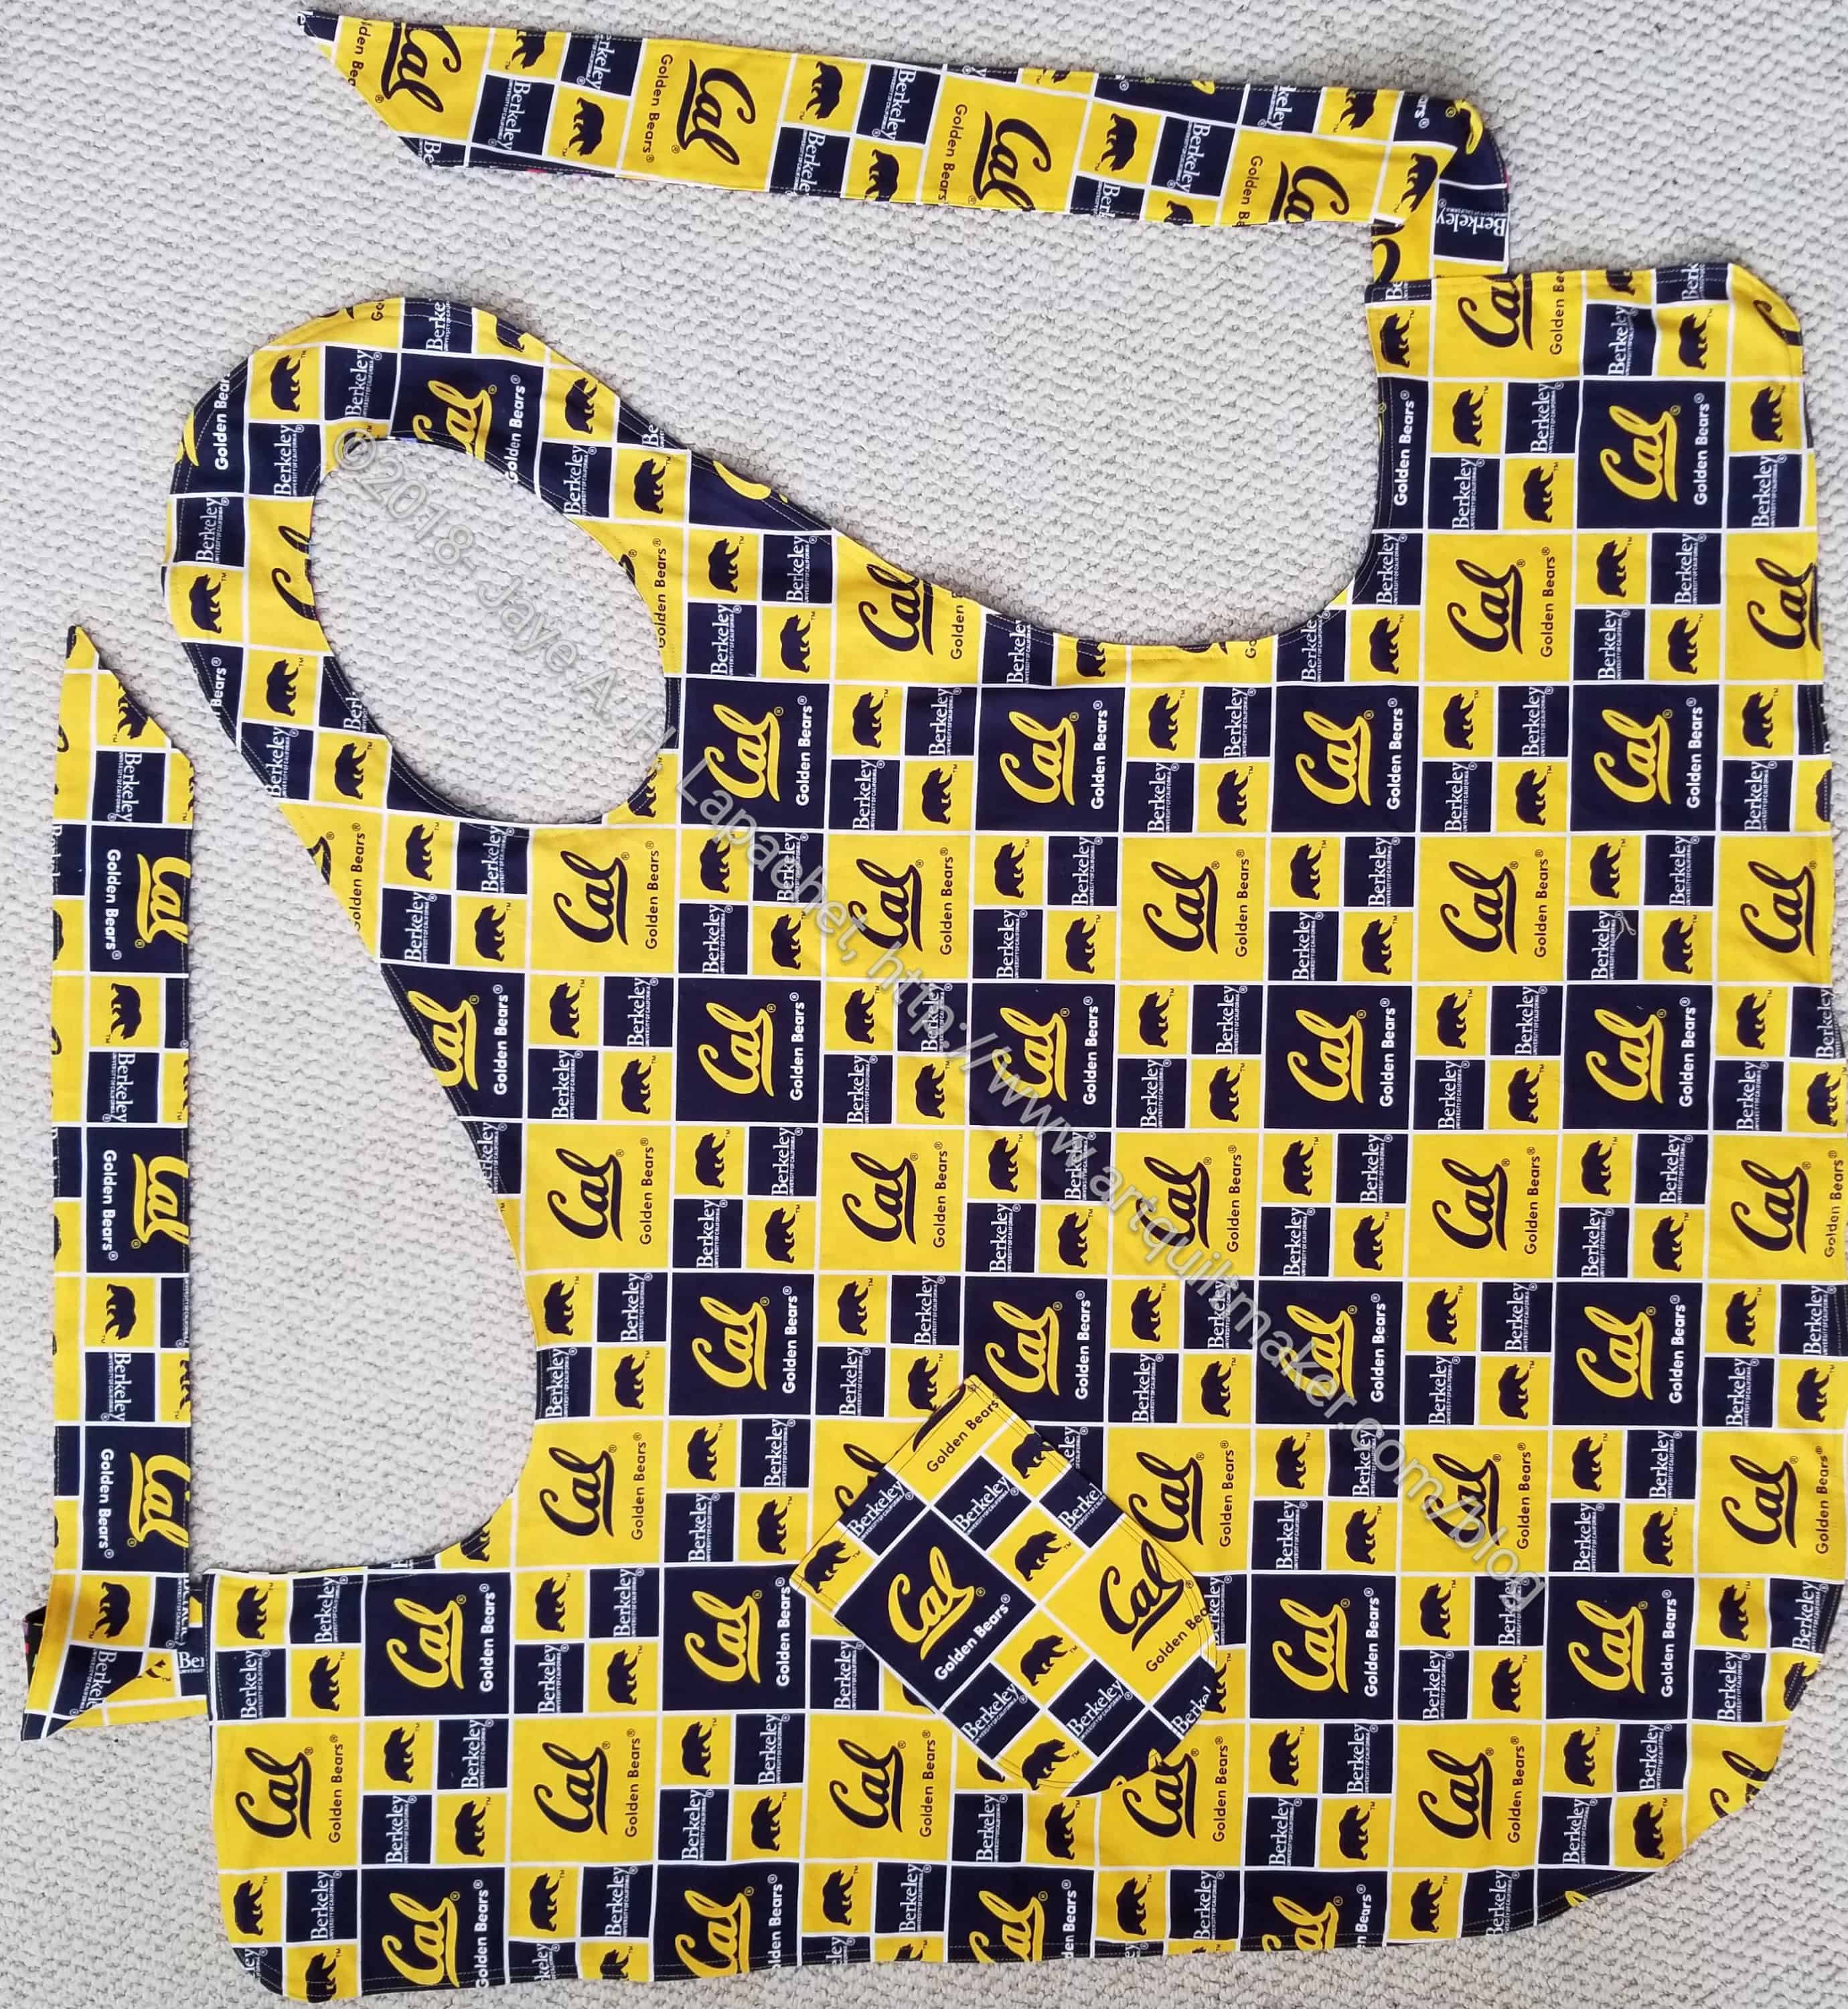
SIL #1 is also a Cal fan and a Cal graduate who attends football games regularly. She got the last of my Cal fabric.
Dee’s Apron, front – Christmas 2018
I learned that the pattern prevents the maker from laying out directional fabric in a certain orientation, but I am ok with the logo being on the diagonal when it is worn.
The front looks good and I hope it won’t show the dirt.