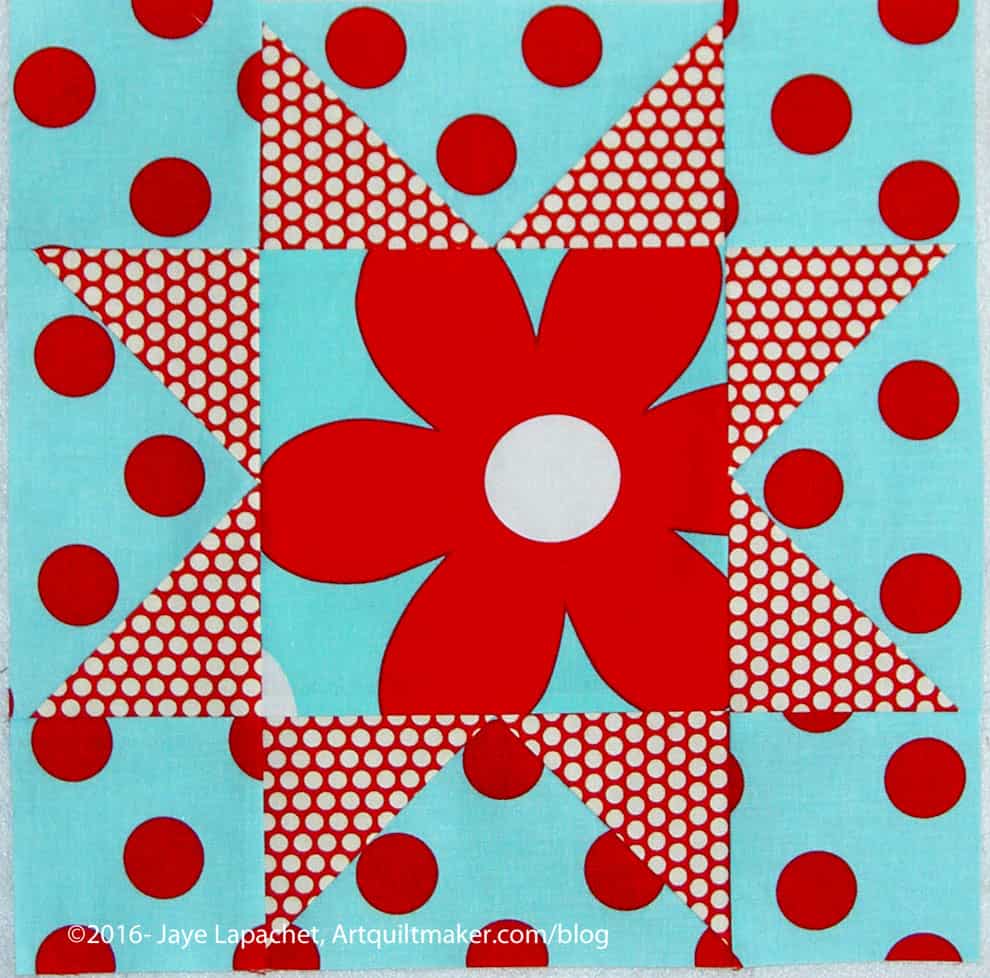
Today we will be making the Sawtooth Star block. You will use your newly formed bias skills as well as cutting. You will also learn to make Flying Geese.
I love this block. I could make tons of them and never get bored. Like the Nine Patch, there are a lot of variations of this block to keep it interesting. I made about 1,000 of them for the Star Sampler quilt. Yes, I got tired of making them, but the end result is spectacular and I would make that quilt again.
In the large size (12 inches or larger), it is good to use large prints, like I did, especially with the center. Alternatively, make one of the variations (see Star Sampler for examples of the variations) with more pieces. For now, if you have large prints, use those for this block.
Flying Geese are a unit comprised of two different kinds of triangles. One of them is the same and the other is different from the triangles we used yesterday. The Flying Geese are also used as a component in many types of blocks as well as as a design component by themselves and in borders.
This is a thinking girl’s tutorial to making flying geese. Knowing how to make Flying Geese allows you to make, not only, Sawtooth Star blocks, but also Dutchman’s Puzzle blocks, borders and many other other parts needed for your quilts.
We will be learning the very basic way to make Flying Geese – no special rulers or tricks. There are many other ways to make flying geese and I use a specialty ruler now that I know the basic method. I’ll see about a tutorial using specialty rulers another time.
Supply list:
- Cutting instructions for Sawtooth Star
- fabric
- rotary cutter
- rotary cutting ruler large enough to cut 4.5″ squares
- rotary cutting mat
- fabric (2-3 different)
- Optional: Mary Ellen’s Best Press (or similar)
- pins
- sharp trimmers or scissors
- thread for piecing
- sewing machine
- Iron
- ironing surface
- Sewline pencil or mechanical pencil
First print the cutting instructions (pattern) for the Sawtooth Star block.
Cut your pieces according to the instructions.

The above is the fabric I will use for the ‘wings’.

Turn the squares wrong side up and draw a diagonal line from corner to corner. You will need to do this on all of the squares for your Flying Geese.

Cut the goose, fabric. Nota bene: above is a different fabric than I used in the final block. In the finished block I used an aqua with red dots.

Lay first square that will be a wing on the goose (blue) fabric. The diagonal line should be pointing to the center of the blue piece.
Pin the square to the larger patch. Make sure the pin is out of the way. You will be sewing on that drawn line, so you will need to pin far enough away so the pin doesn’t interfere with the operation of the machine.

Sew along line and trim threads. I use a foot that has an arrow on it. I can line that arrow up with the drawn line and sew away.

Trim 1/4″ away from the sewn line as shown above. You will cut through the wing and the goose.
Press the wing so the front of the wing fabric is showing. You must press the wing into its final position before you sew the other background on to your block.

Place the second wing on the other side of the background fabric. Again, the diagonal line will be pointed towards the center of the larger patch.


Sew and trim as above. Sew so that you cross the previous sewing line.

Press back the 2d wing and, voila’, you have a Flying Geese element.
Now make 3 more and cut your squares for the rest of the block.
You can also make these with various rulers. I often use the Deb Tucker Wing Clipper ruler and also have the various sizes of the Quilt in a Day Flying Geese ruler. I teach this basic method so you know how to do it and don’t have to purchase a specialty ruler. If you plan to make many Flying Geese, I suggest you buy either of the rulers listed above.
You need four of these to make a Sawtooth Star or eight of them to make a Dutchman’s Puzzle.
Bonus pattern: Dutchman’s Puzzle
I found an interesting border on Instagram using Flying Geese.
Thanks Jaye for class today! Keep them coming
Cindy
Three or so more weeks of lessons!
Thanks for reading.
Do you have the free pattern and tutorial on the Dizzy Geese
Quilt block pattern.
If so could you email it to me
Thank you for your time.
I do not have that pattern. The links in my post are what are available. Thanks for reading.