You Can Run, But You Can’t Hide

In years past, I have seen art quilts evolve from linear, grid based designs to organic swirly pieces with blobs (int he best sense of the word!) of design elements strategically placed. It is always a mystery to me why the linear, grid based designs went out of fashion. I suppose block quilts were just not ‘in’; too old fashioned, not new enough or fresh enough, boring. Too bad, too, because a linear, grid based designs make it easy to incorporate many of the principles of design.

-Unity? No problem. Put the same color in each block.
-Repetition? No problem. Put the same type of design element in each block.
-Balance? Put three design elements approximately equal distance from each other in the grid. Easy to measure or eyeball, because you have a grid.

Well, kids, they are back. Many of the quilts at the Quilt National exhibit at the San Jose Museum of Quilts and Textiles, had some kind of underlying grid. Sue Benner’s piece Fugue XI, had a grid of stitching as part of the design. Lisa Call’s Structures #31 was also grid based. These are definitely art quilts and not the classical block based designs, but they also most definitely show that the design features of a grid works well in art quilts.

Don’t get me wrong. I have nothing against the organic, swirly designs. However, I do have problem if the general design is poor. Good design is everything. You can have ugly fabrics, a saggy structure, poor stitching, but if the design is good, fewer people will care about the other problems of the quilt. I also don’t think it is ok to just adhere fabrics to a backing and call it a quilt. You have to think about the design and be deliberate about placement. (Playtime quilts don’t count. If you are just working through ideas, by all means, just adhere blobs to fabric and get it out of your system. When you go to make something for Quilt National, then get your design board and principles out and spend some time thinking about the overall design.

One design book I like is called Design Basics by Pentak and Lauer. They update the edition every year or so so you should be able to easily find a used copy, which is just as good as the latest and greatest edition.

Good Day with Fabric

I spent the day at home doing laundry and minor household chores. Since nobody else was here (what bliss!), I was also able to get the left side, yes the ENTIRE left side!, of Thoughts on Dots finished. I am thrilled and love the way it looks thus far.

The above photo shows the bottom right corner. Trying to strike when the iron was hot (metaphorically and in reality), the design wall had not cooled before I already had moved the right hand two rows over to the left and was putting more squares up. I tried to use many of the squares I had cut previously, but had not yet made it into the quilt. Many of them, however, I had to remove in short order as the colors were too depressing for this happy, sherbety quilt.

I had dreams of actually picking out all of the colors for this section today and sewing it together. I realized that was only a pipe dream. I ended up cutting more squares, which meant pulling fabrics out of the fabric closet, always an exercise in time and patience. Though not my favorite part, it was worth it because I found some very nice dots that have not been used yet in this piece. I also really want to have the right fabrics after all the work I have done on this piece so far.

Happy Hand

I was fairly depressed about the first hand, but Deirdre kept me going. I would have bailed, but she kept prodding sweetly, so I made a new hand. She said I should send the old and the new hands, but the old hand is too ugly. I love the new hand.

I realized the problems with the old hand: a) the batting. The batting was old and had no scrim; b) the tension on my sewing machine sucks; and c) I ran out of topstitch needles. I can’t say that the old hand was a waste of time, however. By doing the old hand I was able to construct a better process with the second hand and, thus, make a better finished product.


First, I sewed the fabric into a tube, pressing the seam allowances open rather than to the dark:

Next I inserted a piece of batting into the tube and pinned a paper pattern to the top:

I considered drawing around the hand with pencil or chalk, but decided that the paper pattern would be best. I had to take the pins out as I went along, so as to avoid puckering. I also considered using free motion stitching, but ended up using a regular straight stitch with the clear foot so as not to run into tension problems:

You can see the outline of the stitching on the hand:

Next I fused a spiral to one side:

And a heart to the other side. I love the symbol of a spiral and the hearts are for “Heart in Hand.” I found one problem with this part of the project that I did not run into with the first hand. That was that I couldn’t sew the designs on without it going through. This is why I chose to fuse.

By the way, I updated the “Show of Hands” post.

:-( – Not so Happy with the Hand

Afer looking at this hand last night and this morning, I am not so happy with it. The quilting looks off and weird. I think it was the batting that I used. My plan now is to make another one – same design, etc, but better batting and quilting.

I really had trouble with the quilting, because there was nothing to grab on to. I really wanted to use the Glitter, but, as I mentioned, couldn’t get the tension right. My machine better behave or I am junking it and getting a new one! I will try again with straight lines and the Glitter.

The good thing about doing something over is that the second time goes faster. I don’t feel it is a waste; I feel that I am improving the process.

Hands Down

As promised, I made the hand today – mostly. Here is a progression of pictures.
Back of first side:
I did the drawing of my hand before I thought of the wrist. Something caught my eye and made me think of the glove edging, so I added it after I had already cut the Tear-Away stabilizer.

Pieced first side ready for applique’.

When I saw the challenge, I could only think of Hearts in Hands.

Preparing the second side. I wasn’t sure how to do it, but sort of figured it out as I went along.

I decided to put a spiral on the back. It seems to be a powerful sign for me. This side is evolving into the front. I used some glue to keep the spiral down and flat before stitching.

Both pieces ready for quilting.

First bit of quilting. I had to rip it out, because the Libby magic has worn off and the tension was terrible. I wanted to use Glitter, but couldn’t get it to work no matter what I did. I did not have a 90/14 topstitch needle, which is what Libby recommends, so that may have been the problem.

Quilted and ready for binding. I plan to do a blue satin stitch around the edge tomorrow. I hope I can.

Show of Hands by Karey Bresenhan

Karey is always thinking of interesting things to spur us on creatively. I was sent an e-mail about this exhibit, which will be held at Houston. Subsequently, the hands will be sent to the Creative Spirit Center to become part of their permanent collection. It would be great to have a piece in a museum!

I was reminded when Deirdre over at Deirdre’s Sloppy Studio mentioned it again and showed her hand. I decided that I will make one tomorrow. I picked the fabric and have a design. Wait and see!

Final Layout for the Bottom of Thoughts on Dots?

As you can see, I have worked a lot on Thoughts on Dots. Mostly, as is my current mode of working, moving the fabrics around. However, this time, I also replaced a number of fabrics that weren’t working for me. This arrangement has been up on the wall for a week with none of the fabrics really bothering me. It may be the final layout.

Visiting My Fabric

I spent the weekend of 8/10-8/14 visitng the fabric that I sent to Seattle with TFQ. I sent it to Seattle to visit its cousins and have its spa treatment (read: washing and ironing). Of course, visiting TFQ was much more important than the fabric. 😉

We spent the weekend immersed in fabric related activities, eating, sleeping and chatting a mile a minute. It was fantastic! I left my house stressed, catching a cold and in pain and returned refreshed, no cold in evidence and pain-free. it was a good reminder that fabric fun is good for my soul and good friends who don’t judge my whacky, and sometimes misguided ideas, are invaluable.

One of our main activities was visitng the Association of Pacific Northwest Quilters Show held at Seattle Center. The layout of the quilts was the same as 2004 and I was disappointed. I really thought that they should have returned to the layout they used in previous years. Despite my problems with the layout there were a number of wonderful quilts. Good colors, great execution of patterns, wonderful choices of fabric combinations. Unfortunately, however, nothing that made me say WOW! Photos of some of the quilts are posted at:
APNQ 2006 quilts pt.1
APNQ 2006 quilts pt.2

We also got started on an auction quilt that St. JCN promised to an organization, The Healing Center, which helps adults, children and families deal with grief. The quilt started out as multi-colored half square triangles so that it would appeal to parents of boys as well as girls, but St. JCN thinks that she will stick with predominantly blue and green and perhaps change the white to a light green. Even if she doesn’t use any of the squares we made together, it is always great to work together.

Here is a picture of the design as I left in Seattle:


As usual, I purchased a number of pieces of fabric. Many dot designs were purchased in order to add to my dots collection. Other fabrics were purchased with some specific projects in mind. I bought nearly the entire line of Denyse Schmidt fabrics. These were new designs to me – not design types and colors that I normally buy- but interesting none the less and it is always good to branch out form the norm. You can see the fabrics I bought in my Weekend Photos post. I also saw a quilt by Sugata Shah at the Quiltworks Northwest booth (for which they were selling the pattern) that I will probably make from the Denise Schmidt fabric — or at least start out with that idea! I didn’t buy the pattern, because it was just squares and I can manage something similar without a pattern. I have been thinking about that pattern, though and whether I should have purchased it for the inspiration. We’ll see. I will certainly credit Ms. Shah. No, there is no creativity involved, but I think it is important to get sewing. Of course, as projects move along, I tend to deviate from my original plans quite frequently, so who knows how the project will end up? In any case, I still need to get some browns for background.

Mostly St. JCN and I talked, caught up, shared tips and tricks for various things, shopped, did car required errands and relaxed. The worst part was the airport. I spent so much time in the airport that it was a major time sink for the trip, despite the fact that there were no real holdups. Earlier in the day there were major delays, especially at SeaTac once the British terrorist story broke. Fortunately, my flight was later, most people were well behaved. The no-water rule is really a problem for me, though. I was extremely thirsty after both flights.

Real Progress on Thoughts on Dots

After the CQFA meeting today, I came home, eschewed the work nagging in the back of my mind and worked on Thoughts on Dots. Earlier this week, I started to sew the squares into pairs. Today I kept on sewing – four patches, groups of two four patches until I was finished with the main part.

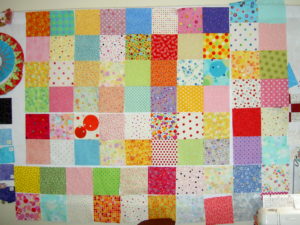
Above: The main part nearly sewn. The big problem I had was that the squares were not the same size. Part of it could be the ruler that I used at St. JCN’s. However, St. JCN said that the fabric was stretching as it went through the feed dogs. It was getting really bad as sewed the four patches together. Finally, I decided to take a page out of St. JCN’s book and trim the squares. Nobody will sue me for changing the size of the blocks. I changed my rotary blade and very carefully measured and trimmed the 4 patches. The larger pieces went together better after that, but I noticed as the same pieces went through the sewing machine a third or fourth time that they started to stretch again. While it is possible that my feeding of the pieces through the machine or my pressing had something to do with the stretching, I doubt it as I was trying hard to be very careful.

This is the second time that I am doubting my machine. I guess I need to take it in for a service. I can use the Gem while the 9K is on vacation, but I think it is time for me to really consider a new machine. 10 years is long enough for one machine and it has seen some hard use.

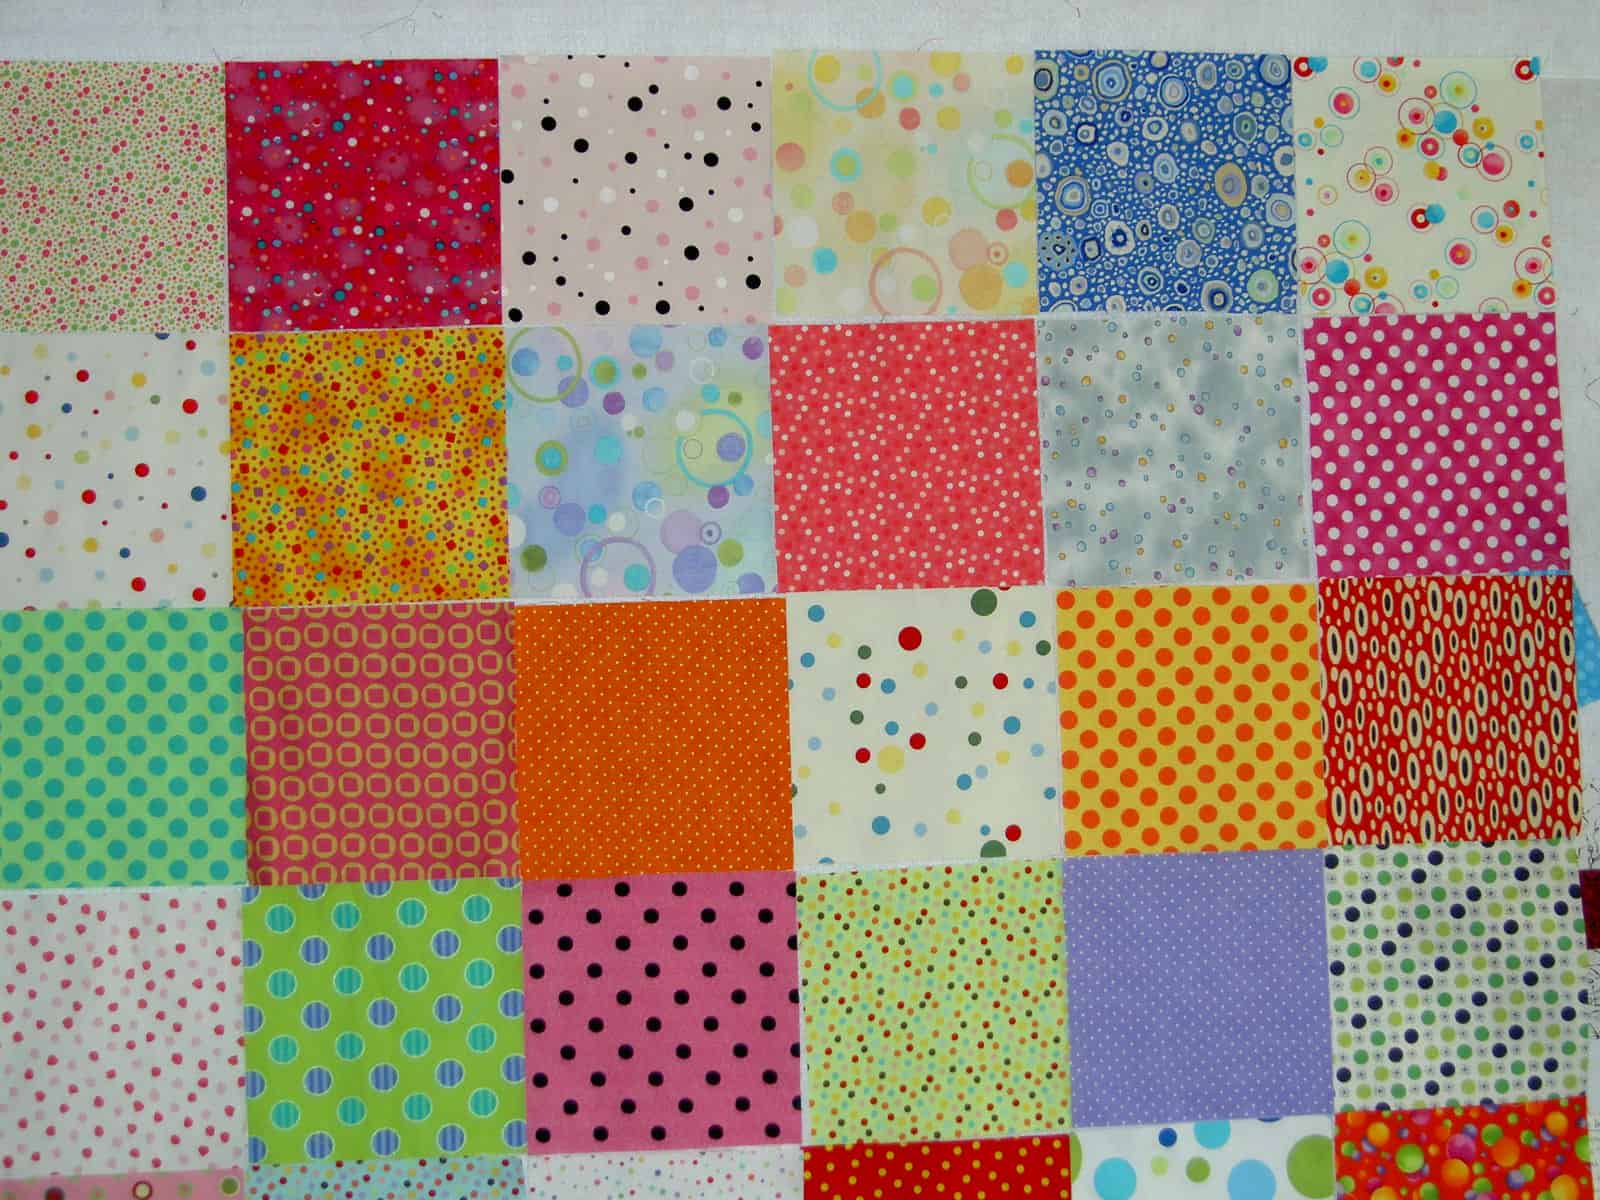
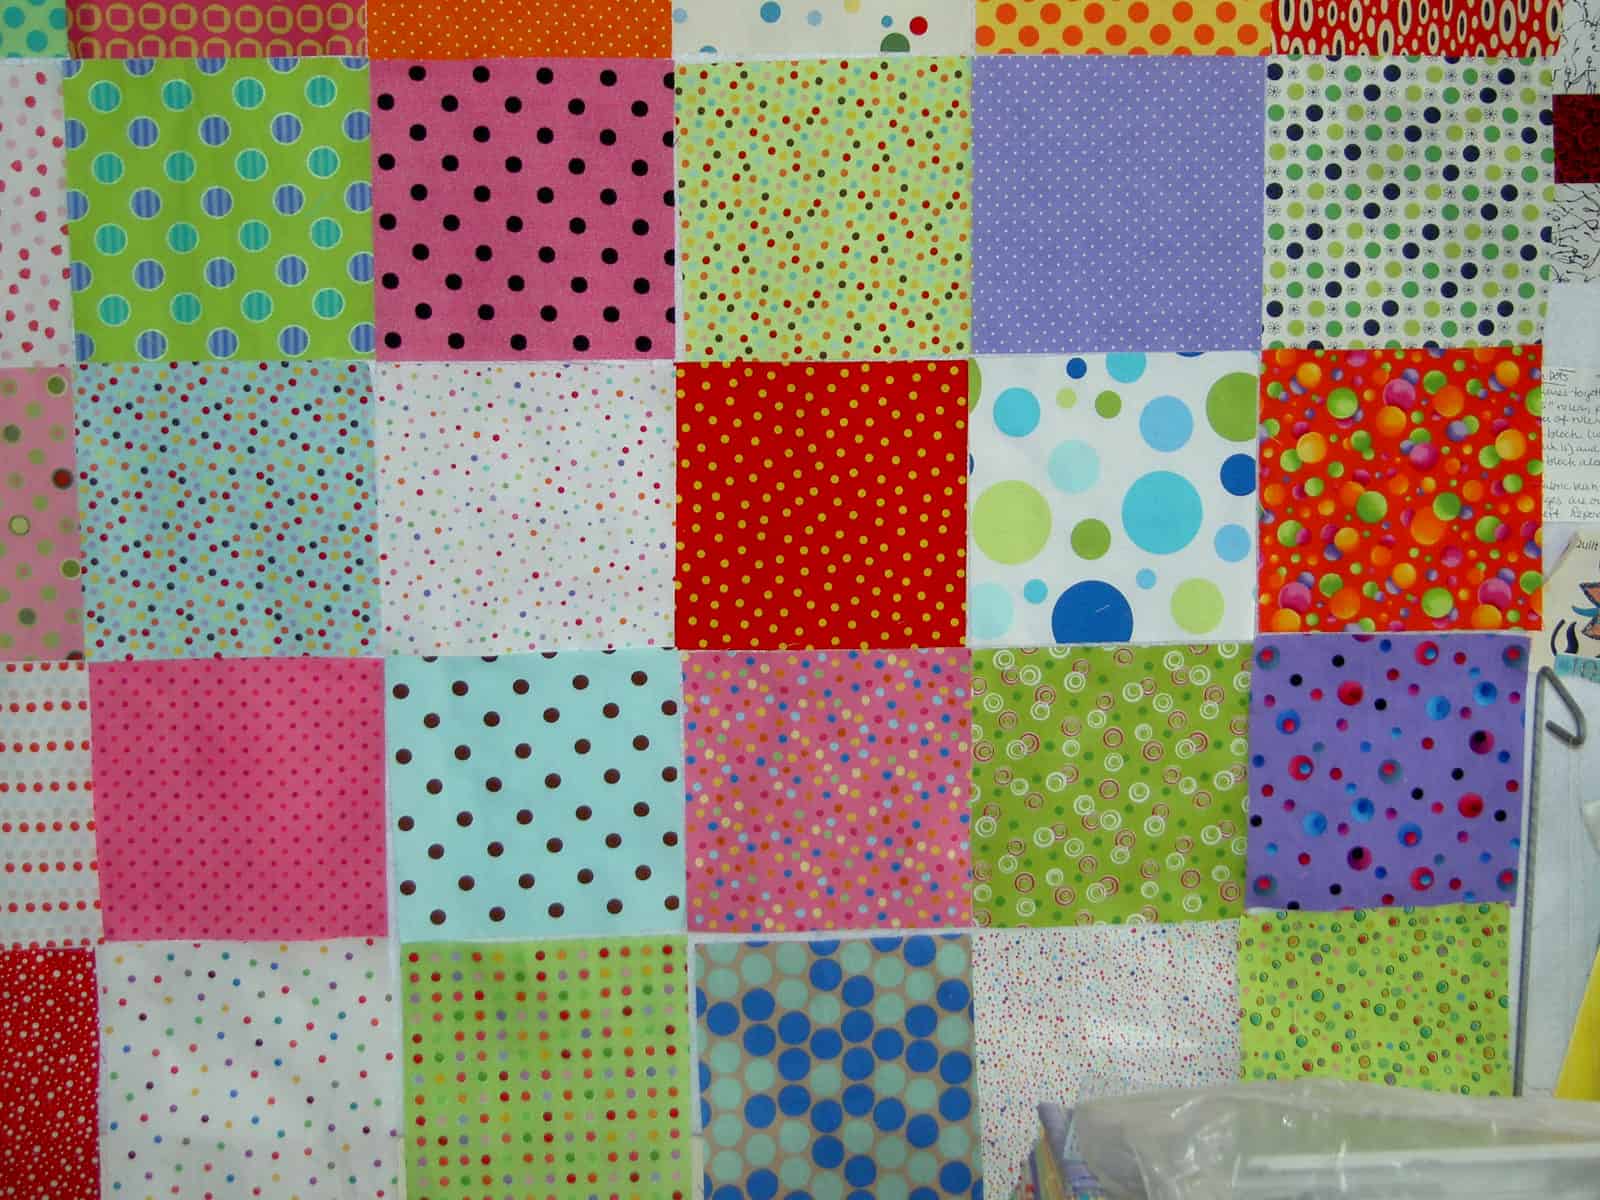
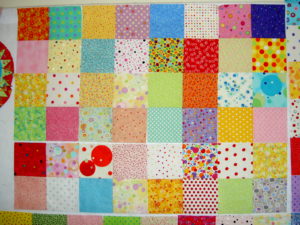
Above: Detail of the main part nearly sewn together.


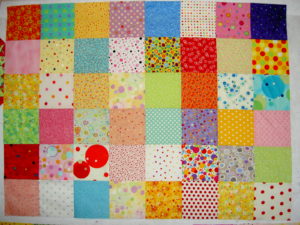
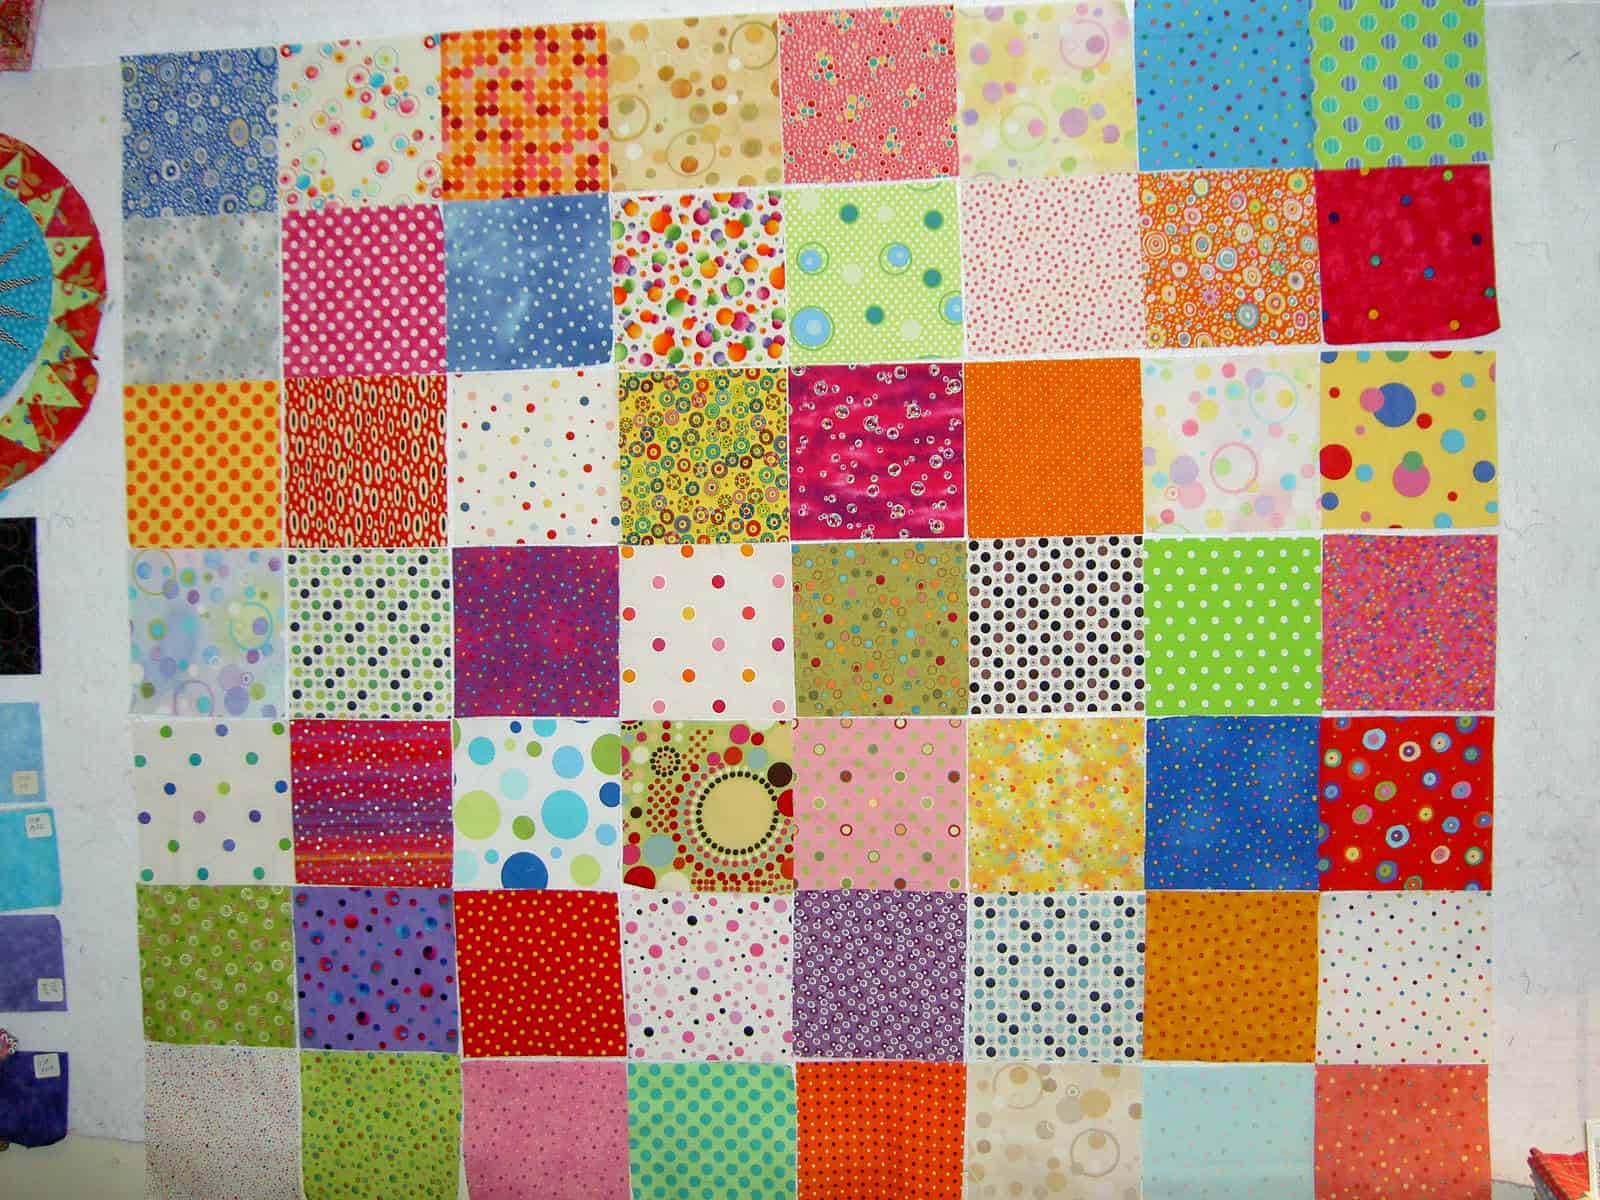
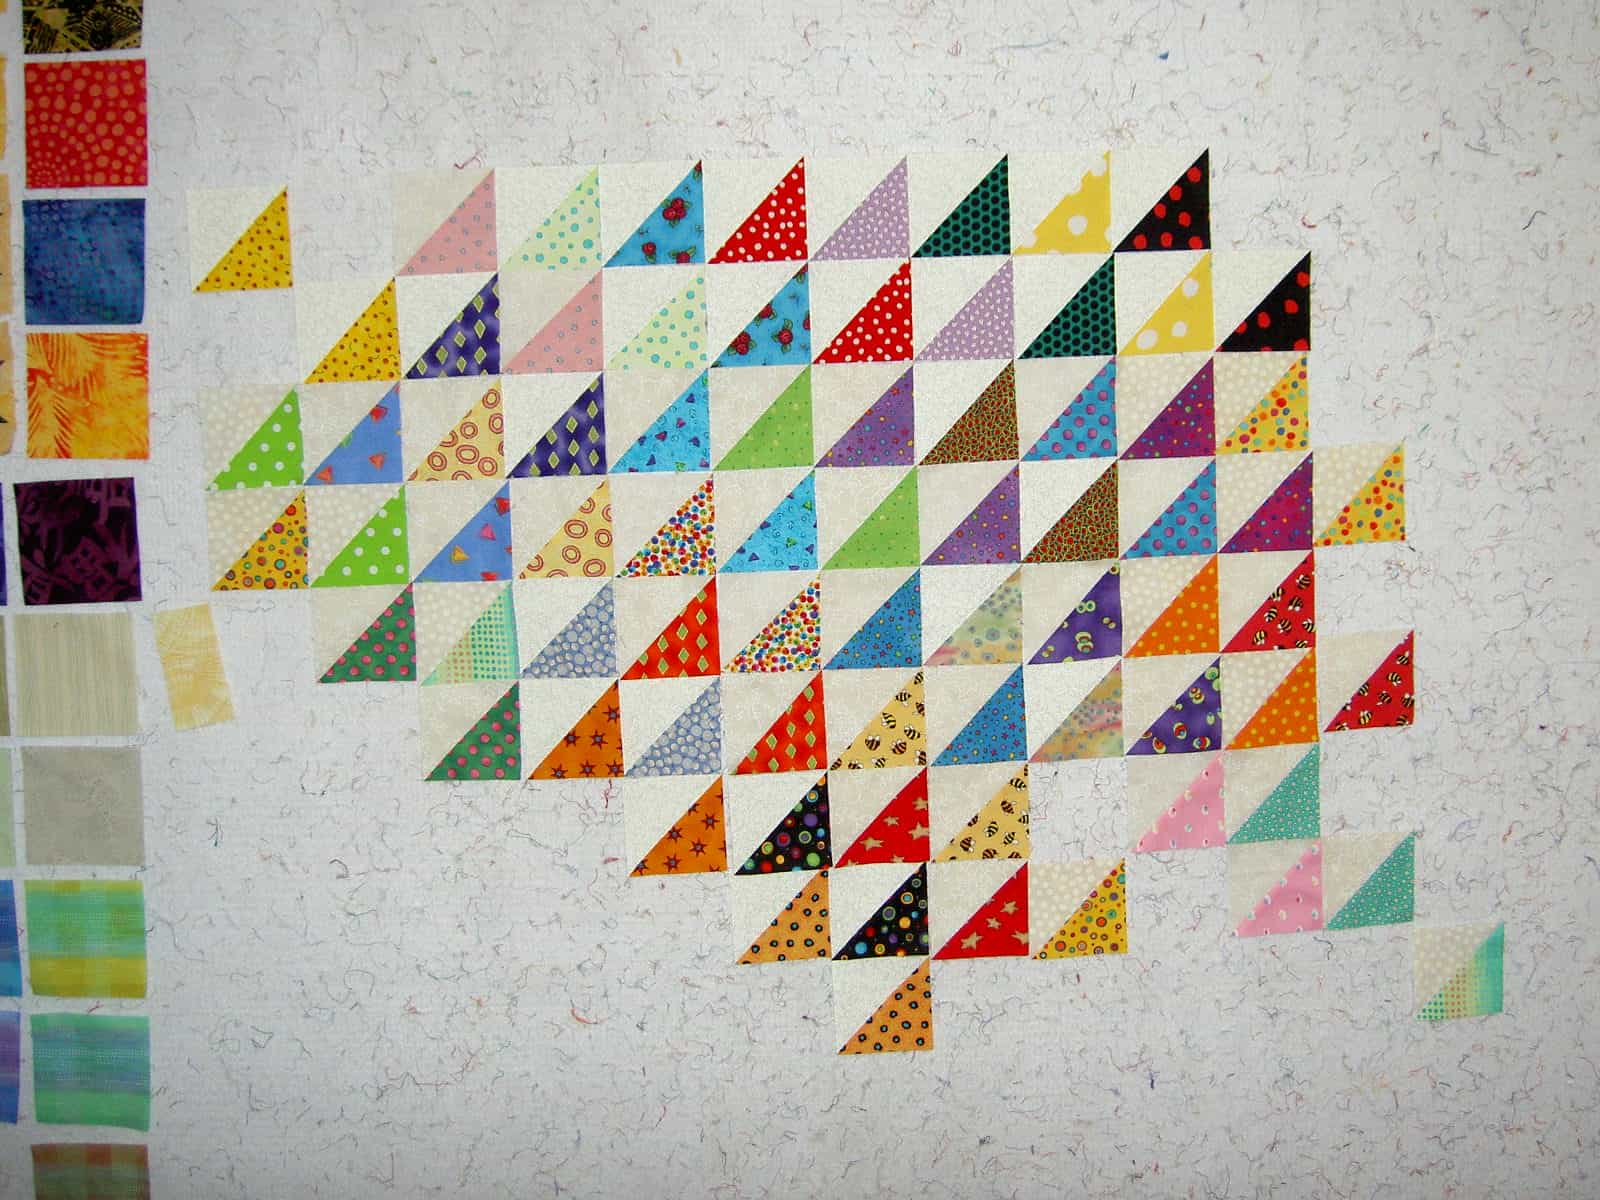
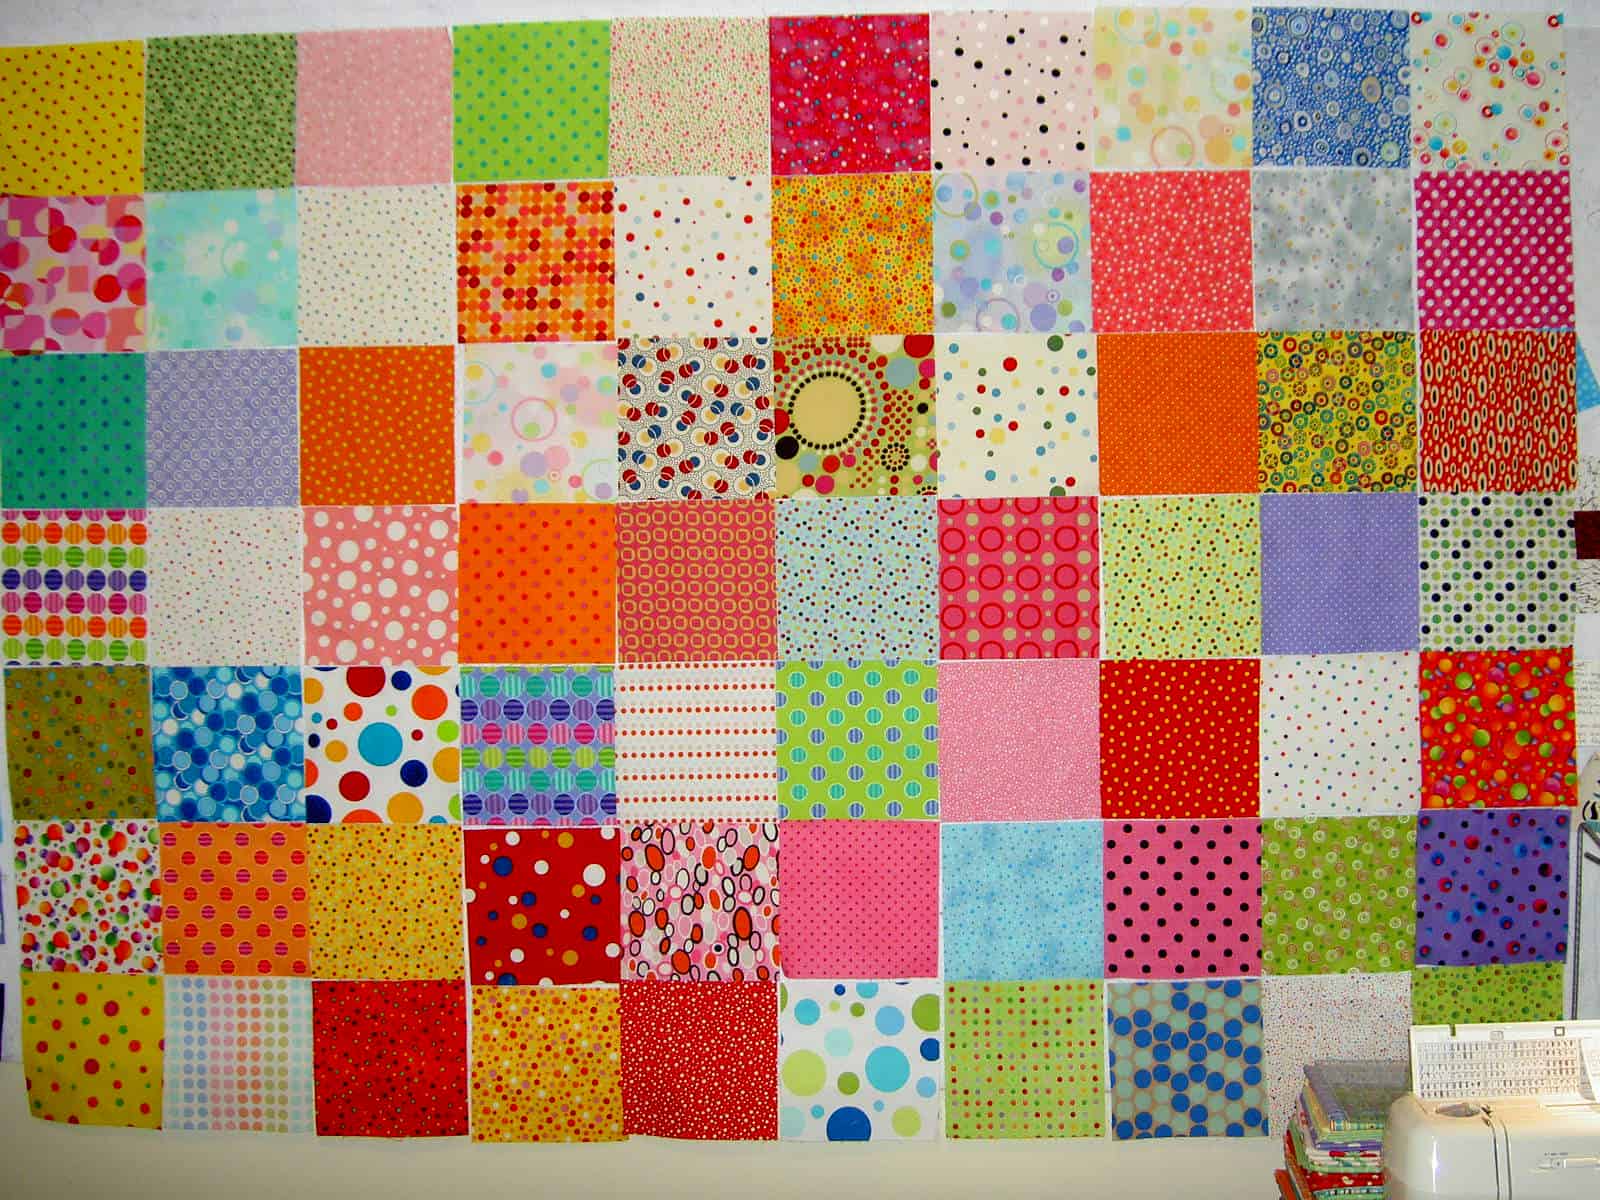
Above: Finally, I got the entire main section done. I call it the main section, because I need to piece the entire top in sections. Since I plan for this piece to be a cuddle quilt, I think it will be relatively large. My design wall isn’t big enough to do the whole piece at once. Pay attention to the bottom two rows, which are still unsewn in this picture.

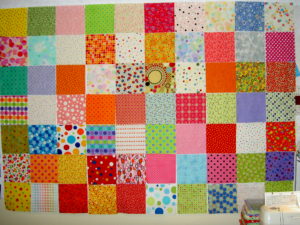
The above photo shows the former bottom two rows at the top of the quilt. They will still be on the bottom of the top section (far above photos), but on top of this new section, which is shown directly above. These are new squares that I threw up on the design so I could arrange the bottom part. The rule is that I am not allowed to move the top two rows as they have to coordinate with both the section above and the section below. I know they coordinate with the section above as they are, but since I can no longer see that section, I have to leave them as is to ensure I don’t make any egregious color errors.

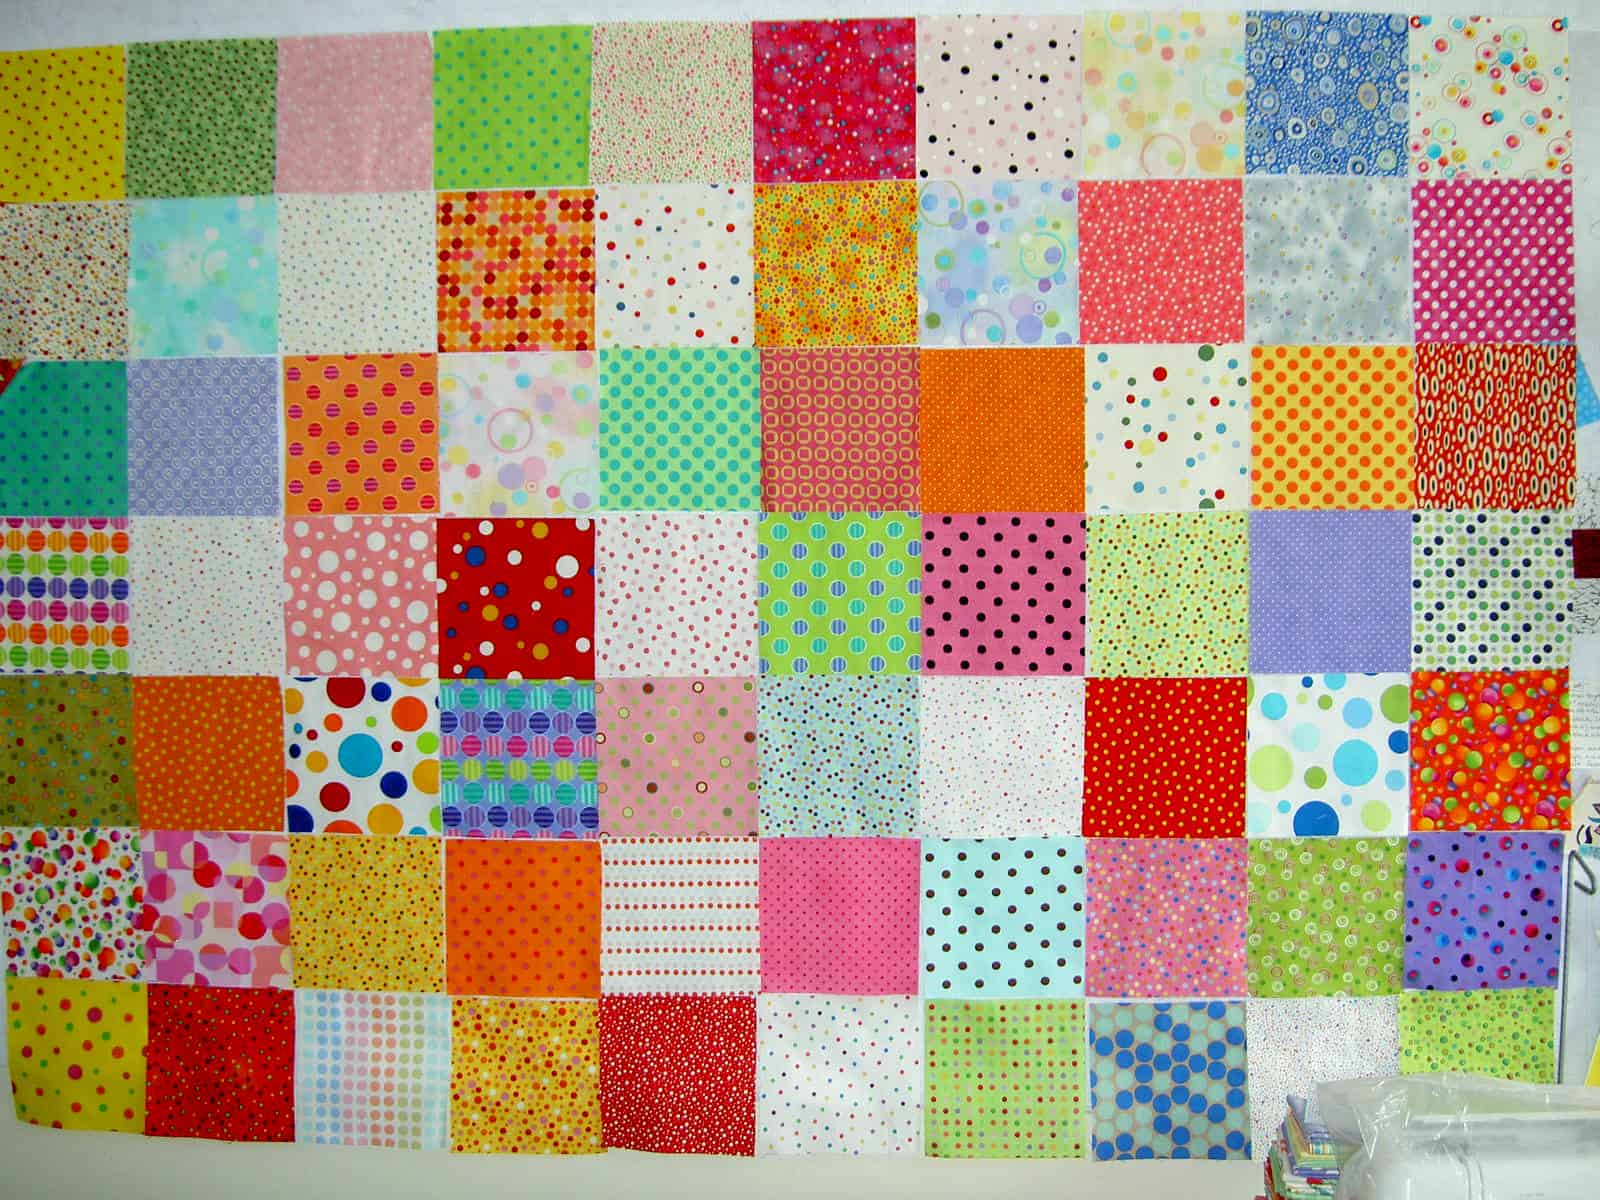
I didn’t think I would make changes right away, but even before I got all the squares up on the wall, I began moving squares away from their fellows of the same color and removing squares that were too dull or didn’t look right. The immediate problem is that the colors in this section seem darker to me. I think I will have to remove some of the darker colors and put in more pink, add some more of the fabrics with the white backgrounds in order to make it more sherbet-y.

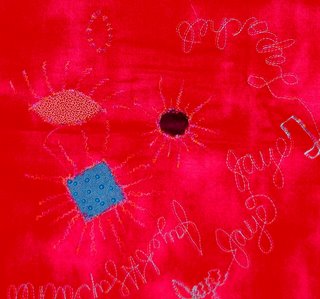
There are colors/fabrics that I like, but may not make it into the final piece. One example is the blue 60s dot (left hand side 3rd from the bottom, two from the left.)

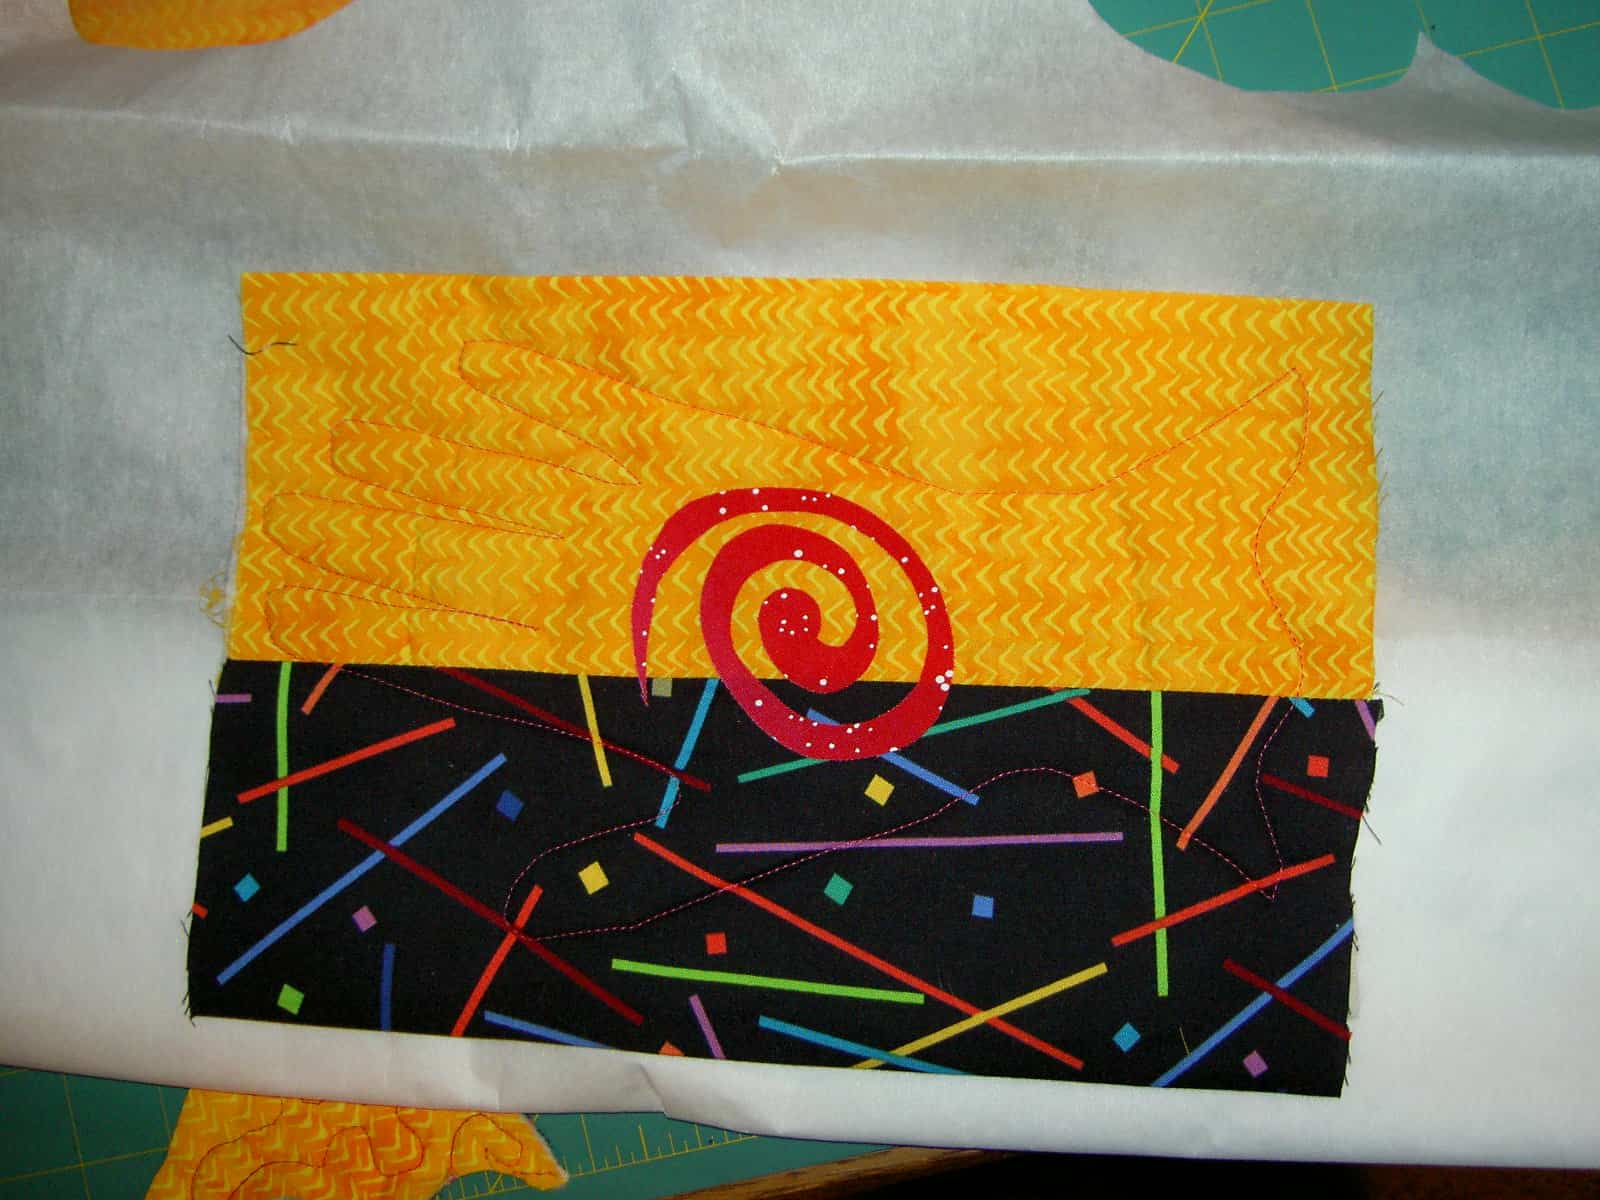
I like the weird spiral dot smack in the middle, but it may be too different to include on the front of this piece.

On the back, I may make columns of the leftover squares and alternate them with plain rows – like a row quilt. It would be good not to let those already cut squares go to waste.

I was thinking about binding today and may add a thin rectangular border of various fabrics and pull it to the back rather than making a regular binding. We will see.

Gualala Arts Center Quilt Exhibit Catalog

I bought a slim volume from the Gualala Arts Center (707-884-1138) containing quilts from the Penny Nii collection. Sue Friedland wrote: “Title: 4 x 4 x 12 BY 3 X 3 X 9
The 4 x 4 x 12 refers to a collection of art quilts commissioned in the 1990s, from leading international artquilters, by Penny Nii of San Francisco. The twelve 48 inch square artquilts, by such luminaries as Michael James, Judith Larzelere, Libby Lehman, Theresa May and our own Sue Friedland, have never before being exhibited publicly. With them will be nine 36 inch square quilts by local artquilters — Mary Austin, Annie Beckett, Suzan Friedland, Kathye Hitt, Iris Lorenz-Fife, Janet Sears, Carol Tackett, Bonnie Toy, and yourself…”

I had a hard time actually getting a hold of someone at the arts center who would sell it to me, but eventually I received my copy. The quilts are great. Star by Leslie Gabrielse is interesting because of the incorporation of classical elements into this art quilts. Jane Sassaman’s Brocade in in her style, but looks very similar to a row quilt.

It is worth getting a copy of this little catalog. I hope it has success so that other quilt exhibits will be encouraged to print catalogs.

Stitching High!!!!

I spent two fantastic days studying with Libby Lehman in two different classes that basically boiled down to using your sewing machine. One class was called Primadonnas and the other was called Super Machine Stitching.

Stop what you are doing (after you read this blog entry!) and then RUN don’t walk to the nearest Libby Lehman class. Do whatever it takes. You won’t regret it! She is a fantastic teacher and I would take another class from her in a hot minute.

Good things about Libby Lehman’s teaching:

1. Dry sense of humor.
2. Knows about more machines than just her Bernina and shows what foot to use for the major brands. Doesn’t treat non-Bernina owners like second class citizens.
3. Willing to take requests.
4. Willing to repeat herself if you weren’t paying attention and explain something again in a different way, if you didn’t understand.
5. No problem with letting students take pictures of her quilts and samples (I do ALWAYS ask).
6. Knows her stuff and can teach it.
7. She uses pieced backgrounds a la the Pushed Neutral idea that Mary Mashuta teaches.
8. She uses any fabric; e.g. she is not a hand-dye only person. YAY! I admire those who can hand-dye, but I don’t want to hand-dye. There is lots of great fabric in this world and I want to use ALL of it.
9. She likes quilts that make her want to look at them some more. She said to keep her intersted.
10. Down to earth and not holier than thou.

In Primadonnas, we learned to couch, bobbin-draw, and use sheer fabric. This is one piece that I made:

Libby Lehman Class sample


In Super Machine Stitching, we did things with satin stitching that I would not have believed possible. This is a techniques class not a project class. You have to think about how you would use the techniques. These are the samples that I made:

Libby Lehman Class sample

I am very proud of the writing as well as the freemotion satin stitching. It is fun, even though I don’t know what I would use it for. I am not planning on making any earthquake quilts in the near future. I was thinking that I could finish See, the piece I started in the David Walker class, using this technique, though not quite as messy, perhaps.

Libby Lehman Class sample

I am particularly proud of my “hippy-dippy flower” (as Libby called it) and the circle. If I have the right threads, I may stitch some of these circles on the Thoughts on Dots quilt. We will see. It would certainly add a bit of interest and dimension. Also, a lot of work.

Libby also has a fantastic teaching set up.

Libby's teaching setup
Libby’s teaching setup

She uses Powerpoint for her presentation as well as video camera projected on the screen to show the details of what she is doing with her sewing machine. It was refreshing not to have to run up to the teacher’s sewing machine every other minute. No more standing around trying to jostle for position behind the tall people who are trying to see what the teacher is demonstrating. No more crowding the teacher. I think it helped provide a relaxing environment for the class and allowed everyone to see the demonstration equally. She has really moved the bar up a notch for quilt teaching. If you are a quilt teacher, step up to the plate.

In all the goodness there is also badness. This may be the most expensive workshop of my life. I want to buy a new sewing machine. My sewing machine performed flawlessly, was wonderful, did not break any needles or cause any thread blobs in the bobbin area. BUT. It also could not keep up with those newer machines and, especially those Berninas (Libby uses a Bernina). They can do things that my machine can’t do, like right and left justify their tapering satin stitch. I never wanted a Bernina before, but the thoughts actually crossed my mind. I feel like a traitor. I tried to assuage my guilt and make my machine feel better by buying two new feet – an open toe embroidery foot (the better to satin stitch, my dear) and the Beading Foot set. I wanted a couching foot, but, apparently, Janome doesn’t make one. I will try the Beading feet for couching and see what they do. I intend to add a lot more couching on my quilts. 😉