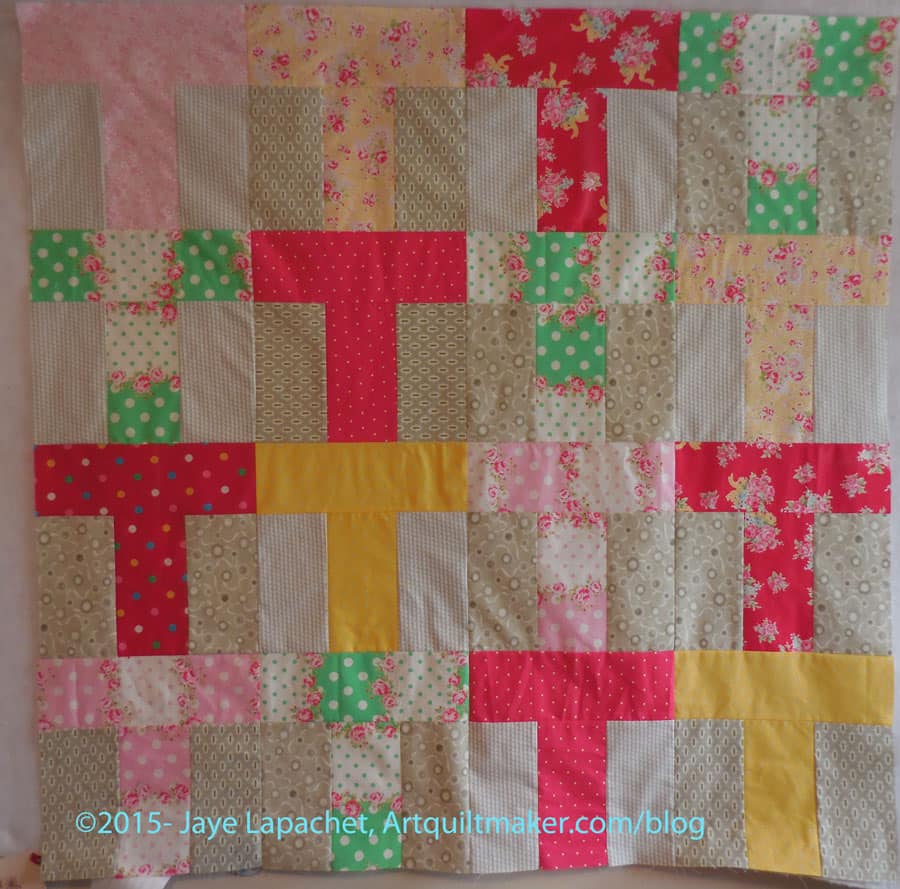
I finished a donation top and back over the weekend. I thought I had posted something about this, but I couldn’t find the post. I think I must have only posted on Twitter and Instagram about it.
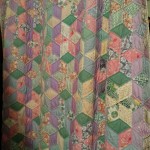
I wanted to use up the Flower Sugar fabrics from Lecien that I used for the Flower Sugar Hexagon (Attack of the Hexies) quilt. I thought a donation quilt would be a good opportunity.
I really want to make donation quilts that can be used for boys, but I also, as I said, wanted to use up this fabric. I don’t think I will use this fabric again, except for some of the blues, perhaps, which I really like. Also, the fabric isn’t really great in terms of quality. Some parts of the fabrics were sun damaged waiting to be used despite the fact that they were covered.
The other fabric I don’t think I will use again was some of the greys from a couple of recent-ish Bonnie and Camille collections. They turned out to be too taupe-y for my projects, so off they go to donation quilts.
I will making the binding and then bring this to the meeting to be quilted. I will see if I have enough batting parts to make a Franken-batting as well.
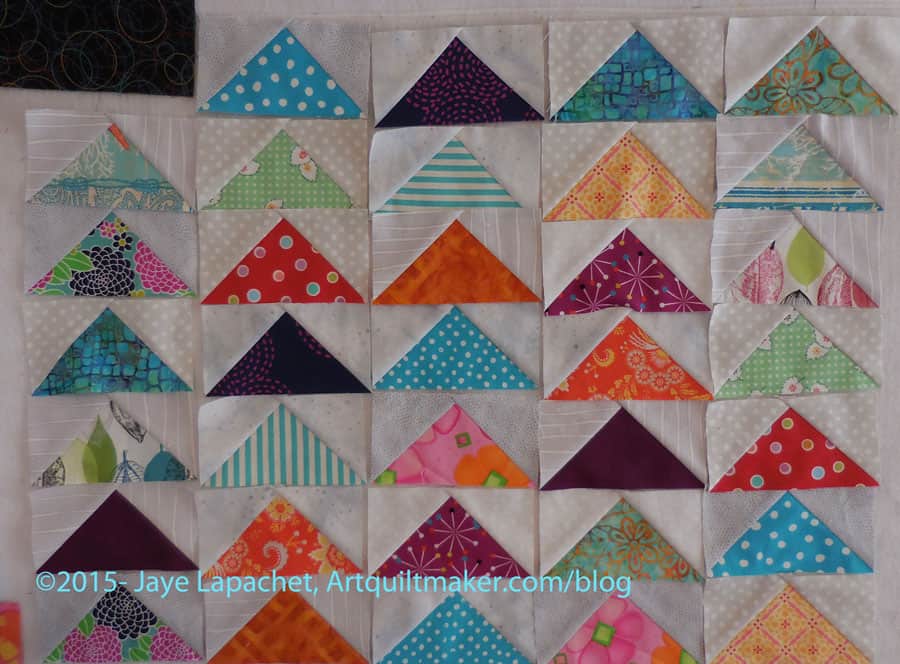
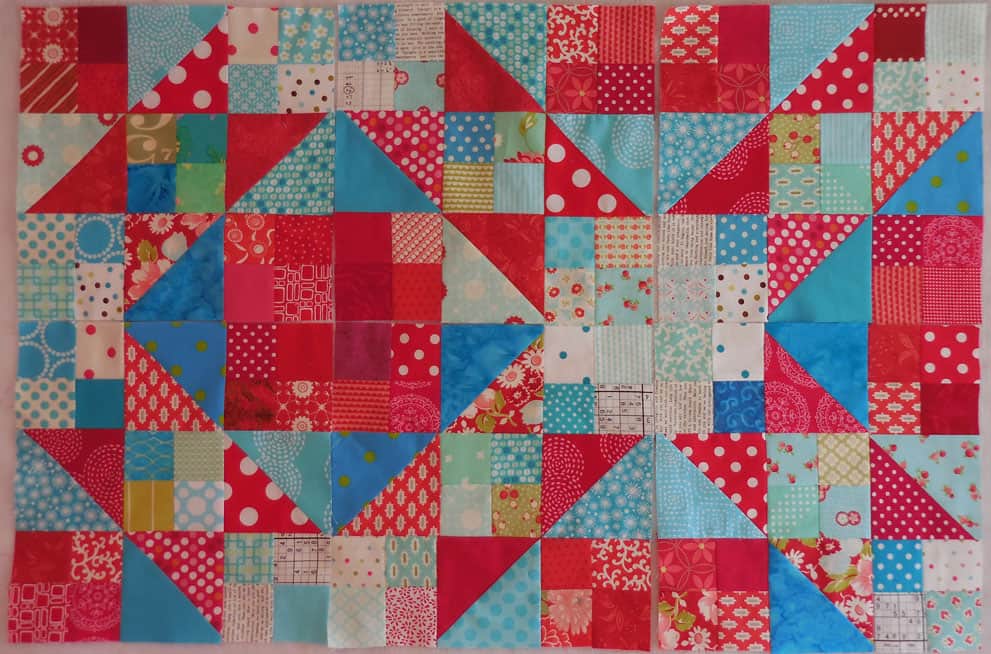
I sometimes make a batch of Flying Geese at once or over the course of a few days. I like to have them available in case my schedule gets crazy and I don’t have time to make some for my weekly swap. I don’t like to show them until I have sent most of them to TFQ, lest she not be surprised at my fabric choices. I also like to show the ones she has sent me. Together hers and mine look super fun.
I wanted the batch off the design wall so I could put up the T donation quilt, so I took a photo and here they are. Aren’t they fun?
I am still thinking of trying out some different rulers for making these geese, but I haven’t done it yet. Stay tuned.
This is such a fun exchange! I am really enjoying it. Find a friend and do one, too.
I am not Miss Muffet, but I am making a tuffet. As I mentioned, I have wanted to make one for a long time. I took the class at Scruffy Quilts and had a great time. The teacher, Robin Koenig, of West Coast Tuffets, was excellent. She was funny and helpful and engaging. She didn’t patronize us and she wasn’t a ditz.
The class is four hours, 2 sessions. The first session was last Thursday. We had to cut strips in advance (or buy a jelly roll), so we were ready to make the pattern and sew when we got to class. The patterns were a bit of a pain to make, but Robin had the templates ready, so we had to trace and cut. I was able to sew two sections out of eight, an accomplishment of which I was very pleased.
Tuffet, 2 sections
I got so much done, because I used 3″ strips, which meant that each section only required 4 strips. My fellow students used jelly roll strips and their sections required at least 6 strips per section so they had a lot more work to do.
The next class is in two weeks. I need to have all eight sections finished. I also want to make the button that covers the center.
Last weekend, I went with DH to Southern California for the NSGW SoCal Weekend. They have it every year and this is the first I have attended. I think it was the first time for DH as well. The official events were two dedications, an initiation and a banquet with a local councilman as a speaker. We also went to a luncheon celebrating the $55,000 that the Natives donated this past year to St. John’s Hospital to help the treatment and research of cranio-facial anomalies such as Cleft Palate. This is part of the money we raised at the Hospitality Suites with the NSGW embroidered pillows. DH also took the opportunity to audit the books of two parlors (chapters).
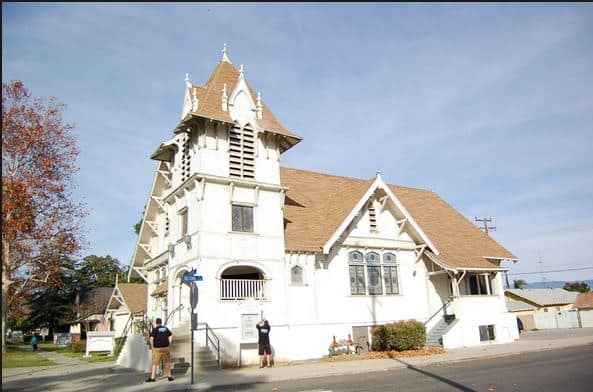
Rialto Womens Club
The Order dedicated the Rialto Women’s Club and the Rialto Historical Society. After the dedication was over we took some time to look at the historical society’s collection. Of course, I was interested in the quilts.
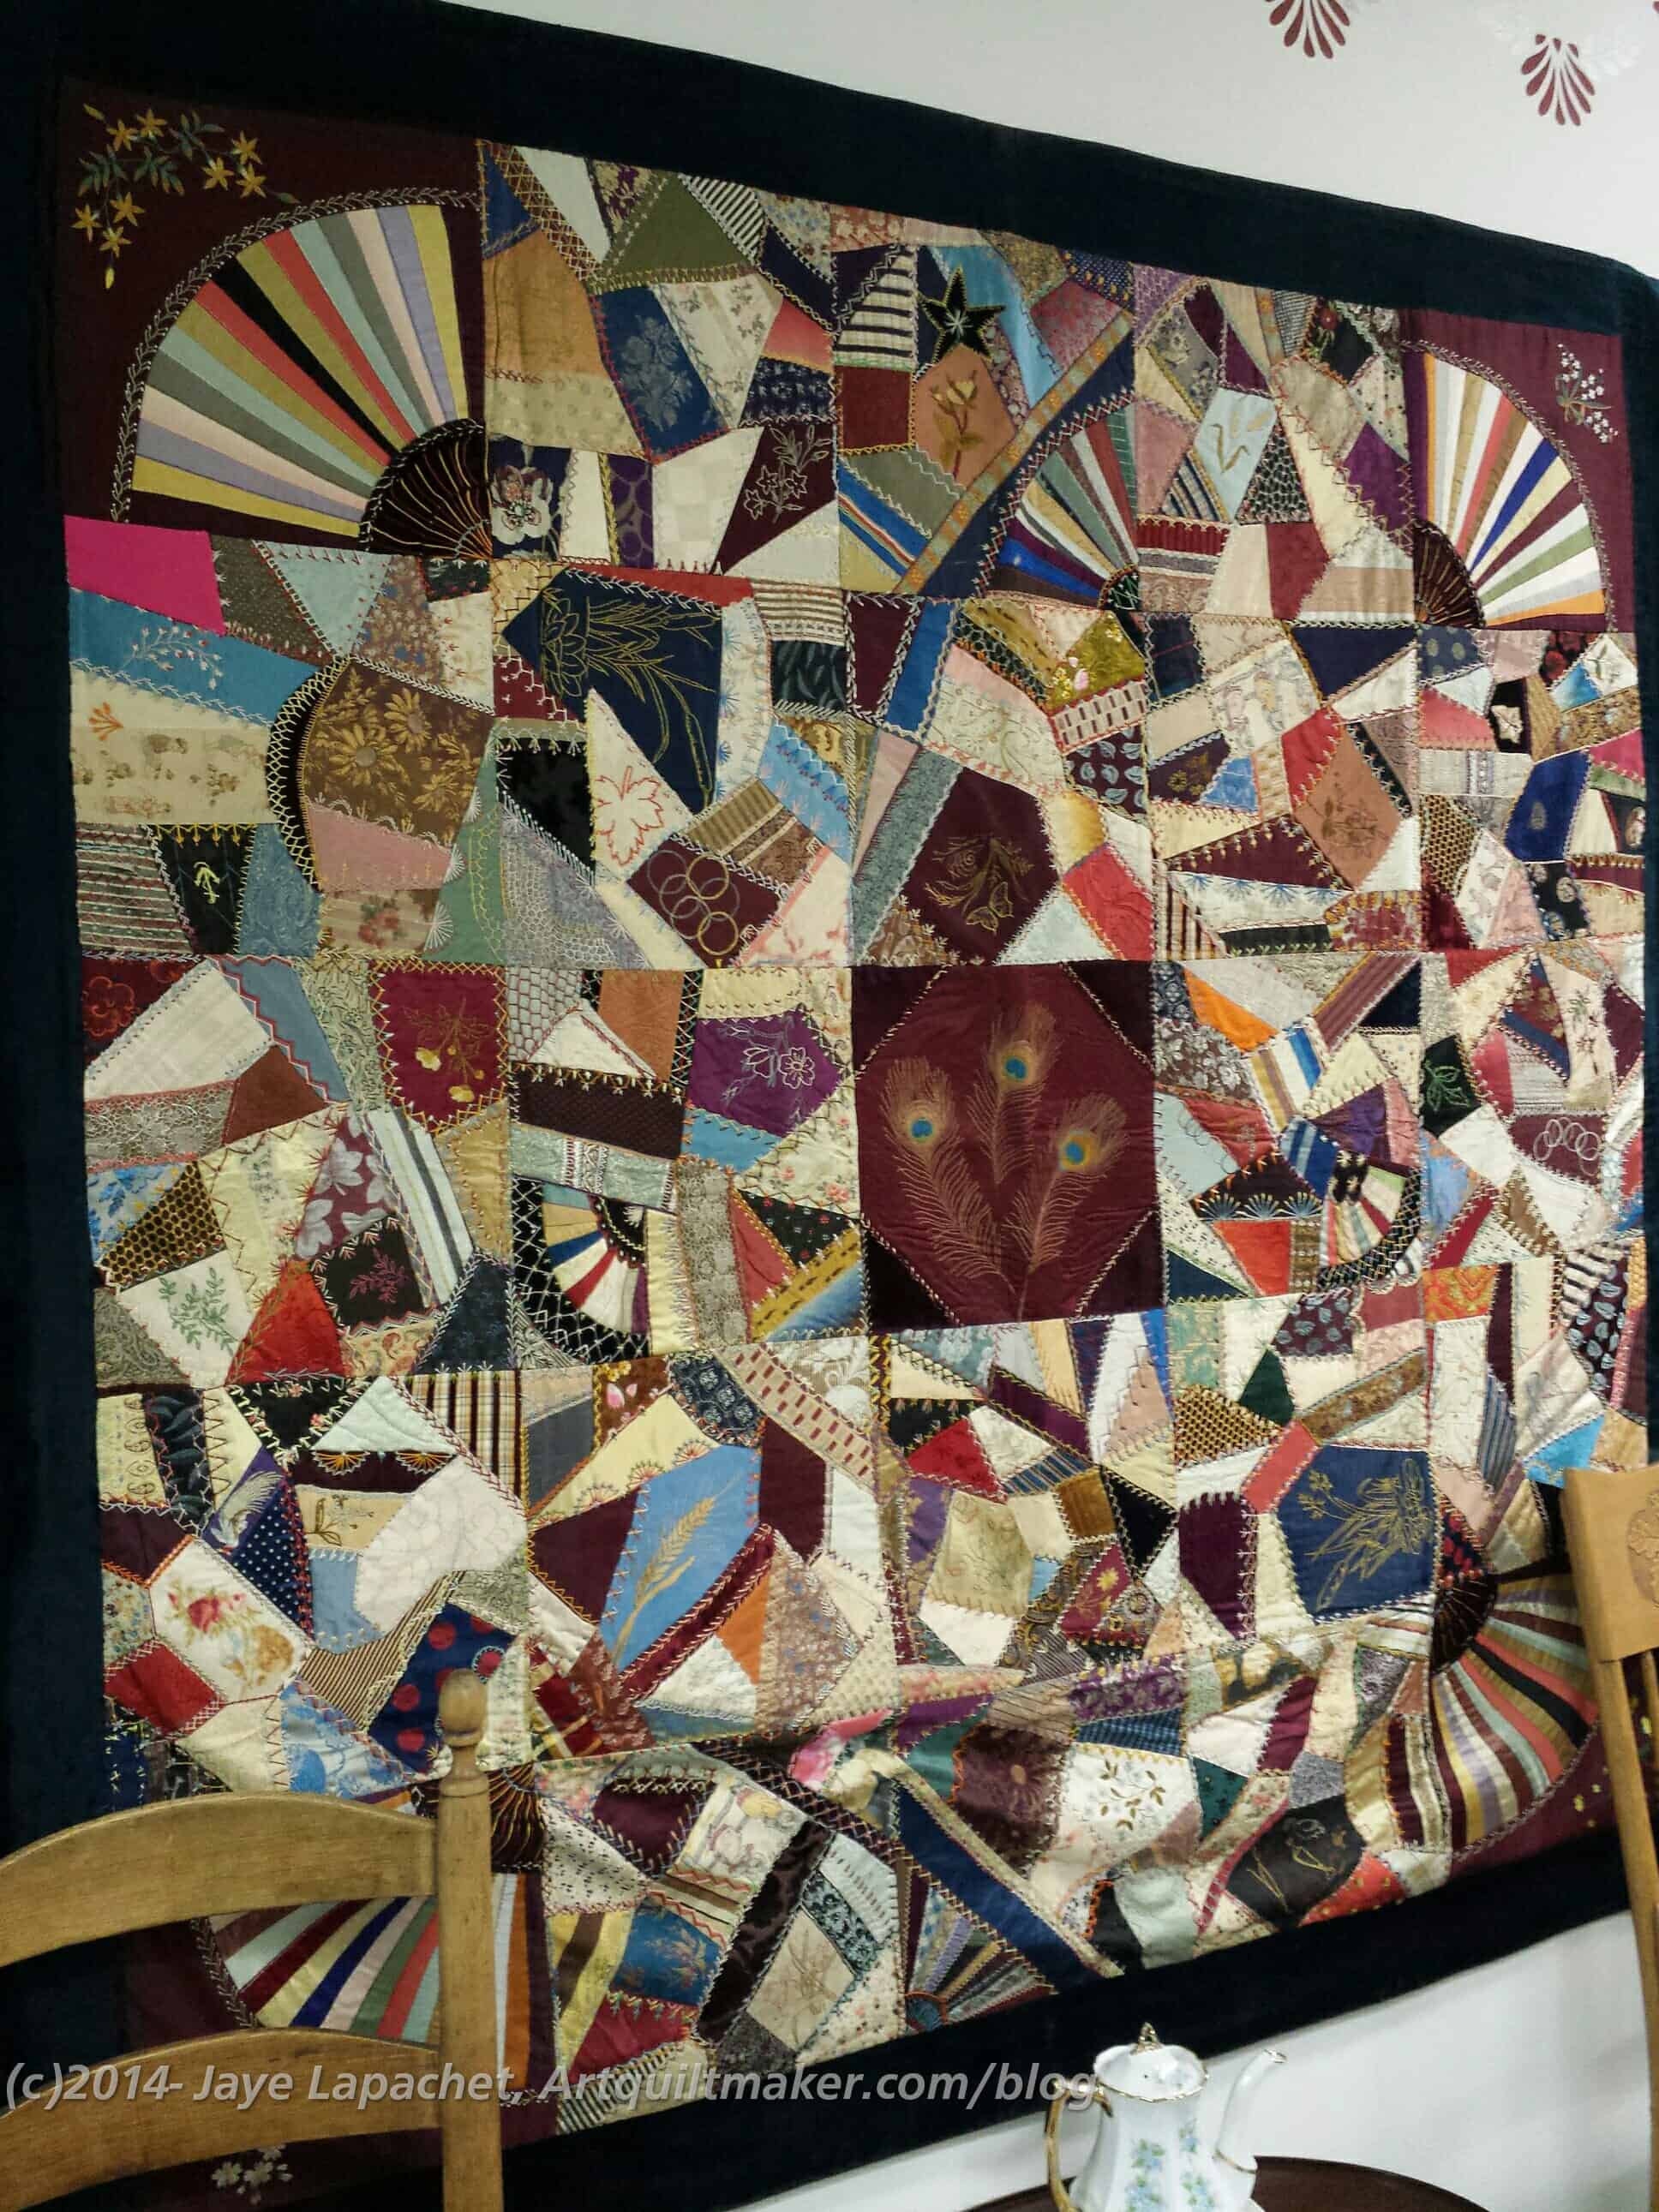
There were a number of crazy quilts, one was in very fine condition and displayed very well on a covered board (for stability) and hung on the wall.
RHS Crazy Quilt
I really couldn’t believe what excellent condition this quilt was in. I don’t know if it had been restored or not. I suspect it had, because there was no damage at all and you know that the silks of that time were full of lead and thus very prone to disintegrating.
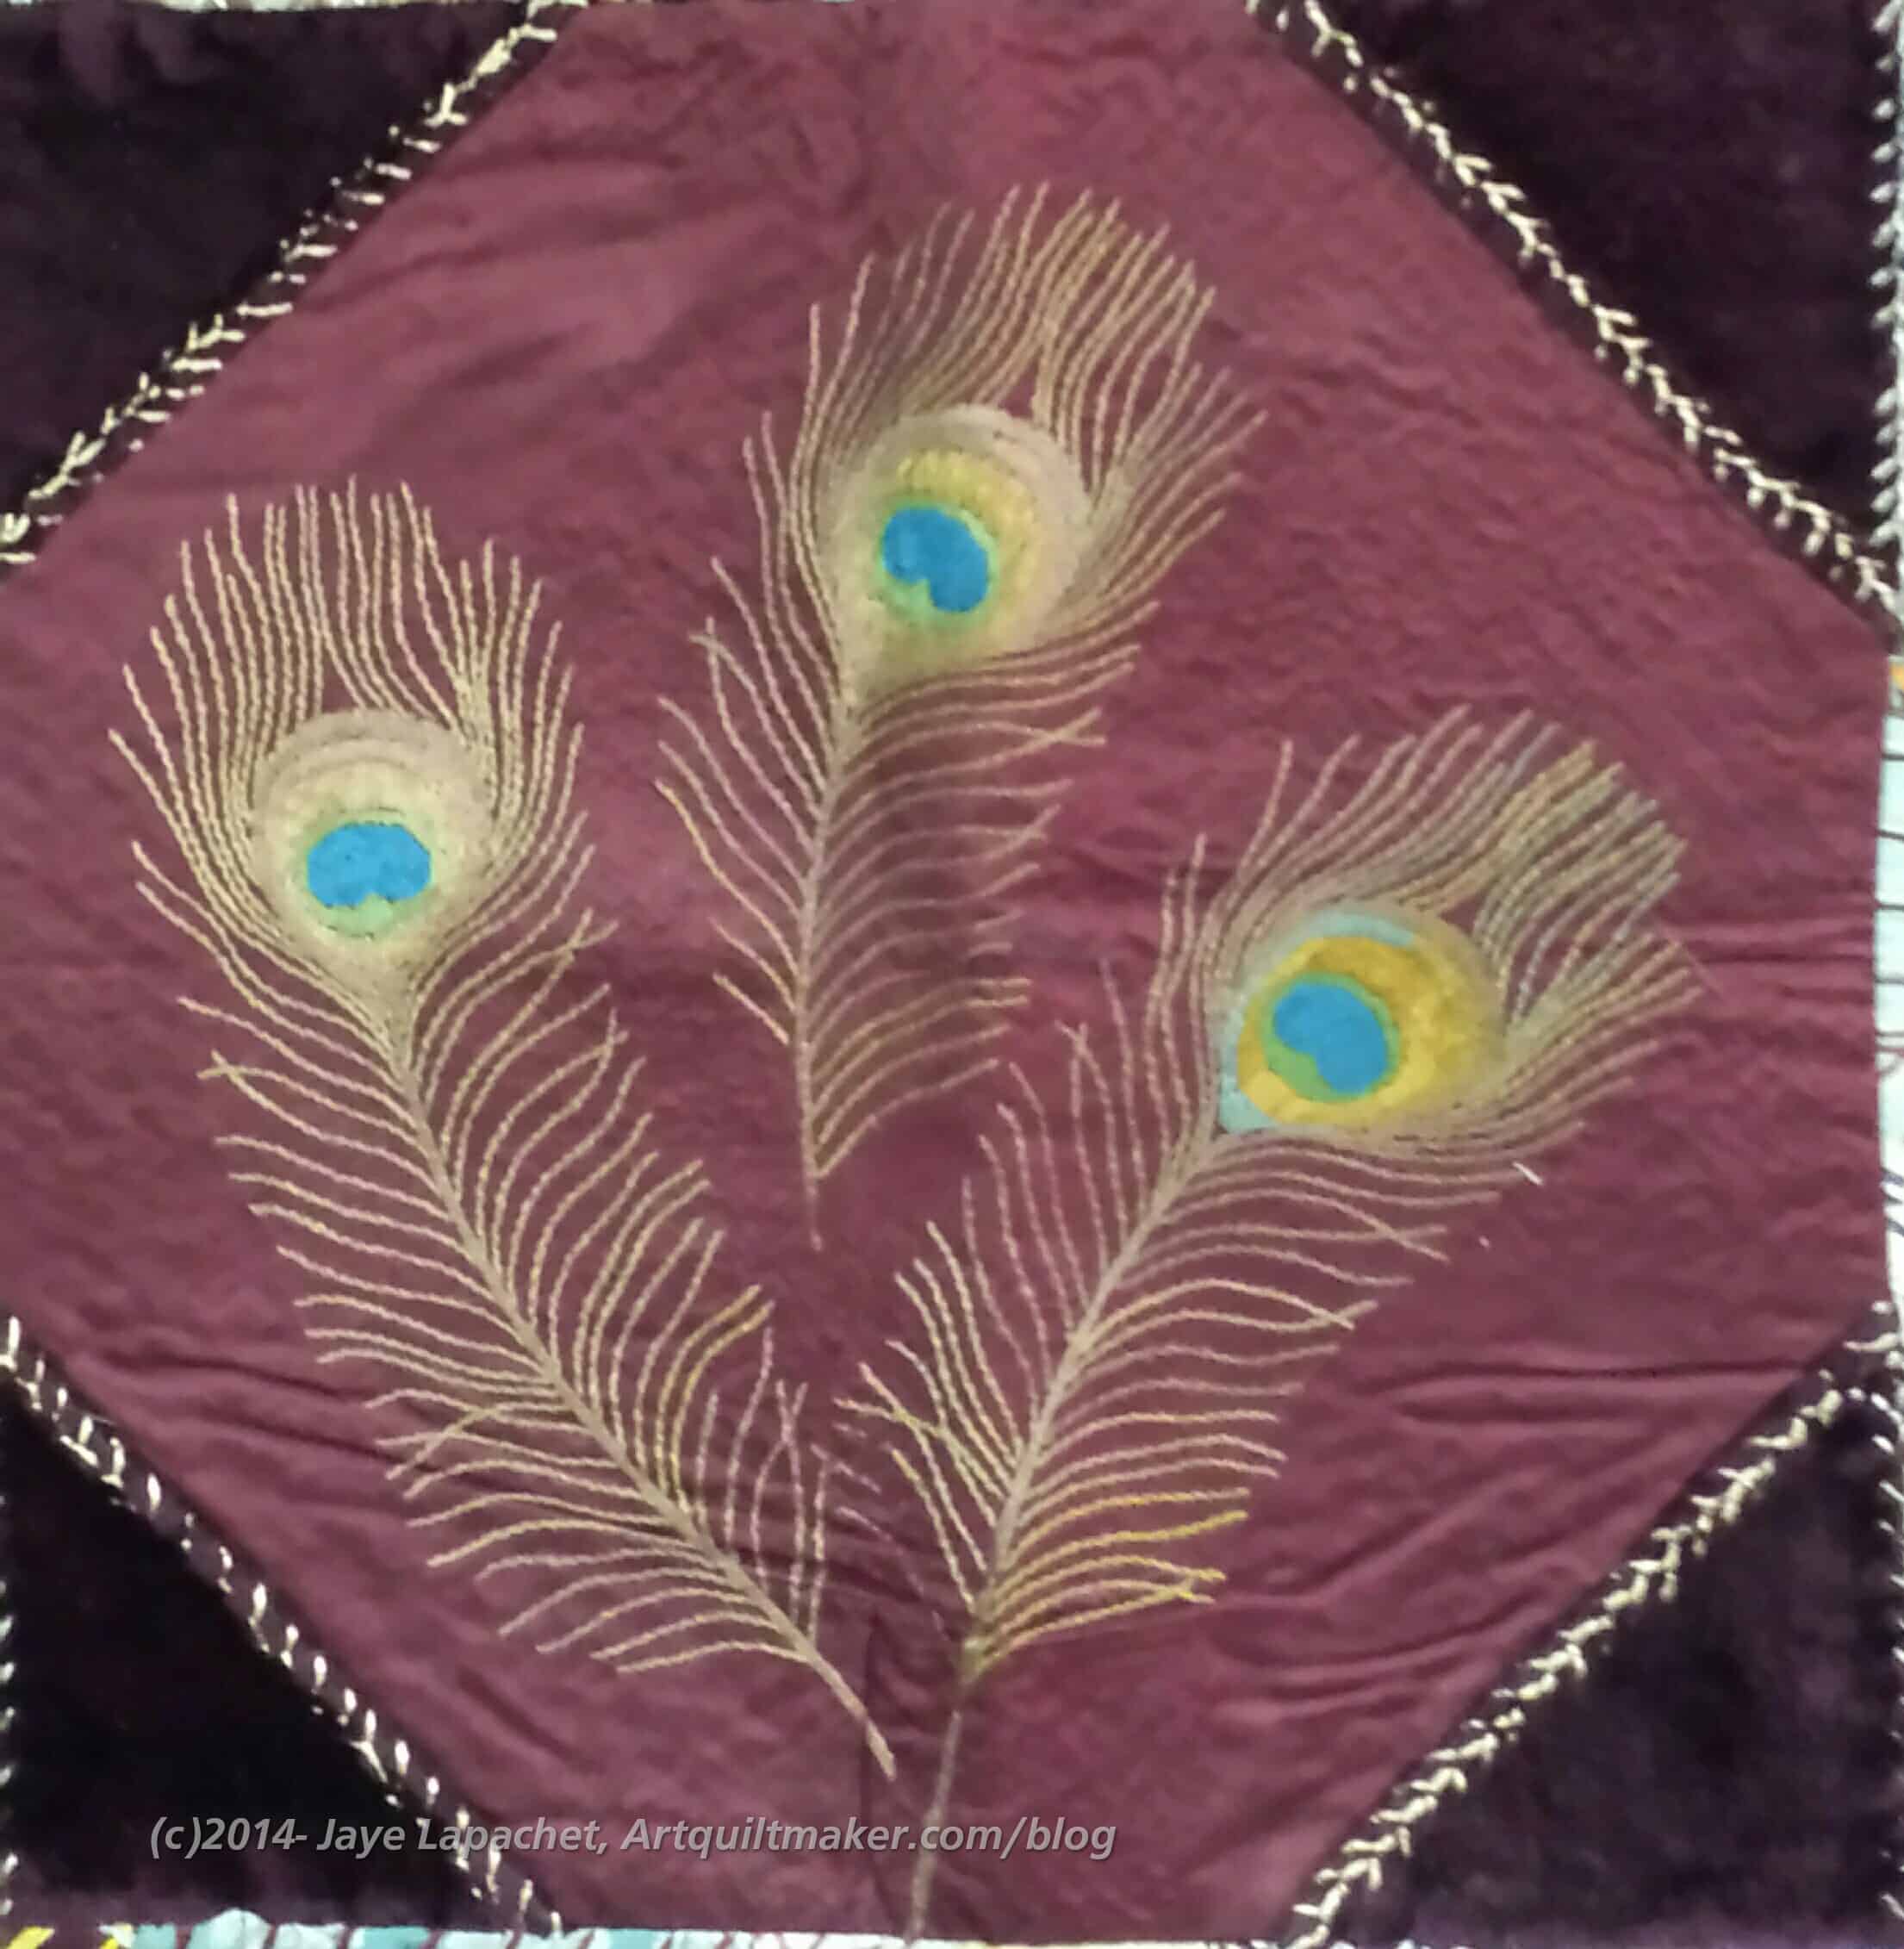
Peacock Cemter
I really liked the center. I HAVE to be in a peacock mode. I don’t even like peacocks. I like the idea of peacocks, but the real ones, while beautiful, make a lot of noise and are messy. Their feathers are wonderful, though, and this embroidered center is one of the most beautiful pieces I have seen. I think the complex simplicity of the design is the genius.
I kind of wish I had taken a more closeup photo so I could see the stitching of the center. I didn’t think of it at the time. It is possible that I will go there again and can look then.
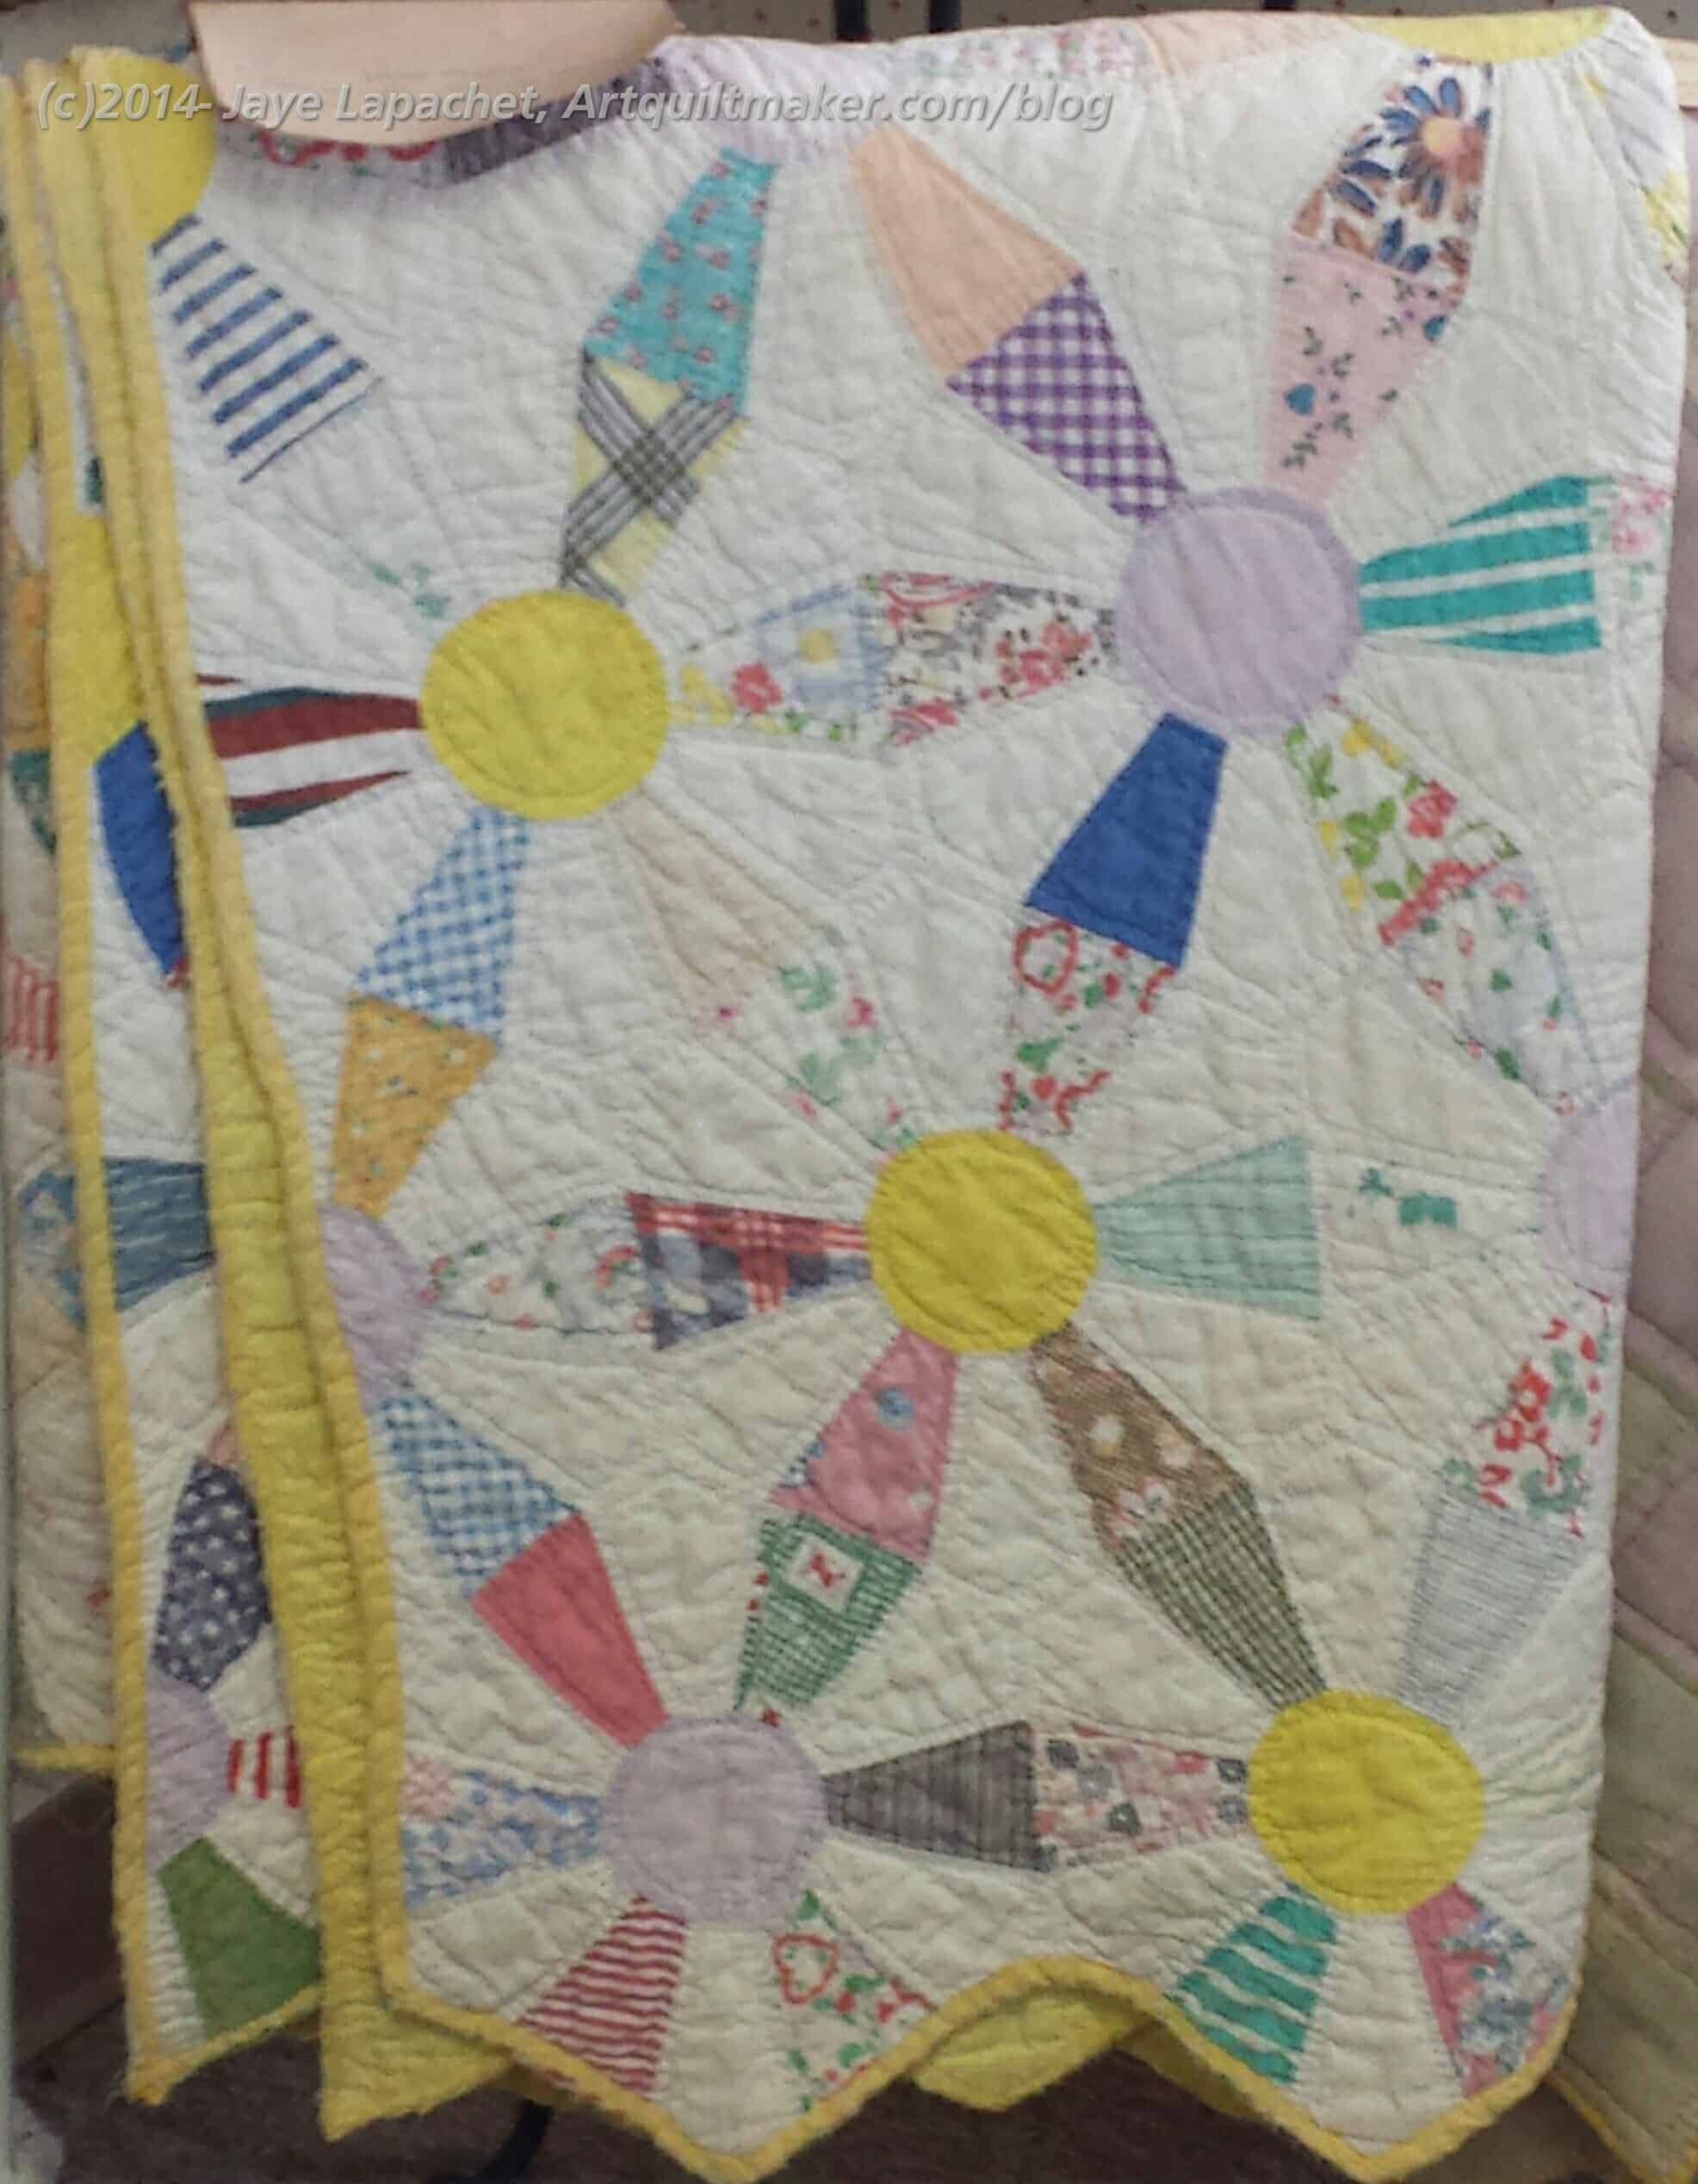
RHS quilt
There were a number of other quilts. One caught DH’s eye. I really need to make him a quilt of his own as he just makes due with any random quilt on the couch.
I haven’t looked up the name, but I think it is some kind of propeller design. It is made from tumblers and I think it would be a very interesting piecing challenge.
The others I saw were all made into curtains and that was kind of sad. They weren’t especially interesting, but they were old and looked finely pieced. I suppose being made into curtains is better than being cut up into softies.
The Peach Kings are an American Indie Rock Band in Los Angeles. Walking a slack line between black leather and blue velvet.
peach fuzz
Peach Fuzzer™ is an advanced and extensible security fuzz testing platform. It can be used to find vulnerabilities in networking protocols, device drivers, etc
Botanical print by Otto Wilhelm Thome
Definition: “The peach (Prunus persica) is a deciduoustree, native to Northwest China, in the region between the Tarim Basin and the north slopes of the Kunlun Shan mountains, where it was first domesticated and cultivated.[2] It bears an edible juicy fruit also called a peach.
The specific epithet persica refers to its widespread cultivation in Persia, whence it was transplanted to Europe. It belongs to the genusPrunus which includes the cherry and plum, in the familyRosaceae. The peach is classified with the almond in the subgenus Amygdalus, distinguished from the other subgenera by the corrugated seed shell.
Peach and nectarines are the same species, even though they are regarded commercially as different fruits. In contrast to peaches, whose fruits present the characteristic fuzz on the skin, nectarines are characterized by the absence of fruit-skin trichomes (fuzz-less fruit); genetic studies suggest nectarines are produced due to a recessive allele, whereas peaches are produced from a dominant allele for fuzzy skin.[3]
China is the world’s largest producer of peaches.[4]” (Wikipedia)
Saturn peach donuts
The Peach Truck Kitchen
Princess Peach (Super Mario)
Peach Melba
Lucky Peach – An alternative quarterly journal of food writing, art, and recipes.
Peach is a parent-led charity that promotes Early Intensive Behavioural Intervention (EIBI) for young children with autism.
Snapple Peach Tea
PEACH, the Los Angeles-based singer-songwriter-guitarist.
Post the direct URL (link) where your drawing, doodle, artwork is posted (e.g. your blog, Flickr) in the comments area of this post. I would really like to keep all the artwork together and provide a way for others to see your work and get familiar with your blog or website.
The Creative Prompt Project, also, has a Flickr group, which you can join to post your responses. I created this spot so those of you without blogs and websites would have a place to post your responses.
We are also talking about this on Twitter and Instagram. Use the hashtag #CPP
Tina, of the Weezyworks podcast wrote a limerick for me. I was so thrilled! It was very sweet of her. Go listen to her podcast. It is listed on iTunes and at WeezyWorks. She reads my limerick on episode #25. The limerick is:
There once was a woman named Jaye
A quilter from San Francisco Bay.
She turns her dots
and fabric spots
Into a quilty ballet.
Molly, Jan Burgwinkle of Be*Mused blog fame’s daughter, has a website and Etsy shop called Tokodots. Her cards are cheerful, colorful and vaguely quilt related. The site has an associated blog, which seems to be more about her projects than about sales. It is a nice refreshing change to read about loving fabric, then sincerely disliking it, only find that it is perfect again two days later. Her post on the robe she made in Field Study fabrics is lovely.
Marsha McCloskey really popularized the Feathered Star pattern when quiltmaking was young. Craft University has captured her genius with a class, Craft University Online Feathered Star Workshop. It begins on September 15. Too bad Craftsy didn’t get to her first.
I was very pleased to see a story about quiltmaking on NPR’s All Things Considered. Of course, it was about the Missouri Star Quilt Company and Jenny Doan, but still! It is good to get the word out about the fabulousness of quiltmaking out to the Muggles.
Sherri D shared a couple of posts from Geta’s Quilting Studio with me. The first is about washing quilts pre-binding. I don’t have experience with this as I don’t wash my quilts pre-binding. The second one is about making binding right after you have finished the top. I do this all the time as making the binding is such a chore that I just want to get it done. Having it done feels like an accomplishment. Also, my quilter machine sews the binding on for me, so I have to have it done before I take it to her.
I was very pleased to see a post on labels on the Dining Room Empire. Cheryl Arkison uses the same print on fabric technique that I use. Yay!
Books, Patterns, Magazines & Projects
The New York Beauty block on the Sew E.T. blog makes me want to get back to some spiky triangles. The thing about this block is that she has some fabrics in a rainbow configuration. I want to do that, but will have to take the time to organize the fabrics.
As if I need to add more to my To Do list, Amanda shared the X Plus pattern with me. I love the scrappiness of the versions I have seen on Instagram. Perhaps this would be a good pattern (and a reason to make it!) for my next Niecephews quilt.
Generation Q magazine has a new newsletter called Stashed. Aside from being super fantastic, I am not sure how I got on the list. It wasn’t too long, had plenty of pictures and a giveaway (which is probably closed by now). Take a look and let me know what you think.
I love the X Plus pattern!! Id on’t know why I love it so much, but I do. Perhaps that lozenge shape that I have been seeing? I am plotting to use this X Plus pattern somehow. I have an idea for one of the Niecephews quilts.
Ami Simms has some good ideas about bibs. She has taken those ideas and made a tutorial.
I saw another fabric basket like the One Hour Basket. I thought I might try it but after reading the directions, I thought it sounded like the fabric handbag pattern TFQ and I made together one time (last time??) when I was at her house. I am not sure how I feel about using the paper bag as the interfacing either.
A few weeks ago, I took a trip with two friends to Scruffy Quilts. It is not to far from me. It is a small shop, but I was pleasantly surprised by the variety of quilt related tools, fabric and supplies they had. For my pillowcase project, there were a wide variety of designs from which to choose. I was also interested in the Judy Niemeyer patterns available. I don’t plan on making one, but the complexity and possibilities for the designs were wonderful to look at. I also had fun looking at the notions! I did sign up for a Tuffet class. I had been wanting to make one since I bought the pattern. I tried to win one at the Santa Clara Valley Quilt Association show, but was not successful, so I bit the bullet. Check out Scruffy Quilts if you are in the area. They also have an online site.
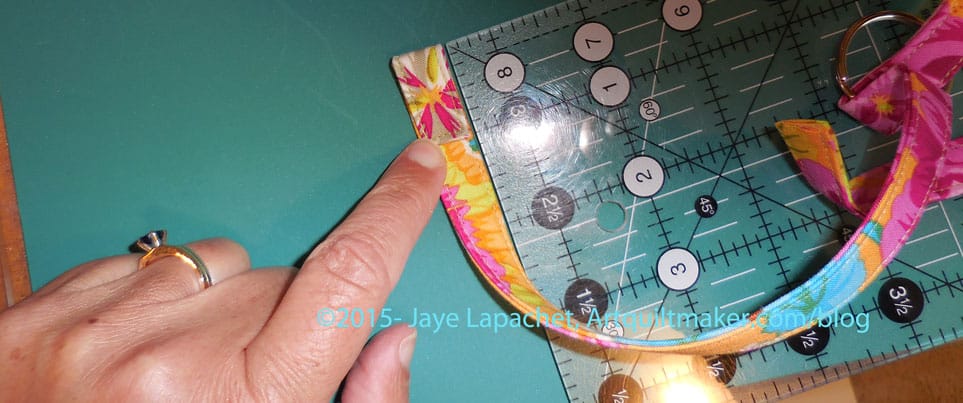
Check the accuracy of your rulers, tape measures and cutting mats. That might help your accuracy.
Exhibits, Tutorials & Events
Marsha McCloskey has posted another lesson in the Winter Star Tutorial on here blog. This one is about finishing the 3″ Ohio Star for the center of the block, and includes setting up to piece, and an accuracy test. You can see all the posts she’s done so far at: https://featheredstar.wordpress.com/
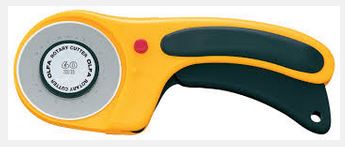
I always like to find good basic tutorials, because then I don’t have to write a tutorial for everything. 😉 Sewmotion has a tutorial on cutting fabric. It is a good, basic tutorial and not long. My only problem with this tutorial is that the photos show her rotary cutter ope in between cuts. CLOSE YOUR ROTARY CUTTER EVERY TIME!!! You never know when you will be called away and little fingers (or big) will come nosing around. Alternatively, you can get a rotary cutter like mine that closes automatically and can be locked closed. I can’t live without it.
Deluxe Rotary Cutter
Doing Good
“From Stashed Newsletter: Last April, Nepal suffered a devastating earthquake that killed 9,000 people and injured more than 23,000. Even more thousands of residents were left homeless from the destruction the 7.8-magnitude temblor left behind.
Luana Rubin is a GenQ friend, owner of eQuilter.com and one of the most compassionate quilters around. Over the years, she’s led efforts to bring quilts to the victims of other disasters, as well as standing charities helping people throughout the world. For more information, go HERE.
Now she’s leading a quilt drive to benefit the Nepalese people left homeless by the earthquake and she’s asking for our help. She needs lap, twin and double-sized quilts in bright, cheerful colors. You can donate finished quilts directly to Luana by shipping them to eQuilter, 5455 Spine Road, Suite E, Boulder, CO 80301. Consider getting your bee, guild or small group together to make some quilts, too. It’s all about fellowship and giving back, something we quilters have always done.
On our own home turf, GenQ staffer Bev Mabry is collecting quilts for victims of recent floods in Wemberley, Texas. If you have finished quilts or you can make a top, contact bev@generationqmagazine.com.”
NQR
If you have a kid going to college as I do, you might enjoy this article about the grief int he process. A librarian friend sent it to me. I don’t know how I will feel, but I will miss my Young Man.
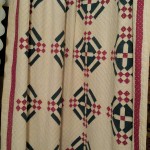
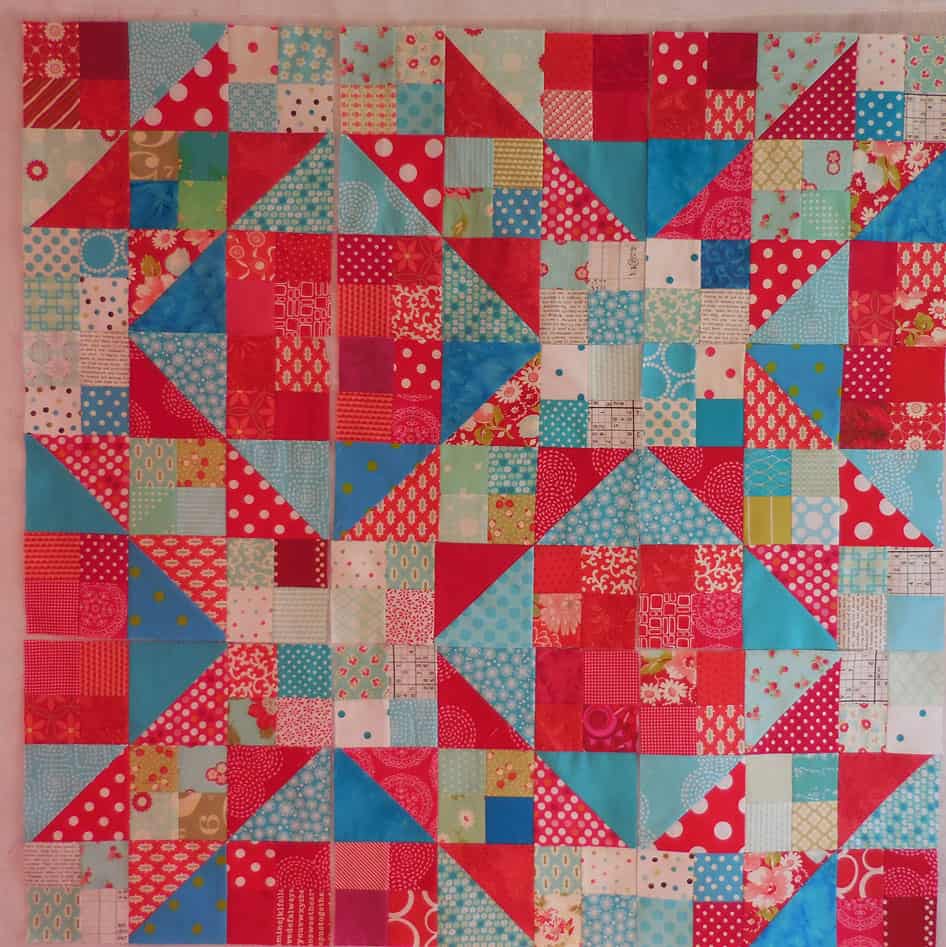
Using leaders and enders I made a few more Stepping Stones blocks. They are looking really awesome, I think. I love the way the red and blue really create distinct secondary designs. This was a little hard to see in my previous quilt. From far away the previous quilt looks great, but close up you can’t see the pattern as well as you can in this turquoise and red version.
Stepping Stones – starting to look like something
I have added a few new fabrics to the mix for this quilt. My original idea of using all Bonnie and Camille fabrics is pretty much out the window. They were a good starting place, but much too limiting. With all the fabrics I have added, I still don’t think there are enough. I get annoyed when I see two fabrics together. I am starting to see the appeal of charm quilts.
The picture to the right is the new blocks with a few of the old ones to show you the effect of the whole design.
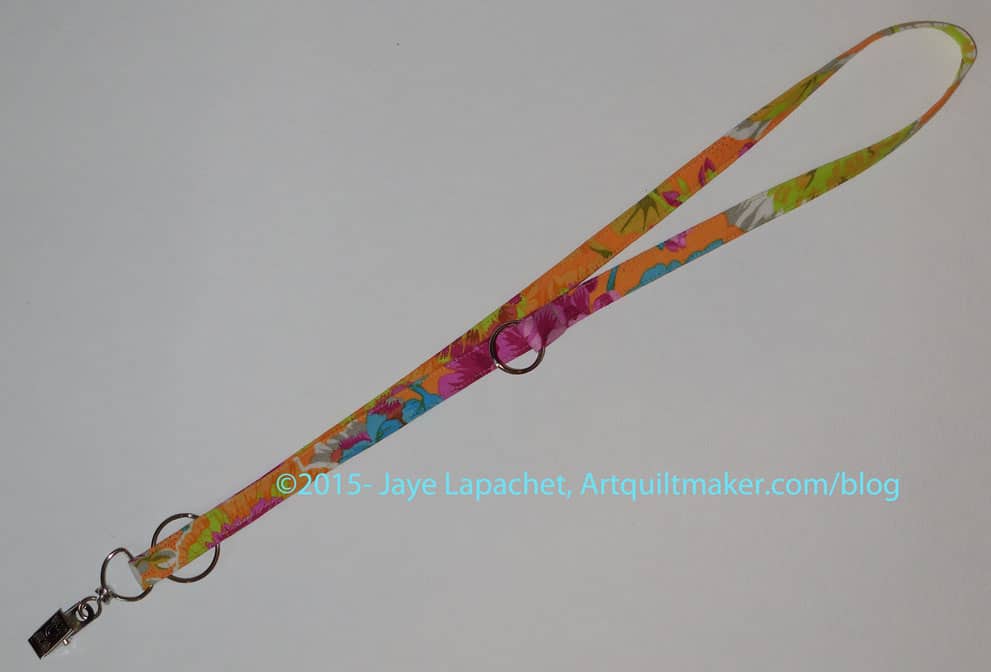
I wanted a certain kind of lanyard for my quilt guild nametag. I wanted my nametag to be near my shoulder so people could really see it. I also wanted some options to hang things from it, like a pouch for id, money, etc.
Make this lanyard fit your personality.
Supplies
sewing machine in good working order
ironing kit
thread
fabric
basic sewing kit (BSK)
pins
WonderClips
Shape Flex fusible interfacing (scraps are perfectly fine)
2 circle metal rings (D ring or similar will work also)
1 metal hanging clip
Directions
Wash and press your fabric
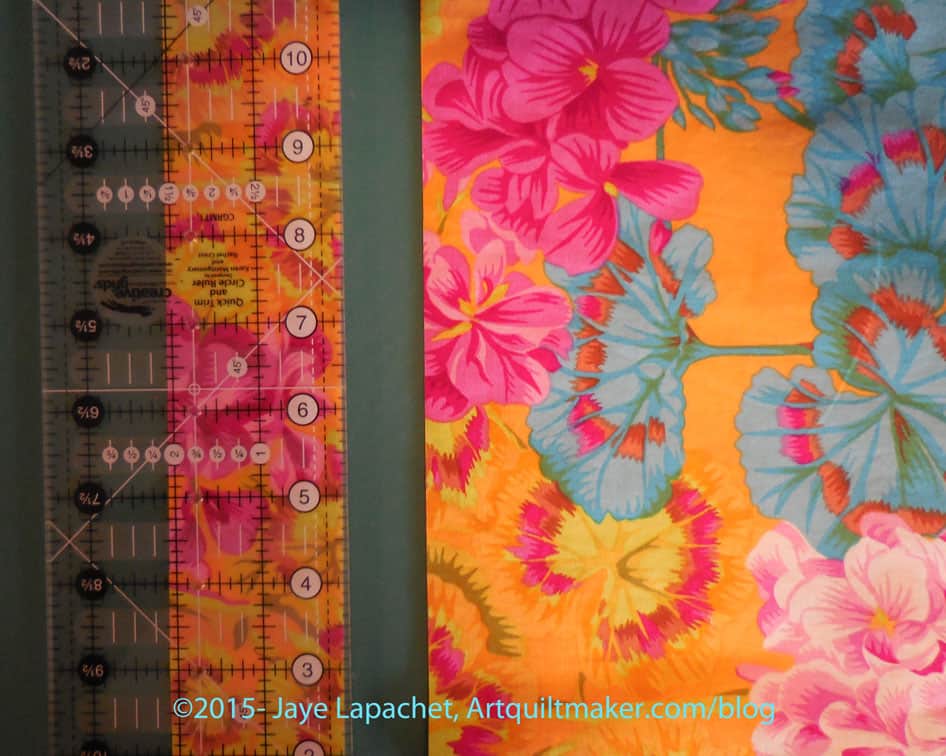
Cut 2″ strip
1. Cut a piece of fabric 40″ x 2″. You can adjust the length to fit your height, neck size, etc.
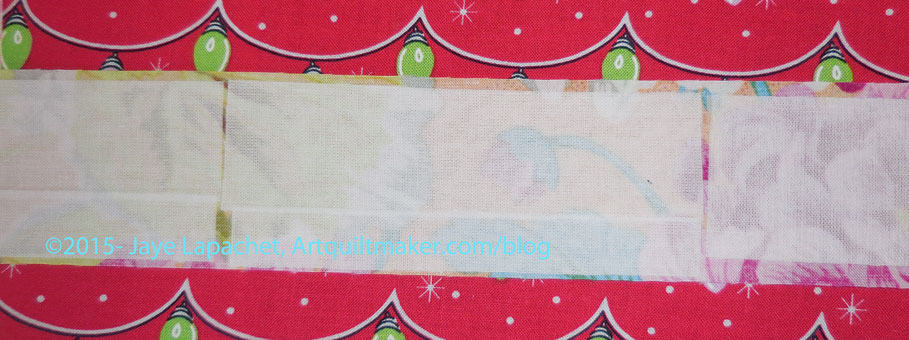
Cover with interfacing
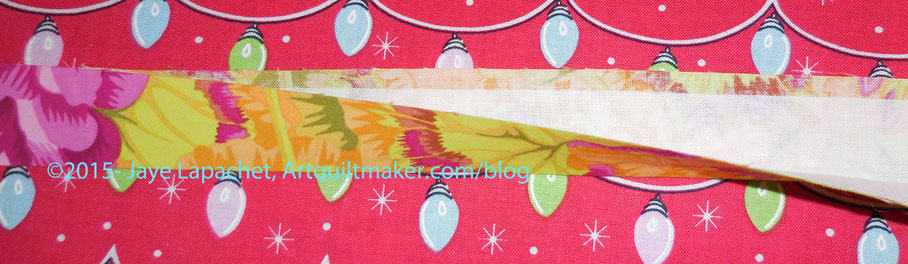
2. Layout your strip on the ironing board wrong side up. Cover the wrong side of the fabric with Shape Flex (or similar) interfacing. I usually cut the interfacing so it only goes with about 1/8″ from the edge. This reduces bulk.
**Note the Christmas light fabric was what was laying on my ironing board at the time I took the photo.
Fold in half
3. Fold your ShapeFlex covered strip in half, wrong sides together, and press so the edges match up.
Fold ends
4. Fold both ends up about 1/8″ (WST). This will finish the ends.
**Note: I don’t know what that tool is or where I got it, but I use it to keep from burning my fingers when I iron.
5. Open the strip you have just pressed down the middle.
Fold towards to center
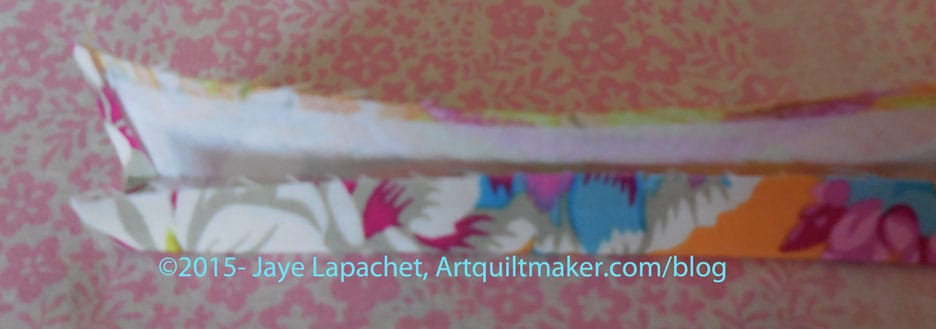
6. Fold both raw edges towards the center. Don’t fold past the center pressed line.
Folded lanyard piece
6A. Once you have pressed both raw edges towards the center, repress the whole strip together on the center line.
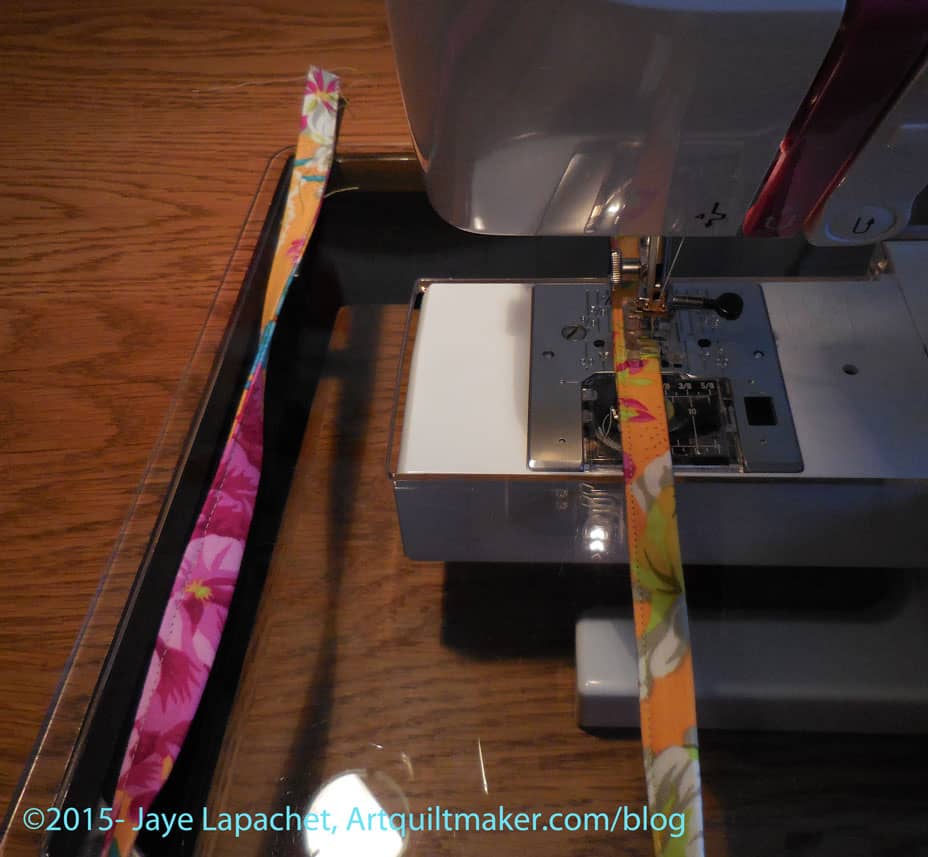
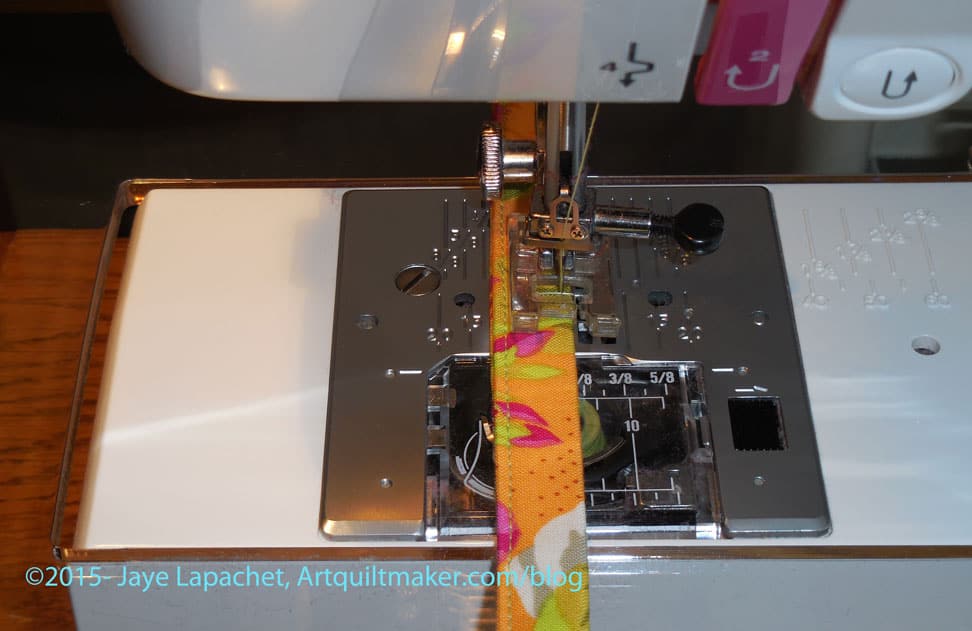
Topstitch around entire stripTopstitch around fabric – detail
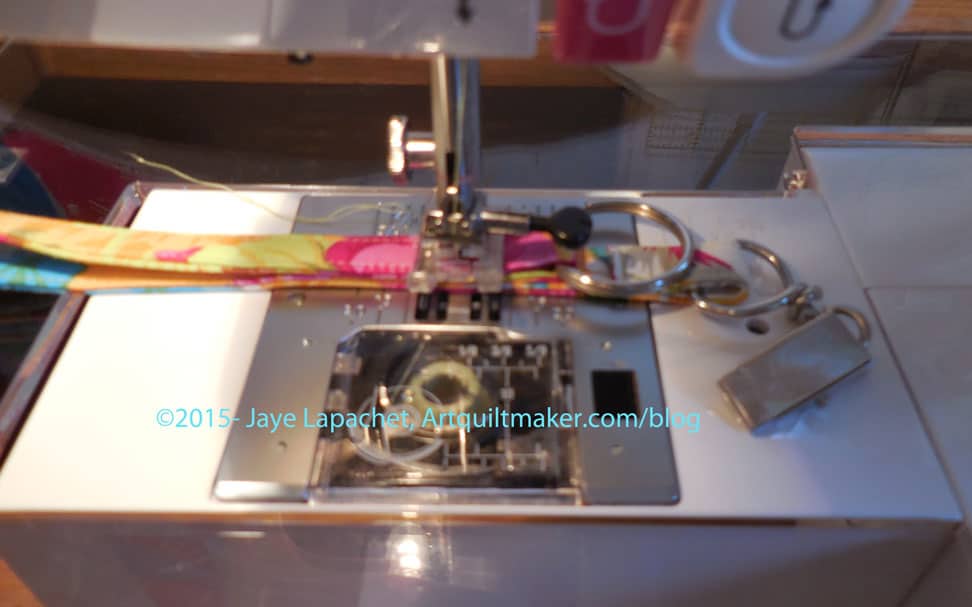
7. Topstitch around the whole strip using a matching thread. Of course, you can use whatever color you want, so do that. Make the piece interesting.
Topstitching encloses the whole strip so there are no raw edges visible.
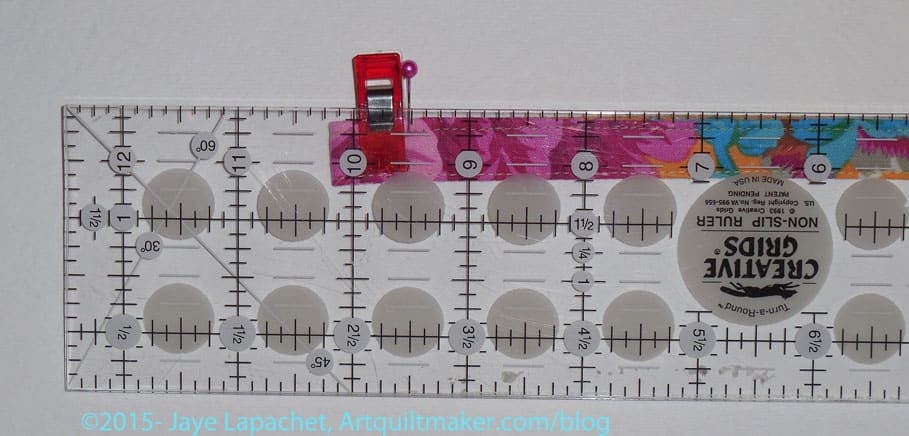
Mark with a pin
8. Mark 9.5″ up from the end with a pin. This will be your sewing line, which will create the lace to clip your name tag.
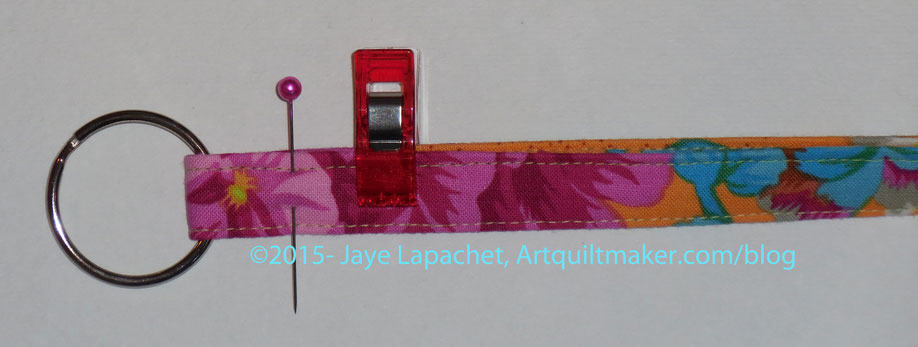
Fold at 10.25″
9. Fold that same end at 10.25″ and insert a ring or D Ring.
Clip to hold ends together
10. Clip piece with a WonderClip to keep everything together while you sew.
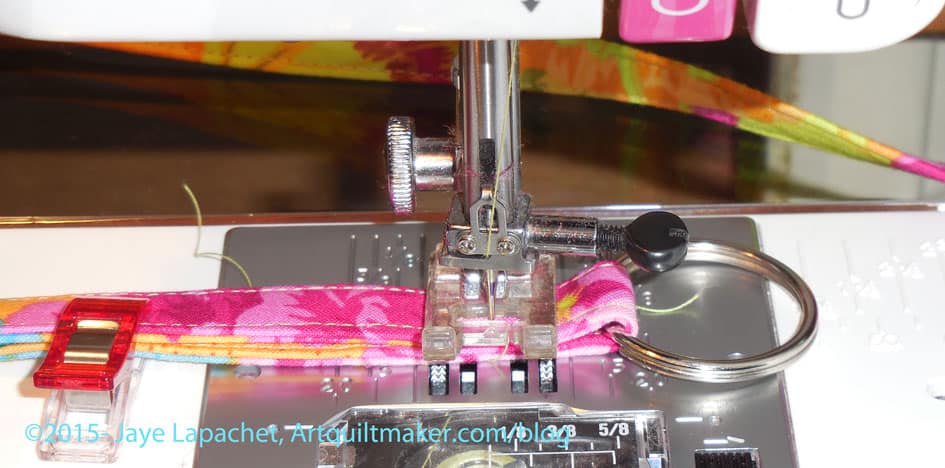
Sew on marked line
11. Sew on your marked line. I sew between the top stitched lines. The ring will need to face out so you can clip your name tag on to it and it will not be covered by the lanyard.
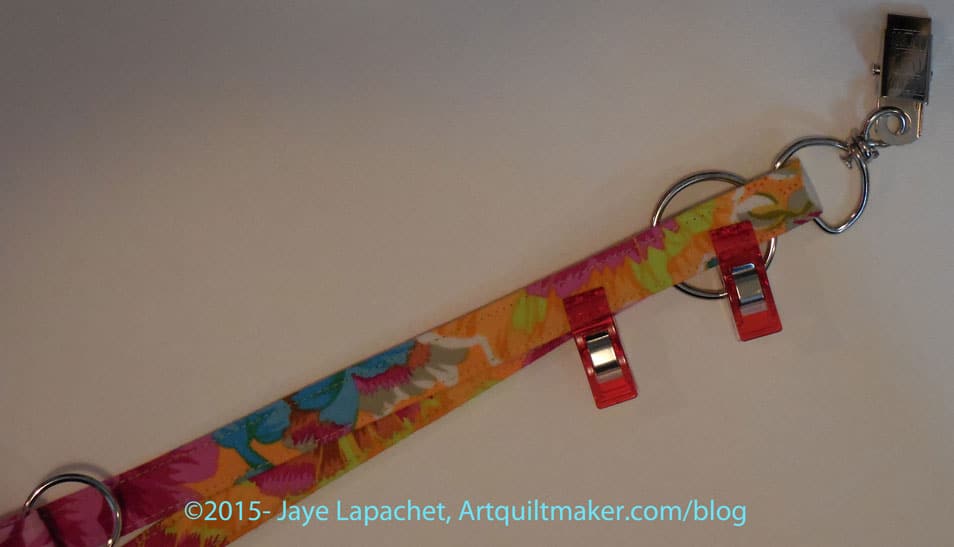
Fold ends up 1″Make sure hardware is on the same side as upper ring
12. Fold each end up 1″. Make sure that the fold on the same side as the upper ring is to the back.
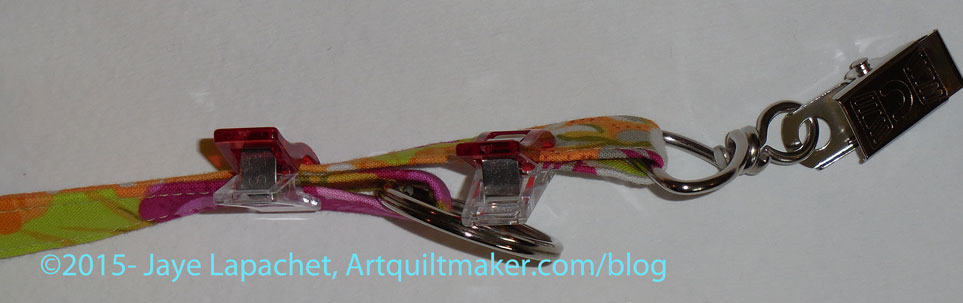
Add hardwareAdd hardware and clip ends
13. Add a circle ring to one end and clip with a WonderClip.
Clip end to prep for sewing
14. Add the metal hanging clip to the other end and clip with a WonderClip.
15. Adjust the ends so the circle ring does not clank against the hanging metal clip when you wear it. If it does it will drive you crazy. If it doesn’t bother you, it will drive someone with auditory sensitivity crazy. I always adjust the hanging metal clip to be the longer end.
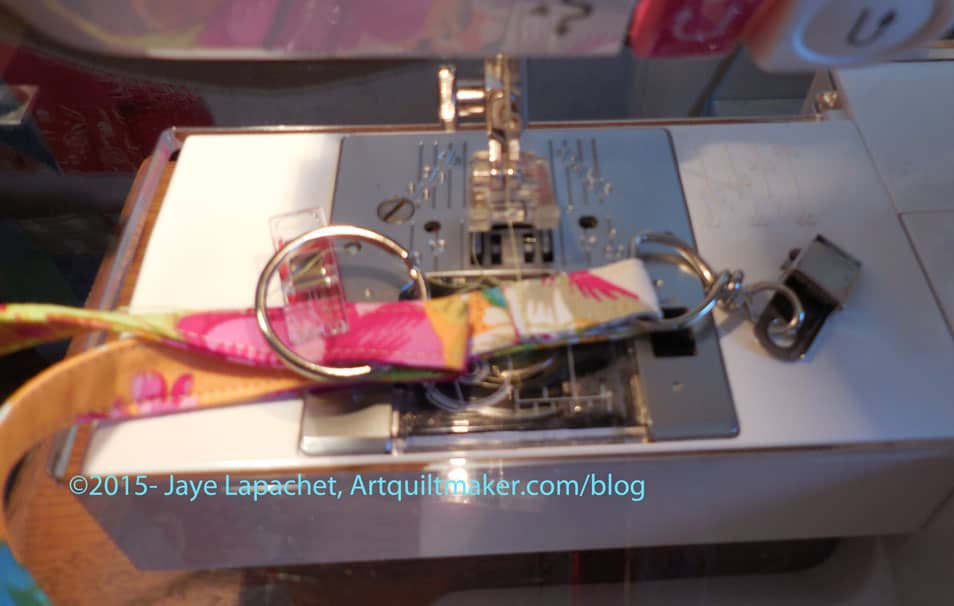
Sew First End Together
16. Sew the end of the hanging metal clip closed. Bury or clip threads.
Sew Layers TogetherSew Layers Together
17. Now, carefully sew all the rest of the layers together. I sew the end with the ring using a square stitch pattern to reinforce all the layers of the lanyard.
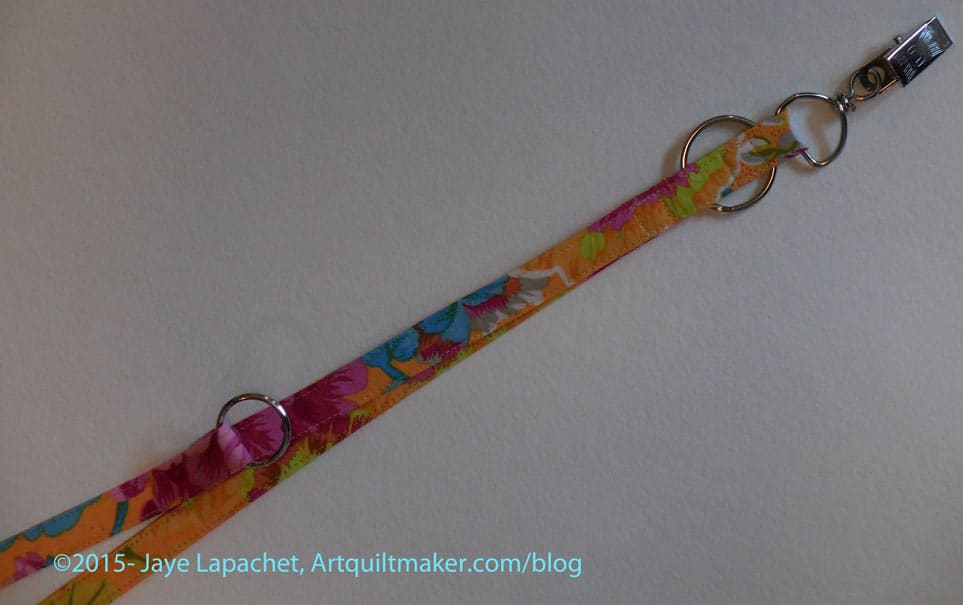
Finished Lanyard detail
Clip your nametag on, hang your pouch and you are ready to rock.
Wash fabric AKA The Great Unwashed-I washed more loads in June and July. I keep having projects for which I need certain pieces of fabric, so I keep washing.
Anna Maria Horner Multi-tasker tote (gift-due Holiday 2013- sigh. Missed 2014 deadline as well)
Cut out 3 notepad covers for gifts
Finish cutting out Day in the Park backpack variation
Finish cutting out 3rd Petrillo bag
Sew Bon Appetit apron
Fix button on DH’s California shirt
Christmas pillowcases
Art supplies Sew Together Bag
Art supplies pincushion
Purple Sew Together Bag
Purple pincushion
To see the 26 Projects Lists, which list quilt WIPS, visit the July 26 Projects update. May’s To Do List has a couple of changes, which is heartening.
All small items, prior to those completed in December 2014, have been completed since November 4, 2013. This is a new list for 2015. You can find the list for 2014 and previous on the last post.
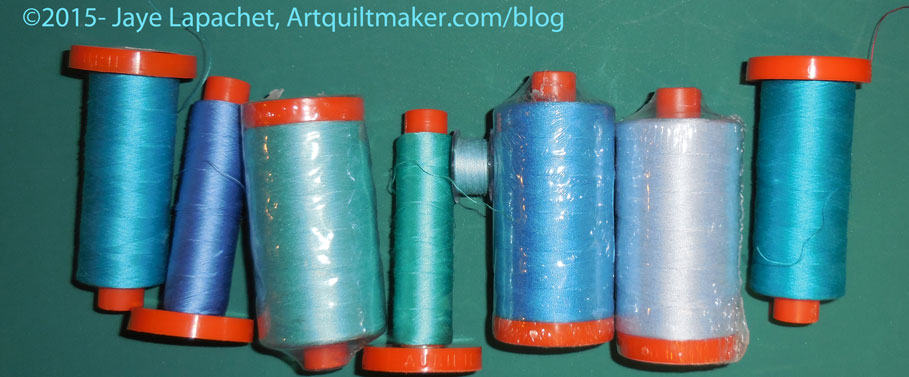
The other day I wrote about the Fine Spring Day journal cover. The day I made it was a day of changing thread colors and that project was no different. I wanted to find a certain blue.
I store my Aurifil in a plastic zipper bag. I know. I know. Not elegant. I am going to get a candy jar soon. I just haven’t done it yet. At some point I separated out the bobbins and put them in a cool box, but the spools are still in the in the plastic bag.
I pulled out the bobbin I wanted and then looked for the spool.
And looked.
And looked.
No joy
The Blues
I finally pulled out almost all of my blues (sans navies and dark blues) and still couldn’t’ find it.
I couldn’t find it. It never showed up. How is it possible to have a bobbin and no spool. I don’t understand it. I guess it could be with some project.
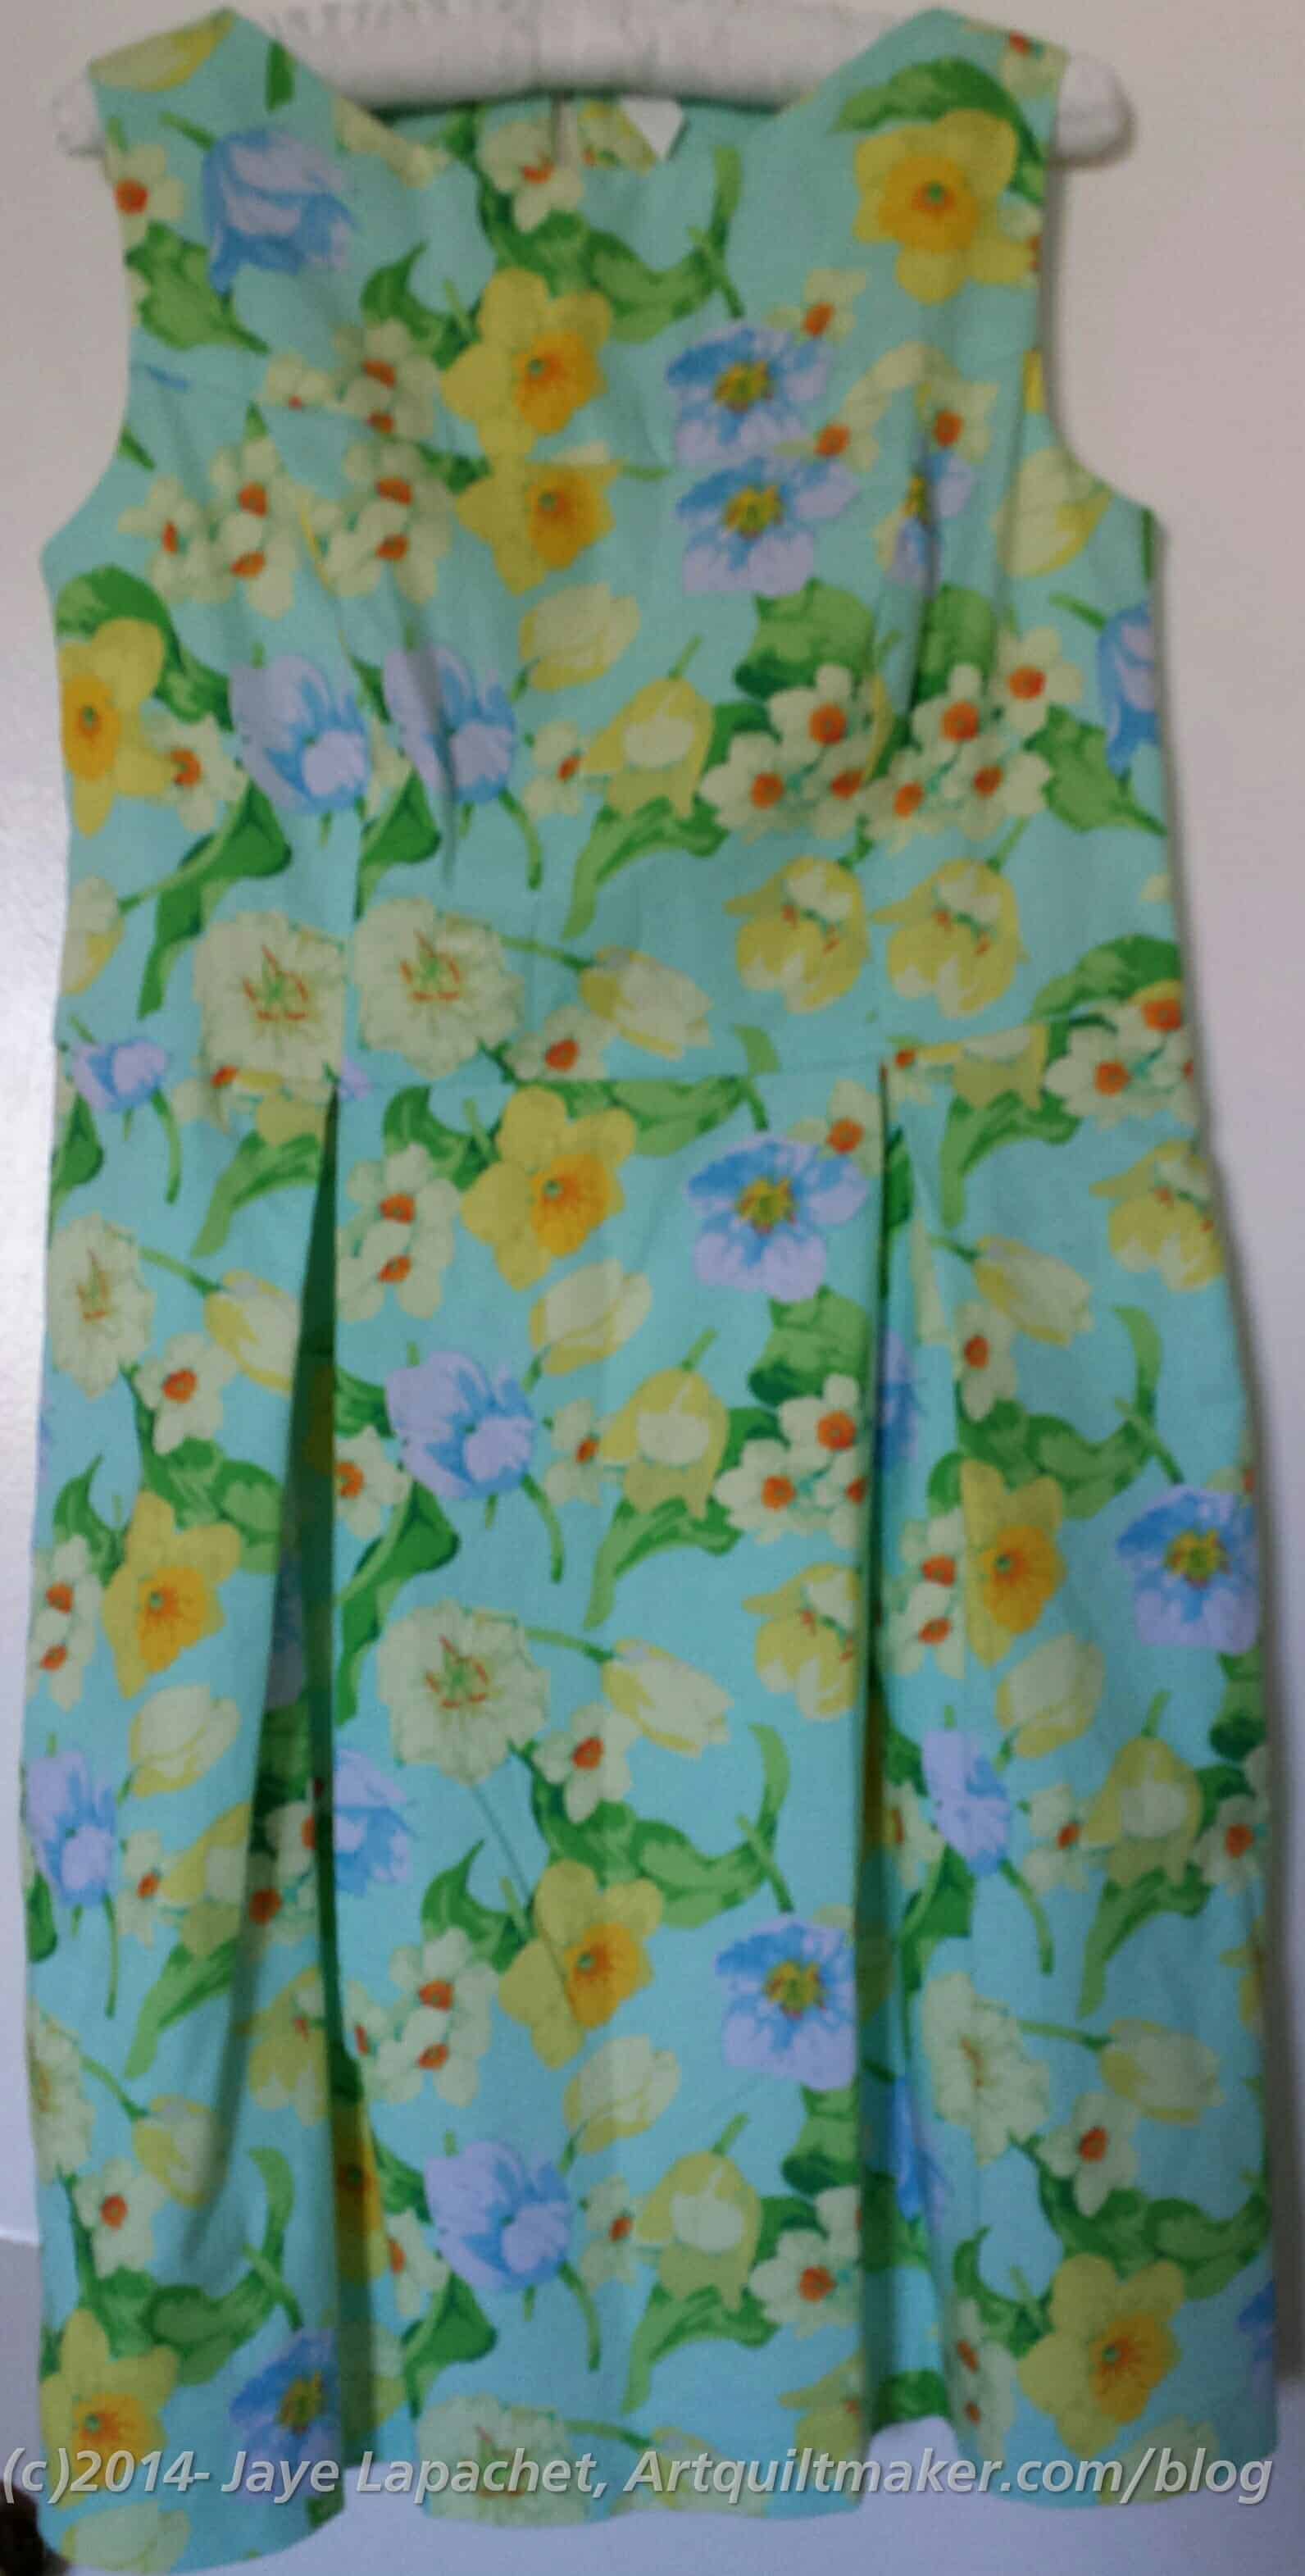
After writing about the Fine Spring Day Journal cover, I went back and looked for a post about the dress made from the same fabric. No joy. I only found my post about the pattern. I thought I would close the loop and show you the dresses.
In the interests of full disclosure, I did not make these dresses. I found a wonderful woman near my old office who not only can follow a pattern, but who is also able to take apart a garment and make a pattern from it. She has also altered a lot of my clothes as I have lost weight.
Fine Spring Day Dress
I went to her to make these dresses, because I wasn’t prepared to do the work myself. These dresses have to fit and I have to look awesome, because, like a rock star, everyone wants to photograph DH and me. Also,, I didn’t think it could possibly be true, but found out that people were keeping track of my clothes. Life in the fast lane is such an adventure.
Anyway, this dress made a sensation. I wore it to the Ladies Lunch at Grand Parlor and I looked really different than everyone else there. The awesome thing about this dress is that I felt great. The style suited me. I really liked the fabric even though it was a bold choice and way out of my normal comfort zone. I felt confident and like I looked good.
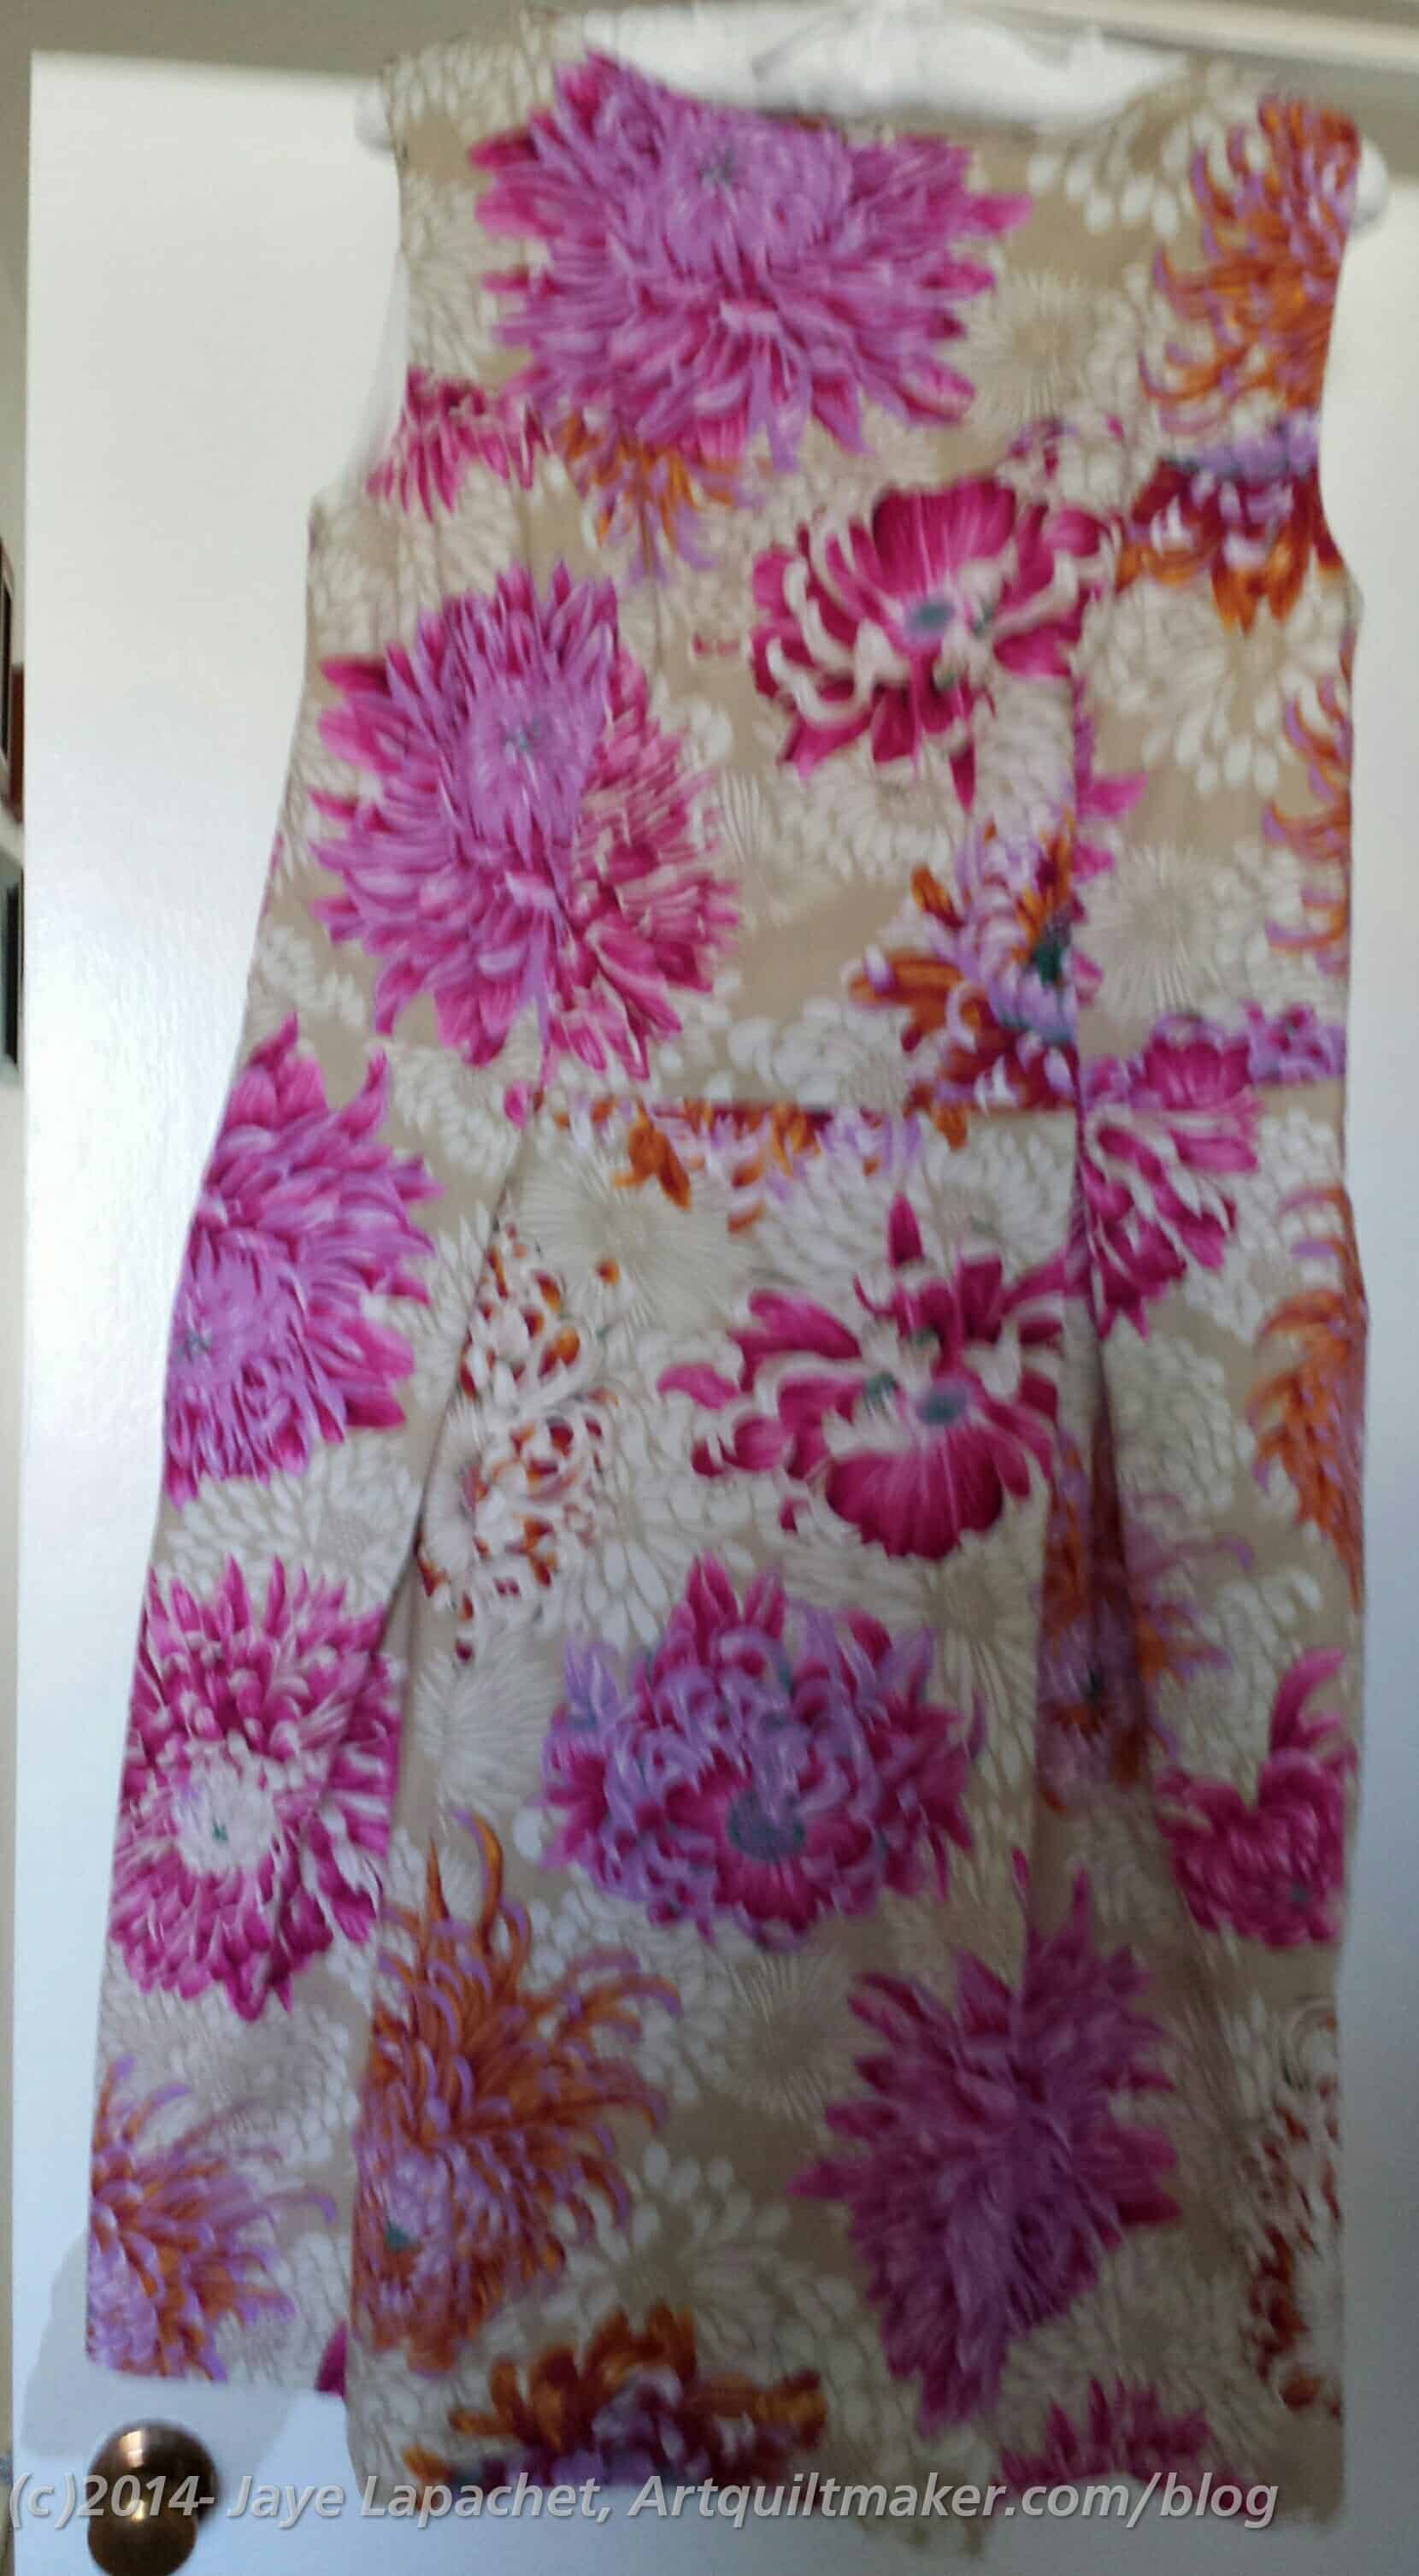
Chrysanthemum Dress
I kind of waited until the last minute to get these dresses made. I thought I would find something at a store, but I didn’t and went back to my original plan to get new dresses made. Yvonne worked like a champ and was able to finish two.
The second dress was the test dress. I purchased the fabric, because I love my pal Phil (Philip Jacobs) and this was a different choice for me for the back of the quilt. For a dress? CRAZY! I don’t think I have ever EVER worn a dress this color. Without the fuchsia flowers, there is no way I would have worn this dress.
Again, I had the right shoes and I felt great.
I have to find the right times to wear these dresses again. They are so memorable that people will remember them. I’ll have to pick the right event. When I need confidence, I will wear them.
The Rainbow Room serves full Sunday brunch each week on its rooftop in Midtown, Manhattan.
dressing room
Reading Room
common room
locker room
No Room In Frame by Death Cab for Cutie
workroom
craft room
wiggle room
exam room
press room
screening room
operating room
rumpus room
waiting room
room spray
laundry room
room and board
bathroom
roommate
dining room
Room by Emma Donoghue
chat room
Tonga Room and Hurricane Bar: A tiki bar established in 1945 in the Fairmont Hotel, serving tropical drinks and Pacific Rim Asian cuisine
Starlight Room is located in Union Square near San Francisco, atop the Sir Francis Drake hotel with views of the city.
rented room
the Room: Android app
The Upper Room is a global ministry dedicated to supporting the spiritual formation of Christians seeking to know and experience God more fully.
boiler room
living room
Post the direct URL (link) where your drawing, doodle, artwork is posted (e.g. your blog, Flickr) in the comments area of this post. I would really like to keep all the artwork together and provide a way for others to see your work and get familiar with your blog or website.
The Creative Prompt Project, also, has a Flickr group, which you can join to post your responses. I created this spot so those of you without blogs and websites would have a place to post your responses.
We are also talking about this on Twitter and Instagram. Use the hashtag #CPP
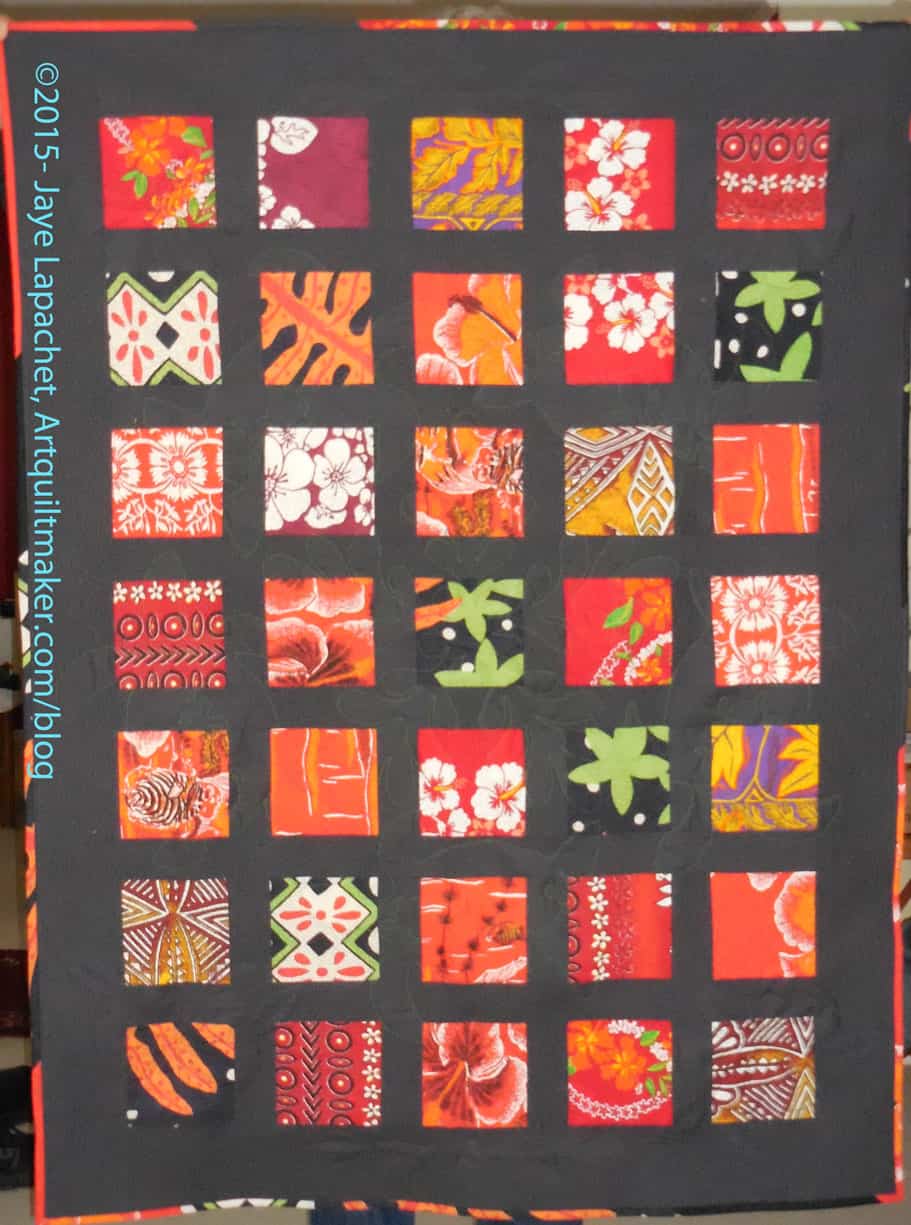
The BAMQG Hawaiian quilts are still in process. Several have been delivered to the family and they were beyond thrilled. The rest are due by the end of August.
A few weeks ago Kelly and I met for lunch. She gave me one that needed to be bound. In the thick of my injury I couldn’t do it right away and it languished. Angela needed to send me the binding, so I didn’t worry. She did and it was time to get to work.
Last weekend was the weekend of little projects: strip for the Food Quilt #2 back strip, journal cover, Stepping Stones blocks, a lanyard, etc. I added the Hawaiian Quilt binding to the list.
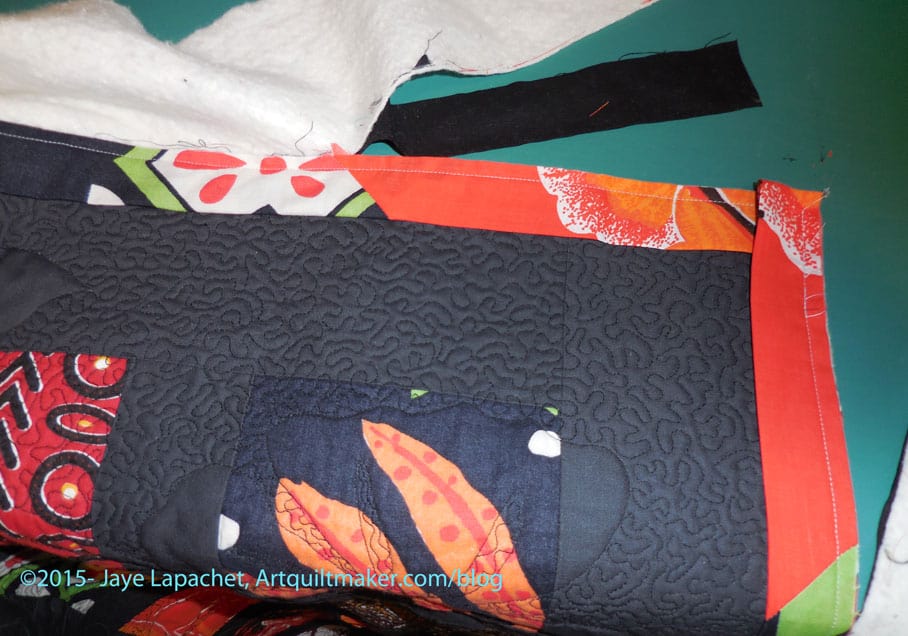
Emboldened by last effort at machine binding, I did a machine binding again as well. Also, with my hand in a brace, hand stitching takes abut 15x as long. Angela and Kelly were fine with the machine binding so I was off.
I did a much simpler machine binding this time. I just used a straight stitch on the back rather than a decorative stitch. The stitching shows on the binding, but isn’t obvious on the front, which is great.
Trimming for binding
The quilt came to me untrimmed, so I put the binding on and then trimmed. I used my regular Aurifil #2600 piecing thread to sew the binding on the front. It did not blend, but would be covered once the binding was flipped so I didn’t worry.
It occurs to me now that I could have trimmed, put the binding on the back and then flipped the binding to the front. I might try that next time just to see how it looks.
Hawaiian Quilt Back
These are very bright and cheerful quilts. I am really pleased to be able to help the guild work on them.
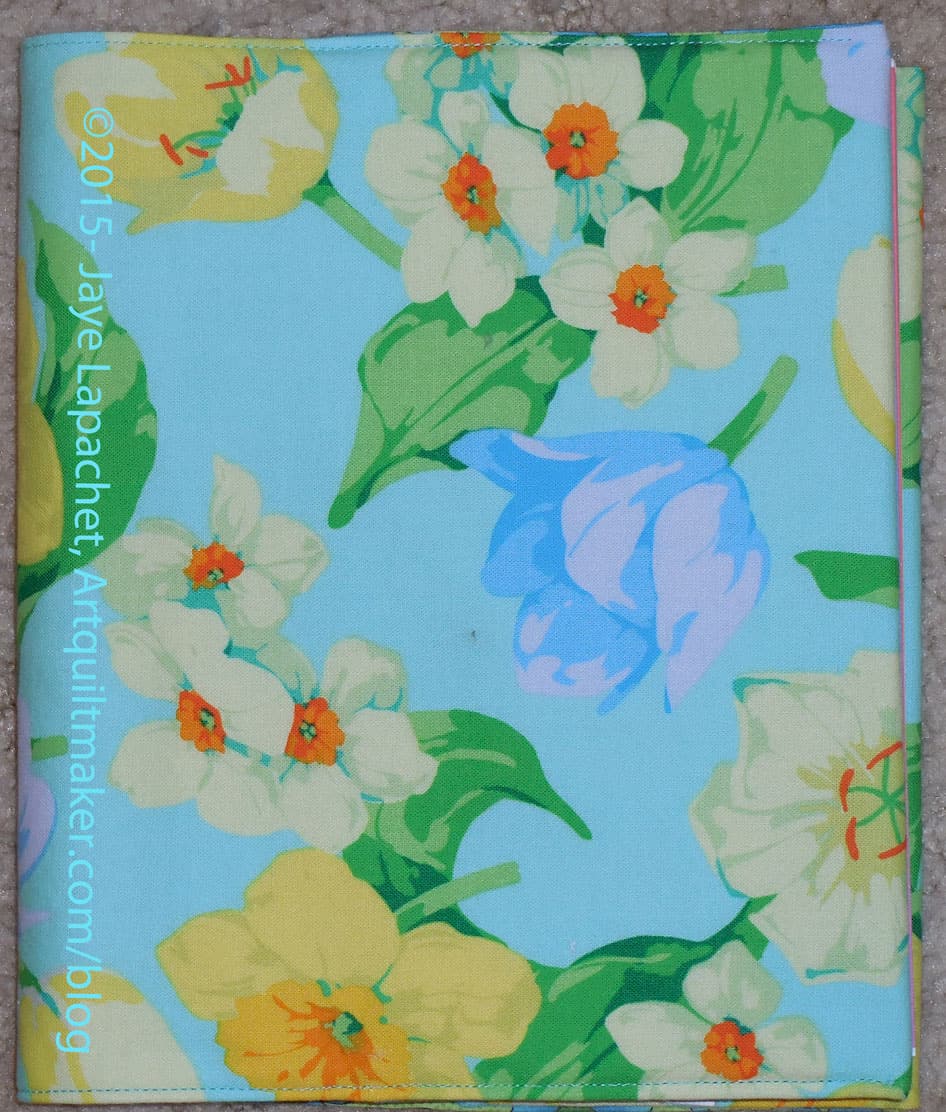
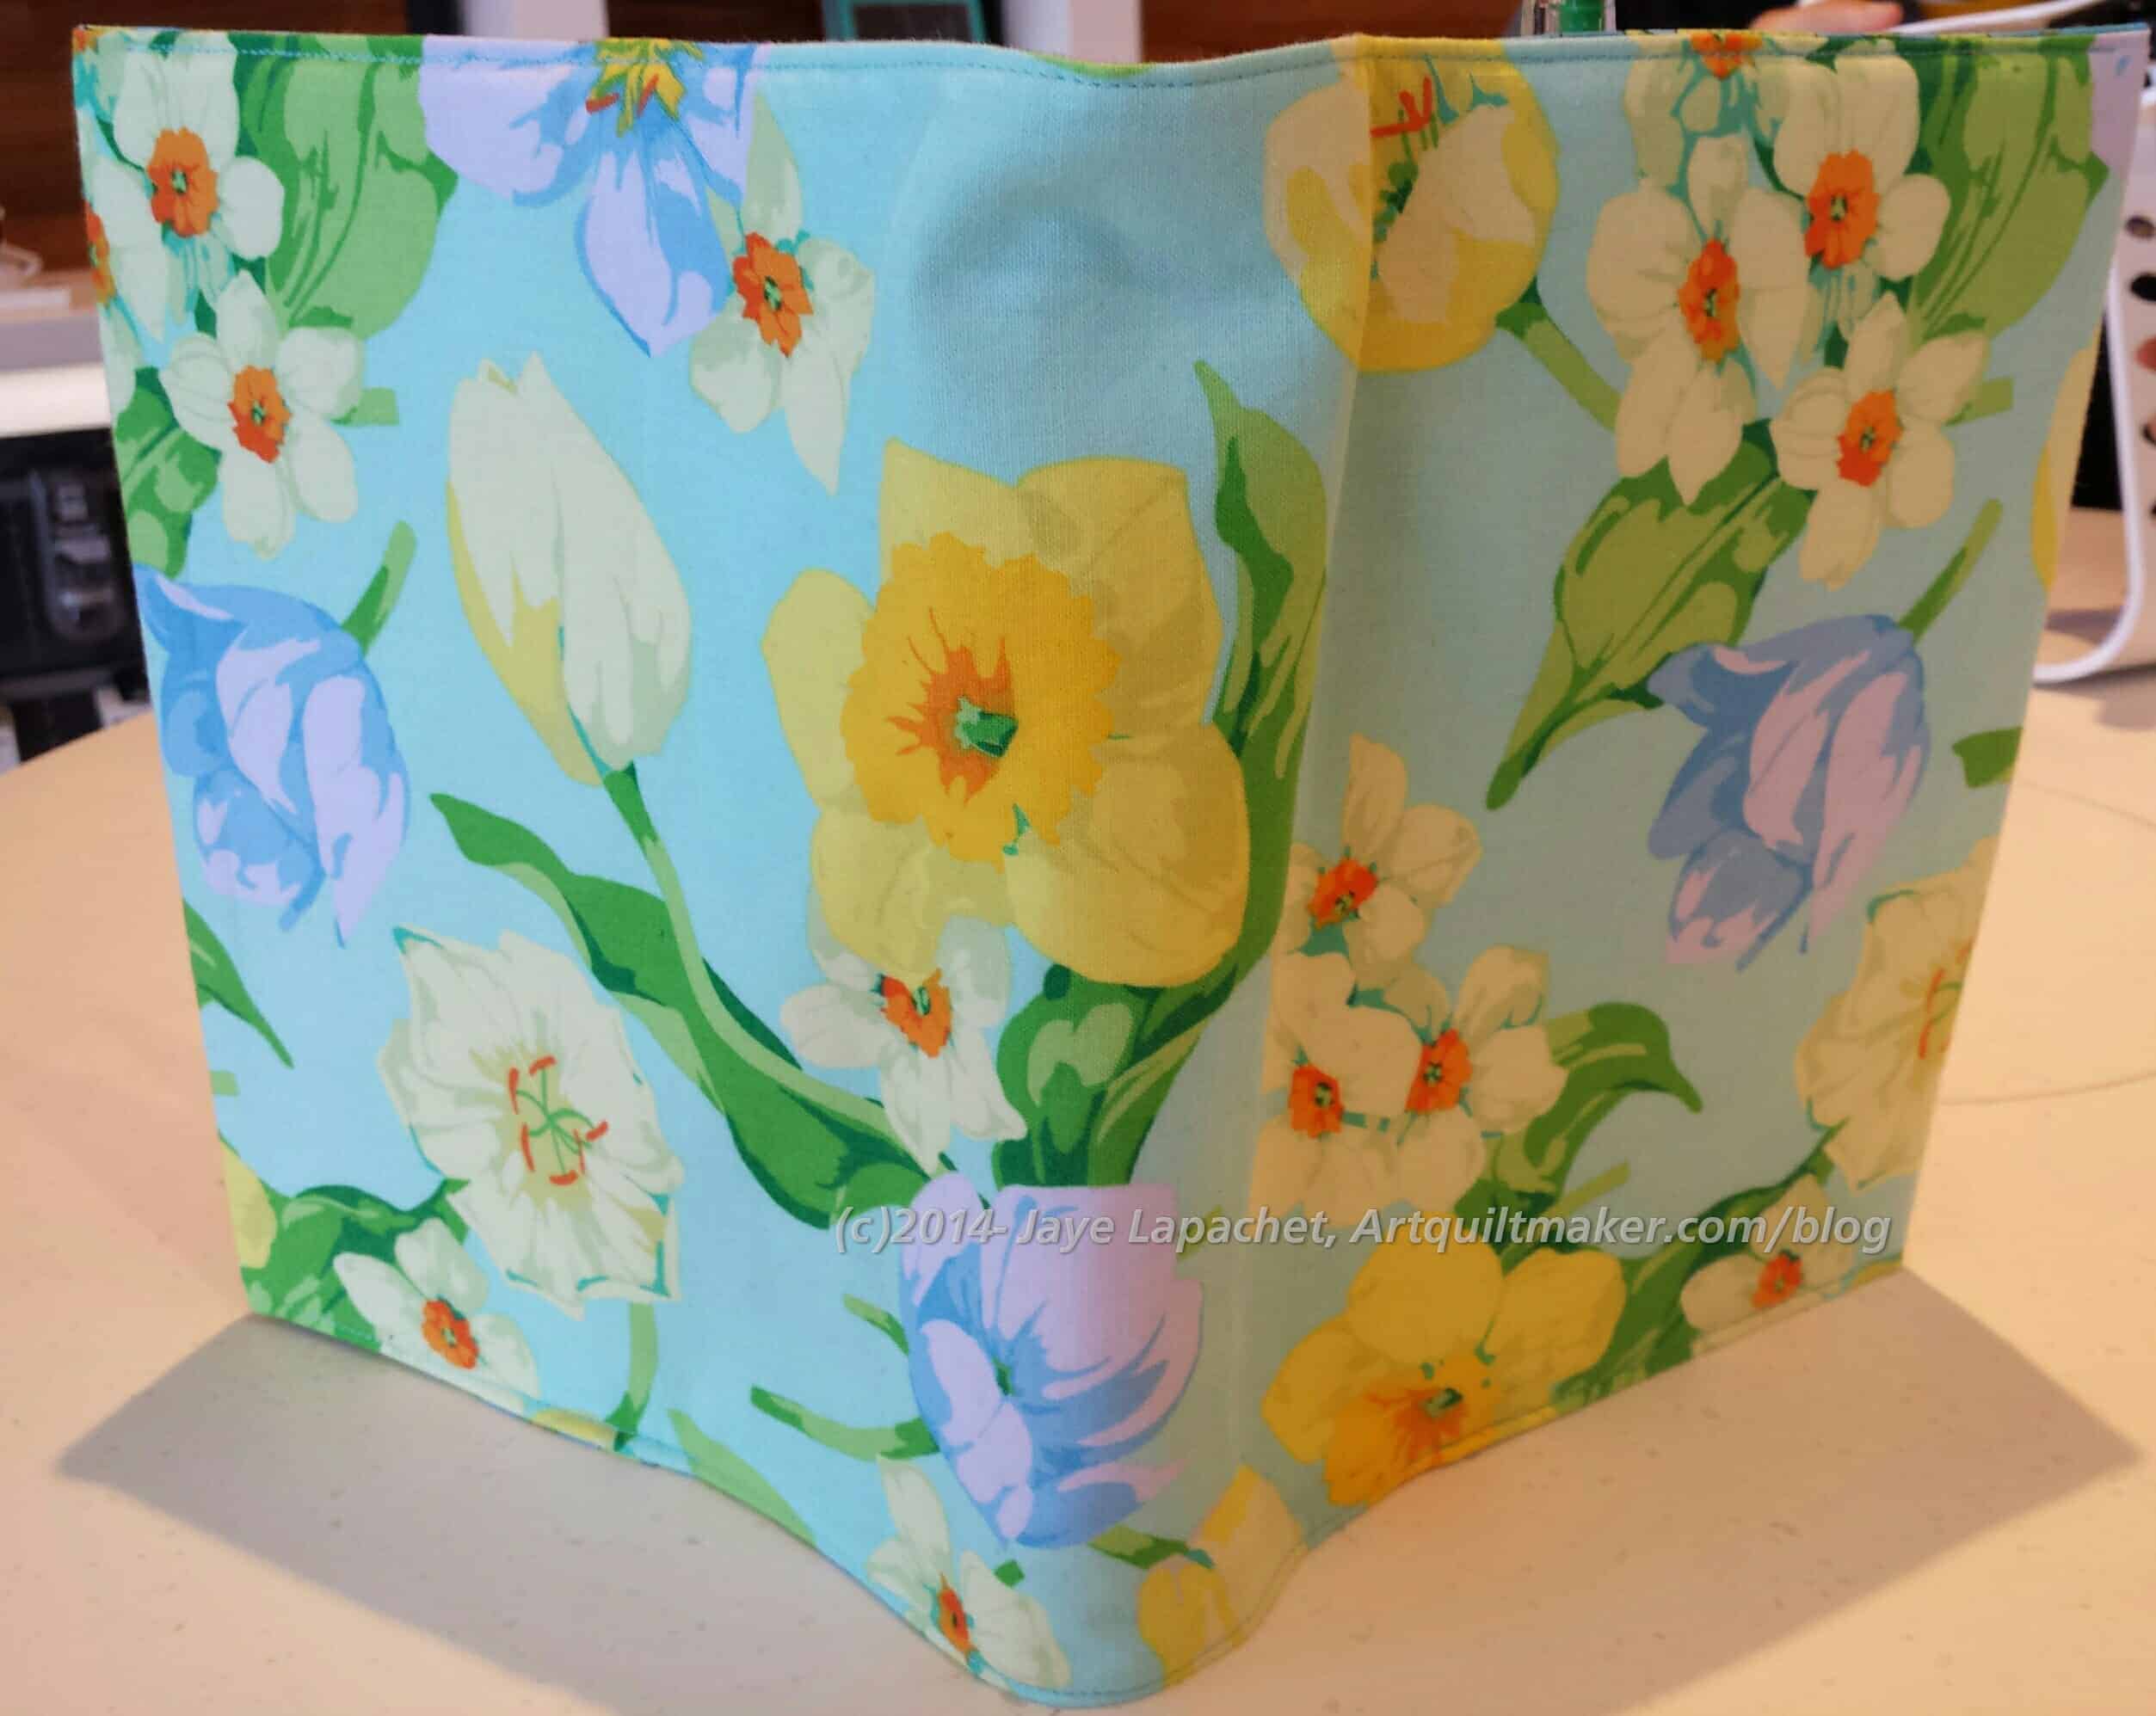
Once again it was time for a new journal cover. Sadly, I finished the journal with the Orange Crush Journal cover. So, over the weekend I sat down and made a quick new cover.
Quick means one piece of fabric and little piecing.
I chose to use the Martha Negley fabric I used for one of the Grand Parlor dresses. I had a bit leftover and it is such pretty fabric that I thought I wouldn’t mind carrying it around for a couple of months. I also thought that it would be a good break between pieced journal covers. I loved Loved LOVED the Orange Crush journal cover so much that I am not yet sure another journal can live up to the wonderfulness.
Using the tutorial I posted some time ago, this journal cover didn’t take long at all. The most time consuming part was piecing the inside. I used an old Pat Sloan fabric that was just a wee bit too small so I added a piece, which still didn’t make it large enough, so I added another. And so on for a frustrating half hour.
Fine Spring Day Journal cover – open
Eventually I succeeded and the journal cover came out fine.
You may be wondering what happened to the pink journal cover I started? Yeah, me, too. 😉 I knew it was close to done so I looked everywhere for it. No joy. It will turn up and there will always be a need for a new journal cover.
I visited Britex a few weeks ago to check out their purse and bag hardware. Definitely awesome and definitely expensive. I bought a couple of things, but not much and still spent a small fortune.
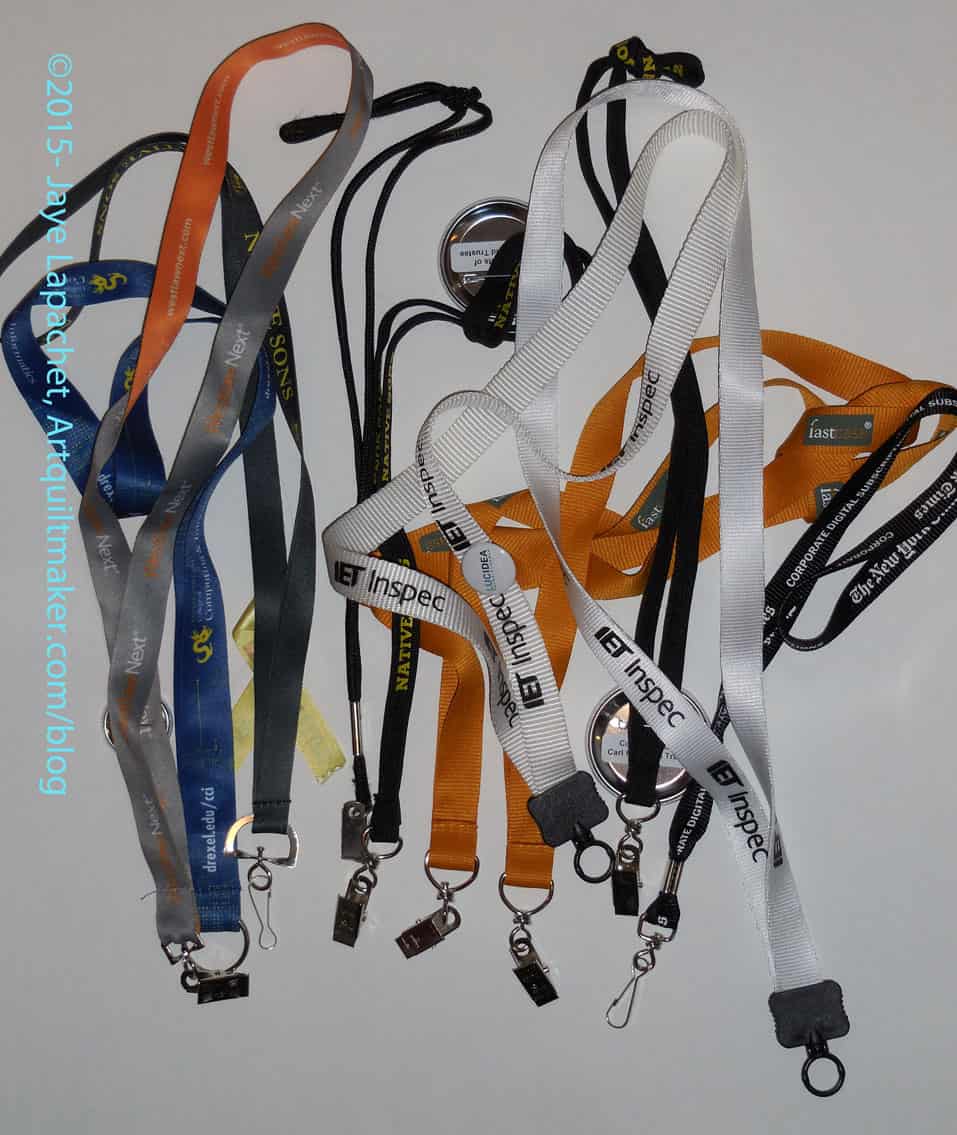
Time passes. Conference and annual meetings happen. I come home and hang my lanyards on the back of my closet door “until I figure out what to do with them.” At the meeting I attended last week, I saw some lanyards laying on the table of a vendor hospitality booth. My closet door flashed in my mind and I had a brainwave. I scooped up as many of the lanyards as I felt comfortable taking and put them in my bag.
When I returned, I took all of them off of the door, removed the nametag portion and set to work.
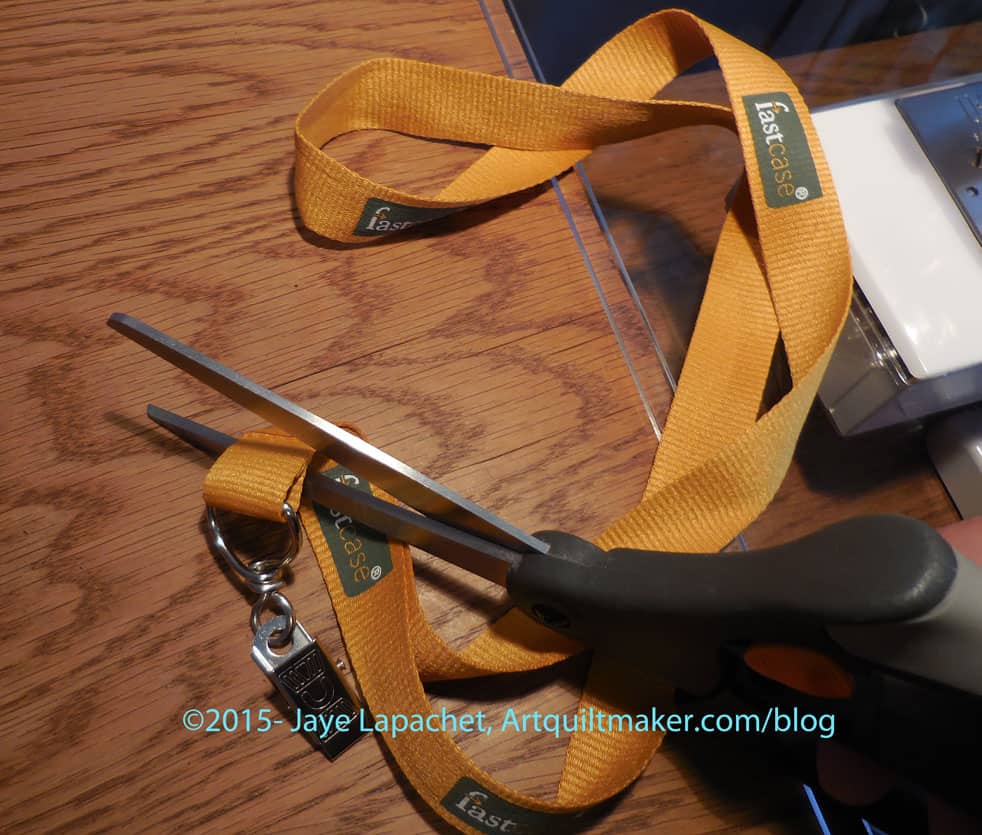
Conference LanyardsCut off lanyards
I only wanted to keep the metal hardware, so I cut off the ribbons, because I didn’t want to sew over them, I wanted to use my own fabric. I felt like a scavenger, but I was just going to toss them anyway, so I fought down the feeling.
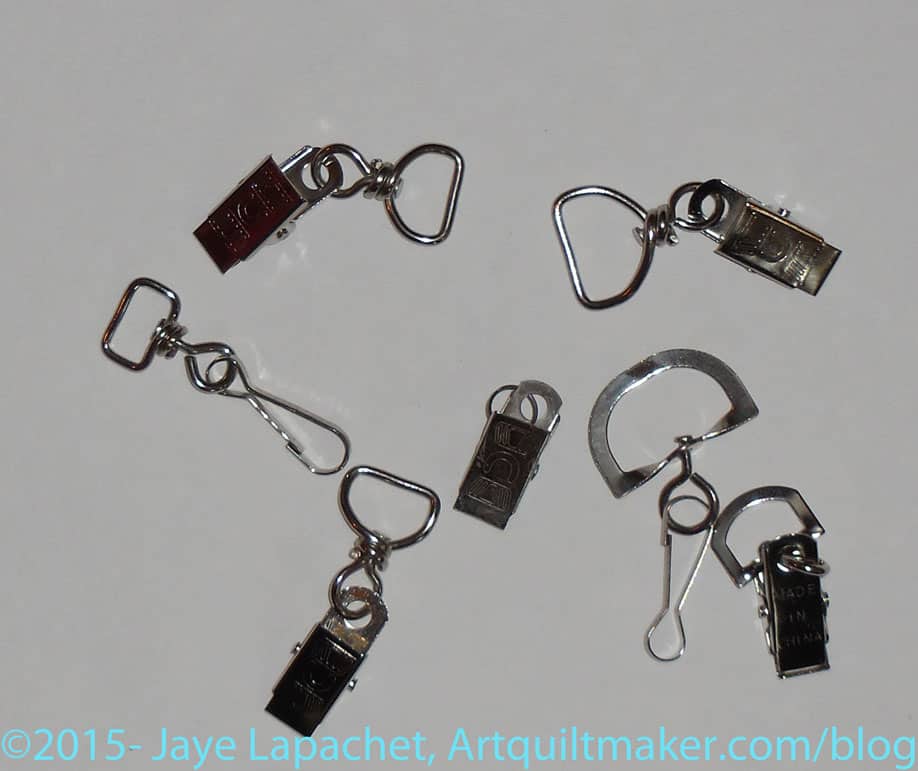
Salvaged Parts
I wasn’t able to salvage everything, but I salvaged several parts and pieces.
Notice the different shapes and sizes used for the D Ring (or equivalent) parts.
These aren’t the greatest pieces since sliced bread, but for lanyards, they will work fine, I think.
I also was able to save some circle rings, which are not shown and will be useful, I am sure.
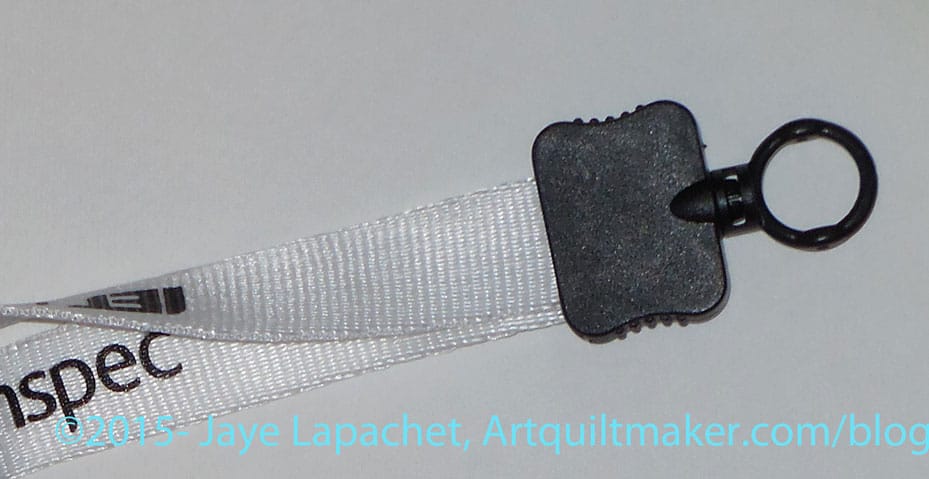
Plastic ring
I was not able to save the plastic loops. I didn’t want to toss them, thinking I might have another brainwave and figure out how to use them, such as covering the existing fabric with better fabric and quilting over it.
Next I set aside what I wanted and put the rest of the hardware into the tin I use to store all of my hardware. I set to work making a test lanyard. I am pleased with how the lanyard came out, especially since I didn’t buy hardware. I am not sure it is perfect for me and I may make another, which makes me even happier than I used salvaged hardware.