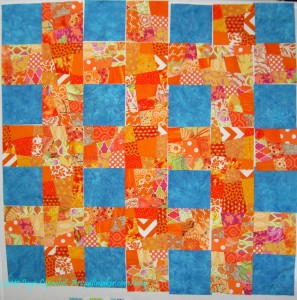
From Zeus, Athena

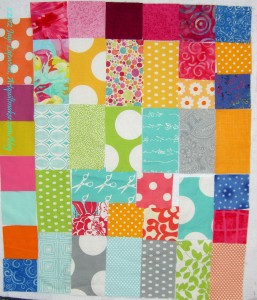
Wonky 9 Patch - Full, unsewn
Wonky 9 Patch – Full, unsewn

I do not believe in the concept of Quilt in a Day. I love Eleanor Burns, I love various quick techniques and the rotary cutter, but I simply do not believe I can make a well designed quilt with great piecing and wonderful quilting in a day.It is not possible for me.

I do believe I can get a lot done in one day, though, and this quilt is proof.

Short story: the top is finished except for the quilting border; back is nearly finished. I do not want this project to linger. I want to finish the back and get it to the quilter. I want to be done with my part before the weekend. We will see. I don’t want it to become an albatross.
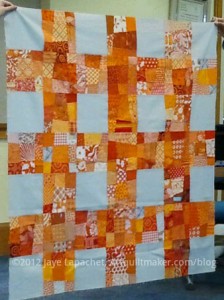
Kathleen's Wonky 9 Patch
Kathleen’s Wonky 9 Patch

Inspiration is a funny thing. You never know when it will strike or what will spur it on. The combination of Kathleen’s quilt, the Pinterest photo and the oranges that I bought some weeks ago from the quilt shop From Here to Quilternity all coalesced into one big blob of inspiration and I sewed.

And inspiration breeds inspiration.

Susan, of the History Quilter podcast commented on Twitter (yes, I am there, too. You can follow me – @artquiltmaker) that the orange part of the quilt looked like mosaics. As you know, I love mosaics and tile and try to take inspiration from them where I can. Susan is absolutely right and her comment has been on my mind all day.

  • what would a quilt look like if I did the same idea, but made the blocks and, thus, the pieces smaller?
  • how would this design look with no plain blocks?
  • is this a great way to explore monochromatic color schemes?
  • etc.

My mind is whirling with possibilities. Simply whirling. If I had more time, I would explore all of these possibilities. Perhaps someday.


Long story: I really got a bug in my ear on Thursday night. I happened to look at a Pinterest photo (above, the door and the orange textiles) I had pinned some weeks ago and that photo, along with Kathleen‘s quilt made got me started.

Did I need another project? No.

Did I care? Obviously not. The muse must be satisfied.
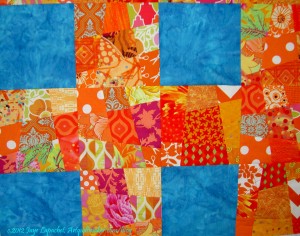
Wonky 9 Patch - detail
Wonky 9 Patch – detail

I spent Friday late afternoon and evening cutting 9.5″ squares from the fat quarter group from the From Here to Quilternity quilt shop. I had to press and cut other pieces according to my ‘new fabric regime’, but it went well. The next day I began sewing.

Kathleen had done a demo for making these blocks and she reminded me that this is an Oh! Fransson pattern. I had forgotten.

When I looked at the pattern, I knew exactly what to do. I referred to it for sizes, but I also just went my own way. I have done this kind of piecing before with the Slash Stars. The thing that makes this quilt, IMO is the setting. Brilliant.

I also, like Kathleen, made the quilt a bit bigger. It has to be wrapped around a boy, so it needed to be bigger. If I had had more of the blue fabric, I would have added two more rows to the bottom, but I didn’t.
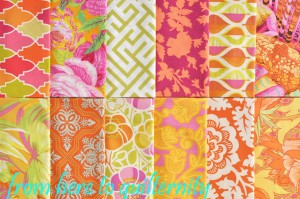
Fresh Squeezed FQ Pack

The only tiny quibble I have with the pattern (perhaps it is just a tutorial?) is the movement of the pieces. You can’t just move one piece each time. You need to move 2 at one point, three at another. I think this needs to be a bit clearer, BUT I should also read the directions all the way through before starting a project. 😉 I looked at my pieces and moved them according to what I thought was best, so it worked out.

I am pretty pleased with my blue plain squares. This sort of blue was my plan all along. I had planned to buy a solid, but didn’t have a Kona color card and wanted to make sure I had the right color. Blah. Blah. Blah.

On a whim, I delved into the fabric closet and came up with the blue fabric above, which is an old commercial hand dye. It is probably a Hoffman, but I don’t know for sure. I love it because it complements the orange perfectly. I like Kathleen’s grey background (the photo above does not do it justice); I am not so fond of the white (I know, Modern quilt blasphemy) in EH’s version. Then again, I am a color girl, someone in love with color, so I didn’t expect anything less.

Now I am in love with orange and blue. Stay tuned for the ramifications. 😉

The title of this post has to do with how Athena was born. Zeus got a massive headache and then Athena sprang, fully formed, from his forehead. Can’t imagine the scar. 😉 That is how I feel about this quilt. I didn’t do much of the work – EH designed the quilt, Kathleen made it and showed it at a guild meeting; I took up the baton and ran with the idea.

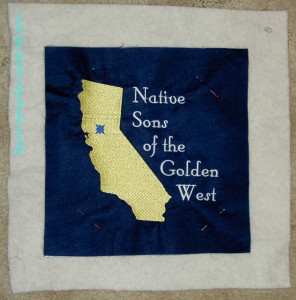
Pillow Top Tutorial

Since the NSGW pillows for 2012 went so well, I thought I would do a little tutorial. Remember, my SIL suggested I do it this way, so I am just passing on her information.

Supplies:

  • basic quilting/sewing kit
  • batting the size of the finished pillow top (leftovers, Frankenbatting are fine)
  • pillow form
  • fabric
  • fabric panel or embroidered panel or fussy cut element from fabric
  • square ruler the size or larger than your pillow

Tips, Tricks, Notes:

Please note that I am really only showing you how to make the pillow top. You can finish it anyway you want. I finish it with the envelope style of closure. I will briefly describe how to do that and, if I can find them, give a few links.

If you know how to foundation piece, you can do this. It is the same principle.

If you are not making a block that lends itself to foundation type piecing, you can make your block the normal way and then quilt it to get the same effect.

Instructions:

Cut strips of fabric the color(s) of your choice. Right now just worry about the width of the strips. You won’t need them any longer than 14″, but keep them as long as possible until a bit later.

Cut the batting to the size of your pillow form. I usually use a 14×14″ pillow form. I cut the batting/foundation half to a quarter inch smaller so that the form fills out the pillow cover well.

Cut a piece of fabric slightly larger than the batting. It will be used as a backing. It can be ugly fabric, if you want. Nobody will see it.

Fabric on batting foundation

Lay your fabric back (ugly fabric)face down on your work surface.

Lay the batting on top.

Lay your panel or fussy cut fabric or embroidery panel over the batting. Center it, if you would like a symmetrical piece. Put it at an angle if you want more movement and don’t mind some bias edges.

Pin panel to batting to hold it steady.

Now you are ready to sew.

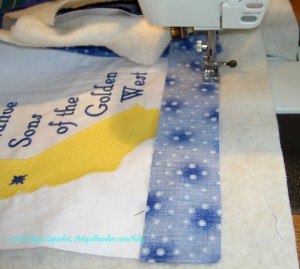
Sew strips using batting foundation

Lay a strips of fabric face down on the center panel even with the edge.

Trim the length of the strip to the length of the fabric panel. If you leave them too long, you will be tempted to sew to the end and it will eventually make the edges bulky.

Sew using a quarter inch seam. Really you can use any seam allowance that will stand the pressure of the pillow form trying to explode out.

Sew strips until the batting is covered. If you want a scrappier look, use thinner strips. If you want the project finished fast, use a few thick strips.

Square up pillow top

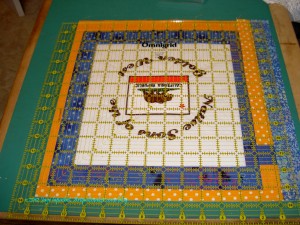
Once you have covered the batting with fabric, take your large square ruler and square up the pillow top to the desired size. I trim my pillow top about a quarter to half an inch smaller than the pillow form, so that the form fits snugly.

Now you are ready to make the back. Make the back anyway you like. I use the envelope method, which I will describe below. There are a multitude of books describing different ways of putting together pillows. Pick your favorite and do that.

Cut 2 pieces of fabric per pillow. The fabric should be the same size as the pillow form in one direction and about 3/4s of the size of the pillow form in the other direction.

For my 14″ pillow form, I cut pieces that are: 10″x14.”

If you have a 16″ pillow form, you may want to cut them 12″x16″, etc

Where possible I use a selvedge as the edge so I don’t have to hem. This works well with batiks as the selvedge is usually the same color as the fabric.

Hem raw edges. I use a decorative stitch.

Lay pillow top face up on your cutting table or workspace.

Lay both pieces of back face down on top of the pillow top. If you care which piece will end up on the top of the back, put that piece on the bottom.

Align edges of back and pillow top so they match.

Pin backs to pillow top.

Sew around the entire edge of the pillow top. Sew back and forth over the spot where the hem of the pieces of the back meet the pillow top. There are four of these sections, which you will have seen when you laid out your pillow top and back. This step is to reinforce the most vulnerable stress points.

Trim threads

Turn your pillow cover right side out.

Carefully poke out the corners with a wooden knitting needle or your favorite tool.

Stuff your pillow form into the pillow cover.

Adjust form so it is evenly distributed.

Congratulations on your completed pillow form!

Block-a-Long #56: Two Rectangles

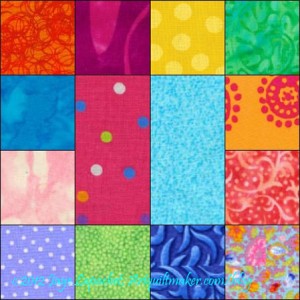
2 Rectangles in a Field of Squares #56

Yes, this has a lot of small squares, but you can do it.

Directions for 2 Rectangles in a Field of Squares #56 are posted.

If you have made blocks or a quilt from these patterns, please post a link in the comments section of the relevant block or on the AQ Block-a-Long Flickr group. I would love to see what you have made.

Nota bene: The AQ Block-a-Long is ending. I am starting to repeat myself and run out of ideas and since this has not been very popular, I don’t feel bad about ending it. I am going to try and make it to #60 so you have an even number with which to work, but we will see.

Sketching #136

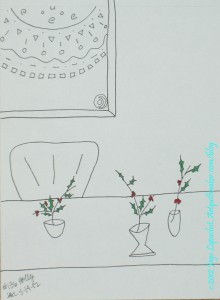
CPP Response #136: Holly

Yes, I am still catching up with prompts I didn’t do. We all go through moods and lack of creativity and response is one of mine. I seem to be back in the saddle, so here is an oldie, but a goodie.

Just spend 5 minutes developing a creative habit. it takes time.

Then, please post the direct URL (link) where your drawing, doodle, artwork is posted (e.g. your blog, Flickr) in the comments area of the original prompt post. Keeping all the artwork together provides a way for others to see the gamut of responses. It is also a great showcase for your work and  way for people to find a link your blog or website.

The Creative Prompt Project, also, has a Flickr group, to which you can join to post your responses. Are you already a member? I created that spot so those of you without blogs or websites would be able to participate as well. Please join and look at all of the great artwork that people have posted.

FOTY 2012 – Mid May

Fabric of the Year 2012 - Mid May

Many of the fabrics in this group are from the back of the Flowering Snowball. I am also diligently pressing and cutting pieces from fabrics that have been washed. The chair on which I hang just washed fabric is no longer falling over. That is a good thing.

There is some Half Moon fabric there, which I need to figure out how to work into a project. No ideas there yet. I have to say that I really came to like that large grey dot and ended up buying a few yards more to use as a background. This, dear readers, is why I do this project. By working with the fabric a little bit, I find out if I like it during a time where I have a chance to get more. I know I am repeating myself, but perhaps one reader will be enlightened. 😉

Fabrics from the most recent A-B-C Challenge blocks are also represented as are fabrics from the NSGW pillows. Kind of like a fabric diary of my recent work, huh?

26 Projects – May Update

Here is the list, again, still in no particular order. This time I have moved the finished pieces off. 23 WIPs left! I had to add two more projects to the list. I can’t believe I forgot about the Stepping Stones. Also, I have a Super Secret project that I did, but it took me such a short time that I don’t know if it really counts.

  1. Original Bullseye: needs border, backing, quilting and binding. Went rummaging through my fabric closet to find this top, because I was fired up to put the border on. I couldn’t find it. It is lost. I know it is in there somewhere. I am also working on my border idea and have definitely decided not to put that particular border on this quilt, if I ever find it, but I am glad I am doing the test.
  2. Corner Store:  106 blocks made, need to cut more foundations with the little bit of Kona Snow fabric I have left. Waiting for more Kona Snow. Need to continue to pin triangles to new foundations, then sew.
  3. Spin Wheel: really not started, but supplies gathered. Cutting fabrics as I go
  4. Infinity blocks: Am starting to think this would make a good nephew quilt.
  5. A-B-C (A-Z) BAMQG Challenge – I am actually not sure if this should be considered a WIP (Please say no!), because I don’t really have enough blocks with which to make anything yet. I am making good progress. I made Q and R blocks and am thinking about putting sashing around all of the blocks and then trimming the sashing a bit so the blocks are all a uniform size. They are not wildly off, but they are a bit off…
  6. Aqua-Red Sampler – steady progress has stopped and the class more than the quilt is really weighing on my mind. As far as I know Frances has nearly finished her Dresden Plate, so perhaps we will start up again soon. The next class was going to be fusible machine applique’, but I haven’t gotten past cutting out the templates. Perhaps I should skip to machine piecing curves?
  7. The Tarts Come to Tea: I haven’t quilted on this since April 2011. I need to work on the quilting. I was making good progress and then got sidetracked.
  8. Garden: used this piece for my beading demo for the 2012 EBHQ Voices in Cloth show (March 17), which means that I added some beads. I started on the machine quilting late in April. Haven’t done anything since I started working on the Flowering Snowball.
  9. Flower Garden: I still find the ‘flowers’ too spiky. I think I need to soften them up a bit.
  10. Moon and Stars: need to finish handquilting. This quilt is not interesting.
  11. Pointillist Palette #4: needs tiny square patches sewn together.
  12. See: needs satin stitching.
  13. Self Portrait
  14. Spiderweb: need to make sure that I have the right number of blocks for the size quilt I want to make. Need to make sure I have the border pattern and start sewing border blocks.
  15. Under the Sea: class project; like the design, but not the colors much.
  16. Flower Sugar Hexagon: sewed more hexagons together. Sewing Y seams is a bit of a chore, so I get tired of doing it after awhile.
  17. Young Man’s t-shirt quilt: have cut up the t-shirts and am in the process of applying fusible.
  18. New: Super Secret Project: top, back and binding made. Ready to go to the quilter. Stayed tuned. ;-)
  19. FOTY 2011: at the quilter, needs binding.
  20. Flowering Snowball: Top and back finished 5/13/2012; ready to go to the quilter
  21. Stepping Stones: at the quilter, made binding, which she will sew on for me and then I need to hand sew.
  22. Food Quilt: sewing binding.
  23. Jelly Roll Race: at the quilter. Needs binding, quilting, sleeve.

Finished or Abandoned projects that were on the list:

  1. Stars for San Bruno #2: Finished! YAY!
  2. Pavers. Finished! YAY!
  3. Kissy Fish: Finished! Yay!
  4. Pineapple: Abandoned; will remake blocks at a later time with more care.
  5.  Stars for San Bruno #3: Finished! YAY!

Creative Prompt #157: Write

Write what you know

writing practice

Palmer method

freelance

comedy writer

wrote code

copy writing

written communications

write me a letter

cursive

write a cover letter

write fiction

write a song

write your own ticket

writing classes

WriterCorps

Definition: (transitive verb) 1. a : to form (as characters or symbols) on a surface with an instrument (as a pen) b : to form (as words) by inscribing the characters or symbols of on a surface c : to spell in writing <words written alike but pronounced differently> d : to cover, fill, or fill in by writing <wrote ten pages> <write a check>; 2 : to set down in writing: as a : draw up, draft <write a will> b (1) : to be the author of : compose <writes poems and essays> (2) : to compose in musical form <write a string quartet> c : to express in literary form <if I could write the beauty of your eyes — Shakespeare> d : to communicate by letter <writes that they are coming> e : to use or exhibit (a specific script, language, or literary form or style) in writing <write Braille> <writes French with ease> f : to write contracts or orders for; especially : underwrite <write life insurance>; 3 : to make a permanent impression of; 4 : to communicate with in writing <we’ll write you when we get there>; 5 : ordain, fate <so be it, it is written — D. C. Peattie>; 6 : to make evident or obvious <guilt written on his face>; 7 : to force, effect, introduce, or remove by writing <write oneself into fame and fortune — Charles Lee>; 8 : to take part in or bring about (something worth recording); 9 a : to introduce (information) into the storage device or medium of a computer b : to transfer (information) from the main memory of a computer to a storage or output device; 10: sell <write a stock option>; (intransitive verb) 1 a : to make significant characters or inscriptions; also : to permit or be adapted to writing b : to form or produce written letters, words, or sentences; 2 : to compose, communicate by, or send a letter; 3 a : to produce a written work b : to compose music.

Make your response simple. It doesn’t need to be a masterpiece. Take 5 minutes. Just respond and create a creative habit. Please post the direct URL (link) where your drawing, doodle, artwork is posted (e.g. your blog, Flickr) in the comments area of this post. I would really like to keep all the artwork together and provide a way for others to see your work and/or your blog, and how your work relates to the other responses.

The Creative Prompt Project has a Flickr group, which you can join to post your responses. Are you already a member? I created that spot so those of you without blogs or websites would have a place to post your responses. Please join and look at all of the great artwork that people have posted.

Nota bene: Daisy Yellow is having an Index Card a Day Challenge in June & July. I think this project fits in well with the Creative Prompt Project and I agree with Tammy that an index card is a great canvas size.

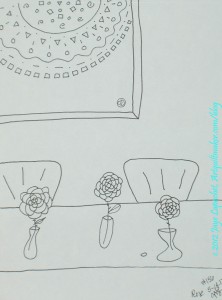
Sketching #156

CPP Response #156: Rose

Lots taking place in the dining room recently. Not sure why. I guess I am obsessed with eating. I am really thrilled that Landscape Lady is participating; she has really re-motivated me. I did 3 prompt responses (still catching up!) on Monday. Check back later for the others. I won’t have my usual drawing time again until June 4, so I’ll have to figure out a way to keep up without that time.

Just spend 5 minutes developing a creative habit. it takes time.

Then, please post the direct URL (link) where your drawing, doodle, artwork is posted (e.g. your blog, Flickr) in the comments area of the original prompt post. Keeping all the artwork together provides a way for others to see the gamut of responses. It is also a great showcase for your work and  way for people to find a link your blog or website.

The Creative Prompt Project, also, has a Flickr group, to which you can join to post your responses. Are you already a member? I created that spot so those of you without blogs or websites would be able to participate as well. Please join and look at all of the great artwork that people have posted.

Corner Store Progress

New Corner Store blocks

I think this project will progress in fits and starts. I made the new blocks (on the right) while I was piecing the Flowering Snowball. I used the Corner Store blocks as leaders and enders. Such a useful, productivity improving technique.

I find that I put the blocks up on the design wall and I become uninspired to make more. Not sure why. I like them; I think the piece works well, is interesting and pretty. As a project I work on steadily, it wasn’t working for me yesterday. However, as leaders and enders in between a different project, I make a lot of blocks. What is that about?

And, the other question is, if I don’t work steadily on the Corner Store, what should I work on? I need some bang for my buck. Can I finish another top next weekend? VIMH#1 says I have to enjoy the process not just go for finished product.

All Corner Store blocks - May

I put all the blocks up. I have quite a few. They are small, though, so it isn’t enough. There is still a lot of red and pink. I made an effort to make blocks with no red or pink, but I have a lot of red and pink triangles, so it is hard.

This is not the final arrangement. I slapped them up on the wall and did a tiny bit of rearranging.

I also have to buy some more Kona Snow as background. The Pure Elements Linen, of which I have plenty, is different enough to be noticeable.

Sketching #135

CPP Response #135: Clouds

This is related to the response to prompt #98. I wanted to use the same location. It is the other side of the dining room.

Just spend 5 minutes on your prompt. It will help you develop a creative habit. Developing a creative habit takes time. What you make does not have to be perfect or for public consumption. You will get better if you do something every week.

Then, please post the direct URL (link) where your drawing, doodle, artwork is posted (e.g. your blog, Flickr) in the comments area of the original prompt post. Keeping all the artwork together provides a way for others to see the gamut of responses. It is also a great showcase for your work and  way for people to find a link your blog or website.

The Creative Prompt Project, also, has a Flickr group, to which you can join to post your responses. Are you already a member? I created that spot so those of you without blogs or websites would be able to participate as well. Please join and look at all of the great artwork that people have posted.

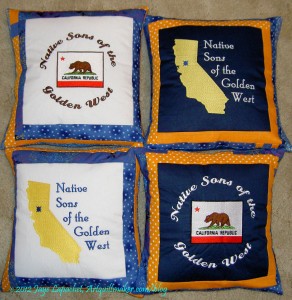
NSGW Pillows

NSGW Pillows
NSGW Pillows

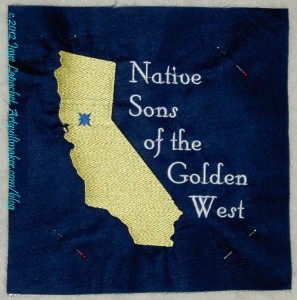
I was back in pillow hell on Monday, except that it wasn’t really hellish. I made four pillows using embroidery panels my SIL and I created on her embroidery machine when I was in Maryland/DC last year. My part in that was saying yes or no to colors of thread and whether the letters should be curved or not. She is the embroidery queen and I was just her humble assistant.

Embroidery panel (1 of 4)

While I was in Maryland, we made a few pillows for the Native Daughters, of which we are both lurker members, but I took the embroidered panels home to make the Native Sons pillows later. As I have mentioned, my DH in on the Board of Trustees of a non-profit. When they are running for off their parlor (e.g. chapter) sponsors a hospitality suite at the Grand Parlor (e.g. annual conference). In the hospitality suite, they play cards, offer liquid refreshments and raise money for their Cleft Palate charity using raffles. For the past year or two, since DH has been running, I have made pillows for him to raffle off. They were wildly popular the first year and he raised a record amount for the charity.

Guess what?

“Later” is this weekend! Can you say last minute? I wasn’t planning on spending my day off making pillows, but this coming Saturday would be even more last minute, so I did the job. I was prepared for drama and there was none. I think I only had to rip out one seam. I measured correctly, counted properly and generally made 4 pillows in record time.

Batting Foundation
Batting Foundation

The big difference was that Cathy, my SIL, suggested using batting as a foundation. It makes the block look nice and gives the maker a goal. You cut the batting the size (including seam allowance, so if finished is 14″ you cut the batting 14.5″, etc) you want the pillow and then sew on top of it. I don’t know how this would work if you didn’t have a flip and sew friendly pattern, but I am sure there is a way to figure that out.

Anyway, the pillows are done and packaged ready to head to NSGW Grand Parlor. DH was pleased and I am going to the dentist and then am going to work on something fun that doesn’t feel like “quilt work.”

The Sunday Stash Report (a la Pam at Hip to be a Square podcast) is 2 yards. More on that later.

Nota bene: if you think there are photos missing, there are. I am having trouble uploading some pictures to the blog. Check back later. It will be resolved eventually.

Flowering Snowball Top & Back

Sunday was a nice day. It was Mother’s Day and, though nobody in my house said anything specifically, I did whatever I wanted and didn’t have to do too many chores. I received a depressing, if very true card and an iTunes gift card from the Young Man and then spent the rest of the day finishing the Flowering Snowball. Not finishing as in quilted and bound, but finishing the top and the back.

Flowering Snowball top

So, the top, back and binding for the Flowering Snowball are all done and will be sent off to the quilter soon.

I am pretty pleased with the top. Since the project spanned several years, some of the fabrics are fabrics that I would not choose to work with now. Also, since I wanted this to be a scrap quilt, I should have stuck to using each foreground fabric only once.

Still, none of the fabrics jump out and demand attention and the variety of fabrics is significant, so there is a lot to look at.

Of course, I can think of things I would do differently if I did the quilt again and the VIMH#1 is musing about making one on the machine and color schemes while VIMH#2 is getting ready to slap her. I have plenty of projects on the design wall that need attention before I can circle back and make another one of these.

I have to admit that after I started chunking the top, I thought that I could have made more blocks so that the center would be wider. I was thinking that two more rows of blocks down the center would be great. I am not doing it. What I have is enough and I will think about this as a lesson and carry it forward.

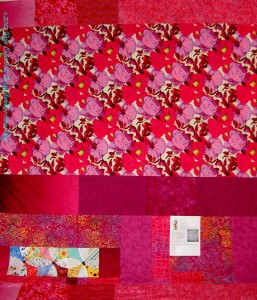
Flowering Snowball back

I am doing backs in a little different way now. I decided that the large Philip Jacobs and Martha Negley prints I love so much would be great backs. I am taking some of the giant pieces I bought recently and putting them on the backs. I am still committed to piecing my backs, but am taking a break from tiny pieces. I am trying to use larger pieces. This makes making the backs much faster to piece. It also means that those large prints are shown off to their best advantage.

In this case, I tried to pick fabrics that went with the Martha Negley print and, further, with each other. I ended up with a very pink back.

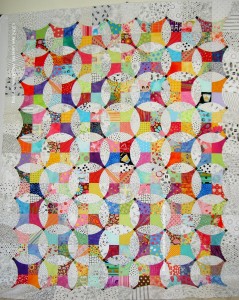
the librarian in me has to tell you that I called the pattern “Cross Blocks” until I found that Barbara Brackman had cataloged it. In EQ7, the notecard lists it as “Barbara Brackman’s Encyclopedia of Quilt Patterns  #3081 – Aunt Kate 7/65.” It is from the Classic Pieced, Orange Peel family.

The Sunday Stash Report (a la Pam at Hip to be a Square podcast) is 8 yards. More on that later.

I can’t believe that this approximately 6 year project is finally done. this means that I am down to 20 projects which need serious work. Some of the 6 are still at the quilter or need to be bound, but I consider this to be good progress.

I don’t know what project is next. I’ll have to work on the Flower Sugar Hexagons again just to get some more of them sewn and added. I also have some blocks to make for the A-B-C Challenge.

Nota bene: the WordPress media uploader has not cooperating. I have been having trouble with it for the past few days so I added the photo of the top, but it is large. If I can make it smaller, I will.

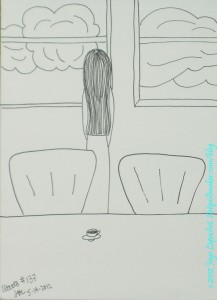
Sketching #149

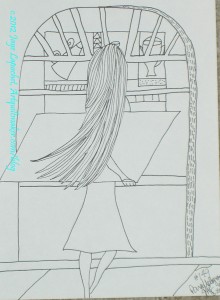
Creative Prompt Response #149: Parallelogram

People are hard.

I had to do this response twice, because people are hard and I wanted to get the swing of her hair right….or mostly right.

I am pleased with how this came out.

Please post the direct URL (link) where your drawing, doodle, artwork is posted (e.g. your blog, Flickr) in the comments area of the original prompt post. I am trying to keep all the artwork together and provide a way for others to see your work and find a link your blog or website. It is also a great way to see how your work relates to the other responses.

The Creative Prompt Project, also, has a Flickr group, to which you can join to post your responses. Are you already a member? I created that spot so those of you without blogs or websites would be able to participate as well. Please join and look at all of the great artwork that people have posted.

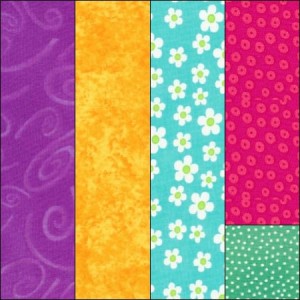
Block-a-Long #55: Three Columns & a Square

3 Columns and a Square

This is related to last week’s block, Four Columns Squares.

This block is suited to 4 or 5 fabrics. I think that it would look best with multiple fabrics.

Directions for Three Columns & a Square are included.

If you have made blocks or a quilt from these patterns, please post a link in the comments section of the relevant block or on the AQ Block-a-Long Flickr group. I would love to see what you have made.

Nota bene: The AQ Block-a-Long is ending. I am starting to repeat myself and run out of ideas and since this has not been very popular, I don’t feel bad about ending it. I am going to try and make it to #60 so you have an even number with which to work, but we will see.

Happy Mother’s Day!

KQED, my local public radio station, has a feature called Perspectives. Perspectives are small audio essays by regular people on a subject. On Friday, in the half awake state before I have to jump out of bed and start my day, I heard a Perspective by PeiPei Zhou. Ms. Zhou talked about all the sacrifices her mother made for her so she could have a better life. Immediately my mom popped into my mind.

I knew we weren’t rich. I never had the trendy clothes and shoes that my classmates sported, but I never felt deprived either. I traveled, I went to college all because my mom made sacrifices. I didn’t even realize the magnitude of her sacrifices for me until I was an adult. I am not sure I can fathom them now. I only know I have what I have and have accomplished is due to my hard work, but the unfailing, unquestioning support of my mother.

I probably wouldn’t be writing this blog without my mother. She sewed a lot when I was a kid — at least I remember her sewing a lot. You know how kids and time are: they think you did something all the time when you only did it once? I remember her sewing costumes for Halloween, school play costumes and doll clothes.

Cara of TalknT said it very well this morning on Twitter. She said “Happy Mother’s day to all the moms, mommys, Grandmas, mom in waitings, Stepmoms and caregivers. Blood doesn’t make a family. Love and you do.”

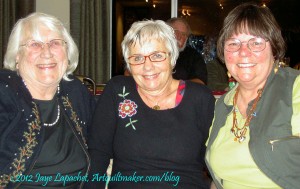
If you like this blog, or tolerate it 😉 head over to Mary’s Art Musings and say hi to my mom, Mary, and thank her for everything she has done.

My 3 Moms: Ruth (l), Edeltraut (m), Mary (r)