Tarts Inspiration???

This tea set has a lovely warm color and wonderful shapes. I can see sitting in a big comfy chair with one of these cups in my hand.

Spode Meadowsweet tea set vintage by asmallferret on Etsy

This is one of the most divine teasets we’ve seen.
Buttermilk yellow and moss green glaze. 4 cups and saucers, a milk jug and sugar bowl (open style). 10 pieces in all. No chips, no cracks, no crazing, in perfect condition.

SFMOMA and the 1000 Journals Project

I have been slack about posting my various holiday adventures, but, with this post, will try and redeem myself. One of the great things I did on my break over the holidays was go to the SFMOMA with friend Julie. My goal was to see the actual journals from the 1000 journals project in person. Julie has posted a great set of narrated photos about our adventures.

The 1000 Journals project has, for some reason, captured my imagination. Faithful readers will know that I have posted about it, gone to see the film and have been trying to get my hot little hands on one of the journals. The film depicted a lot of back and forth with the SFMOMA about this exhibit because Someguy wanted to allow people to add to the journals. A great idea, but the curators aren’t used to allowing people to touch the art. I was really happy that they finally were able to work everything out.

They ended up putting the project in the Koret Education Center. There are people there to watch you, somewhat, working on the journals, so it probably made them feel ok about touching.

Stupidly I didn’t plan ahead and bring an art kit like I had planned, so I rummaged through my purse to see what I had:

  • an old temporary drivers’ license
  • breast health center “how to get your results” sheet
  • pink pen
  • Golden Gate Ferry schedule from 1997

With the pencils, glue sticks, pens, etc that the SFMOMA provided my theme turned into bureaucracy. I was able to make a page with which I was pretty satisfied. As Julie said, it was hard to make art standing up. Not very comfy. Other viewers of the exhibit also have a different sense of personal space than I do, so I had to glare at some people who were just too close, and ask them to step back.

I was disappointed to see that some contributors had basically defaced the books with a message of anger and hate of their own. If I had had colored paper, I would have glued it over those messages, which, I guess, is defacing the books as well, in a way. There was a lot of 13 year old boy potty humor as well. Sad to think that people aren’t enlightened enough to think up something that they would be proud to have endure through the ages. Perhaps I am just being a snob because what they wrote doesn’t fit my idea of ‘good’.

I had fun. I found that I actually can do a visual journaling piece. It made me think that, perhaps, I have too many options at home.

I am happy that I got to spend the day with Julie (no children/young adults=freedom) and that I got see and write in the journals. I feel like I made a contribution. The journal I wrote in was number 754.

Word of the Day: Happiness

I am glad that today’s word is not something awful like disaster funeral or death. Another post will fill you in on why.

Each entry starts with a little poem. Today’s poem clearly defines the word of the day:

“Let us not follow vulgar leaders
Who exploit the fear of death,
And promise the bliss of salvation.
If we are truly happy,
They will have nothing to offer.”

This applies to many things in our lives: work, politics, etc.

“If we attain freedom from the fear of death, a sound way of health, and a path of understanding through life, there is happiness and no need for false leaders.”

I think this poem and saying applies to the Quilt Police type of attitude surrounding our quilt work. Some people demand perfection by following their rules. We can turn away from this kind of attitude by having knowledge about different techniques, by educating ourselves. If we know “the rules,” we can reject them and not have a quilt that falls apart. Happiness comes, in one respect, from education. We don’t need “vulgar” leaders if we are happy.

Longarm Class 1/9/2009

I want this to be a year of creativity. I can’t say that this is on my to do list, but it is in the back of my mind. One way to do that is to sew as much as possible.

To that end, I took the longarm certification course at Always Quilting on January 9, 2009. As a result, I am now a certified longarmer at Always Quilting. Don’t be too impressed as this certification only gives me the privilege of renting their longarm to quilt my quilts. Still: YAY!

After seeing the demo in November with the CQFA team, I signed up for the class. I was curious about the whole longarm process and because I wanted to see how I could incorporate the longarm as a tool into my repertoire.

That being said, I learned a few things about longarming:

  1. Using the machine takes practice and people who machine quilt well should be admired greatly
  2. There is much more to learn
  3. I will never be Colleen. I also don’t want to be her and will still use her fabulous services for some of my quilts
  4. I am not going to quilt all of my quilts myself
  5. Using a pantograph is hard
  6. Taking the class will improve the quilts I prepare for someone else to quilt

I really enjoyed the class. It was an expanded version of what we learned at the demo. It was great to hear some of the same information again as it helps to cement it into my mind. Some of the information she gave about preparing quilts, especially, applies to the computerized machine they use to quilt quilts for customers. It is a large computerized machine.

One thing I learned was that the longarm professionals vary, but if you understand some of the background and the way the process works, you can work with your longarm professional of choice much more effectively.

Always Quilting wants you to have square corners. No lopped off edges or strangely shaped corners, because you use the corners to pin the quilt to the machine. Oh! Now I get it. Better fix that I Spy quilt.

Kit also suggested practicing good pressing habits in order to reduce bulk where seams meet. The centers of pinwheels and 8 pointed stars can be a challenge for the machine. I was surprised to learn that the machines have a hard time going through selvedges! I’ll have to look at some of the quilts that Colleen has quilted for me to see what she does in this circumstance.

  • The Always Quilting staff wants the backs 6″ wider than the quilt and had several suggestions for the back. The back needs to be longer than the top, but they don’t care how long.
  • It is ok to piece the back, but they don’t encourage it and the same rules about bulk and bulky seams apply.
  • Kit suggested using large pieces of fabric rather than piecing a second top for the back.
  • She also said to consider pressing seams open on the back and using a larger seam allowance to help reduce bulk.
  • Both top and back should be square and FLAT. Kit reiterated that quilting does not cure all evils. She gave some tips about measuring the top before one cuts and attaches borders that were really interesting, especially to make sure that there isn’t more fabric in your border than in the quilt top.

Always Quilting prefers batting such as Hobbs Natural and Warm & Natural, both of which they carry. A quiltmaker can bring her own batting but they reserve the right to not allow you to use it. Apparently, batting with scrim works best. As you know, Colleen has quilted my quilts using Hobbs Organic for awhile with no problem, so I am not sure what I am going to do about that.

Kit said that they want a quiltmaker to use the shop thread, because of the way it interacts with the machine. Again, you can bring your own, but they reserve the right to not let you use it. They use Signature, King Tut by Superior and Permacore, which is their preference. The Permacore is polyester wrapped in cotton. Bad thread can incapacitate the machine, which is why they encourage quiltmakers to use the shop thread. They have hundreds of colors.

To put the quilt on the machine:

  1. Put the back on first, right side DOWN. You could put a quilt on the machine sideways. This orientation works well for row quilts because it is easier to quilt different things in rows.
  2. Find the center of the back by folding it in half.
  3. Pin the back to the leader about 1/4″ down from the edge of the leader. There are notes in Sharpie on what attaches to what leader. There is a black mark in the center. Pin from the center out.
  4. Ask your helper if the machine has been oiled
  5. Brush the lint out of the bobbin area. There is a very important disk in the bobbin. Hold on to it when changing or cleaning the bobbin.
  6. Line up batting on backing right below the pins on the leader.
  7. Use a single stitch to baste the batting to the backing.
  8. Baste top to batting, lining it up just under the batting.


I have found it important to doodle a bit before going to class. It seems to train your brain to sew a continuous line. It helps with practicing for achieving a smooth, continuous line. I assume this would be rule for going to quilt as well. It gears up your muscles for the quilting motion. Above are doodles I made during class. They are my own variations inspired by designs from the various books the shop had. I wasn’t able to try them all out on the machine.

One of the books we were able to look at was one by Trillium House Designs. They have a set of three books called Pocket Guides to Freehanding containing a multitude of quilting designs. Kit said Always Quilting didn’t carry them, because books 2&3 were too advanced and the company did not sell book 1 separately. The price for the set is also $55, which is a bit steep.

I think that there are a lot of continuous quilting designs out there you can use as a guide for your own quilting. It would pay off to start collecting some of those designs and practicing them with pencil and paper before renting the longarm.


My section of free motion quilting loops. This is the pattern they encourage their students to use for most quilting project. They also encourage people to use this size of pattern when quilting.


My attempts at using the pantograph (above). It was very hard to get the shapes smooth and I thought I would have an easier time posting the design on the wall and following it with my eyes, rather than trying to trace it using the laser.

I am scheduled to quilt one of my own quilts on February 6. I am planning to quilt the Crazy Test. I was planning to quilt the hexagon/I Spy quilt, but decided to do something I didn’t care about much before quilting something I did care about. I do have to make the back before I can quilt it. The longarm doesn’t work very well without a back!

I was really pleased with this class. I thought it was well run and thorough.

Random Blog Ring Bullseye

Ellen Guerrant
Ellen Guerrant

I barely know what a blog ring is, but today I clicked on the random link from the Pink Chalk Studio blog and ended up on the Occasional Threads blog. I saw this bullseye there and thought I would share. The writer loves the colors, which are not my thing (no turquoise, what was she thinking???) 😉 , but I really like that little black strip separating some of the pieces. This also looks like the Wonky Circles quilt.

Quilting Arts says: 10 Ways to Rev Up Your Studio

This is the Quilting Arts email newsletter, Embellishments. It often one big come-on to buy something from their store, but this time has great ideas for updating your studio or workroom space.

Having problems viewing this email? View in a browser window

space holder

Embellishmenets
QA home subscribe stitch quilting arts gifts other  magazines shop

space holder

December 30, 2008
space holder    
space holder

In This Issue

Easy, Inexpensive Ways to Redo Your Studio

Learn new techniques with Pokey Bolton & Friends!

space holder
Calendar
gifts
join mailing list
Subscribe to qa
Renew your subscription
give a gift
 

space holder

Greetings !
In this issue of Quilting Arts Embellishments we offer you 10 tips for giving your studio a new look, plus tell you how you can learn new techniques at home from Pokey Bolton and friends.

Easy, Inexpensive Ways to Redo Your Studio

A new year, the lack of light, and cabin fever (for those of us in cold climates) often moves us to mix things up and make a change in our surroundings. Here are 10 ways you can rev up your studio or other creative space (even if it’s just a desk) quickly and inexpensively.

  1. Rearrange the furniture. Saying, “What if I put the desk over there?” and doing so, can give you a fresh perspective on your room and your art.
  2. Let in the light. Remove the window treatments or, if privacy is an issue, install blinds or shades that will let in maximum light during the day and can be closed at night. Not only will this help more light shine on your artwork and your psyche, it will give the room a cleaner, airier look.
  3. Put light on the subject. Those fancy “natural light” lamps are great, but even a small but powerful desk lamp will help you see things in a better light and avoid eye strain.
  4. Get “new” furniture. Do like the furniture re-arrangers do on those home dec shows and “shop” for furniture in other rooms of your house. Is there a funky old desk in the garage? An extra chair in the guest room that would make a cozy place to embroider in? Sweep out the old and swap in the “new.”
  5. Paint. A can of paint costs very little yet it can transform a room, warming it up, making it cheery, or conjuring up calm.
  6. Floor it. Hard floors are usually best for sewing-oriented rooms—the better to sweep up threads and find dropped needles. But to give your floor some added oomph, put a colorful throw rug here or there away from the sewing machine or pick up an inexpensive piece of patterned linoleum to put down like a rug under your work area.
  7. Find fresh inspiration. If you have an inspiration board, change the pictures or swatches. Find a new quote or quotes to create by and pin or staple them to the board. Cover the board with fresh fabric or paper. StudiosOr use something unusual for your “board,” like a large, lightweight metal tray, and attach your pictures and notes with magnets.
  8. Change the scenery. Creative people need to stare out windows. If the space where you create has no windows or small, high ones (like in a basement), create your own “view.” Hang a large, framed photo of your favorite vacation spot or other vista where you’d like your window to be. Or, if you have the talent, paint a mural of your favorite view on a wall.
  9. Trade spaces. So, you’ve been working in a corner of the dining room while a guest room upstairs goes unused 50 weeks of the year? Maybe it’s time to turn the “inn” into a studio with a fold-out sofa bed.
  10. Get some new goodies. A couple of fat quarters, a new sketch pad, some dyes you’ve been longing to try, even a new pair of scissors—a small splurge goes a long way to upping your energy level and igniting the creative spark.

Looking for more ways to organize and spruce up your studio? Get the Fall/Winter issue of Cloth Paper Scissors Studios now.

space holderline

space holder

Learn new techniques with Pokey Bolton & Friends!

 Quiling Arts bookOn “Quilting Arts TV” and in The Quilting Arts Book, Pokey Bolton brings together some of the best creative minds in the art quilting world to bring you techniquesqatv300, tricks, and inspiration. With the “QATV” DVD sets, you can watch and enjoy each of the three seasons at your own pace. The Quilting Arts Book shows you much of the best artwork and tutorials from Quilting Arts Magazine. Whether you are an experienced art quilter or just learning the basics, Pokey’s book and DVDs will help you take your art to the next level—and beyond!

Get the “QATV” DVDs now.
Get The Quilting Arts Book now.


space holderline

space holder

To our customers: Please allow 10 days to process your order, due to the fact that our offices will be closed between Christmas and New Year’s. We thank you for your patience. Happy holidays from Quilting Arts.

space holderline

space holder


Watch the Quilting Arts Holiday Video!

space holder

space holder


©2008 Interweave Press, LLC. All rights reserved.
Interweave Press, 201 E 4th St., Loveland, CO 80537

Re-introducing The Tarts

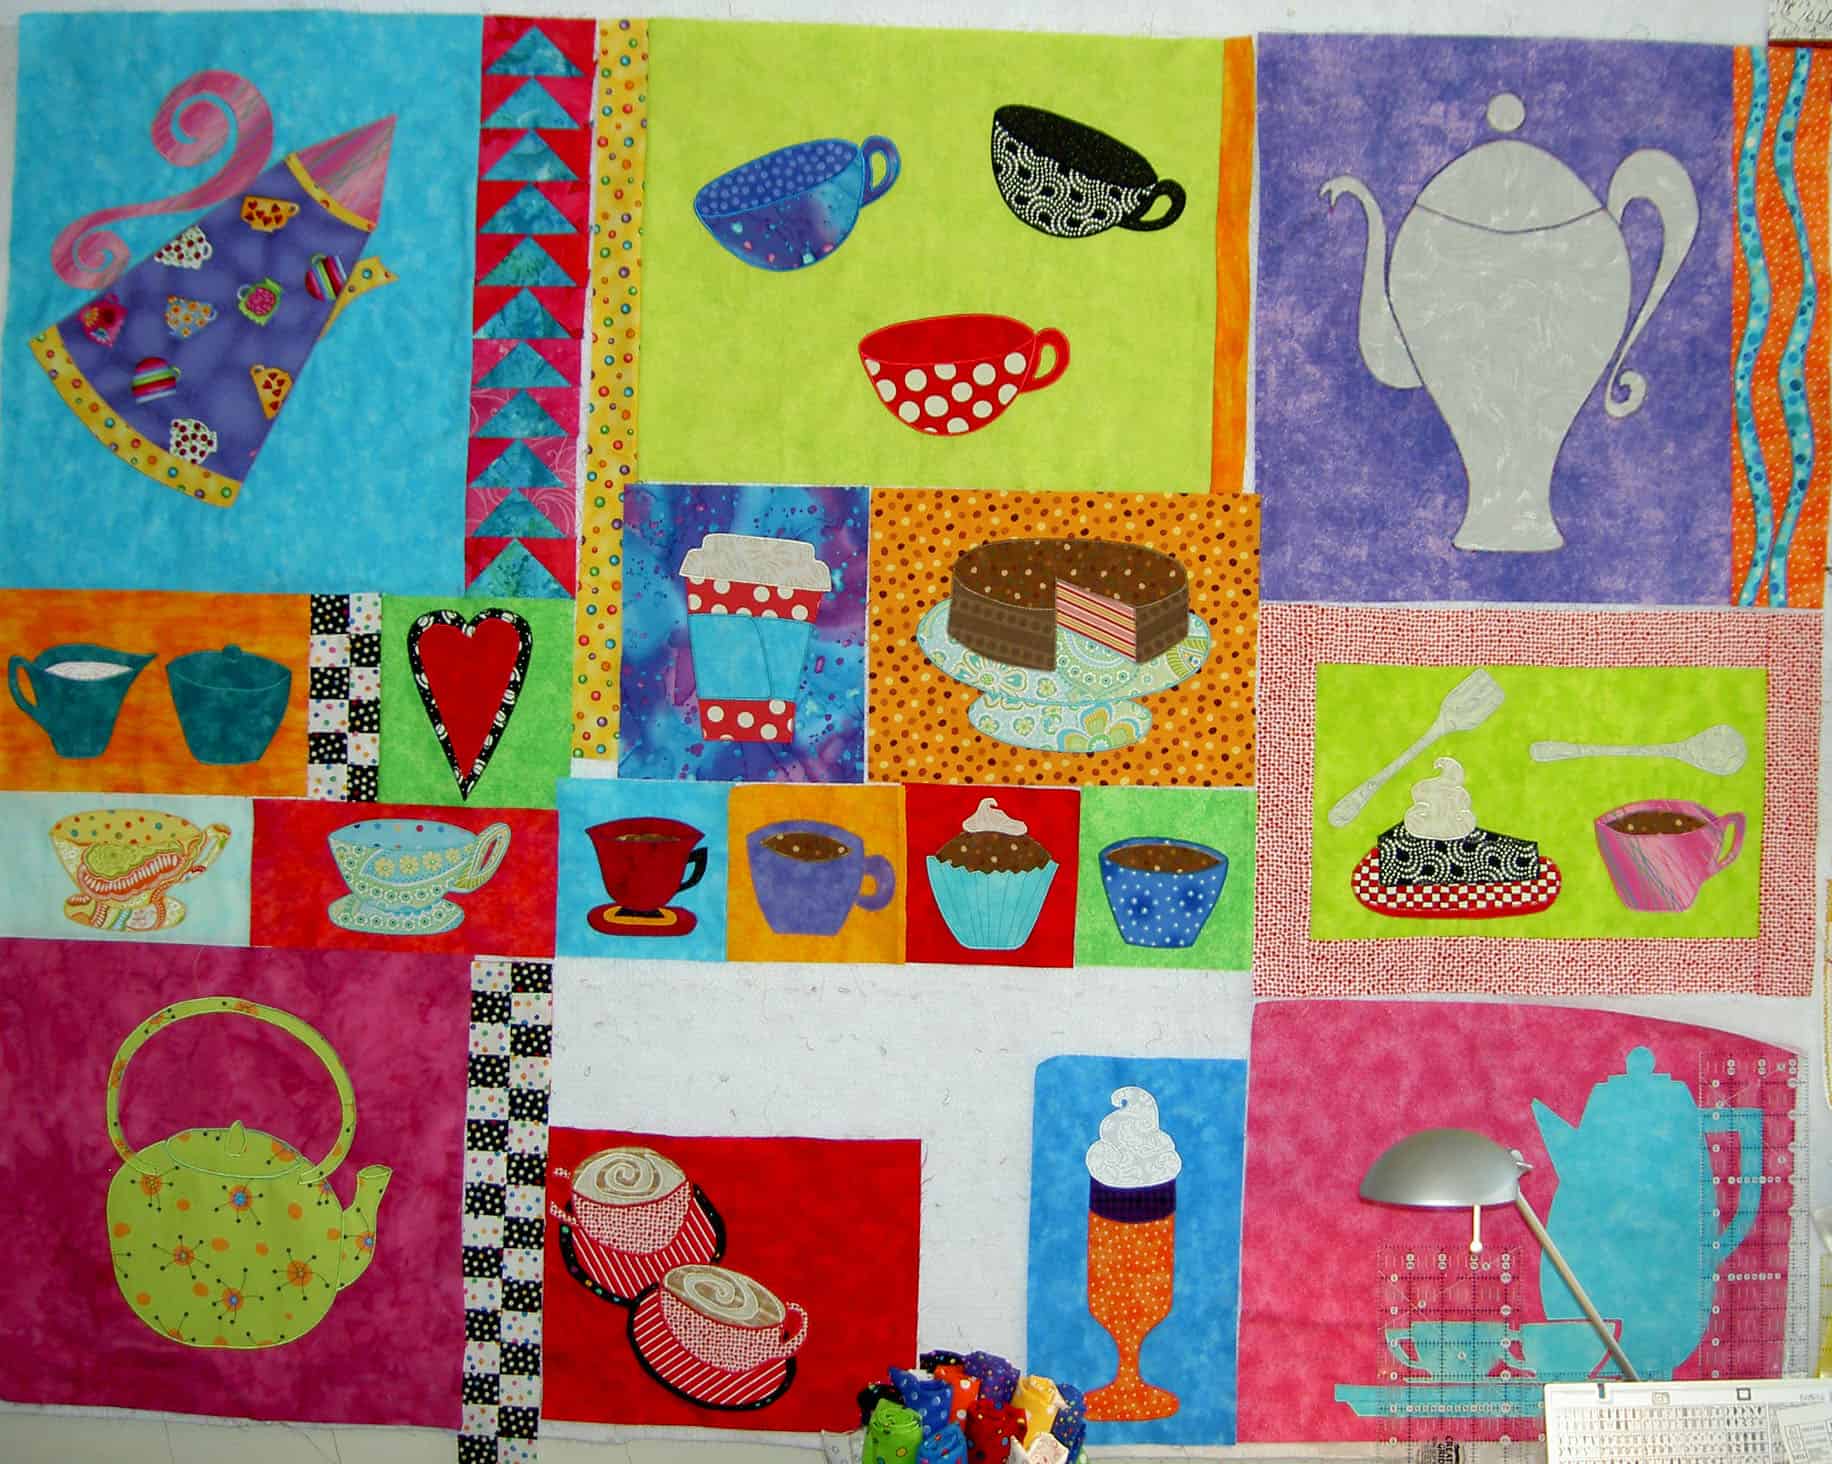
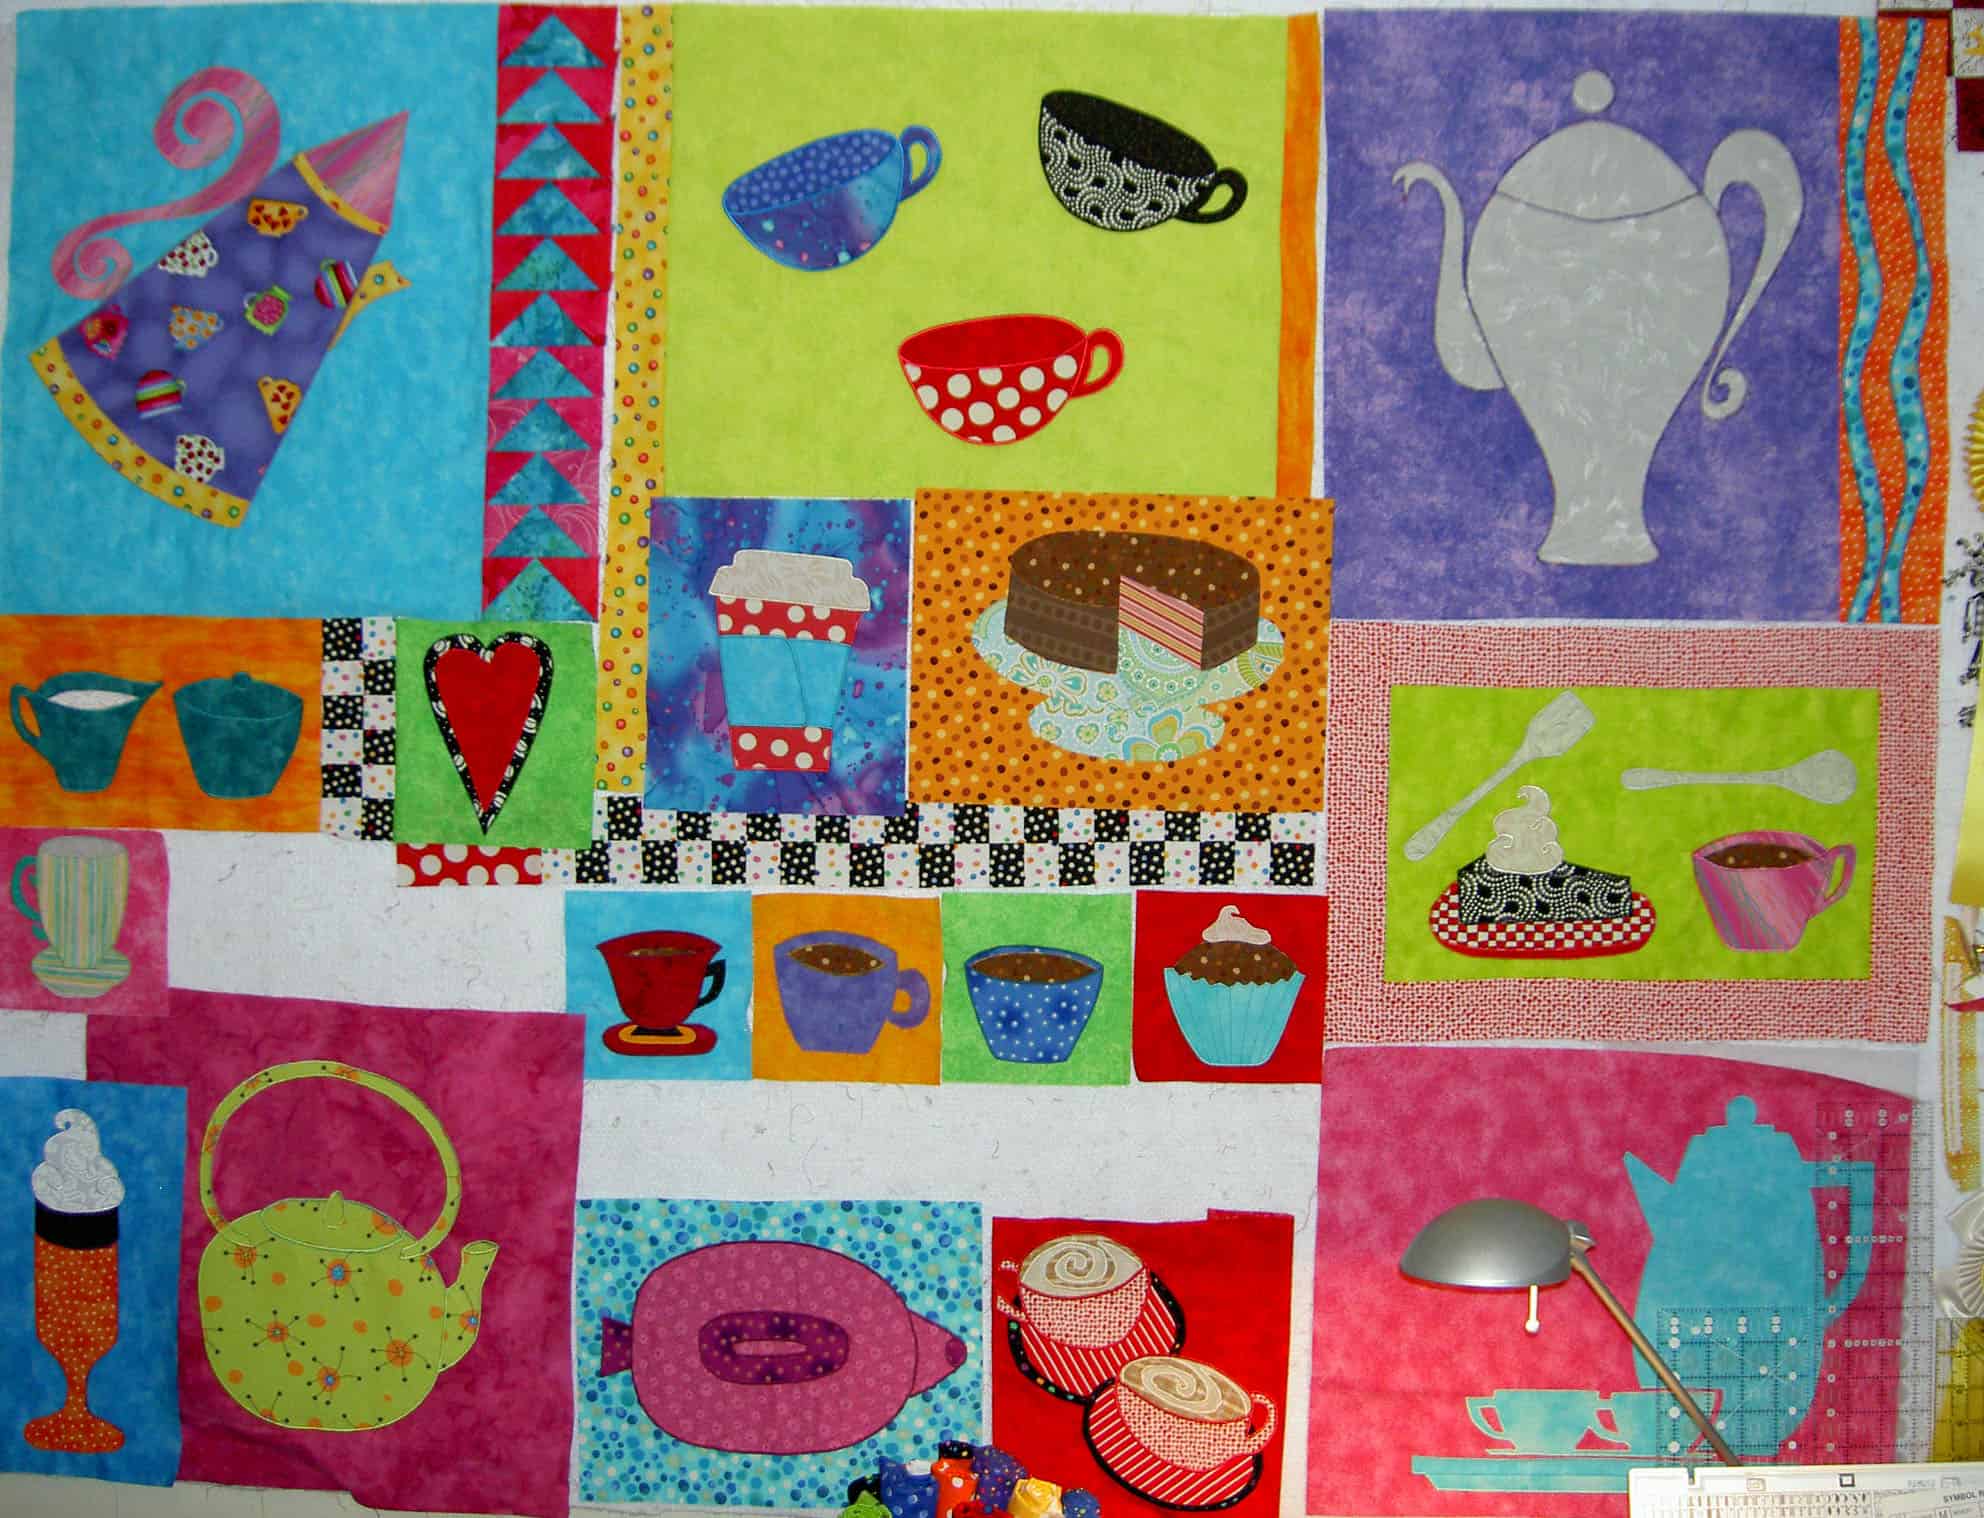
Please meet The Tarts Come to Tea.

I started this project sometime in the past. TFQ and I made some tops using a technique that we called Improvisational piecing. Mostly we did this type of piecing at her house. When I came home after one trip, I decided to take an idea for a hot drink quilt and work on it on my own using the technique. After doing quite a bit of work, I put it away.

I was spurred on to take this piece up again after writing the UFO report for 2008. I want he UFO list to be shorter on 12/31/2009. Either some of these projects have to be completed or they have to be abandoned. It isn’t about just getting things done, though, it is about deciding whether I want to devote mental energy to projects that no longer make my heart sing.

I have put it on my design wall as the first step in getting it off the “to do” list. I decided that I wanted to look at it for awhile before I decided how to proceed. There are elements that I really like about it, but others that I want to redo. My plan is to work on a few other projects (like cutting FOTY patches!) while I look at The Tarts and figure out what needs to be done. I already have a small list of parts that will change.

1. The plaid has to go.
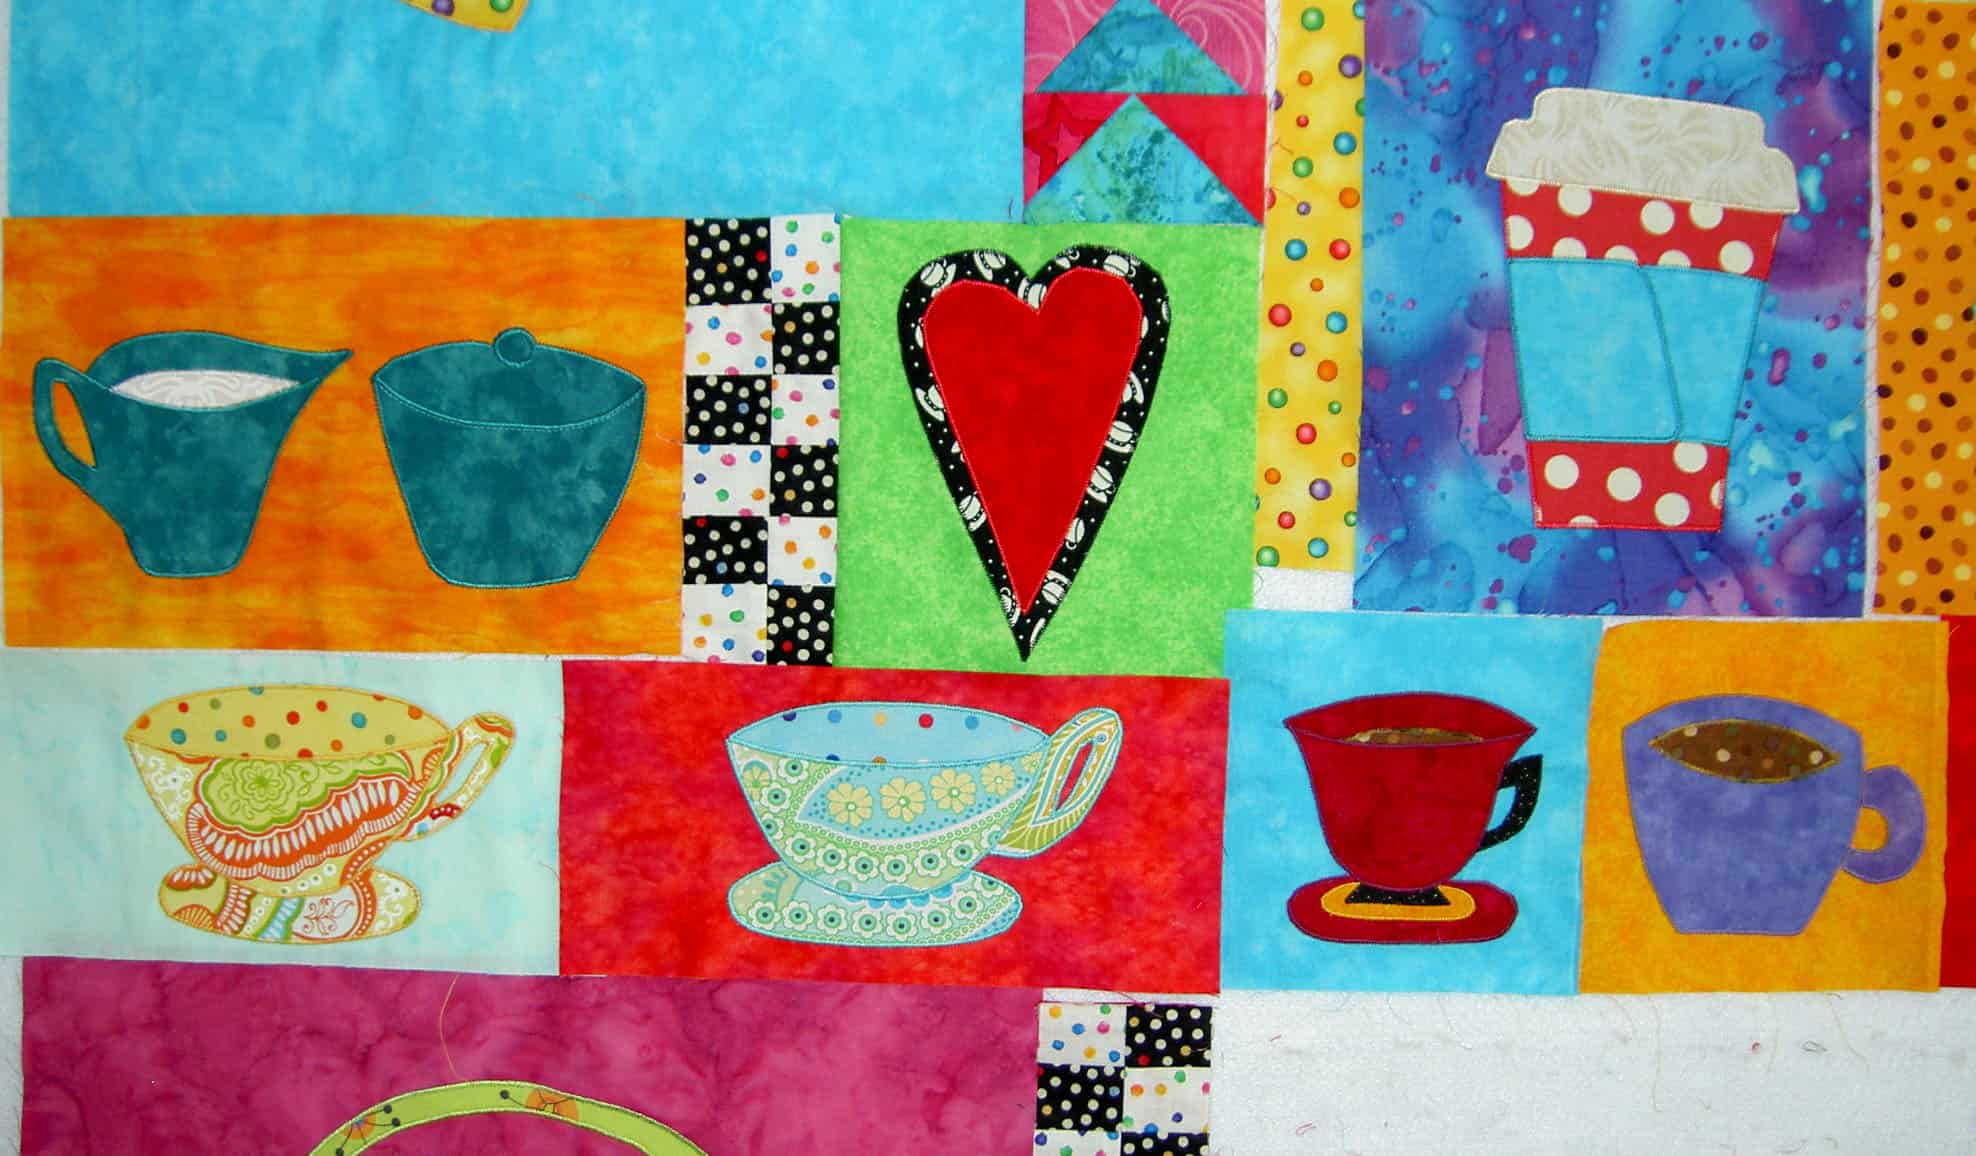
2. The cup in the middle with the striped print will morph into a cup with a sleeve on it, like a Starbuck’s or Peet’s cup.
3. I need to add some more of the red/white dot print that is currently in only two of the cappuccino cups.
4. The random piecing under the grey tea pot with the purple background has to go.

TFQ and I worked on a list of elements to change and add, but I can’t find the piece of paper anywhere, so I have started to recreate it.

When I first took the pieces out of the box, I thought I would just abandon the whole project, but I see possibilities now. I will work on it a bit and see if I can generate some enthusiasm. Looking at this project has made me realize how I have evolved as a quiltmaker: different types of fabrics, different colors, more piecing. Some of what I talked about in the Word of the Day: Time post applies here.