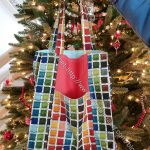
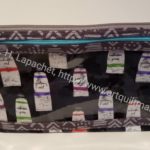
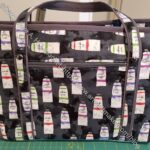
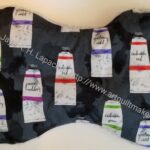
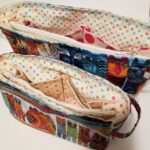
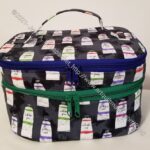
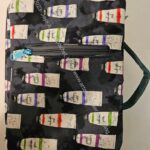
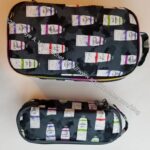
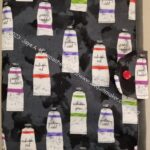
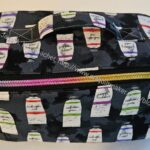
No, this is not pink, but I am still making it part of the Pink Project, at least for the time being. I don’t want to make a new tag for every project I decide to start.
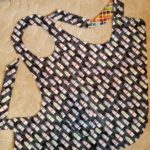
I was so excited by the triangles that I wanted to use this fabric. I think it is a Carrie Bloomston fabric, but I can’t remember where I bought. I am pretty sure it was a recent purchase.
As mentioned, I am doing a blue version as well as a pink version for two different groups to auction off.
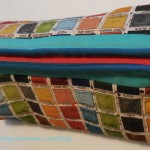
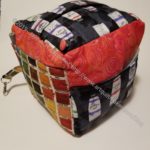
Blue Triangle Cotton Candy – side
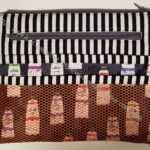
I wanted to cement my technique for the Cotton Candy pouch after the mistakes I made with the Slimline Cotton Candy. This is one of the pouches that I made. I decided to make one each for the two projects.
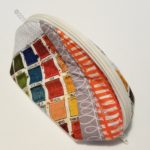
Blue Triangles Cotton Candy pouch inside
While I did better this time on lining up the pieces, I didn’t do as well on the zipper. I am not sure why. It looks really wobbly. Most people won’t notice, but it bugs me.
I wasn’t able to anchor the the sides to seam allowance like I did with the Hildegarde. That might be a challenge for another day.
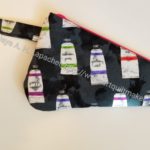
Blue Triangles Cotton Candy zipper end
I did veer the zipper on one side of this bag, but not on the ‘top’.
I decided to fold over the zipper ends and place them where I wanted them rather than hoping for the best when I was veering the zipper. I think the ends look pretty good.
These are the two sunflower blocks I made for the Wrap the World in Quilts project to make quilts for Ukraine. Posting the patternlast time generated a lot of interest in making the block. I hope that means people are contributing to the project.
I am also including some blocks people sent me.
Julie’s sunflower
Some of my friends took my pattern and made some sunflower blocks. Friend Julie took my pattern and worked on this block. I am always so excited to see the fabrics people choose. Julie wrote about her blocks (she picked another to make as well) in her blog while I was away.
I really like the center of Julie’s block. It is different, but gives the impression of a sunflower center.
She finished two, one of which I didn’t see in the original post. The one that doesn’t use my pattern is fantastic as well. I am so glad I put up the pattern. It has inspired people to make blocks for a good cause!
Carrie’s Sunflower blocks
Carrie also took my pattern and tried to make some blocks. She struggled with the ‘flip & sew’ sections of the center as I did. Her blocks will be good for the project anyway.
I hope posting the pattern has enabled people to make a lot of blocks.
I started this rectangle donation top informally awhile ago. I decided to clear off some of the lingering, half finished projects and this was one of them.
It was a collection of rectangles I had cut from larger scraps. I used the same 4.5 x 8.5 Creative Grids ruler** I use to trim my strip donation blocks. As I cut them I pinned the rectangles randomly to my design wall. Over the weekend, I got myself together to organize them and the few additional cut the few additional pieces I needed.
For once I used the one fabric for the cornerstones. I had enough of one fabric and it had a lot of variety so I thought ‘why not?’
I am in the process of sewing, but it has been slow going. I’ll get there.
*N. B. : Obviously, you should shop at local quilt shops and support small businesses whenever possible. However, if you are too busy or can’t find what you need there, I use Amazon affiliate links and may be paid for your purchase of an item when you click on an item’s link in my post. There is no additional cost to you for clicking or purchasing items I recommend. I appreciate your clicks and purchases as it helps support this blog.
This is the second tutorial for the Orange Peel circle.
Orange Peel Circle
I don’t know how this shape came into my mind, but I was driven to learn to make it when I took the Latifah Saafir class in 2021. I have the start of an idea for a quilt using this shape, though I am still finalizing the details. The closest I have come to drawing it out or designing it is the Bubble (circle) donation quilt I made with Gerre a few years ago.
Ever since I learned to make these Orange Peel Circles, I have wanted to write a tutorial. I wanted to remember how to make these shapes whenever the desire arose and the best way is to post something here. I also wanted to share the knowledge with you so YOU would have another use for your Clammy** rulers. In a lull in the class, Latifah showed me two ways to make this shape. I broke up the tutorials so you could focus on one method at a time.
Optional, but very helpful: rotating cutting mat** (The 10″ rotating cutting mat** is also useful for smaller spaces)
fabric (at least 2 different) – I used large-ish scraps for this tutorial
pins
Sewing machine
quarter inch foot
thread
Iron and ironing board
Notes:
You need the directions for using the Clammy for this tutorial
The tutorial for the first method was posted a few weeks ago. This second method yields the same results, but gives you construction options so you can figure out what works best for you.
6″ Clammy and packaging
For this tutorial, I am using the 6 inch** Clammy. Adjust if you use other sizes.
The directions for cutting the Orange Peel shape are on the front of the Clammy ruler. The directions are in a different context, but you can extrapolate.
Steps:
Gather your two pieces of fabric.
Orange Peel Circle tutorial 2: cut a square
Orange Peel Circle tutorial 2: cut a square
Cut a 1/4 circle out of the square. I cut my square slightly larger than the square indicated on the Clammy.
Orange Peel Circle tutorial 2: Cut inside circle
Cut the inside circle to make a quarter circle. This is one step where I use the 28mm rotary cutter**.
Orange Peel Circle tutorial: cut 1st 1/2 of Orange Peel
You will have a quarter circle. Throw the extra background into your scrap bin.
Do the same again with a different fabric. This will be the whole circle in which you will insert the Orange Peel piece.
Orange Peel Circle tutorial 2: Cut a square
Cut a square-ish shaped piece.
Orange Peel Circle tutorial 2: cut quarter circle
Align your ruler and cut a quarter circle.
Note: For most of the cutting in this tutorial, I used my regular 45 mm rotary cutter**. For this step, however, I switched to a 28mm rotary cutter**. It is easier for me to cut the inside circle with a smaller rotary cutter. If you are using the larger Clammy, then the 45mm will work. Use the tools that feel best to you.
Orange Peel Circle tutorial 2: cut quarter circle
Cut a quarter circle out of the larger piece of fabric.
Orange Peel Circle tutorial 2: make registration marks
Fold the circle and the Orange Peel in half to create registration marks. I do this to allow me to line up the two pieces more precisely.
Tip: If you fold one piece RST and one piece WST, you will be able to nest them in the next step.
Orange Peel Circle tutorial 2: line-up registration marks
Line up the registration marks. The fabrics should be right sides together.
Pin at the registration marks to keep the pieces in place.
Orange Peel Circle tutorial 2: pin at the ends
I anchor the ends of the Orange Peel with pins.
Orange Peel Circle tutorial 2: pin the rest
Pin the rest of the Orange Peel to the circle using 2-3 pins between each end and the center. You may not be able to line the piece up exactly end to end. The ends may extend beyond the ends of the circle fabric.
Orange Peel Circle tutorial 2: sew the seam
Piece the quarter circle into the square with the quarter circle cut out. I put the piece that will be the Orange Peel on top to sew.
Orange Peel Circle tutorial 2: sewn
The piece looks odd and not circular at all when you are finished sewing.
Orange Peel Circle tutorial 2: press
Press the seam towards the piece that will be the Orange Peel. In this case, that piece is the green.
Now, follow the directions for cutting out a circle using the Clammy. Review the directions on the packaging.
Fold the sewn piece in half with the fold towards you.
Orange Peel Circle tutorial 2: line up the ruler
Line up the ruler as shown in the photo. Remember: the fold needs to be closest to your body.
Orange Peel Circle tutorial 2: cut the circle
Cut out your circle. Again, the directions on the packaging will help you.
Troubleshooting: If your circle is not whole (cut in half) when you open it, then you need to realign your fabric and make sure the fold of your folded square is close to your body before you cut. If this is the case, you will need to start over, because your circle is ruined.
If you have cut the circle with the fold towards you, then you have done it correctly and have a fabulous Orange Peel circle.
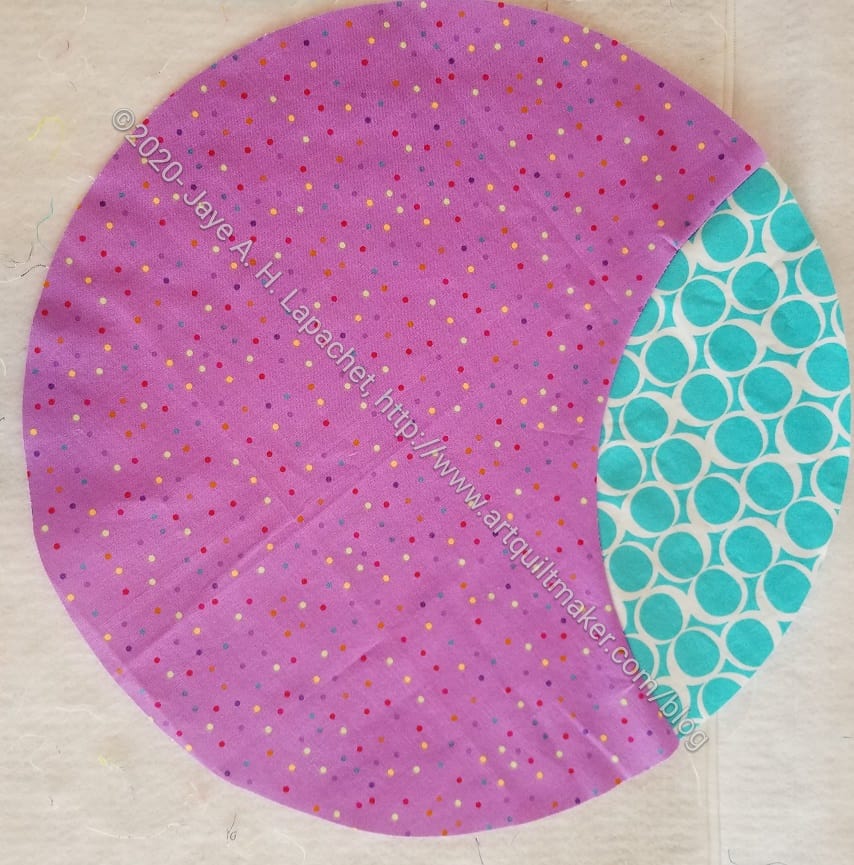
Orange Peel Circle tutorial 2: Orange Peel circle
Toss the background excess into your scrap pile. Cut the background for a circle and piece your Orange Peel Circle into the background. Stay tuned for that tutorial or check Latifah’s site.
–>Alternatively –> applique your Orange Peel Circle onto the background using hand or machine applique’
See the other method for making these Orange Peel circles.
If you make one of these circles, send me a photo and I will post your work here! I’d love to see your efforts.
Notes:
*I prefer the smaller versions. The Orange Peel circle I made with the 12 inch** (first photo above ) just looks too big to me. If I made a bunch of them, it might be fine.
*If you have tossed the packaging or can’t find it, download the information from Latifah’s site. I downloaded one and the information is laid out very well. You can also check Latifah’s videos on YouTube. One video shows how to cut different shapes, though it focuses on the half circle. You can get some good tips even if you don’t get the full instructions. Take a look at all of her videos.
**N.B. I use affiliate links and may be paid for your purchase of an item when you click on an item link in my post. There is no additional cost to you for clicking or purchasing items I recommend. I appreciate your clicks and purchases as it helps support this blog.
**N. B. : Obviously, you should shop at local quilt shops and small businesses. However, if you are too busy or can’t find what you need there, I use Amazon affiliate links and may be paid for your purchase of an item when you click on an item’s link in my post. There is no additional cost to you for clicking or purchasing items I recommend. I appreciate your clicks and purchases as it helps support this blog.
Back in April I started cleaning out my green scrap drawer. While I didn’t work exclusively on this project, it was a constant companion. I made progress through the summer. Finally, I have cleaned out my green scraps as much as I can. The pieces left, which I have sewn together, are not big enough to make anything, but will be the basis for a Journal Cover or the next Color Improv donation quilt.
Of course, this clean and clear state of affairs won’t last for long. As I work through other projects, this drawer will fill up again in a never ending cycle. It’s the nature of the beast, I guess.
Green Strips Donation top #2
Green Strips #3 donation top
Green Improv #2 (The Swamp Thing) top
The good part is that I made a few quilts, mostly from the scraps in this drawer, for people in the community. These aren’t super large quilts (approximately 40×40 inches), but there are still three of them. These three help me meet my goal of 12 donation tops for the year.
In another part of the never ending cycle, I need to decide which color is next. I might want to work with blue, for example, but really need to choose the drawer that is the fullest.
I finally started the needlepoint kit I bought awhile ago. I am not quite completely organized, but I wanted to get started.
I am just working on the blue for the moment, so I didn’t have to change yarn a lot and could get used to the routine. I discussed needlepoint with Mary C at the Sew Day the other day. She brought her needlepoint project to work on, so I could see what she was doing. I learned how to make my back neater and hopefully save yarn, so I won’t run out. My grandmother’s voice saying the back should be as neat as the front has been rocketing around my head as I work on this project.
Needlepoint in process – detail
It is a bit repetitive, but I decided to ignore that. I can’t say much about that since I have organized all of the threads yet. I need to do that before I leave for Portland in a few days as I want to bring this with me as my hand project. As I make progress, I want to change colors to fill in areas that are slowly being surrounded by the blue background.
Yes, La Passacaglia is a hand project, but I might take a different tack on that project.
I finished the Swamp Thing (Green Improv #2), which puts me close to 50 yards used (net). Yes, I have sewed quite a bit in the last 2.5 months. I am pleased.
It is mostly green, but very light. I thought it might be the photo I took, but I took a second one and I think it just looks light. As mentioned before, I seem to have a lot of light greens and yellow greens.
This is finished which means it is time to select another color.
As mentioned, I started sewing some Cotton Candy pouches at Sew Day. I had cut them out as a reminder after I sewed the Slimline version of the Cotton Candy pouch wrong. I was a little angry at myself, because I want to work on new pouches – patterns I haven’t tried before. Even though I love the Cotton Candy pouch, I have made it many times. I felt, however, that I needed to remind myself how to get this pattern right.
I was pleased with the progress I made at our Special Sew Day. I would have liked to have made more progress, but forgot the zippers. When I got this far, it was time to clean up and go home anyway.
I thought I would try the triangle fabric fabric I bought at Bay Quilts recently and see how I liked it in bags.
Both of these will be for the Pink Project. I know one is blue, but I am doing a second batch for the local Alumnae Panhellenic group and want to use some different fabrics.
I received a little brush at one of the Quilt Retreats I attended in the past. I used it for cleaning out the bobbin area of my sewing machine. Recently, it disappeared and I really missed it.
Sewing Machine Cleaning Tools
Each time I change bobbins, I clean the lint, etc out of the bobbin case. The brush I lost made the job quick and easy.
As soon as I got them I tried using the various tools to clean out the lint from my bobbin case. I like the different shapes of the tools, but I really don’t need all of them.
Regardless of the shape, the brushes are not quite right. They are more flexible than my previous brush. I may not have a choice in that my original brush is gone. Thus, I think that this set will have to work for me.
**N. B. : Obviously, you should shop at local quilt shops and small businesses. However, if you are too busy or can’t find what you need there, I use Amazon affiliate links and may be paid for your purchase of an item when you click on an item’s link in my post. There is no additional cost to you for clicking or purchasing items I recommend. I appreciate your clicks and purchases as it helps support this blog.
The Half Hexie Star is finally finished and off to its new home.
Someone said that I must really like the people to whom I gave the quilt. I do like them, but as I often say: there is always more fabric. I like the people and the quilt was a lot of work, but there is always more fabric. The point of the quilt was to have something to work on in the evenings when I was watching TV and visiting with my DH.
Half Hexie EPP back
Now I am on to another EPP project and the Half Hexie Star quilt will be loved in a new place. As an added bonus, I have spread the joy of quilting to a new couple.
I made another lined Drawstring bag from the Jeni Baker In Color Order pattern as a gift bag for a friend. I was pleased to use the Anna Maria poppy fabric. Can you tell she loves pink?
This one is the Artist size, which is slightly larger than most of the drawstring bags I have made. The size I normally make is called the Project size. I just wanted to try something different this time.
The Artist size is one of the sizes that comes in the paid pattern. As a side note, Jeni Baker has an annual Lined Drawstring Bag Sew Along. It’s coming up in November 2024. It’s hard to find another great way to get familiar with the pattern.
I am still struggling with the ties and really need to figure that out. These look fine, but I always struggle.
I filled the bag with some self care supplies. She said she really liked everything. My friend’s mother died right before her birthday and this was a great way to let her know I was thinking about her.
In honor of my Mom’s birthday, which was yesterday, I am revisiting the gifts I have made for her. She is downsizing so I have slowed my production for her and she didn’t get a bag yesterday. Still, there are a couple of new items on the list. I still have fabric for her, so I am not done making things with it yet.
I made this Cotton Candy pouch for a friend’s birthday.
It ended up being a ‘slimline’ version as I sewed the side panels to the wrong end of the main panel and had to trim extensively. It worked out and she liked it so no harm.
However, I need to get this right. I have made so many of these pouches that I am shocked and amazed that I made such a big mistake. I am going to make some others to cement the process in my head.
I don’t know how this shape came into my mind, but I was driven to learn to make this combination of shapes when I took the Latifah Saafir class in 2021. I have a sort of idea for a quilt using this shape, but it hasn’t come to fruition yet. The closest I have come to drawing it out or designing it is the Bubble (circle) donation quilt I made with Gerre a few years ago.
Ever since I learned to make these Orange Peel Circles, I have wanted to write a tutorial. I wanted to remember how to make them whenever I wanted. I also wanted to share the knowledge with you so YOU would have another use for your Clammy rulers.
Supply List:
Clammy ruler – the 12 inch** or the 8 inch** or the 6 inch** (any size works)
fabric (at least 2 different) – I used large-ish scraps for this tutorial
pins
Sewing machine
quarter inch foot
thread
Iron and ironing board
Notes:
You need the directions for using the Clammy for this tutorial. They are included on the packaging. If you have tossed your packaging, download the information from Latifah’s site. I downloaded one and the information is laid out very well.
For this tutorial, I am using the 8 inch** Clammy. Adjust if you use other sizes.
Steps:
8″ Clammy ruler and packaging
The directions for cutting an Orange Peel are on the front of the Clammy ruler.
Orange Peel Circle tutorial: cut a square
Start with a square. If necessary, give yourself some wiggle room by cutting the square a bit larger than called for in the directions.
My Orange Peel Circle came out perfectly using the sizes on the ruler packaging. Try out some test circles to gauge whether you need to start larger or not.
Orange Peel Circle tutorial: line up Clammy
Cut your Orange Peel from this square. Line up your ruler as shown. You can see the lines of the Orange Peel shape clearly on the ruler. You want the straight dividing lines to be on the edge of the fabric and the Orange Peel shape to be completely in the square. Review the directions on the front of the Clammy packaging* to line everything up.
If you have cut a larger square, you will trim more.
Orange Peel Circle tutorial: cut 1st 1/2 of Orange Peel
Cut the first part of the Orange Peel. This will yield a shape like you would use for Drunkard’s Path.
This is where your rotating cutting mat** comes in handy.
Orange Peel Circle tutorial: realign the ruler
Turn your fabric and re-align the ruler. You can see how your Orange Peel piece will look through the ruler.
Orange Peel Circle tutorial: cut the 2d part
Cut the second side of your Orange Peel. Set this part aside. Toss the leftover background fabric into your scrap bin.
Now you are ready to cut your full circle
Orange Peel Circle tutorial: cut square
Based on the 8 inch Clammy, cut a 8.5 inch square of fabric. Adjust if you are using a different Clammy.
This will be the main part of the circle.
Orange Peel Circle tutorial: fold squareOrange Peel Circle tutorial: fold square
Fold your square in half and place the fold closest to you.
Orange Peel Circle tutorial: align your ruler
Place your ruler on the fabric. This is a good time to review the instructions or one of Latifah’s videos.
Orange Peel Circle tutorial: cut the circle
Cut the full circle.
Orange Peel Circle tutorial: open the circle
Open the full circle and admire your work! I always feel excited when I see that circle opened up.
Troubleshooting: If your circle is not whole (cut in half) when you open it, then you need to realign your fabric and make sure the fold of your folded square is close to your body before you cut.
Orange Peel Circle tutorial: align your ruler
Line up your ruler to prepare to cut the Orange Peel out of the full circle.
Note: For most of the cutting in this tutorial, I used my regular 45 mm rotary cutter**. For this step, however, I switched to a 28mm rotary cutter**. It is easier to cut the inside circle with a smaller rotary cutter.
Orange Peel Circle tutorial: cut the Orange Peel
The photo above shows the Clammy lined up and the Orange Peel cut out.
Orange Peel Circle tutorial: cut the Orange Peel
Cut an Orange Peel out of the full circle. Turn the circle if you want to avoid cutting into certain fabric motifs. In this case, I wanted to leave the full crescent moon on the fabric, so I avoided cutting the Orange Peel out of that part of the circle.
Throw the Orange Peel from the full circle into your scrap bin
Orange Peel Circle tutorial: create registration marks
Fold the circle and the Orange Peel in half to create registration marks. I do this to allow me to line up the two pieces more precisely.
Tip: If you fold one piece RST and one piece WST, you will be able to nest them in the next step.
Orange Peel Circle tutorial: Line up the pieces
Line up the two pieces using the registration marks. The fabrics should be right sides together.
Orange Peel Circle tutorial: pin at the registration marks
Pin at the registration marks to keep the pieces in place.
Orange Peel Circle tutorial: pin at the ends
I anchor the ends of the Orange Peel with pins as well.
Orange Peel Circle tutorial: pin the rest
Pin the rest of the Orange Peel to the circle using 2-3 pins between each end and the center.
Orange Peel Circle tutorial: sew
Sew the Orange Peel to the circle. I sew with the Orange Peel on top. Take out pins before your needle gets to them.
I keep the two pieces of fabric as flat as possible while sewing the curve. If necessary, make little clips in the curve.
Orange Peel Circle tutorial: sewn
Your Orange Peel is now sewn to your circle.
Press the seam allowance towards the Orange Peel.
Orange Peel Circle tutorial: sewn & pressed
You now have an Orange Peel circle!!
Your finished circle is ready to be pieced into a background. Stay tuned for that tutorial or check Latifah’s site.
If you make one of these circles, send me a photo and I will post your work here! I’d love to see your efforts.
Notes: I prefer the smaller versions. The Orange Peel circle I made with the 12 inch** (above photo) just looks too big to me. If I made a bunch of them, it might be fine.
*If you have tossed the packaging or can’t find it, download the information from Latifah’s site. I downloaded one and the information is laid out very well. You can also check Latifah’s videos on YouTube. One video shows how to cut different shapes, though it focuses on the half circle. You can get some good tips even if you don’t get the full instructions. Take a look at all of her videos.
**I use affiliate links and may be paid for your purchase of an item when you click on an item link in my post. There is no additional cost to you for clicking or purchasing items I recommend. I appreciate your clicks and purchases as it helps support this blog.
As mentioned, the Hildegarde Notions Trunk is finished.
I have to confess that the end of making the Hildegarde wasn’t as smooth as I would have liked. The Velcro was the challenge.
The photo left shows the dividers in the interior. They velcro to the side strips of Velcro, which I sewed to the lining. The problem is that the I sewed the wrong side of the Velcro to the sides. It was the same side of the Velcro that I used on the dividers, so the dividers didn’t stick very well. Yes, I should have checked I had the right part of the Velcro, but I assumed. Always a problem.
Resewing the Velcro
The Hildegarde looked really good, so I thought about not changing out the Velcro. I decided, in the end, that I would never be really happy with it-and I really like this bag, for once-, so I ripped the lining apart and sewed the correct Velcro sides to the lining sides.
The Velcro strips are originally sewn before the lining is sewn together, so it is very easy to sew them to the sides of the lining. I used the sewing holes to place the new strips of Velcro and took my time. I didn’t want to take the whole lining apart, so I unpicked as little as possible. I used some washaway tape to hold the strips in place and resewing worked pretty well. Later, I realized I could have changed the Velcro pieces on the dividers, which probably would have been a lot easier.
In my defense, I rarely use Velcro, so I forgot to check that I had the right Velcro side. I won’t make that mistake again. At least I hope I won’t!!
I am glad I did, because now I am super happy with it and the dividers actually work!
Hildegarde Finished – front (closed/exterior)
It turns out I had to unpick the turning opening a second time, because I forgot to put the Peltex in between the lining and exterior. Again, I thought about whether I really needed to do it, but the bag was saggier than I wanted, so I did it. I had to insert the Peltex around the stitching of the lining to the exterior. It wasn’t easy, but it was doable and the bag doesn’t look as saggy. The reason this happened is that I didn’t notice the last page of the pattern! In my defense, half of the second to the last page was blank so I thought that was the end, though I did think it ended a little abruptly. I have made a note on my pattern in case I make this bag again.