Yes, you have to experience every little detail of the process.
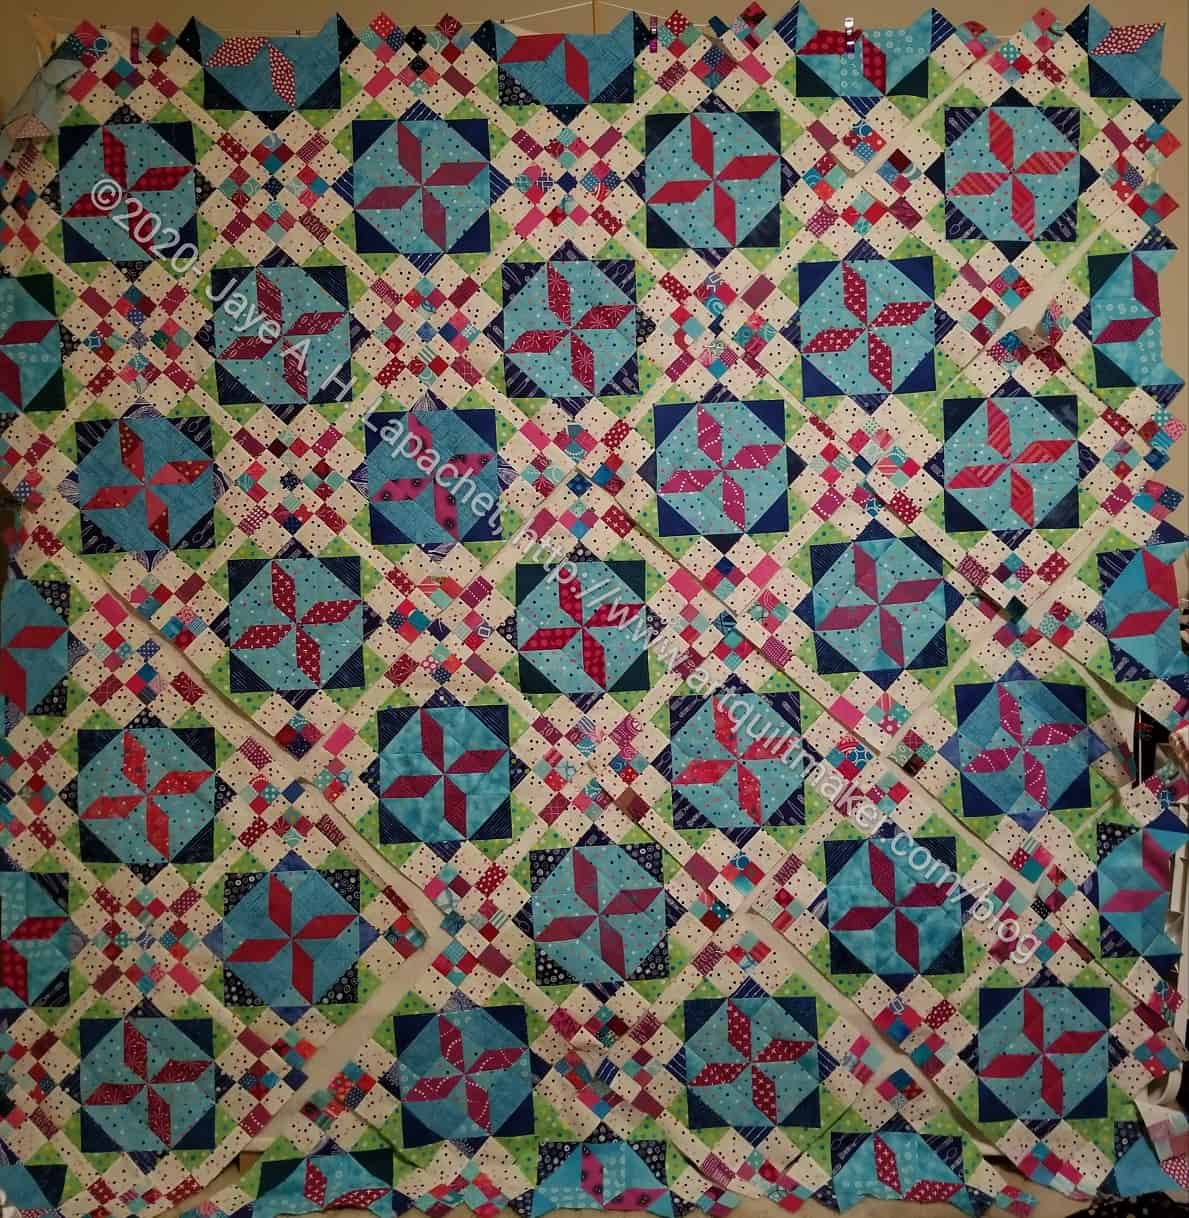
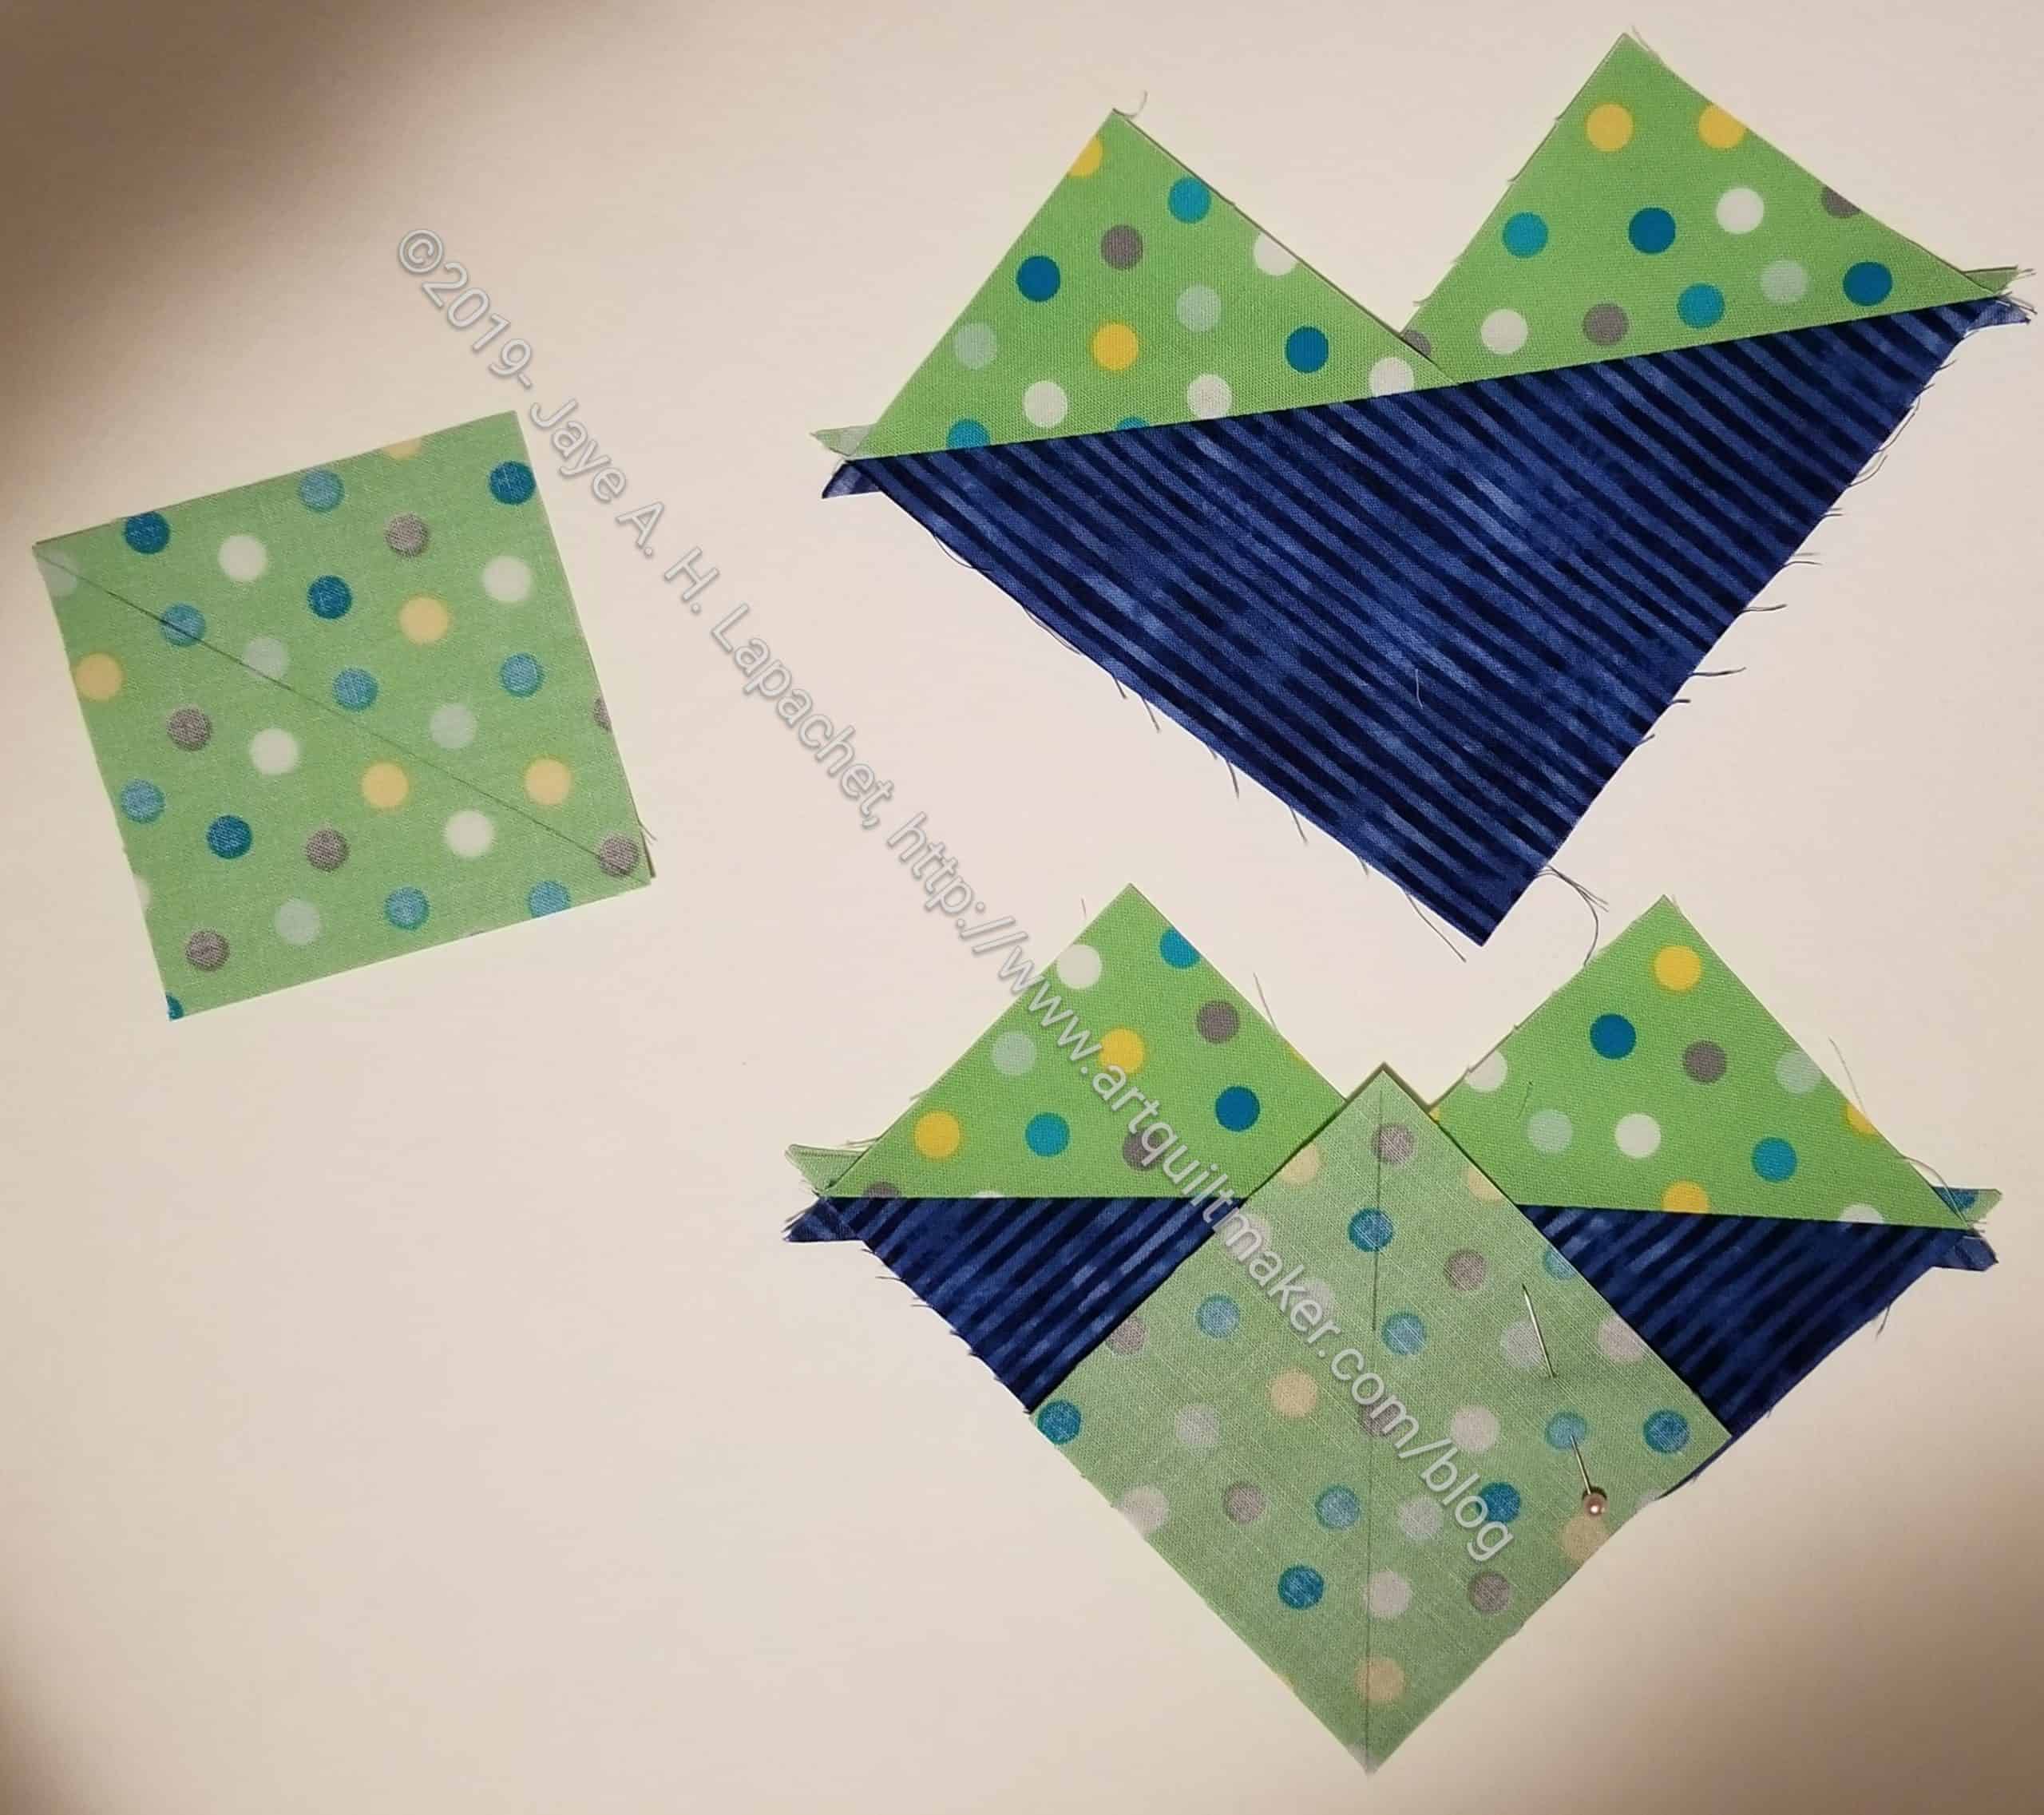
Can you tell I trimmed it?
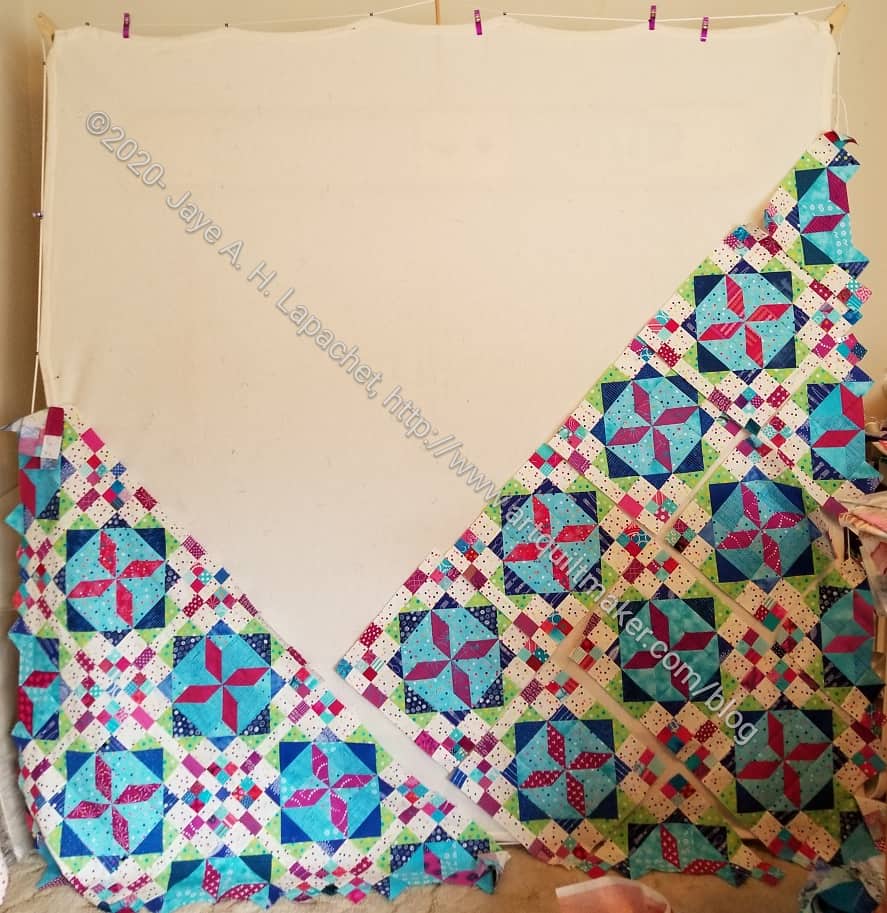
The edges of the quilt were not squared during piecing, so the top center had to be trimmed. I did in two stages, mostly because I had to go back to work.
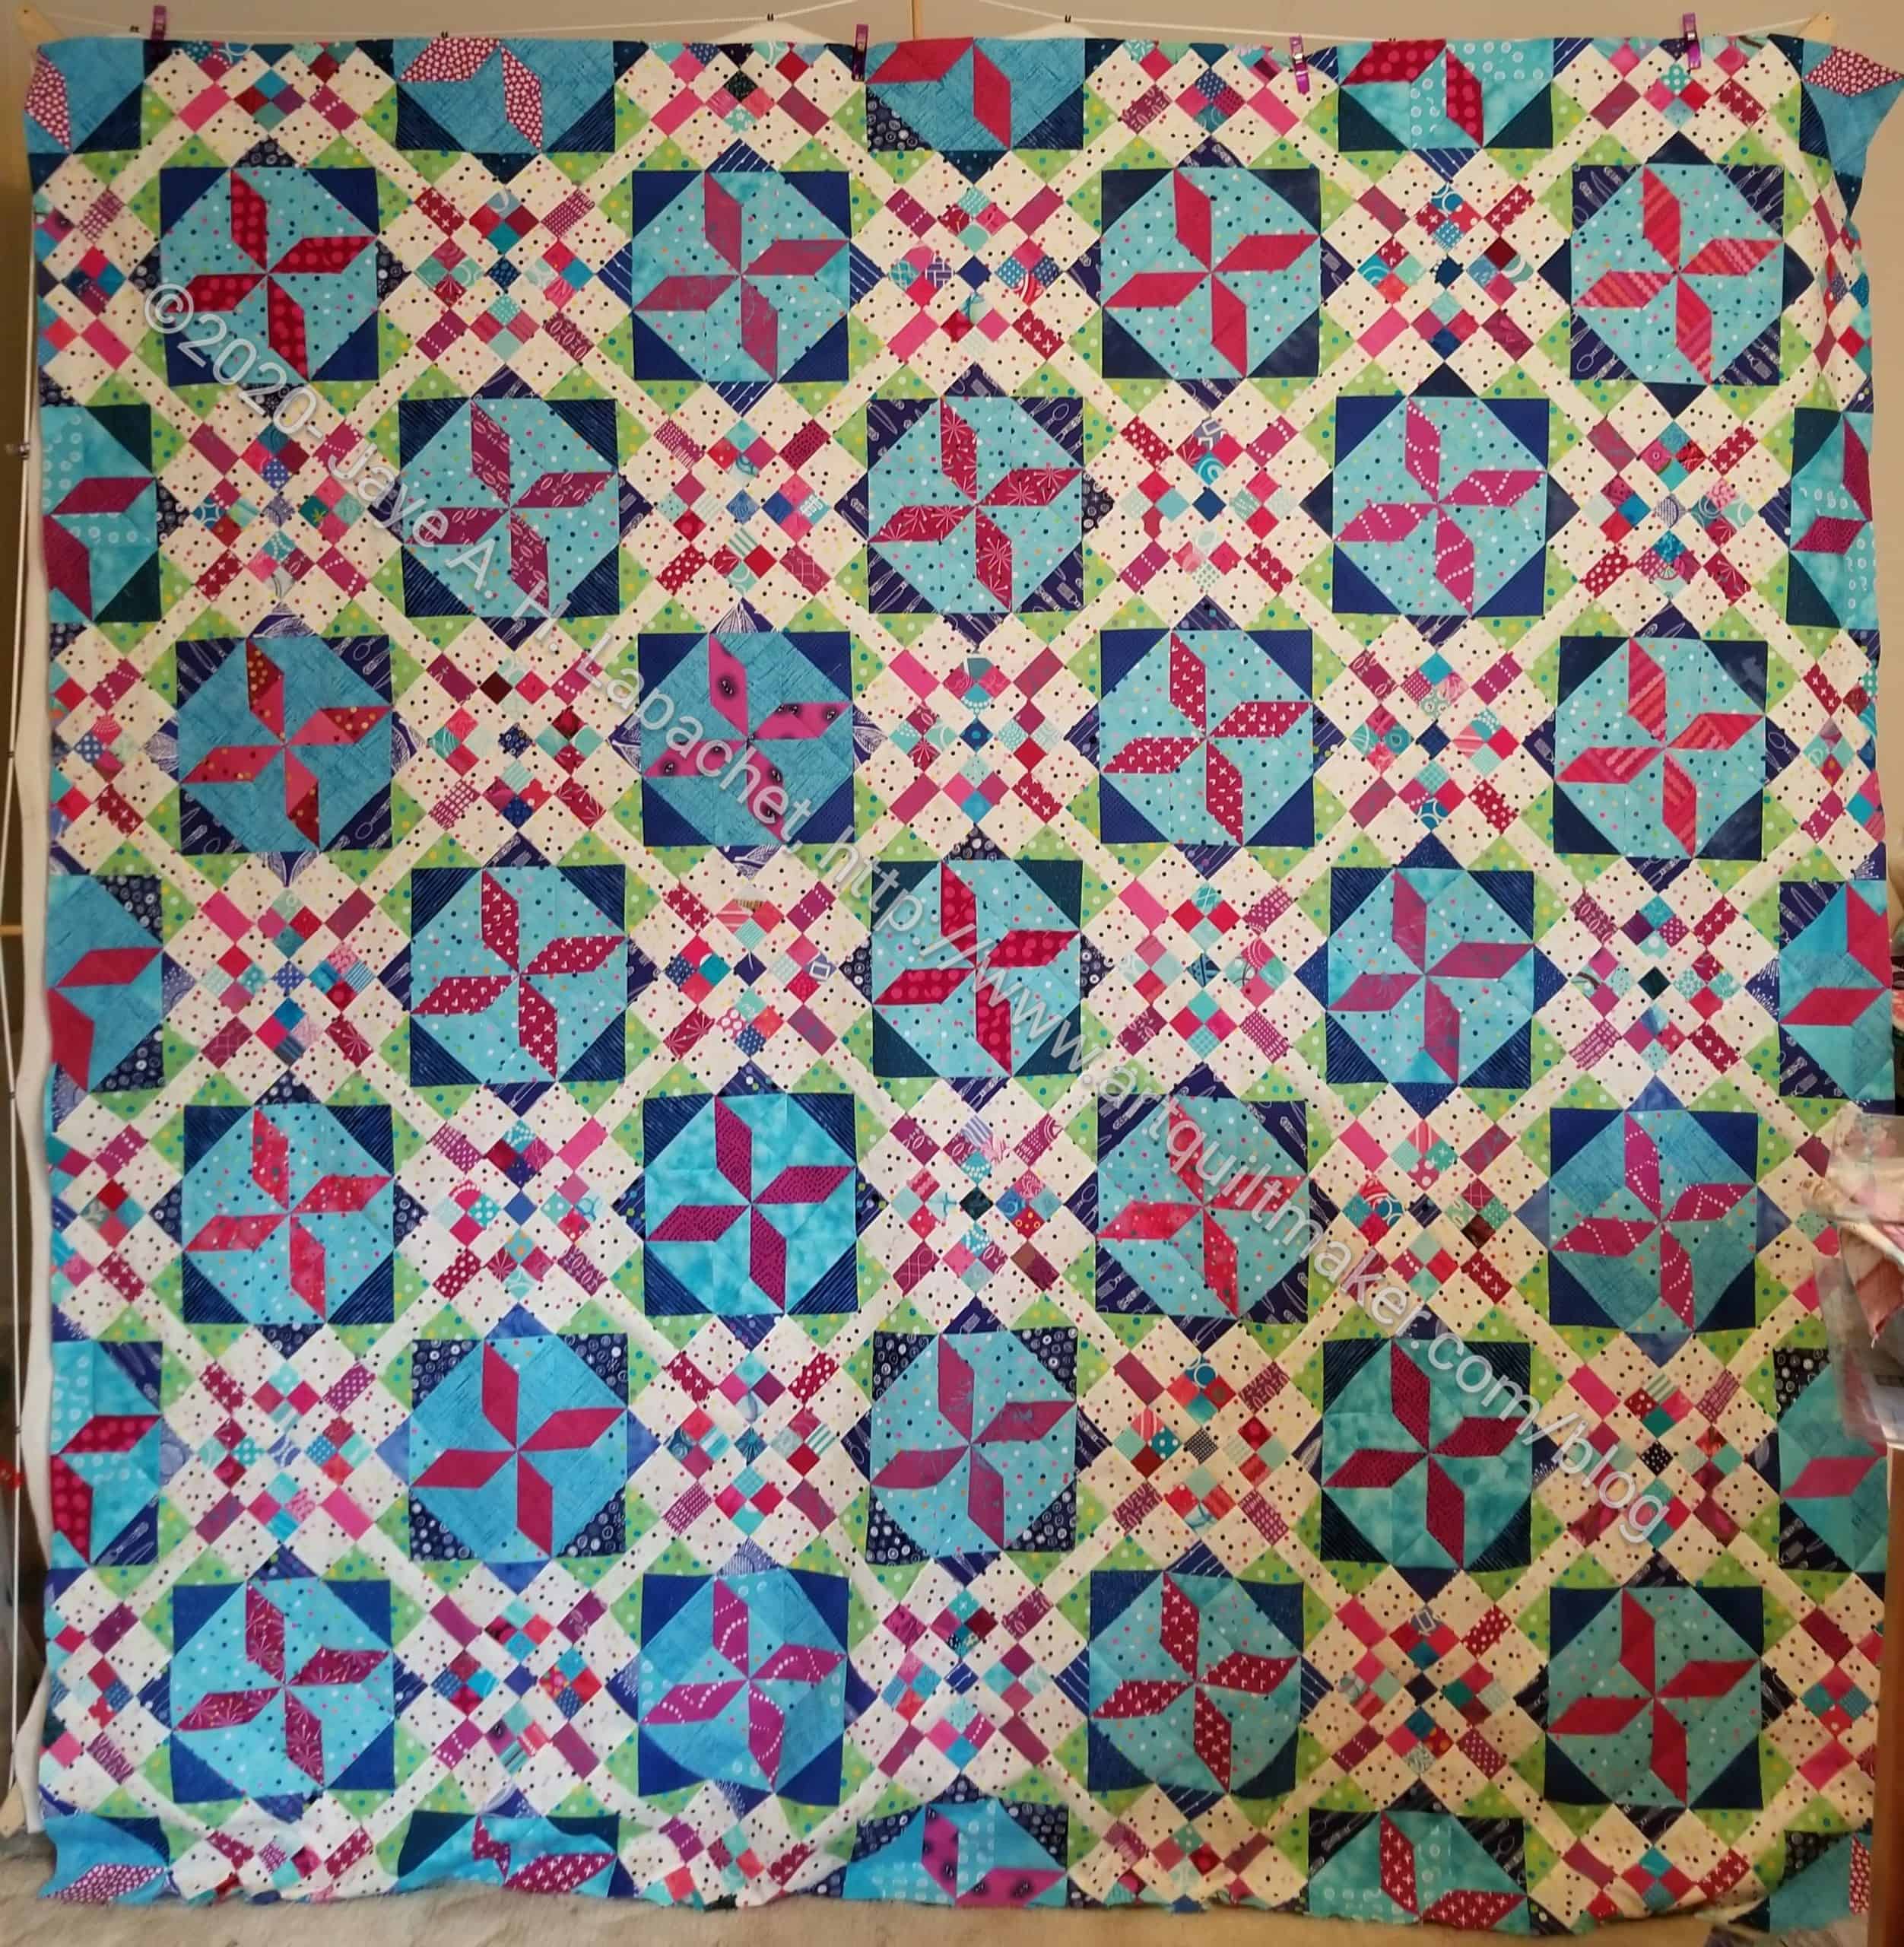
I am really pleased with this quilt. Piecing it all together made a huge difference!
Today would be Tax Day, but it isn’t and I am pretty sure I don’t need to go into why.
This is the last seam. I had to take a photo, because I feel like this top has been such an effort.
Frolic! Center Together
Yes, the top is together.
Finally! Seriously, I feel like this center took for-freaking-ever!
As I said last week, I have a long way to go before I can get it to Colleen, but this is major progress. I feel like I have accomplished something.
My friend Cyndi retired (even though she is about 35!) just before the shelter-in-place order and she is going to town on her UFOs. She is the rockstar who finished her UCAB already.
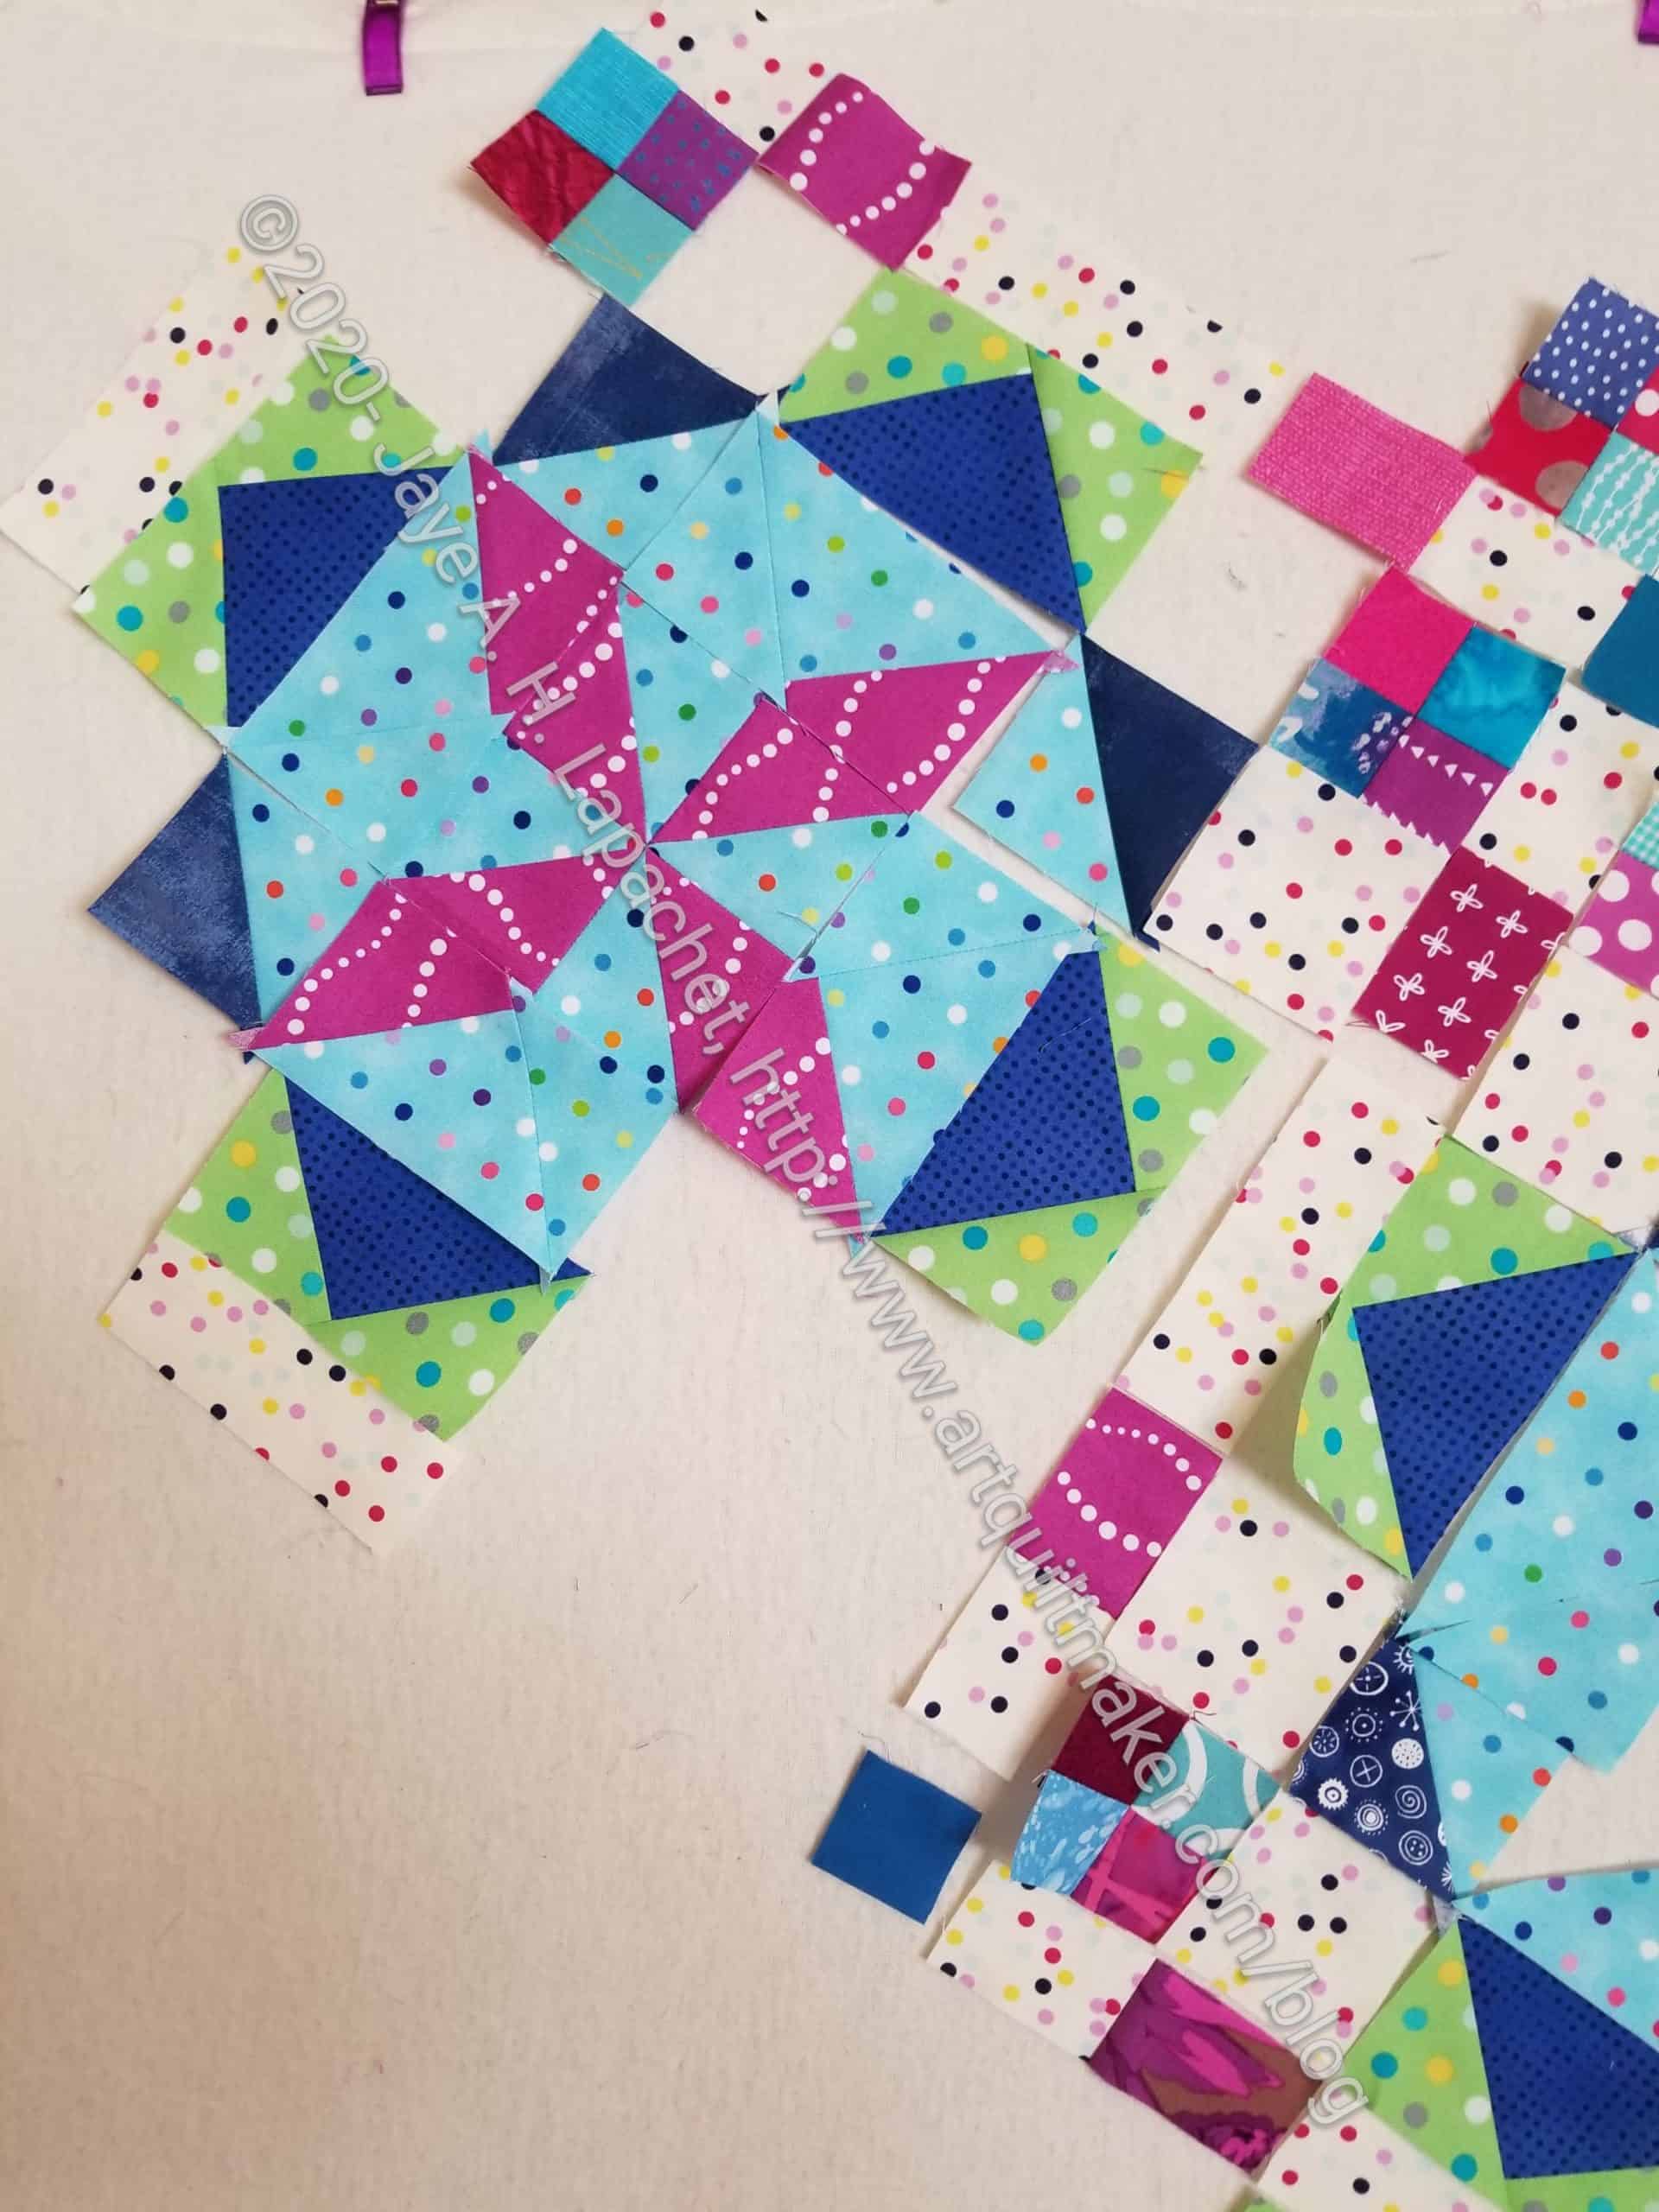
Frolic! Secondary Block
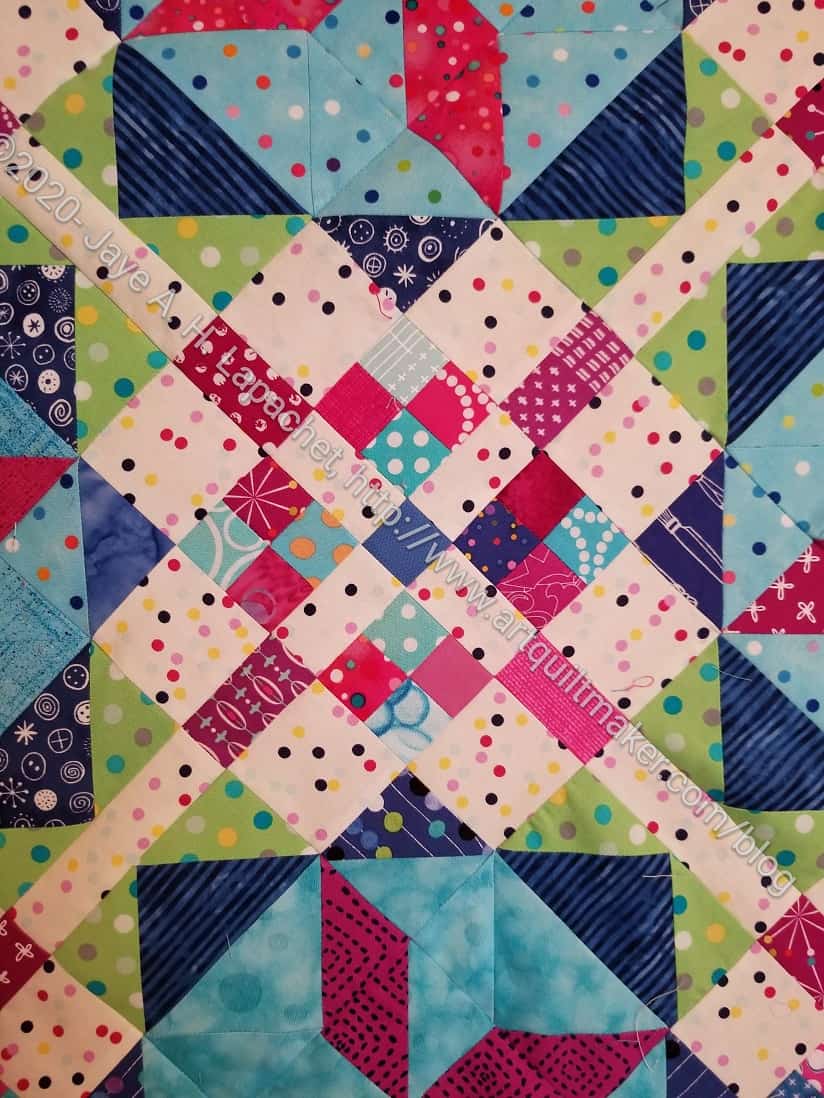
I think I might need to do something with the secondary blocks/setting blocks. They really look good sewn together. The bad part is that the block is made up of the edges of the main blocks. I could include the pieces on the edges of another block. I just have to figure out how to do it.
I liked this top before I started sewing it together, but I like it so much more now. Despite my whining, I think it looks great. I am constantly amazed how sewing the blocks together can change the look.
Someone asked me why I just don’t put it away and work on something else. Yes, I have been *almost* miserable working on this at times, but I want to keep my habit of not putting a quilt away. I don’t want to build up my UFO pile again after working so hard to get it down to a manageable size. It would be easy to put it away, but I don’t think it would feel good and I am sooooo looking forward to add the yardage to my “Fabric Used” spreadsheet!
I am finally sewing the Frolic! quilt top center together! Yay! I say and I am sure you say, because we have both, probably, had enough.
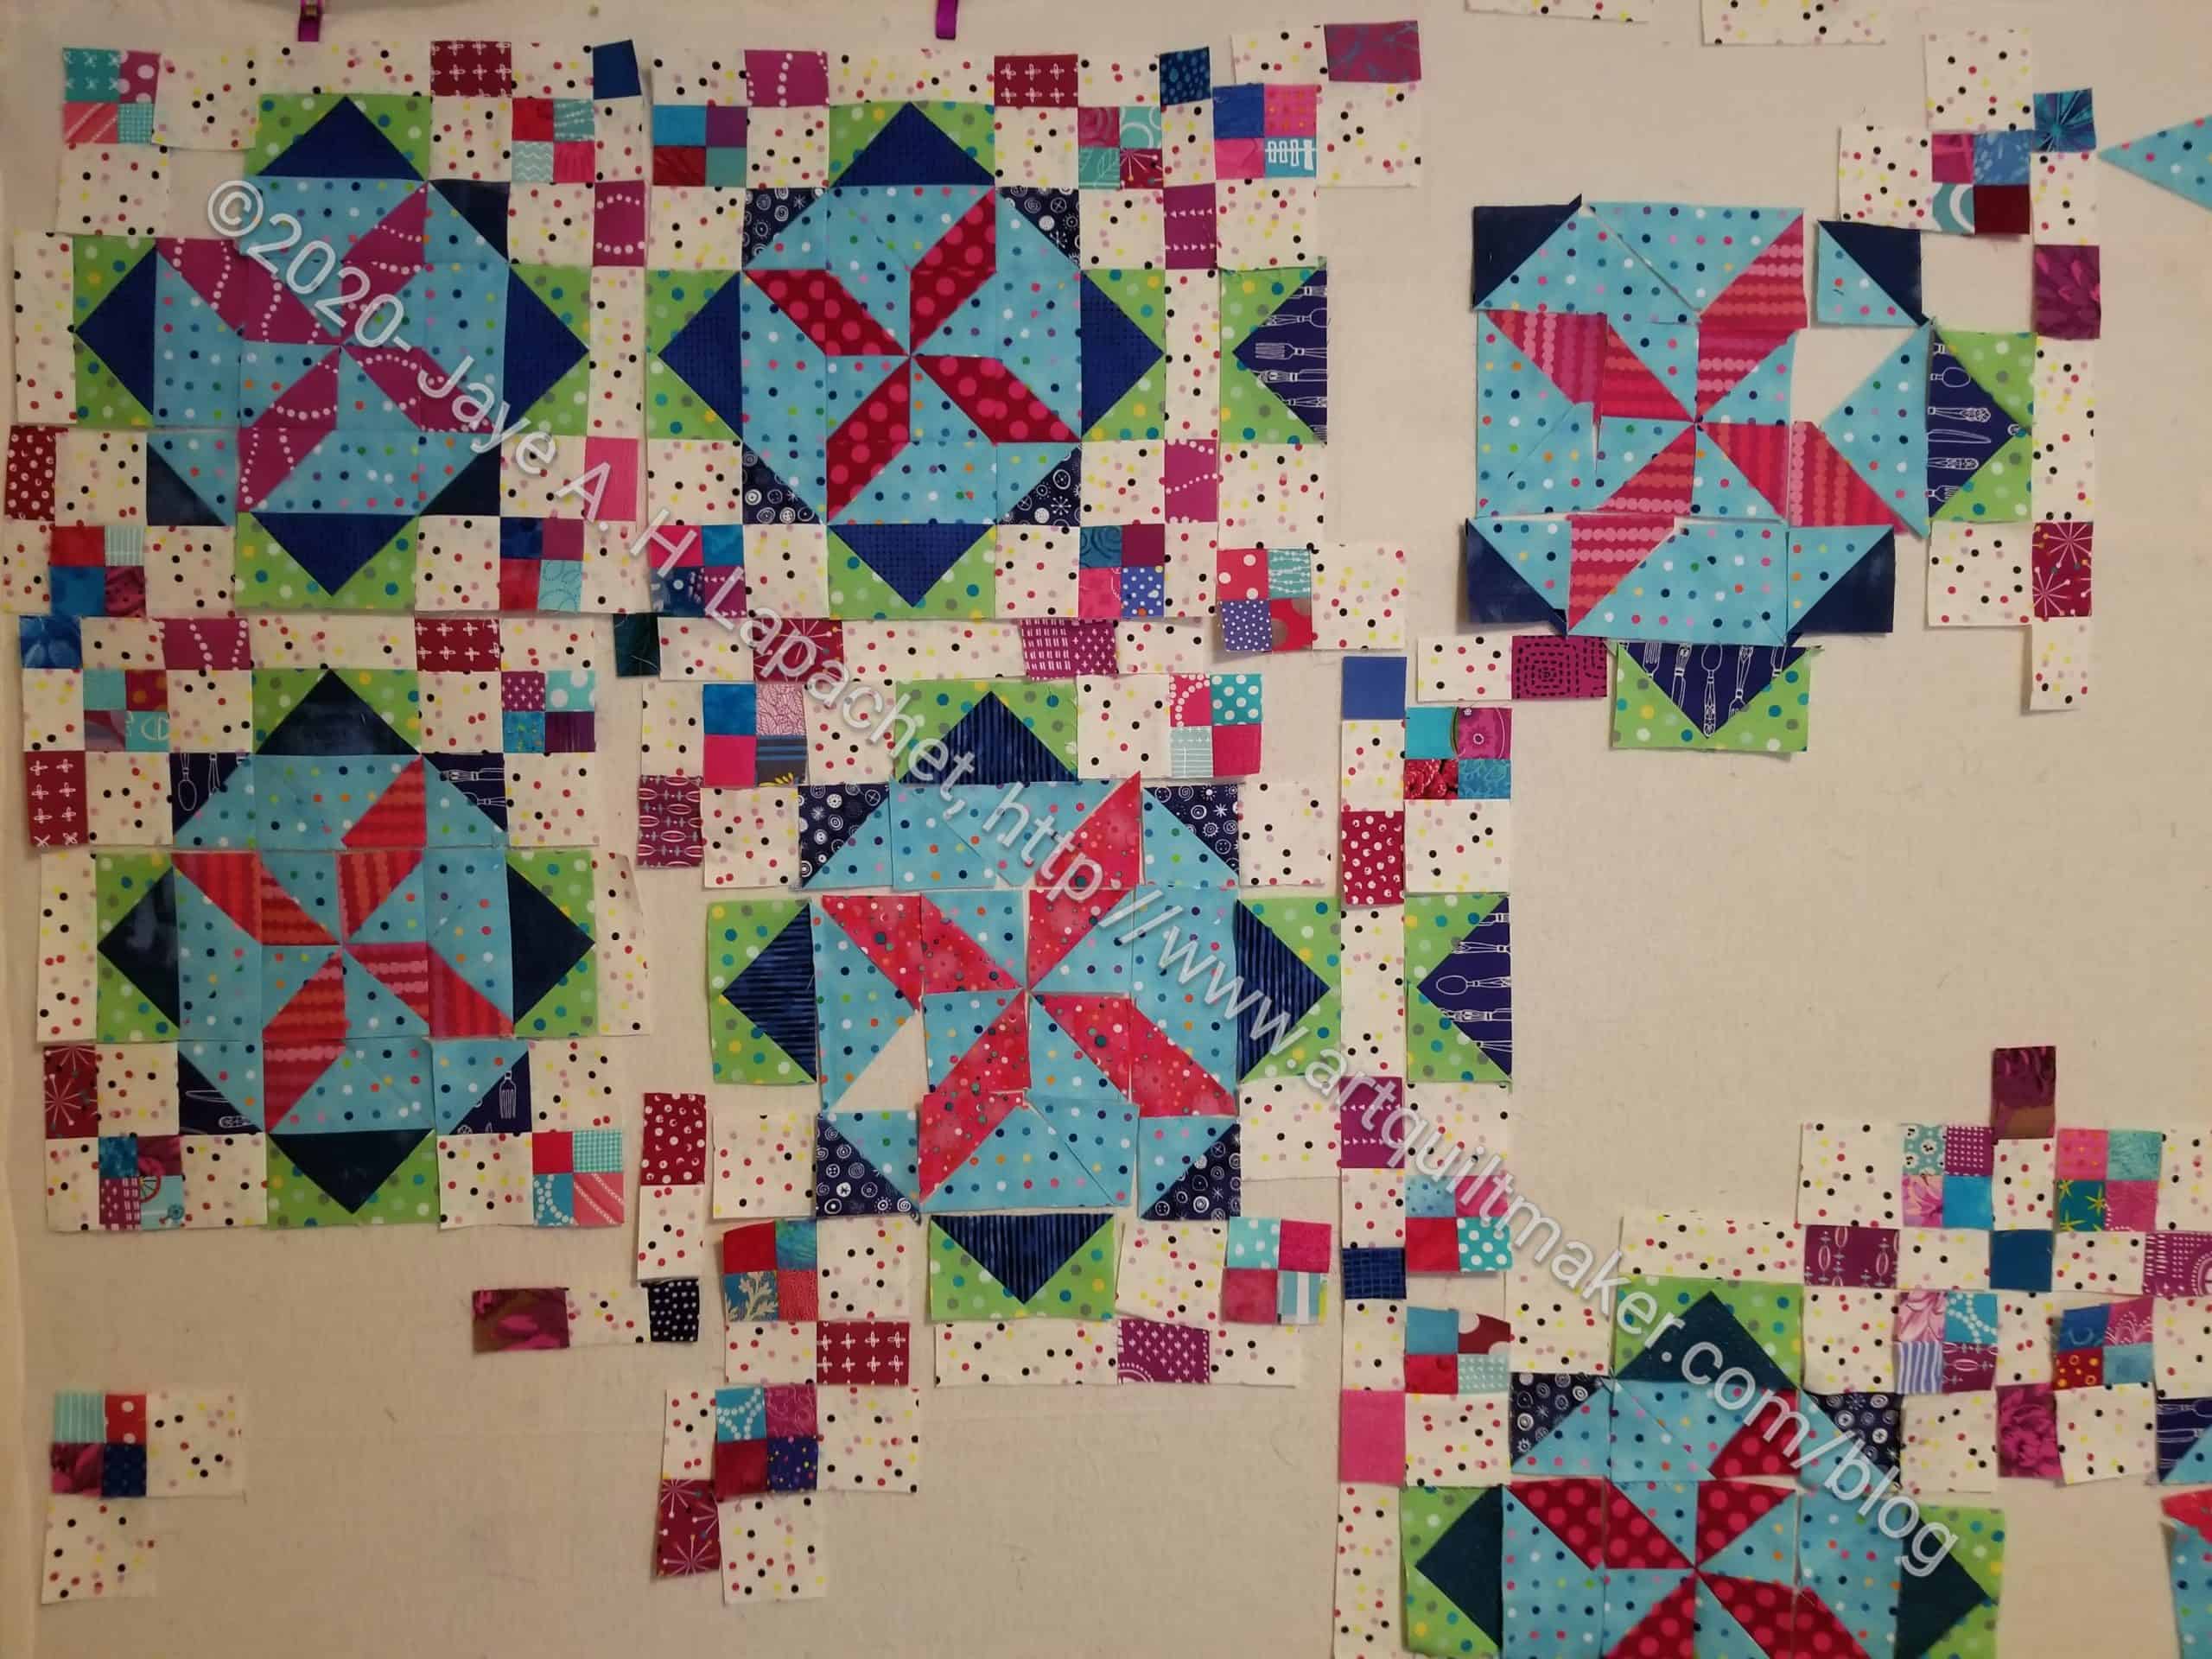
It isn’t really pretty, though, as I sewed sashing to the blocks in an attempt to chunk the blocks and that worked against me in the final stages. I have had to do some partial seams. Some blocks ended up with sashing on them and others didn’t.
< this is one of the good things about shelter-in-place: sewing at lunch time >
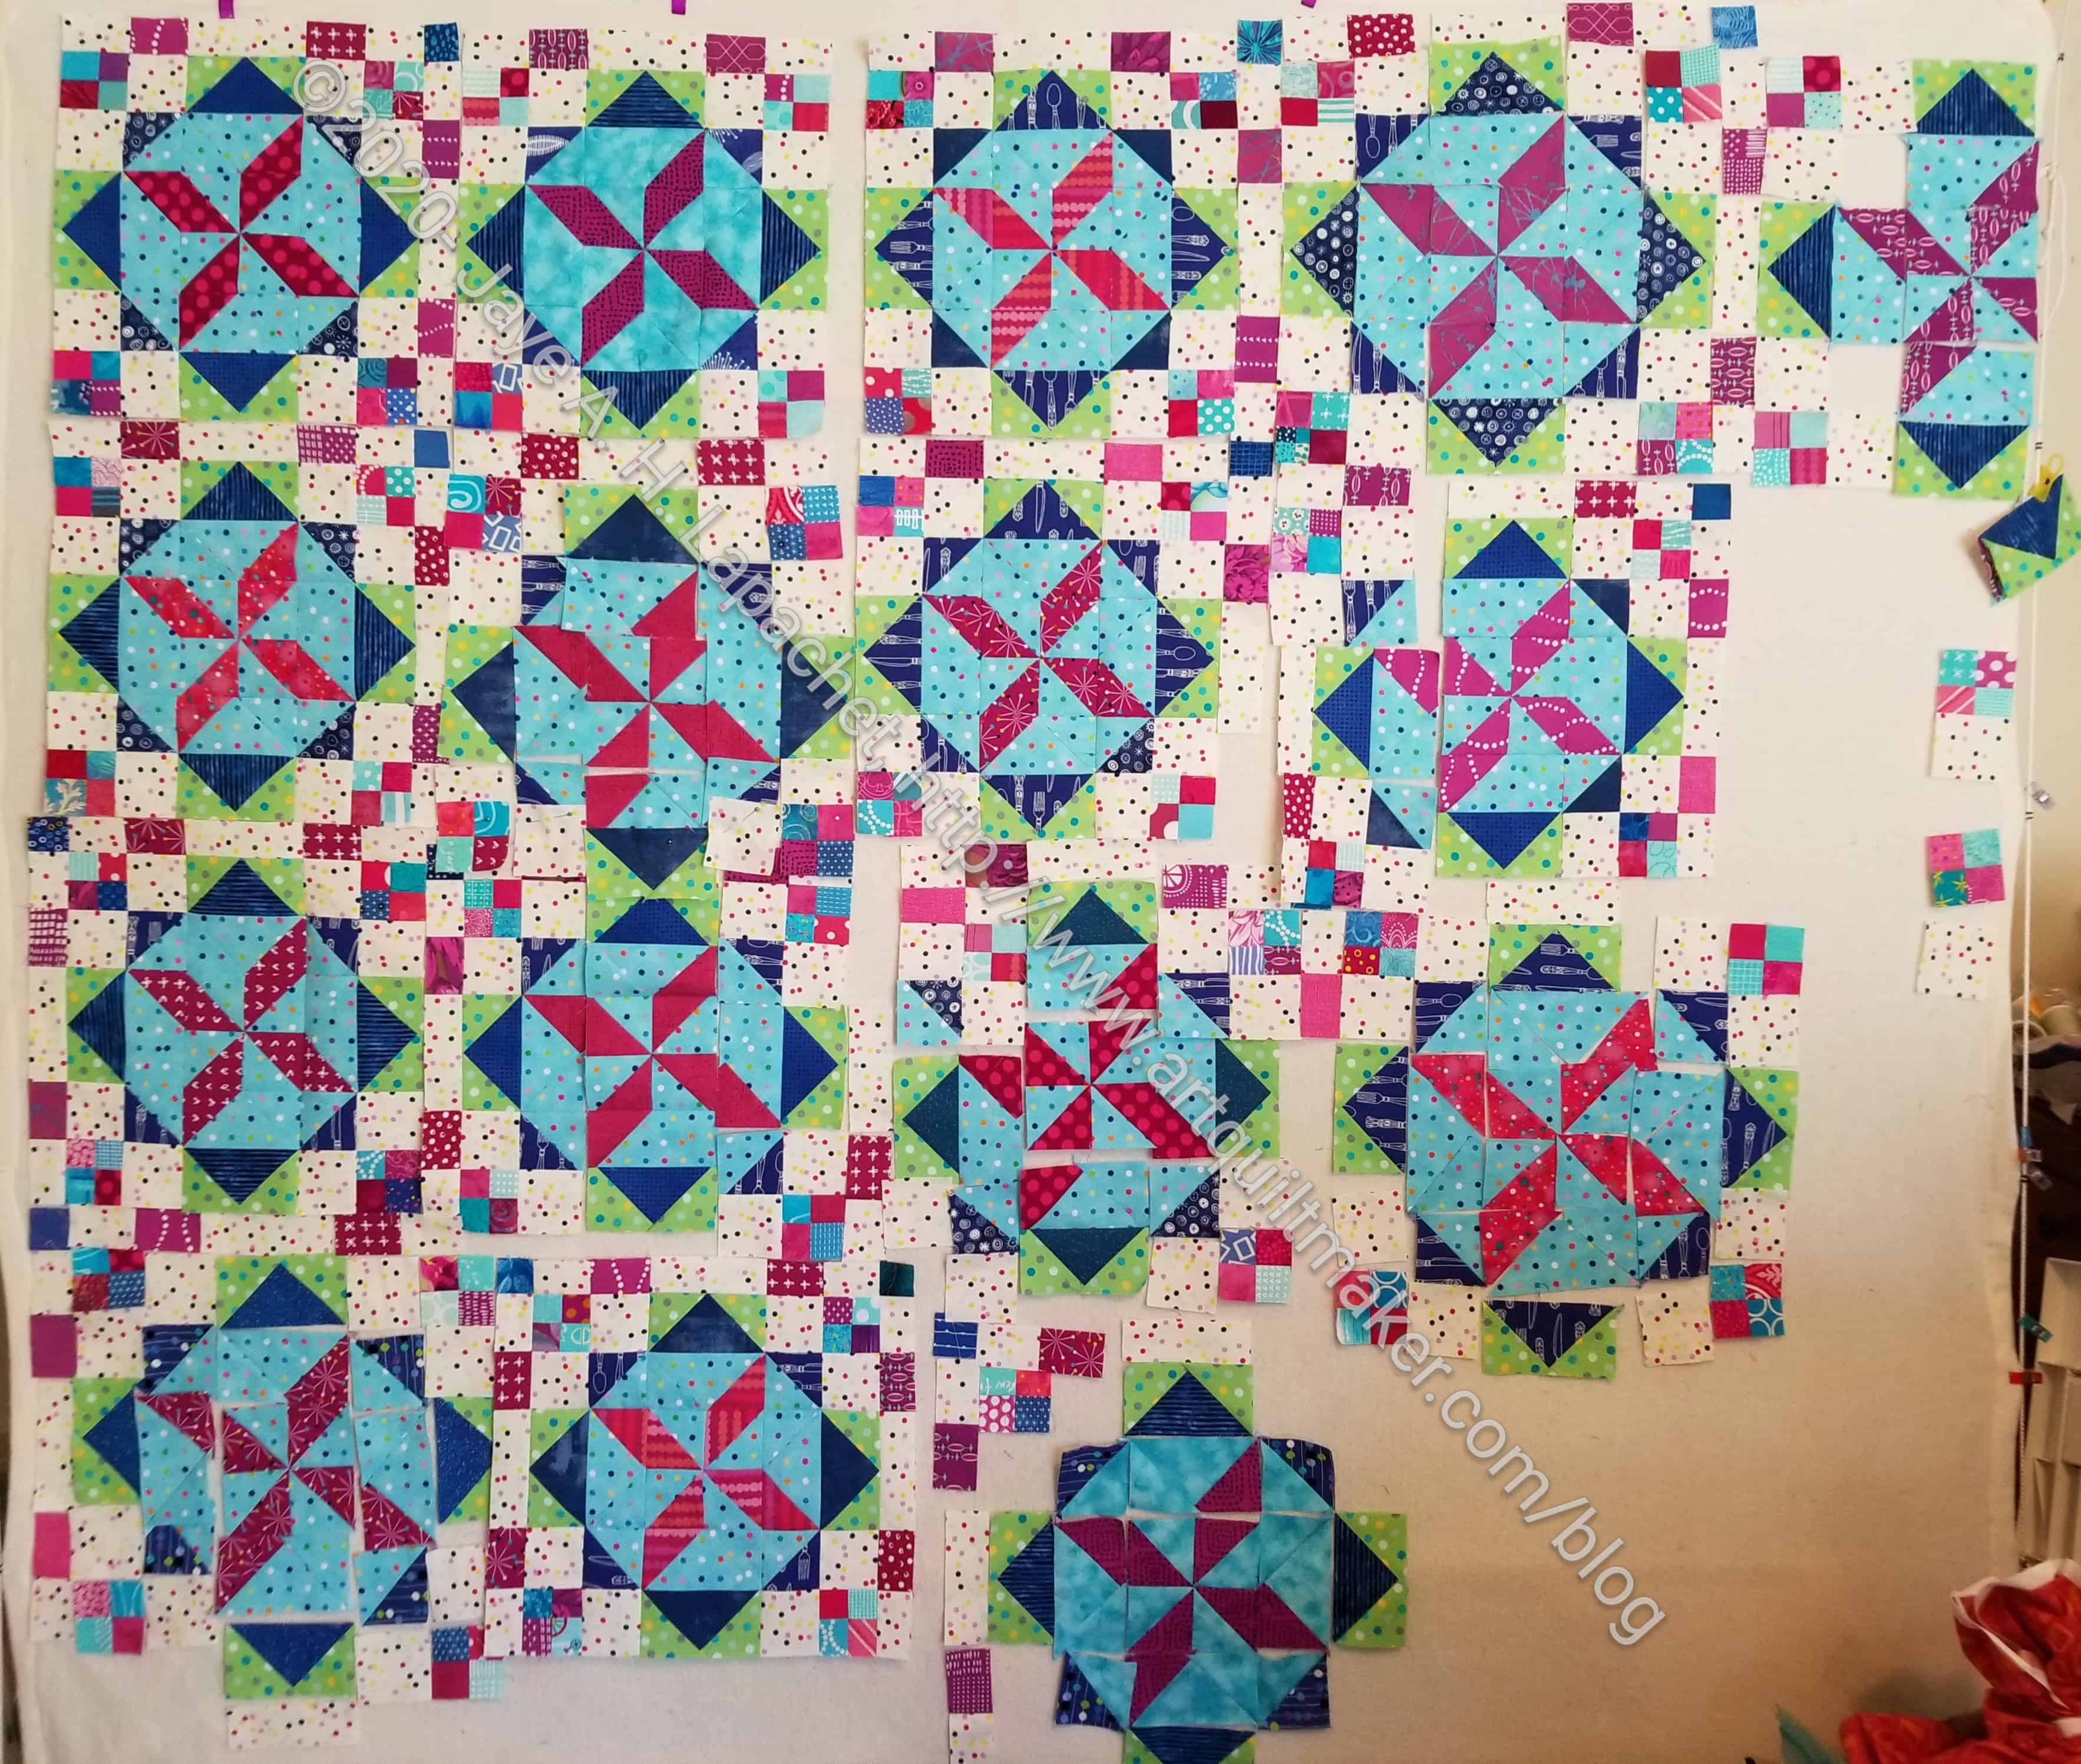
Since then I finished all the blocks, half blocks, quarter blocks: ALL. Hooray. Now I just have to sew the thing together.
This doesn’t mean the piece will be finished. There are still at least two borders, the back and the binding. Perhaps by the time shelter-in-place is over, I will have it done.
You probably think Frolic! is taking forever. I think it is so you wouldn’t be wrong!
Frolic! Mid March 2020
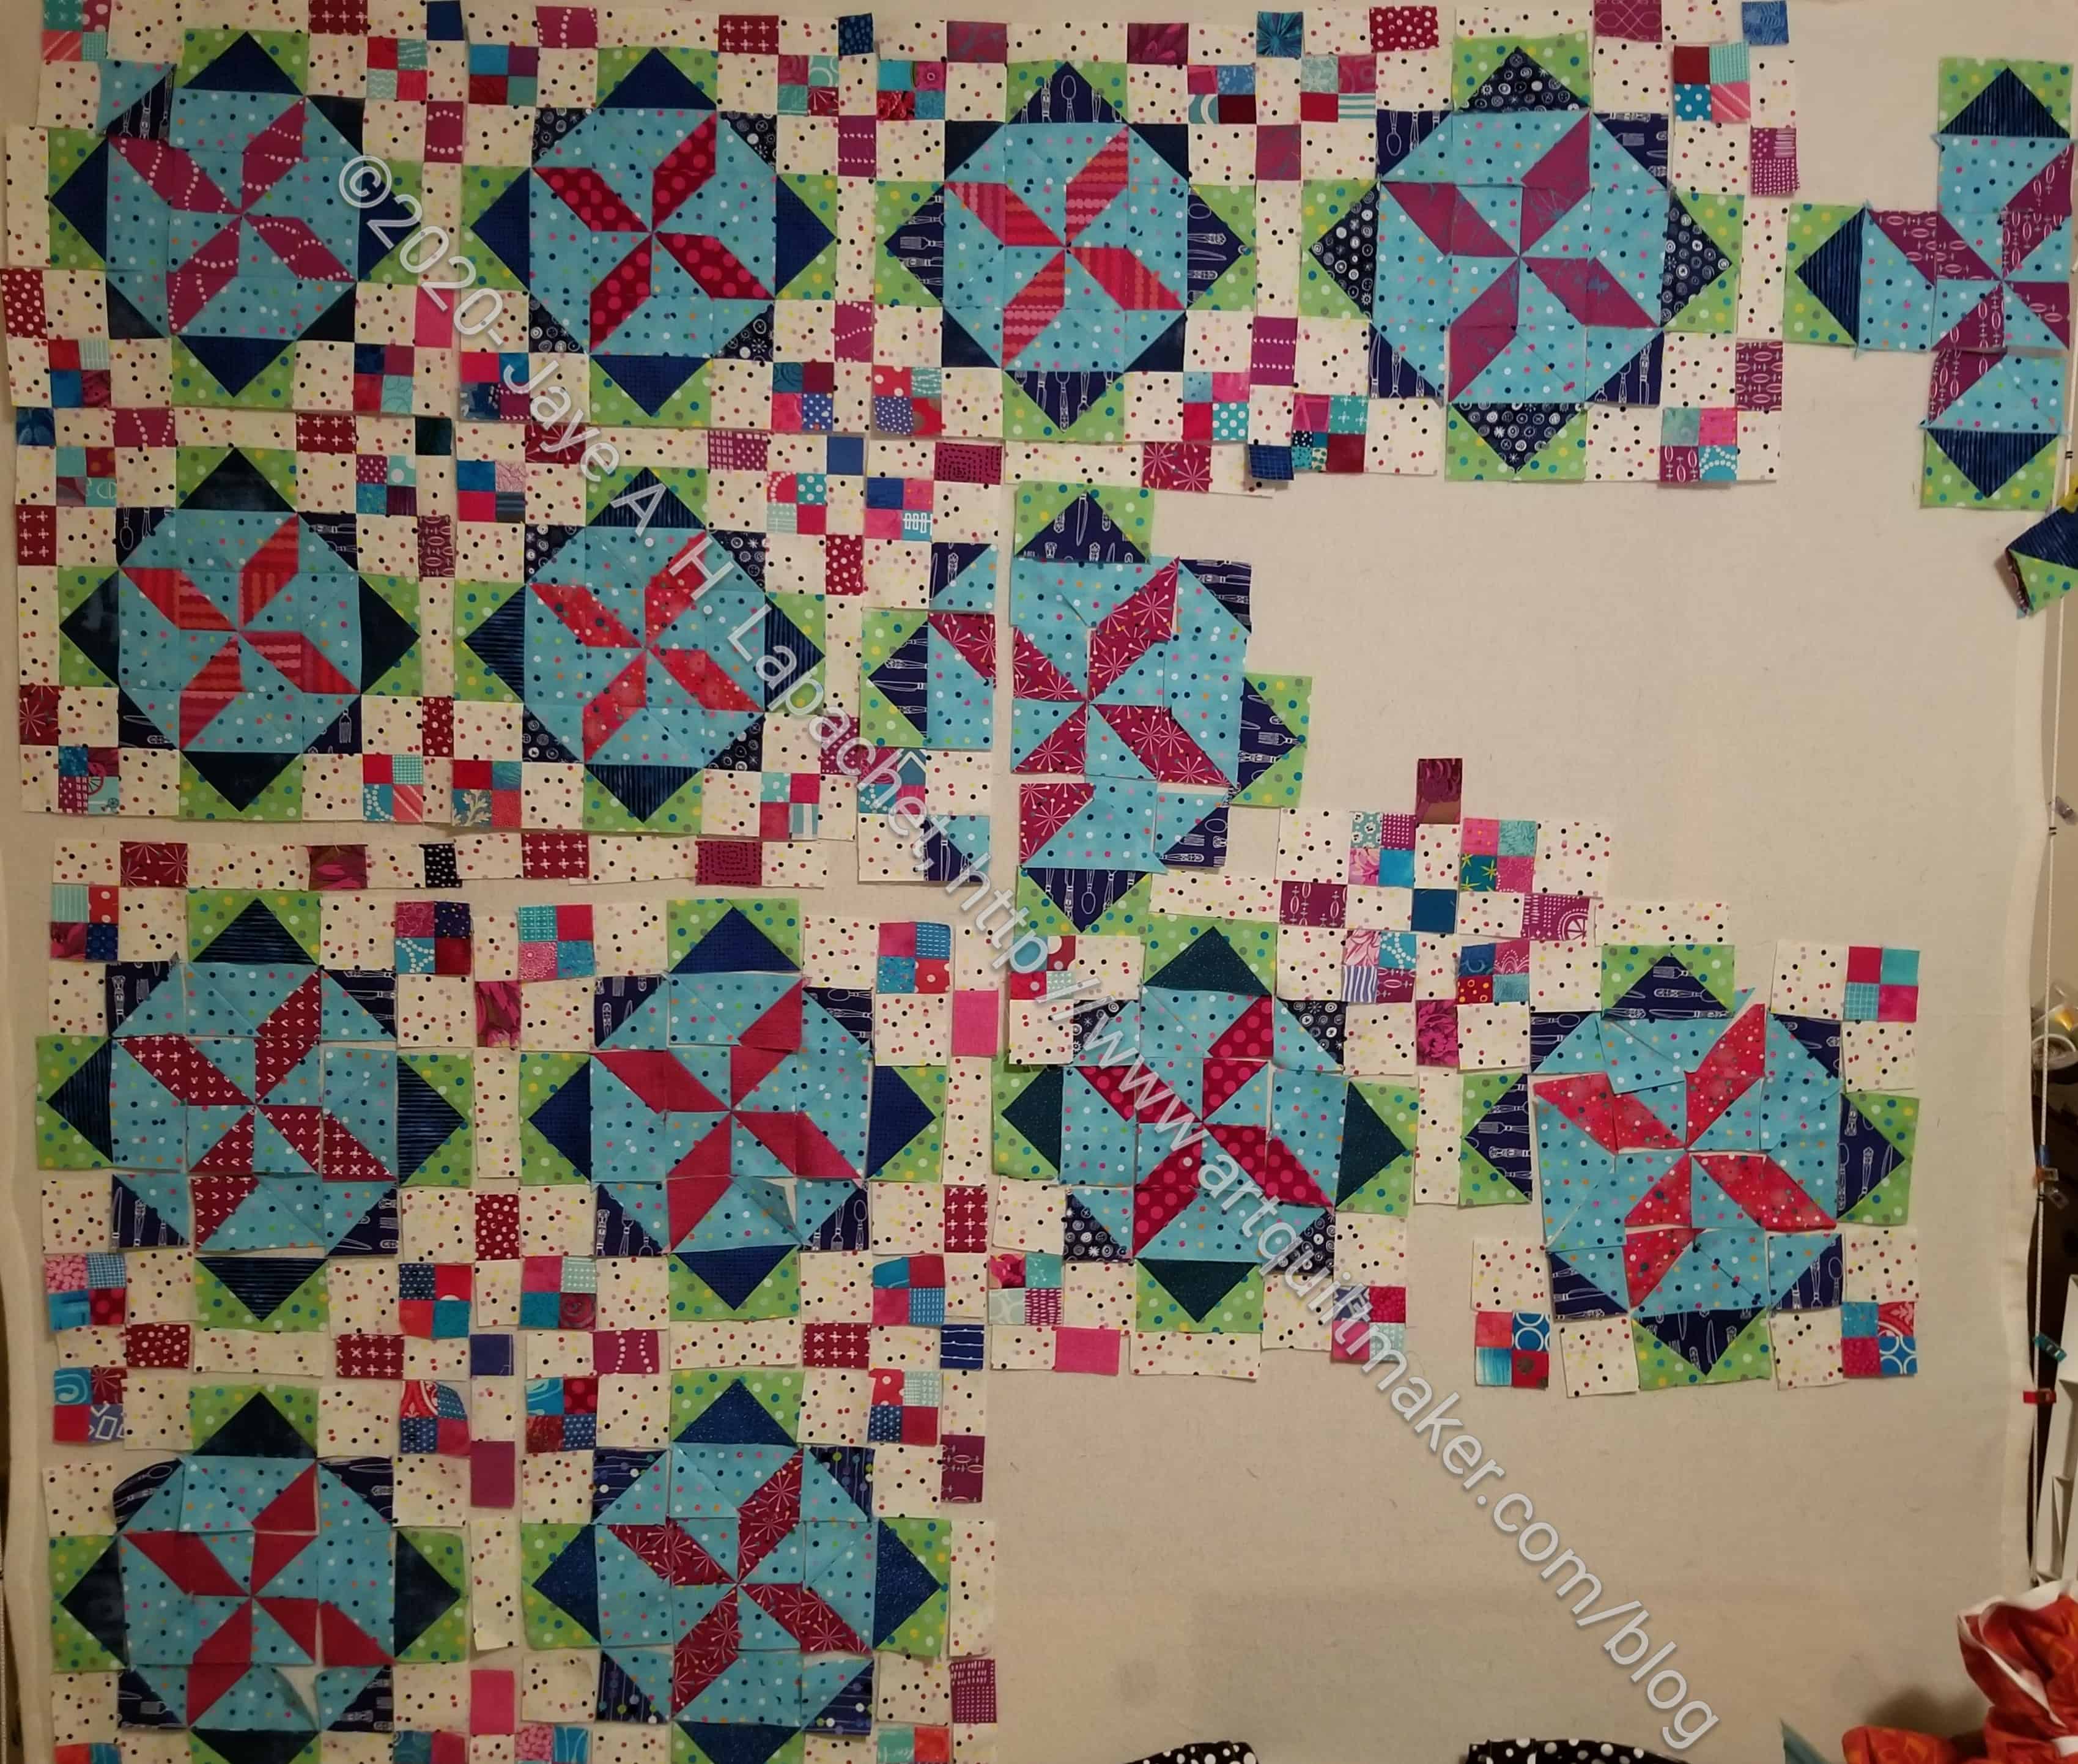
I pieced a lot this weekend, what with COVID-19 keeping me at home 24/7 (no, I am not sick, but everything is cancelled), I really had nothing else I wanted to do. I finally finished sewing together all of the whole blocks.
After not getting a response to my plea for the Amy Bradley fabric, I am cutting the last bits very carefully and scrounging every last bit. I won’t have enough to use for the half and quarter blocks, but I found another fabric that will work as well. It has a similar blue to the background of the Amy Bradley fabric, so will blend in.
I spent another day Sunday, ostensibly sealing the fate of the cold I felt coming on, but really sewing. I did stay home in order to make sure I didn’t get sick. It was a great time to sew. I thought I would get as much done as I felt I had done on Saturday. It wasn’t to be.
I feel like I sewed as much, but I can’t see the progress. The progress isn’t as dramatic and I wanted visible progress.
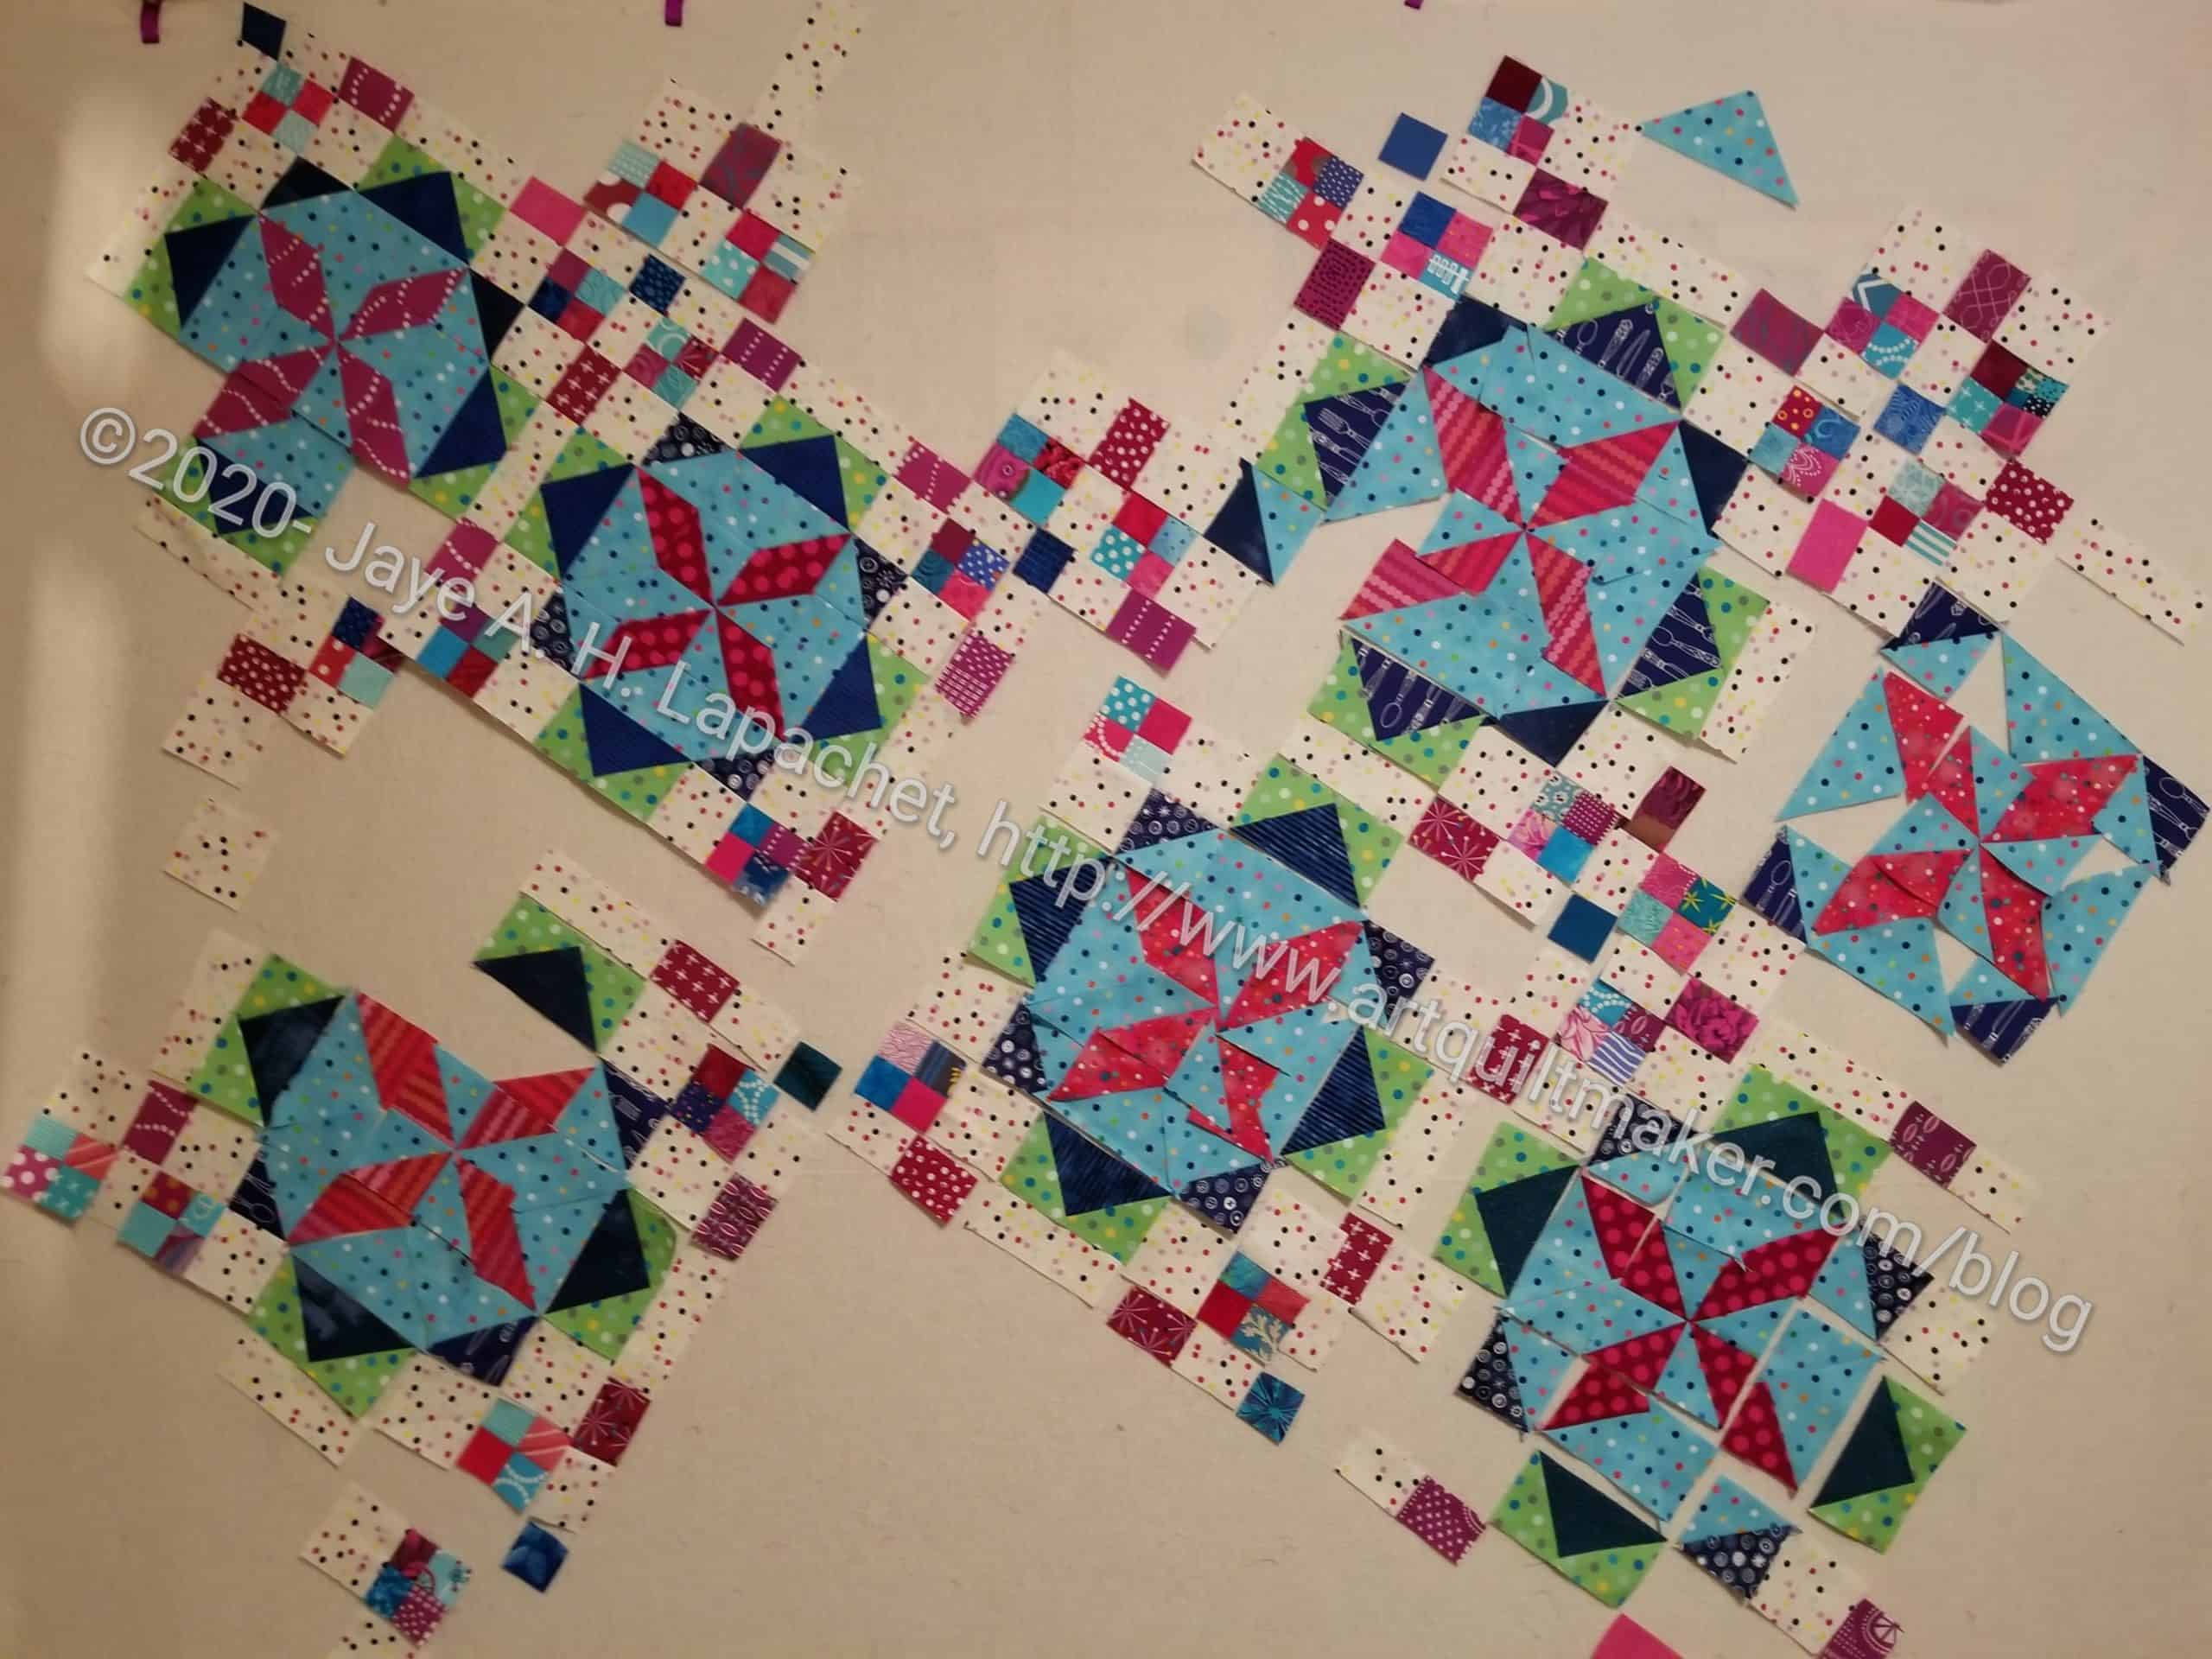
After my efforts on Friday night and Saturday, I was hopeful that I would get the blocks done on Sunday. I had to make space on my design wall. I would gain space as the seams shrank the blocks together. That required sewing, so I got down to it. I forgot how much piecing Bonnie Hunter‘s quilt patterns require. I really did make progress. If you compare the two photos, they look similar at first glance, but do show the progress.
Frolic! – end of February 2020
Work finished Sunday:
Frolic! – early March
I also know I am on the brink of really having my progress show up.
After last week’s Frolic! ‘progress’ and my lack of time to tinker with projects during the week lately, I felt like putting Frolic! away and working on something else. This is not a good strategy for me and would not have helped the project. I also don’t want more UFOs.
I decided on Friday that I go back to Clue 4 and start there. I decided I would spend a little time cutting as not having the pieces to work with seemed to be hampering me.
I have to acknowledge that I did sew blocks together last weekend and that was some project.
Frolic! – end of February 2020
I, however, wanted major progress and that required cutting more pieces. I cut about 15 ‘sets’ on Friday night. When I was ready to sew on Saturday, that made a difference. I still had to do some cutting, but I was able to get a lot of sewing done. The blocks are not all sewn, but they are well on their way and my design wall is more full.
The best part was that I felt like I did good work and felt hopeful about this project again.
I am backtracking. I worked hard on piecing Frolic! over the weekend. This is no different than other Bonnie Hunter Mystery quilts in that there is a lot of piecing. I think I pieced 1.5 blocks total. I worked for about 6 hours on this piece and don’t feel like I made a ton of progress.
Regardless, I had a lot of time to work on this piece and look at it. I think it may need to be on point. I may still set it straight, but I am thinking it may need to be set on point. Stay tuned.
Half and quarter blocks are not my favorite. As a result, I have been thinking about setting Frolic! in a straight set in order to avoid those pesky half and quarter blocks. Since I haven’t had the time to actually move any blocks around on my design wall, I went trolling for examples of the Frolic! quilt on IG.
I saw a number of blocks sets laid out in a straight set. Jeff Rutherford took a straight on photo that really helped me visualize how the quilt might look. Little Bunny Allison also posted a straight on photo.
Finally, I saw a previous Bonnie Hunter Mystery Quilt, On Ringo Lake, by Sew Angela. She has some setting triangles, but they are just a few pieces. This layout keeps the quilt on on point, but avoids me having to make those half and quarter blocks.
Perhaps I am just being lazy? There is a lot of piecing in this quilt (and all of Bonnie’s mystery quilts!) Barbara Reeves had a particularly nice example of the quilt as Bonnie intended, so it is still a possibility.
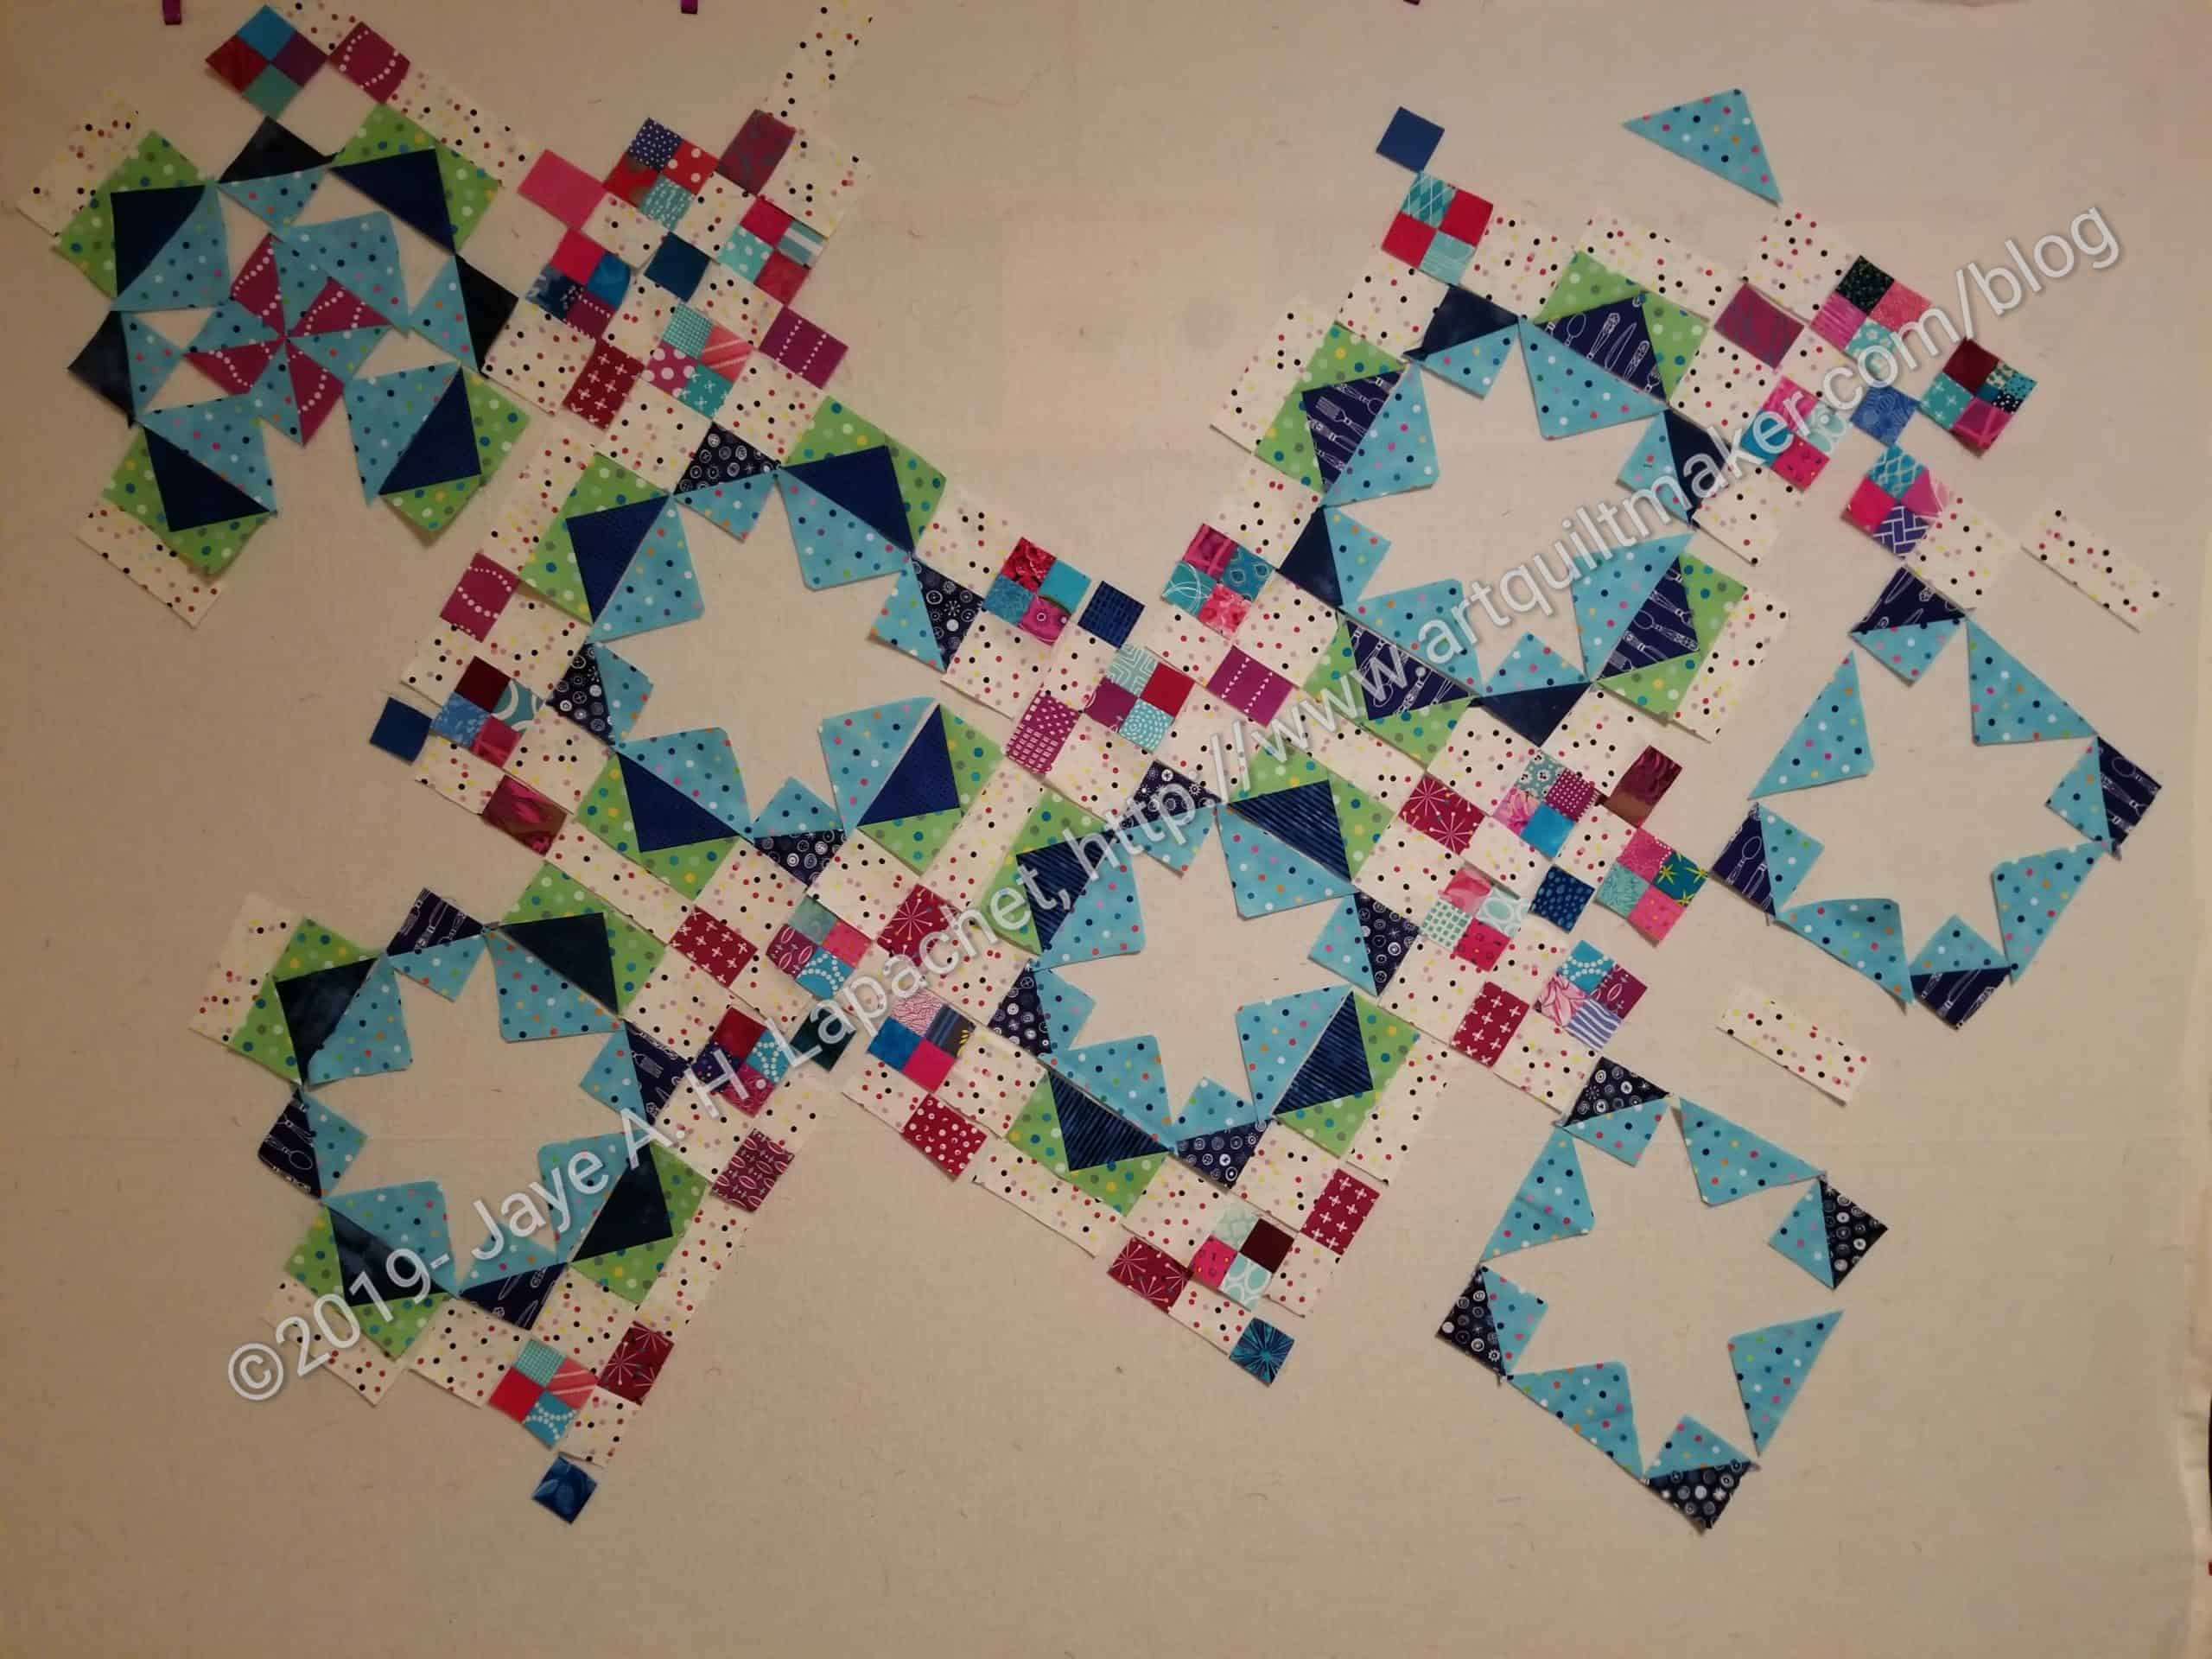
After the update the other day, the piecing on Frolic! went a lot faster. I think I reached a tipping point and was able to zoom right along. I made some more progress and feel like I am making good headway, though it looks like a mess right at the moment.
Frolic! Reveal in process
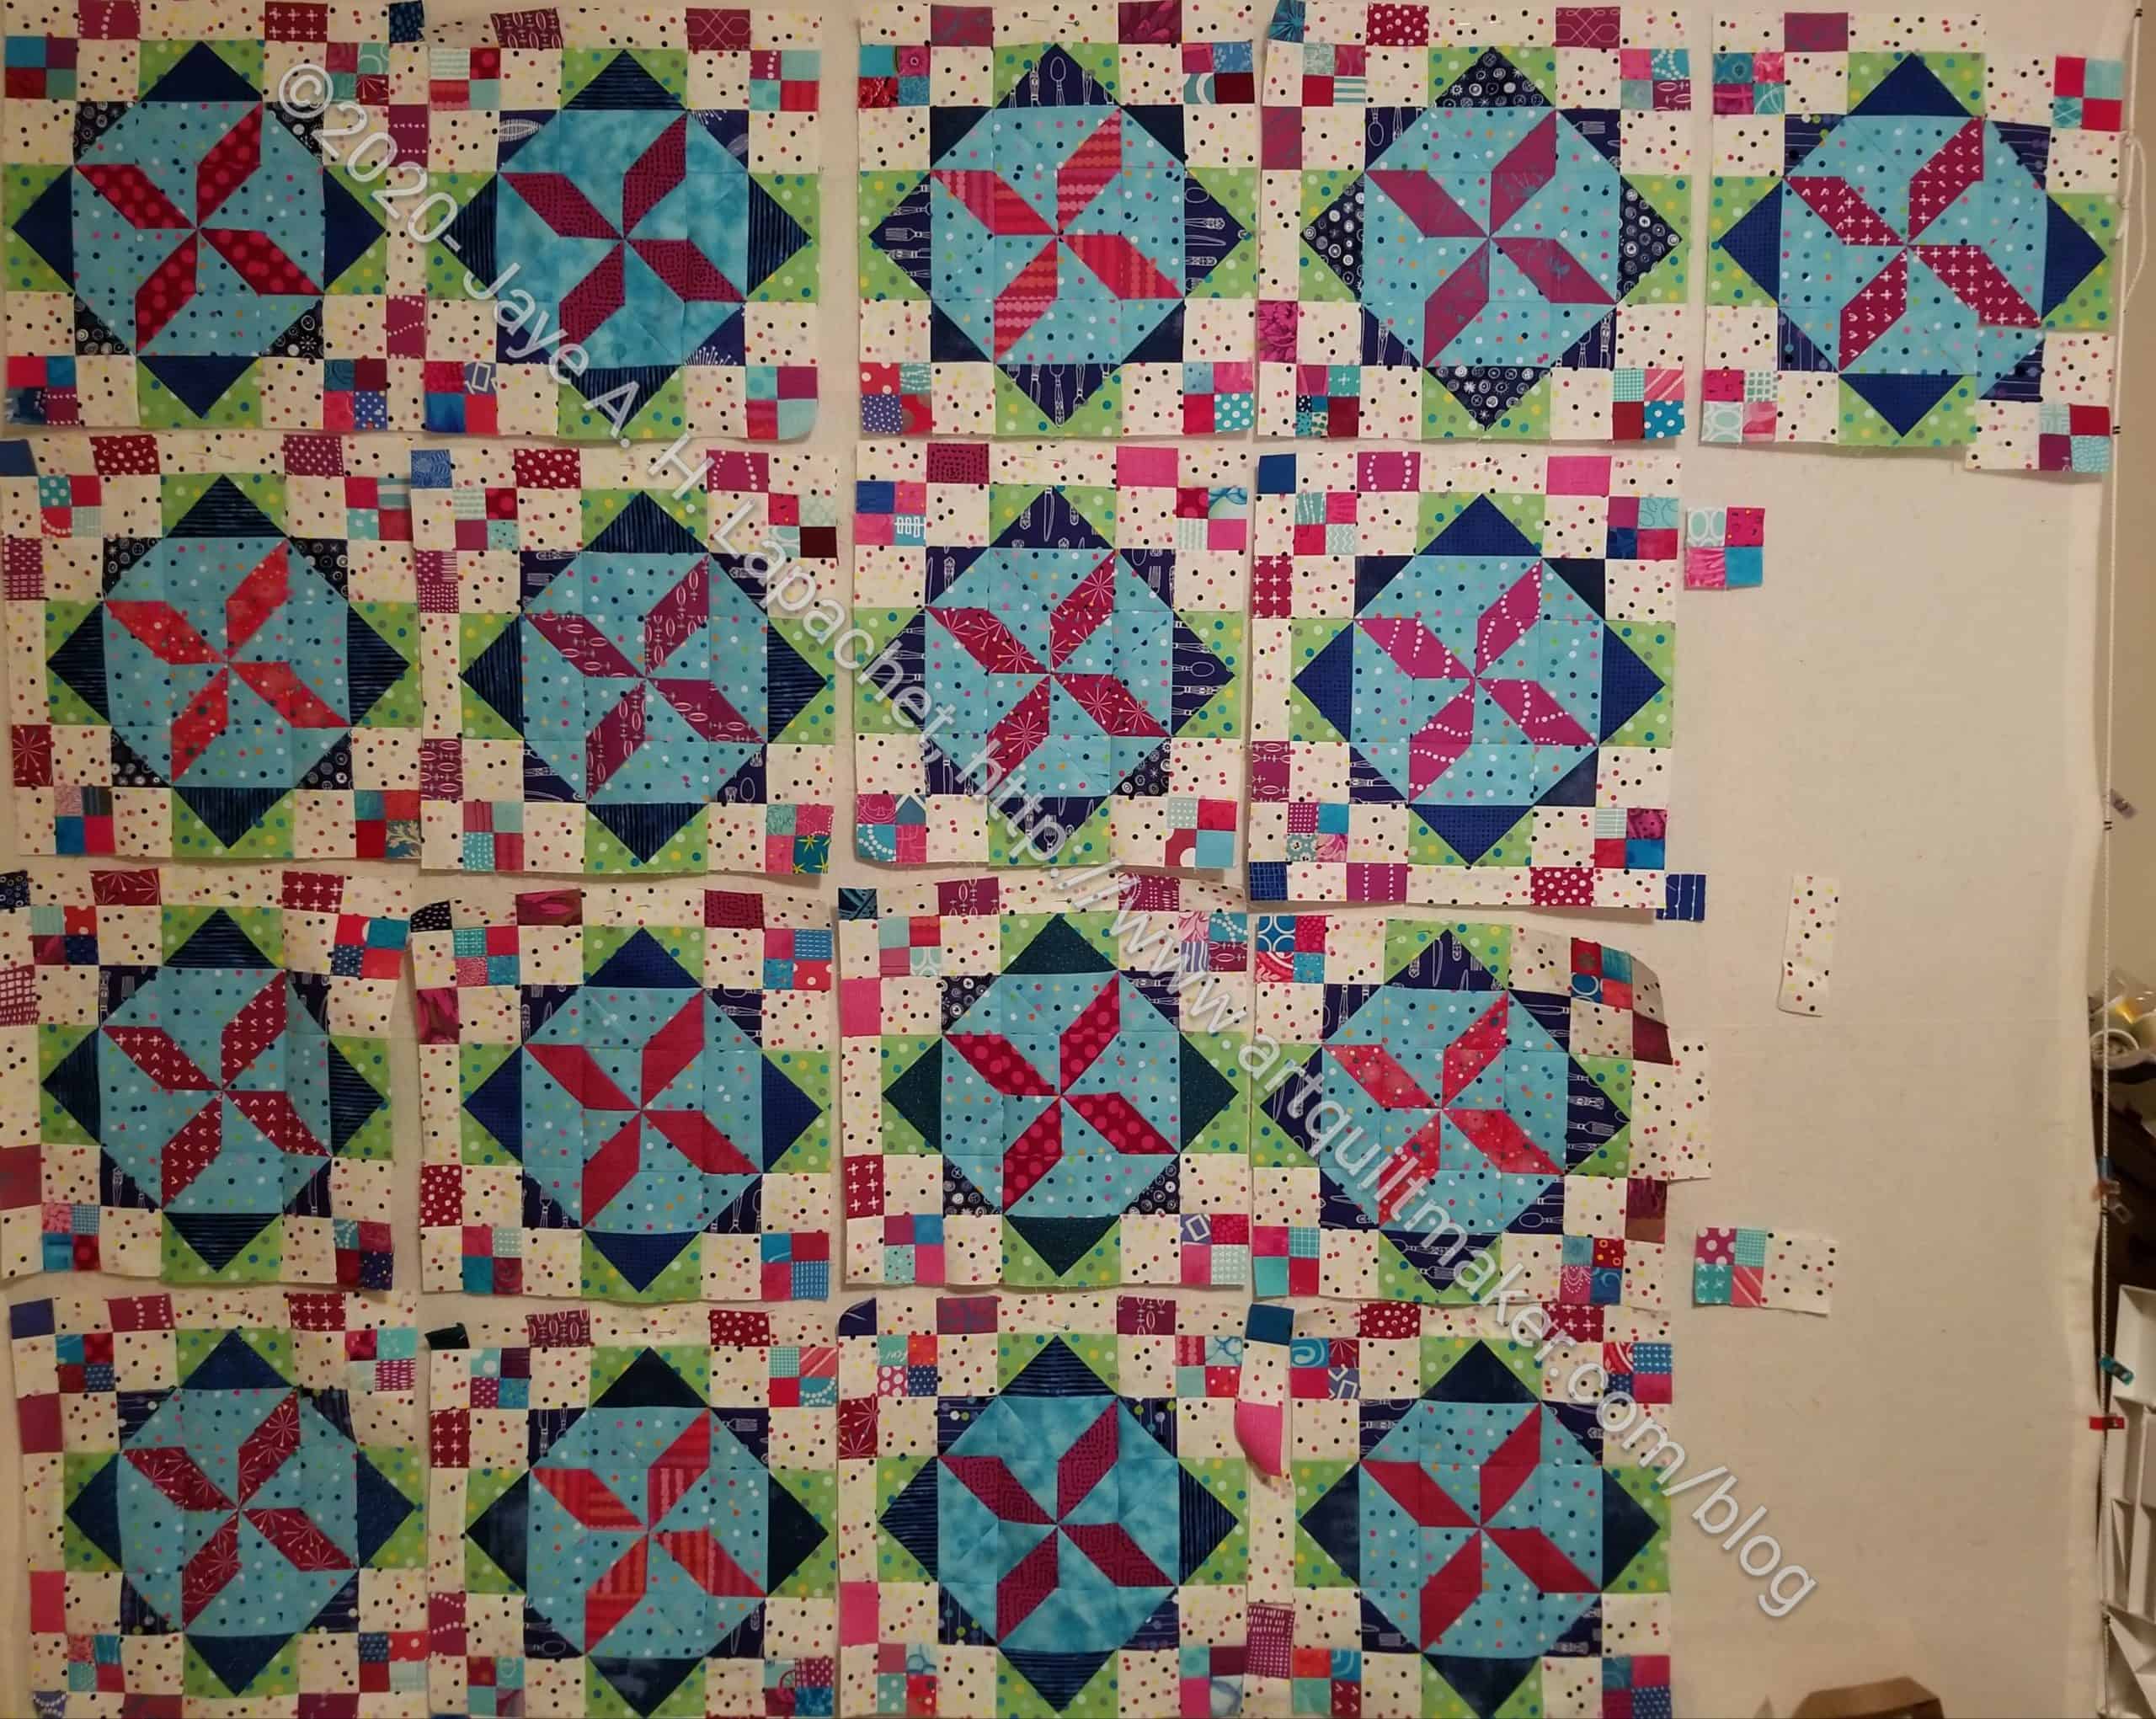
I believe I need 25 full blocks. The 7 I have are in various states of being sewn. The spaces are because of the seam allowances or missing pieces.
I haven’t dealt with the half and quarter blocks yet. I don’t like quilts where there are half finished blocks, in general. I am seriously considering a straight set. I laid out some of the pieces in that way before the Reveal. When I have a few more blocks finished, I’ll lay it out that way and see what I see. The corner pieces with the 4 patches make a very interesting secondary pattern.
Frolic!, or what there is of it, has been on my design wall since earlier this month. I said then that I didn’t want it to become another UFO, but I didn’t made any progress. I don’t want it to become a UFO, so I worked on it over the weekend.
I determined that I needed to start piecing in order to get interested in it again. I haven’t finished Clue 4 (still!). I don’t want that lack to drag me down.
I thought I would start from the corner and cut and piece as I went along, chunking the top together. The corners are a conundrum and I left them off after awhile and worked on the blocks. You can see that my progress doesn’t look like much, but it feels like progress. I am still contemplating a straight set.
A lot of the Frolic! Mystery quilts have been posted. I am determined not to let this one become another UFO, but I have to admit that a couple of the steps are not making my life easy.
They aren’t difficult just require a bunch of weird cutting and few speed techniques.
As you can see from the photo, I have done a couple of things. First, I rearranged the pieces so that the piece is oriented the way it will be oriented when it is all sewn together. I did not have it on point before. I didn’t exactly achieve the on point look at this time, but as soon as I get some of the more difficult pieces cut, I’ll be able to do it.
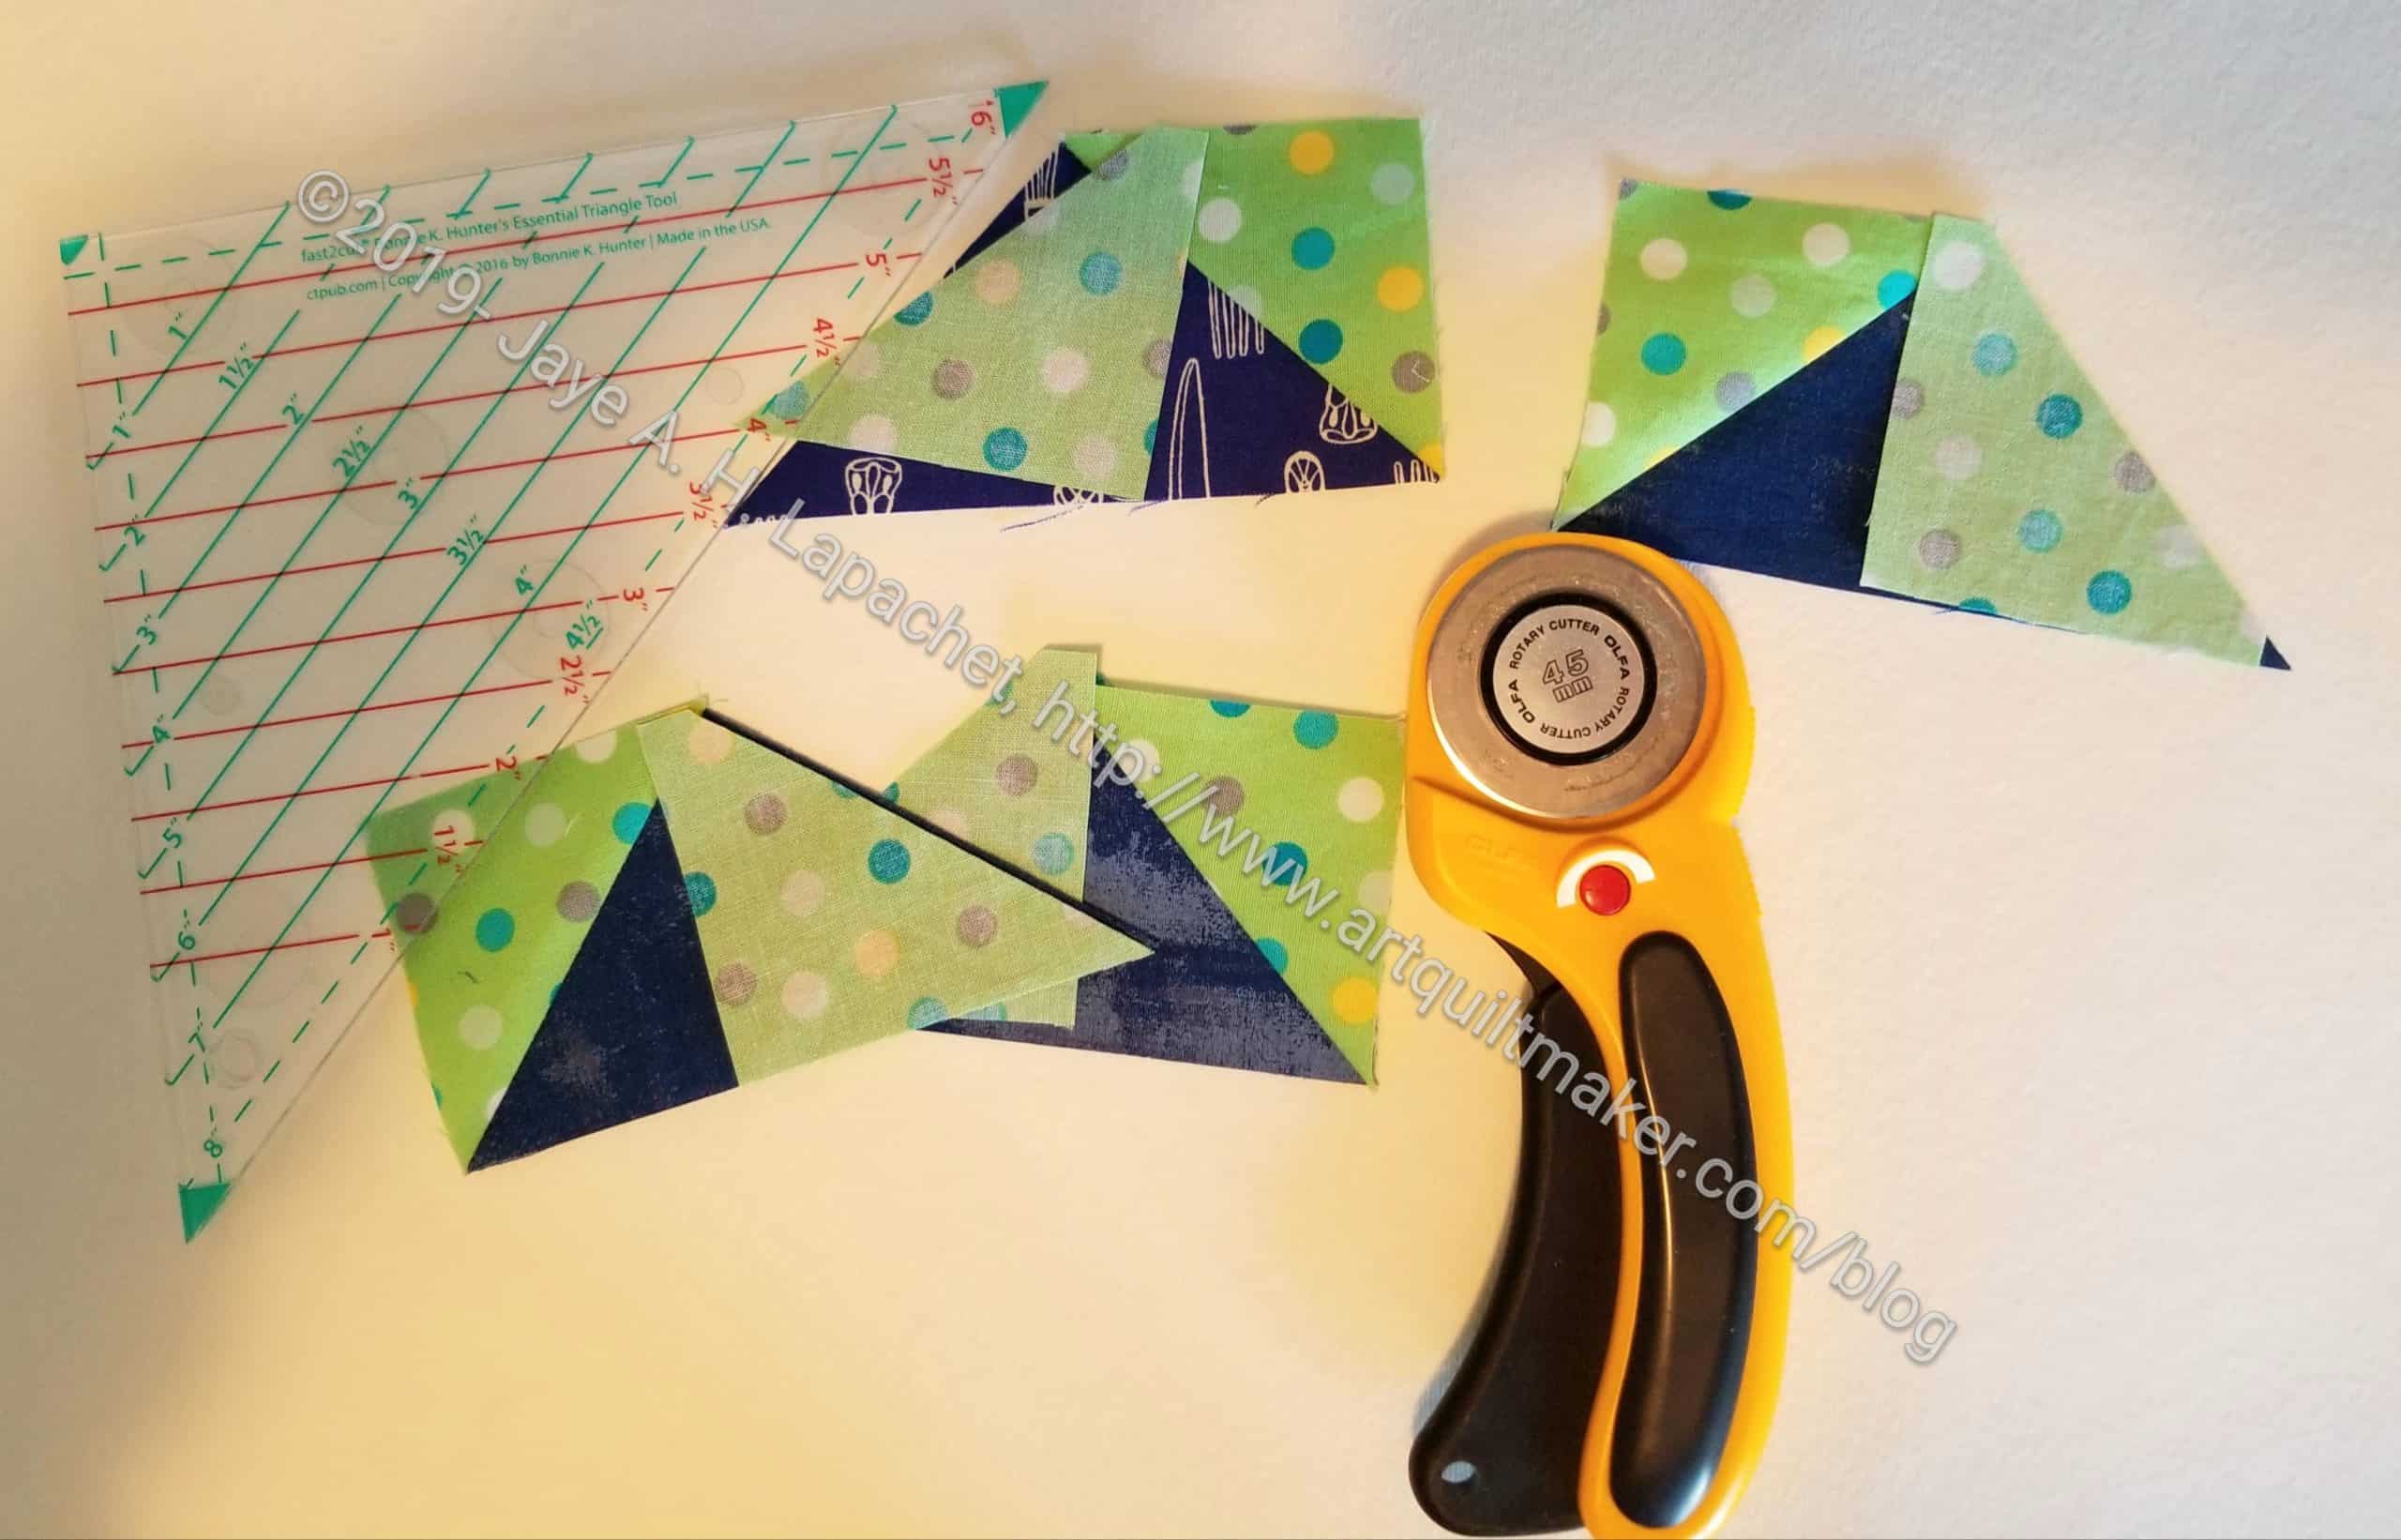
I also cut some of the triangles that will be Flying Geese in the near future.
I’d really like to start sewing the piece together, but I don’t have enough pieces yet. I need more of the pinwheels and the weird Flying Geese.
Bonnie Hunter did the big reveal of the final layout of Frolic! the other day. I laid out the pieces that I had to see how my version of the project would look. What you see in the photo does not show the piece on point, which is how the final will be sewed together. As soon as I get some more of the pinwheels made, I will begin sewing the piece together in the way it was intended so I have more space on the design wall.
I am happy with my choices. The green does stick out quite a bit, but I think it will settle down once I have more pieces ready to sew. I have a lot of HSTs and Flying Geese to make.
This is probably a design I wouldn’t have made if I had waited until the final reveal to decide, but I am happy enough with it. I’d be happier if I had been able to keep up with the clues, but it is what it is.
I finally finished part 6. I am now only 2.5 parts behind in the project. Bonnie published a sneak attack set of directions on New Year’s Eve. I just didn’t have a chance to do it when I finally did notice it, which wasn’t until the Friday.
Flying Geese – Wing Clipper method
I was vindicated in not finishing part 4 when part 6 was making Flying Geese from the quarter square triangles that were supposed to be cut in part 4. I did use the pieces I had cut to make Flying Geese using Bonnie’s Essential Triangle Tool* method, but I made the rest using the Deb Tucker Wing Clipper ruler* method. If you have the dimensions, you don’t actually need the ruler, but the chart of sizes is one of the benefits of the ruler. I also use this ruler to make Sawtooth Star blocks.
*I use affiliate links and may be paid for your purchase of an item you click on. There is no additional cost to you for clicking or purchasing items I recommend. I appreciate your clicks and purchases as it helps support this blog.
I am sort of keeping up. I am still working on Clue 4, but I did finish Clue 5. This was another clue that went pretty quickly and where I used the Triangle Technique for making HSTs.
I find now that I am two clues behind as Bonnie slotted in a clue on New Year’s Eve when I was otherwise occupied. Oh well, one is pretty easy, so I should be able to catch up soon.