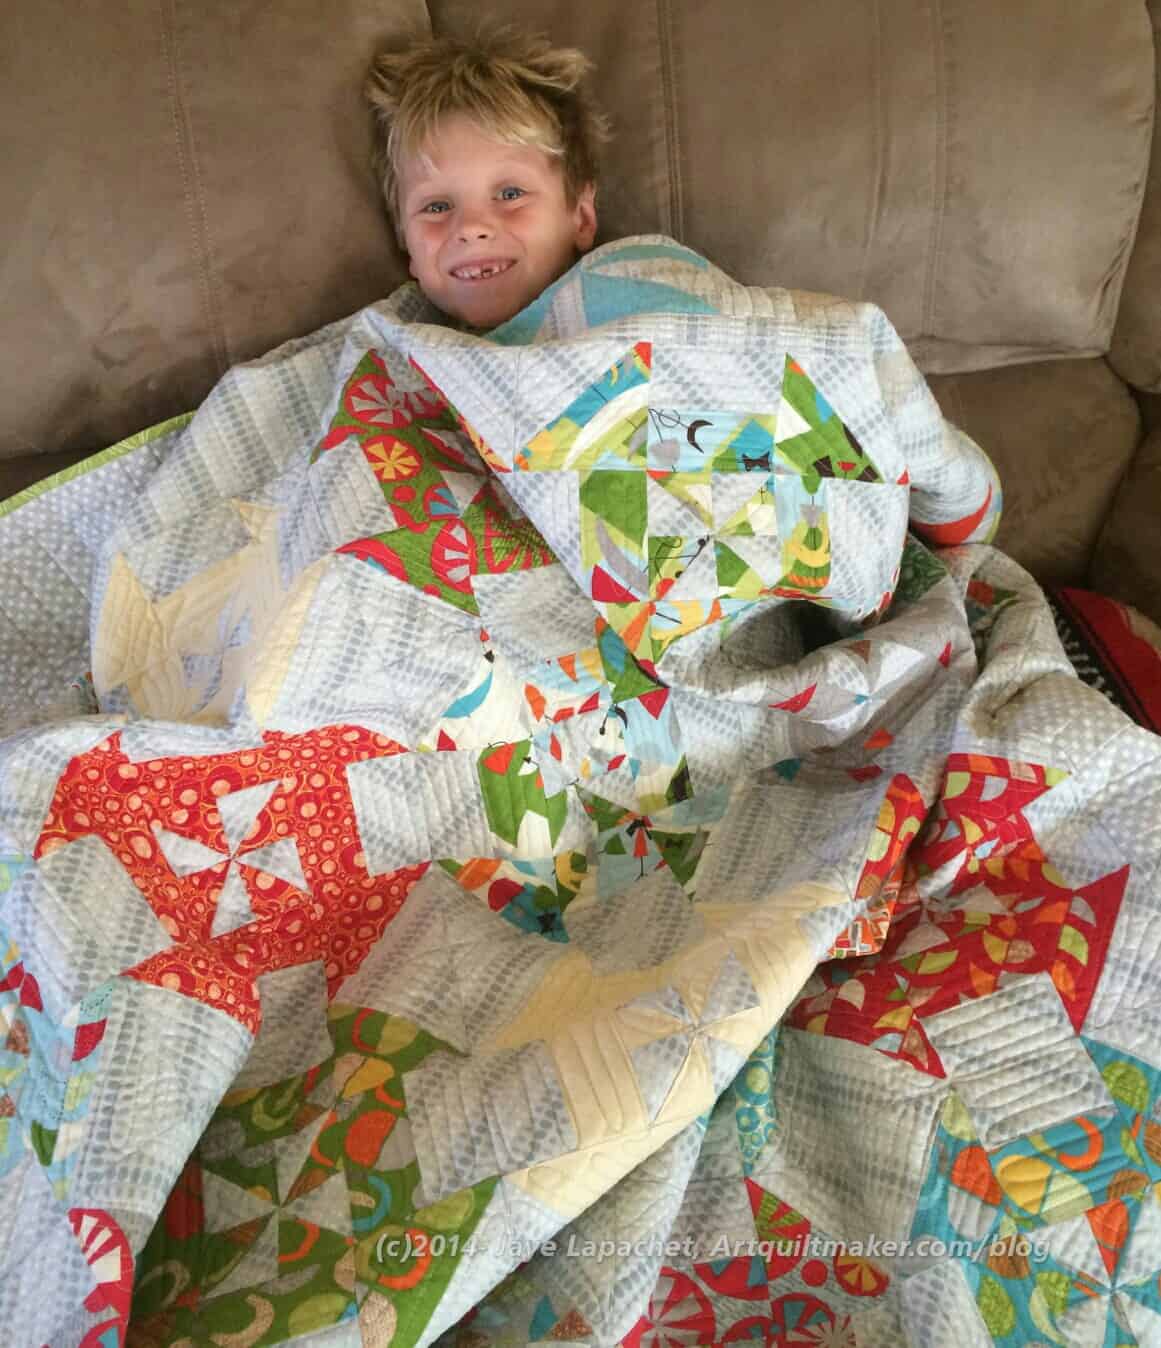
I finally got my act together and sent off the latest niece-phews quilts to the intended recipients. The Disappearing Pinwheel and the Wonky Nine Patch headed off about a week ago to two brothers, the youngest of my nephews. I was thrilled to finally get them out of the house. All reports were that the boys liked them. The boys liking them is the most important part. Truly. An added bonus.
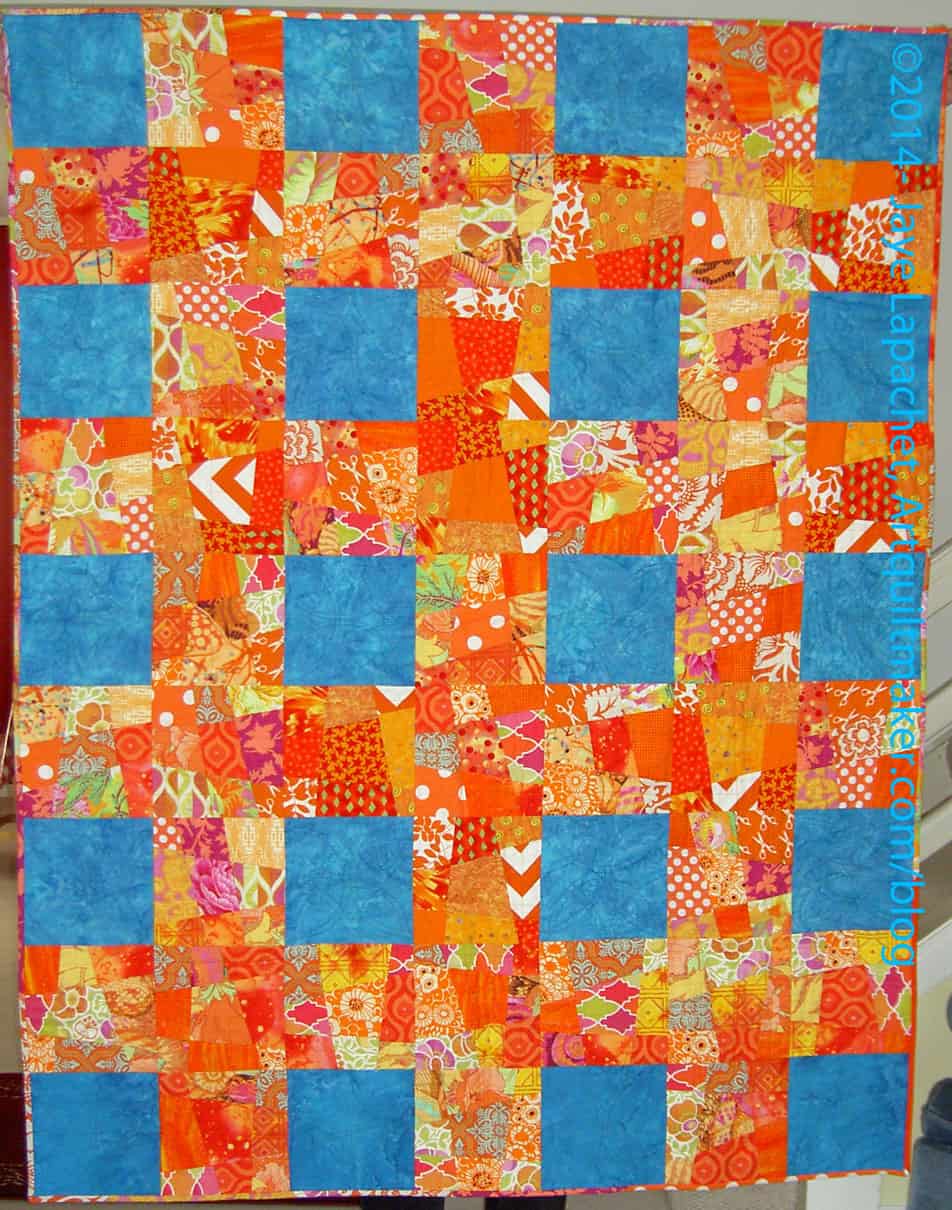
Finished: Wonky 9 Patch
The orange of the Wonky Nine Patch was a bold choice. I made it, because when I started the quilt, Aidan told me, in an offhand way, he really liked orange. It stuck in my head and when I saw Kathleen’s quilt, it all jelled in my head. I was a little nervous about the orange, because some of the prints were tending towards the girly side. Also, boys, and kids in general, change their mind as often as they change their underwear…almost.
I didn’t say anything to anyone (Shhhh! Don’t tell!) and nobody has said anything to me. Aidan’s mom said the colors were perfect and I am so glad.
I have to say, again, probably, that I love that blue batik. It isn’t turquoise, but it also isn’t really in the navy family. It is a great water blue. If I see it again, I’ll buy 10 yards. That is probably too much, but I’ll have enough.
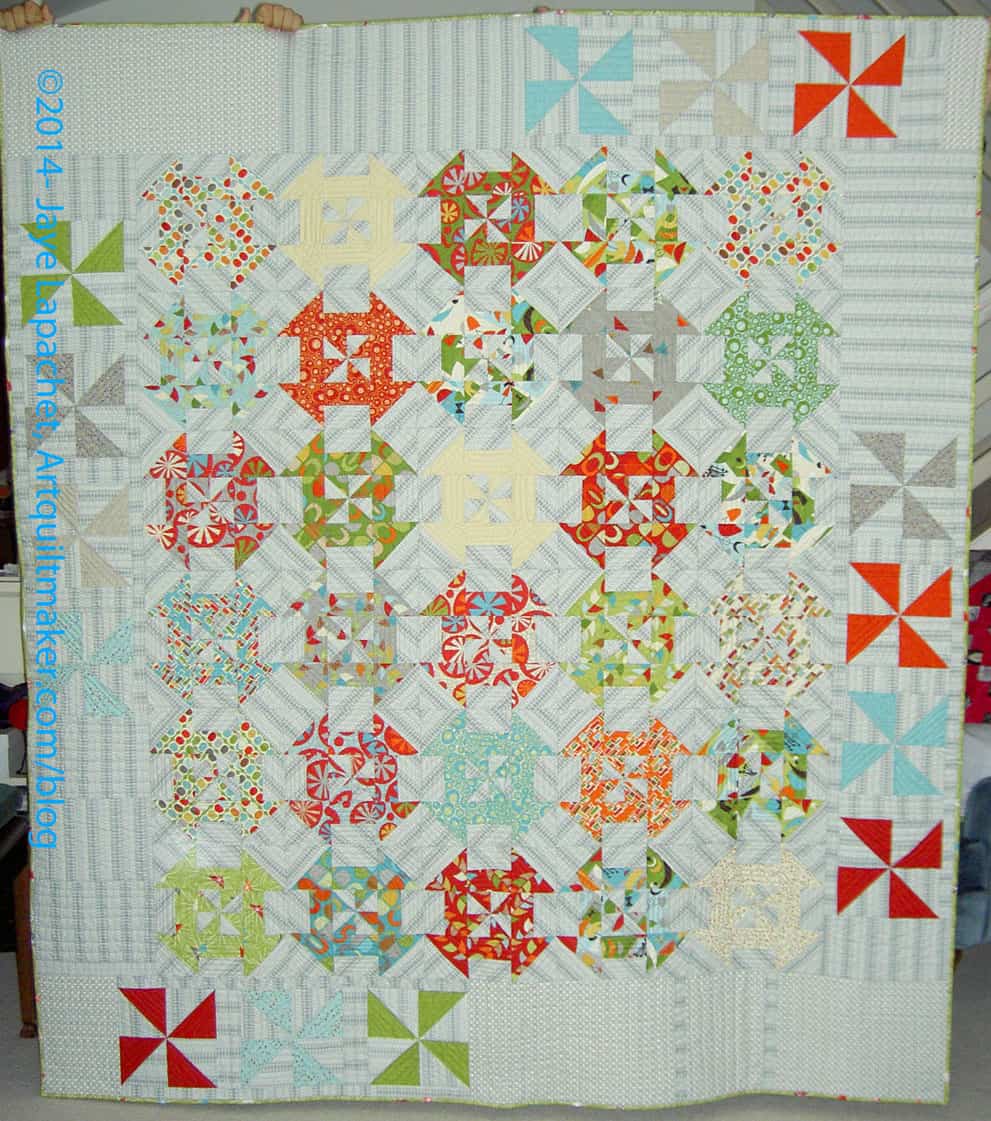
Disappearing Pinwheel Finished
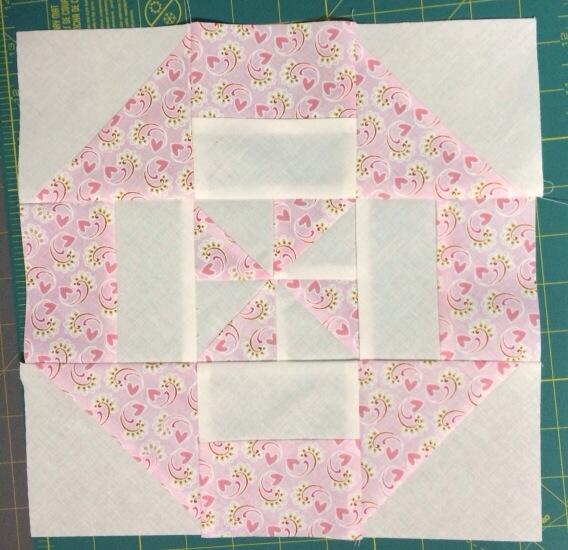
Pierce, the youngest of all of my nieces and nephews, got the Disappearing Pinwheel. I was concerned, again that it would be too girly, but the grey makes it boyish.
Looking at it again really makes me like the layout. If only I had thought to switch a pinwheel block with one of the Disappearing Pinwheel blocks, that would have added interest.
I have a loose project making quilts for all of my nieces and nephews. So far I have made 7 quilts for 7 youngsters. I have 8 more to make. As you know, I make them when I feel like making one or when I get inspired to make a quilt and then don’t know who should get it. I started out with the idea that I would give each niece or nephew a quilt when they graduated from college, but that didn’t quite work with my creative process. Some of the younger kids may end up with two quilts – an additional quilt when they get to college. We’ll see.
I thought of waiting until next week to post this, but I just couldn’t wait! Last night I finished the binding on the Disappearing Pinwheel. Hooray!
That means that another project is finished.
This is probably the fastest that I have completed a project of this size in a long time. I started it in January and here it is barely June and the entire quilt is done. A new era of completion? Perhaps. I have to acknowledge that Colleen is back on her gamenow and that helps.
This quilt is part of the Niecephews series and will go to one of the small nephews. I have to finish his brother’s quilt first and hold off sending off either quilt until I show them at my guilds.
No joke. I worked diligently on Saturday and finished the top of the Disappearing Pinwheel. When I last wrote about this project, I didn’t really feel like I could ever finish it. I may not have conveyed my feelings in the post, but I was feeling pretty low about it. I don’t know why.
Then Friday, I had a lot of paperwork and boring stuff to do (e.g. sign Young Man up for ACT test-bleah!) and didn’t work on any quilt anything. So, Saturday was the day. I had to get up at 5am to get the Young Man to a Drumline competition (do you sense a theme here?), so by 9 I was ready to sew. I spent most of the day sewing the top and got it done.
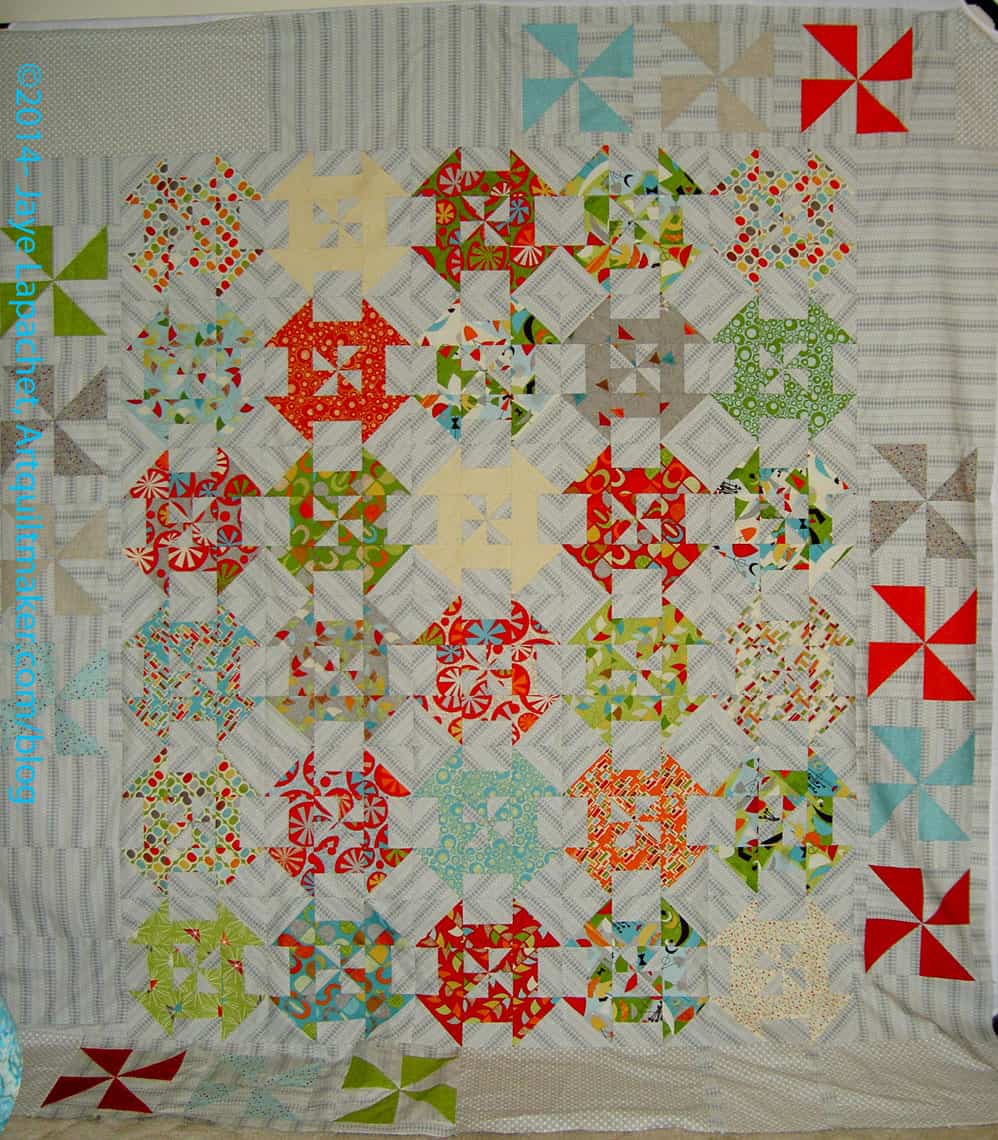
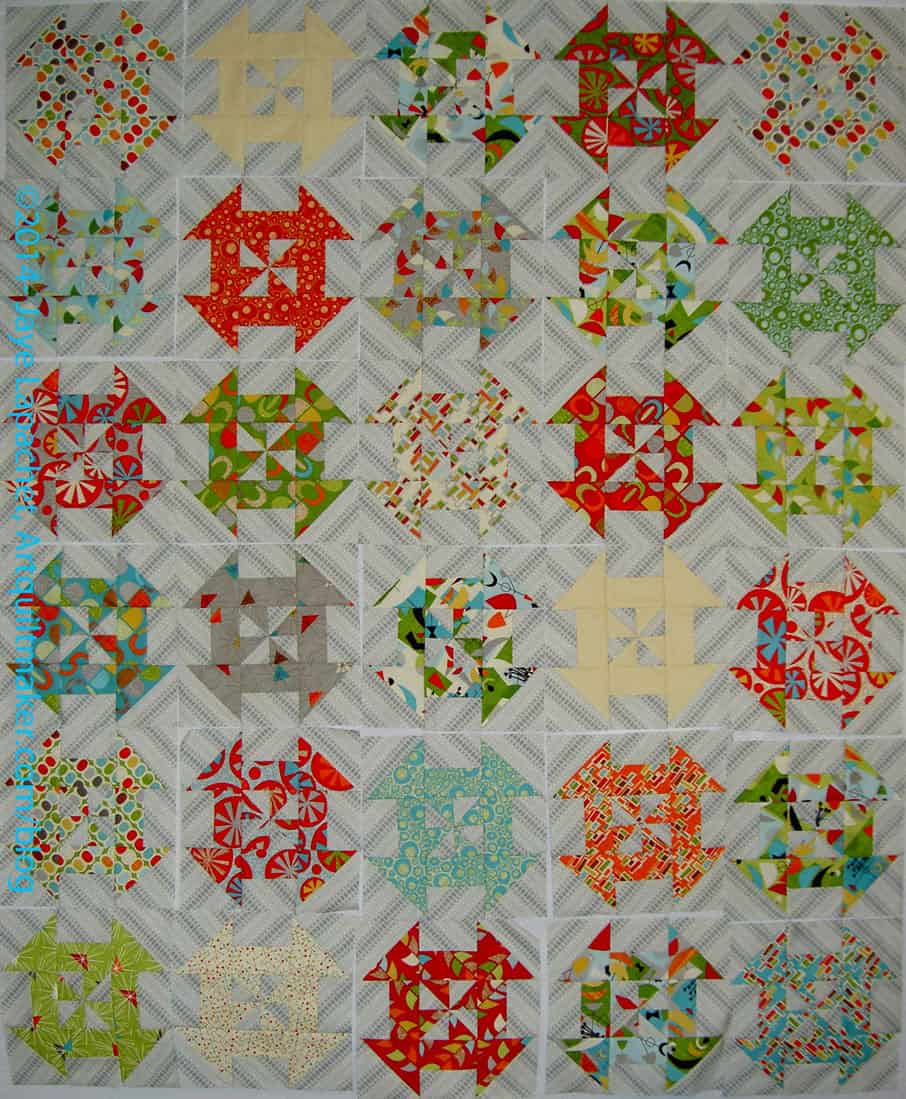
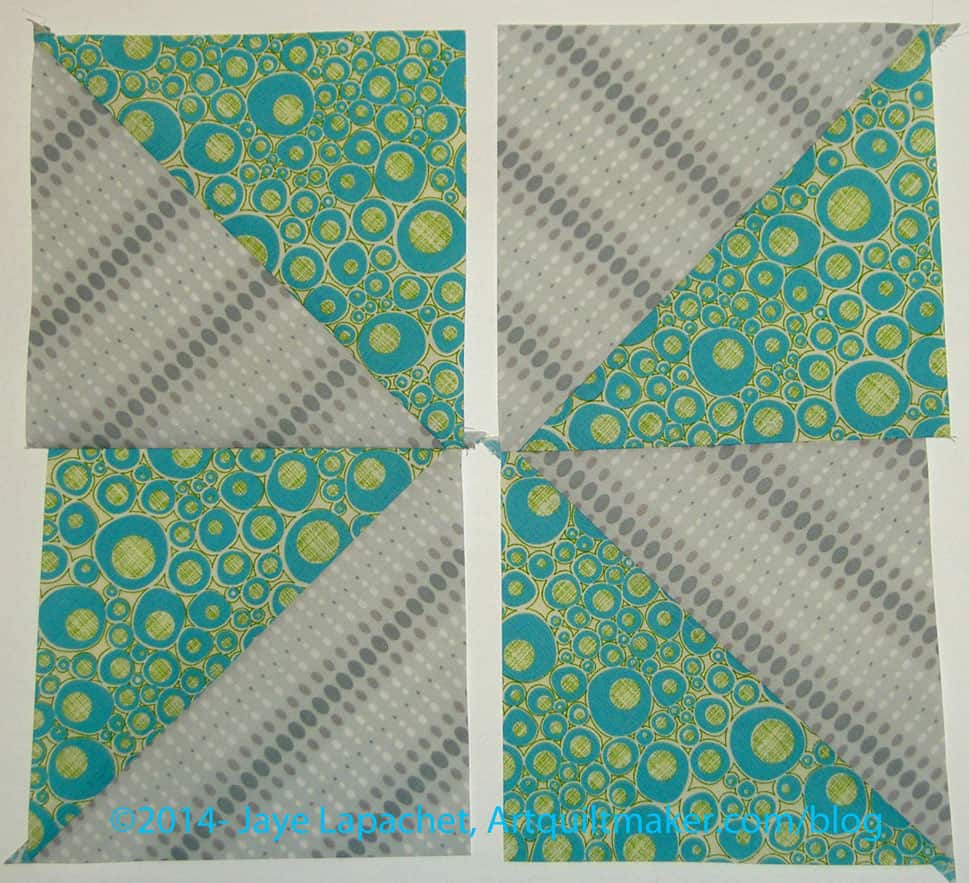
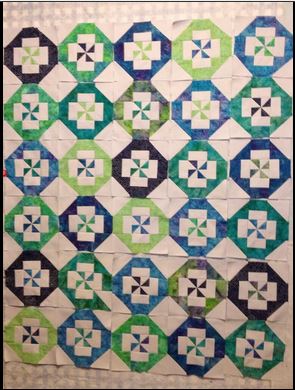
Disappearing Pinwheel Top
I am pleased, though a little disappointed that I ran out of the background fabric. I could have gotten more (thanks to Kelly O! for the offer), but I decided to use what I have and get the top done, so I can move on. I didn’t want to wait for an order, or for a friend to send the fabric.
It turns out that I actually like the way the second background drops out and the first background looks more highlighted.
I plan to have Colleen quilt the second background in a slightly darker grey so that the lightness is toned down a bit. When I talked to her about it, she said OK.
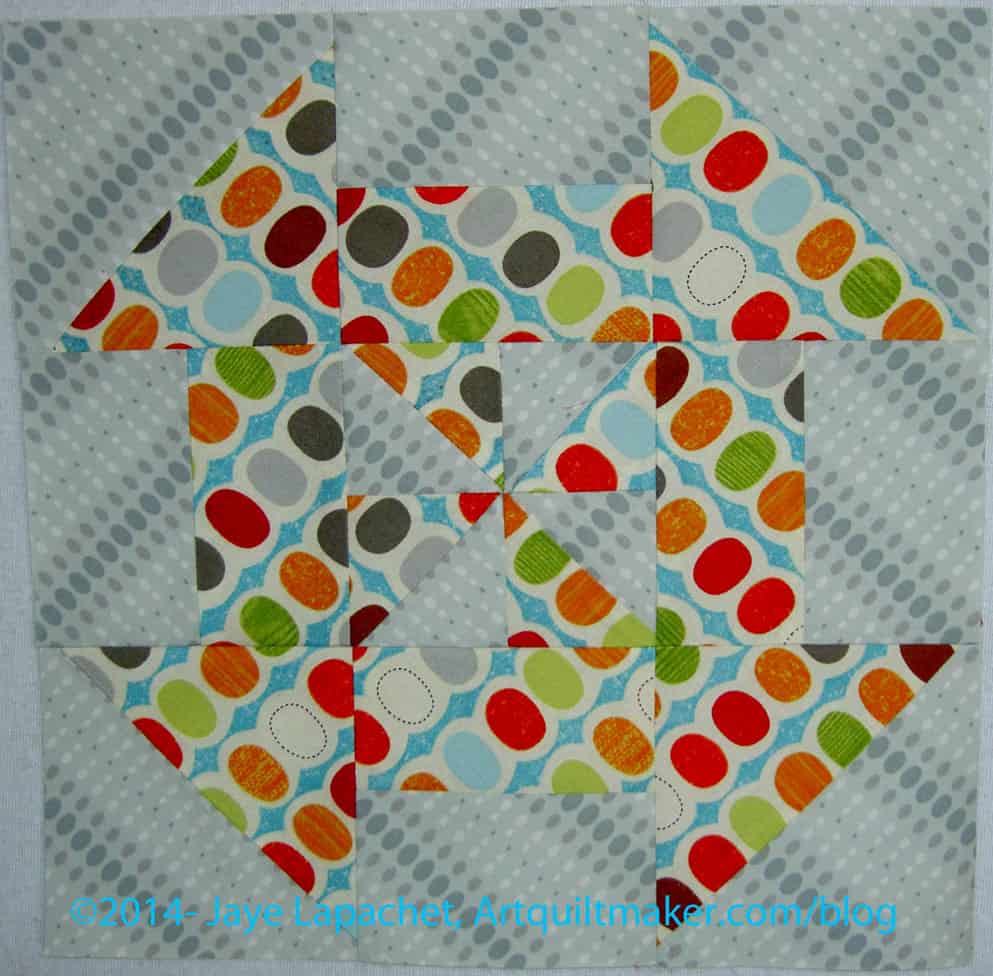
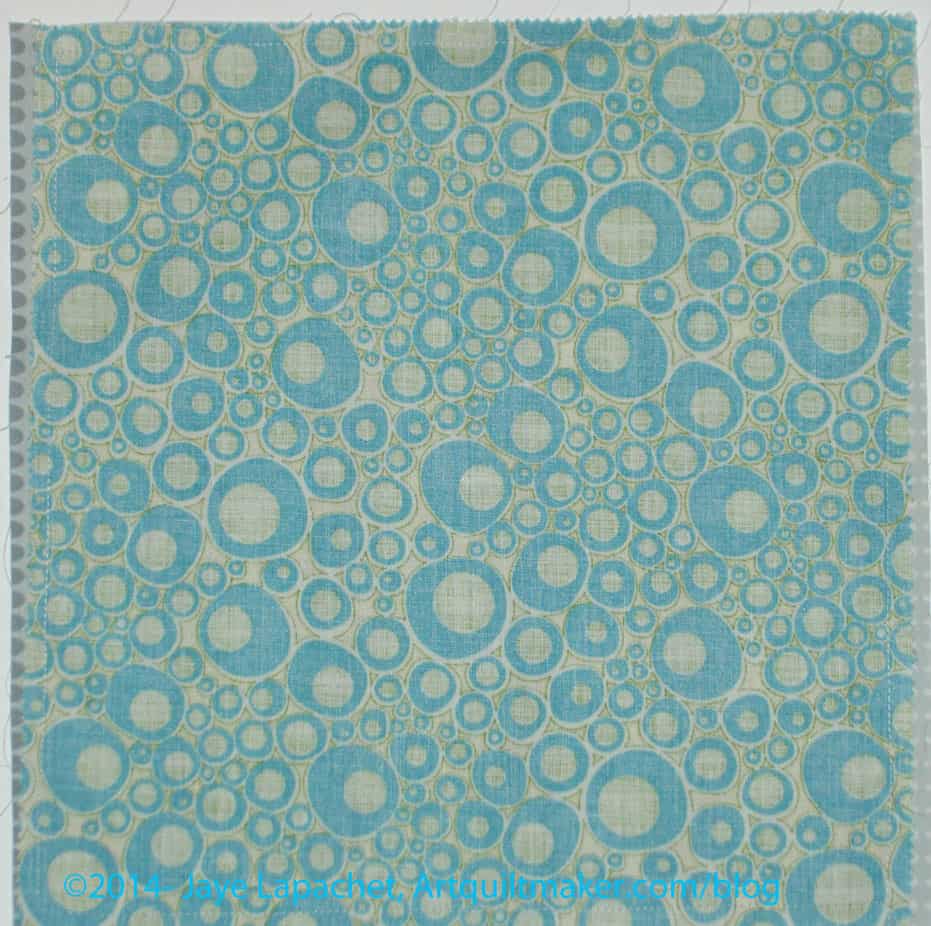
The smaller detail shot shows a close up of the second fabric. It was also one of those I bought with an eye towards using it for the Russian Rubix. Too beige for that project, but it worked ok for this one.
Disappearing Pinwheel detail
Vital Statistics:
Size: 84”h x73”w
By Jaye A. H. Lapachet, 2014
For the collection of Pierce Lapachet
Pieced by Jaye A. H. Lapachet
Longarm quilted by Colleen Granger
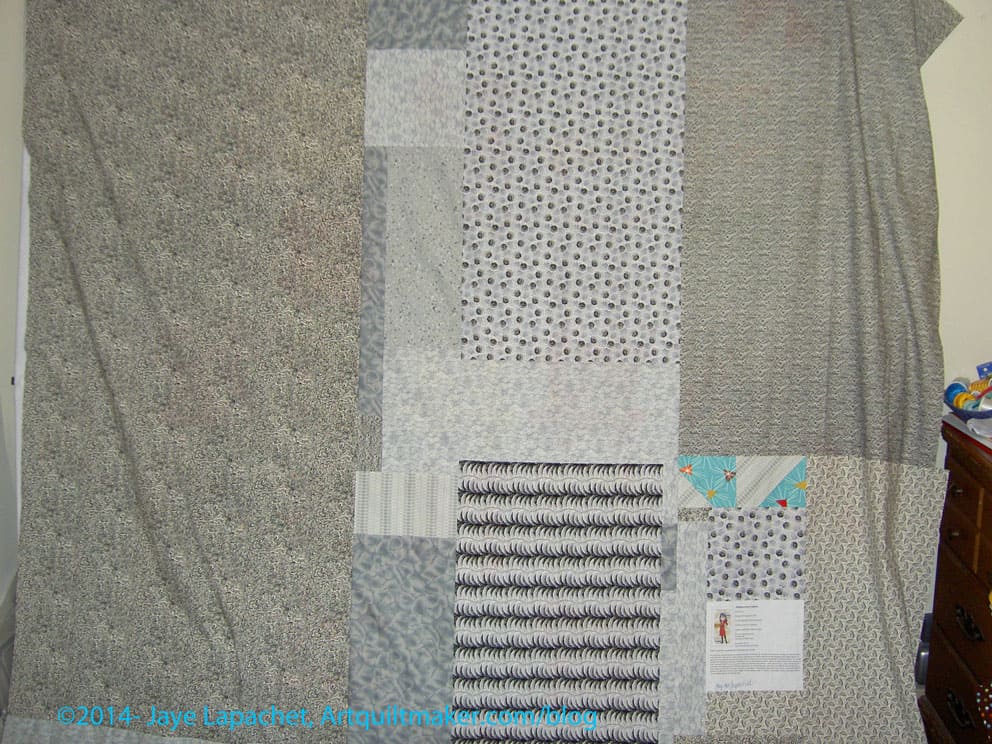
I also finished the back. It was a pain, as backs are wont to be, but I wanted to get it to Colleen yesterday, so I powered through. I thought I would get a lot more done on Sunday, but I didn’t. I just got the back done and then I had to clean up my workroom. It made me cranky to work on it, so I am glad it is finished. I continued pulling from my grey bin and a lot of greys you see have been in my fabric closet for over 10 years. I am happy they are finally getting an airing.
Disappearing Pinwheel Back
I still have to make the binding. What color do you think would work with this top?
I had hoped to show you a finished quilt by now, but that is not yet to be. Perhaps over the weekend I will finish. Despite being off of work, I have been quite busy this week and whenever I haven’t been busy, I have been laying on the couch or face planted in bed. Neither of those activities are conducive to finishing the DPW! ERGH!
Still, I have to remind myself that there are no prizes for finishing and the process is important. Blah. Blah. Blah.
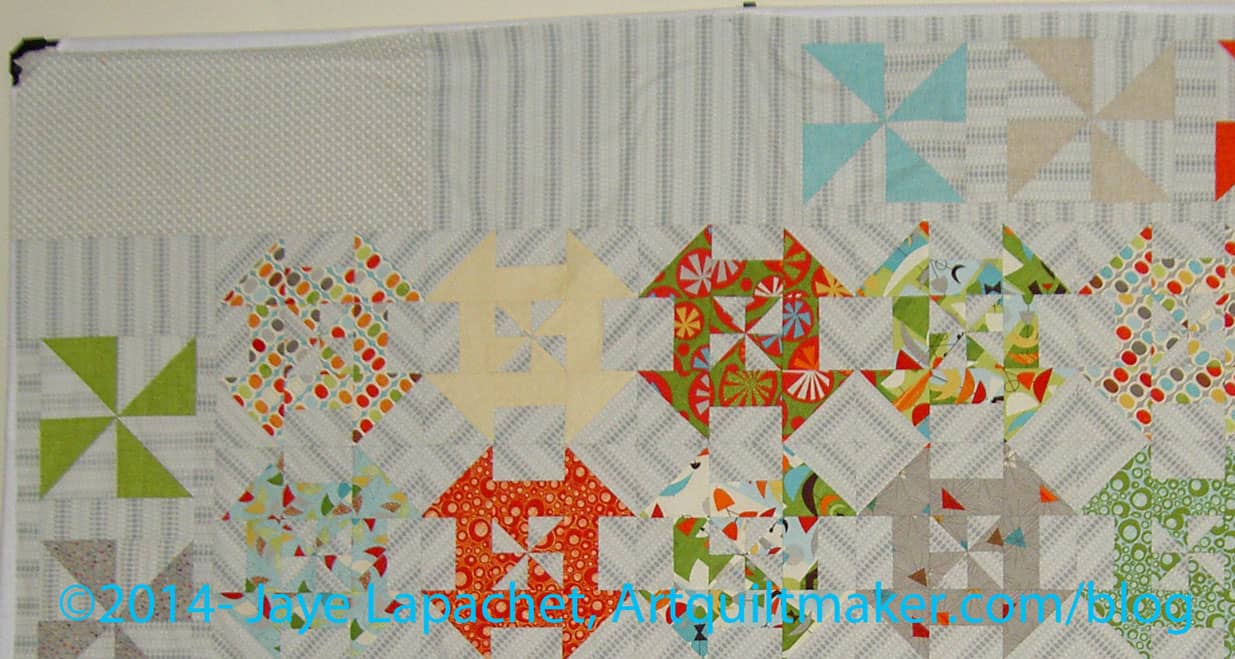
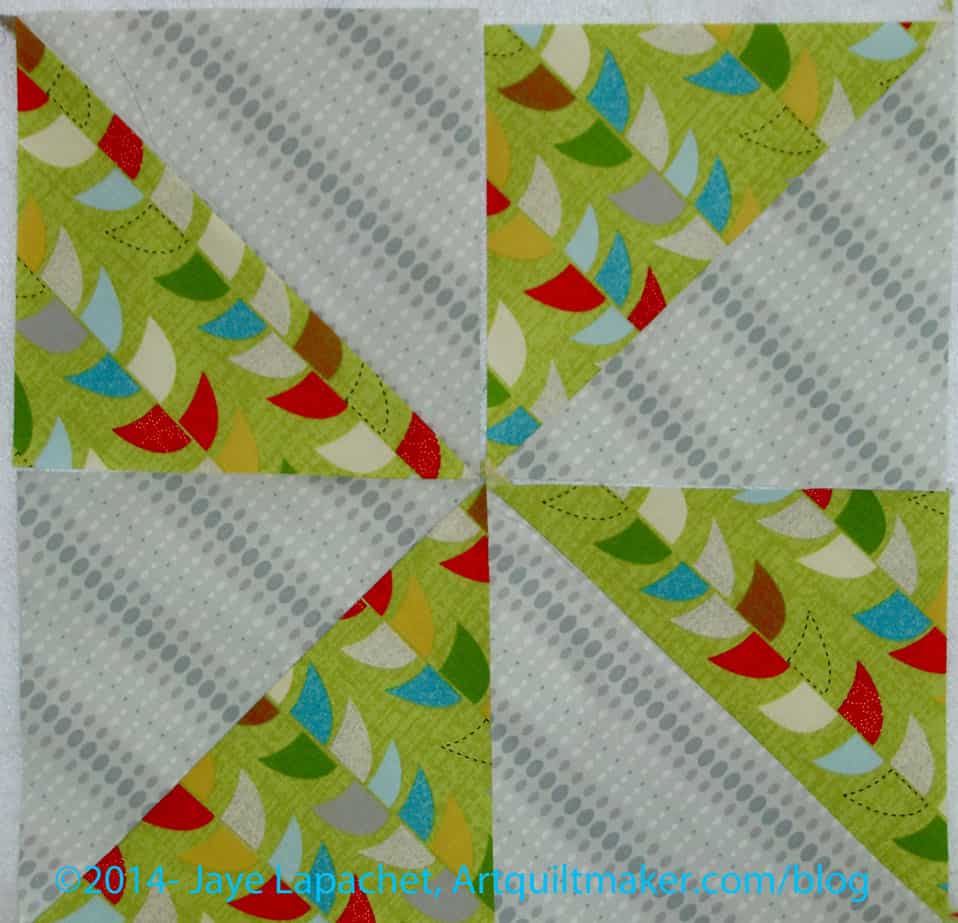
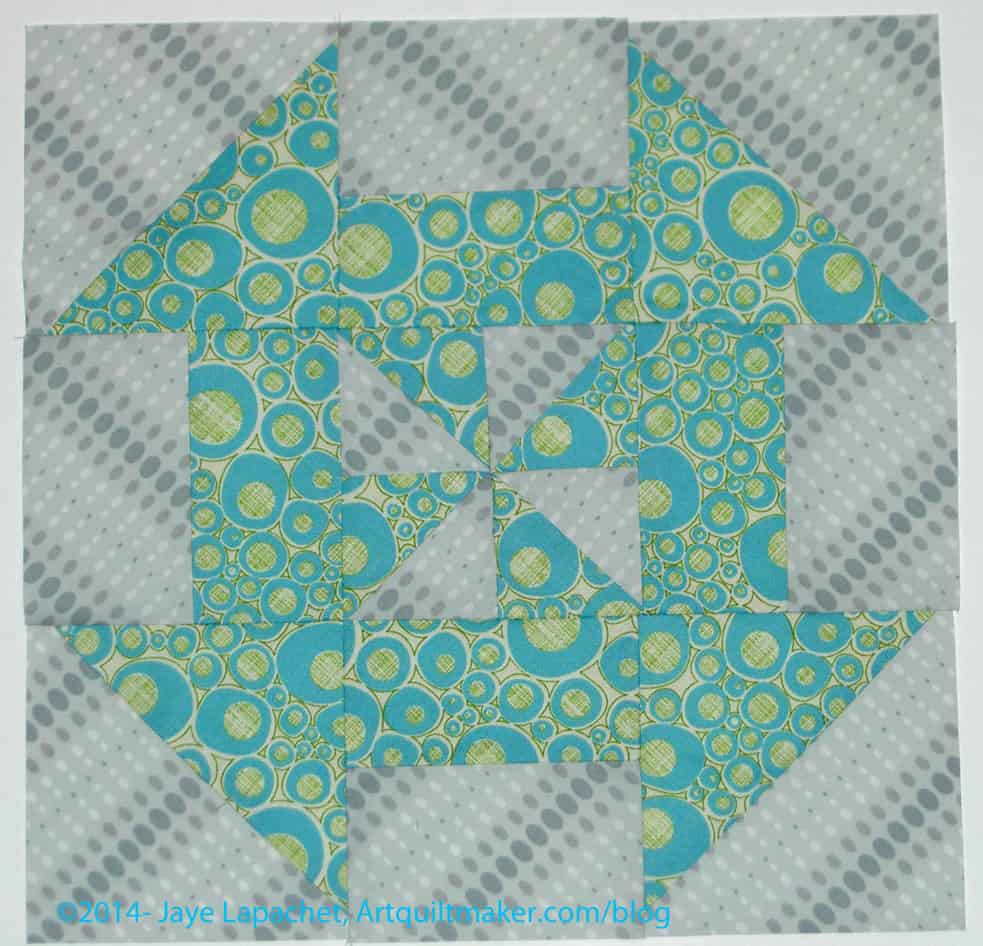
Finally, all the blocks I am going to make are finished. I am pleased with the blocks. They look fun, are a bit off and not my usual style. The background adds to that idea. I am wondering if this is stretching my fabric choices. If so, then this quilt pattern was a good one to use to stretch, because I wasn’t in love with it.
DPW Block
Don’t get me wrong. It is a fun project, but I didn’t have a good reason for doing it, so using fabrics I wouldn’t normally use was a good thing. It also used up the Mod Century layer cake which was an impulse buy and not slated for another project. I also used that grey background, which was sort of an unfortunate purchase (online), but worked out for this project.
I really enjoy seeing what other people are making with the same pattern and this project was no exception. There is a lot of variety in the DPW projects the Twilters are making and it is interesting to watch.
I am really glad I had little bits of this fabric to work with. I don’t think it ever caught my attention in a quilt store, but I like the different prints and think the shapes and colors are interesting.
I think the border will be very interesting. You’ll have to wait a bit to see that as the piece is in such disarray at the moment as to prevent me from taking a photo that would be anything but embarrassing. Soon, trust me.
The bad news is that I probably won’t have enough background fabric to finish the borders. I am going to look around and see if I have more. If I do, I certainly want to dig it out and use it, but if not, I will find something else. No, it won’t be the same, but I want to use what I have on hand.
I have had a few busy weeks plus Scrapitude to prepare for quilting so I haven’t had a chance to work on the Disappearing Pinwheels. I thought I remembered taking some photos of the latest group that I hadn’t posted.
I made a lot of progress on my last session of making these blocks and will need to get busy on it again soon.
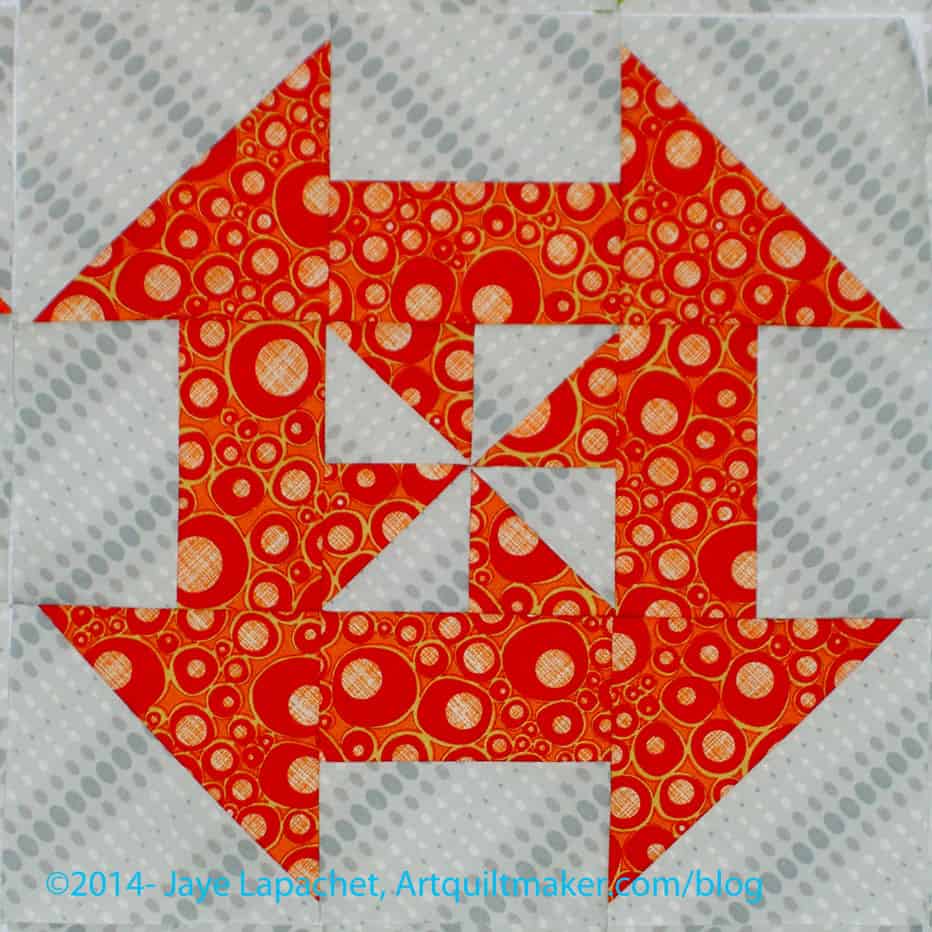
The orange and red block to the left really caught my eye when I was looking at the whole group. I noticed how well the pinwheel in the center of the block stood out. Some of the blocks are very subtle, but that one has god contrast.
In the group photo, I noticed how the background stripes have a subtle stripe, but it does add a lot of movement. Friend Julie and my mom both said the same thing when they saw the blocks.
I may take Scrapitude over to be quilted next week and I have some idea that I will take this quilt over as well. That is a lot of work between now and then, but we will see. It would be nice to get this out of my hair.
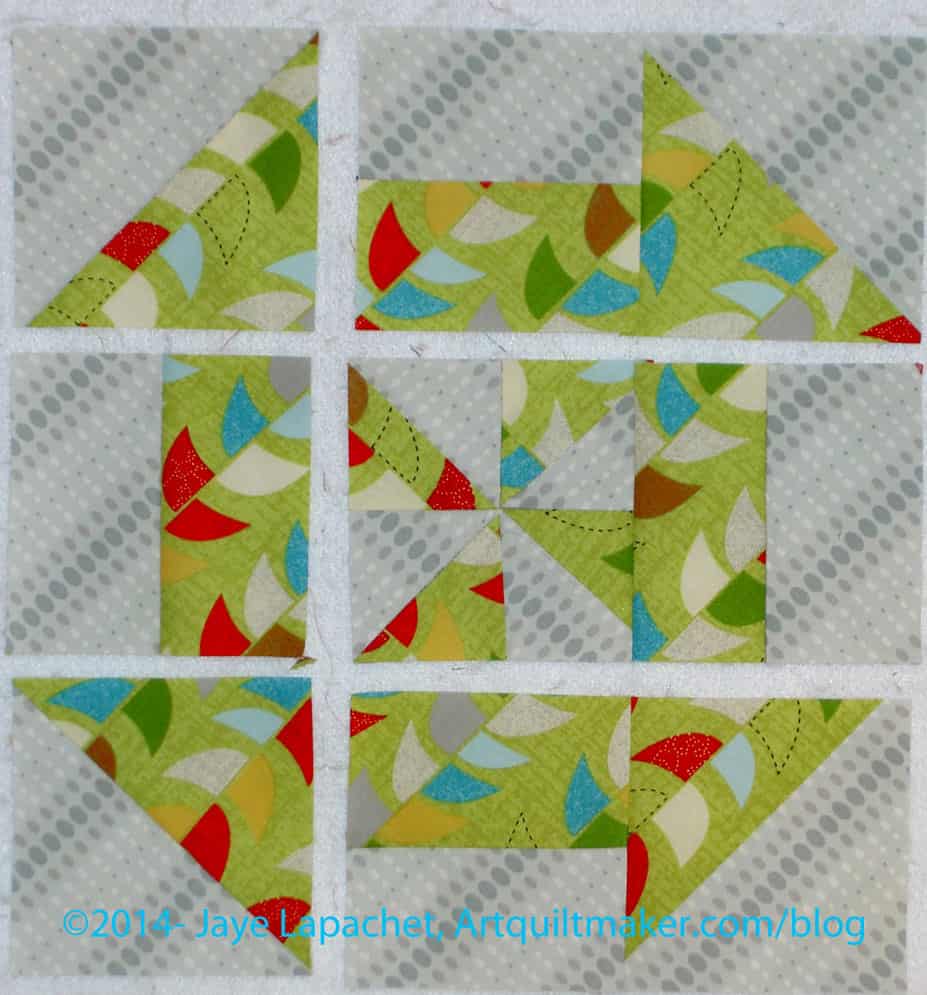
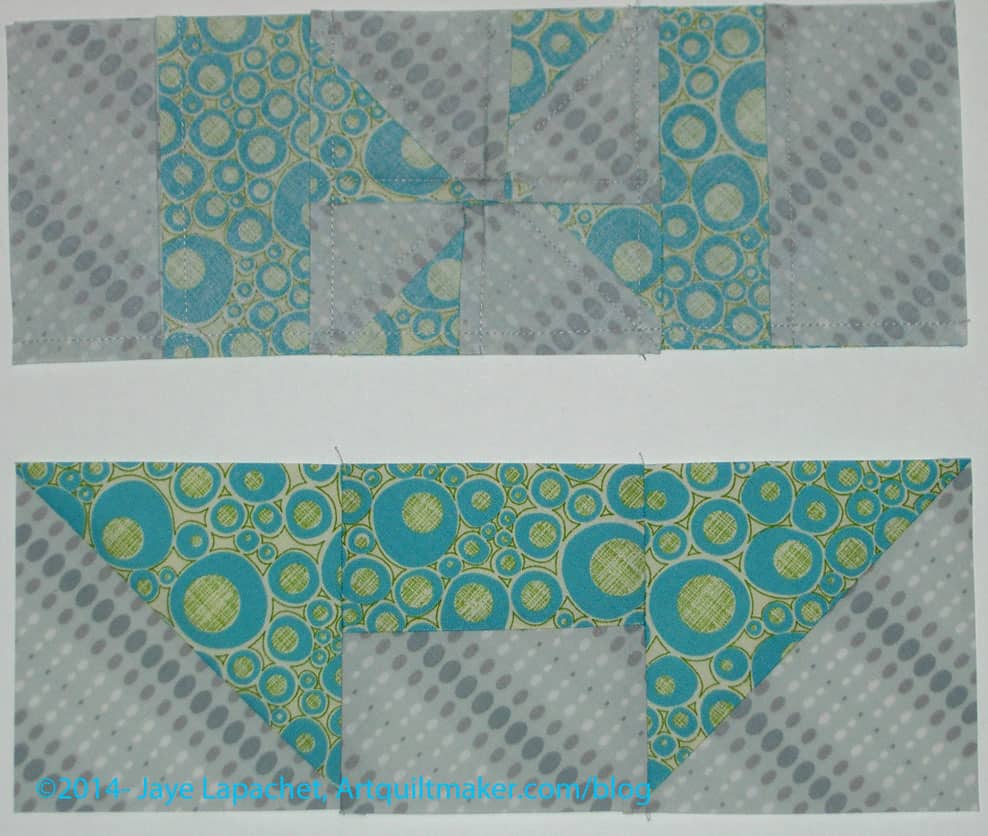
1. Select a layer cake or cut 10″ squares of foreground fabric.
2. Cut 10″ squares of background fabric. Make sure it is a good contrast to your foreground fabric, unless you want a blendy-low volume look.
Pin foreground & background squares together
3. Place 1 foreground square and one background square right sides together.
4. Sew around the outside 1/4″ from the edge. No openings are needed.
5. Starch two squares heavily. I use Mary Ellen’s Best Press. Once I have sprayed the starch, I change the setting on my iron to dry.
Nota bene: the project takes a lot of MEBP to keep the bias edges under control, so have some refills on hand.
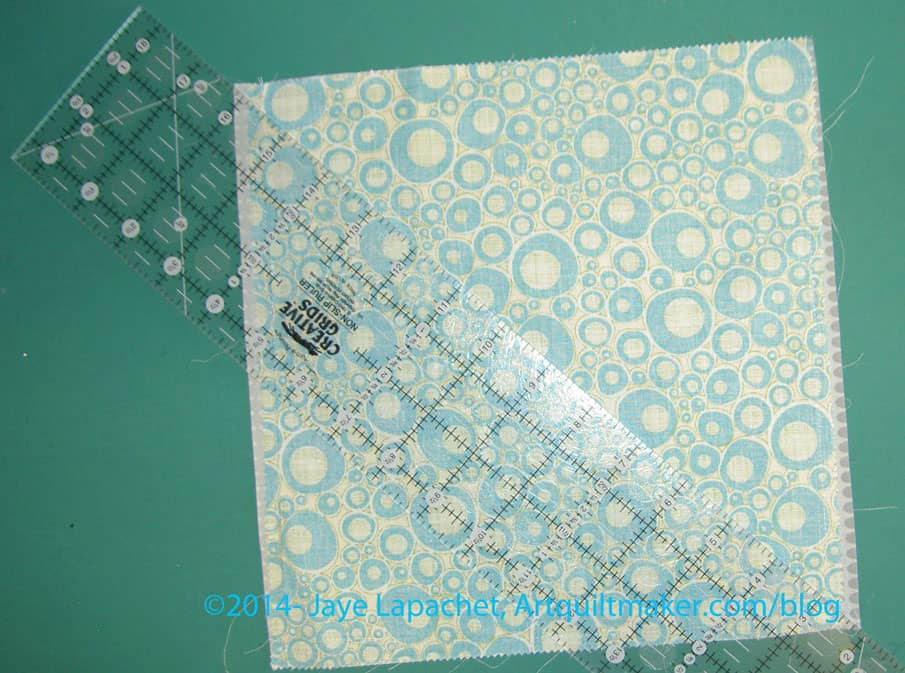
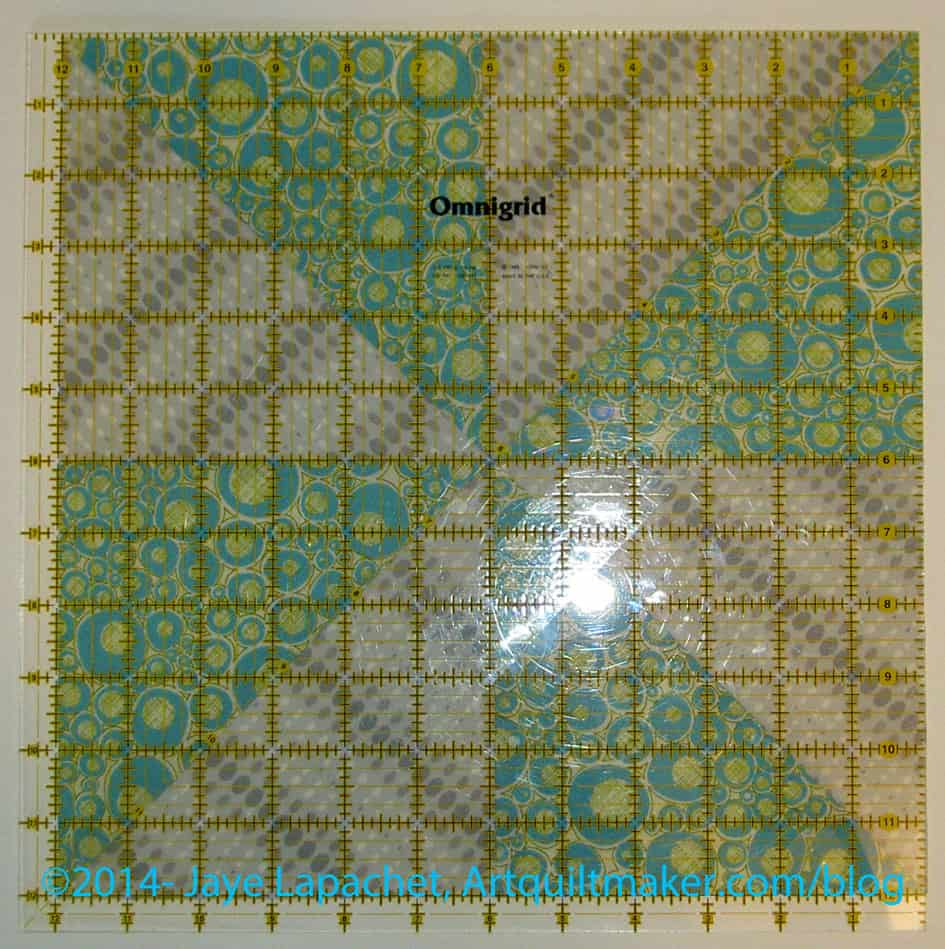
Cut sewn foreground & background on the diagonal
You will not always be able to cut exactly corner to corner. I found that when I starched, the layer cake fabric shrank. Trimming later helps square things up, so just cut to the corners of the background if you can, or line the ruler up with the sewn corners.
Cut on the diagonal
6. Cut sewn 10″ squares on the diagonal.
Nota bene: pay no attention to the different fabric in the photo above. The steps are the same.
HSTs
You will end up with some Half Square Triangles (Triangle Squares)
Layout HSTs to form a pinwheel
7. Lay the HSTs out so they form a pinwheel.
Pin HSTs to create Pinwheels
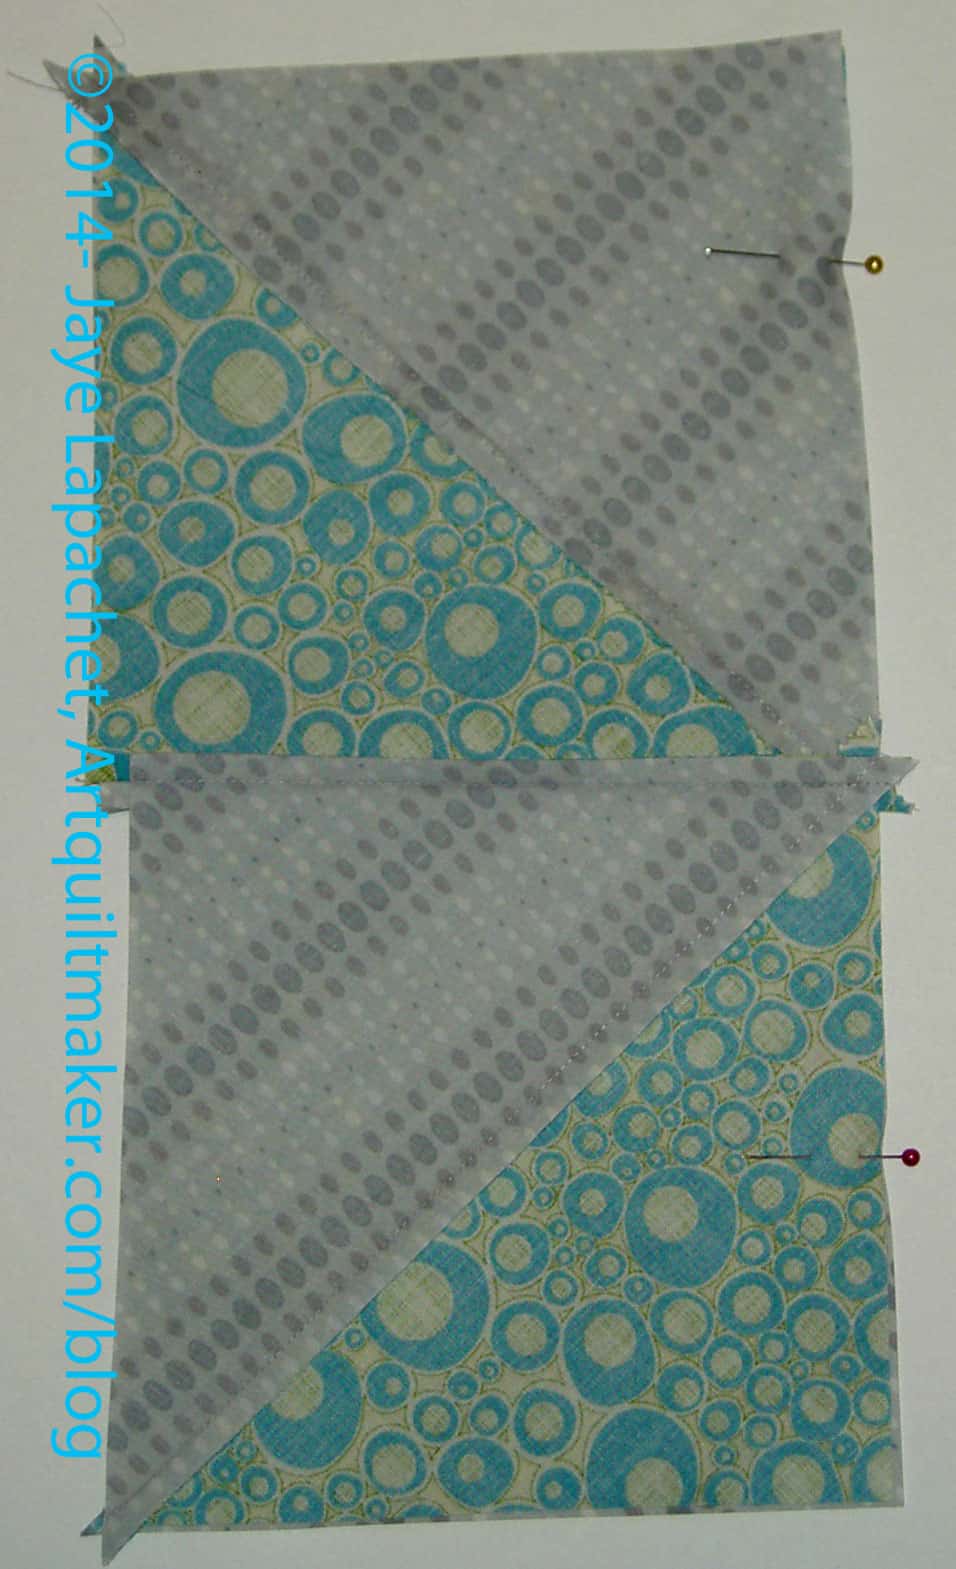
8. Put half square triangles together to make the top and bottom half of a pinwheel block. Pin the side you will sew as a reminder.
You can see from the photo above that my HSTs were not lining up with each other. I did worry about that, but finally decided that trimming later would solve a lot of sins. I nested the middle seams together to help make the point in the center of the final pinwheel.
9. Sew the HSTs together to make two halves of the pinwheel block.
10. Lay the piece down so the foreground fabric is on top.
10a. Press. I press from the front towards the foreground fabric. It doesn’t matter as long as you are consistent.
Prepare Pinwheel
11. Put squares together, once again, in a pinwheel configuration. Pay special attention to getting the center to line up.
Pin 2 halves together
12. Pin so that center nests together nicely.
13. Sew all the pieces together so you end up with a block in the Pinwheel configuration.
Press
14. Press.
14A. (Optional) Add more starch (I use Mary Ellen’s Best Press), if desired. I like my pieces and parts to feel a bit like cardstock. I get assurance from that feeling that the bias edges will be under control.
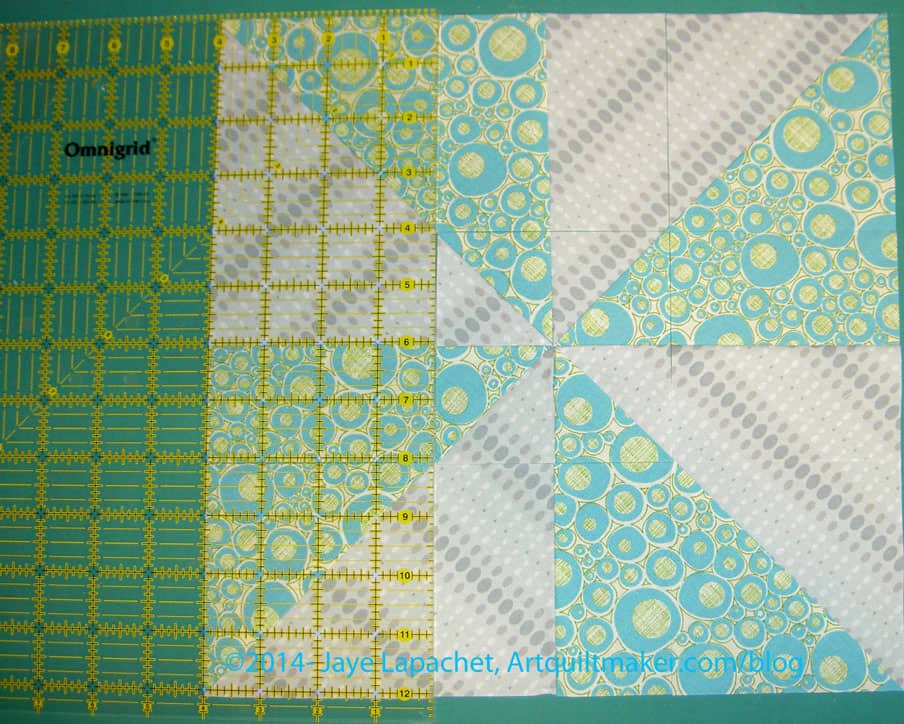
Trim to 12″
15. Trim to 12″. This will get rid of the uneven edges seen in the previous photo. I don’t know if others do this, but I decided to do it to keep my pieces square.
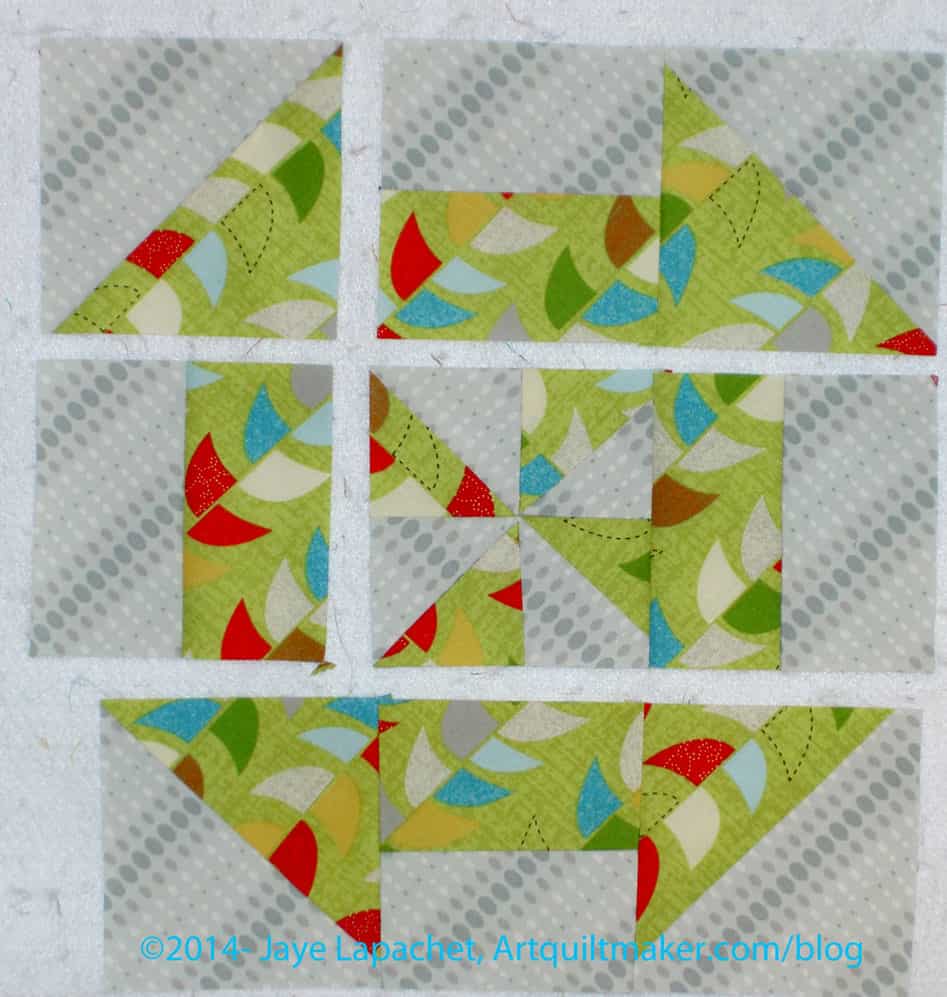
Cut into 9 Pieces
16. Since I trimmed my blocks to 12″, I used the 4″ line on my ruler to cut the block into 9 pieces. I started from the left and cut the vertical lines first.then moved my body around my cutting cutting table to finish this step by cutting the horizontal lines.
Cut into 9 Pieces
Photo above shows the pinwheel cut into 3 equal parts – 4″ each, but not yet rearranged.
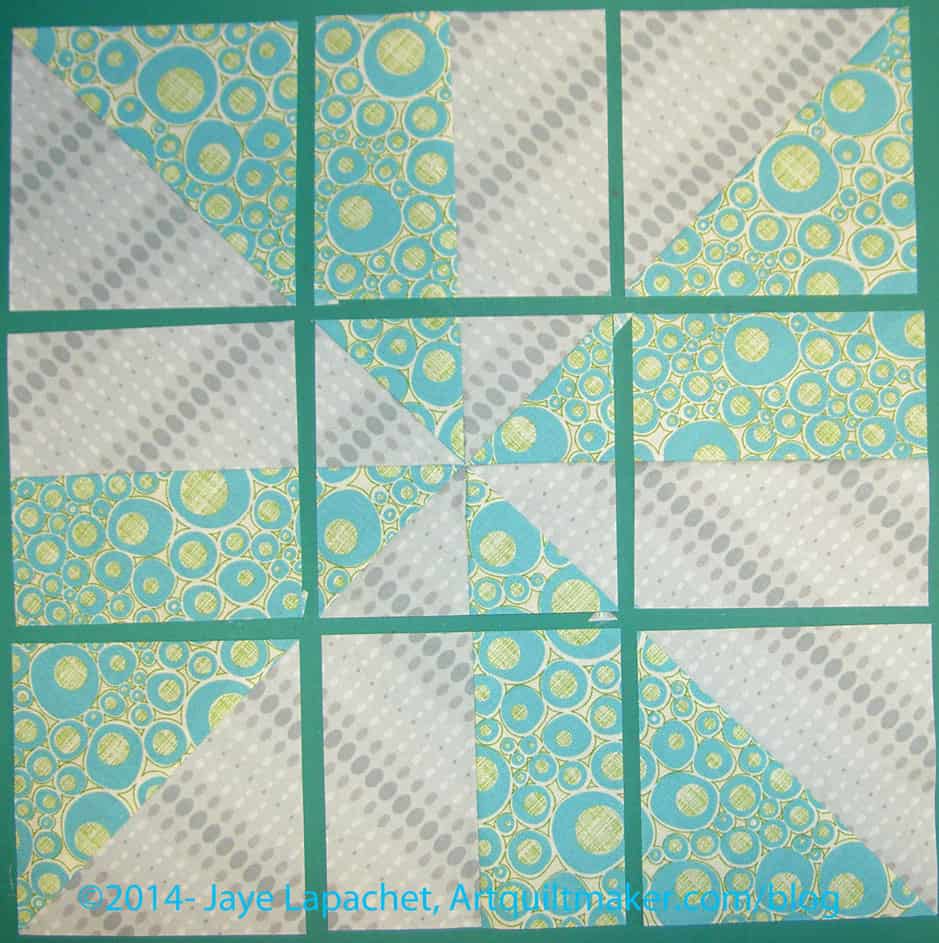
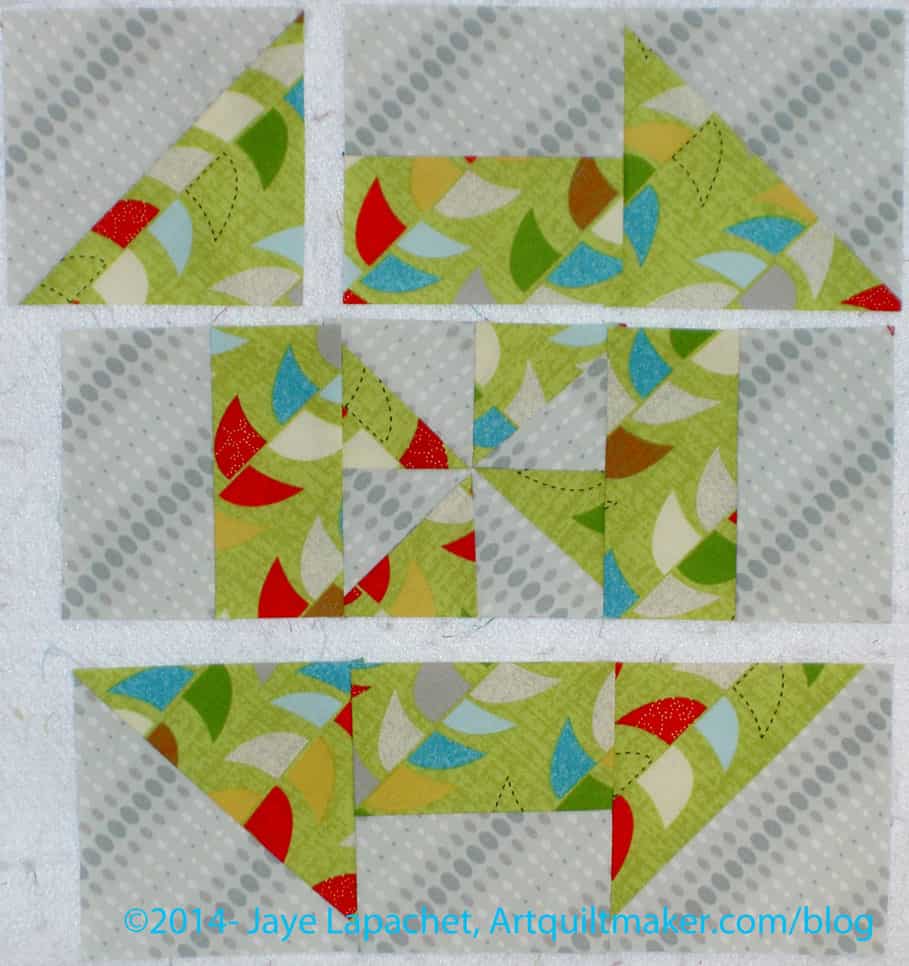
Rearrange to Suit your Tastes
17. Rearrange the 9 parts to suit your aesthetic. You can create a look of the Churn Dash block configuration above or you can switch the corners and the centers in the opposite direction (foreground on the outside) for more of a flower/circle arrangement.
18. This block is now a 9 Patch and you can sew it together like you would a 9 patch. If you do not know how to make a 9 patch, see my tutorial.
Fold part #3 onto part# 2, from chart above, on top of each other and sew inside seam. do this for the rest of the parts, like you would a 9 patch, to create the rows.
Sew like a 9 PatchSew like a 9 PatchSew like a 9 PatchThree Rows Sewn
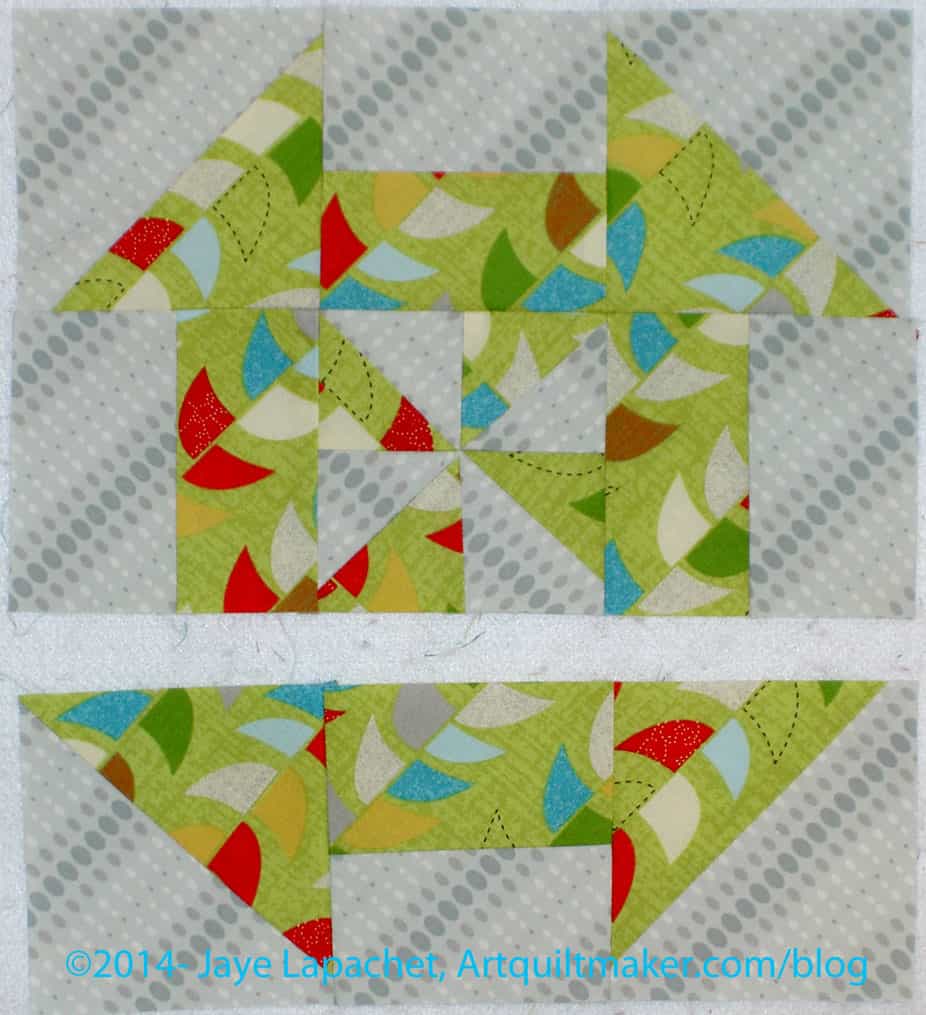
19. Finish the rows by sewing the final part to the two parts already sewn together. You will have 3 rows of 3 parts each.
Two Rows Sewn TogetherSew 3 Rows
20. Sew three rows together like you would a Nine Patch.
In the above photo, the bottom row is not involved. Place the center row right side down on top of the top row (right sides together) and pin at the intersections, along the seam closest to the bottom row in the picture.
21. Press to the “bars.”
22. Once the two top halves are sewn,place the bottom row on top of the middle row. Pin as needed and sew to the center row.
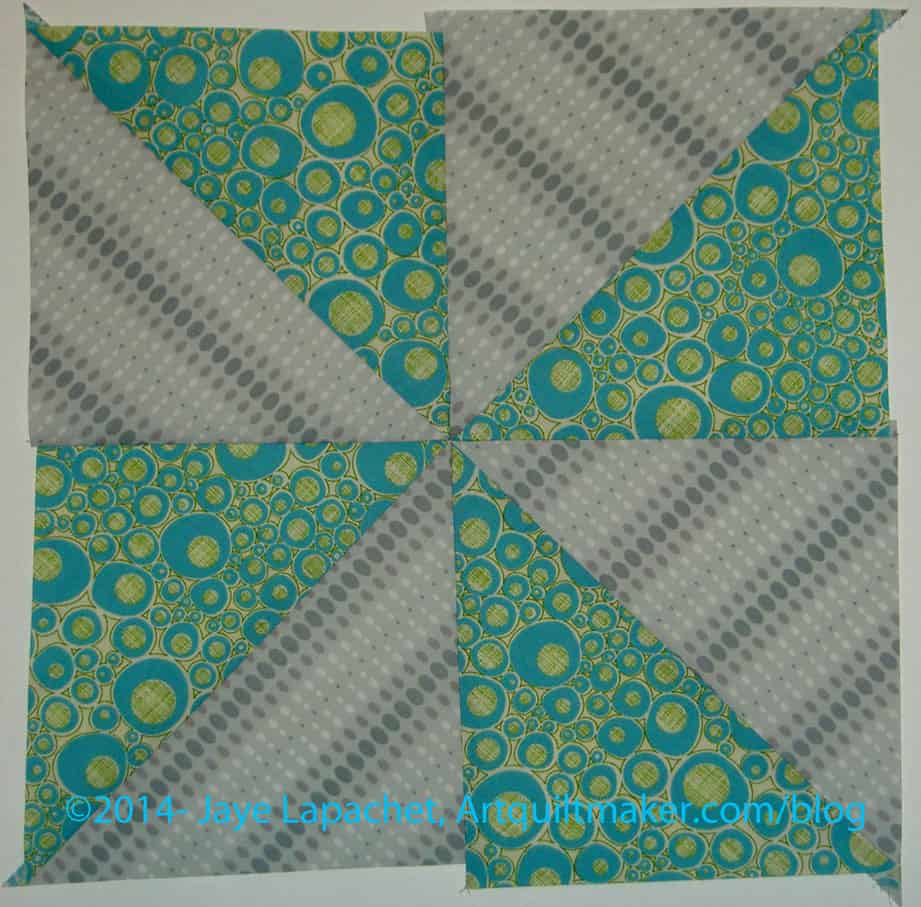
Finished Disappearing Pinwheel
23. Voila! Good job!
I didn’t make this block up. I first saw it in a video put out by the Missouri Star Quilt Company. The tutorial above is how *I* make the block.
Other Resources
You might want to take a look at the post I wrote a few weeks ago. Included in that post is a link to a video that shows how to make a Disappearing Pinwheel by the Missouri Star Quilt Company
Nota bene: I may update this tutorial or make clarifications, changes as necessary
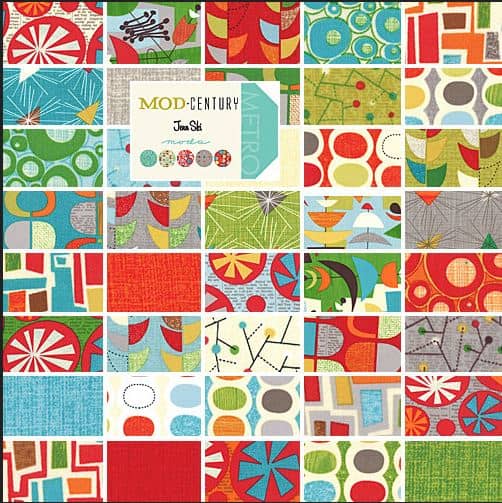
I am tempted to start each of the DPW posts with “I blame Sandy for this project.” It isn’t, however, a very positive statement and I do have free will with which to resist her quilty-wiles. I didn’t on this one, perhaps because I had a Layer Cake that really needed to be used as well as a lot of grey from the background tribulations of the Russian Rubix. The planets aligned, all the pieces were available and I didn’t have to leave the house to start.
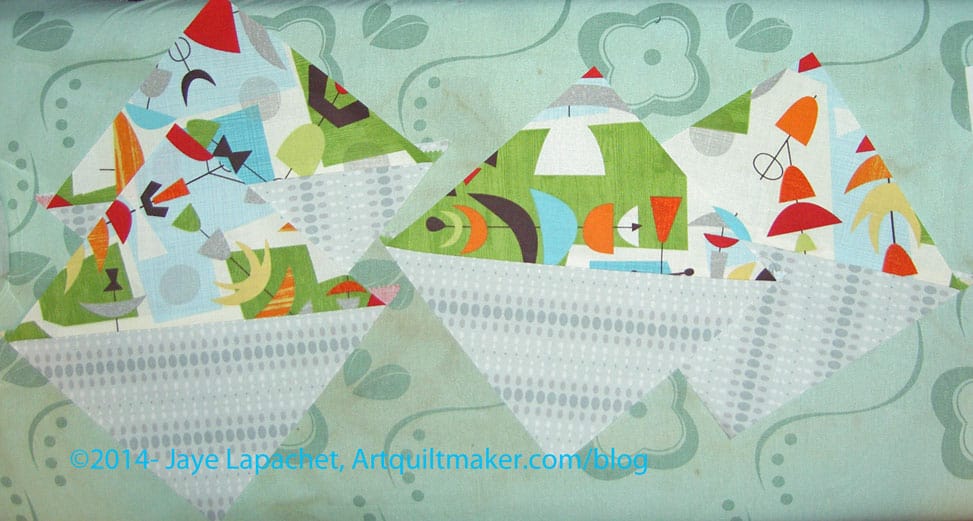
Disappearing Pinwheel Blocks
I am determined not to let this project languish. I want to sew the blocks, put them together and move on. I thought about giving it to someone associated with DH’s nonprofit, but I think it might be suitable for one of the Niece-phews. I’ll have to ask DH if it is boyish enough. There are a lot of nephews and they get annoyed and confused when I try and give them pink quilts.
On the color front, I am not thinking too much about the combinations of fabrics. The grey that mom chose is good, but some of the fabrics from the Layer Cake do blend into it. I think that is ok. I think it will make the eye of the viewer move around the quilt. The larger prints of the Moda Mod Century fabrics made blocks with a lot of movement as well.
After the cutting, the blocks go together like 9 Patches, which is pretty easy. I used the parts and pieces of these blocks as leaders and enders to Scrapitude, which meant I really got a lot done on the project with very little effort. I think I have nearly 15 blocks by now.
I am using a lot of Mary Ellen’s Best Press, so the blocks feel a little bit like cardstock. They will have to feel that way as I want to keep them as straight as possible since all the edges are on the bias.
I have also decided on the border and started those blocks, simple pinwheels, but smaller than the starting pinwheels for this block, as well.
I really don’t know why I started it except to say that I am interested in the cutting oddly and rearranging of blocks. I was amazed and thrilled at the way the Disappearing Nine Patch pattern created automatic sashing in my Food Quilt and this is even better.
A week or so ago, before the Martin Luther King, Jr. holiday, Sandy and AJ started ‘a thing’ on Twitter about the the Disappearing Pinwheel block. I have made a Disappearing 9 Patch (Food Quilt) and really like the disappearing part, so this ‘thing’ caught my attention.
Mod Century
I watched the video (see below) and found a layer cake. I also played around with the techniques on paper and then got busy and haven’t done anything yet. I have a Mod Century Layer Cake and thought the pattern would be a good use of the Layer Cake. I haven’t done anything yet.
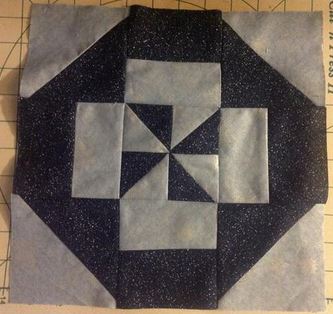
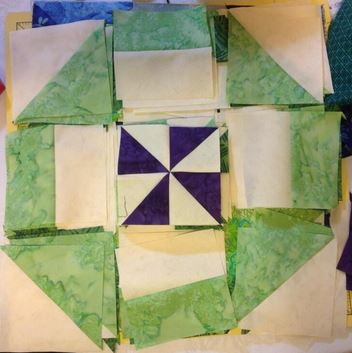
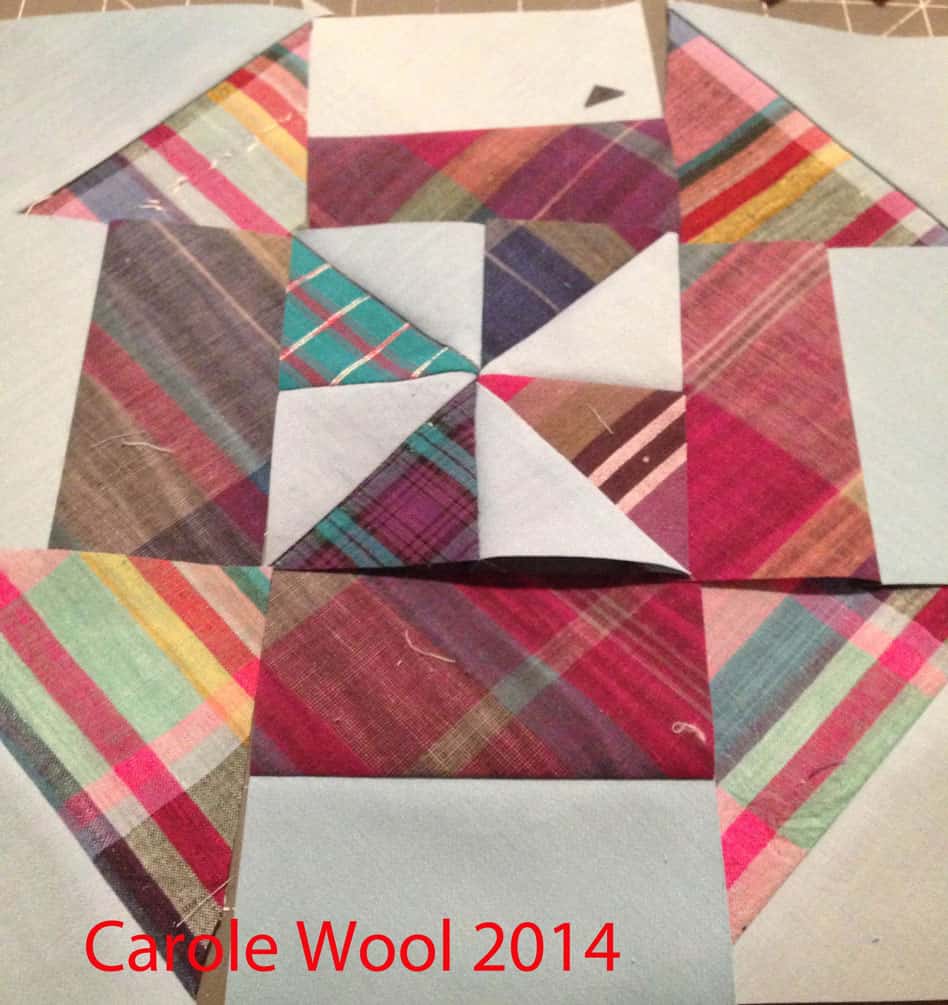
A lot of people are working on the Disappearing Pinwheel, including many Twilters. While I was out of town for work and political wifery, Daisy already has a top done, Carole has her blocks done and Torie is close to having her blocks done. Jackie, Gretchen and Valerie are close behind. It is awesome how dedicated they are and how they got to this project so quickly.
Daisy’s DPWRobin’s DPW (via Daisy)
Gretchen’s DPW
Torie-Test’s DPW TestTorie’s 2d DPW
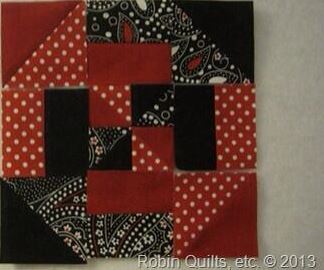
Now, Carole is an interesting case, and I don’t mean ‘interesting’ in a derogatory way. Carole uses a bold palette that makes a lot of her work look really different than other work I have seen. Carole’s DPW is no exception. I don’t know where she comes up with these ideas, but she succeeds with flying colors. I am so glad she agreed to allow me to share these photos with you!