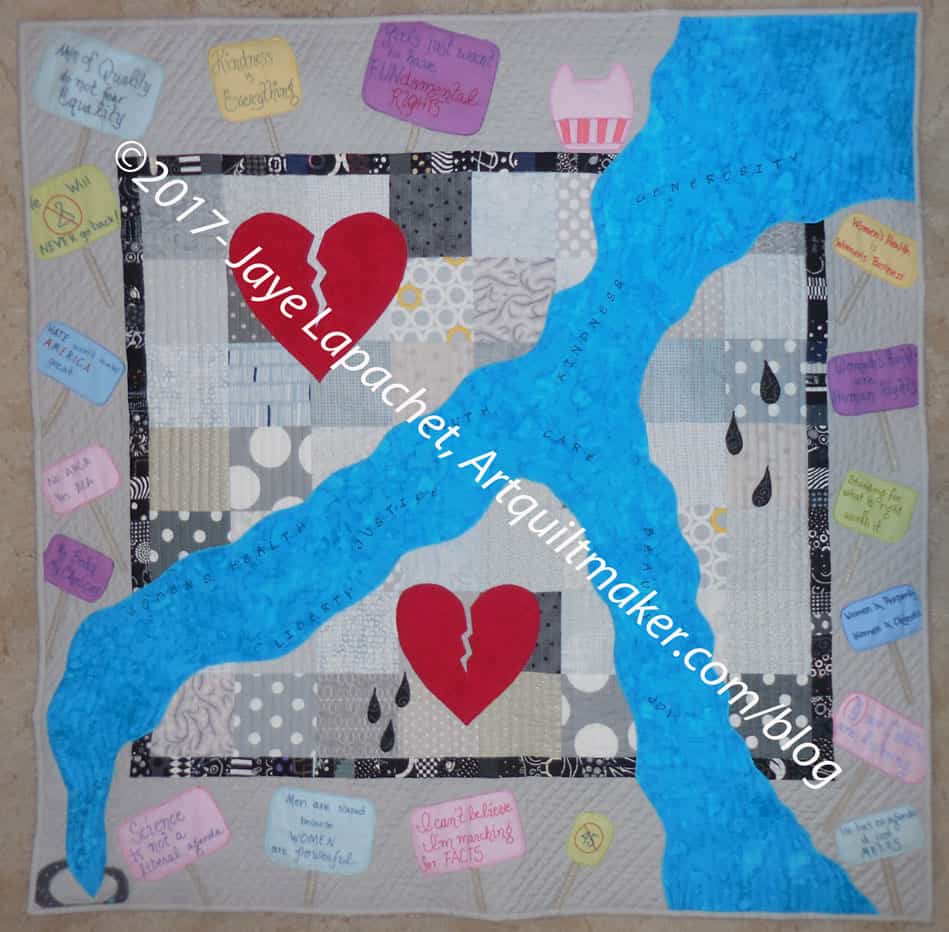
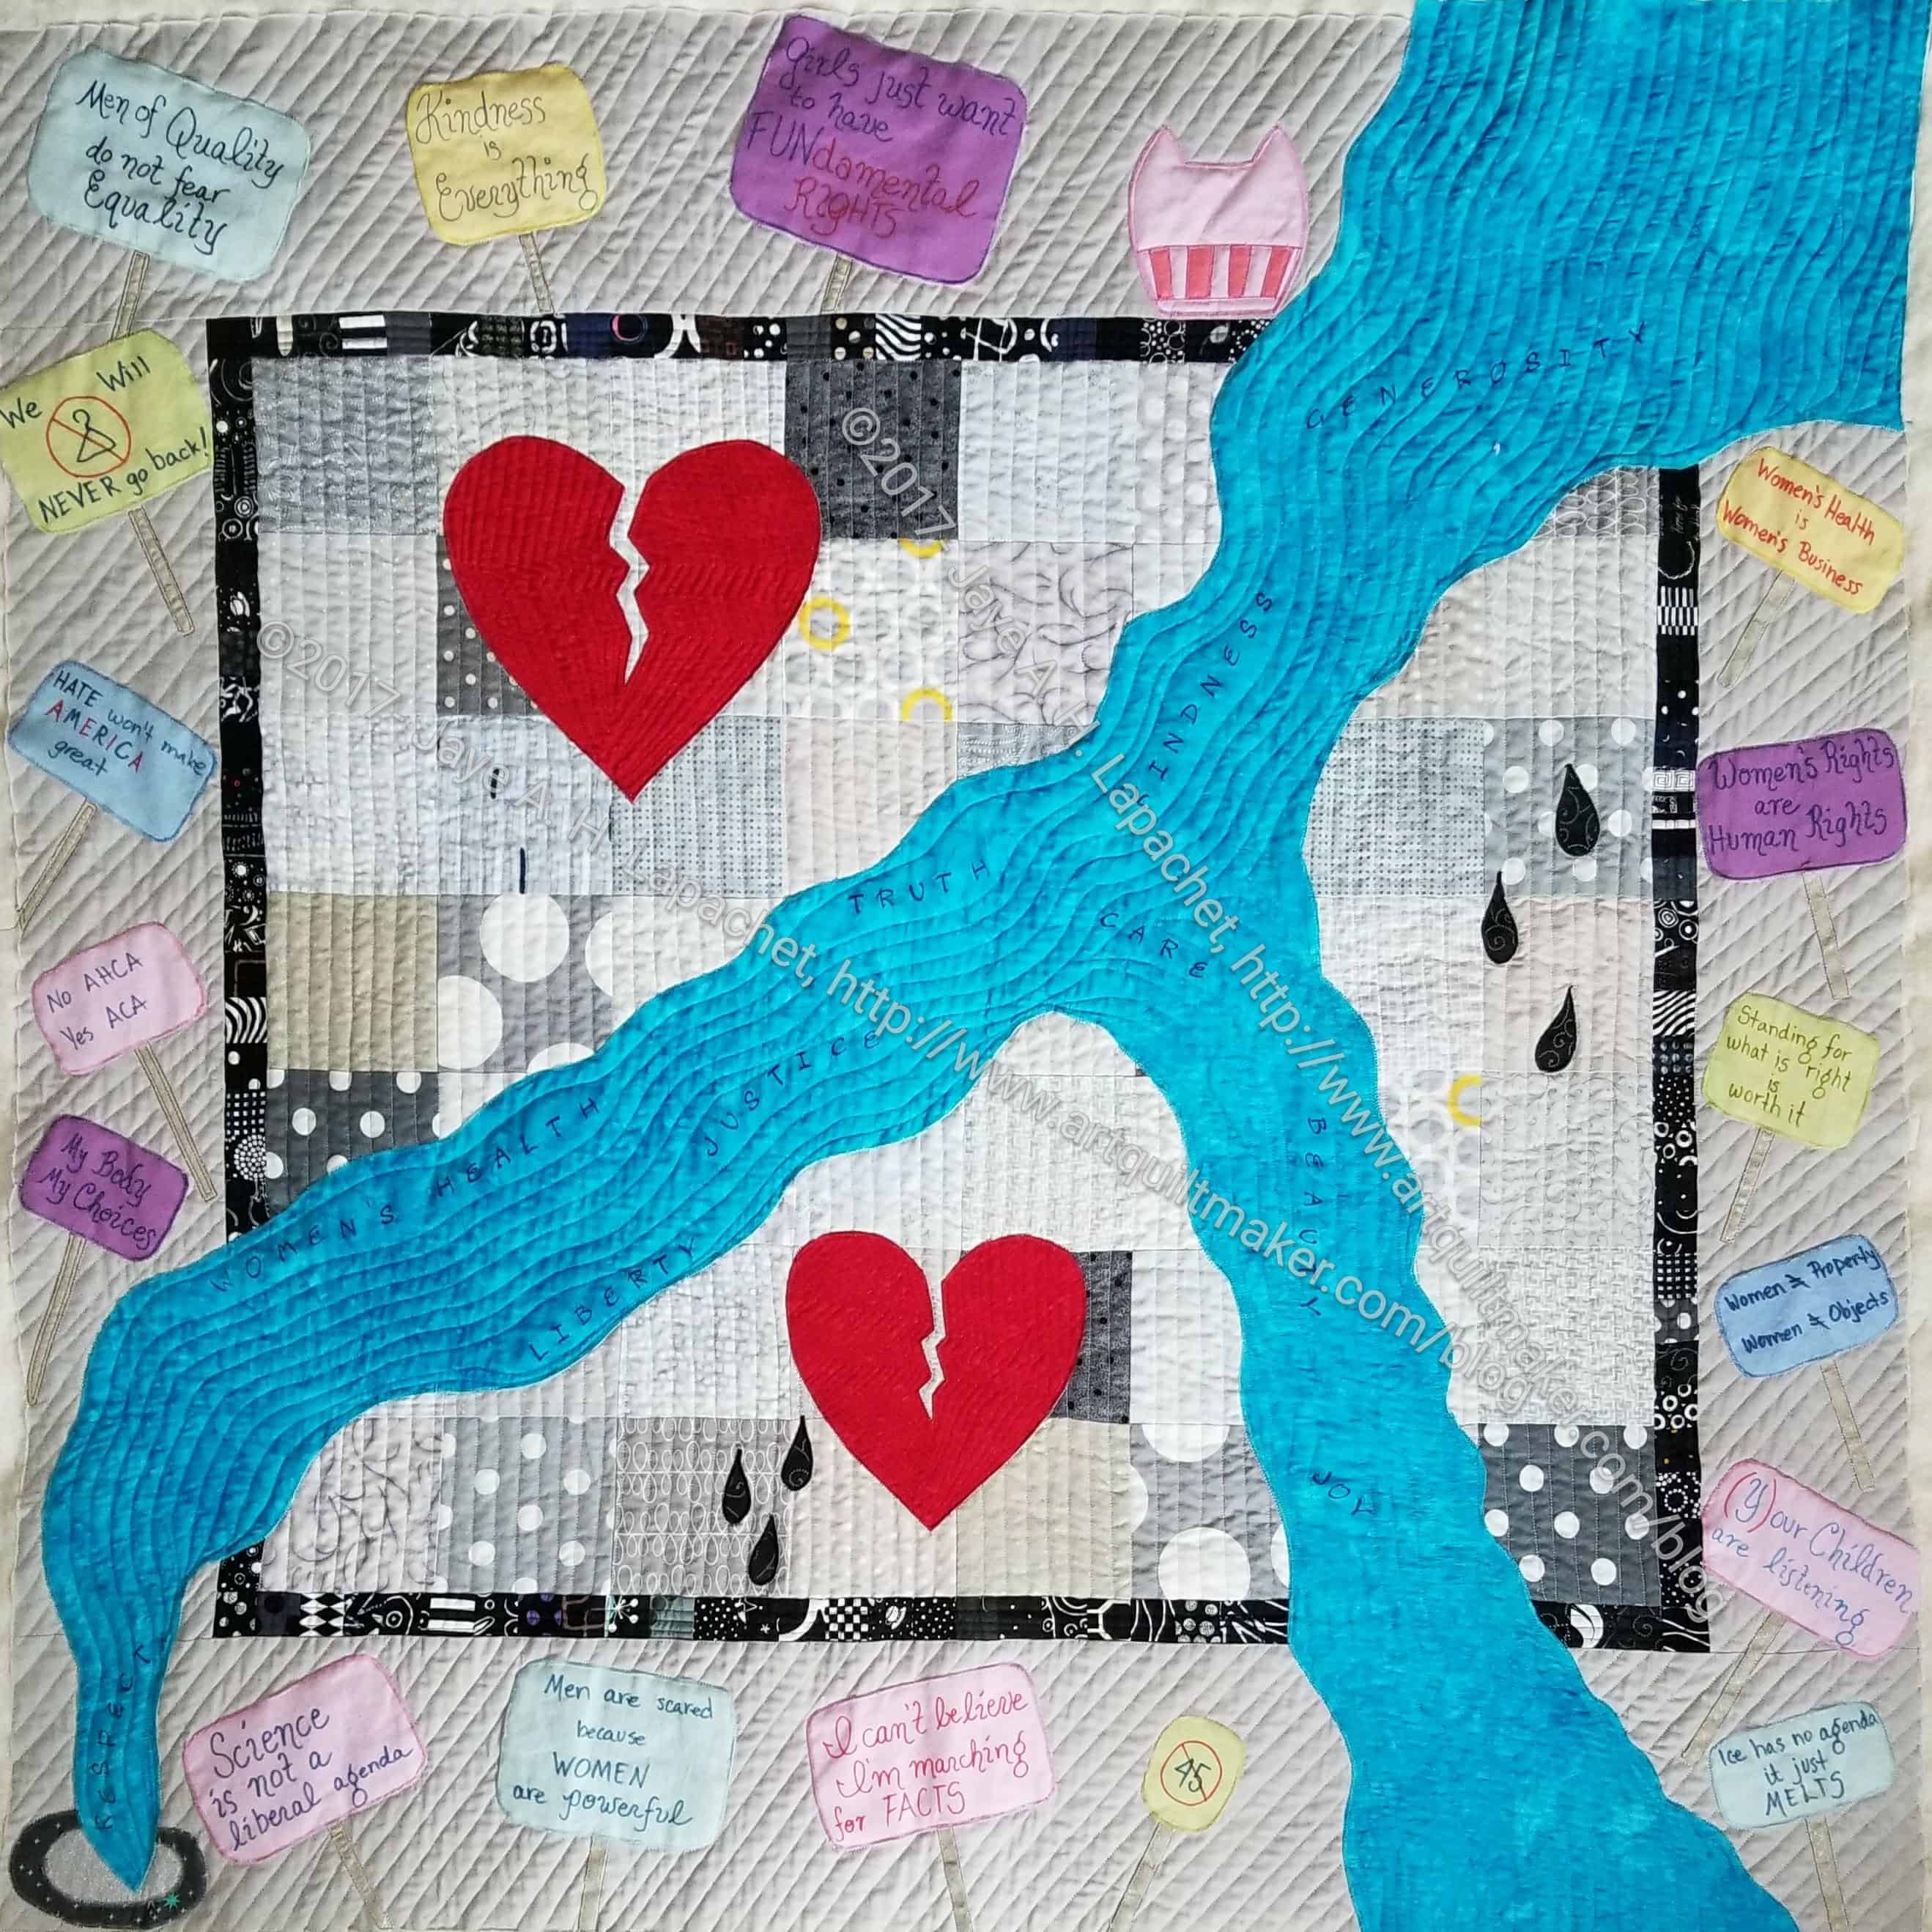
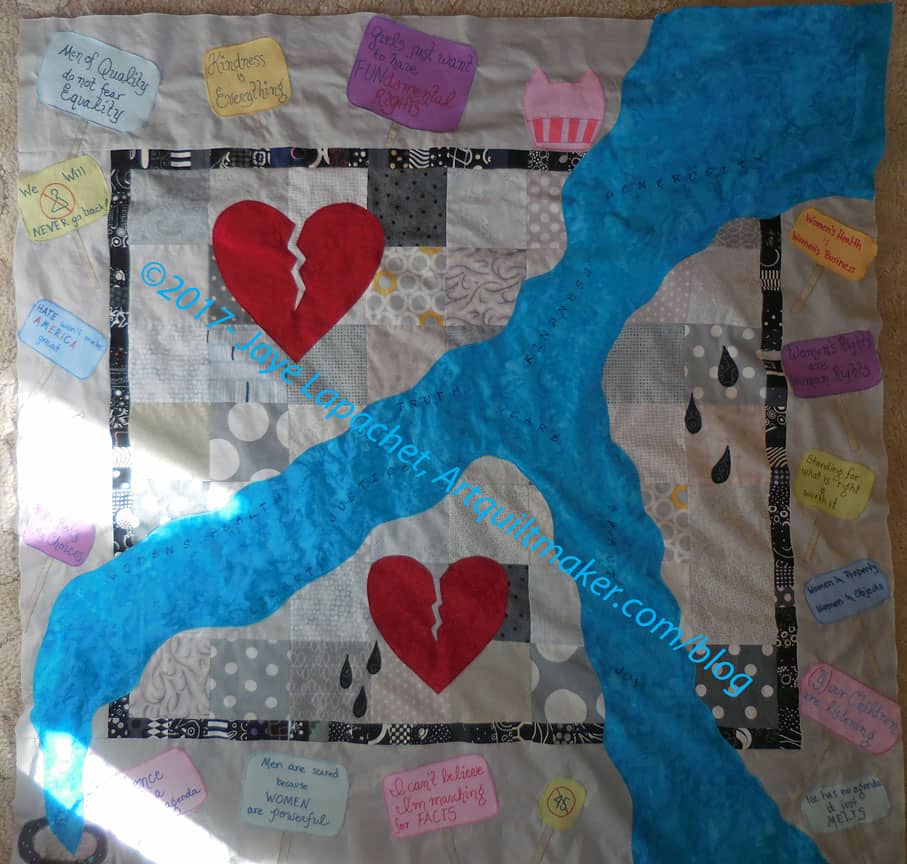
I made this quilt to represent the rights I thought were in danger in 2016. I think they are in even more danger. The worst part is that most of them reveal that lawmakers are thinking too much about sex when they consider women.
Go Vote and think about what YOU want your future to be like. Don’t consider what others are telling you. You are smart enough to decide for yourself.
I finally finished Down the Drain on Friday night. Completely finished: quilting done, binding on, sleeve sewn down. Done.
First, as I mentioned, I finished the quilting. Of course I could have stopped any time, but was clearly on a mission. I kept quilting minutely almost every single open space.
I finished hand sewing the binding on earlier this week. Normally, the combination of tightly woven fabric (an AGF solid) and Aurifil make for slow going, but the combination worked great! My needle went through the fabric with no problem and I sewed the binding in only about 4 hours.
I stitched the sleeve down in only about 2 hours. The whole process of making this quilting was so relatively painless. The experience was not and continues not to be painless. The actual process of making the quilt went so smoothly. I guess it was meant to be.
I finished quilting the art quilt, Down the Drain, a few weeks ago. I don’t know why I didn’t post it. My only explanation is life got in the way.
I am pretty pleased with my quilting. I found that doing the work on the 6600 was relatively painless. The border quilting is not perfect. I couldn’t have done perfect quilting if I had wanted, but I also wanted to express that life isn’t perfect, people aren’t perfect and we have a chance to improve.
I have machine sewed the binding and made the sleeve.
You saw the other day that I had finished the first layer, or perhaps it was the second layer?
I really kind of liked this look despite the slightly depressing look, but I was on a mission.
I used a satin stitch, but not a dense one stitch down the River. In some cases I will straight stitch first, but I didn’t in this case. I try to keep track of the settings so I can use the same density again. I often start with the density I used to sew on Merit Badges and then adjust from there. Despite the siren call of temptation, I always test the density before I sew on the actual piece. Have you every tried to rip out a satin stitch. It is doable, but I don’t find it to be fun.
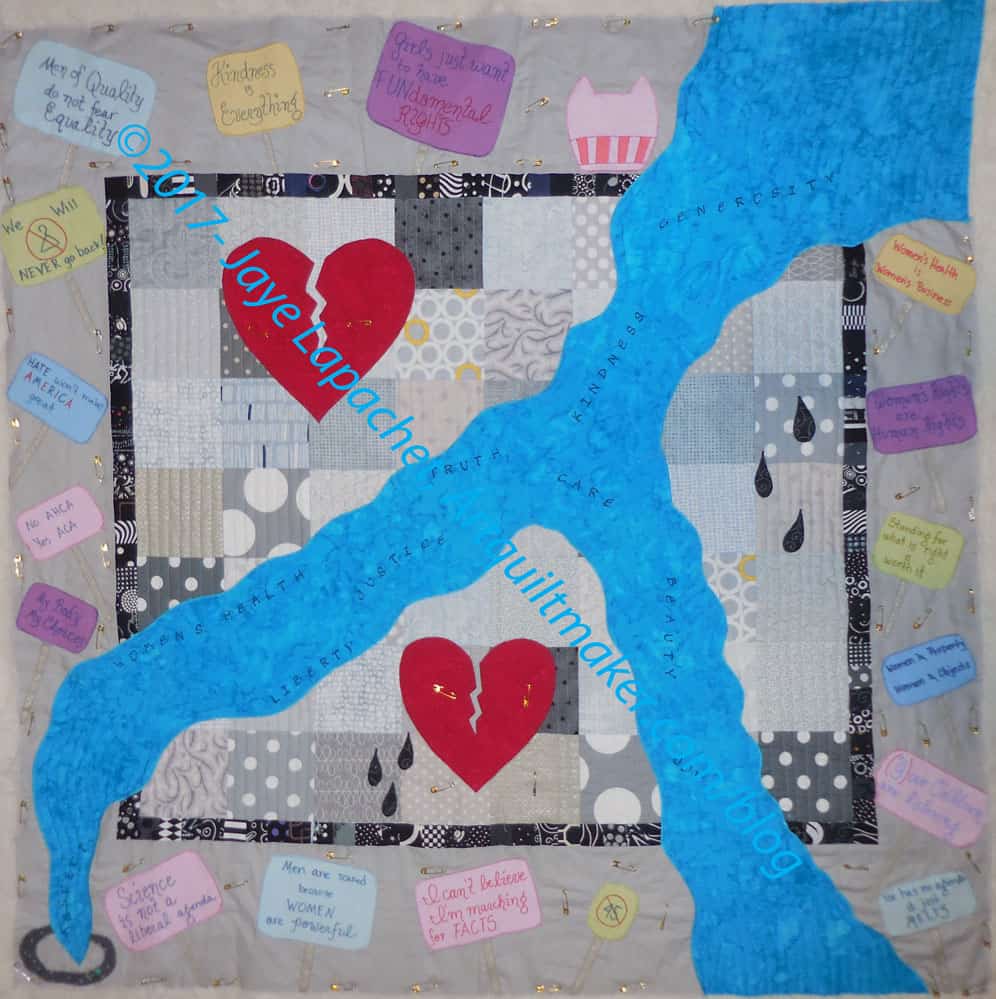
After applique’ing down the River shape, I moved on to the broken hearts.
Art Quilt: with hearts in progress
After making some hearts some time ago I have a trick, so I used it to make the heart shape then cut into them with very sharp scissors (should have used my Karen Kay Buckley scissors) and made the broken part. I put fusible on the back of the hearts and pressed them down. I use Soft Fuse. I have used other products, but that is my current favorite.
I had to play around with the placement of the hearts. I wanted them on the background, not on the borders or covering the River. Once they were placed where I wanted them I satin stitched them down and added the tears. I think tears coming off of a heart is powerful imagery.
Art Quilt: Signs in process
The signs took a lot longer. I needed to add sticks and get the placement right, trim the shapes and write the messages.
I don’t know why I wanted these Easter Egg colors, but they seemed right. I didn’t even have to hunt for them as they magically appeared in a convenient stack of fabric.
Weird.
I fused the sticks, then found they didn’t show up very well, so I stitch around them to highlight them. I still don’t think they show up as much as I wanted, but I am okay with the look.
Art Quilt: Top finished
This is very much a quilt where you get one view from afar and need to come closer to get a more detailed view.
After sewing the background together, I thought there might be a small chance I was done and could move on. No dice. I would like to say that my Muse gently stroked my hand encouragingly. No such luck. The VIMH #2 was impatient and insistent. “keep going,” she said (loudly). She has no patience because she knows I know what I am supposed to do. When I don’t do it she has no patience for my prevaricating.
I thought the piece needed an inner border to keep the center motifs contained. I thought a dark border would work. Not being done with those 1.5″ squares yet, I cut about a gazillion more out of black and white fabrics. The fabrics were mostly dark, but the white provides a little space.
Down the Drain with border #2
I cut enough for two rows, then put them up on the wall.
Down the Drain with border #2- different sizes
The effect seemed kind of heavy to me, so I put one row up and compared the two. One row seemed best to me, so I sewed those together and put them on to the quilt.
Except.
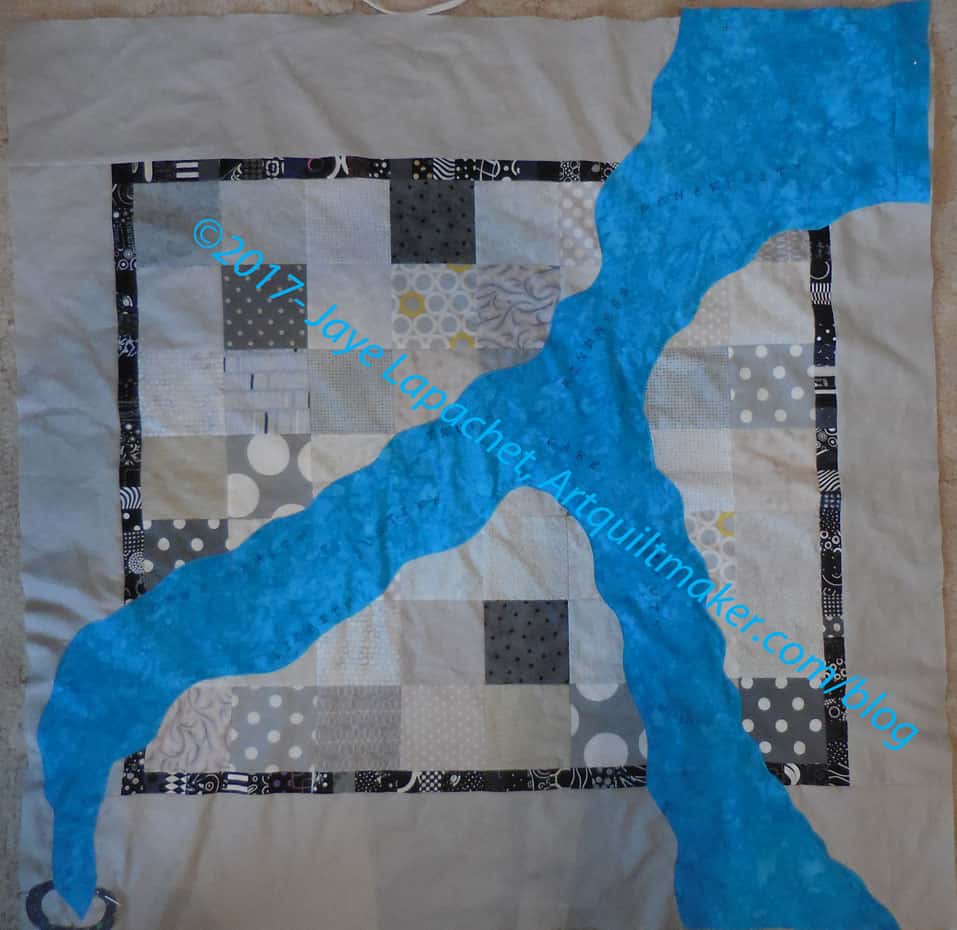
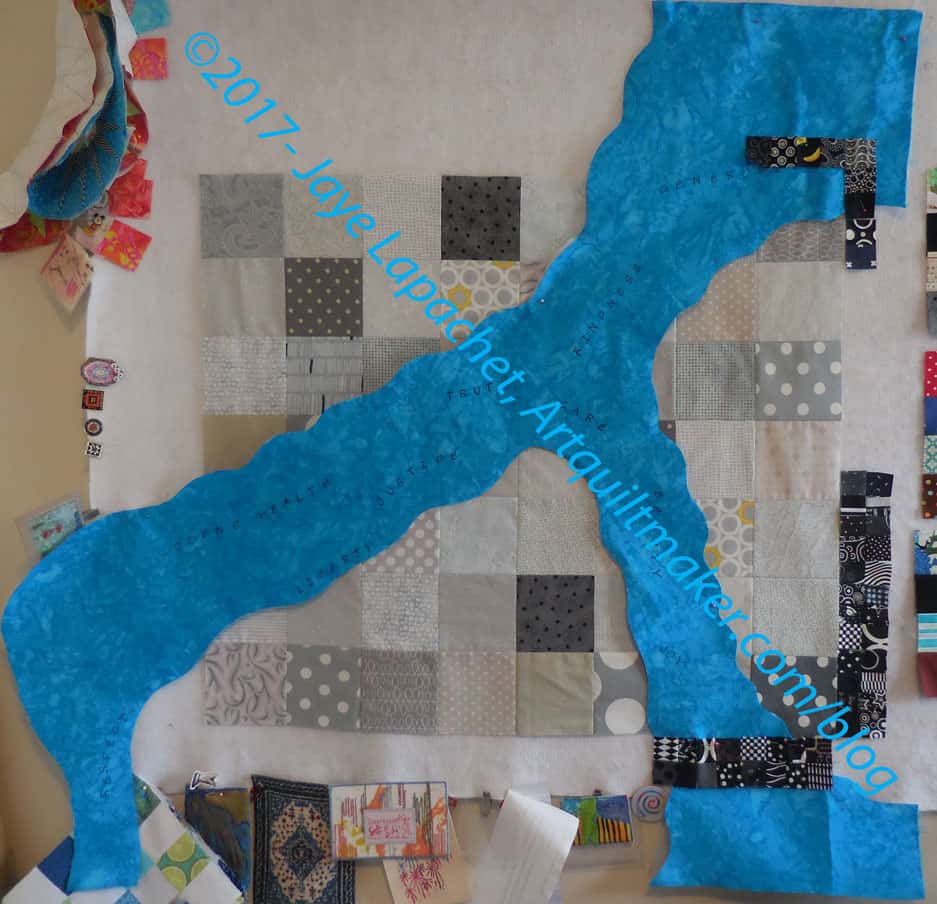
River of Sorrow and border n.1
I really wanted the ‘River‘ to go underneath the border. I fiddled with that concept a lot, then finally gave up.
Part of the problem was that I was going to have to applique some of the squares and I really didn’t want to do that. I also didn’t think it added anything to the quilt overall. It was hard to tell, though, and it made me sad not to be able to work out the technical details.
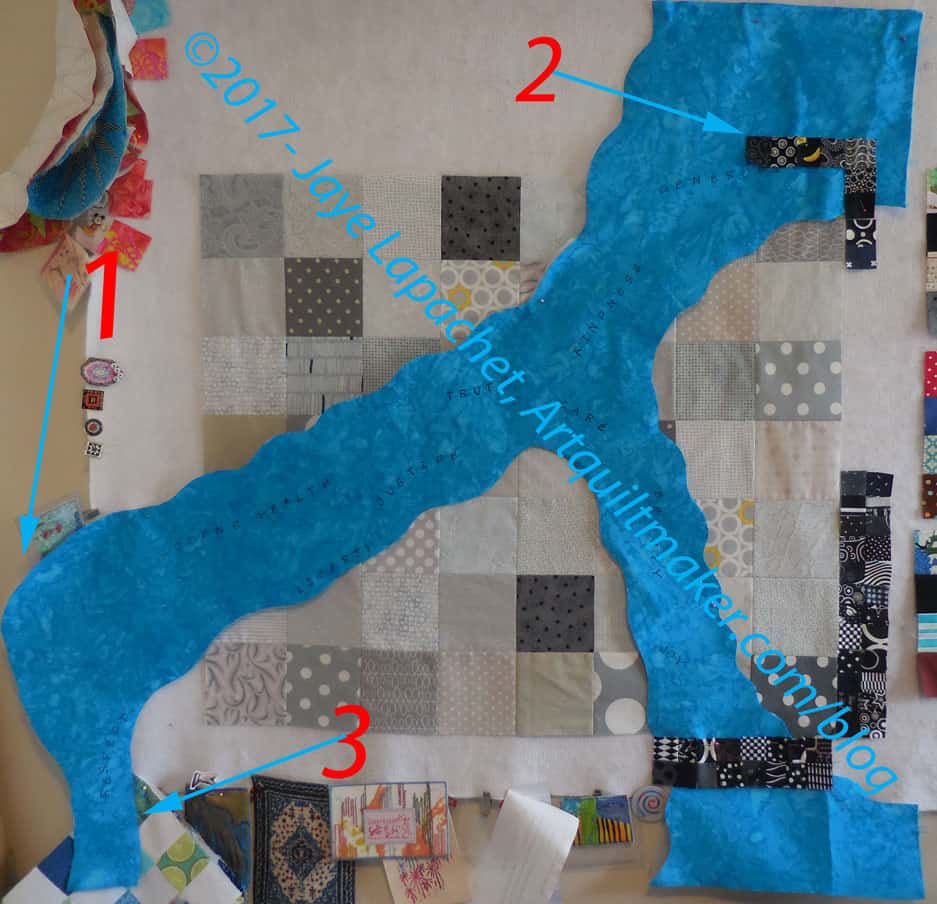
Down the Drain: River of Sorrow-detail
I got busy trimming the River as I didn’t want a 20 inch third border.
I needed to make the water filtering into the drain end up in the corner but not on the edge, otherwise I wouldn’t be able to applique the drain.
I was still trying to figure out how to get the inner border over the River shape. This point in the process decided me, because I was already thinking about quilting and how I would manage that with this border on top.
Trimming the bottom of the water going down the drain was also a problem because of the angle of the viewer. I looked at water sluicing into a drain, which didn’t help me, because I was looking at it from on top. Even if I stood on my head **in** the sink, I wouldn’t have been able to get the same angle. Finally, I decided that my viewers weren’t stupid and would figure out what I was trying to say. I am not 100% happy with the outcome, but sometimes one has to make compromises.
Down the Drain: River of Sorrow complete
After trimming, sewing, ripping and sewing again, I finished the second layer.
The weather has been very gray lately, so the quilt, being predominantly grey at this point, looks depressing. It isn’t really. The grey made into the second border is a bright clear grey. Even thought I don’t get the interwoven feel I was trying for, I am pleased with how this came out.
Kind of dramatic, huh? I am not sure what else to call the shape. I have used this shape two other times – both on political quilts.
I knew the approximate shape I wanted, so I made a paper template by taping a bunch of pieces of newsprint together.
Then I cut out the fabric. Then I trimmed the fabric. Then I shaped the piece until I had it the way I wanted it.
Down the Drain: River of Sorrow
Finally, I was able to put it on the wall. It didn’t stick, so there are pins you can’t see.
Down the Drain: River of Sorrow-detail
I wanted to make the shape look like it was going down a drain. I needed it to look like it was constrained in some way and forced to flow down.
I wanted the black border squares to go on top of the Shape. At this stage, I pinned the border over the shape to move in that direction.
The part of the ‘water’ that goes down a drain was hard to approximate. The shape you see in this picture is what I ended up with.
After I got the approximate shape, I took fabric ink and a rubber stamp alphabet and wrote on the shape. I wrote words that described what I observed was going down the drain.
I always have a hard time naming my political quilts. Their names end up being straightforward and somewhat unsophisticated. I guess I have learned to go with that.
As I said yesterday, I saw Sarah Ann Smith’s quilt, Speak Up, Speak Out and a whole bunch of stuff coalesced in my mind. Mind you, I didn’t even really know that all that stuff was rolling around. I have been feeling stressed out since the Inauguration and all of the stuff stressing me out suddenly came together.
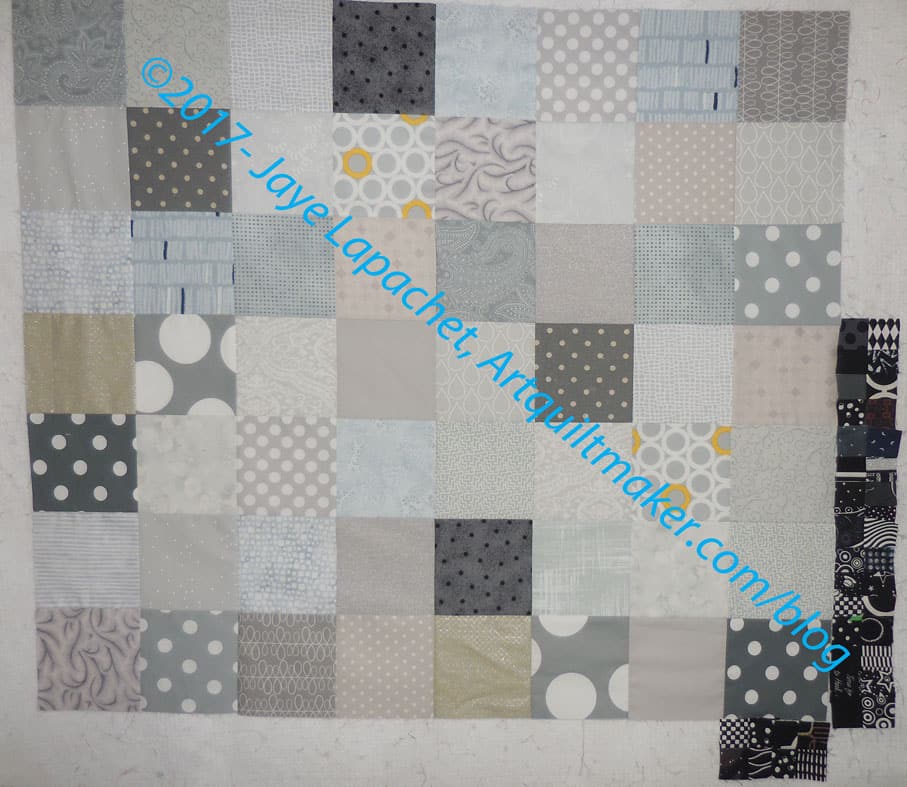
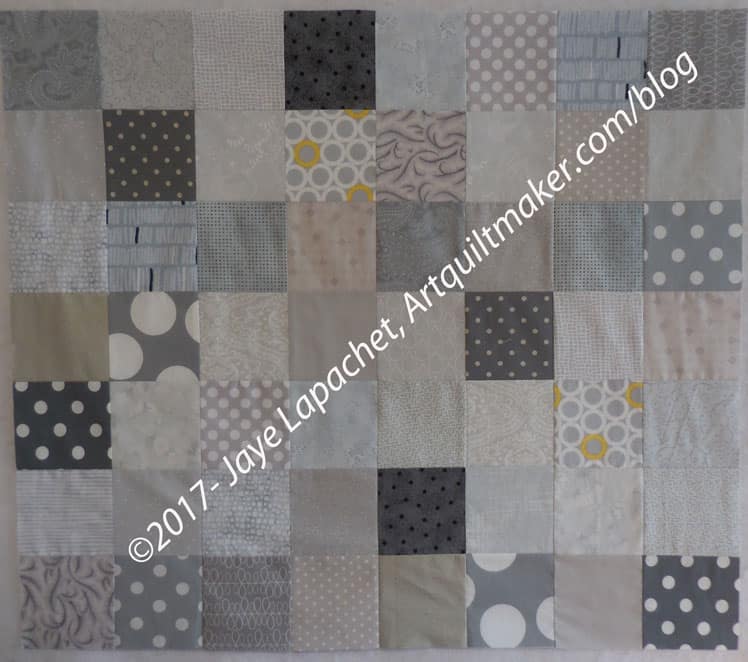
Background 1
As I said, I started working on my project from a couple of drawings in my journal. I had no measurements beyond “not big” when I started working on the background.
I, again, used Mary Mashuta’s Pushed Neutral technique. I have done this in the past with other neutrals and now I use the same techniques with colors. This time, I worked with grey. Some of the greys are a little dark, but I keep telling myself the darks create disharmony, which is one thing I was trying to do. This quilt should unsettle you. I think, ultimately, the whole idea worked.
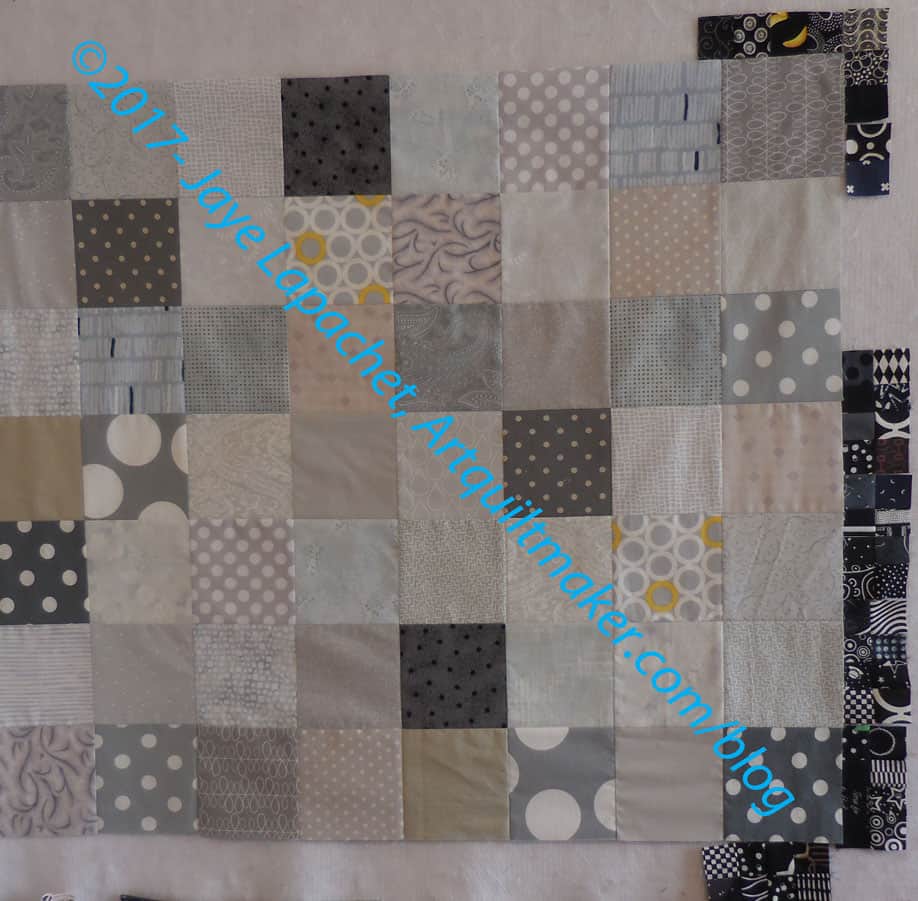
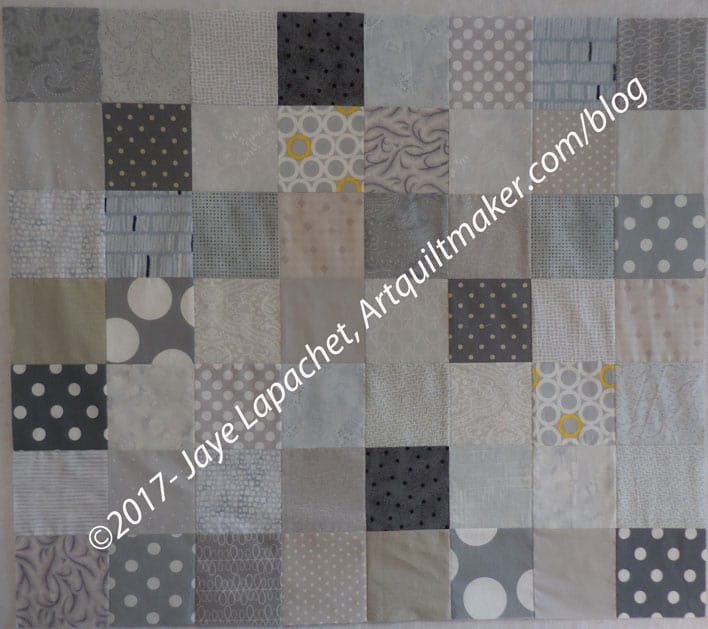
Background 2
I did move some of the squares around to get the right mix of locations with darks and lights of grey.
A few weeks ago I posted a Spark about having a secret. It was purely coincidental with the project I was working on.
Down the Drain: basted and ready to quilt
I needed to work on this project, but I did not want comments or to provoke the storm I know will come with this post. I wasn’t quite ready. I still am not ready. As long as I still have freedom of speech I will post this quilt. I knew about the Threads of Resistance project and I would love to be a part of that, but I don’t do well with challenges. I wish I did because I’d love to be a part of that show.
The stress started on my birthday, which was January 20, not just because it was inauguration day, but also because I was at an event where people were happy to see President Obama leave office. They didn’t like him because he was black. For them it was No-Bama Day. For me, even though I didn’t know it at the time, it was the beginning of a stressful, distressing time.
I walked around waiting for my ATM card not to work, to be made subhuman, like in the Handmaid’s Tale. I started really to fear that the better country we were making would be dismantled. You might think we don’t need the EPA or the ACA and that is your right. I do not want to create a Sh*tstorm and this is not a political blog. I feel we do need clean air and health care for everyone. My feelings coalesced when I saw Sarah Ann Smith’s quilt, Speak Up, Speak Out.
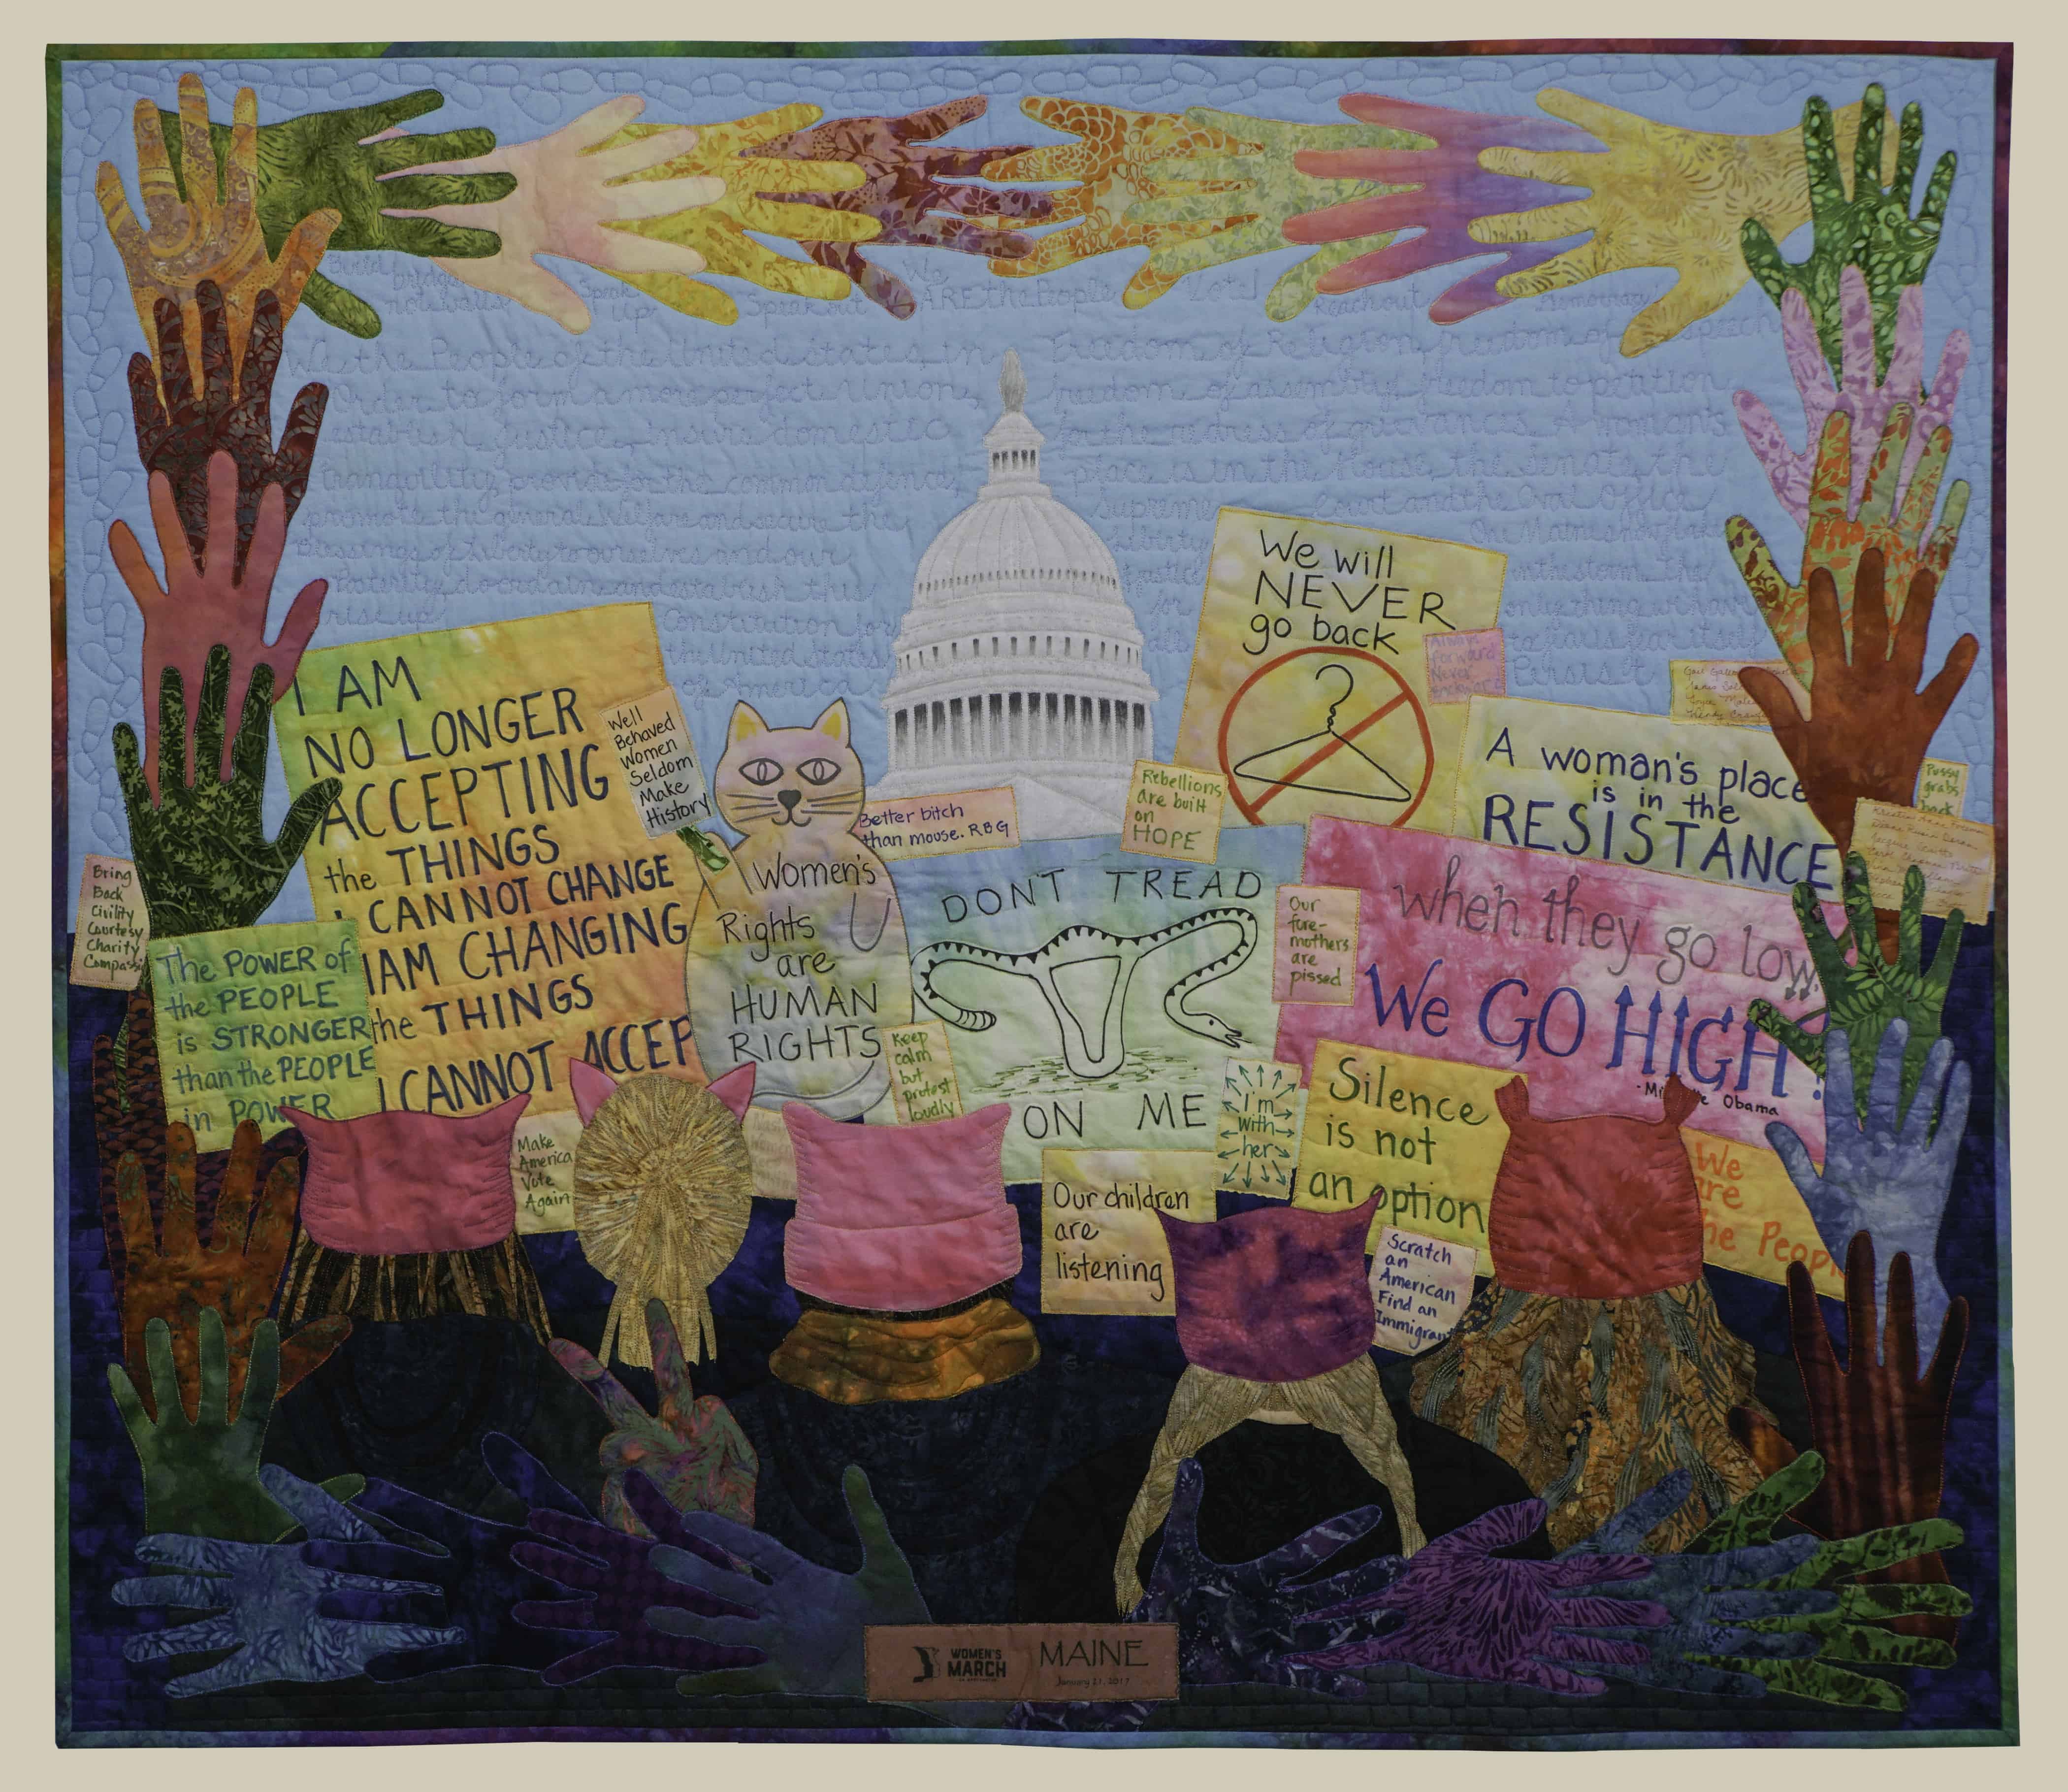
Sarah Ann Smith’s Quilt Speak Up, Speak Out
When I saw her quilt, I realized that another in my political art quilt series had been brewing in my head without me really knowing. I thought “this is the quilt I wanted to make.” I said so to Sarah and she said to make my version.
I thought about it for a long time, then I drew a picture in my journal. I thought that would be the end of it, but I couldn’t get the image out of my mind. I drew it again, a little more refined and more to scale.
I drew it over an over, continually refining, adding detail. The whole process went so smoothly that I kept going into piecing and cutting and sewing and quilting.
As I write this, the piece isn’t quite finished, but it will be soon (YAY! Another finish!). What happens to it after that, I don’t know.