Remember the Ring Toss block that I agonized over? I am pretty sure I told you I wasn’t going to make the quilt. The block, which I like has been hanging on my design wall since December of 2018. It occurred to me that it would make a great exterior for a Sew Together Bag. I thought this was an especially good idea since I had no idea what colors the recipient likes.
While I am sad I won’t have this block to look at, I am pretty pleased with how it came out as a Sew Together Bag.
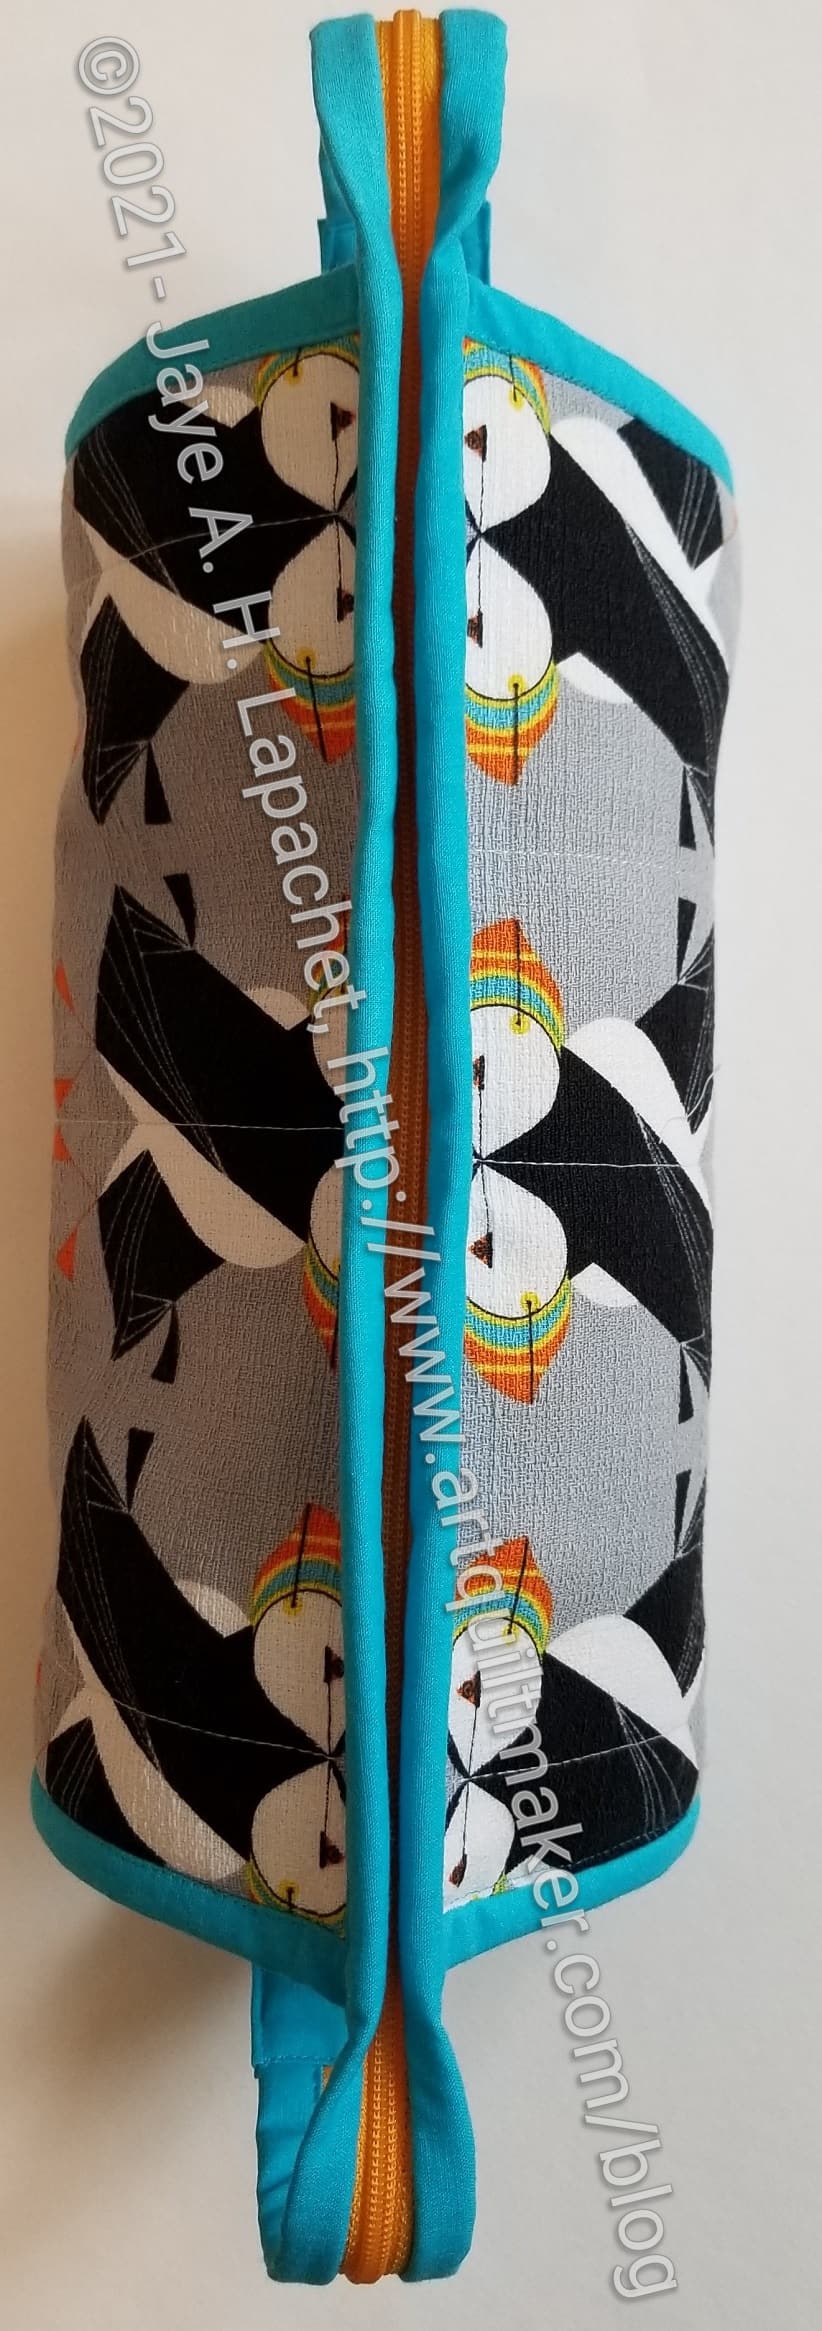
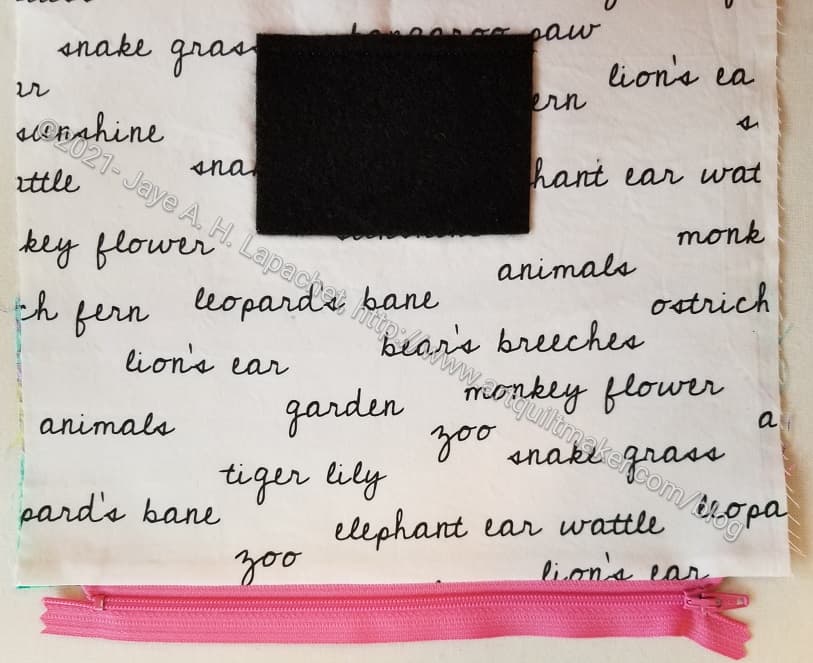
Ring Toss Sew Together Bag closed
Ring Toss Sew Together Bag
I wish I had thought of how the bag would look from the top. I added grey around the block to make it large enough for the exterior. The viewer can’t see the Ring Toss block from the top. Mostly you see the grey. I think it is fine, since I mostly look at mine from the side or end.
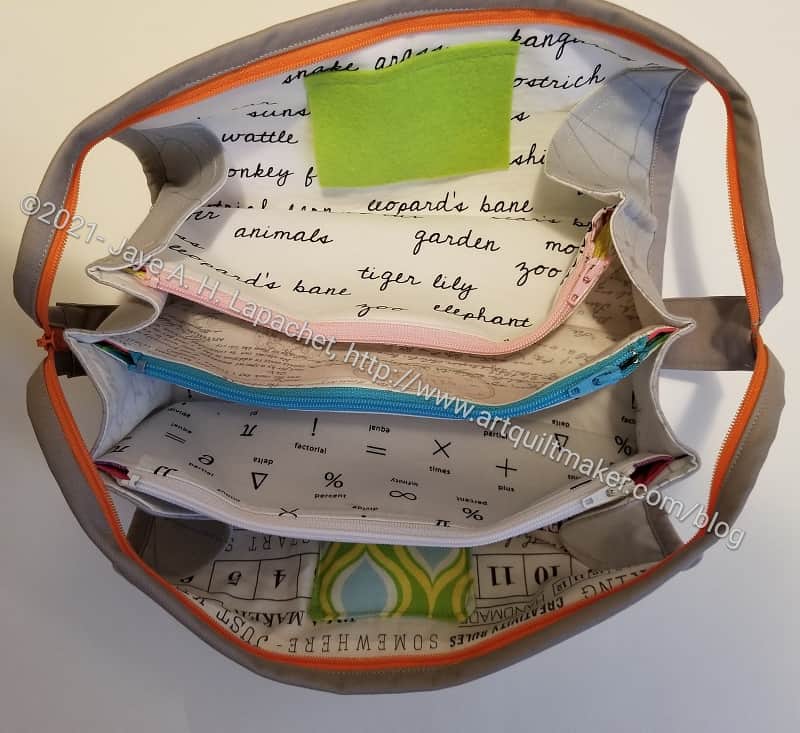
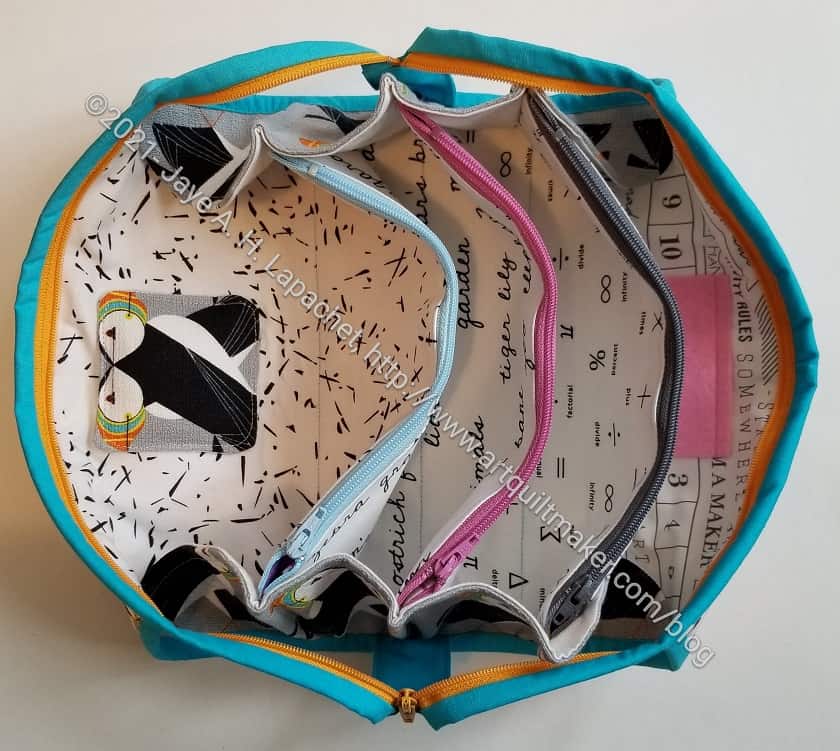
Ring Toss STB open
This bag has similar insides to the Leaf STB, the Puffin STB and the Brocade Peony STB. I chose different colors for the zippers, needle holder and pincushion so they are different from the other bags.
I meant to hand this off to my DH to deliver at a Native Sons event, but I forgot until he was already gone, so I’ll have to mail it.
I made this Sew Together Bag as a gift. I want to send it off now, but am trying to wait until Christmas.
The outside is a Charlie Harper print made from Barkcloth. I have never used Barkcloth before and it was fine. I interfaced it with SF101 and didn’t have any problem with the looseness of the weave. I am not sure how it will be if I cut squares and try to use them in a Fabric of the Year quilt. I only bought it to make this bag because my friend loved it. Ordinarily I wouldn’t have bought it.
I really struggled with what to put with it for the binding. I don’t think the turquoise is perfect, but I think it looks pretty good. Black was my other choice, but I think with the grey background and the black on the puffins the whole project could have easily gone towards depressing. I chose the turquoise binding to make it super cheerful.
Puffin STB interior
I fussy cut some more puffins for the mini pincushion. I think they look really cute.
You can see similar interior fabrics to my Brocade Peony / La Pass Sew Together Bag. Same fabrics- different order.
I haven’t talked much about zippers as I have spoken about these projects. Each bag requires 4 zippers. I chose, mostly, different colors for each zipper to make the bags more visually interesting. I also think that zippers are another visual cue to where the maker put a tool or supply. I kind of wish I has used another orange zipper on this bag, but I think it looks good as is.
I worked on the leaf Sew Together Bag over the weekend and was able to finish it. Yay!
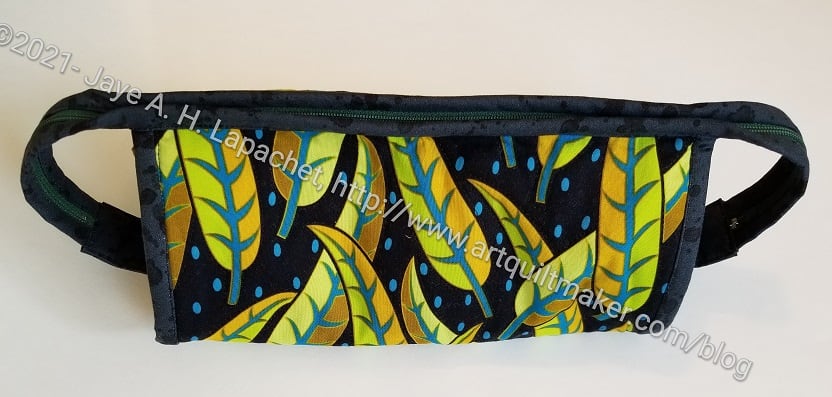
As shown the other, this used a Jane Sassaman leaf fabric for the outside. I used black for the binding, though green might have worked as well. I don’t have a lot of dark green. I think the black is a good choice.
Leaf Sew Together Bag – open
As you saw on another day, I made all the insides light colored so items stored inside are easy to find.
The recipient works for a public health department and I have been assured she will like the ribs.
I did the pincushion a little differently from my red-violet Sew Together Bag. I made it much smaller and I machine sewed it to the interior. I don’t know if that is better, but we will see.
The flap on the right of the pincushion is for WonderClips. I think Sew Tites could be stored there as well.
I spent last weekend finishing the Sew Together Bags. Mostly what I had to do was put the bindings on.
In the last batch of Sew Together Bags, I did something a little different. I tucked the zipper tab into the side binding to make it look really finished. Look for a mini-tutorial about how to do this later. I did that again, so it took me most of two days to get them completely finished. Now they are and I am really pleased with how they came out.
These were much easier to make. I felt like I was playing a bit and not fighting the pattern. I guess that is what comes after you have made 14 of them!
I spent a lot of time over the weekend working on these bags. I have to say that it was a joy. I do want to get them done, but I really enjoyed the process.
I talked, a long time ago, about trying to be process oriented. It is hard and I have to focus on it. This sewing didn’t feel hard. I just moved through the process steadily, listened to an audiobook and felt very happy.
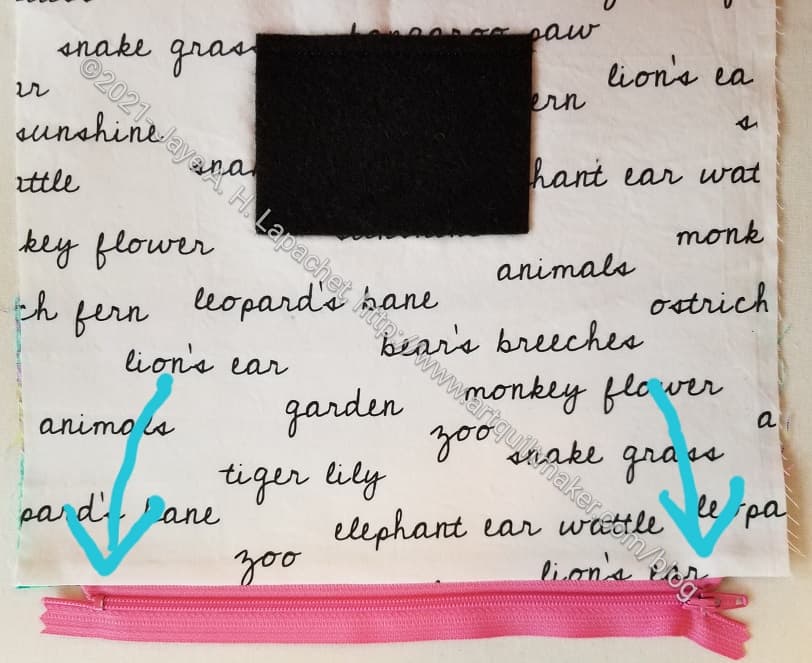
I also added a little flap to hold WonderClips. It isn’t a great solution and I’ll have to think of something better for next time, but it will hold WonderClips, which will keep them from falling out of the STB if it gets turned on its side.
The arrows point to the flap. I want to hide end somehow for future models as it is hard to get the end straight with the seam allowance pushed down into such a small space.
I am not sure if this is actually called a pocket panel. I might have heard that somewhere else or in another bag pattern. It fits the description, however.
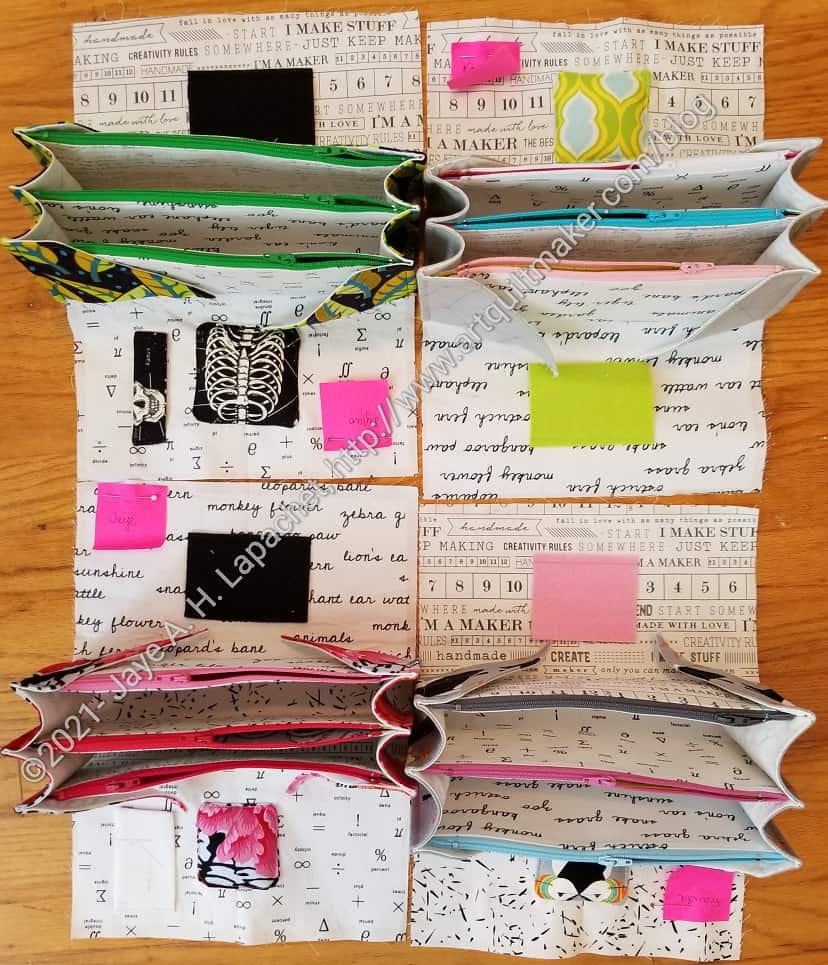
I tried to match up the different zippers with the exteriors of the bags. Stayed to see what you think about my matching.
In the photo, you can see that I have already added the needle holder and pincushion. I haven’t found a good pincushion size. I did something different this time, which was to sew the pincushion to the lining piece by machine. I have sewn them by hand before. The pincushions are also much smaller. Not sure that is good, but we will see. I am sure I will make more in the future.
It occurred to me that I should add a WonderClip holder. I wish I had thought of it sooner, but I can still add something.
I decided to use the zipper foldy trick that I learned from making the Ultimate Carry All Bag on these Sew Together Bags.
Zipper ends folded on STB
I didn’t use it on all of them, because I wanted to be able to compare the final result. One thing I noticed is the big space from the end of the zipper to the edge of the fabric. We’ll see how that works once the thing is done.
It makes the ends of the zippers look very neat and tidy, which I like. I kind of wish I had used a longer zipper, but I know the side panels will take up some of the space.
I mentioned the other day that I had gotten my sewing machine back in gear. Some of my supplies, etc are still packed, so I am kind of doing ‘camping sewing’ – making do with what I have.
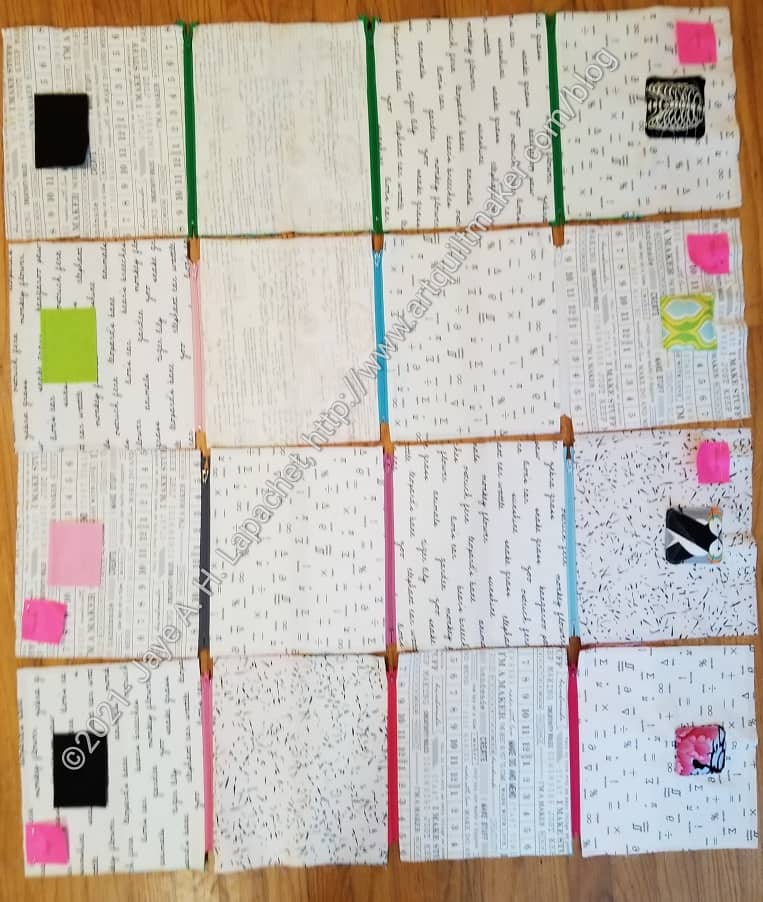
What I worked on was the exterior and sides of the Sew Together Bag pattern. I am making 4 of them this time. One is for me and the others will be gifts.
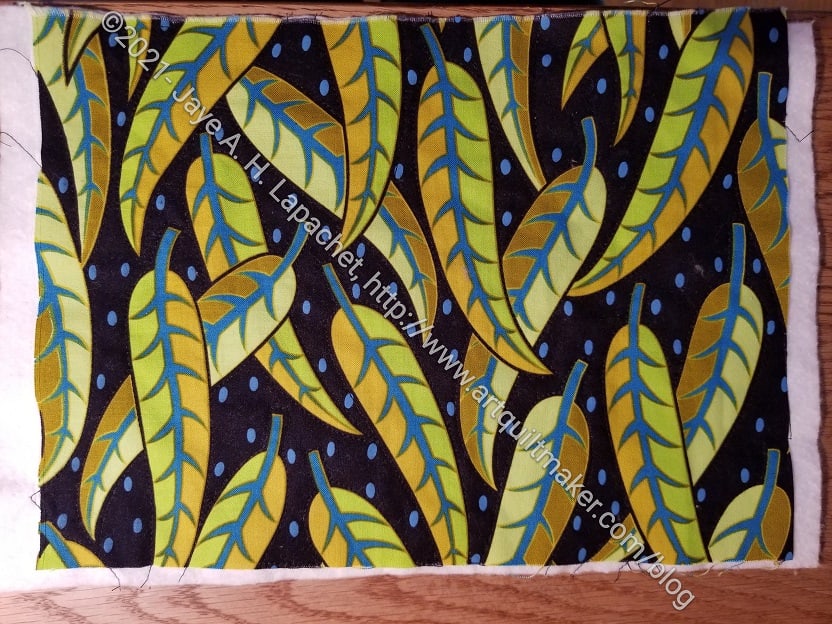
Leaf STB exterior
Leaf STB exterior
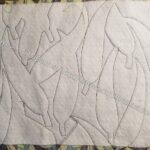
The first thing I did was quilt all of them. The two pieces above are from the leaf print. There are two pieces because I wanted the leaves facing up, so I had to use the ‘directional print’ directions for the exterior. Viewers cannot really see the quilting from the outside, but it looks great from the inside. I used a straight stitch and my quarter inch foot*
I did a little quilting on the others, mostly because I wanted to get to assembly.
*part of the ‘camping’ since I don’t know where my box of other feet are at the moment.
I was slightly horrified at the large pile of paper napkins on the YM’s dining room table. I came home and made napkins for the YM and the YMG from fabric I bought at Pioneer Quilts in Portland.
I sent them off and I hope they like and use them.
I made good progress at Craft Night on Gelato. I got all of the background sewn to the precut strips.
I wanted to prepare for my mini Sew Day with Gerre. This quilt was on the agenda. By sewing all the background to the strips, I could get it ready to transport. It was important to me to keep the strips in a certain order. I was able to use the numbered pins** I bought some time ago (and thought were useless) to good effect. I also used giant WonderClips** to keep the strips together.
I didn’t have a design wall at Gerre’s and with the numbered pins, I was able to keep the whole thing in order so I could sew it together.
**I use affiliate links and may be paid for your purchase of an item when you click on an item link in my post. There is no additional cost to you for clicking or purchasing items I recommend. I appreciate your clicks and purchases as it helps support this blog.
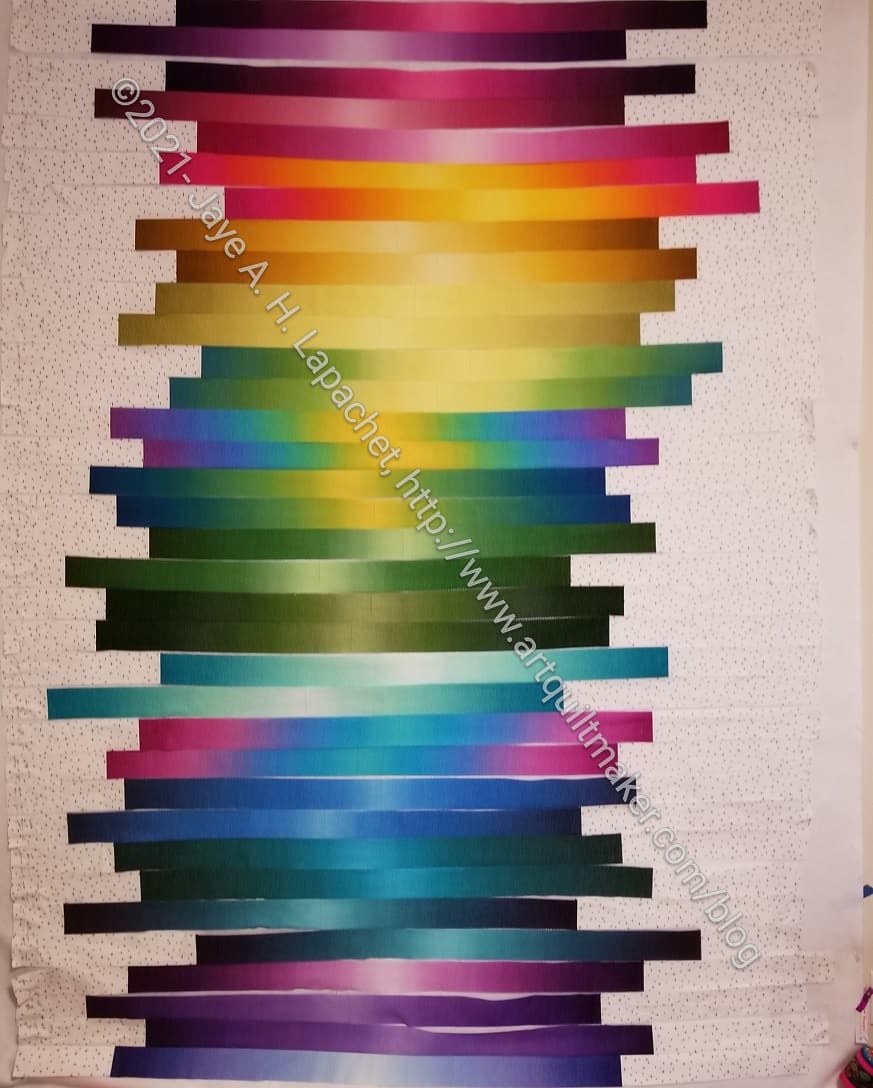
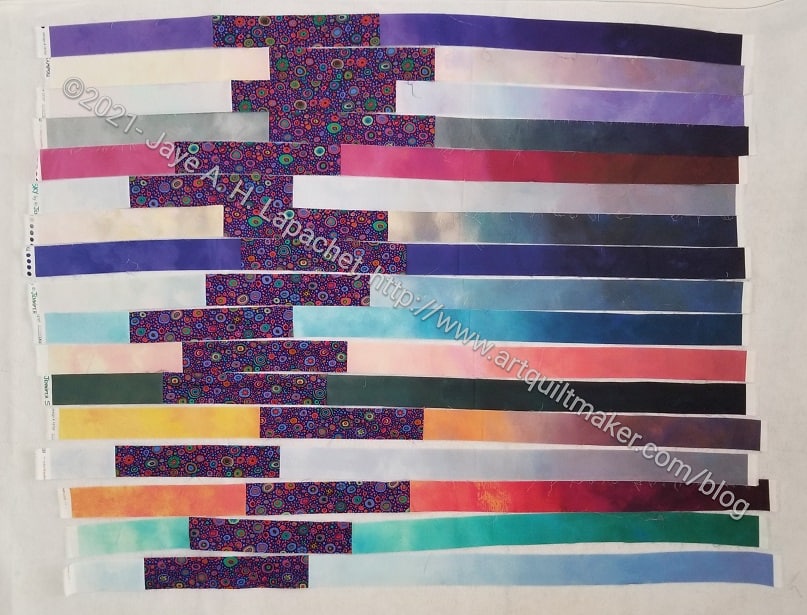
I made some good progress on Gelato the other day.
I think it is looking really good. It kind of glows in a way that I didn’t expect. I am working really hard on cutting the background fabric for the outside of the colored strips.
I don’t think this quilt will take me very long. Fingers crossed.
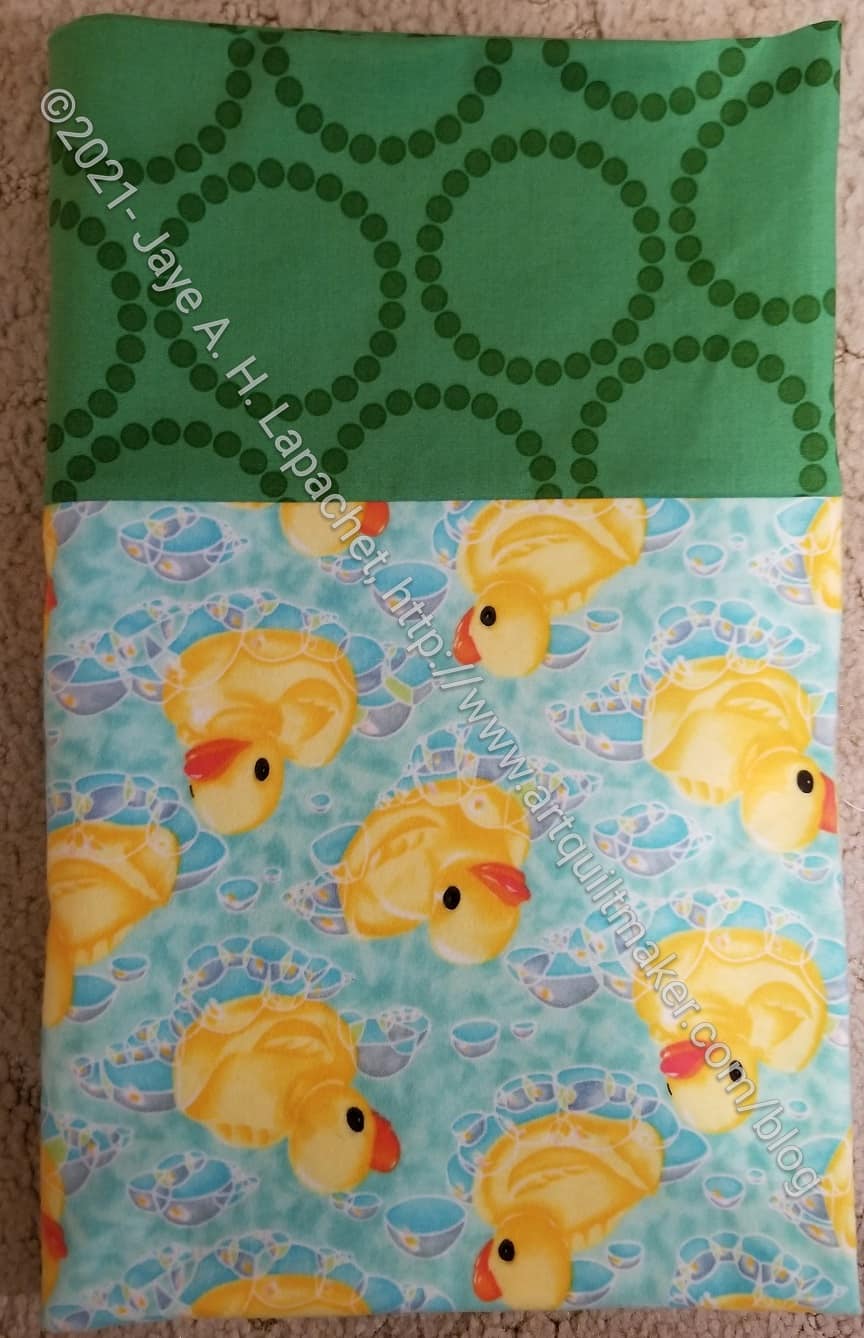
The YMG has a collection of rubber duckies. When I saw the flannel rubber ducky fabric, I decided to make her a pillowcase.
I made it last weekend and will save it for Christmas or her birthday.
Tim commented that she isn’t five, but I decided that she could use a snuggly pillowcase in winter. I also bought a yard of the same print in regular quilting cotton. I’ll put it on the inside of some bags I plan to make for her.
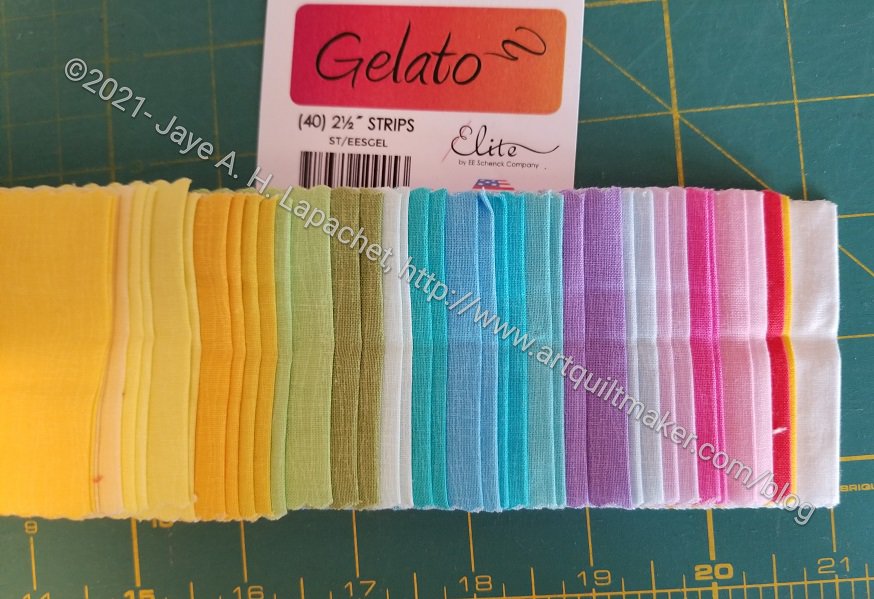
A long time ago, in this galaxy, Friend Julie gave me a jelly roll. I don’t usually like jelly rolls, but I like this one.
One reason I like it is that the serrated edge isn’t deeply serrated, so the width is actually pretty close to 2.5 inches. Also, the strips seem to be pretty much cut on grain.
Molly’s Jelly Roll Top – June 2021
At Sew Day, Molly was working on a jelly roll quilt. She also didn’t want to cut up the jelly roll into squares so she was using the strips almost as is. She made a cut in the middle where the color really started to change and inserted a KFC fabric.
Molly’s quilt got stuck in my mind and I couldn’t get it or the jelly roll in my workroom off my mind. I tried to stay focused on Scrap Dash, but the jelly roll kept creeping in.
One good thing about Sew Day is that I get to be inspired by projects on which other people are working. It is also a good thing about the guild.
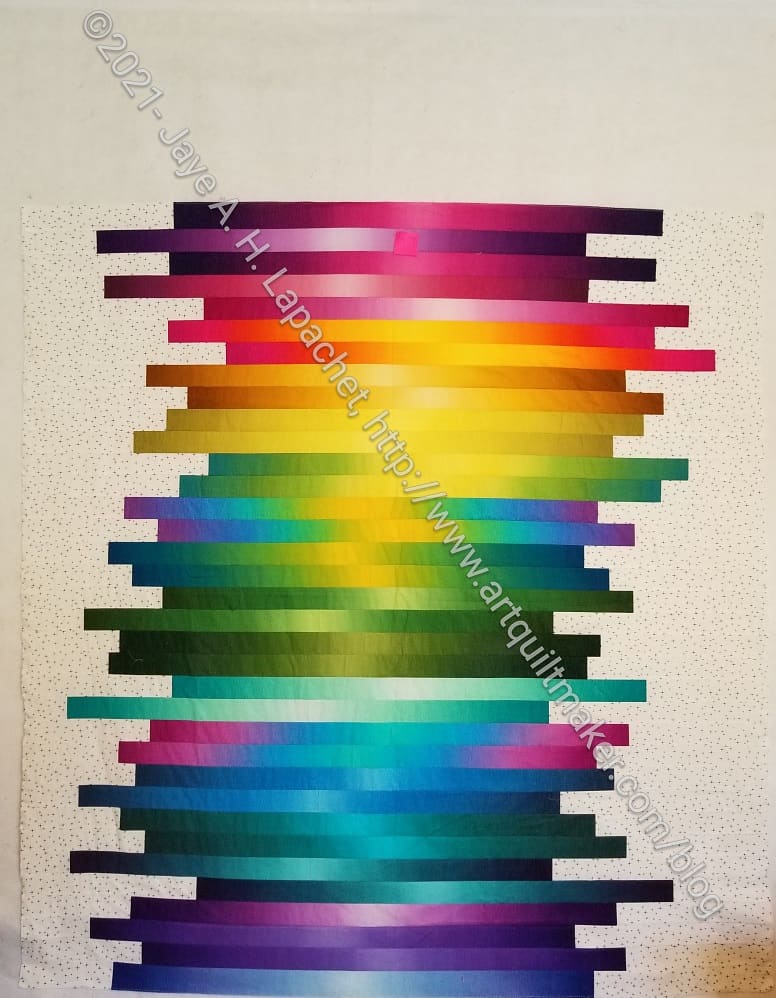
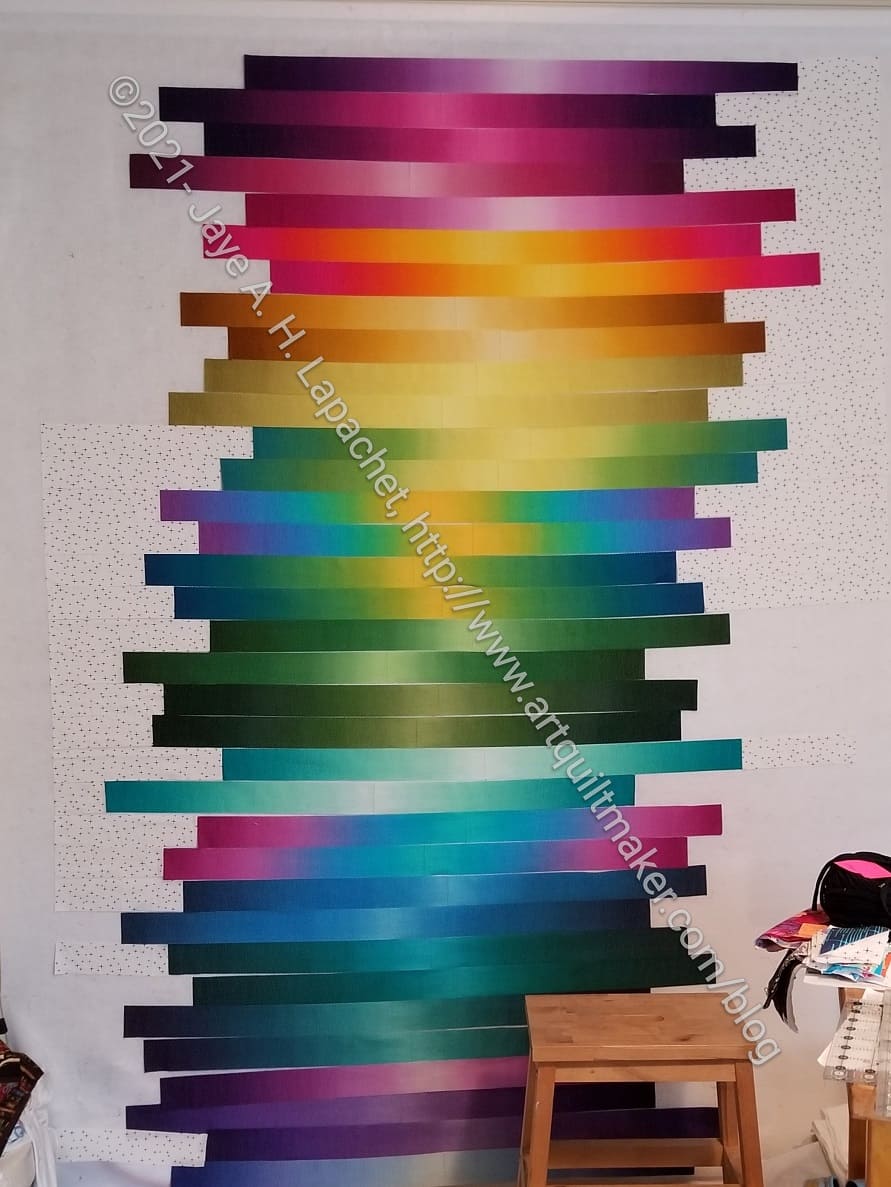
Gelato Start – June 2021
Almost as soon as Scrap Dash was ready to be quilted, I opened the Jelly Roll and started putting strips on the wall. I want to add the background to the outside of the strips.
I didn’t realize the fabrics were ombre! This makes the project much more interesting. Just putting them on the wall is exciting.
Gelato Jelly Roll Open
I am starting out keeping the strips in order. I may move them around later after I see what I have. I am also planning to use the Art Gallery fabric I used as a background for Scrap Dash as a background for this quilt.
I finished these organizers at the end of April, but I couldn’t show you until today. They are gifts for my mom for Mother’s Day. As I mentioned yesterday, she opened her gifts early when I saw her on Friday. Good thing I got them done early!!!
Purse Organizers were a special request. As I said, I was showing her the new Minikins Season 3 patterns and she immediately saw these and loved them. I had already made her a gift, but I have put that item aside for her birthday.
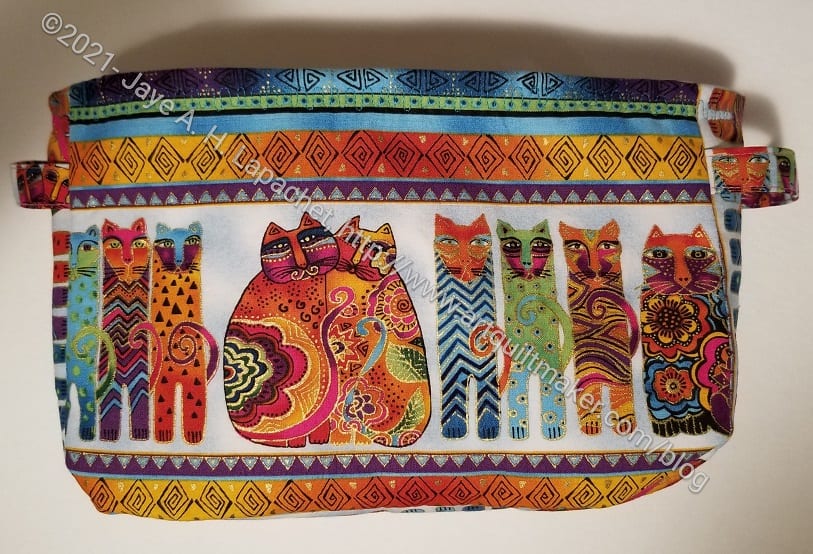
Large Mustang front and top
There are two sizes. She can choose the one that works best for her handbag or tote bag. She already has an idea of how she will use these. Someone said that using these for a tote bag would be a good idea. It never occurred to me, but I have to agree. How often do you scrabble around in your tote bag for whatever it is you need. I’ll need to think about whether one would work in the bag I take to quilt shows.
Small Mustang front
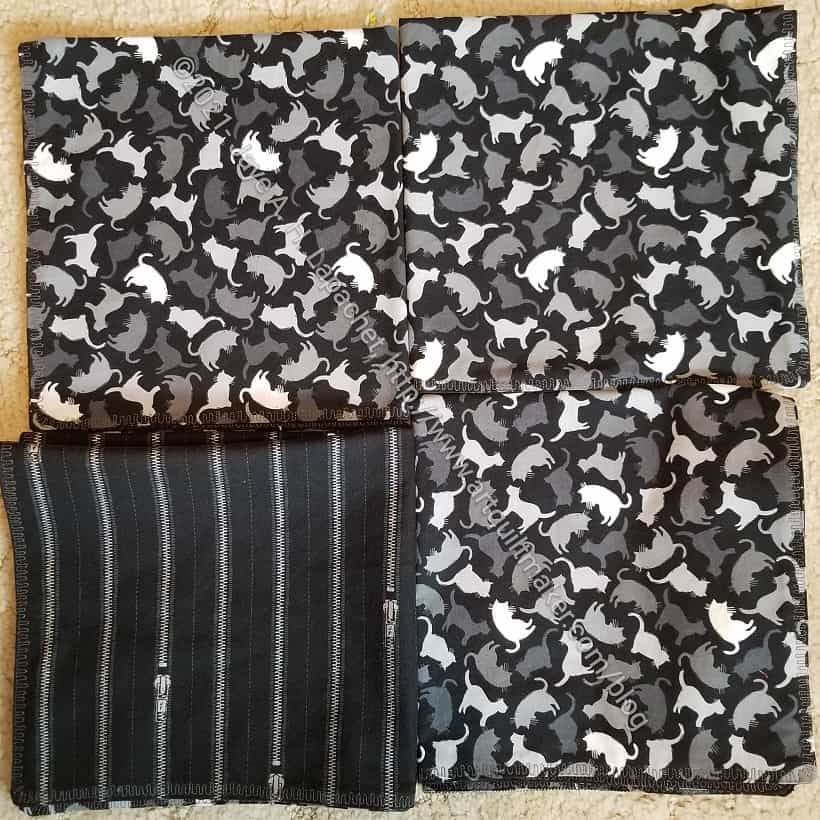
For these pouches, I used Laurel Burch fabric that I purchased to make items for Mom. I know it doesn’t go with the Artist Paint tube fabric, but these won’t be with the items I make for her to take to Sew Day. I made an effort to fussy cut well so the cats faces would show. The fabric has two sizes of cats, so I used the small cats on the small pouch and large cats on the large pouch. I am pretty happy with the fussy cutting.
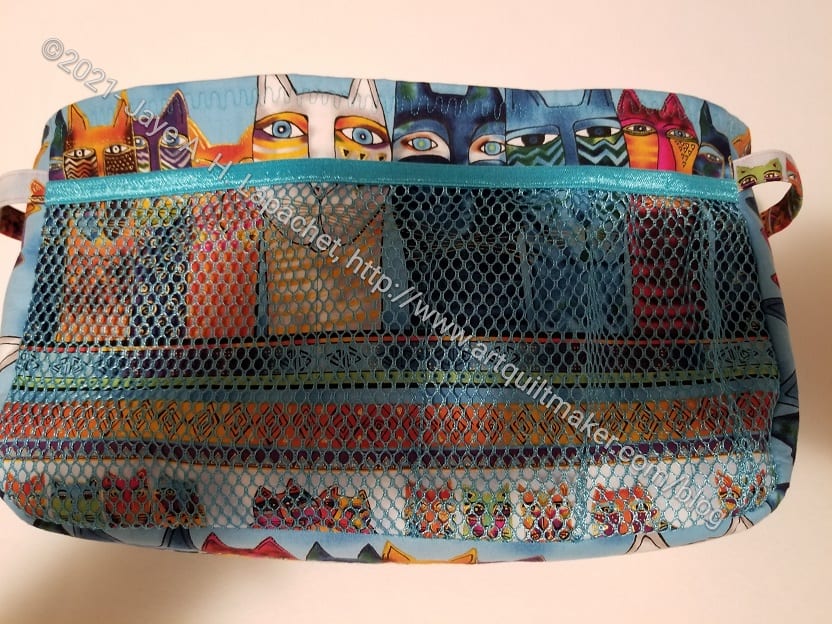
Small Mustang -mesh pocket
One thing I didn’t think about was the outside pockets. I realized that the outside pockets would cover up the cats, so I omitted them. It means fewer pockets. I made a note on my pattern and will use the main fabric for those pockets next time.
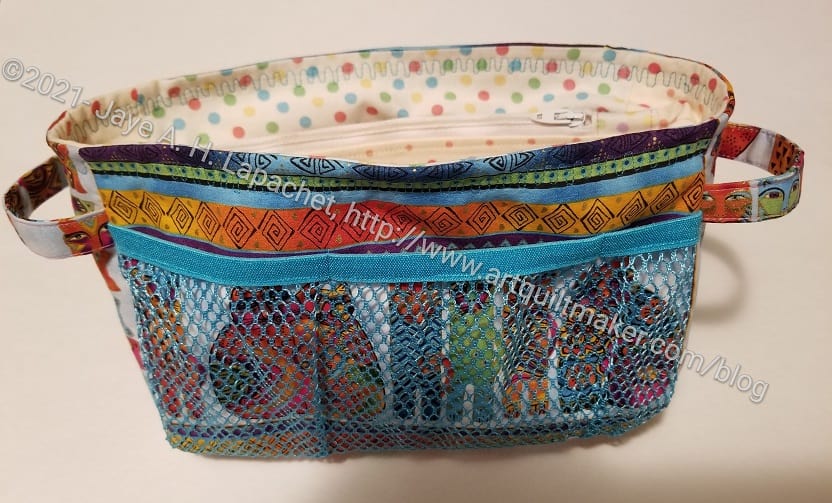
Large Mustang -mesh pocket
One side of both pouches already has mesh, which obscures the cats, but doesn’t cover them up completely. In my large version, the cats look like they are peeking over the edge of the mesh. Total luck, but cute, don’t you think?
A lot of people don’t like mesh pockets, because items get caught. I don’t mind them. One has to pick carefully what to put in them.
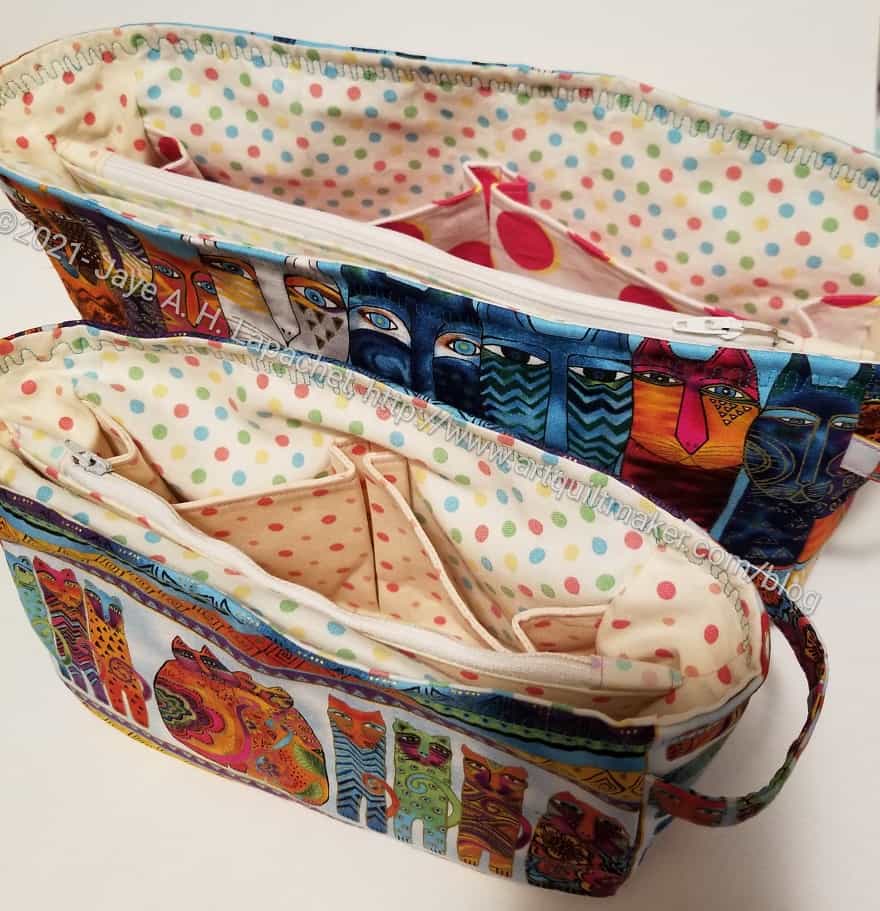
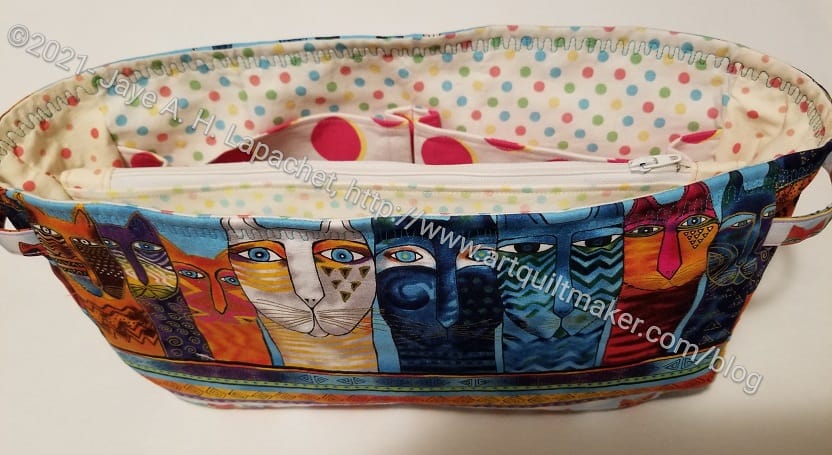
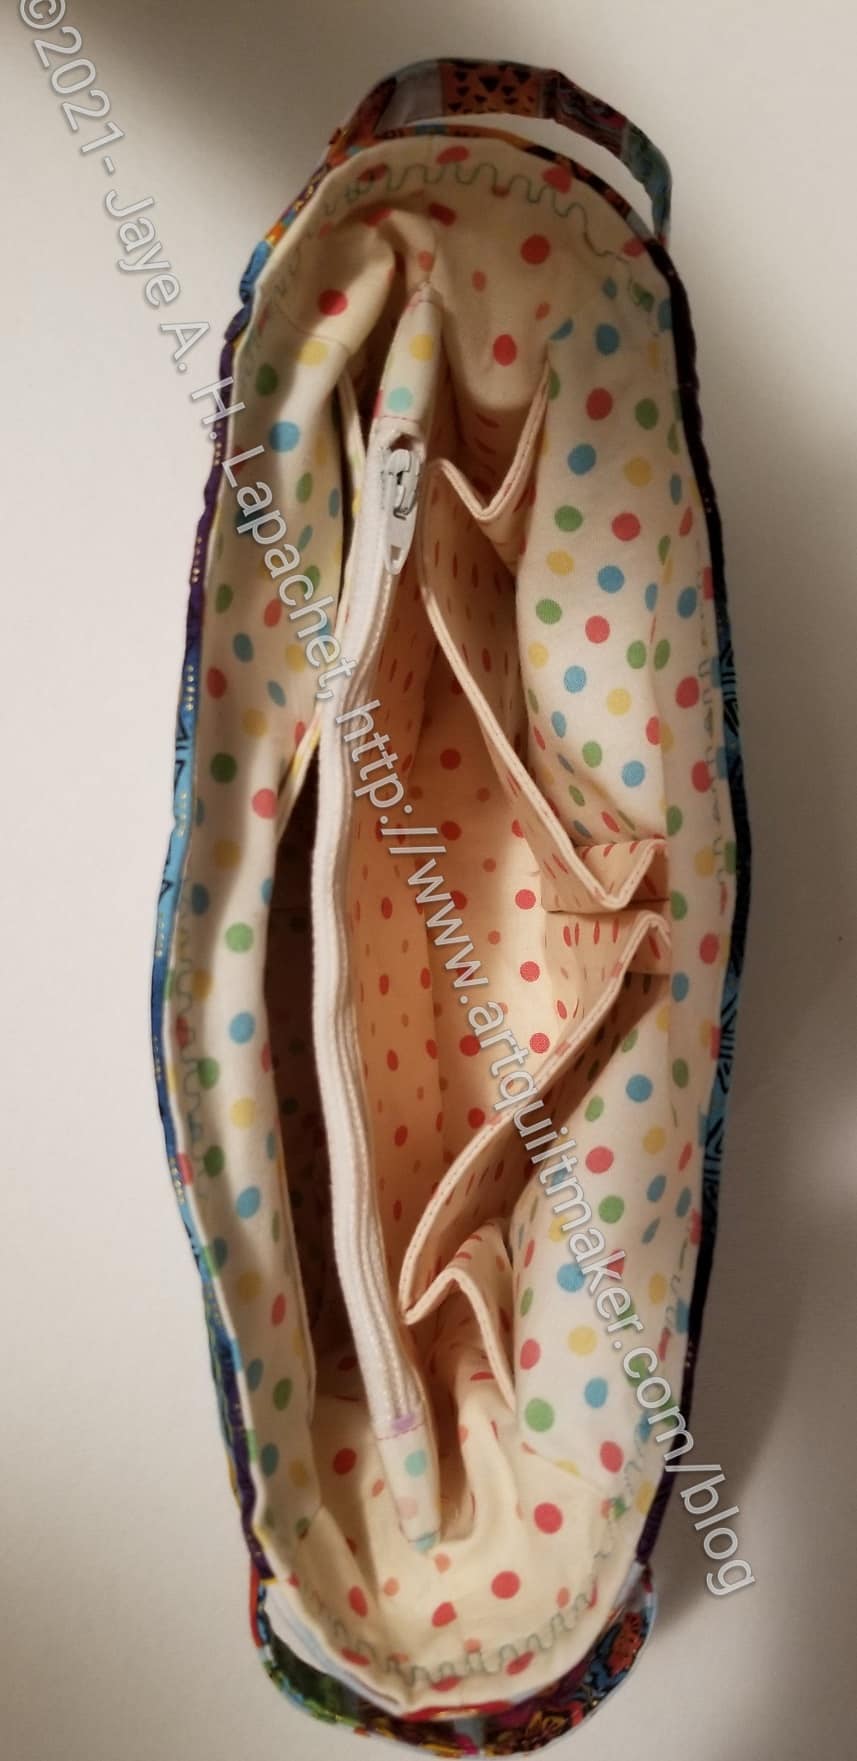
Large Mustang – interior
Even without the outer slip pocket, these bags have a lot of pockets. In addition to the mesh pockets, there are two slip pockets, a zipper pocket and two pleated pockets.
I am a little concerned about how much can be put inside as the Organizers look so slim, but I hope Mom can put enough in to make them useful.
I am also ridiculously pleased with the grab handles. Aren’t they cute?
There is no top to this pouch, so everything will fall out if it is tipped over. I hope Mom likes these pouches and they work for her.