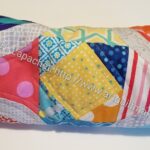
I was really pleased to see the Sew Together Bag I made out in the wild.
I went over to Tim’s the other day and saw the bag I made for him. It was full of supplies, which made me very happy.
Commentary about works in progress, design & creativity
I was really pleased to see the Sew Together Bag I made out in the wild.
I went over to Tim’s the other day and saw the bag I made for him. It was full of supplies, which made me very happy.
I know I just showed you all of the Sew Together Bags a short time ago, but I have to show them to you again. Move along if you don’t want to see them again.


I know I have a ton of bags to make and soooo many patterns. I like making bags over and over because I can make them better and faster when I know what I am doing. The last batch of Sew Together Bags went together so easily in comparison to past efforts. I have to say, though, that each time I make them they are easier.
As I mentioned yesterday, I was sewing on the go. I have a specific way I do that using my Sew Together Bags. I usually use the grey Sew Together Bag for EPP. I have used that one for years for working on the Half Hexie Star project. I could have used that one, but I didn’t want to disturb my Half Hexie project (which I haven’t worked on in a year. 🙁 )

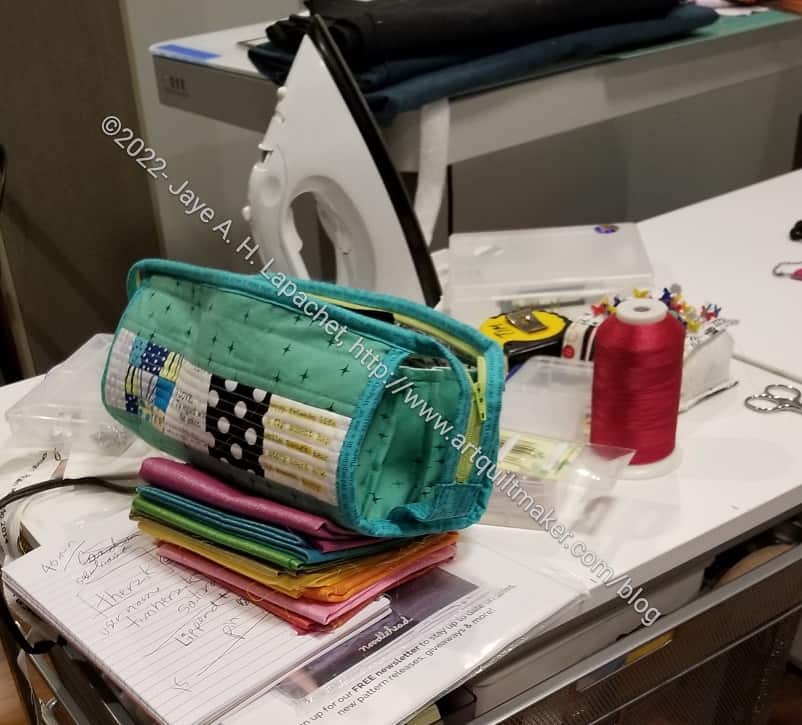
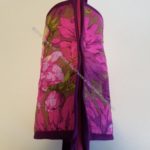
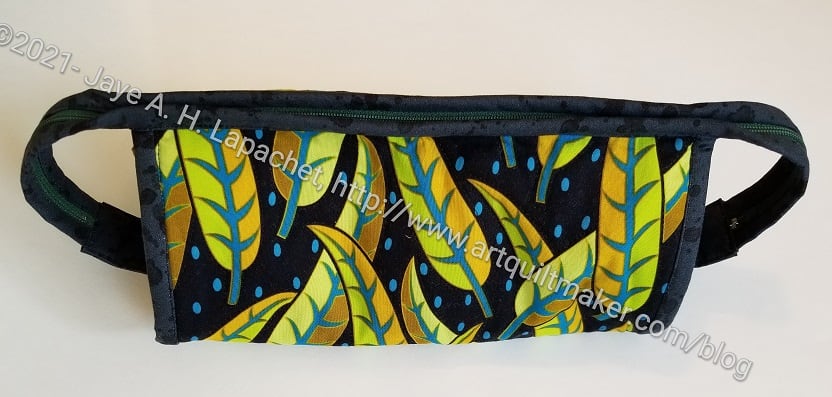
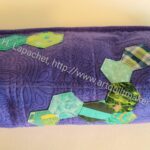
For La Pass, I am using the Brocade Peony Sew Together Bag. The photo, left, is what it looks like sitting in my lap as DH drives.
I made this one specifically for La Pass. I didn’t really realize that all the pieces weren’t going to fit inside.
Some of the smaller pieces fit inside, but the larger chunks don’t. For the Half Hexie Star project, I can fit a couple of stars in the bag after they are sewn together.
I kept my backpack nearby while DH drove and could put the larger chunks in the project folder to keep them flat. I also had some zipper bags with the basted pieces inside. They were also in my backpack so i could just reach down and grab what I needed. I probably need to make the A Place for Everything Bag for this project.

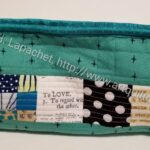
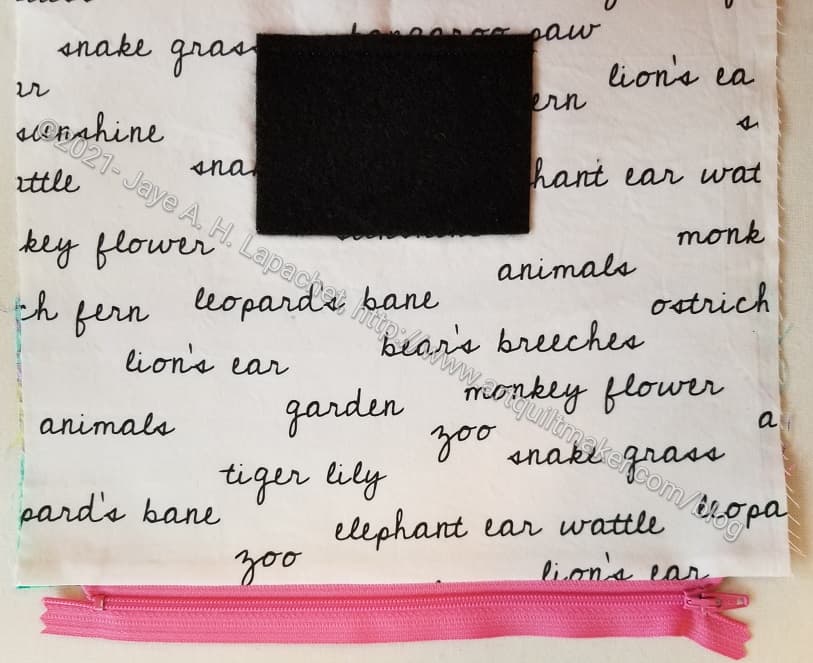
Remember the Ring Toss block that I agonized over? I am pretty sure I told you I wasn’t going to make the quilt. The block, which I like has been hanging on my design wall since December of 2018. It occurred to me that it would make a great exterior for a Sew Together Bag. I thought this was an especially good idea since I had no idea what colors the recipient likes.
While I am sad I won’t have this block to look at, I am pretty pleased with how it came out as a Sew Together Bag.
I wish I had thought of how the bag would look from the top. I added grey around the block to make it large enough for the exterior. The viewer can’t see the Ring Toss block from the top. Mostly you see the grey. I think it is fine, since I mostly look at mine from the side or end.
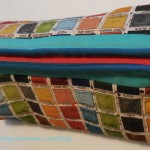
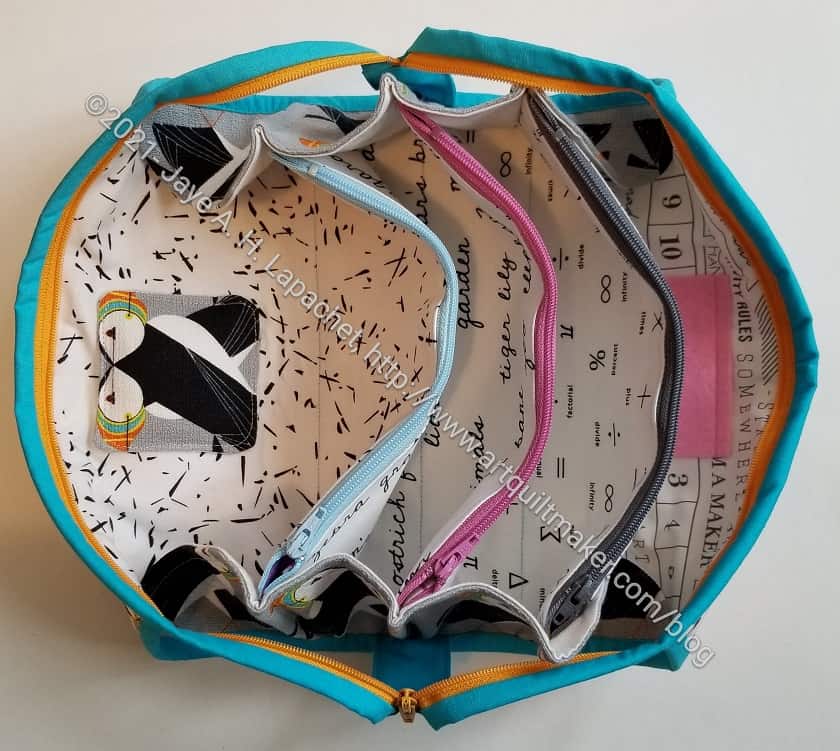
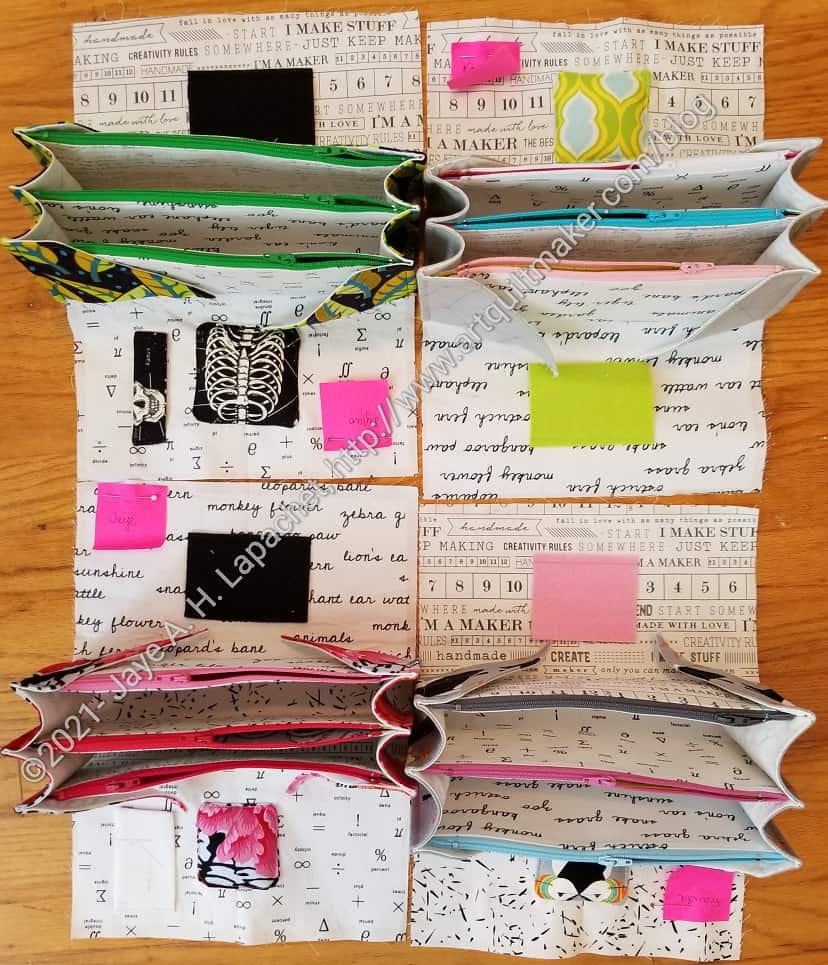
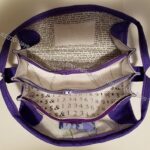
This bag has similar insides to the Leaf STB, the Puffin STB and the Brocade Peony STB. I chose different colors for the zippers, needle holder and pincushion so they are different from the other bags.
I meant to hand this off to my DH to deliver at a Native Sons event, but I forgot until he was already gone, so I’ll have to mail it.
I made this Sew Together Bag as a gift. I want to send it off now, but am trying to wait until Christmas.
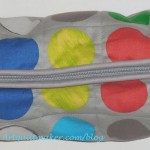
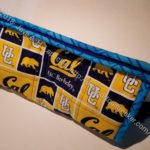
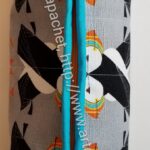
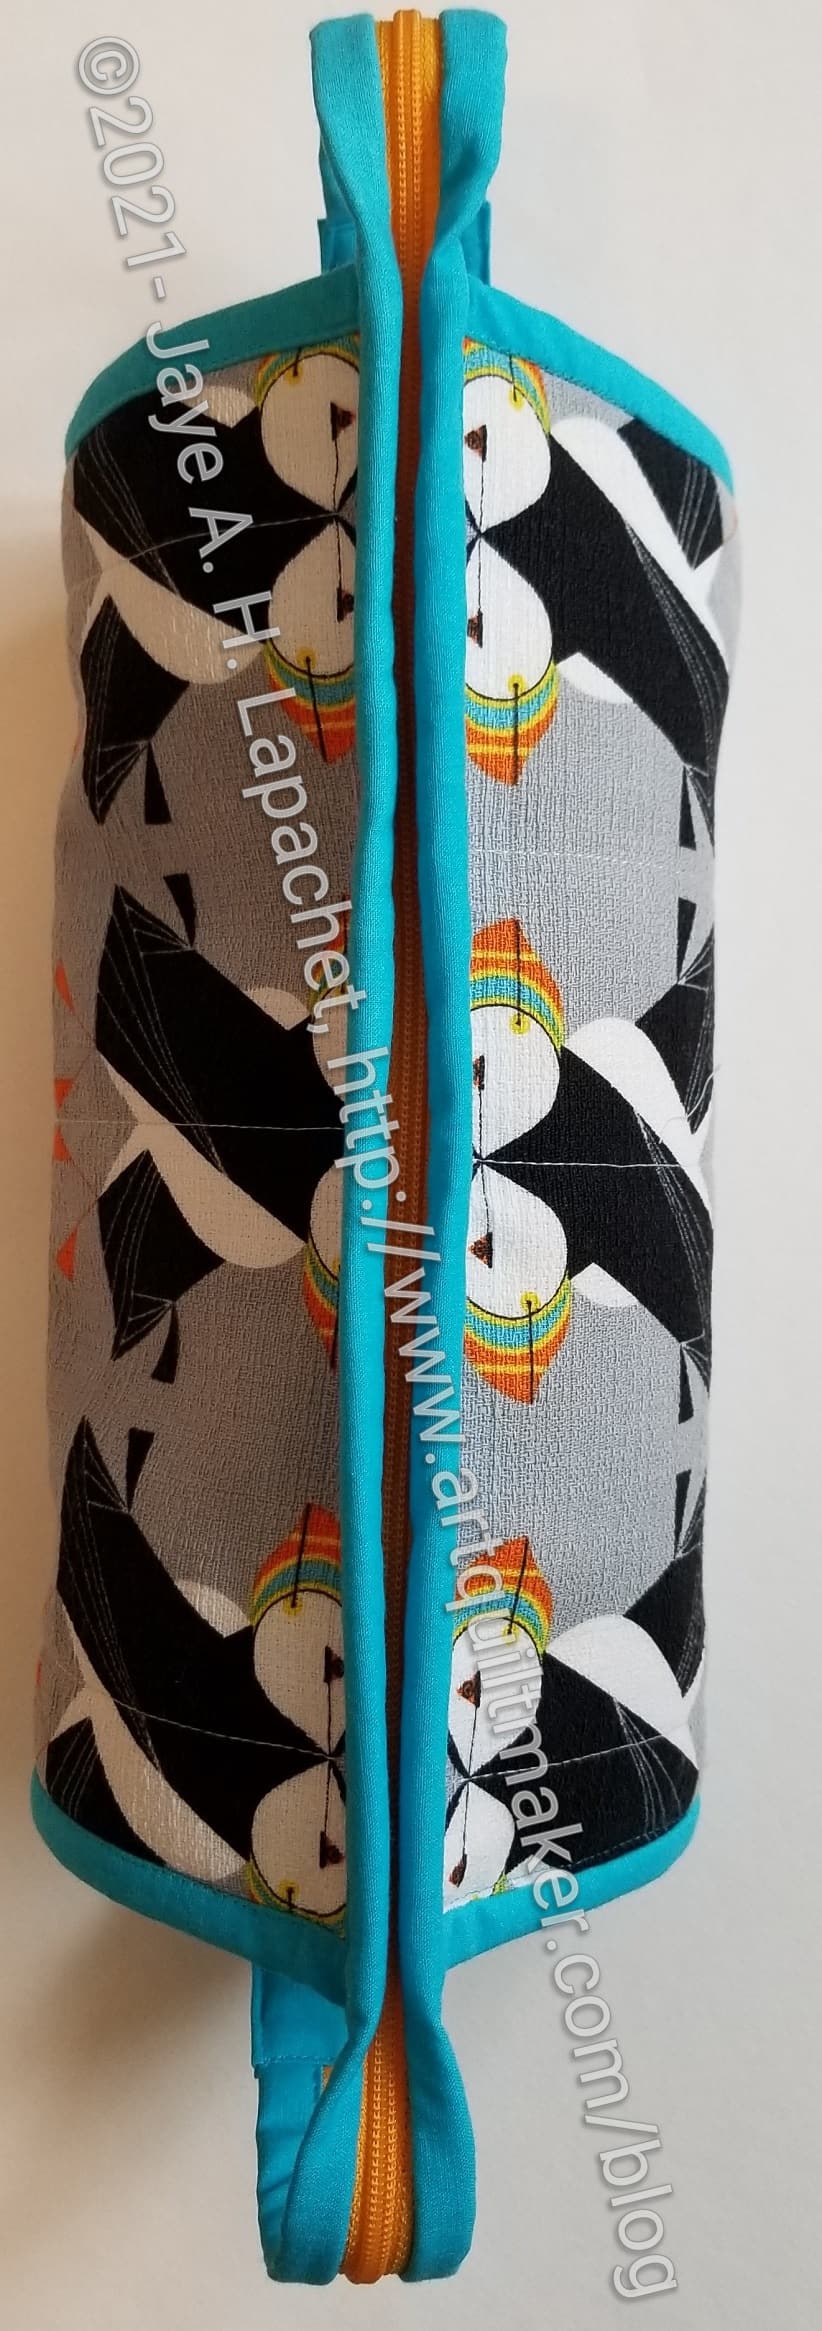
The outside is a Charlie Harper print made from Barkcloth. I have never used Barkcloth before and it was fine. I interfaced it with SF101 and didn’t have any problem with the looseness of the weave. I am not sure how it will be if I cut squares and try to use them in a Fabric of the Year quilt. I only bought it to make this bag because my friend loved it. Ordinarily I wouldn’t have bought it.
I really struggled with what to put with it for the binding. I don’t think the turquoise is perfect, but I think it looks pretty good. Black was my other choice, but I think with the grey background and the black on the puffins the whole project could have easily gone towards depressing. I chose the turquoise binding to make it super cheerful.
I fussy cut some more puffins for the mini pincushion. I think they look really cute.
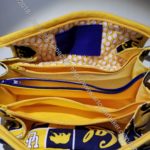
You can see similar interior fabrics to my Brocade Peony / La Pass Sew Together Bag. Same fabrics- different order.
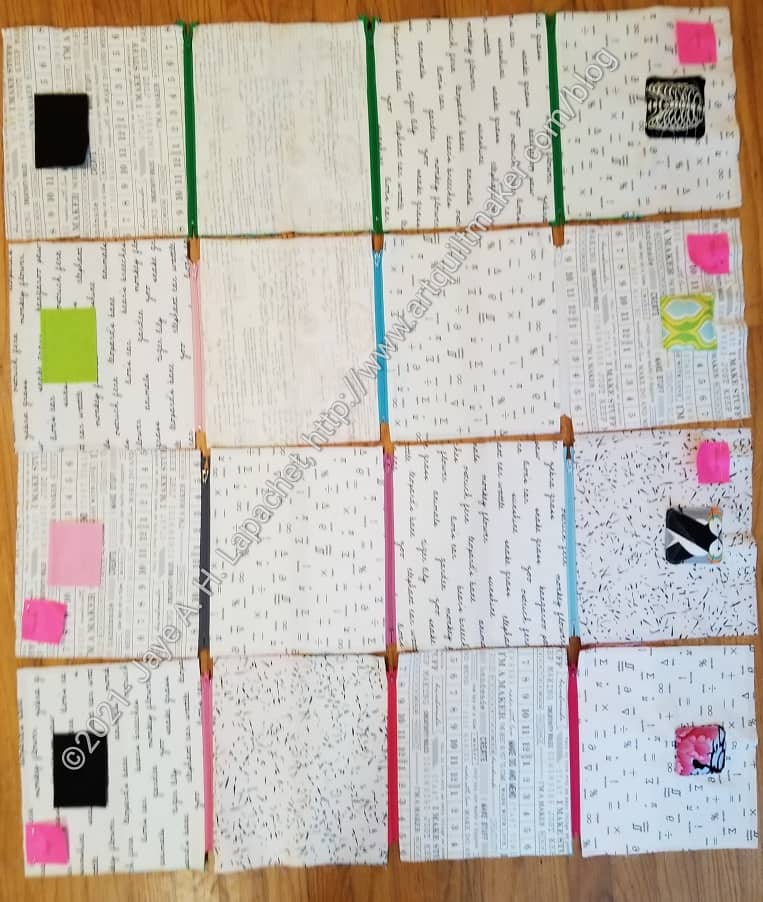
I haven’t talked much about zippers as I have spoken about these projects. Each bag requires 4 zippers. I chose, mostly, different colors for each zipper to make the bags more visually interesting. I also think that zippers are another visual cue to where the maker put a tool or supply. I kind of wish I has used another orange zipper on this bag, but I think it looks good as is.
It might seem ridiculous to make another Sew Together bag for my latest project. I have plenty of fabric and I know how to make these bags, so that is not the issue. The issue is that have been using the area under my computer stand to store various supplies and tools. This does not make the project very portable. It does make it convenient to grab some pieces and sew when I have a work meeting.
I have been using my embroidery Sew Together Bag for this project, but I want to be able to take the pieces around and I need my embroidery STB to stay with my embroidery. I was also making some gift STBs so I thought I might as well make one for myself.
This might be a stopgap until I can make the A Place for Everything Bag that will be really useful for this project. I talked about it briefly in a Various & Sundry post. I have been collecting supplies and I think I would rather just toss the Sew Together Bag in the A Place for Everything Bag when I go somewhere. I am used to using Sew Together Bags for handwork and don’t want to try to learn new habits. At the moment. I just want to sew.
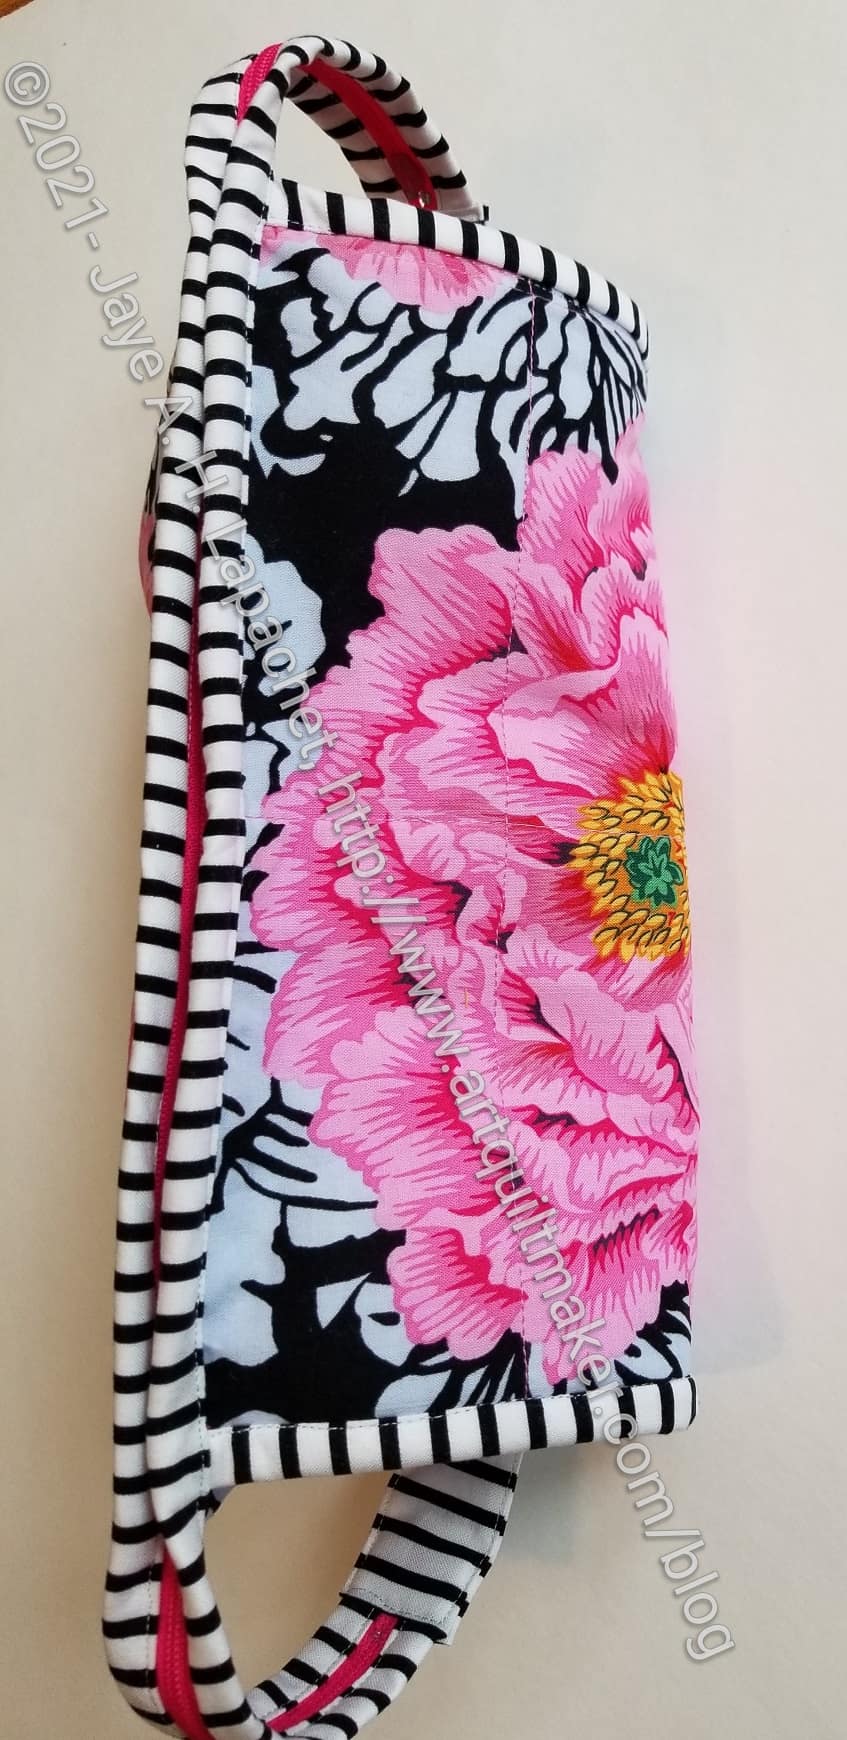
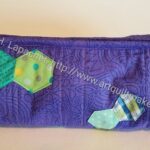
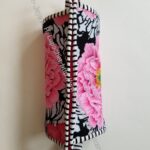
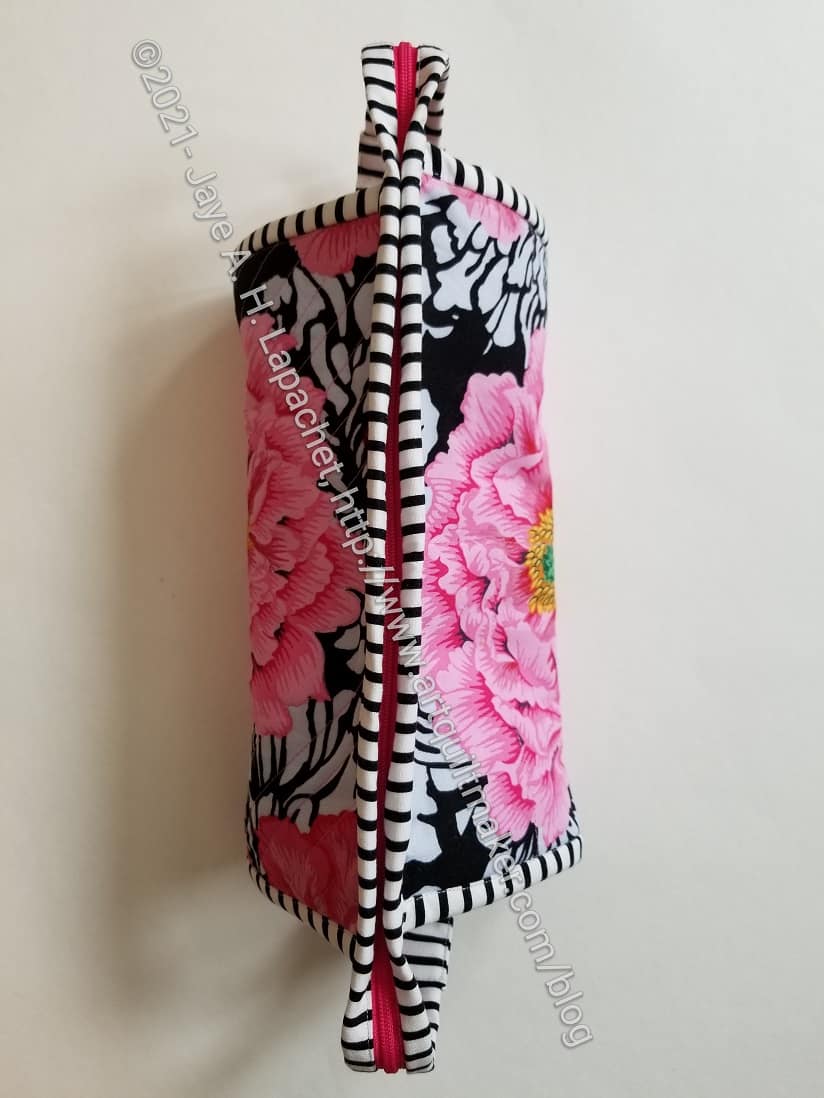
As you can see, this bag uses one Philip Jacobs recent prints. He recolored the Brocade Peony print and I thought it would be good to showcase a couple of the blooms on this bag.
I also used the striped binding, which is a favorite trick for adding interest to a bag. If I were making this bag again, I might use pink on the side bindings and reserve the stripe for the top zipper only. I don’t think the stripes as I have used them are too much, but they are verging on too much. I keep thinking of the striped stockings the witch wore in the Wizard of Oz movie. In general, I am happy with the exterior of this bag.
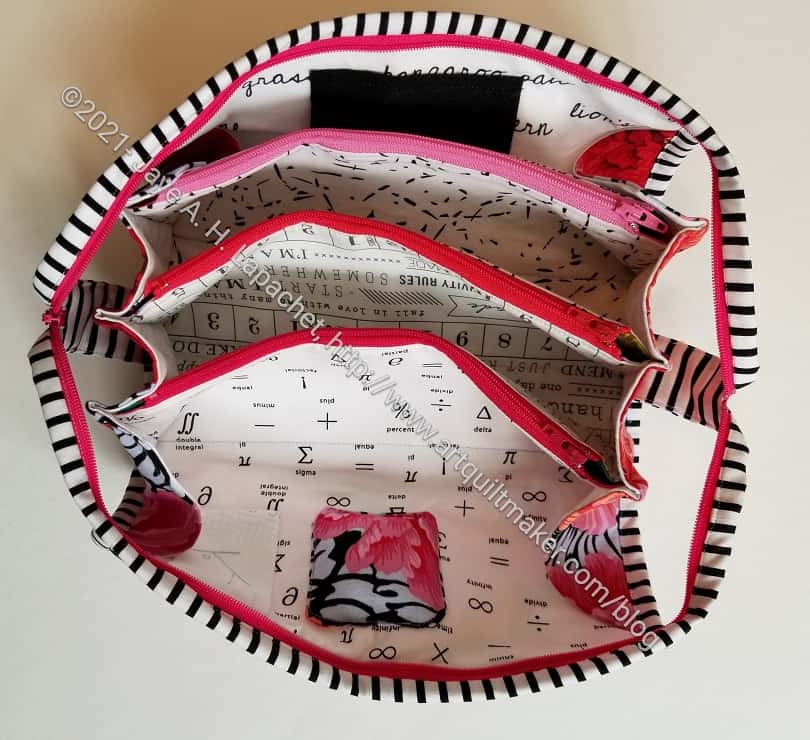
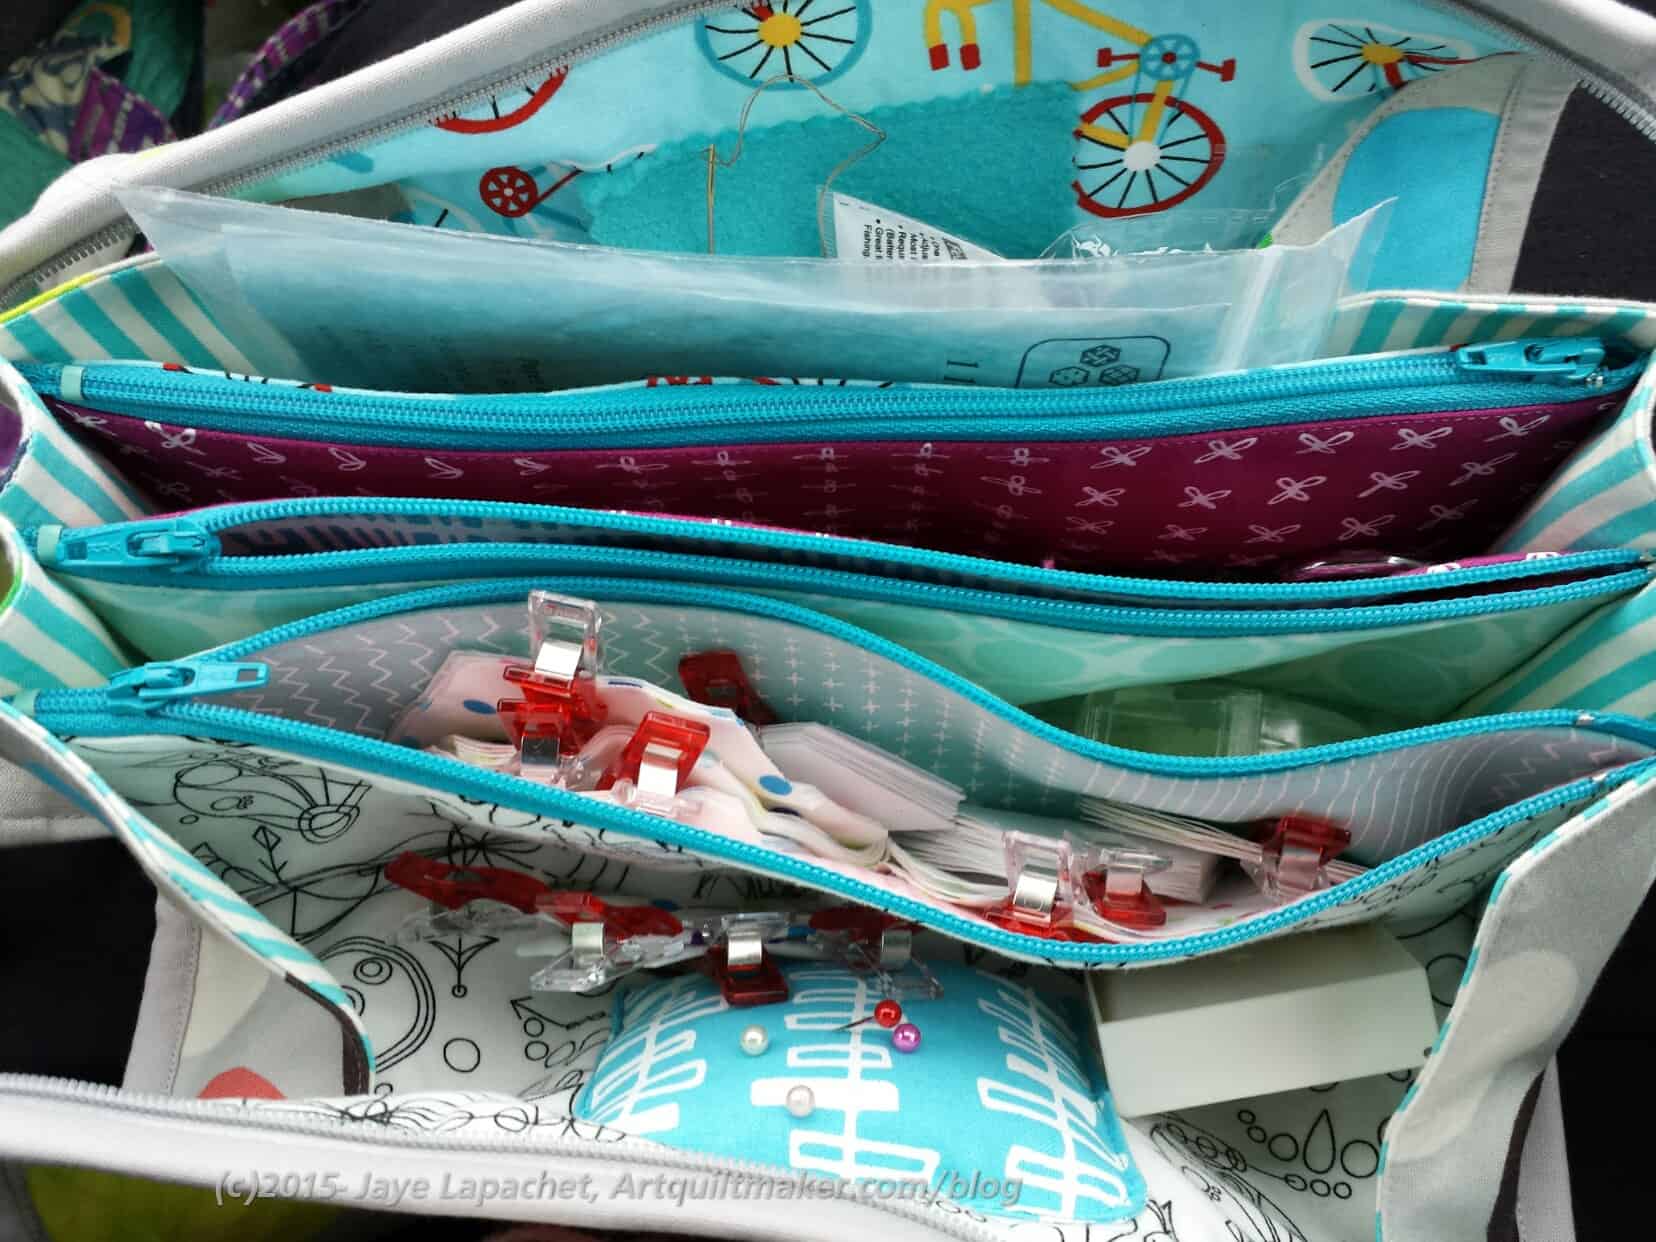
As you saw in another post, the white insides are mostly the same for the four most recent bags. It was easy to cut the whites all at once. I did put the whites in different places on the different bags, but I used, mostly, the same prints. I did run out of a few, so there are a few differences.
As I have said before, I like light interiors so I can see my tools and supplies.
I did vary the fabric in some of the pockets according to tastes of the recipient.
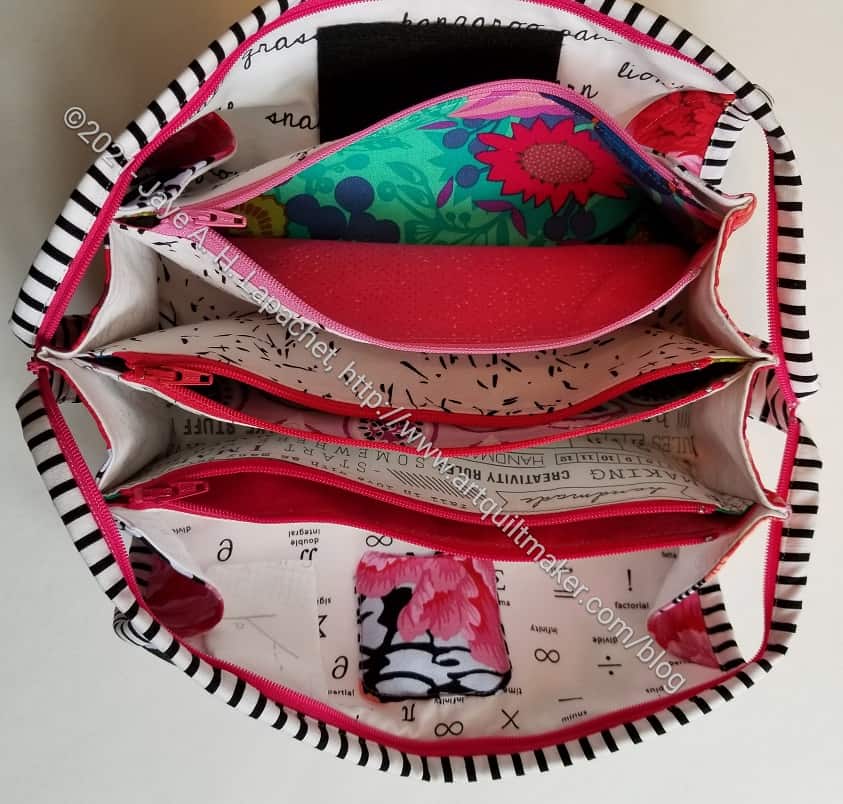
For mine I used a lot of pink and that great Anna Maria Horner print with the emerald green that I got in the Modern Quilter’s Box from Modern Handmade last year. I am not a huge fan of green, but something about that fabric is perfect. I also used it for a Retreat Pouch.
And look at this fantastic zipper tab. I carefully cut the fabric to match and used the directions I posted the other day for securing the zipper tab. I am really pleased with how it came out.
Now I just have to fill it with my supplies and tools for my La Pass project.
The Sew Together Bag pattern tells you to put the binding on the bag, then sew the zipper tabs over it. With a little effort, you can hide the ends of the zipper tabs under the binding, which is what I did with my recent Sew Together Bags. My hack takes place after you sew the binding on to the sides.
Extra Supplies
First, I sew the side bindings on to the exterior. The pattern says to sew it to the interior, but trust me. This will work.
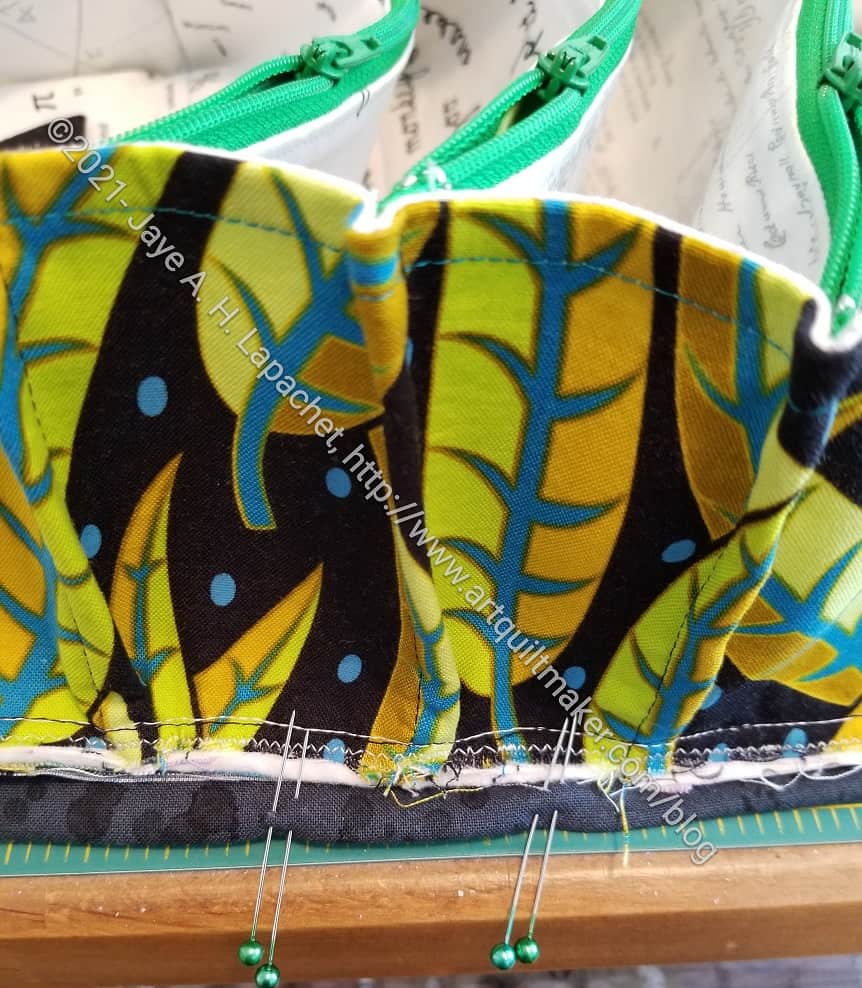
Second, I mark where to stop sewing. The goal is to leave that section of the binding under the middle fold open so I can insert the zipper tab. My regular practice is to use 2 pins. That is a sign to me that I need to stop sewing. use whatever method works for you. A Chakoner** or a Sewline Air Erase** pen can also work.
Next, I wrap the binding around to the top. In this case, I have to switch to WonderClips to mark where to stop sewing. because that whole area is WAY TOO thick. Ask me how I know. Note: my clips are in the same place as the two pins and I deliberately used pink only to mark the stopping point. The clips on the rest of that edge were different colors. Do whatever you need to do to mark your stopping point.
Finally, I sew. I stop halfway between the folds of the bag’s side on each side of the center fold.
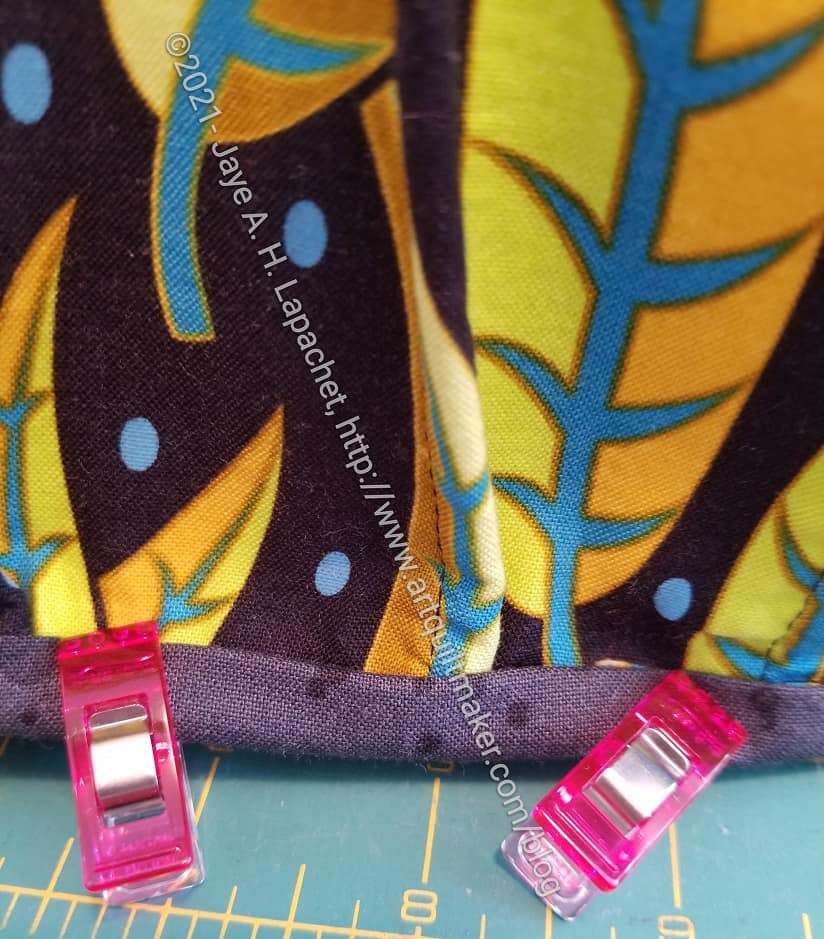
After following the directions in the pattern to sew the binding to the long, top zipper, I sew the zipper tabs to the ends of the zipper.
It occurred to me while I was doing this that next time I would cut the zipper tabs the same size as the binding. It would make wrapping the zipper tabs around the zipper ends a little easier.
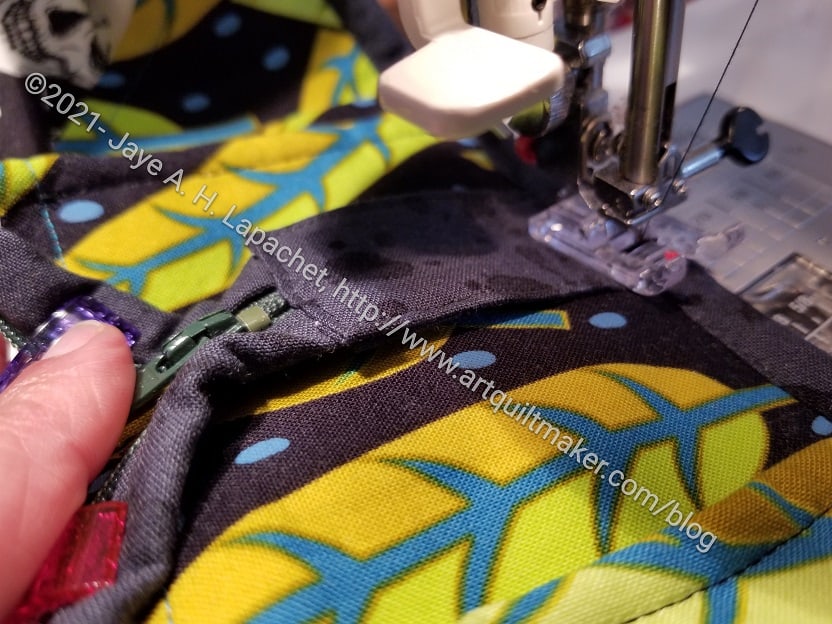
Once the zipper tabs are sewn to the end of the zipper, I insert the end of the zipper tab into the space in the binding. Then I connect the stitching lines from where I stopped sewing to where I started sewing.
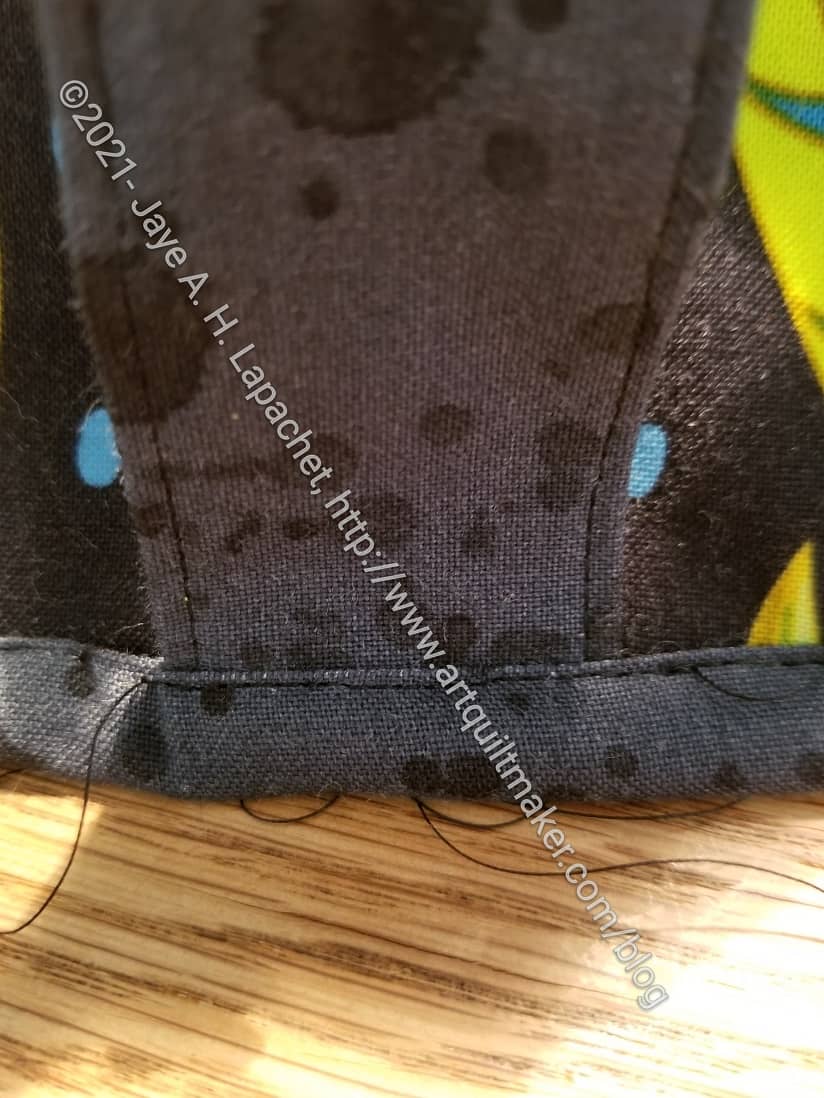
After that I sink the threads and the side bindings are done. I suppose you can backstitch, but I don’t like the look. It takes more time to tie knots, but I think it looks more finished.
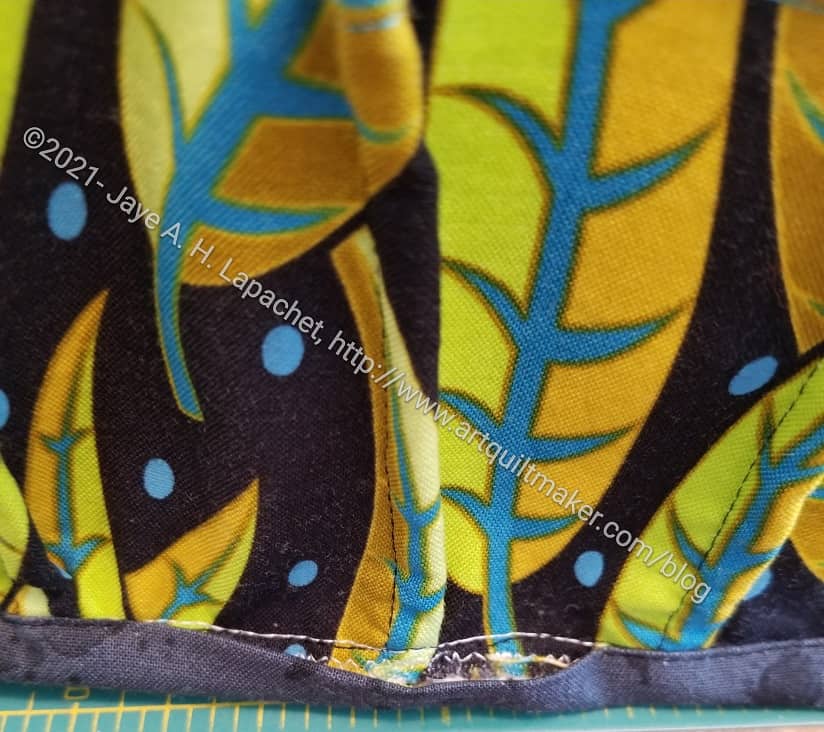
Here is the first Sew Together Bag I made according to the directions (left). See how the zipper tab is just sewn to the top of the binding after the fact? One from the most recent batch is on the right. See how much better the end of the zipper looks tucked in? Is it a pain to sew it this way? Yes, it is an extra step, but it looks so much better.
**I use affiliate links and may be paid for your purchase of an item when you click on an item link in my post. There is no additional cost to you for clicking or purchasing items I recommend. I appreciate your clicks and purchases as it helps support this blog.
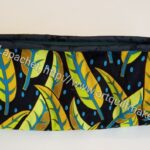
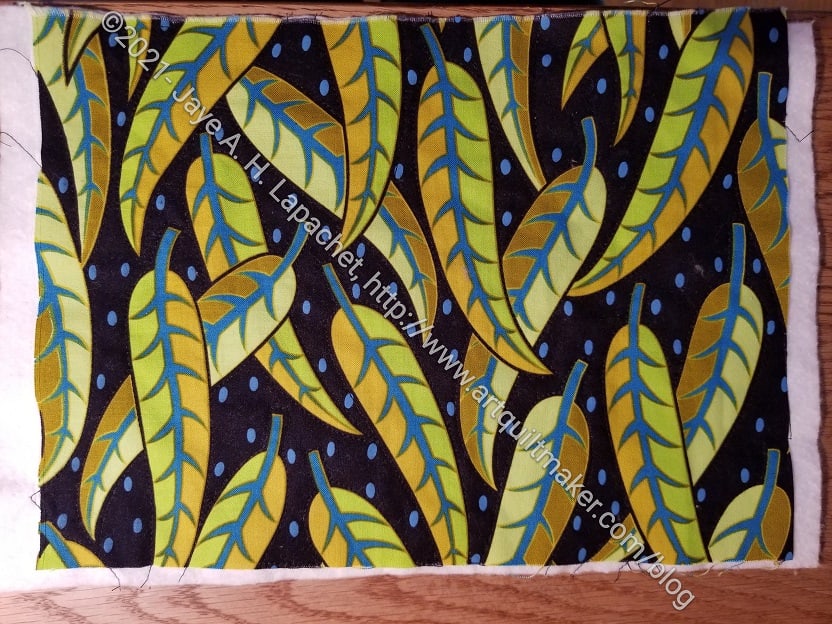
I worked on the leaf Sew Together Bag over the weekend and was able to finish it. Yay!
As shown the other, this used a Jane Sassaman leaf fabric for the outside. I used black for the binding, though green might have worked as well. I don’t have a lot of dark green. I think the black is a good choice.

As you saw on another day, I made all the insides light colored so items stored inside are easy to find.
The recipient works for a public health department and I have been assured she will like the ribs.
I did the pincushion a little differently from my red-violet Sew Together Bag. I made it much smaller and I machine sewed it to the interior. I don’t know if that is better, but we will see.
The flap on the right of the pincushion is for WonderClips. I think Sew Tites could be stored there as well.
Yay! Another finish and one Christmas gift down!

I spent last weekend finishing the Sew Together Bags. Mostly what I had to do was put the bindings on.
In the last batch of Sew Together Bags, I did something a little different. I tucked the zipper tab into the side binding to make it look really finished. Look for a mini-tutorial about how to do this later. I did that again, so it took me most of two days to get them completely finished. Now they are and I am really pleased with how they came out.
These were much easier to make. I felt like I was playing a bit and not fighting the pattern. I guess that is what comes after you have made 14 of them!
I spent a lot of time over the weekend working on these bags. I have to say that it was a joy. I do want to get them done, but I really enjoyed the process.
I talked, a long time ago, about trying to be process oriented. It is hard and I have to focus on it. This sewing didn’t feel hard. I just moved through the process steadily, listened to an audiobook and felt very happy.
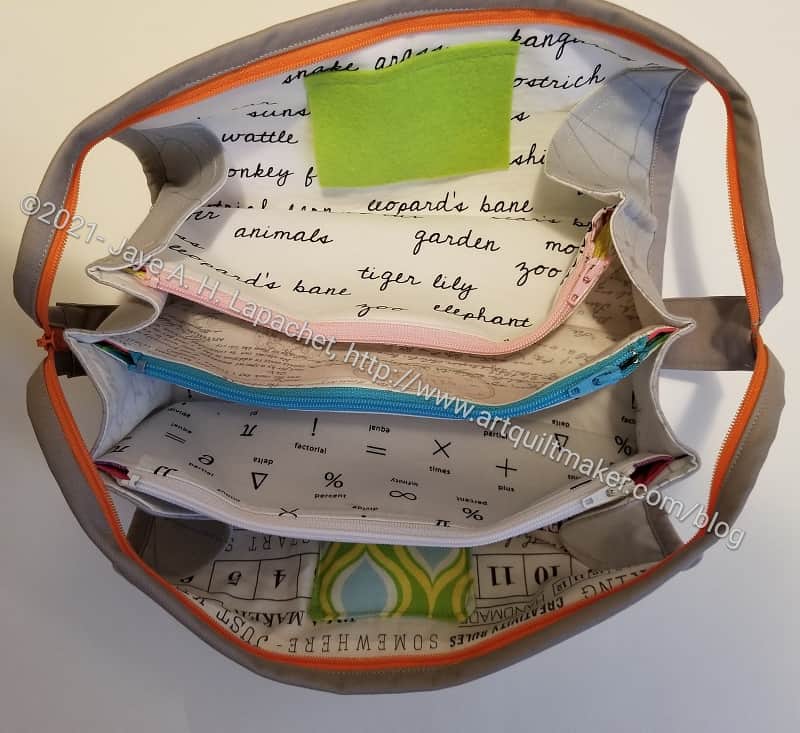
As you may know, these are the interiors. I was able to put them together, after making the pocket panels the other day.

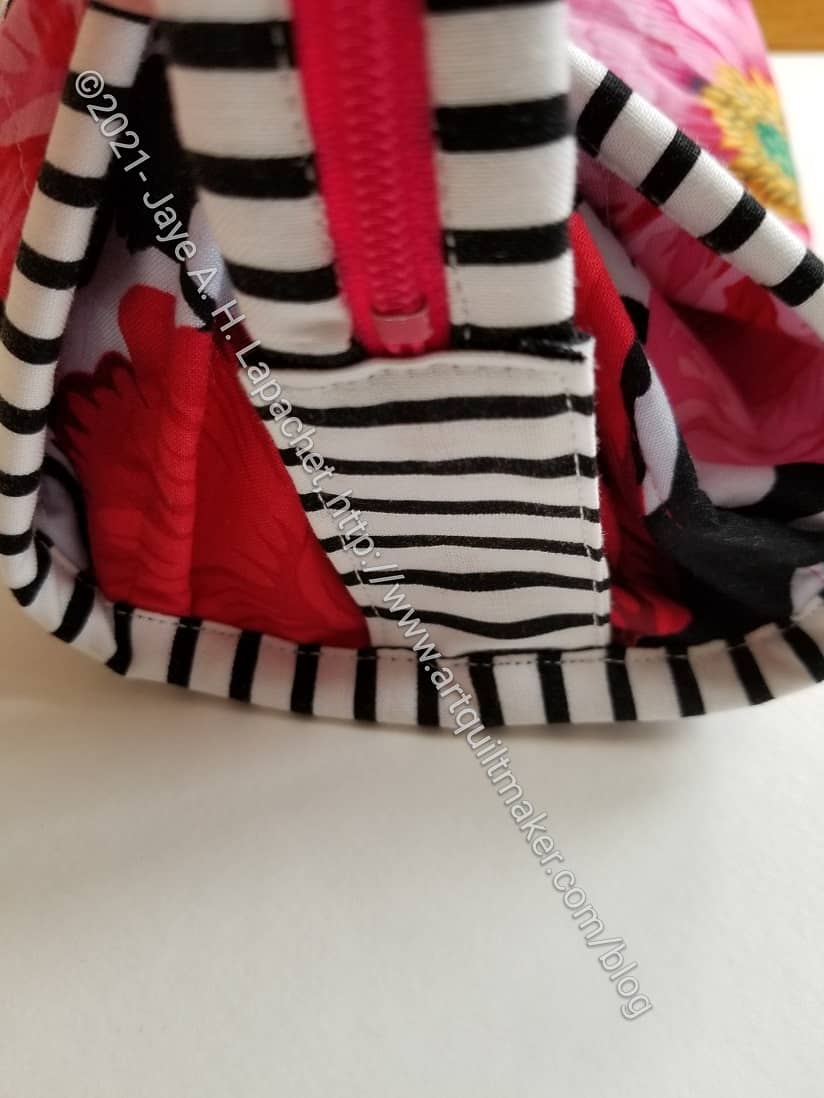
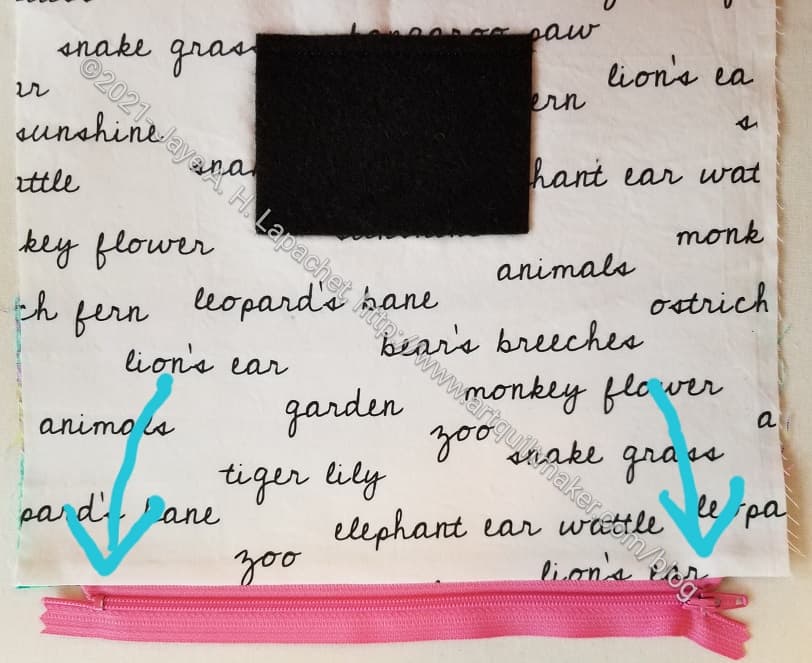
I also added a little flap to hold WonderClips. It isn’t a great solution and I’ll have to think of something better for next time, but it will hold WonderClips, which will keep them from falling out of the STB if it gets turned on its side.
The arrows point to the flap. I want to hide end somehow for future models as it is hard to get the end straight with the seam allowance pushed down into such a small space.
I am not sure if this is actually called a pocket panel. I might have heard that somewhere else or in another bag pattern. It fits the description, however.
I tried to match up the different zippers with the exteriors of the bags. Stayed to see what you think about my matching.
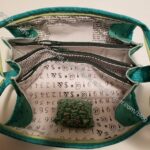
In the photo, you can see that I have already added the needle holder and pincushion. I haven’t found a good pincushion size. I did something different this time, which was to sew the pincushion to the lining piece by machine. I have sewn them by hand before. The pincushions are also much smaller. Not sure that is good, but we will see. I am sure I will make more in the future.
It occurred to me that I should add a WonderClip holder. I wish I had thought of it sooner, but I can still add something.
I decided to use the zipper foldy trick that I learned from making the Ultimate Carry All Bag on these Sew Together Bags.
I didn’t use it on all of them, because I wanted to be able to compare the final result. One thing I noticed is the big space from the end of the zipper to the edge of the fabric. We’ll see how that works once the thing is done.
It makes the ends of the zippers look very neat and tidy, which I like. I kind of wish I had used a longer zipper, but I know the side panels will take up some of the space.
I mentioned the other day that I had gotten my sewing machine back in gear. Some of my supplies, etc are still packed, so I am kind of doing ‘camping sewing’ – making do with what I have.
What I worked on was the exterior and sides of the Sew Together Bag pattern. I am making 4 of them this time. One is for me and the others will be gifts.
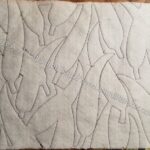
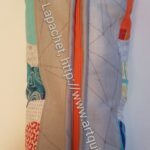
The first thing I did was quilt all of them. The two pieces above are from the leaf print. There are two pieces because I wanted the leaves facing up, so I had to use the ‘directional print’ directions for the exterior. Viewers cannot really see the quilting from the outside, but it looks great from the inside. I used a straight stitch and my quarter inch foot*
I did a little quilting on the others, mostly because I wanted to get to assembly.
*part of the ‘camping’ since I don’t know where my box of other feet are at the moment.
Yes, I am making 4 more Sew Together Bags. Yes, I started cutting at Sew Day in July. Yes, I am writing about these now, because I was finally able to make a tiny amount of progress on a non-La Pass project. No, I didn’t sew, but I cut the rest of the fabric for the 4 bags and am now ready to quilt the exteriors.
Since I discovered this pattern, I have made 10 different versions of this pattern. Two are mine and the rest were gifts. As I have said, this isn’t the greatest pattern, but people love it. Recipients are also pretty impressed by the intricacy. I feel like I really got the whole process the way I like it on the last batch. I am excited to get finished with the prep and start sewing these together, if I can ever sew again.
I finally finished the Sew Together Bags and they are now in the hands of their new owners.

The outsides used different fabrics and embellishments, as I mentioned, but the insides were similar. I used most of the same fabrics for the insides. While the white insides make tools and supplies easy to find, I think they are a bit boring and might use one or two pieces of colored fabric to break up the white next time (yes, I am sure there will be a next time. 😉 )
As I mentioned in one post, the placement of the hexagon embellishment feature was off. I tried a few different things and considered some others. In the end, I left the original embellishment where it was and added a couple of extra hexagons. I think it looks nice and the original embellishment provides a surprise for the bottom if anyone looks there.
The recipients all claimed to enjoy their new bags. Tim doesn’t do much handwork, so I hope he finds a use for this bag.