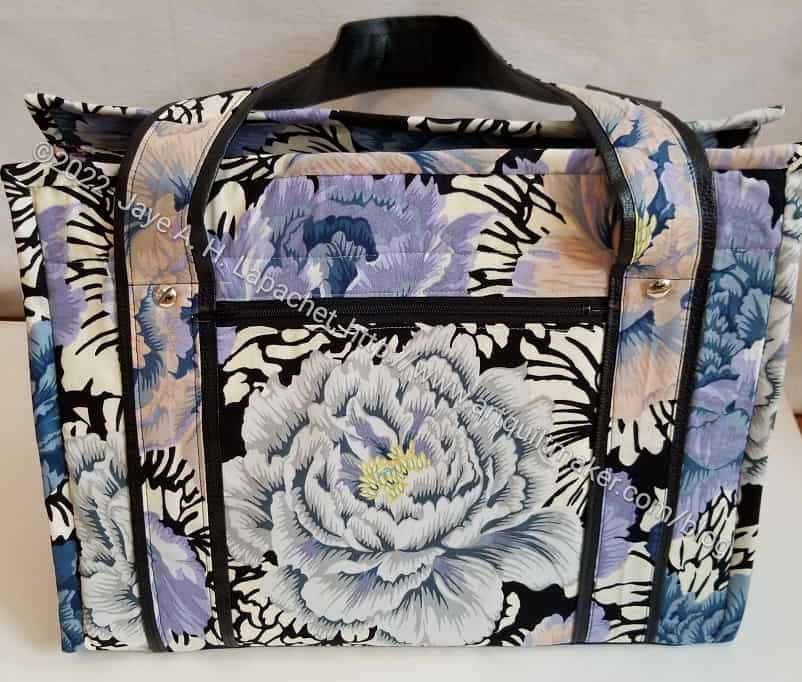
Yes, I made Julie a UCAB. This wasn’t planned for her, but she admired mine at Super Sew Day so much that I showed her the outside of the Brocade Peony UCAB and we made a deal. I would finish it for her and she would forget our conversation and be surprised.
I didn’t wait until the last minute to get the project done. About a week after Super Sew Day, I started on the pockets and just powered through. This is my third UCAB and I don’t find it any easier than the first two. Well, maybe a little easier.
Anyway, I sent it off the day before Thanksgiving and I am sure she got it. I can’t wait to hear if it is useful or her.
I was not able to find a 12″ separating zipper so I used a 10″ and it worked fine. you might be able to find one the right size at Wawak.
Use E8 pieces for this step. The zipper flanges (fabrics surrounding the zipper) should be exterior fabrics ifyou want them to match the outside of the bag.
Tutorial:
Use a 3/8″ seam allowance for this step.
You will be using the pattern starting on page 20. Use the exterior fabrics for the fabrics surrounding the zipper (E8-zipperr flanges). Match thread to those fabrics.
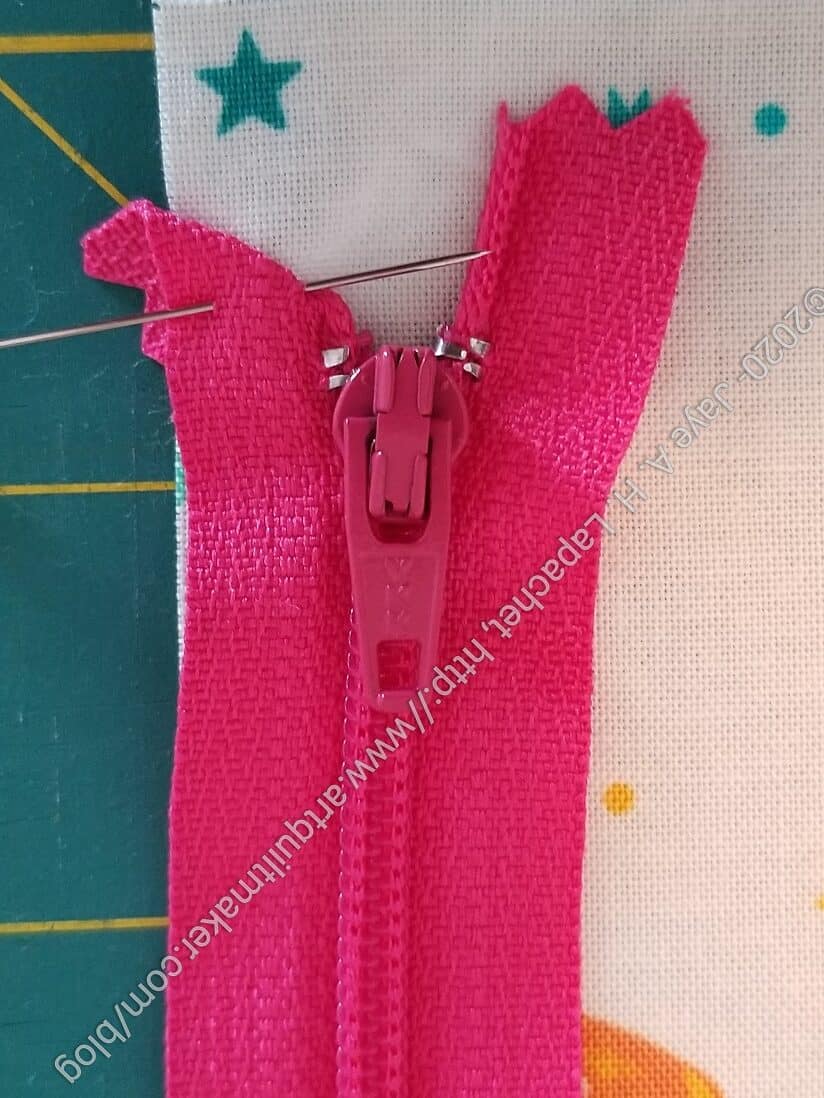
Take the zipper apart. Keep all the pieces oriented as if you are going to zip them back together.
Clip E8 to the zipper
Make a zipper sandwich
Lay 1 E8 piece right side up
Position the zipper tape along the center of E8 half an inch from the end (see photo above where clips are)
Clip fabric to zipper tape
Put another E8 piece face down to make the sandwich
Reposition the clips on the E8 pieces to encompass the entire zipper sandwich
Clip the top of the zipper (side where the stop will be when the bag is closed) so you can veer it and the top of the tape will be hidden. Sew Sweetness has a tutorial on veering a zipper.
Follow these directions for the second piece. You want to continuously check that the two pieces of the zipper are lined up so the zipper will work properly.
Look at the images on pg.20 of the pattern as they will help.
Install the zipper. Stitch to the end of the fabric.
Check the zipper
Stitch both short ends closed. You have, basically, sewn around the zipper lining/edges in a U shape so that the ends are closed and three sides are finished.
Make sure the end of the zipper is OUTSIDE of the seam allowance. You want to stitch as close as you can to the stop, then match the seam allowance on the second side of the zipper.
Turn the piece right sides out and press. Top stitch the U after you have finished the second side.
Throughout this step:
Remember that this zipper comes apart.
Make sure the two sides of the zipper are in the correct orientation and the ends are even the whole time.
Keep checking.
N.B.: Quiltessa Natalie calls these zipper tabs, but I have never heard of zipper tabs being applied to the sides of the zipper. I call them zipper flangesI have also never used a separating zipper, so who knows?)
Small Front Pocket Tutorial pt.2 – Clippy pockets (instead of badge holders)
Pocket information – post showing additional mesh pockets (not a tutorial)
**Obviously, you should shop at local fabric, knitting shops or quilt shops. However, if you can’t, please know that I use affiliate links. I may be paid for your purchase of an item when you click on an item’s link in my post. There is no additional cost to you for clicking or purchasing items I recommend. I do not recommend items I don’t like. I appreciate your clicks and purchases as it helps support this blog.
I am back on the UCAB bandwagon! I worked on the pockets for the Brocade Peony UCAB over the weekend and made some good progress. This is part of my effort to clear off my to do list. I know I have gifts to make, so there is a push-me-pull-you going on in my brain. Fortunately, this ticks off both areas.
UCAB: Front Pocket
I started the work on the two large pockets at Tim’s on Saturday. We got together for the meeting and to sew and catch up. I started in carefully on the large pocket #1 and made good progress until I realized I had screwed up. I had the wrong piece noted in the pattern and sewed the extra pockets to the wrong piece of fabric. I didn’t have the extra fabric with me, so I stopped and worked on binding some other bags.
UCAB: Large Second Pocket -front
By the next day, I had figured out the problem and was ready to go. I thought I would abandon my efforts and start over. Unfortunately, I couldn’t find the extra fabric I thought I had, so I unpicked everything and redid it. It worked out. It took time, but unpicking is rather meditative.
Despite this inauspicious start, I was able to complete the two large pockets and make the center section of the small front pocket. I also started making the sides of the small front packet, including the Clippy section. There is a lot of fiddly sewing and cutting, so I didn’t make much progress yet.
My UCAB is finally finished. This will replace part of my travel bag and it will fit nicely on the handle of my sewing machine travel bag.
I am happy with how it turned out and I am glad I feel comfortable putting the project together as I think it will make a great gift if and when I decide I have time to make more of them.
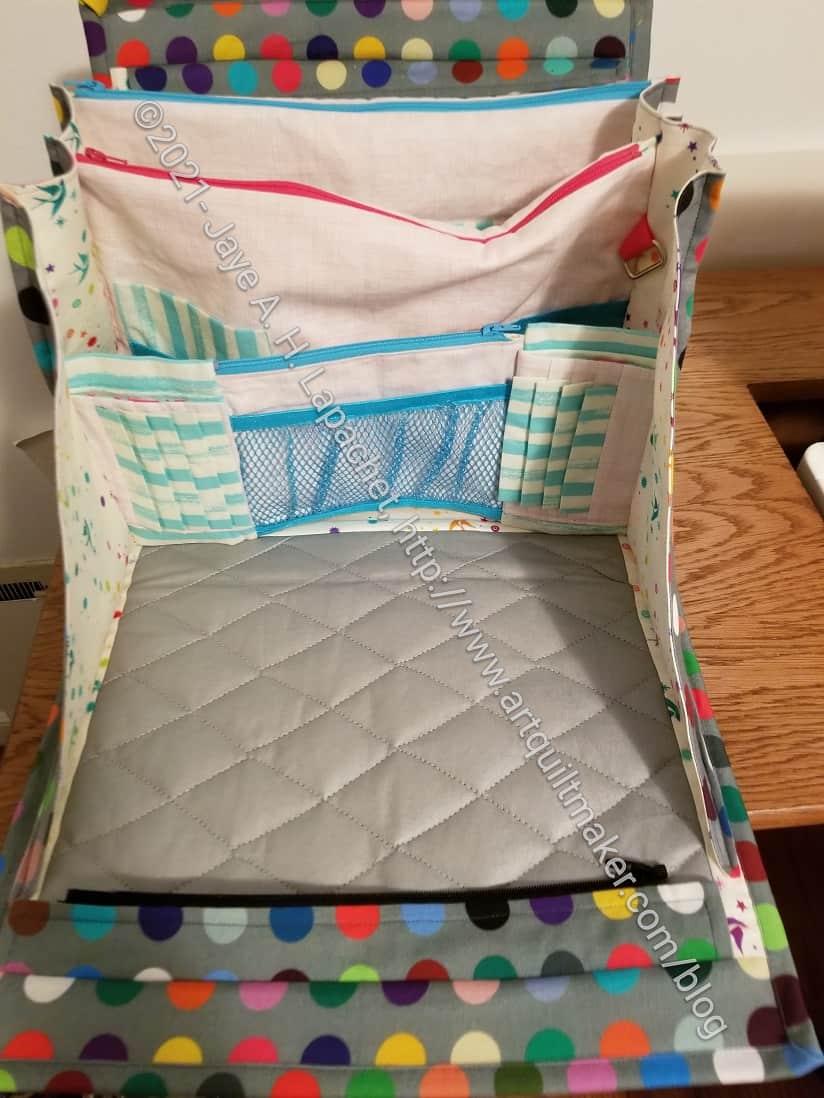
UCAB: inside pockets from top
I am not 100% happy with the project, but I think that is true for all of my projects. I get to like them better after I have lived with them for awhile. 🙂
One thing I think I forgot to do was put Shapeflex** on the inside of the pockets. Some of them are a little floopy. They will be fine once I get some stuff inside them.
I still haven’t decided how to marry the use of this bag with the use of my Pink Tupperware box. I am not sure I am ready to give it up, though it is clearly not big enough for the stuff I need at Sew Day or when I travel.
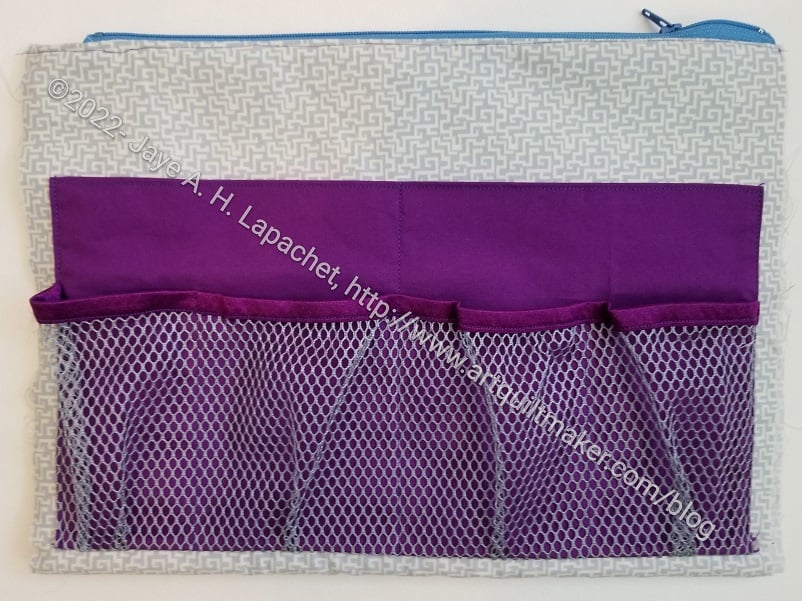
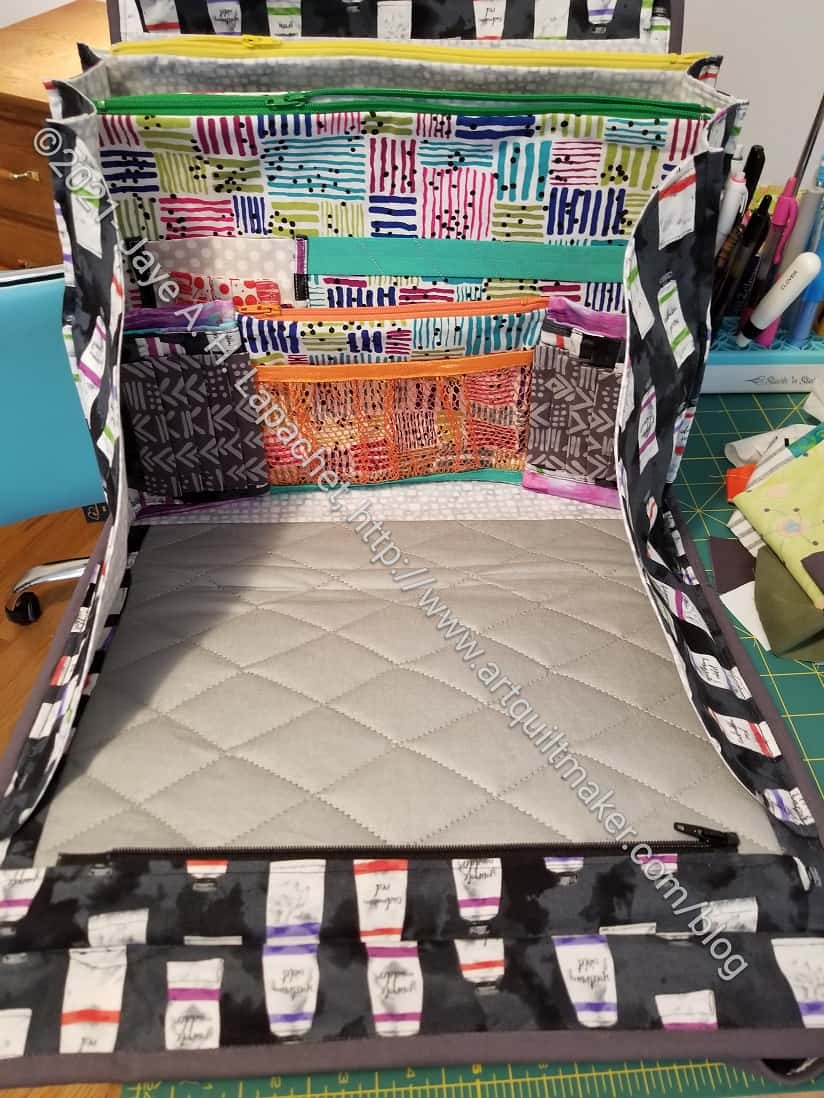
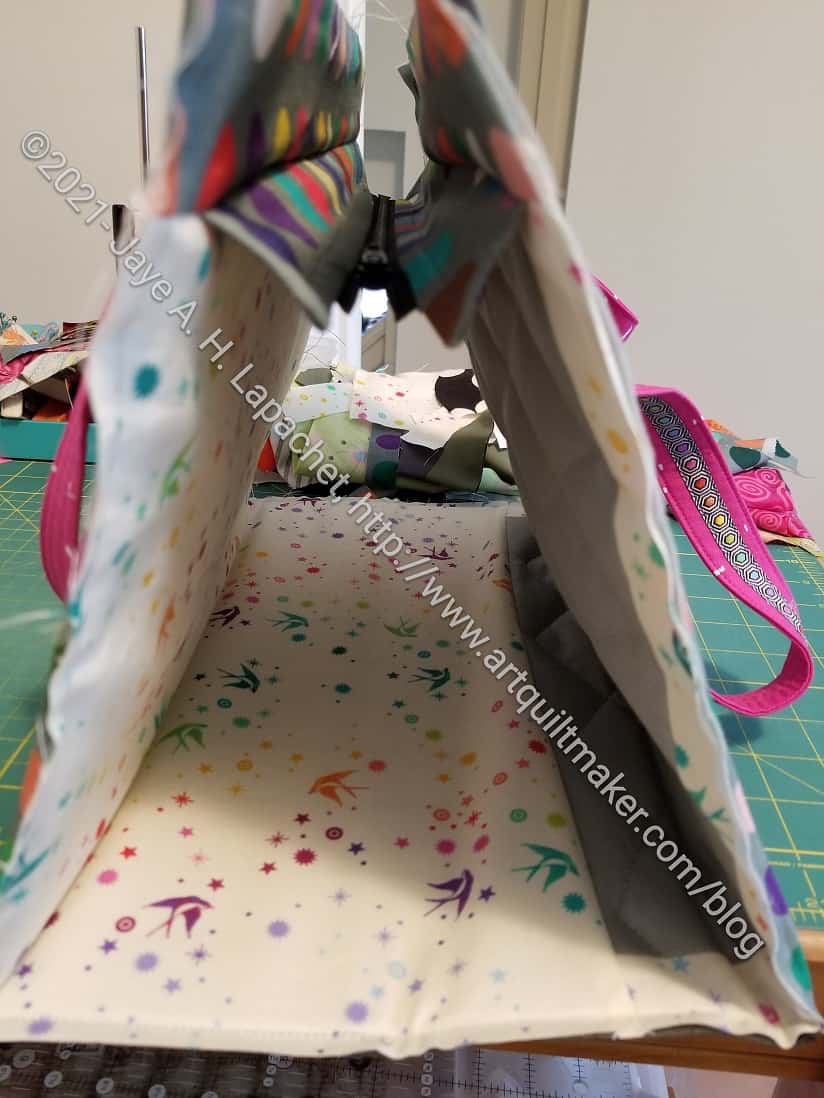
UCAB: front, open
As I may have mentioned, I didn’t install the front zipper. I wanted the front to be the front. In the pattern, the designers put the ironing pad in the back because she, rightly, doesn’t want you sewing over a zipper. I just omitted the zipper and made an open pocket. I think it will be much more useful and I think having the front (with the ironing pad) open to the front is much better. I didn’t want the front of the inside opening from the back. Also, I will be able to slip things, like my phone, into that front pocket easily without unzipping.
I haven’t made any pouches to use with this bag, like I talked about back in March of last year. I put some square ‘rings’ in the seam of the pockets, so if I have one to attach to the inside of the bag, I will be ready. I wasn’t careful about the way I placed the pockets and both ‘rings’ ended up on the same side of the bag. I don’t think it will make much difference, but we will see.
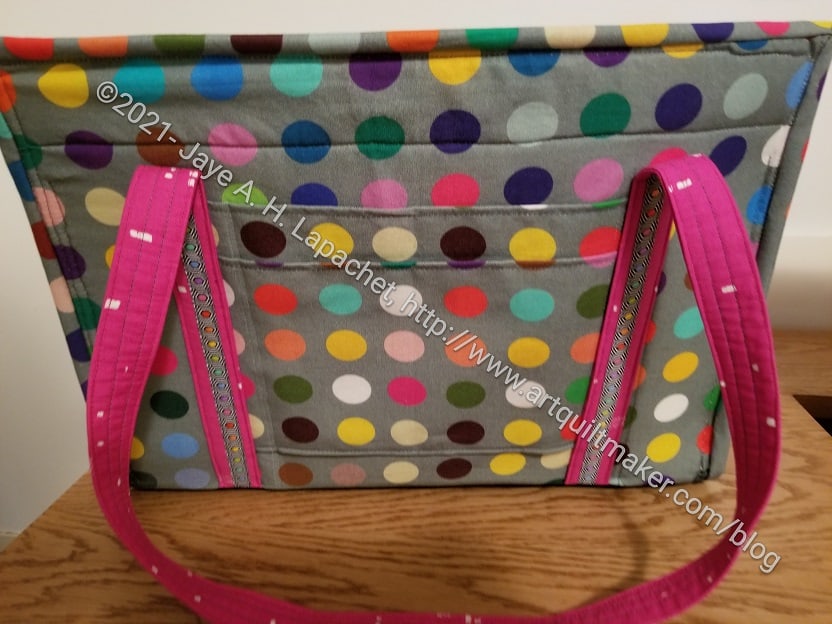
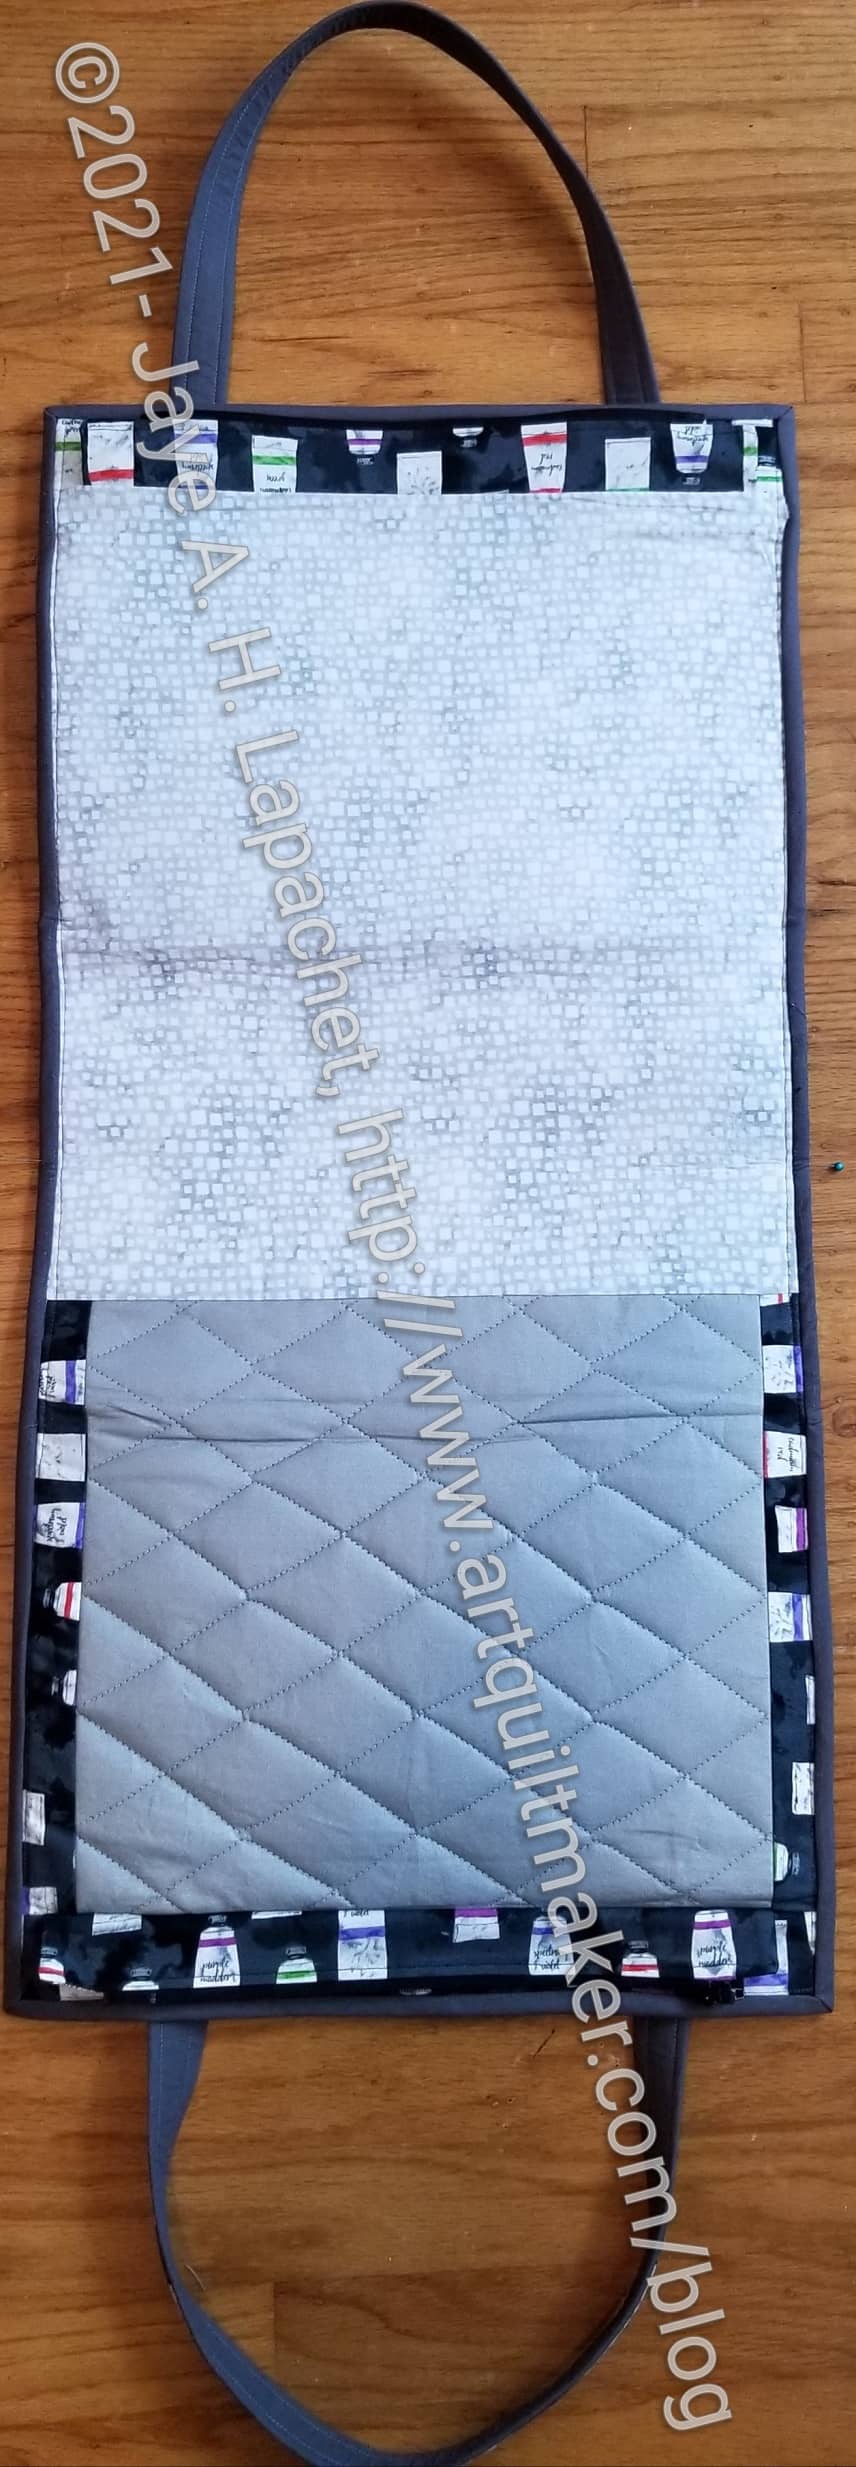
UCAB: Back
The back is a tight fit over the handle of my sewing machine rolly bag, but it does fit. There is another open pocket, for which I am sure I will find a use.
One thing I did was use Renaissance Ribbon as a trim on the handles, over the pink, and on the front pocket. I want to do more of that type of trim. I think it looks nice.
Stay tuned for some ‘in use’ pictures.
**I use affiliate links and may be paid for your purchase of an item when you click on an item link in my post. There is no additional cost to you for clicking or purchasing items I recommend. I appreciate your clicks and purchases as it helps support this blog.
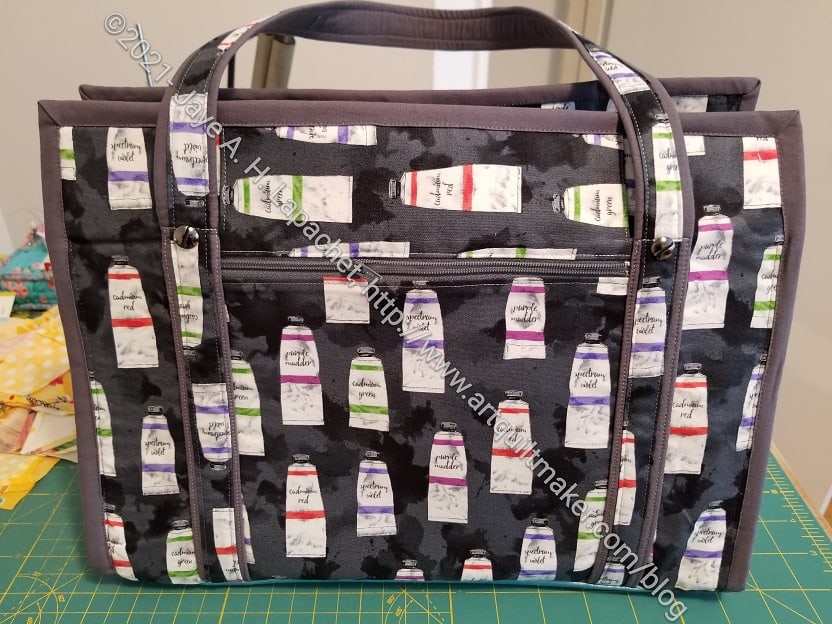
I can’t tell you how excited I am to be saying that I finished the UCAB for my mom and gave it to her for her birthday! This bag goes with the set of items I am making from the Paint Tube fabric.
I am so excited because I spent a lot of time on this bag and got everyone excited about it, then the pandemic hit and all the excitement died.
I finished the bag on September 12, 2021 after spending September 11 ripping out a lot of what I had sewn the prior week. I spent the Sunday morning of the 12th thinking about construction and how I could avoid putting the bag together the way Natalie does. I know she has had success putting together a million of these bags, but the construction did not work for me. I can’t believe how flat she gets her binding.
Ultimate Carry All Bag – binding applied
What I ended up doing is putting the binding on before I constructed the whole bag. I know the binding is supposed to cover the edges of the sides. This made no sense since the sides were finished.
After thinking about how I could construct the bag without killing myself, I decided that I would put the binding on the exterior, then sew the side section to the exterior. The sides were already finished and the process worked very well. I lined up the bottom of the sides right next to the binding and clipped the living daylights out of it, then sewed that section to the exterior. It looked a lot better than my previous effort, which was a big mess. My effort is not as neat as Natalie’s, but I am happy with what I did. I am not embarrassed to give this bag as a gift.
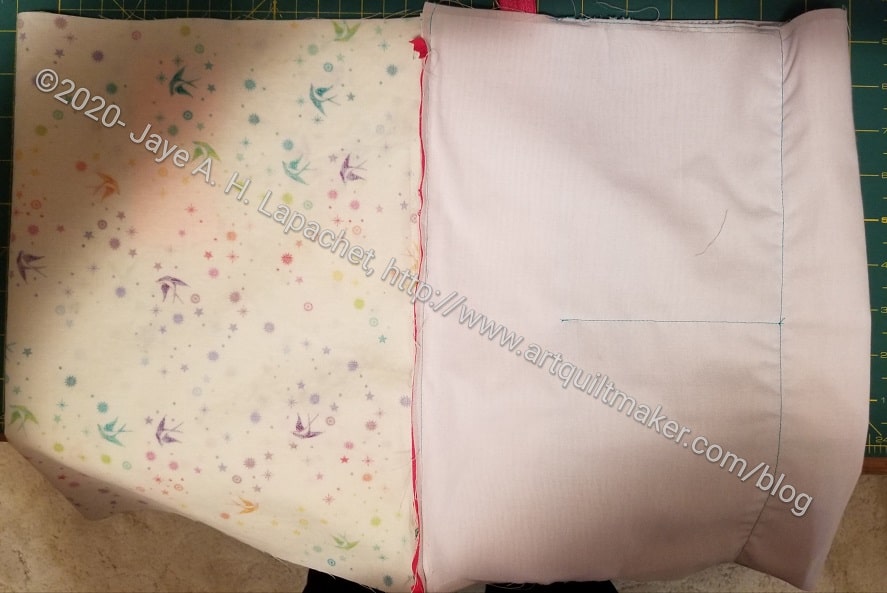
Ultimate Carry All Bag – interior
The other thing I thought about is not finishing the bottom of the side panels. This would mean that only two layers of fabric along with the thickness of the exterior would need to be under the binding. I might try it that way on the other version of the bag.
I had a day off the other day and really wanted to finish my UCAB.
UCAB Lining
In order to finish the exterior I had to sew the lining. I decided to put in an ironing pad even though I don’t think I will use it much. I have my new Mini Maker Case, so I may actually use it. I will try it out regardless.
I had to cut all of the pieces for the lining before assembling the interior. Construction of the lining went pretty smoothly.
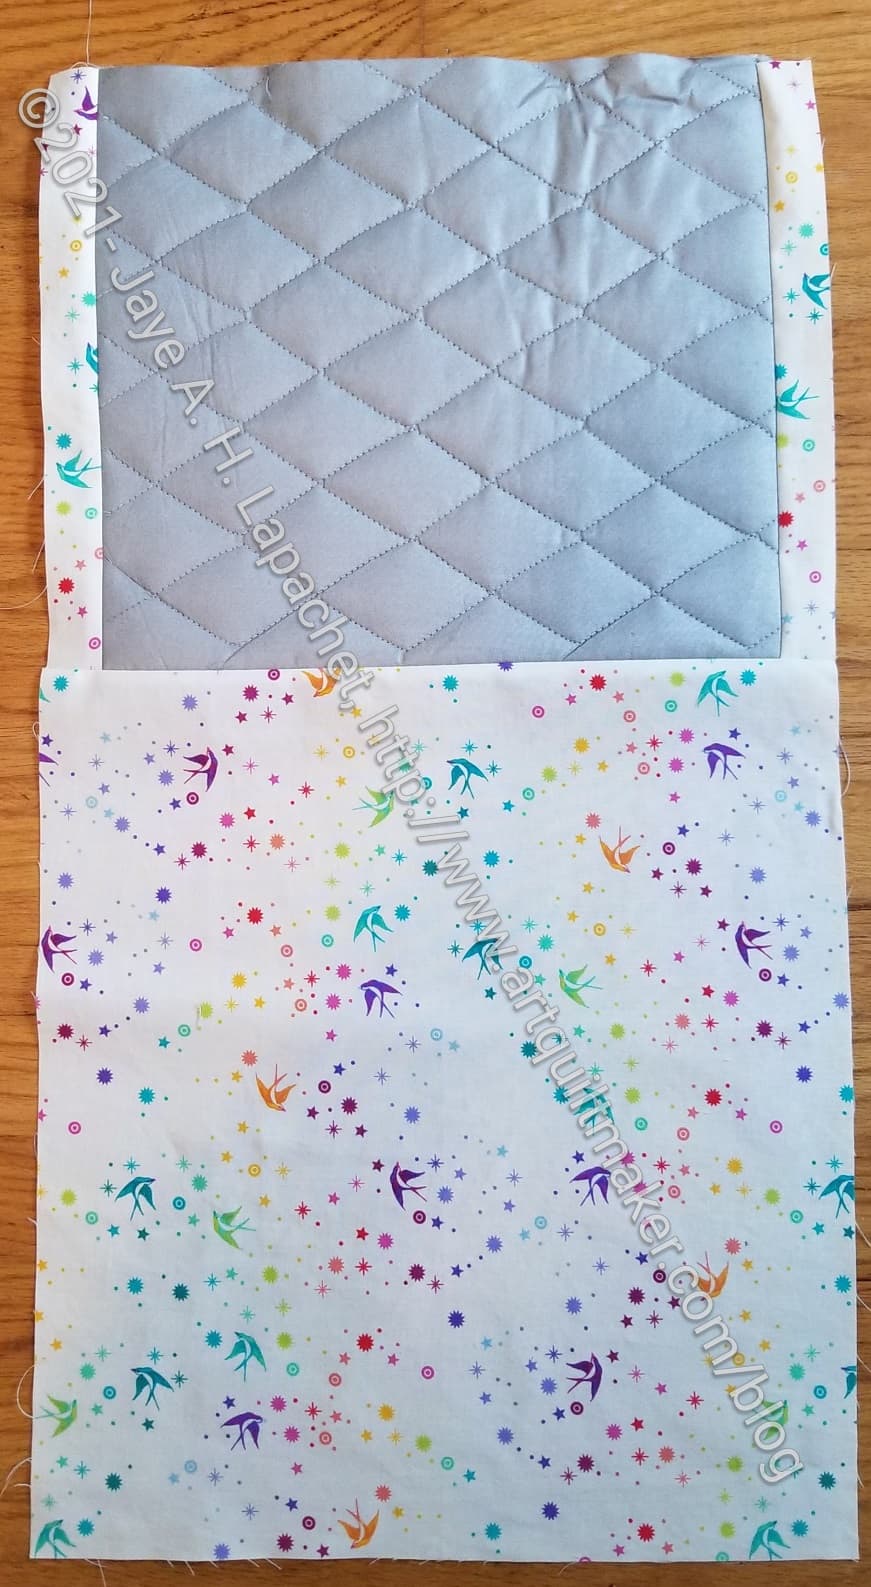
UCAB Exterior
Another task was to finish the exterior. I sewed the three parts together (back, front and bottom), which was pretty easy. I did have some trouble with the pleather bottom sticking to my machine’s bed. I held up both edges and kept as much of it off the machine bed as I could. Then I sort of shoved it through, but will need to rethink that strategy in the future. It doesn’t make for nice stitching.
Laid out like the photo left doesn’t do anything for the overall look of the bag, but you know how it is. It always looks worse before it looks better.
UCAB Exterior – standing up
I wanted the bottom to be flat, so I sewed two layers of Peltex to the pleather – kind of like quilting it. I was careful to keep the Peltex away from the edges so that the edges wouldn’t be too thick. I don’t know if that strategy will work, but it seems to be flatter than I could have hoped.
To encourage the bottom get into (and stay into) the right shape I thought of sewing a seam along the edges where the front and back fold up. The ironing pad extends into the bottom of the bag, so sewing a seam would create a bump. If I want to do that, I’ll probably need to omit the ironing pad.
I also cut out the sides (from a template) and put those together. They are an odd shape, so I used scissors. I also pressed the folds into the places where the pockets will be inserted.
I got a fair amount done, but didn’t finish. Progress! Not finished, but progress.
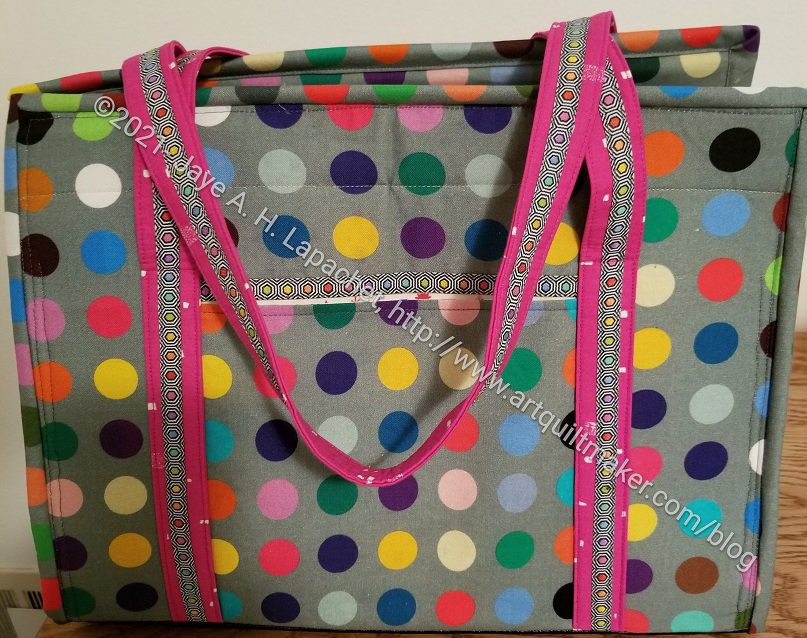
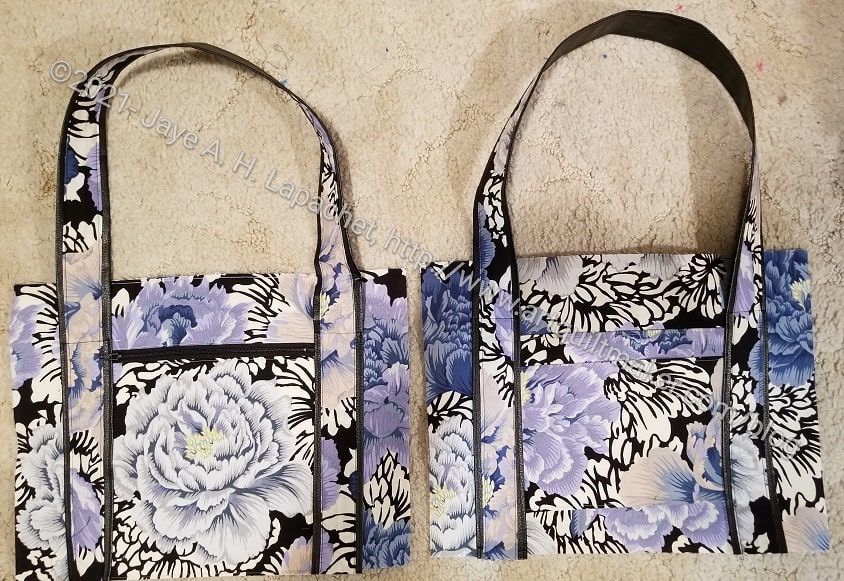
I love the Brocade Peony fabric, but I did not love the handles and the front zipper.
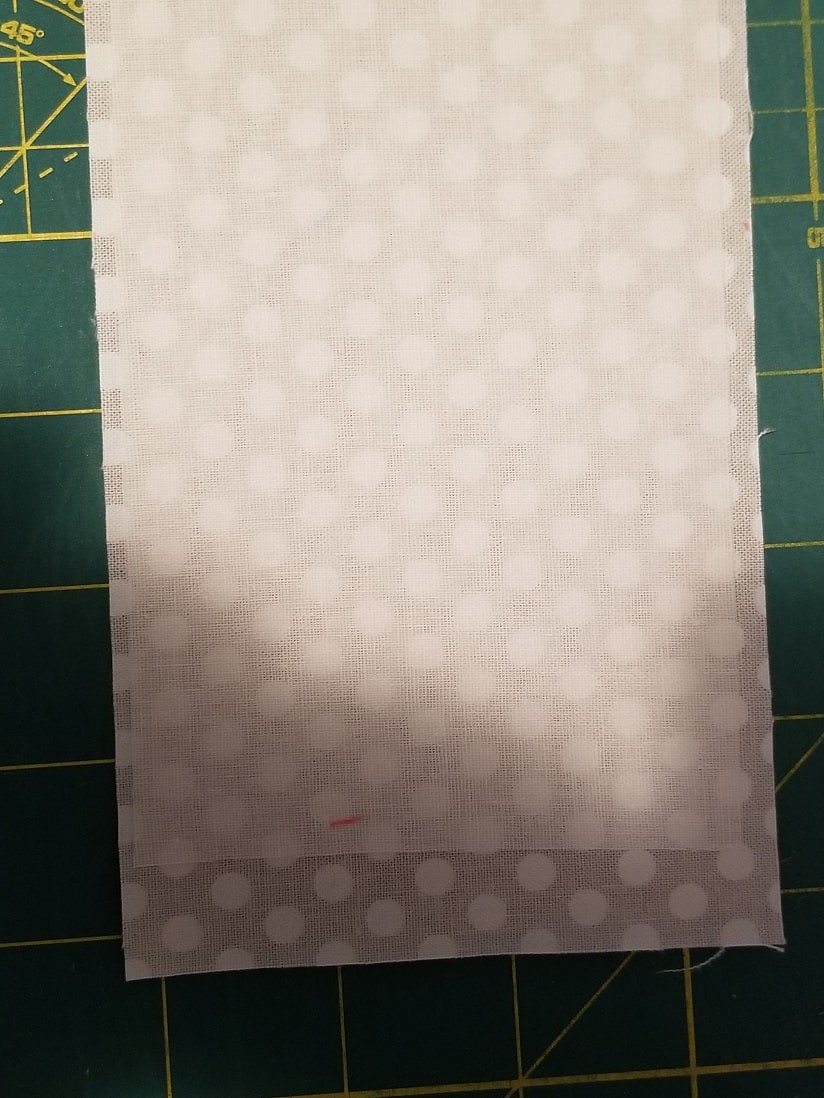
For this version, I used some dot fabric that was actually 108″ backing fabric that I bought when I went shopping with Friend Julie at Bay Quilts.
This fabric turned out to be rather delicate. The holes are visible where I had to rip some stitching out and the fabric gets runs in it easily.
I also excluded the front zipper. I want the ironing pad to be in the front rather than in the back because of the zipper. I still had to do that weird cutting thing because the handles don’t go all the way up to the top, but there will be no zipper to interfere with ironing.
The other thing I did was to trim the pink handle fabric with some Renaissance Ribbons. I am pretty pleased with how that came out.
I intend to finish this bag soon, so stay tuned. I also intend to finish the Brocade Peony version. I Just don’t know what I will do with it. Maybe a giveaway? Maybe part of the raffle prizes the guild gives away every month?
I know these tutorials are taking forever, but they also take a long time to write. Doing them in smaller chunks fits my schedule better. Hopefully, the smaller chunks makes the bag more doable as well.
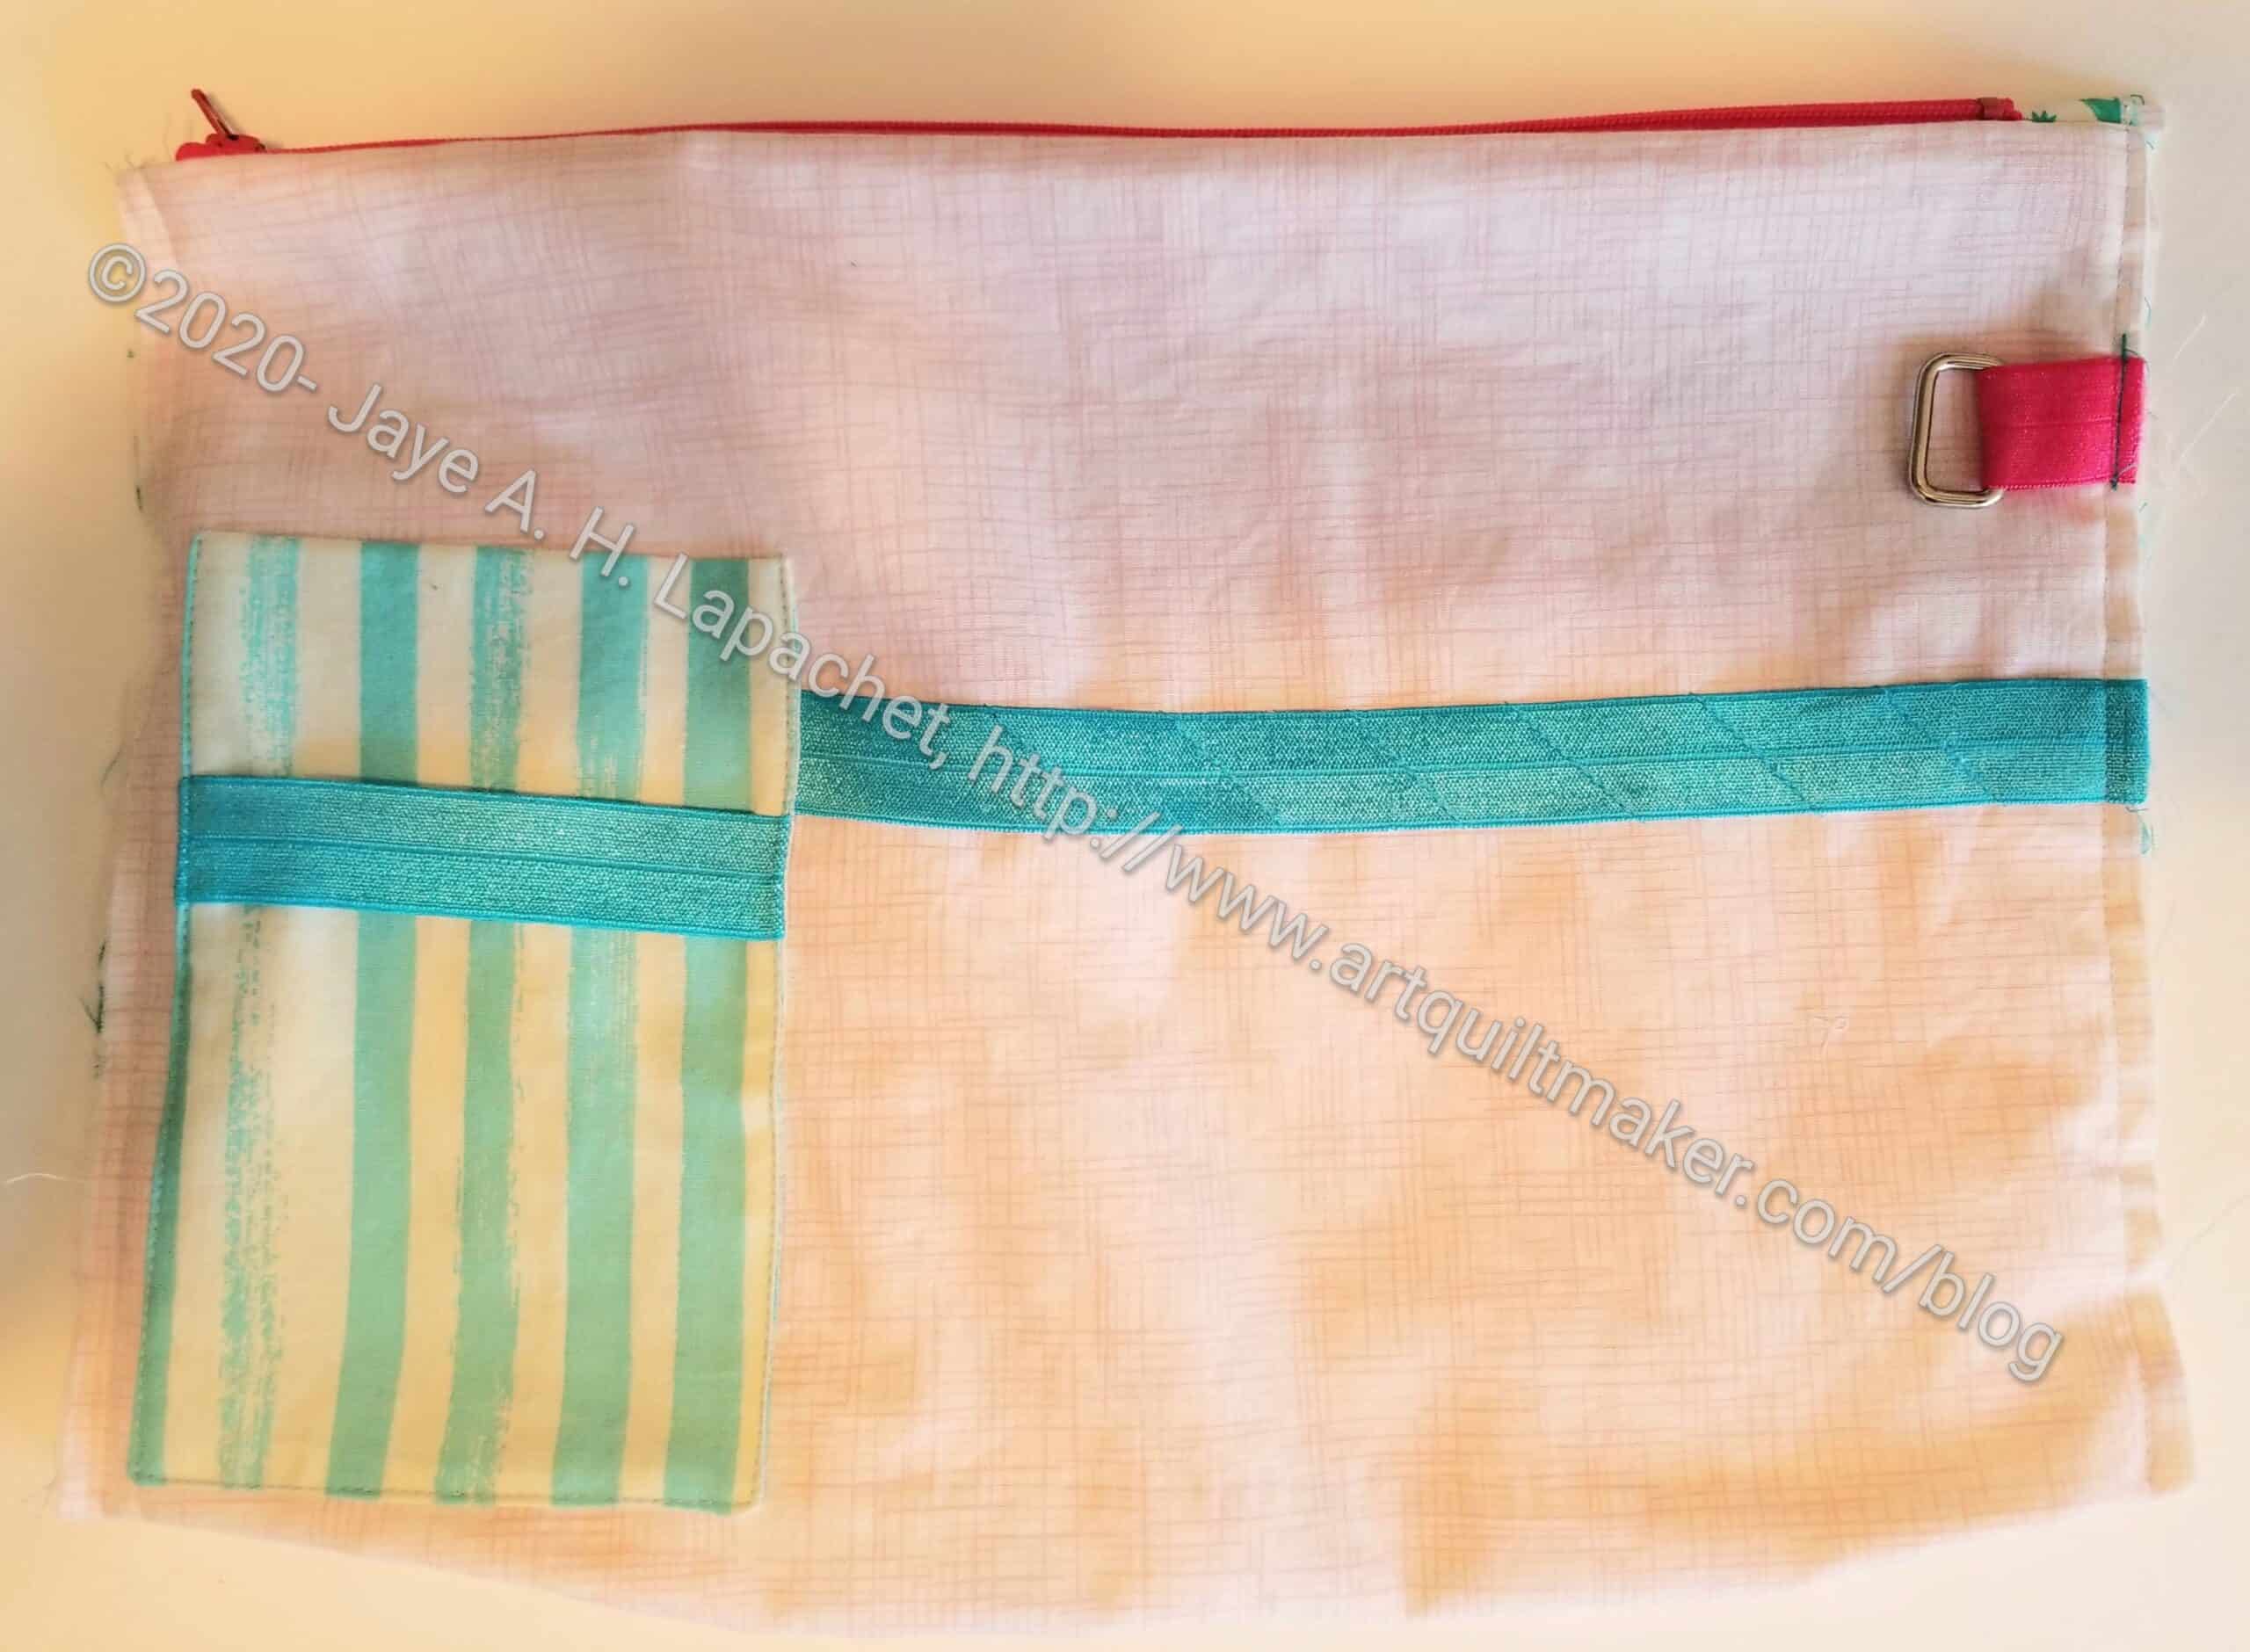
Finished Small Interior Front Pocket
Today we are going to make the Clippy Pockets (type 1) used on the sides of the small, interior pocket instead of using the badge holders. The other day, we made the center zipper section. These Clippy Pockets will be placed on either side of the center zipper section. The pleats hold your WonderClips. The Clippy Pocket is not part of Quiltessa Natalie’s original pattern.
You can find the original pincushion instructions, from which this tutorial evolved, in Love of Patchwork & Quilting, issue 39. It is available digitally in the Apple and Google Play stores. The same pincushion pattern is available in the book 50 Little Gifts** from Lucky Spool.
SF101 – add this to whatever section you think needs it. I added it to P4 to add some stability to the Clippy Pocket
Post-it Notes** (really, you can use any post-it notes. I just like the shape and color of these. Another good product is Semikolon’s Sticky Tab Markers in a Booklet-no affiliation)
Pay attention to the flaps and pin them back if necessary so you don’t sew them down
Tutorial:
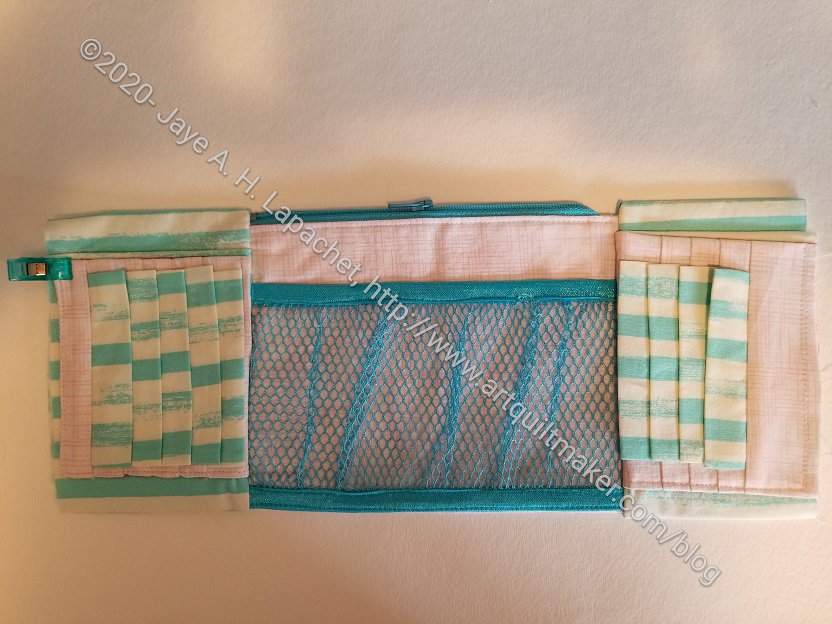
Side front interior pocket with clip holder
The front pockets needs two of these side pockets. They will go on each side of the center zipper/mesh pocket.
You can make four and put more Clippy Pockets on the back, if you want. We won’t do this in this tutorial, but it is an option.
You will need P4 and all the pieces for the Clippy Pocket, v.2.
The Clippy Pocket section is inserted on the bottom of pattern pg.13. I made the Clippy Pocket instead of vinyl badge holders.
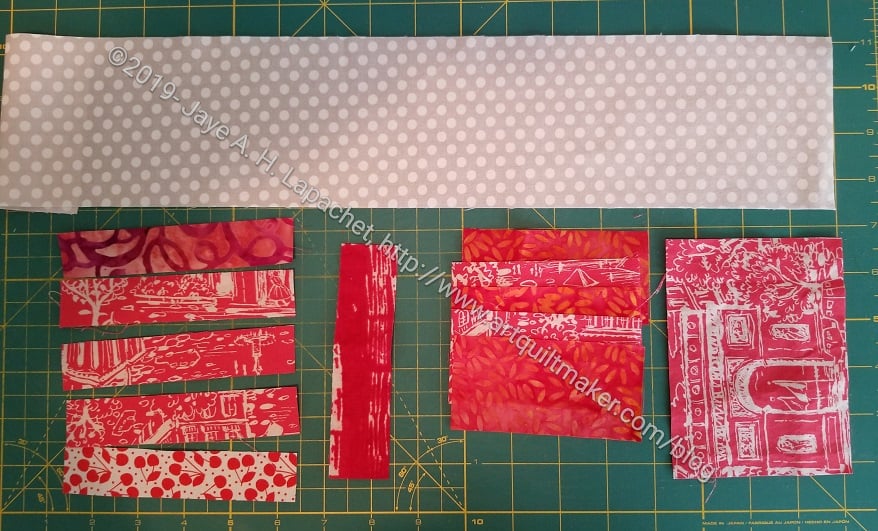
UCAB: Pieces You need
Yes, I am using different fabrics. I am sure you can manage.
Directions:
1. Cut the following:
A – cut 1 -1 1/4”x5” for edge
B- cut 5 – 2”x4” for Clippy tabs/flaps
C – cut 5 – 1”x5” for between the flaps
D – cut 1 – 3 ¾”x5 for back
Shapeflex – cut 1 piece 19 ¾” x 3 ½”
Sew flaps: fold B pieces RST and sew short sides. One long side will remain open
Turn sewn B pieces right sides out
Press B pieces. Fold will have a crisp seam. B pieces are now flaps
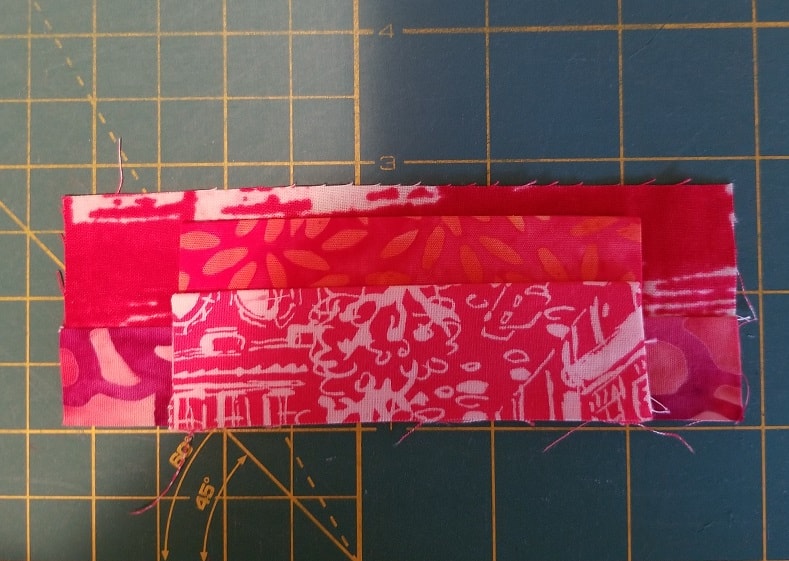
Lay A piece right side up
Layer and center a sewn B piece (flap) on top of the A piece
Layer and center a sewn B piece (flap) on top of the A piece
Layer and center a sewn B piece (flap) on top of the A piece
Layer a C piece on top of the A and B pieces WS up
Sew 3 pieces together along the long side where the raw edge of the flap will be sewn shut
Press Piece
Press C piece away from the other two pieces
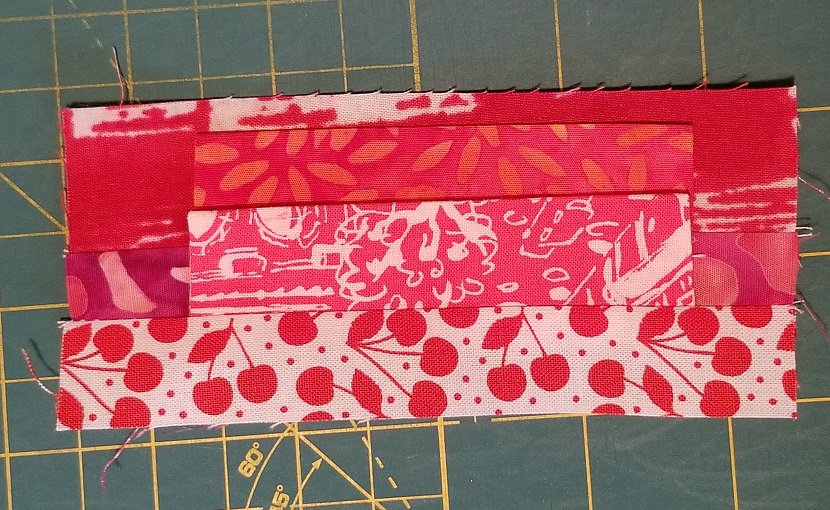
Layer another flap (B piece) on top of your sewn pieces
Layer another flap (B piece) on top of your sewn pieces
Follow steps until you are out of flaps (B pieces) and C pieces
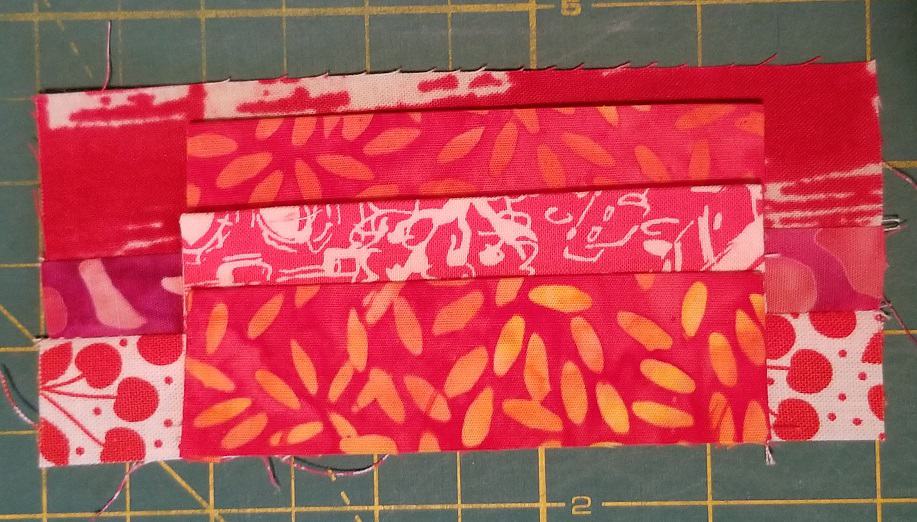
20200113_162045-sm
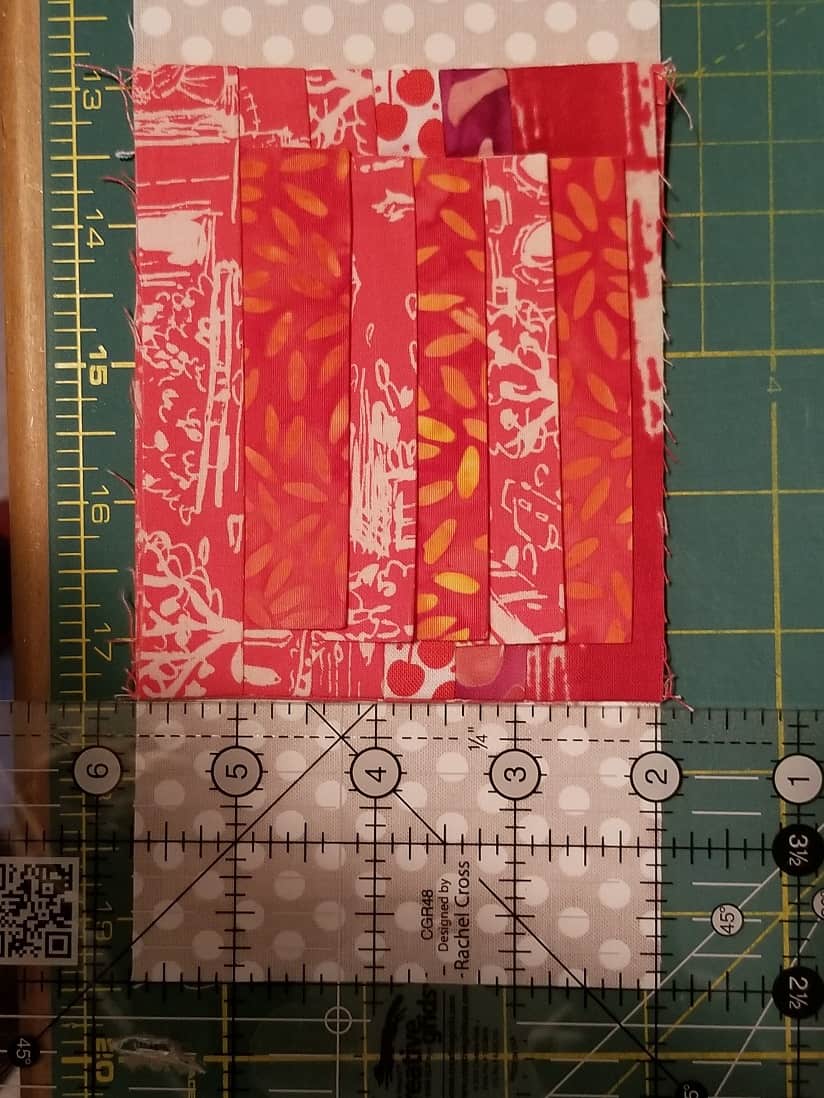
You will end up with a piece comprised of strips and flaps that is approximately 3 ¾” x 5”. This piece looks like a ‘flap ladder’. The sides of this ‘flap ladder’ should reach the sides of your P4 strip
Press ShapeFlex to P4
Press Shapflex on to your P4 piece
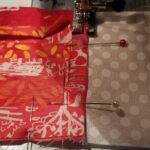
Layer your ‘flap ladder’ RST with piece D and sew along the short sides
Pin
Sew the Short Sides
Layer your ‘flap ladder’ RST with piece D and sew along the short sides
Carefully press seams open without creasing piece D or the ‘Flap ladder’
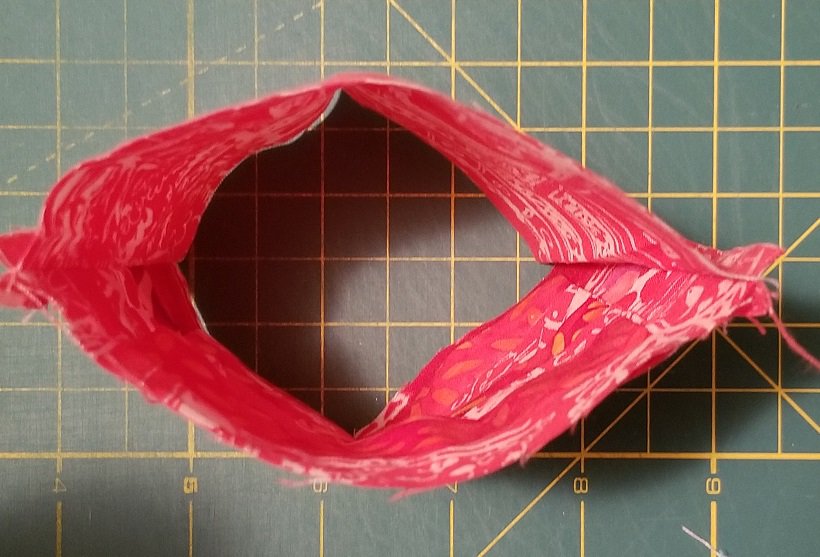
Now you have a loop
Now you have a loop.
Turn your loop right sides out
Press flat
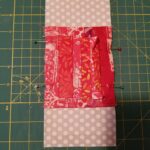
Place 2″ from the bottom of P4
Place your sewn piece 2” from the bottom of your P4 strip.
Pin in place with the raw edges at the side
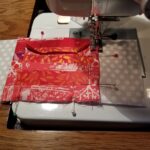
Fit your machine with your matching or top stitching thread
Pin and sew across the bottom using matching or top stitching thread
Sew
Sew
Sew across the bottom. N.B. : I used a contrasting thread so you could see it. For my final bag, I will use a matching thread.
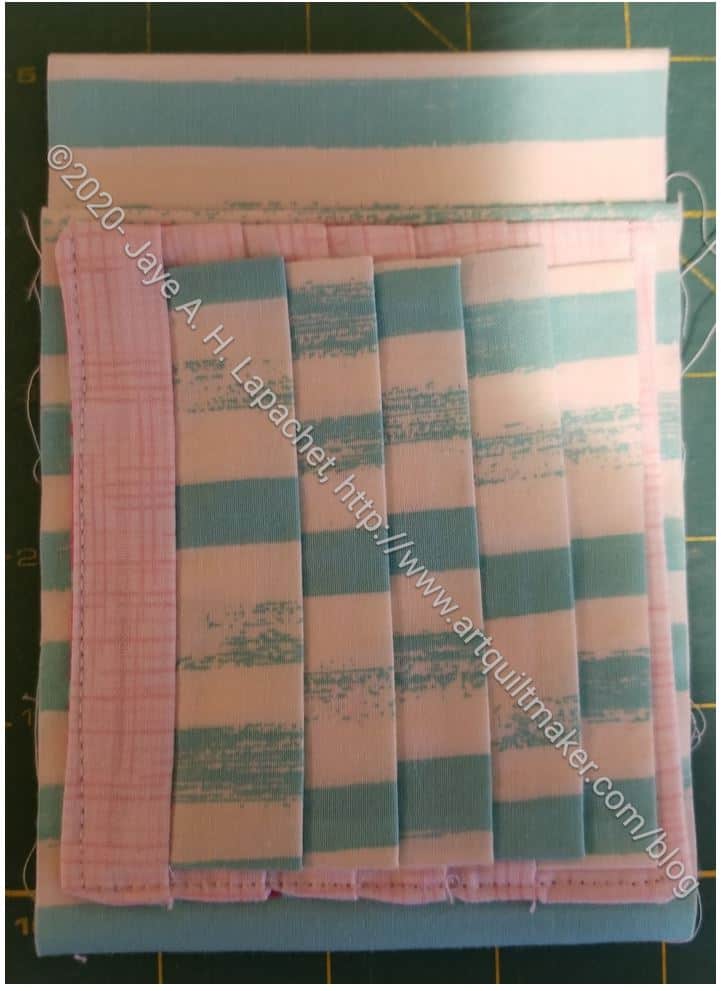
Finished Clippy Pocket ready to add to small front pocket
Continue with the directions on the Ultimate Carry All Bag pattern, pg.14, starting with “then fold the pocket fabric in half…”
Next time we will work on the Exterior front pocket
**I use affiliate links and may be paid for your purchase of an item when you click on an item link in my post. There is no additional cost to you for clicking or purchasing items I recommend. I appreciate your clicks and purchases as it helps support this blog.
I made some progress last weekend on the Ultimate Carry All Bag. Shocking, I know. I was spurred on by finishing the STBs, not having my design walls available and by talking with Lynette at Sew Day. Mostly, I am also determined to get this *&^% project off my to do list.
As you might remember, I am making one as a gift. That one is farther along, because all the pieces are cut. I have been cutting the pieces as I go along for this one and I didn’t cut the pieces for the zipper yet.
Sometime ago, I decided to use some fake leather I bought for the bottom, so I want able to use that piece to put the exterior together.
I am still trying to decide whether I will put an ironing pad in this one. I am not sure I will use it, but it seems like a good thing to have anyway.
During the tutorial session on Saturday during Sew Day for the Ultimate Carry All Bag, Lynette showed how to complete the front panel. I had tried and messed it up. Don’t worry, though, I will write a tutorial for this step now that I know how to make it to post here later.
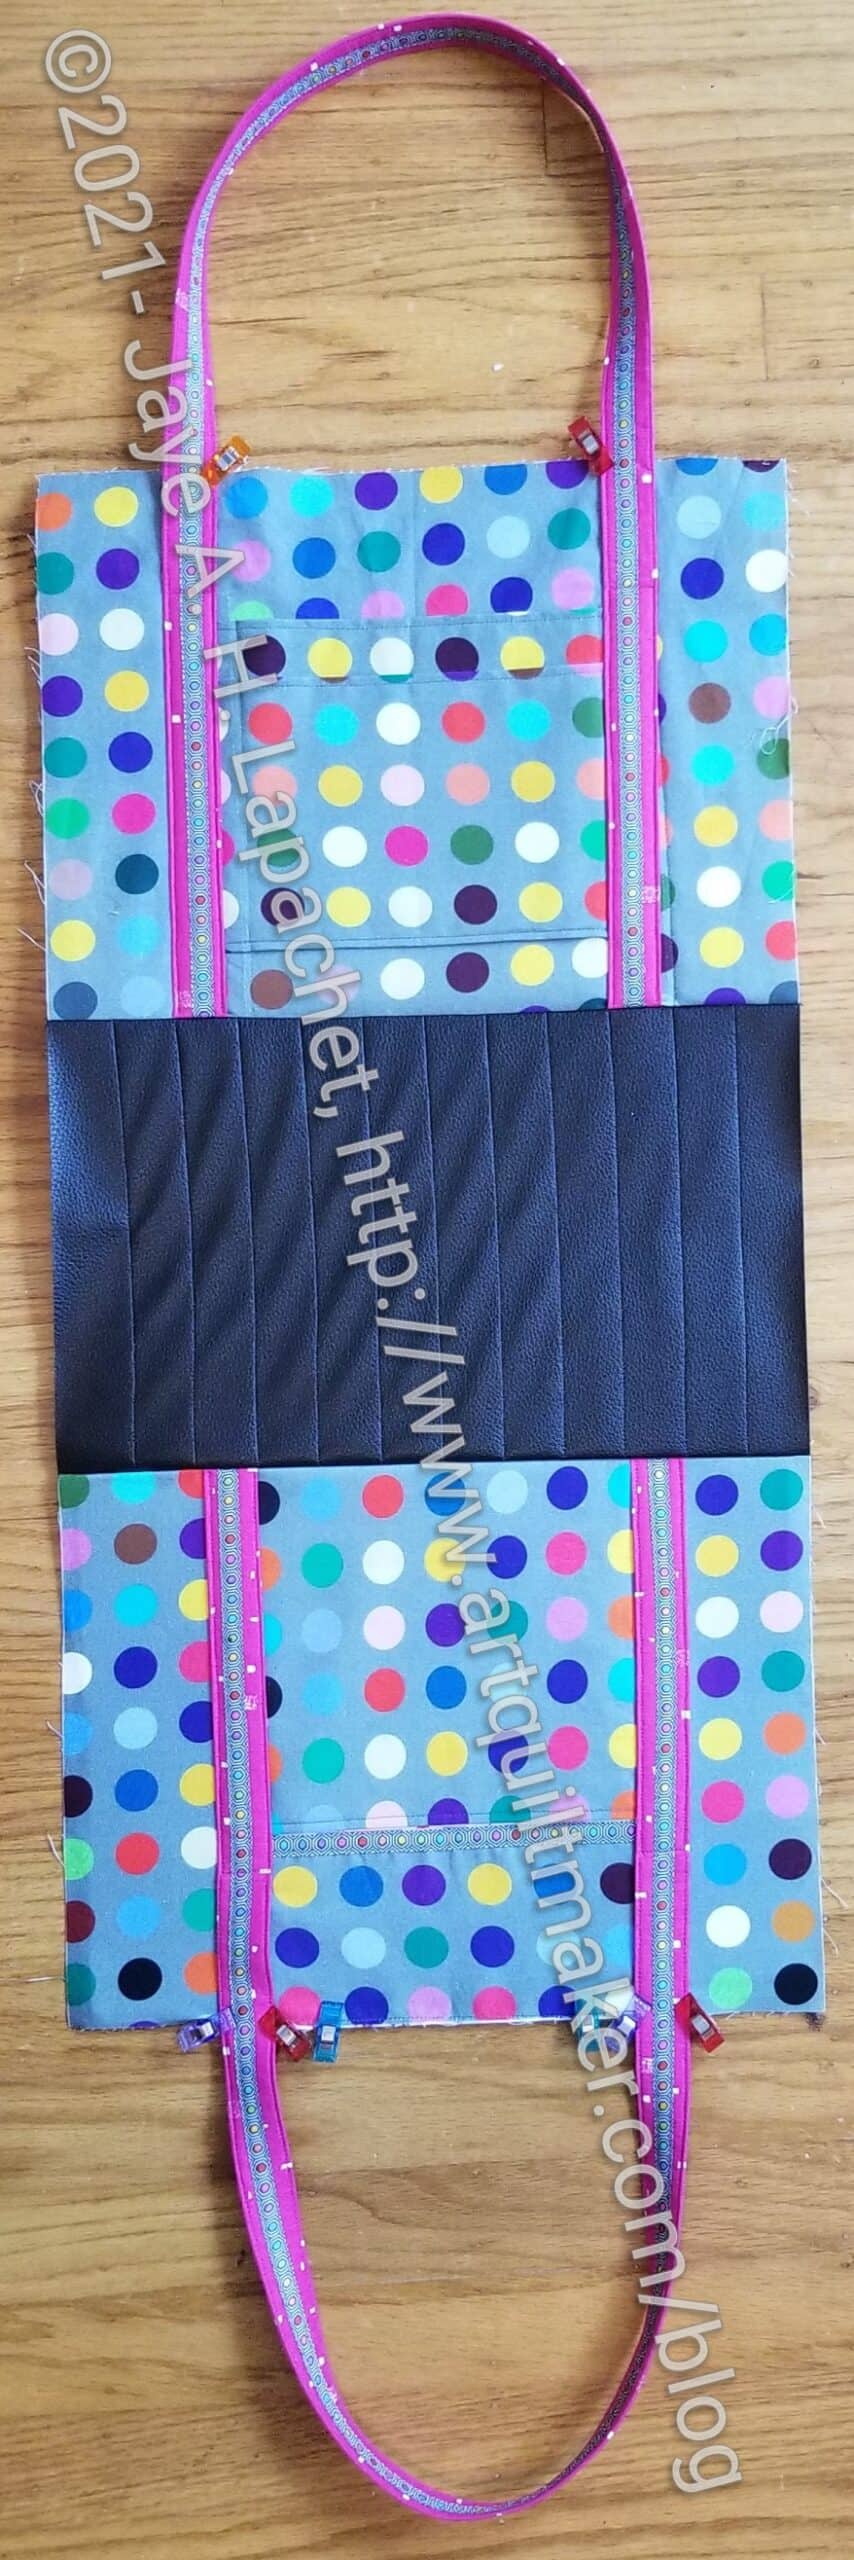
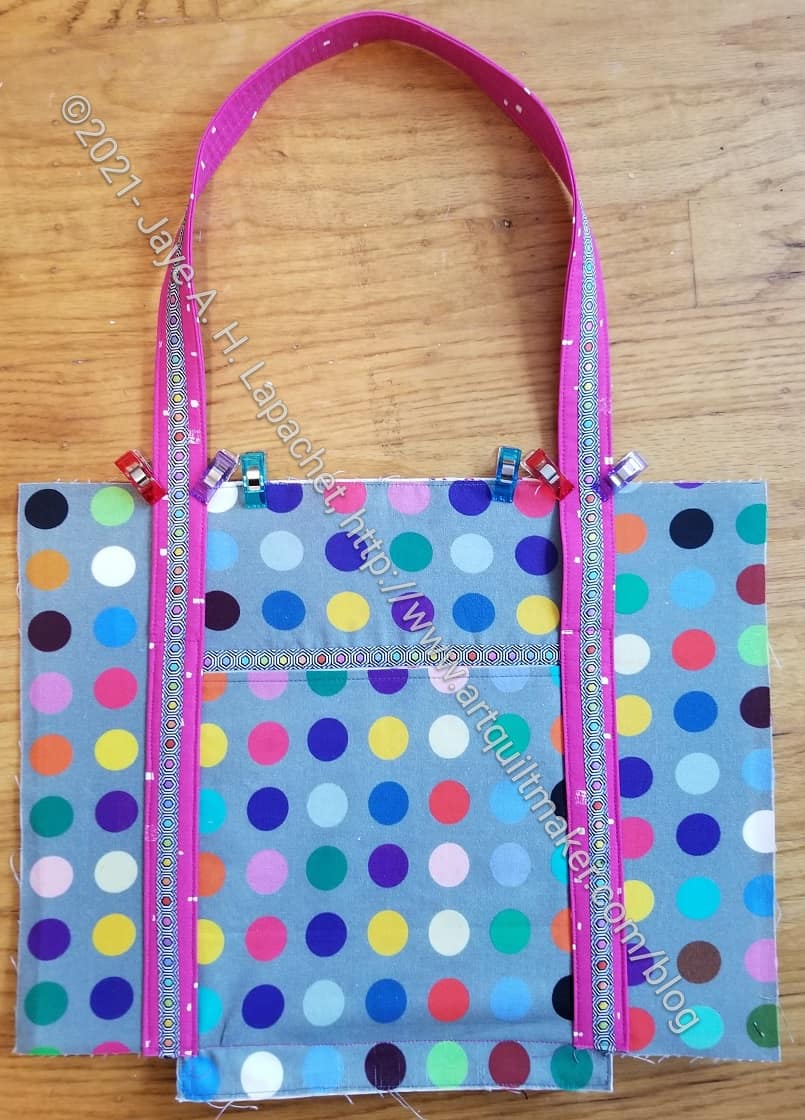
UCAB front and back panels
Lynette went further than I had planned. I had planned on just doing the front zipper pocket, which I talked about the other day. She showed us how to complete that pocket, plus apply the pocket to the front, add handles and make the back panel with handles. I am really glad as it makes the tutorials move along faster and I have to create fewer. I am not afraid; the work just takes time.
One thing that came out is one piece was missing from the list on the pattern of pieces we needed for this step. On part 2, pg.16, you need to add L6, an 8×8 lining piece, to the list of pieces you’ll need. This pattern would improve significantly if the designer went through and numbered all the pieces. I know you know that we did that at the beginning, but you can’t number pieces in the pattern that aren’t listed.
One thing I did was use the handles I made for the All Rolled Up Tote, which I ended up not using for that project. I decided that those handles would work for this bag even though they are a little wider than called for in the pattern. One side, which you can see in the other blog post, is pleather and the side you can see above is the accent piece I sewed from Philip Jacobs Brocade Peony fabric to cover the pleather seam.
I had to unsew and redo the back luggage sleeve because I forgot to put SF101 on the back. I thought it would be ok, but decided it was too flimsy. I am much happier now that I redid it, though unsewing takes awhile.
Finally, this project is starting to look like something. With the back and front panels finished, I can see the end of the road in the distance. In some part of my brain, I feel like I am wasting time when I am working on this project. I feel like I could be working on better projects. In another part of my brain, I tell myself that I am making progress, this bag will use up some fabric in my palette, etc. It is so weird. I just think this project has been hanging around for longer than I like and I want to be done with it.
I have to remind myself that one of the reasons we started this was to encourage people to make bags and show them they could do it. Perhaps we didn’t choose wisely with this weird and difficult bag. Fortunately, it will be a useful bag. I don’t know if people will be encouraged to make other bags or be daunted.
We had another tutorial session on Saturday during Sew Day for the Ultimate Carry All Bag. This time Lynette was the teacher. I was relieved not to have to do the tutorial, because I was confused about how to complete the front zipper pocket. I had tried and messed it up. I hadn’t quite given up, but had put it off for awhile.
The directions seemed to be more complicated than necessary, but once Lynette discussed the steps, I was able to follow. The key is that L7 is sewn to the rest of the zipper panel by top stitching the top part of the zipper. you sew around the outside of the whole panel eventually, but this top stitching is such a weird instruction. I have never seen that type of instruction before.
Recently, I posted the tutorial for the second Large Pocket. That is one of the pockets needed to complete the Ultimate Carry All Bag by Natalie Patton. Next we are going to work on the first part of the small, interior front pocket
SF101 – add this to whatever section you think needs it. I added it to P4 to add some stability to the Clippy Pocket
Post-it Notes** (really, you can use any post-it notes. I just like the shape and color of these. Another good product is Semikolon’s Sticky Tab Markers in a Booklet-no affiliation)
The directions for the small interior, front pocket start the bottom of pg. 12 in the pattern.
N. B.: My version of this Small Front Pocket eliminates the vinyl/badge holder pockets and includes a second type of Clippy pocket that I developed from a pincushion pattern.
N.B.2: put a Post-it note on pg.9 to remind you where her zipper instructions can be found. She refers back to them in a non-specific way and marking them is helpful for quick access.
N.B.3: I am using a couple of different versions of the front pocket for this tutorial. Ignore the differences in fabric and pay attention to the location of the parts as well as the piece numbers.
Tutorial:
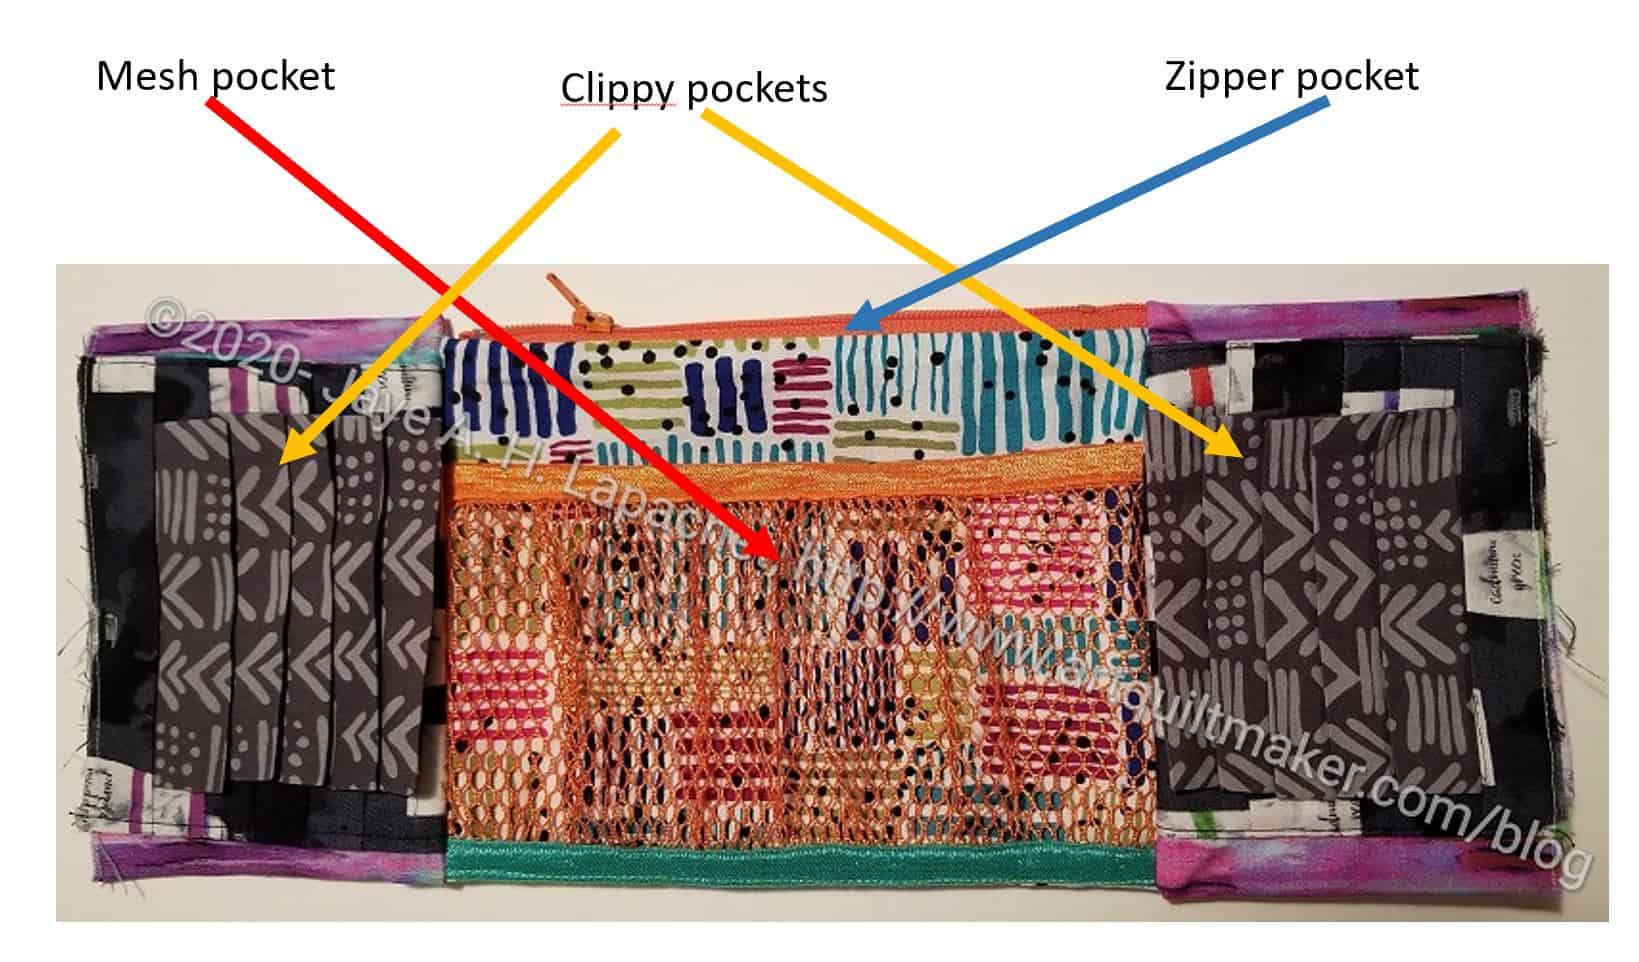
UCAB – Front, small pocket
This pocket is made in 3 parts.
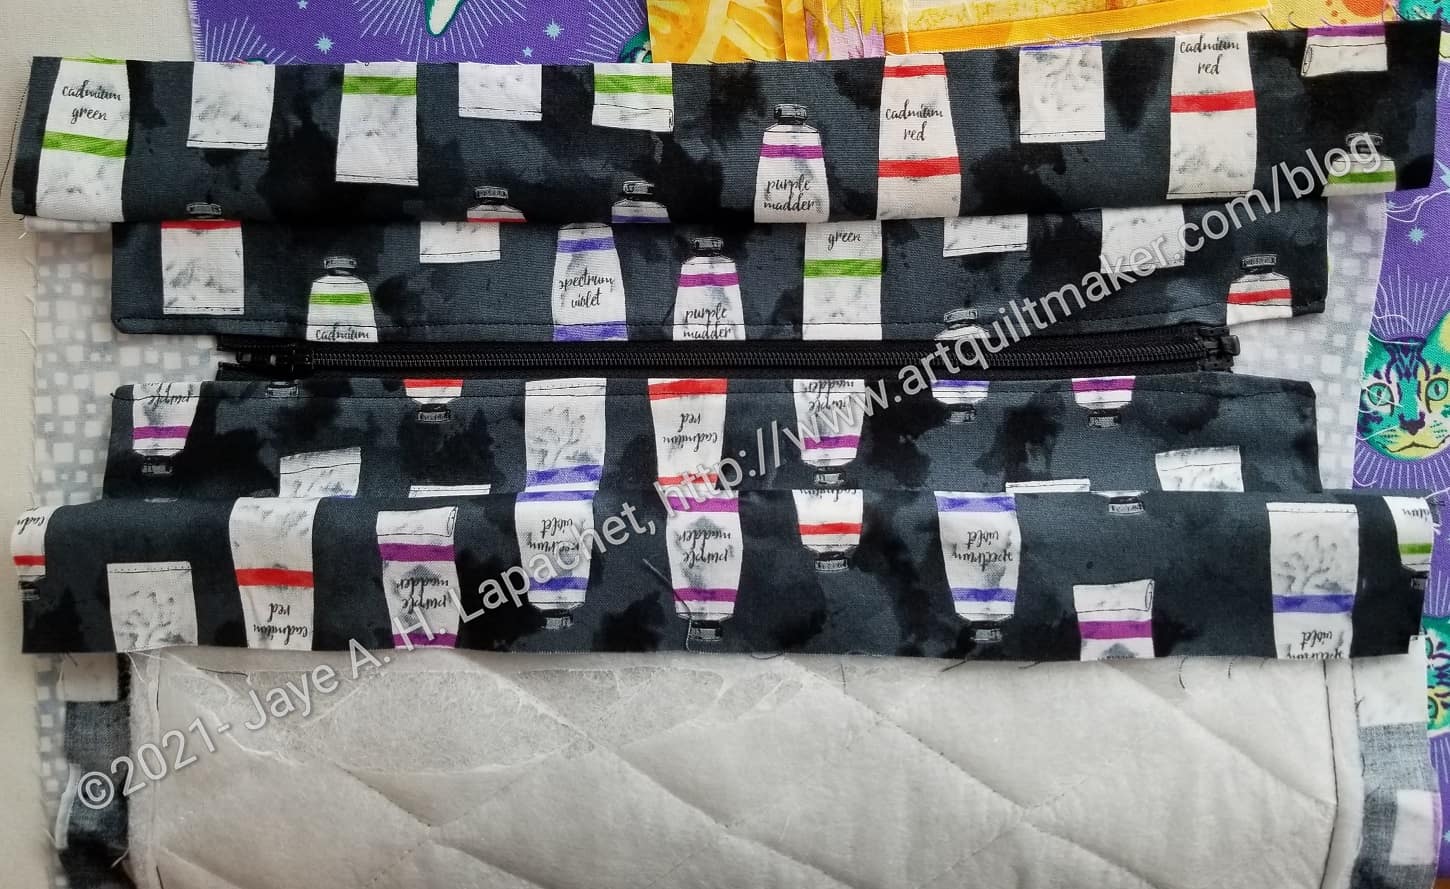
Center Zipper Pocket
UCAB -layer fabrics to insert zipper
First, we will make the center zipper pocket. If you haven’t already done so, fuse SF101 (or similar) to the pieces that make up the zipper pocket.
We need to add a zipper to the center part of the pocket. Full directions for adding a zipper start on pg.9. We also talked about this in the Large Pocket Tutorial.
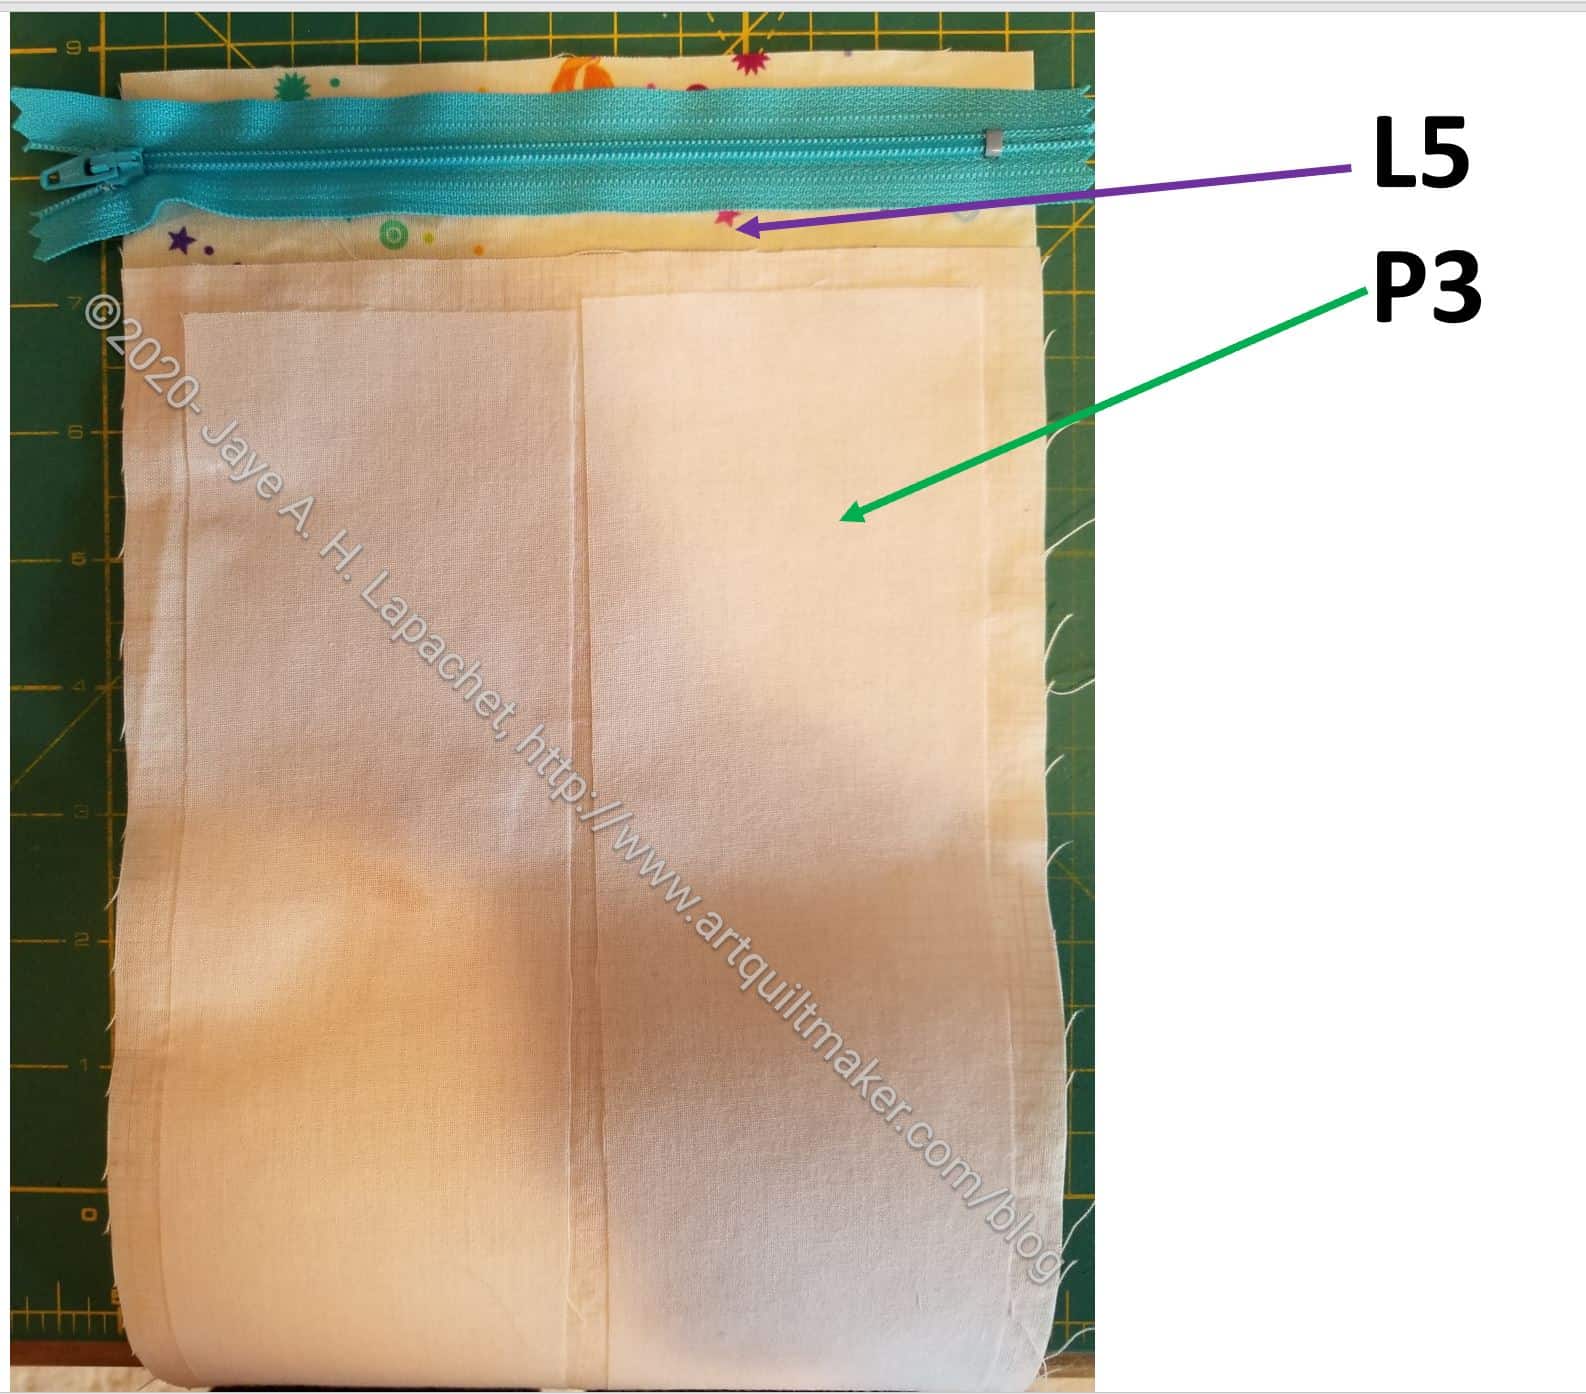
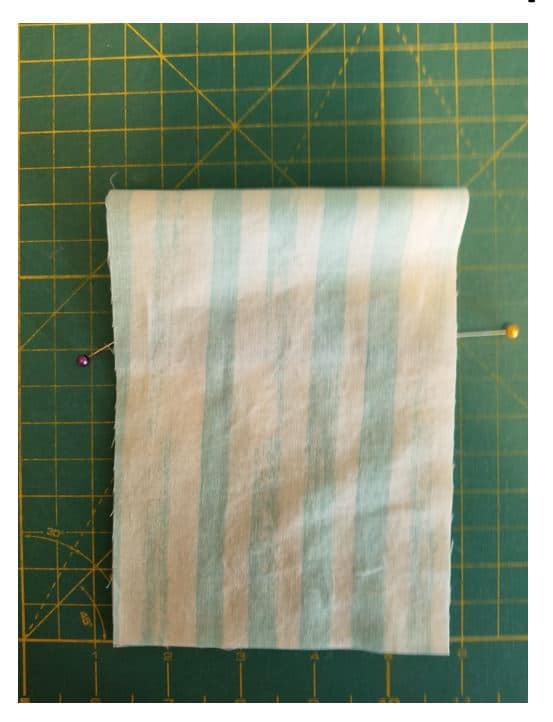
First, lay L5 down face up/right side up.
Lay zipper on top of L5 with zipper pull facing up.
On top of L5 and the zipper, lay P5 on top of zipper face down/right side down. The layers should be L5 and P3 RST with the zipper in between.
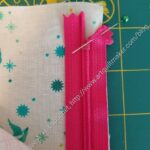
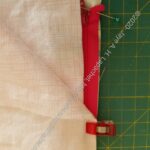
Pinning Zipper ends
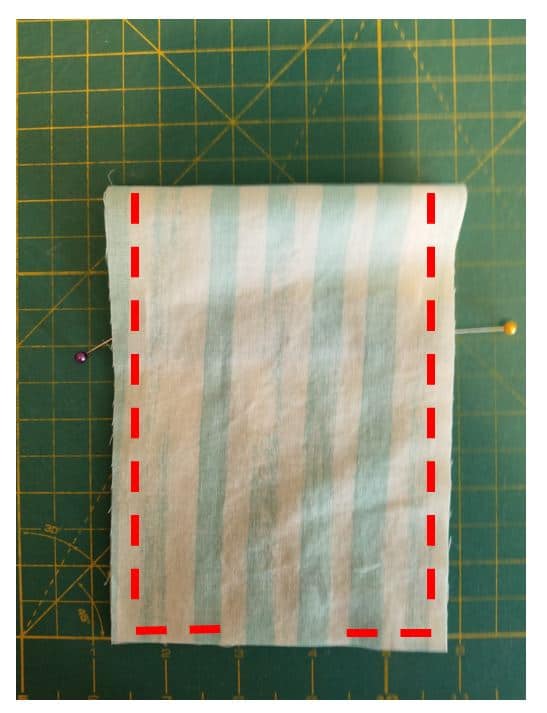
As I said before, Natalie Patton does something really clever with her zipper. She folds the zipper tape at a 45 degree angle and pins it. This makes it look really neat and tidy. Do this, as shown in detail in the Large Pocket Tutorial. Sew the layers including the zipper, being careful to move the zipper pull out of the way as needed. The last photo above shows how to sew (green line) and reminder to stop half way (red line) in order to readjust the zipper pull.
Turn over and press. Top stitch next to the zipper.
Wait to sew second side of zipper until later.
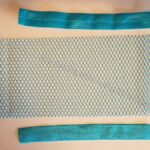
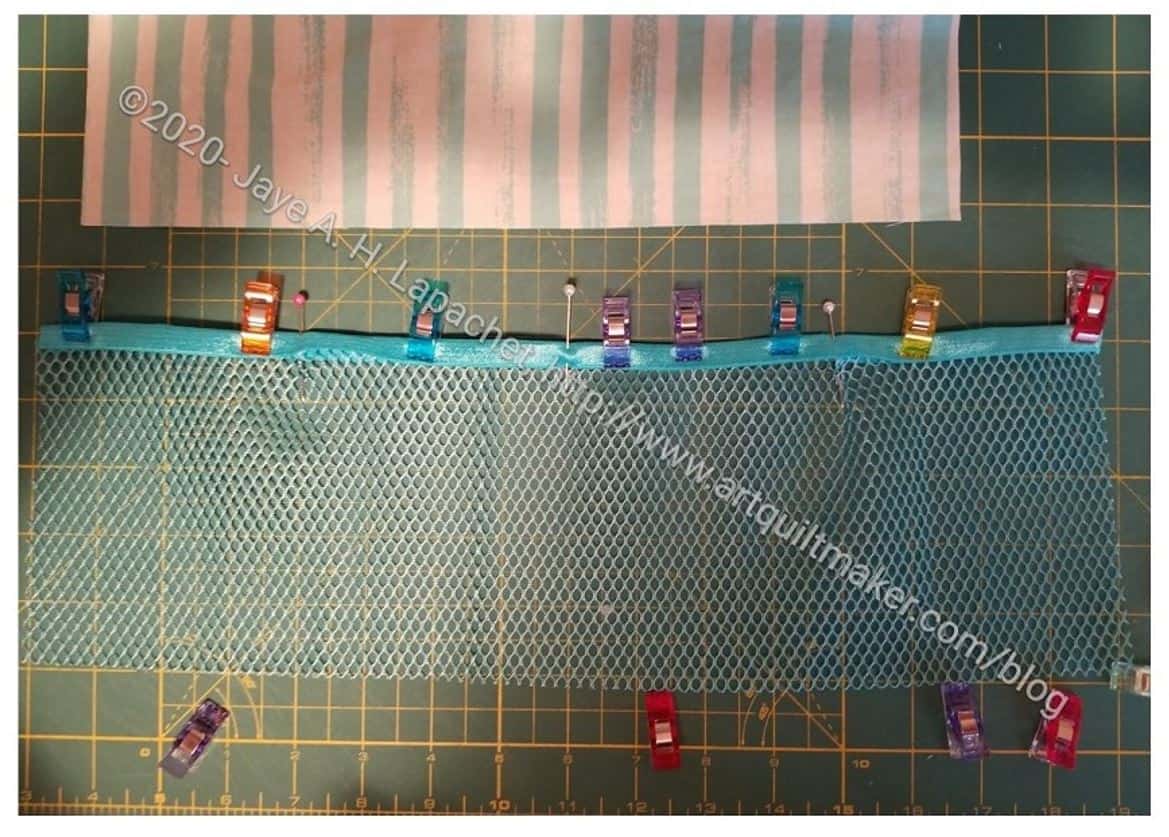
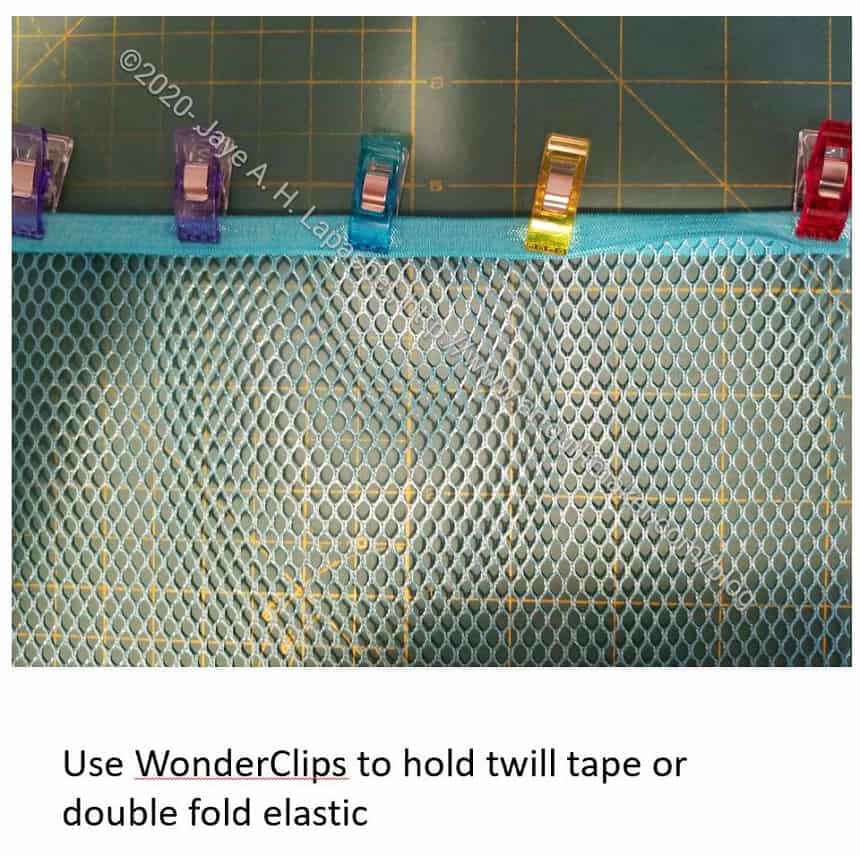
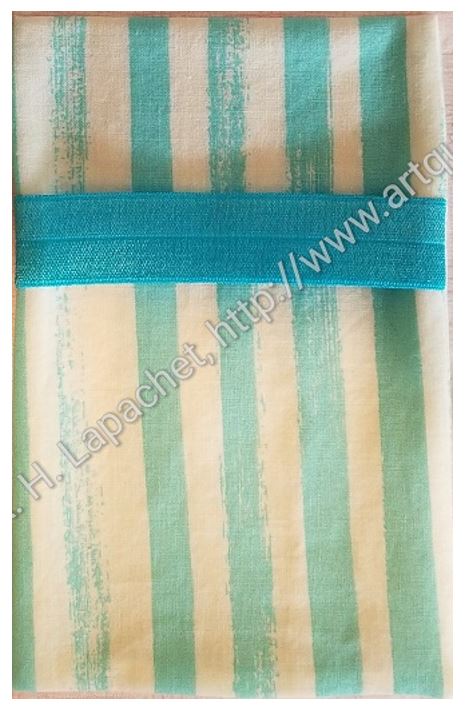
Cover mesh edges with double-fold elastic
Completed mesh prep
The center pocket has mesh, so cut the mesh and the double-fold elastic. The pattern doesn’t say, but you need to cover both long edges of the mesh with double-fold elastic or twill tape. I prefer the double-fold elastic.
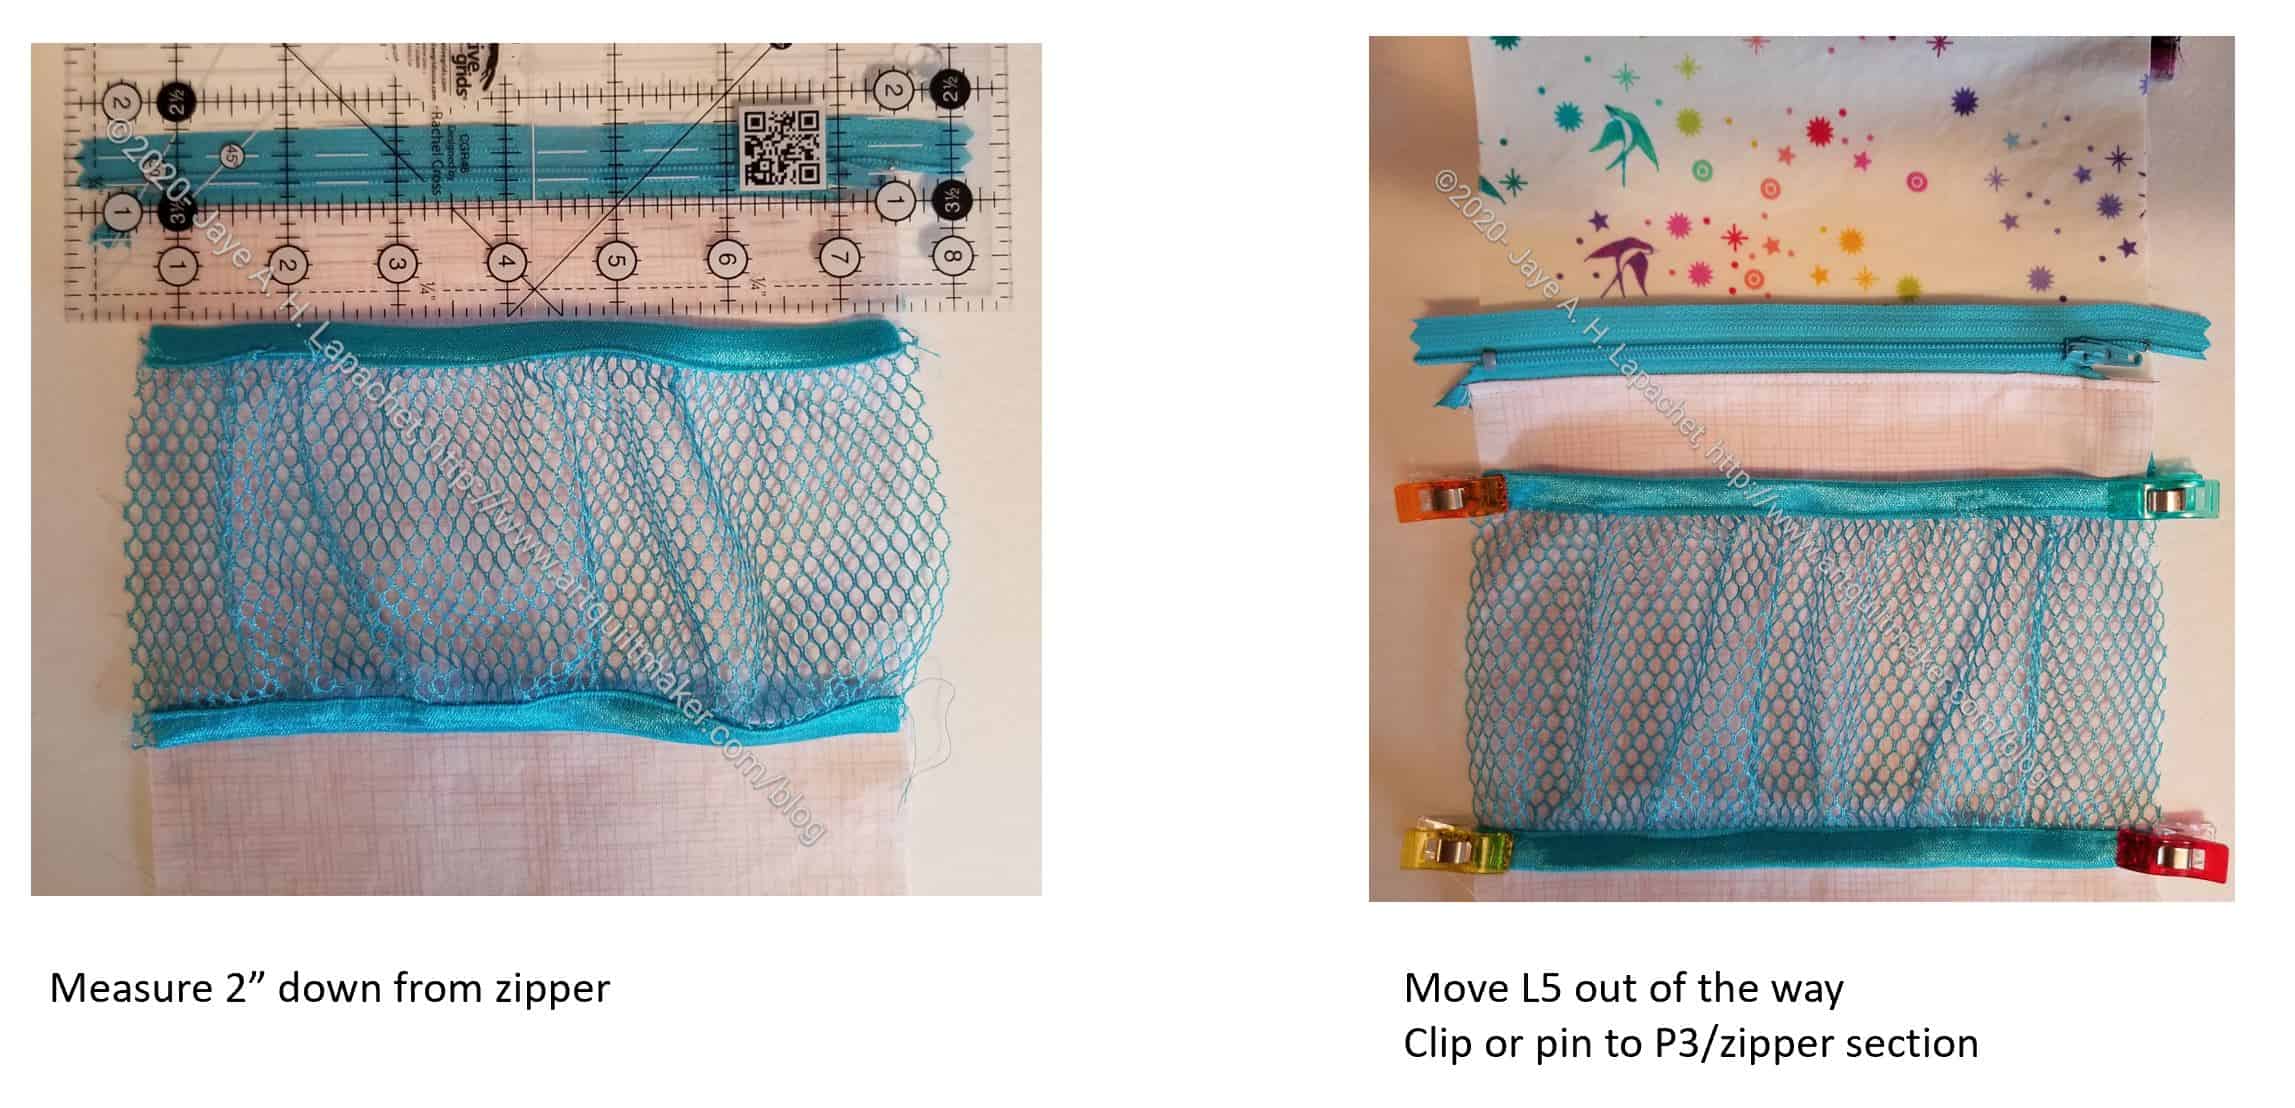
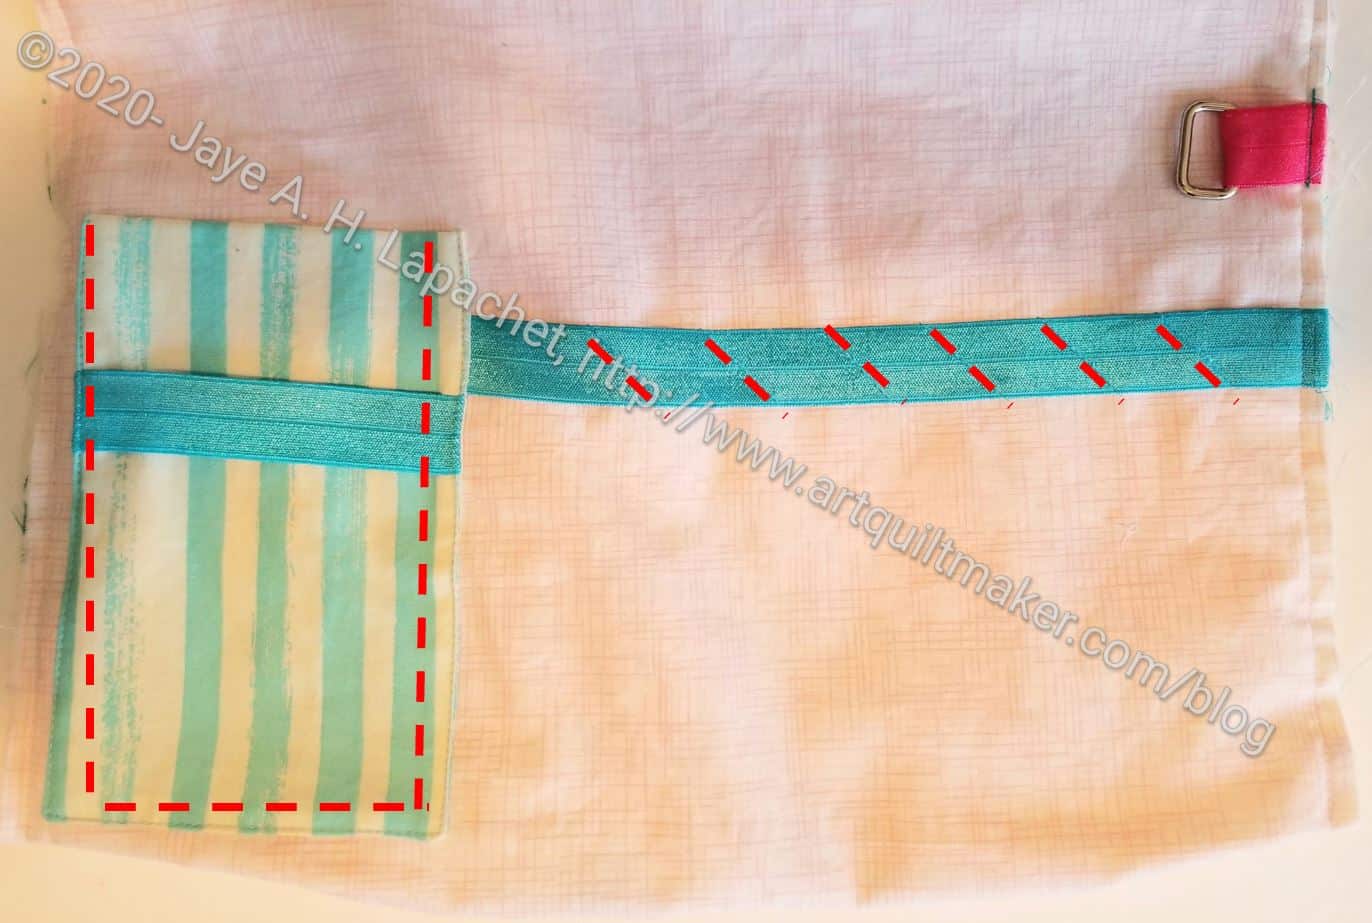
Add mesh pocket to center zip pocket
In order to attach the mesh pocket to the center zipper pocket, first mesh 2″ down from the zipper.
Move L5 out of the way (right photo above).
Clip the mesh pocket to P3/partly sewn zipper section.
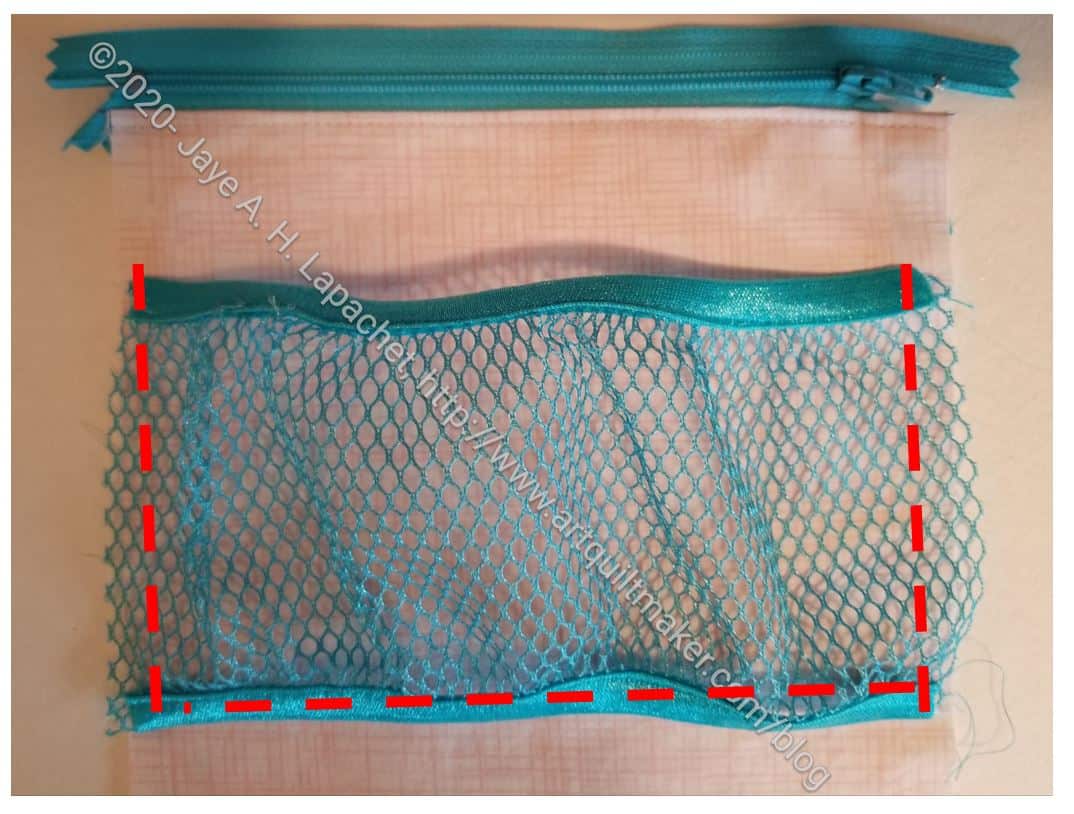
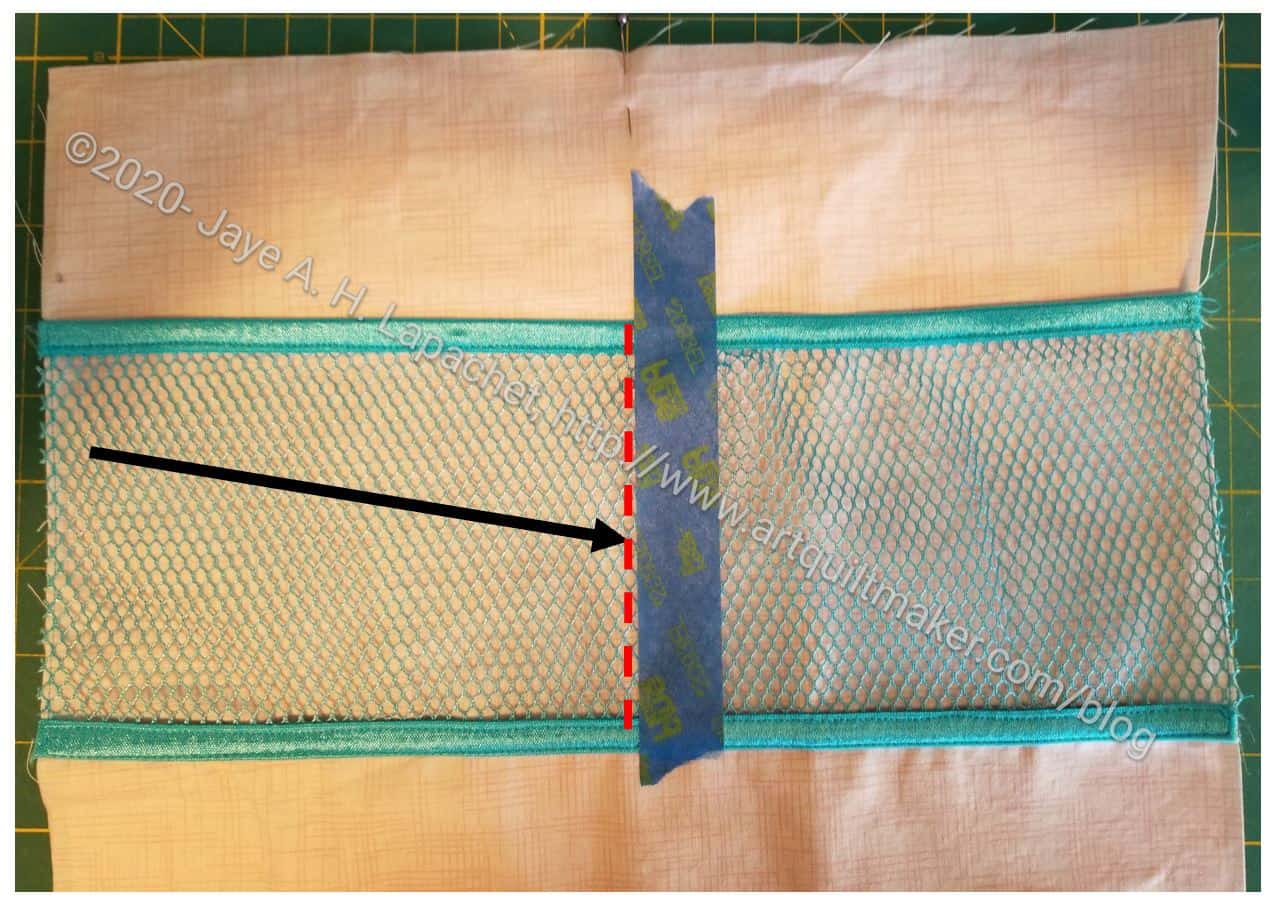
Sew around the mesh pocket
Leaving the top open (opening/top is closest to the zipper), sew around 3 sides of the mesh pocket. If you want to divide the pocket, mark as many divisions as you want with painter’s tape and sew very close to the painter’s tape without sewing through it.
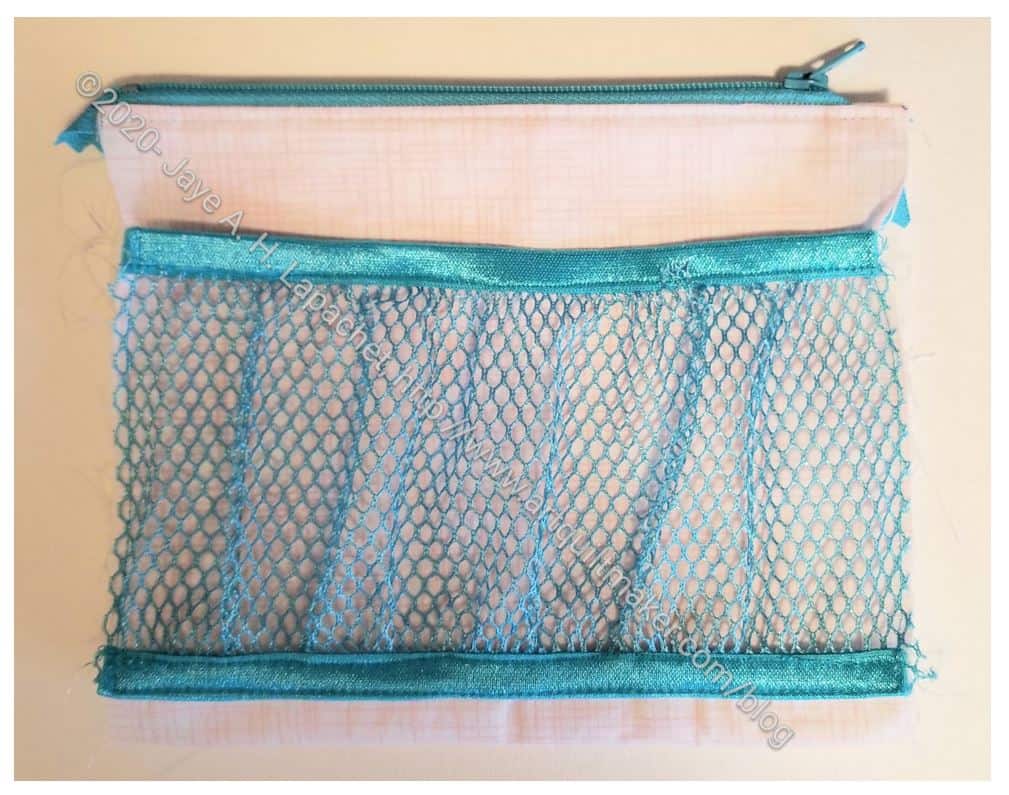
After you finish sewing the mesh pocket, finish the center section by layering the other sides of P3 and L5 with the zipper the way you did before and sew. You will be sewing more of a roll this time.
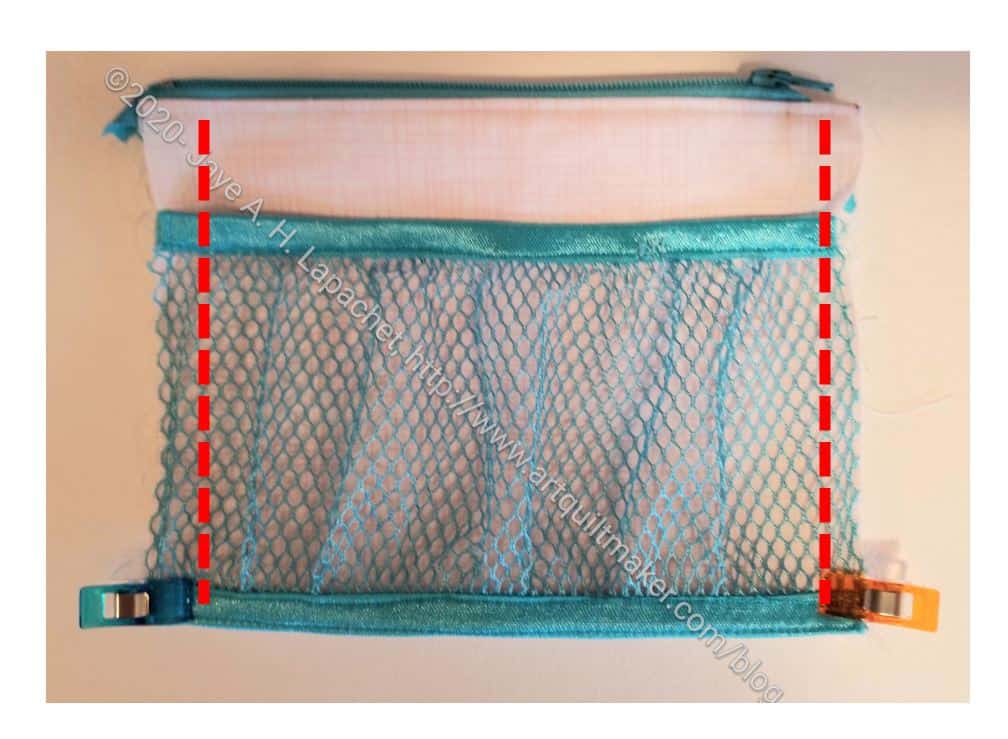
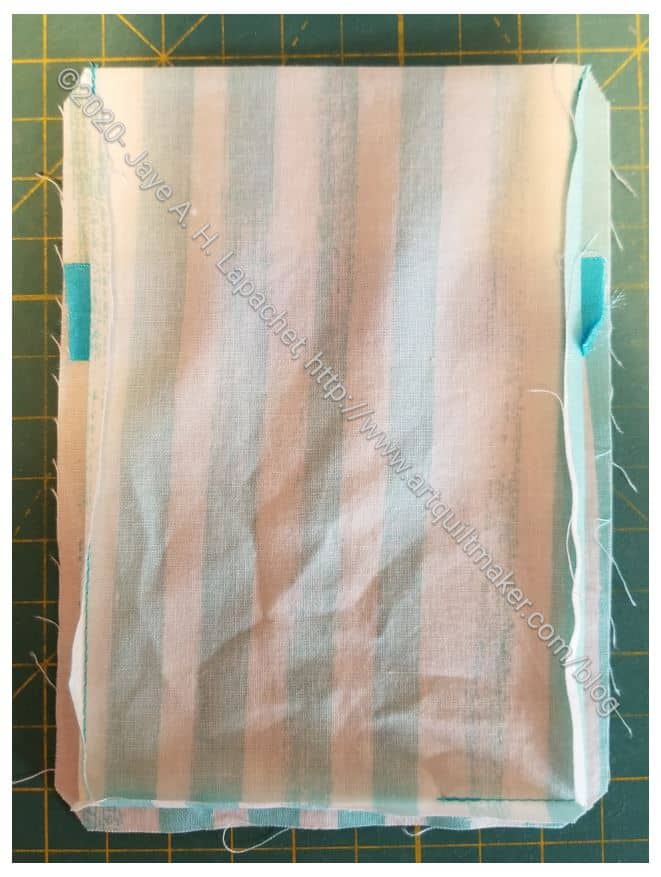
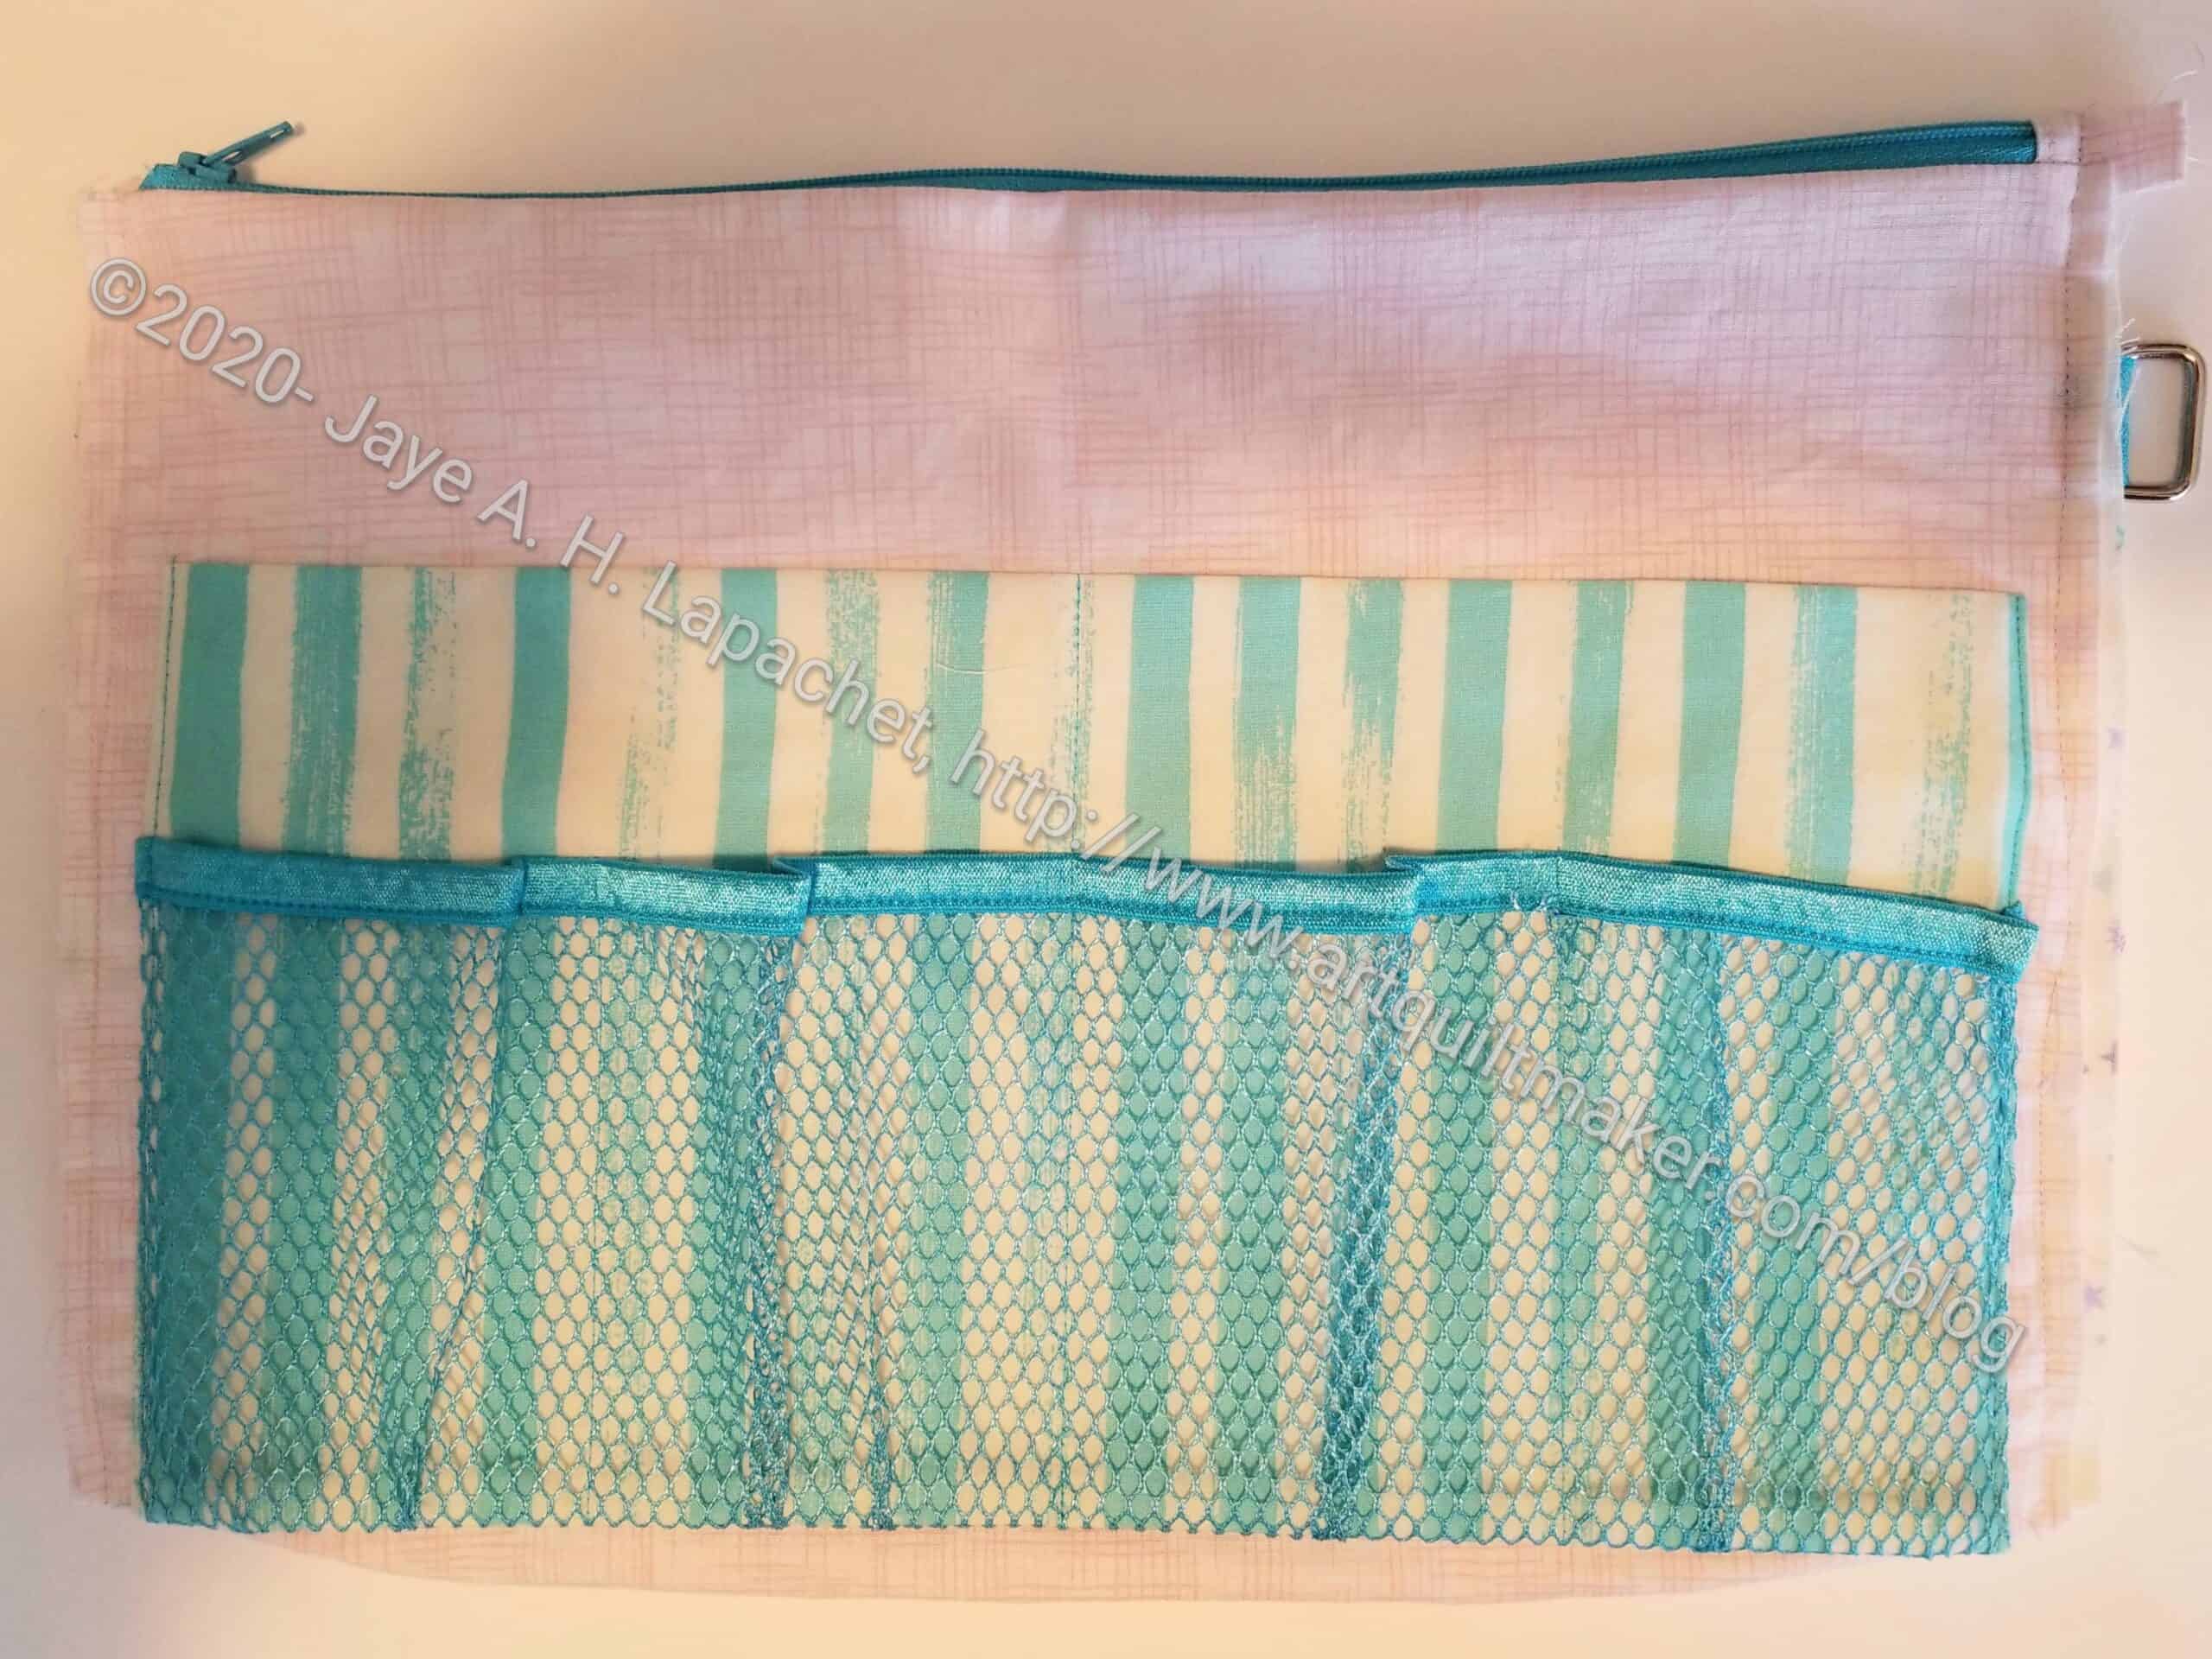
Almost finished center zipper pocket
Your finished center pocket will look like the above photo. You still need to make the pleat so you can add 3D items to the pocket.
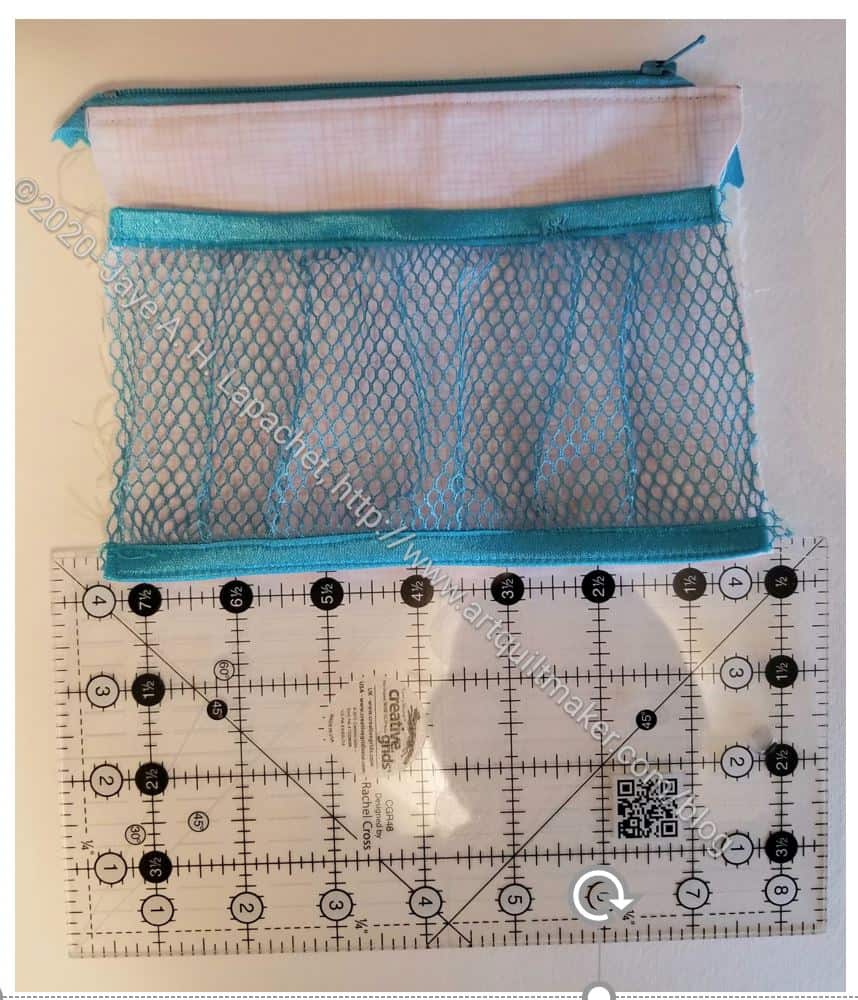
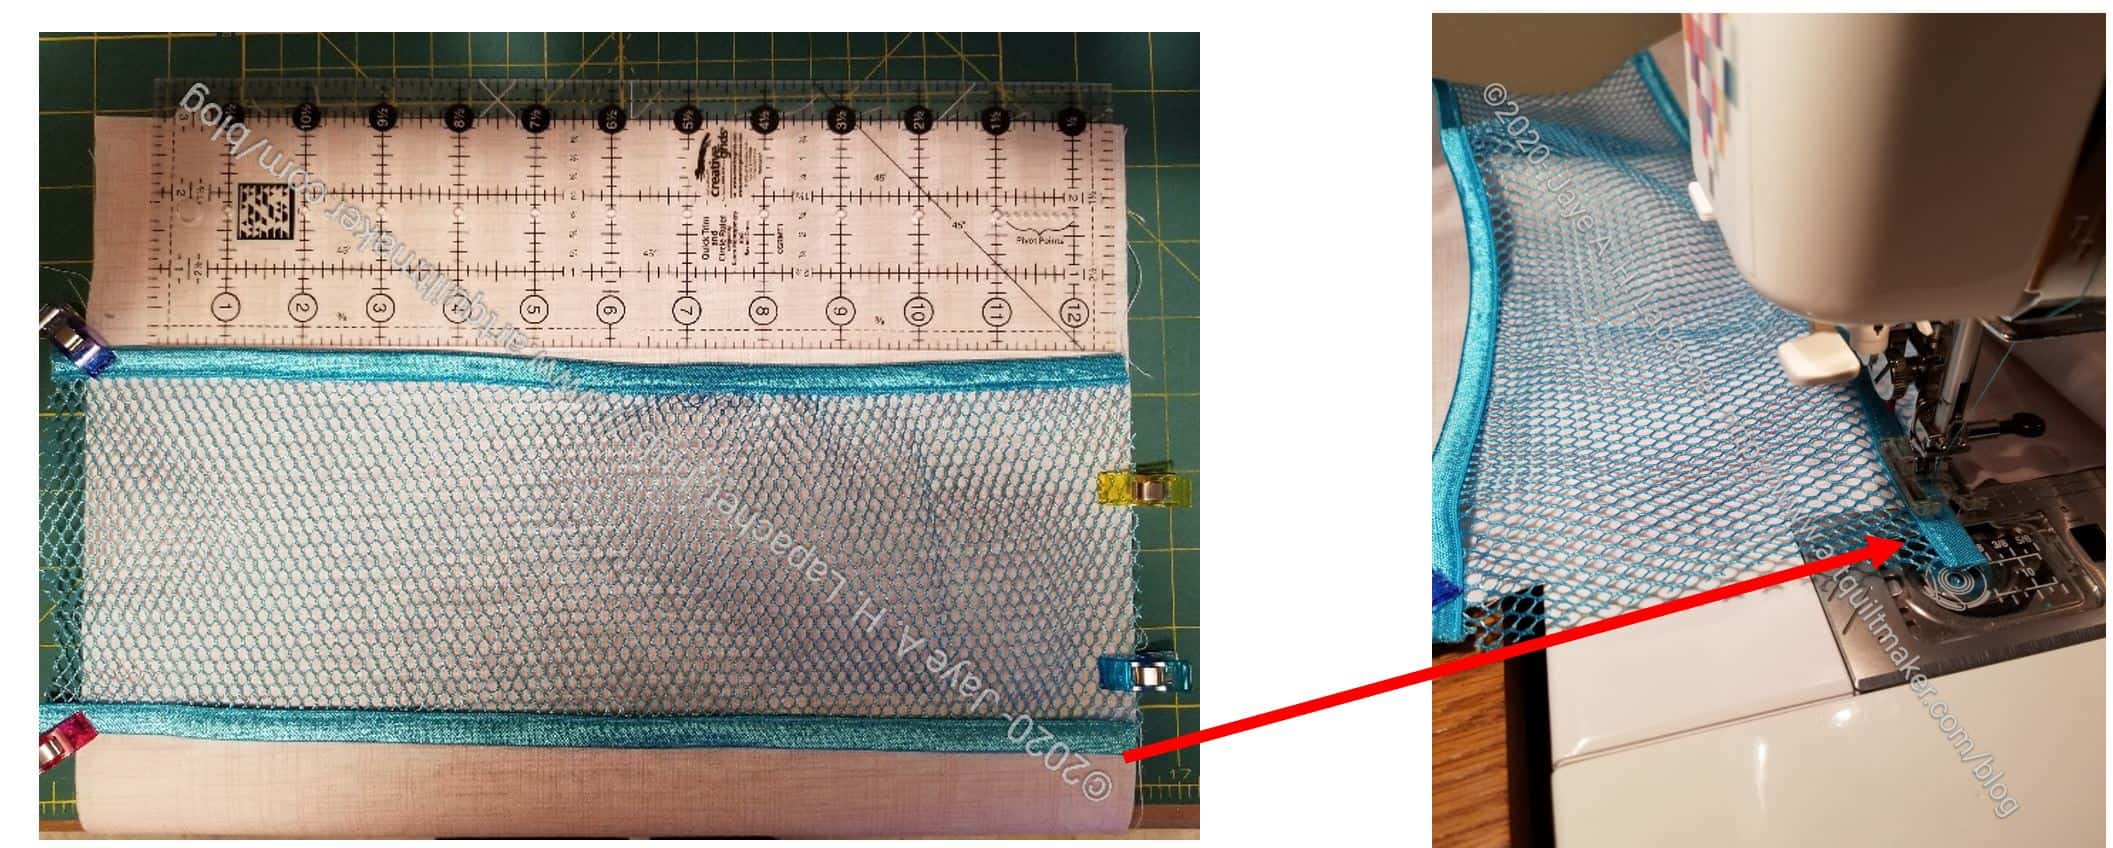
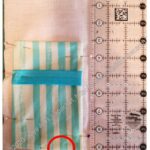
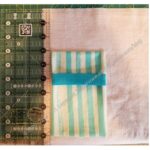
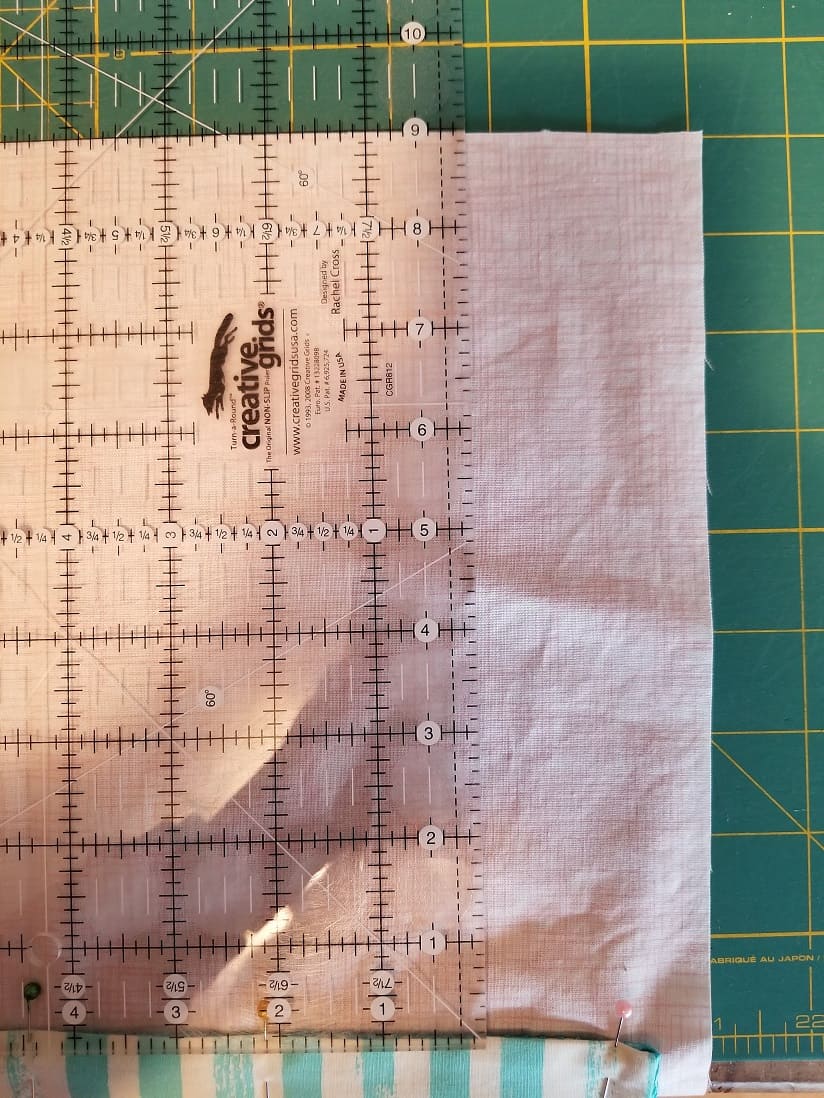
use ruler to measure for pleat
Stick your ruler 1/2in into the bottom of the mesh/zipper pocket to create the right sized pleat.
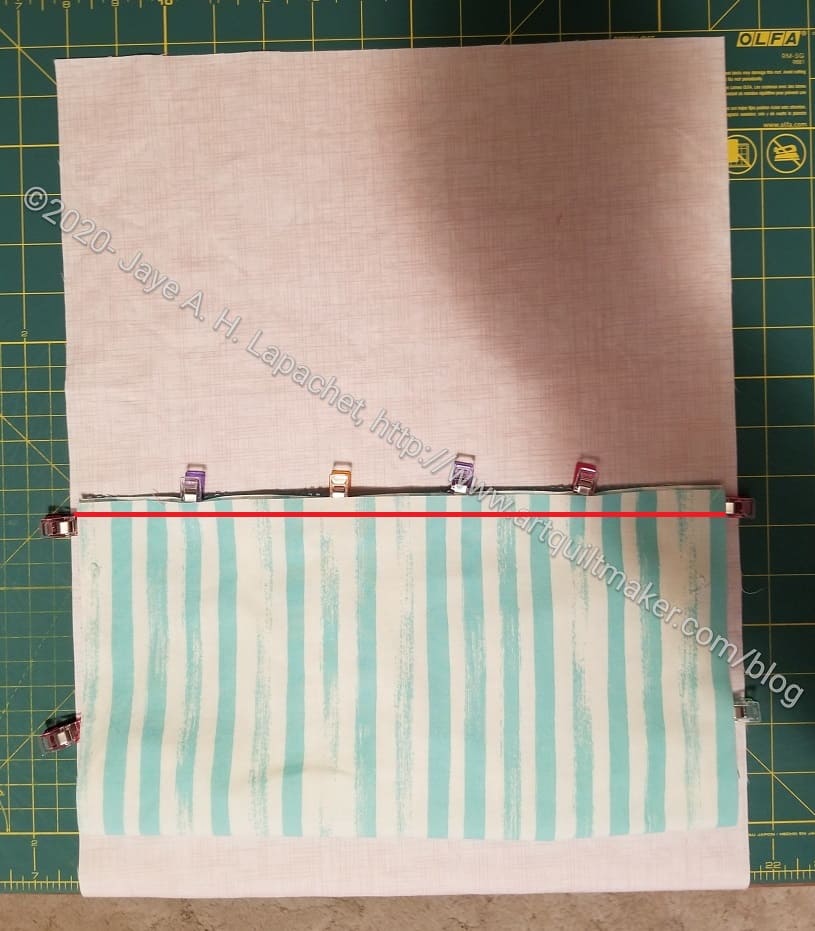
Clip and sew
Use Wonder Clips on the sides and the bottom to keep everything in place, especially on the top double-fold elastic. I didn’t take a photo, but you do want to put clips on the top double-fold elastic, because it tends to curl in from the mesh pocket wanting to curl.
Sew up the sides. These seams will be sewn again later, so you just need to sew enough to hold them in place until final assembly.
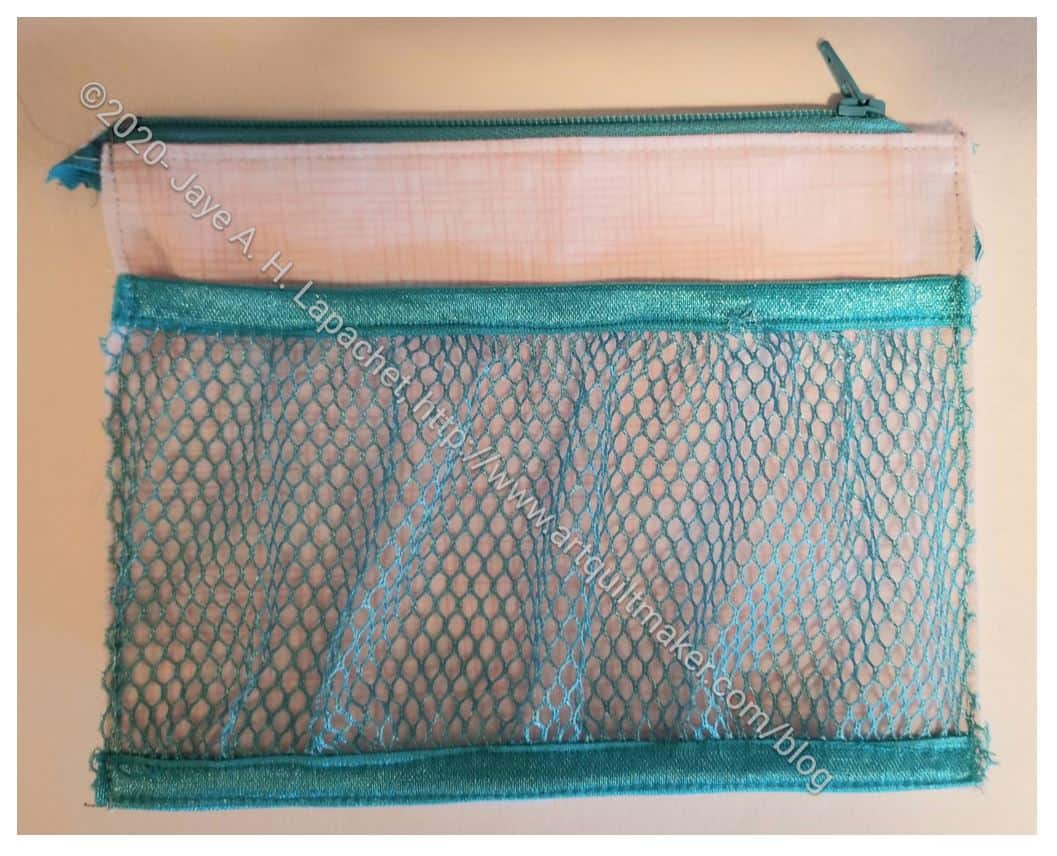
Finished interior center zipper pocket
Your center section is finished.
Next time we will work on the side Clippy pockets.
**I use affiliate links and may be paid for your purchase of an item when you click on an item link in my post. There is no additional cost to you for clicking or purchasing items I recommend. I appreciate your clicks and purchases as it helps support this blog.
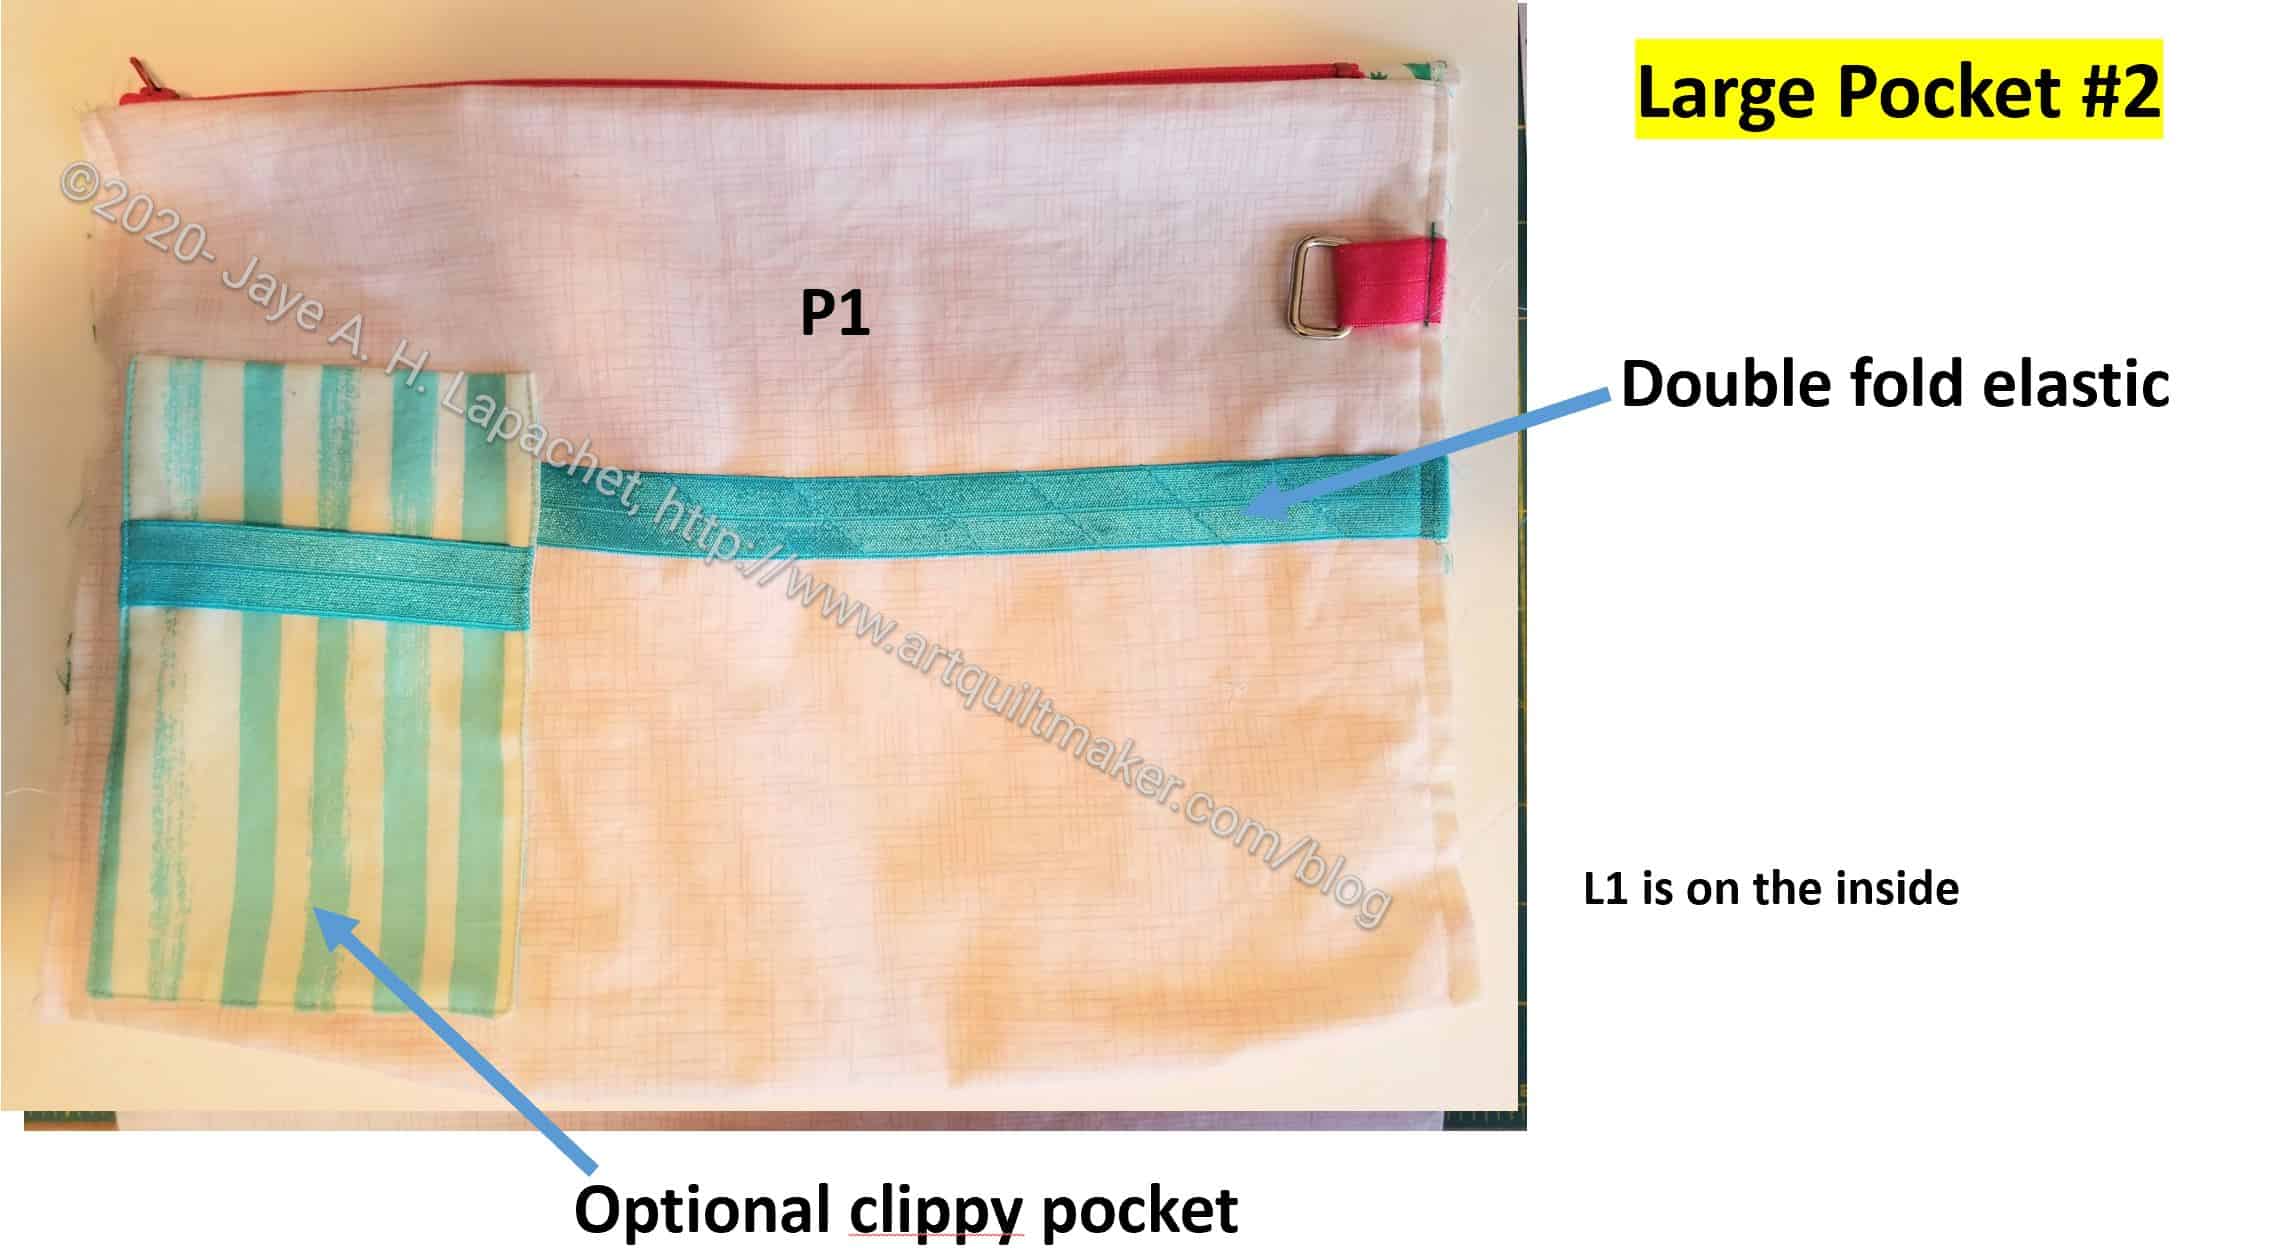
Recently, I posted the first part of the tutorial for the Large Pocket #2. That tutorial included a pocket that would help you organize your WonderClips.
Today we will finish putting together the second large pocket. As I said in the previous tutorial, the Clippy pocket is not part of the original pattern, but using that tutorial, you can easily add it to P1 and still have enough space for other tools.
Seal the edges of the mesh with doublefold elastic like you did on Large Pocket #1.
UCAB Bind Mesh Pocket
The first step is to bind the top of the mesh pocket. Take the fold over elastic and fold it in half. Use WonderClips to hold the elastic in place.
Using matching thread, sew along the edge of the binding closest to the mesh. I used a straight stitch.
Add Mesh pocket
Mark 3” down from the other side of the right side of P1.
Tip: Make sure, before sewing that both pockets (Clippy & Mesh) have their openings in the same direction up. When the two raw edges are held WST, both pockets should have their openings up, closest to where the zipper will be sewed.
Line up top of mesh with 3” line.
Sew bottom of mesh pocket to P1.
Mark with blue tape
Mark your pocket divisions with blue tape – make however many you want. I have two, separated by one line of stitching
Lay zipper on top of L1 with zipper pull facing up.
Line up P1 with Clippy Pocket on top of zipper right side down.
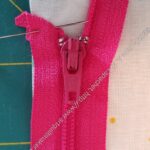
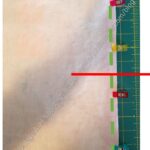
Natalie Patton does something really clever with her zipper. She folds the ends of the zipper tape at a 45 degree angle and pins it. This makes it look really neat and tidy once the zipper is sewn in.
Fold zipper end
Layer fabric with zipper
Zipper’s 45 degree angle
In the pattern (pg.10), she talks a lot about pinning, horizontal pins, etc. I found it to be kind of confusing.
The photo (left) shows how I interpret her instructions. I tried it and it worked for me. Sotak Handmade has a video where she adds the zipper using a similar method.
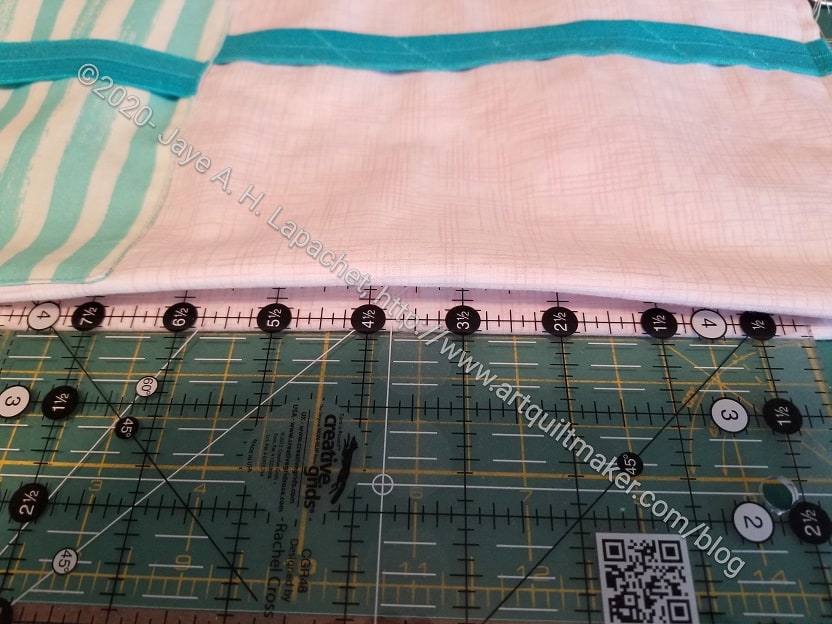
Once you have the zipper tape folded and pinned, continuing layering the last piece of fabric on top.
Three layers waiting to sew in zipper
The edges of the folded zipper tabs stick out a little bit from the side of the piece where you will be sewing. This is ok and how it is supposed to look.
Sew along clipped edge to secure zipper. I use my quarter inch foot, but you can use your zipper foot, if it works for you. Make sure you move the zipper out of the way as you sew so it doesn’t interfere with your seam.
Zipper’s 45 degree angle
Fold zipper end
Sew along second side of zipper
Layer second side of zipper
Open up three layers.
Top stitch near zipper. Follow the same directions for the second side of the zipper.
Measure pleat on the bottom
Pleat the bottom.
I use the ½” marking on a ruler to mark the ½”. Push it into the bottom.
Clip to keep it in place and sew along the edges using the seam allowance noted in the pattern.
**I use affiliate links and may be paid for your purchase of an item when you click on an item link in my post. There is no additional cost to you for clicking or purchasing items I recommend. I appreciate your clicks and purchases as it helps support this blog.
A few days ago, I posted the second part of the tutorial for the first Large Pocket needed to complete the Ultimate Carry All Bag by Natalie Patton. This is the tutorial for the second Large pocket.
Today we will start the second of the large pockets. The directions for this step in the pattern start on page 8, step 2 of your pattern.
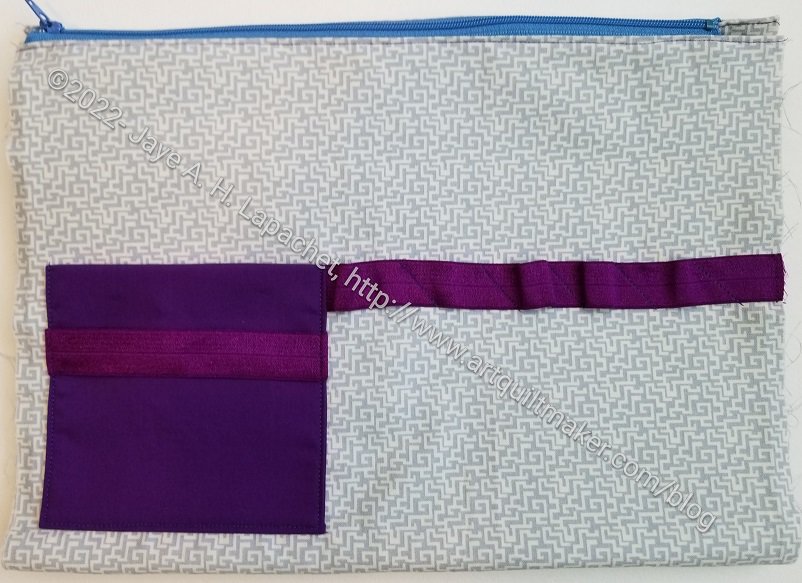
My version of this Large Pocket #2 includes a type of Clippy pocket that I added. The elastic holds your WonderClips and the pocket holds a rotary cutter.
Fabric and supplies layout
This Clippy Pocket is not part of the pattern, but I will share how to make it.
The picture shows all the pieces with which we will be working. If you want to omit my Clippy pocket, skip those parts of this tutorial. If you want to include it, make this Clippy Pocket before starting on the bulk of Large Pocket #2, but after you have cut all the pieces. Having the small bits and bobs ready makes the assembly of Large Pocket #2 easier.
Cut the pocket fabric 4.5 x 12.5”
Cut the SF101 interfacing 4×12
Apply SF101 to wrong side of fabric
Cut double fold elastic (you can also use a strip of fabric) 4.5” long. You can add two strips if you want more space for WonderClips
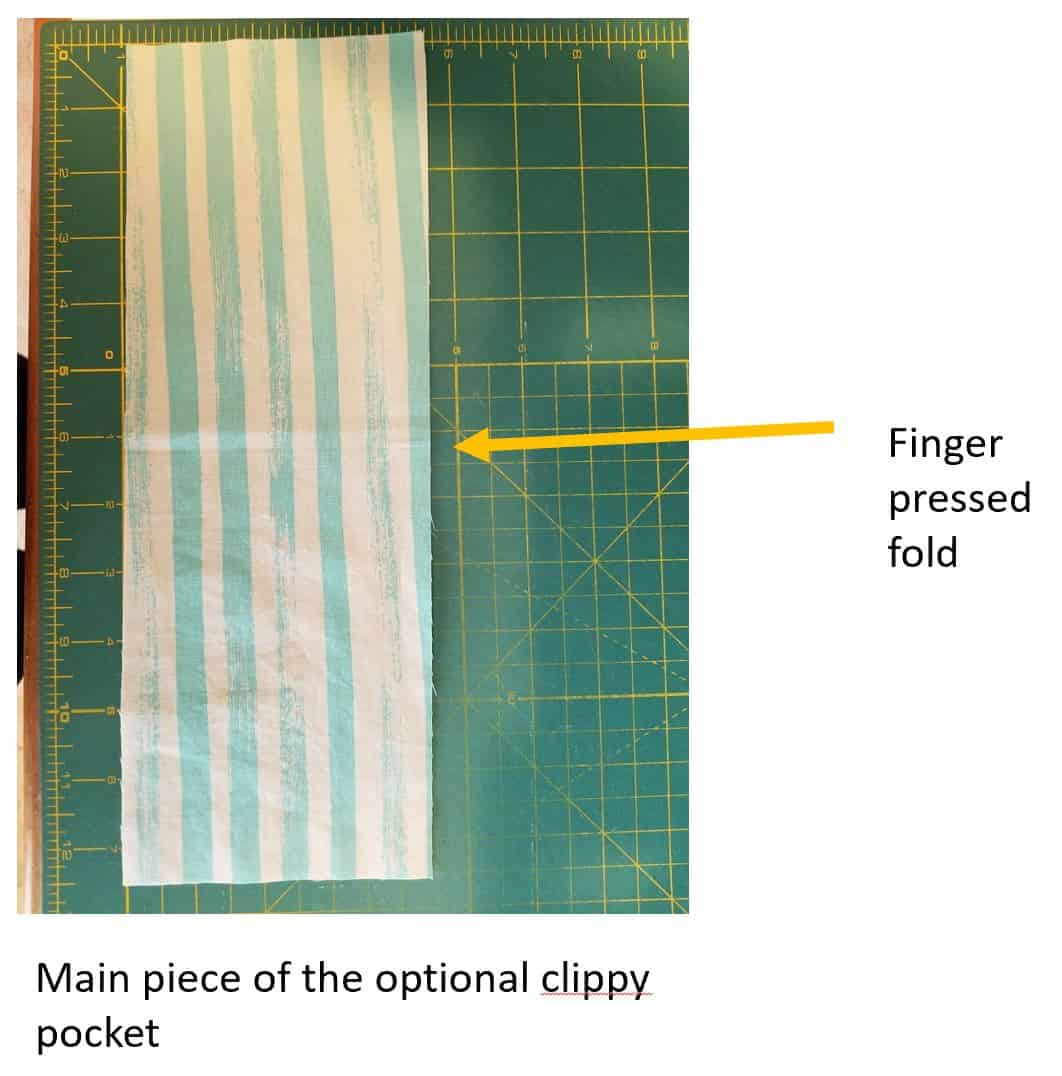
Clippy Pocket Fabric folded, finger pressed
Fold pocket fabric in half and finger press. You want the short edges to touch when you fold and finger press. The folded piece will be 4.5”x6.25 (approx.)
Pin RST with Elastic
Unfold and pin elastic to piece 1/3 down from the fold or 1 ¾” down from finger pressed center
Sew around edge
Sew around edge, leaving an opening the bottom to turn and avoiding the top with the fold.
Press Clippy Pocket
Press.
Clip corners Tip: try to press the opening seam allowances as straight as possible
Turn RS out
Turn RS out, push out seams, especially corners. Make sure seams are crisp, the press again.
Measure to place Clippy Pocket
Measure to place Clippy Pocket -2
Place Clippy Pocket in place on P1 by:
Measure 9” down from top
Measure ½” over
Place Clippy Pocket
Pin in place
Cut an additional piece of double fold elastic 9 1/8 – 9 ¼”
Measure down 3” from the top of P1. Place elastic in this location.
Tuck one end of the elastic under the Clippy pocket to hide the raw edge
Pin in place
Mark the elastic so that your tools will fit. At some point prior to this, I looked at all the tools I thought I would use and measured them to make sure they would fit.
Attach Clippy Pocket and divide elastic
Sew around 3 sides of the Clippy Pocket (not the top), ensuring that you catch the elastic in your seam.
Sew on your marks in the elastic
Add D-ring using a scrap of double-fold elastic or some fabric. Sew it in the seam allowance. I backstitch or go over the stitching a few times. This helps prevent the D-ring from becoming unsewn.
Leave long tails at the start and end of your seams, pull threads to the back and tie off with knots
If you are not adding the Clippy Pocket, cut your elastic 20″, mark and sew, following the directions on the pattern.
Check back in a few days for the rest of the tutorial for putting the large pocket #2 together.
Today we will finish the first of the large pockets.The directions for this step int he pattern start on page 8.
In the first part of this tutorial, we made the P2 pocket. We will continue from where we left off.
Tutorial:
Sew P2 to P1
Take your P1 fabric piece and your P2 pocket.
Lay P1 Face Up and Mark
Measure line 9” down from the top of P1.
Draw a light line with a Sewline** pencil. You can leave the ruler in place and adjust the placement of the pocket using the ruler, if you don’t want to mark your fabric.
Place P2 upside down on top P1. Line up the bottom of P2 with the 9″ line.
Pin the pocket in place.
Remove the ruler, if you haven’t already.
Sew across bottom of pocket
Using a 1/4″ seam allowance, stitch (see red line) across the bottom of the pocket ONLY. You may want to backstitch carefully or tie knots and sink your threads to secure.
N.B. In this picture (right), the pocket is unfinished. On your pocket, you will not need or being using the small clips show on the bottom of the pocket, which is in the middle of P1 in the picture.
Sew to secure P2
Flip the pocket up so you can see the mesh pocket. Clip or pin in place.
Sew down the center of P2 (red line), going over the mesh pocket to secure everything and make the final division in the center of the mesh pocket.
Sew down the sides of the pocket (blue lines). Leave long thread tails at the beginning and end of these securing seams. Pull the threads to the back of the piece and tie the threads off with knots. You can use a backstitch, but tying off the threads will look better in your finished bag.
Add Zipper to Pocket
Layer fabric with zipper
Lay L1 down face up/right side up.
Lay zipper on top of L1 with zipper pull facing up.
Line up P1 on top of zipper face down/right side down.
Natalie Patton does something really clever with her zipper. She folds the zipper tape at a 45 degree angle and pins it. This makes it look really neat and tidy.
Zipper’s 45 degree angle
In the pattern (pg.10), she talks a lot about pinning, horizontal pins, etc. I found it to be kind of confusing.
The photo (left) shows how I interpret her instructions. I tried it and it worked for me.
Once you have the zipper tape folded and pinned, continuing layering the last piece of fabric on top.
Three layers waiting to sew in zipper
The edges of the folded zipper tabs stick out a little bit from the side of the piece where you will be sewing. This is ok and how it is supposed to look.
Sew along clipped edge to secure zipper. I use my quarter inch foot, but you can use your zipper foot, if it works for you. Make sure you move the zipper out of the way as you sew so it doesn’t interfere with your seam.
Open up three layers
Top stitch near zipper.
Episode 4 of Natalie’s video is actually pretty good. I like the way she shows installing the zipper.
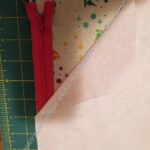
“Butterfly effect”Layer second side of zipper
The confusing part is putting the pieces you have already sewn together with the other side of the zipper. The photo above shows kind of how this looks. This is the step where Natalie talks about opening up the first sewn side like a butterfly (pattern pg.10).
L1 face up/right side up.
Zipper on top of L1 face up/right side up.
P1 on top of zipper face down.
Second side of zipper ready to sew
Sew along second side of zipper
Sew along clipped edge to secure zipper. I use my quarter inch foot, but you can use your zipper foot, if it works for you. Make sure you move the zipper -See red line in the middle of the second side? – out of the way as you sew so it doesn’t interfere with your seam.
Top stitch near zipper.
Make Pleated Bottom
The pleated bottom allows you to more easily store items that are 3 dimensional
Measure pleat on the bottom
Use 1/2″ marking on my Creative Grids ruler, stick the side with 1/2″ marking into the pleat to measure it.
Clip the sides (the ruler should not interfere) to hold it in place.
Remove the ruler.
This is where I add D-rings. In this case, I used leftover bits of doublefold elastic to stand in for a loop.
Sew up the sides. Make sure to catch the loop/D-ring.
UCAB episode 7 : very brief video showing how the piece looks after installing the pockets in the side panels
UCAB episode 8 :Brief video showing the finished bag. No sewing
**I use affiliate links and may be paid for your purchase of an item when you click on an item link in my post. There is no additional cost to you for clicking or purchasing items I recommend. I appreciate your clicks and purchases as it helps support this blog.