I finished the two Dogwood pouches at the Retreat. This is a worthwhile pattern as there are multiple sizes, but also a couple of new techniques to use in making your pouches.
Pouch F is the larger one and would be great for chargers and other small electronics. It went together very quickly.
The zipper instructions were a little tricky, but I watched the video (glad I brought my tablet to the Retreat!) and it was clear. I was actually kind of excited about the zipper instructions. They make a very cool finish to the zipper ends.
Finished: Dogwood Pouch-J
Pouch J is the smaller one. It would be good to corral small items in your handbag.
I found that the boxing of the corners was a different technique as well. I had to watch the video (Yay tablet, again!), which made the technique clear.
These are already off to their new home. I haven’t had a clear answer as to whether the Angel Mama likes her set of bags, but I feel good having made an effort to thank her somehow.
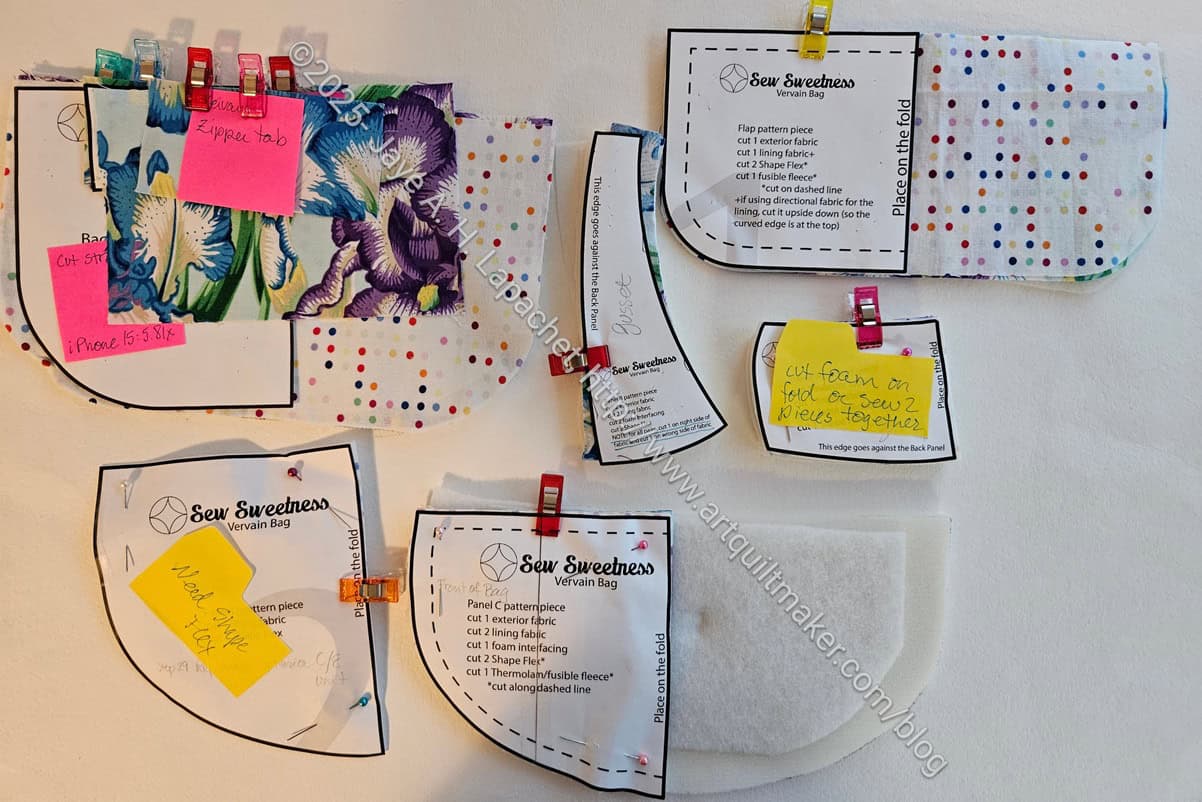
I started the Vervain at Sew Day the other day. The Vervain is a small belt bag (fanny pack). A front pocket on the outside and a lining zipper pocket on the inside lend storage space. The main compartment secures with the top zipper.
I am making this for my aunt, mostly because I have more iris fabric. She wants to use it to hold her cell phone on her daily walks I am happy to do it as she is my favorite aunt and I have wanted to make this bag.
Honestly, I almost cut out two of them. I restrained myself, though. I decided just to make the one and go from there.
Sew Sweetness has no templates for this one, which is a shame as the pieces are weirdly shaped. I used my scissors and that worked fine. I have a couple of pieces of foam I cut separately rather than on the fold. I’ll either stitch them together or cut a new piece on this fold this time.
These are some of the pillowcases I made at the Retreat.
Angel Family Pillowcases
I wasn’t planning on making them, but I was inspired by the chocolate fabric. I have been thinking of making the kids pillowcases and seeing the fabric at Family Threads was a little nudge. Knowing I had 2.5 days to get them done made the weekend a good opportunity. I don’t need another small project hanging around.
I chose some of the V&Co Galaxy fabrics for the cuffs. I wanted the pillowcases to be mostly equal so the kids wouldn’t fight. I like to call the chocolate pillowcases “Sweet Dreams.”
I used different bodies for the older kids. One of them really likes soccer and the other is really grownup, so I wanted to make him a pillowcase that was a little more sophisticated. The older boys got the same cuffs in different colors.
I wasn’t able to wash the fabric and I was pleased that I didn’t have any kind of reaction to ironing the unwashed fabric. I am giving them some Color Catchers** and strict instructions to wash them in hot water with the Color Catchers so they don’t bleed on their other laundry.
**N. B. : Obviously, you should shop at local quilt shops and small businesses. However, if you are too busy or can’t find what you need there, I use Amazon affiliate links and may be paid for your purchase of an item when you click on an item’s link in my post. There is no additional cost to you for clicking or purchasing items I recommend. I appreciate your clicks and purchases as it helps support this website.
I sent another pillowcase off the other day. Well, really, DH did it for me. I was rushed off my feet last week and he had Friday off, so I asked him to do it for me while I left for the retreat.
The nephew should have this one by now.
I didn’t know what to call the main fabric, thus the Shark’s teeth moniker.
The other day I mentioned Lee Ann’s Classmate Tote. I wanted to share SueG’s bag with you. It is the other one I made.
As you can see, I made it from the same fabric (Carrie Bloomston) with which I have been making her other gifts. I really hope she likes it as I still have enough to make some other gifts. This does mean that she and Carrie have a couple of bags that are different from each other. I have tried to make them the same bags, but Carrie is not on the board, so she didn’t get one of these. Christmas? We’ll see.
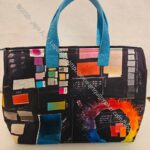
SueG’s Classmate Tote – exterior
One of the things *I* like about this fabric is the color wheels. I know I have mentioned it before. It is very handy to have a color wheel with you. I didn’t manage to get one of them on the front, but I was able to get one on the back – a whole color wheel. I am thrilled.
This is a very active print, so I wanted the accent fabric to work with the activity. I chose the black and white stripes. They do add a lot of movement, but I don’t think they compete with the Carrie Bloomston fabric.
It is great to use a whole piece of fabric for the exterior, but I wonder, given the design, if I could add another slip pocket on the outside? Considering how the bag closes, it might not work, or I would have to have a pocket that closes. Something to think about.
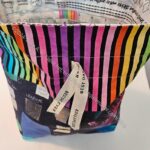
SueG’s Classmate Tote – interior
As with Lee Ann’s the inside is very useful. I, again, chose the white version of the Carrie Bloomston fabric and was able to fit most of 3 color wheels inside. It is a bit over the top and I probably should have chosen a less active print. Still, it would be useful for a travel kit.
I showed photos to someone who said it looked like a jewelry organizer.
SueG’s Classmate Tote – pen holder
One thing I did differently from the pattern is use some double fold elastic for the pens and pen-like tools holder. The pattern calls for making a pocket (see example) using fabric folded and sewn. I didn’t like the thickness and I thought something like a simple strip would be more useful. The blue strip replaces the pocket. As you can see, I varied the size between the stitch lines so even a small rotary cutter could fit. I triple stitched so it would be tight and wouldn’t pull off with heavy use. Fingers crossed it works.
SueG’s Classmate Tote – half open
The closure is a part of the pattern I am not 100% happy with. I thought about what I could use to replace it, but didn’t think of anything, so I went with the directions in the pattern. I don’t know if I’ll make this again, but I’ll have to think about a different closure if I do.
I did fussy cut a bit to get the color wheel, as mentioned above, but also make sure something interesting was on the bottom so it looked good like I have shown in the photo above.
2024 BAM Officers
Carrie did a great job wrapping, as usual. She is amazingly gifted at wrapping. I am always so impressed with what she comes up with.
The Chrysanthemum print by Philip Jacobs is one that Cyndi gave me after she visited an estate sale where she found fabulous fabric on offer. This is a colorway I don’t often buy. As I said the other day, I wasn’t sure whether Lee Ann would like it, but these colors spoke to me when I thought of her. I’ll have to see about finding some more of this fabric for her next bag so she has a matching set.
Lee Ann’s Classmate tote – exterior
The outside is one continuous piece and I think the fabric is shown very well.
As you know, these colors are a little difficult for me to work with. Not as difficult as brown, but still hard. I am glad this is a Phillip Jacobs fabric as it has rich layers of color. It also makes me think of Fall, autumn colors and Thanksgiving.
Since I don’t have a lot of these autumn colors, or don’t think about combining them, I was also pleased that the yellow I chose for the folds and the binding. The color fit with the Phillip Jacobs print very well.
Lee Ann’s Classmate tote – in/exterior
For the inside, I used a poppy print I bought in Sacramento in 2017, and also some Tula as I didn’t have enough of either.
Normally, I would have used the same yellow for the folds on the inside, but, again, I didn’t have enough fabric. There is a little bit of “making it all work” going on.
Lee Ann’s Classmate tote -interior
I have plenty of zippers, but I didn’t have all the same colored zippers, so I chose a couple of different hues in the orange/sunshine yellow range.
There are 5 pockets you can see in the picture. Under two of the pockets, slip pockets provide additional flat storage. I think a 6 inch ruler might fit in the middle area.
2024 BAM Officers
Carrie did a great job wrapping, as usual. She is amazingly gifted at wrapping. I am always so impressed with what she comes up with.
It’s officer gift time for the guild again. Since I organize the gifts, I get to decide what bag we will make. The Classmate Tote** is the bag of the year for the officers.
This is a small project bag the officers can use for a small flat project, like English Paper Piecing, or that they can use for tools and supplies. I wanted to make this pattern again after making one for Gerre and one for Lindsay. I also thought it wasn’t too big, but had a useful design.
I initially started writing this post back in December after I spent some time one day cutting for both bags. I know several officers read this blog, so I decided not write about the process as I didn’t want their surprise to be spoiled.
We gave them the bags yesterday. We delayed the thank you gifts until all of the officers were at the meeting.
Lee Ann’s Classmate tote
Mary C and I made two bags each for the officers. I’ll have to recruit more people next year as I struggled to get mine done.
I wasn’t sure what fabric to use for Lee Ann’s bag. I wasn’t originally scheduled to make it, but picked it up when another member couldn’t do it. This Philip Jacobs fabric spoke to me and I really hope she liked it.
Sue’s Classmate tote
For Sue, I used the fabric I have been using for bags for her and Carrie for the past year or two.
I am pleased with how they both came out.
Mary, as usual, did a great job on her bags.
MaryC’s Classmate for Melinda
MaryC’s Classmate for SueS
**N. B. : Obviously, you should shop at local quilt shops and small businesses. However, if you are too busy or can’t find what you need there, I use Amazon affiliate links and may be paid for your purchase of an item when you click on an item’s link in my post. There is no additional cost to you for clicking or purchasing items I recommend. I appreciate your clicks and purchases as it helps support this blog.
I was very pleased to make this Emmaline Retreat Pouch for Carrie for her birthday.
I decided to make one when I ran out of time to make her a Classmate Bag. The other thing that helped me decide was the several Retreat Bag frames I have stashed in Quilts Illustrated Tool Tote, where I keep my bagmaking hardware.
Retreat Bag for Carrie – top
I used the Color Theory fabric by Carrie Bloomston, which is the fabric I have been using for her gifts.I have some random pieces that are cut from yardage, but still good sized that I was able to use.
Retreat Bag for Carrie – side, frame detail
The whole project went really quickly. I made the whole pouch in about 3 hours while I cooked dinner during part of the making. I did finish the pouch later in the evening. It requires a frame so I had to prepare and insert the frame, then sew up the hole.
Retreat Bag for Carrie – interior
The frame means that this is an Open Wide or Wide Mouth style pouch. It is great for seeing everything you have stashed in the bag.
Carrie’s Retreat pouch – veer zipper
Carrie’s Retreat pouch – veer zipper
I am super pleased with the technique they use to veer the zipper. It made that process SO easy and it looks great. I have to remember it and try to use is on other bags. The only other pouch I can think of offhand that veers a zipper is the Cotton Candy pouch and that is a different sort of technique.
I thought it would take me longer, but am glad I was able to get it done quickly. Her birthday was a week after I made it and I had to fill and mail it as well. Carrie is super generous and I could never match her generosity, but I can make pouches and bags.
This is a free pattern, so go and take a look. Make one and tell me what you think.
Today is International Women’s Day and I am celebrating by sending the bag to Gerre for her celebrations.
Sugar Skull Retreat Pouch-small – top view
This is the smaller version than I made for Gerre before. They are a matched set now, which I always like.
Sugar Skull Retreat Pouch-small – zipper end
I like the way all parts of this came out. The zipper ends came out especially well. I left a little space between the end of the zipper and the end of the fabric, which made it easier to sew.
I am still thinking about how to incorporate the technique used for veering the zipper in other patterns like the Cotton Candy pouch.
Sugar Skull Retreat pouch – interior
I chose a text print for the interior. I haven’t been using this particular print for Old Town, because the text is in pink. I love it as a fabric, though, and am really glad I can use it for this pouch.
This one came out really well and I am pleased, but this is a great project. I still want to try enlarging it and using a border print, as discussed a few months ago. I haven’t had the chance as I am caught up in making gifts.
I sent off two quilts to a great niece and nephew. I made two lined drawstring bags as gift bags and quilt storage bags. Sadly, I forgot to take a picture of one of them, but I hope my nephew will be able to do it for me.
The other bag I made for his sister was made from some of the V&Co Confetti dot ombre. That one came out really well as I had big pieces to use and didn’t have to do any piecing. That bag will house the Hugs and a Kiss quilt.
Sheesh! March already. Can you believe it? I can’t.
Passport Pillowcase
A new month means a new pillowcase. This month I am sending off the Passport pillowcase. This is one of the travel pillowcases I made with the new fabrics I bought last month.
With this pillowcase I sent a note encouraging my nephew to get a passport, if he doesn’t already have one.
I started another Day Trip Cell Phone Wallet almost immediately.
This one, as you can clearly see, is for my mom. I want her to be able to carry her cell phone while leaving her one free hand. Now that she is moving around more and using her cane more, she might need a free hand to hold a banister. I tried something new with the strap, which I’ll talk about later and am in the process of working through the first steps.
The one thing I am trying on this one is to cut the foam a little smaller in order to reduce the bulk in the seams.
I am so excited about finishing this bag! I am not sure that is the right way to say it, but it has been a long time in coming. As mentioned, I bought Minikins Season 2 for the express reason of making this bag. Then, I was intimidated and didn’t feel up to making it.
A few years have gone by, and I have made several bags. This bag seemed right for a gift. I guess I was ready.
The bag was a challenge, but only because of the many layers, not because of the directions. The process is actually very easy. With the pattern and the video, it wasn’t hard.
Finished: Day Trip Wallet – interior
This bag is, basically, a small wallet that fits your cell phone. You could put this into a larger bag, but then take it out when you don’t need the whole bag.
This would be great for doing that since the strap is detachable. You could store the strap elsewhere or in one of the inside zipper pockets and take it out as needed.
Finished: Day Trip Wallet – exterior pocket
This is the first one that I have made, but I hope to make more. I wonder about the size of the flap for the cell phone pocket. I wonder why it is so small. It might interfere with stitching the zipper. I have asked in the Sew Sweetness group to see what others say.
I was a little worried that the pattern was designed when cell phones were smaller and a modern phone wouldn’t fit. I tried my large-ish Samsung phone in the pocket and it fits just fine. Whew! This is good as the bag is not that large and I wouldn’t want it to be enlarged so much that it wouldn’t fit in the larger bag mentioned above.
Finished: Day Trip Wallet – interior detail
The inside has two sides, both with a zipper pocket and several card slots. Behind the top card slot could be a spot for cash.
I added the optional D-ring on the spine so there would be a place to clip keys.
I also used two different colors of zippers in order to give the recipient a visual cue as to where she stashed something.
Hindsight Day Trip Cell Phone Wallet
I think I could probably have put another cell phone pocket on the other side of the bag exterior. I am not sure how useful that would be, though more pockets are always better.
I am pleased with how this came out and am cutting out a second one. This one will be for my mom who needs something for her phone so her hands are free to maneuver her walker.
I am pleased to say that the Day Trip is progressing much better than I expected.
As mentioned, I was anxious about the difficulty of this project. I am carefully following all the directions and watching the video accompaniment when I have even a sliver of doubt. I am not having any problems! I am so excited.
In some ways, this is a meditative process for me. There are a reasonable number of pieces and I was able to cut them out relatively quickly. I decided that I wasn’t going to skip steps to get to the sewing faster. That attitude made the sewing, once I finished all the prep, go much faster.
Day Trip: Magnetic snaps
It has been awhile since I installed magnet closure. I added some Decovil Heavy scraps behind both pieces to reinforce the snaps. I hope they will hold.
Sara has a really good tip in this pattern about using the round template/reinforcement thingy that comes with the magnet closure for placement. It is so obvious yet I never thought of it.
Day Trip zipper installation
The cell phone pocket (above) is complete. I am working on installing the zipper that closes the whole bag. I had to cut the zipper to the right size. I really need to make some of those Center Street Quilts heart pouches in order to use up some of my leftover zipper pieces. This is a difficult part as the zipper really doesn’t like going around corners, but I went slowly and persevered. It’s the same challenge all the time. Am I getting better? Maybe. I should be after all those Hackney pouches.
I am really jealous of that skinny quarter inch foot Sara uses. I think it would make going around those corners easier.
At Bag Club on Saturday we talked about installing an interior zipper pocket. I did sort of a theoretical tutorial using the Sotak Handmade Purse Organizer as an example. Since it was already made, there was a lot of imagination required.
Day Trip: one interior zipper pocket
Funnily enough, I had to make two of these types of pockets on Sunday! They are a little fiddly, but really easy. I use Sara’s zipper pocket ruler for the measuring and drawing the box. She is not restocking her acrylic templates, so get them while they are still available. I checked other places and can’t find one like Sara’s. I found one from Arc Expressions (no affiliation) that I think would work, though you would have to use another ruler to measure pockets on larger bags.
Anyway, talking through the pocket installation on Saturday was really helpful on Sunday when I went to make the pockets. I had an idea in my mind about what I was doing. I made one (or more??) on the most recent Superbloom, so I was in good shape. I like having the process firmly in my mind.
One of the best things about these pockets is you can pull the bag right side out through this pocket. I love it when designers use that technique. You can add these pockets to almost any bag with a lining.
I am well on my way. Get this pattern and make one!