I finished Lil Sissy’s birthday gift over the weekend and was able to get it off in the mail in time for her birthday, which was yesterday.
She writes a daily journal entry on a manual typewriter. While I plan to go back to Paris fabric for her soon, I saw this typewriter fabric and thought it might tickle her.
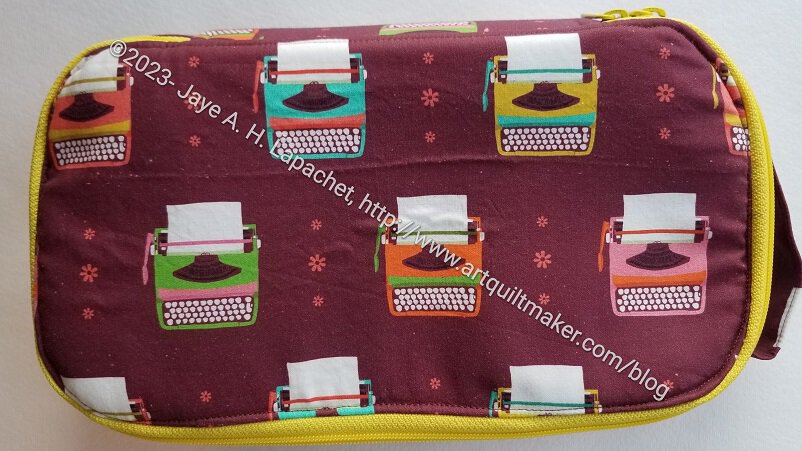
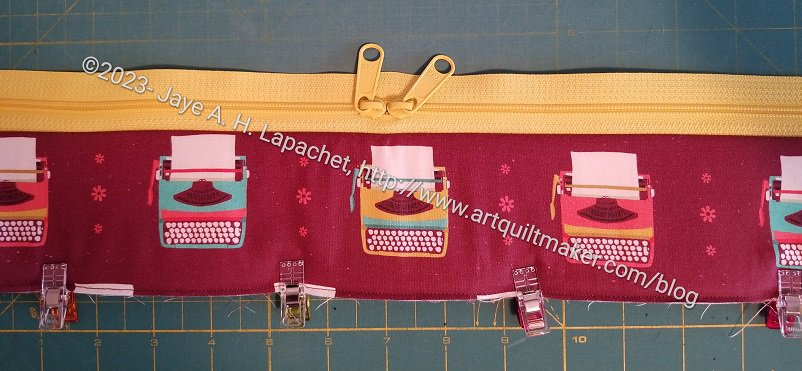
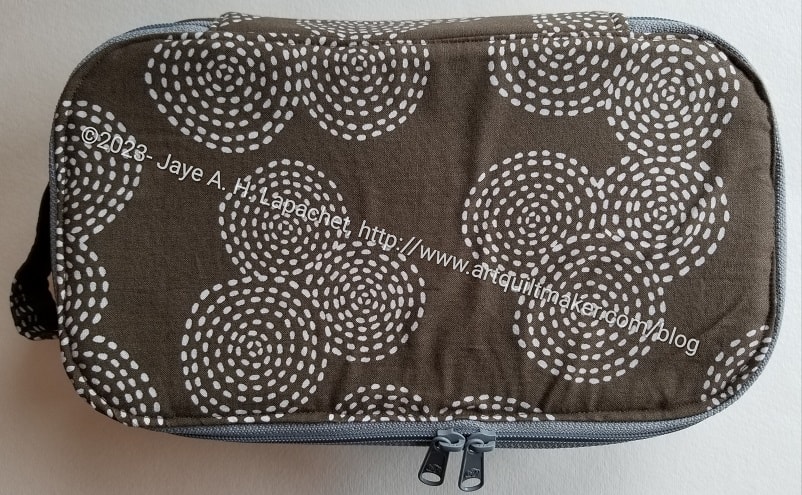
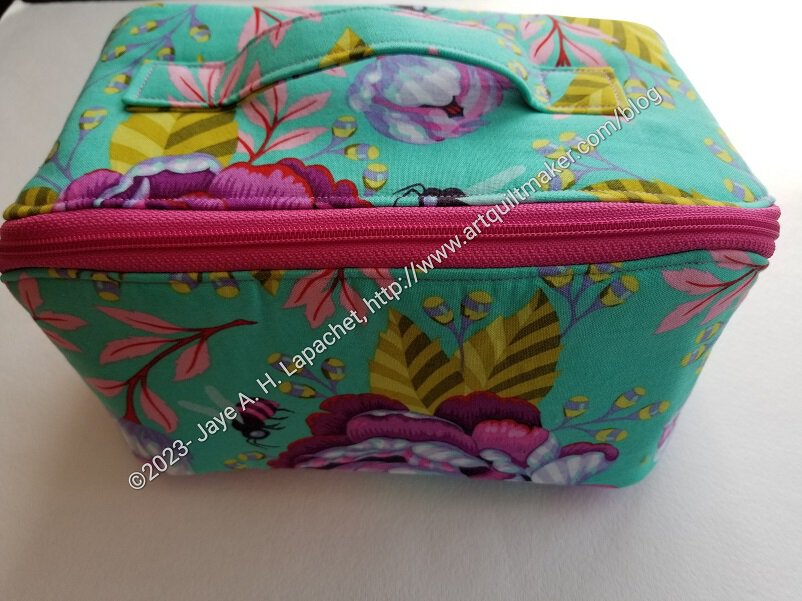
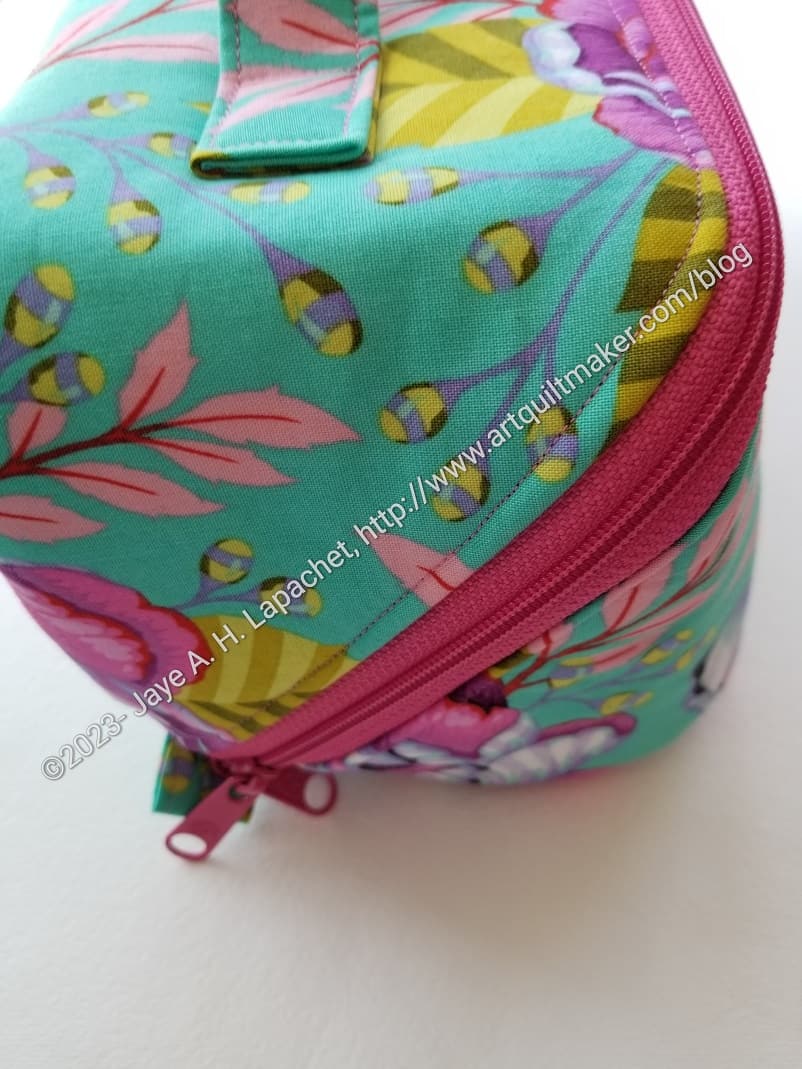
Typewriter Hackney – Top & Front
This Hackney is another large version and went together pretty well. I do better if I don’t have to break the process at the end, but needs must.
I am pleased with how well this looks. I struggled a bit with the top stitching on the top, but eventually got it right.
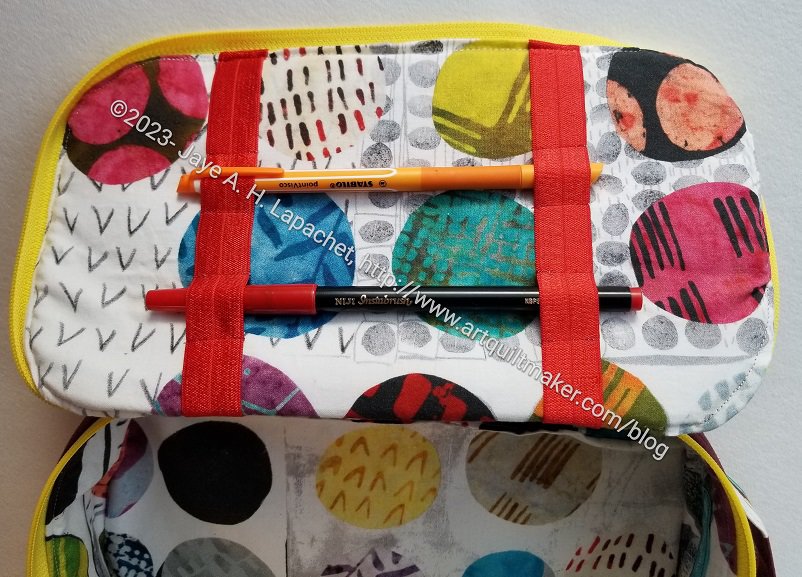
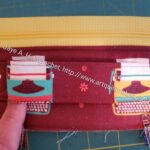
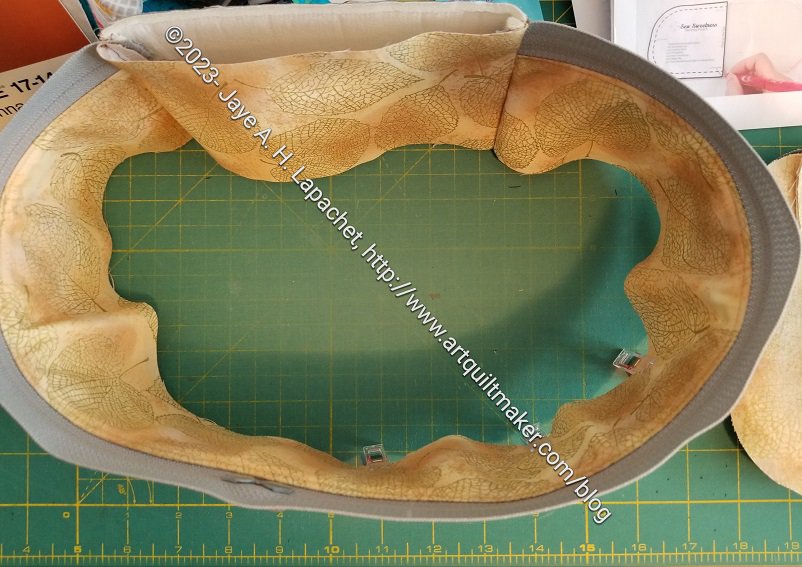
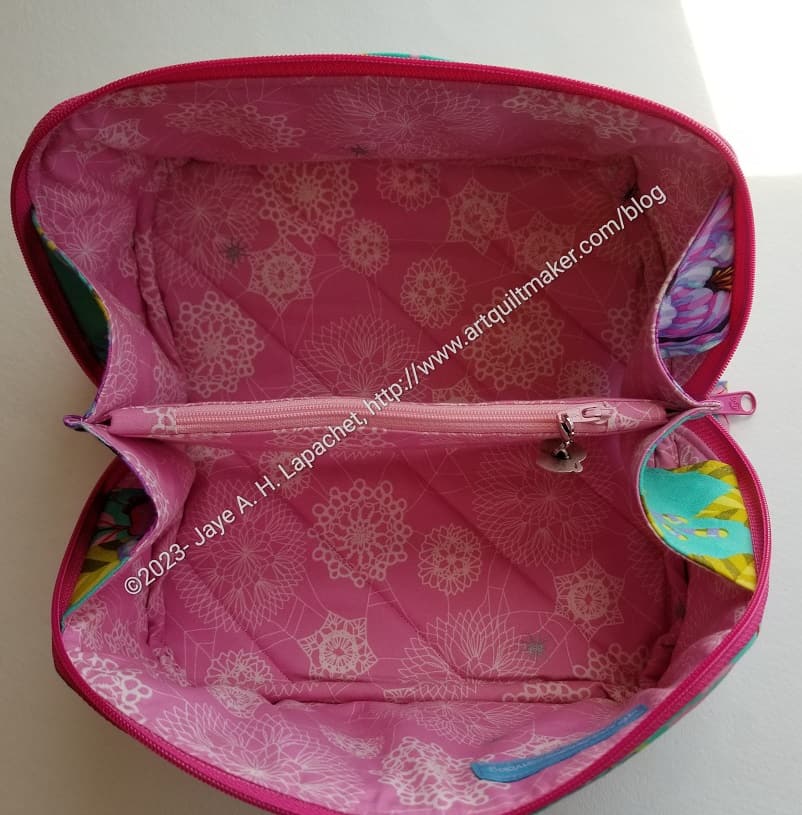
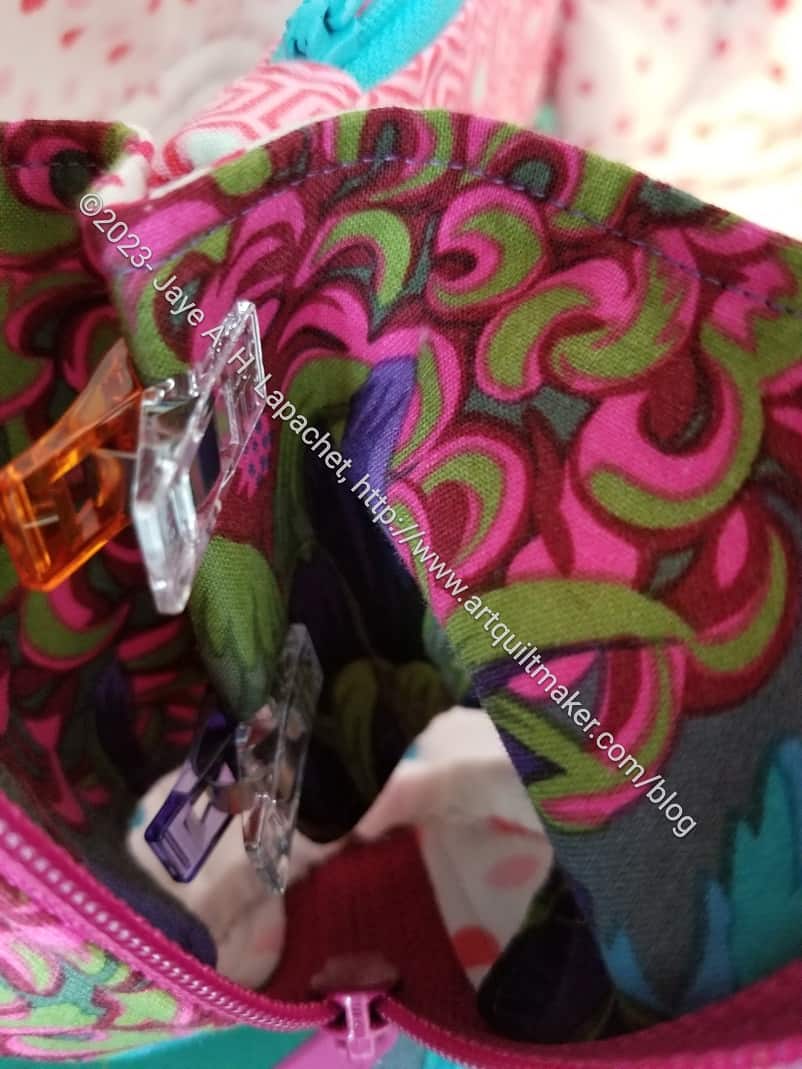
Typewriter Hackney – Top Inside
I used one of the Marcia Derse fabrics for the inside. I thought it was entertaining and would appeal to Lil Sissy.
The inside, again, has some elastic to keep pens and tools in place. I saw another one I made and was reminder that I put three or four strips of elastic on earlier versions to improve stability. I may have to do that again. Or go back to the top mesh pocket as per the pattern.
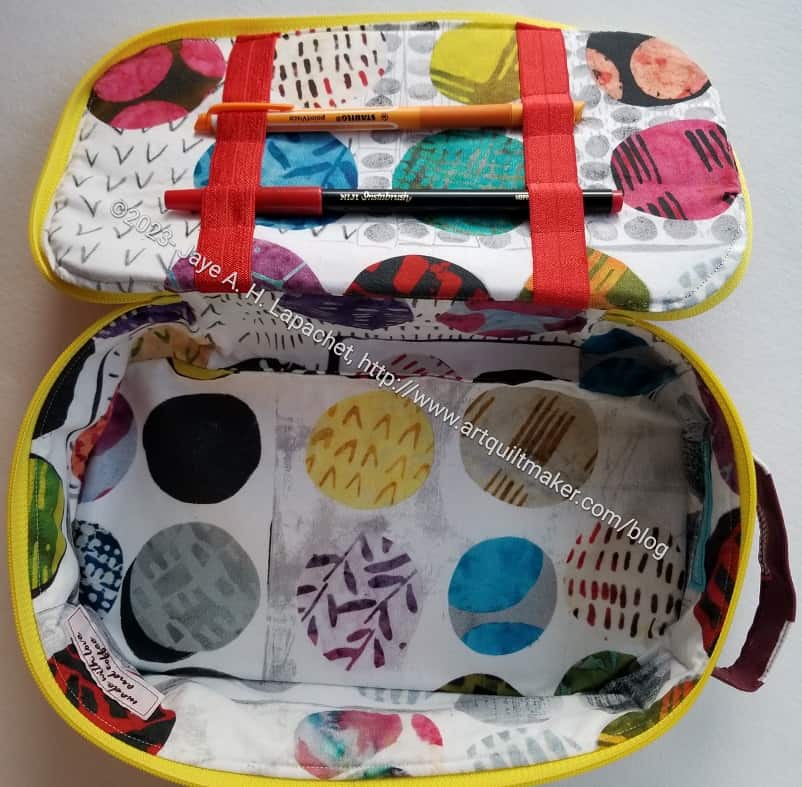
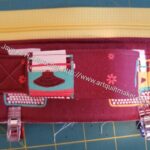
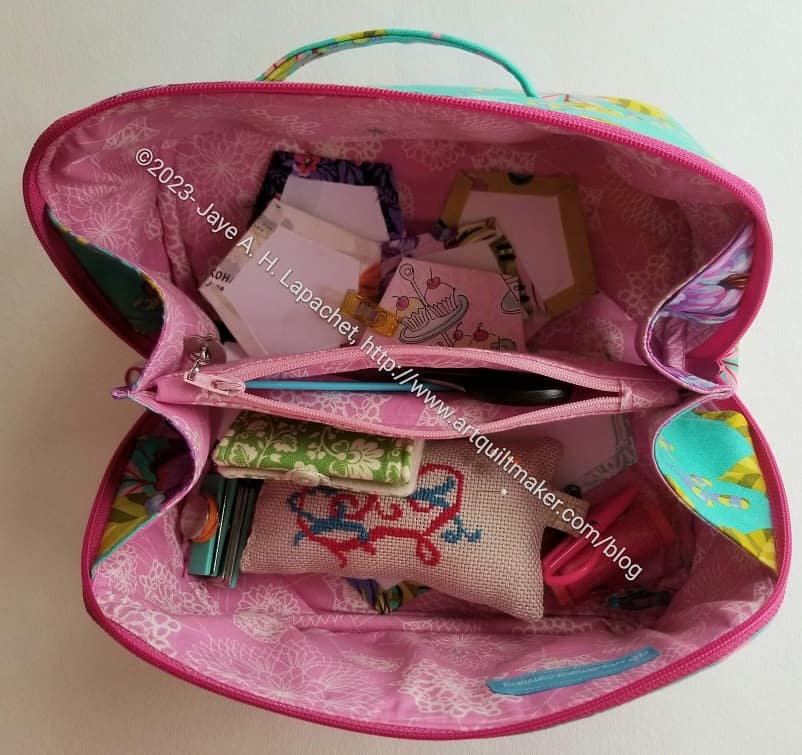
Typewriter Hackney – interior
I machine sewed the opening closed and I hope my sister won’t notice. I think it will be fine once she puts some stuff in it.
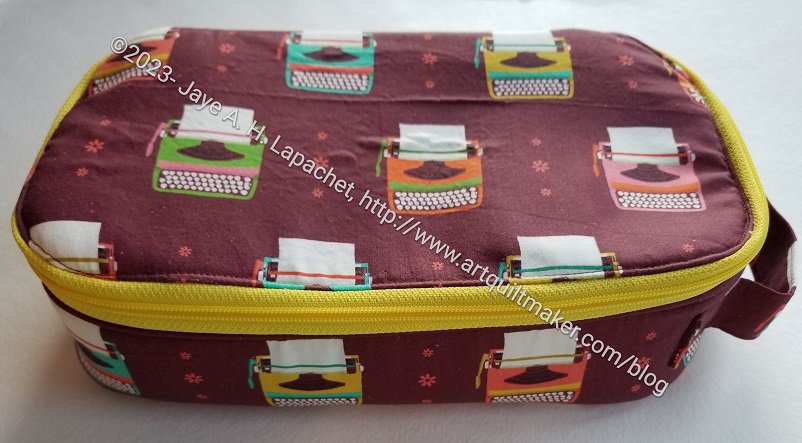
Right after finishing the Brown Stitch Hackney, I started this Typewriter Hackney. I am pretty pleased with this gusset. I fussy cut it to highlight the typewriters and it is coming out pretty well.
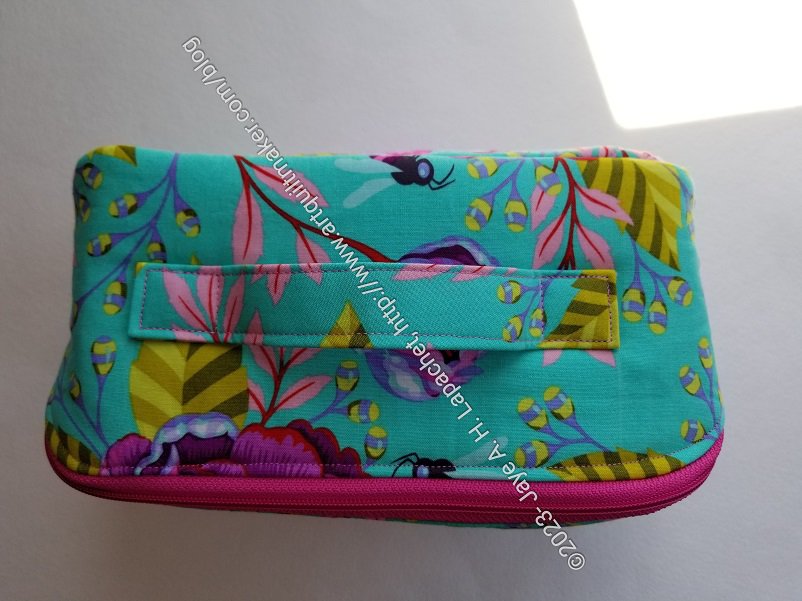
Typewriter Hackney handle
Typewriter Hackney handle
I also added a handle, which is lined up almost perfectly through no effort on my part. The handle motifs line up with gusset if it is flattened against the gusset. I am probably making too much out of it!
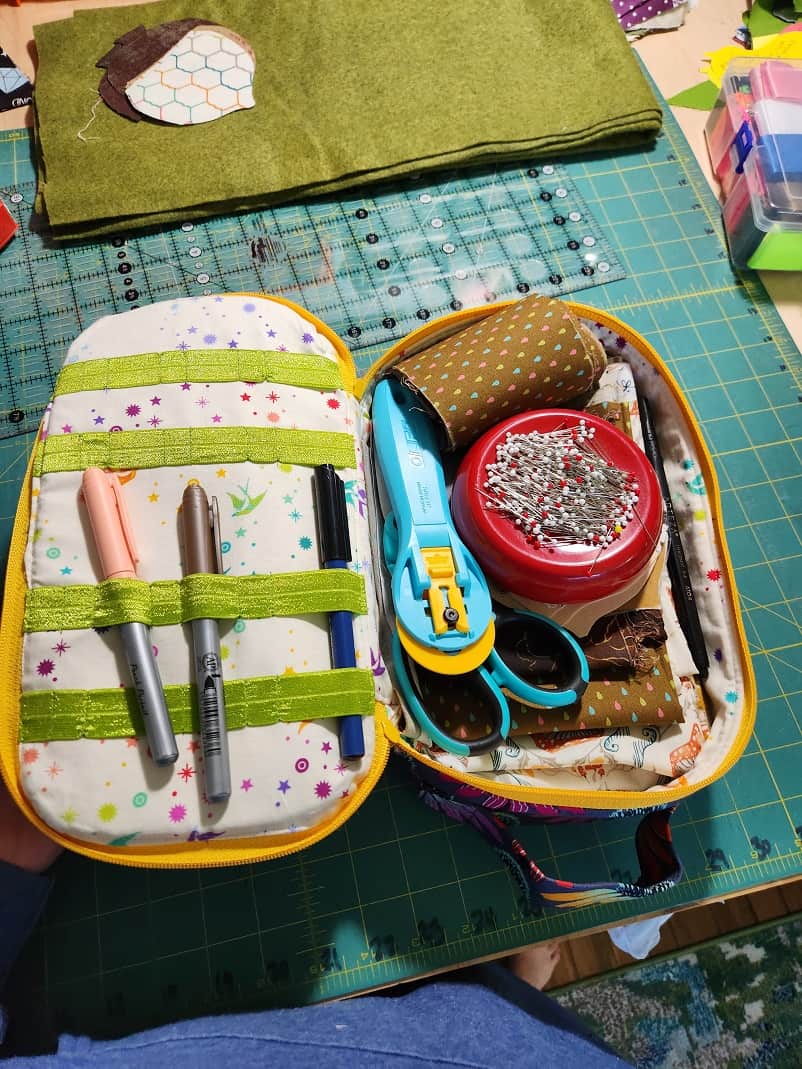
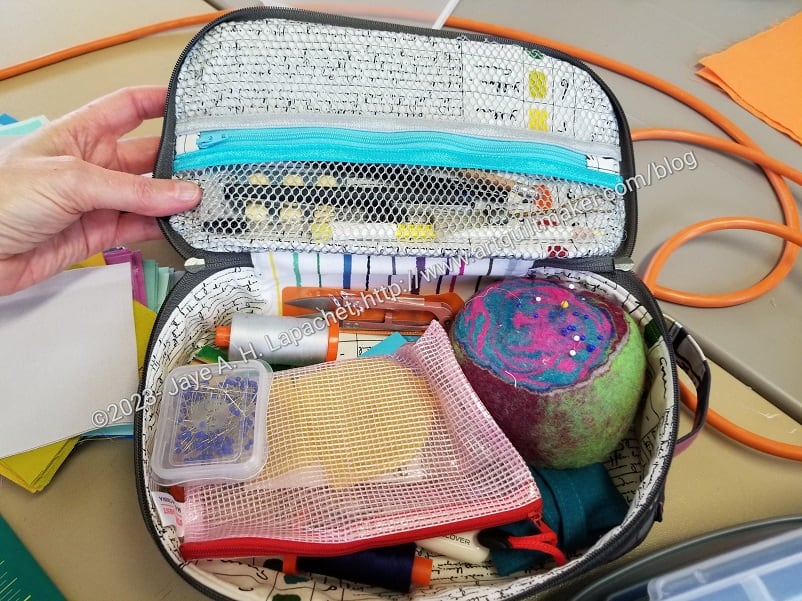
Amanda was kind enough to text me yesterday just to say that she was thinking of me. We had a text exchange and in it she mentioned the Hackney I made for her birthday. She was kind enough to send me a photo of it in use.
I am constantly amazed at how much these hold. I am glad to see that she though the pen/tool holder in the top / lid was useful.
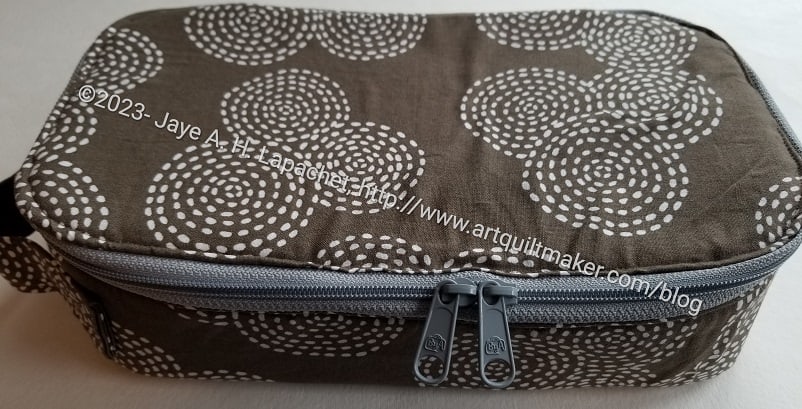
I was able to finish the Brown Stitch Hackney relatively quickly.
I think it looks the best of all of the Hackneys I have made so far in terms of construction. The brown is not attractive despite the lovely stitch pattern.
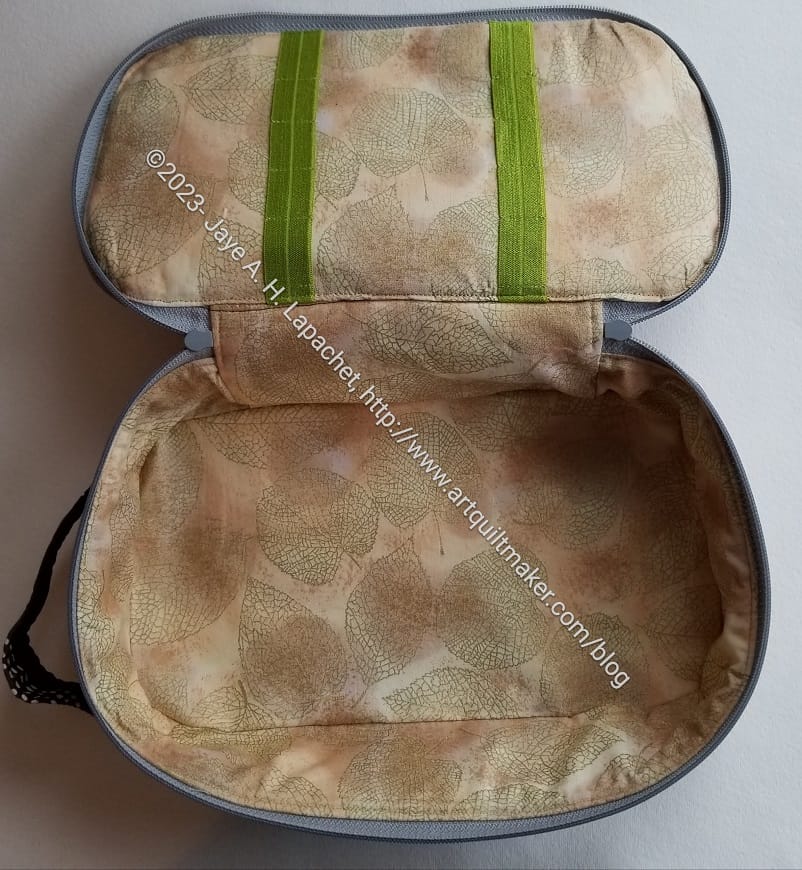
Finished: Brown Stitch Hackney – open
Using ByAnnie doublefold elastic**, I made the pencil holders again in the top lid. I measured where I wanted the elastic by measuring out from the center in both directions. The bands might be a hair too far apart, but they will will work. I tested them after the bag was made and found they could be a little closer together. Still, I think it works in general. I usually put a pen or some sort of tool in the gift so as to demonstrate how they work.
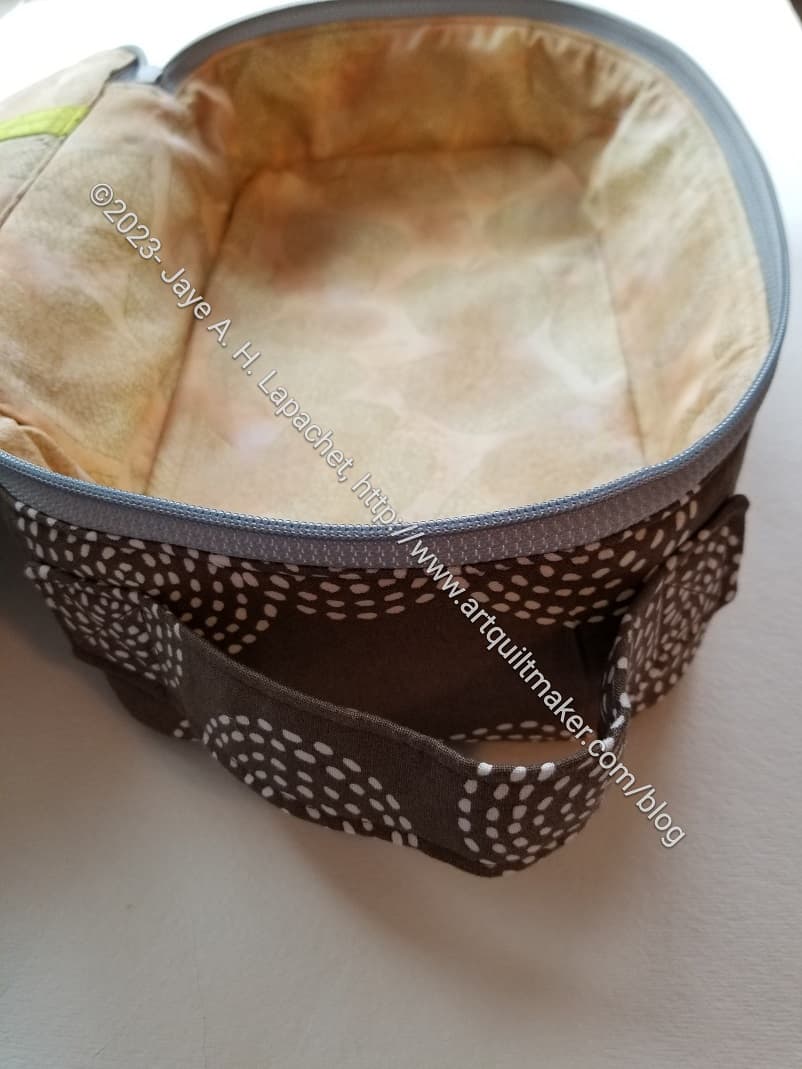
Finished: Brown Stitch Hackney – handle
I am particularly proud of the handle. I finally figured out the perfect measurements to get it in the right location.
I don’t know if I will be able to replicate this success in other Hackneys, but I am reveling in the success this time.
I was able to place it so it is exactly in the center of the end.
I did forget to put in a label, but can easily whipstitch one on later if I want.
Finished: Brown Stitch Hackney – top
Now, on to the Knitting Needles bag!
**Obviously, you should shop at local quilt shops and small businesses. However, if you are too busy or can’t find what you need there, I use Amazon affiliate links and may be paid for your purchase of an item when you click on an item’s link in my post. There is no additional cost to you for clicking or purchasing items I recommend. I appreciate your clicks and purchases as it helps support this blog.
I am making really good progress on this bag. The gusset is much easier to assemble after making so many.
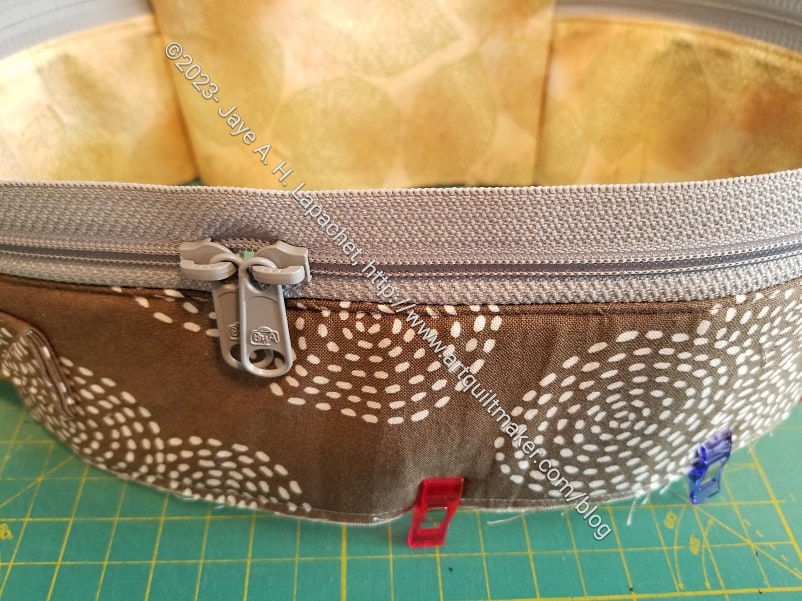
In this case, I didn’t have a brown or beige double zip handbag zipper**. That is definitely a problem. I like matching my zippers to my fabrics, but I don’t want a bunch of beige and brown zippers hanging around that I can’t use, but have to look at. I think the grey looks ok. We’ll see when I get the top on.
Stitch Hackney in process
I am fond of the leaf fabric I used for the interior even if it is beige. I don’t remember when I bought it, but it has a very nice metallic leaf on the fabric. The motif is delicate and not garish at all.
**Obviously, you should shop at local quilt shops and small businesses. However, if you are too busy or can’t find what you need there, I use Amazon affiliate links and may be paid for your purchase of an item when you click on an item’s link in my post. There is no additional cost to you for clicking or purchasing items I recommend. I appreciate your clicks and purchases as it helps support this blog.
I can’t seem to help myself. I really like this bag and seem to need to keep making more. I definitely need to start making some more of the Minikins Season 4 patterns.
Hackney for Markus
But, for the moment, I am stuck on Hackneys. I decided to make this bag and one of the Zaudal Creates Knitting Needles bags for my friends in Austria. I stayed with them and they drove to and from the airport and were generally super nice hosts. Honestly I enjoy making bags and can’t use them all so making gifts works well for me. Continuing to sew keeps me out of trouble as well. 😉
As you can see this is a lot of brown fabric. 🙁 Fortunately, it isn’t an awful brown fabric. I didn’t know that I had bought so much of it until I unearthed my brown bin and saw 2 yards of a completely uncut piece. 🙁 I have that fabric in several other colors and love it, but really had no memory of buying the brown. I’ll have to think of some other projects to make for my friend.
I plan to use it for small EPP projects when I am on the go. In this case, I have the pentagons that will be made into a ball in the bottom.
I was able to stock the bag with scissors, needles etc by using some other gifts I have received that haven’t had a home yet and I am really pleased about that.
I forgot to post about the finished second Enigma. I wrote about last a week ago.
I am so pleased with the fabrics, which I talked about last time. They look so well with the zipper, too.
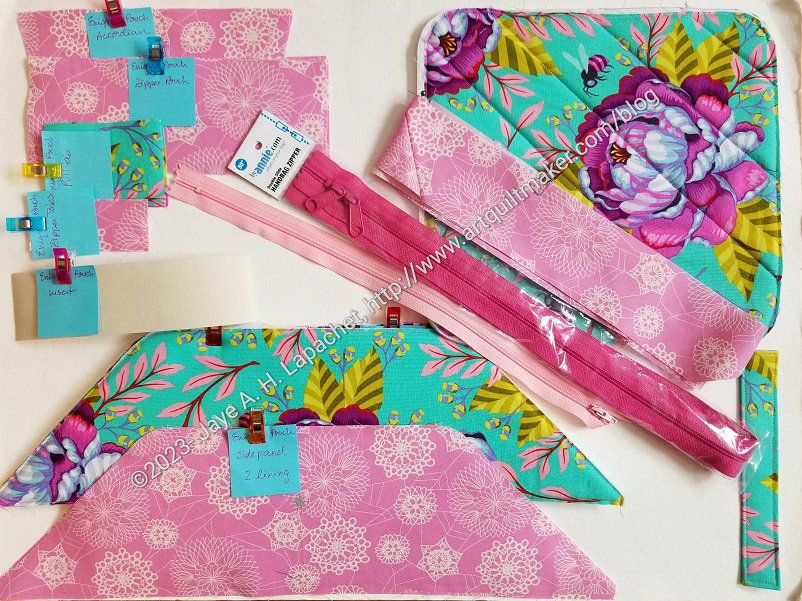
Peony Enigma open
As per usual with second tries, this one went together a lot easier and much faster. I didn’t use the prequilted fabric I had Colleen make for me. I only have one fabric, the Philip Jacobs fabric I used last time and I wanted something different. The bottom piece needs to be quilted, which meant I had to quilt the bottom. It was fine. I used one fabric for the lining and I like that look a lot better, even if the various lining fabrics aren’t very noticeable on the first Enigma.
Peony Enigma: accordion pocket
The accordion construction of the center pocket is magical in a way. It is just so amazing how easily it goes together. I am really pleased with how it came out.
Also, the fabrics look so pretty in this configuration. I think the Kabloom fabric is just a good fabric design, because I didn’t have much fabric left to fussy cut. The end with the half peony flower is a happy accident.
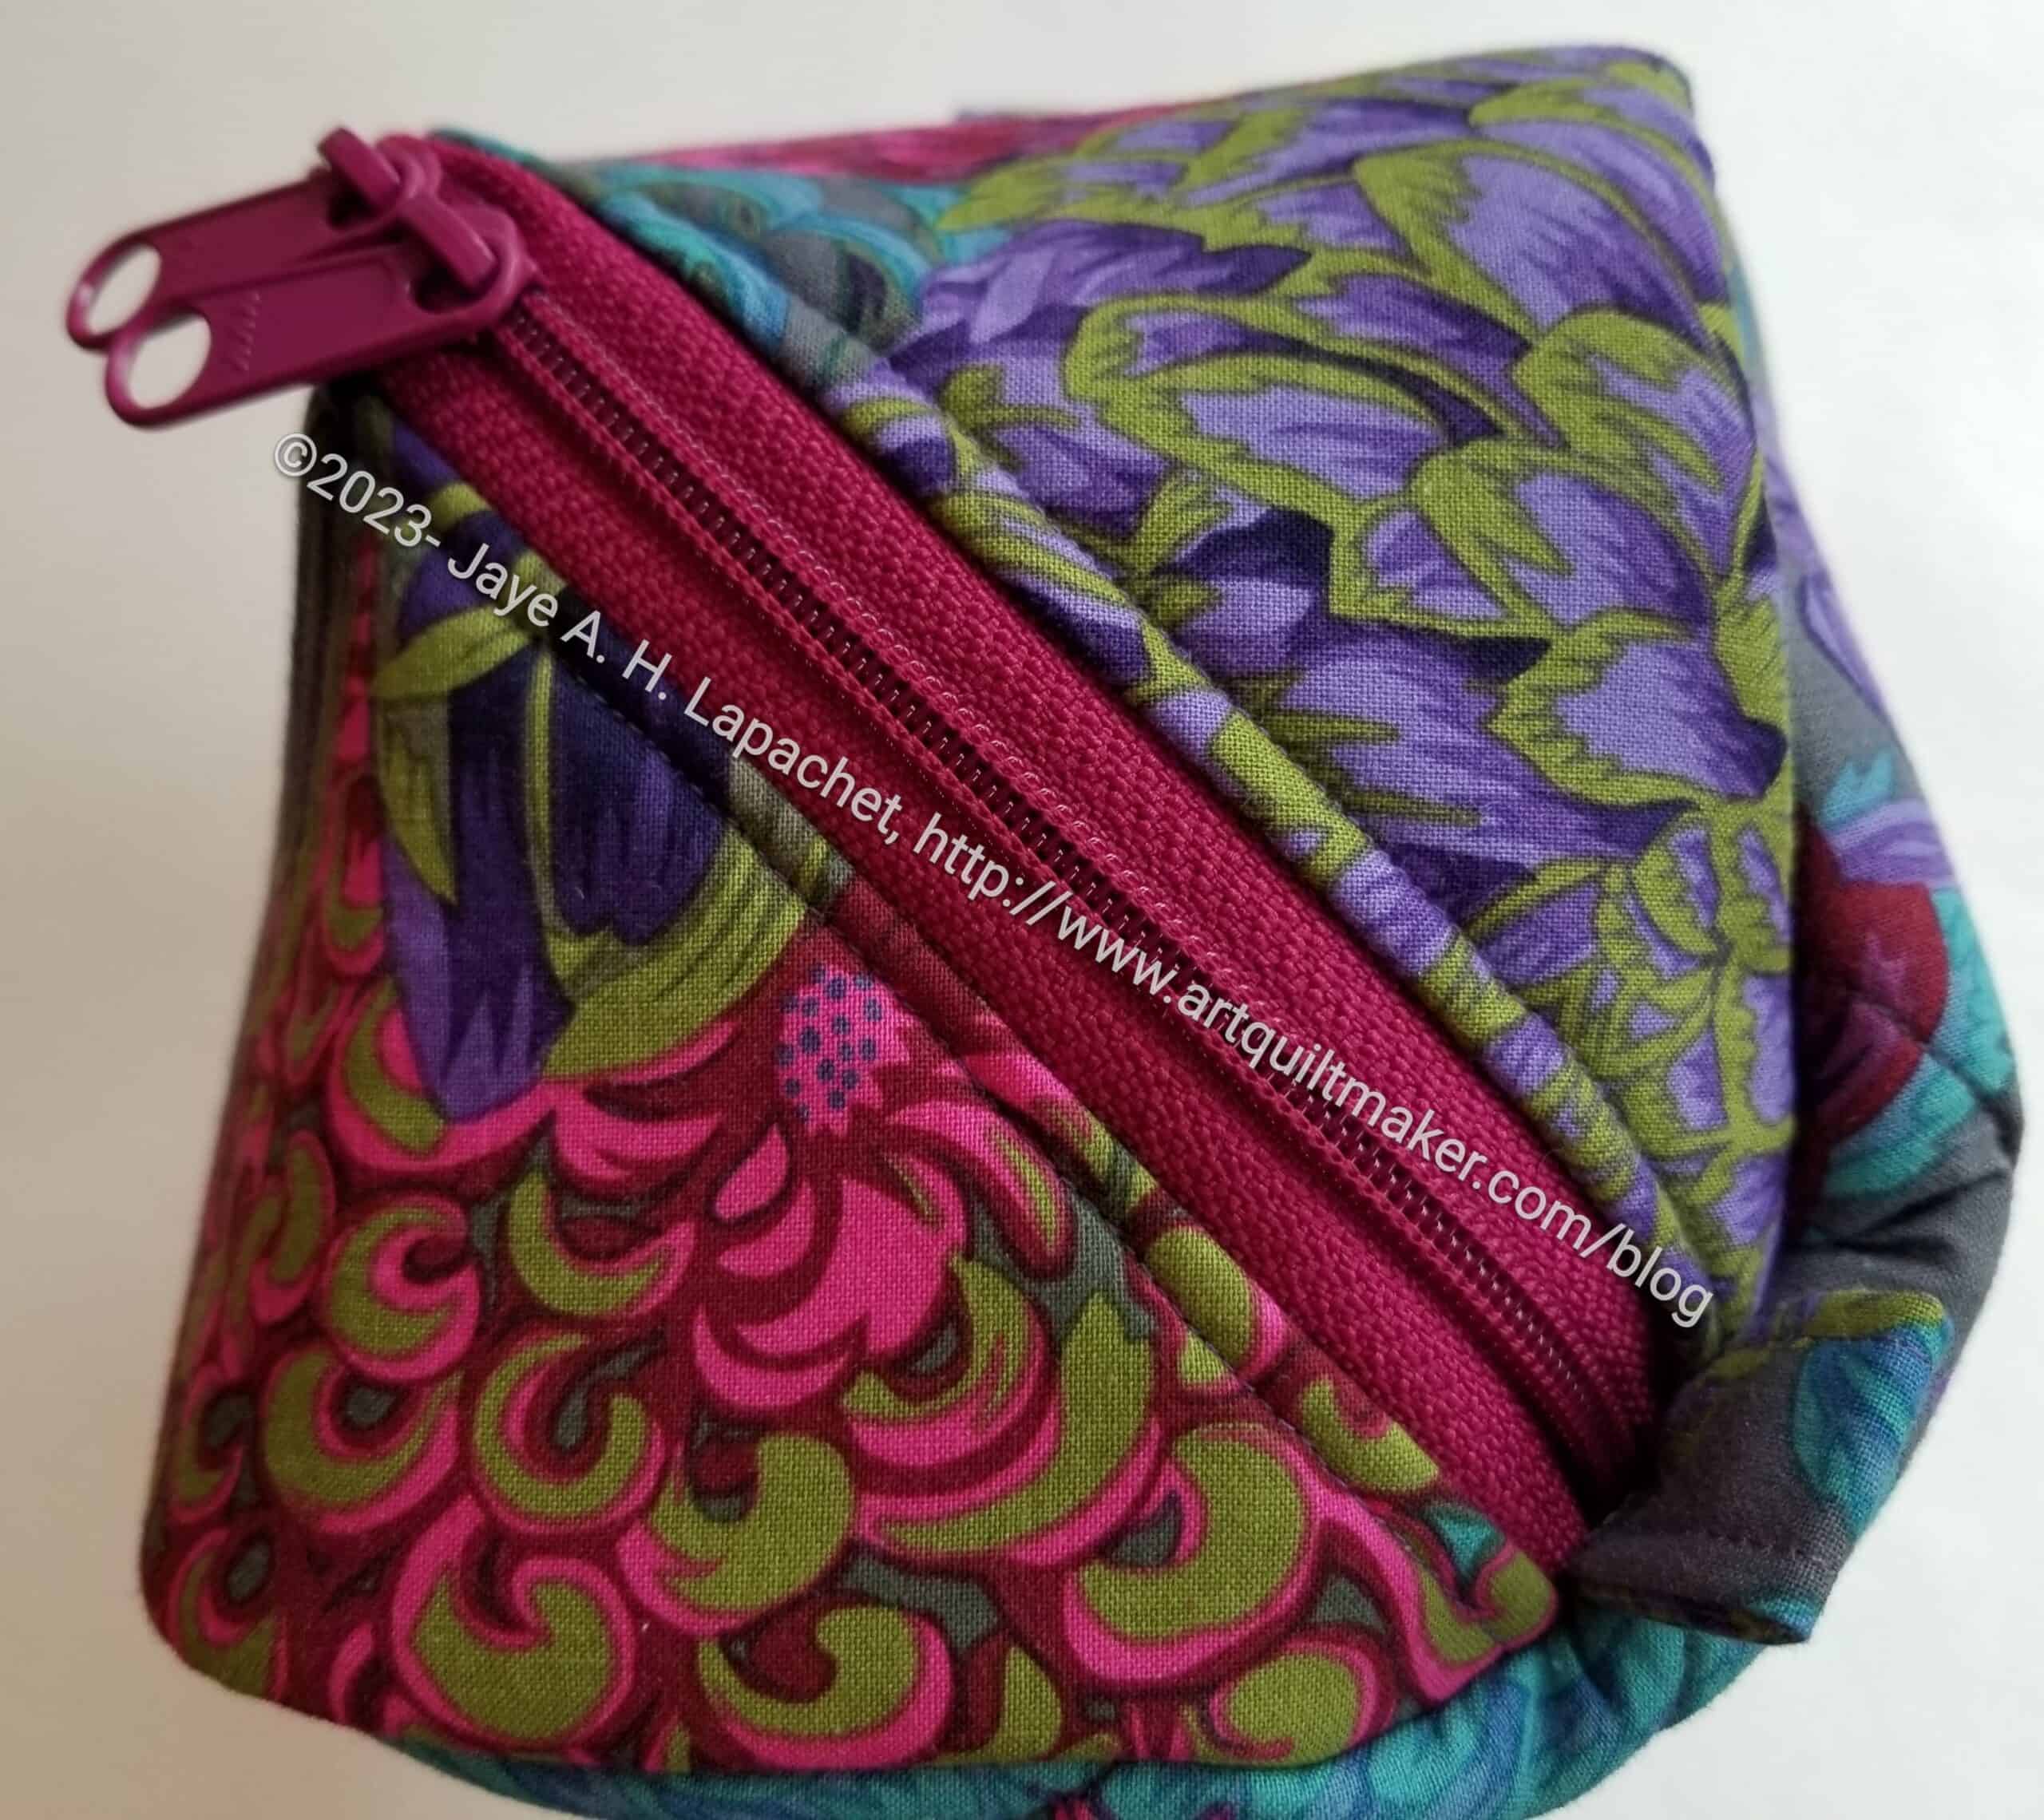
Peony Enigma: diagonal zipper
I am still kind of enamored of the diagonal zipper design. I really need to know how Sara comes up with her designs. I saw another bag like this, but can’t believe that she would steal a design.
The only part that didn’t come out exactly as planned was the handle. I think I spaced the stitching too far apart. The empty space is large enough for me to carry it, but the Chrysanthemum version had more space. C’est la vie!
Peony Enigma: handle
I am so pleased with how this bag came out.
I plan to use it to travel with EPP projects. I haven’t filled it, or the Chrysanthemum version, up yet, but will. I have a few trips coming up later this year and will need it for them. Cross your fingers I can find a good project.
I might put this bag on my list to make as gifts. I am not done with the Hackneys yets, so stay tuned.
I decided that I will make this Enigma and then get back to the Hackneys I planned and cut out. I am making amazing progress.
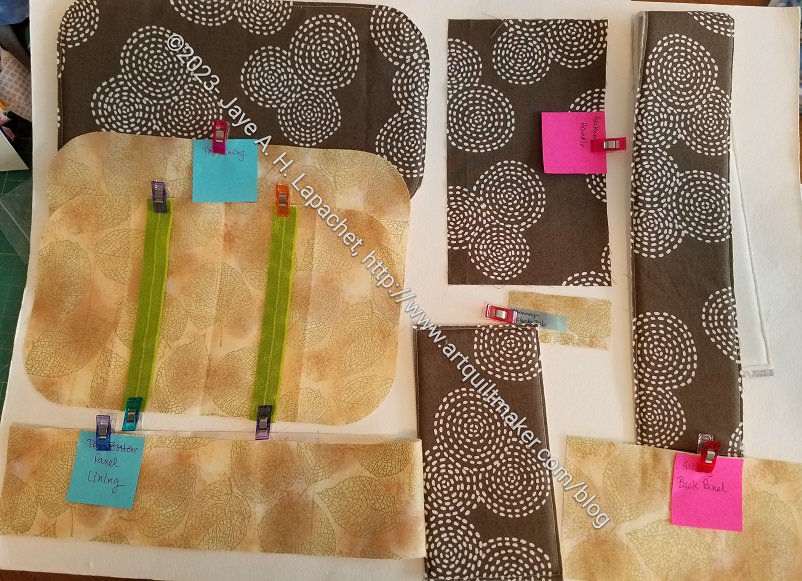
Kabloom Enigma body
I have all of the pieces prepped, the bottom quilted, which you saw in the other post, and assembly is underway. The second time is almost always easier than the first.
I remembered to put on my label this time, though this one will probably be for me and I don’t really need a label. I am trying to make it part of the process so each bag I make gets a label. I have a few more hours to make it a habit.
Kabloom Enigma bottom before binding
As mentioned before, this bag design requires binding and Sara shows how to do it on the machine. I sewed the binding on by hand last time, but decided that I would do it by machine this time. I am pleased to tell you that it went well and it looks good.
The bag looks like the photo above and on the right when it is ready to be bound. I had to keep the sides out of the way when I got to the binding part.
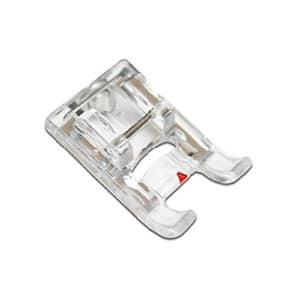
Janome foot F
I changed feet and used the Janome foot F with the little red triangle and kept the left hand tip of the triangle right on the fold of the binding. My seam line looks pretty good. I didn’t really check the bottom because it doesn’t show when the bag is in use anyway.
Kabloom Enigma binding
After sewing, the inside of the bag looks like the photo on the right.
The hardest part to sew past is where the zipper stops. You have to zip the zipper a little to keep it out of the way of the machine foot while keeping the bottom of the bag flat. It was a lot easier the second time, though still not 100% easy.
A few more things to do, then I’ll be finished with this bag.
I can’t decide if this is a bag or a pouch. Sara said that Minikins Season 4 had only one true pouch and this one wasn’t it. Despite that I still tend to call this a pouch.
New Enigma – cut out
Despite the 5 million other projects on my list, I started another Enigma. I have to admit, in case you haven’t noticed, that I like to make bags more than once.
I know Sara used the Kabloom fabric for her model. I am truly not copying her; I just love those giant flowers. I have to admit that it was tough to get two pieces large enough out of the Kabloom fabric I have left. From making the pentagon pieces for La Pass Month 18, my yardage of Kabloom looks like Swiss cheese. I would have fussy cut more peonies if I had had a large enough piece.
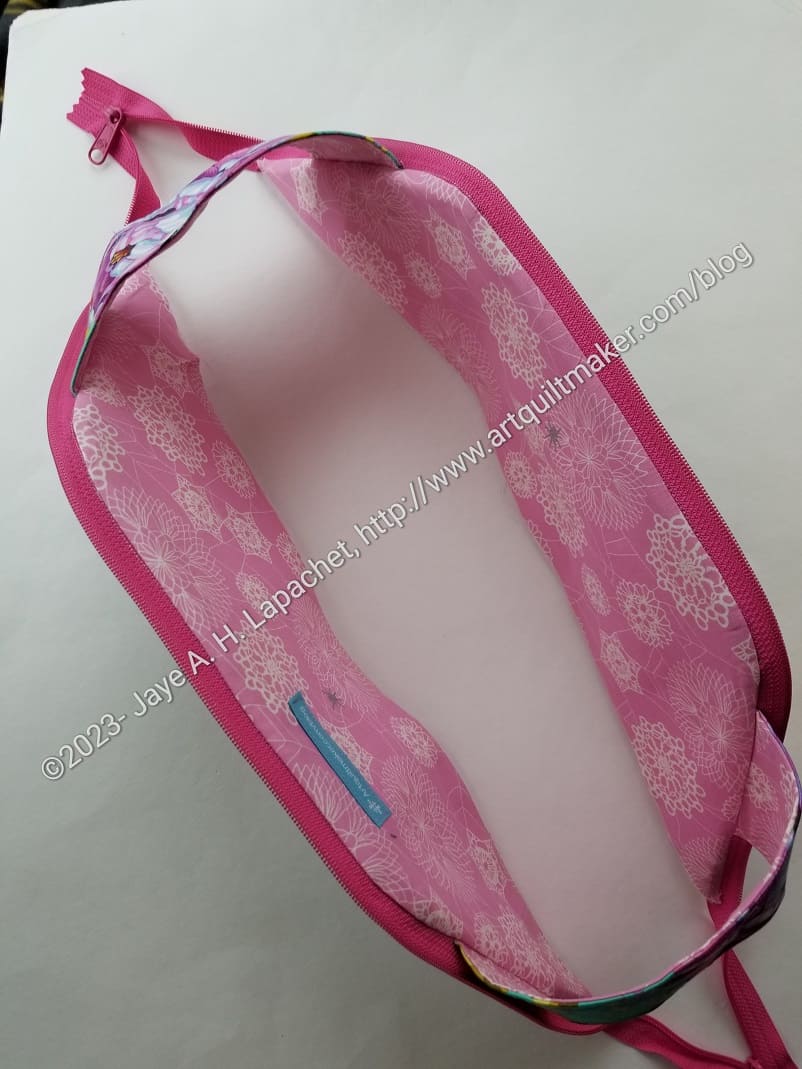
One reason I started this one is I kept looking at that pink snowflake fabric and just had to use it. I have to say that the lining takes most of a half yard of fabric. After cutting out the pieces and cutting up the scraps into usable pieces, I don’t have any of it left beyond what is in my scrap bin.
Hooray! I finished and I had plenty of time to post it on the blog post to win a prize. I may not win, but hope springs eternal.
I like this pouch. It’s interesting, yet normal, so surprising. It packs a punch and isn’t difficult to sew. There are some tricky bits, but it would be a boring sew, if the whole thing was easy.
We’ll have to see. I have some scissors and a pincushion I was gifted that I could put inside as a start.
The bag opens flat, which makes for a nice tray that keeps items confined in the car. You can see the bottom piece in the picture I took after I cut all the pieces. This will give you and idea of why it is flat.
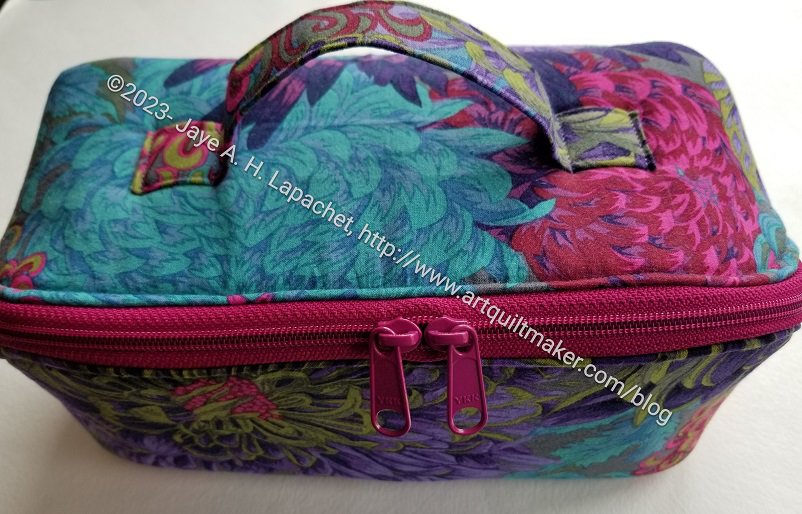
Finished: Enigma Bag – end view
The zipper, though, zips at a diagonal, which I think is part of the interesting bit of this bag. It also allows the bag to zip up small, be completely contained and then open out flat. Clever, isn’t it?
I was concerned that there would be a hole where the zipper meets the bottom of the bag, but there isn’t. WHEW!
I always wonder how Sara thinks up some of these bags. I am always curious about the designs, but then I wonder how she figures out the construction. I know enough to modify some bags, but I am not sure how I would figure out how to make a bag like this.
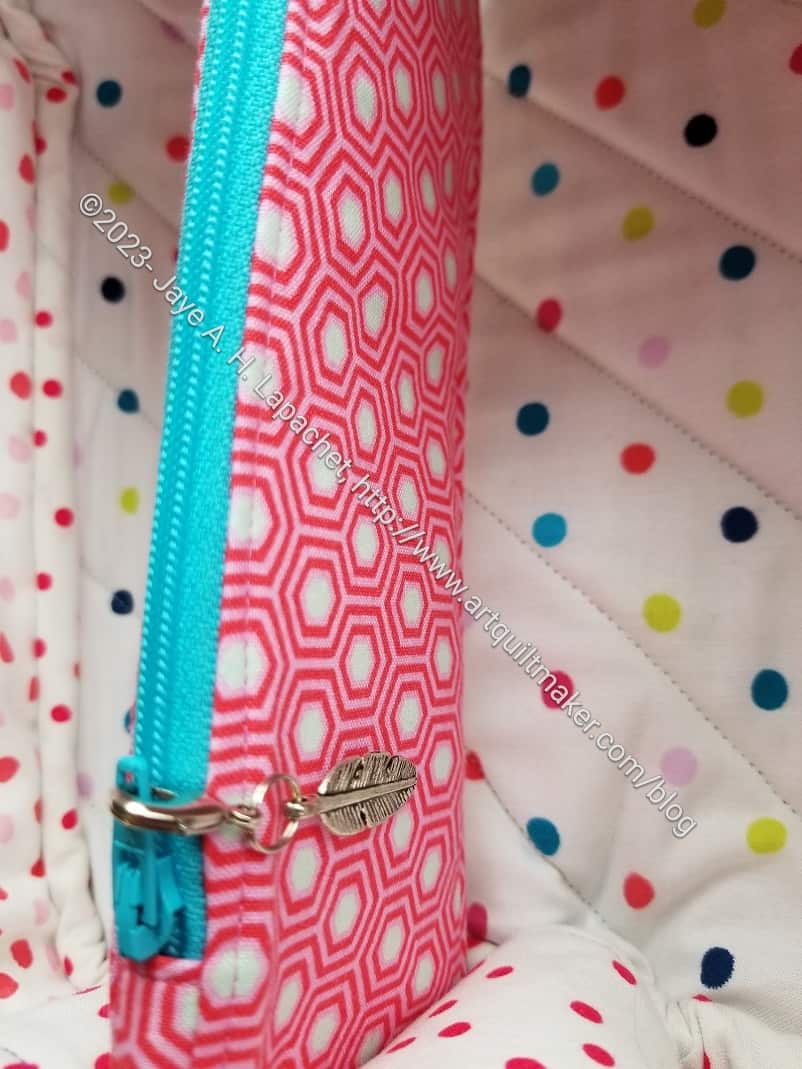
Finished: Enigma Bag – accordion pocket
As mentioned, there is one accordion pocket. It is fully contained like the Sew Together Bag and the Ultimate Carry All Bag. This type of pocket allows the user to put something under the pocket like a ruler or quilt block (hand piecing?).
This pocket went together really well and even though the zipper contrasts with the pocket, I think it looks nice. Yes, I added one of the charms I bought when we went shopping for the Retreat. I bought a tool afterwards that makes it really easy to open the jump rings and connect the charms to the lobster clips. The tool is called Split Ring Tweezers**. Total game changer!
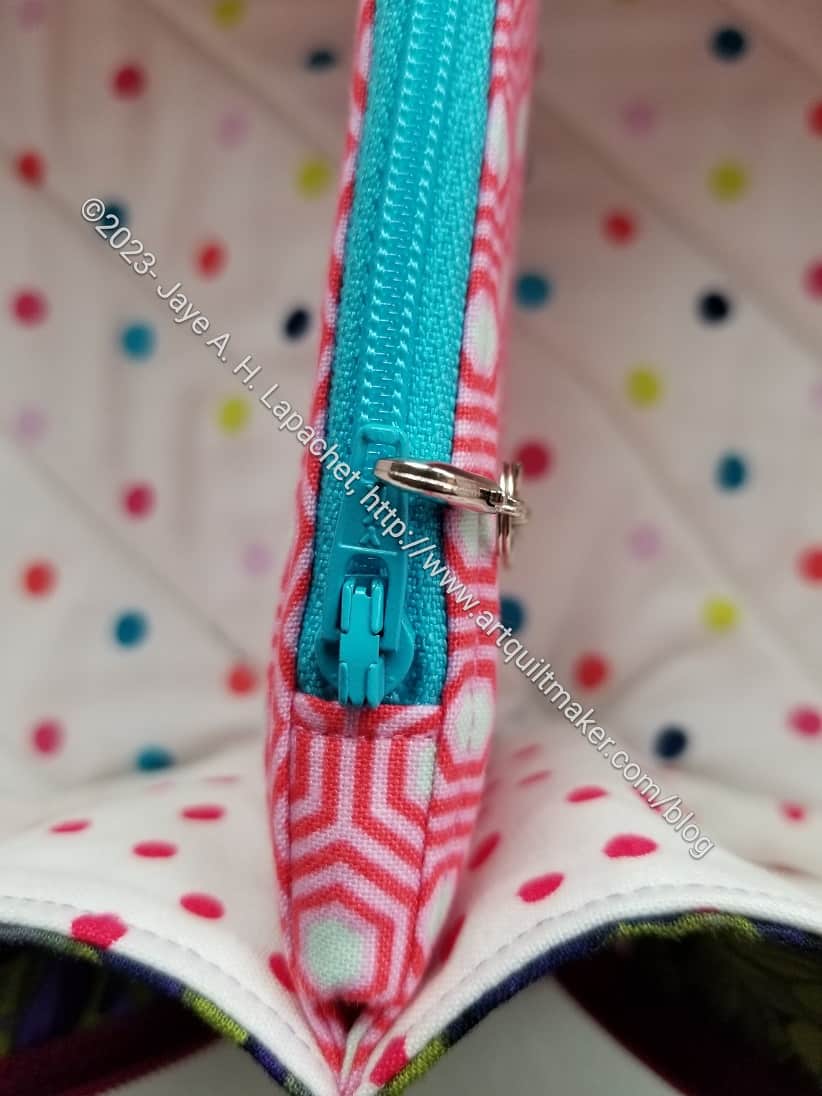
Finished: Enigma Bag: zipper end
I love the directions for the zipper tabs in this pattern. I really think my zipper tabs came out better than they ever have. In turn, this made my zipper look really good.
As mentioned, this bag is part of Minikins Season 4. Minikins patterns are only sold in bundles. This bundle has 12. There are at least two other projects I plan to make really soon.
Now I am worried that I won’t want to finish the Hackney pouches from Minikins Season 3 I have cut out. 😉
You can see the other finished Enigma Bags on the blog post.
**Obviously, you should shop at local quilt shops and small businesses. However, if you are too busy or can’t find what you need there, I use Amazon affiliate links and may be paid for your purchase of an item when you click on an item’s link in my post. There is no additional cost to you for clicking or purchasing items I recommend. I appreciate your clicks and purchases as it helps support this blog.
Well, I couldn’t just make one. I cut out a second Enigma on Saturday. It’s a second one with fabrics I like even though I don’t know what I will do with either.
Part of the reason is that I kept looking at that pink snowflake/spiderweb fabric all week and knew it would be a perfect lining.
I also chose the Tula Pink Kabloom fabric, because I love those flowers. I forgot that Sara also used that fabric for one of her Enigma bags. I feel a bit like a copycat, but I didn’t choose it consciously because she did.
This time I am going to remember to put in a label. I hope to find the perfect spot.
I cut out and made another one of these pouches on Saturday. The acrylic templates for the Enigma bag were laying around and it seemed like the right thing to do. Also, I got a finish after almost no finishes during May.
The Enigma templates almost don’t fit in this large sized I Spy. Soon, I’ll have to pluck up the courage to try making one of these slightly larger. Saturday was not the day as this was a quick win.
The teacups look a little weird, because I used vinyl with stars on it (also from Sew Hungry Hippie). I think I prefer the glitter vinyl, but the stars are fun, too. I have a small roll of it, which is what I grabbed and cut before I realized what I was doing.
I am sticking with the Coneflowers theme. I can’t seem to get away from it.
So, I know this Enigma process must seem interminable. It seems like it is taking me forever to finish it and I have to keep reminding myself that working all week prevents me from sewing much during the week. Today I have time off and I will use it for sewing.
As an aside, I enjoyed my trip, but I am frothing with excitement thinking about actual sewing. AND, then, being able to actually sew.
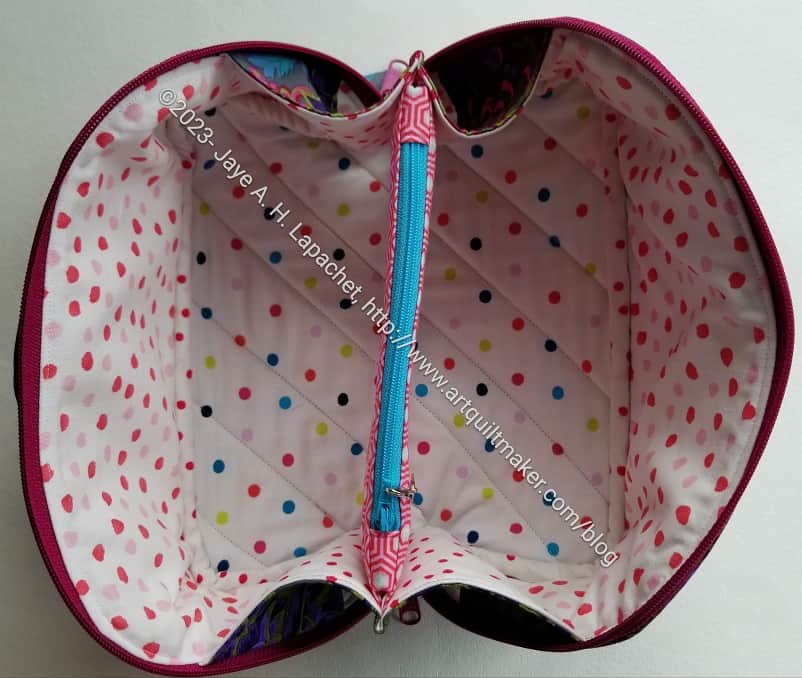
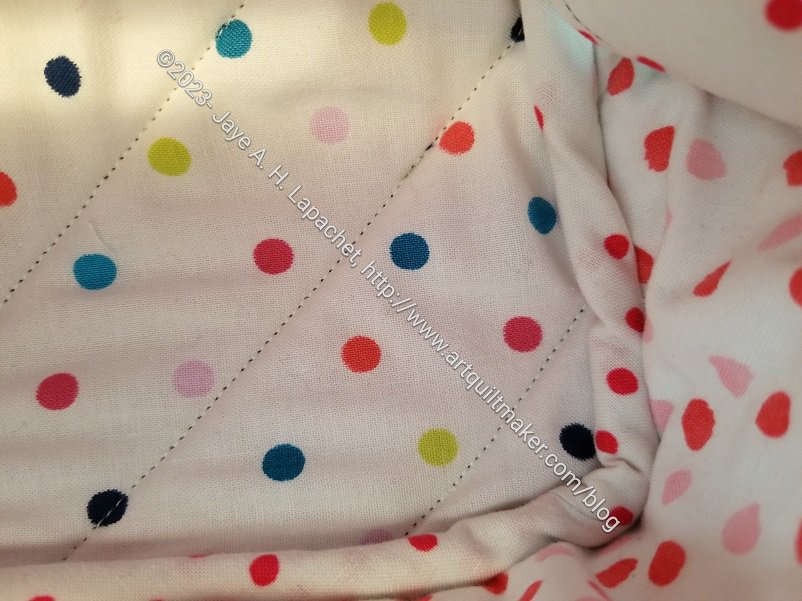
Enigma inside binding – detail
The photo above shows the inside of the pouch. The intersection of the bottom and the side panels has a binding. This is a challenging method of finishing a bag. Sara doesn’t use it very often. When she does, I know there was no other way. The video shows Sara easily sewing the binding by machine. I took the coward’s way out and sewed it by hand. The part by the zipper was really hard. Zipper tape is no joke to sew through.
Enigma inside pocket – detail
I have only a step or two left to do and I hope to finish today so I can still post it on the sew-a-long and possibly win a prize.
Next, I will sew the inside pocket.
I used the video more for this bag than other bags. I didn’t try to understand directions that were confusing. I just went straight to the video. I kind of feel like I cheated, but I also don’t care that much.