I finished Clue 6, the odd looking blocks with HRTs and HSTs. For about 12 hours I was completely caught up. That is definitely a first with a Bonnie Hunter Mystery Quilt!
I am really curious to see how these blocks fit into the quilt. Remember we have Flying Geese to fit in as well.
The thing about making blocks for one of Bonnie’s mystery quilts is that once you make the units, the blocks are pretty easy to make.
Now I am on to Clue 7, some rectangles with flippy corners. I think I’ll use the Simply Folded ruler**. It is a really good ruler. It works really well. I’ll have to look for the mini version. I can’t remember if I have one.
N.B. Bonnie will remove the posts to which I have linked from her blog sometime in February 2026. Download or save the clues now if you want to make this quilt.
**Obviously, you should shop at local quilt shops and small businesses. However, if you are too busy or can’t find what you need there, I use Amazon affiliate links and may be paid for your purchase of an item when you click on an item’s link in my post. There is no additional cost to you for clicking or purchasing items I recommend. I appreciate your clicks and purchases as it helps support this website.
In this case, 2d time around is the charm, but sheesh! It took me long enough to make some simple HSTs.
I am happy for a number of reasons. Done is done, which is good.
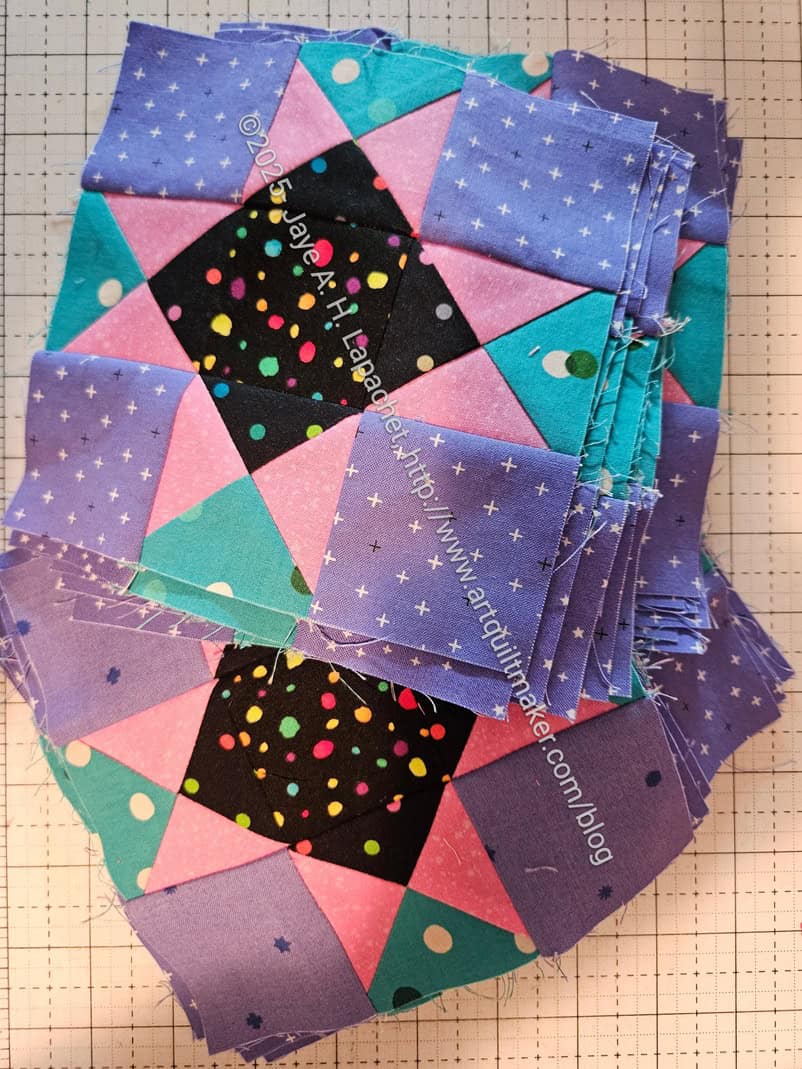
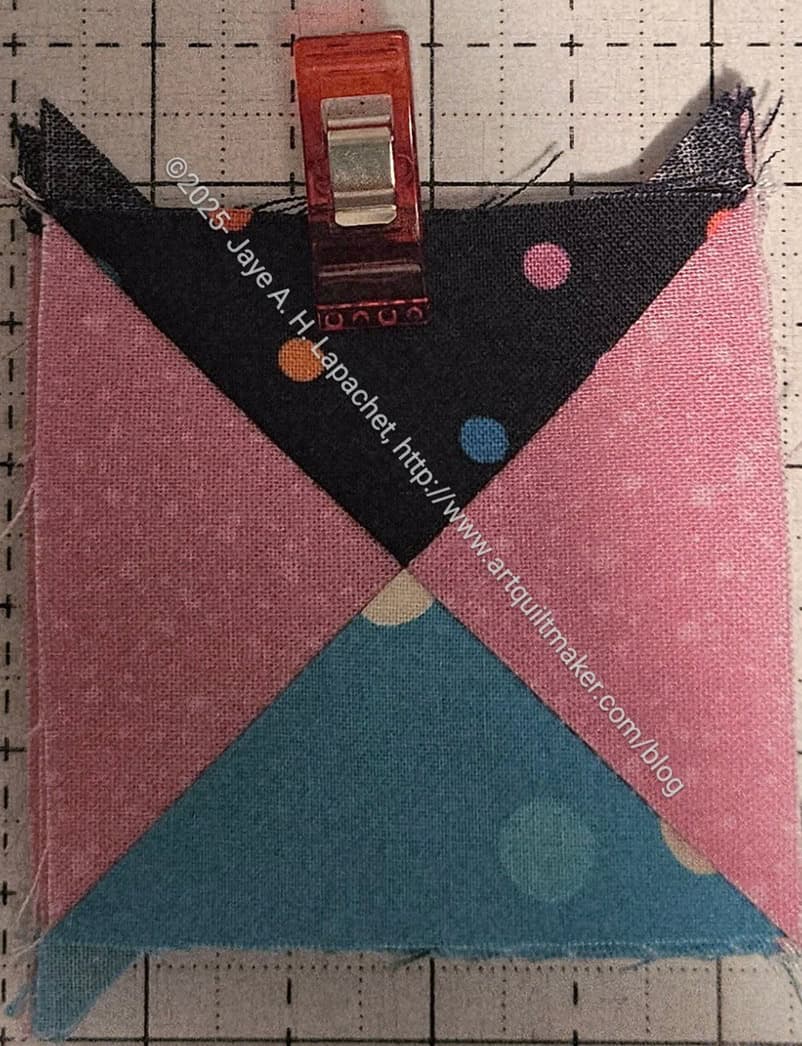
Lupine & Laughter Clue 6 block example
Now I can move on to Clue 6. I am really looking forward to making those blocks. I have made a few already just to try them out and to give myself a break from the endless trimming of HSTs.
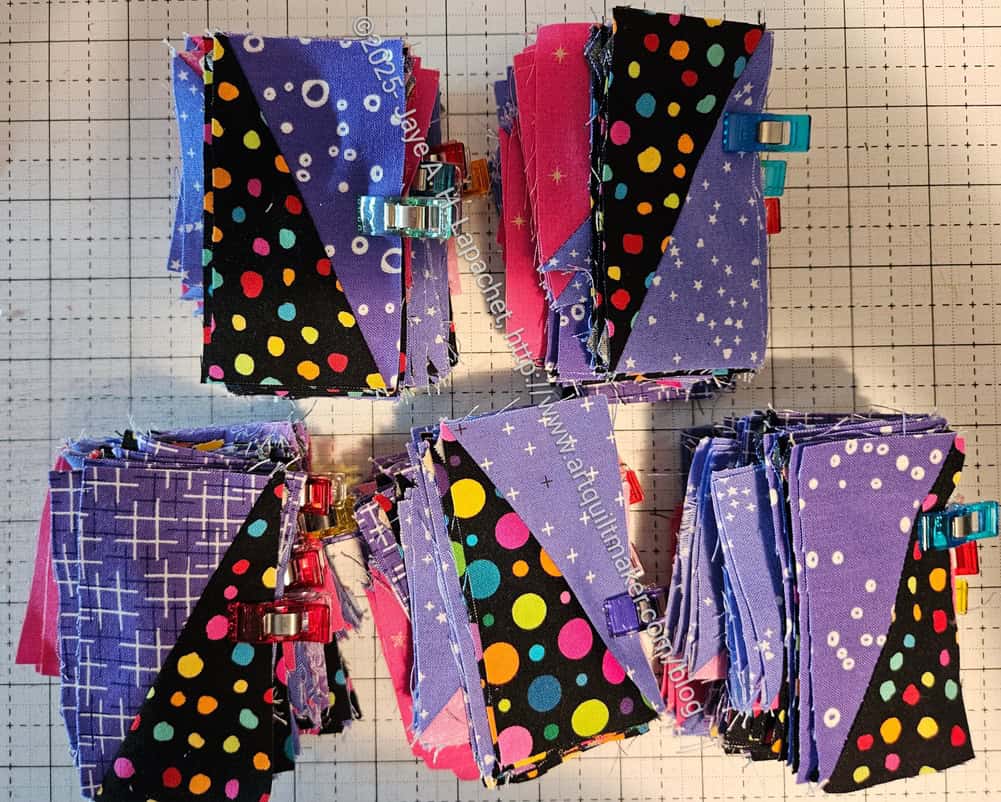
Like last year, the HSTs, HRTs and these blocks are all in sets of four, so another million to make.
Now I am almost caught up. I am hoping to get the blocks done in the next few days so I can be ready for the next clue. I am super curious about what comes next.
Finally, thanks to Jeff, as mentioned, I am reacquainted with my Accuquilt. Definitely for future Bonnie Hunter quilts, but in general, I plan to use it more. It is less of a trial to get it out and find the right dies than I had built up in my mind. And, no surprise, the cutting is easier.
N.B. Bonnie will remove the posts to which I have linked from her blog sometime in February 2026. Download or save the clues now if you want to make this quilt.
It’s been a good few days of sewing. I think I re-learned how to count and measure. 🙂
Except for one set of a million* HSTs. I have finished all the clues up to Clue 6. I have to finish those HSTs before I can work on Clue 6.
Lupine HRTs
The biggest achievement was finishing the HRTs. As I mentioned the other day, using the Accuquilt to cut them out was a real life saver. I was able to plow through some of the rote sewing in double quick time.
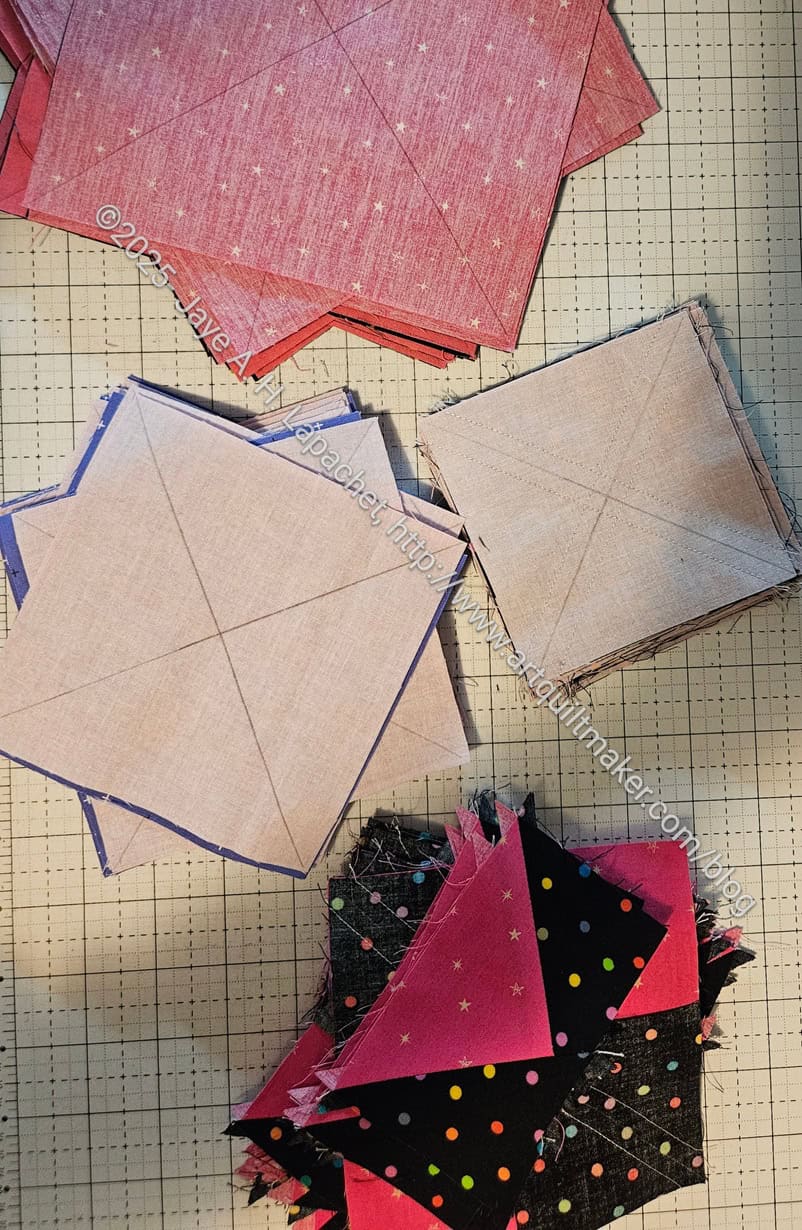
I was running out of the dots on black fabrics I chose as a background. I always intended to use a variety of colored dots on black, so I wasn’t worried. However, I found fewer multi-colored dots than I expected and panicked a little. I set about hunting out some more. I looked in a couple of other places and found more suitable background fabrics hidden in a weird place. I’ll be able to work on that last set of HSTs now.
I have been working on Lupine steadily since after Christmas. As previously mentioned, it is a lot of piecing. This is not a project to work on while distracted and I have made some cutting errors. This means I have had to re-cut and sew some of the pieces. No shortage of fabric, but frustrating.
Lupine Clue 5: finished
I really wanted to make progress, so I cut some 2.5 inch squares and made the blocks for Clue 5.
Clue 1 was the only clue I had completed, but I had the units I needed so with some squares, I thought this was low hanging fruit, which would give me the boost I needed to get back to the miles of piecing I still needed to do.
These are also the first finished pieces for the quilt. I don’t know how they will fit in, but they show me how the color combination I selected work together. I am pleased. So far the black doesn’t seem too dark and I am using up some fabric that has been around awhile.
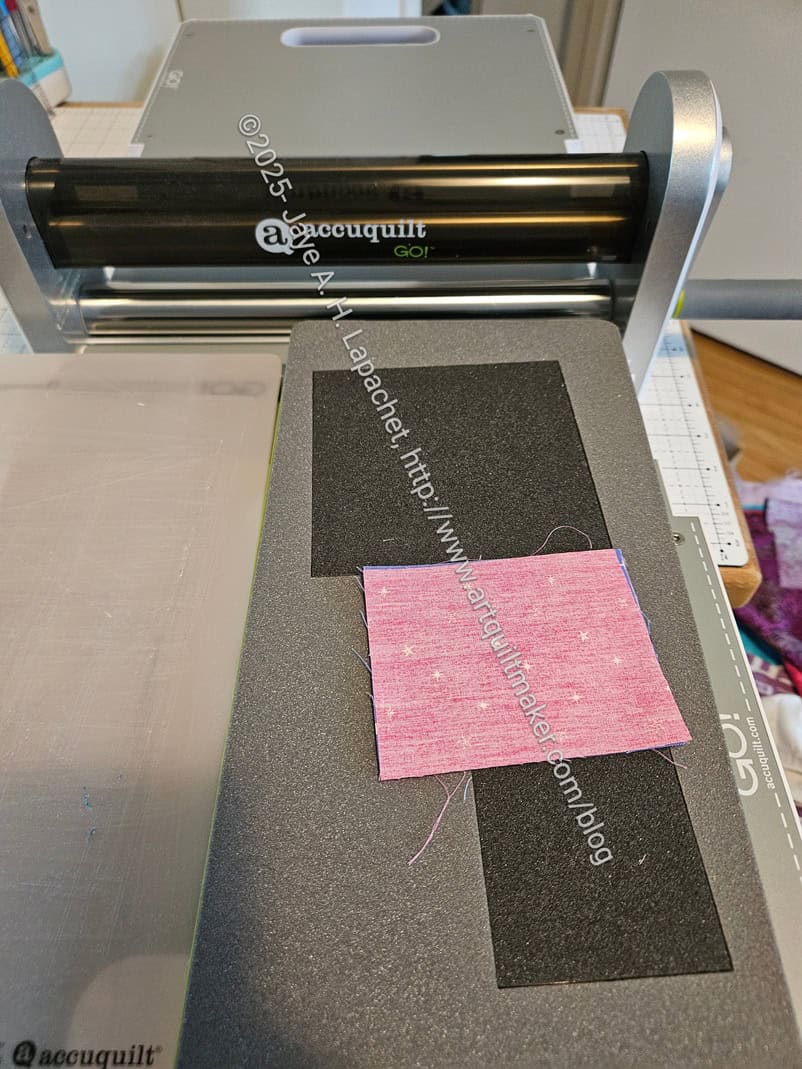
Accuquilt in use
Jeff Rutherford gave me a great idea. It was a serious DUH! moment. He made a comment on my blog and sent me some instructions I needed (free, no copyright issues here!), which set off an email exchange. In the course of this exchange, he mentioned he was using his Accuquilt** to cut pieces for the various Luppine clues. I don’t have tons of dies, but thought that even if I had one die that would work, it would be worth dragging out the machine and doing the prep.
It turns out I have three dies that worked for this project, though I couldn’t find one of them. ERGH! Fortunately, I had HST and HRT dies that I could use. There was some pre-cutting because the HST die I have is the “Value“** die. It came with my Accuquilt and has pretty useful shapes. I cut some fabric just the size of the HST section so I wouldn’t waste fabric on shapes I didn’t need. The picture above shows my fabric/die layout before cutting.
I was able to layer 6 pieces of fabric on the die and cut about 6 HSTs at a time. When you need a lot, it is a good deal.
I did the same thing with the HRT die. I don’t think I had ever used that die before. I think I bought it when I was writing the HRT Resources guide or while making a donation quilt. Anyway, it worked GREAT. I was able to cut, then sew them together easily. As a bonus I didn’t need to trim. I am behind in getting my clues done, but this machine really helped me to almost get caught up. I have to start incorporating the machine into my thought processes and planning when working on a quilt that has general sized shapes to cut. If I start using it more, I might even consider buying one of the electric versions.
N.B. Bonnie will remove the posts to which I have linked from her blog sometime in February 2026. Download or save the clues now if you want to make this quilt.
**Obviously, you should shop at local quilt shops and small businesses. However, if you are too busy or can’t find what you need there, I use Amazon affiliate links and may be paid for your purchase of an item when you click on an item’s link in my post. There is no additional cost to you for clicking or purchasing items I recommend. I appreciate your clicks and purchases as it helps support this blog.
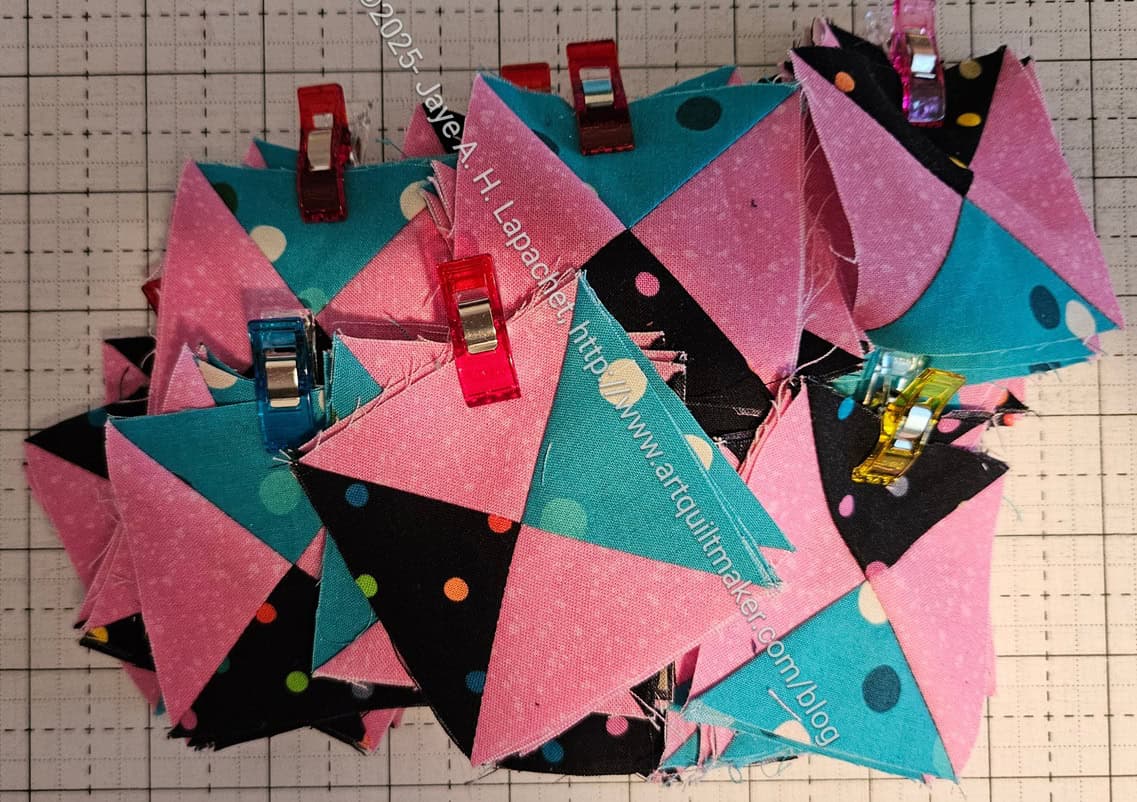
I am very behind, but not giving up. These Flying Geese took a long time, but I was working on the HSTs at the same time.
Clue 5 will be easier, I think, as it is block making and I might jump to it before I get back to the HRTs and HSTs.
N.B. Bonnie will remove the posts to which I have linked from her blog sometime in February 2026. Download or save the clues now if you want to make this quilt.
I have been working on and off on Lupine, especially after I finished some gifts.
Lupine: Clue 1 Finished
A week or so ago, I finished the Lupine & Laughter First Clue. I wasn’t sure how the black would look as a background, but I am pleased with the combination. It has a little bit of a 1954 vibe. I know you are thinking “WTH? How can she be so specific?” I have a book called 100 Years of Color** by Katie Greenwood. It gives a palette for each year for 100 years. While 1954 doesn’t have the black as part of the palette, it does have the feeling that occurred to me when I put the combo together.
One concern I have with the black is that the fabric seems to shred very easily. Not within patches, but as I trim shreds of fabric embed themselves in my rotary mat. As I mentioned before, I have had this fabric for a long time, so it is possible that the quality is different from current fabrics. Fortunately, I have a number of blacks with colored dots that I will use for this project, so not all will be subject to this problem.
Lupine Clue 2 and 3 Progress
I am simultaneously working on Clue 2 and 3. I sewed quite a bit over the weekend. It was kind of rote sewing, but it was good that I didn’t have to think too much. I also did quite a bit of trimming, though not enough. There is a lot of trimming in this quilt.
Bonnie always has different ways to make the various units. Friend Julie says that she likes to try the various methods in order to practice and to find the method she likes best. I usually just use a method with which I am familiar. For the HSTs, I am using the 8-at-a-time method you can find under tutorials. Her comment gave me something about which to think. I did use the Essential Triangle Tool** to make the QSTs, which was new-ish to me.
N.B. Bonnie will remove the posts to which I have linked from her blog sometime in February 2026. Download or save the clues now if you want to make this quilt.
**Obviously, you should shop at local quilt shops and small businesses. However, if you are too busy or can’t find what you need there, I use Amazon affiliate links and may be paid for your purchase of an item when you click on an item’s link in my post. There is no additional cost to you for clicking or purchasing items I recommend. I appreciate your clicks and purchases as it helps support this blog.
Yes, I started another project! I know it is crazy, but here we are.
As usual Bonnie Hunter has started her winter mystery quilt. This year it is inspired by a trip to Iceland and called Lupine & Laughter. I wasn’t going to make the project this year, considering all the other quilts and bags I have on the go. I changed my mind and started piecing.
Of course, before piecing I had to choose fabric. I thought about using one consistent background. I couldn’t find a white piece large enough so I picked out several whites to use. Still I wasn’t happy with the choices.
I could have certainly used text motifs on white fabric again, but I didn’t want to make the same quilt again.
Color tryouts for Lupine
Each time I go into my fabric closet, I see a bin of dots on black. I decided that I would pull some out and try them. The first black was called Color Dots by Jean Ray Laury. It has been in the fabric closet for a long time and it was a good time to bring it to the light.
I thought it looked good with the purple and pink (again!!!) I chose, so I started cutting.
Lupine: QSTs
I realized pretty quickly that I had selected the wrong color for the QSTs required and pivoted to a blue-green (Carousel by Melody Miller). The combo is fantastic, if I do say so myself.
I am still concerned that the black will be too dark, but it feels right compared to the whites I felt ‘meh’ about. I do like the pink and black combination.
So, I am working on QSTs and, of course, am already behind. I am also cutting for Clue 2 and will need to start on Clue 3. I spent the day yesterday piecing, so I won’t get too much farther behind.
I got online with Latifah Saafir the other day as part of her Mystery Quilt project. I almost didn’t, but am really glad I did, because it was me, Latifah and one other person for almost the whole session. I didn’t have a Zoom background installed so the other participants could see my small design wall. Latifah asked about the Blue Improv piece hanging behind me and we talked about it for awhile. I almost swooned. Latifah admiring MY piecing.
Finished: Triumphant top
One of the things I got to do during the session was show my finished Triumphant top. Despite having continual cutting problems, I was able to finish the top. Now I need to make the binding and backing then it will be ready to go to Colleen.
I am pleased with how it came out. I am glad it is done, but happy with the finished result. It is really different than other quilts.
I am also not feeling as cranky about the rulers as I was. I think I will try the HuRTy PuRTy design to try and get the way those rulers work stuck in my mind.
I didn’t get Triumphant on the wall as early on Sunday as I would have liked. I was busy finishing the Sidewalk #2: Blue Strips so Triumphant would have some design wall space.
Triumphant blocks on the wall
When I finally did get it on the wall, I found that I had miscounted the pieces I cut at Sew Day. I was short about a dozen units. Sigh.
The photo doesn’t show any of the side border pieces I cut on Saturday. You’ll have to trust me when I say it wasn’t enough.
I was actually glad to get it on the wall as I could see what I was working with. The main part of the quilt is just a giant 9 patch, so I sewed it together and then sewed the top and bottom borders on which I had finished a week or so ago.
Then I sat down and had to correlate the pieces I had with what I needed. Once I figured out what happened, the cutting went relatively quickly.
The way this piecing is going is I cut a lot wrong, then I figure it out, cut it right and piece cool units together. This is the case with Blocks 4 & 5.
However, I like this quilt, am pleased with the fabrics I chose and am learning a lot.
Except for a couple of background strips, these blocks are done and I have the patterns for blocks 6 & 7. I plan to work on this weekend.
After out Triumphant week off, I am back to cutting out pieces. Well, I am back to trying to cut out the pieces. There are very few this week as we are on the borders, but I am struggling with those #@%^ HRT Bs again.
I watched the video, which is very clear, and cut several pieces wrong. I am now watching the video again,but stopping it, doing the step and then watching more. I just can’t seem to wrap my head around this ruler. I am glad she came up with the mystery quilt as it is a good way to try out the tools.
Triumphant top border
Now I have the Color 3 (turquoise) pieces cut and am about to add some Color 6 (red-violet) pieces. Fingers crossed I can trim these to the correct size.
I cut like a demon at Sew Day, so the pieces were ready to go when I was. Having the pieces cut, having fewer pieces and being more familiar with the process meant I was able to finish Triumphant block 3 in record time.
I am all caught up and have a break for a week until the border instructions are posted.
Yes. This top is in sight of being done. Hooray!
There are some pieces I would have cut differently, though I am sure Latifah had her reasons. I prefer large pieces for the background – as large as possible. I’ll have Colleen quilt over the intersections of the background, however, and I am sure by the time I get it back I won’t care. LOL!
Triumphant center complete
These are large blocks: 20 inches finished. Right now this is a large Nine Patch that is 60 inches wide.
I find the shapes that I can make with the HuRTy rulers are really different from other shapes. I looked at Latifah’s other patterns and didn’t see anything appealing. I hope she has a “Design with HuRTy rulers” course.
I finished the rest of the block 2 blocks. my design wall is full of Sidewalk, so I used the design floor (LOL!) to lay it out.
What stands out to me is that turquoise border around block 1 (center). It doesn’t stand out to me in a bad way. It definitely highlights the center block.
I kind of wish I had used the purple from the center for the purple tips of block 2, but c’est la vie. I am not ripping out more seams.
I am trying to keep up with the Triumphant Mystery quilt. I don’t want that lingering. Since the cutting is the hardest part, I spend as much time as I can on that when I have time.
I cut all the pieces for block 2, but started out just sewing one (of four) together. It has a really different look than ‘regular’ blocks.