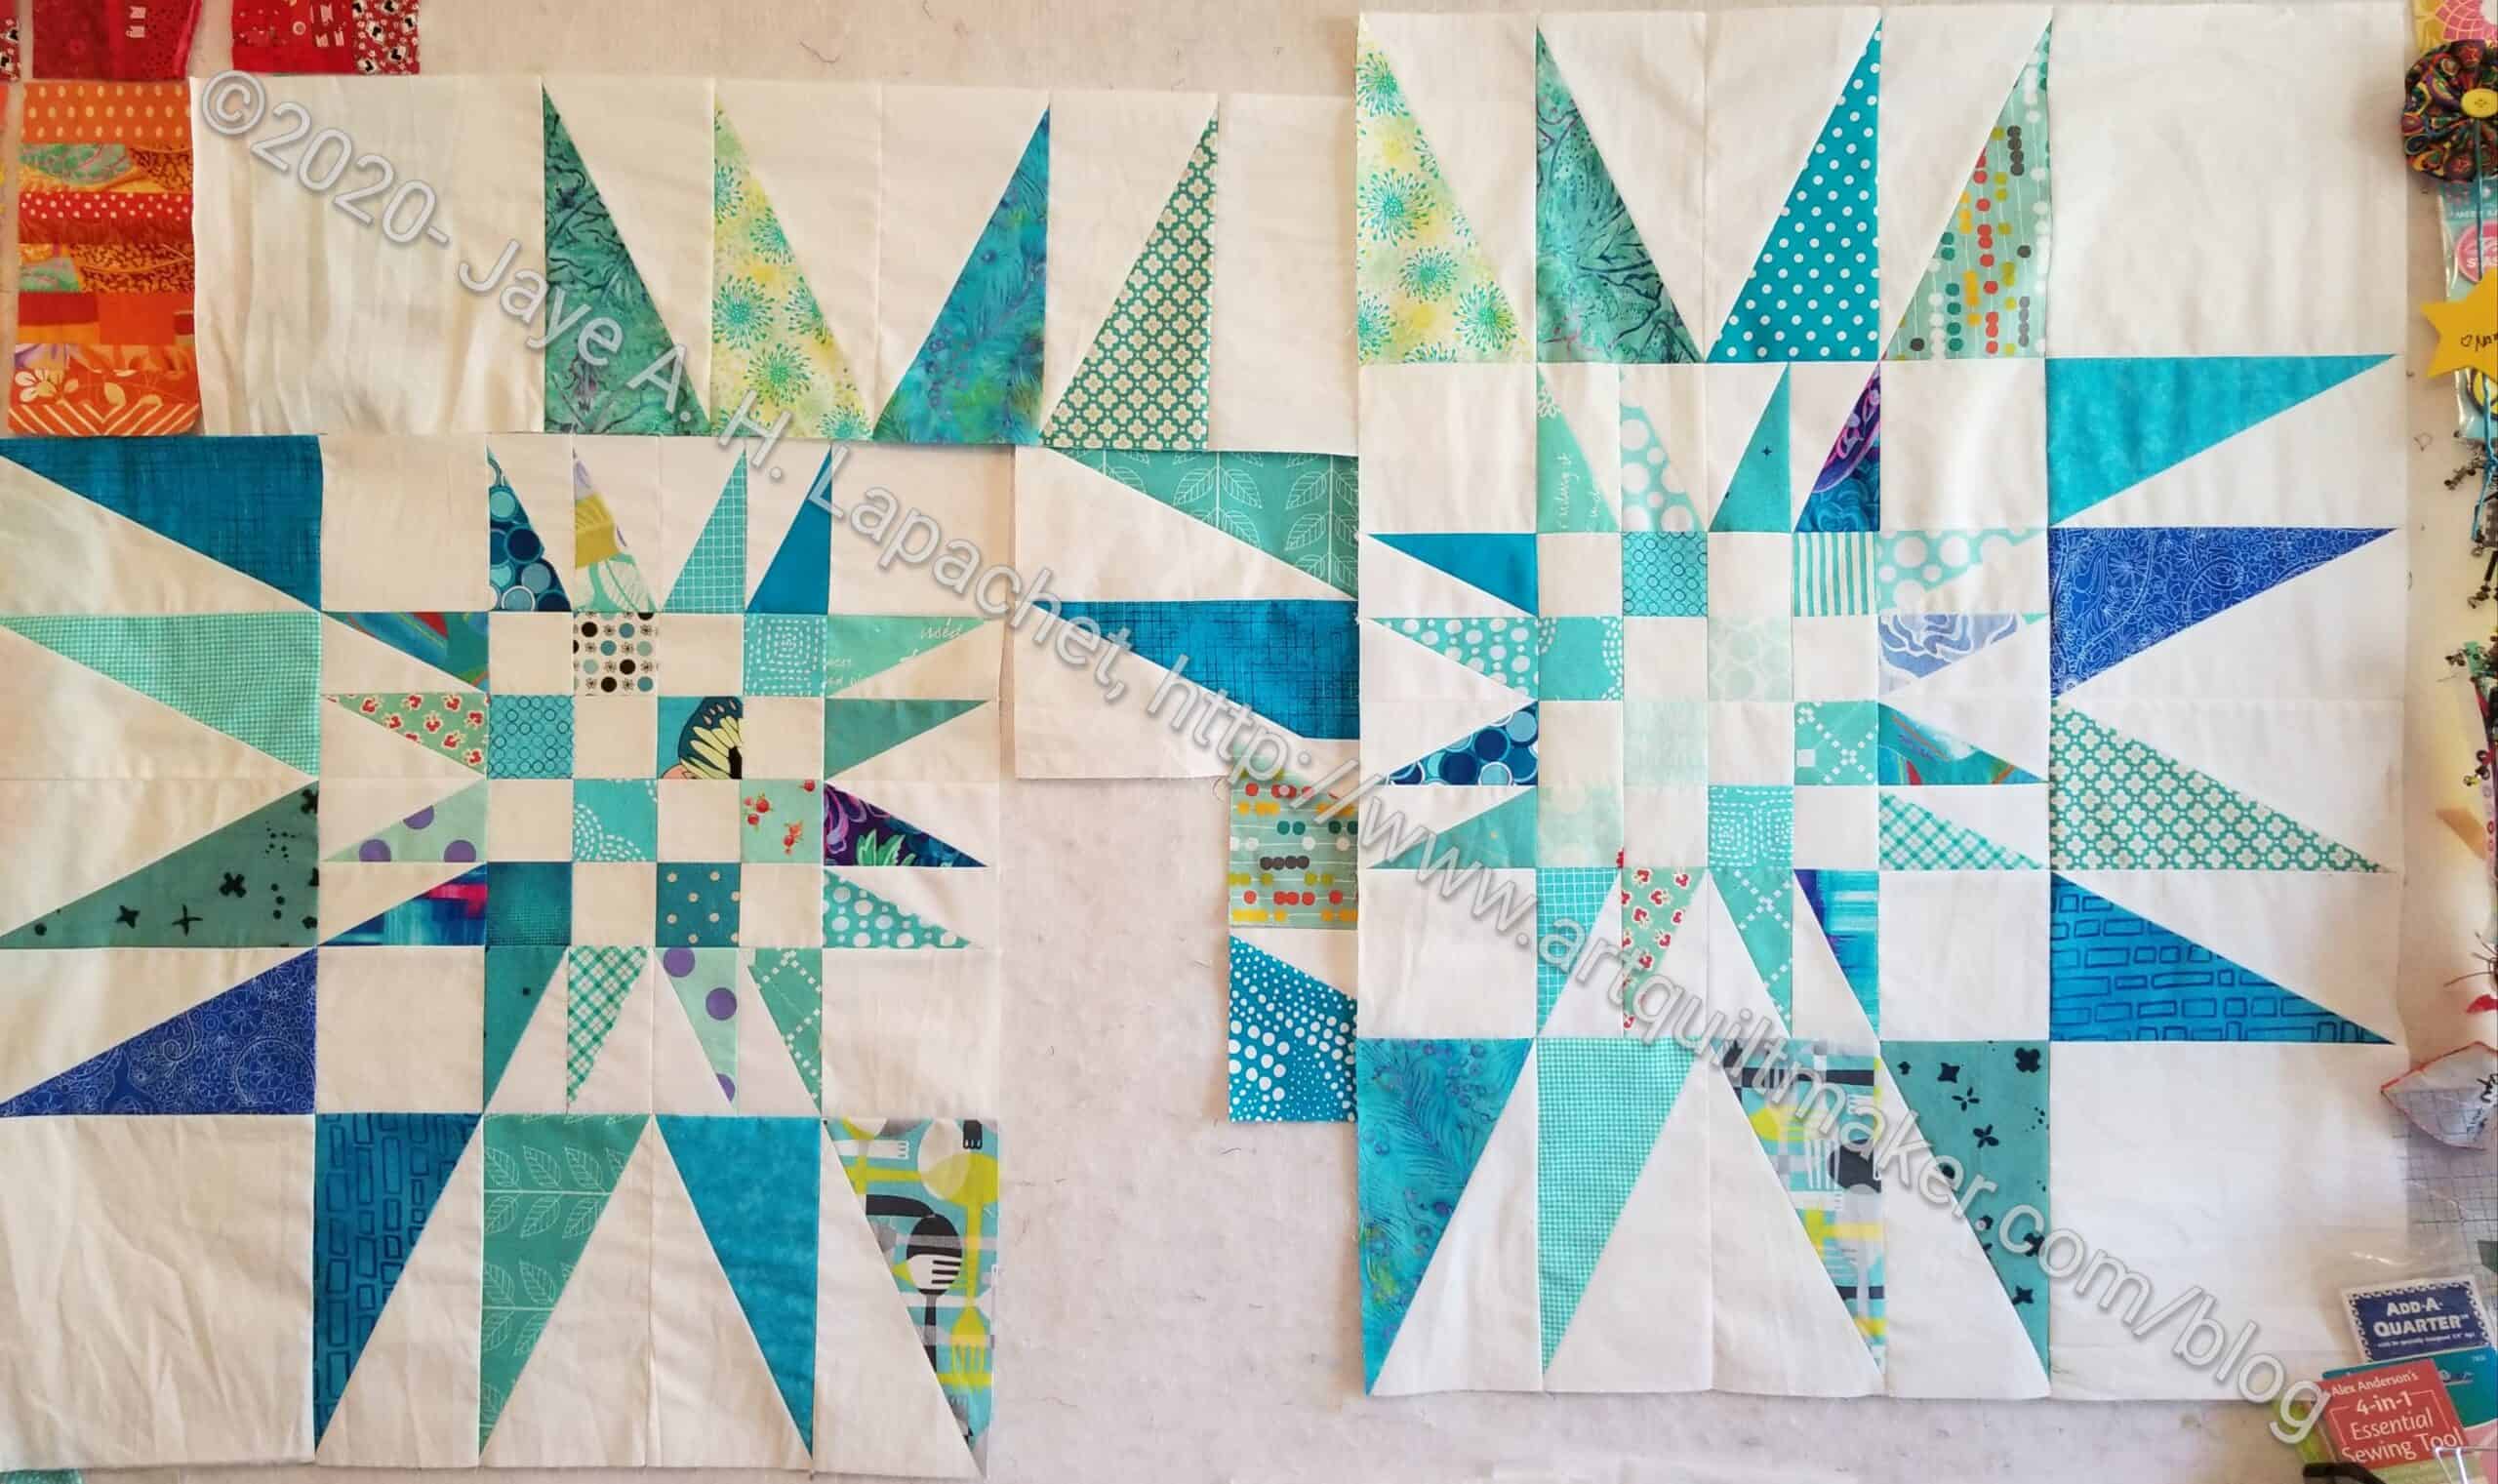
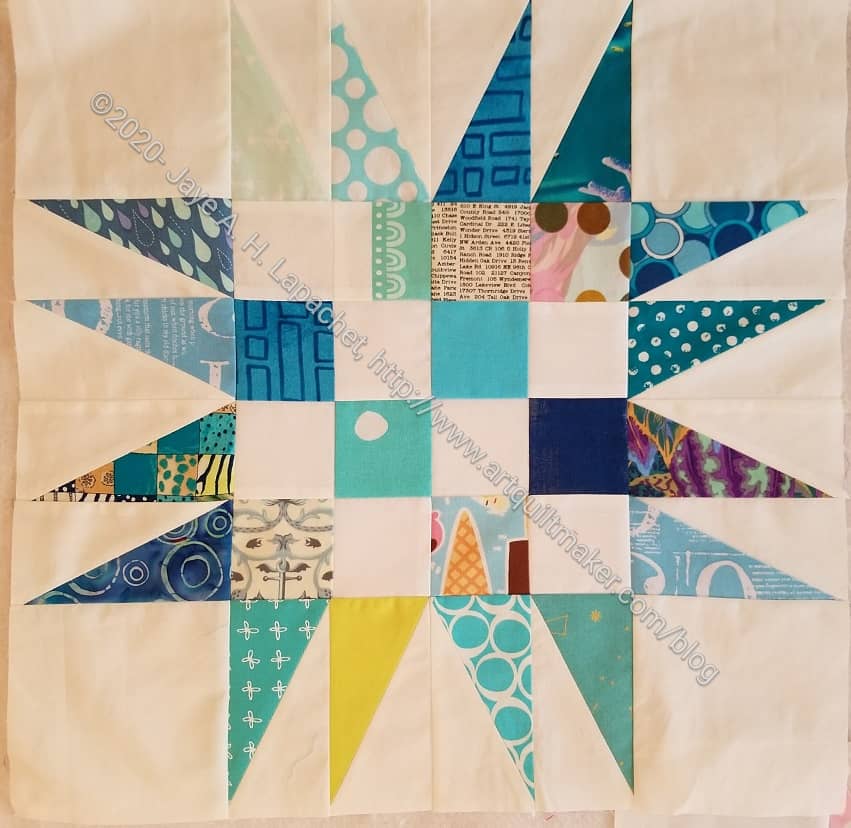
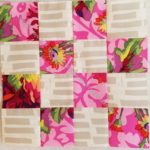
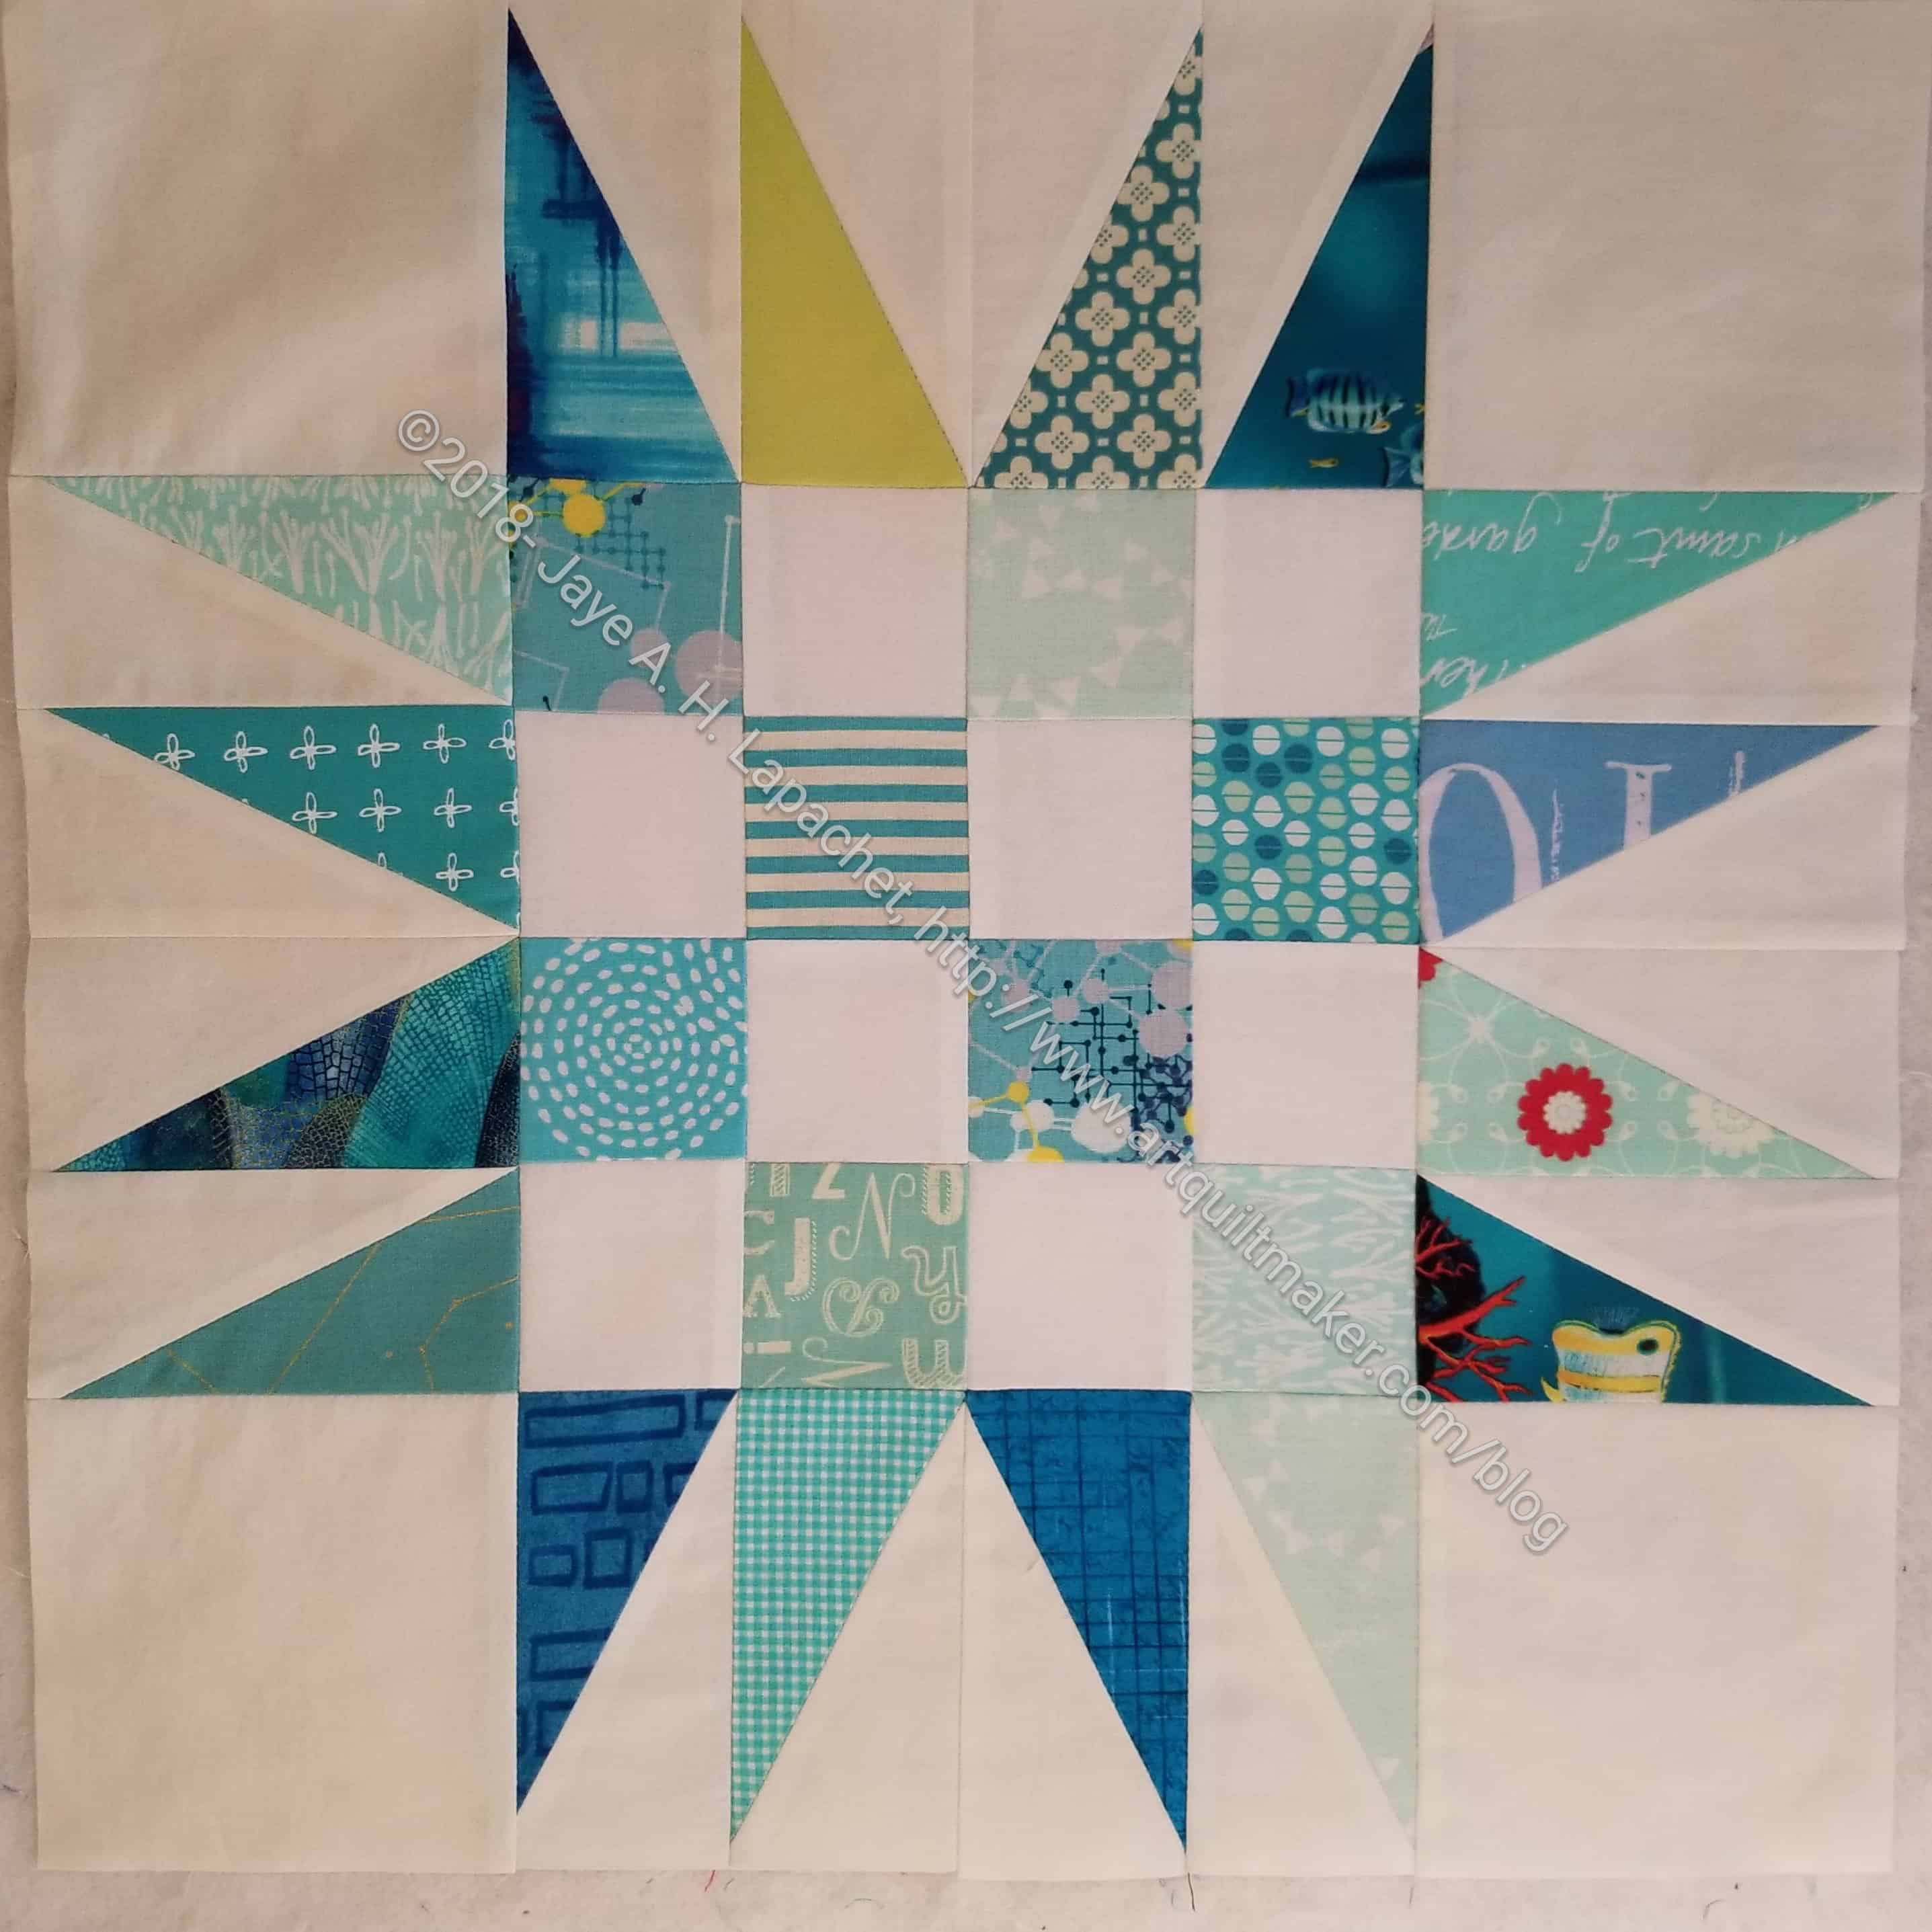
I cut like a demon at Sew Day, so the pieces were ready to go when I was. Having the pieces cut, having fewer pieces and being more familiar with the process meant I was able to finish Triumphant block 3 in record time.
I am all caught up and have a break for a week until the border instructions are posted.
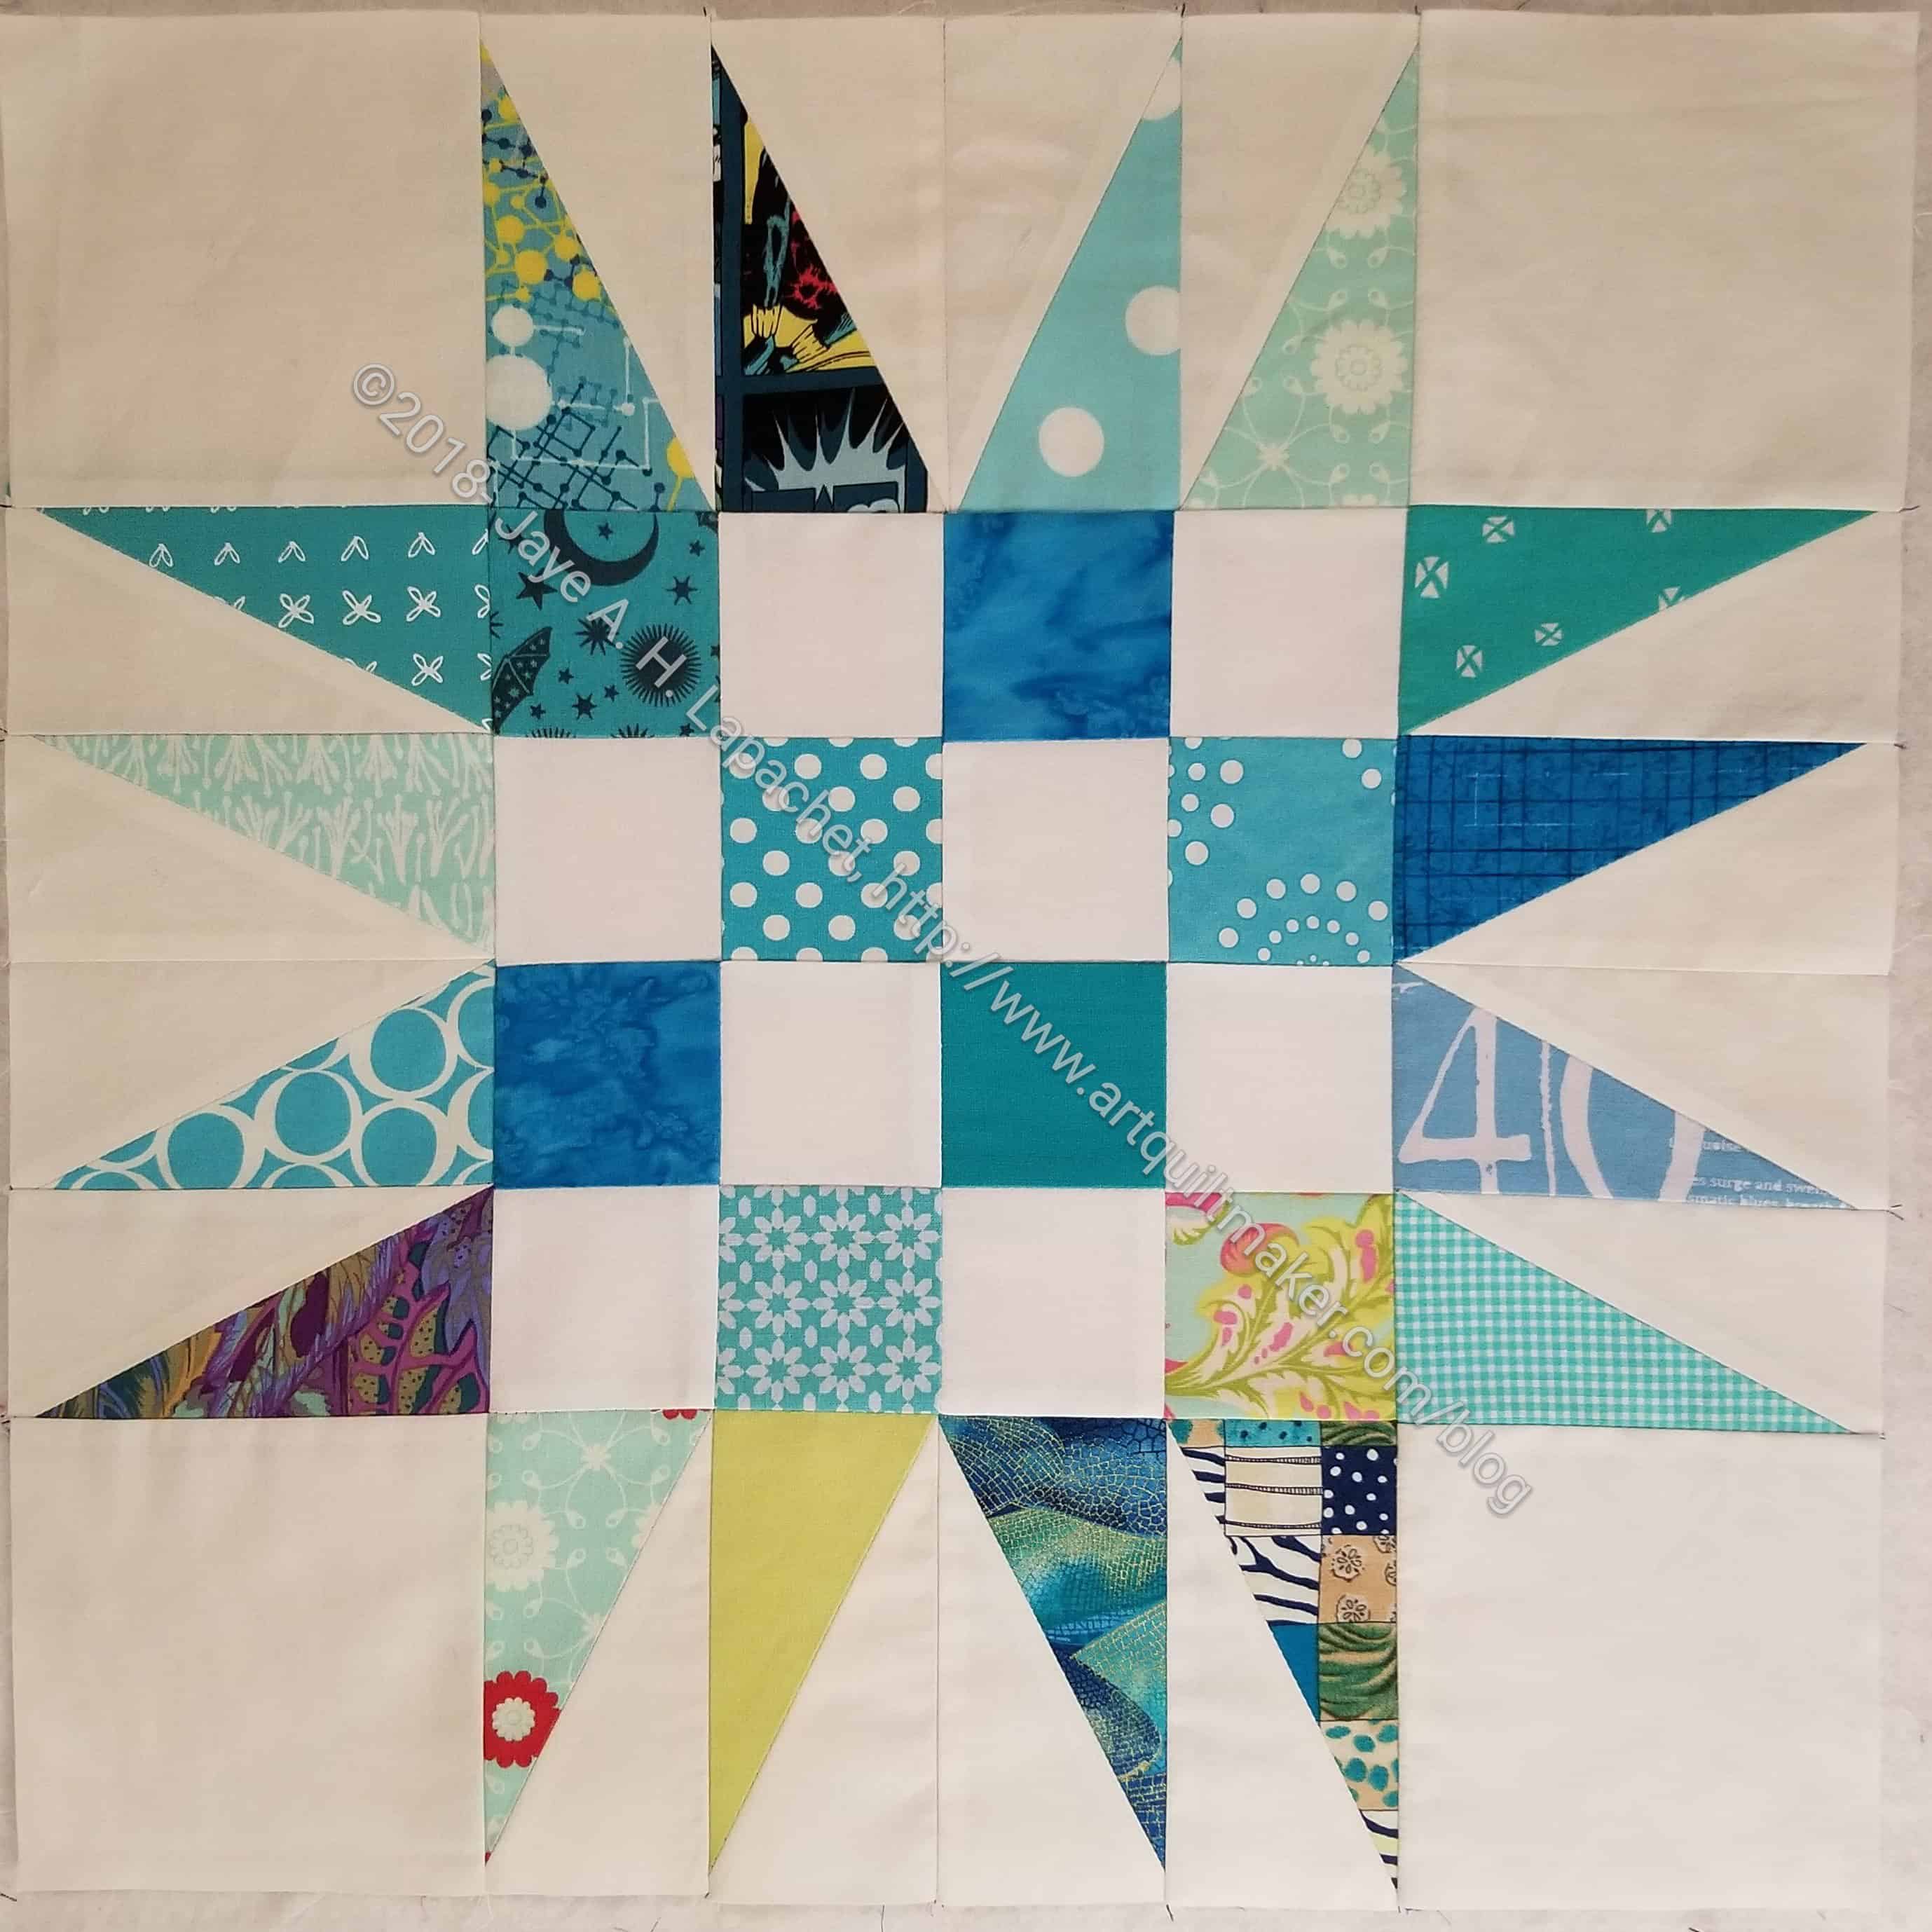
Yes. This top is in sight of being done. Hooray!
There are some pieces I would have cut differently, though I am sure Latifah had her reasons. I prefer large pieces for the background – as large as possible. I’ll have Colleen quilt over the intersections of the background, however, and I am sure by the time I get it back I won’t care. LOL!
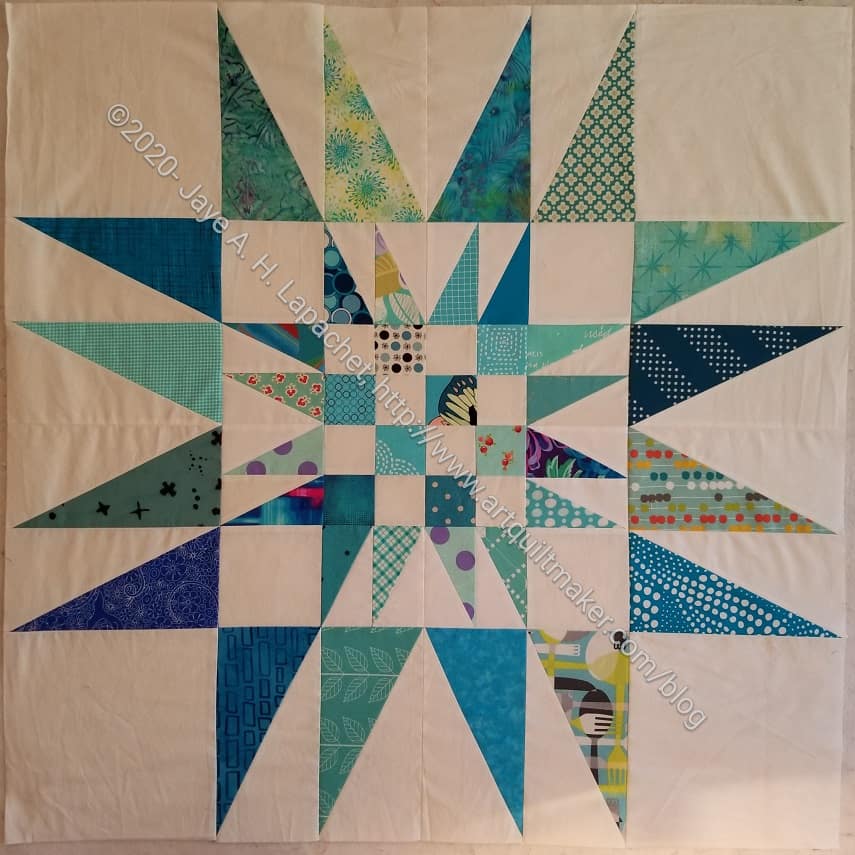
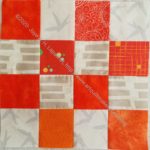
Triumphant center complete
These are large blocks: 20 inches finished. Right now this is a large Nine Patch that is 60 inches wide.
I find the shapes that I can make with the HuRTy rulers are really different from other shapes. I looked at Latifah’s other patterns and didn’t see anything appealing. I hope she has a “Design with HuRTy rulers” course.
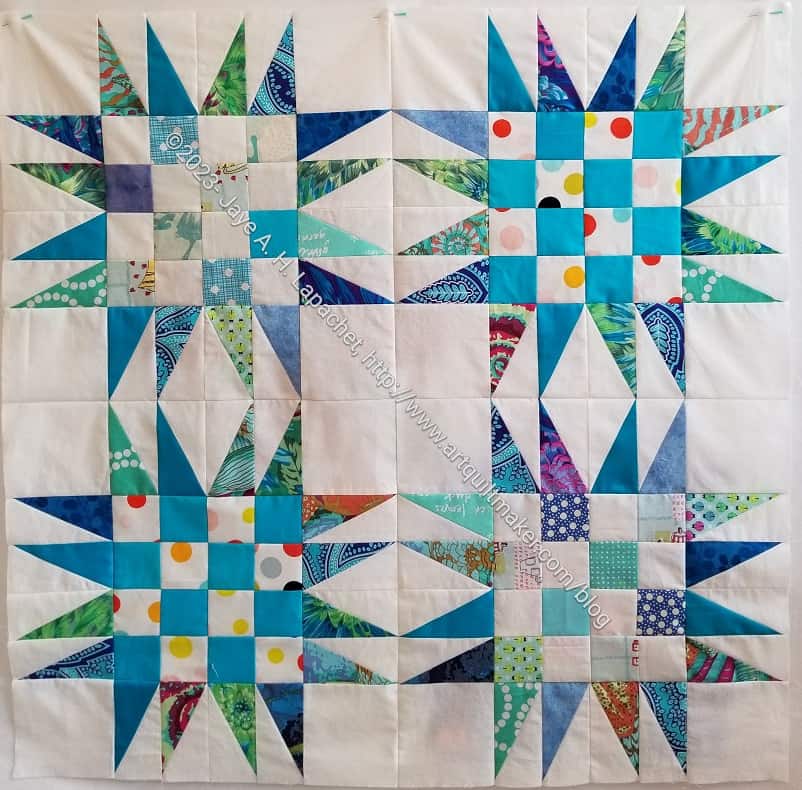
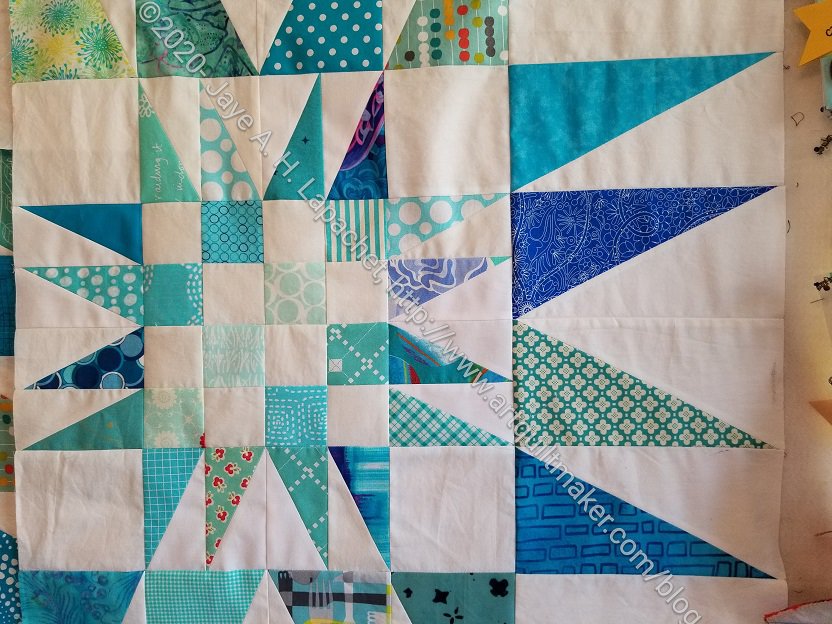
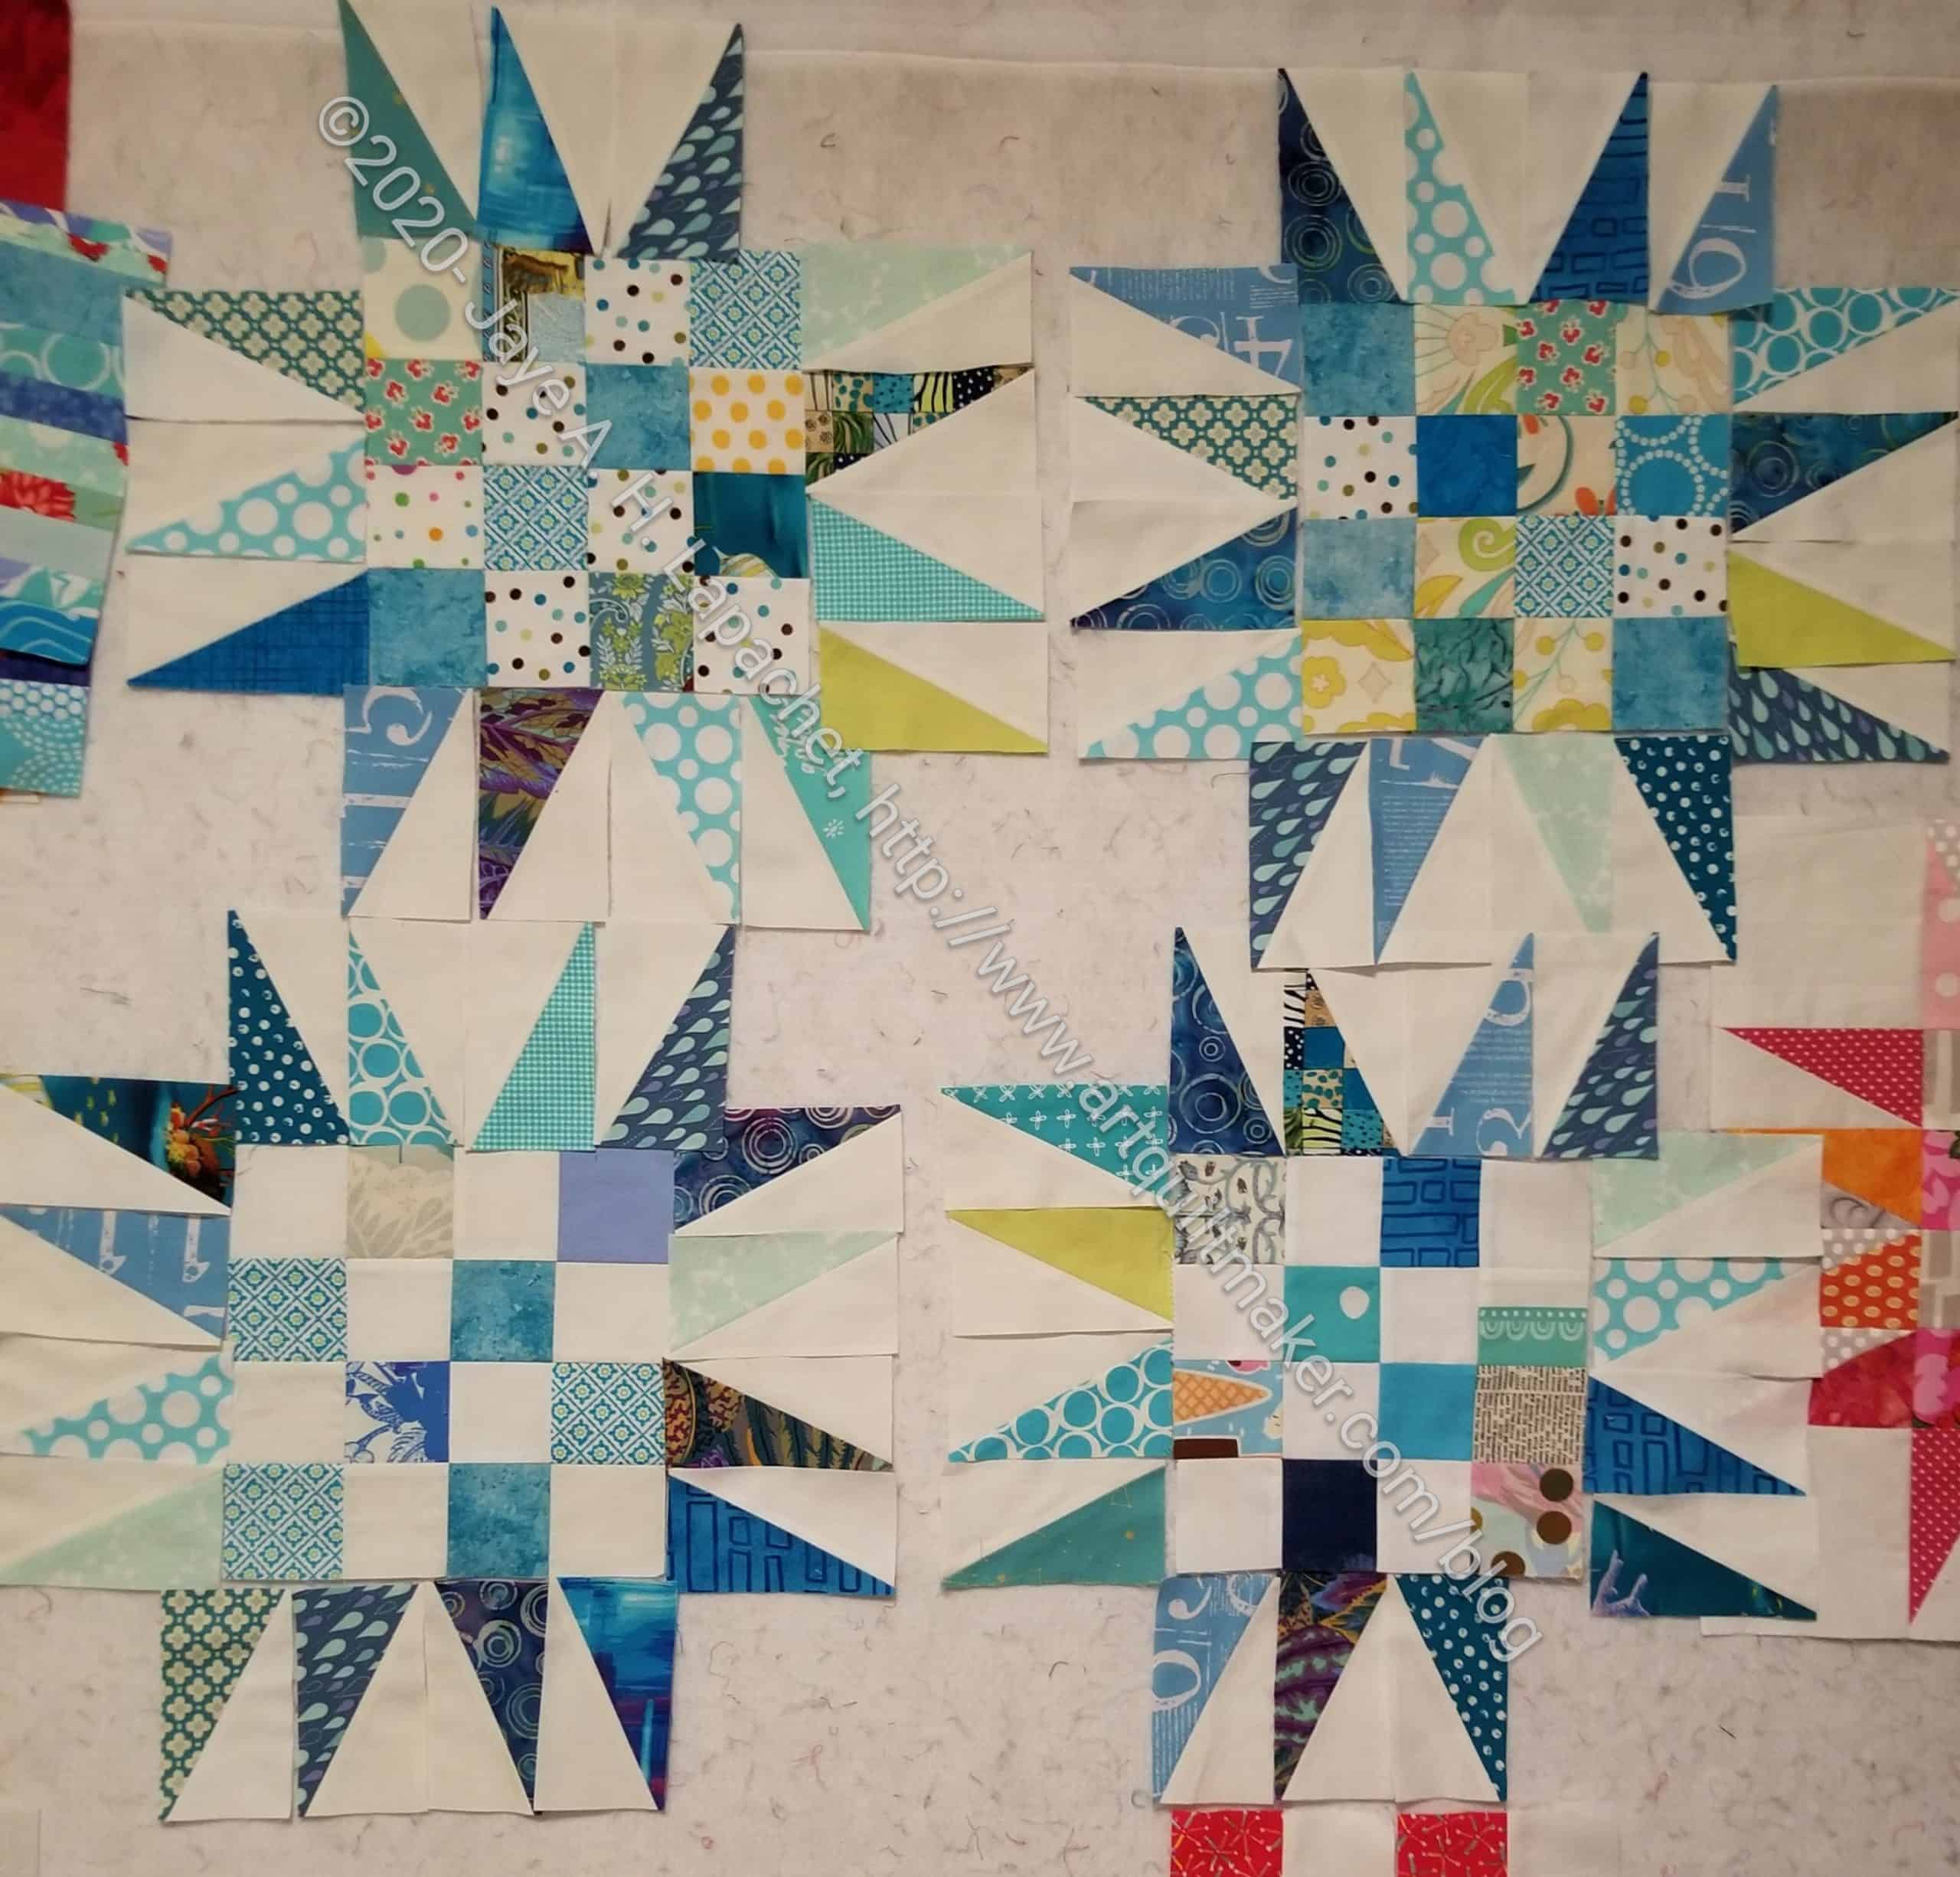
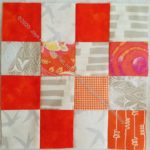
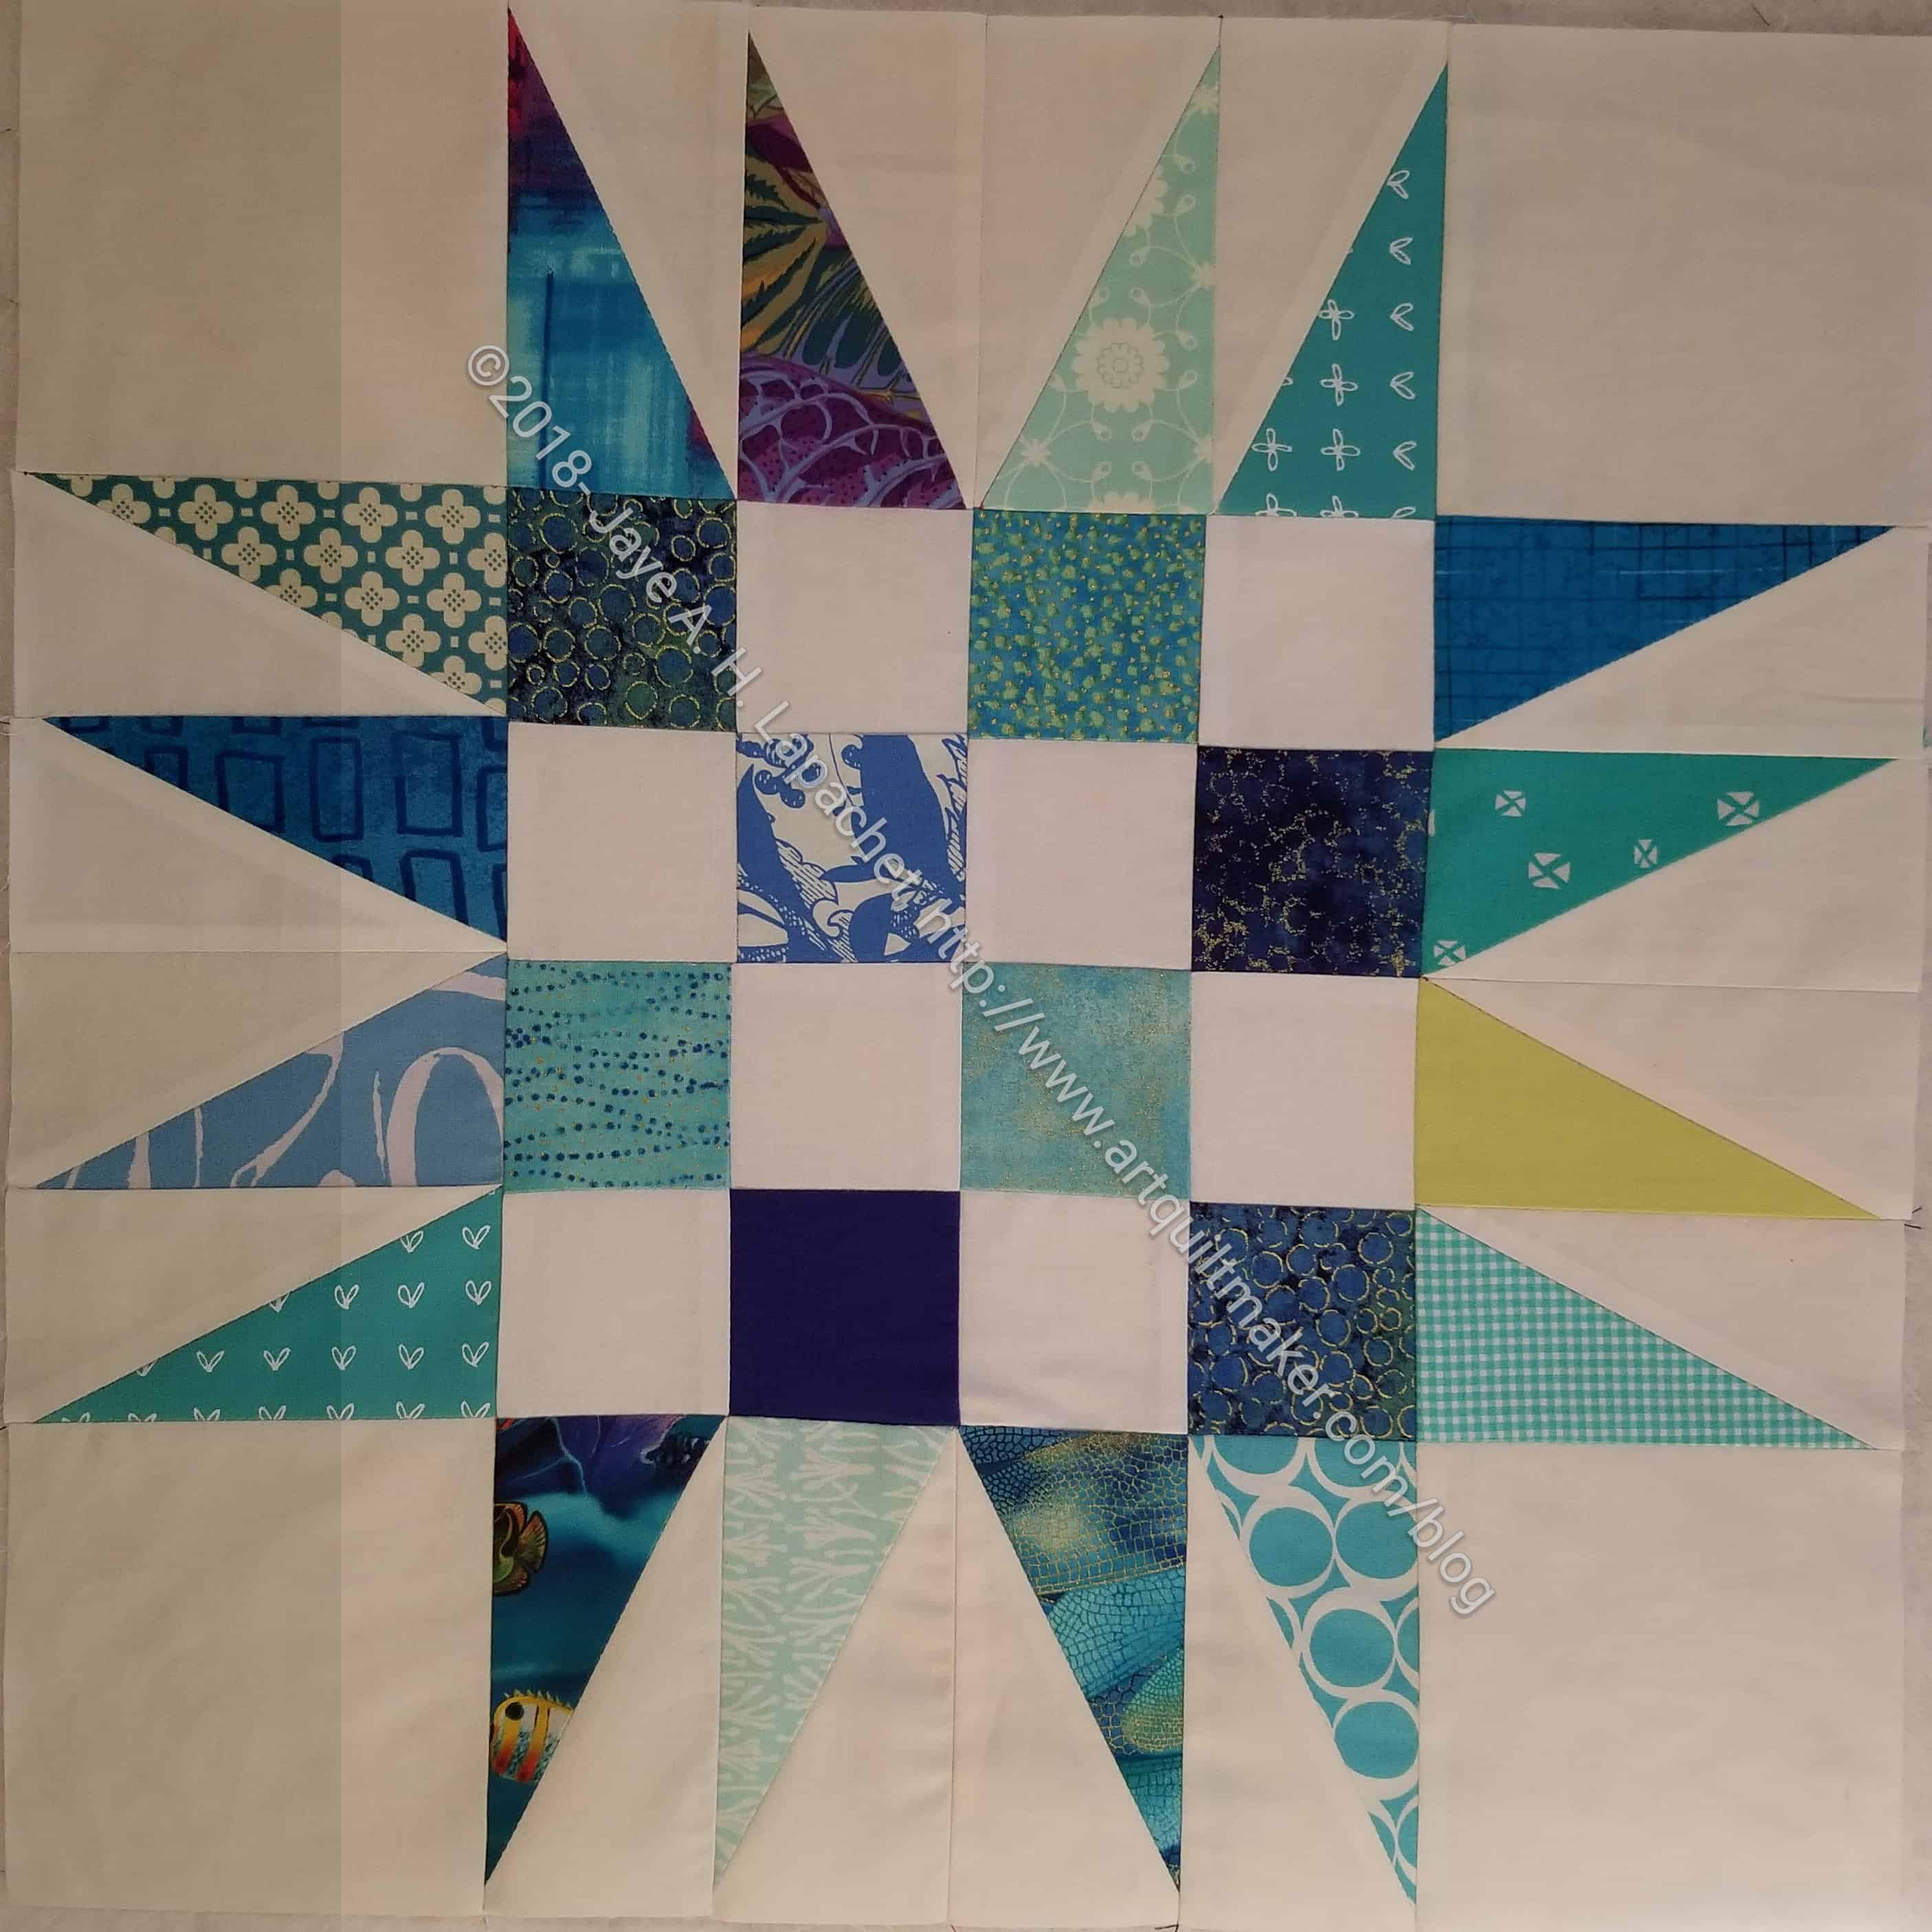
I finished the rest of the block 2 blocks. my design wall is full of Sidewalk, so I used the design floor (LOL!) to lay it out.
What stands out to me is that turquoise border around block 1 (center). It doesn’t stand out to me in a bad way. It definitely highlights the center block.
I kind of wish I had used the purple from the center for the purple tips of block 2, but c’est la vie. I am not ripping out more seams.
This is more of a product review than a tutorial. I’ll talk about the ruler and give you some resources and tips.
I started this post when the HuRTy 1** was a new-ish tool. The designer, Latifah Saafir has now released two more HuRTys: 2 and 3. All three HuRTys help quiltmakers cut and sew Half Rectangle Triangles (HRTs). I received HuRTy 1 as a gift from Friend Julie! On a whim, I bought HuRTY 2 and 3 myself.
You may know that Latifah is the creator of the Clammy series of rulers** that help make curved designs. You might remember the class I took from her and the quilt I made using the Clammies, as well as the relatively recent Orange Peel Circle tutorial. Latifah is talented and her rulers work really well!
Remember, I did a series of posts on tools for making HRTs? Take a look at those to get an idea of the various tools available for making this great shape. I use the Split Rects** ruler, mostly. I am always open to new tools and I had high hopes for the HuRTy 1 ruler** when I received it. I have to admit I struggled using it at first. The only way I got more comfortable was to cut a million HRT pieces for the Triumphant quilt. I admit that I cut a lot wrong as I got used to the ruler. Make sure you have plenty of fabric. You can plan to use the mis-cuts for a donation quilt.
Latifah, the designer of the ruler, has a YouTube channel. On it she has some good video tutorials, which SueS talked about when she wrote for this space recently. I tried using the ruler without watching the video and it didn’t work for me. This has nothing to do with the ruler or the instructions. As I have said before, it has everything to do with the way I learn. Also, specialty rulers can be challenging, so videos are great learning tools.
One of the things about HRTs is that you have to be able to make both HRT A & B blocks, if you want to make a piece like my Spiky 16 Patch. This means a lot of flipping and turning of the ruler. Different HRT ruler designers accomplish this in different ways.
Spiky 16 patch #5 top in progress
The first HuRTy video shows viewers how to use The HuRTy™ to cut both A & B HRT pieces. Amazingly, Latifah includes left handed cutting! These HRTs are the normal ones that I was able to cut using the SplitRects rulers.You can see the A and B pieces in this Spiky 16 Patch quilt. They face each other in the top center with the fat part of the triangle pointing in different directions. In this design the middle HRTs are touching.
My first efforts with HuRTy ruler, before using the Triumphant instructions, didn’t seem right. The pieces just seemed too small, then I realized I would have to trim them anyway, so I think most of them would work on my test project. I think trimming is a good thing with HRTs. There is so much bias that, in my opinion, it is the best method for making sure the patches are the right size.
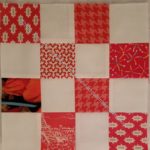
Triumphant block #2
Part of the issue is knowing what size to cut the strips or pieces at the beginning. The Split Rects ruler** by Studio 180 Designs has that information printed on the ruler, which is super helpful. The Triumphant pattern had a whole section about cutting strips, which are later subcut into HRTs. The strip info does not seem to be printed on the HuRTy rulers.
Using both sides
You use both sides of this ruler. For the HRT A, the side called ‘A Start’ is up. For the HRT B pieces, the ‘B Start’ side is up. In the photo you can see that the ‘A Start’ is upside down. In the photo, I am trimming an already made HRT.
This is a little challenging, because you would have to put True Grips**, or similar, on both sides. I often put True Grips on specialty rulers so they stay in place. With the HuRTys, I have to pay careful attention.
I am curious about how to design a quilt using the HuRTy(s). Though I love specialty rulers, one thing I don’t like is if you have follow a pattern in order to use them.
In general, I will try new rulers. Often I buy specialty rulers with the intention of trying them and never do or get derailed. I was glad I signed up for the Triumphant quilt as it really is helping me to learn about using the HuRTy(s). It would be great to have a ‘ruler library’ where people can check out rulers in order to try them out.
Other Resources and Previous Posts
Deb Tucker tutorial on using the Split Rects ruler
Friend Julie has some posts about her Slopes quilt, which uses Half Rectangle Triangles. She used the HuRTy ruler, partially, to make them for a Color Collective project. You might want to take a look at her blog.
**N.B: Obviously, you should shop at local quilt shops and small businesses. However, if you are too busy or can’t find what you need there, I use Amazon affiliate links and may be paid for your purchase of an item when you click on an item’s link in my post. There is no additional cost to you for clicking or purchasing items I recommend. I appreciate your clicks and purchases as it helps support this blog.
The last meeting was a bonanza of quilts. There was a lot of show and tell plus 3, yes THREE, mini-trunk shows. It was so interesting to see the different styles and designs of the members.
SueS’ HRT quilt
One of the quilts at show and tell was SueS’ HRT quilt. I didn’t even know she was working on an HRT quilt. I am on high alert for HRTs since I am working on the Triumphant quilt with the HuRTy rulers**.
SueS sent me the text I used for this post. I have edited it and tried not to change the meaning.
For this quilt she wanted to see how a single block could be used to create a sense of movement. Sue said that the half rectangle block reminded her of a bird in the distant sky, so she tried to create the idea of a flock of birds.
When I first saw this quilt, I was intrigued by the way it looked like the quilt was sideways. Knowing that she was working to create the sense of a flock of birds make the orientation make more sense.
Sue found that of all the techniques she has used for making HRTs, Latifah Saafir’s HuRTy ruler is her favorite. She used the HuRTy 1**, which is for making 1:2 and 1:6 ratio triangles. The 1:2 triangles range from 1 x 2 to 6 x 12 inches while the 1:6 triangles are 1 x 6, 1.5 x 9, and 2 x 12 inches. All of these sizes, shapes and angles can be made using 1 ruler.
Sue found the instructions to be clear. She also found the ruler to be well marked for right (HRT A) and left facing (HRT B) blocks of each size. She found the markings limited the mistakes that are really easy to make when cutting HRTs.
The HuRTy 1** has a QR code printed on it which links to YouTube tutorials. The tutorials provide help for using the ruler. Sue found the videos to be very helpful for getting started, along with general tips for making HRTs. One tip is to press the seams open. You know me! I prefer to press the way the quilt needs. I have also found that HRTs work well when seams are pressed open. The bulk ads up quickly, and pressing seams open helps reduce the bulk.
Other Resources and Previous Posts
Deb Tucker tutorial on using the Split Rects ruler
**N. B. : Obviously, you should shop at local quilt shops and small businesses. However, if you are too busy or can’t find what you need there, I use Amazon affiliate links and may be paid for your purchase of an item when you click on an item’s link in my post. There is no additional cost to you for clicking or purchasing items I recommend. I appreciate your clicks and purchases as it helps support this website.
As mentioned, we are all about starting projects here at AQ!
Yes, I am doing the Latifah Saafir Mystery quilt. My time has not become more free, but I am doing it anyway. It uses the HuRTy and this is a good way to get the tool into my bag of tricks.
It is a little unclear to me whether you can still join, but here is a link and you might be able to navigate your way from there.
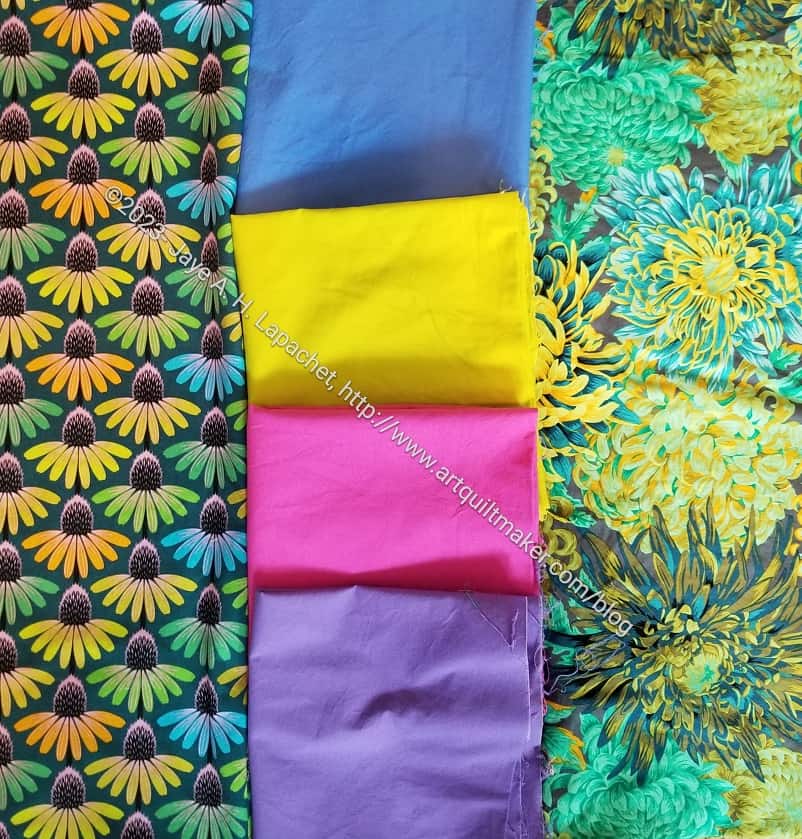
Latifah is at H&H in Chicago (whatever that is!), so participants have a little time. I have two selections of fabric that I am contemplating. The quilt needs 7 fabrics including a contrasting background.
Fabric Pull – Guicy Guice
First, is all fabrics that I bought recently.
Most of them are from Guicy Guice, but there are a few from Alison Glass and that white is Seasons from Figo fabrics.
This is mostly cool colors, which should come as no surprise. I am not sure if there is enough contrast, but I like all the fabrics, so I am willing to go with it.
Coneflowers & Chrysanthemum Fabric Pull
The second option is an old fabric pull for which I am still seeking a project.
I still really like this group of fabrics. I am just not sure if pointy HRTs would work with the Coneflowers & Chrysanthemums.
I do feel like there is something missing and I can’t quite figure out what. Dots, maybe?
I finally finished the first two Double Spiky 16 Patches. It turned out to be 32″ square and I think I will leave it this size. I just don’t feel like adding anything to it.
I am pretty pleased with the way it came out and I had a lot of fun making the second row of larger HRTs.
After writing the Spiky 16 Patch Tutorial I decided to try adding another round of HRTs to my regular block to see what would happen.
I am still using the Split Rects ruler** (By Deb Tucker) from Studio180 Designs for this project, so you will still need to review the how to use video.
Double Spiky 16 Patch in process
The photo looks like a bit of a mess because the pieces are all overlapping and I need two more HRTs for each block.
I have a lot going on and this has been my leaders and enders project, so I haven’t worked on it in a week or so.
Double Spiky 16 Patch in process detail
I like the look of the double row of HRTs. The outer HRTs are pretty large!
I am not sure if I will make more of these blocks for this project, whatever it is. If it is a donation quilt, I have to make it larger
**I use affiliate links and may be paid for your purchase of an item when you click on an item link in my post. There is no additional cost to you for clicking or purchasing items I recommend. I appreciate your clicks and purchases as it helps support this blog.
While sewing the Frolic! top together I used the New Blue Spiky 16 patch blocks as leaders and enders. I felt like I had quite a bit of Frolic! to sew together, but I only ended up with two Spiky 16 Patch blocks. I guess the Frolic! top work seemed like more than it actually was because I feel like I have been working on it forever.
I haven’t, of course, but it feels like it.
New Blue Spiky 16 Patch #2
In any case, these Spiky 16 patch blocks are coming along well. They are the same, or similar to Spiky 16 Patch #1 and #2. I’ll probably do the same kind of setting as Flame just to get this top finished. I’d like to try something else with the HRTs.
I am thinking about making a donation quilt with just the HRTs, but don’t think I will do that yet. I think I want to just make another Spiky 16 Patch quilt. I think I want to make the HRT version (no 16 patch) with a variety of different colors – not monochrome or warm/cool.
As I said the other day, I am working with HRTs again. After getting re-oriented to the Split Recs ruler (By Deb Tucker). I followed my own advice (for once) and watched the video, which told me what I needed to know to get going.
I am using these as leaders and enders, though I also seem to be sticking in some regular 16 patches as well, while I work on the Frolic!
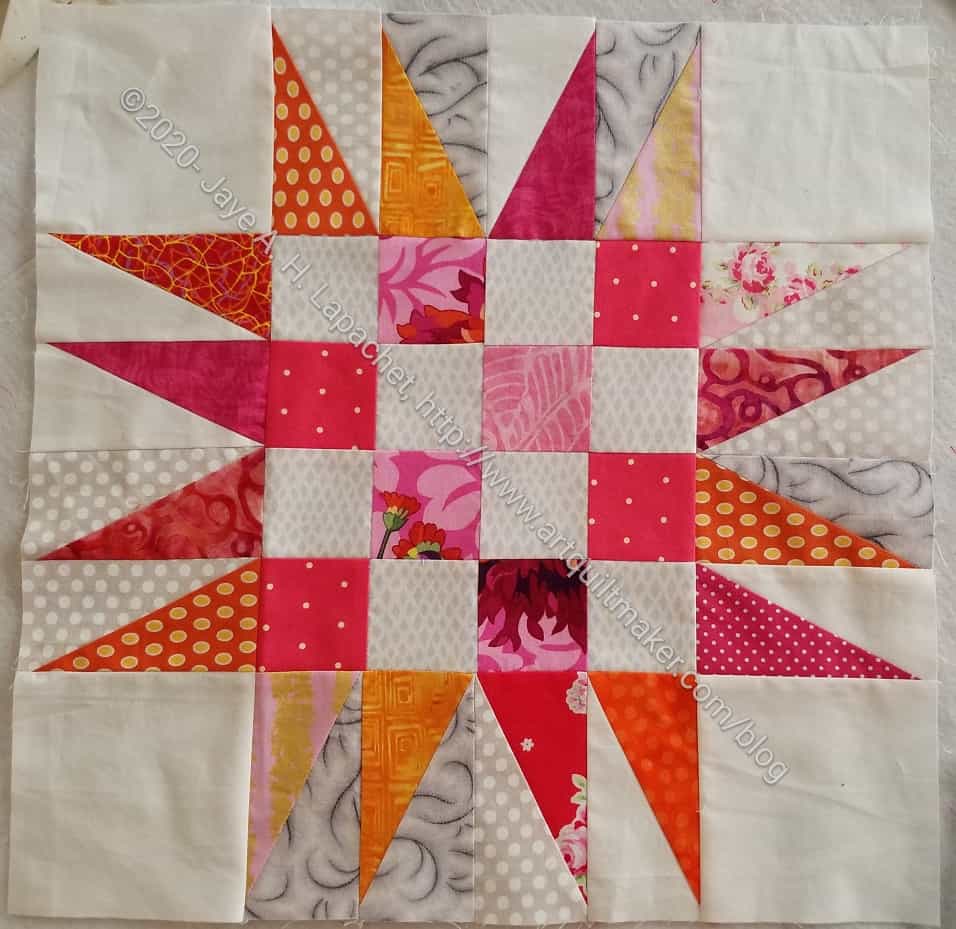
I am really loving these warm colors, which is an antidote to staying home most of the time and the rain (no complaints; we need it). They look so happy. I have used 5 blocks to make a quilt in the past, but might try 4 this time. It will be easier to make the corners.
**I use affiliate links and may be paid for your purchase of an item when you click on an item link in my post. There is no additional cost to you for clicking or purchasing items I recommend. I appreciate your clicks and purchases as it helps support this blog.
The other day I talked about making some HRTs with the intention of making a new donation top. I got inspired by some 16 patches that I made while my subconscious worked on Frolic! I also have the Warm Windmill on my mind.
Warm Spiky 16 Patch on the design wall
For the past few days, I have been cutting and sewing HRTs and trying to relax. I am coming up with a quilt top that I really like.
I didn’t have any time to sew at the end of the week and was kind of busy as well. I did manage to finish another Spiky 16 patch donation block.
I might be getting a little tired of these blocks in this color scheme. I know! Crazy, right? I’d kind of like to see a version with more colors. That means making a stash of HRTs in different colors as well.
I finished another Spiky 16 patch over the weekend, so my collection is growing. I need to start thinking about how I will set these blocks. I could do another quilt like either n.1 or n.2. I am trying to think of something different. Something different might be a small addition like Mrs. K added to her corners.
On point settings are kind of a hassle, but so effective. I have two more blocks to make before I have to decide.
I have been working a little at a time on these blocks. Thanksgiving took up a lot of time last week and I didn’t get much time to sew until Friday.
As mentioned the other day, I had to make some right facing HRTs. I made a few so I could finish this block.
I want these blocks to, at least, have the appearance of being scrappy, so I can’t make many of the individual units without getting too much duplication. I am pleased with this one.
I am getting started again on a third Spiky 16 Patch donation quilt.
It is easy just to keep making 16 patches. They are pretty rote, but I have a lot of the prep done for more spiky 16 patches and the units don’t help anyone laying around the workroom. I made the first block with no problems. The first block is always the hurdle. Now I feel like I can zoom through the process.
The stack of the 16 patches and the half rectangle triangles made a good start.
As you can see the rectangles point in different directions I am a bit short of the ones that point to the right (on the bottom row). I had to make a few to finish this block. I will need to make more to finish the rest of the quilt as well. It is a little confusing to know which way to cut the fabric to get the triangles to point in the right direction. I think it is with the print fabric on top. I want to dig out the Split Recs ruler directions to see if that particular piece of information is clearly noted. If it is clear, then I won’t have to try and remember. Small details like that disappear when there is space between projects.