Pillowcase Party

I am sick of Wordless Week. It was great while I was gone, because I didn’t have to worry about posting, but now that I am back (yes, I will tell you all the details) I want to toss up some words and get some words back from YOU!

I am sitting here listening to Patrick Monahan and Train singing “Hey, Soul Sister” and “Save Me, San Francisco.” Suddenly, I am obsessed with these two songs and have been listening to them over and over for the past half hour or so. I don’t know what they mean, but I love the sound. I first heard “Hey, Soul Sister” on a re-run of CSI: NY, then I found the performance on YouTube and, then, had to buy the song. Now I can listen to it, as well as “Save Me, San Francisco” whenever I want. It is a good thing I am home alone (as I write this), because I am sure the family would be screaming for me to stop torturing them.

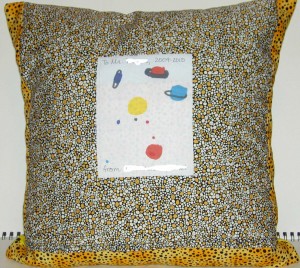
Along the lines of obsession, I have been making pillowcases for the past 24 hours. I have 4 cut out and two made. Of the two, one has already been mailed as a special gift. I hope the recipient is still where I mailed it when it arrives! She told me today she is leaving! Oh well!
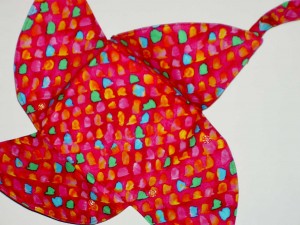
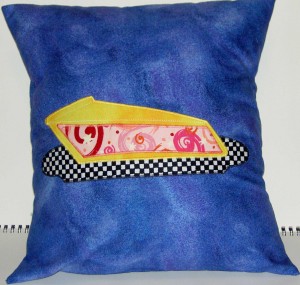
Hoffman Fish
Hoffman Fish

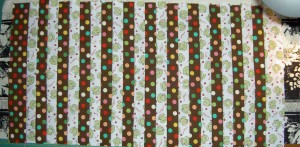
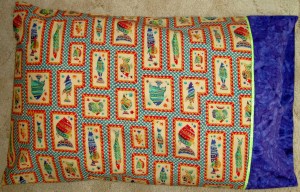
The fish pillowcase is made from an oooolllllddd Hoffman print. TFQ informs me that it is at least 15 years old. It was in my stack of fabrics that are designated for backs or ‘other.’ Often I buy a half yard or less (though I am having a crisis of how much fabric I should buy), which is not enough for a pillowcase.

Unless I have bought specific fabric for a pillowcase, then my general collection does not provide large enough pieces for the main piece of the pillowcase, so I dug into the back stash. If I haven’t used the fabric, it should be fair game, right? I have a lot of conversationals in this group, so they will work well for the cheerful pillowcases being requested.

I have mentioned the Million Pillowcase Challenge a couple of times. I went to the website to try and figure out where to send the pillowcases and encountered a problem. Quilt shops are collecting them. I have to donate them locally and don’t really have a local quilt shop. One is a few towns over, but they don’t seem to be collecting them. I was determined to forge ahead when CraftHope came through.

CraftHope just finished their largest project, related to the oil spill clean up in the Gulf of Mexico, ever. As is their M.O., they started Project #9, a collection of pillowcases for the Con Kerr Cancer Project. The good thing (for me) about this particular project is that they provide a regional directory of hospitals to which I can send or take the pillowcases with contact information. The deadline is September 15 for the CraftHope project. Can you make some pillowcases?

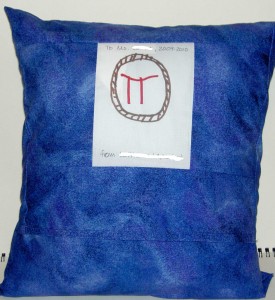
As I mentioned, The Child and I will be making the taco and robot pillowcases tomorrow. I cut all the pieces and made the fish pillowcase so that I have the steps firmly lodged in my head. He would lose what little interest he has if he had to wait around while I tried to figure out the directions. TFQ walked me through the first pillowcase (see below) and, thus, was instrumental in getting me started.

One big problem is suitable fabrics for the 12-17 year old boy set. After all, all agesa nd genders get sick. I looked at the various quilt shops I visited last week and saw some that would be ok. I saw a great selection at VooDoo Rabbit.
Sweet Dreams Pillowcase

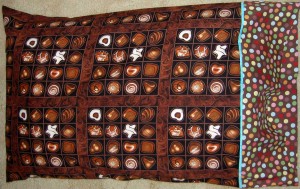
I saw the chocolate fabric at Britex when I was inspired to make a Sweet Dreams pillowcase for my mom. She has ongoing problems sleeping and is having a hard go of it taking care of Grama in SoCal.

The fabric has been around since the end of June and I finally got my act together and made the piece. I am happy with the way it turned out. She is coming home next week. I sent the pillowcase today and hope it arrives before she leaves.

I used the Twiddletails pattern and it is great! It seems bizarre, but works very well and I learned to make French seams! She has a store, so go buy a pillowcase kit and make one for Con Kerr. Thanks, Anina!

I have graduated from Train to Semisonic singing Closing Time, so I will end this post and work on my CPP responses, pillowcases, napkins, and all the projects I am fired up to make!
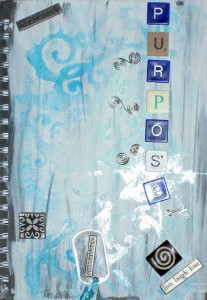
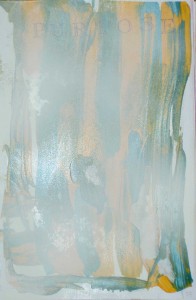
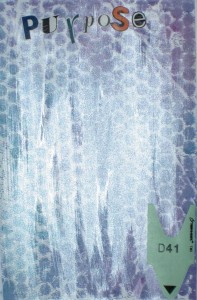
Purpose Journal Progress

Finished Cover + Marker

Don’t get too excited, I haven’t started writing. I had a big burst of writing inspiration back in April, but the journal wasn’t ready. After working on it recently, it is more ready. It is funny. I worked on it diligently and thought I was done with all of the backgrounds. As I looked through it after everything was dry, I saw other spots and pages that needed work.

If you haven’t been to work of heart, you need to put it on your list for your next vacation. After going to see the Rosacrucian Museum, you need to spend some time at A Work of Heart. As I have said before, it is an awesomely creative environment.

Lightening a Page
Lightening a Page

Some of the pages were too dark. In my previous post about this journal, I showed the Credit Card plaid. While the page above is not the credit card plaid page, it was just as dark. Andrea had some spray on Gesso, which makde short work of lightening the page. It is a spray paint type of application, which I didn’t much like (had on my cute clothes), but I did like the end result. I think it will be much easier to write on this page with it lighter.

Adding Words
Adding Words

While I don’t have a complete plan for how I am going to work with this journal, I do know that I wanted page numbers. The Child usually gets a slice of pizza at a place which requires we take a number. I realized that the numbers would make interesting, if a little large, page numbers.

The point of the journal is to explore the word “Purpose.” To that end, I wanted to, first, explore the shape of the letters of the word. I stamped and pasted letters on to almost every page. The letters on the page above are favorites.

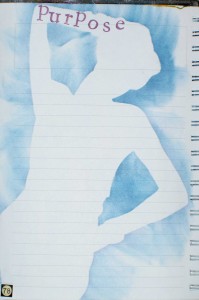
Chalk and Silhouette

One of the techniques Andrea showed us was the one above – creating a silhouette page out of pan pastel and a magazine photo. One of the other students did it and I borrowed her silhouette and added it to my journal.

The page number on this page is a little different.  I got a pack of note cards at IKEA which depict address signs on one side. Each pack has a different group of numbers, but the back of each pack shows a tiny illustration of all of the notecards. I cut out each of the  numbers and used it for the page numbers. There weren’t enough for every page, so there are a variety throughout the book.

There is another class in July. We’ll see if I can make it and actually finish my journal.

Finished: Knitting Box

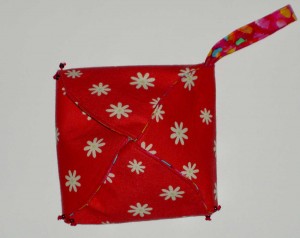
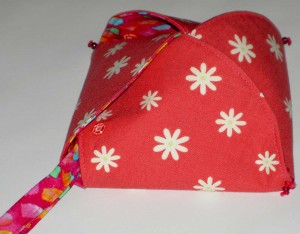
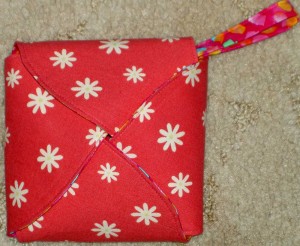
Knitting Box Closed
Knitting Box Closed

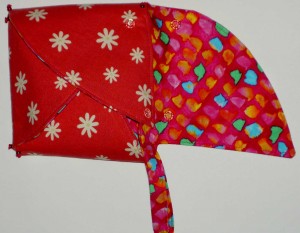
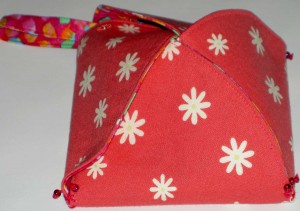
Yes, the Knitting Box, which seemed like such a failure, is finished. It took me much longer than I thought it would. Even though I should be done with this project, I am tempted to make another just because I would like to perfect the process as well as make a few modifications.

Knitting Box Open
Knitting Box Open

SIL likes it and I hope she will find it useful. I was nearly finished when she dropped off her child and requested a wrist band instead of the belt loop she originally requested.

Knitting Box One Flap Open

No dice. I did not want to rip out the seam and insert a longer loop. I didn’t have it in me. Fortunately, SIL is very thin and the belt loop was generous enough to fit over her hand. It is tight enough not to slip off as she is in transit.

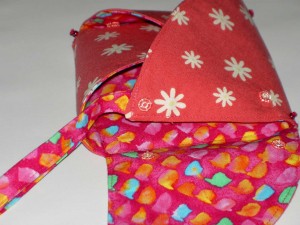
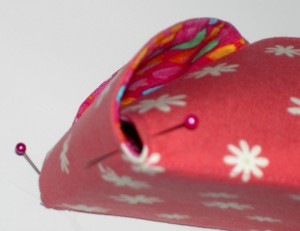
The above photo shows that I added some snaps. I had some large black snaps on hand, which SIL said would be fine to use. I decided I wanted something to match the piece. I looked for pink snaps in several local shops with no success. I am sure I have seen colored snaps before, but I couldn’t find any. I must have seen them online. I finally bought clear snaps and they work well to keep the box closed. I was able to finish it while she was out.

Corner Detail
Corner Detail

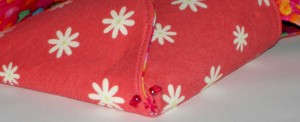
Part of what I wanted to do was secure the corners into a small box shape. I did that with beads and Laura Wasilowski hand dyed Perl Cotton. I hope it holds up. If not, I can fix it.

Snaps in Action/Corner Detail

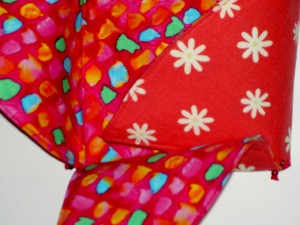
Above you can see the snaps and unfolding action as well as a bit of the corner detail.

Open View from the Side

I put two snaps on the edge covering the section where the yarn will come out. I thought that SIL could only snap one in order to allow the yarn to flow out more smoothly.

Another View - Closed

You can see how the yarn would come out with one snap open.

Another View - Closed

I will be really interested in how this project actually works in practice and if SIL uses it. I like the way the box looks in this picture and wonder if it will stay like that while she is on the go and knitting.

One of the things I really ended up liking about this project is how it became a group effort. I appreciate my SIL and my niece helping me figure out the solution to my challenges and to all of my readers who gave me resources. I also appreciate the opportunity to do something a little different and to Ruthann Logsdon Zarroff of Mirkwood Designs for posting the original Truffle Box pattern.

Thanks!

Another Gift

I think the cycle is complete. For a couple of years, I have been trying to focus on the process of making rather than the finished object. I think the cycle is complete, because I am starting not to care that much about keeping things that I make. (there are no lines for the stuff I make, though) This could be a bad thing, because it is possible that I will just start and start and start projects and not worry about finishing. Let’s not go there.

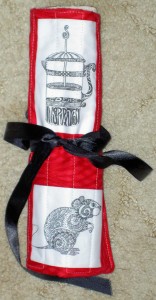
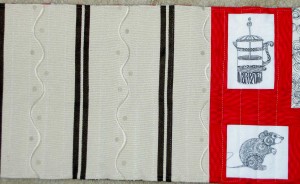
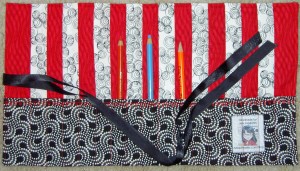
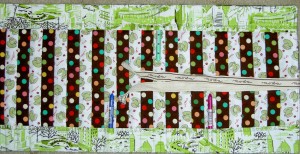
Jill's Pencil Roll - closed

Jill received her pencil roll yesterday. I have been waiting, for what seems like weeks, to tell you about about, especially since I am scraping the bottom of the barrel for blog posts, Jill’s Pencil Roll. Being sick really cut into my sewing time.

Anyway, Jill has been a loyal contributor to the Creative Prompt Project, along with SherriD, for the past year +. Jill has contributed a fabulous doodle response every week. I wanted to thank her for her contribution. It is a time commitment and I appreciate her gift to me of a bit of her time. I had hoped to post both gift posts together, but SherriD received hers the day after I sent it! (Thank  you, USPS) Jill’s took a bit longer to arrive.

Back when I started the CPP, I didn’t plan to reward people for contributing. It is something that popped into my head a month or so ago and seemed like the right thing to do. When I decided I wanted to do this, I thought I would “borrow” some images from Jill’s blog and surprise her. At that time, she had a problem with someone else “borrowing” images. I decided that stealing was wrong and I should just ask. I didn’t give Jill all of the details, but she was very gracious, didn’t ask many questions and sent me some of her images from which I could choose.

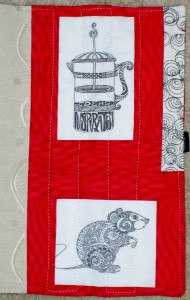
Jill's Pencil Roll - outside detail

I had an idea in my mind of what I would do, but in looking at the images, I decided on something else – what you see above. I don’t like rats, but I thought it was important to include this little guy to go along with Jill’s blog name.

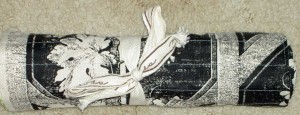
This one was a little more challenging than some of the others I have made, because I had to fit the images in to a piece of fabric that would become the outside of the pencil roll. I went back to the days of piecing journal covers and took a page out of that book in terms of piecing the back. I didn’t want to piece the whole back, because I had a piece of FabMo fabric that screamed Jill at me.

Jill's Pencil Roll - outside

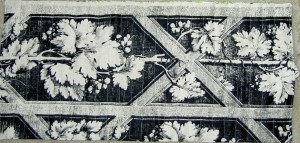
The black and white is a designer sample that I got via Bron from FabMo. It wasn’t very large, so I thought adding the bit with the images would work and wouldn’t be too large and unwieldy. It worked out very well and I am pleased with how it came out.

Jill's Pencil Roll - inside

Everything I use to make the Pencil Rolls is from supplies I already have or from FabMo fabric. You don’t need much more than fabric, ribbon and something to use as interfacing.  I save ribbon, which I seem to get a lot of, so some of the pencil roll ribbons have odd words on them. Other things would work as ties as well. I just think it is nice to give these bits and pieces a new life.

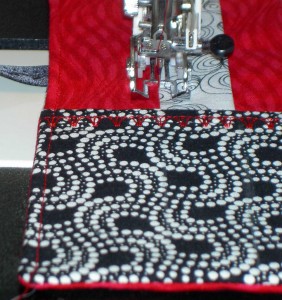
Decorative Stitch on Pencil Pocket

I have also started to use a decorative stitch on the pocket of the pencil roll just to make it a little more special. It makes the pocket pucker a bit, so I think I start adding a bit of length to it to account for that puckering. It doesn’t pucker so much that I have had a problem sewing it within the seam allowance.

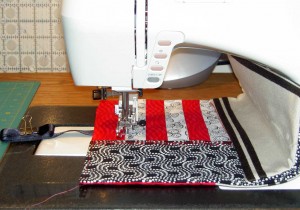
Jill's Pencil Roll - Tips

One thing I learned the hard way on Lil Sissy’s pencil roll was to use a binder clip to gather the ribbon tie out of the way. What is the hard way? Sewing the ribbon to the back as you sew along creating the pencil pockets. If you don’t have a binder clip, get one!
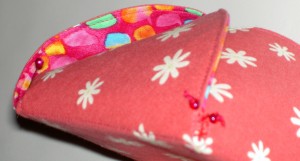
I am really happy that Jill liked the pencil roll. Thanks to everyone who participates in the CPP!. If you are quietly doing it alone, please post a direct link to your responses in the comments section of the prompt or to the Flickr group so we can ooooh and aah over your contributions!
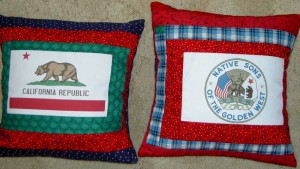
Gift Pencil Roll

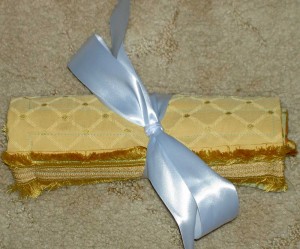
SherriD's Pencil Roll - closed

This pencil roll was made with FabMo fabric. I found the piece and it made me think of SherriD’s Renaissance Faire activities. I decided to make her a pencil roll as a thank you for participating in the Creative Prompt Project for the past year+.

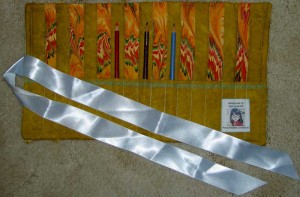
SherriD's Pencil Roll - open

If I haven’t mentioned this before, the FabMo fabrics are generally samples. They vary in size, but I can usually get only one piece of a particular design. I didn’t have enough to use for the inside, so I tried to pick some fabrics that would coordinate and give the feeling of history. The marbled fabric reminds me of the end papers in a book.

2010 Teacher Pillows

Yes, it is Teacher Pillow time of year. I had resolved to not leave it until the last minute, but being in bed with a nasty virus for over week did not assist me in my resolve.

I made one pillow last weekend after I was feeling a little better. I also made a block during the week for one of the pillow tops, but spent the better part of Friday finishing them up. School is out on Friday, so I had to get it done.

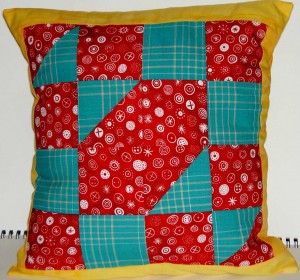
Resource Teacher Pillow

Above is the pillow for the Resource Teacher. She has been working with The Child for the past four years. She has made my life a lot better, because she gets The Child. She has provided support that I wasn’t getting from the lower school resource teacher (through no fault of his own).  I will be VERY sad not work with her anymore.

Every year I pull out the same fabrics and make a different block. Now she has a set. I am thinking of making a quillow next year. I have never done that, but my SIL is an expert and I can draw on her expertise.

I was surprised to see that lozenge design show up in the middle of the block. I amy have miscolored the blocks when I sewed the pieces together. The block is called Crockett’s Cabin in Around the Block. That lozenge shape is very appealing and I am wondering if it would work for a FOTY piece?

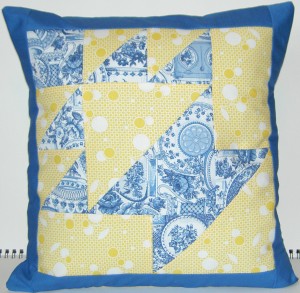
Literature Teacher Pillow

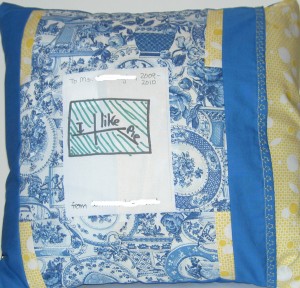
As The Child has moved up in the grades, I spend less time in the classroom, thus I know the teachers less and less. I try to get a sense of the colors of the teachers and it is very difficult when I have only spoken to them 3-4 times. The literature teacher, who also happened to be The Child’s homeroom teacher had a hard year this year. She was out for four months at the beginning of the year, because of the death in her family. I thought The Child would have a hard transition when she came back to school, but he took to her like a duck to water.  He liked her because “she doesn’t think she knows everything” and I found her to be a very intuitive teacher. I don’t know if the above colors or design are her style, but they are what immediately came to mind when I thought of her. I hope she likes it.

Literature Teacher Pillow-back

I force The Child to do a little drawing for each of his teachers. He had a hard time this year. He is getting out of creative practice and I have to get on him about that. (N.B. I blacked the names to protect the innocent!)

Making the backs fit is the most time consuming part. I couldn’t seem to get it right on any of them. This one is actually sideways on the pillow. I figured that nobody would care, if they even noticed.

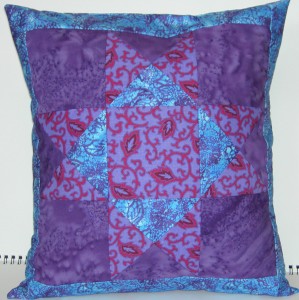
Social Studies Teacher

I really hope she doesn’t sincerely dislike purple. This block, in Around the Block, is called Star of Hope. It looks to me like a basic Ohio Star. I don’t really believe that blocks should have different names just because they have been recolored. I haven’t taken the time to look this up in the Jinny Beyer’s new book, The Quilter’s Album of Patchwork Patterns.

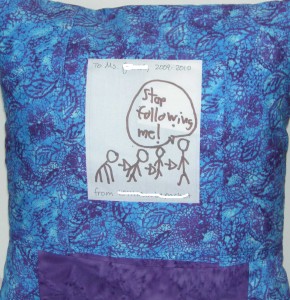
Social Studies Teacher - back

The Child kind of got into his drawing after a bit. He has a subtle sense of humor. I thought this drawing was very funny. Do you get it?

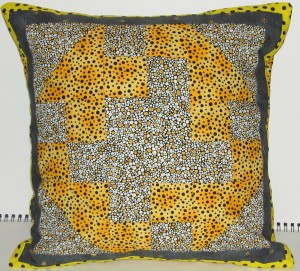
Science Teacher
Science Teacher

I mentioned on Tuesday that I found some fabrics I didn’t really like while I was cutting FOTY pieces. A couple of the above fabrics are those fabrics. However, the Science Teacher is male and I have not had the opportunity to make pillows for many male teachers. I found these fabrics to be great for a science man. I think they look a bit like rocks. I only had a fat quarter of each, so I had to add some others and I don’t have any to match next year, but may continue with the rock theme.

Science Teacher-back

You can see that The Child got on to a roll with his drawings as he progressed through them.

The drawings are done on an 8.5×11″ piece of paper. First I fold the paper into quarters and then I draw pencil lines to mark the seam allowances. I also make a note as to which rectangle on the paper goes to which teacher. This year I also put in the name and the year. The Child knows now to keep within the seam allowance

Math Teacher
Math Teacher

In the past, The Child has chose the blocks for each teacher. This year he didn’t really care that much, so I mostly chose them. He was adamant about what he wanted for the math teacher. He saw the piece of pie I appliqued on the Tarts Come to Tea piece. He was adamant that he wanted that on the math teacher’s pillow. This is the first time I have done applique’ for a teacher.

Math Teacher-back
Math Teacher-back

The Child kept with the Pie/Pi theme for the back. Again with the sense of humor!

So done for another! YAY! I am going to a party today, but am going to find a fun project to work on tomorrow. I am glad I soldiered through and don’t have this project hanging around for tomorrow, except for the wrapping and the card writing.

I have to admit that I am sick of this project. There is only one year left and I am finished. I am not doing them for high school. I don’t think it is really appropriate and would embarrass The Child, but there are also too many teachers.

It is funny how you think something is a good idea and then a tradition and expectations start, which turns the fun into a chore.

I do enjoy looking through Around the Block and picking out the blocks to use. I am tempted to make blocks for next year’s pillows while I have the fabric out and just tuck them away until April or May so I have less to do next year. We’ll see.

Lil Sissy Pencil Roll

Kim Pencil Roll
Kim Pencil Roll

Pencil rolls usually take me about 3 hours to make. That assumes, of course, that I don’t sew the ties to the back as I am making the pencil pockets and have to rip out.

This one took me three days for a number of reasons. First, not being one to make simple requests, she wanted one that would accommodate the colored pencils she had cut in half so she could have half of her collection at her job in SF and half at home in Santa Barbara. This meant that the pocket had to be smaller, which meant adjusting the pattern and not just sewing like a demon. I mulled this over for some time and finally came upon the idea of two pockets. The green and white city fabric is used to make a pocket on both top and bottom, so there isn’t really a top. Looking at it now, I should have made those pockets a wee bit wider or the whole piece a bit smaller, but it will work.

Second, I was sick almost all of last week, the weekend and the previous Friday. No kidding and no fooling around kind of sick. Stay in bed and don’t do anything kind of sick except read and sleep kind of sick. I don’t remember being that sick in a long while. The only thing I really accomplished was cooking dinner one night, breakfast one morning, loading the dishwasher twice and reading 4 books.

Finally, I made a lot of mistakes in this project. I blame it on the illness and the mad desire not to waste all this time at home. Getting well just doesn’t seem like enough, but apparently it had to be.

Lil Sissy Pencil Roll Closed

Yes, that is a ribbon or tie from the Merry & Bright Jelly Roll I used for the It’s a Merry & Bright Wrap quilt. It really was the perfect length to tie up this pencil roll. It also fit with the linen feel of the fabric I used for the outside.

Yes, that grape fabric is another fabulous FabMo fabric. I only used half the piece, too, so I’ll have to think of another accessory to make for Lil Sissy with the rest.

Lil Sissy Pencil Roll back

I don’t really get a sense of the fabric until I start working with it. This backing fabric was more loosely woven than the quilting cottons I normally use. One of the good things about the FabMo fabrics is that they are generally of good quality. At least I think they are of good quality. Despite the looser weave (and I am NOT saying it was holey), I had no problem with fraying or raveling or any of the sewing. Looking at the back of the piece, I find that the leaves and grapes really look 3 dimensional.

Lil Sissy Pencil Roll piecing

Kathy Mack of Pink Chalk Studio‘s pencil roll pattern has EXCELLENT directions. I really like this pattern and think that you should go off, as soon as you are done reading this post, and have opened a new window, and buy that pattern. I know I have waxes rhapsodic before about her pattern. I like this pencil roll pattern, because the font is the right size, and there are enough visual cues: boxes and borders, drawings, etc for me not to get lost in a mire of directions.

All that being said, I almost never pay attention to making a 12 or 24 slot pencil roll. I see what size FabMo fabrics I have and make as many slots as will fit the piecing of backing fabric I have, so I don’t have to waste or cut it. The thing is that I am probably not going to use these weird fabrics for anything else and it seems a shame to throw them away. Nobody to whom I have gifted an 11 slot pencil roll or an 8 slot pencil roll has complained, so I am going to keep doing what I am doing. One thing about making the same thing over and over (remember all of those Eco Market Totes I made?) is that I get to know the pattern and how the item goes together. This method works for me.

Lush Gift Bags

One of the reasons I buy fabric specifically destined for and make gift bags is so that I don’t have to wrap gifts using paper. I also like to have an excuse to buy holiday fabric that I know I will never use for a quilt. FabMo has created a whole new aesthetic for me for gift bags.

At the last CQFA meeting, Bron brought a few pieces of FabMo fabric and I scooped up a couple. You’ll see some of them soon, but I already made the gift bag.

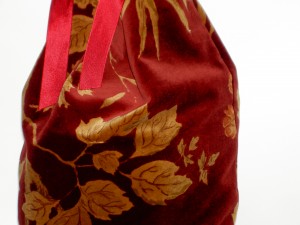
Lush Gift Bag
Lush Gift Bag

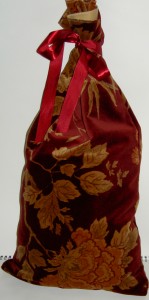
This fabric is some kind of velvet like material and it changes the whole look of the gift bag. I didn’t take any chances when sewing it. I used the new open toe walking foot because I am not familiar with how this fabric acts in the sewing process.

The ribbon is also from another gift.

It is an odd shape, because I just used the shape of the sample and folded it in half. The edges were serged and I wanted to maintain that integrity.

One of the things I like about it is that it looks really special. That is a good reminder for me that the fabric really makes the piece – especially in other types of sewn accessories that don’t have the opportunity for quilting or embellishment, etc. I realize that the maker could do both on a gift bag, of course, if the design were different.

Lush Gift Bag detail

I actually think that gift bags would be a good way to try out new techniques, feet, stitches on your sewing machine, free motion quilting, etc.

Knitting Box Un-Fail?

Knitting Box - A new view

Last week I discussed the Knitting Box. I thought it was a hopeless failure and I would have to go back to the drawing board.

My fabulous readers came up with some solutions, including a list of comments about “portable knitting sacs” (thanks, Jessica!) and using a pattern for a take out box (as in Chinese take out). On Jessica’s list, I found the Port-a-Pocket and the Knit Knack Sack. One lady also described how to make something similar from a CD. I couldn’t exactly follow her directions, but my go back to them if the failure cannot be repaired. Knituition also had directions for a knitted wrist yarn holder. Sarah on Ravelry shows a slight variation of Knituition’s wrist yarn holder. Halcyon Yarn also has a wrist yarn holder, which, not being much of a knitter, looks like a torture device to me. I will only subject my SIL to that as a last resort. Finally, there was something called a waisthook. I have no idea how this works and am also thinking torture device!

One of these hints led me to the portable knitting pouch, which is made from fabric and up my alley. I also found a Yarn Traveler bag, which is interesting, but doesn’t quite fit the belt criteria. The portable knitting set was also a source of inspiration.

Potential Amount to Sew

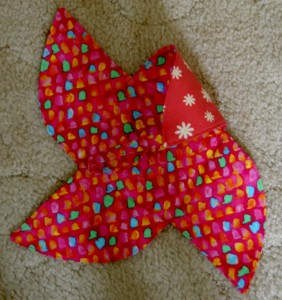
I decided to bring it with me on the trip to Mother’s Day brunch and show it to the intended recipient. My SIL agreed with me that the Mirkwood Designs pattern has style and I should try and salvage it if I could. My SIL and niece played around with it in the car and we all brainstormed on how it could be salvaged. First, they found a different way to fold it (above). This way of  folding it keeps the box together pretty well. It is actually probably the intended way to fold it. The bad part is that the parts still aren’t strong enough to hold a ball of yarn. An idea they had was to sew up the side about an inch, so that the box will already be partially shut.

Beaded and Sewed
Beaded and Sewed

I think sewing it up a bit is a good idea. I used some Perl cotton so that it doesn’t matter if the stitching shows. If I put some beads on the end of the Perl Cotton I won’t I have to try and hide the knot. My only concern is that they would get stuck on stuff as my SIL moves around with the box on her belt.

I will probably put something on the top to keep it together. I talked about buttons. My niece suggested snaps and SIL suggested velcro. I’ll see what I have around and try them.

I always say that more brains are better and this is a perfect example of more brains getting involved helps a lot. Thanks, all!

Auction Throw Pillows

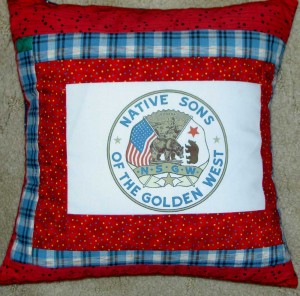
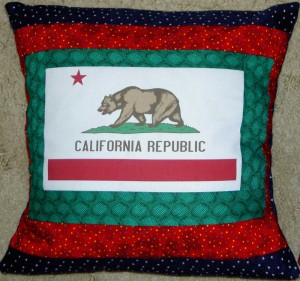
NSGW Pillows
NSGW Pillows

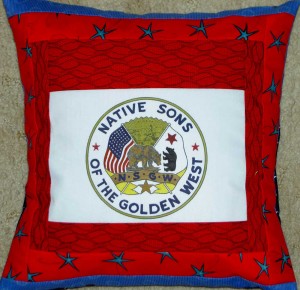
My DH is an executive board member for a California organization called the Native Sons of the Golden West. In addition to supporting the preservation of California history, they raise money to help people suffering from facial deformities such as Cleft Palette. During their elections, each of the candidates opens a hospitality room. They do their best to raise the most money for Cleft Palette. To do this they display items, such as gift baskets, for sale. People purchase raffle tickets or bid on items. The competition to put out the best items is fierce, because each candidate wants to draw the most people to hospitality room. They get kudos for the amount of money they raise.

NSGW logo pillow
NSGW logo pillow

DH comes from a long line of ‘Brothers’ and his mother rallies her friends to make up the gift baskets. I told him I would make throw pillows. He found the designs and fixed up the images. When I was ready to make them, I printed them on fabric, and last weekend made the pillows.

California Flag pillow

The hardest part was the color. I needed colors to match the logos, which were slightly greyed. I used some older fabrics. I am pleased with how the pillows came out.

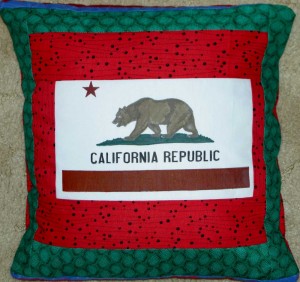
When I did the printing, the first print came out in greyscale. DH had selected, at some point in the process of fiddling with the images, to print in greyscale. I ended up with a black and white rendition of the California flag and NSGW logo. I printed again and gave DH some fabric pens and left him to coloring the first printout.

NSGW logo pillow #2
NSGW logo pillow #2

He did a good job on this logo.

Bear Flag pillow #2
Bear Flag pillow #2

He went a little outside of the lines on this one.

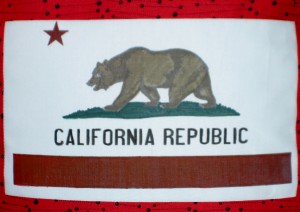
Bear Flag pillow #2 -detail

The bear looks a little angry. DH is off to raffle these pillows tomorrow.

I was very glad to be able to cross things off of my to do list and pillows are a big one. I feel like I am now geared up to do the 2010 Teacher Pillows.

LisaLizaLou’s ATCs

If you haven’t been over to Lisa’s blog, today is the day to check out her ATCs. These are awesome! The one with the circular motif on the right looks like a quilting design. I had to look really carefully and I still don’t know for sure that it is not stitched. She has some ATC swaps going so check out her FB fan page and/or her blog.
clipped from www.lisalizalou.blogspot.com

  blog it

Knitting Box Fail

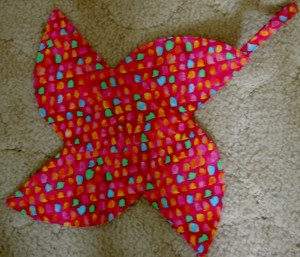
I have been trying create a portable knitting bag for my SIL.  The idea is that she can put the loop on the ‘box’ through her belt and the bag/box part will hold a ball of yarn. The point is that she can knit while standing in line and her ball of yarn won’t roll away.

Finished Piece
Finished Piece

The engineering part of this has been a challenge. I didn’t see the one that she saw and only had it described to me. I searched the web for a pattern (didn’t go to the Library and look through their patterns). I wasn’t sure what to call this thing, so searching and looking in indexes was hard. I thought I was golden when I found a truffle box pattern over at Mirkwood Designs (great podcast, BTW).

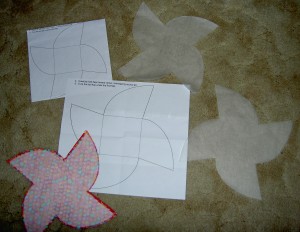
Various Pattern Bits

Not only the pattern seem like I could blow it up and use it, thus eliminating the need to deal with proportions, but it also has style. The copy center at work helped me blow it up. Then I traced for the fabric and traced it again for the interfacing pattern and traced the square one more time for some Timtex-like stiffener.  The short answer is that I couldn’t make it work. You should make the designs at Mirkwood Designs as truffle boxes, though, because I am sure they are fabulous made out of the right materials for truffles. Her recipe for the truffles sounds fabulous, too.

I have to admit that not everything works the way I intend it. This is one of those things. I am not giving up, but I have to regroup and start over.

Finished Piece
Finished Piece

I am not sure why it doesn’t work, but it doesn’t. One thing I do know is that the sides aren’t right. The piece has style, but no functionality. The idea was that the curves would slightly overlap the straight edge and keep the ball of yarn in. Alternatively, I thought I could also put a cute button on each side with some ribbon to wrap around it, which would keep the thing closed.

I don’t consider failing a bad thing. I am not happy about it, but failure helps me learn and that is good.

Now, back to the drawing board. Need a failed project?

Petal Apron is up for Auction

Help support creating an end to domestic violence by bidding on my apron!
clipped from craftsanity.com

Let the Bidding On Aprons Begin!

Okay, folks, it’s time to shop! Click on the photos below to view the eBay auction.

blog it

I like the photo of the apron on the clothesline, but think it looks better on Lil Sissy.

ATCs and CQFA

The CQFA meeting was Saturday. We had two new people and that was GREAT. The whole meeting, actually, was great. There was LOTS of laughter. People who came late said that they could hear the laughter out in the parking lot. I need to attend more meetings where everyone is laughing.

As usual, show and tell was excellent. Everyone is really churning out the work and being inspired by each other. It was great. I showed Passionate Purple, the Chocolate Box and FOTY 2009. I also showed some books, talked about the Dale Fleming class and traded ATCs.

My ATCs
My ATCs

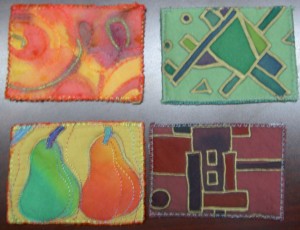
ATCs

People did really nice work for this round of ATCs. I was really pleased with the ATCs I chose. My score were the pears! I love them all though.

Nancy
Nancy
Bron
Bron

Bron used FabMo fabrics for her ATCs. She is on the board and finds all the good stuff there!

Maureen
Maureen

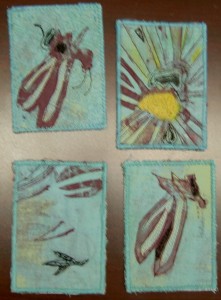
Maureen has a new blog, Flies in a Cathedral. She only promises to post once a week. I look forward to hearing about the flies.

Debbie
Debbie
Amy
Amy

I wasn’t fortunate enough to get one of Amy’s cards, but I loved the texture.

Julie
Julie
Diane
Diane

Diane is a very accomplished silk painter. When I saw those pears I knew I had to have them. I wasn’t the first person to choose either, so I feel very lucky to get that card.

My ATCs were really fun to make. I haven’t had much fun making them in the past. I am working on a series of ATCs and I may have to rethink that as it seems like a chore — until this go ’round.

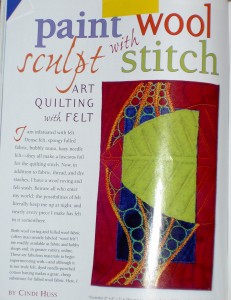
QA Article by Cindi Huss, Apr/May 2010

I was reading Quilting Arts magazine last Thursday night and saw a picture of a leaf in an article about wool felting or something I wasn’t interested in. The article was by Cindi Huss I was interested in the image and the technique.

April ATCs in Progress

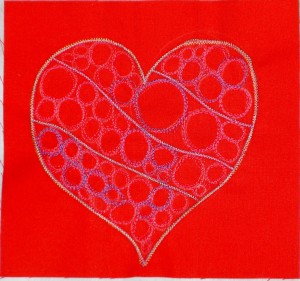
From what I could see in the picture, the author stitched zigzag lines three times with different threads. I did that in the picture above. One of the great things about my machine is that it has a very precise stitch. I can stitch over the same line and the needle will land in the same hole. That wasn’t what I wanted to for this. I wanted the zigzag to be a bit messy. I wanted the colors to blend. I had to readjust the needle to get it out of sync with the previous line of stitching.

Because of the Dale Fleming class, I was no longer hampered by changing the foot. I know it sounds silly, but sometimes taking off the foot holder is just too much of a hassle. I think I am over it now. I put on the darning/free motion foot and created the circles. I drew them lightly with a white pencil first so I had something to follow. I also slowed down the machine and that helped make the stitches show. After doing all of the circles. I went over some of them with two different colors of thread. Using Aurifil means that the stitched area does not get too bulky.

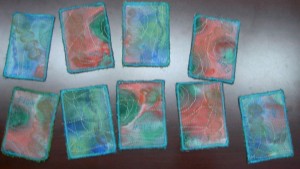
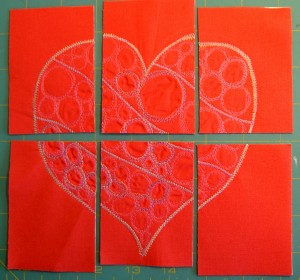
My idea was to make one piece and then cut it up. I had planned to try this technique in paper, but was inspired by the QA picture that I decided to go for it. I did make the background larger, but if I do this again, I would make it even larger and the ATCs were a bit small this time.

April ATCs cut
April ATCs cut

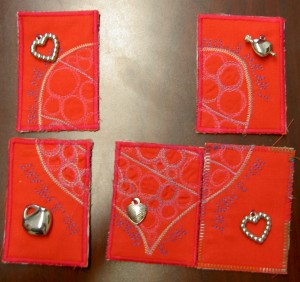
I have never made one piece and cut it up. I didn’t think people would like the right and left bottoms, but those were the first to go, actually. After cutting, I took apart a necklace Lil Sissy brought me from the Carribean and used the hearts for embellishment.

April ATCs finished
April ATCs finished

Here is the piece (minus the middle) embellished and finished and ready to be distributed. I was really pleased that they were so popular this time.

Book Review: Journal Spilling

Journal Spilling: Mixed-Media Techniques for Free Expression Journal Spilling: Mixed-Media Techniques for Free Expression by Trout. Diana

Art journaling is a technique (tool??) that I have struggled with for a while. Part of the problem for me is the mess. I thought I didn’t like to make messes. What I found was that I don’t like to make messes that I have to clean up! The Purpose Journal showed me that under the right circumstances, I can really use this technique in a creative and satisfying way.

Journal Spilling by Diana Trout is a really encouraging and pleasant book to read. I read it, and thought about what was in it, but didn’t try any of the projects that are integrated into the various chapters.

The first thing that I liked was in the Welcome message.”Welcome” is much friendlier than “preface” or “introduction.” In her Welcome, Diana states that you don’t need to be an artist to be an artmaker. I have long refused to label myself an artist – for better or for worse. Like Wayne Thiebaud, I have decided to let history decide my artistic fate and concentrate on making. If history ignores me, so be it. Thus, Trout’s comment really hit home and make me feel like my decision was fine.

The author also has a sense of humor, which is infused throughout the book. On page 9, she says “…I once did a ‘highly scientific’ experiment to check the lightfastness of Portfolios alongside Caran d’Ache. They both held up remarkably well when exposed to sunlight for six months!” I love the idea of this ‘experiment’. It really made me smile.

Ms. Trout writes about things I have never heard described this way and find very useful. In her section, Stretch & Spill, she discusses ‘micromovements.’ About them she says “micromovements refers to a system of breaking down a large job into tiny parts. This is a great concept that addresses the biggest obstacle between you and your journal: Fear. It also helped me greatly with time issues. If you break down a job (or hope or dream), step by step it seems less scary and overwhelming.” I didn’t realize until I read this that I had been doing this with the Purpose Journal. Since I been, yet, able to face making a mess, I have been breaking down the steps, before I have to make the mess, into manageable bites that fit into my schedule and my comfort zone.

The book’s title, Journal Spilling, seemed a little confusing to me until I read the section on the generosity and hospitality of pouring sake. By creating that analogy, Diana gave me a picture in my mind with which to understand as I read the book.

Throughout the book, the author talks about continuously moving. At one point she refers to it as aerobics for creativity. Isn’t that a great mind image? The idea is to not think too much and keep moving creatively; to keep your hand moving. Some examples Ms. Trout gives are to draw boxes (good for writing in later!), circles, little houses and flowers. She also gives some advice on what to say to your mind if it starts to interrupt (which mine does all the time!!) : “…quietly tell it you are busy right now.” (pg.76). This was another thing that really made me smile.

I think that most people who make interesting objects have an inner critic. A very revealing and interesting section was about her inner critic. She names him, tells us how he looks and sounds. I thought this was a great technique, because things that you name are much less scary than the things which are unknown. In this section, Diana reminds the reader “My art does not have to be BIG ART.” This is wonderful. In a way I feel like I have been doing this with all of the sewn accessories I have been making: journal covers, pencil rolls, tote bags. They are mind sorbet, in a way, but they are also, for ME, small art. For me, small art is valuable as well. She follows that up by saying “I pick up my brushes and pens in the odd spaces of time that occur in the life, gently coaxing the art out into the light.” I think this could be used as an excuse to move on to a different project, creating another UFO, but for me it means sometimes things have to simmer a bit and by working often, the simmering happens a bit faster.

Ms. Trout uses the various sections to convey techniques through her various projects. At the same time, she drops little pearls of wisdom in various text of each section. The Secrets & Wishes section is, somewhat, about getting things out without revealing too much. In the introduction, she writes “Respect the power of the words you write and believe that writing them will fix them into your mind and, maybe, with some attention, some of your dreams will become a reality.” This makes me think that I should write down some of the things that I dream about. Perhaps the power of the word, which is so important to me, can help me identify my goals and make them a reality.

Lately, in general, creativity books are more interesting to look at. The days of plain white pages with text and a few photos seem to be gone. I have seen a lot of well designed, well laid out and visually appealing books of late. This book is not an exception. Not only are the photos appealing, the step outs clear, but the page layouts fit the theme of the book. It looks like we are looking at Trouts journal. There are watercolor strokes, bits of masking tape, scribbles, and doodles interspersed with the regular book information.

As I said above, the messes stop me from working in this technique. When Diana says (pg. 55) “write into the wet gesso” I stop cold. I have to say that working at a Work of Heart helped with this feeling. I just have not, yet, been able to translate to working at home.

I found this work to be really inspirational. As I read, I found myself inspired to create a quilt design or add something to my Purpose Journal. In the Personal Landscape section, the author suggests the reader go for a walk and think about the area in which s/he lives. She follows this suggestion up with an exercise to create a collage about your thoughts and feelings. I read this section and immediately  thought of the Women’s Work quilt. Reading the words made me imagine the next in the series, more of cityscape buildings, still using Gwen Marston‘s style.

In the same section, but also mentioned throughout the book, Trout talks about writing – spill writing – in her journal and then covering some of it up with her collage style. This appears to be something that she does frequently. I am not sure I want my words covered up. I may not want people to read them, but I feel like I might want to read them later. I can’t read them if I cover them up. This was also confusing, because of the power of words section she discusses in the Secrets & Wishes section.

The Drawing Games Section has perfect exercises for the CPP! She suggests exercise really clearly that would work for quick drawings of the words I suggest each week. For regular contributors, it might be a way to vary what you are doing or to break out of a rut. One exercise is to draw a “curved line from one of the paper to the other, three times. She, then, asks you to observe the shapes and take some further steps, which she outlines in the book.

Who Am I? Is the question that slammed into my head when I was partway through the Lifeline section. This section has discussions of writing your autobiography in a way that she found, she was able to handle. This feeling blew me away and I’ll have to consider a bit.

There are lots of things to try in this book: paper dolls, using book covers to make a journal, making glitter glue, using white out as an art supply, cutting rubber stamps, using regular household items to make marks, book making, and many other exercises and techniques. She also tells you how to make a traveling kit. In the end of the book are sections with various resources, such as quotes, supplies and materials inspiration and techniques.

I am planning on putting this book on my wish list.

View all my reviews, including my non quilt and creativity reviews