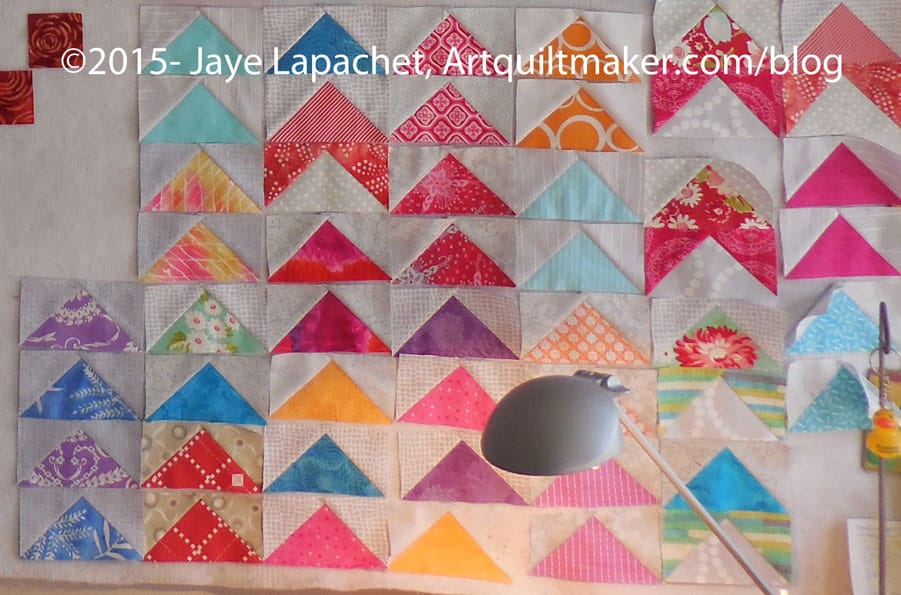
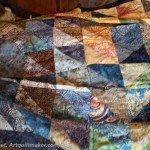
Before I revamped my design wall, I reorganized the Flying Geese from my exchange with TFQ and took a good picture of them.
Yes, the mistakes are still in there, but they won’t be on the front of the finished piece.
It is kind of fun to see how bright and cheerful they are. Even the grey does not make the group look depressing.
Looking at them this way makes me see all the red and pinky-red I, especially, have used. I think I need to work with some cool colors for awhile.
Looking at them also made me want to sew them together instantly. I don’t have enough to make anything (and I had no time), so I refrained. Still, I think the end product will be one I enjoy when I do sew them together, whenever that is.
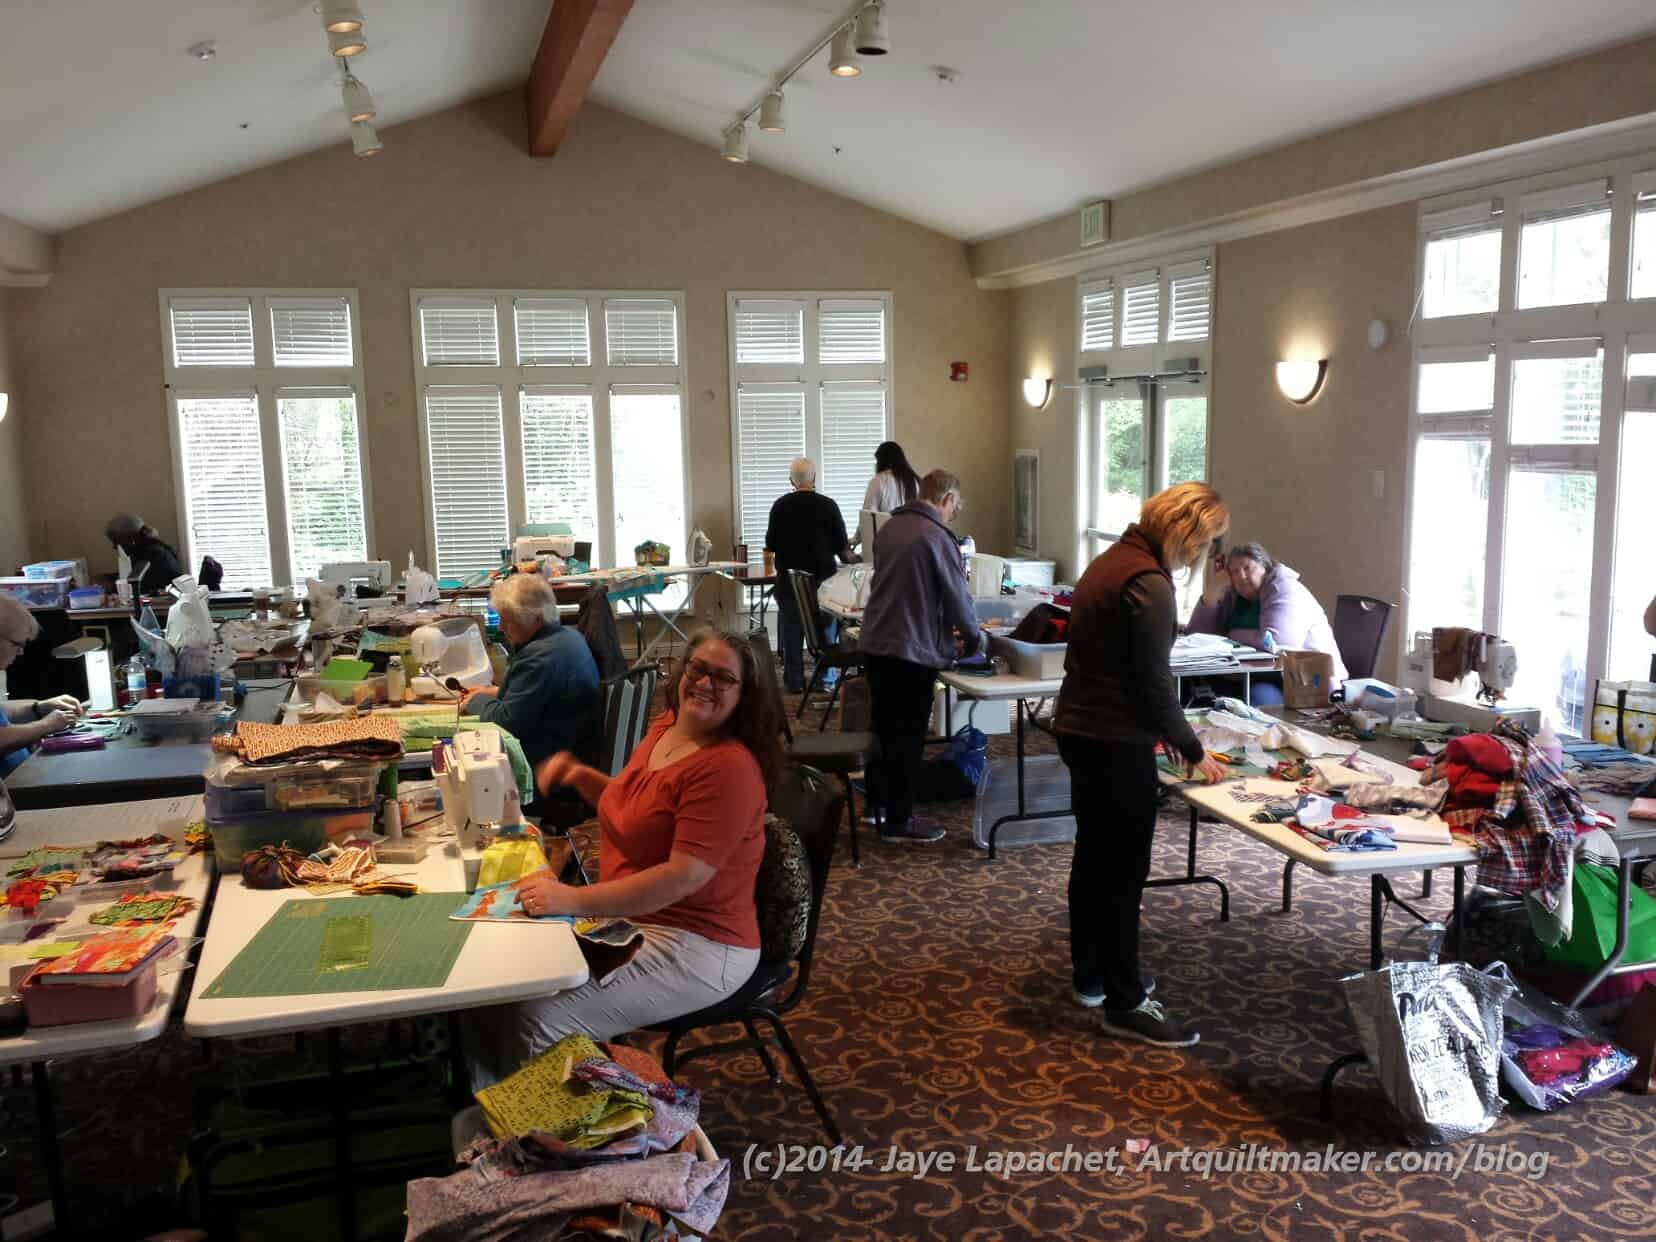
It has been awhile since I was able to attend a CQFA Retreat – 2 years, I think. I was so thrilled to be able to attend the current retreat, which was held over Mother’s Day weekend. Isn’t that a great Mother’s Day gift?? As a bonus, I sewed so much!
I feel like I really made some good progress on projects that were languishing:
First of all, I, pretty much, threw projects and parts into project bags starting about a week before the retreat. This helped me not forget critical fabric and supplies. The only thing I forgot was a lamp and my sewing machine’s light kept me from going blind.
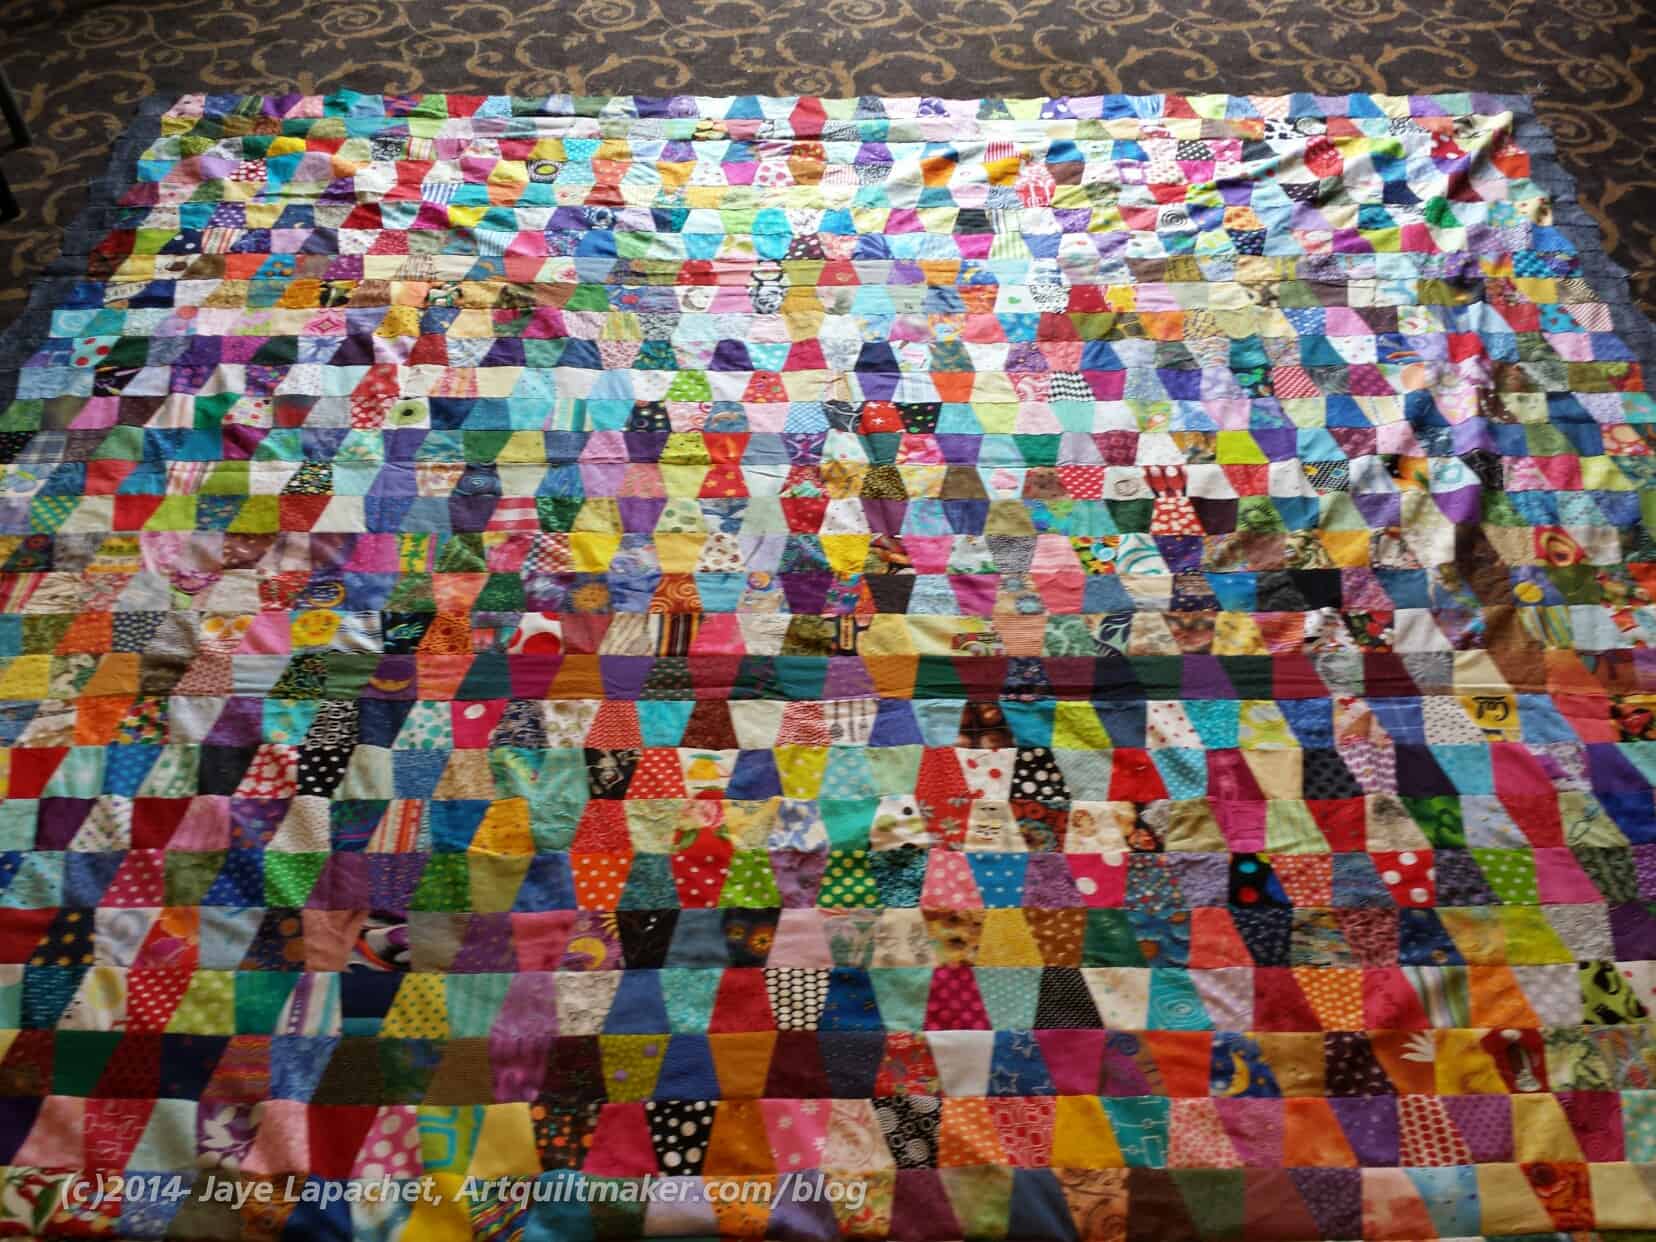
Next, I made sure I had plenty of blocks and parts that would make good leaders and enders. Using the leaders and enders technique, I made 20+ Nine Patches for the octagon 9 Patch on which I have been working and 27 (!!!) Box Full of Letters blocks. In addition to significant progress on two projects, I am pleased with the progress I made on the leaders on the leaders and enders projects.
Oliso ironing surface
The other thing I did was try out the Oliso iron I bought. I finally dragged out the June Tailor ironing surface I bought for the Dale Fleming Circle class as well. It was a little different because you don’t set it up on its end, it just pops up away from the ironing surface. Also, the steam and basic functionality are a little different. Friend Julie tried it also (we shared a table and a mini ironing surface) and gave me her feedback as well.
Sue’s Baby Quilt
People made great projects. Bron and Sue were working on baby quilts for friends. I liked the ideas they had and may use the ideas for donation quilts.
Sue’s (left photo) quilt is made from strips and a background. She said she cut strips and then sewed them together in rows. She said she used different widths of strips and I think that gives the piece a lot of movement. Lucky kid, I say.
In thinking of different ways to make this quilt, I could use strips, cutting them as I cut into new yardage. I would save up strips until I had enough and then get Gerre to quilt it. 😉
The other thing I could do it rummage through my scraps and get pieces large enough to do something similar. My mind is reeling.
I didn’t get a photo of Bron’s quilt, sadly, but what she did is wacky sew pieces together, then she cut the pieces into squares and sewed them together with sashing into a baby quilt. She used a white dot on yellow for the binding, which I loved! It would be a good scrap project.
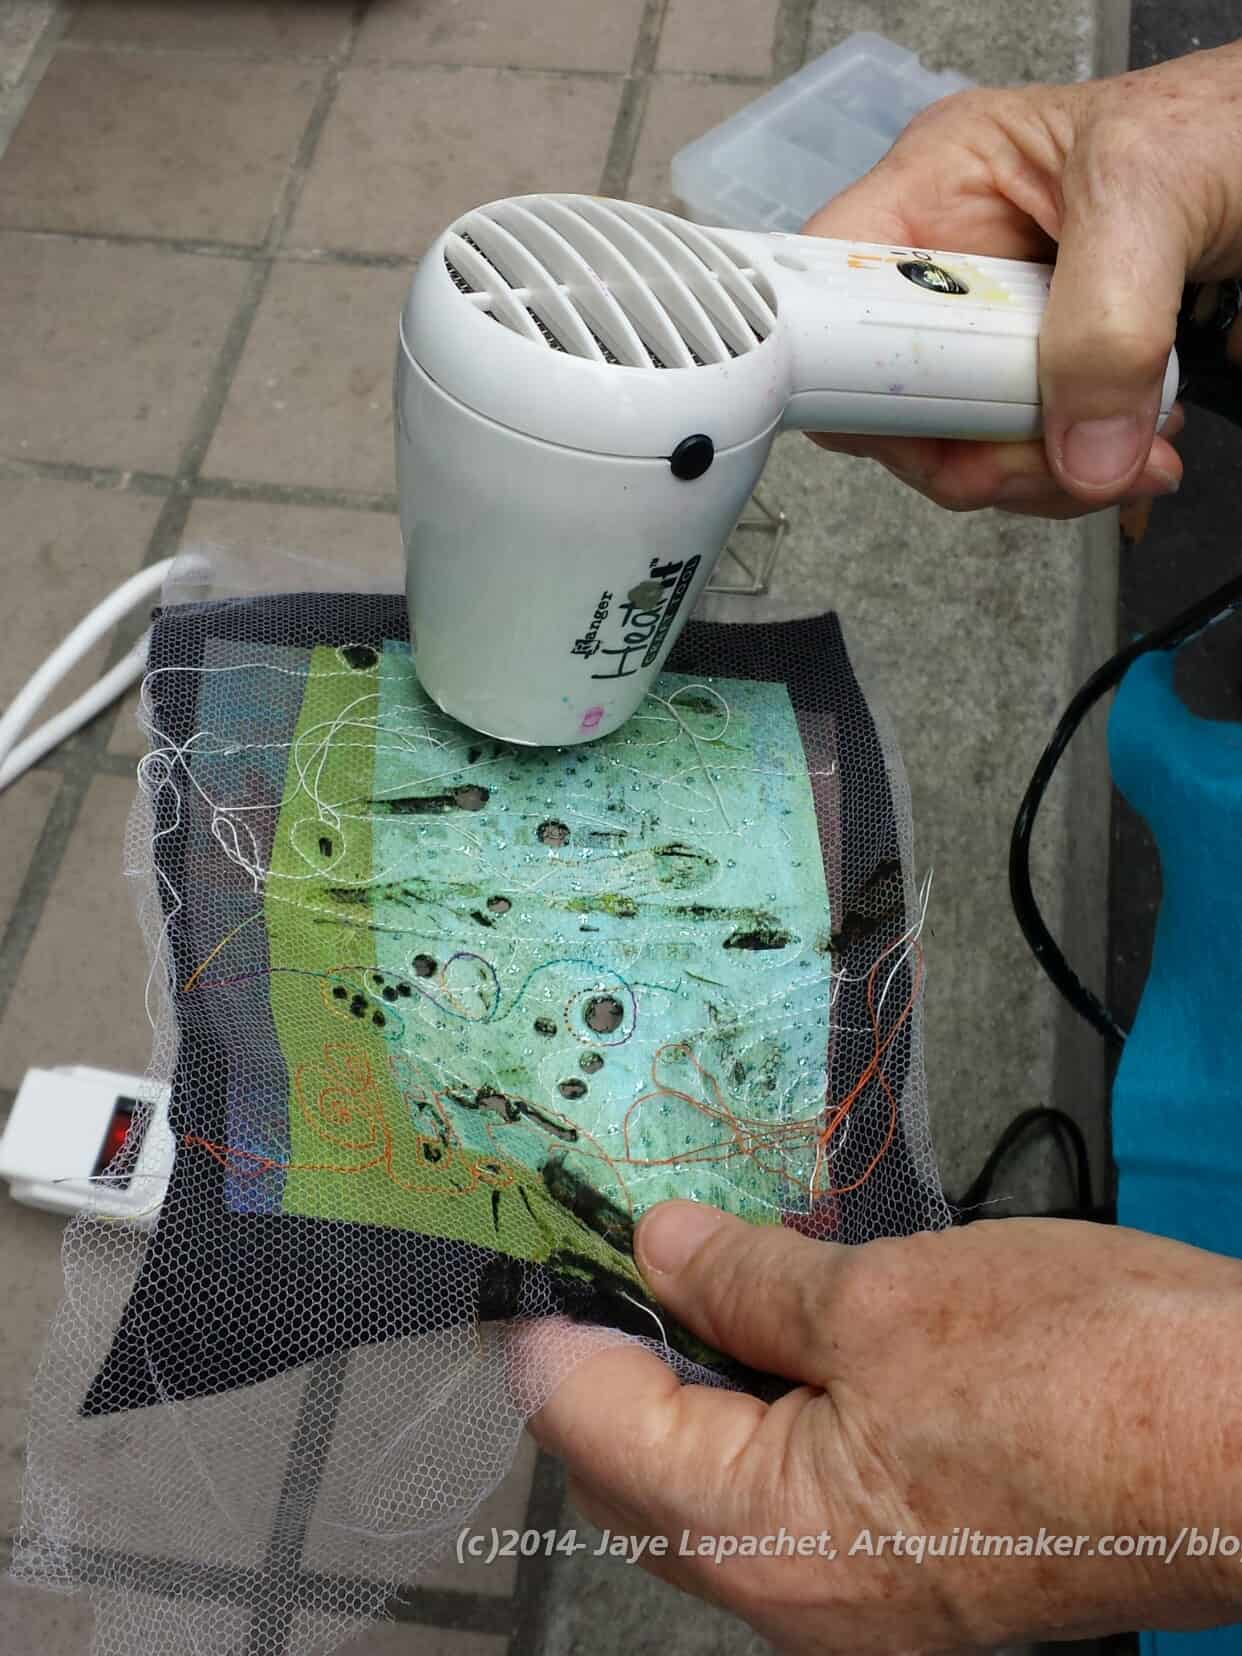
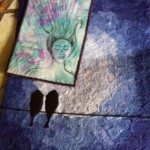
Gerre’s art quiltGerre burning her quilt
Gerre was working on an amazing art quilt. She put layers of fabric together with tulle on top, then quilted it then BURNED it! It was awesome.
Reva worked on a flower quilt.
Angela was doing some improv piecing based on a piece she started in a class.
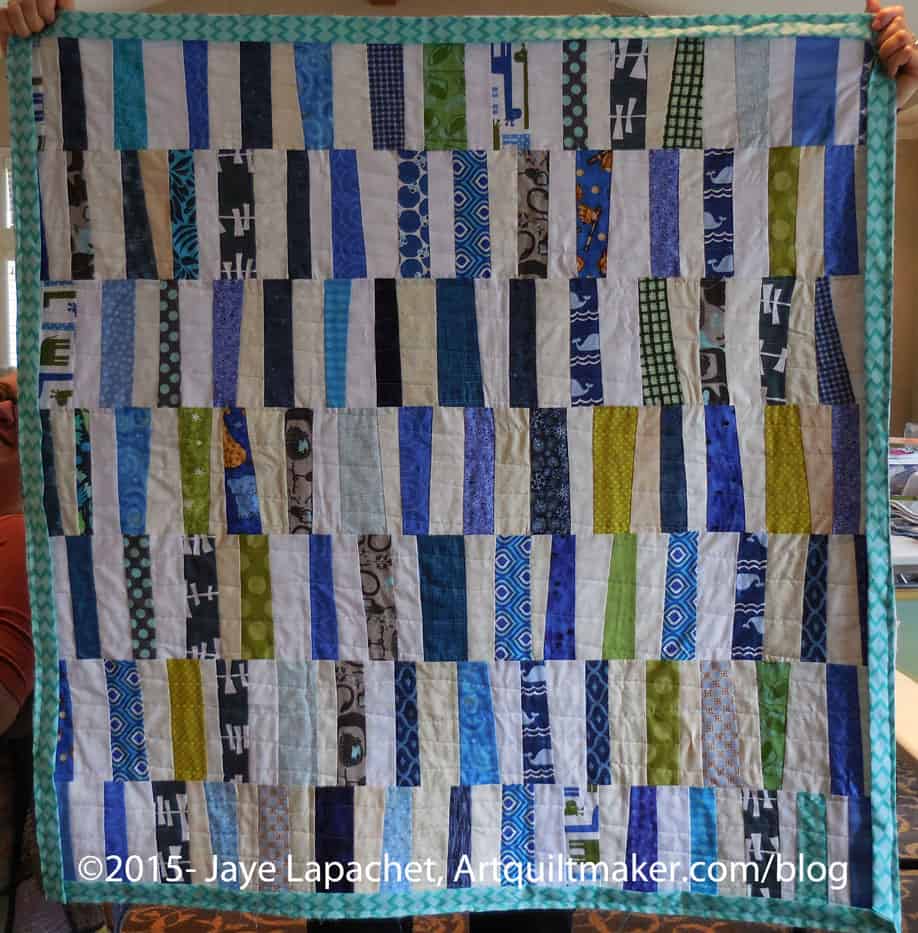
Julie’s Tumbler
Julie worked on 3 or 4 pieces, including a self portrait and a couple of pieces she started in China. She also sewed rows to her tumbler quilt top, which is nearing completion. It was so great to see her so productive as well.
Rhonda worked on handwork all weekend, including an applique’ project inspired by Kevin Kosbab. She showed me the Valdani Pearl Cotton collection she bought from MassDrop, the temptress! I love Valdani Pearl cotton. I may have to start another quilt like Beach Town. Or just pick a project on which I can embroider. Hhmm.
Maureen’s Mid-Century Modern
Maureen worked on a piece that I thought was made from a pre-cut, but she picked all the fabrics herself. I really think that she should put pre-cuts together for Moda. Her piece looked like a mid-Century modern quilt or painting.
Maureen worked on a plaid piece as well. She found the fabrics at FabMo and turned them into improv blocks which she was playing with when we all had to leave.
Dolores was working on dolls from a class she took with Susan Else as well as the piece from the online class she is taking.
Caroline made pillowcases and worked on a crazy paper piecing project. I think the one section she worked on had 58 pieces!!!
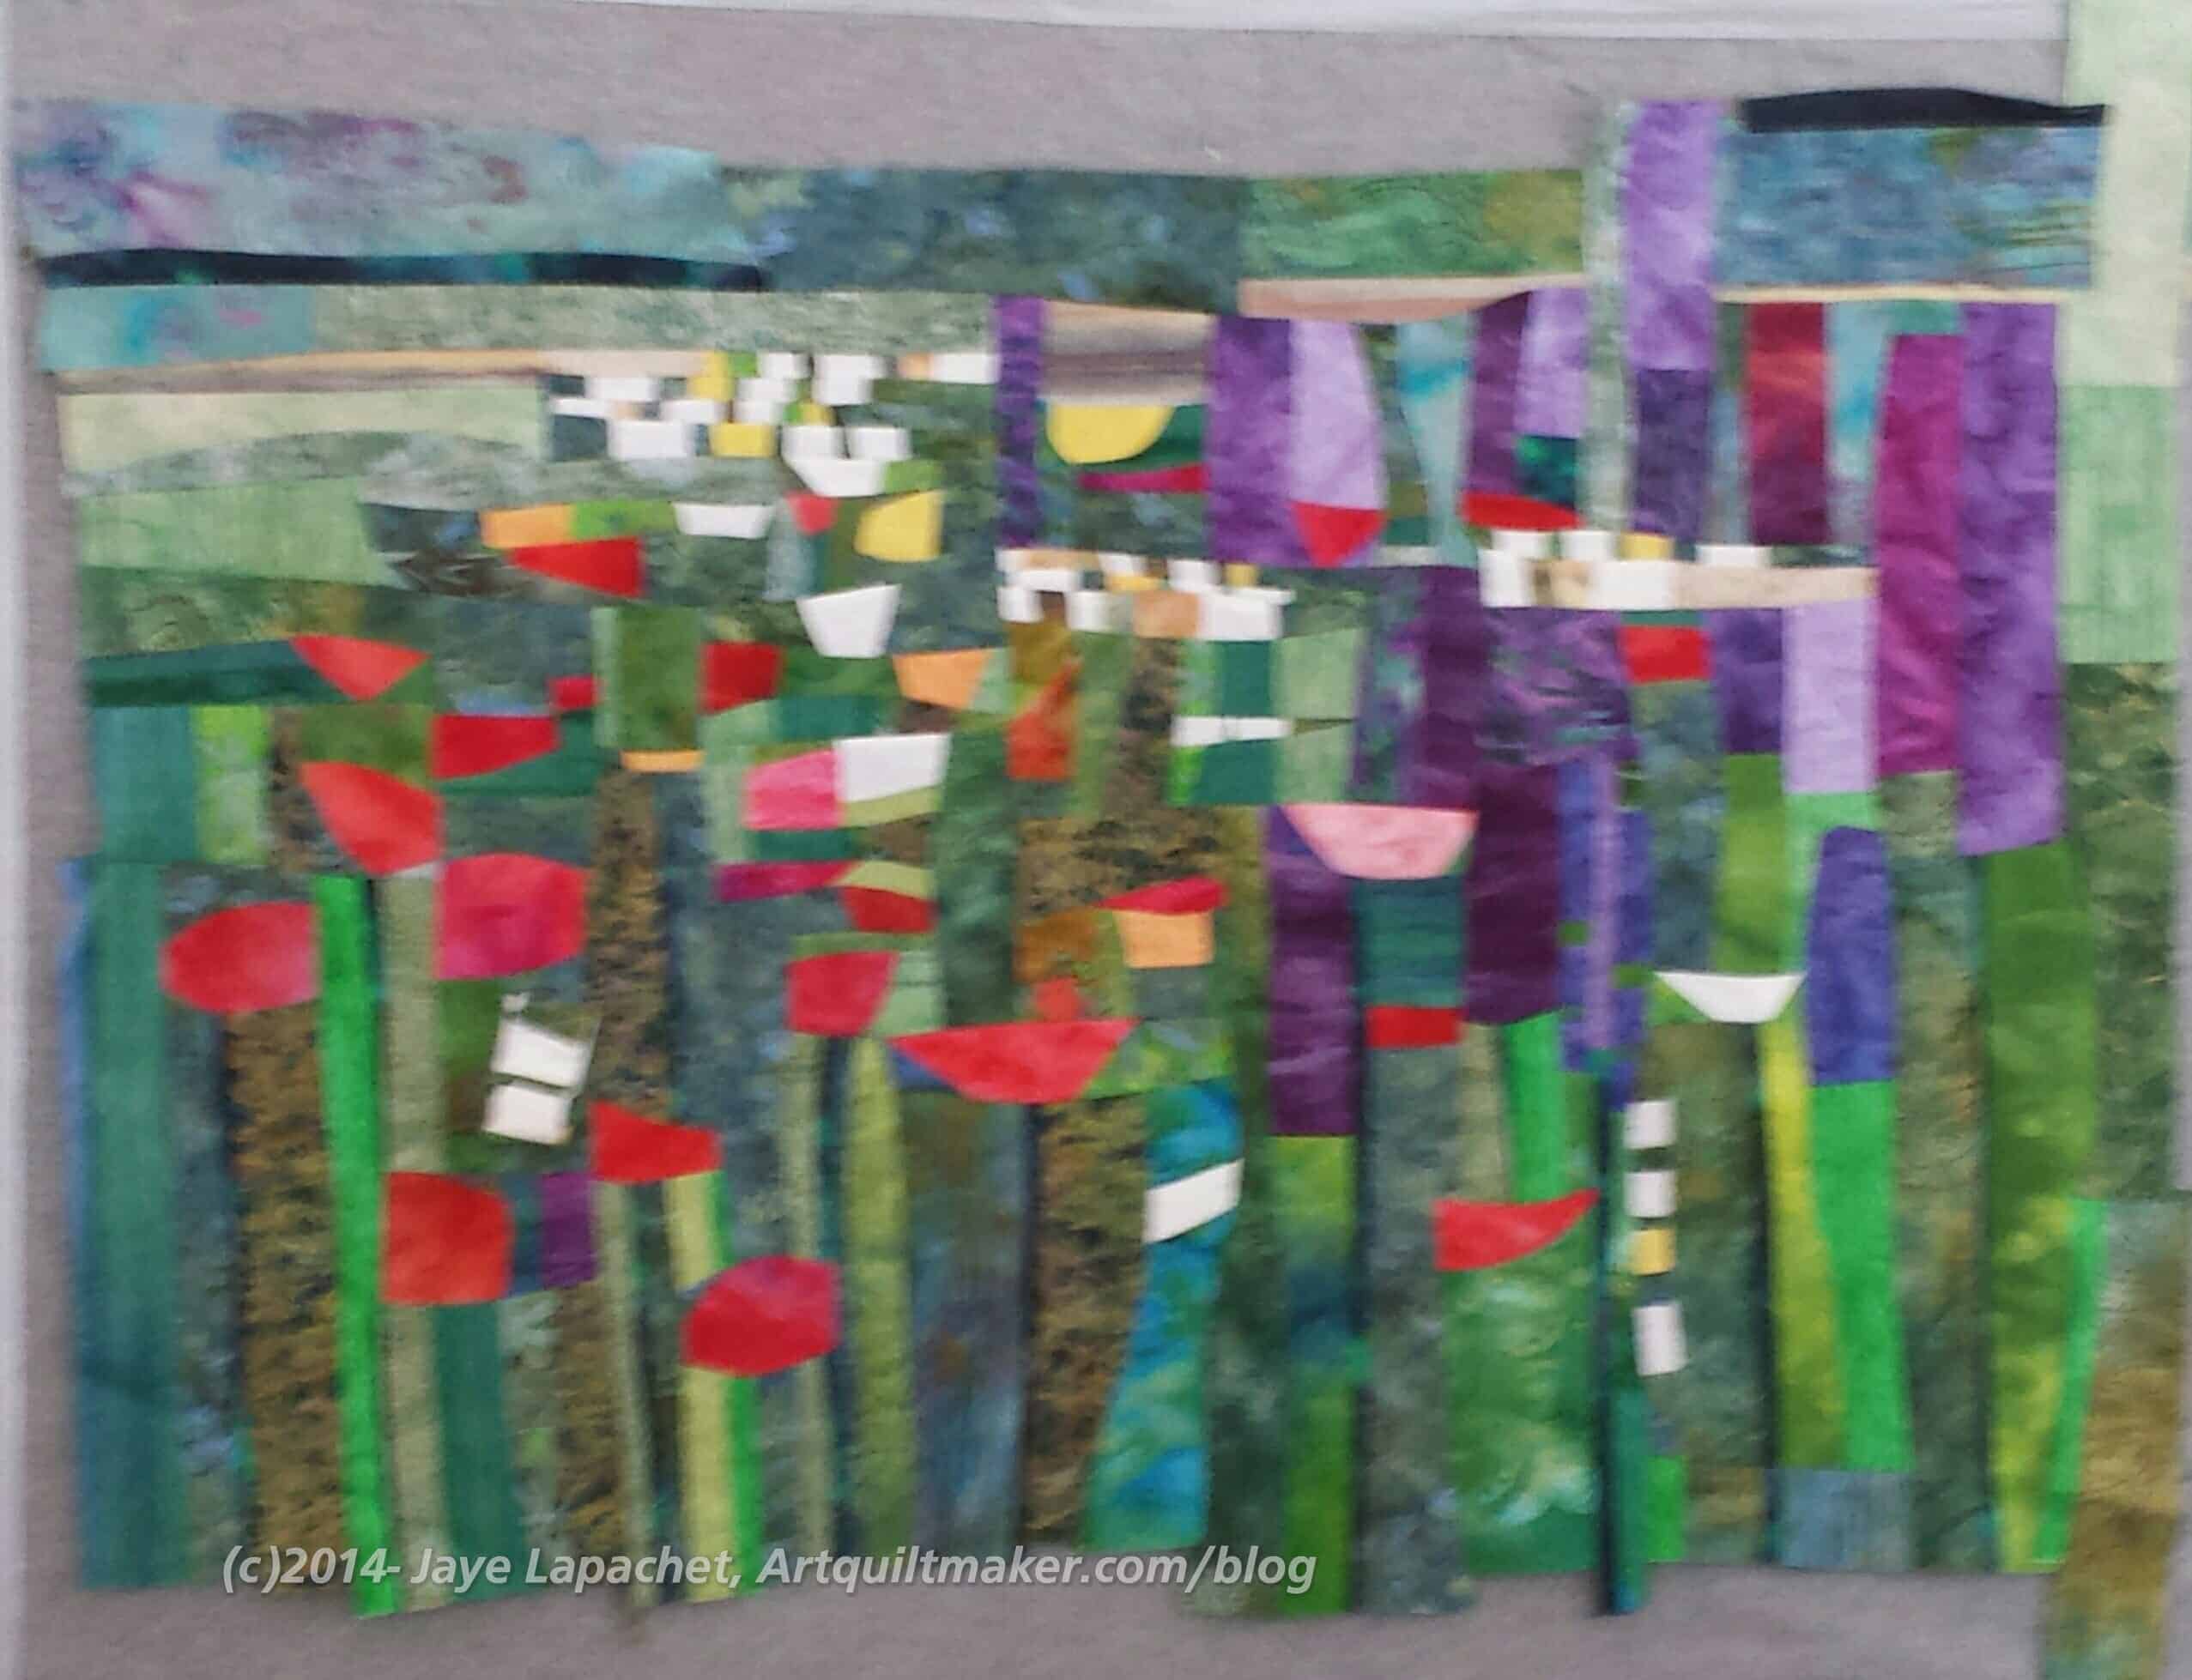
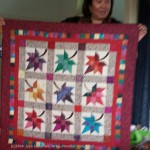
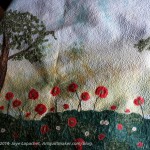
Amy’s Landscape
Amy was working on a kind of landscape with flowers. I loved it!
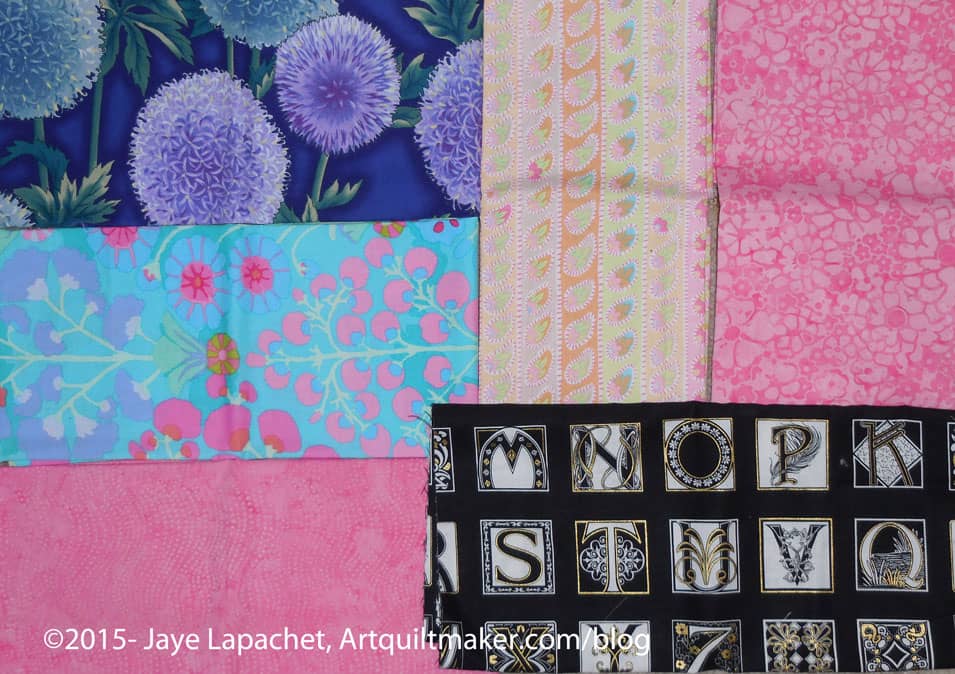
There was also a “free stuff table” and I picked up a couple of pieces of fabric. There was something about the colors and imagery that attracted me. There were a couple of pieces of Kaffe Fassett and some others. I tried to exercise restraint. It was difficult, but I seem to have succeeded. The purple dandelions were kind of a surprise, but they will come in handy somewhere.
CQFA Retreat Free Fabric
In addition to the sewing, it was great to see other people’s projects and chat with my friends. There was never enough time to find out everything I want to know about other people’s process or what is going on in their lives. I didn’t take nearly enough photos and wanted more time to sew.
Still I am glad I got the time I did, especially at this time of year. I felt like I was really productive and that feels good. I need to sew more.
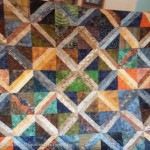
I thought I would write much more about the Flying Geese swap than I actually have. The last time I posted was back in January. My lack of reporting is not an indication of lack of interest.
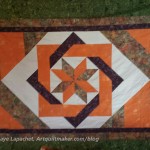
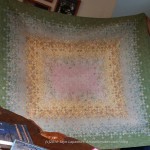
Flying Geese, Early April 2015
This is a great exchange and I am really enjoying it. First, the FGs are easy to make. Next, they have a good impact. Third, there is a lot of bang for my buck. I take 5 squares and come up with 4 Flying Geese. Also, they are like potato chips. I can’t make just one set at a time. Once I get started, I want to make bunches of them. Finally, though I am sure there are other positives, all the colors I try work well.
So, the photo at right is the sum total of the Flying Geese I have made and received until last week. Not, it’s not a great picture, but, as you saw on my last Design Wall Monday, my design wall is backed to the gills and there is no space. I’ll get a better picture at some point, but for now you’ll have to be happy with this one.
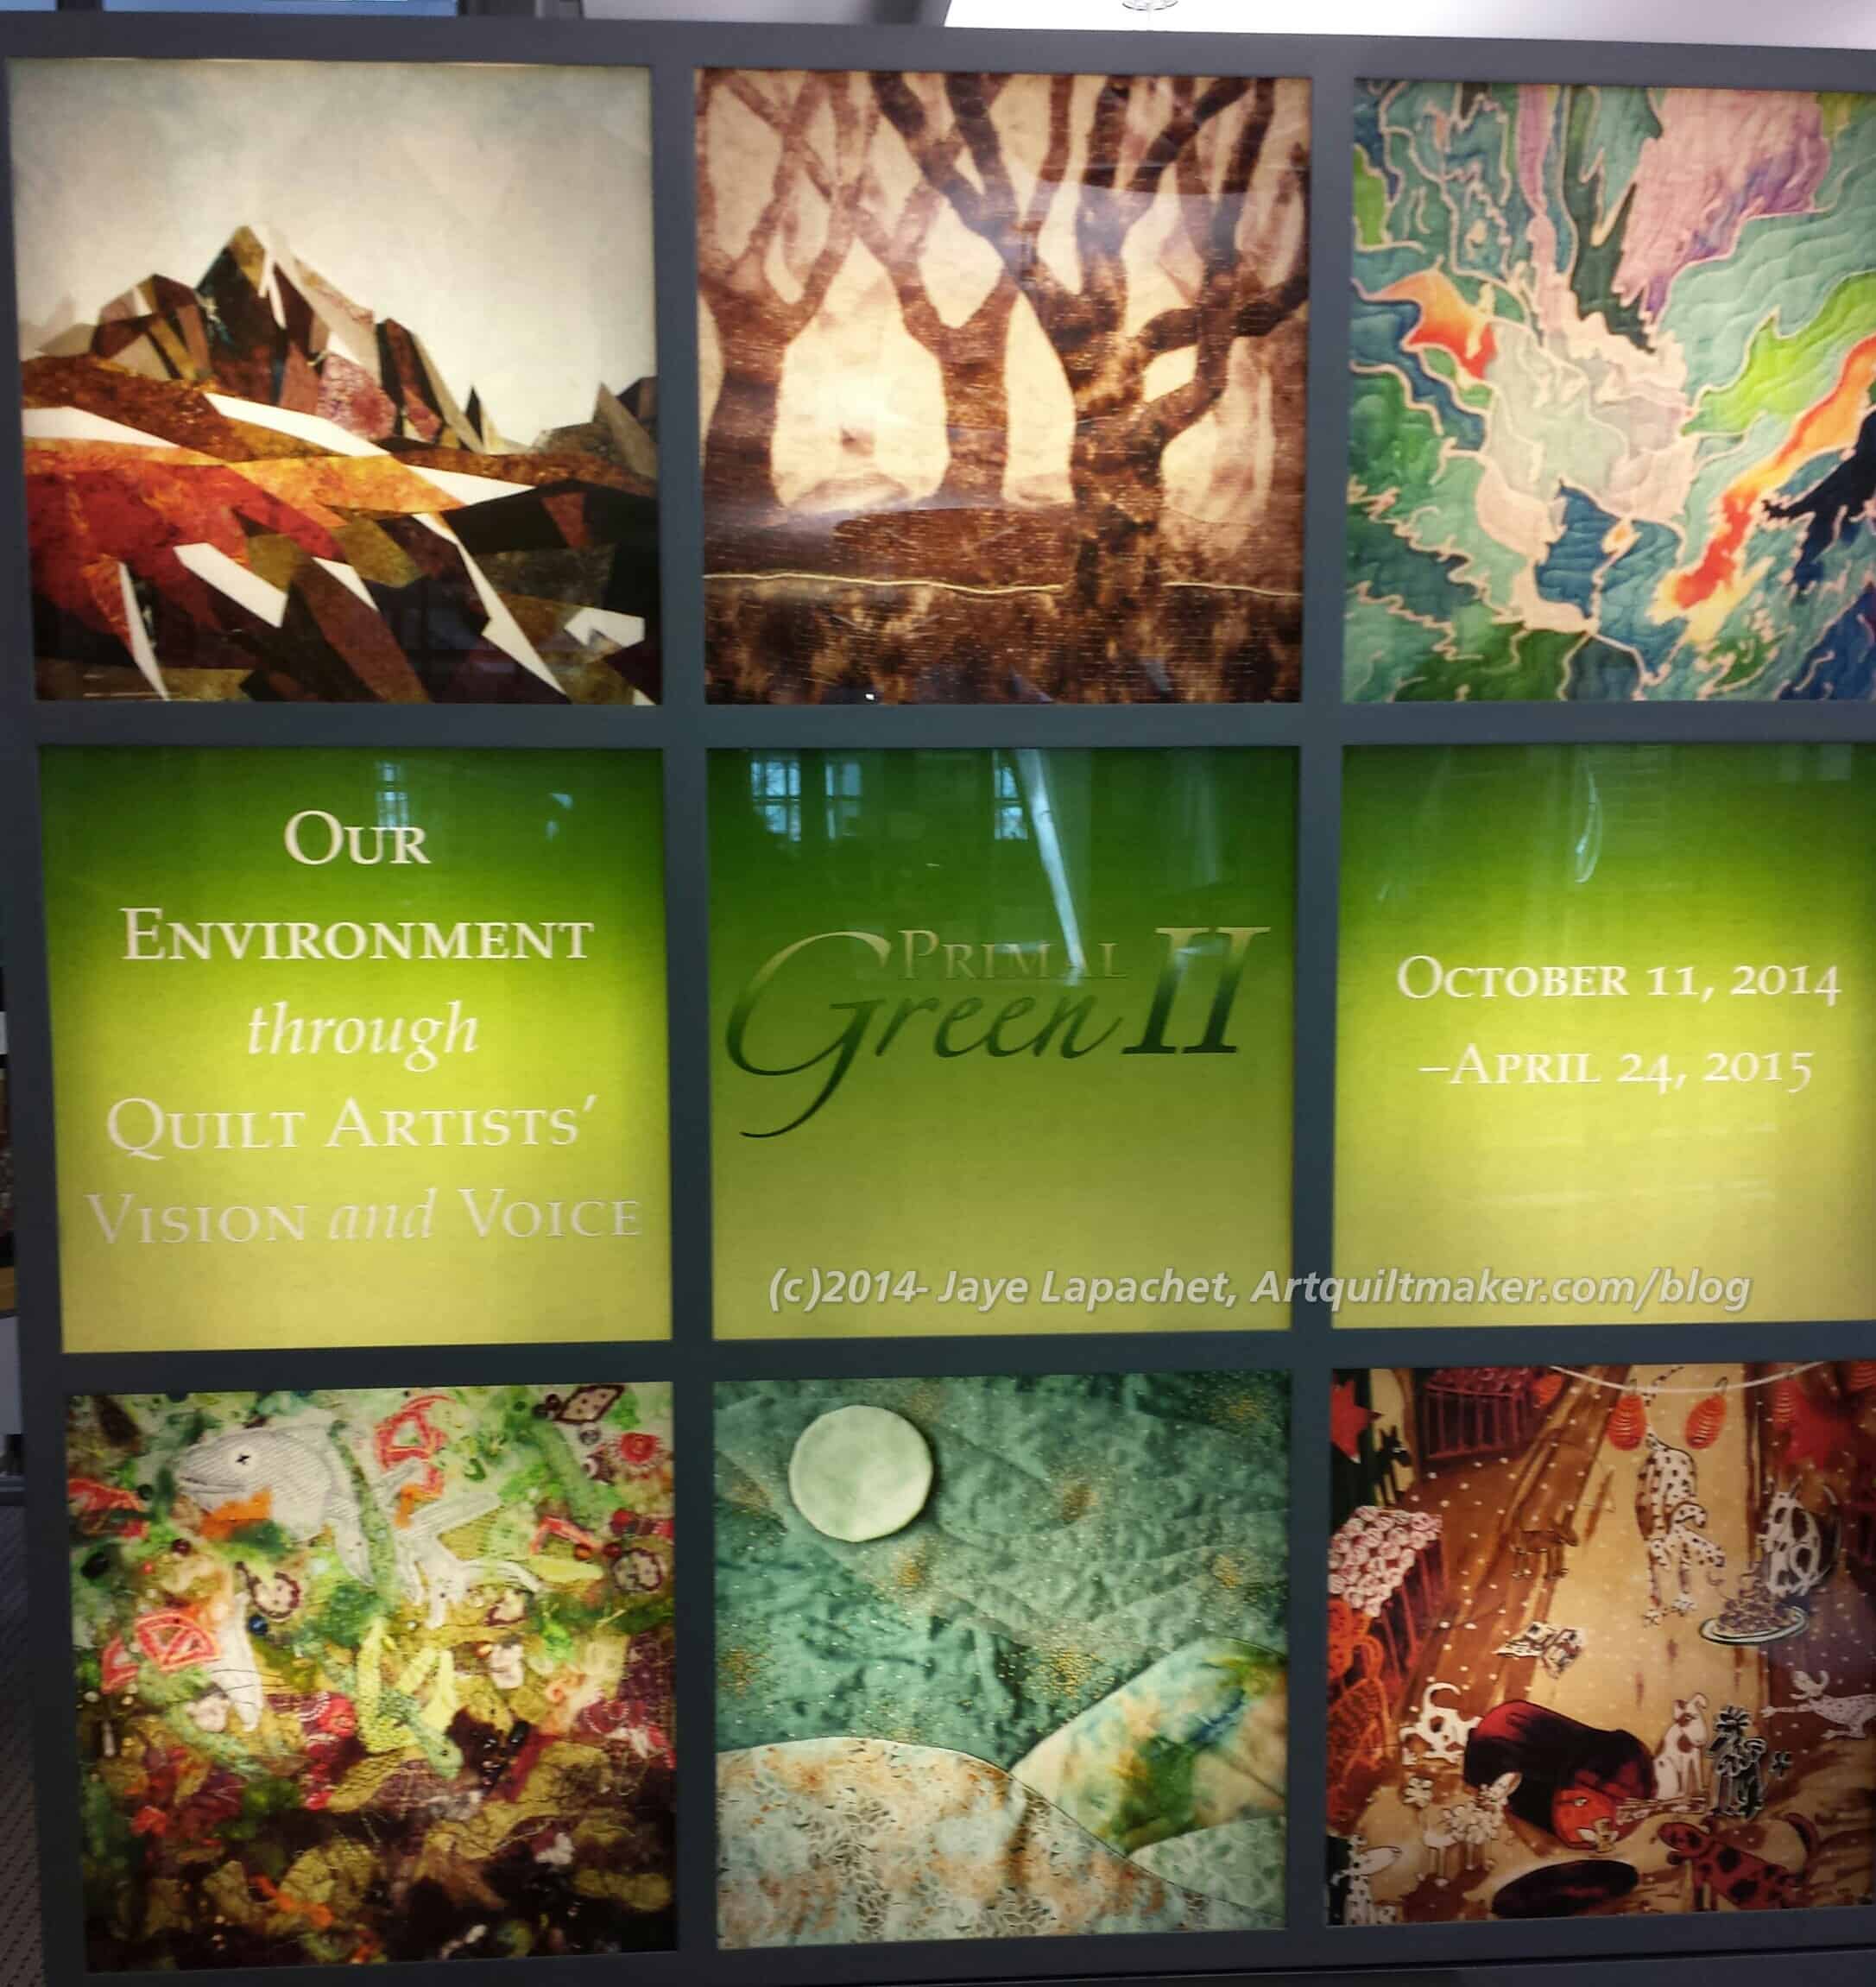
The last days of the CQFA Show Primal Green 2 is at the San Francisco Public Library. I went to see it one day on a trip to the City, but this is as much a reminder for me to see it again as it is to encourage you to go.
Did you go and see the show? The 24th is the last day to see it. Primal Green2 is a show of environmental art quilts at the Main Branch of the San Francisco Public Library.
The Wallace Stegner Environmental Center is one of the special collections at the Main Branch and, after a year of work with the Library, CQFA has over 20 quilts and other fiber art on display. The quilts all have an environmental theme. The show will hang until Friday April 24 and be available to viewers during the Library’s normal open hours. Don’t wait until the last minute! Oops! It is the last minute. Go TODAY!
One of the things that makes me feel really good is when someone tells me that a project I made inspired them.
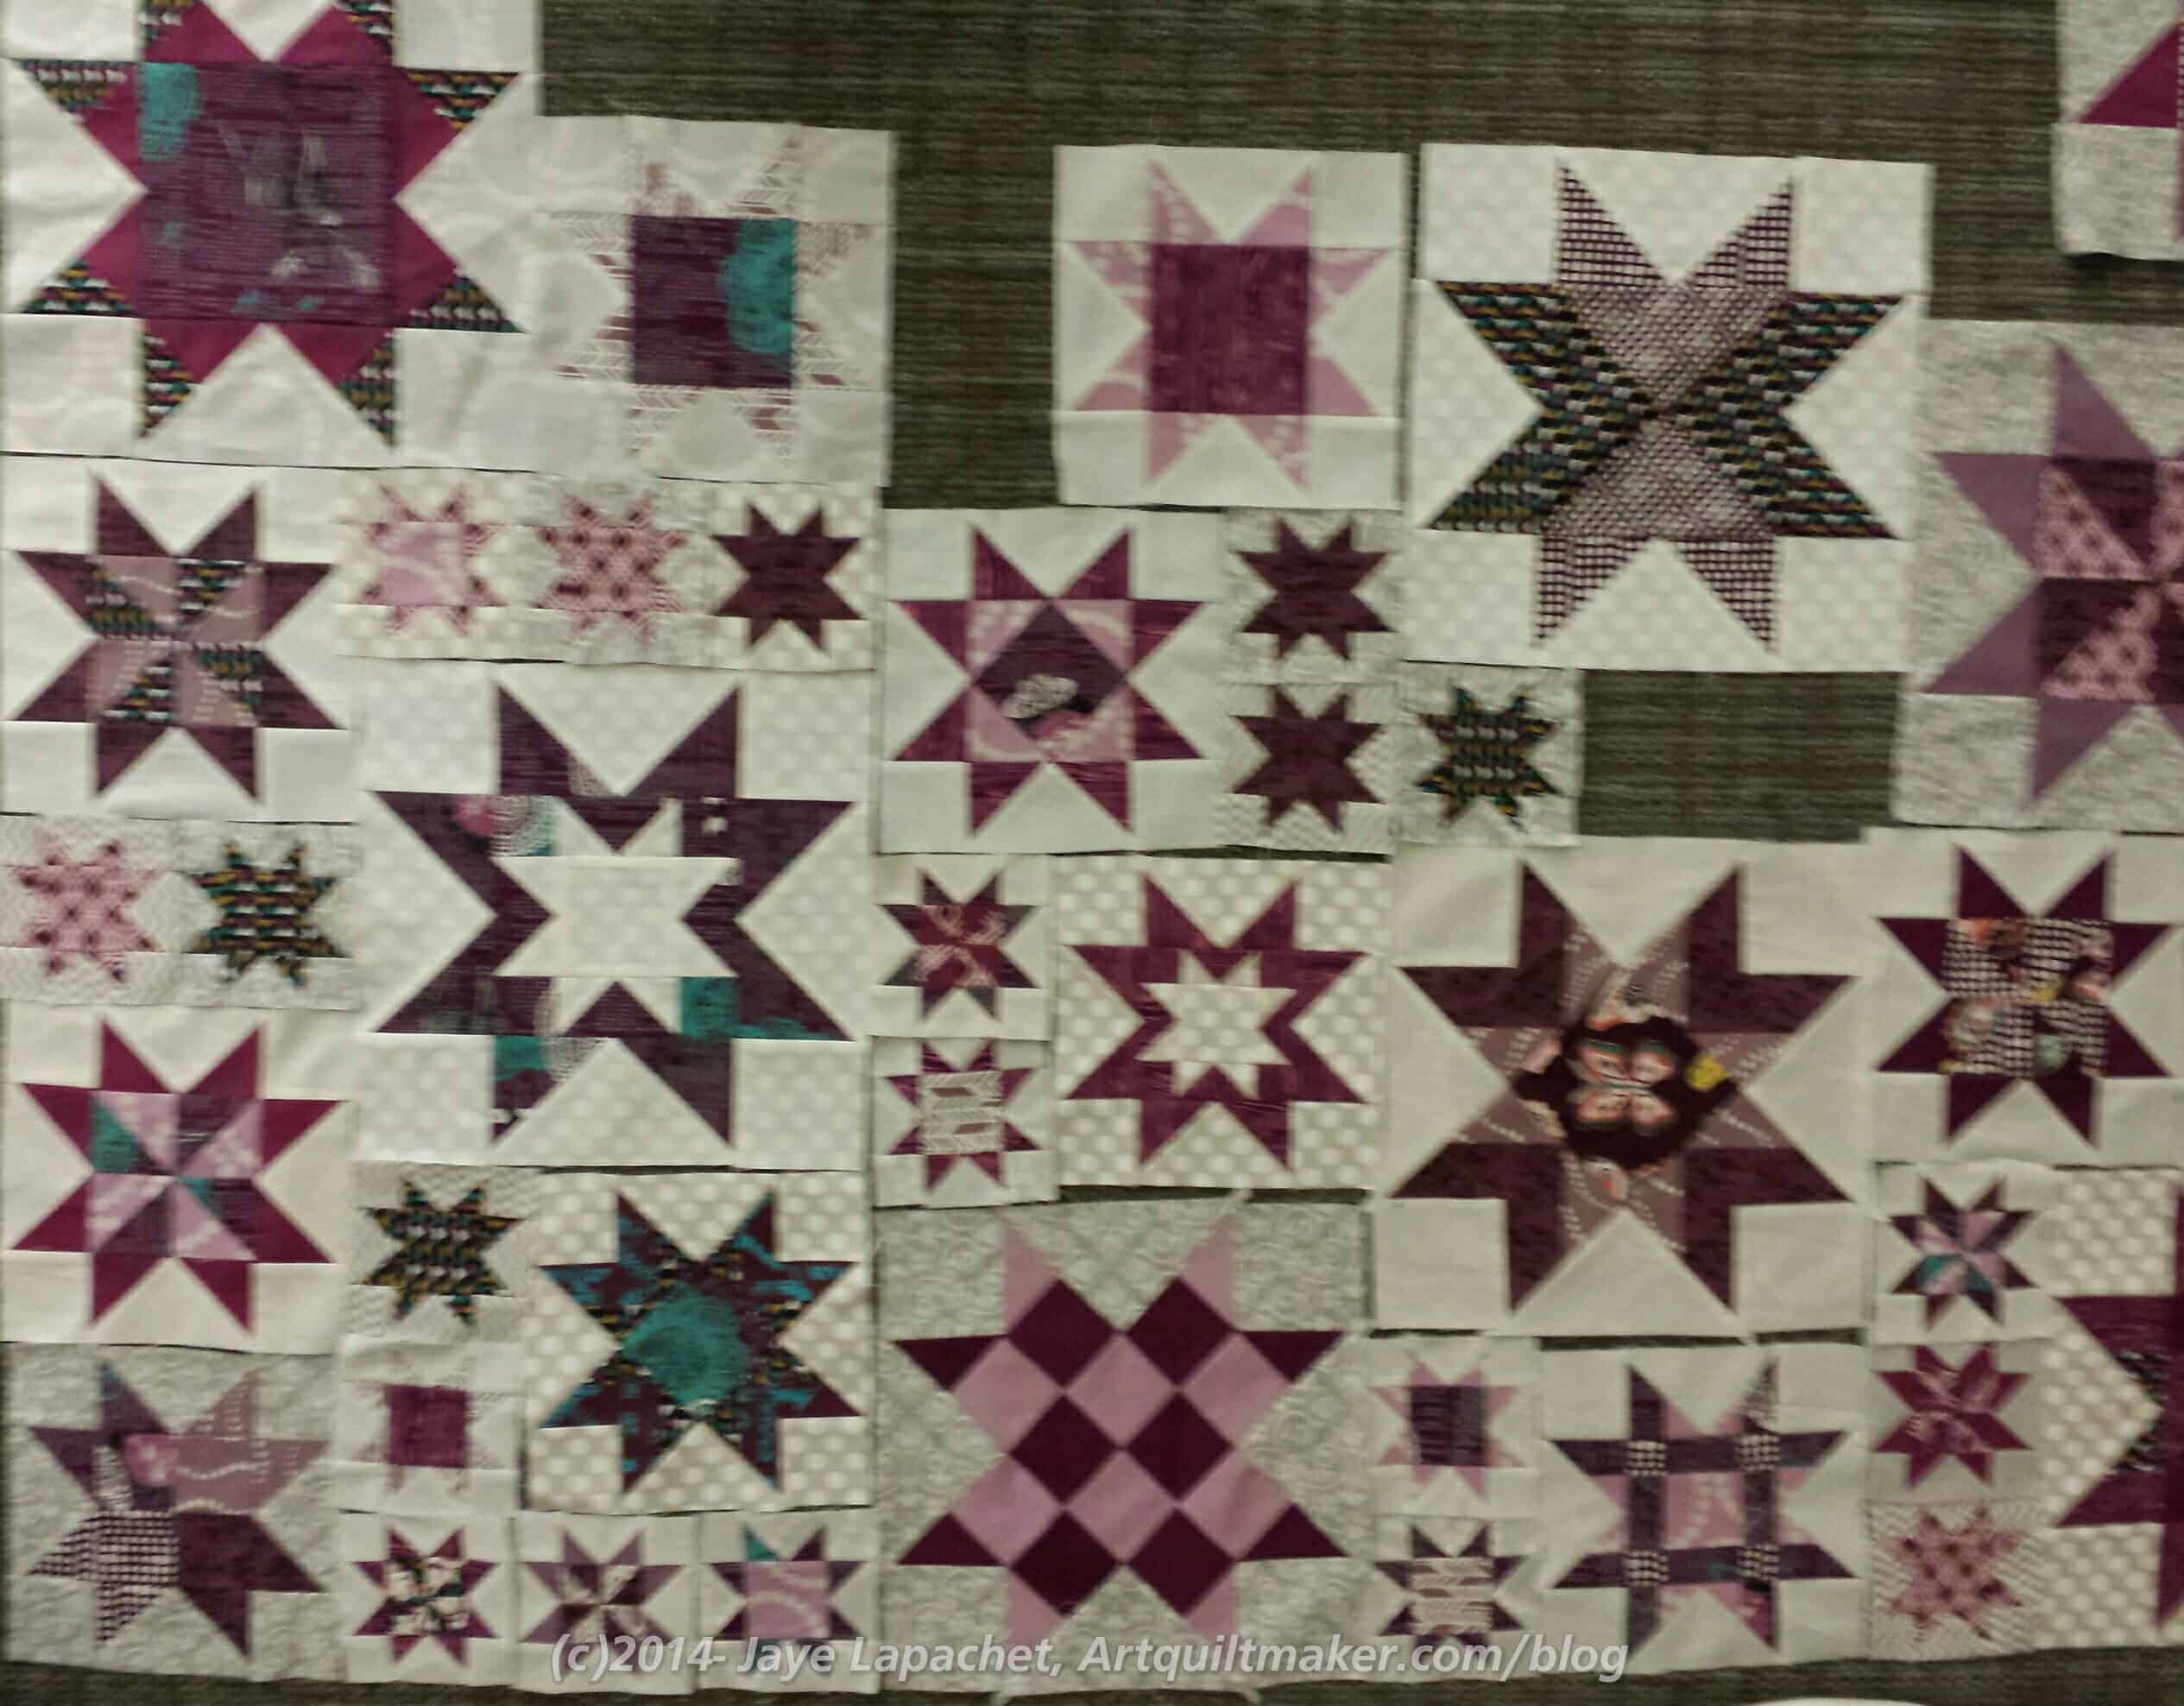
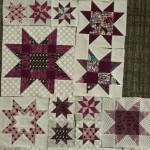
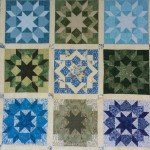
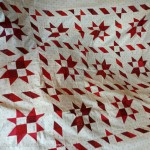
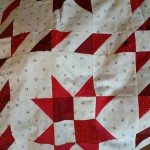
Lynnette’s Star Sampler
At a recent Sew Day, Lynnette was laying out star blocks that looked suspiciously like my Star Sampler, but in really awesome colors. She told me that my Star Sampler had inspired her.
Ooooh! I inspired someone. That feeling is awesome.
I know the colors are hard to see, but it is in shades of white, plum and grey. It will be a gift. That told me that Lynnette is a better person than I am. I am just thrilled to see another version IRL of the Star Sampler.
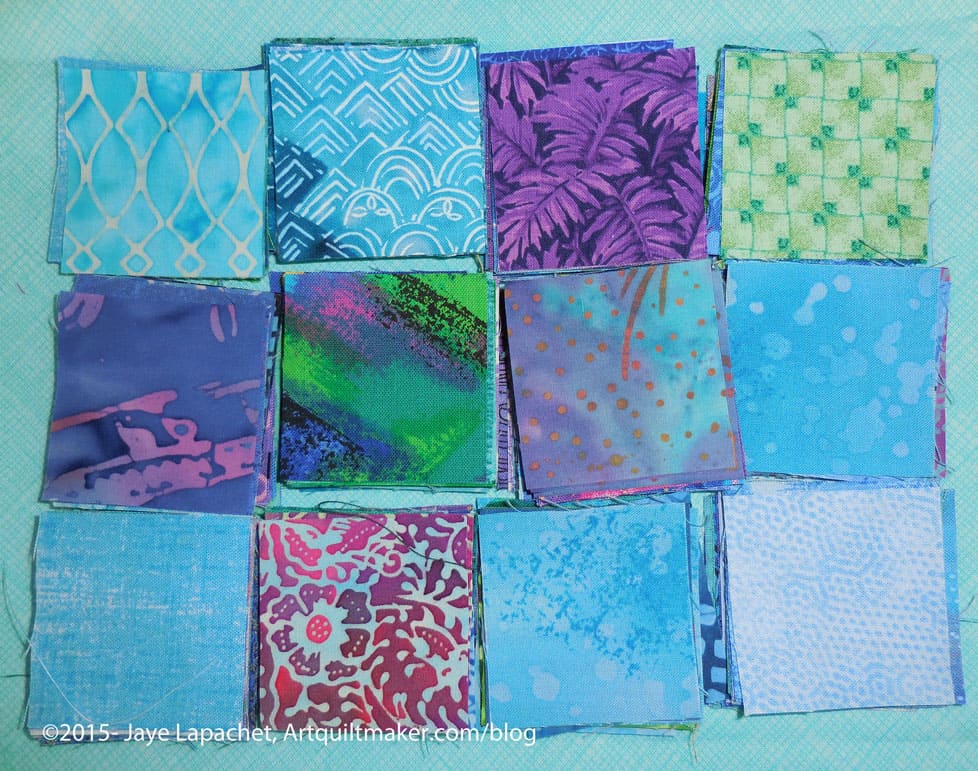
These squares arrived in the mail for me last week and I felt like a kid at Christmas. It was so fun to receive an unexpected batch of fabric. I really had a good time looking through them and imagining their placement in the Blue Lemonade quilt.
I have made good progress lately on Hunting & Gathering. Between these, the ones Mom cut for me and the squares I have cut for myself lately, there is a nice little pile accumulating.
I am still definitely in the Hunting & Gathering stage. I will be until I, at least, figure out how many patches I need. I do think this quilt will definitely happen.
I think I have 3 blue quilts in process and I wonder if I will get sick of them before the last one is finished?
There is a lot of creativity happening in Maryland. No, I am not surprised.
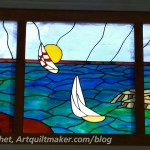
Rick’s Leaded Glass
Cathy’s Swoon
Cathy’s Embroidered Star Quilt
Torie’s Disappearing Pinwheels
Torie
Torie
Tanesha
Tanesha
Tanesha
Tanesha
Tanesha
Tanesha
Tanesha
Tanesha
Tanesha
Tanesha
Torie – Fraternal Twins Quilt
Torie – Fraternal Twins Quilt
Torie
Navy Retirement Pillow
I have to say that I was really inspired by everything I saw. I love Tanesha’s mummy owls. I love the way Torie uses batiks. I really enjoy the way Rick has incorporated leaded glass panels into his house to make the house unique.
TFQ already talked about our Flying Geese exchange on her blog. Still, I am going to talk about it here. Over the course of the year, probably ad nauseum. Still, it is my blog.
I like doing projects with TFQ. The last one we did together was the Star Sampler. She is waiting to finish hers, but mine is done.
As you might remember, we started off, after PIQF, exchanging the PIQF Cross blocks. TFQ admitted to sincerely disliking those blocks before I did, but I really did not like them very much. When we finally got on the same page, TFQ suggested Flying Geese patches and I thought that was a good idea.
We decided to use the same color selections: light, bright grey, which was good. I already had a selection out to use. I have since picked out a few others.
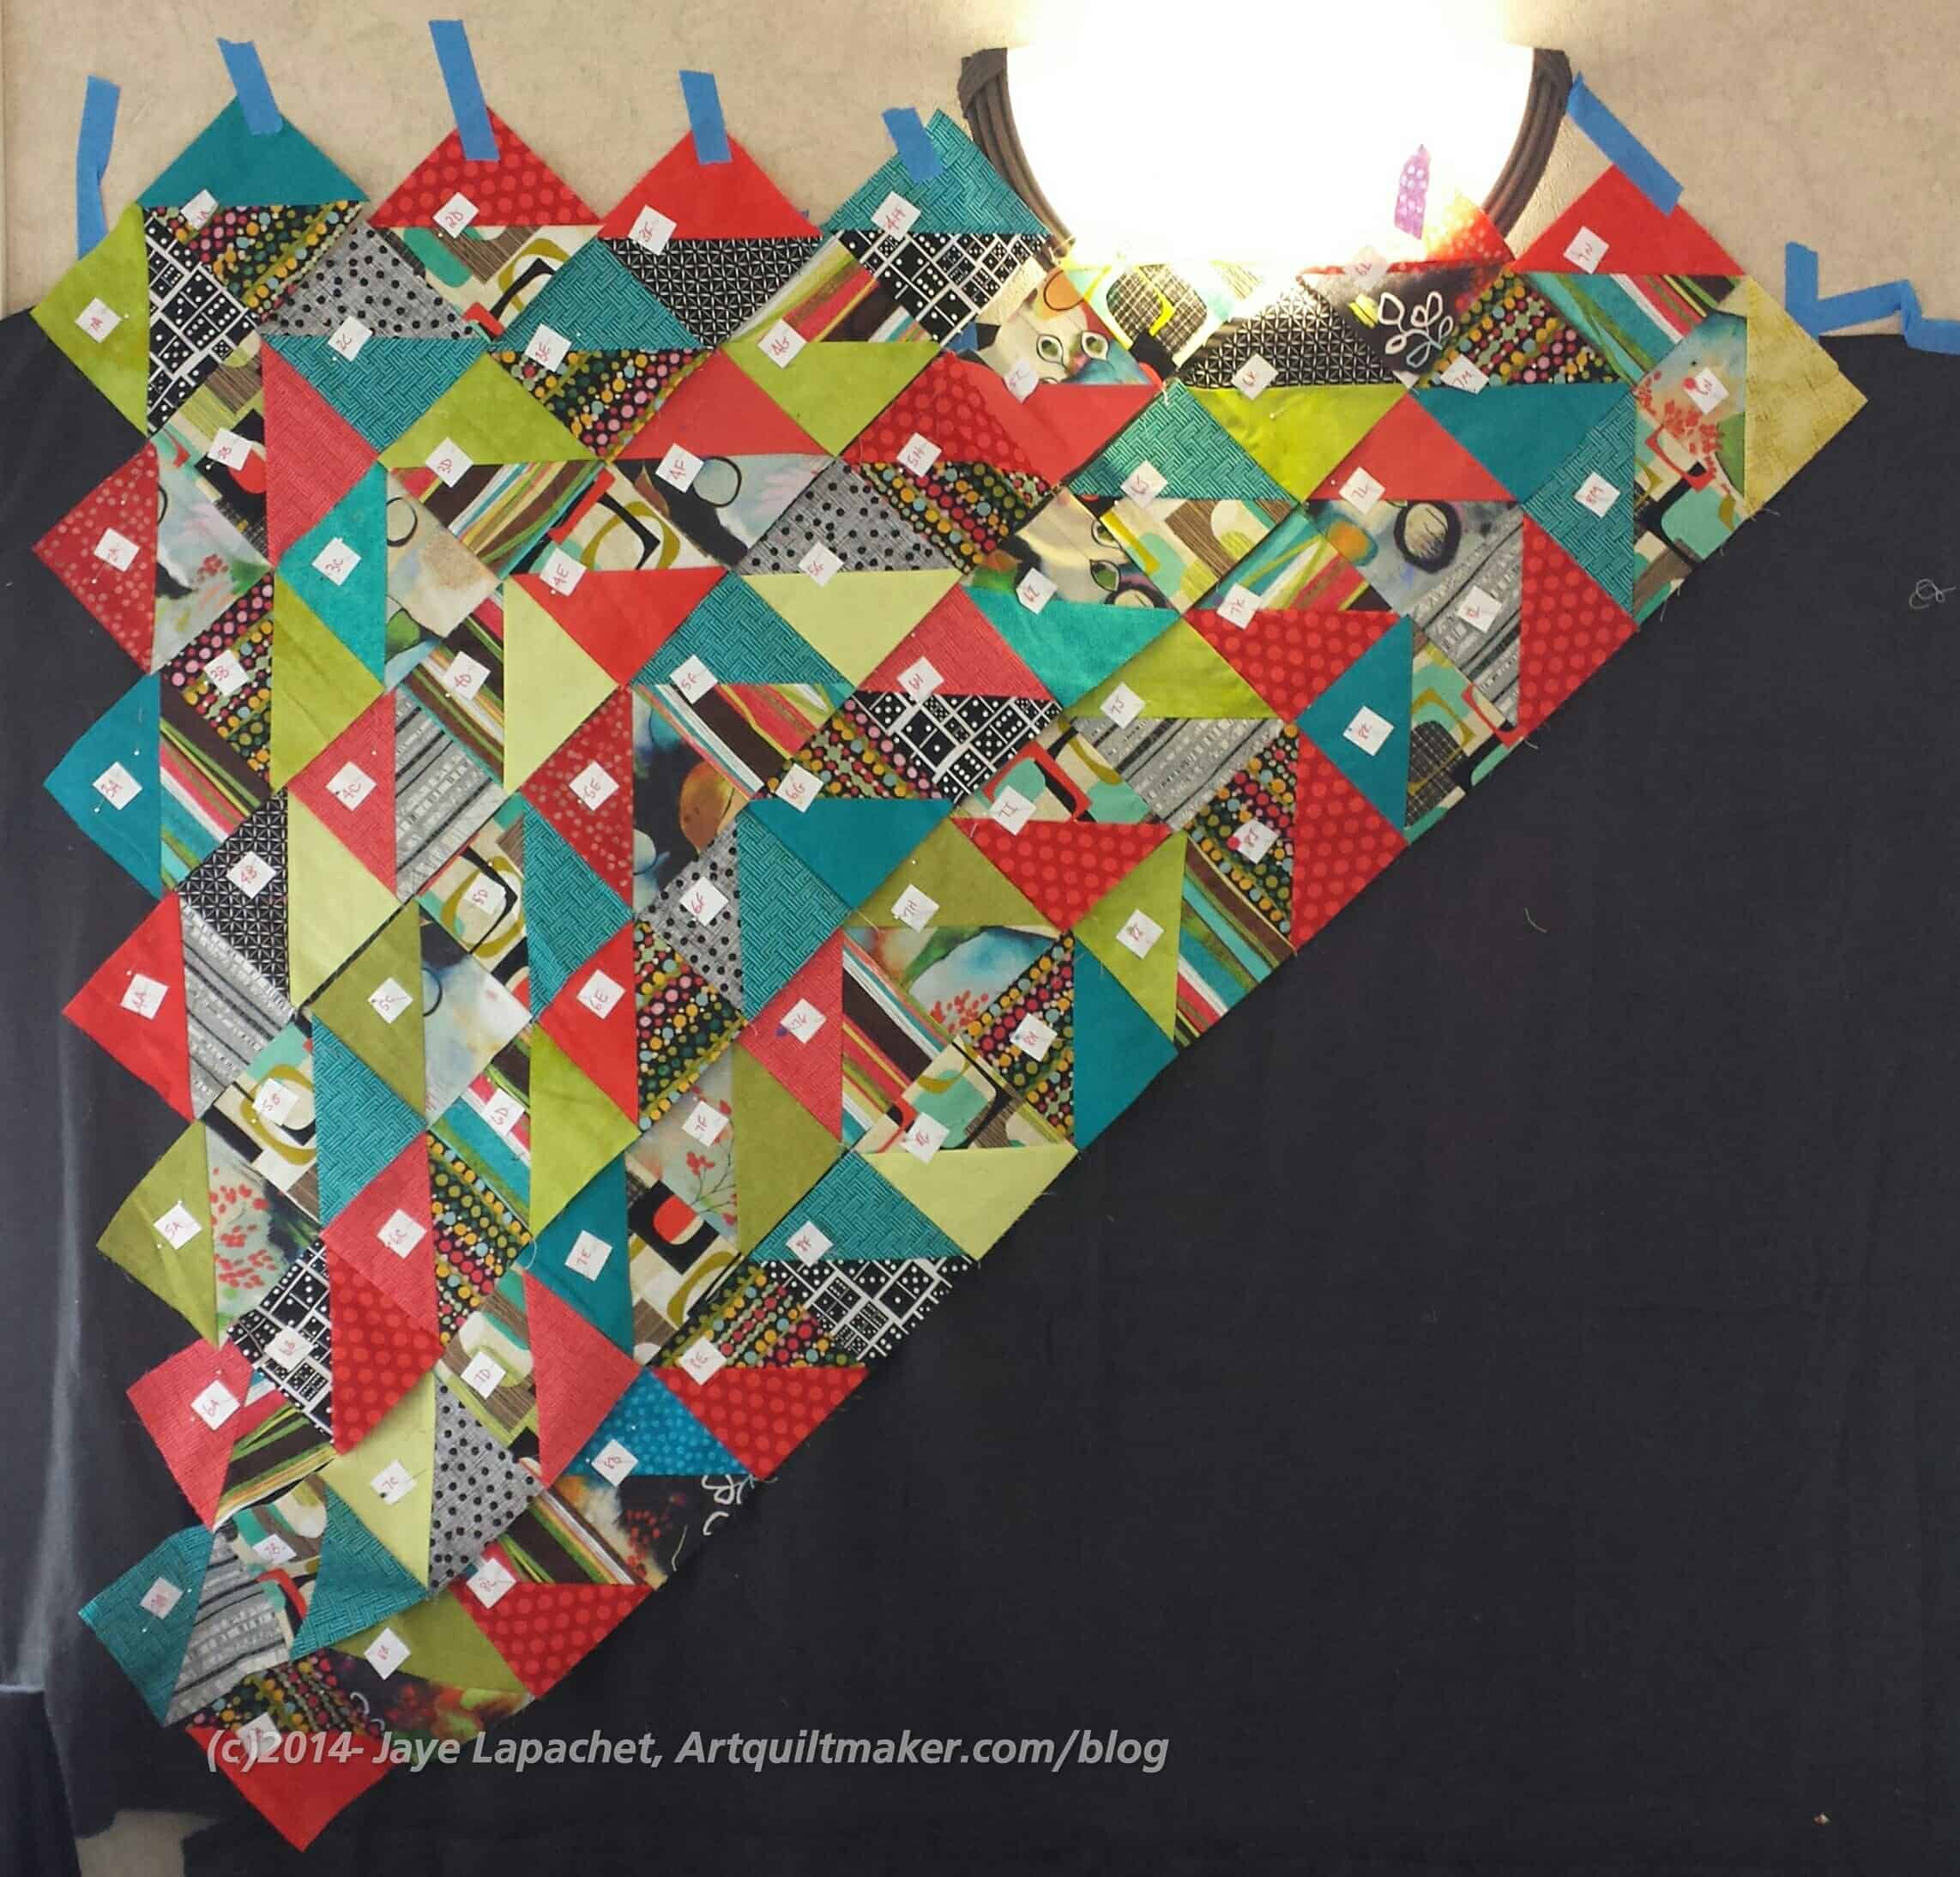
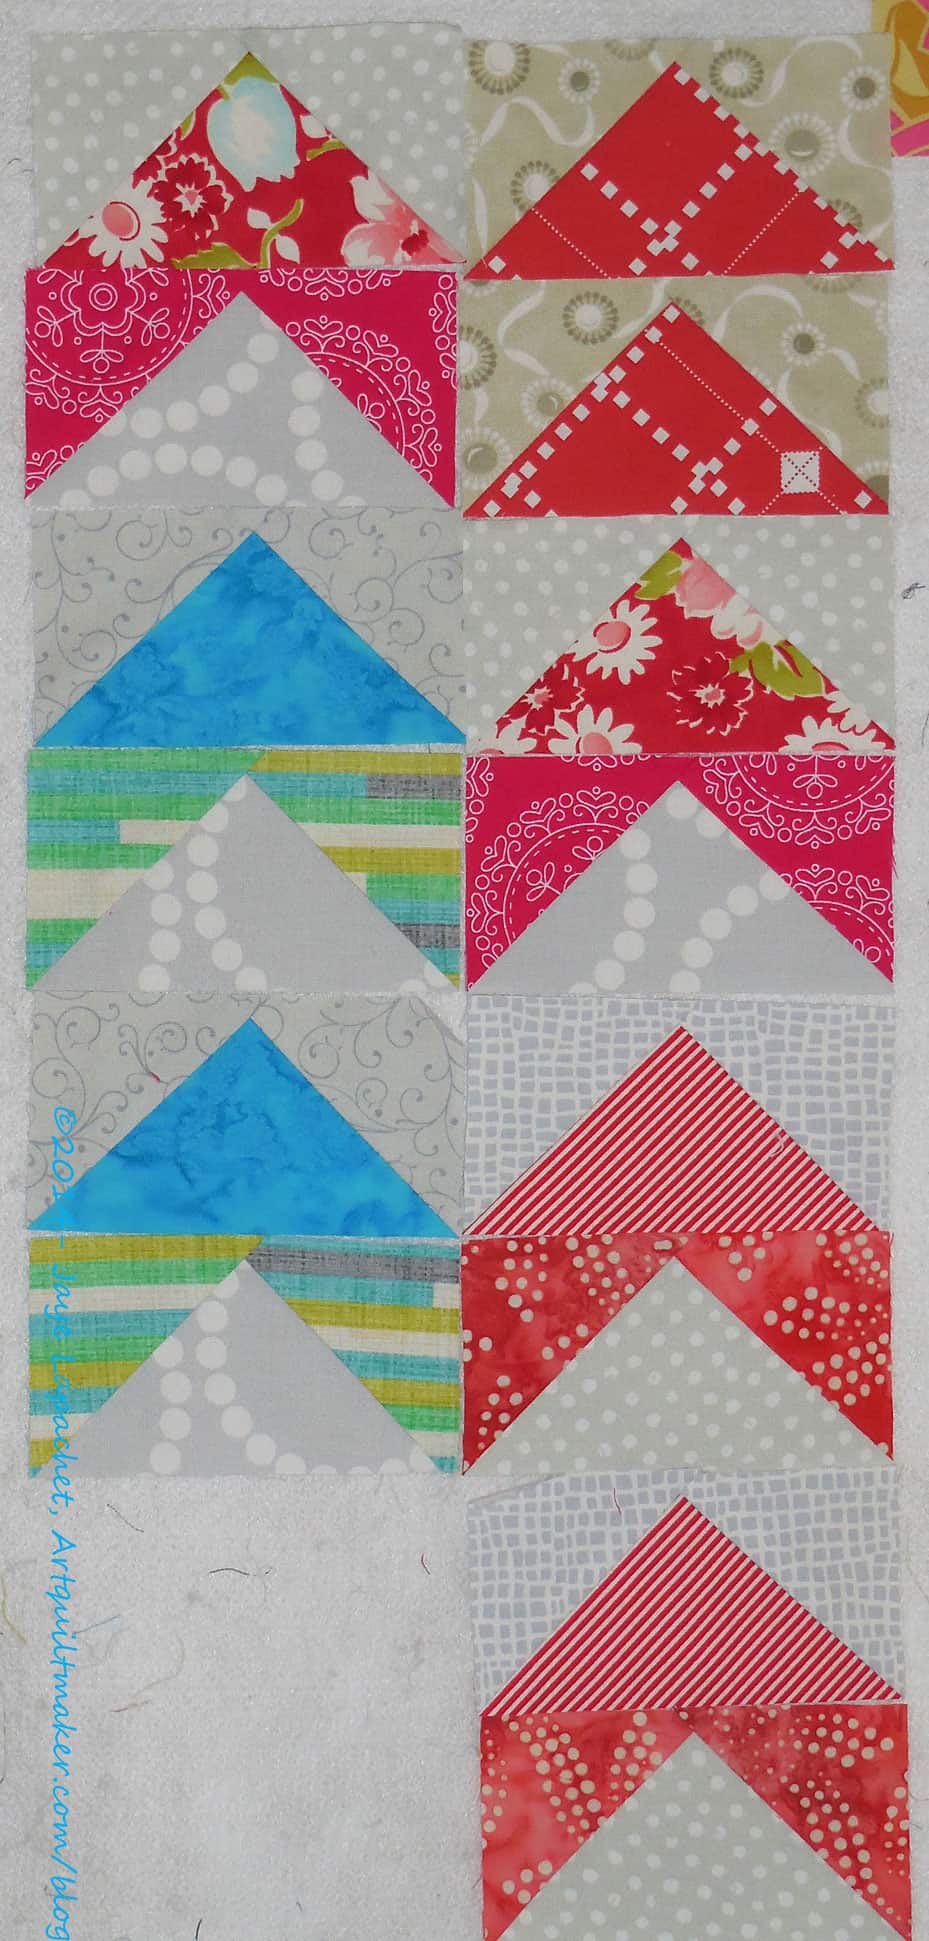
First off: I started off making the Flying Geese wrong. That is why you see some of the geese have been made into chevrons. I just have them on my design wall arranged like that for kicks. I can’t see making more of the Flying Geese the wrong way. I don’t suppose you ever really know.
That meant that I had to start over, recutting, readjusting my brain and sewing more to catch up.
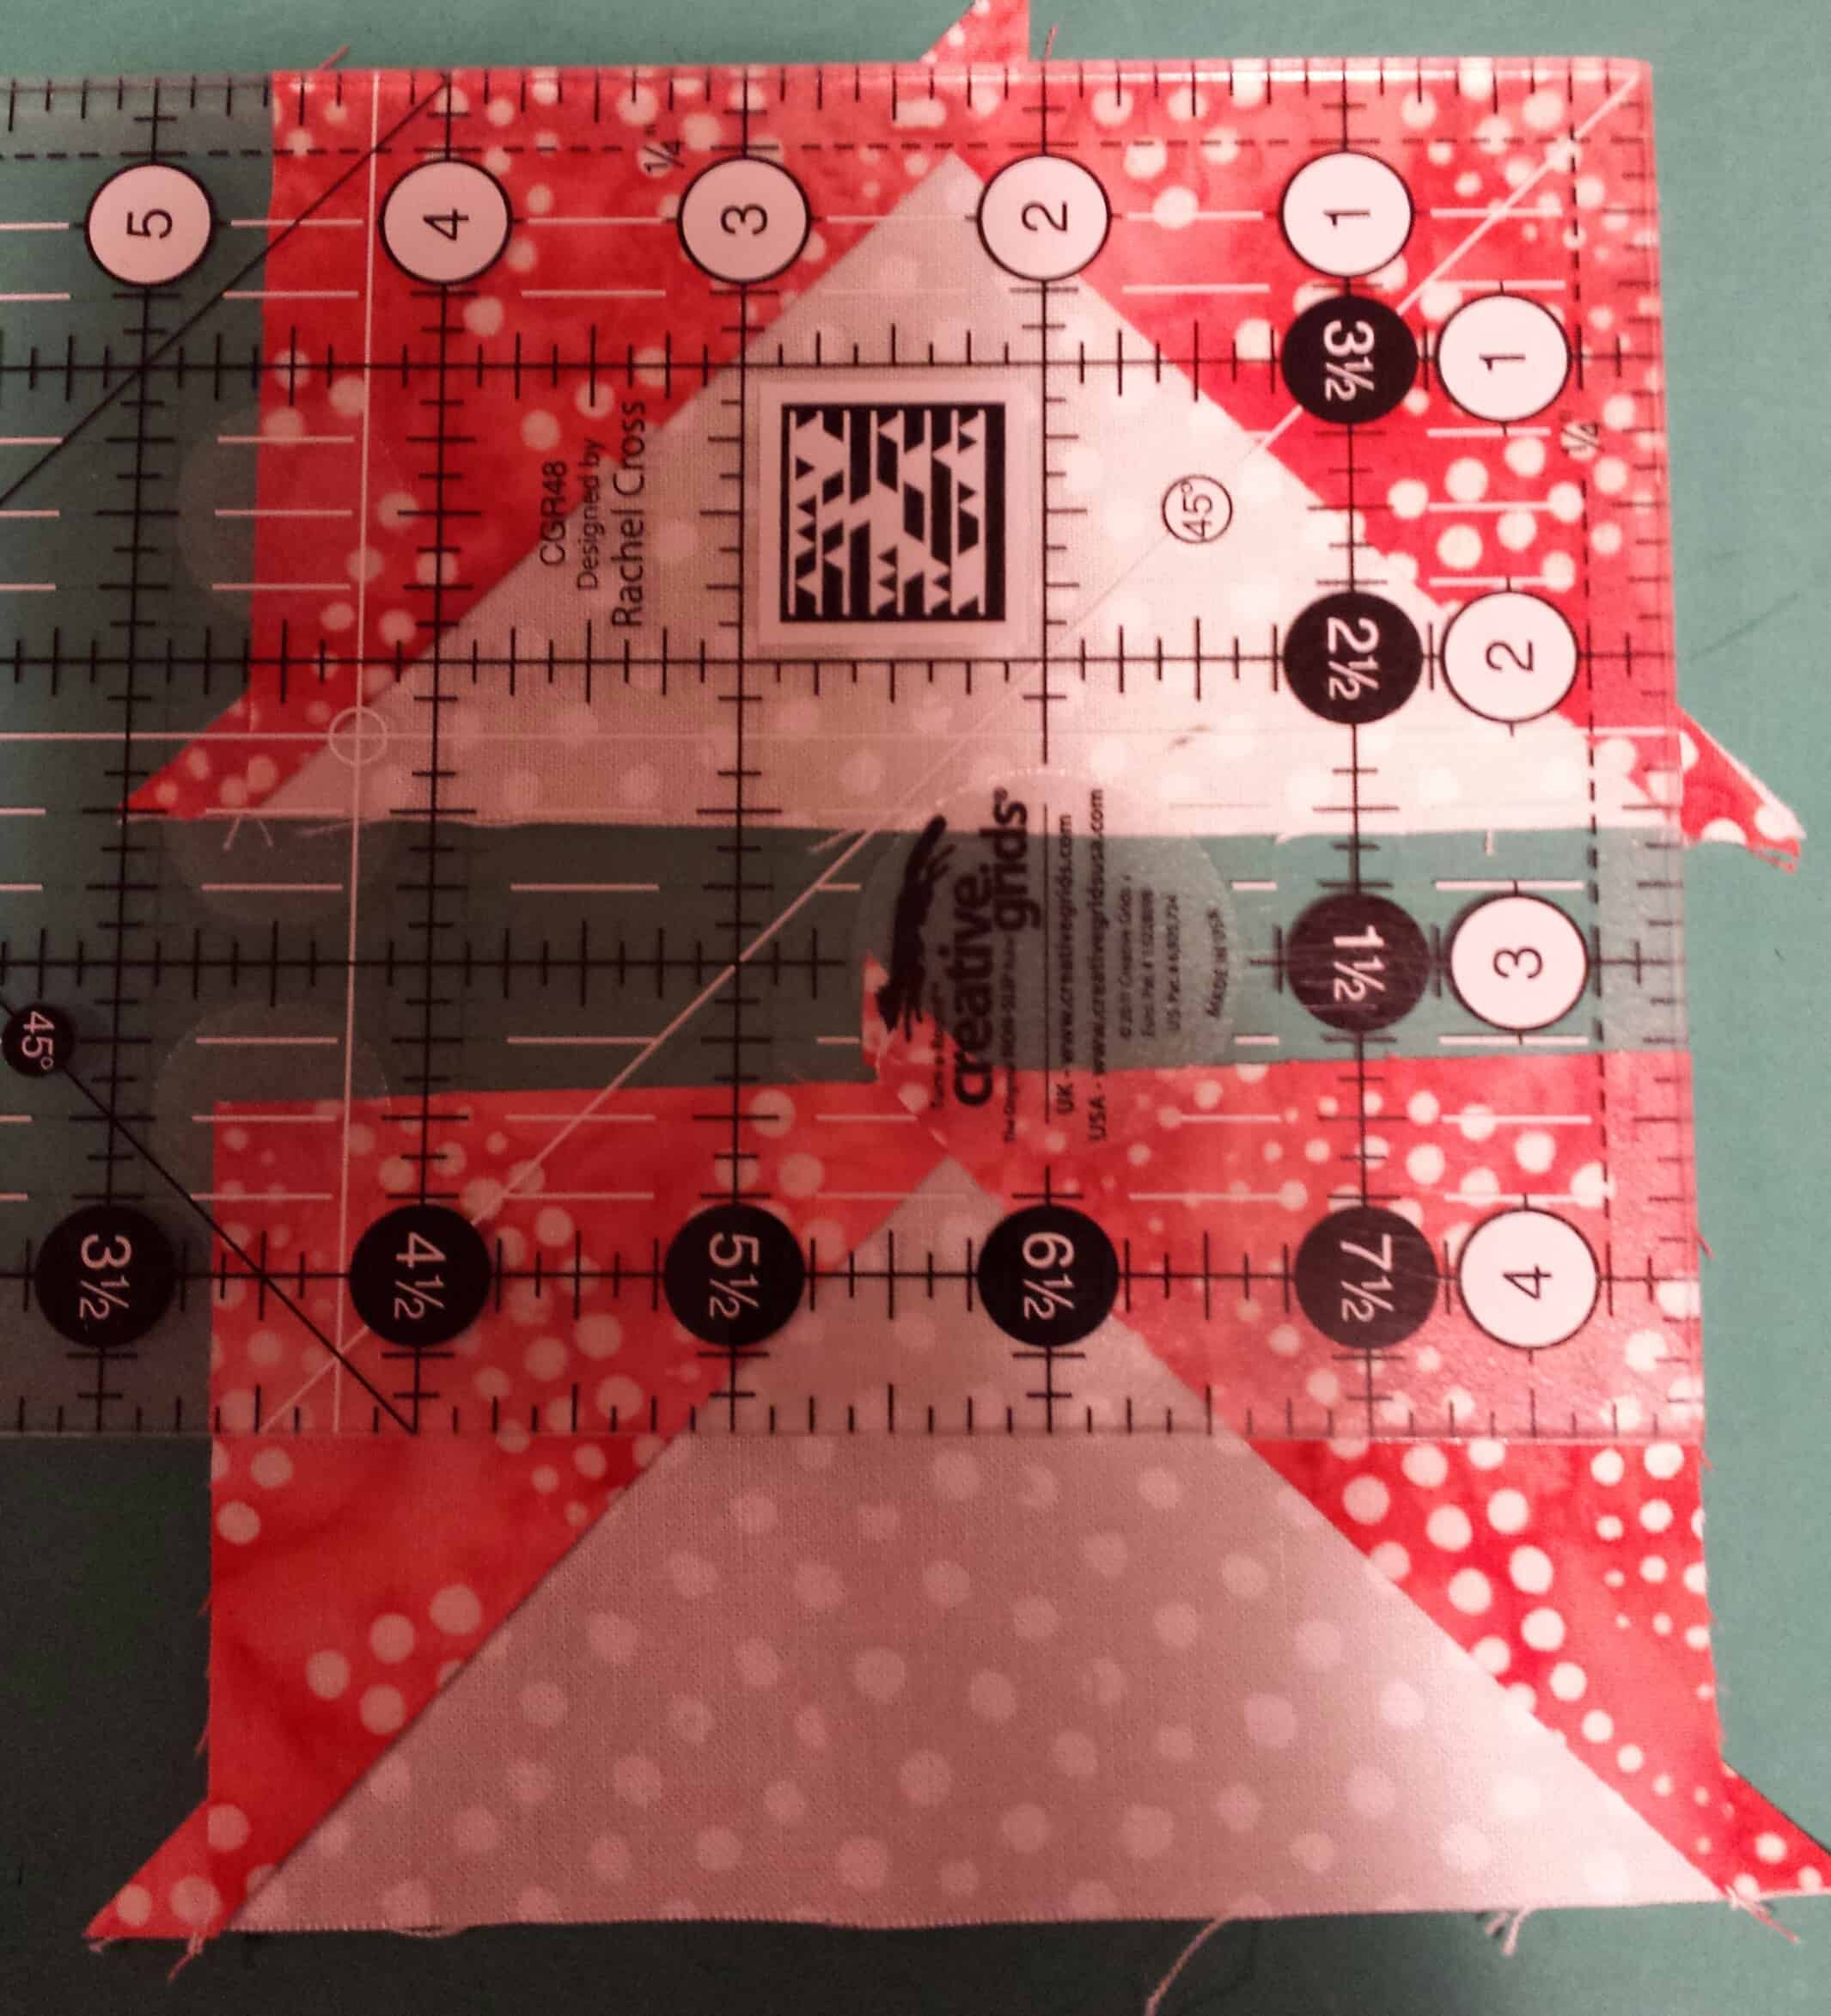
Measuring
Next, I got reacquainted with the Deb Tucker Flying Geese ruler. I have also used other rulers such as the Creative Grids Flying Geese ruler. This time I am using the Deb Tucker Flying Geese ruler. Once I figured out what size to cut each square, then I churned out several geese. The Deb Tucker Flying Geese ruler makes 4 at a time, which is one reason I like it.
Aside from actually mailing off the patches, which I keep forgetting, I am doing pretty well making them. This is a much better project. I am already thinking about what I will do the mounds of Flying Geese I am going to have. I do have ideas, especially for these, which are gorgeous!
My friend, the environmental librarian, asked us to do the show again.A lot of the same parameters were applied to this show that we created for the last show.
It is on through April 24, 2015, so you can go and take a look as well and check out some books while you are at it. 😉
I finally was able to go and take a look. I stopped in before going to lunch with a friend who works nearby. I missed the CQFA group viewing because I was in Houston.
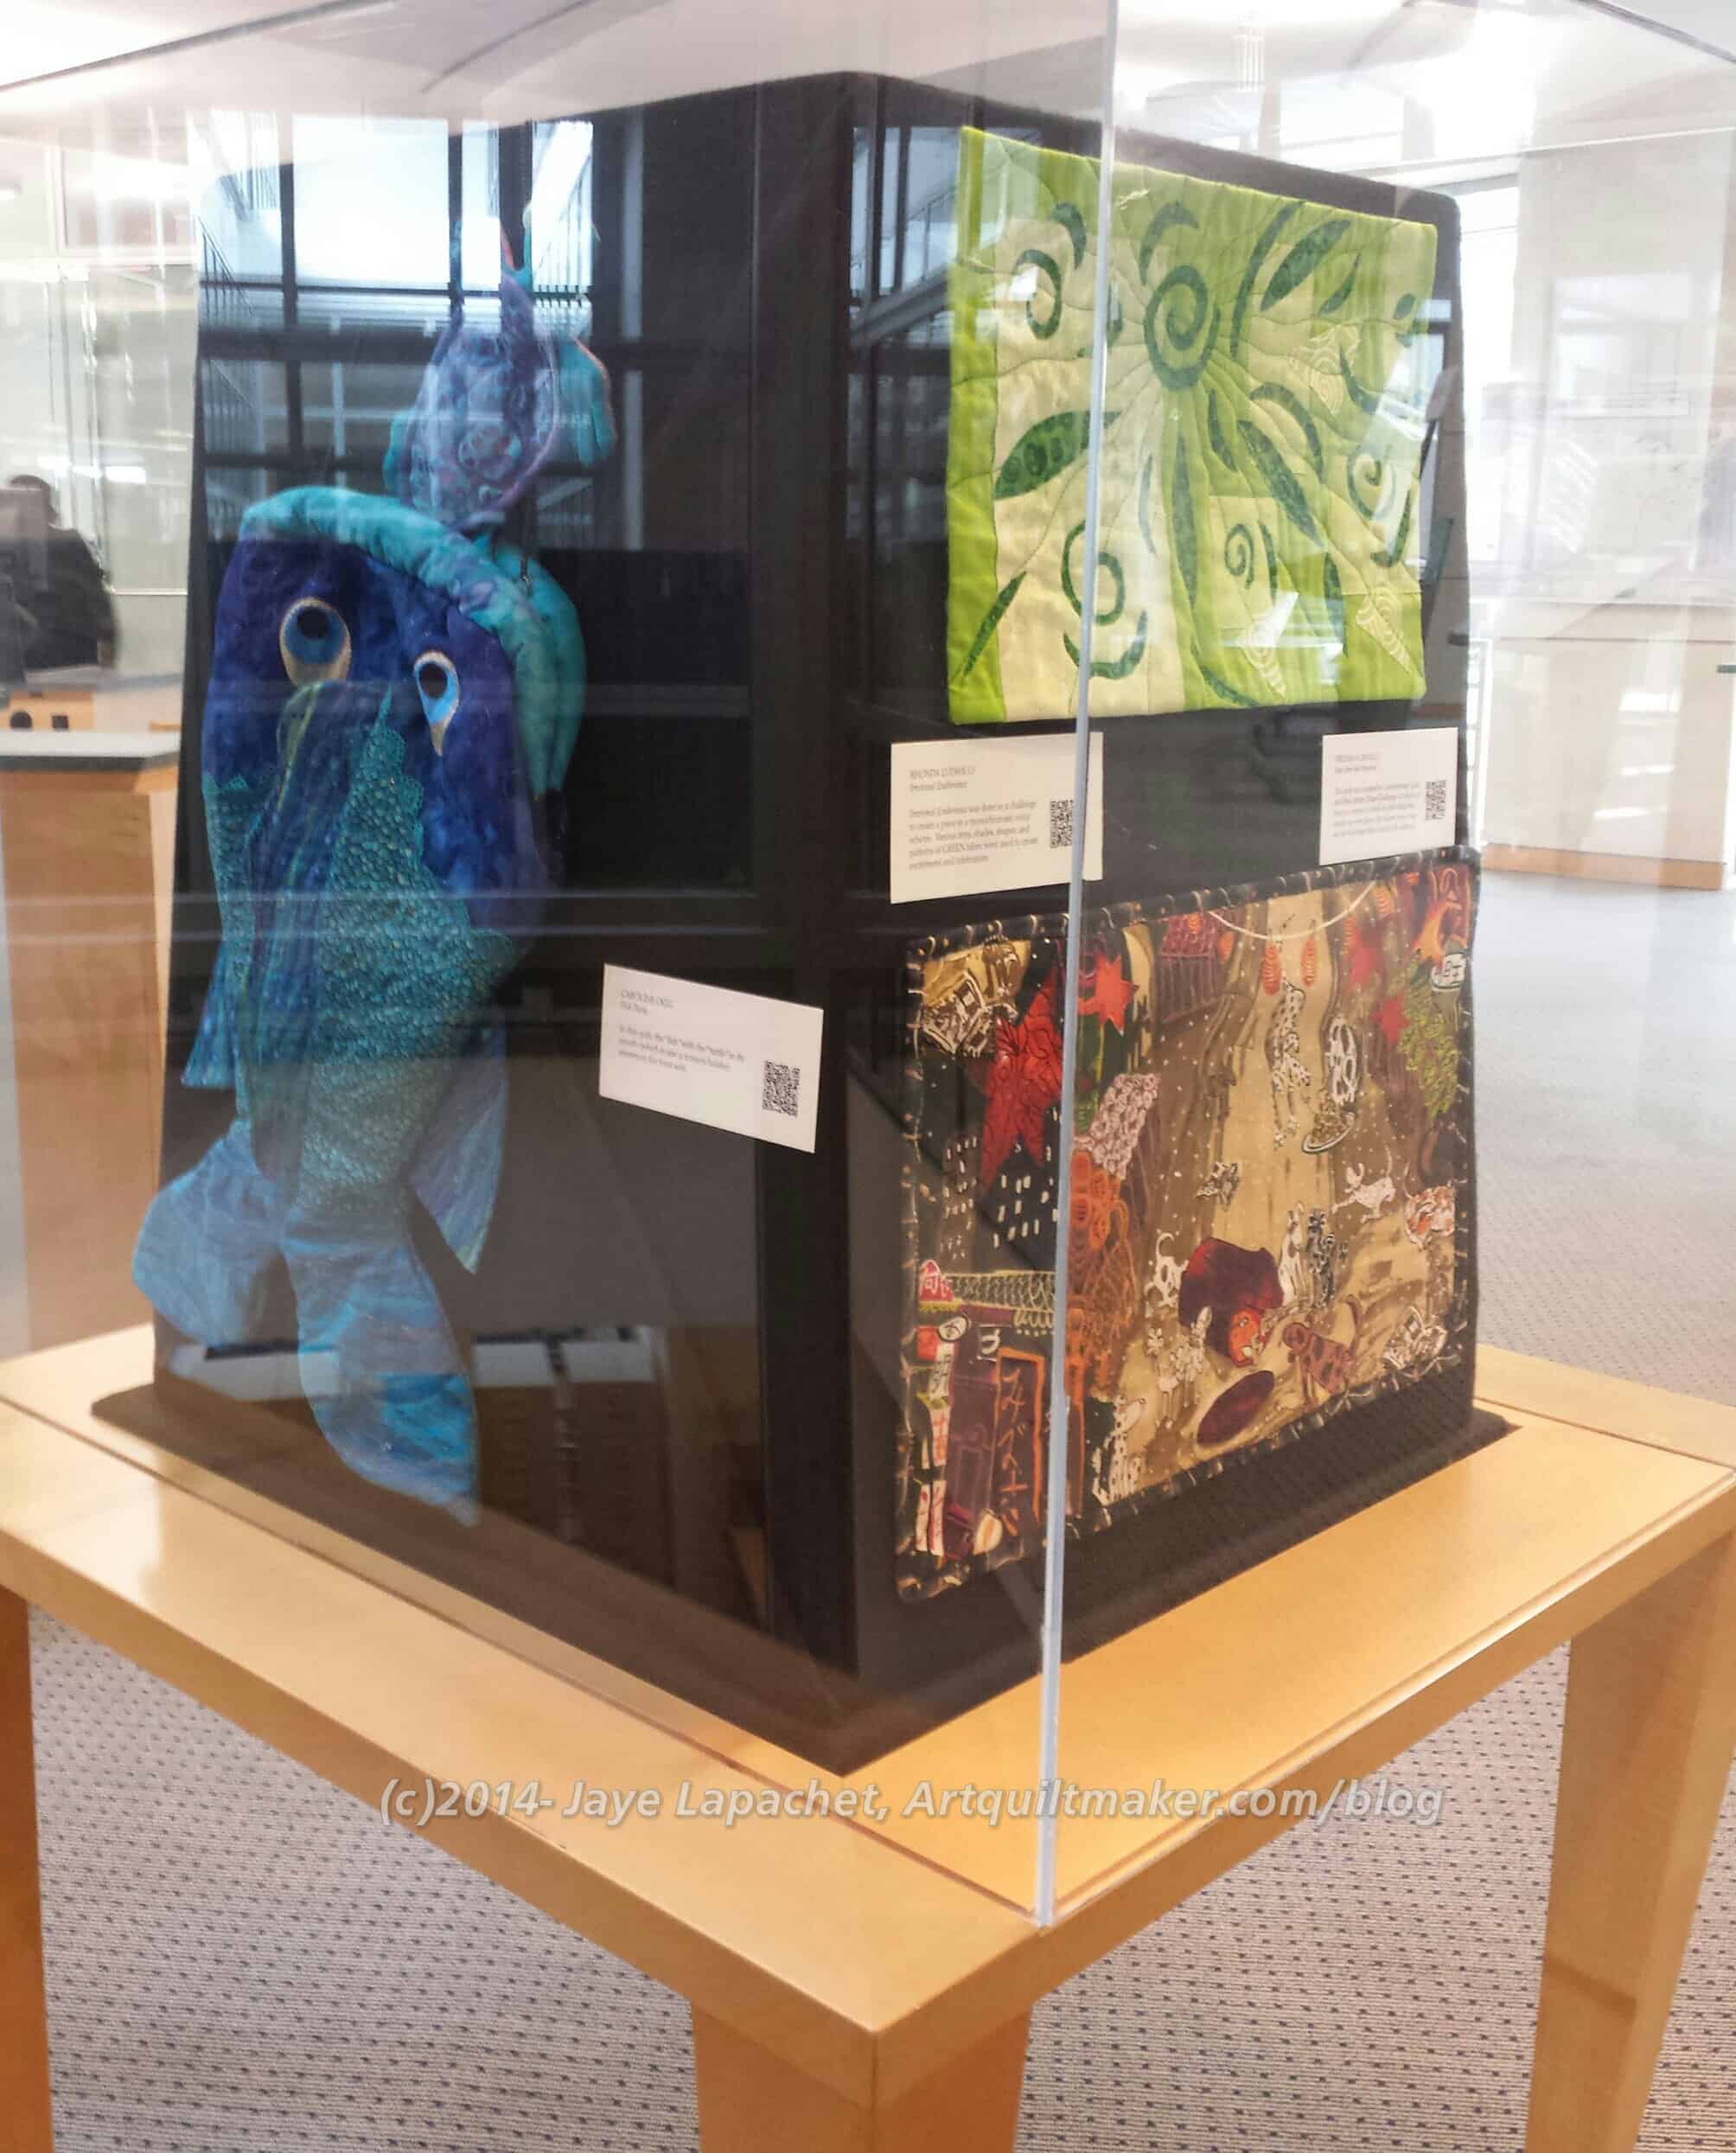
Display Cabinet
There are a number of quilts displayed there. I thought they were hung very well. One of the display cabinets had Caroline’s fish purse in it. I love that piece, because of the whimsy. I wonder what the general public thinks about it?
The green piece on the top right is from the color challenge (I bought the fabric for that challenge and never did the piece – or haven’t yet done the piece).
The signature book was tucked in a corner so I don’t know if people saw it and were writing in it. The last book for the show had some odd comments, but had some really nice comments as well.
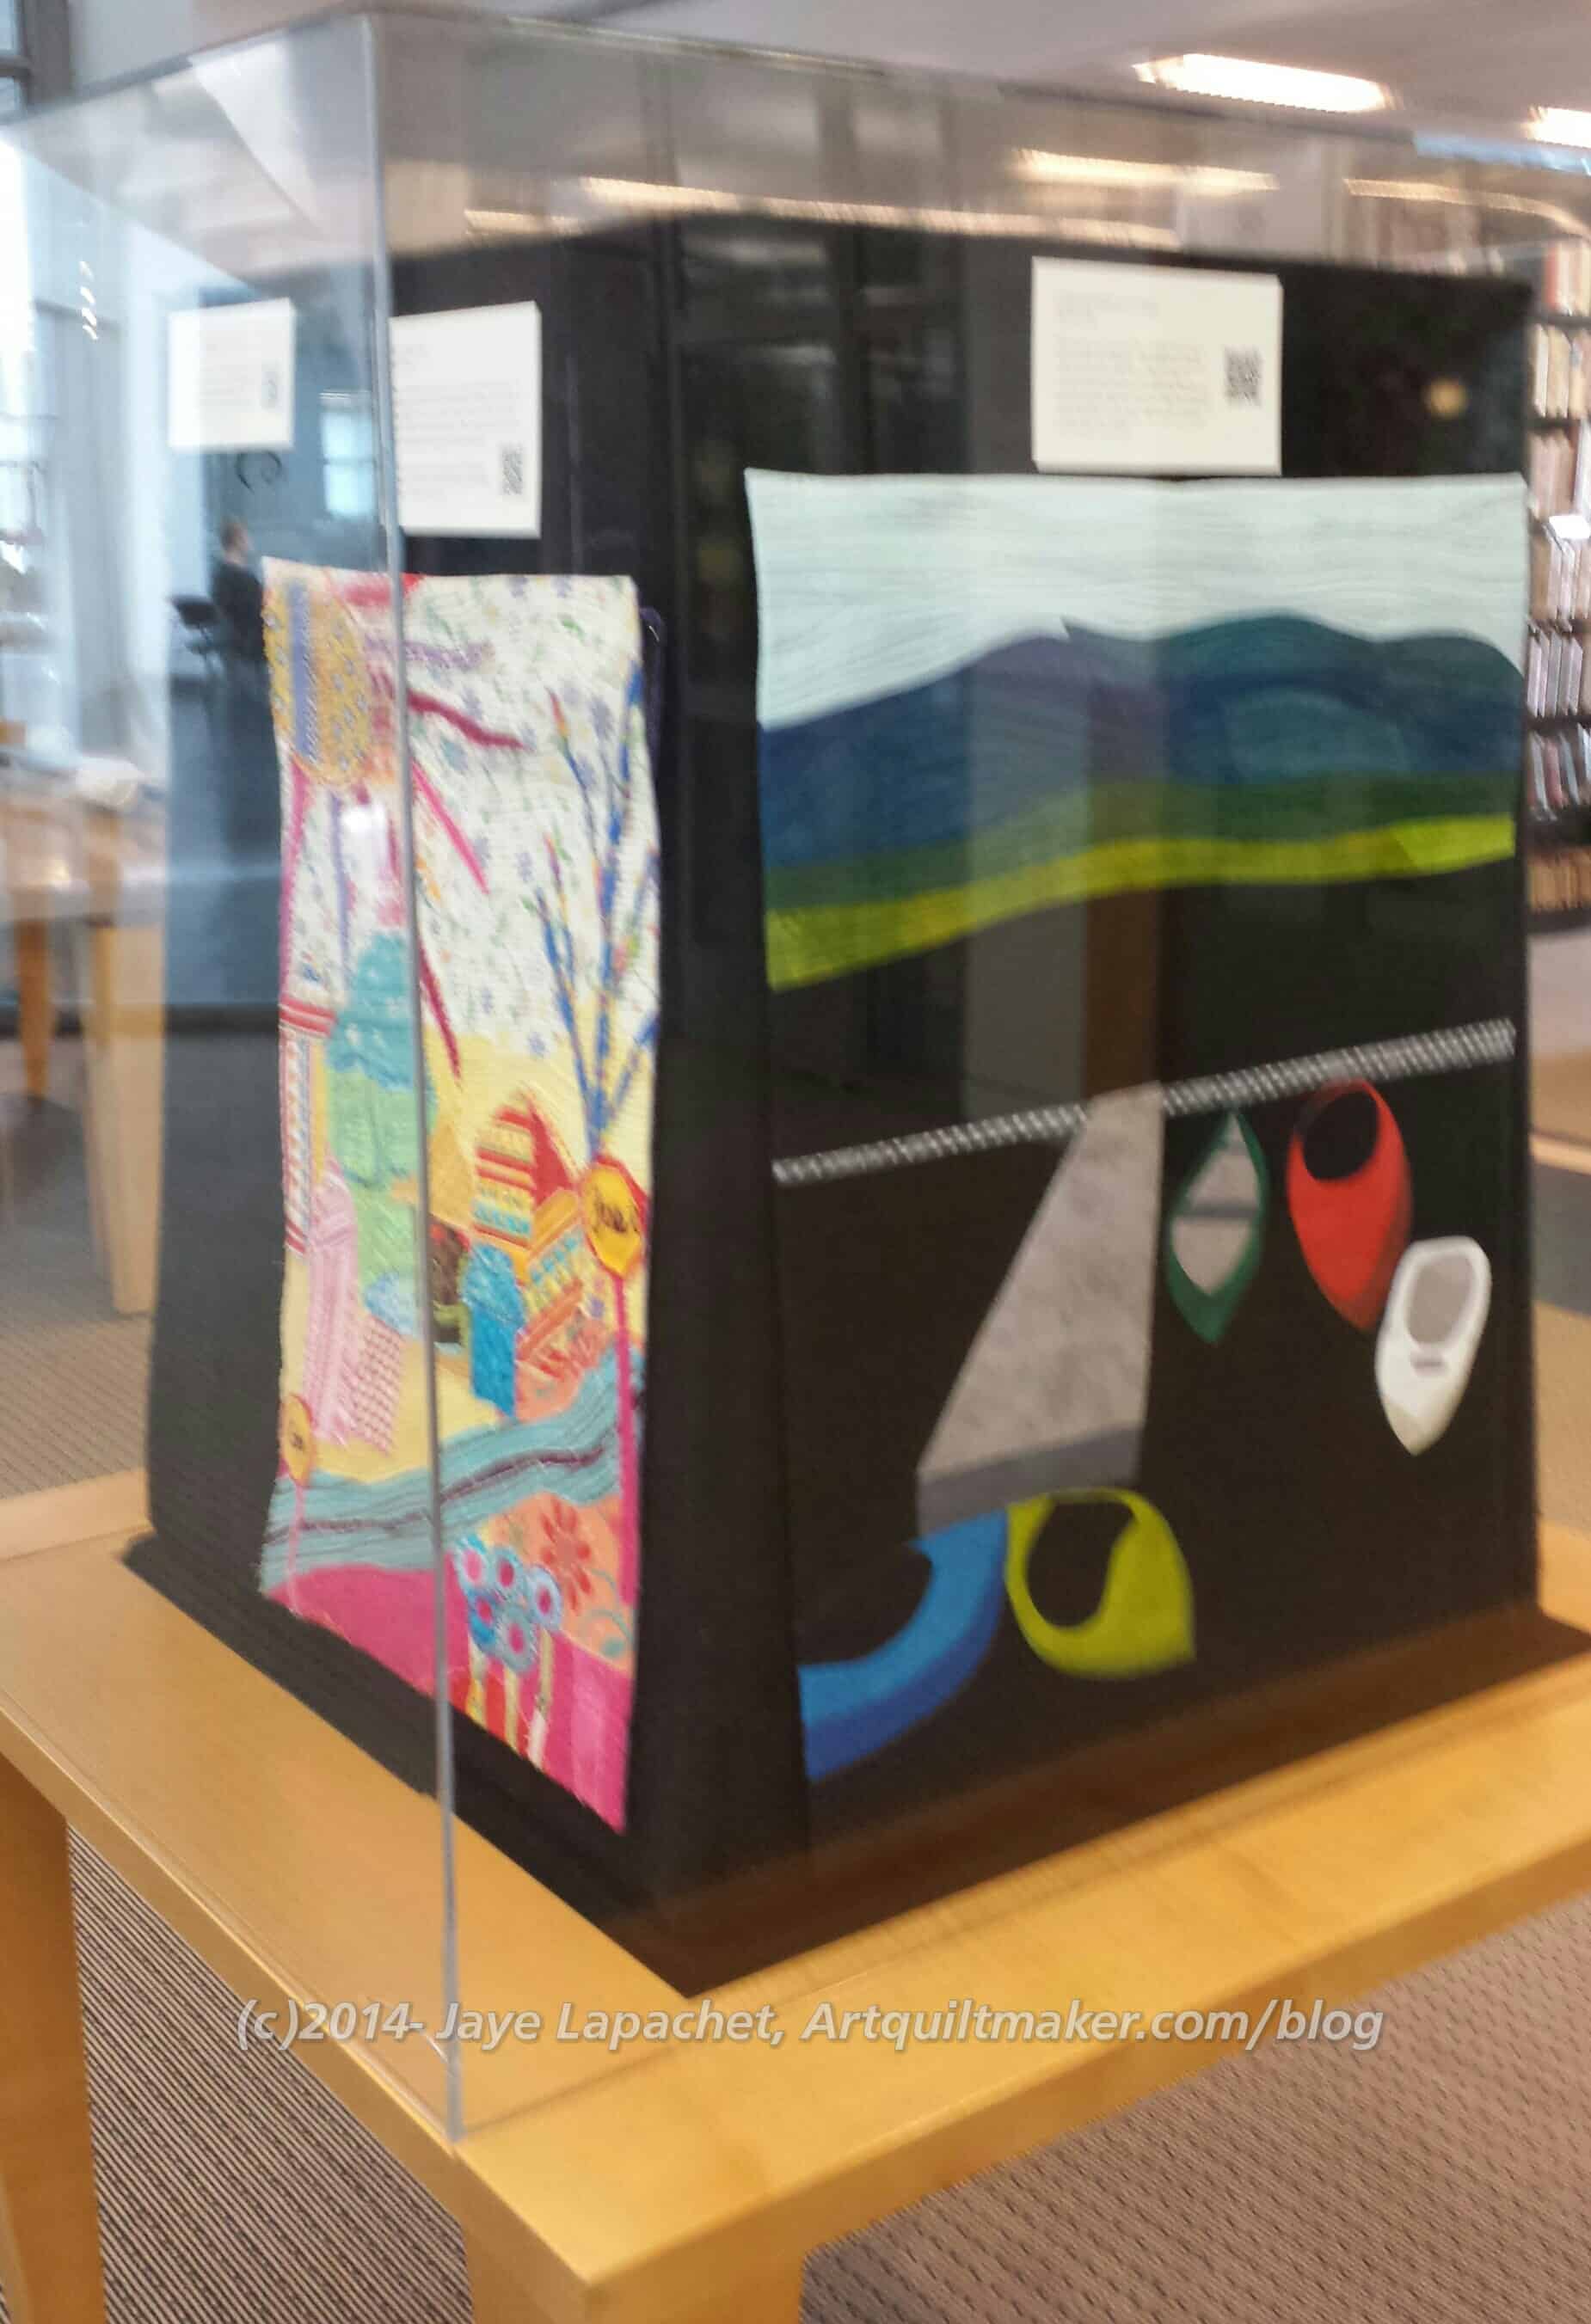
My Quilts in Display Case
My quilts were well displayed and I was pleased. You can see Beachtown on the left. What you can’t see is The Flower Garden on the right.
The quilts were all behind glass for security, so they were difficult to photograph. Still, they have to be there, because they will get stolen and touched. I was just taking photos so you could get an idea of how the show was hung not so you could get a perfect rendition of the quilts.
My Whole Cloth Quilt is also in the show. I didn’t get much of a better photo of it than I already have . The stitching is too subtle for a regular camera.
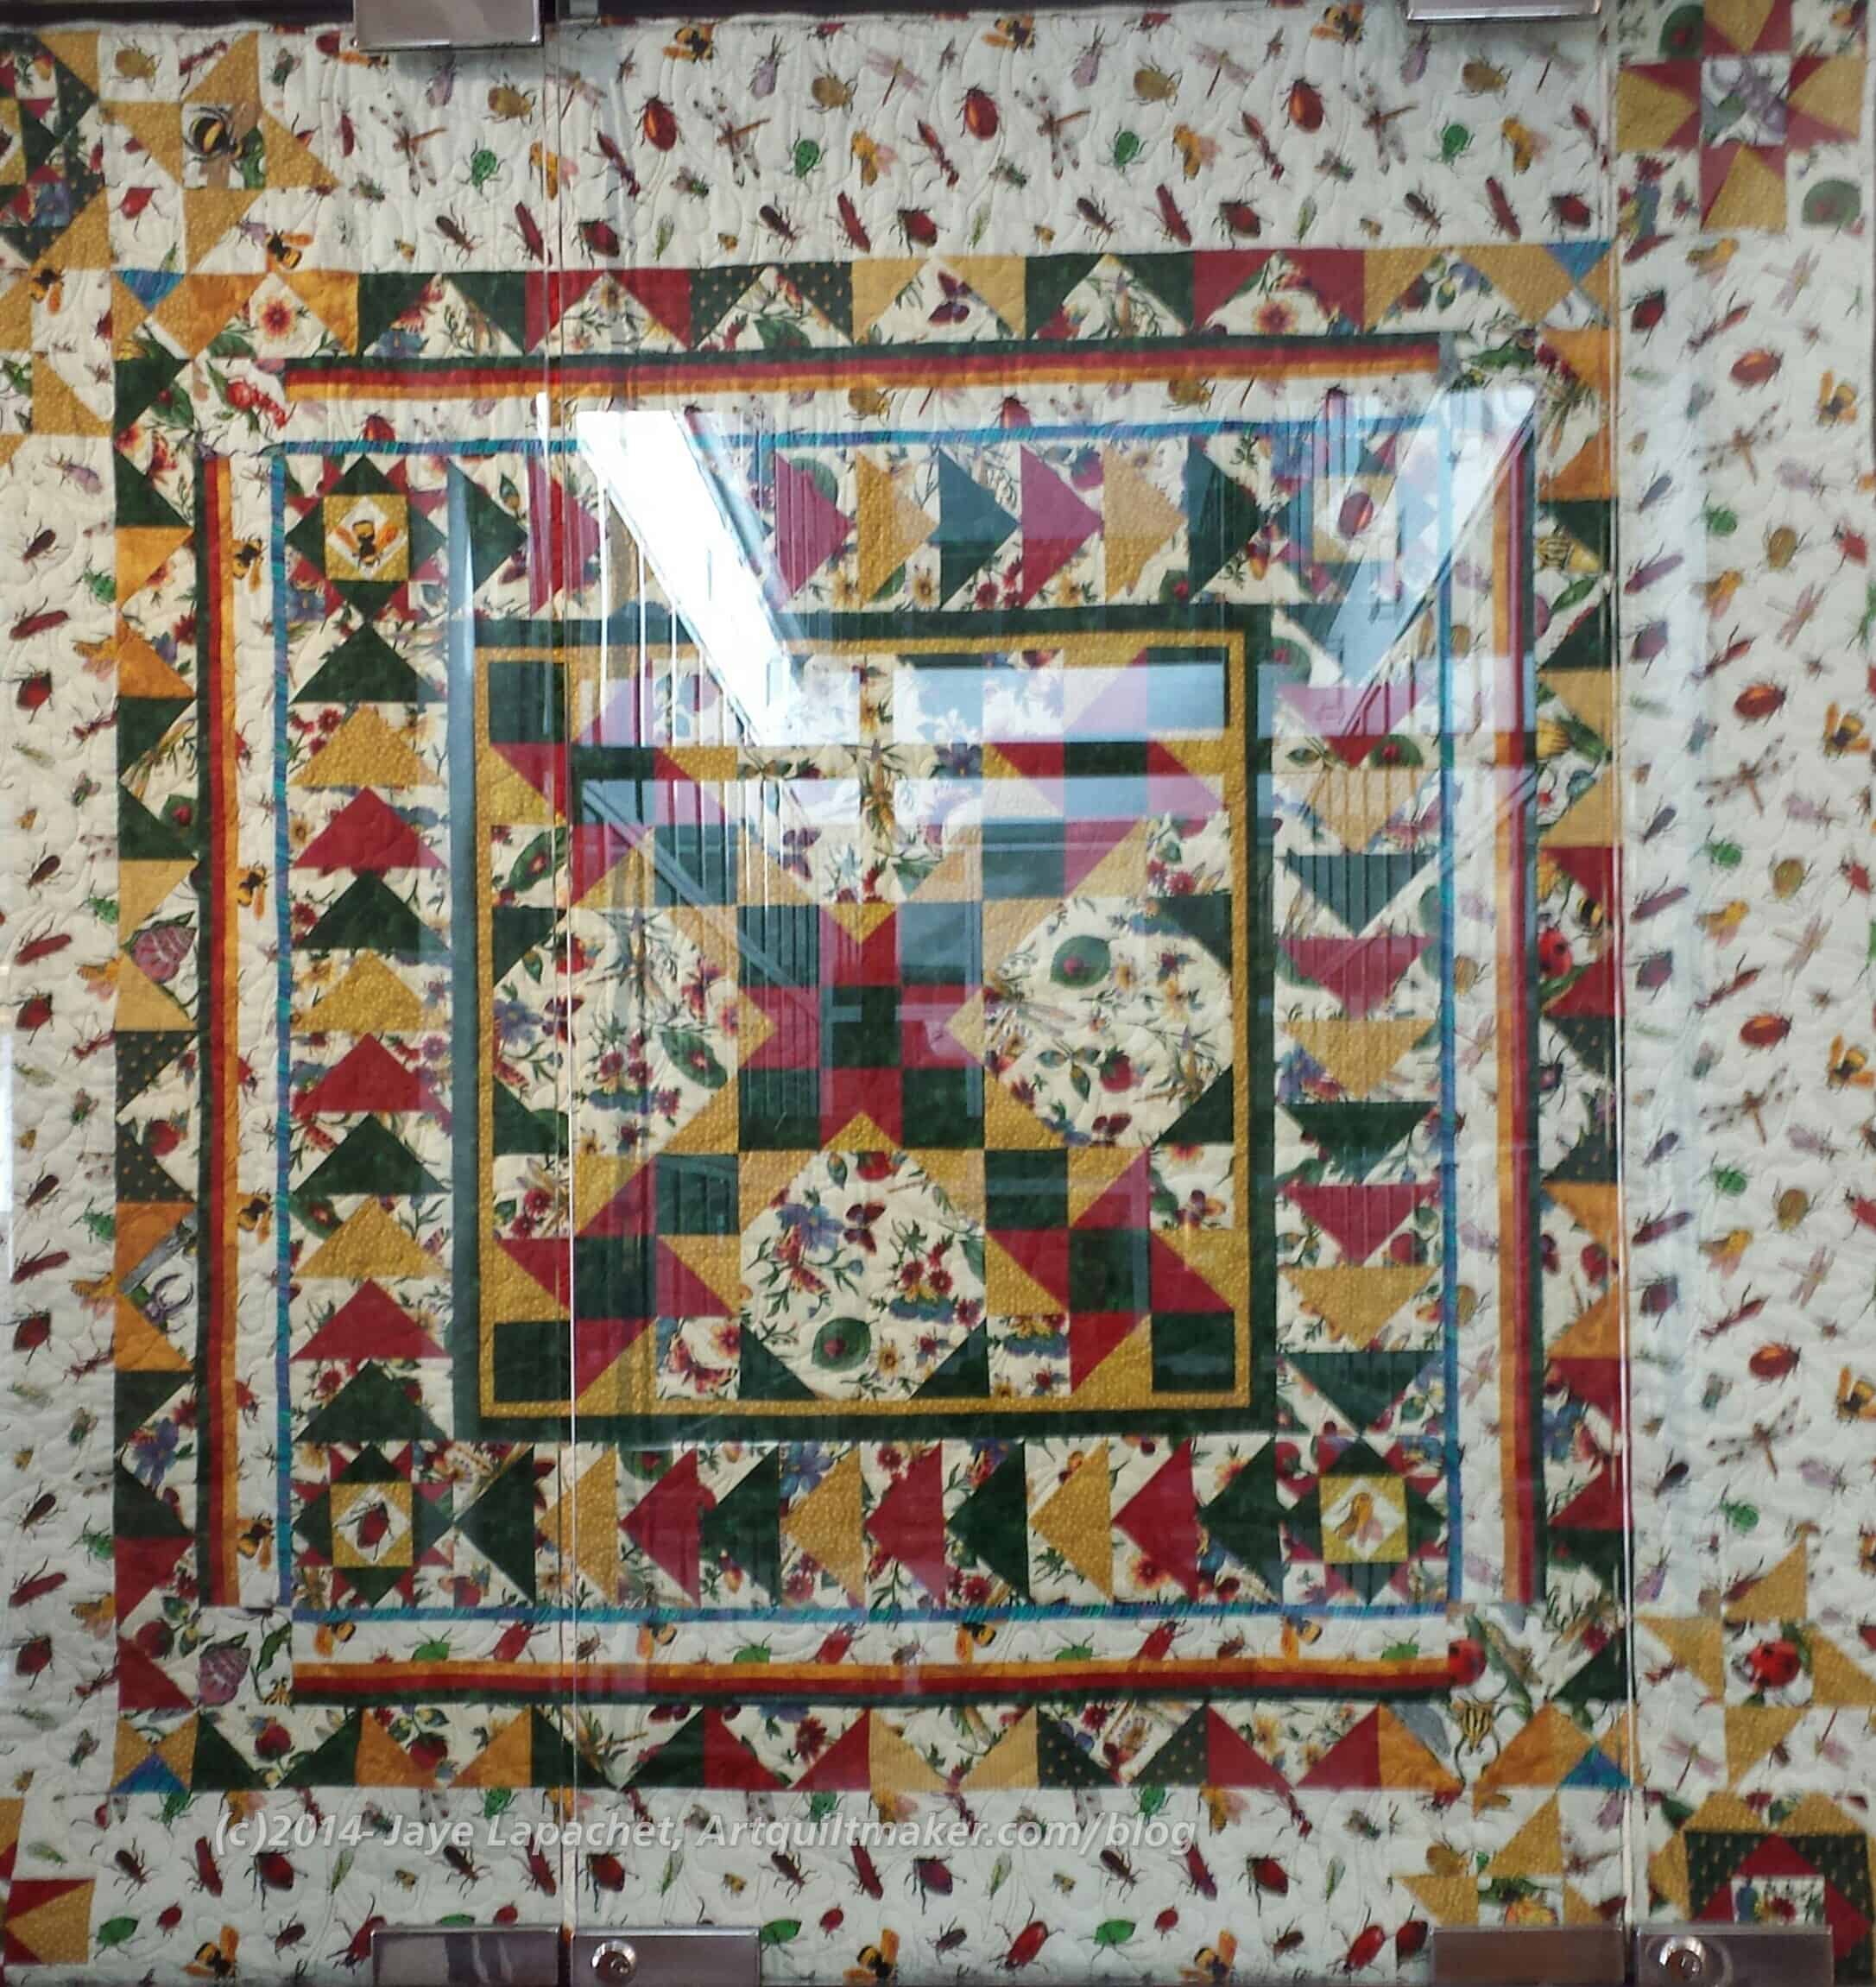
Virginia’s Quilt
One of the quilts is so great. It is a regular traditional quilt from far away. If you look closer at the quilt, you will see that the fabrics are covered with bugs. LOL! This is by Virginia and I love the bugs.
There are many more quilts and I will see about creating another post about them. The show is really worthwhile and I hope you will go and take a look.
Can you tell that I don’t know what to call these blocks? I really have to look the pattern up in Barbara Brackman’s book or Jinny Beyer’s book and see if they have a real name.
First PIQF Crosses
I haven’t made a ton of progress since I last talked about this project. I seem to have not had much time to sew in the past week or so. I finally took a few minutes last night while I was waiting for dinner to finish to sew the blocks together. It really only took a few minutes. I finished two of the blocks I have in process, but the others need fabric cut and I wasn’t set up to do that.
I was able to use scraps for most of the pieces as they are small, which is really good since my scrap bins seem to be overflowing. Still, the blocks are small and, thus, a pain to sew. In my haste I cut off some points, which I will need to remedy if we are going to continue making these blocks. I am not sure I like them well enough to make a whole quilt out of them.
TFQ & JHL Blocks
I think they do look nice together. I like the scrappy look. We didn’t intend to use all blues for the crosses, but it seems to have worked out that way. The others I have in process do not have blue or blue green or aqua in the center.
So, my blocks will be winging their way to TFQ today. It is possible that I’ll have more time to sew tomorrow and will send some on Monday.
These are the blocks we saw in the quilt at PIQF. I had a bad start with these blocks.
PIQF Inspiration Blocks
I started making them before I went to Houston and the pain and suffering was almost beyond endurance. OK, I am exaggerating, but I couldn’t understand why the square in a square pieces took so long to make. I really have had very few issues like this with blocks.
While I was in Houston, TFQ sent me one of her blocks. I put on the wall as inspiration for my blocks. When I finally got the square in a square pieces (ONLY the square in a square pieces, mind you, there are 5 additional pieces in this block) finished and up on the design wall, I found they were wrong. Much too small.
Huh?
I went back and checked the measurements and found that I had cut wrong or read the directions and cut wrong or something. Bleah. This was a total head on desk moment.
Once I got the dimensions correct, the square in a square pieces went relatively well. I put the first block together relatively quickly. I was able to cut pieces for the other blocks from some scraps, which was great.
There are lots of pieces in this block, but being able to use scraps is a bonus. I have to make time to sew about 10 more seams and then send them off. Wish me luck.
A few days ago I talked about a project that TFQ are trying out. I think I am behind, because I didn’t get to sew anything until this past weekend.
First of all, I know some of you are thinking “what the heck, dude, don’t you have about a bajillion projects in process?” Well, yes, I have a few on my Current Projects list. I just really like doing a one-on-one project (also group projects like Scrapitude) with (an)other quiltmaker. Also, a few blocks isn’t really a project, is it??? Mostly, I am a social animal and like to have some human contact, especially if I can talk about quiltmaking in the geeky, detailed process-oriented way that my brain loves.
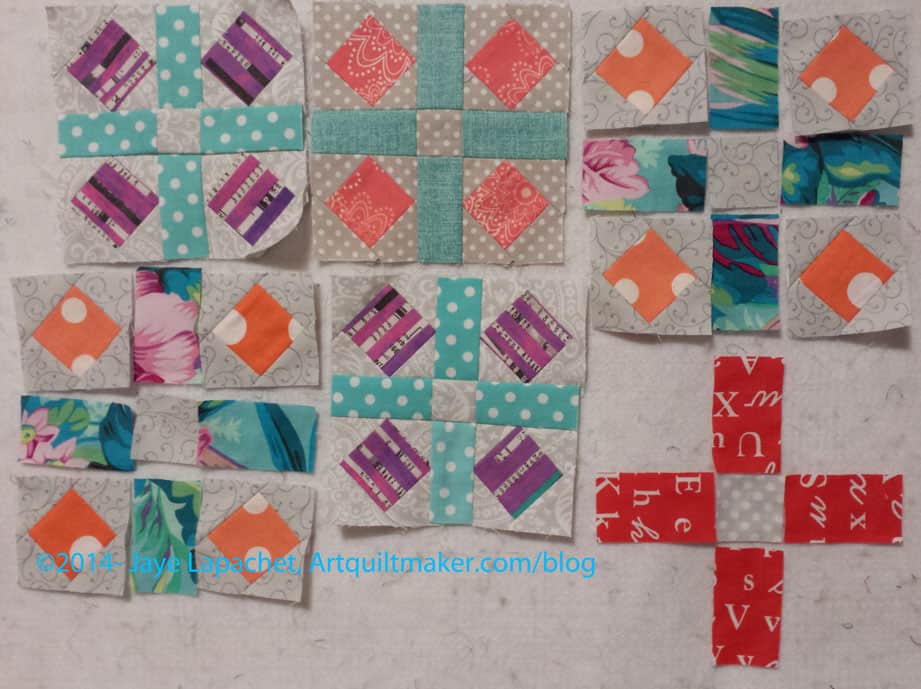
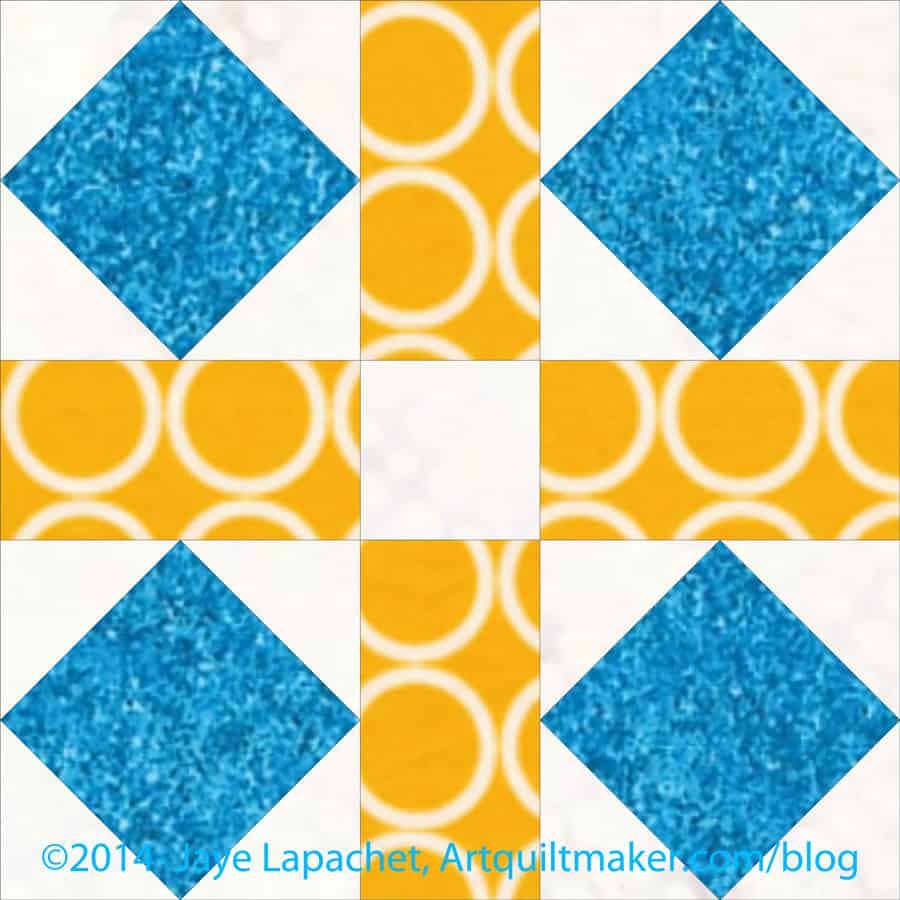
Second, I looked up the pattern and found a block called Garden of Eden that I could modify in EQ7. EQ provides such an easy and quick way to look at sizes of pieces. We were able to look at the rotary cutting directions for individual pieces in order to decide what finished size to make the blocks.
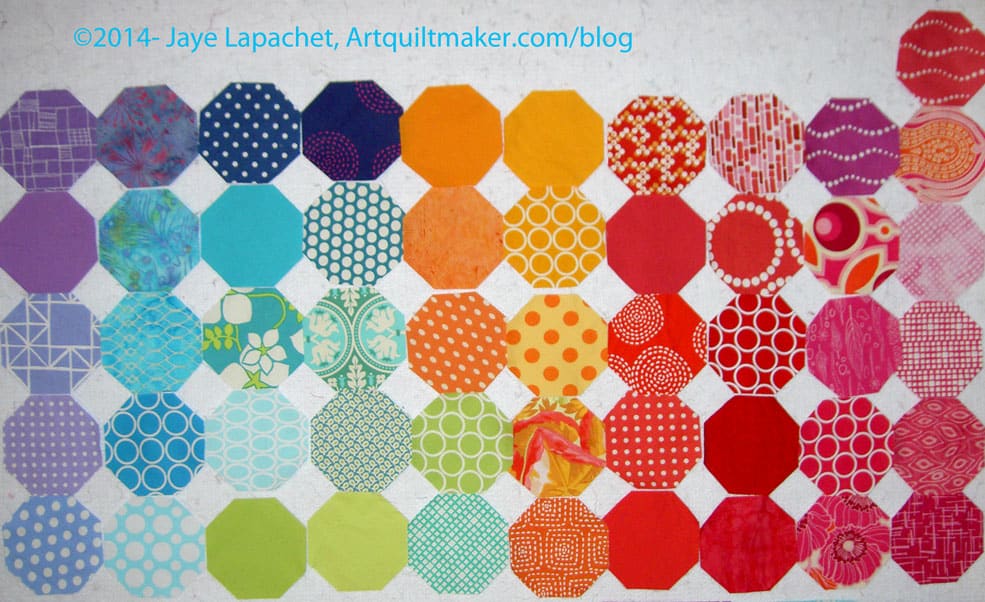
I don’t know exactly, but to put us on the same page, TFQ and I talked about colors of the octagons I am using for the Russian Rubix and whether those were the sorts of colors. Yes, they are the sorts of colors, but I will also use different fabrics and make it scrappy.
For the background, we will be using different cool, light greys. Again, they will be the same in each block, but, possibly different between blocks. The four squares in each block will be the same the same color, but not necessarily the same fabric.
I am not sure about the cross in the middle. I am not sure if I will use analagous colors or complimentary colors or what.
This review is all about a book by my pal, Lisa Fulmer. I am reviewing her book as part of her blog tour. Take a look at her Craft Your Stash website while you are here!
Lisa and I met through her former workplace where I would hit her up for prizes and giveaways for my blog and guilds with which I am involved. I even got her to join CQFA for a year. No renewal, sadly, but I live in hope.
Craft Your Stash is Lisa’s first book, but she writes a column for her local paper and writes a blog, marketing copy for her clients and, generally, knows how to put her thoughts into words. I think this book reflects that.
The first 18 pages are intro and background for the projects. If you read the introduction, which is only half a page, you will get a feel for what you can expect from the book.
The first section is called Tools and Techniques. Guess what it is about?
In this section, Lisa has a note about the metric system. She accompanies all of the measurements with an equivalent metric measurement. I have never seen that in a quilt or craft book that I can remember and I think it is a great idea. Yes, our friends who are used to metric are probably smart enough to convert, but really, why should they have to do calculations before they start a project? Great job, Lisa!
The subsection on Stash Essentials is broken up into several sections, which are fully supplied with your must-haves in that category:
Surfaces
General tools
Adhesives
Embellishing,
etc.
Each subsection is then broken down and Lisa writes about differences in quality, amounts, fun points and gives examples of how things look. She has a photo of two different grades of acrylic paint and how they look on the same type of paper (pg.9). Nice touch, I think.
Next comes a section on organizing. The main image for this section is fantastic. It really makes me want to buy some little bowls and containers. The problem is then I would have to also buy the charms and shells to put in them. 😉
Lisa’s tone is very conversational, but written in a way that is still grammatical and not offputting. As I read, I thought “she is just like me” and, though I know Lisa and I know she is just like me (except way better at embellishing and painting!), I appreciated the tone and style of writing, because it wasn’t boring craft book prose. It made me want to read on.
In the section on organizing, Lisa shows pictures of different solutions from the pricier to those you can pick up at your favorite thrift store AND how to use them (pg.14-15). Each item has a brief description of what she uses it for and how the reader can use it. If none of these work for you, you will get ideas about how a slight variation could work for you. The other thing I noticed was that everything was labeled. First purchase: label maker!
Clearly I didn’t read the table of contents as carefully as I could have because I was surprised by the Design Basics section. On the first page (pg.18) is what Lisa terms “a crafter’s best friend”, the Color Wheel. this lovely surprise is followed up with the various color wheel combinations: primary colors, tertiary colors, warm and cool colors, analogous color schemes, etc. This is a good reference to have if you don’t have these tools in another place. Refer to them!
This section also includes some of my pals, design principles and elements. Balance is first (pg.22-23), followed by Unity (pg. 25) and some others (I can’t give away all of Lisa’s secrets.
With all of this preparation under your belt, you are ready for the projects, which start on page 26. The projects all have variations, so the reader is encouraged to use the projects as a guide, though there are complete supply lists and tools required for each project. One of my favorites is the Mosaic Scrapbook Layout (pg.31), which looks like a game board. I might have to send Lisa a blank scrapbook page from my sadly neglected son’s scrapbook project and say pretty please. 😉 If she won’t make it, the directions are very clear for me to make on my own. Now you can stop laughing.
The projects flow into each other, but are unique. From personalized cards (like business cards) to the Mosaic Scrapbook Layout to Shaker Cards (pg. 34). The idea seems to be that if you have your paper out, let’s use a bunch of it while adding some skills and not boring the reader.
The photos are really fantastic. I find myself wanting to look closer and closer at the detail, which is very clear. I also love the colors and color coordination on each photo. Lisa has a lot of in progress photos and does some black and white layouts (pg.40-43) to show placement for the greeting card set (pg.37-39).
The projects have a lot of elements, pieces, parts, but there isn’t a sense of too much nor of charms and beads added to move them through the stash. These projects are well designed and I wouldn’t be embarrassed to have any of them at my house. I would use the cards right away, hang up the suncatcher (pg.50-53) and gift the shadow box. No qualms.
For those of you with a lot of fabric around, there are three projects for you to try so you can make some space for new fabric.
The tips and techniques shown in the projects can be extrapolated out and used in your own ideas. I see this book as a skillbuilder as well.
And last, but certainly not least, there is an index. It is one page, but it is a full page and it is an INDEX. I love indexes and am so glad to see it. It makes things so easy to find, even in craft books.
Finally, Lisa is having a nice big giveaway on her blog as well. She will have a giveaway using Rafflecopter as part of the tour. The prize will be a copy of the book, plus a generous selection of crafty swag to add to YOUR stash – She is willing to ship internationally to the winner, so get busy adding your name. Check out the posts below:
If you don’t win, go buy a copy. Here’s how (as if you didn’t know):
Purchasing information
The formal release date is September 1st and it should be in stores by mid-to late September (list price $16.99). Amazon will start shipping orders on October 1. Want a signed copy? The are for sale on Lisa’s website now ($16 + tax/shipping). Shipping is going on now.
When I receive an email like the one below, it makes all this blogging even more worth it. To really find that someone gets value from my work is fantastic!
I got an email with the gist of the information below last week. It came from my dear, dear friend, Mrs. K. and made my heart sing.
________________________________________
My morning ritual includes reading your blog. I have loved the charity quilts. Then you shared about leaders and enders. I had the book, but hadn’t applied the lesson. So I started with Kona Snow and a bunch of mostly blue 2-1/2 inch squares. I was amazed how fast the pairs and then the quartets got sewn! I really had not noted how many starts and stops happen when sewing… like shortening pants and mending, and bag making.
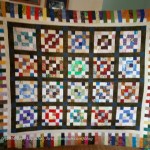
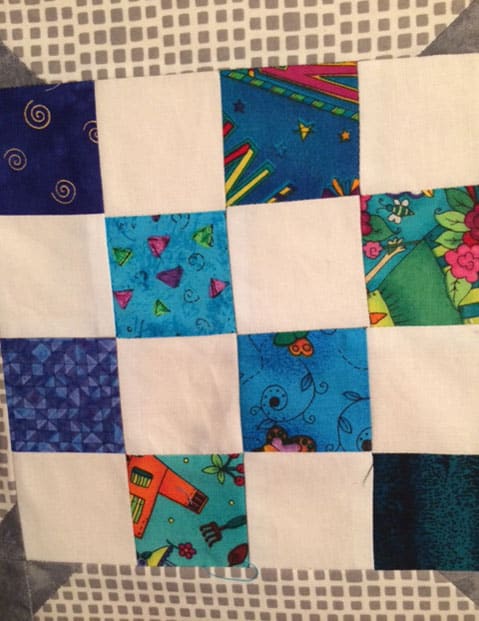
Leaders and Enders Block
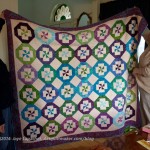
I finally decided I’d better get them sewn into blocks to see what I had. Well, I had enough for 34 blocks!
I like sashing between the blocks so I auditioned a bunch of things. Under your influence, I have been collecting some nice grays and I liked how they looked.
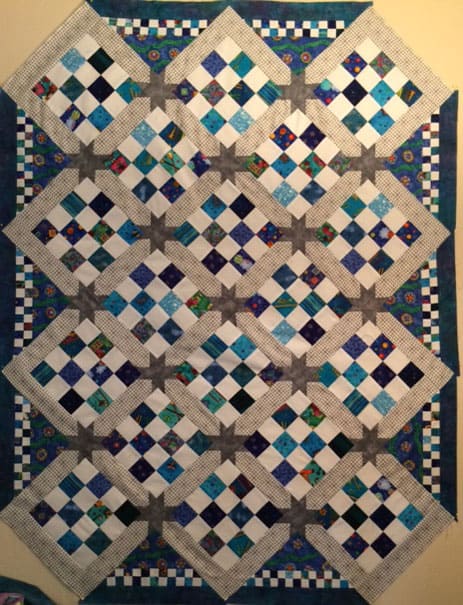
Then I went to my LQS (for something unrelated). I was the only one there and had a chat with the quilter/associate there. As I was leaving I had to walk past a large wall covered in all kinds of rulers (uh-oh). I mentioned that I am something of a ruler fanatic and the lady got all excited. OHHHH! you must try THIS one… The Cutting Corners Ruler.
She had a notebook with her from a class she had taken from the author. She showed me what she was doing and it is pretty clever. So, of course, I bought it for several reasons. I wanted to practice setting the blocks on point. And I loved the idea of the stars in the sashing. With her instructions and the ruler, it was easy to fashion the stars.
Also, the author shows how to do the setting triangles in a more interesting way…not just a big plain triangle, but with it divided into sections…
So I thought I’d give it a try. The problem for me, as it always is, was choosing the fabrics. I had wanted to continue incorporating some of the Kona Snow, but it was too bright. So I got the grand idea of making checkered fabric by cutting up the extra blue and white squares. I began working with 1-1/4 inch squares.
Top in Process
The Ruler author has a very clever way of figuring the math of the setting triangles and cutting the corners on the pieces. But it didn’t work for me because of the ‘elasticity’ of my checkerboard strip. But I managed it differently.
<Photo right shows the setting triangles in place.>
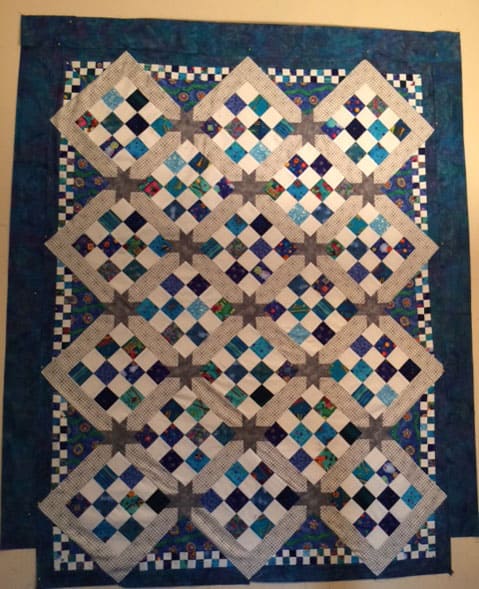
Later I made the corner triangles. It is clever how the author divides the triangle into two so the design makes a square corner. It was only as I was sewing them onto the quilt top that I figured out a better way to have done the checkerboard stripe. I will consider redoing that tomorrow…. or maybe leave them.
Next I need to sew on the last border. This is the one that, I hope, will make the design ‘float’.
Top Mostly Complete
Here it is on the design wall with pieces pinned. I like it.
So there you have my current project. It has been fun to make something to learn new skills. No deadlines, no focus on anything buy enjoying the process. I might even keep this one!…of course I still have the back and then the quilting to do.
Thanks for your inspiration!
Susan
___________________________________________________________________________________________________________
This makes my heart sing.
One thing about leaders and enders, to which Mrs. K alludes, is how much thread goes in garbage when you start and stop (not using leaders and enders method**). I was testing my machine last night and found at least 6″ worth of thread between the needle and the thread cutter as I was working. That thread could have been holding squares together to make pairs that would have ended up in a charity quilt if I were using leaders and enders. I know that a few inches of thread isn’t that expensive, but in a quilt such as one of the FOTY quilts, I can’t do a lot of chain piecing. I need something in between each set of FOTY shapes so that I can keep them in order unless I just want to cut the thread after each pair are sewn. That adds up to a lot of thread.
Mrs. K’s blocks look really bright in the closeup, but the whole quilt looks cohesive when we are shown the whole quilt.
I haven’t tried the ruler, but I am very interested in it. I have a couple of setting rulers and it takes me forever to figure out how to use them. Perhaps this Cutting Corners ruler would work for me?
**Nota Bene: I didn’t think up this technique. I am just a huge fan of the leaders and enders method. I first heard about the leaders & enders method from another quiltmaker who referred me to Bonnie Hunter’s website. She also has a whole section on her blog on Leaders and Enders, which includes detailed how-tos, photos of quilts made using this method and books, such as Adventures in Leaders & Enders and More Adventures with Leaders and Enders, on the topic.
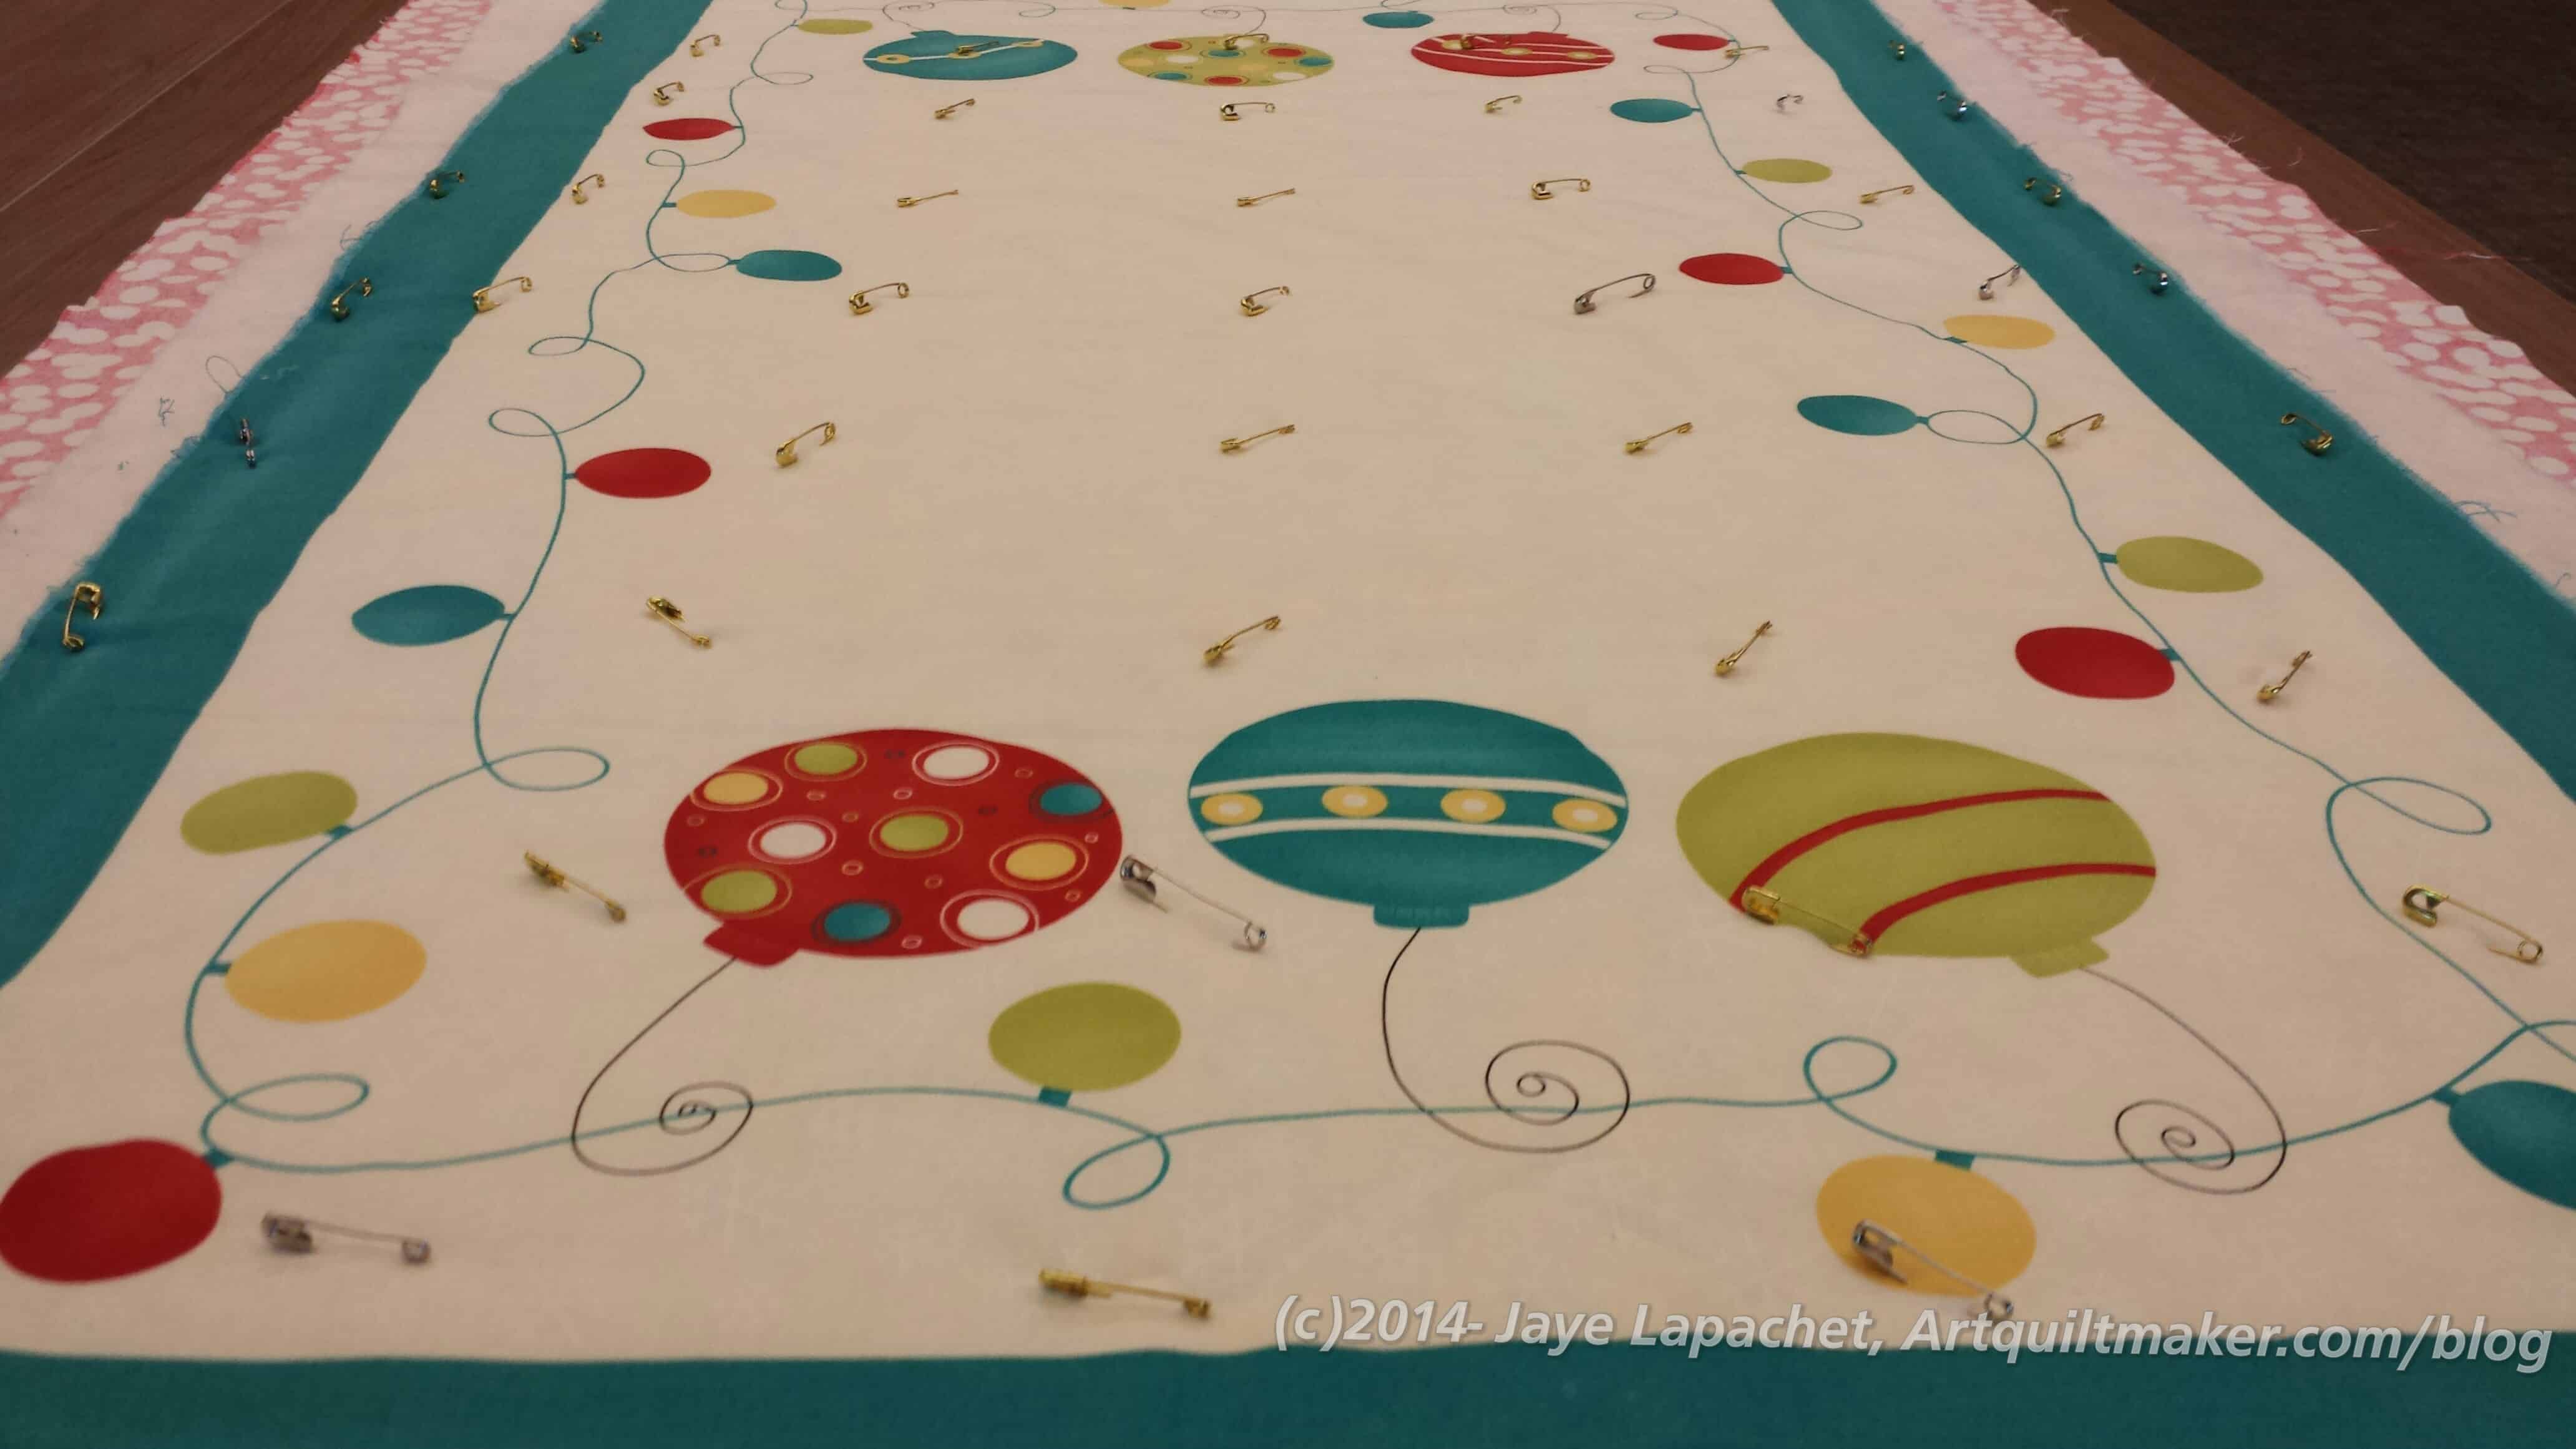
I don’t get to the Sew Days very often, but I am glad I went to the July Sew Day yesterday. I was a basting fiend (for me). I basted two projects that have been hanging around for a long time. This feels like a major step towards quilting and finishing them. Hooray.
I don’t even remember when I bought this Christmas panel, but I remember buying and it thinking that it would make good practice for free motion quilting. Aside from that, I like it. It is cheerful and the colors are a little off of the traditional Christmas colors.
It has been hanging over my door ever since I bought it. When Kelly mentioned last week that I could baste at the Sew Day, I immediately remembered this project in addition to my Wonky Nine Patch.
Wonky 9 Patch – basted
Since I was planning on working in my workroom yesterday anyway, I thought I might as well baste and cut out projects with my pals rather than alone. Also, the tables at our meeting place are pretty big and it is much easier to baste using large tables than crawling around the floor of my laundry room. Much better on my knees as well.
First, I basted the Wonky 9 Patch. My thinking was that I would suffer through the large project, then zip through the small project. Basting just sucks, but it is a necessary evil. I took my time and put in plenty of pins so that I didn’t have the droopy problem I had with Calm. I think I spent about 2 hours total basting, then I moved on to ripping.
As you might remember, I started a Jane Market Tote for something (BAMQG officer gifts??) and my 9K stopped working in the middle of the last decorative stitch. Recently, Mom asked for something for her church auction and I thought of this bag. It was, after all, almost done and meant I didn’t have to start a new project. Perfect. Photos when I finish it!
Kelly’s Swap Star
I had barely started to rip when Kelly, who was working on the binding of a small swap wall hanging, offered to rip for me, in exchange for sewing on her binding. She doesn’t like hand sewing much and I was planning to be sitting there anyway, so we swapped projects. I hand sewed her binding and sleeve onto her swap project while she ripped out the decorative stitching on my bag. It was pleasant sitting there stitching and a good break from standing.
We both finished at about the same time, though I finished a little bit after Kelly because I offered to sew on the sleeve as well. I think Kelly was pleased and I was pleased not to have to rip out that line of stitching.
[Update: 7/7/2014] Kelly is heading off to the Fat Quarterly Retreat and will take a quilt she got from the South Bay Modern Quilt Guild to donate to Siblings Together (a UK charity that keeps siblings together in foster care). After Kelly finished machine quilting it, Lynette took it to trim and bind it, so it’s truly a collaborative effort. BAM’s charity committee has also donated another quilt for this cause! We’ll be well represented next week!!
Lynette, as mentioned, was there, too. She brought me Fresh Fruit and the Whole Cloth Quilt back from the county fair. They had been having a vacation at her house. I thought about them while I was at Disneyland, but completely forgot about them once I got home. Friday afternoon, I remembered that I wanted to hang Fresh Fruit in my office and I put all of the pieces together. I contacted Lynette and fortunately she was coming to Sew Day. I am glad I remembered and she was able to bring them.
Lynette’s Mystery Quilt
Lynette worked on her Retreat mystery quilt and it looks really great. She added an original block to the eight blocks we made as part of the mystery pattern, so she had a large 9 Patch. I think she will also put some borders on it. She said that she had already cut the batting and backing. I look forward to seeing it finished.
Seeing Lynette’s made me think of mine. UGH. I am pretending it doesn’t exist, but I have to do something with it.
Amanda came and was working on her word quilt. It is a gift for friends who have been married for 25 years. All the words have to do with love and marriage. She has been working on it for a long time, yet she finished the last word block yesterday, so I think she is nearing the home stretch. Amanda is super nice making so much effort for a gift. Definitely someone to model myself after.
She didn’t bring Cat Bed kits, but gave me an already-made Cat Bed to fill up. Good thing because my my schnibble bag overfloweth. I feel bad that I haven’t made any recently, but at least a kitty will be comfy on my schnibbles.
Geri was there making everyone laugh and working on a feather quilt. I am not sure if it was the Anna Maria Horner pattern or another.
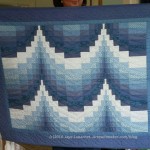
Rhonda and Peggy were also there. Rhonda has a new haircut. It is a blunt cut and it looks really great. She gave me a huge hug when I arrived which made me feel great. Rhonda was working on her whole cloth quilt, which is a kind of sampler of free motion quilt stitches that she started for the BAMQG Whole Cloth Challenge. She has the middle all done and was working on quilting the outside of the design, which I would describe as the between sections of the rays of the sun.
Charity Kites
Peggy, the Energizer Bunny of BAMQG, finished a charity top and back, then worked on another top of her own design that was a big hit. She took some blocks leftover (squares and rectangles from strips) from another charity project and cut them in half. She thought they looked like kites and voila’.
I really enjoyed myself and was pleased that it was a small group. I got a lot done and wasn’t as intimidated as I have been at other Sew Days. I tend to take cutting and other non-sewing projects and it feels like I don’t get as much done, but I gave myself a stern talking to about process and how not all of the parts of the project involve sewing.