As you know, I am all about process. Well, I try to be all about process, but I do like finishing things.
Ann is also a member of EBHQ, but we haven’t met in person. Back in March, I posted a photo of a quilt by Ann Grundler. Kelly and I admired her quilt at the EBHQ show.
I contacted her to get her permission and we have had a few emails back and forth. Mostly, Ann has shared her work, but she reads my blog diligently, which, I guess, counts as me sharing my work as well. 😉 I have not been as good a correspondent due to other commitments. Not just Ann, but others with whom I correspond have been neglected as well.
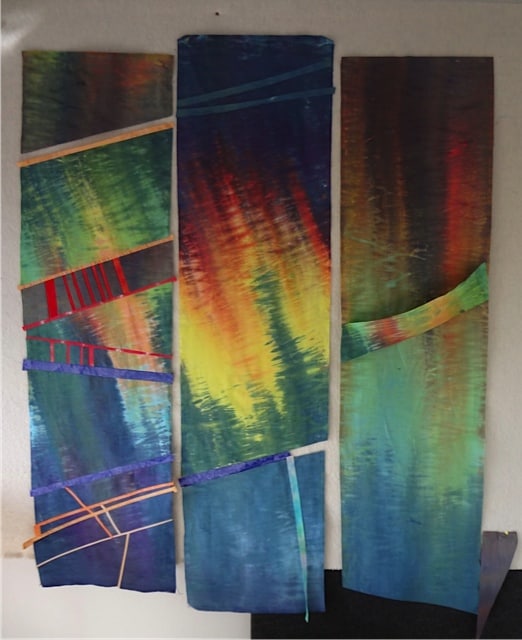
Ann Grundler Triptych
While I was in Vancouver last week, Ann sent me a photo of a hand dyed triptych on which she is working. I am very pleased to share it here with you.
Ann writes “These are two 90” dyed panels now growing into a three panel wall hanging with skinny lines. The piecing of the center and bottom left panel is more or less completed.”
There is a real sense of dimensionality in this piece and I wonder if it is actually 3D? The center panel looks like a sunset shining behind a forest.
Ann also makes jewelry! What a talented woman!
Ann does not have a blog, but says that you can Google her and look at her Google+ and Picasa profiles.
I am not sure if I will get through all of the retreat info in one post. It might just be too much. We’ll see.
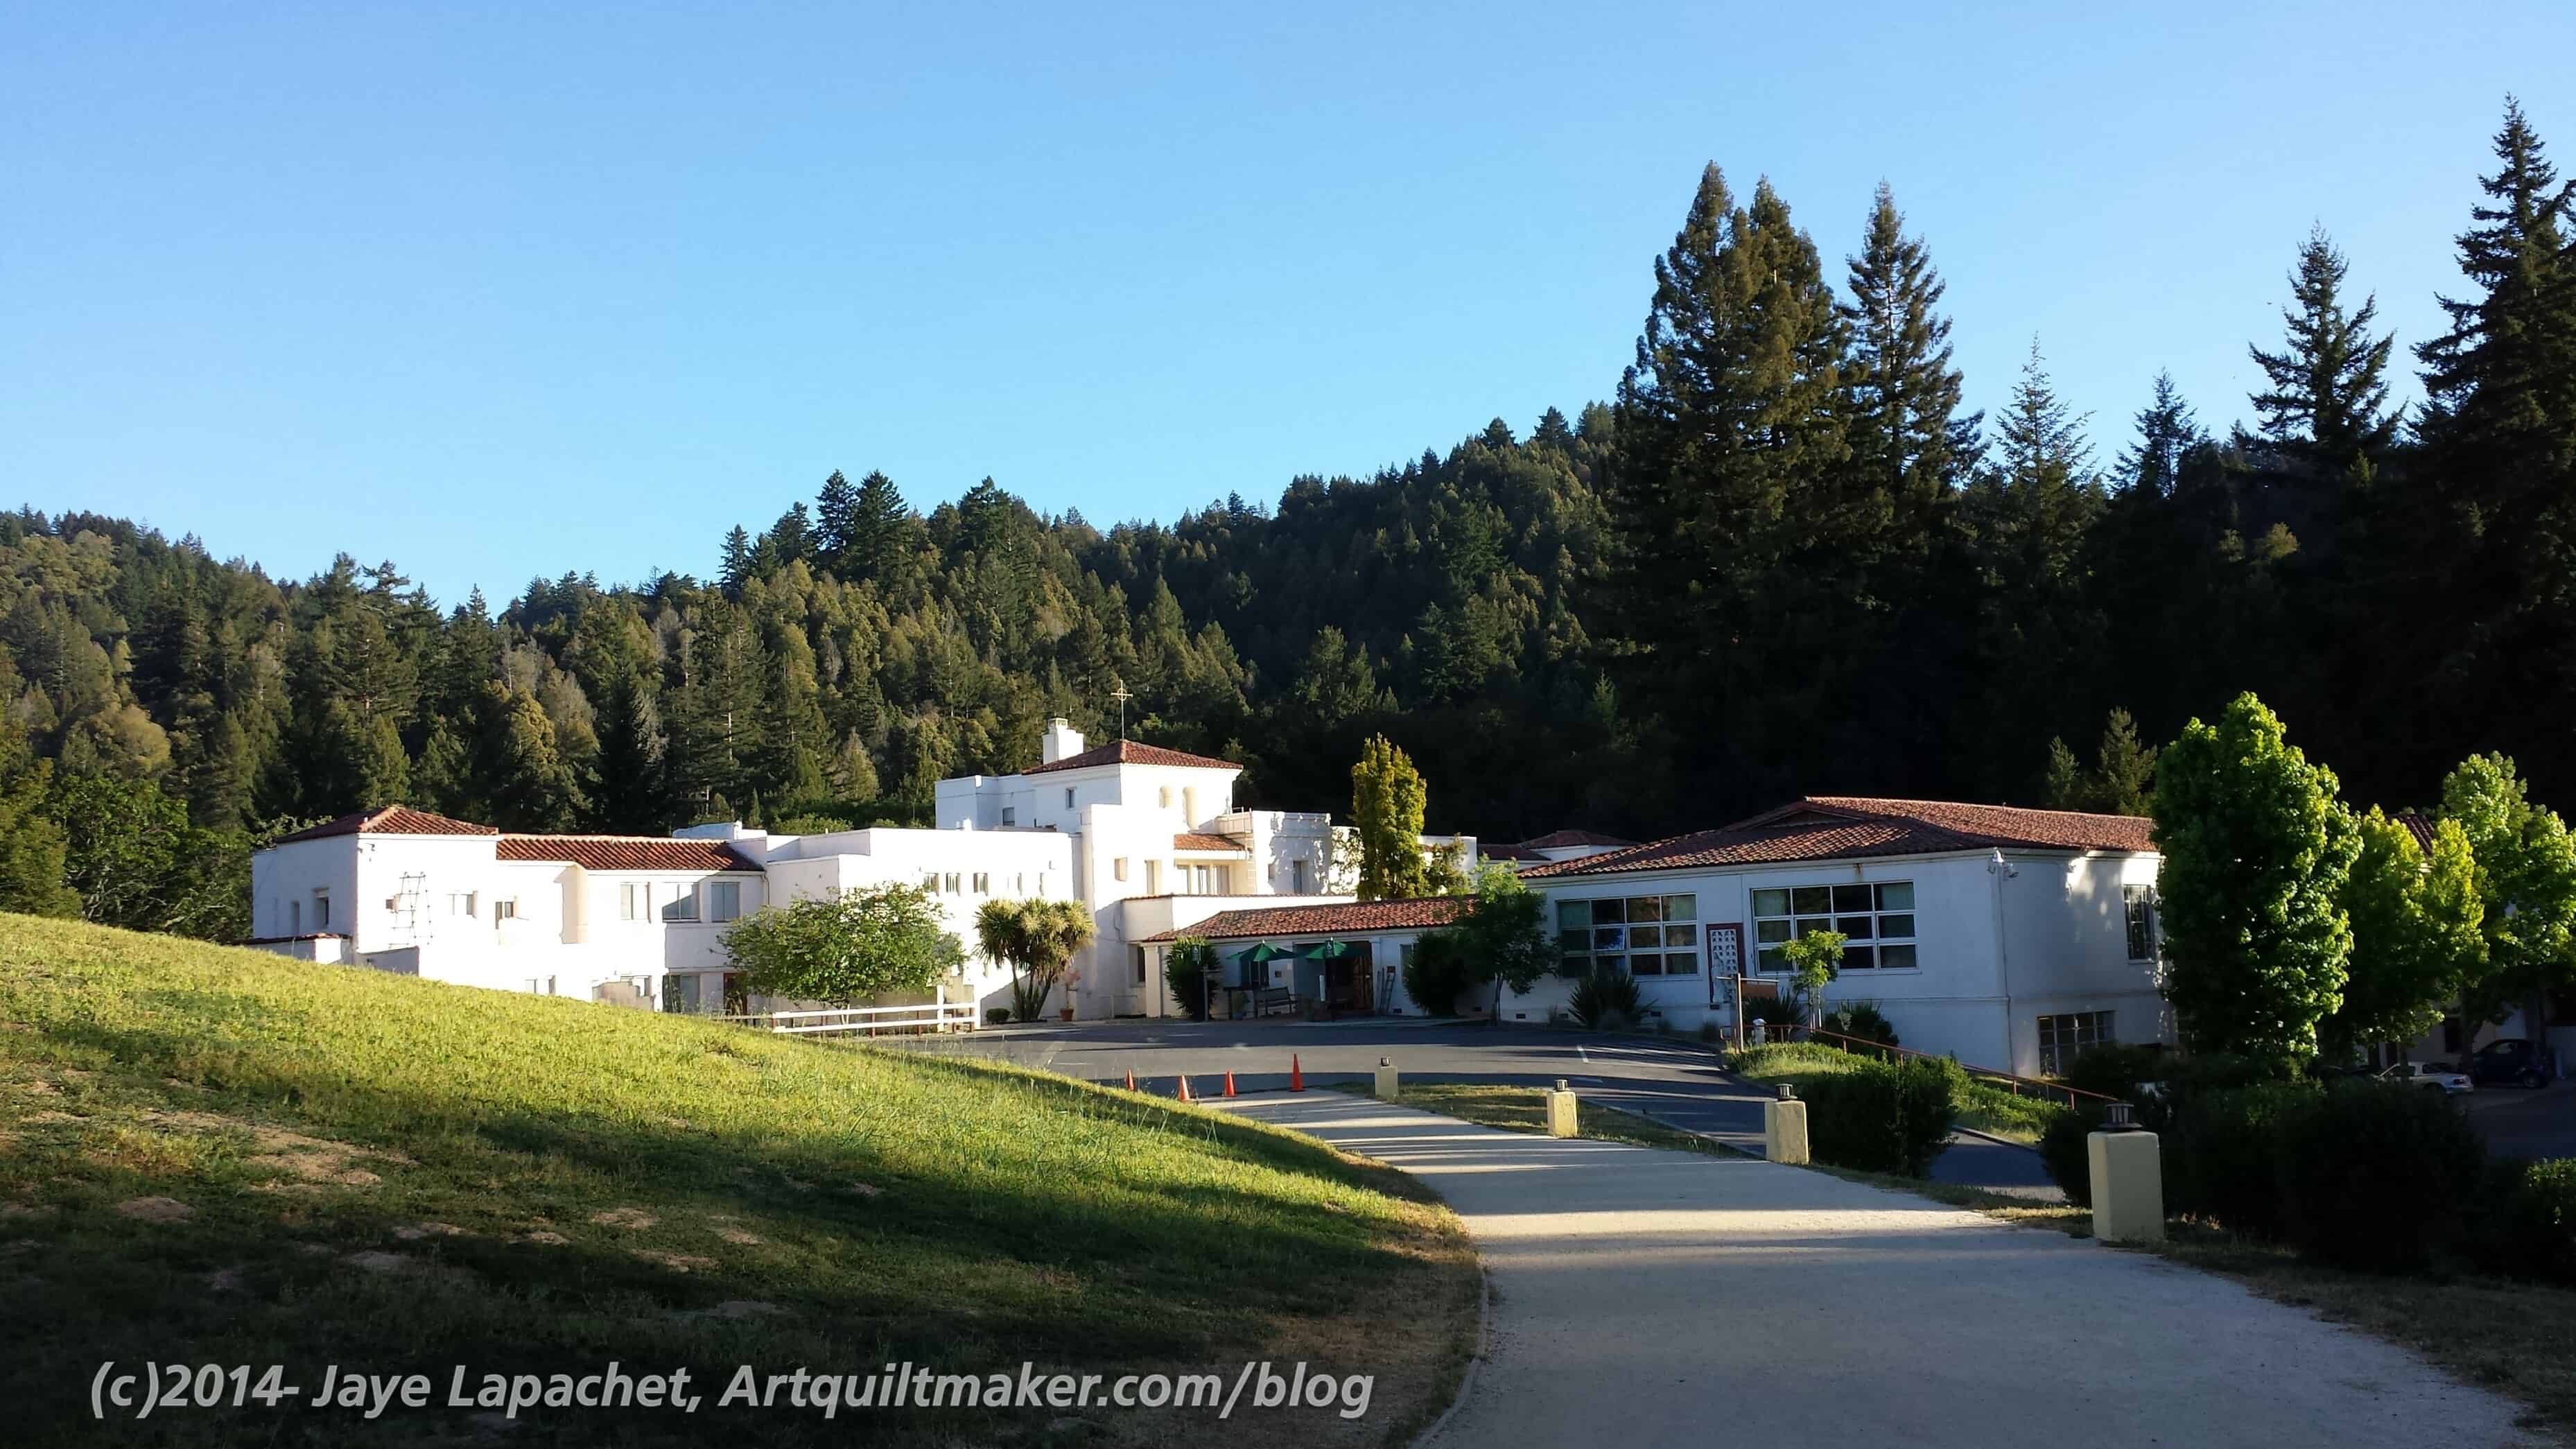
Retreat Location
The retreat started on Friday, but I didn’t get there until mid day on Saturday as we were traveling for the Native Sons back from Grand Parlor. I was a commuter, so I drove back and forth. It is about an hour each way, but after the intense people time of Grand Parlor, some quiet time in the car made me more human at home and at the retreat.
Two things that happened right as I got there, practically before I got set up, was that I got a bag of goodies and I won a prize! The CQFA Retreat does not include goodie bags or prizes (someone has to organize all that). It was fun.
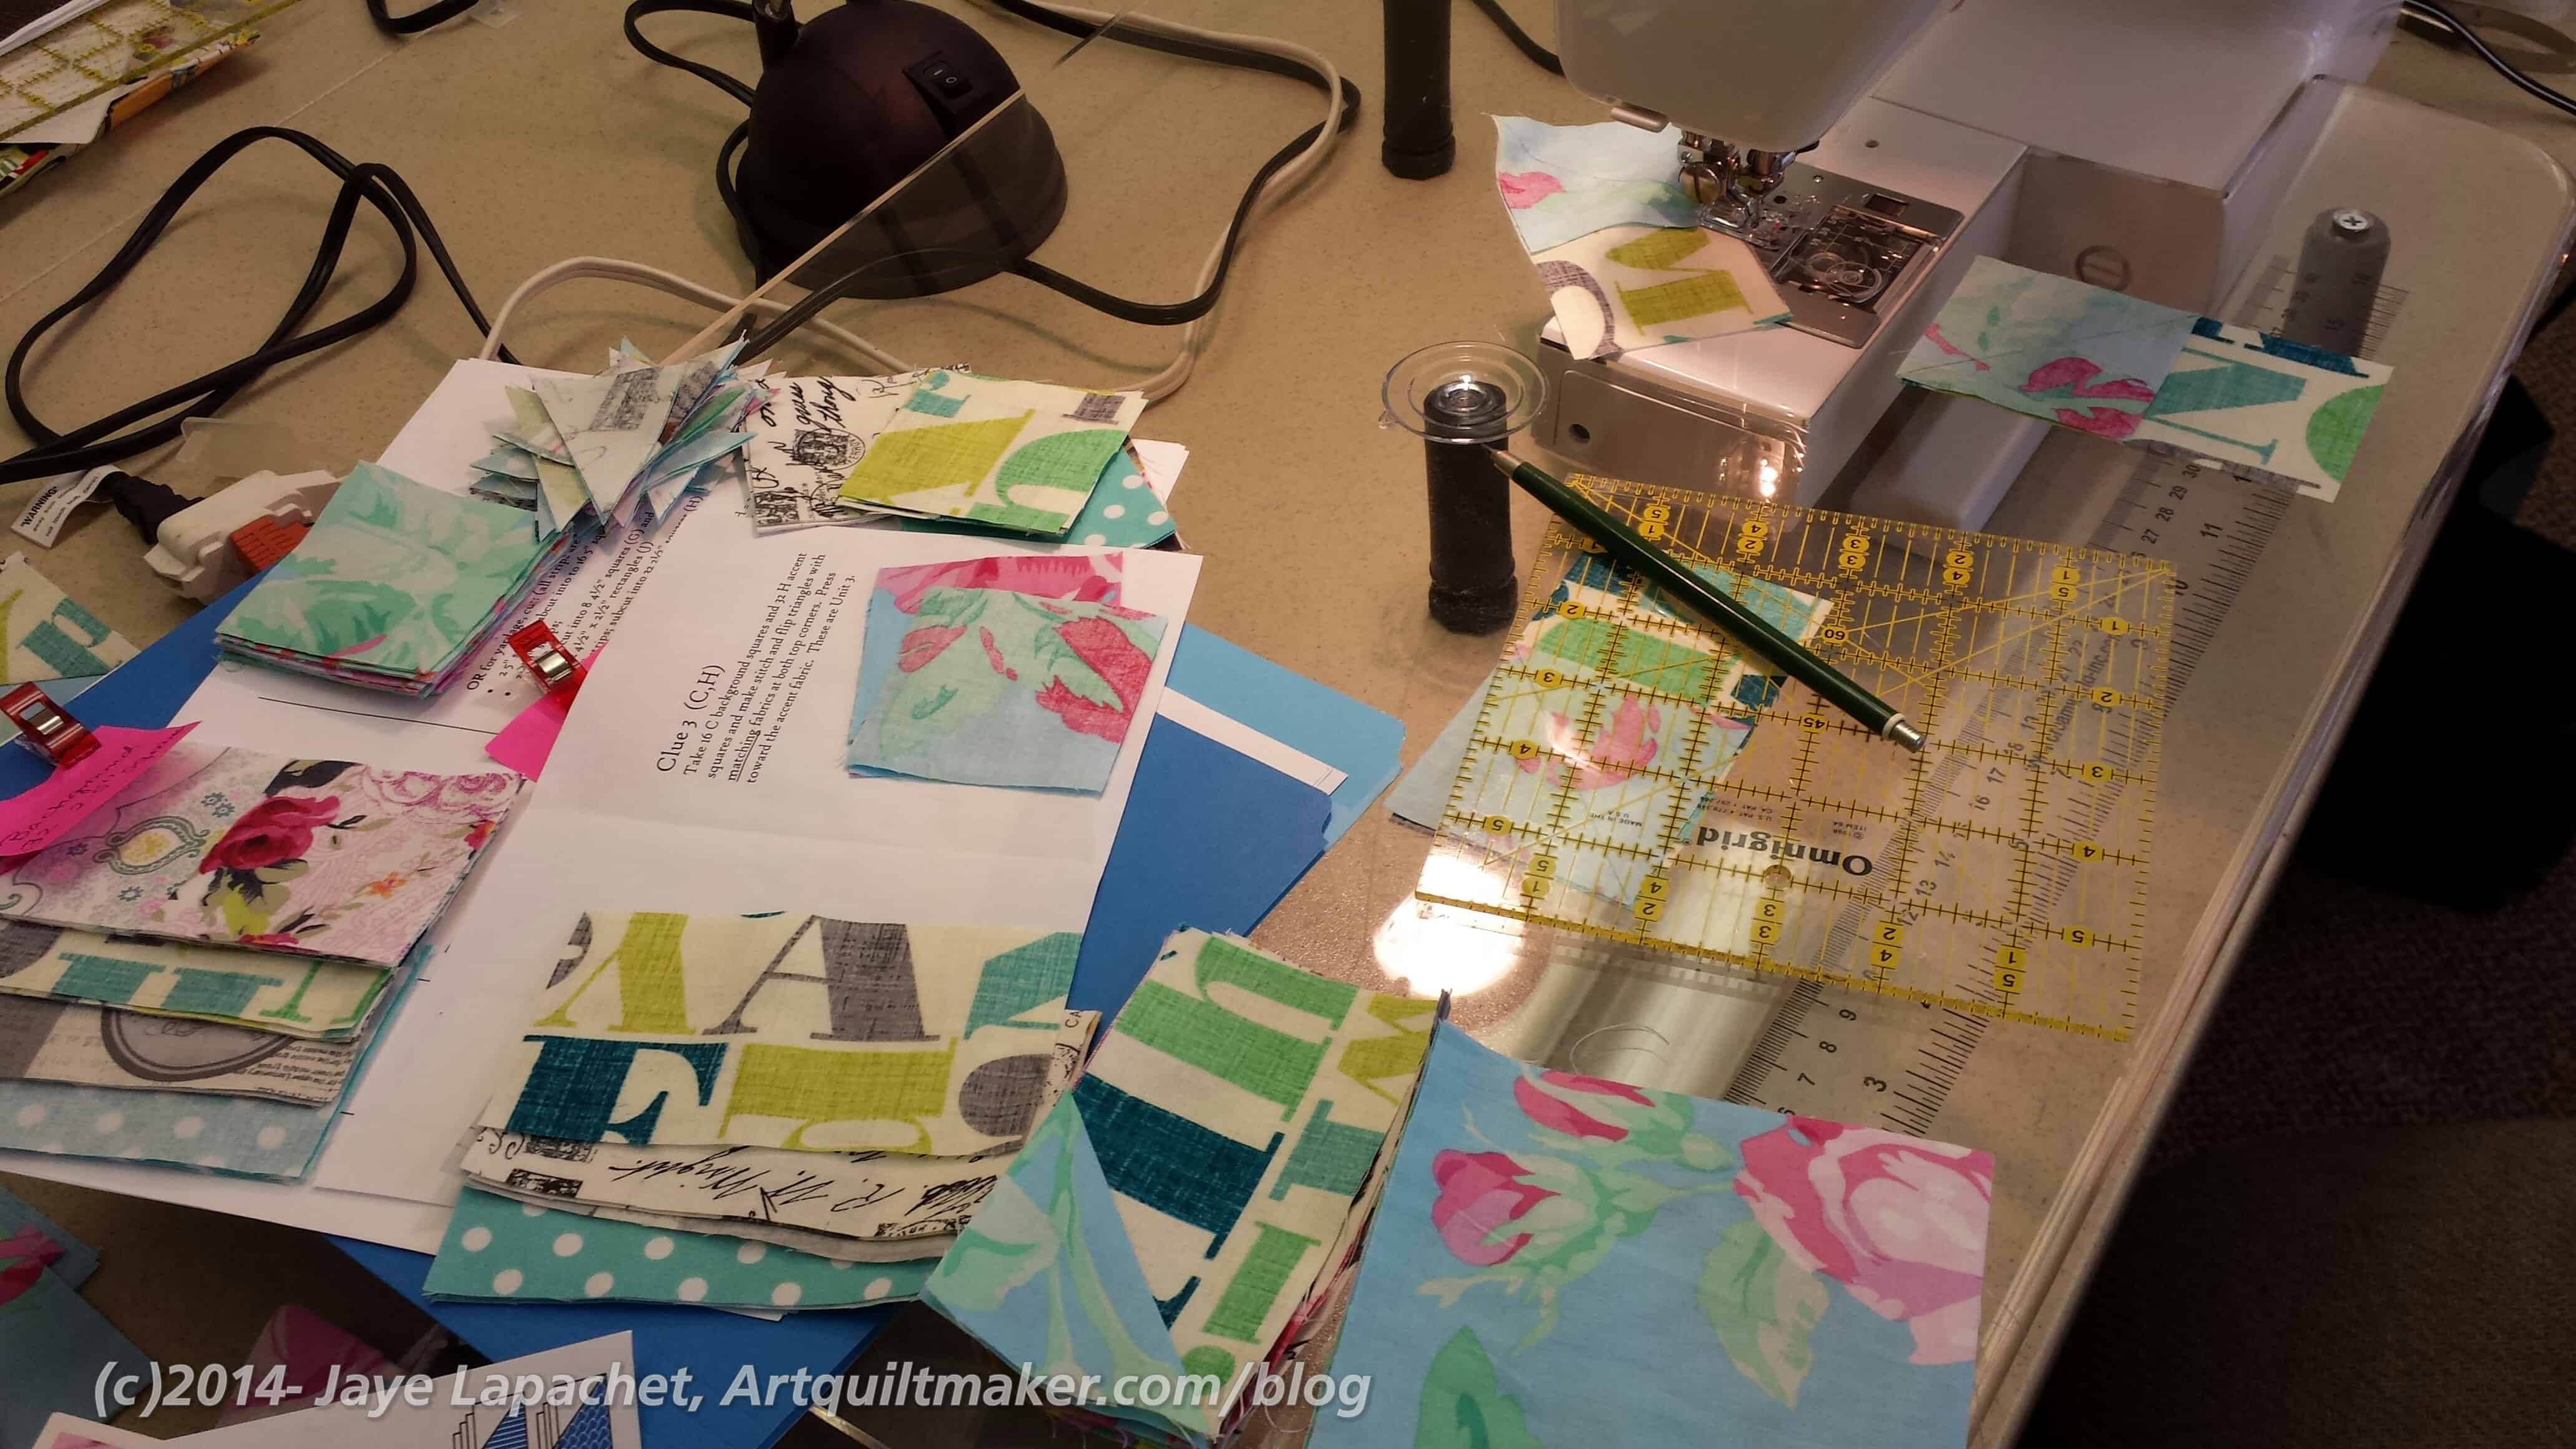
Mystery Quilt in process
People were working on the mystery quilt and I was 3 clues behind, but they had just gotten Clue 3 when I arrived, so I made those units and used Clue 1 as leaders and enders, so I had most of Clue 1 done as well by the time I got finished with Clue 3. I had my fabric and I had cut out all the pieces, thus I was ready to dive right into sewing, so I got busy on that.
I really liked all of the different fabric choices that people came up with for their mystery quilts. People admired mine, but by the end I wasn’t liking the combination very much. the funnest part of the mystery quilt was working on the same project as everyone else. I enjoyed that with Scrapitude as well.
I have only been on CQFA retreats, which are very basic. This retreat was kind of the deluxe edition!
Cutting Room
There were 3 rooms we could work in. One room was set up as a cutting and ironing room. We also gathered there for Clues and prizes and the donation blocks were as well. People put their finished blocks there and kits for blocks needed were also available there.
It was great to have those high tables for cutting out large pieces. I used them when I was working on my bag.
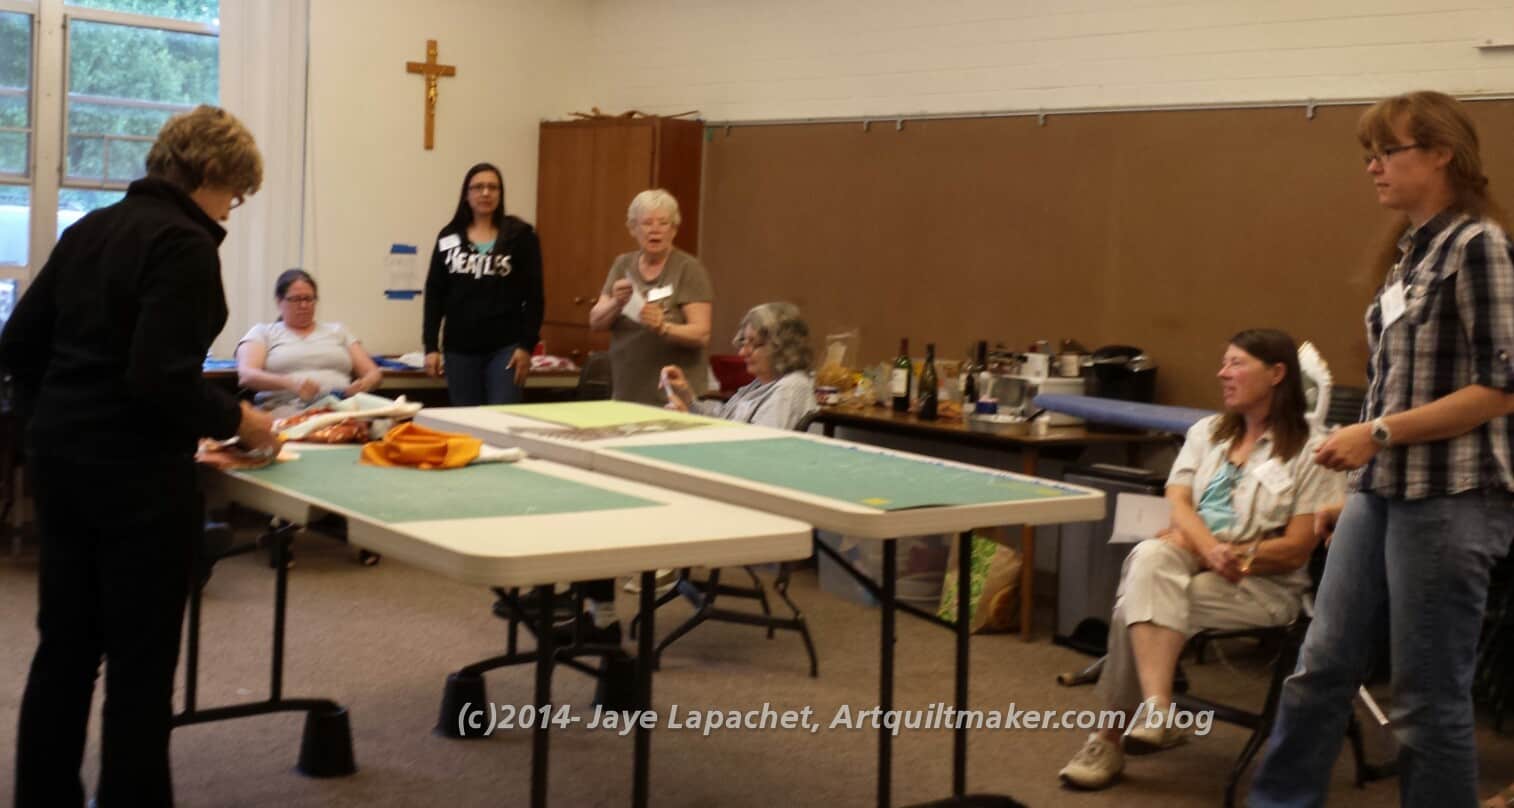
Hard at Work
There were 6 tables set up on each side of the two rooms (room were linked by a very large opening). Ruth set up a design wall at the end of the room (I believe the Steampunk blocks belong to Cheryl). My spot was the spot from where I am taking the photo. People were pretty diligent, but there was a lot of laughter as well. Some of the laughter was fairly crazy.
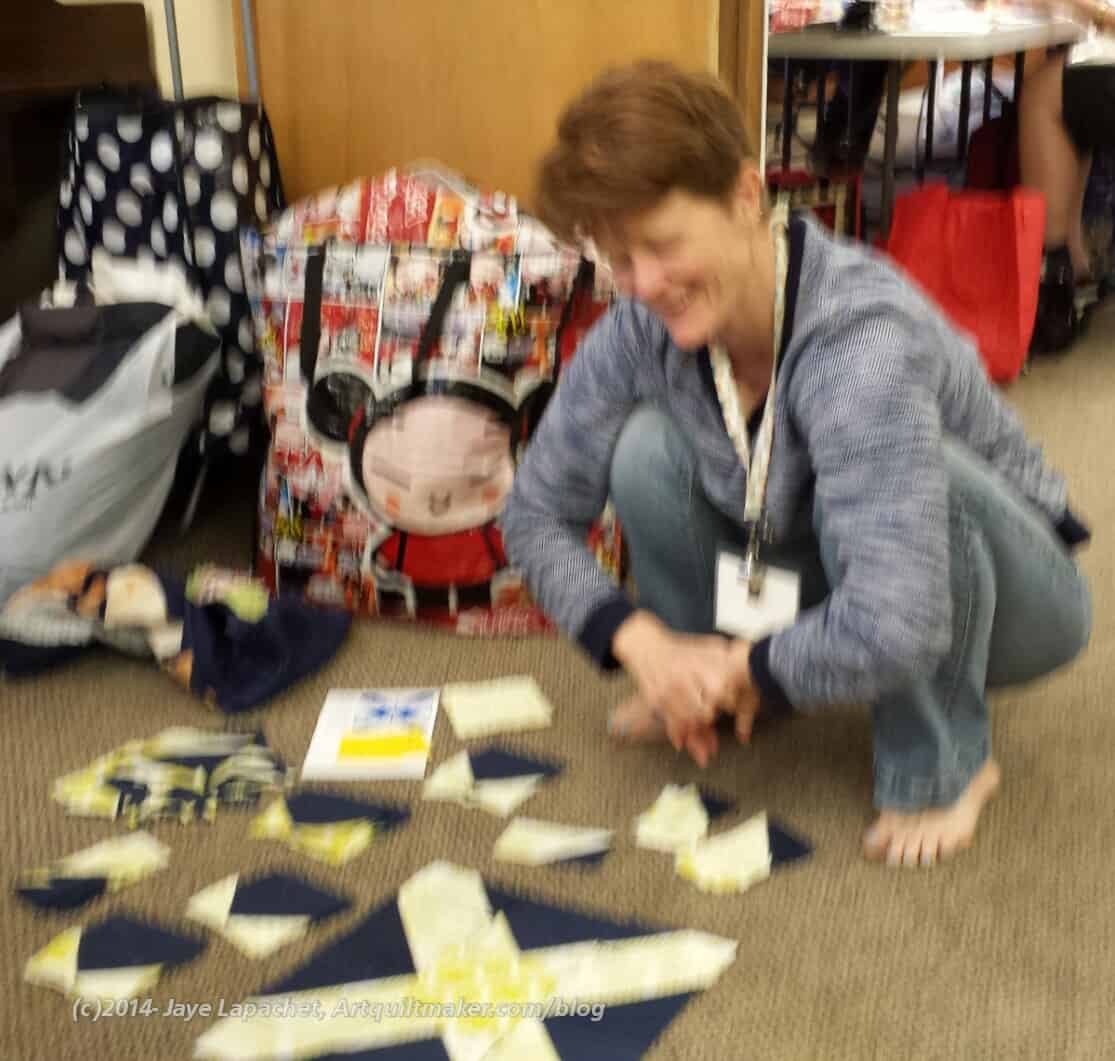
Design Floor
I sat across from Corky. I don’t think Corky and I had had a chance to talk at a meeting, but we were chatting and borrowing tools like old pals. It was nice to get to know her a little better.
Quilts and quilt parts were everywhere. Any open space was fair game and people just hopped over them and continued on their way. It was awesome, in a way, that people would just take it in stride that quilts were everywhere.
I had my mystery quilt on the floor for awhile while I laid it out.
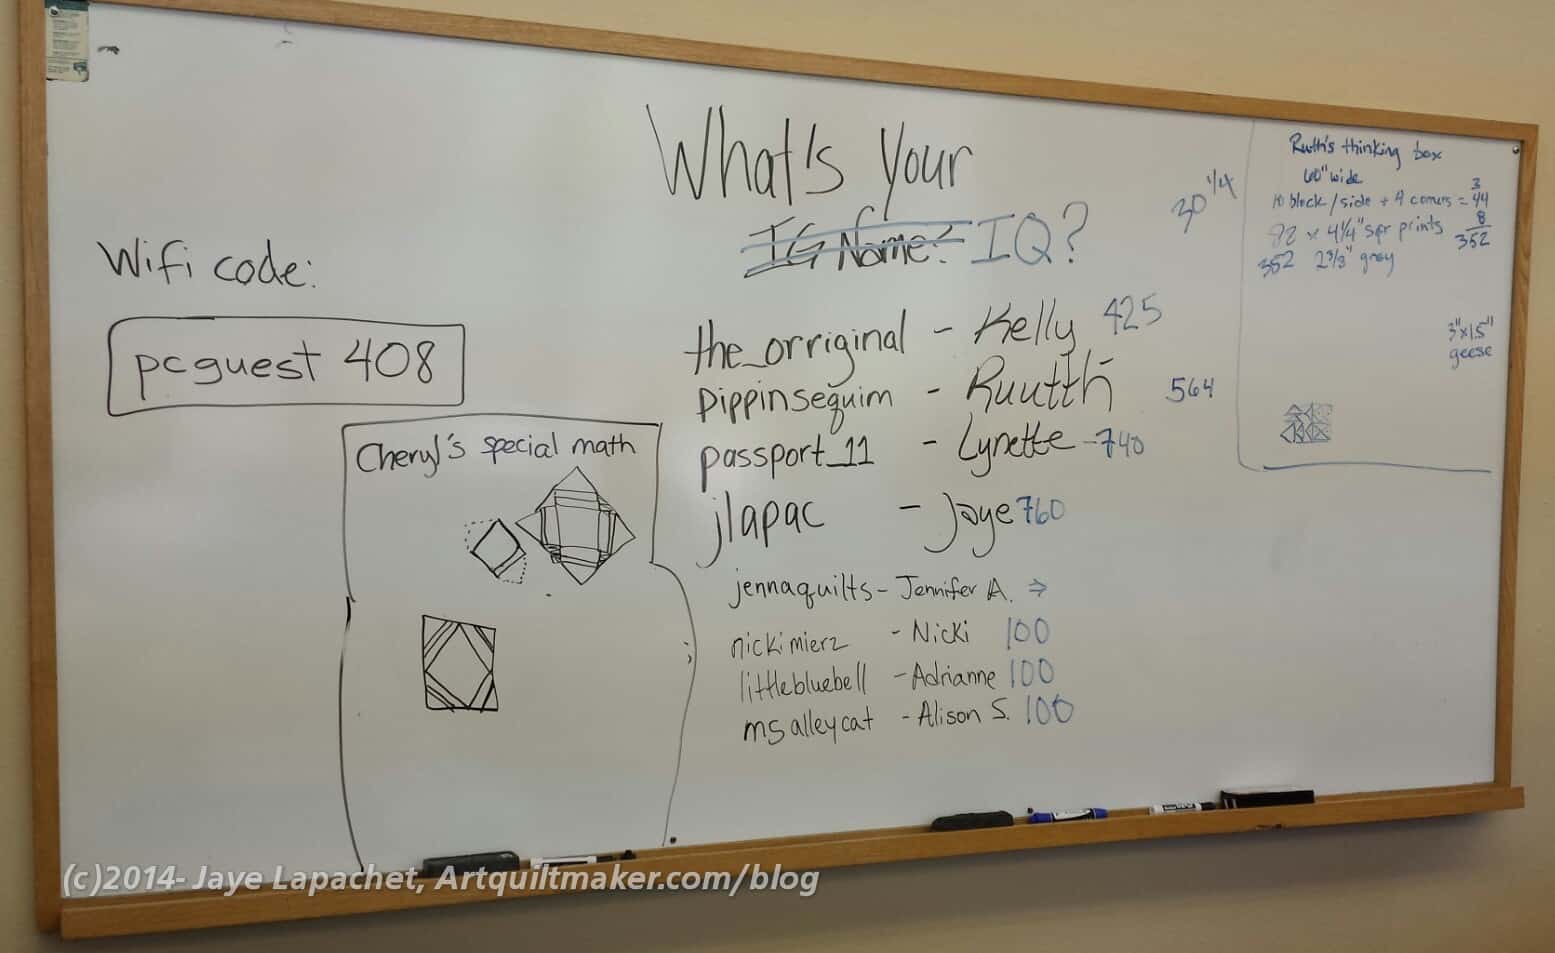
Special Math
The whiteboard was right across from my workstation. Right after I arrived, Kelly added me to her list of Instagram names. Somehow after that, the Instagram names morphed into IQ. I didn’t say anything about my IQ; I just watched the points increase.
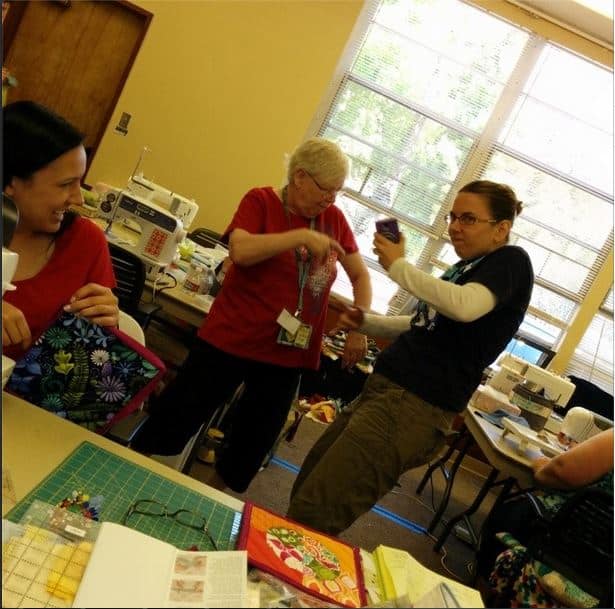
Peggy & Amanda
I couldn’t sleep and got up at 5:30. After doing a few of my morning things, I got on the road and was at the retreat by about 8:30. Monday morning found us all a little more punchy than the previous 2-3 days. References to music started coming up and Amanda played songs for us on her phone. One got Peggy and Amanda up and rapping together.
Anyone who thinks that Modern Guilds are for young people only should meet Peggy. Peggy is the most ‘modern’ of anyone in the guild and she has only been quilting for about 5 years. She has a great and inspiring and practical attitude and is also the most prolific charity quilt maker. I would do well to take after Peggy.
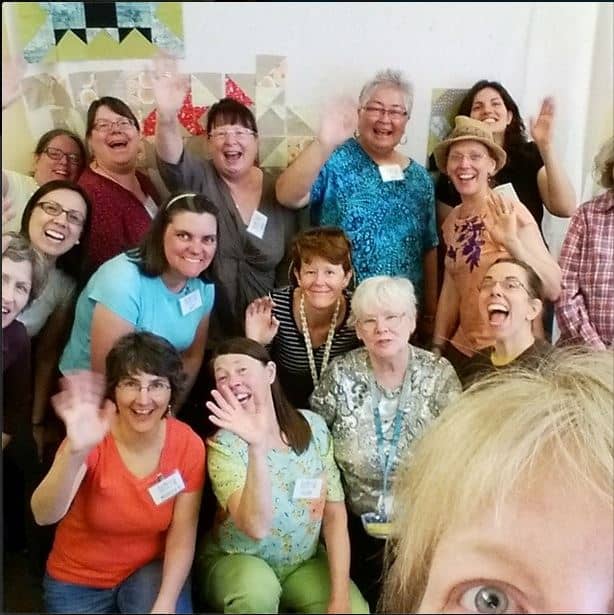
BAMQG 2014 Retreat Group
We took a group shot. I am pretty sure not everyone was in it, as ‘everyone’ was hard to wrangle. It was a fun shot, especially that Kelly got herself, or part of herself in it. I stole this version from Kelly’s Instagram.
I am always on the lookout for inspiration and I have to say that I was overwhelmed by my choices. there are so many creative people in the group that everywhere I looked, there was something I wanted to try or make or know more about.
I’ll write about actual projects in another post. This one is long enough. I would love to hear about retreats you have attended.
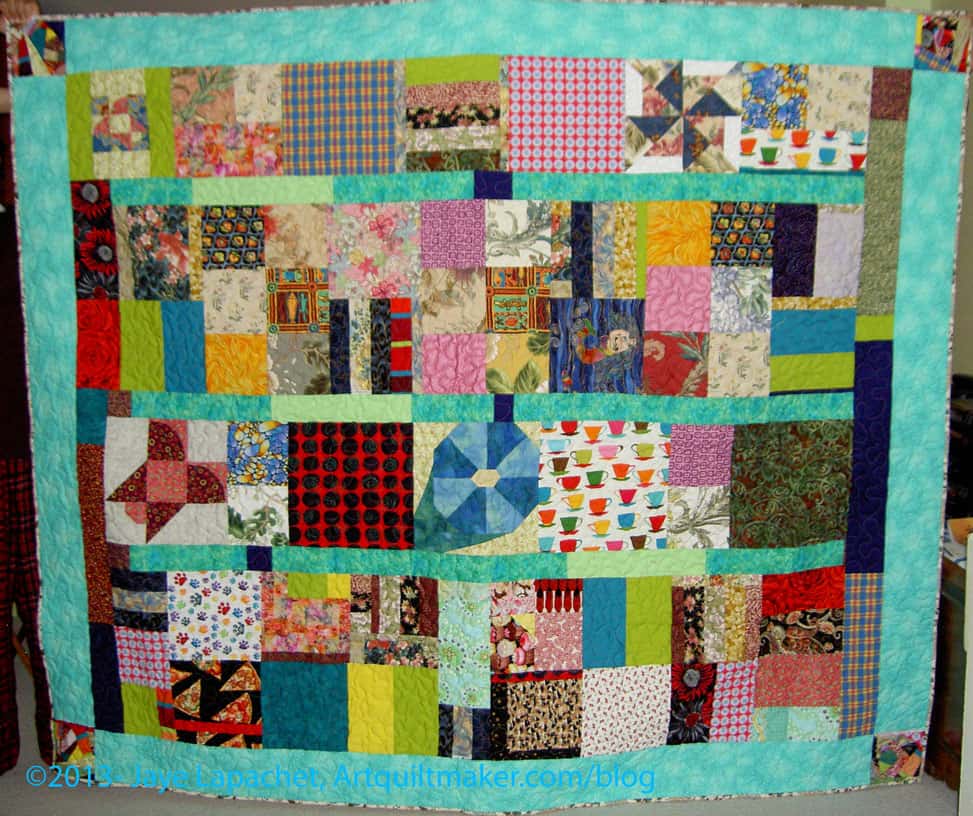
This is a cool quilt top made by my friend TFQ. I love this design. It has inspired me to cut 2″ blue, green and violet squares. I have a long way to go, but it is a start.
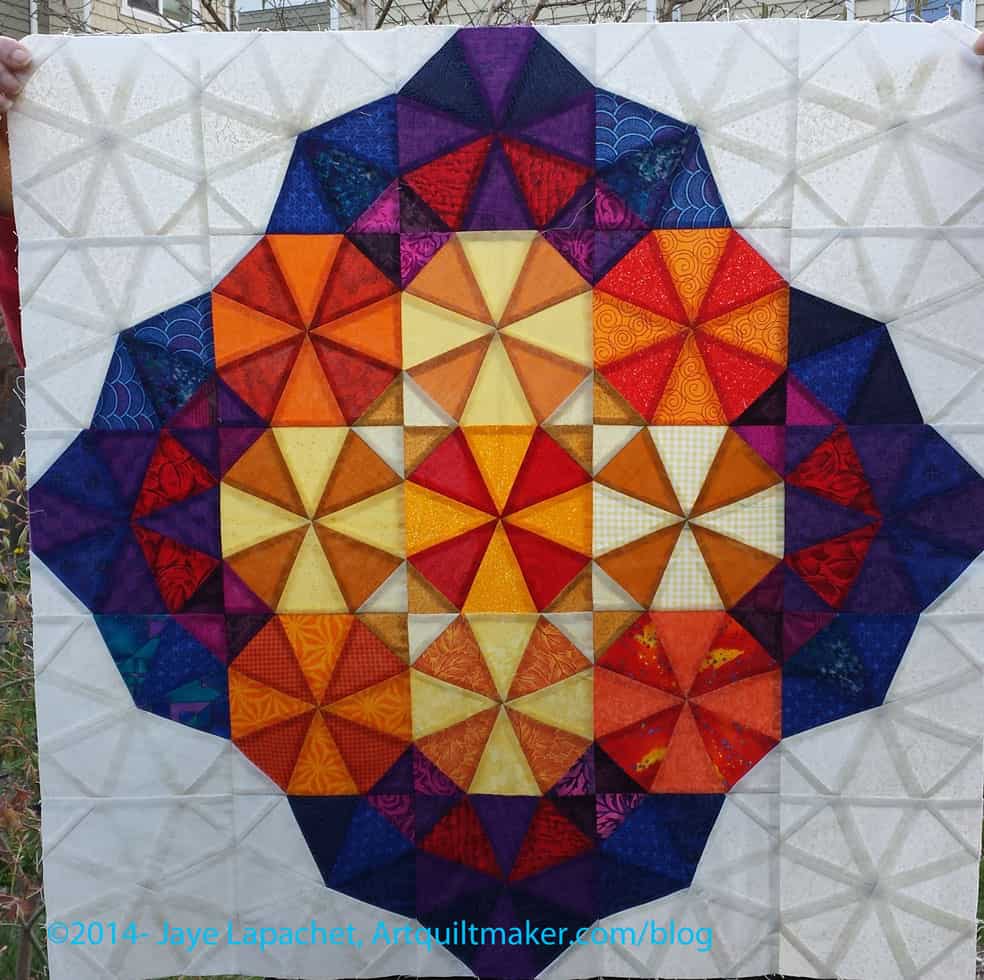
I love the way TFQ has chosen the pinks, yellows, oranges, etc for this piece. She said that she chose fabrics that read pink, yellow, orange, etc. They are similar in temperature, and sometimes in vlaue, but because of the different hues, there is interest in the piece as well. There is that quality of making the viewer want to come closer.
Some of the fabrics had white in them and TFQ was careful to not let the white creep in too much. This is to mitigate the holes that can be caused by too much white. White isn’t bad, but it wasn’t TFQ’s choice for the look of this piece. White can create a hole if it isn’t distributed well. The concept goes back to something Sandy and I have discussed in the Design Series: what is your intent as an artist and designer?
TFQ’s top is named Pink Lemonade. I may name mine Blue Lemonade. That will be the working title for now and we will see.
I did nothing to get these quilt tops to the stage they are at now. I am only transporting them and using them for content for this blog. 😉 Also, I always enjoy tooting the horn of other talented artists.
TFQ had to clear off her guest bed so I could sleep in it last week. She keeps her quilts flat on that bed. When she went through them, she decided that she would donate some quilts and tops that had served their purpose for her artistic development. I have several she gave me to donate, but will spread the wealth over a couple of blog posts. Hopefully, you will be inspired to create some donation quilts of your own.
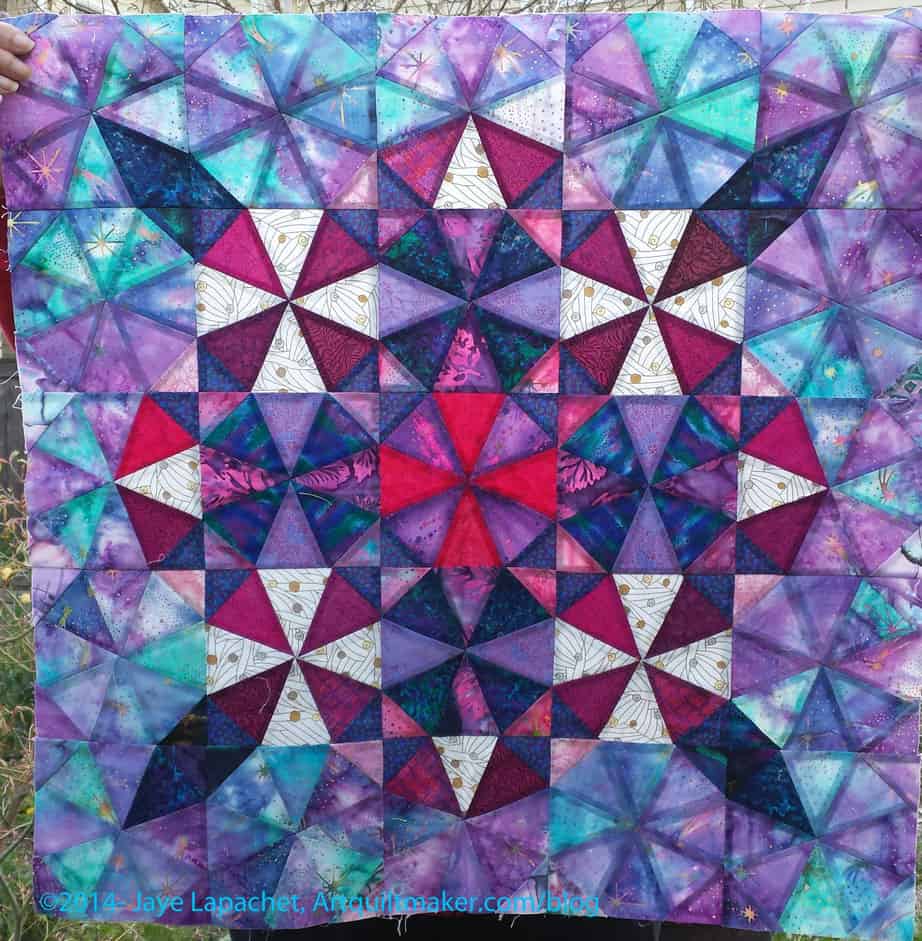
The kaleidoscope pattern is an old pattern. In Jinny Beyer’s, The Quilter’s Album of Patchwork Patterns, there are 9 references to that name and many of them are not the Kaleidoscope as I have always known it. Of course, block pattern names develop, have colloquial an regional differences, so references like the above as well as Barbara Brackman’s Encyclopedia of Pieced Quilt Patterns and the accompanying BlockBase are invaluable references.
TFQ’s Kaleidoscope #2
The closest patterns listed to the one shown in the photo (above) are on pages 292 and 293, categorized in the 8 pointed star category. There is also a continuous pattern called Kaleidoscope (413-7), which except for the squares that join the actual Kaleidoscopes, is the pattern TFQ made.
There is a lot of opportunity for color work in this pattern. In the two examples, you can see the differences in the way TFQ used background and also blended the colors somewhat. Example #1 looks like an actual Kaleidoscope (the thing you put to your eye and twirl). The arrangement and selection of colors looks like broken glass that has been shaken up.
You might be wondering why TFQ pieced the background like she did in Example #2. I don’t presume to kn ow for sure, but if I had to guess I would say that there are two possibilities. The first is texture. The color of the inner blocks really draws our attention. They also have texture and I think that the bringing the texture out into the background provides continuity. Second, the piecing in white is one of those rewards you get for looking more closely at a quilt.
As I said, these are tops so someone else will need to finish them. It will be interesting to see how they end up. Thanks, TFQ!
I plowed through, via audiobook, a number of the Jo Beckett series of mystery novels by Meg Gardiner while I was home over the holidays. They novels are a little formulaic, but I like the characters and the relationship of the characters to one another. The latest one, The Nightmare Thief, is the best, I think, though I liked the character development in the others as well.
Want some free audio books, so you can listen and sew? Try openculture.com. They have a lot of public domain stuff.
Housekeeping
We moved the blog to a new hosting site. This will alleviate, with any luck, the 500 Internal Server errors that were recurring with some regularity. If you are reading this, you have gotten through the worst of it. If you commented before the move, but not since, your comment will not show up until I confirm you are not a spammer. I try to be very quick about it, but if you are on the East Coast and commenting at 6am, you’ll have to wait until I get up a few hours later. 😉
We have noticed a few missing posts. If you commented on one of the missing posts, we will have to restore it and then I can respond to the comment on the blog. I’ll try to send you an email sooner, though. Polly, you leave such fabulous comments and you are one of the ones in this bucket. So sorry! Data conversion is a *itch!
Projects, Patterns & Tutorials
Quiet Play blog has a very appealing BOM called Sew Kitschy. It is appealing for me because of the turquoise and red. The imagery consists of 1950s looking kitchen accessories. I am not sure how the artist will create some of the patterns, but I look forward to seeing what you all make.
I found a pillowcase pattern that might be more my speed. I haven’t tried it, but there is nothing about selvedges, which might be a blessing. Thanks to Pam for pointing me to it.
There is an interesting Blog Hop going on called Dreaming of Stars. I saw it on the Magnolia Bay Quilts blog.
Now I know what crumb blocks are. Daisy mentioned it on her podcast and I had a minute to go look up the explanation on Bonnie Hunter’s site. I know it as mosaic quilting! I do it all the time and make new fabric from like colors.
I really like the Super Size Castle block from Sew Mama Sew. After the Swoon and Round and Round, I am thinking that blowing up some of these blocks with 85 pieces is a good idea and a lot of bang for my buck.
Joyce, over at Quilting Adventures, has a blog post up about making Hearts. It came about because of the upcoming Valentine’s Day. She acknowledges that many do not celebrate VDay and this project transcends those people to be all inclusive. It is a really sweet idea and an easy project – really good for TV time, or doctor waiting room time.
Helpful Hints, Tips, Traps & Tricks
If you need to know how much yardage a layer cake has in it, take a look at this page of quilt terms. I didn’t check the math, but it is a start.
Robin has a great, temporary, but not lame, tip for preventing your rotary ruler from shifting while you cut. You can find it and a brief overview of other more permanent methods on her blog.
The Metropolitan Museum of Art and the Guggenheim has 474 free art books available online. There is excellent access to catalogs, bulletins and other hard to find art materials. thanks to Timi for pointing that out to me.
From ResearchBuzz “Wellcome Images is releasing over 100,000 high resolution images under a Creative Commons license (CC-BY). “The earliest item is an Egyptian prescription on papyrus, and treasures include exquisite medieval illuminated manuscripts and anatomical drawings, from delicate 16th century fugitive sheets, whose hinged paper flaps reveal hidden viscera to Paolo Mascagni’s vibrantly coloured etching of an ‘exploded’ torso.” Good morning, Internet…” I am sure you’ll find some inspiration for your quilts there.
I heard a recent lament from a quiltmaker friend who hadn’t followed her own advice and put the kind of information on her label that she really needed. Yes, she put name and year, but not whether the quilt was from a guild challenge or made especially because of some specific inspiration. What if we all put QR codes on the backs of our quilts? Then, we could tweak the related page infinitely. I saw an article recently about prettifying QR Codes. There are Android & iOS versions to play with for free.
Fabric, Supplies, Tools & Jewels
I popped by the CraftSanity blog and was thrilled to see a feast for the eyes. The fabrics shown are gorgeous and I feel the first stirrings of interest in buying some fabric that I have felt in awhile.
Timeless Treasures has a hilarious vampire fabric. You don’t often see hilarious and vampire in the same sentence, I know, but this fabric made me laugh.
Exhibits
Weeks Ringle and Bill Kerr will have an exhibit of Modern Quilts at the Wisconsin Quilt Museum from now until the beginning of April. If you are a reader from Wisconsin, I would love to hear what you think.
The California State Parks are celebrating the 150th (WOW!) anniversary of the system with a quilt contest. Make a quilt, make history. The contest will include an online show of quilts created by quilters throughout the state to honor our state parks. The theme of the quilts is any aspect of California State Parks that inspires you. There are no restrictions as to quilting style, fabric, technique, size, etc!!!
Other Artists
Friend Julie has a new website and her own domain. Check it out at JulieZacconeStiller.com. I am jealous. I really need to work on Artquiltmaker.com, but haven’t done it. Yes, I am putting it on the list.
You can still read Libby Lehman’s CaringBridge site. She went home last week, which is great news. You have to log in to leave a comment.
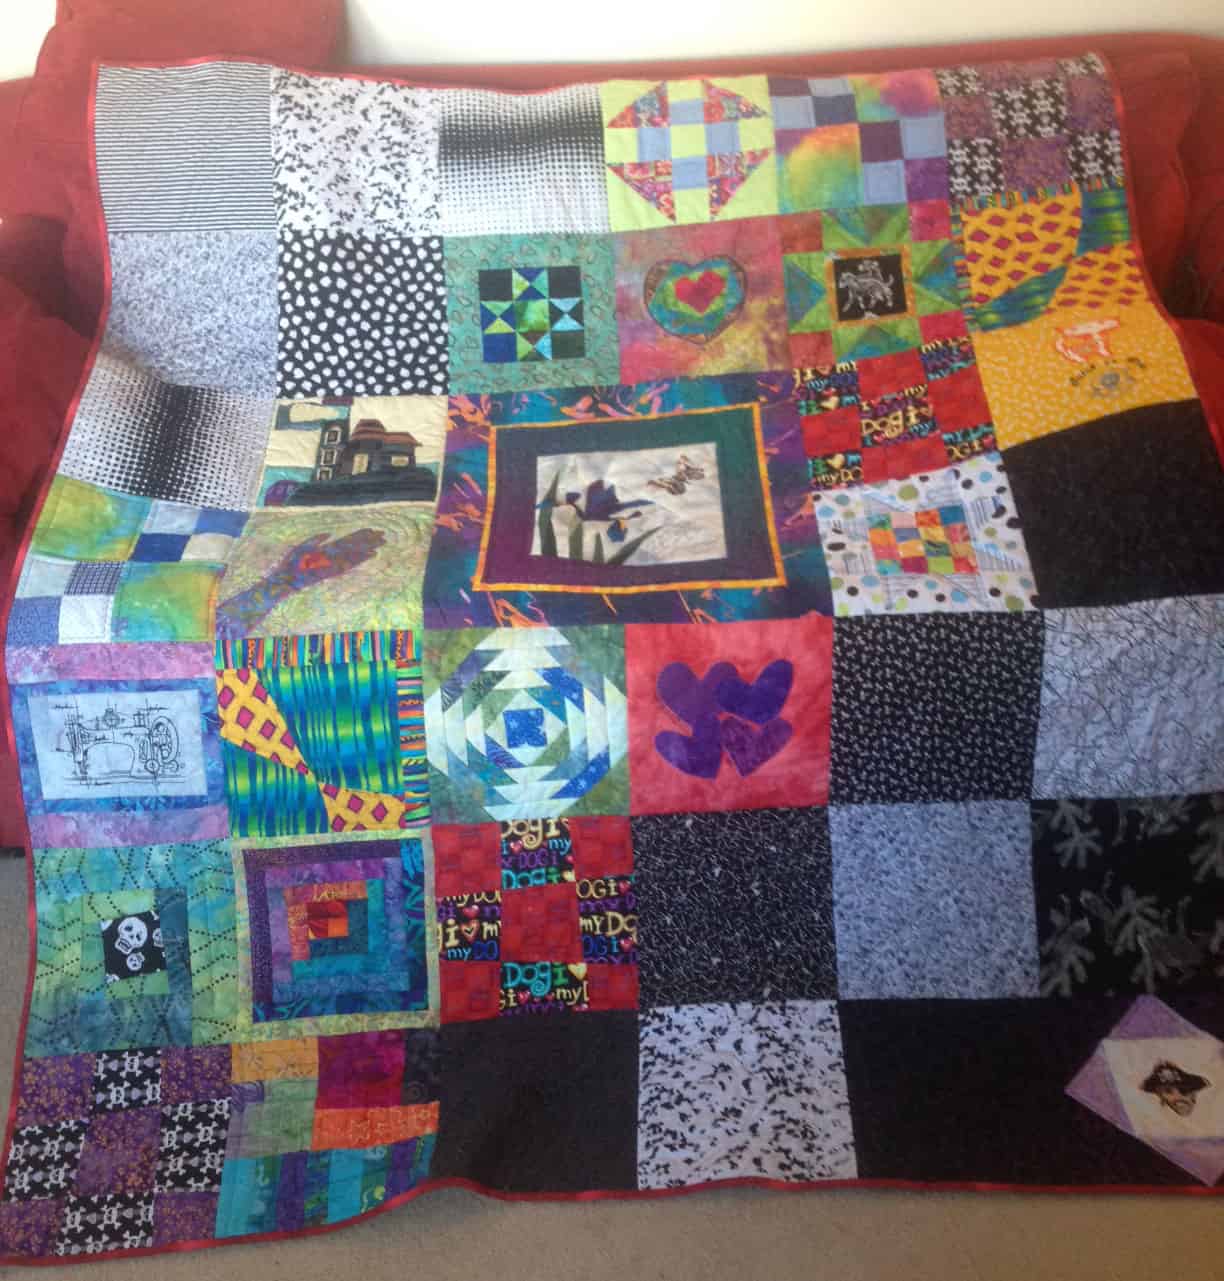
Frank’s Lovey
I am in an online quilt group and periodically a member will have a really terrible year. this happened to a member recently. We all made blocks and one of the members put them together into a ‘lovey’. I no longer remember which block I made, though I suspect it is the Sawtooth Star with the black on white background to the right of the center. I think I made it during my Star Sampler craze last year.
I was interested in the way the author of the With Strings Attached blog calls quilt tops ‘flimsies.’ I have never heard that before. She has a page with all of her flimsies listed (no links, though) so you can take a look.
Quilty Fun
Most Interesting Man
I do think that quiltmakers, for the most part, are funny people. Recently I saw this posted to Instagram by MissouriMel and retweeted by Alex Veronelli of Aurifil fame. I wonder if the most interesting man knows?
Some of you read of my computer woes last summer. After reading a brief article about Windows 8, I feel a bit vindicated in my frantic search for a Windows 7 machine when Windows 8 was taking over the world.
Are you interested in cheesecake (@HQSuz??). I met a librarian at a recent conference who bakes cheesecakes in his spare time. Then he writes about them in a blog. He is a librarian, after all, and that is what we do. You can see the regular blog as well, which has interesting bits of information, things about life, books, etc.
Remember last week when I showed you the Pink Spider Looking at the Stars? Well, Amy and I are friends on FB and she chimed in about her version of the quilt. She was in my quilt group and made another quilt with the same fabrics. She sent me a photo and gave me permission to post it. I am posting it here.
This is a great example of the same fabrics being used in completely different ways. I really like the white background as it gives the quilt a lightness.
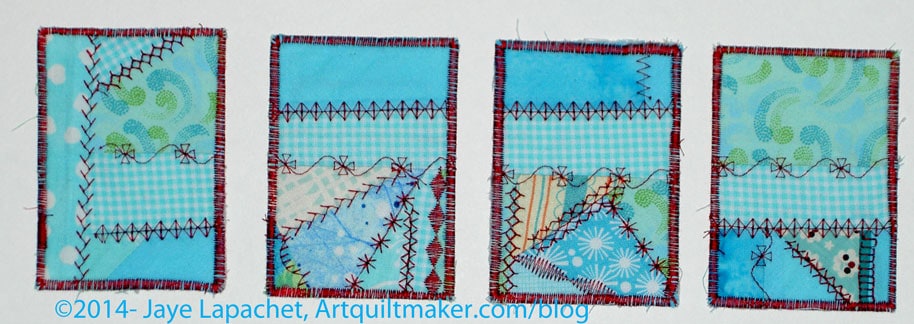
ATCs are 2.5″x3.5″ – the size of baseball or other trading cards. They are made using discarded bits and are not limited to being made from fabric. Paper artists make them from paper and other materials are suitable as well.
As you read this, CQFA is meeting (or will be if you are reading this at 6am ._. ) and part of the meeting is trading ATCs. It is fun to see what other people have made and I love it when a lot of people participate. I am always sad when I can’t one of each example of the other members’ cards.
I had a mosaic pieced fabric in turquoise already made and decided that I would use it since it was a start. I stitched out some of the stitches on the loaner machine over the seams and called it good. The flower on the right hand card is my favorite of the few decorative stitches on this machine.
Sarah was kind enough to ask me to participate in this blog hop. Although I did write a bag review for Purse Palooza at the request of Sara over a Sew Sweetness, I feel like this is a different kind of thing. Thus I am sticking to my guns and saying that this is my first blog hop! Please be kind! I am so thrilled to be part of this blog hop. There are so many great artists who did the September round and now another group of fabulous artists doing the November round.
Bonus and Prizes
There will be a giveaway on my blog. I have one DVD to give away thanks to Sarah and Interweave Press. You can win this DVD by leaving a substantive comment (e.g. ‘s,ign me up!’ will not work), such as telling me what you thought of the video if you saw it or a clip, telling me what you thought of the review or something else. Sarah may read the posts and comments as well, so throw the girl a bone. 😉 You must leave the comment on THIS post.
UPDATE: COMMENTS CLOSED. WINNER HAS BEEN CHOSEN
I will pick the winner, contact the lucky winner and then send the contact info to Sarah who will get the DVD to the winner.
Sarah will be having a Grand Finale at the end, sometime in late November or early December (I’ll let you know), which will include additional goodies to win from MistyFuse and Havel’s Scissors!
Background and Purchase Details
I have known Sarah for awhile, mostly through an online group to which we both belong. I have enjoyed watching her career and cheered her on as she has reported her quiltmaking successes. This DVD/online workshop is just the most recent in a long line.
The following is from the Interweave email announcing her video, which I thought was a great description: “According to Sarah Ann Smith, not creating would be like not breathing: not possible! Sarah learned to sew after a neighbor girl made an apron for her doll when she was 6; when she found quilting, she knew she had found her passion: art and sewing. A former US diplomat, she draws on her years living in South America, Africa and North America, as well as her travels to Asia and Europe. She specializes in machine work and coloring with thread. Sarah is the author of ThreadWork Unraveled, lives in Hope, Maine, and has a husband, two sons, four cats, a pug and too many ideas!” Sarah’s website is a gateway to all things Sarah Ann Smith. You can reach her blog, store and a gallery of her quilts as well as tutorials, videos, her free bibliography, class supply lists and much more. Her site is very well done.
The video is a workshop which teaches you her “collage process, from selecting the best photo for your first effort at this technique, to fabric selection, patterning, fused collage, to threadwork at either the top or quilting stage.”
Digital download or DVD
Available from Interweave
Available to international quiltmakers
1 hour 16 minutes in length (first 30 second or so are the FBI warning)
Meat and Potatoes
The first thing I noticed was that the video started in my browser kind of suddenly after I clicked on the link in the email. I don’t watch a lot of videos-I have to actually watch them, which interferes with my sewing productivity, so I prefer audio only so I can sew while I listen-so I don’t know if this is normal. I was able to stop the video with the normal type of computer video controls, so it was no problem. I am thinking that this is a setting on my computer that I would do well to adjust.
I was under the impression that this was a free motion quilting video and was pleasantly surprised to find that it was so much more. Students learn how to:
Select a photo for your composition.
Choose fabrics, prepare them with fusible web, and alter them with textile paint.
Create the working pattern.
Fuse the quilt top.
Use free-motion machine quilting to bring the fused design to life.
Discover Sarah’s strategies for creating an artful machine-stitched fabric collage!
The workshop starts out with an interview with Sarah. One thing that stuck out in my mind, from that interview, is that she says to “learn and be proud of every project you do.” This is absolutely right. You cannot get better without practice. Sometimes the practice means ending up with projects that are not as successful as your next one will be.
The interview sets a tone of encouragement. The tone is positive and upbeat and made me feel like I could do whatever Sarah taught. This tone is continued throughout the video.
The next section discussed materials. After a brief introduction Sarah gets right into the discussion about the supplies, starting with the photo. I liked this part, because she doesn’t just say “take a photo”; she tells us what makes the photo good for her process, the things to look for in a photo and what to avoid. Even in this early stage of the video (2:03), I get the impression that she has thought a lot about the process.
I am skeptical when people describe products which they would like me to use. Do you know how many specialty items I have from classes and projects? I always wonder if I have to have that particular brand or if I can use something I already have on hand. When describing the materials, Sarah tells you why she likes a particular product. She mentioned Saral (remember I told you about that in one of my tutorials?), but also mentioned something similar called Transdoodle (3:58). In the discussion about the two products, she gives the pros and cons. One thing she said about Transdoodle is that it had a heavier chalk layer. That means that I can get more uses out of one sheet. I may have to get some and try it out.
Five minutes in, Sarah is showing the student her method of selecting fabric and giving some hints on painting on fabric. Sarah talks about commercial prints, batiks and hand-dyes. She gives her preferences, but doesn’t disparage the use of any types of fabrics (6:10).
The fabric selection includes modifying fabric using materials such as paints, pencils and judicious cutting to get the right shades and textures. Throughout Sarah tells us why a particular fabric works or doesn’t for the piece.
I also liked it that Sarah gave some practical and useful tips on fusing (9:30): why she uses a certain type of iron, what she uses to clean it in case of a fusing mishap and maintenance of her pressing sheets. The whole time I watched I was thinking of Pam and her Miss Jingle quilt and SherriD with her Unicorn quilt. I am sure they could have used some of the techniques that Sarah shows. I was really impressed with the amount of detail included. It was really useful. It made me think that fusing wasn’t so bad.
Design and composition follow fabric selection (17:55). This is the longest section of the video and really gets into making the bones of the piece. The first part of this section talks about the photo. Sarah gives some examples of variations of the photo she eventually started to use. I was pleased to hear her use terms that we have learned about in the design series.
I was also very interested when Sarah talked about the light in relation to how the light source was positioned and how our eyes perceived the light (20:50). I think that little tips like this, even if I never do her technique, will help me be a better quiltmaker.
Sarah shows two methods of creating shapes (~30:00) for your composition. This is a great addition to the video, because not all of us learn or work in the same way. Having a variety of methods from which to choose makes the video more useful. I also think that there is an appropriate amount of detail. Not too much so as to be boring and not allow for creativity, but enough so that the viewer can make the project while having a bit of leeway to inject what s/he knows about art quiltmaking.
Sarah’s Thread
Remember I said I thought this was a free motion quilting video? Well, Sarah doesn’t disappoint in the free motion quilting department (43:08), though she does not show you in detail how to FMQ. She gives an overview of the important parts in relation to her workshop: needles, thread, FMQ design. Her information will be helpful in conjunction with some of the other FMQ workshops, books and videos out there.
The beginning of this section is really appealing, because of the way she has the thread laid out. During the thread preparation section, she reiterates the issues with the darks and lights that she brought up at the beginning. She also talks about her process, including describing how she works at the machine. For those of not used to working with a lot of thread changes, this conversation is very helpful.
I was pretty impressed with her stitching. She uses a darning type foot (not hopping) and has set the feed dogs to the down position. With these parameters, her stitch quality is excellent. The stitches are small, but not microscopic and relatively even in terms of length. I was also impressed with how a fabric blob suddenly turned into a shadow with nothing more than a little stitching over the top of the fabric. The stitching really smoothed out the lines of the fabric pieces.
The last part of the video is called Gallery and Conclusion (1:10:30) and this is the place where Sarah talks about moving on to your own photo. Using some of her quilts, she explains what she did to make certain quilts work, including where she used precision vs blob fabric pieces. I liked her tip on quilting with light thread in the background to enhance contrast.
Throughout the video, there are hints. Some include such things as protecting your furniture, features of products, details of using particular products and things to watch out for when using her preferred products. Sarah gives examples from particular pieces of her work in relation to the tips. She also gives alternatives, where possible, for tools and supplies that the viewer may not own and may be too expensive or too specialized to purchase. While some of them may seem like pure common sense, the way she interjects them at just the right moment makes the tips and hints even more helpful. They are in context, which helps me remember them when I am actually doing the same action. Something along the lines of muscle memory, I think. This workshop reminds me so much of being in an EBHQ class!
Clearly the techniques take practice if the viewer wants to get as good as Sarah, but she takes the fear out of a lot of the steps with her clear instructions and tips and tricks.
Technical Difficulties
When watching a video, I find that my computers stops and downloads/processes in the middle of the video, which degrades my viewing experience. As a result, I have learned to let the video download and then start watching after most (or a lot) of it has downloaded. I had some trouble with this video. I really think that it had something to do with my computer or the user (me!). This has nothing to do with the production or quality of Interweave/Quilting Arts products. I downloaded the video twice and even after turning off the sleep and hibernate modes on my computer, I wasn’t able to download past about 55 minutes within my browser (Firefox). I was able to fix this by going to my Interweave account, finding the download link and saving the video to my computer. The video took about an hour to download, but then I was able to watch the last 20 minutes.
Wrap Up
I was reluctant about this video in the beginning, but also determined since I committed to helping Sarah with her blog hop. I was pleasantly surprised. This is a great video and I don’t think you would be disappointed. From early on in the video, I felt that not only that could I do Sarah’s collage technique, but that I wanted to do it. Throughout the video, I added some of the supplies she mentions to my Amazon Wishlist and felt excited about using some of the products that had inspired some reluctance in me in the past.
Mean Mom Stuff
The giveaway will be open for 3 days only. It closes officially on Nov.22 at 6pm PDT, so leave a substantive comment NOW. I may not actually get to choose the winner until November 23, but no whining if you can’t leave a comment at 6:01pm.
November 28: Sarah Ann Smith Sarah writes “Yep–it is US Thanksgiving that day…I’ll write mine up in advance! Or maybe I should do mine on Black Friday (the beginning of the holiday shopping season the day after…)” Sarah claims this will be The Grand Finale including goodies from MistyFuse and Havel’s Scissors!
Nota bene: I have included some time codes where appropriate as a kind of citation. I hope this is helpful.
A few days ago, I talked about my mom’s quilt. I decided that you would probably appreciate some detail shots.
This is one of the Blossom BOM blocks. Now, I always thought that BOM blocks were supposed to encourage people to quilt more. This block is a tough block. My mom has garment sewing experience and she had a tough time with this block. Look at the pieces – curves and that little block in the lower right hand corner. Not impossible, but also not a nine patch.
My mom is tough and created a strategy. After screwing up a few blocks and not having enough fabric for the BOM block, she started making a practice block with her own fabric and then used the BOM fabric for the non-practice block. The above blocks are the practice blocks.
Blossom BOM block
This is the same block, but made with a bolder selection of fabric. I believe that I gave my mom some of these fabrics. I feel like I make some bold choices in fabric selection, but my mom has me beat by a mile. I would not have thought to put the blue and the pink together.
I am glad that I took the time to look at these blocks.
They make me think. What would your interpretation of this block be? Even if you use fabric on paper with glue stick, what colors would you choose? What colors would take you out of your comfort zone?
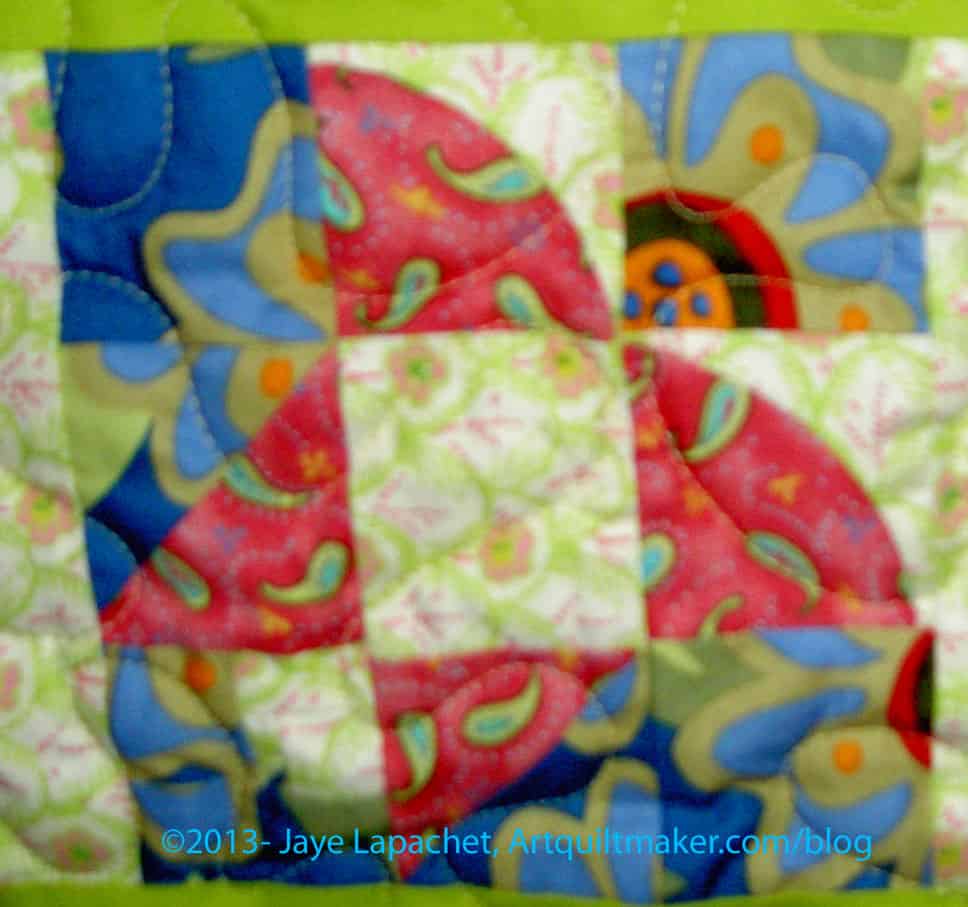
Pinwheel
The pinwheel block is a pretty standard pattern. It is actually a pattern that you can really make look like it is spinning if you place the fabric a certain way.
Again, though, mom has made it her own. The blue and the cabbage rose/bold flower print are an interesting combination.
I really think my mom and I see color in different ways. Again, I wouldn’t have chosen these fabrics together, but they work. It kind of reminds me of the quilt Bill Kerr showed that included David Butler and Jo Morton fabrics together.
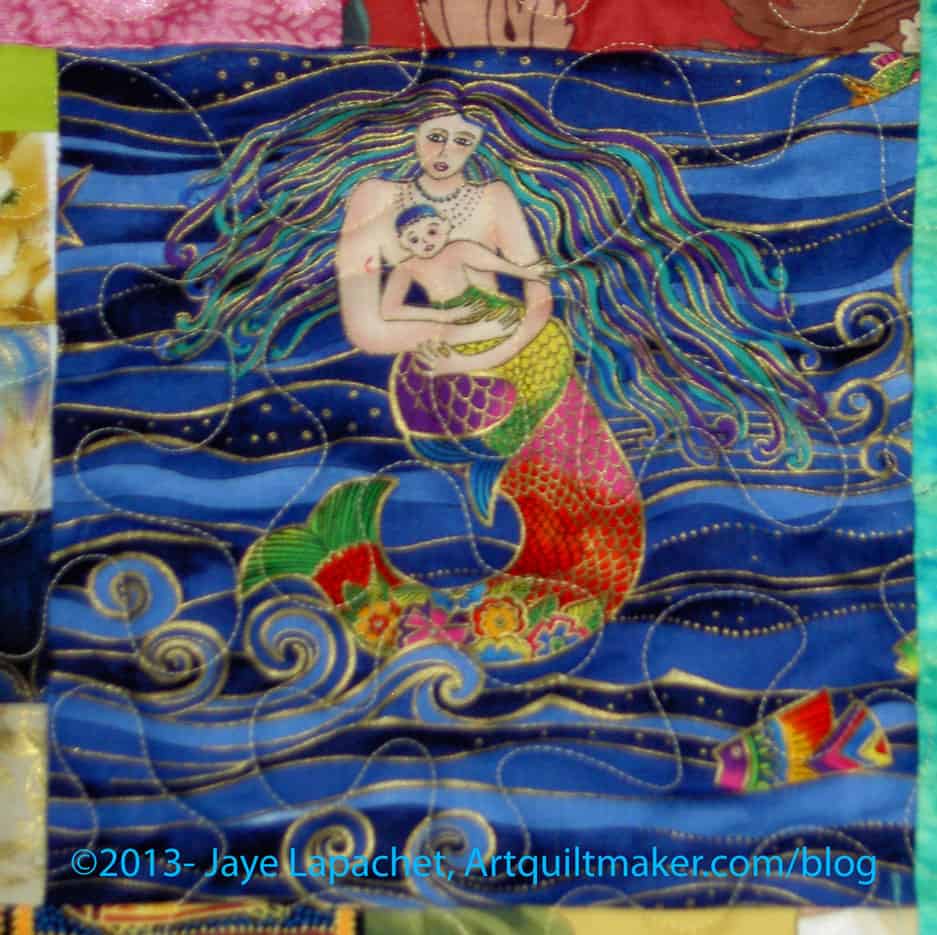
Mermaid Block
The mermaid block is some kind of panel. I have no idea what possessed her to add this to the quilt, but it works. Interesting.
Morning Glory
The Morning Glory block really looks like a morning glory. You can see that the center cannot have been easy to piece. I know that isn’t applique’ and am pretty sure it isn’t paper pieced either.
Improv Piecing
The very bottom block reminds me of one of Gwen Marston’s filler blocks. I also, though I am reluctant to say it, think it has qualities of the Gee’s Bend blocks.
My mom just finished a quilt – well, a month or so ago.
She has a really unique style. If I had to put a name to it, I would call it Gwen Marston-esque, but that isn’t quite right.
Recently she finished a quilt shop’s block of the month program. It was the first she had ever done. This program was made up of flower blocks. I believe it was called Blossom.
Very few people would have set these blocks the way my mom did, but if you have seen any of her quilts, you know this is totally her style.
And it is isn’t boring. She has a great view of quiltmaking and always sees settings and design in a whole new way.
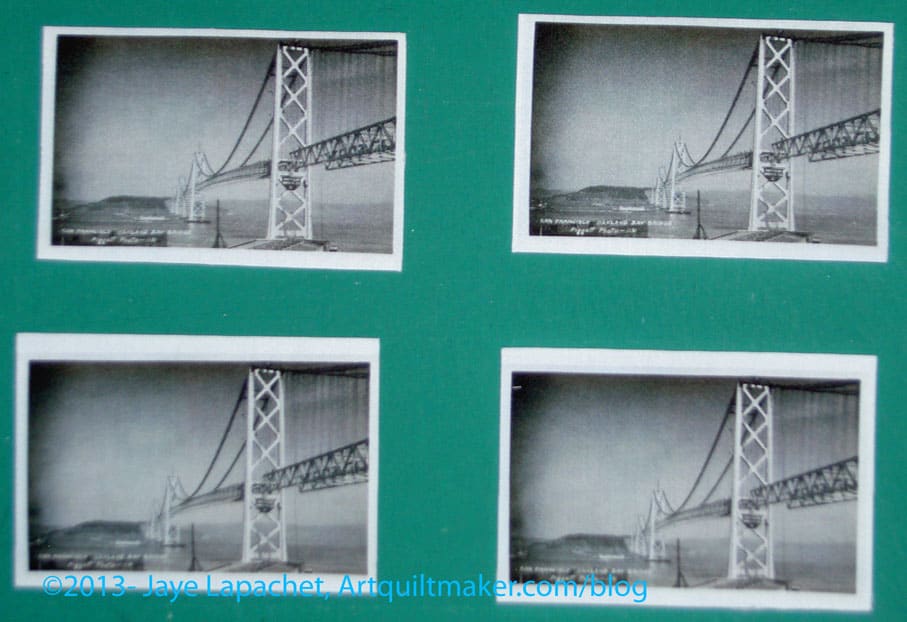
The Oakland-San Francisco Bay Bridge, a main artery between the East Bay and the City, closed on Wednesday August 28 at 8pm forever.
Well, sort of forever.
They replaced it and they had to reconfigure the onramps or interchanges or navigation whatevers.
I started ATCs months ago. I just wasn’t excited about it, but I wouldn’t face it.
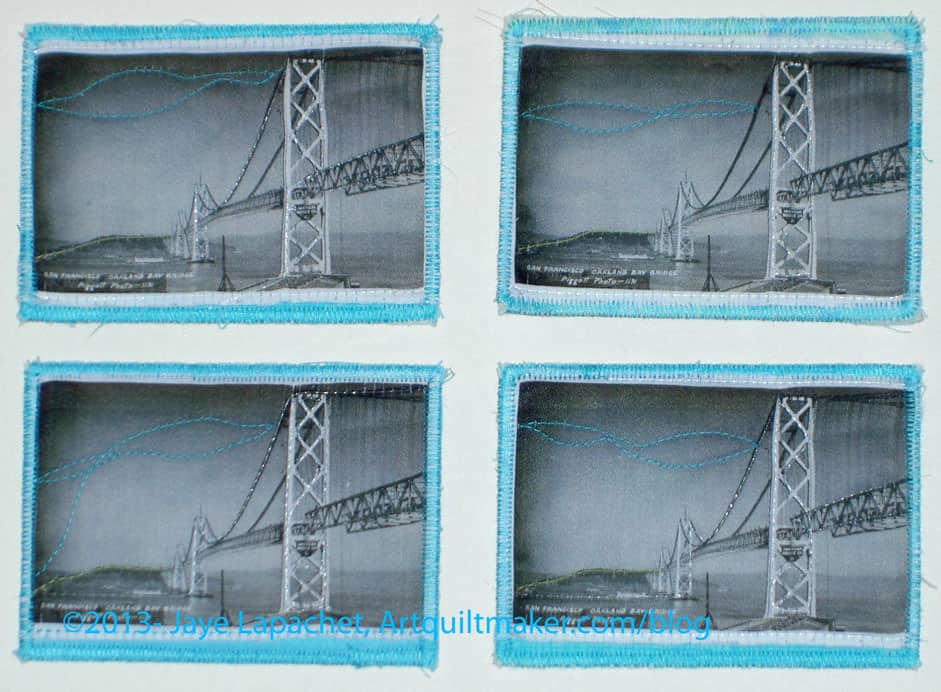
Finished ATCs
Somehow, thinking about the Bay Bridge closure made me get excited about ATCs again. I found a historic photo of the Bay Bridge, adjusted the size and printed them on fabric.
I added some stitching, including testing out the Aurifil monofilament.
Voila!
While you read this, I will be at a CQFA meeting. I haven’t been able to attend a meeting in a while.
I meant to post this right after the workshop and I even worked on getting the photos in shape to be in the post. Life intervened and here it is late on a Saturday morning and I am just getting to post it. You East Coasters are already off doing whatever it is you do at 1pm on a Saturday. 😉
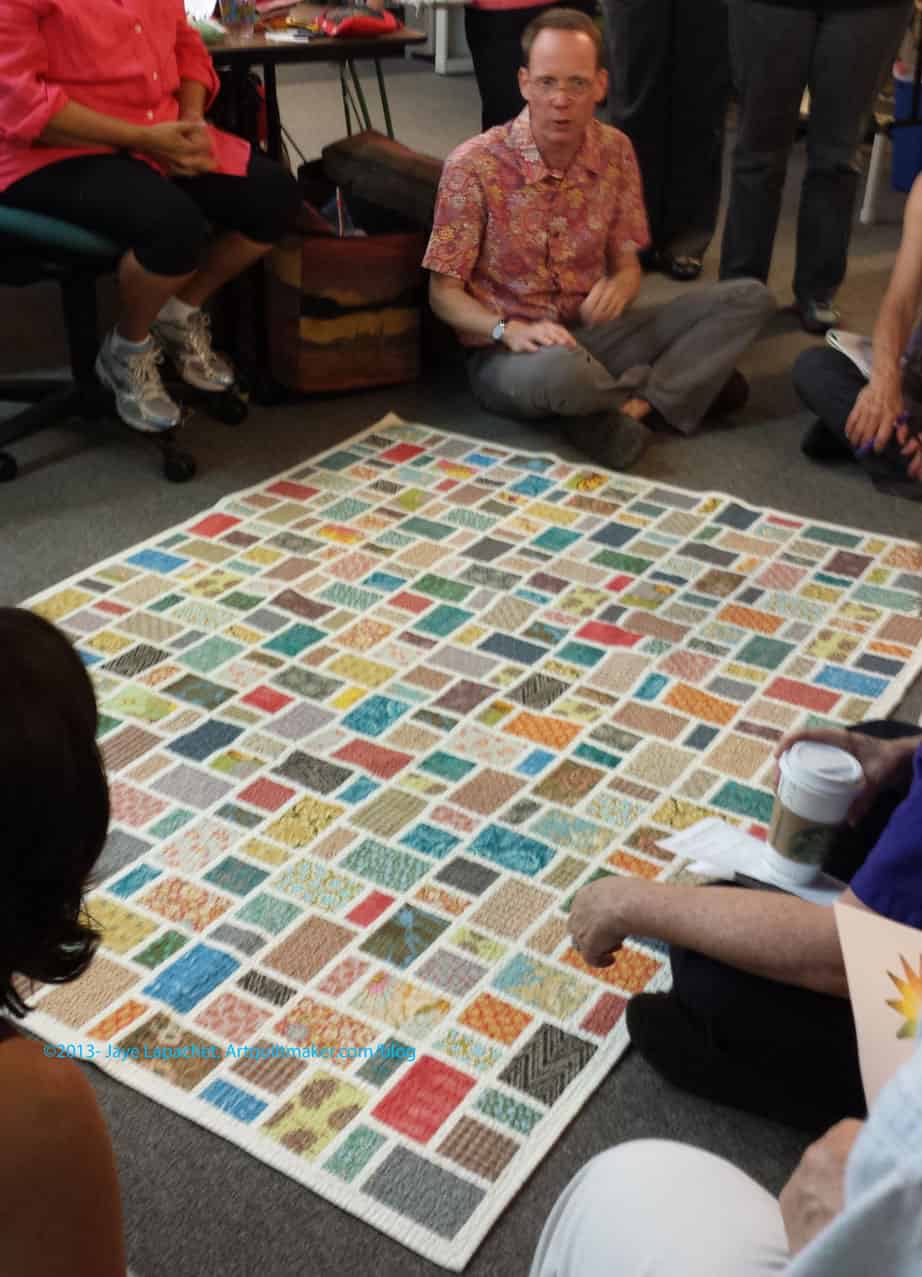
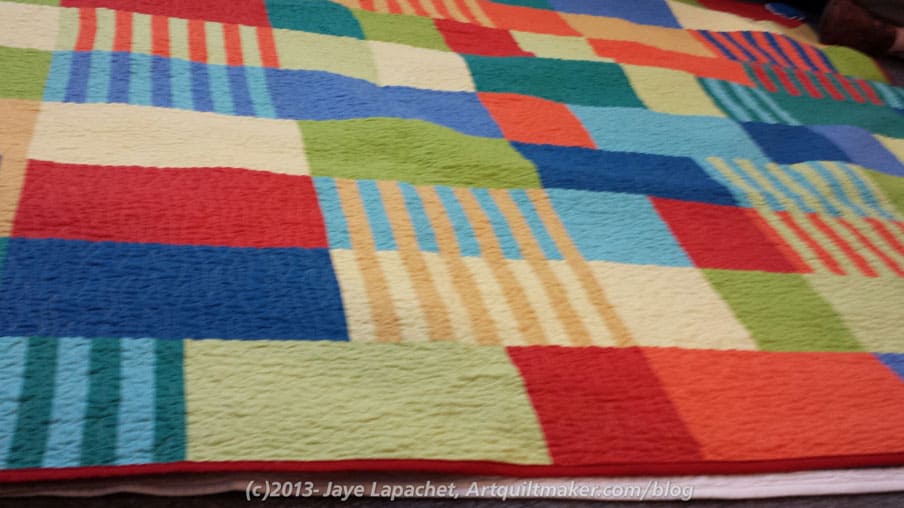
Bill Kerr Quilts
This is the quilt that we discussed the most and made the idea of choosing fabrics for their role in the conversation stick in my head. The thing about this quilt is that each fabric has a role and is related to, at least, one other fabric and is a bridge to another. I really like this idea of bridging fabrics to each other. Even if fabrics don’t look like they fit together in a quilt, there is a story the maker can tell through the fabric. Read the Fabric Smackdown post for more information.
I have been reading through the color sections of the Bill Kerr/ Weeks Ringle books to try and find a reference to this method, but so far I haven’t been successful. I also haven’t found tow of the books, which I know are buried in one of my quilt book stacks, so stay tuned.
I knew all the names of the quilts after the workshop, but now I don’t. If I get them wrong, let me know nicely and I will make the changes.
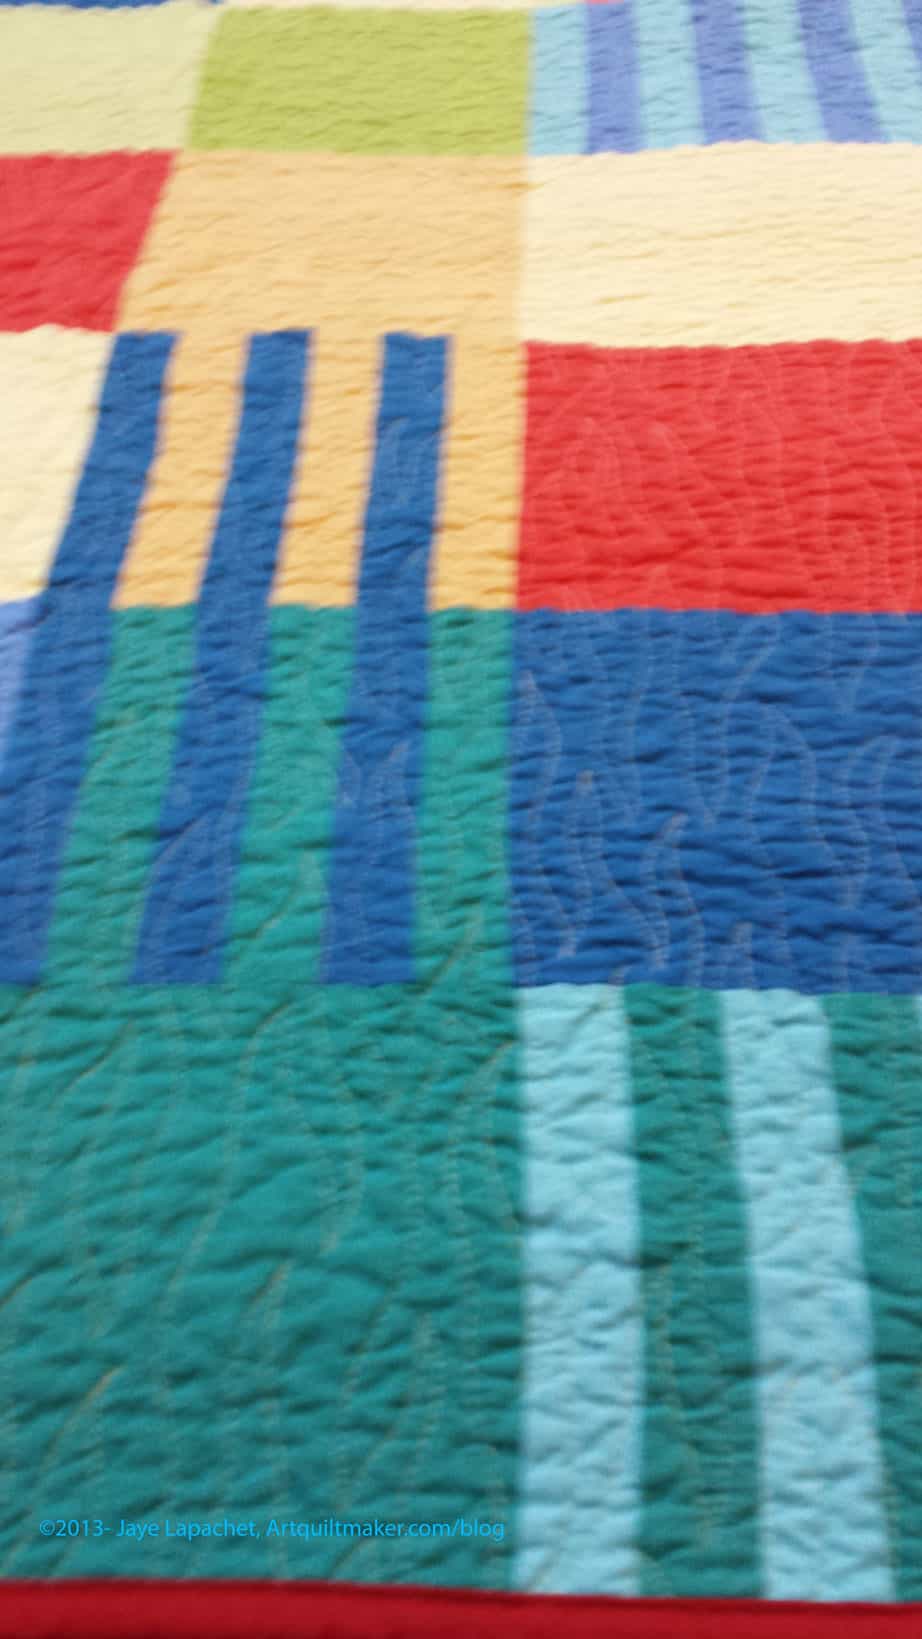
Follow the Leader
One of the questions I have heard numerous times in workshops that deal with using fabrics is how to use the fabulous large scale prints that are so popular now. Follow the Leader is a good example of how to use large scale prints. One of the things that brings these fabrics together is the literal connection of the grey bits connecting the rectangles. He still followed the other guidelines we discussed, but that bit of grey (could be another color) adds a connection.
Follow the Leader
One of the things I found in almost all of the Kerr/Ringle quilts was that my eyes moved around. There was interest in the selection of fabrics in the quilts. Their method of selecting fabrics is a lot of work, but, clearly, for my eye, it works.
There was, also, a consistent message throughout the ‘trunk show’. Each quilt provided another lesson in the same things we discussed at the beginning: scale, pattern, role, etc.
In the detail of Follow the Leader, you can see that fuschia-maroon dot on a greyish-beige background (lower right hand corner). We discussed that fabric a lot. It is related to the paisley on the sea green background. The shape of the dots is also related to the green/gold dot next to the paisley. The relationships are some part of why both fabrics work in that quilt. The class discussed that dot a lot, though, because it was an unexpected choice. Not wrong, but it might not be the first choice when choosing a selection of fabrics.
Kid Quilt
We had an unexpected discussion about kid quilts as well. I am sure many of us have made quilts for our kids (see T-shirt quilt, Eye Spy, etc), grandkids, nieces and nephews or even for Project Linus and other kid charities. The default is something like the T-shirt quilt or a quilt using novelty fabrics. They give us a place to start.
As a parent, I have always tried to talk to my kid like a person rather than a kid. I have also encouraged others to do the same. The conversation we had about kid quilts in the workshop was all about kid quilts that encourage play and grow with kid. In other words, quilt as more than a bed covering.
Duh.
Kid Quilt
The quilt he brought to illustrate this point was made from all solids and would be suitable for a dorm room bed as it would be for a toddler’s play mat. The quilt comes with bean bags and Bill said that Sophie made up a lot of different games using the quilt and the bean bags. This quilt is on the cover of Modern Quilts Illustrated issue 6. I presume the pattern is in the magazine, but don’t have that issue.
I know that I could make this quilt with solids I have on hand. It would be great with tone on tones as well. You could try changing out some of the squares for suitable novelty fabric and add to the game playing fun. I wonder how it would look in black and white fabrics with one color?
Sophisticated Easter
Pam has a series of holiday and seasonable quilts going that she uses to decorate. When I saw this quilt, it reminded me of a stack of eggs and I thought it could be used as a sophisticated Easter quilt in the colors shown or, made with pastels, a more traditional kind of spring quilt. I believe they use raw edge applique’ for the construction. This quilt is still available in the Kerr/Ringle Modern Quilts Illustrated issue 2 and there is a much better picture there as well.
Yellow & Grey Quilt
I think that the quilt is interesting, but what I really like is the construction technique. They made it by sewing the grey and white, then cutting the strips apart and inserting the yellows. I thought that was brilliant. Why make yourself crazy trying to piece those angles if you don’t have to? The quilt is in their MQI #3 issue.
I didn’t know what category to put this post in, so I hope it works for those of you who are category-crazed.
The last time I really thought about this piece was back in June and I really wasn’t thinking about this particular piece, but the Round Robin in general and my piece specifically.
Where did you say July went?
I haven’t been to a BAM meeting in forever, sadly, but Kelly has been a great sherpa for me. Yesterday, I sent off my round robin work along with some cat beds and she will, once again, kindly, sherpa them to the meeting this Saturday. Someday I will see the BAMQGers again.
I wasn’t able to finish the orange and grey donation quilt yet. I didn’t really work on it last weekend. I’ll get back to that as soon as I pick out a blue for the sashing. Apparently, that is the hold up in my brain.
Round Robin
I did make some time last weekend, in the midst of the quantity to do some quality.
This is Chris’ piece and when I first saw it, my impression was that it needed some space. I used the white to give it some space, but didn’t want to just put white strips on, thus the corners.
I also varied the width of strips a little bit so it would have a bit of movement, or viewer’s eyes would move around.
Now that I look at it, it kind of looks like a tulip.
I tried to make the white the same white as in the flowery black/white/yellow print so neither would look dirty. The black on white I added is pretty bright. I think it works. I hope it works, at least. Chris makes art quilts, so she can paint over the white, if she doesn’t like it.
This project definitely involves muscles that are atrophied in me. I am committed to working through all of the pieces, but I am not sure about the project. I am anxious about doing a good. My technique will be good. I hope the design will be, too. I am not sure if my design work fits the piece. It certainly isn’t terrible.
I finally got a chance to see the blocks that TFQ made as part of our Star Sampler project. I hadn’t seen her blocks before, though I did see a few of them on Flickr. There weren’t enough hours in the day for me to photograph them all, so you just get an idea of what she did. I cajoled, but hadn’t sunk to bribing by the time I left, her to sew them together. She was afraid that if she didn’tget the project done by the time she left for vacation, she would lose momentum. She said that is what she is experiencing. Sigh.
The other night, I had the pleasure of a trip to the quilt shop and a meal with Susan from the History Quilter podcast. We had enough time, so I gave her the nickel tour the western part of the City, which is nearest the ocean before we went to dinner. I totally scored, because she had never seen the part of Golden Gate Park we drove around.
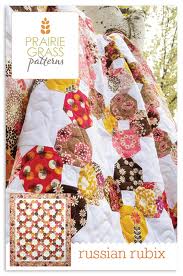
Russian Rubix
Before the tour, though, we visited the quilt store. It is really the only one near enough for me to actually visit without making a day trip. I thought Susan might enjoy a new quilt store and I want to encourage her to get going full force on her quiltmaking. I am dangerous to know in that way. ;-)We had fun walking around the store and looking at the books and fabric. I gave her a mini-lesson on how to select colors, because of a chance comment about how it wasn’t easy to pick out colors.
One of the things I skimmed over at the quilt store, but Susan keyed right into was a pattern called Russian Rubix. The pattern is by April Rosenthal and she has a shop called Prairie Grass Patterns. The quilt shop we visited had made up a sample and it was great.
What is different about the quilt is that the pieces (shown in color in the photo above) are octagons. Big deal, you say? Octagons not hexagons. I love hexagons, especially the Flower Sugar Hexagon on which I have been working. However, everyone creates with hexagons, but you don’t see octagons that often. The parts of the blocks have the octagons arranged in such a way that they look like wreaths. I was intrigued.
Susan, as I said, saw the uniqueness in the pattern originally. She decided to the buy the pattern and we looked at it during dinner. The more I saw of it, the more intrigued I became.
I think that the way the directions are described are not the only way to make the octagons. One can cut squares that will end up as octagons, sew smaller squares to the corners, eh voila! You have an octagon. The only problem is that the pattern doesn’t need squares. If I made squares, I wouldn’t be able to make the wreath shape.
One of the things I love about quiltmaking is the puzzle part of the process. I know I will make some test blocks and figure out the size and the construction method for this piece. I do that as a general practice. I will buy the pattern, but I don’t really need the pattern, because I can figure it out myself. However, I do think that the pattern designer deserves something for her efforts. I’ll get a copy when I go to the quilt shop next time.
Ms. Rosenthal has Rubix Too, a follow-up, quilt pattern in her shop.