I made a few more Scrappy Celebration blocks last week when I was off of work. I think they are coming out nicely. The colors are an interesting combination.
Scrappy Celebration D6
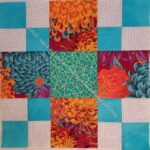
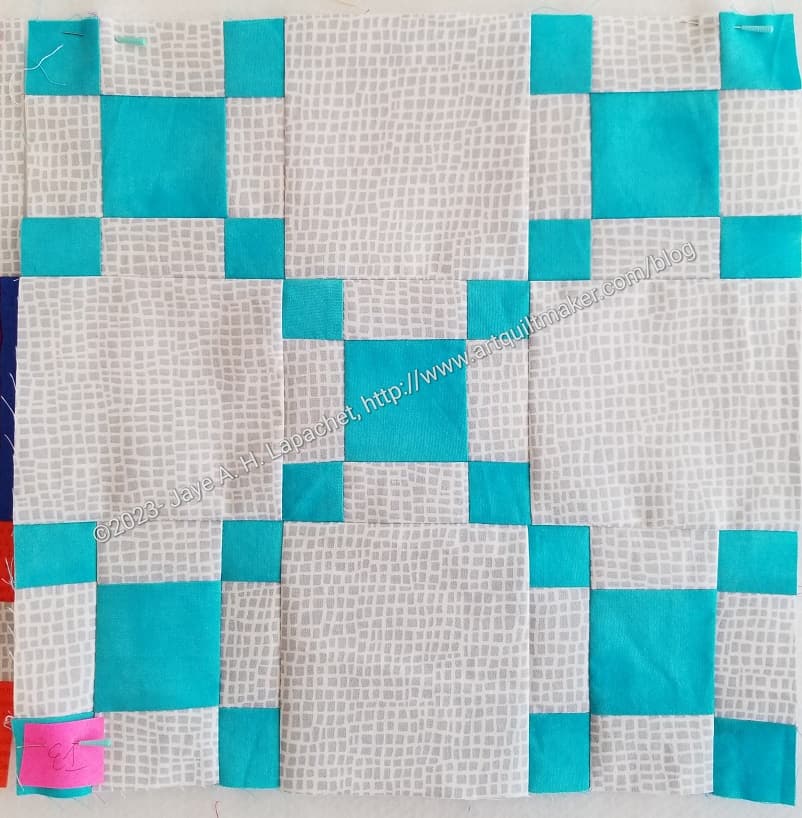
I really like the way this 9 Patch/ 4 Patch combination came out.
I was really good about making several of these blocks last week, but have been off my game on them since the weekend.
I am working to make ongoing progress on the Scrappy Celebration. I now have two full rows and ideas for more blocks.
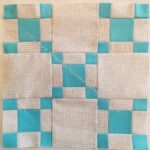
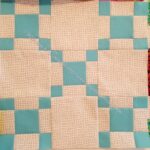
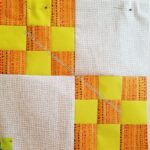
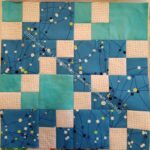
9 Patch with large center
Scrappy Celebration, 9 Patches within a 9 Patch
I made the 9 Patch with large center with a different fabric this time. I wanted to do it before and I may switch this particular block with the D2 block. I was inspired by the other 9 Patches within a 9 Patch block to use the orange for the larger patches.
It is a good thing that I chose good fabrics for this quilt, because the piecing is super easy and not interesting. I don’t know if it was the best choice for my ‘next project’ after finishing most of my UFOs. Still, it is a project and I will continue.
Scrappy Celebration A3
Scrappy Celebration F4
Scrappy Celebration F2
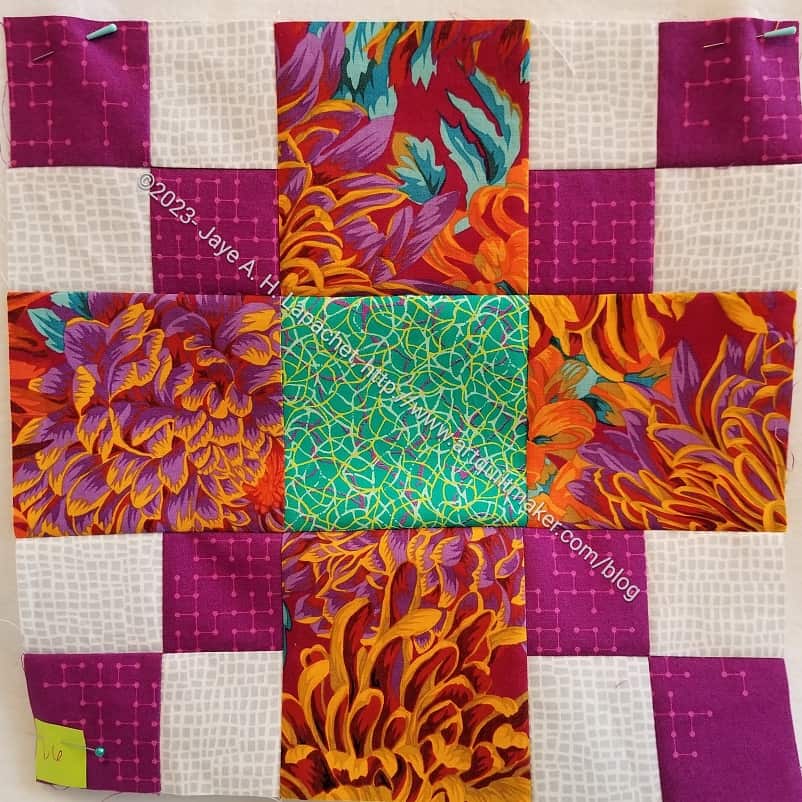
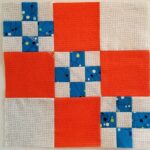
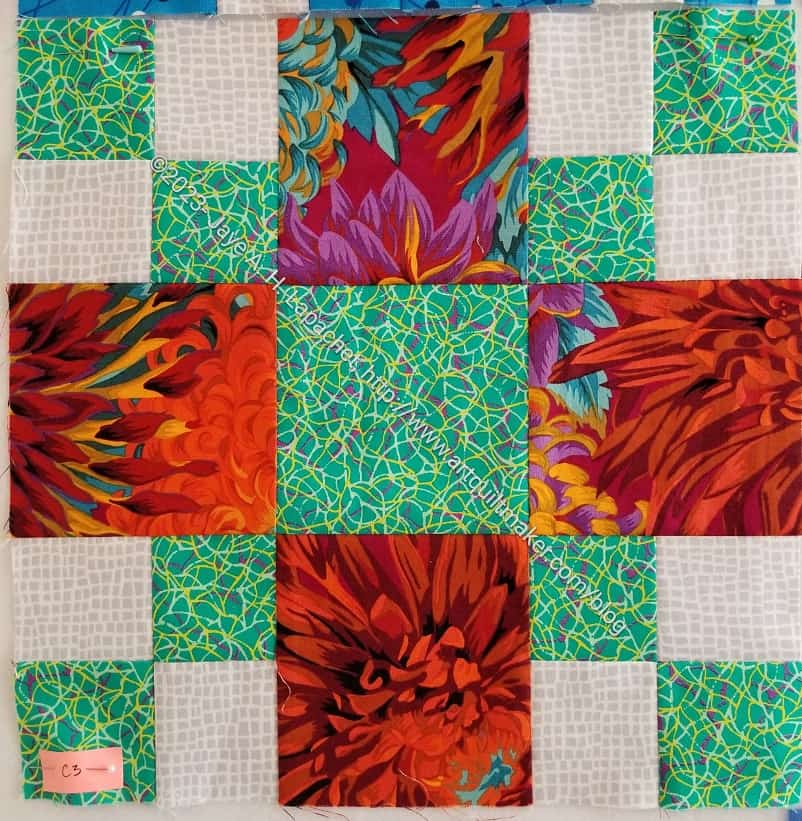
The Philip Jacobs Chrysanthemum print in those Autumn colors is really growing on me.
I have decided to use the Chrysanthemum print in the same block design, combined in different ways throughout the quilt. I may use it in other blocks, but primarily, I will use it in that block design.
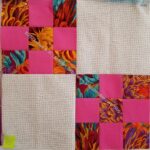
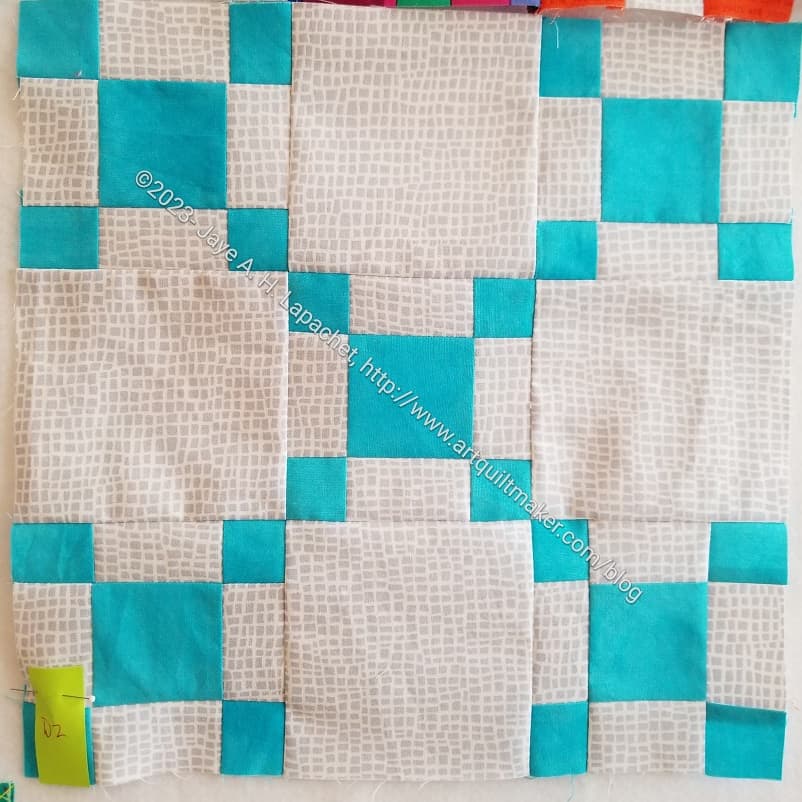
Scrappy Celebration C3
I am not 100% on board with my first use (C3) of it when I used the same fabric in the center as I did in the Four Patches. I like the one above much better. The combination of the colors in the Chrysanthemum print and the turquoise is stunning.
So far, I have made 18 blocks of the 56 I need. I think this will be quite the large quilt.
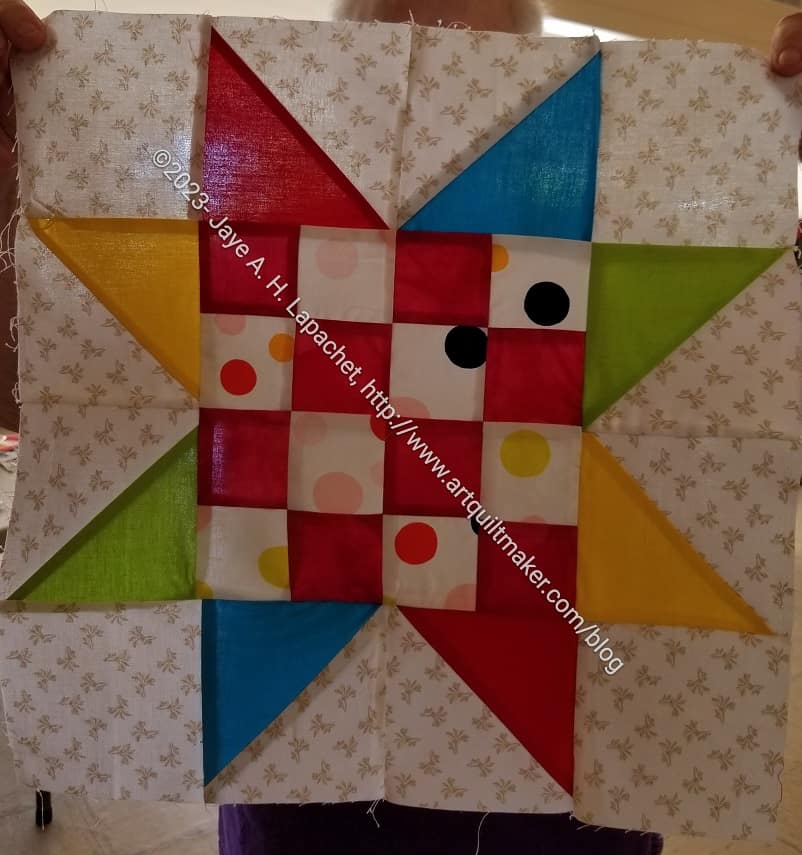
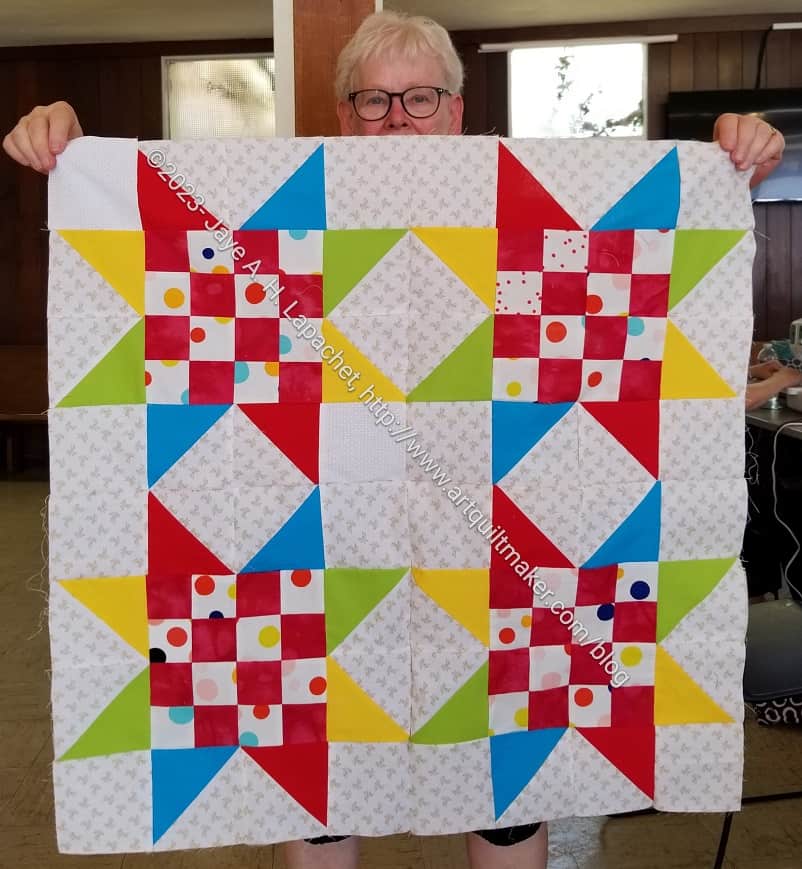
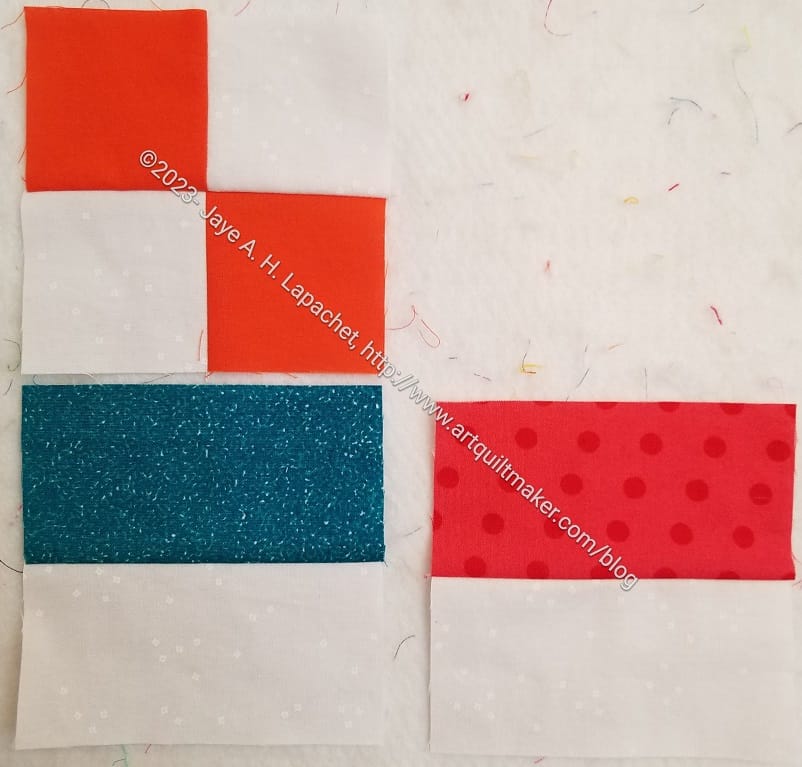
The other day I showed some red and dot donation blocks. I brought them to hand in at sew day and Peggy immediately grabbed them. Very quickly, she came up with a block with my donation blocks at the center.
This is such a cheerful block. I love the way she used HSTs instead of Flying Geese to vary the color of the rays of the star. I would say the block is probably 16″ in this form, but I didn’t measure.
Sawtooth Star donation top
As the day wore on, Peggy continued to work. Midafternoon, she came up and showed me the quilt top made with my block at the center.
I know I say this all the time. I love this about the guild community quilt program. I can hand in something half finished and Peggy or someone will take it and make something fabulous.
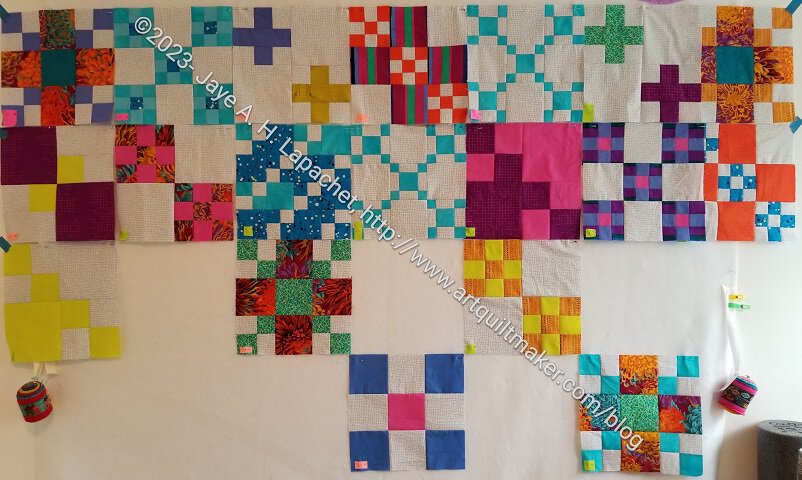
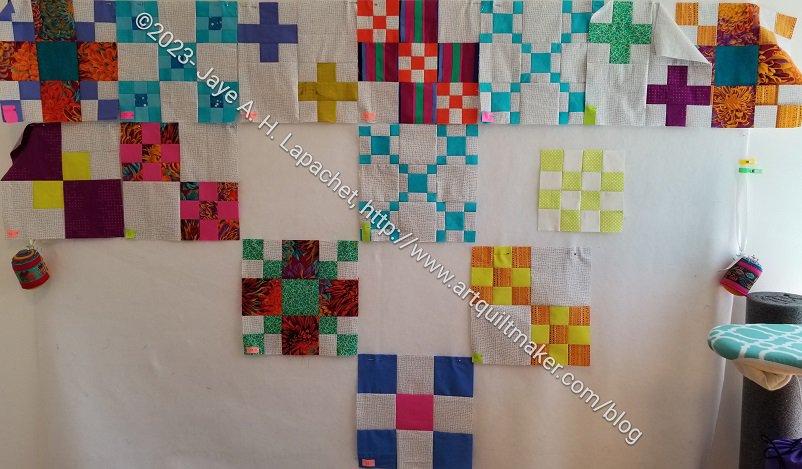
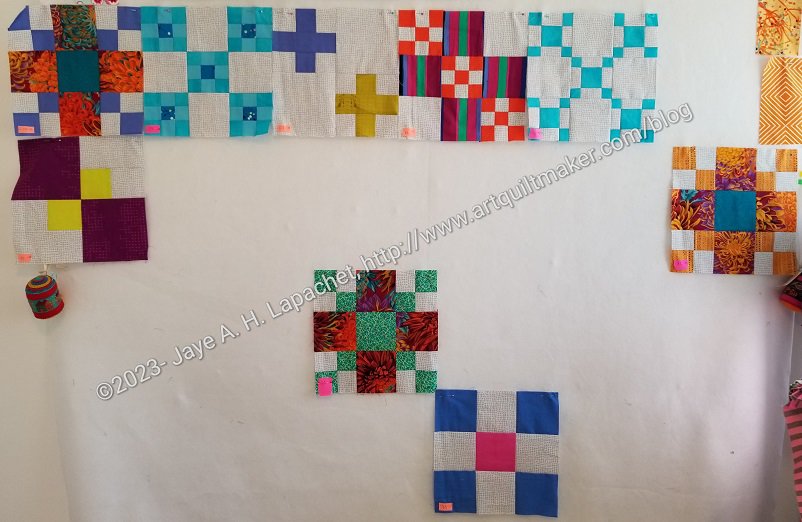
I focused on getting some more blocks done for Scrappy Celebration over the weekend. My design wall is looking good even if I have to layer some of the blocks. I do need to move them all up and will probably do that today.
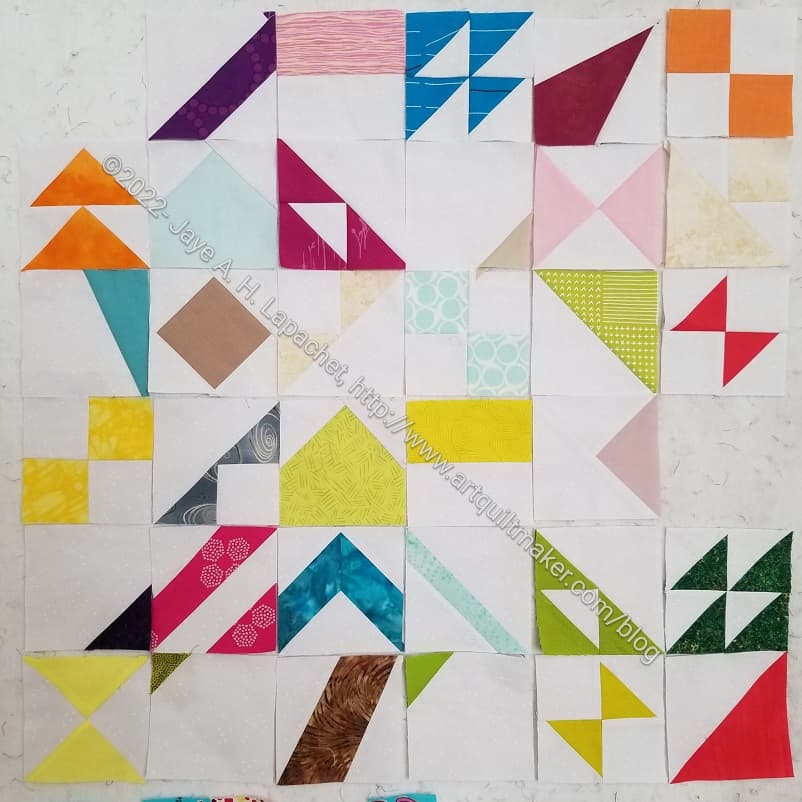
After the meeting on the weekend, I cleaned out the Chubby Charmer I take to the meeting and found a bunch of stuff leftover from Retreat in the bottom. Among the items was a bunch of Pantone Project blocks that Julie made. She must have handed them over at the Retreat.
This group looks very Fallish/Autumn-like to me.
I feel terrible that they have languished unremarked upon for weeks. My only explanation is that I left for a business trip only a few days after I returned from the Retreat and really didn’t do a great job of putting everything away.
I have some fabrics chosen for some blocks for Julie and I am determined to get some done.
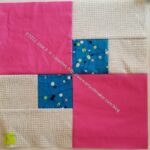
After encouraging my sewjo a little bit with the Spiky 16 Patch, I made some more blocks for the Scrappy Celebration quilt.
I have to admit I was dreading this block a little bit because the first one took so long to sew. I concentrated on chain piecing this one and it went more quickly.
I did forget to use the other blue fabric, so it looks the same as #1. Still, it is done and I can move on to other blocks.
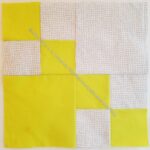
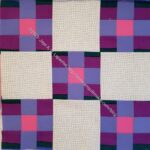
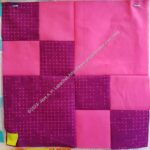
Plus block #2
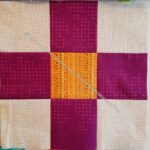
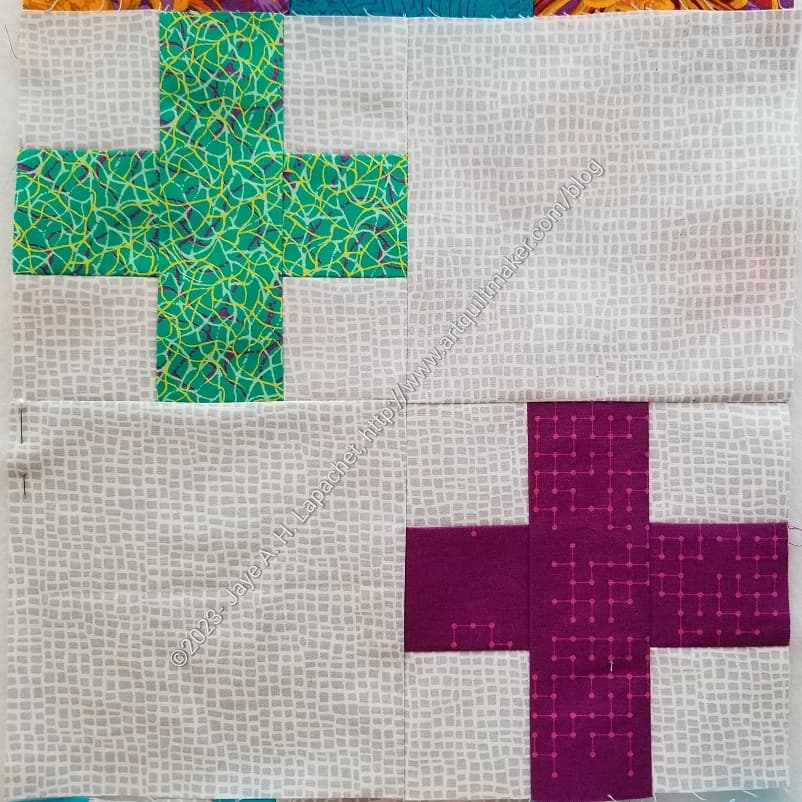
I also made the second Plus block, which completes the top row. Unlike the 9 patch above, I have decided to make the Plus blocks different colors. Well, I have decided that the pluses will be different colors. I have been longing to use that emerald green again, so here it is.
I like the combination of the red-violet and that emerald.
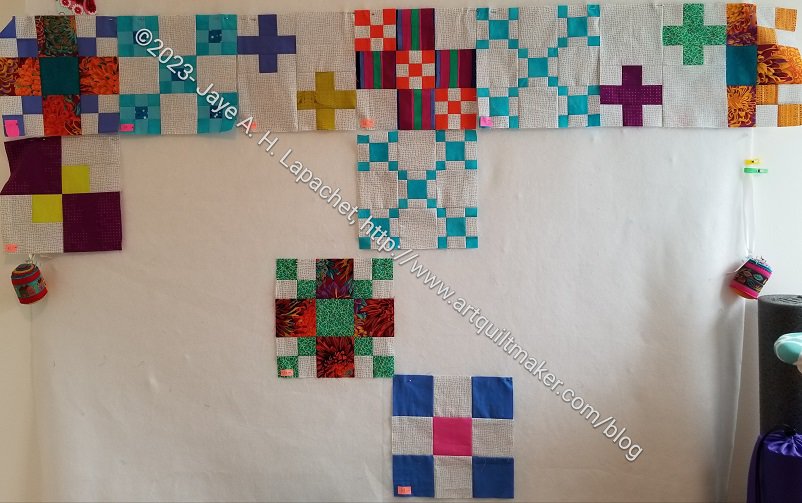
Scrappy Celebration blocks – June 2023
I moved some of the blocks around so the completed block layout I have looks different now.
Not a lot of progress, but over a small hump and progress is progress.
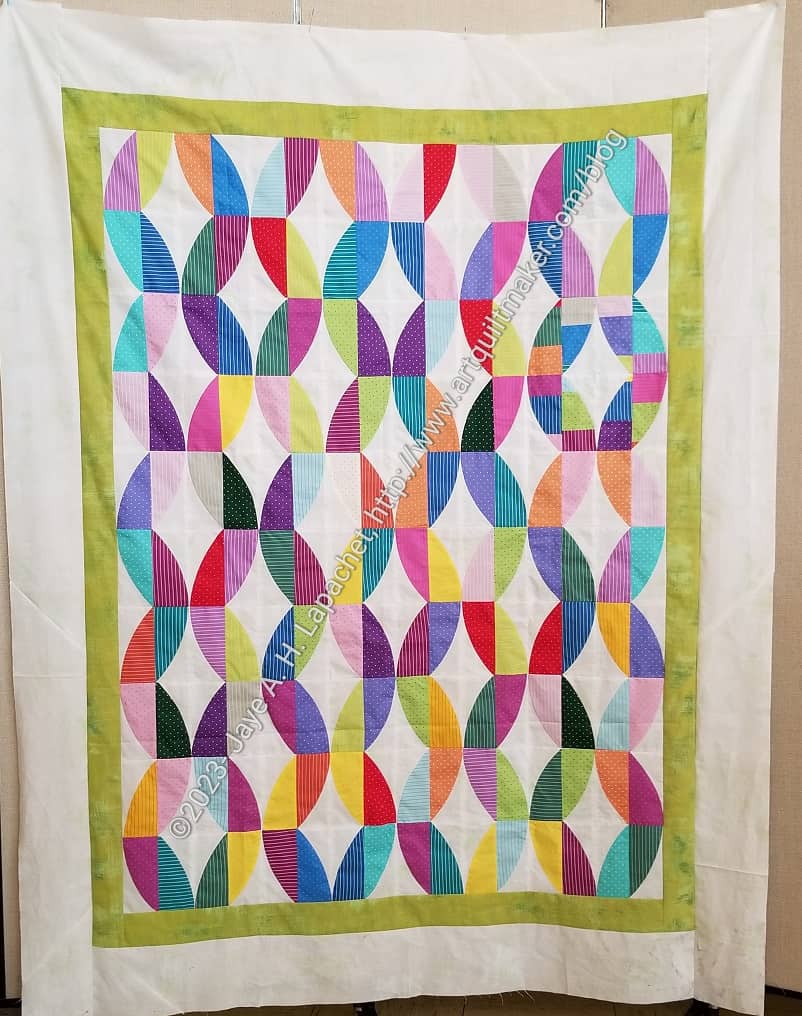
Metro Twist** is another pattern by Sew Kind of Wonderful that uses their Quick Curve Ruler**. You might remember that I made Metroscape** a few years ago with this ruler.
At the last Sew Day, she was putting on borders and preparing the top for quilting. I was able to take a photo of the quilt and it looks great!
I didn’t really realize how popular this project was until I heard that Amy will be teaching the guild how to make it at the next Super Sew Day, in July. I also had a clue when Mary C said that a bunch of people bought the pattern and the ruler after seeing Amy’s quilt.
I talked to Amy and offered to help her teach. She hasn’t told me what she needs me to do yet, but I am kind of excited about it. I really need to find some fabrics I want to use. I love Amy’s choices of Tiny Dots and Tiny Stripes, but I don’t want to copy what she did.
The quilt on the cover of the pattern isn’t super appealing and I don’t think the Tula All Stars (if even still available) would work for this pattern.
**Obviously, you should shop at local quilt shops and small businesses. However, if you are too busy or can’t find what you need there, I use Amazon affiliate links and may be paid for your purchase of an item when you click on an item’s link in my post. There is no additional cost to you for clicking or purchasing items I recommend. I appreciate your clicks and purchases as it helps support this blog.
I had planned to get more blocks for this project finished over the long weekend. In the end I only finished one. It has about 50 pieces. I finished a few other projects, so I don’t really feel that bad.
I need to make another one of these blocks and am trying to decide if I will use the same foreground fabric or a slightly different one.
I have about 9 blocks out of the many that I need. As I have said, the piecing isn’t difficult, just a little tedious.
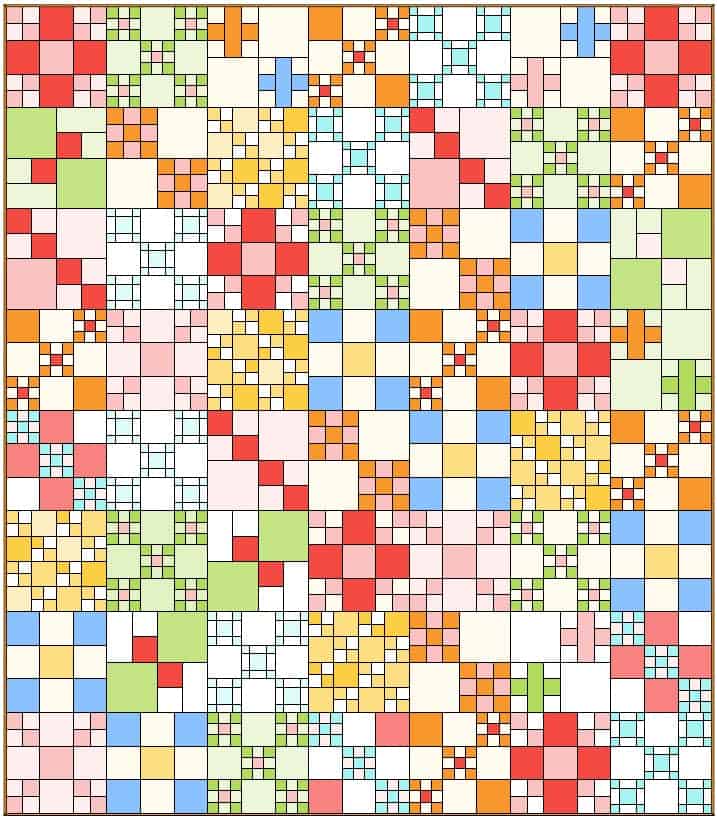
Scrappy Celebration is the name of the quilt I started at the Retreat. This one was not on my list, but I saw it in a recent American Patchwork and Quilting magazine and thought it looked interesting.
It was also easy to ease back into series piecing after creating so many bags.
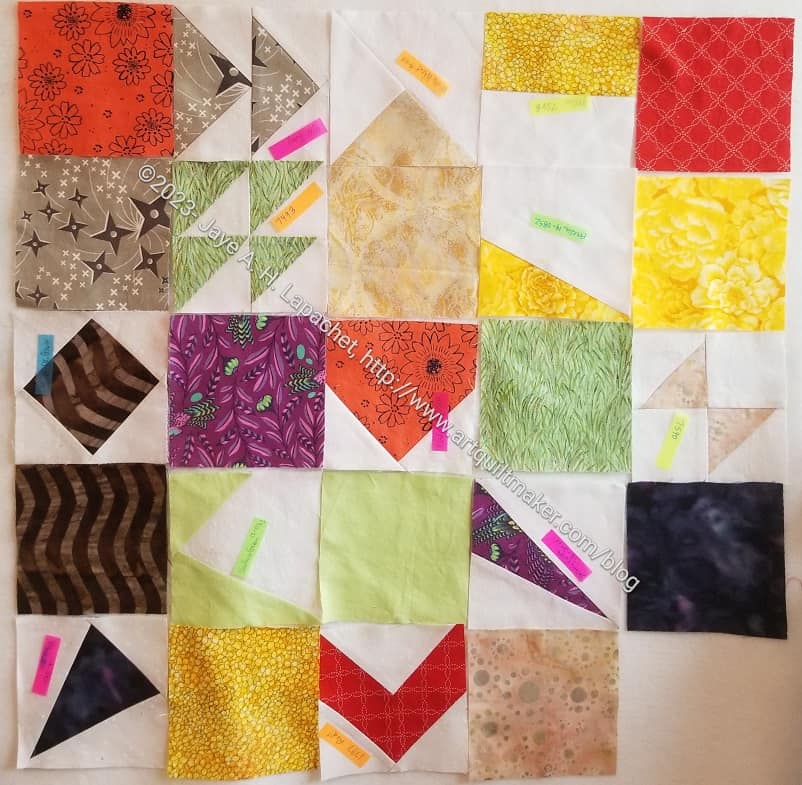
Scrappy Celebration – first blocks
I was able to make about 8 blocks, but cut a lot more pieces. As you can see this quilt is made up of Nine Patches and Four Patches.
I used some fabrics I bought in Washington when Mom and I went to visit the YM. I had put together a fabric pull to which I added a grey background and I think it looks good. I am going to try to vary the centers from the four patches (top left) so the Nine Patches with Four Patches look more like the block in the upper left corner). I haven’t had time to work on it since the Retreat, but it shouldn’t take me very long in general. The cutting is the worst part.
I received a nice package of blocks from Friend Julie the other day. It is so interesting to see these blocks. Julie mentioned that it looked like a real project now when she posted about the blocks I sent to her last week.
I can’t really see what they will end up looking like, but I can see that they will end up as something. I can see the possibilities now.
I have received more postcards and need to match them to fabric. I might be over the hump of fabric selection being a big barrier. We’ll see how it goes with the next group.
I worked all last weekend on the Pointillist Palette #4 project. I made good progress, but I am not feeling any connection with this quilt. I was quite enamored back in the day, but time did not look kindly on this project. I don’t sincerely dislike it, but I also don’t understand why my younger self loved the concept so much. I guess I need to think about how my quiltmaking has evolved and what makes up my quiltmaking.
This cements my resolve to not let projects linger.
Pointillist Palette #4: blocks in process
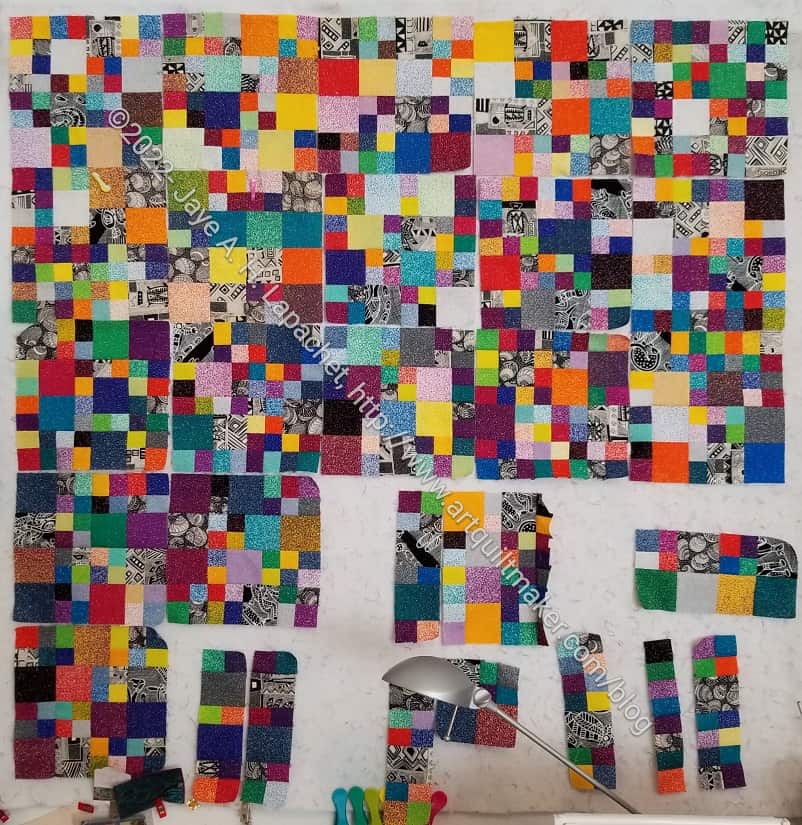
So, I worked hard on finishing the blocks for this project.
The piecing is super easy, just a lot of straight stitching in long chains. It is going quickly. It is good after the other projects I have worked on recently.
For this quilt in the series, I want it to be dark, thus the black and white aboriginal prints. I stopped using the lighter parts of the ombre fabrics to get that darkness, but there are still a lot of light fabrics in the quilt. I wonder if I will have to resew some blocks.
I have had this project on my list for awhile. I show the original drawing in one post that also calls this piece part of a CQFA placemat challenge. I discussed working on it after I did some stitching. I showed it at a CQFA Art Walk. It seems that 2019 is the last time I worked on it.
The piece is small and I kept chiding myself for not just doing it. The muse, however, is a fickle mistress and she was not interested in this piece for a long time.
The Lobster with potential blocks
Finally, she allowed me a flash of inspiration and I ran with it. I have started piecing it into a table runner. I need more table runners for my buffet and I thought this would make a good one for summer. Also, I could admire my lobster more frequently.
I always like the Sawtooth Star block and thought it would work to make the table runner a little longer. I put some pinwheels inside the Sawtooth Star’s center just to make it a little more interesting.
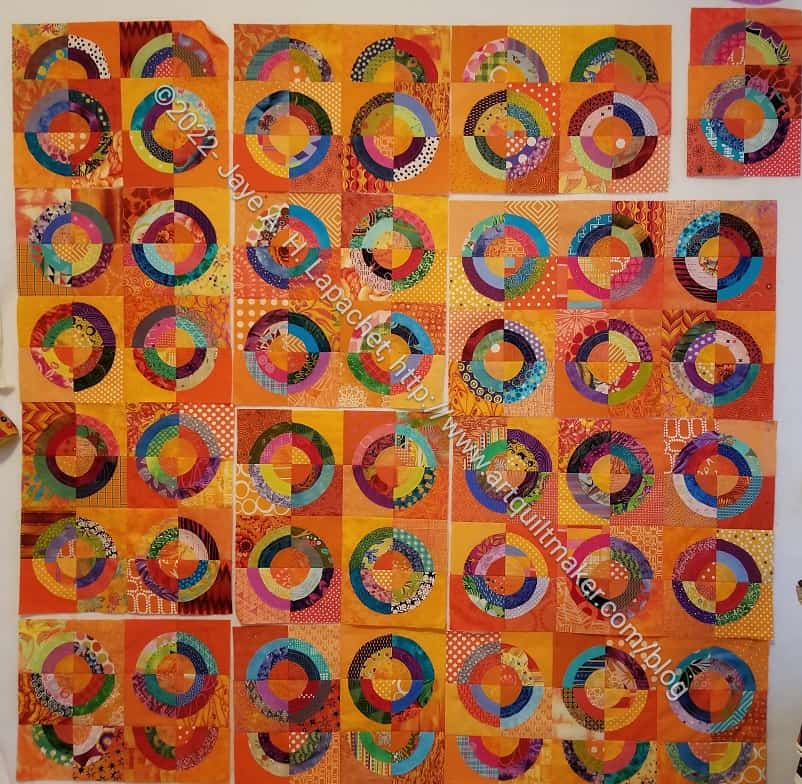
I know it is all Orange You Glad all the time right now. I am almost done piecing the top.
I spent the last few days chunking the top. I have many chunks and the piecing is going much faster. I’ll probably be able to finish piecing the top tomorrow or the next day. Life gets in the way of sewing.