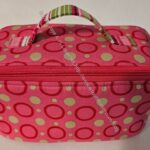
When I sewed the Bone Enigma I followed the directions exactly with regard to rivets. The directions say to add rivets before assembly. The rivets can go anywhere, but I wanted to put them on the ends of the handle, just to reinforce it. It is at the stage of assembly shown in the photo where the directions say to add rivets.
Peony Enigma with rivets – full
This is great except for Enigma bags already completed. I decided I wanted rivets on my Enigma bag. The bag is already complete, so I consulted with Mary and we decided it could be done. We had to squish the top a little, but the overall procedure worked and my bag now has rivets on the handle.
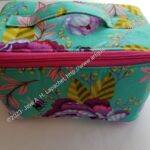
Peony Enigma with rivets – detail
I wanted silver, but Mary thought a gunmetal finish would look better. I am pleased not to worry about ripping out the handle.
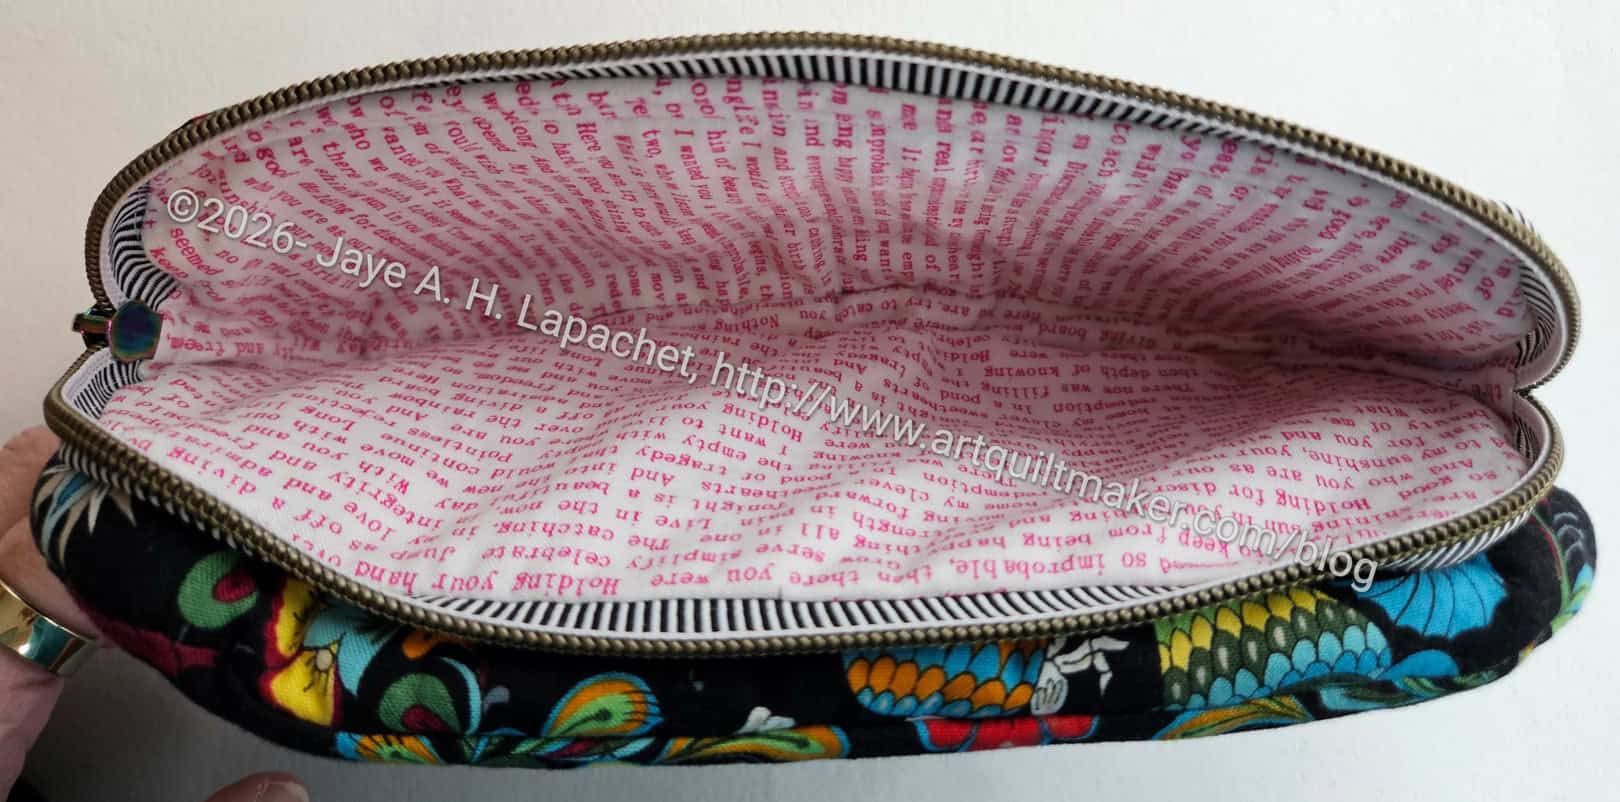
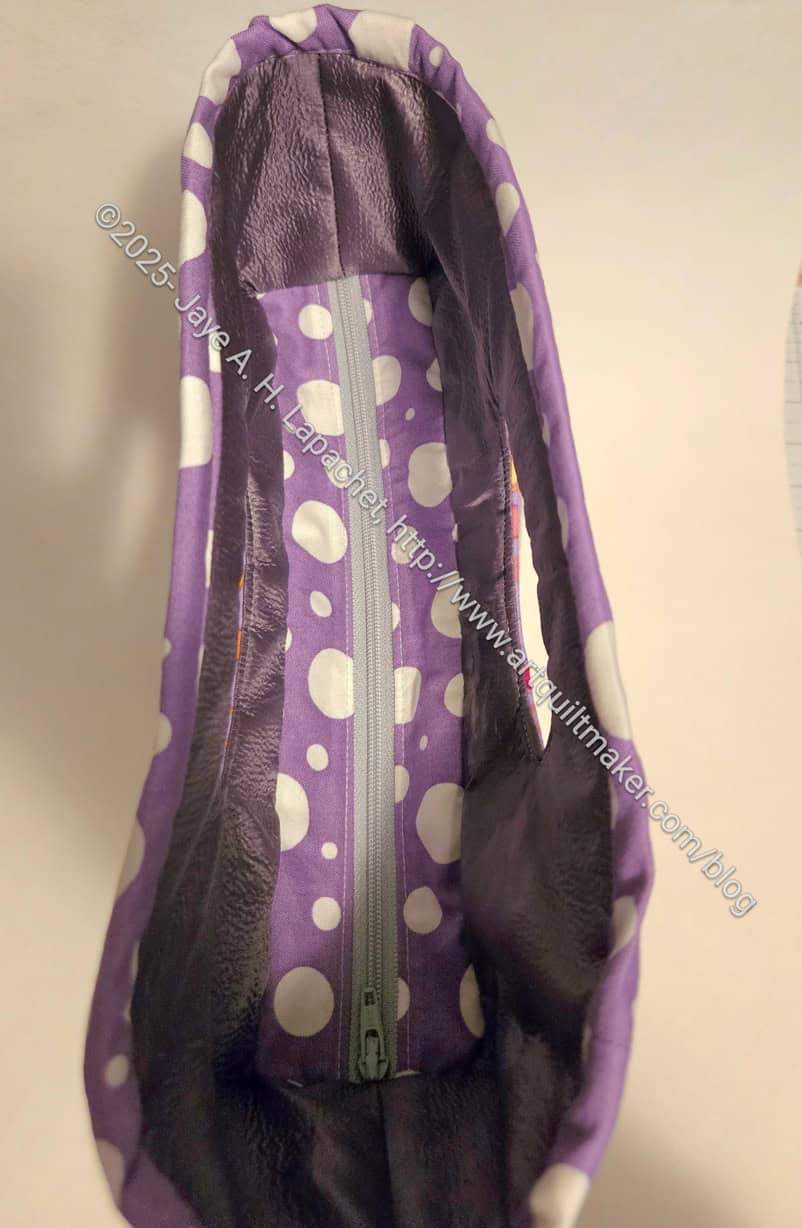
I finished the Tadpole I made for Gerre’s International Women’s Day celebration. This is another Sew Sweetness pattern I bought and hadn’t yet made. I made this one at the same time I made Carrie’s.
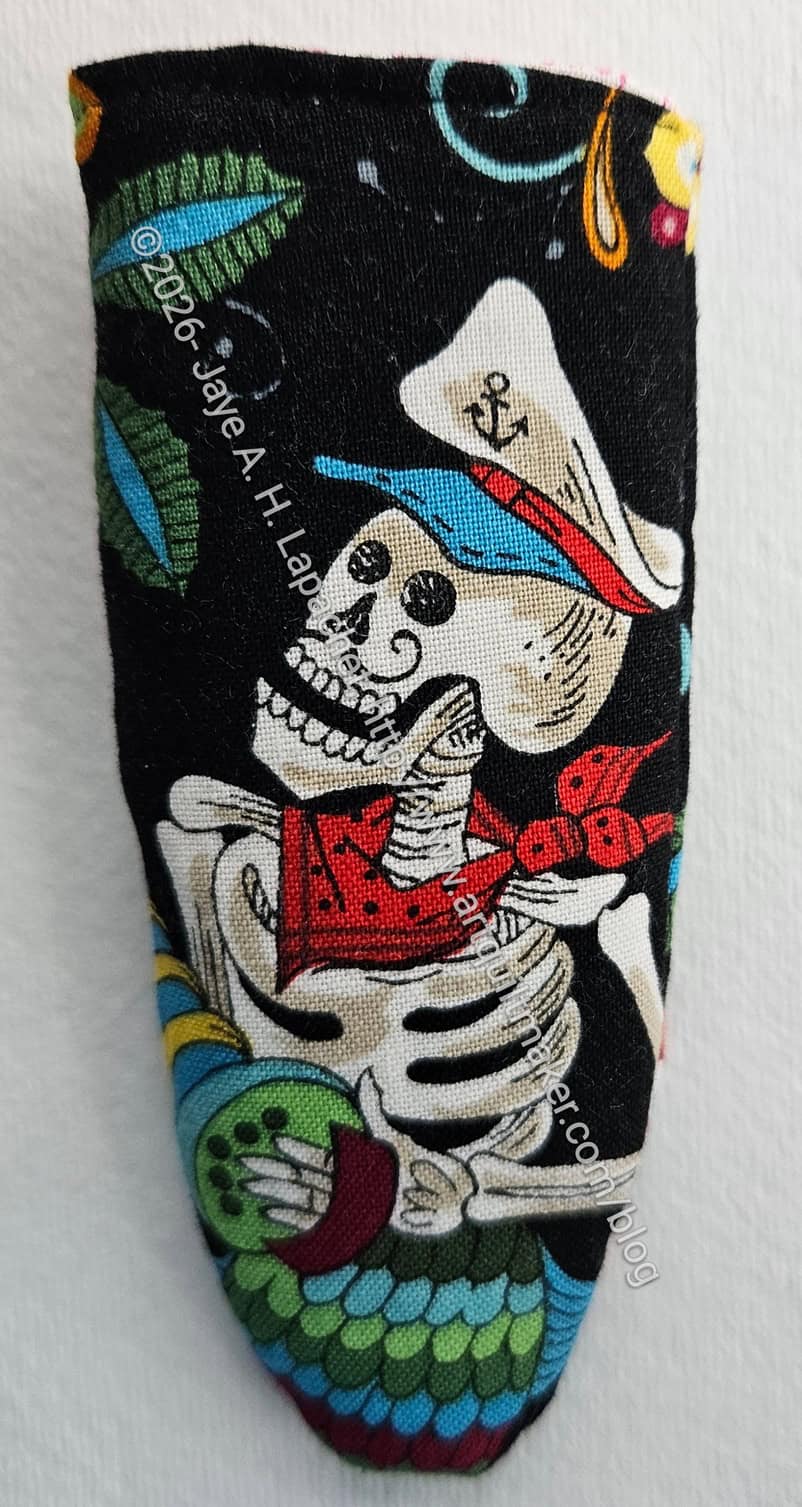
Gerres’ Scissor Sheath
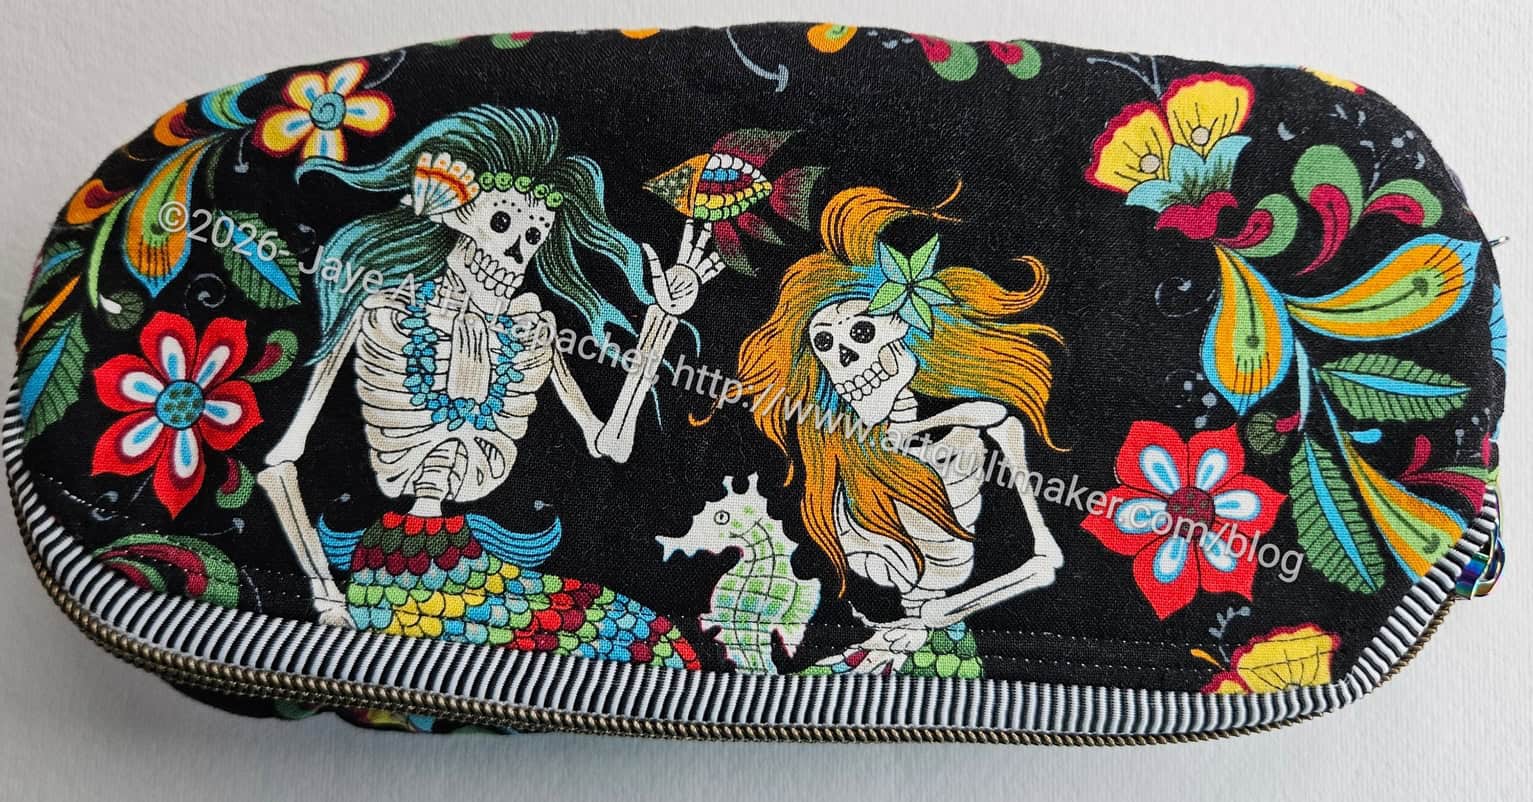
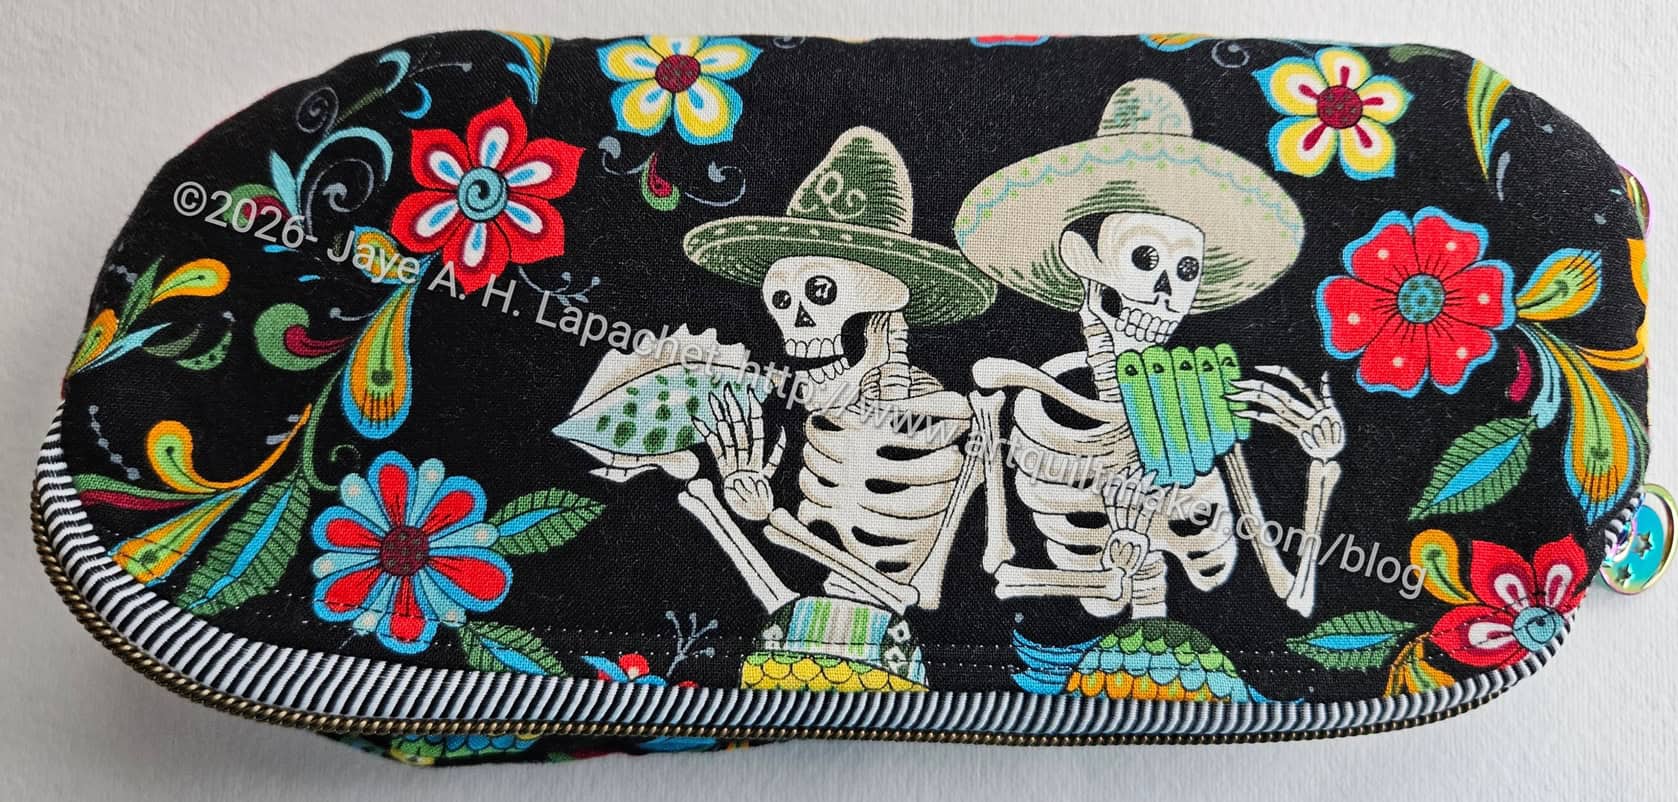
The fabric I used was the same used for another of Gerre’s bags, the Enigma Pouch. I am not a huge fan of this fabric as it looks a little too creepy for me. However, first, I am almost out, and second Gerre said she really likes it. I decided to use it up and then I can get back to the Alexander Henry Dia de los Muertos fabric I also use for her gifts. Yes, I have used a few different fabrics for her gifts. She was the first one, I think, for whom I started making sets of bags. It took me awhile to settle into the process.
This fabric does provide some good fussy cutting opportunities. Since I don’t have much of it left, I am using all the bits.
Gerre’s Tadpole other front
This pouch is more 2 sided than Carries, because of the fussy cutting opportunities. It is interesting how different the two sides are. However, all the figures are skeleton mermaids or mermen. I mostly cut off the tail of them. I suppose I could have turned the fabric 90 degrees and included the tail. Considering the design of the pouch, that might be a better way to orient the fabric. I guess I’ll have to make another one to see. 😉
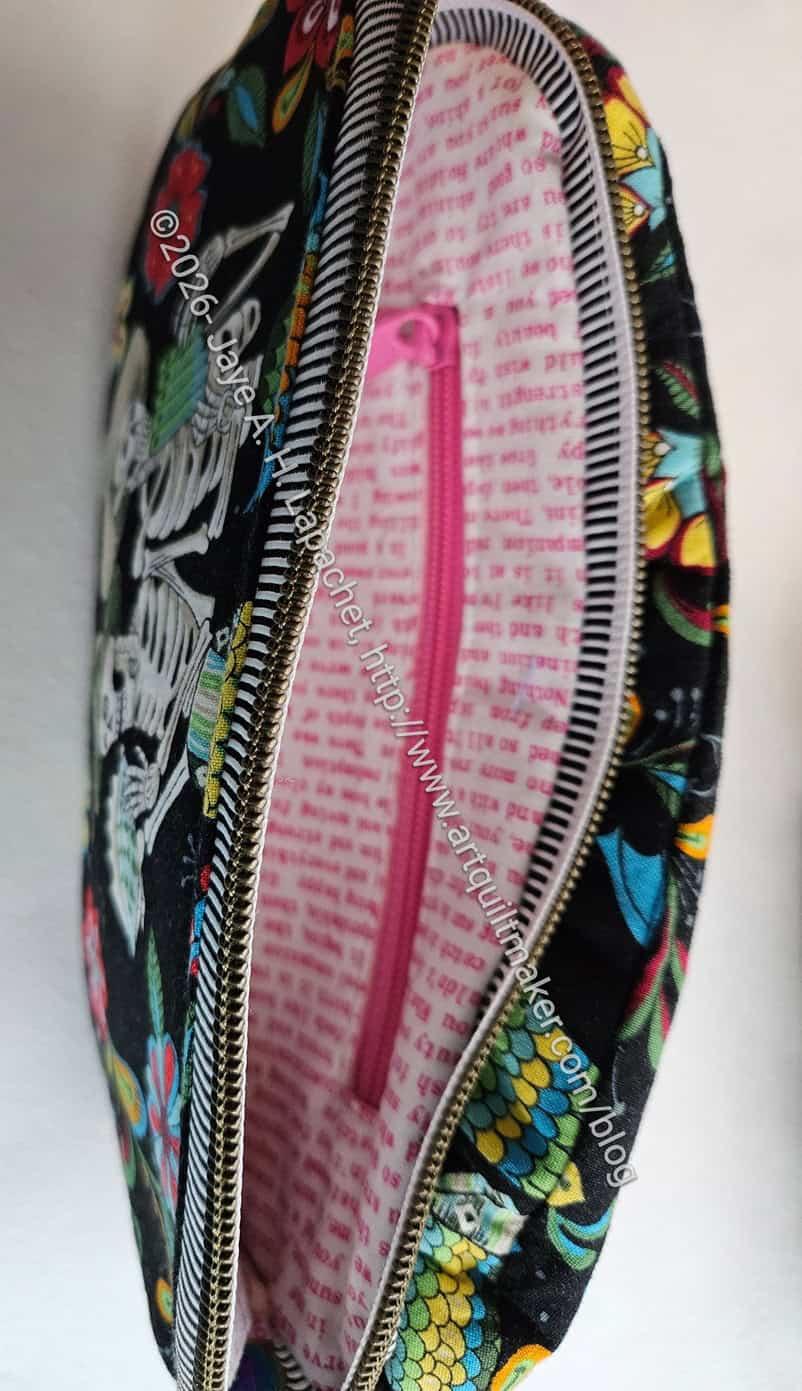
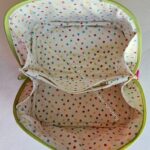
Gerre’s Tadpole interior
As mentioned, I followed the pattern exactly, which I might not do if I make this again.
I also put an interior zipper pocket on one side of the pouch. I think this pocket could be used for extra rotary cutter blades. They might not be obvious, but a reminder could be using this same side for a rotary cutter.
Gerre’s Tadpole – interior
I am paying closer attention to making sure the linings are not saggy baggy. I am pleased with the way the pockets came out.
Two Tadpoles – front
Two Tadpoles – other front
Both Tadpoles look good, I think. I need some practice to make them better, but this is a useful pouch.
The Tadpole is a pouch that I bought as part of a 4-pack with the Cosquilla pattern last June. I am glad to say that this isn’t the first time I have made a bag from this 4-pack.
Carrie’s Tadpole front
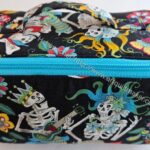
The Tadpole (weird name, I know) is a useful pouch with two pockets that can secure scissors, rotary cutters and other similar types of tools.
Tadpole with interior zipper
One pocket is on the top and the other is on the bottom so you have to kind of flip it around to get at both zippers.
One of the pockets includes a small internal zipper pocket. This pocket could be added to both of the larger zipper pockets. I am not sure what I would put in that interior zipper pocket, but I do think that, generally, the more pockets the better. In this case, that might not be true if I were to put something in there and then lose it or forget about it. I look forward to seeing what Carrie says.
Tadpole open with sheath (Carrie)
The pattern includes a scissor sheath. I bought Carrie a nice pair of scissors to go with the pouch and the sheath can be customized to fit the scissors. I wanted to do that, but I didn’t want to open a new pair of scissors. I am not 100% sure the sheath is very useful with sharp scissors. It is definitely cool to have a matching scissor adornment, but I am concerned that sharp scissors will cut through quilting cotton. I might make the scissor sheath out of cork or pleather scraps in the future. It wouldn’t match, but it might be useful.
I made this first one in the fabric I use for Carrie, the Carrie Bloomston Color Theory fabric. I was able to use some smaller pieces, which was nice.
I forgot to post about the lunch bag I made for Friend Julie for Christmas. This was a project from Minikins Season 1. Season 1 includes the I Spy pouch pattern, which is one of my favorites. The Cotton Candy pouch is another of which I have made several. I knew that I had this pattern when I decided to make her a lunch bag.
I noticed that she was carrying her lunch around in a plastic bag. There is nothing wrong with plastic bags, especially with messy food. I thought it was odd. I thought I would try this pattern and hope it was a useful bag.
Morsel Handle
The first thing I did was get some ripstop nylon in order to make the inside sort of water resistant. I was inspired by Lynette using it for her Oxbow. Hers came out flat and beautiful. Mine came out bubbly and lumpy despite using Lynette’s tips. I have a feeling the ripstop I used was lesser quality than what Lynette used.
Morsel lunchbag interior
The pattern had no interior pockets. I guess a person just tosses all their lunch items in and pockets aren’t really needed.I keep thinking of regular bags and pockets are always useful.
I decided, based on my lunch bag, that I needed to include an ice pack. I added a mesh pocket for an ice pack. I thought a mesh pocket would better for something that might sweat. I included an ice pack (not shown) before I wrapped the gift.
Morsel Lunchbag top
The bag is on the small side, so no 5 person picnics.
The top has a recessed zipper, so the contents are out of the way of the handles. It might have been useful to include a shoulder strap, but I didn’t think of it.
In general, I am pretty happy with how this bag came out. Julie has brought it to a couple of Sew Days and that is really nice to see. I am definitely happy that I was able to use another Minikins pattern.
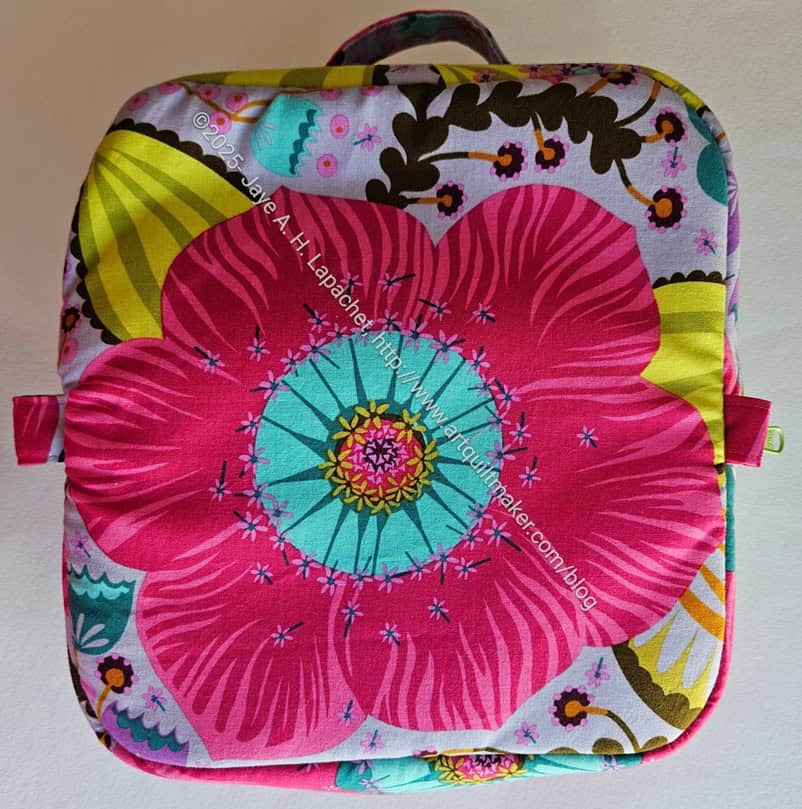
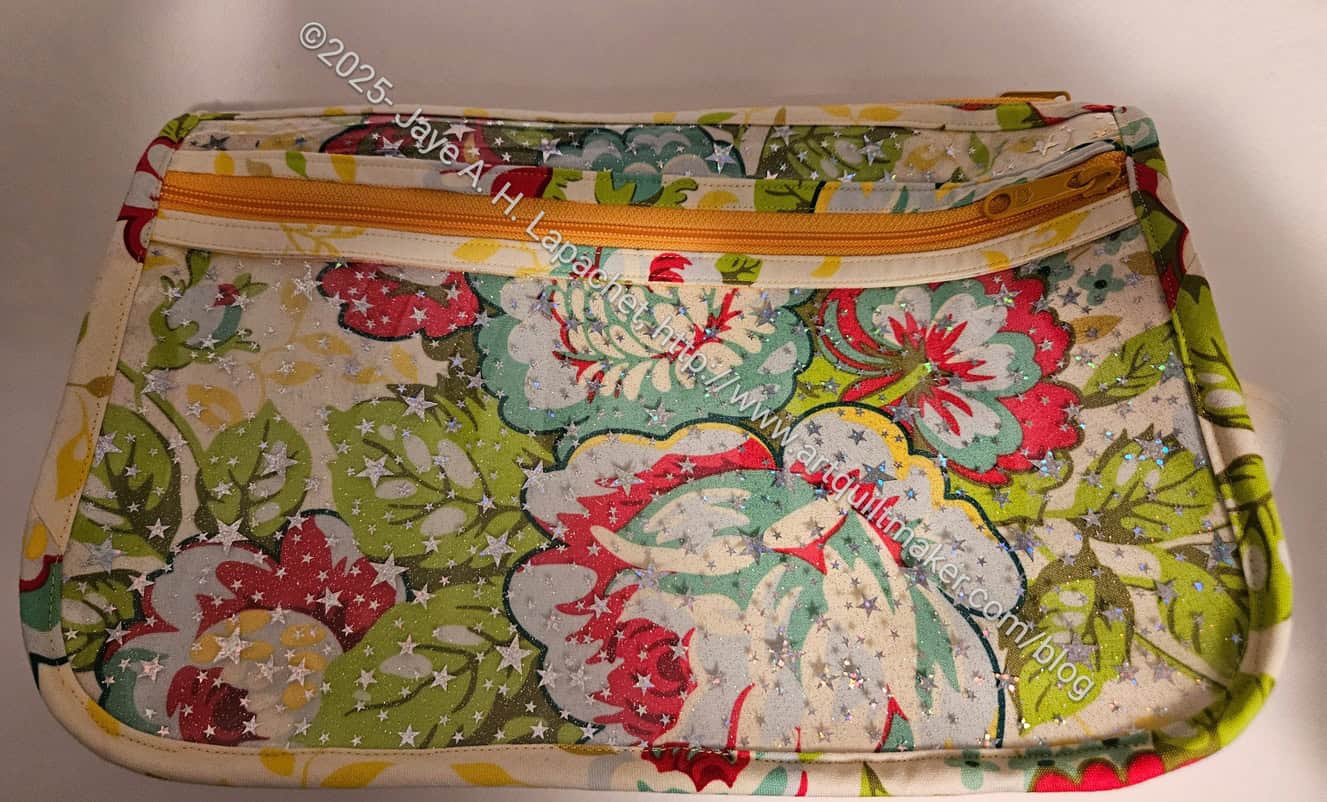
This is my first finish of the year! Finally! The Enigma might be my bag of the year as I feel excited about this bag and am eager to make two more.
I started this, because I had another one on my to do list and thought making two at a time would be quick and efficient. I also thought (and really hoped) it would, maybe, be chosen as the UFO project for the first month of the guild UFO challenge. As mentioned, no such luck, so I held off making the one on the list and just worked on this one.
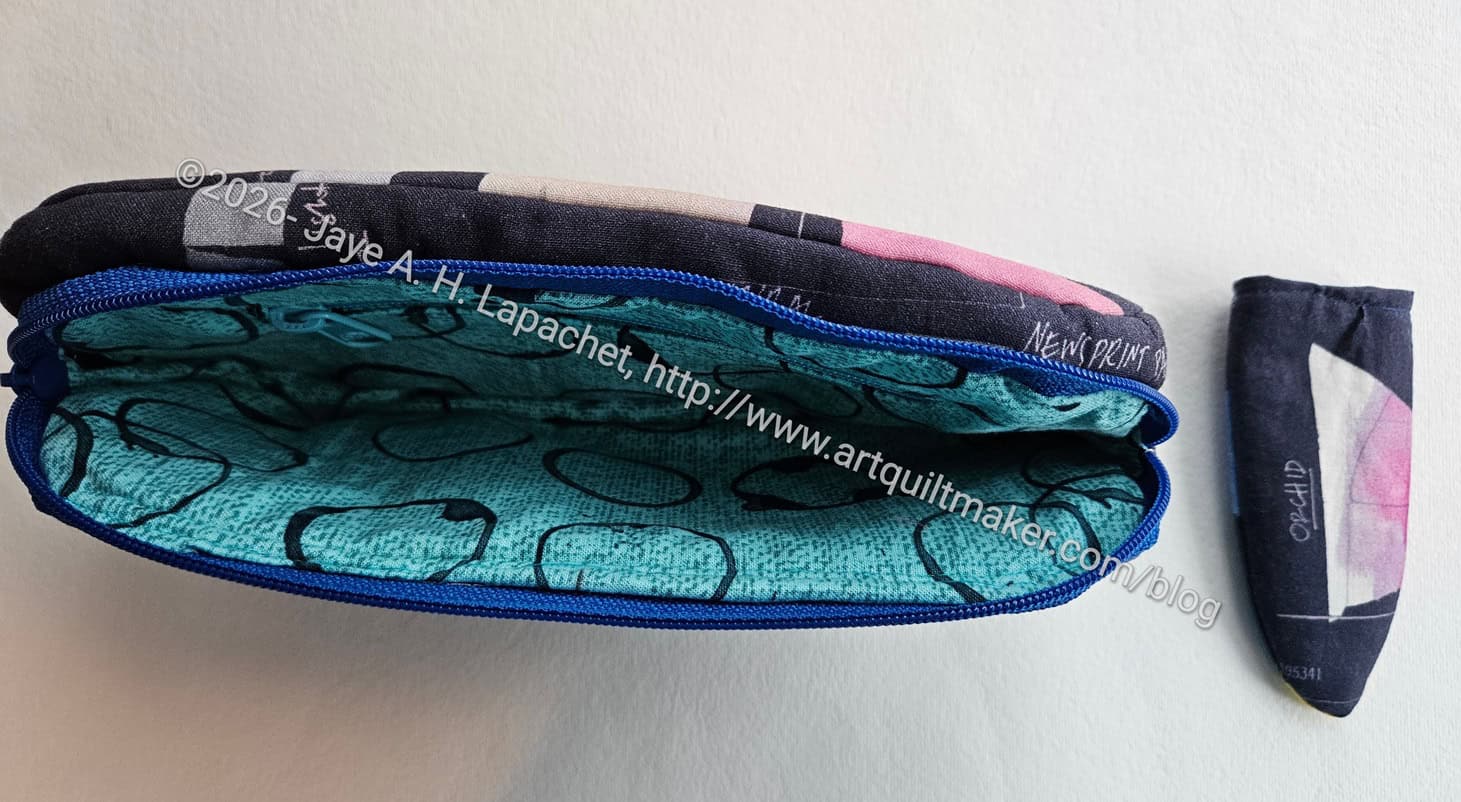
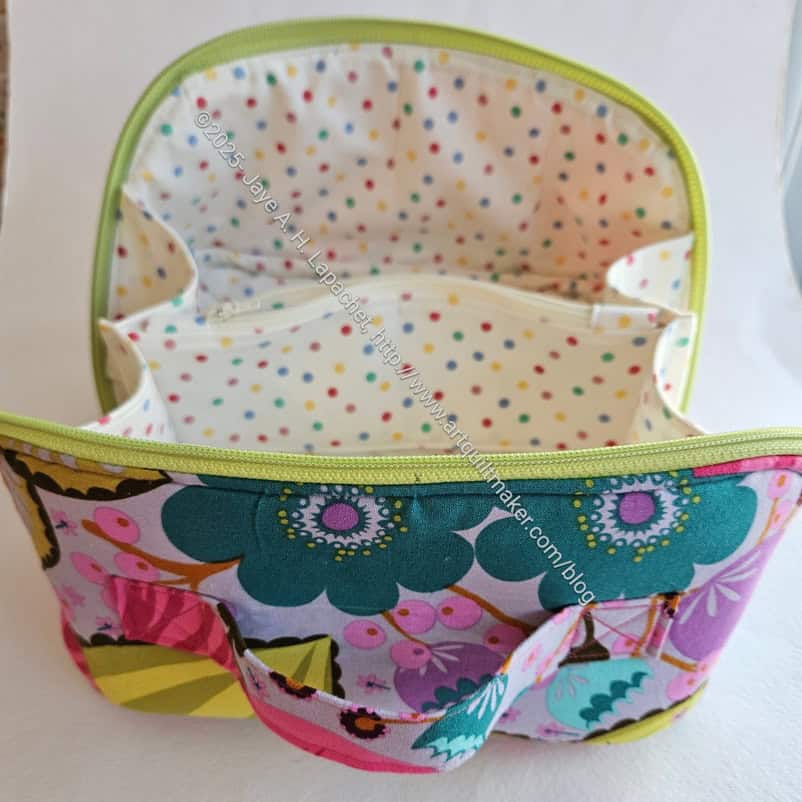
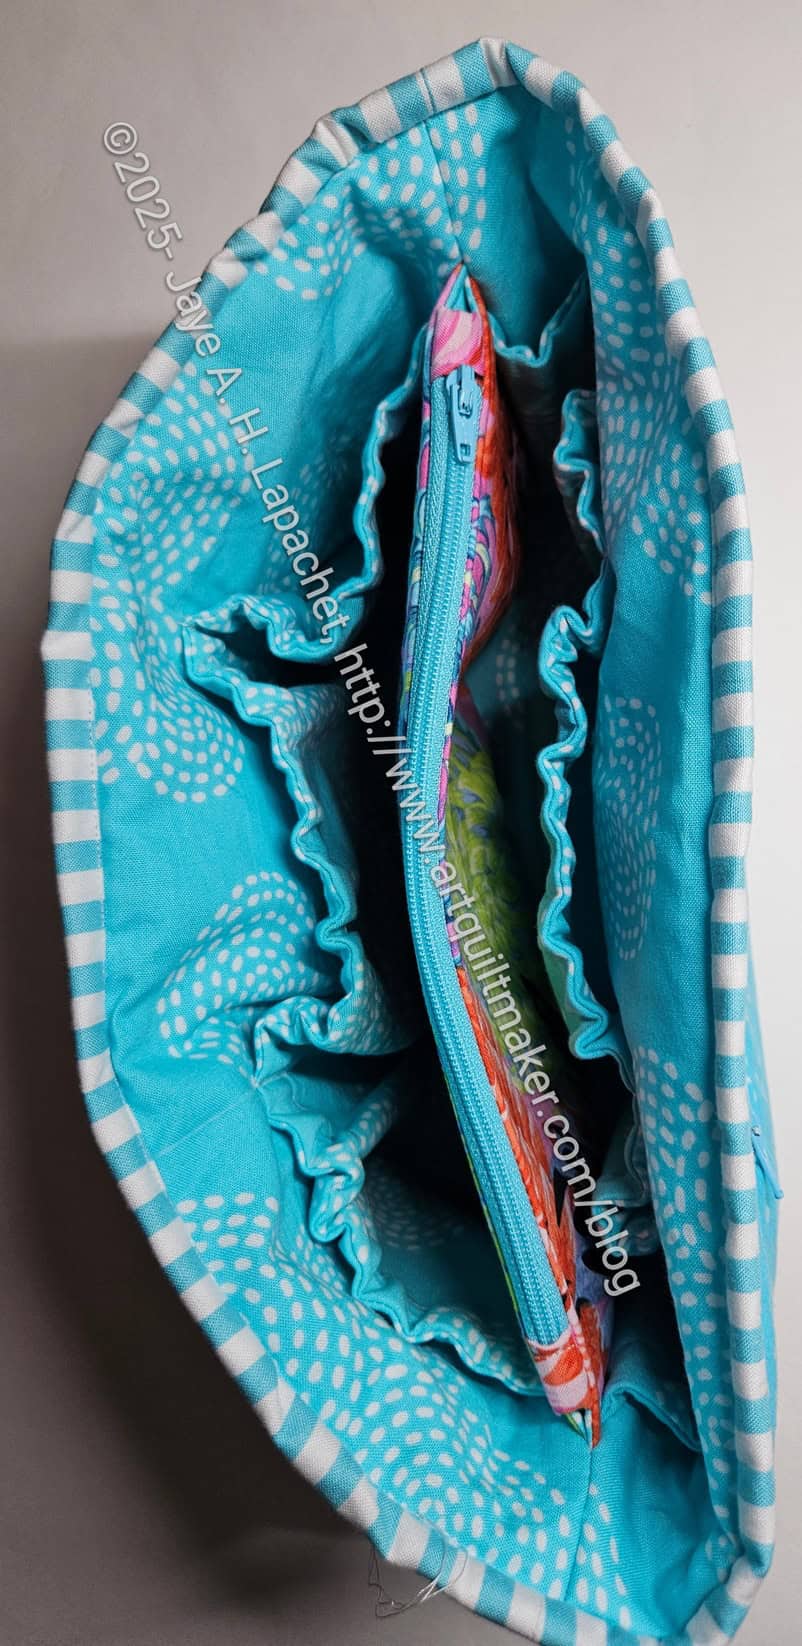
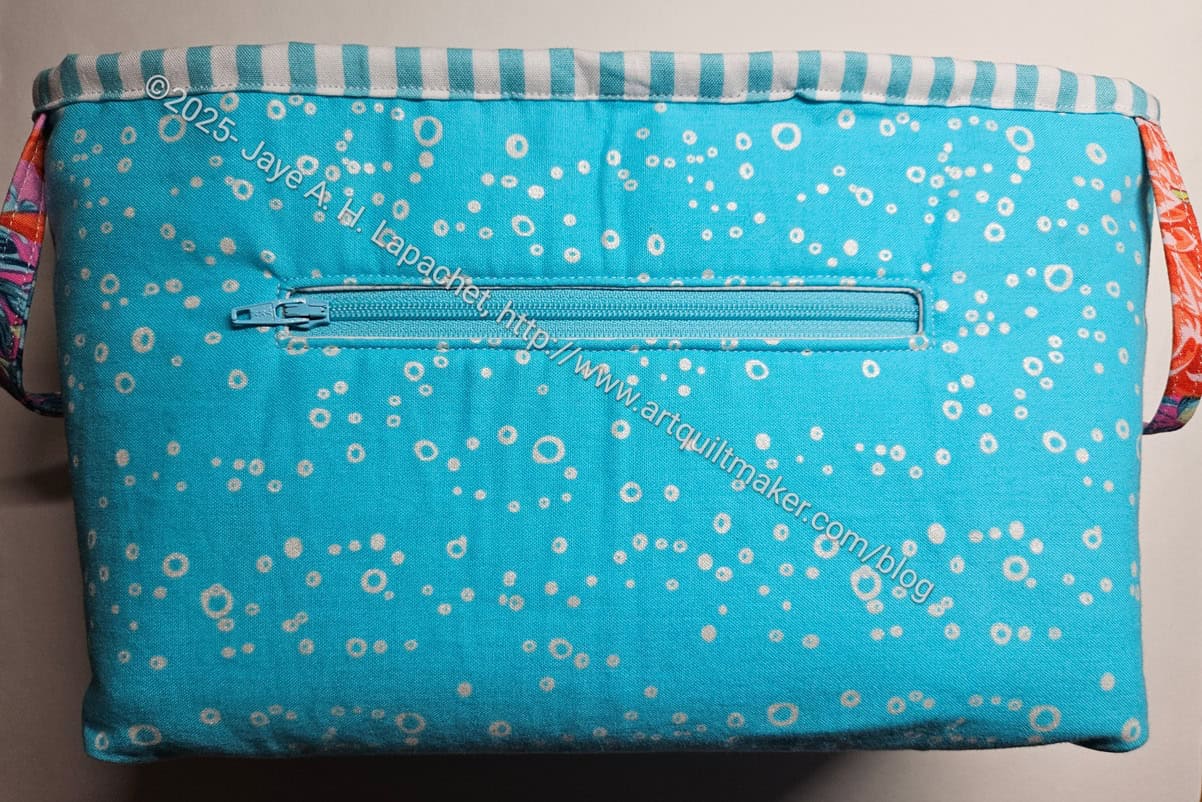
Diana’s Enigma – open, side view
I made this bag for the Angel Mother, and my birthday twin, Diana. I have made a Day Trip Wallet and two Dogwood pouches using the same fabric. I have no idea if she likes it, so I’ll just keep on making bags for her until I run out.
Diana’s Enigma bottom
I wanted to fussy cut the front so it looked a bit better than mine. I ended up fussy cutting the bottom, which ends up being one side. It looks good, but you can’t really see it.
I really like that big flower.
The more times I make this bag, the easier it becomes, but the more I like the construction. I watched part of the video and there were some helpful hints in it. The video is totally worth the purchase when you buy a Sew Sweetness pattern.
Of course, the Enigma is part of a 12 pattern bundle. While Minikins Season 3 is probably my favorite, I have also made several of the patterns from Season 4. See the various projects and decide which season you like best.
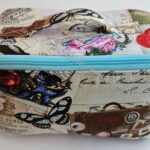
One of the patterns I used to make holiday gifts was the Stella Pouch from Center Street Quilts. I have made a couple of these before. One was for a swap and one was my contribution to Laura’s gift basket. I got excited about this pattern when I saw the video with a half vinyl version. I also like the ability to see the fabulous prints used for the lining.
Stella Pouch for Carrie
I made three of these for the holidays. There are no specific directions for using vinyl or adding a Flying Geese strip, as Katrina shows in the version linked above. It isn’t difficult to change substrates or add some Flying Geese, but I forgot the Flying in all three pouches! I’m annoyed because foundation paper piecing, in general, takes me forever and I worked hard at getting these strips done for these specific gifts. Oh well. I’ll make some more of these pouches and add the Flying Geese to them.
Stella Pouch for SueG
The other thing I did just to add a bit of flair was use some of my Renaissance Ribbon as the pull tab. I am not sure how practical it will be. I need to start using my ribbon and this was as good a start as any.
The one thing I need to do differently was the zipper end. It was very thick and hard to turn. I talked to Mary about it and probably need to trim more around the zipper. Another good reason to make more of these.
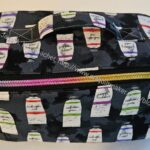
I quickly made this pouch for Tim as a gift. I usually make him a gift, but for some reason I didn’t plan ahead for him. I will in 2026.
I rounded the corners of this version as it was easier to sew. I also used some great hand-dyed fabric that Sonja made for me a long time ago. It is precious so I save it for special projects.
Green I Spy for Tim-back
Tim loves everything green and he uses the bags I give him, so I decided to use some of this precious fabric for him.
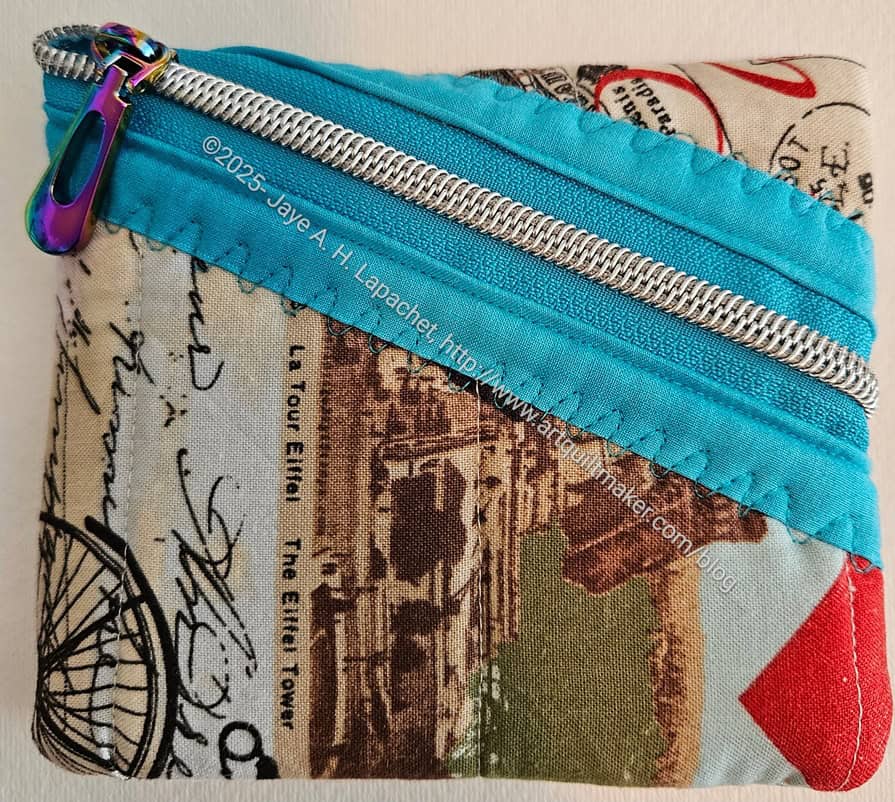
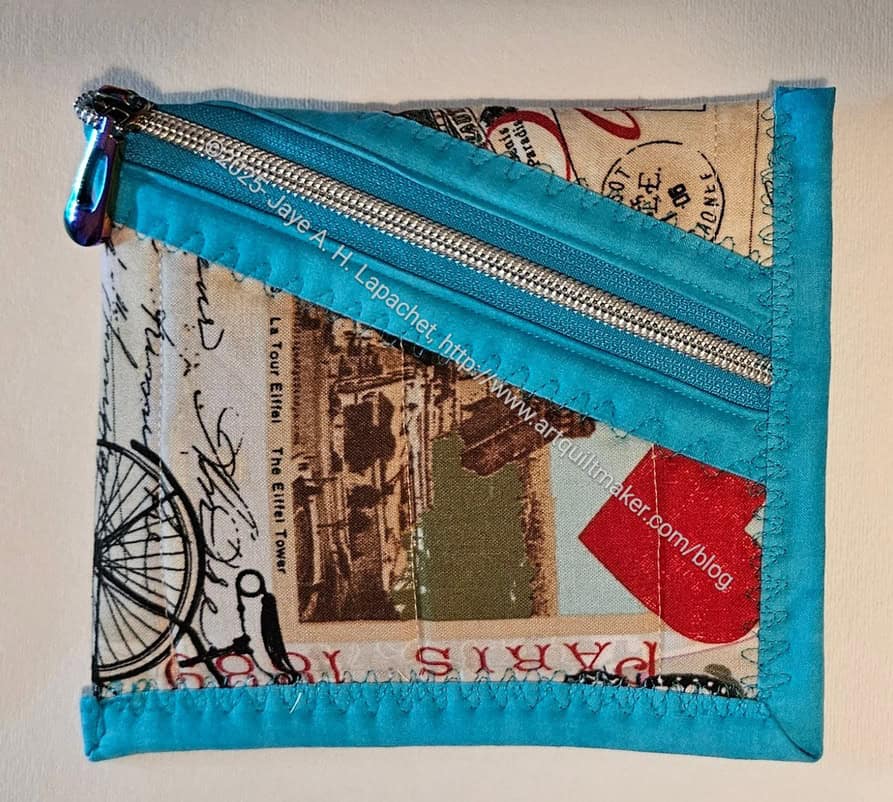
After making the Hemingways for my sister, I had a piece of quilted foam left over. I have been collecting strips of quilted foam and it is getting a little annoying. It seems like such a waste to throw them away, especially since I spent time to quilt them (or money to have them quilted). However, they are small and I haven’t found a good project for them.
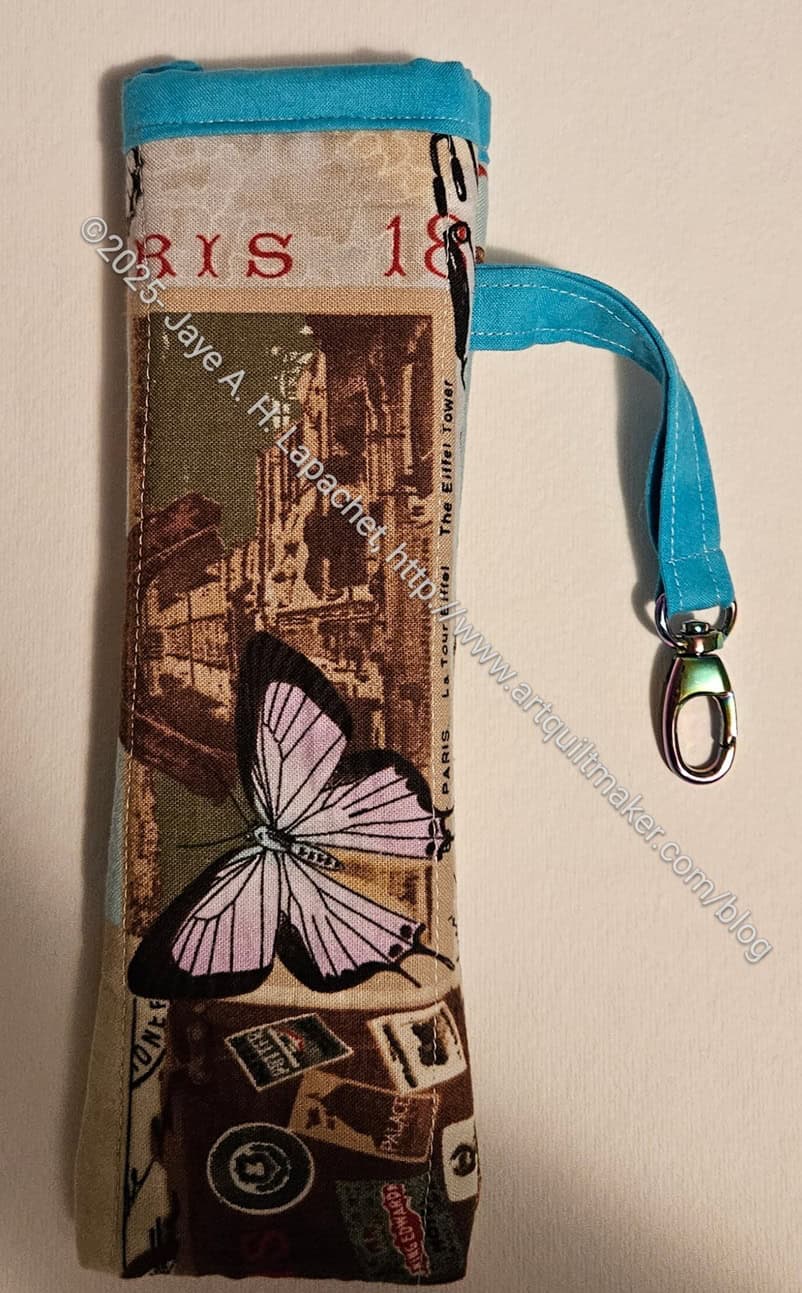
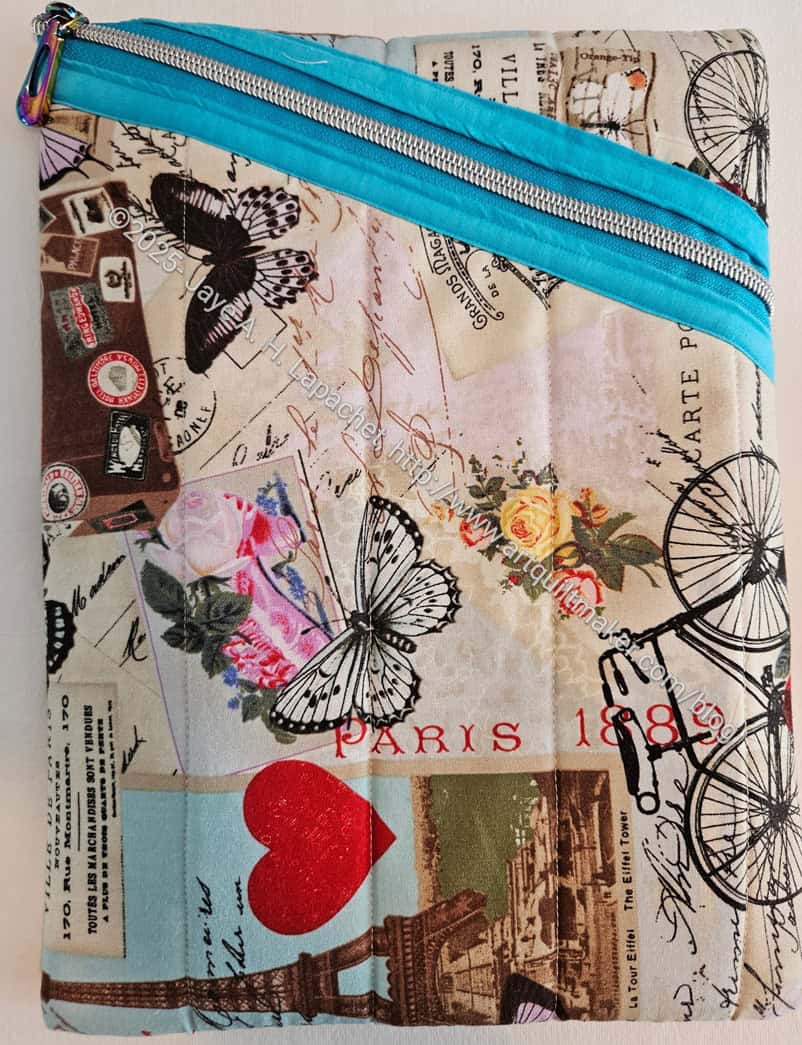
Eventually, I decided to sew the leftover Paris fabric/foam into a pencil or glasses case. I am not sure which it is and will let Lil Sissy decide.
I decided to make a Hemingway pouch for my sister for Christmas. Partly this was to provide a laptop/tablet cover for her and partly because this is a quick project and I hadn’t started a more complicated bag in time to get it done before Christmas.
I made this pattern once before. I ended up with a section of vinyl and half a zipper. This time I decided to take MaryC’s advice and make a small pouch to go with the larger one. Mary uses hers for WonderClips, but Lil Sissy can use her for small cosmetics or dog treats.
I am pretty pleased with how it came out, though the print looks a little sideways. I also meant to add a handle, but forgot in the process of getting it done.
Baby Hemingway – 1st iteration
The first iteration of the small Hemingway had the binding on the outside. My machine binding still needs work. I didn’t like the way it looked so I cut off the binding, bound it on the inside and made it a little smaller.
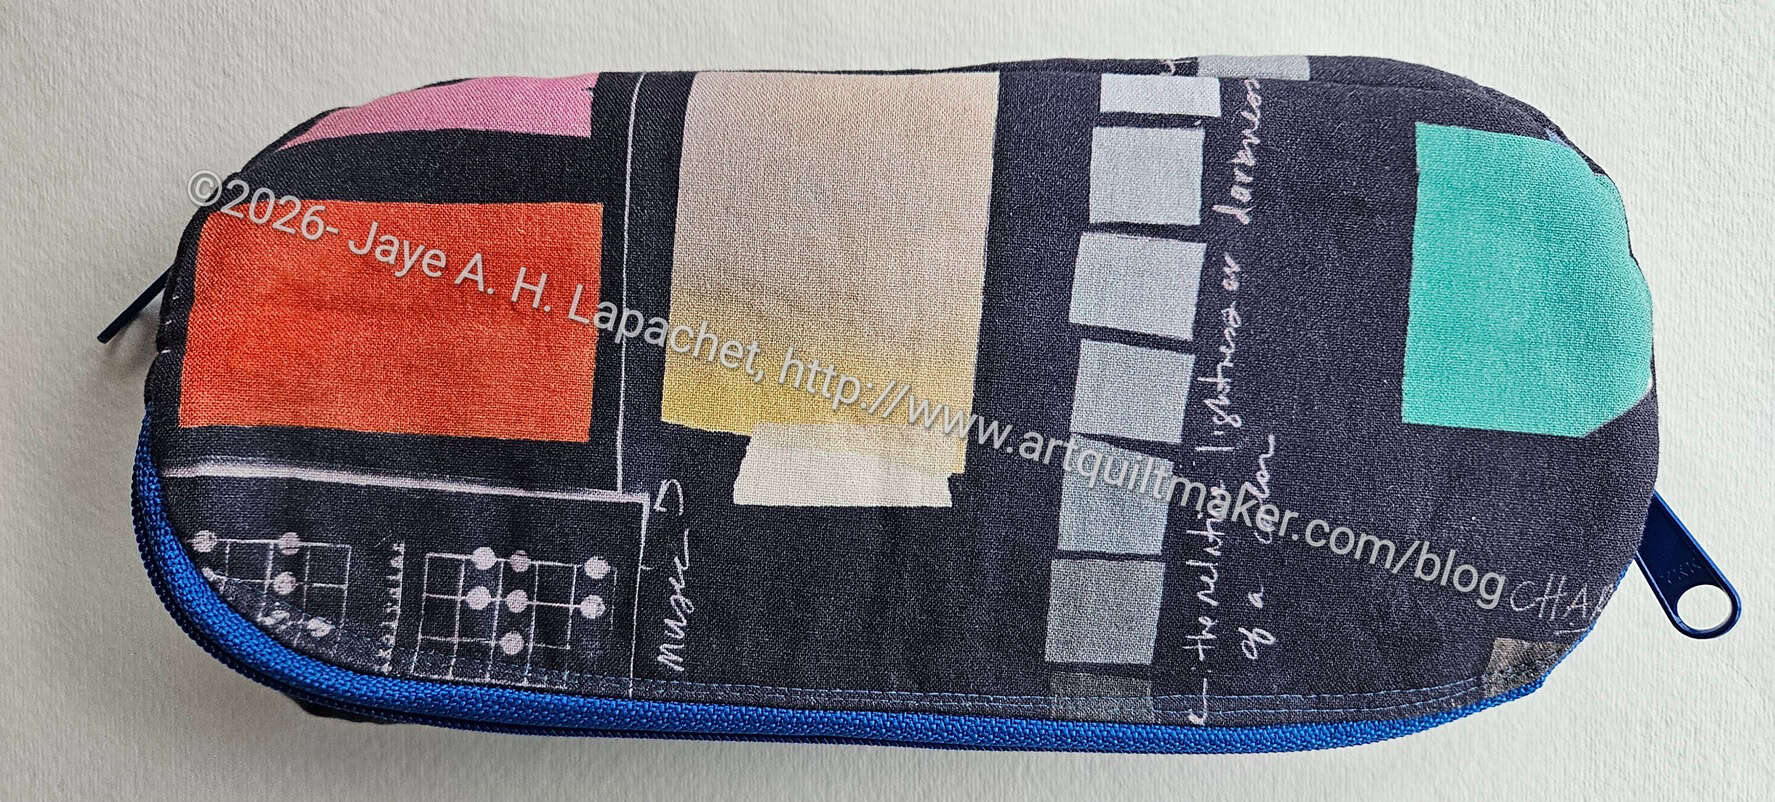
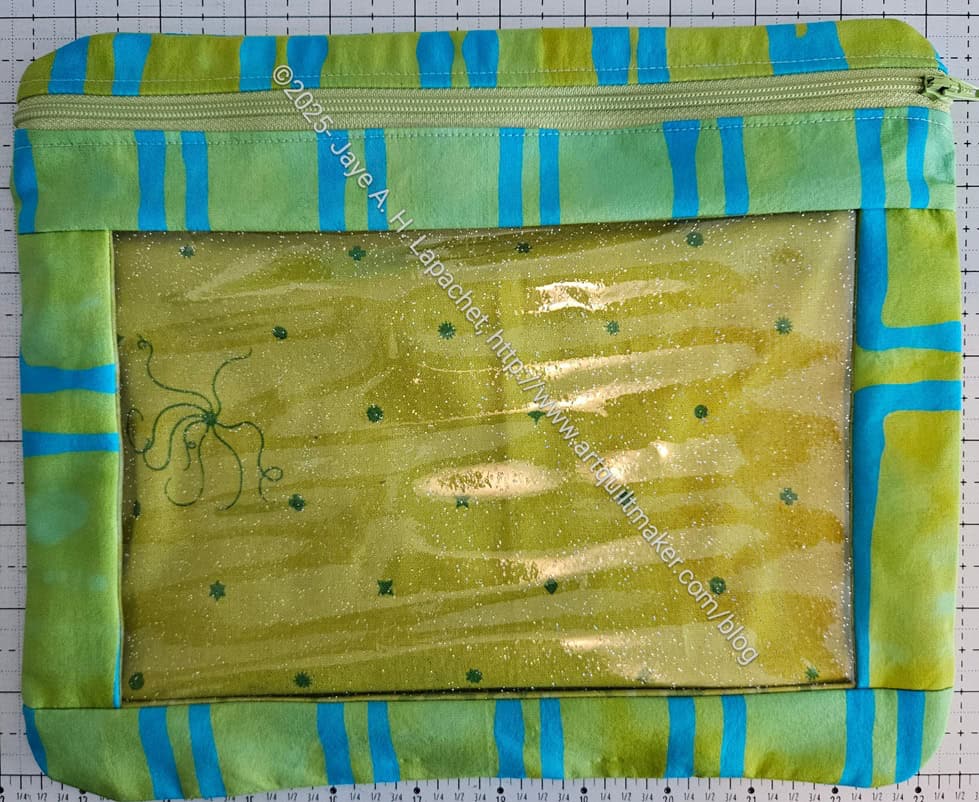
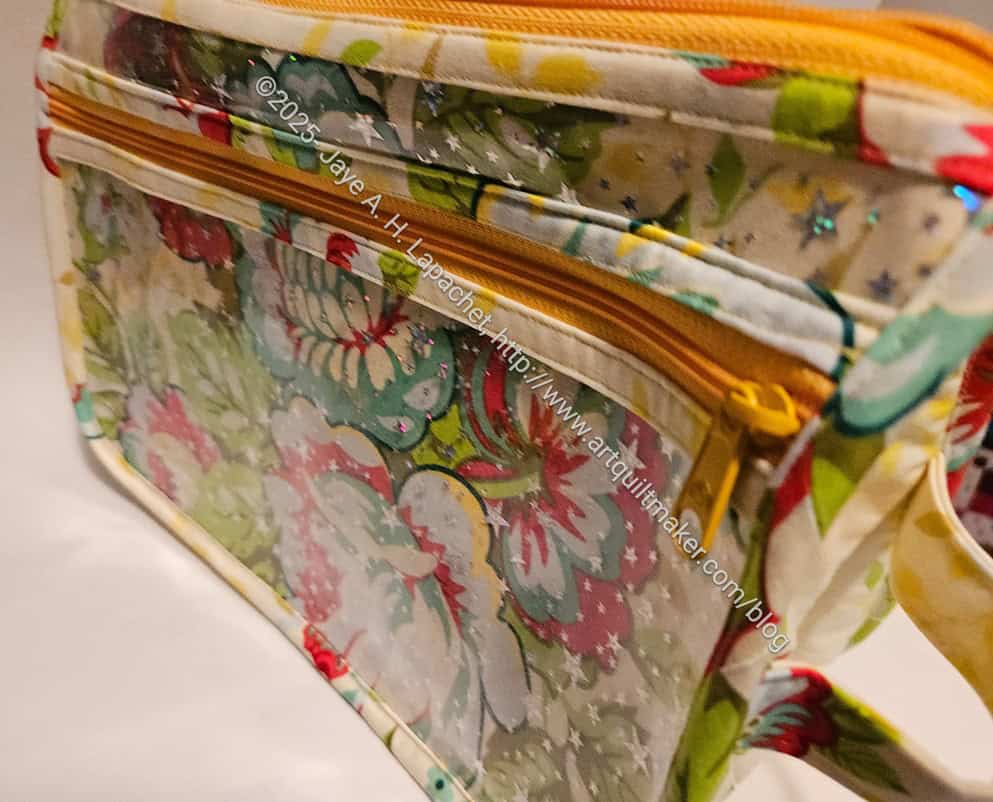
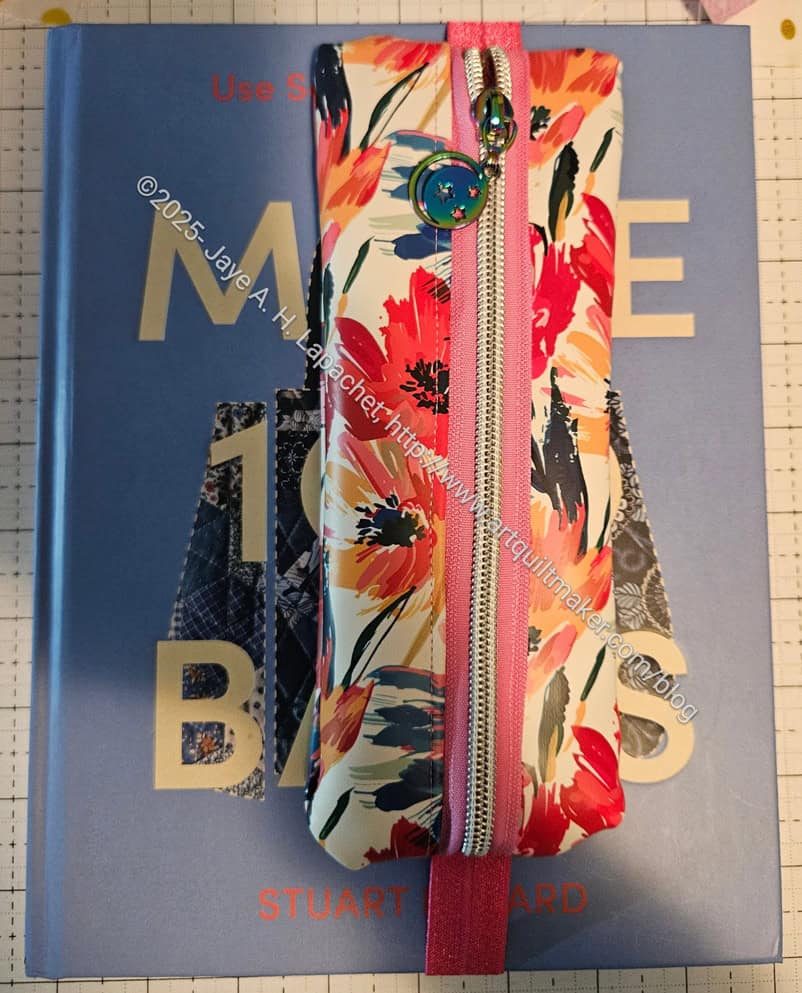
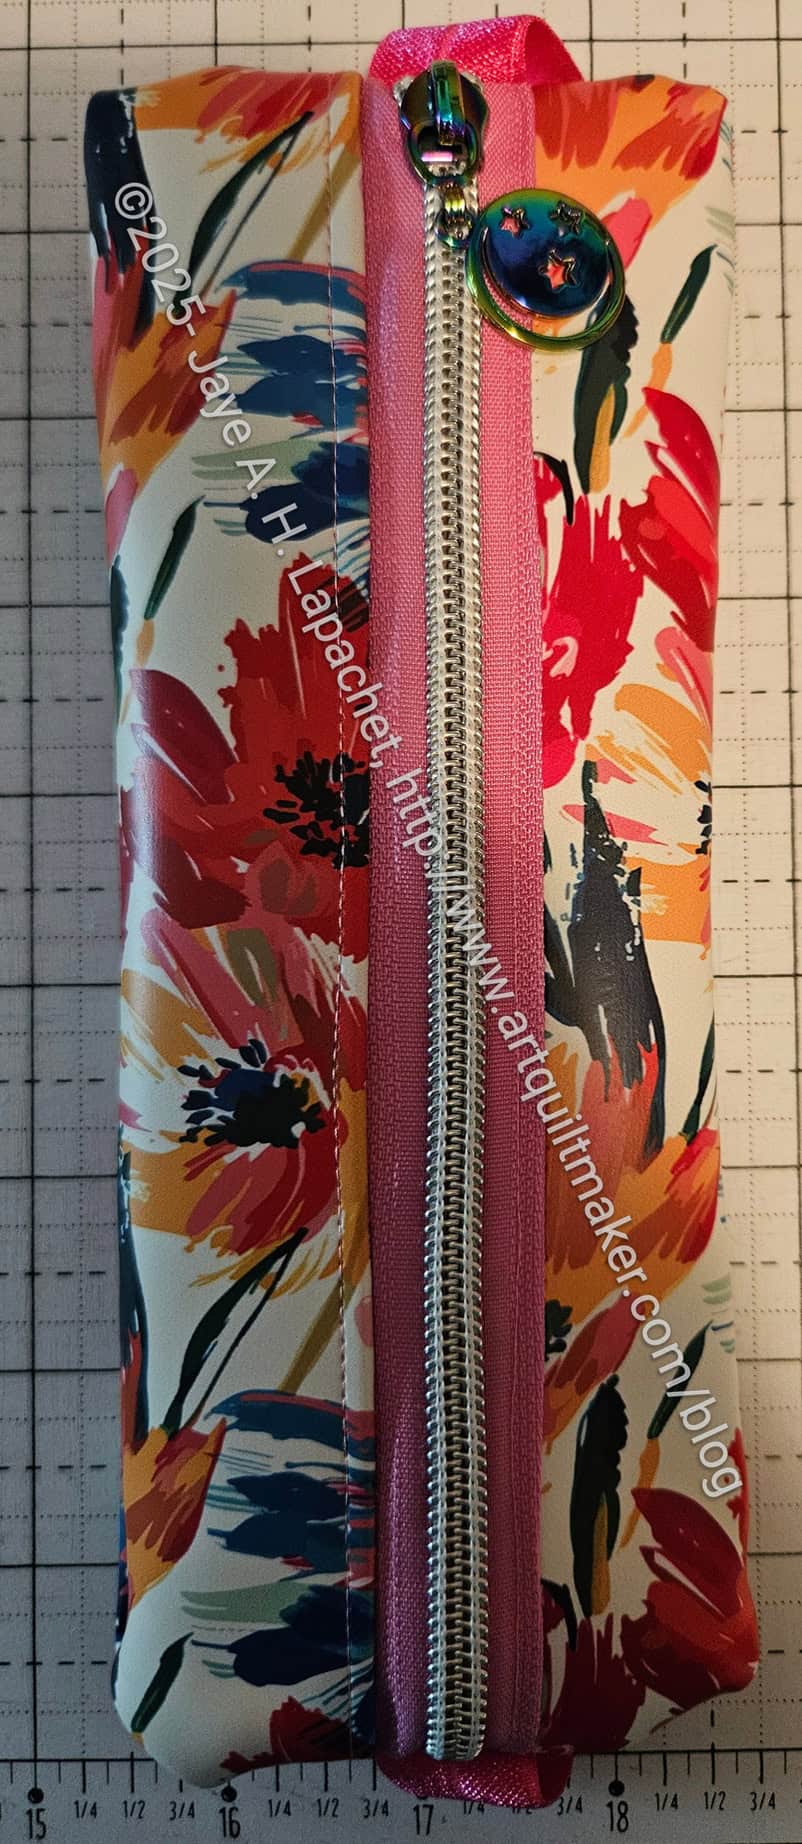
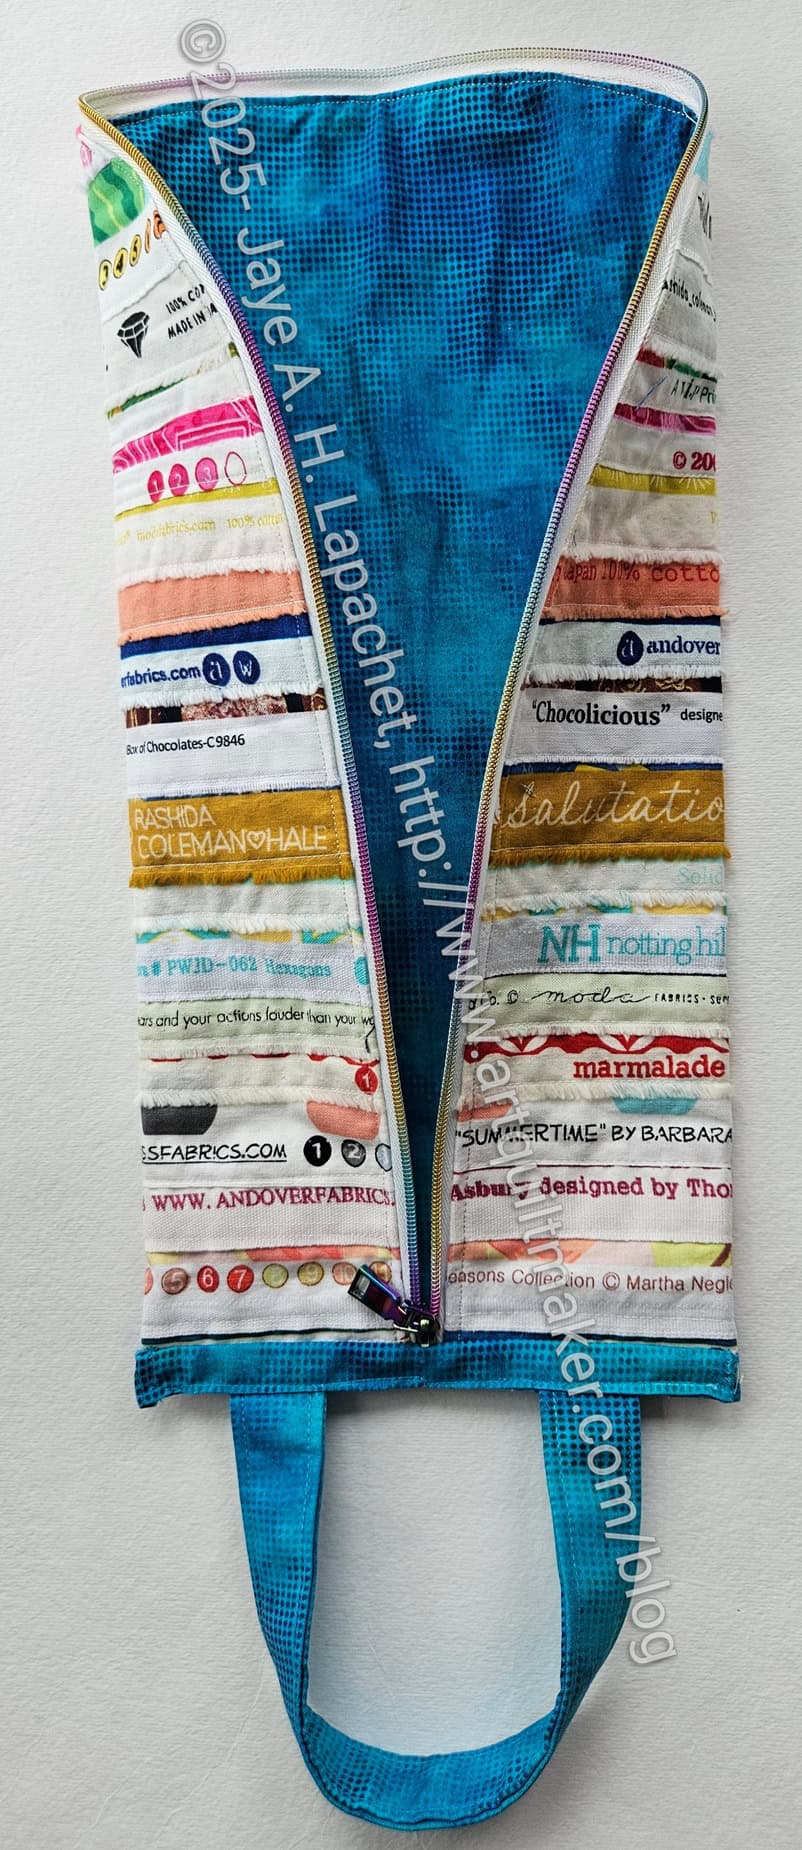
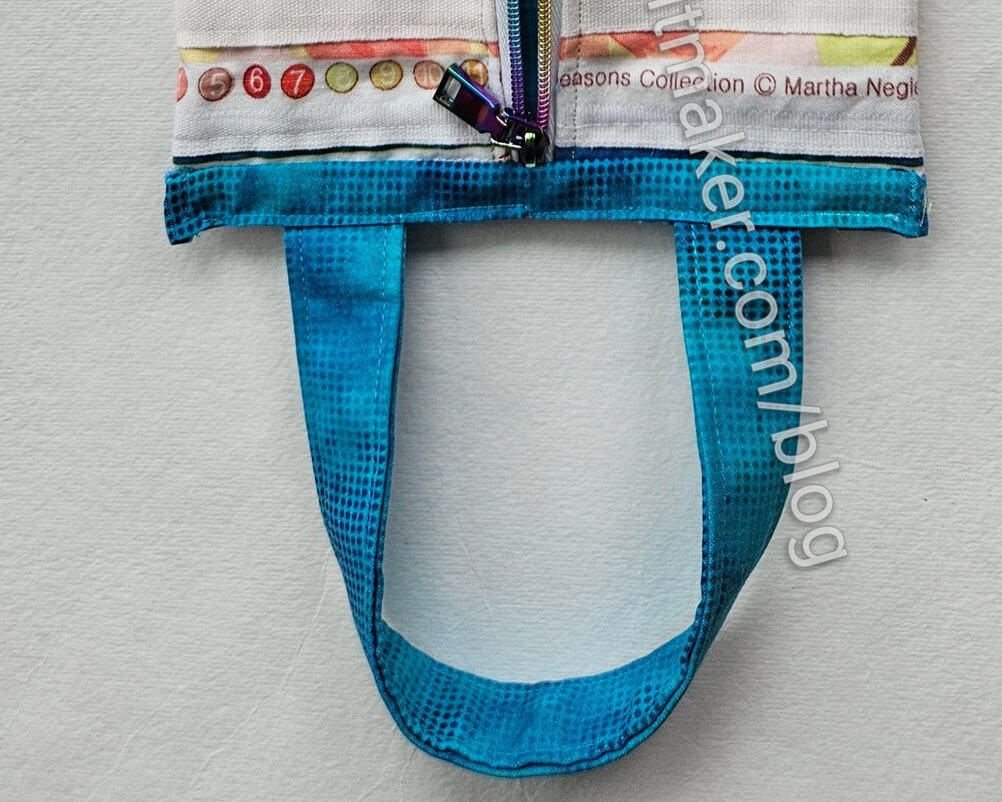
I finished the Cosquilla pretty quickly, considering I only started it a few days ago. In general, this pattern has only a few pieces, so is easy to cut out. The instructions are excellent and there was only one confusing part where I needed to watch the video to complete.
I was able to use one ByAnnie 30 inch double pull handbag zipper for both of the zippers needed in the project. The yellow of the zipper doesn’t go exactly with the fabric I chose, but I think it looks good. There are not as many zipper colors as fabric colors.
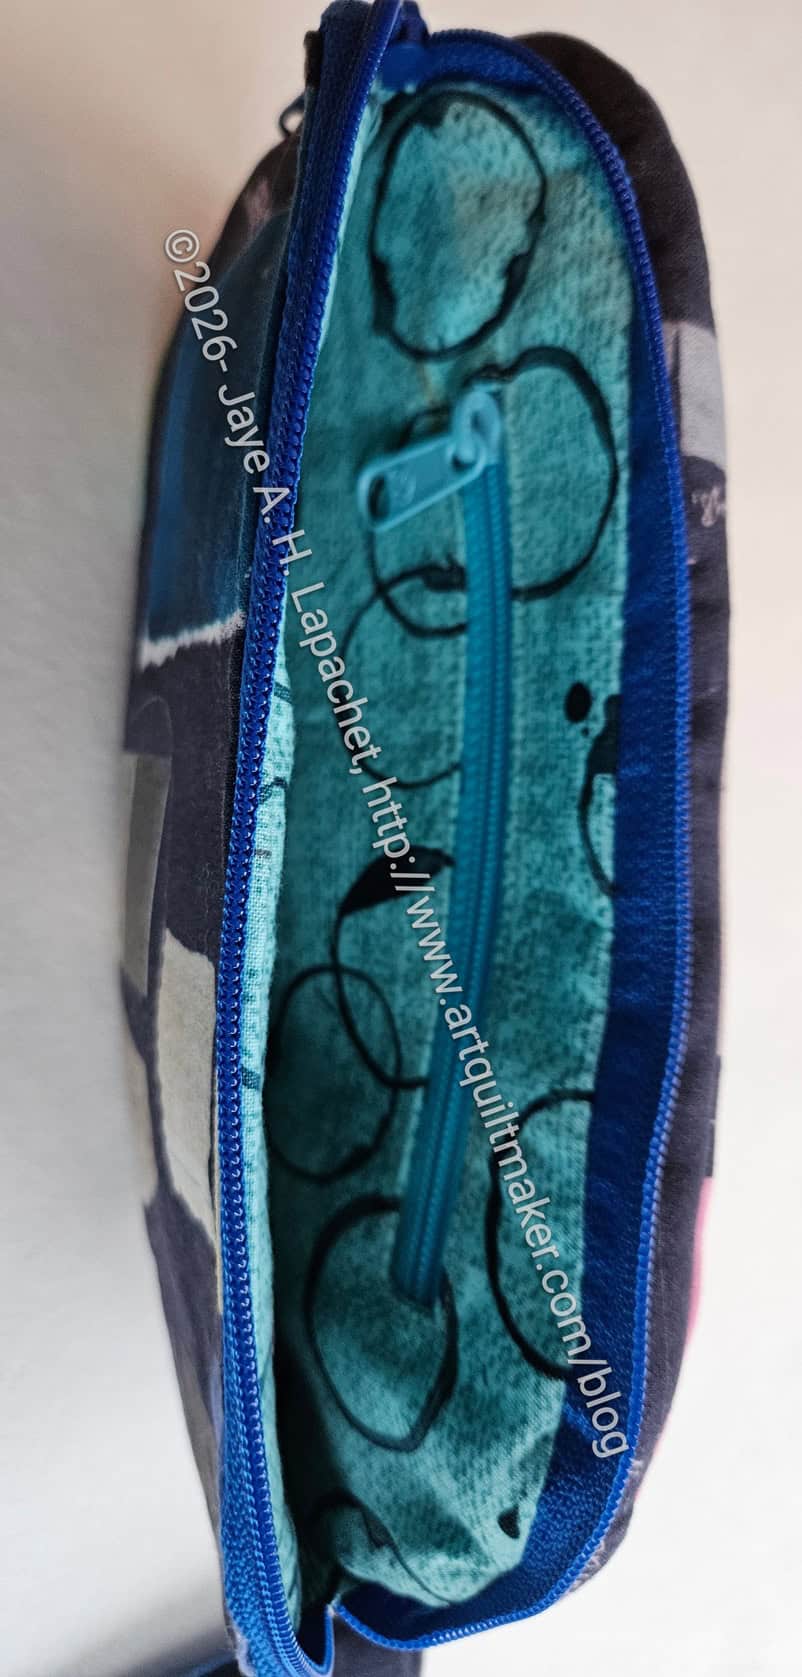
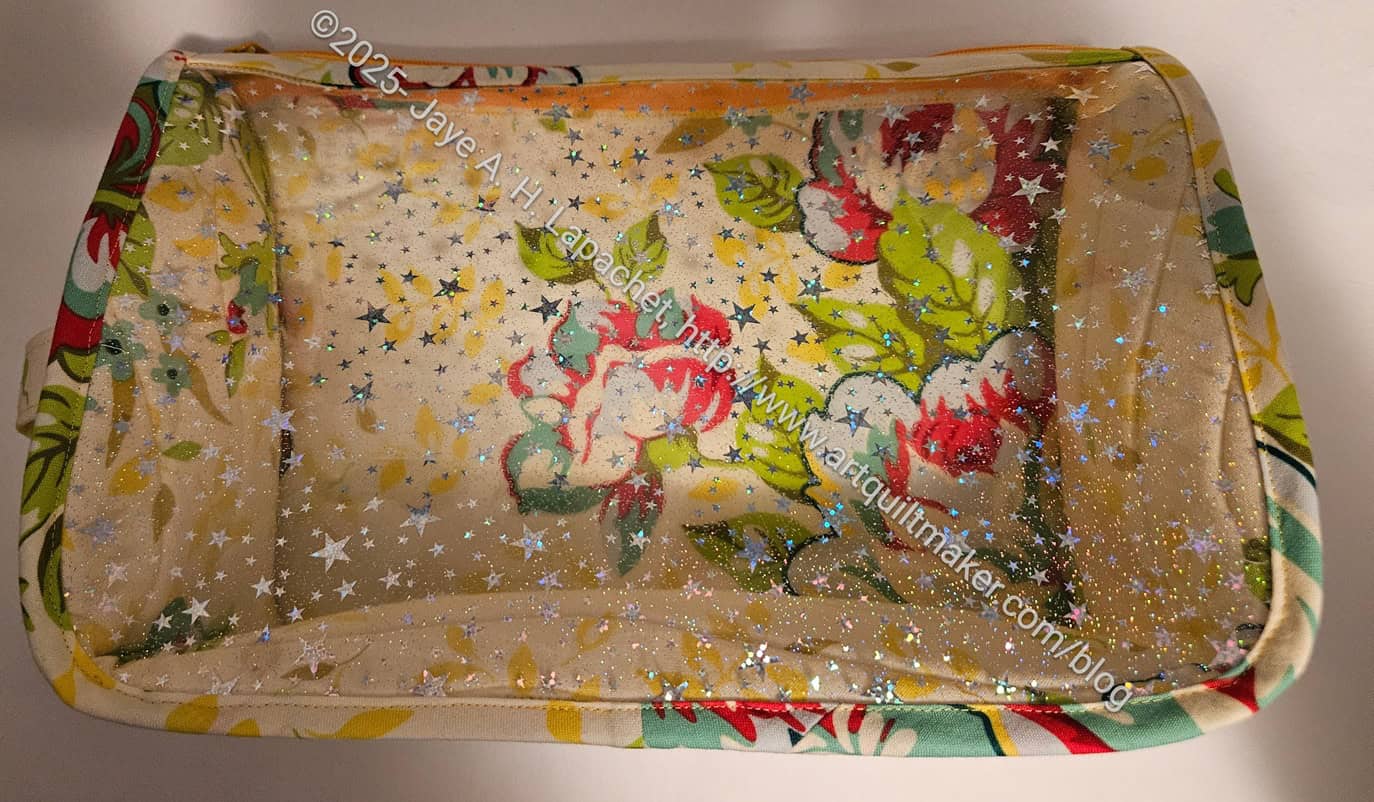
Beth’s Cosquilla: interior
This is the first time I have used the same fabric for both the exterior and interior. I don’t know why I never thought of it before (DUH!), but I think it worked really well. There wasn’t a lot of exterior and there were some focus type motifs that I fussy cut in order to make the parts interesting. I still wanted the whole pouch to read as yellow, so I kept that in mind.
Beth’s Cosquilla: zipper side
This pouch, as you can see, has a lot of vinyl. I recently replenished by supply of vinyl. Mostly I like the glitter vinyl, but this time I also bought some vinyl with stars printed on it. I like the glitter vinyl, because it doesn’t interfere with the pattern on the fabric. In this case, I used the star vinyl and I think it allows the fabric motifs to shine as well. The other thing I like about these two vinyl patterns is I can use every inch. I don’t have to worry about the motifs on the vinyl being in the wrong direction when the bag is finished.
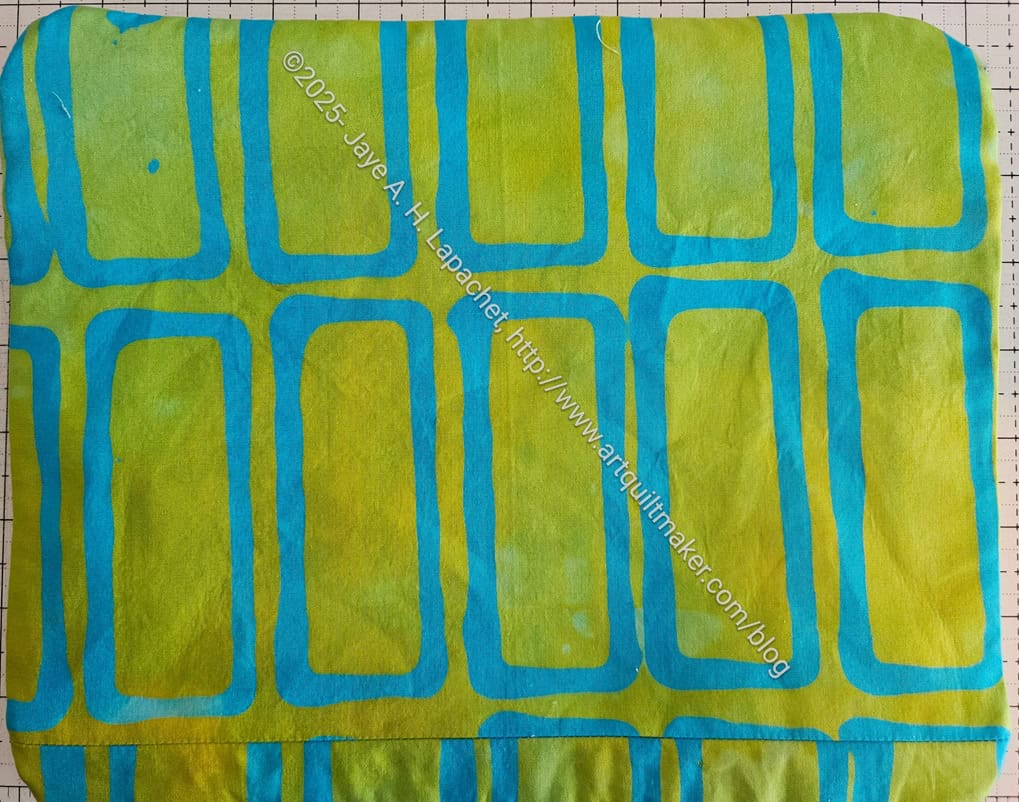
Beth’s Cosquilla: side
The pattern had a really interesting piece for the bottom and the sides. It was a long oval piece that had to be quilted before cutting it out. There are fewer seams when one piece makes up the sides and bottom.
I really don’t know how Sara thinks of these bag designs, but I am constantly impressed. Having the sides wrap around the bottom/sides piece was really clever. I like the way it went together.
Sewing it together was no picnic, but it wasn’t as difficult as the Pearce Sling I made for Mom. They share that curved shape, but this pouch is much bigger and that curve was easier, though not easy to navigate.
Anyway, I got SIL#4 a couple of gifts off her list, but also made her this as a bonus. I like to receive things I want, so I always make sure I buy someone something off their list even if I make them something.
My niece, Michaela, asked me for a pencil pouch that she could use with her journal. It wasn’t quite that straightforward, but that is what the gist was. She had a use for a pouch that could go around her journal’s cover and hold a few pens. I love a challenge and went looking for a pattern. I didn’t find one in my Bag Patterns db and no mention in my Quilt Books catalog. That was disappointing, but it could be that such a thing wasn’t on my radar and I didn’t note it.
I had to go looking for a pattern and after a few false starts, which I talked about, I found one from Apple Green Cottage, which I liked. It’s free, but you can get a better looking PDF for $5. It is not a difficult project and I even modified it a little bit out of the gate. The project is billed as a 10 minute project. It took me about an hour and I think I might put my zipper foot on next time. I struggled a bit because the vinyl was a bit slippy with the zipper I chose.
Pencil Pouch with Elastic for Michaela
I also didn’t have the right sized tool to poke out the corners really well. I still need to work on that. I might talk to Modern American Vintage to see what they can make. First, though, I have to find the right size.
The picture at the top is an example of how it is to be used. I demonstrated for myself on the Make 100 Bags book** as it was a similar size to M’s journal. You can see the elastic at the bottom.
I told M that it was v.1 and to let me know if she needed a v.2. I am concerned with the Aurifil 50wt I used. I think I might need something stronger with the vinyl.
I want to make more of these. They do suggest pleather, vinyl or a similar substrate. I am going to try one out of glitter vinyl when I get my restock order and see if the insides are too sharp. I’d love to make more of them from this flower vinyl just to use it up. We’ll see.
Aside from loving a challenge, I love my niece and the fabulous person she has become. I also love making gifts that people can actually use and want. I used some flowered vinyl I received in an SHH gift box I bought for myself, which was great, because I wasn’t sure when I would use it.
It was a fun project and I like the speed in which I could make it.
**N. B. : Obviously, you should shop at local quilt shops and small businesses. However, if you are too busy or can’t find what you need there, I use Amazon affiliate links and may be paid for your purchase of an item when you click on an item’s link in my post. There is no additional cost to you for clicking or purchasing items I recommend. I appreciate your clicks and purchases as it helps support this website.
I finished another Multi-Pocket Organizer for me. I gave the previous one away. LOL! I might end up giving this one away as well. 😉
Again, I carefully picked out fabrics that I would like. I cut the bag out before I left for Portland, so this was a good project on which to work while I was there. I worked on it after I finished Gelato #2.
Multi-Pocket Organizer #3: interior
The goal was to make this for my handbag to get the mess on one side of the divider pocket organized. I tried out the first one I made and it fit pretty well. The mistake I made on this one was to put fusible fleece on the back of that front pocket and on the Multi-Pocket Organizer’s divider pocket. This makes the Multi-Pocket Organizer much thicker, so it doesn’t fit as well into my handbag.
I am really happy with the way it turned out, so I am still thinking about what to do.
Multi-Pocket Organizer #3: back with zipper pocket
I am excited that I finished the Sleeping Bag pouch. I put it aside, but picked it up again last week to finish the binding and the handle.
Overall, I am pleased with the way it came out.For a project with no pattern it was fun and my success spurs me on to think about other bags I want to modify or create.
I want to make some changes to the Ultimate Project Bag and this pouch has made me feel more confident.
Sleeping Bag Pouch – binding/handle
There are things I want to change, so I will be making another one of these. I want to refine the way I finish the edges of the binding. I worked hard on those ends, but wasn’t super happy with the finish. I plan consult Bag Club about other ways of finishing the edge.
Sleeping Bag Pouch – closed
I am thinking about whether the zipper pull would be better closer to the handle when it is closed. I don’t know if it is possible to install it that way. I think I would have to use a regular zipper – use both halves of a zipper instead of one side as a continuous piece as I did with this one. Another topic to discuss with the Bag Club.
I may try another one with selvedges since I have a seemingly endless supply. I want to place the selvedges 180 degrees from the way I placed them this time. I’d like them to be right side up when I carry the bag. I don’t think it makes much of a difference since the selvedge words will be upside down if it is laying on the table or being carried depending on how they are placed. I’d just like to see the difference in how they look. I may as well do it since I have another half zipper anyway!
This will be a useful bag regardless. If I don’t give it to someone else, I have decided that I can use it as a small handwork bag. Maybe I’ll keep it in the car or in my suitcase? I plan to put the pincushion Amanda made for me along with a small EPP project. It is also quite the statement bag!
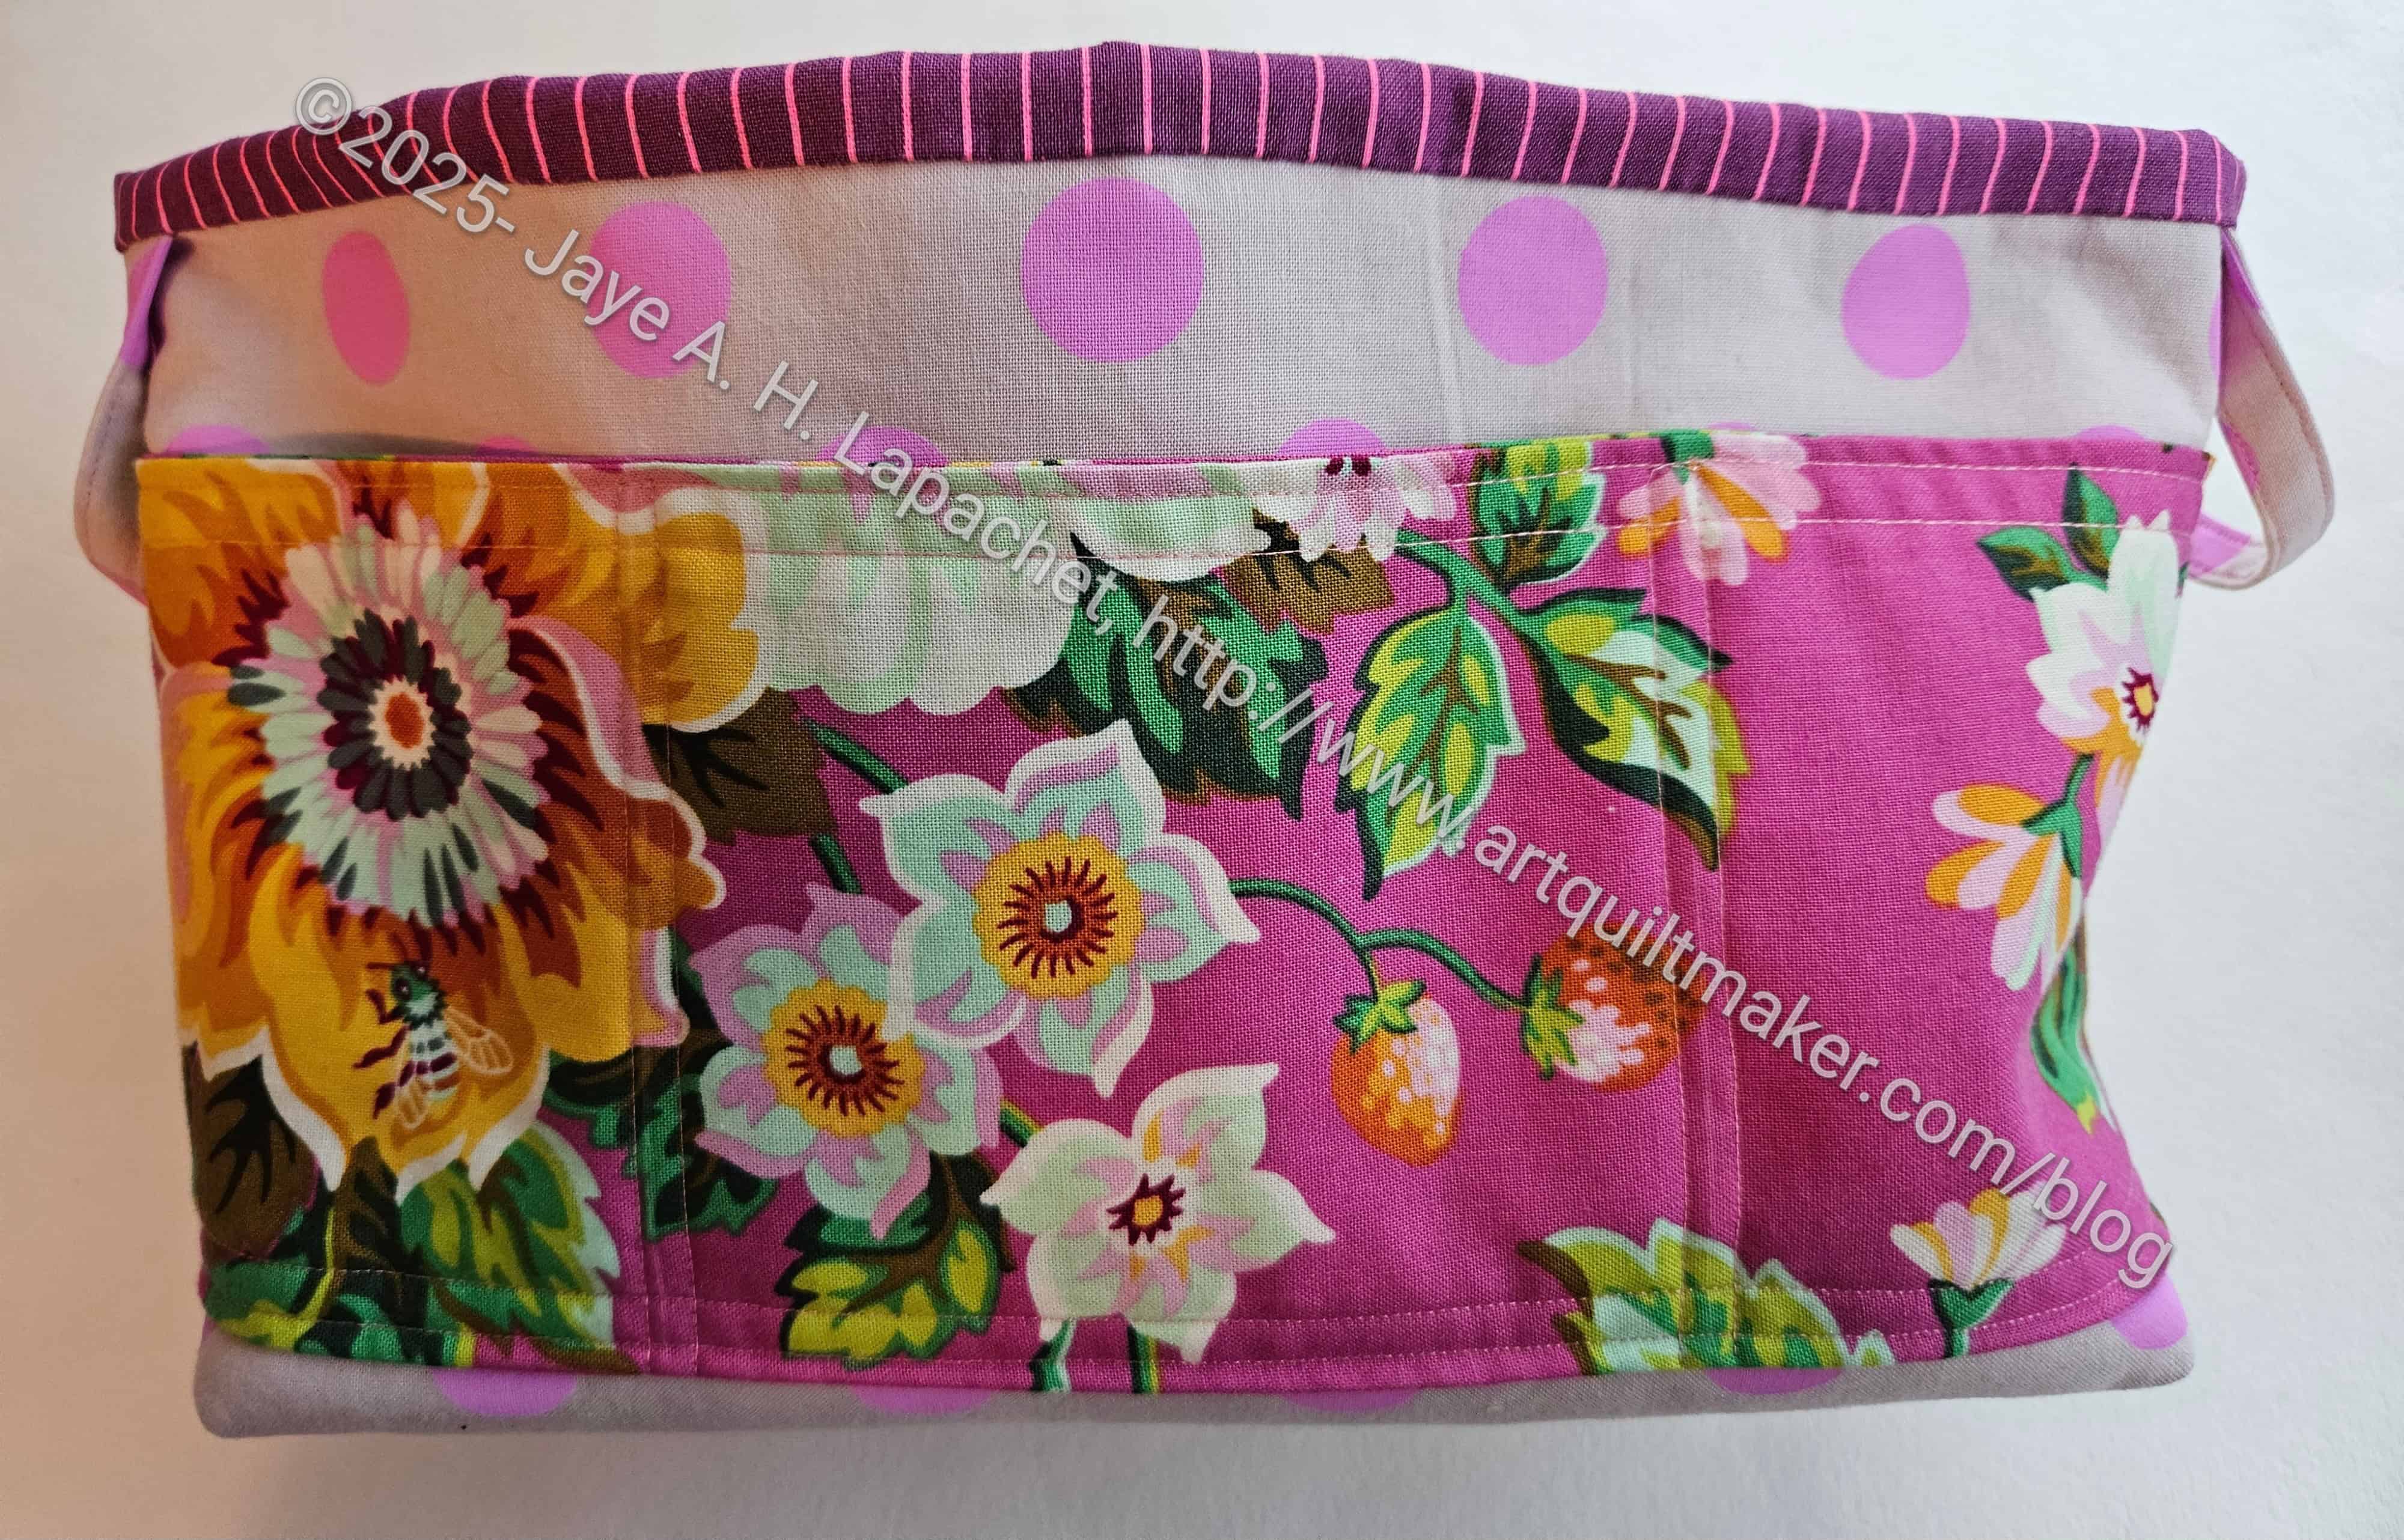
Yay! I finished the Multi-Pocket Organizer for my handbag! That is the intention anyway. More and more I have been thinking of sending this to a friend. It isn’t that I don’t like and don’t think it will be useful, but it is telling me it wants to go to my friend. We’ll see. I can always make another even with the same, or similar fabrics.
Above is the front of the organizer. It has a divided slip pocket that can be useful for pens or other item you need quickly.
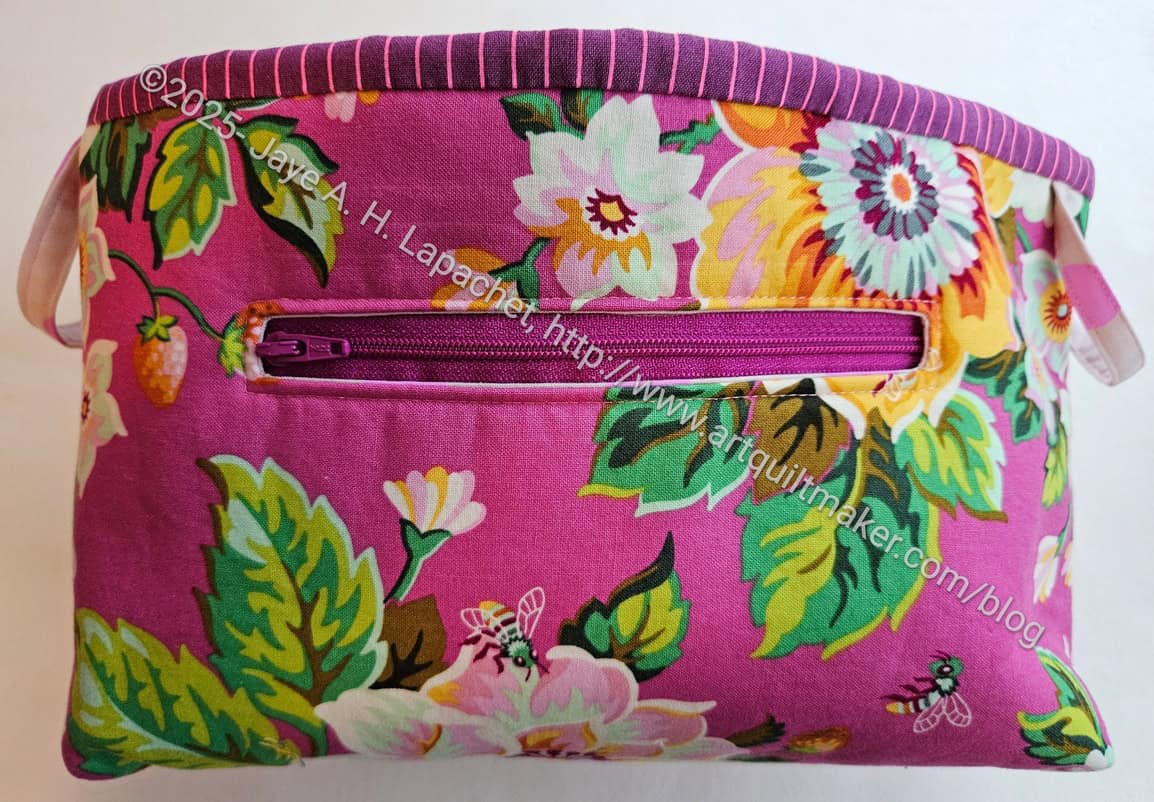
Multi-Pocket Organizer #2: back
The back of the bag has an interior zipper pocket.
I used the Heather Bailey flower fabric as the exterior. If you look at the front and the back, you will see that I used the exterior fabric for the slip pocket. I was trying to give the most space to the large print. The Tula dot print on the front is sort of like a tone-on-tone and I thought it would work under the slip pocket. I am not sure I was successful. The only thing I don’t like about the heather Bailey fabric are the flies. I didn’t notice them until I cut out the pieces. If they were bees it would be different.
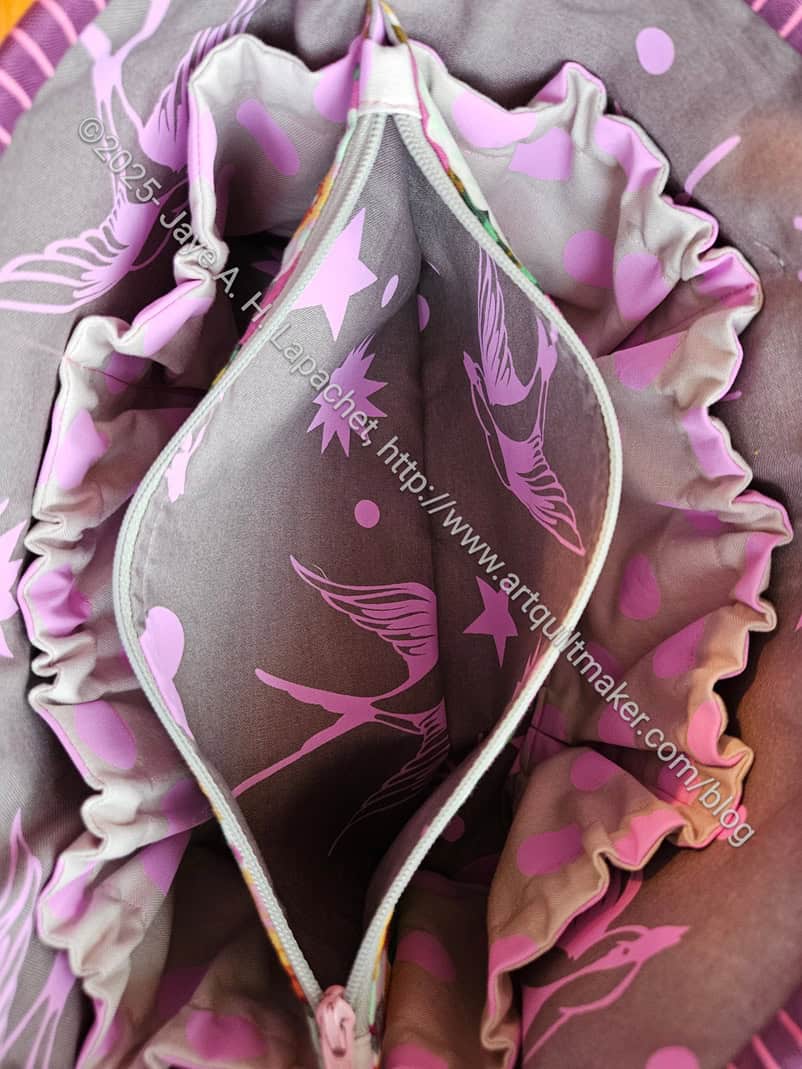
Multi-Pocket Organizer #2: divider pocket open
Inside are a lot of pockets. The first one I made, according to the directions, after assembling the exterior was the divider pocket. In the photo, left, it is wide open. The inside is made from one of the Tula neon fabrics. The taupe/grey (?) background was a bold choice for me, but I wanted to use the fabric and it went with the dots I used on the exterior.
The ruffly pockets are sewn to the lining and made with elastic. I was looking for a tool I have, the Clover Clip & Glide Bodkin**, which is great for slipping something like elastic through a channel, but couldn’t find it. I am sure it will turn up when I don’t need it.
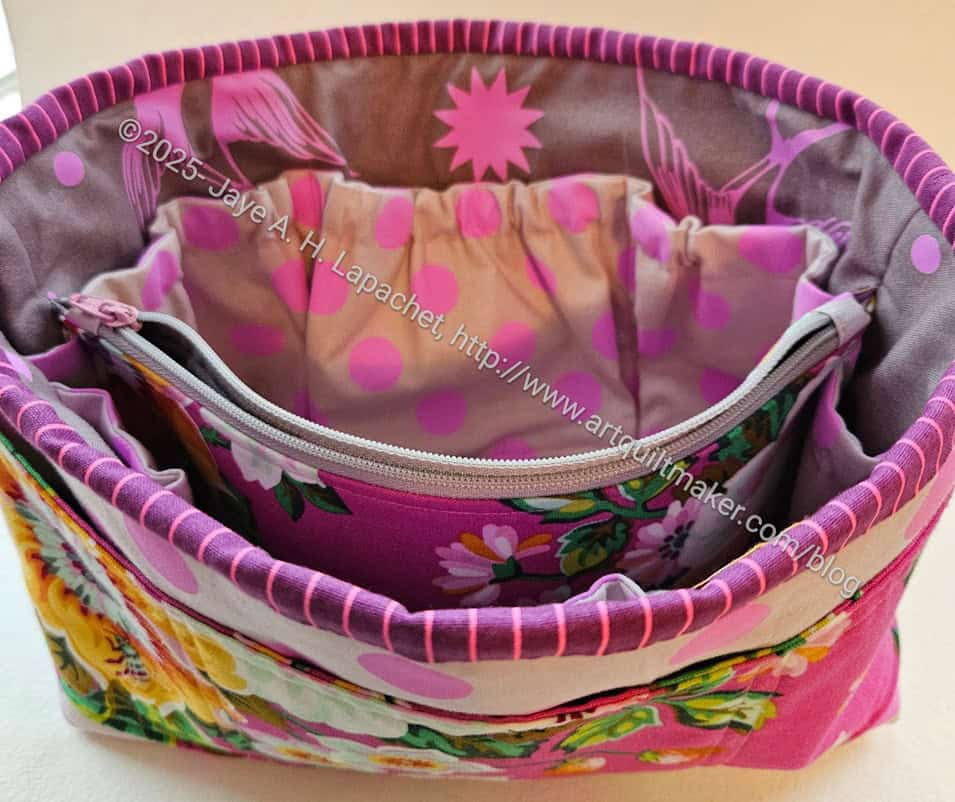
Multi-Pocket Organizer #2: interior
The photo, right, shows the inside with the divider pocket mostly closed and a bit of the exterior. I used the exterior fabric on the divider zipper pocket, though lining fabric would work as well.
One thing I learned is to make the handles and zipper tabs out of the exterior fabric. They would blend in better.
This is a good project and it doesn’t take very long to make. Again, the pattern is from Sotak Handmade.
**N. B. : Obviously, you should shop at local quilt shops and small businesses. However, if you are too busy or can’t find what you need there, I use Amazon affiliate links and may be paid for your purchase of an item when you click on an item’s link in my post. There is no additional cost to you for clicking or purchasing items I recommend. I appreciate your clicks and purchases as it helps support this website.