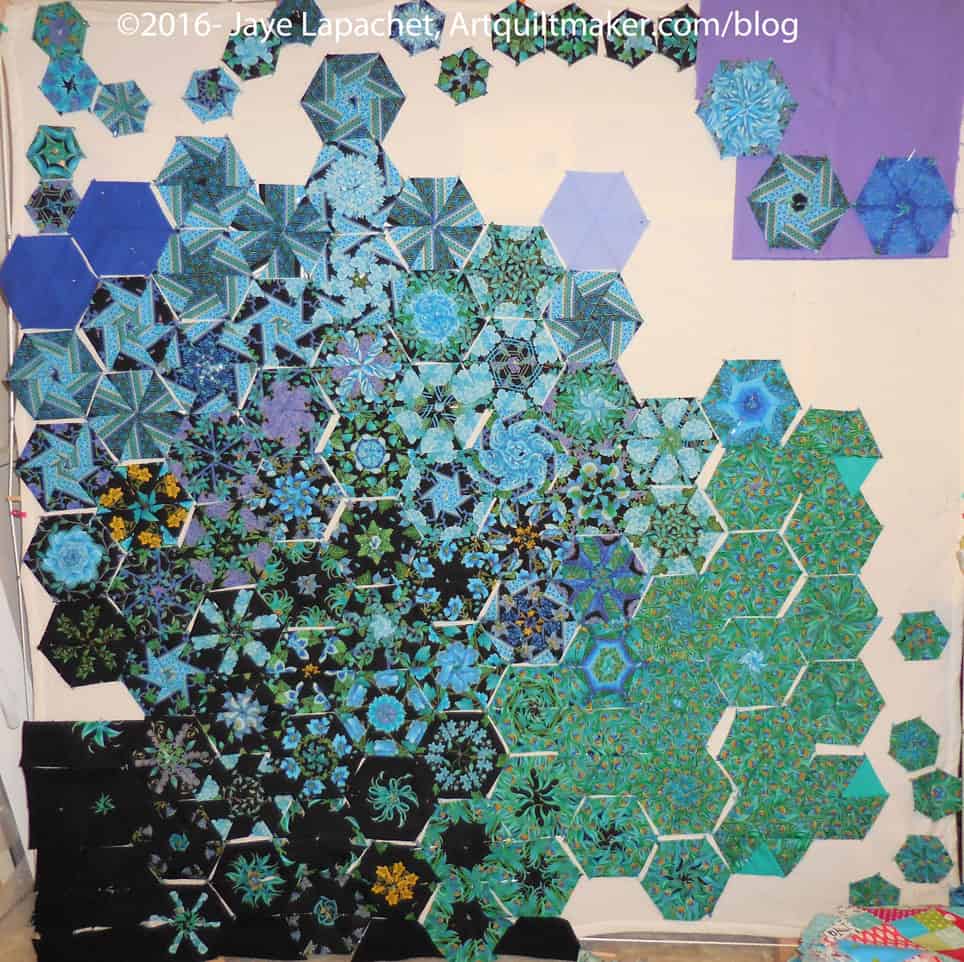
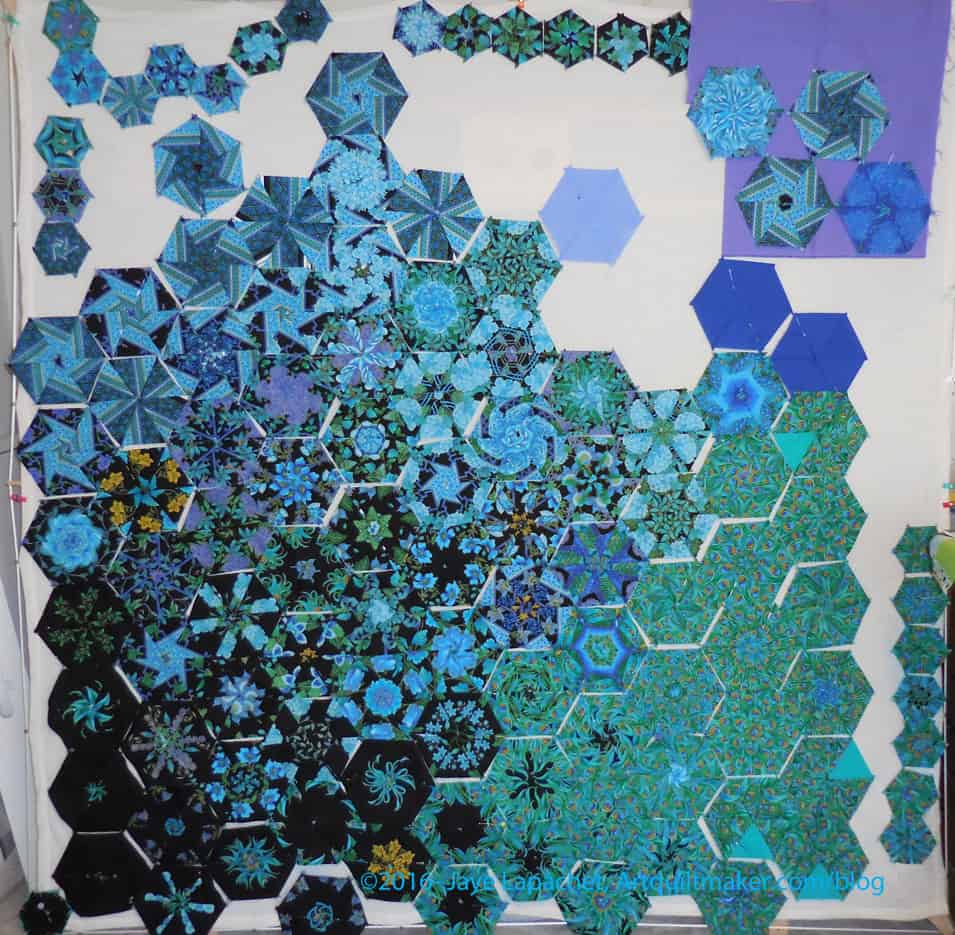
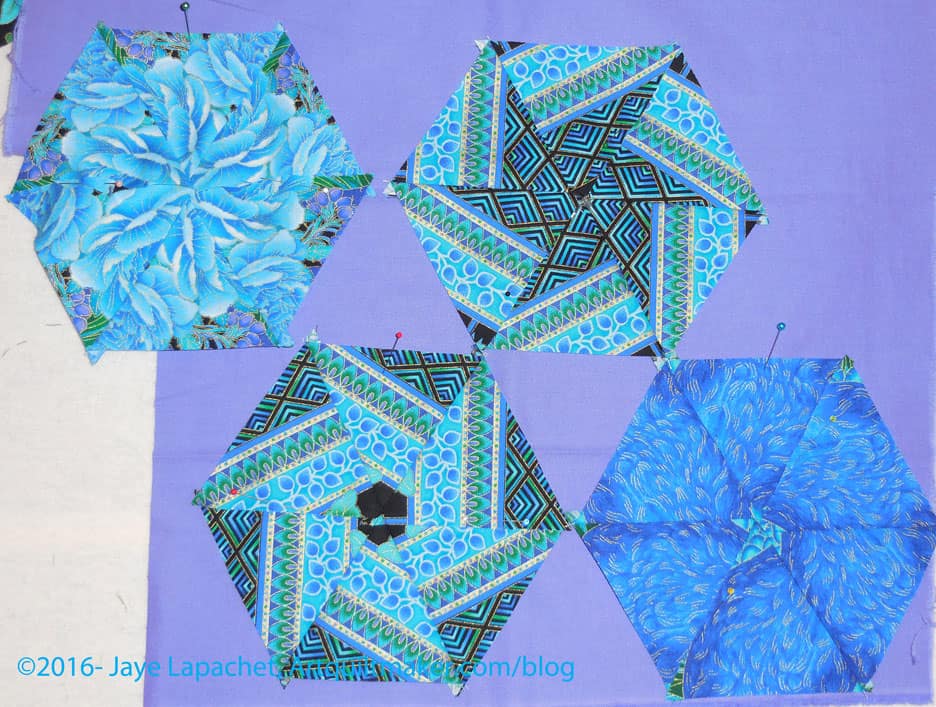
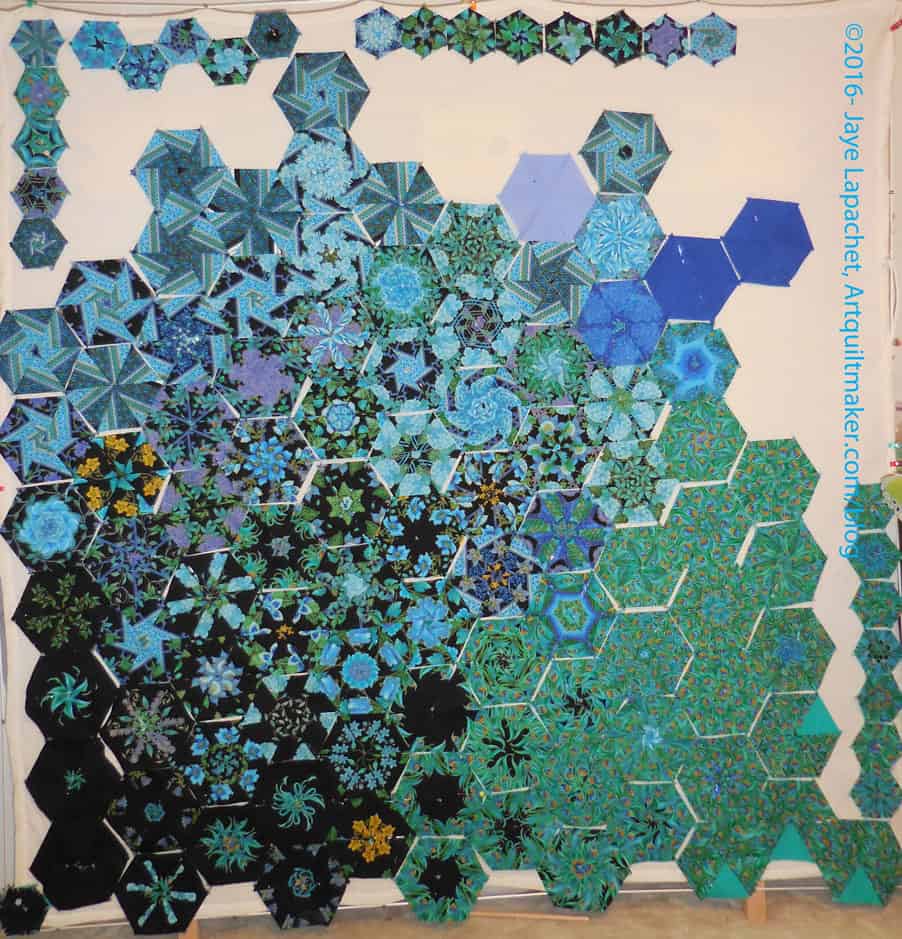
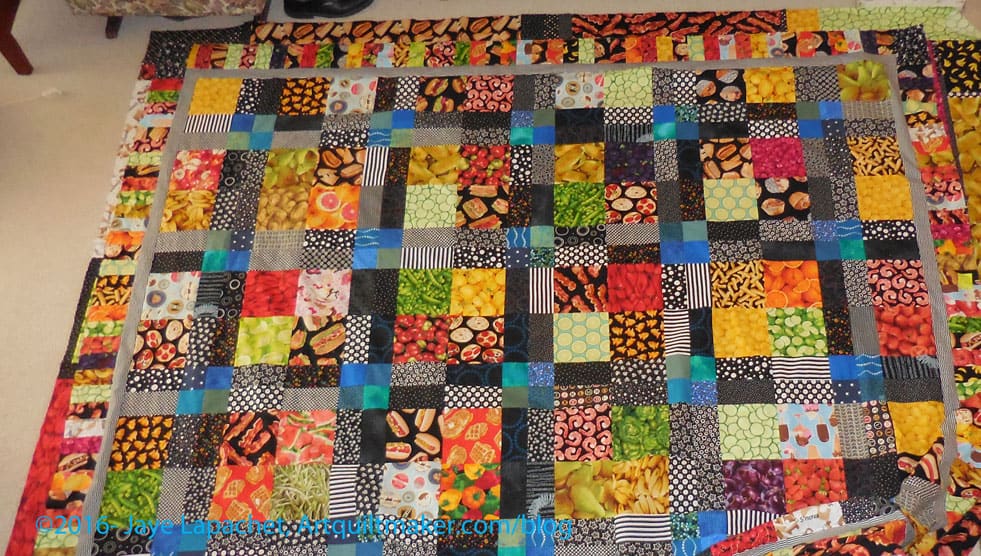
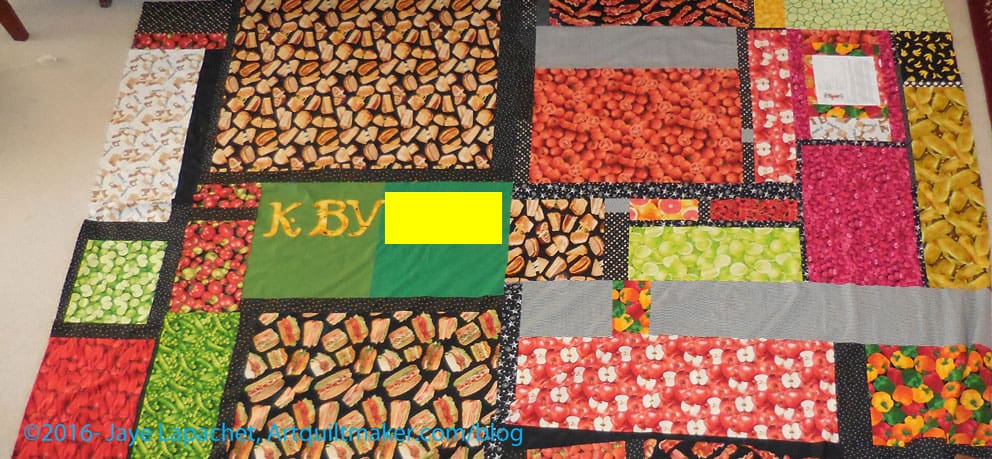
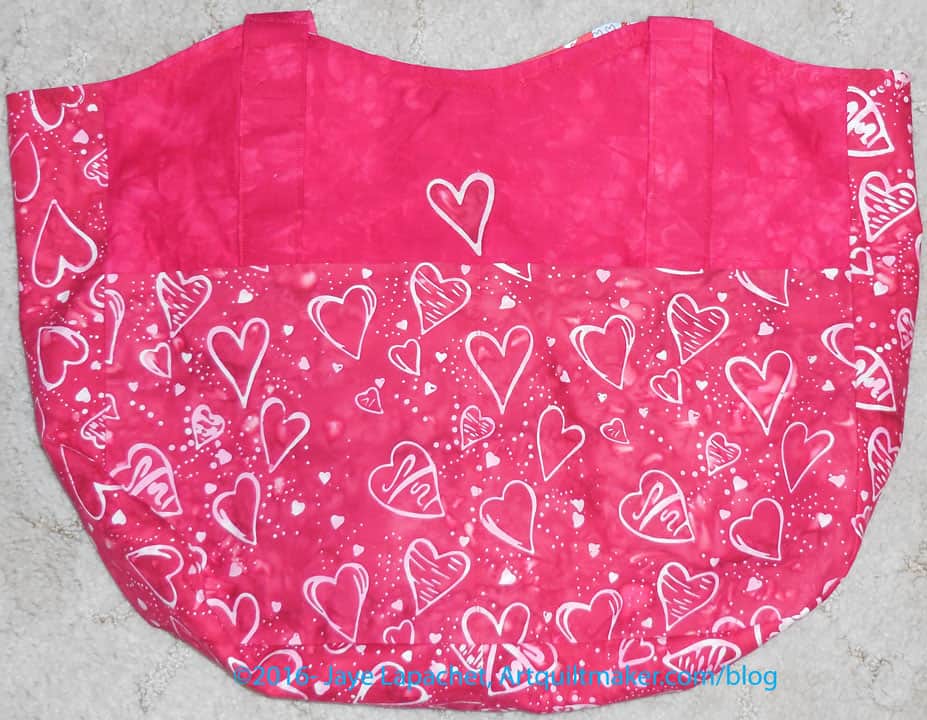
I spent some time on Saturday night and most of the day Sunday trying to make progress on The Peacock. I now have four rows sewn together in a chunk. A fifth is the start of a new chunk.
The piecing is very labor intensive, though not as labor intensive as Y seams. The good part is that I have to put a leader/ender piece between each Peacock seam under the machine. This will equal a lot of additional blocks or, perhaps, a quilt top.
I started to put the small blocks into the ends of some of the rows. That piecing is fiddly and I haven’t gotten all the measurements figured out. Still, I am pleased that I have been able to incorporate those small blocks into the border as I piece. I have more to piece in and have to figure out how to do that.
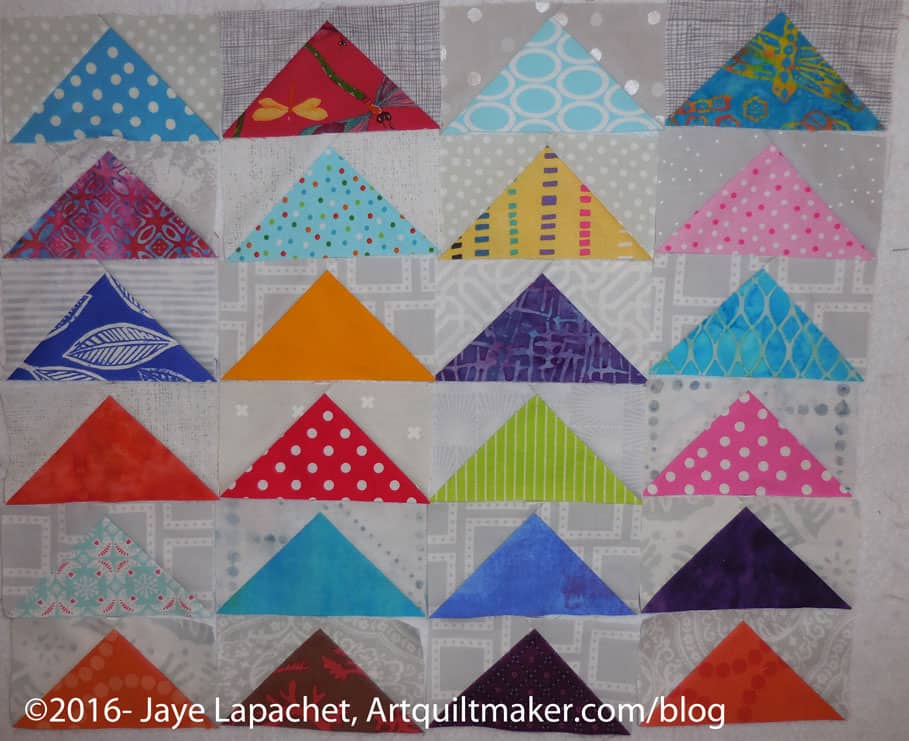
I took a photo of the last few Flying Geese I made before I went on vacation.
This is a cheerful bunch and I am pleased with them.
My next step is to make a block, per my design, and see if it works. The Round and Round pattern is a genius way to use the Friendship Star and I really like the pattern. Combining it with the Flying Geese will be an interesting challenge.
During the past little while, I have been flinging curses at the Peacock as it sits on my design wall, taking up space and glaring smugly at me.
No more.
Peacock on Sunday
I made two cuts on Sunday and was off. With those two rotary cut strips, everything changed. Finishing the piecing actually became possible…. no probable. I only had time for a little work on it, but the piece progresses. I am snatching bits of time where I can and making some progress. It is amazing how something can change so quickly. I do think that, more importantly, my attitude about the project changed.
First, I had along rest with absolutely no sewing. The closest I came was visiting a craft shop that carried quilt fabrics and magazines.
Next, solving the problem of squaring up the piece began to rumble around in the back of my mind until I had a solution I wanted to try. Two cuts and I realized that what I wanted to do would work and it was actually a reasonable idea.
The idea was to cut 3.5″ strips (same width as half one of the blocks), cut a 60 degree angle on one side and sew it to the edge blocks. These short strips work. The black, with which I have started, blends nicely in with the very darkest blocks.
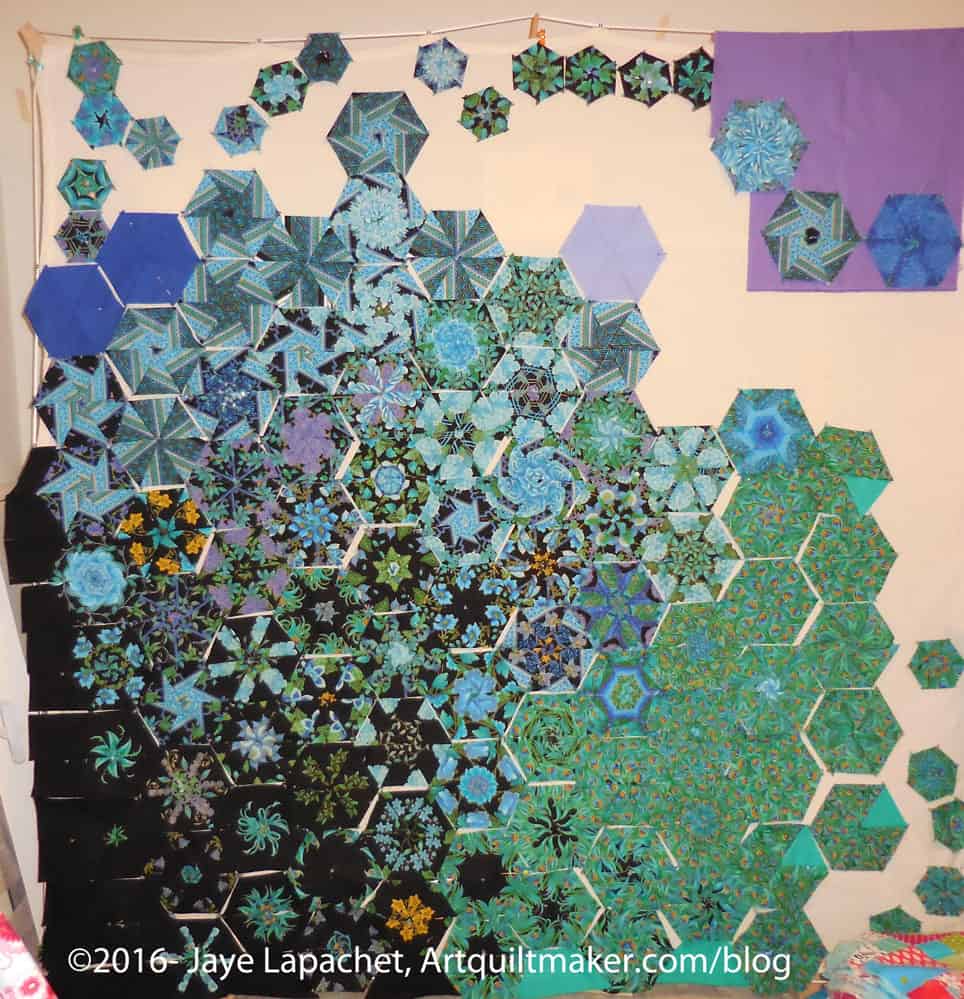
Peacock: More background added
Third, I started to move the blocks around after taking some photos. Some of the blocks looked out of place in the photos. Moving them make the piece come together better.
In the photo, right, I have moved some of the solids around to try and blend the background a little better. I haven’t tried super hard yet and I know I won’t be able to blend as well as I do with the Fabric of the Year quilts, but I want to give the impression of a bit of blending going on. That I immediately started to blend the blocks into an Impressionist look tells me I have much more color blending in my future.
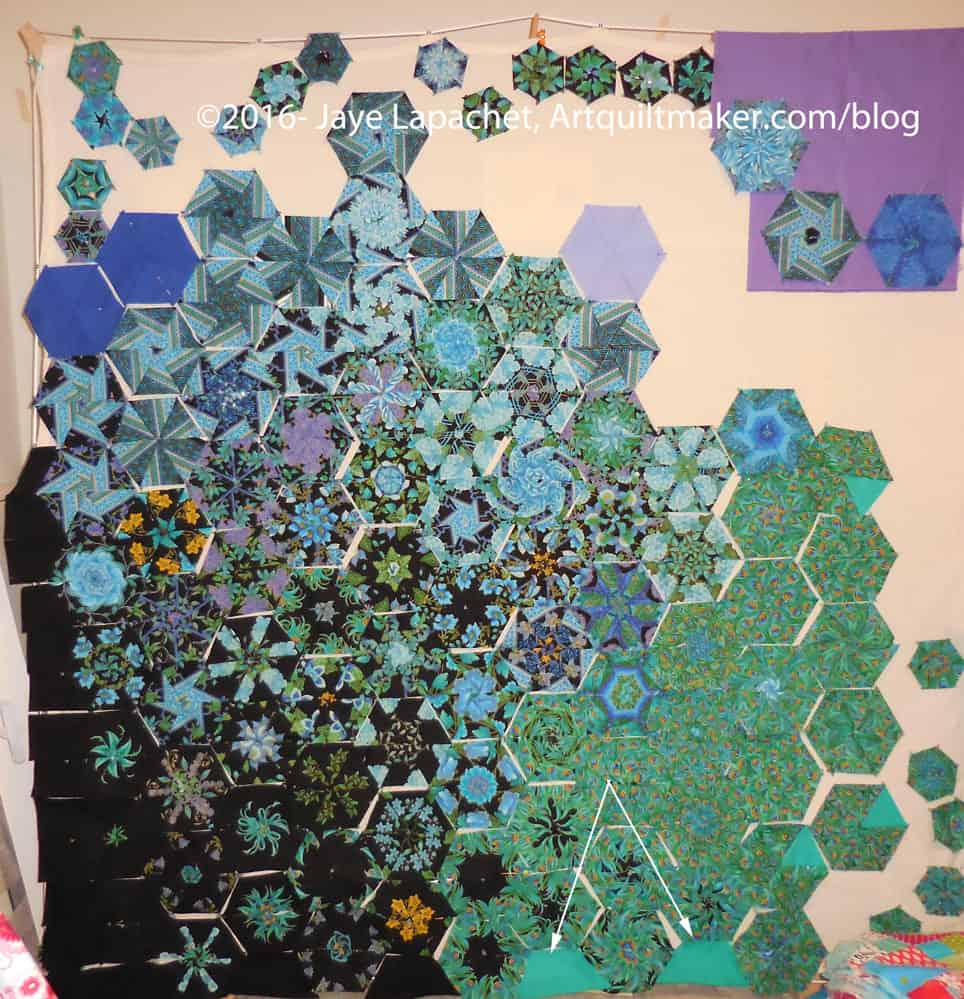
Peacock: Exchanging Black for Green
Most importantly, I have changed out the black on the bottom and used green (see arrows at the bottom). The black was too jarring near some blocks that had no black. The green isn’t a perfect match to those feather blocks, but it is the green I used in the other feather blocks.
I am also trying out some of the blues at the top, but I am thinking they may be too dark and I might try some light blue. I have a stack of solids I can try. I just haven’t tried very hard to find the right one yet.
I plan to have a sort of irregular line of blocks, as the quilt looks now, though the background will make the quilt square. There are still some unknowns. I don’t know what the quilt will look like exactly. I am not sure how I will make the small blocks float around the edges as you see them now. I will let it mull in the back of my mind and see what comes up.
As I said in July, I have been using a version of Pam‘s spreadsheet to keep track of my fabric usage. My goal is still not to get rid of my stash, though I do want to use my stash. This means I am not telling you my Net totals. To date I have used almost 136 yards of fabric, 21% of which is for charity. I am upset, because I am not using as much as I expected. I am, however, enjoying keeping track of my fabric usage, because I can see that I am actually using fabric.
September To Do
Wash fabric AKA The Great Unwashed-some progress
Cut out 3 notepad covers for gifts
Finish cutting out Day in the Park backpack variation
Finish sewing Anna Maria Horner Multi-tasker tote -this was a gift I intended to give during Holiday 2013- sigh. Missed 2014 Holiday deadline as well. I made it for birthday 2016 and it was a successful gift.
The other day I had to go to Santa Clara to take the YM to a one day job. He actually got paid! He could have ridden the train, but Julie and I decided to get together, so it worked out.
We went to lunch and went to Golden State Sewing. I hadn’t been to this store before (sorry no photos), but I had been to their booth at PIQF. The store was crammed with fabric, but in an organized way. I looked at fabric for dress for next Grand Parlor and some upcoming events. They had an excellent selection of Kaffe Fassett fabrics.
I looked very seriously at a couple of Kaffe prints for dresses, but didn’t end up buying any. I did end up seeing the Pokemon fabric from which I promised to make a pillowcase for the YM’s new roommate.
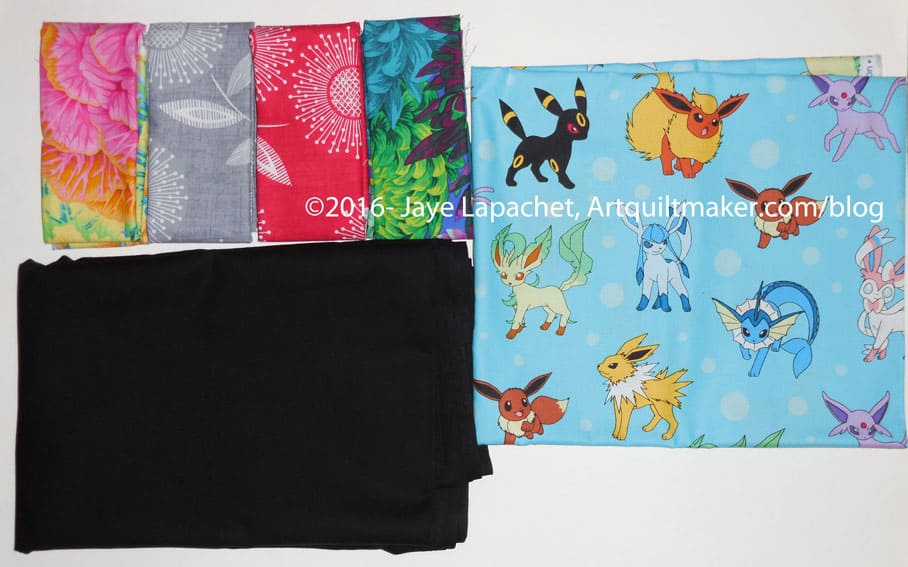
Golden State Sewing fabrics
I bought a few things. I bought the Pokemon fabric. I also bought a boatload of black solid for the Peacock. The other fabrics are fat quarters. The two Kaffes are the ones I am still considering for dresses. The center fat quarters are similar to the blue I used for the Midi Bag. I had never seen that print in other colors. While I like the blue best, the red and grey are nice, too. The grey is a little too dark for the Flying Geese, but I have to admit to trying it out on a few FGs anyway.
The Peacock has been on the design wall and I am not as excited as I was. I thought that it would be quite exciting, but I am not excited now. I am trying not to take down all the blocks and put it away, though I do think that is a very real possibility.
Still I am happy with the basic layout. I think the blocks need some space between them, but I don’t think I have it in me to cut up strips of fabric to put between each block.
Testing squares
I thought that perhaps I would add a Peaky to each block and make them in squares. That means I could put the blocks together with a little space between them. I put a piece of a solid behind a couple of the blocks to see what it looked like. It is hard to see what the whole piece would look like, but even still I don’t really like the look.
I think I’ll just sew the piece together, basically as shown, and be done with it.
It has been almost a month since I did a Design Wall post. The wall seems like a storage facility for pieces and parts lately. I am putting patches, bits of fabric, parts of blocks and hunting / gathering pieces up to get them out of the way more than work on them. Space feels at a premium in my workroom right at the moment.
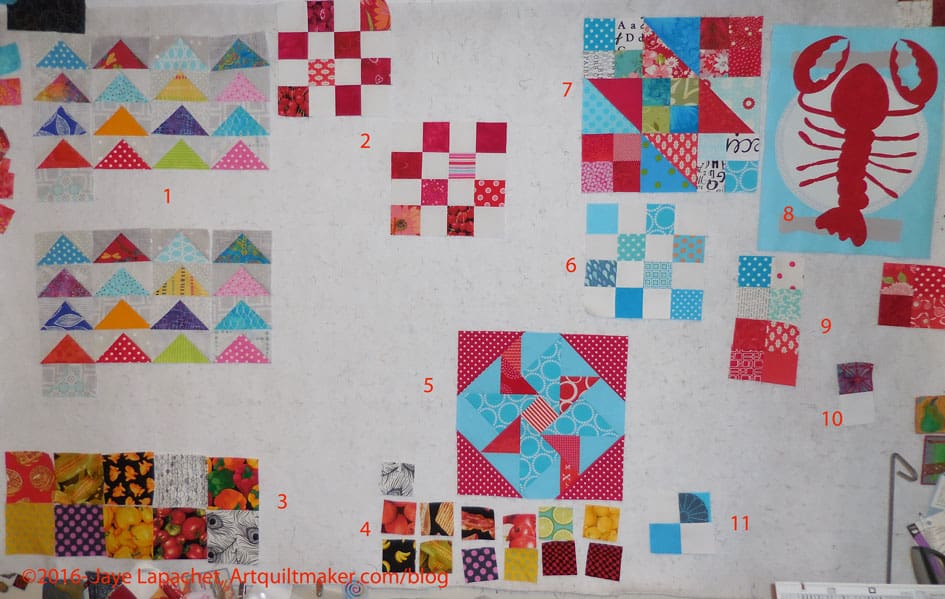
Design Wall mid-July
Flying Geese. I am making some sets of them again. I don’t think I need anymore for the design I am contemplating, but I have a stack of squares already cut and so I might as well make them.
2. I am still collecting red donation blocks. The two set apart are the latest.
3. FOTY 2016 latest squares. You can see some of the Food Quilt #3 fabrics showing up.
4. Donation squares. I seem to have mislaid the box, so I have been putting them on the design wall until it turns up, which it will undoubtedly do. This is always why there are no new donation blocks. No fabric = no blocks.
5. Partial seam block for my Aqua-Red Sampler. Tutorial coming soon.
6. Turquoise donation block. I am thinking of making a bunch of these next for another donation top.
7. Stepping Stones block. This is my sample. Yesterday I made some progress in my head about making the parts for the rest of the blocks I intend to make.
In Process
The ‘In Process’ is used to denote projects on which I am actively working or pretending to stitch. I try not to put away projects, because that will ensure I never work on them.
Carpenter’s Wheel blocks – I finished #9 and #10. This concludes the blocks and I will start laying them out soon.
English Paper Piecing Project– half hexies – I am adding another big section, but I have done half and stopped. Slowly but surely wins the race
Lobster – have more stitching to do and then I need to quilt it.
Octagon 9 Patch: ready to put together. Not sure what I am waiting for
Pies and Points from Victoria Findlay Wolfe class. No further progress. I did find more of the background fabric when I went to Portland, so I can make a larger piece.
Still WIPs
I still have WIPs. Who doesn’t, after all? A project in the ‘UFO’ category means I am stalled. A nicer way of saying UFO is a WIP. The list is a lot shorter and the projects are newer, for the most part.
Aqua-Red Sampler – I made progress on the partial seaming tutorial and need to sit down to finish it.
The Tarts Come to Tea: I still haven’t worked on this since April 2011, though, it is in a prominent location so I have easy access. I was thinking about how this was veering in the direction of being one of my ‘masterpieces,’ but now that it has languished for so long it just looks old and dated.
Pointillist Palette #4: Fourth is a series of 6 quilts; needs tiny square patches sewn together. I still haven’t worked on this project either, but I do think about it.
Self Portrait: started in 2006 at a class at Quilting Adventures in Richmond, Virginia. My career counselor breathed new life into this project for me. She asked a simple question and the end result was inspiration for this piece, but I kind of lost steam again after printing images on paper to try out different designs. Lately, I have stopped feeling like I need to finish this piece. I am not ready to give up on it yet. I think it really needs major surgery.
Under the Sea: class project; like the design, but not the colors. Still a possibility for abandonment. Just can’t seem to pull the trigger.
Spin Wheel: really not started, but supplies gathered. I probably have enough fabrics and just need to decide to start.
Windmill quilt: Still hunting and gathering. I am supposed to be cutting a variety of greys for the background. The problem is that I mislaid the rotary template. Sigh. I may be able to cut the greys on a Sizzix.
Other
Stepping Stones #3 using the Macaron pre-cuts from Hoffman. I have all the fabric in pre-cuts and am just waiting for space in my schedule.
As I said in May, I have been using a version of Pam‘s spreadsheet to keep track of my fabric usage. My goal is not to get rid of my stash, though I do want to use my stash. This means I am not telling you my Net totals. To date I have used almost 82 yards of fabric, 18% of which is for charity. I am upset, but also enjoying keeping track of my fabric usage, because I can see that I am using fabric.
July To Do
Wash fabric AKA The Great Unwashed-no progress
Cut out 3 notepad covers for gifts
Finish cutting out Day in the Park backpack variation
Finish sewing Anna Maria Horner Multi-tasker tote -this was a gift I intended to give during Holiday 2013- sigh. Missed 2014 Holiday deadline as well. I made it for birthday 2016 and it was a successful gift.
As I said yesterday, I finished the binding and back of the Food Quilt #3 and it is ready to go to the quilter. The top was already finished. I was trying to decide what project to work on next when I realized that I wanted to look at the blocks and projects I had been working. I started putting all of the projects up on the design wall and taking a look at them.
Pulling out a bunch of projects and putting a zillion blocks up on the design wall is a lot of work. I am exaggerating. None of my projects have a zillion blocks, though the Peacock and the Octagon 9 Patch do have a lot.
Peacock – July 2016
I could spend all week going through the projects with you until I made a “big reveal” and told you what I would work on, but I think you should know immediately that the Peacock blocks excited me most when I put them up on the wall. I am not sure why. Perhaps my eye is liking the dark colors?
I also realized that this is the first time I have seen these quilt blocks on the design wall.
The above photo shows a pretty raw layout, but not terrible either. I am still in that gradation mode, so I put the darker blocks towards the bottom. I don’t have a lot of the small blocks, so they will make an asymmetrical border.
I only have a couple of solid blocks, which I talked about adding as tests. The lavender definitely doesn’t work in the current location. I kind of like the way the top of the quilt (without the small border blocks) is not straight. That begs the question of what I would put to make the edges straight. I am definitely not making an edge like that.
My other immediate thought upon stepping back was that the gradation was nice, but that blocks needed a bit of space between them. I might be backing off that thought, but I will put some black behind and in between the blocks to see.
This quilt requires more work, so I may quilt one of my projects while I look at it, try things and rearrange.
There was a Sew-in this past weekend (4th of July in the US) and I spent most of the time working on the finishing aspects of the Food Quilt #3. I finished the binding on Saturday and the back on Sunday. Even though I have other projects on which to work, this felt like a coup.
Food Quilt #3: Finished top
The piece is about 101″x 86″. Yes, it is huge, which means that I don’t have a full picture of the top or back. The YM was gone, it was cold outside and I don’t have a room large enough to lay out the back or top. The above photo is part of the top with a bit of the back peeking through.
Food Quilt #3: Finished back
Of course the back is larger. Again, I have shown you only part of it due to the size.
I am pleased that this is done and will see about getting this and FOTY 2015 to the quilter soon.
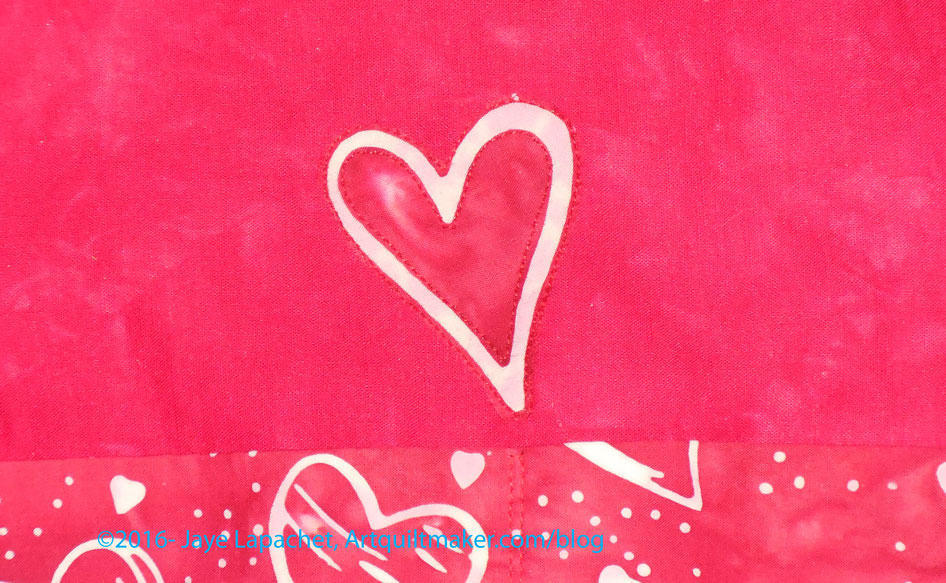
Right before we had to leave for the NDGW Grand Parlor, I decided the front of the Heart Bag needed something more. I didn’t have a suitable button which I have put on other versions of this bag. Finally, I decided (perhaps SIL suggested?) to applique’ a heart on to the front. I cut out one of the hearts from the scrap of fabric I had left. I used raw edge applique to sew it on and an Aurifil thread that matched pretty well.
Heart Bag with Applique’ detail
I don’t think the placement will be in the way too much and I sewed it very close to the edge to minimize fraying, though there will be some.
I am pleased with how it turned out. I think it breaks up the expanse of red just a bit.
The recipient really liked the bag, which was gratifying.
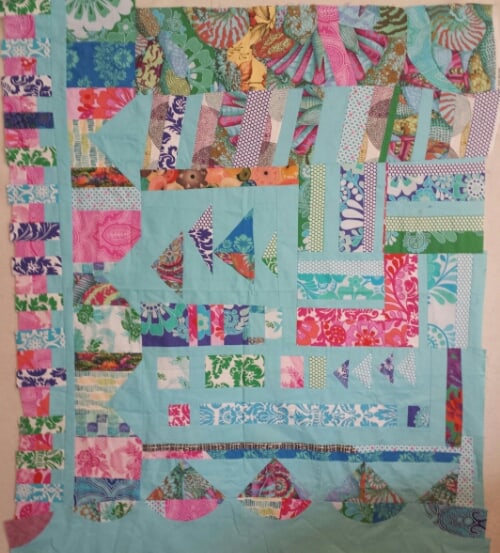
My Improv Round Robin has returned. Ruth had it for a couple of months because I wasn’t at the meeting last month and she wasn’t sure whether to pass it along.
She added the bottom part with the curves. It is an interesting addition.
I am trying to decide whether to try and get more people to work on it or whether I should just do some work of my own and finish it. I have some thoughts:
It needs some space around the edges. The outside top and right side might need some of the turquoise solid to provide some breathing room.
It is definitely not square and I need to figure out what to do about that, if anything.
I want to add more Flying Geese, which I will do myself. Perhaps I will add them on the right.
I am surprised that more people did continue the Flying Geese motif. The time constraints were daunting, however, so I understand.
I made a little progress on Food Quilt #3 over last weekend. The center is now done. My next step is to put a thin (not sure how thin) black border around the center and then attach the piano key border to the black border. I have to decide if I want to use a solid back or a white on black. If I use the latter, I want it to have a subtle white design on it.
You may have also noticed that I have broken the bounds of the design wall and the quilt is laying on the floor. Crazy, I know!