I thought I would be able to sew the Poolside Tote together over the weekend, but no such luck. The project is still waiting for me to have time.
I was engrossed in En Provence and the Carpenter’s Wheel, as you know.
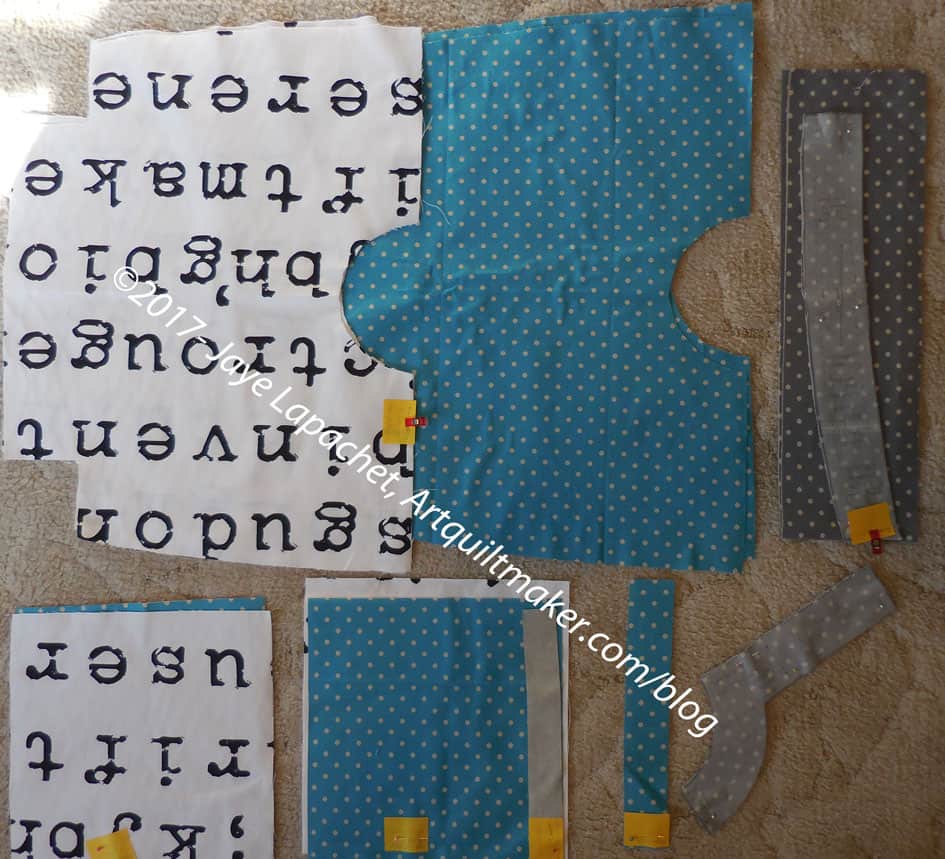
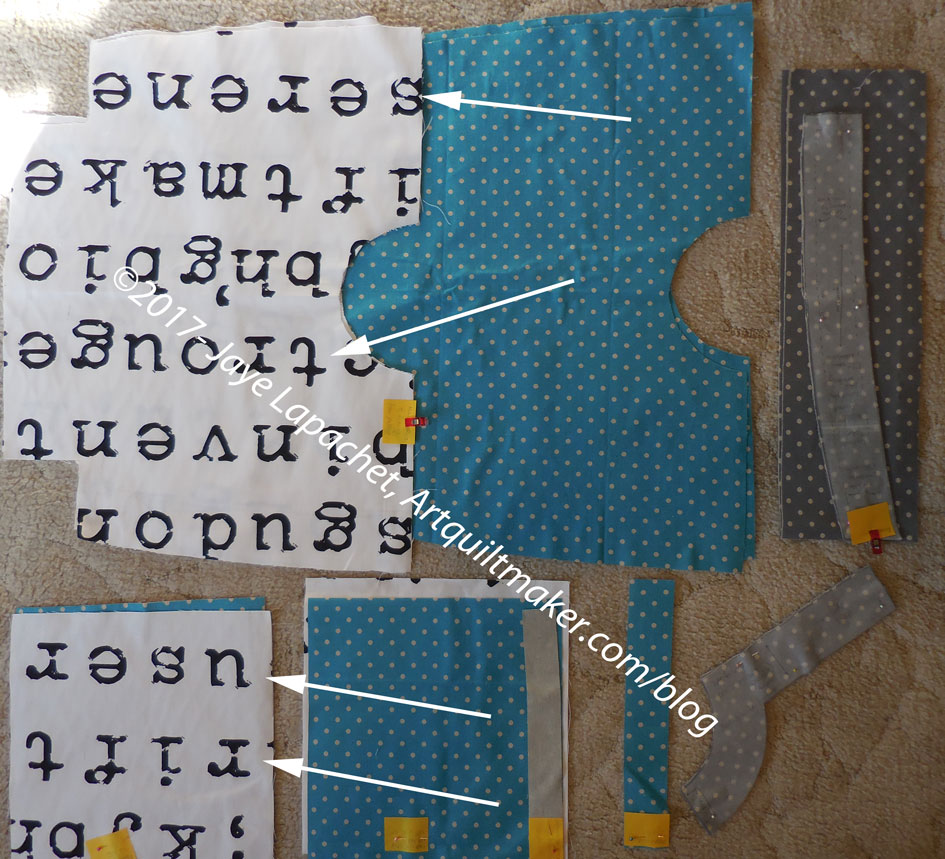
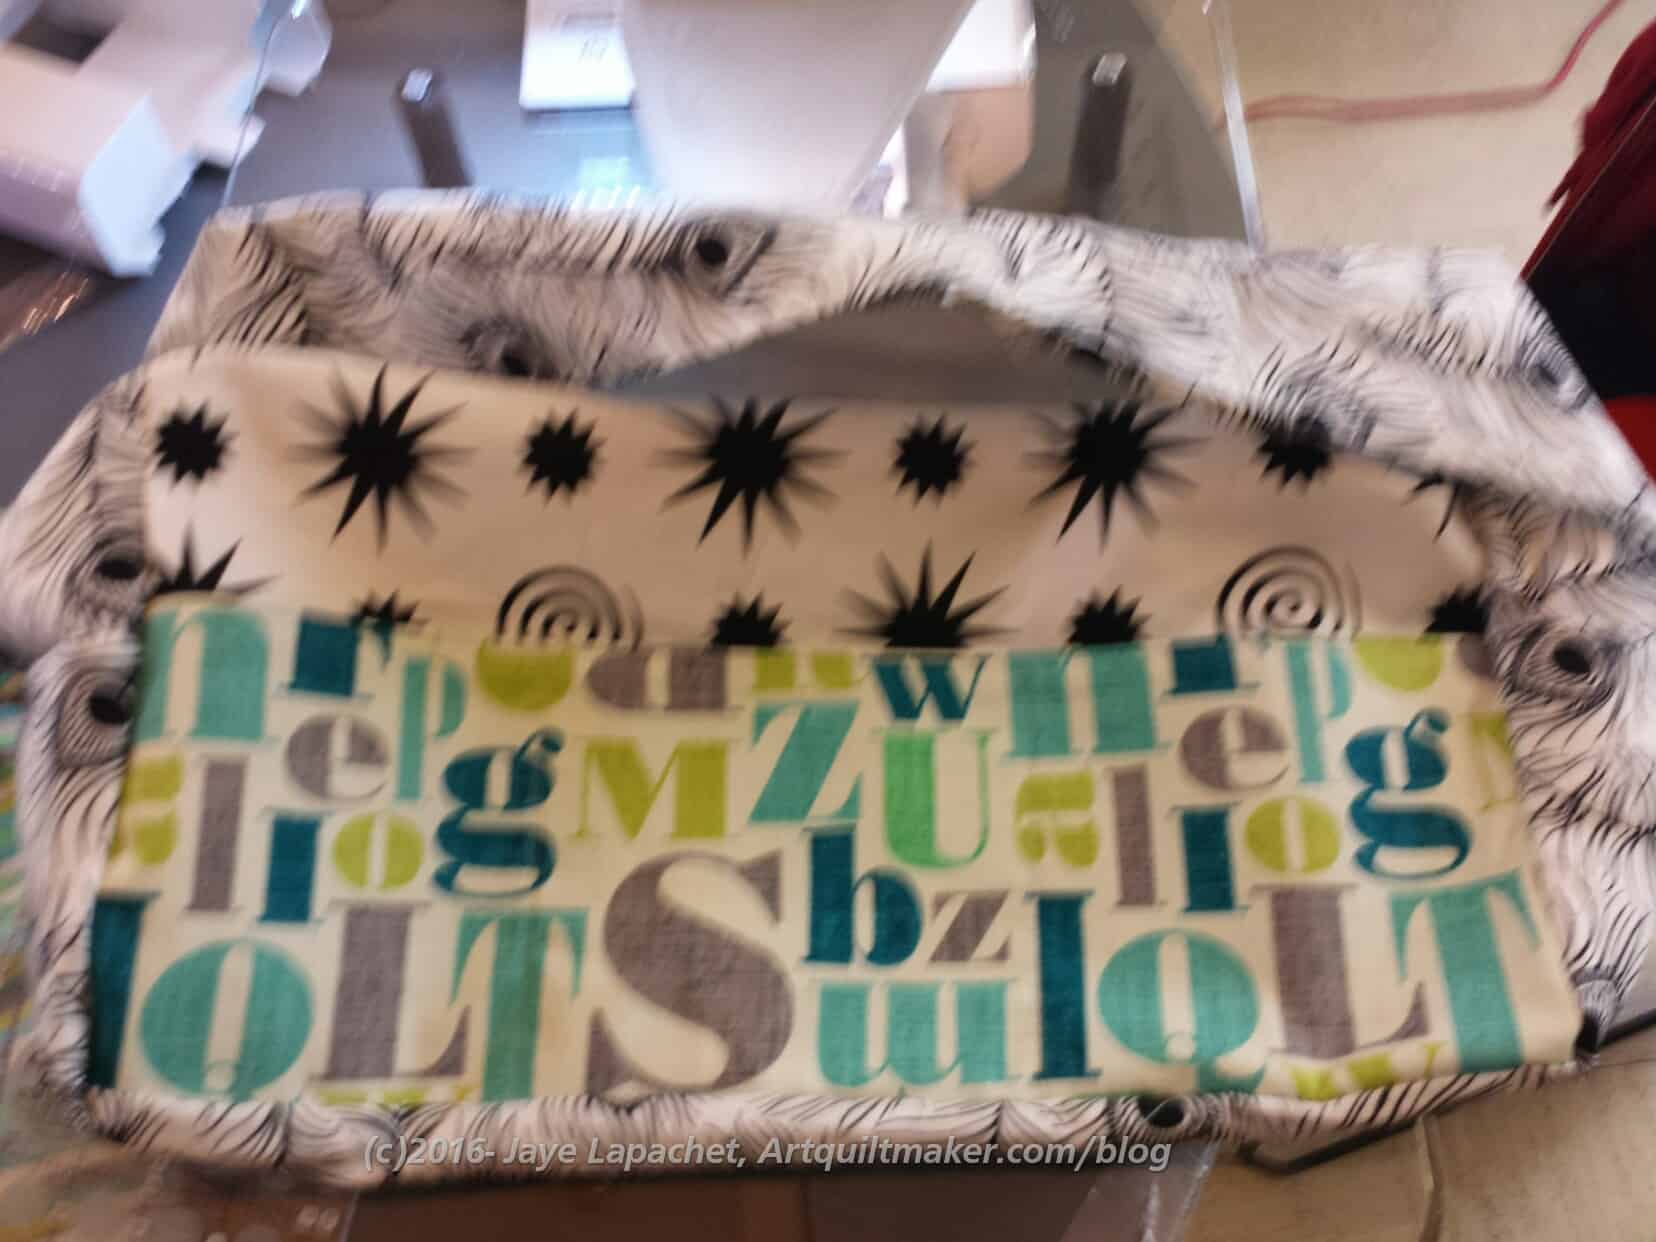
While the pieces laid on my floor (all horizontal surfaces are fair game for storage), I noticed that the random letters, in certain cases actually made words.
Hhmm.
Poolside Tote in pieces, annotated
I am not sure how I feel about that. I have pointed out some of the words I see.
The text fabric will be on the inside of the tote, so they won’t be very prominent. Making up stories using the words is a challenge.
On another note, the text fabric is VERY loosely woven and frays quite a bit. I might stitch the edge like I would a quilt with no border. I am just worried that another layer of stitching will make it hard to sew a bunch of layers together.
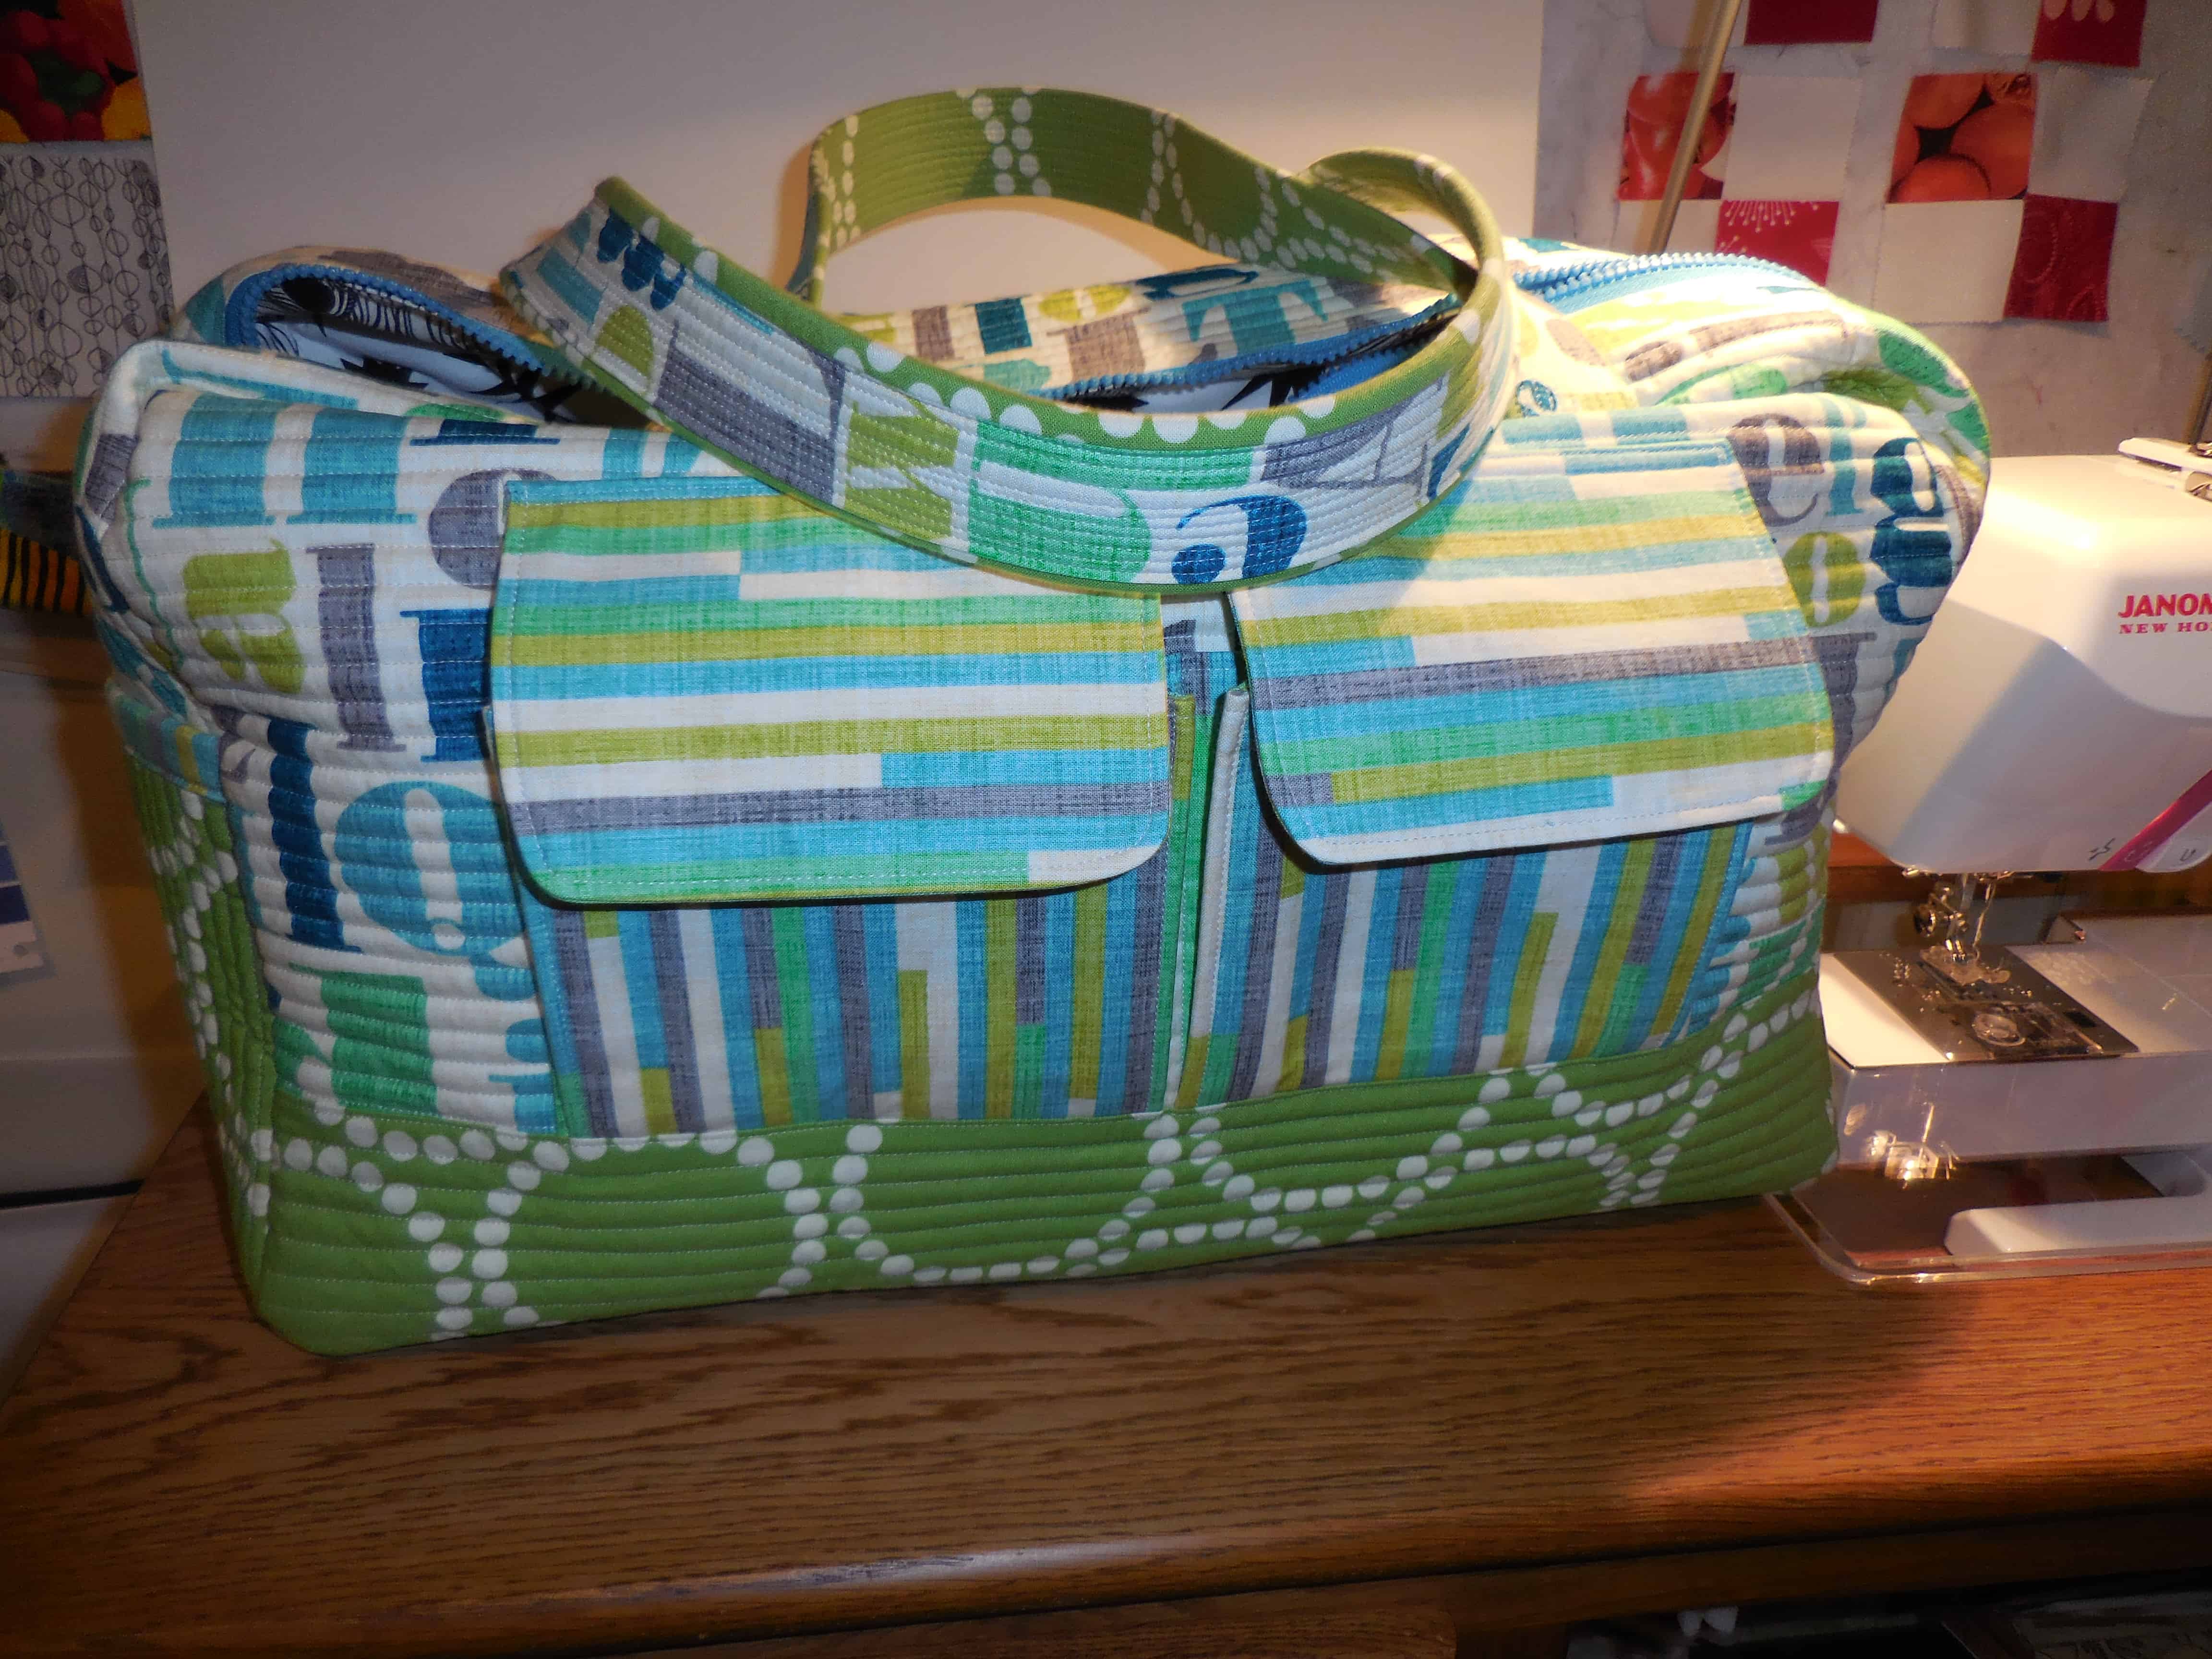
Not long ago, I talked about assembling the fabrics, etc to make the Poolside Tote. I know you thought it would be forever until I made it. Angelainspired me to get off my duff and said she would offer advice. Then Tim (both BAMers) said he wanted to make one as well. Julie also said she is going to make one. I might be leaving my two pals in the dust, however, or inspiring them to get off their duffs.
Poolside Tote: outside bag (tote 1)
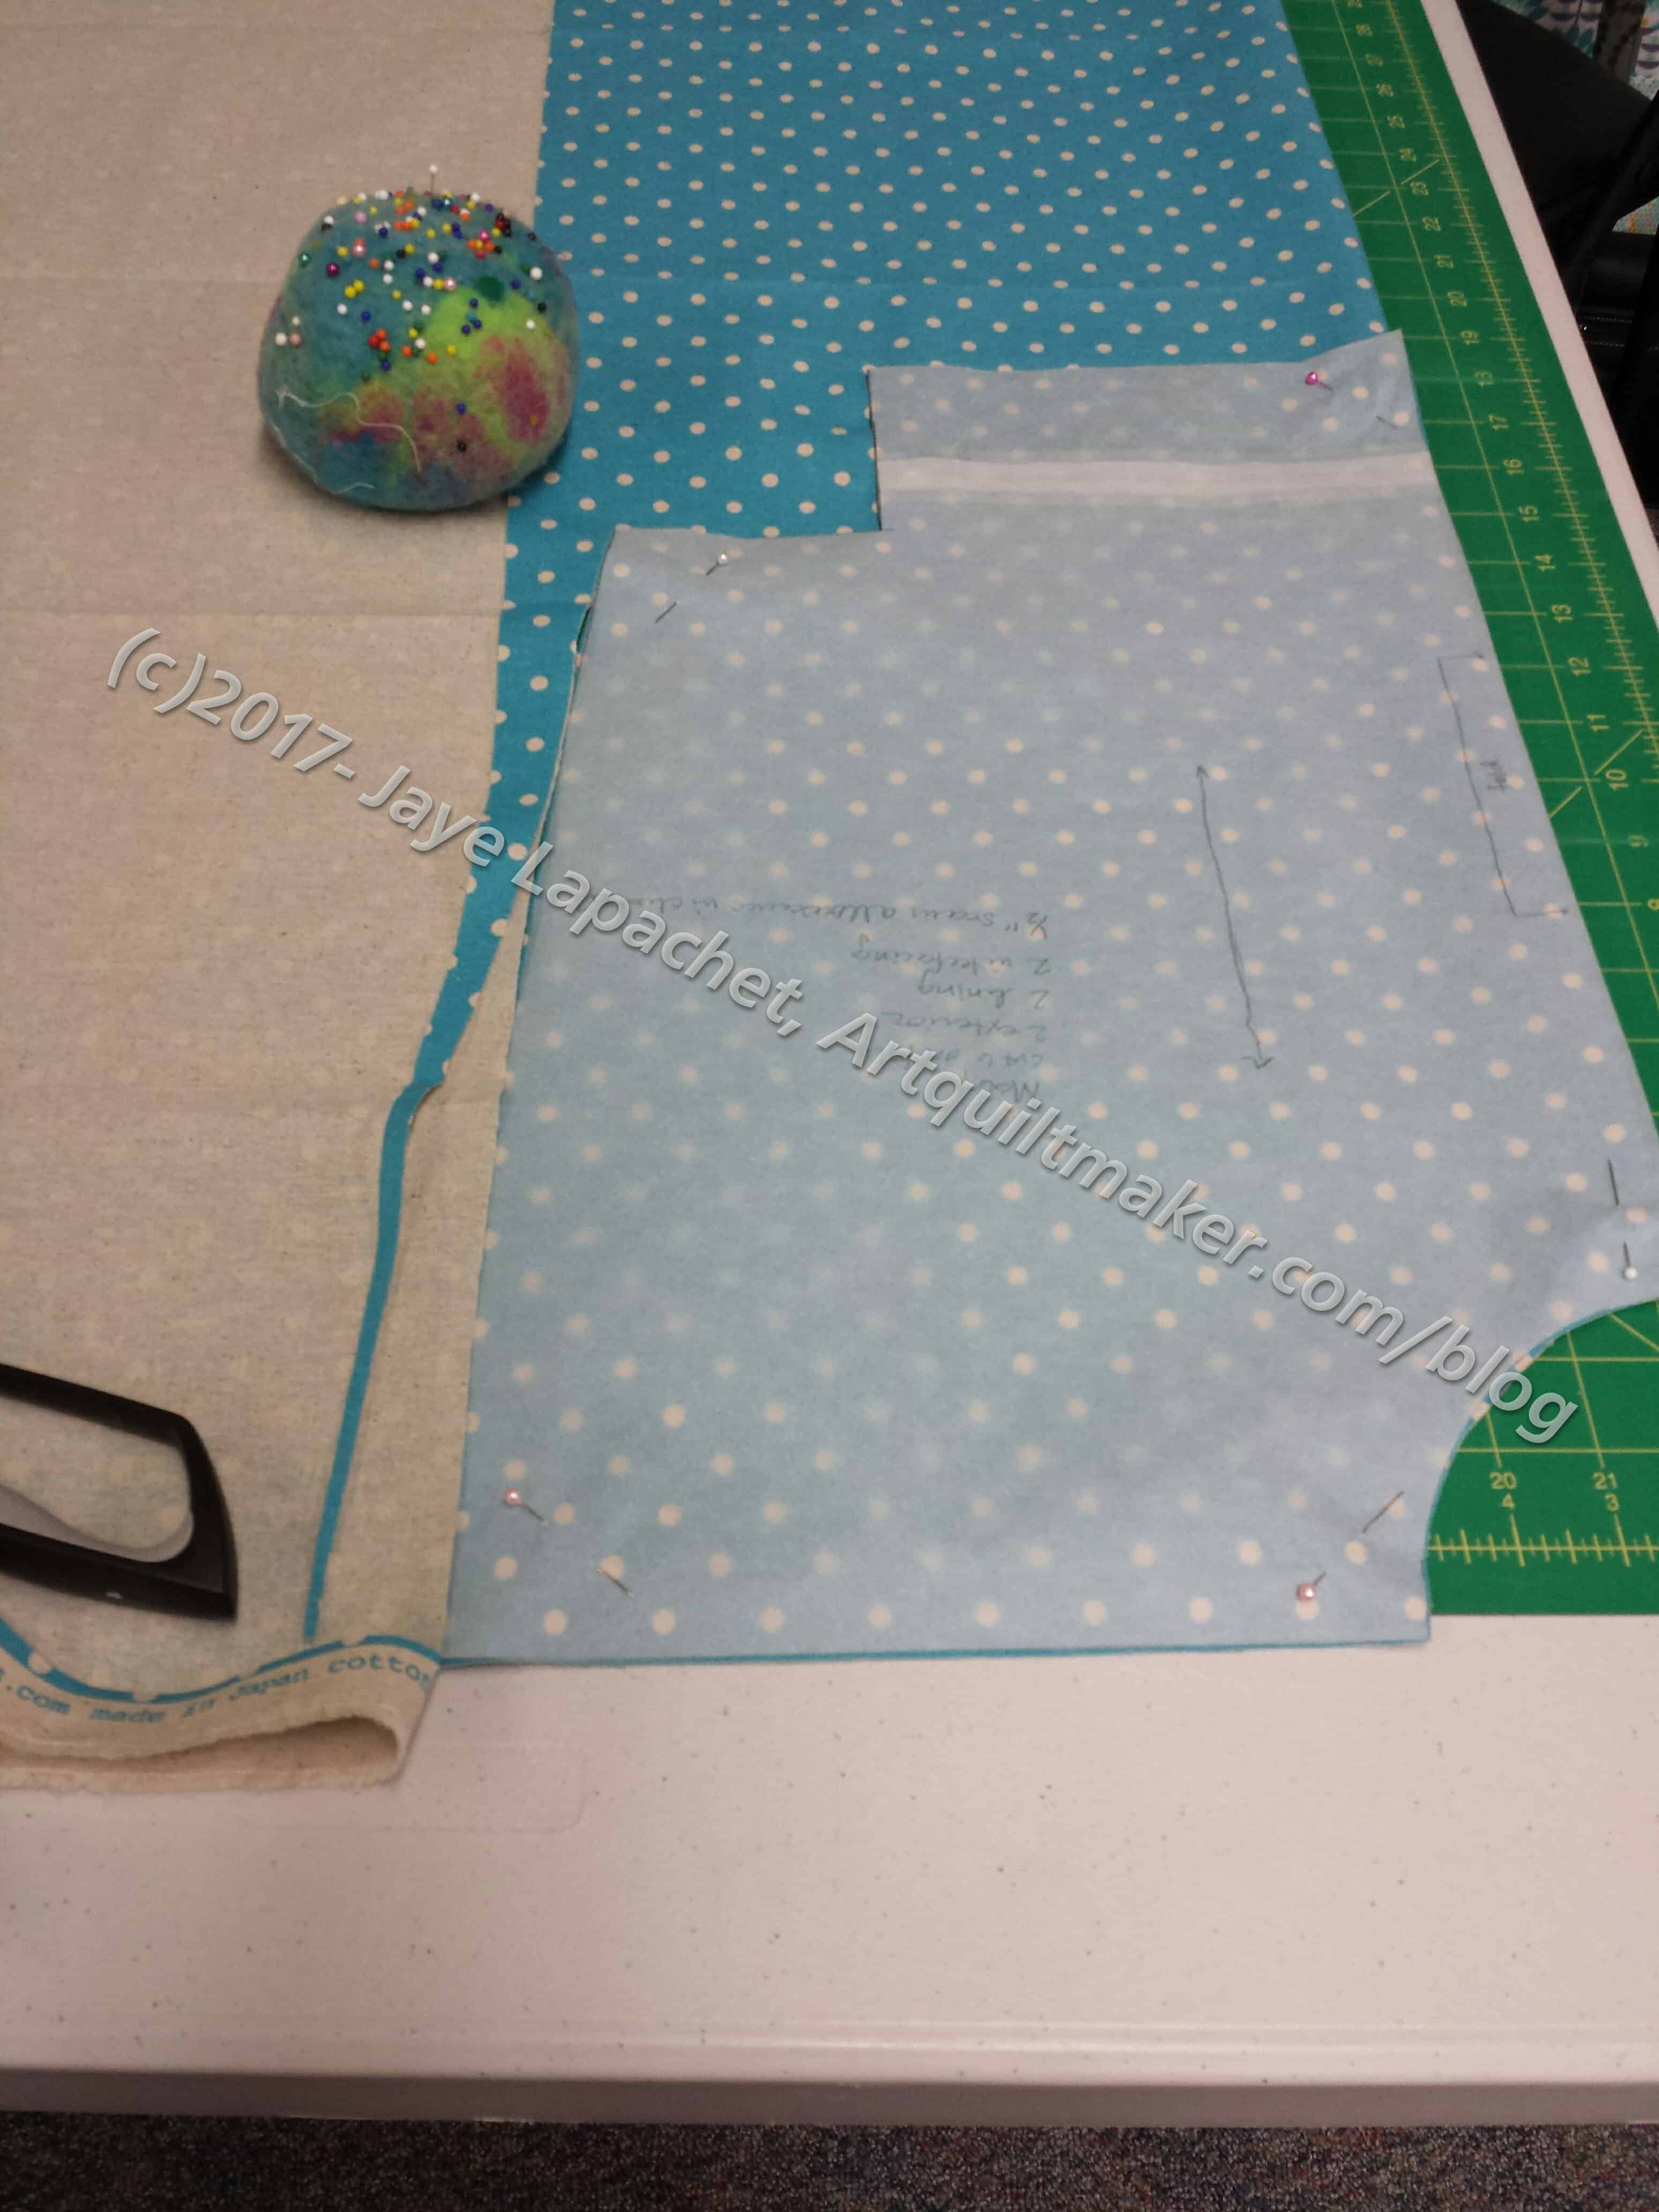
I went to a Sewcial on Thursday and cut out one version of the Poolside Tote. I used all the linen I bought and the AGF text print. It was a three hour Sewcial at Scruffy Quilts and I was able to cut out an entire bag except for the Soft and Stable.
I was kind of shocked at how much fabric this bag took. I don’t remember using up so much fabric. Well, I don’t remember using almost the same amount of fabric that the pattern demanded.
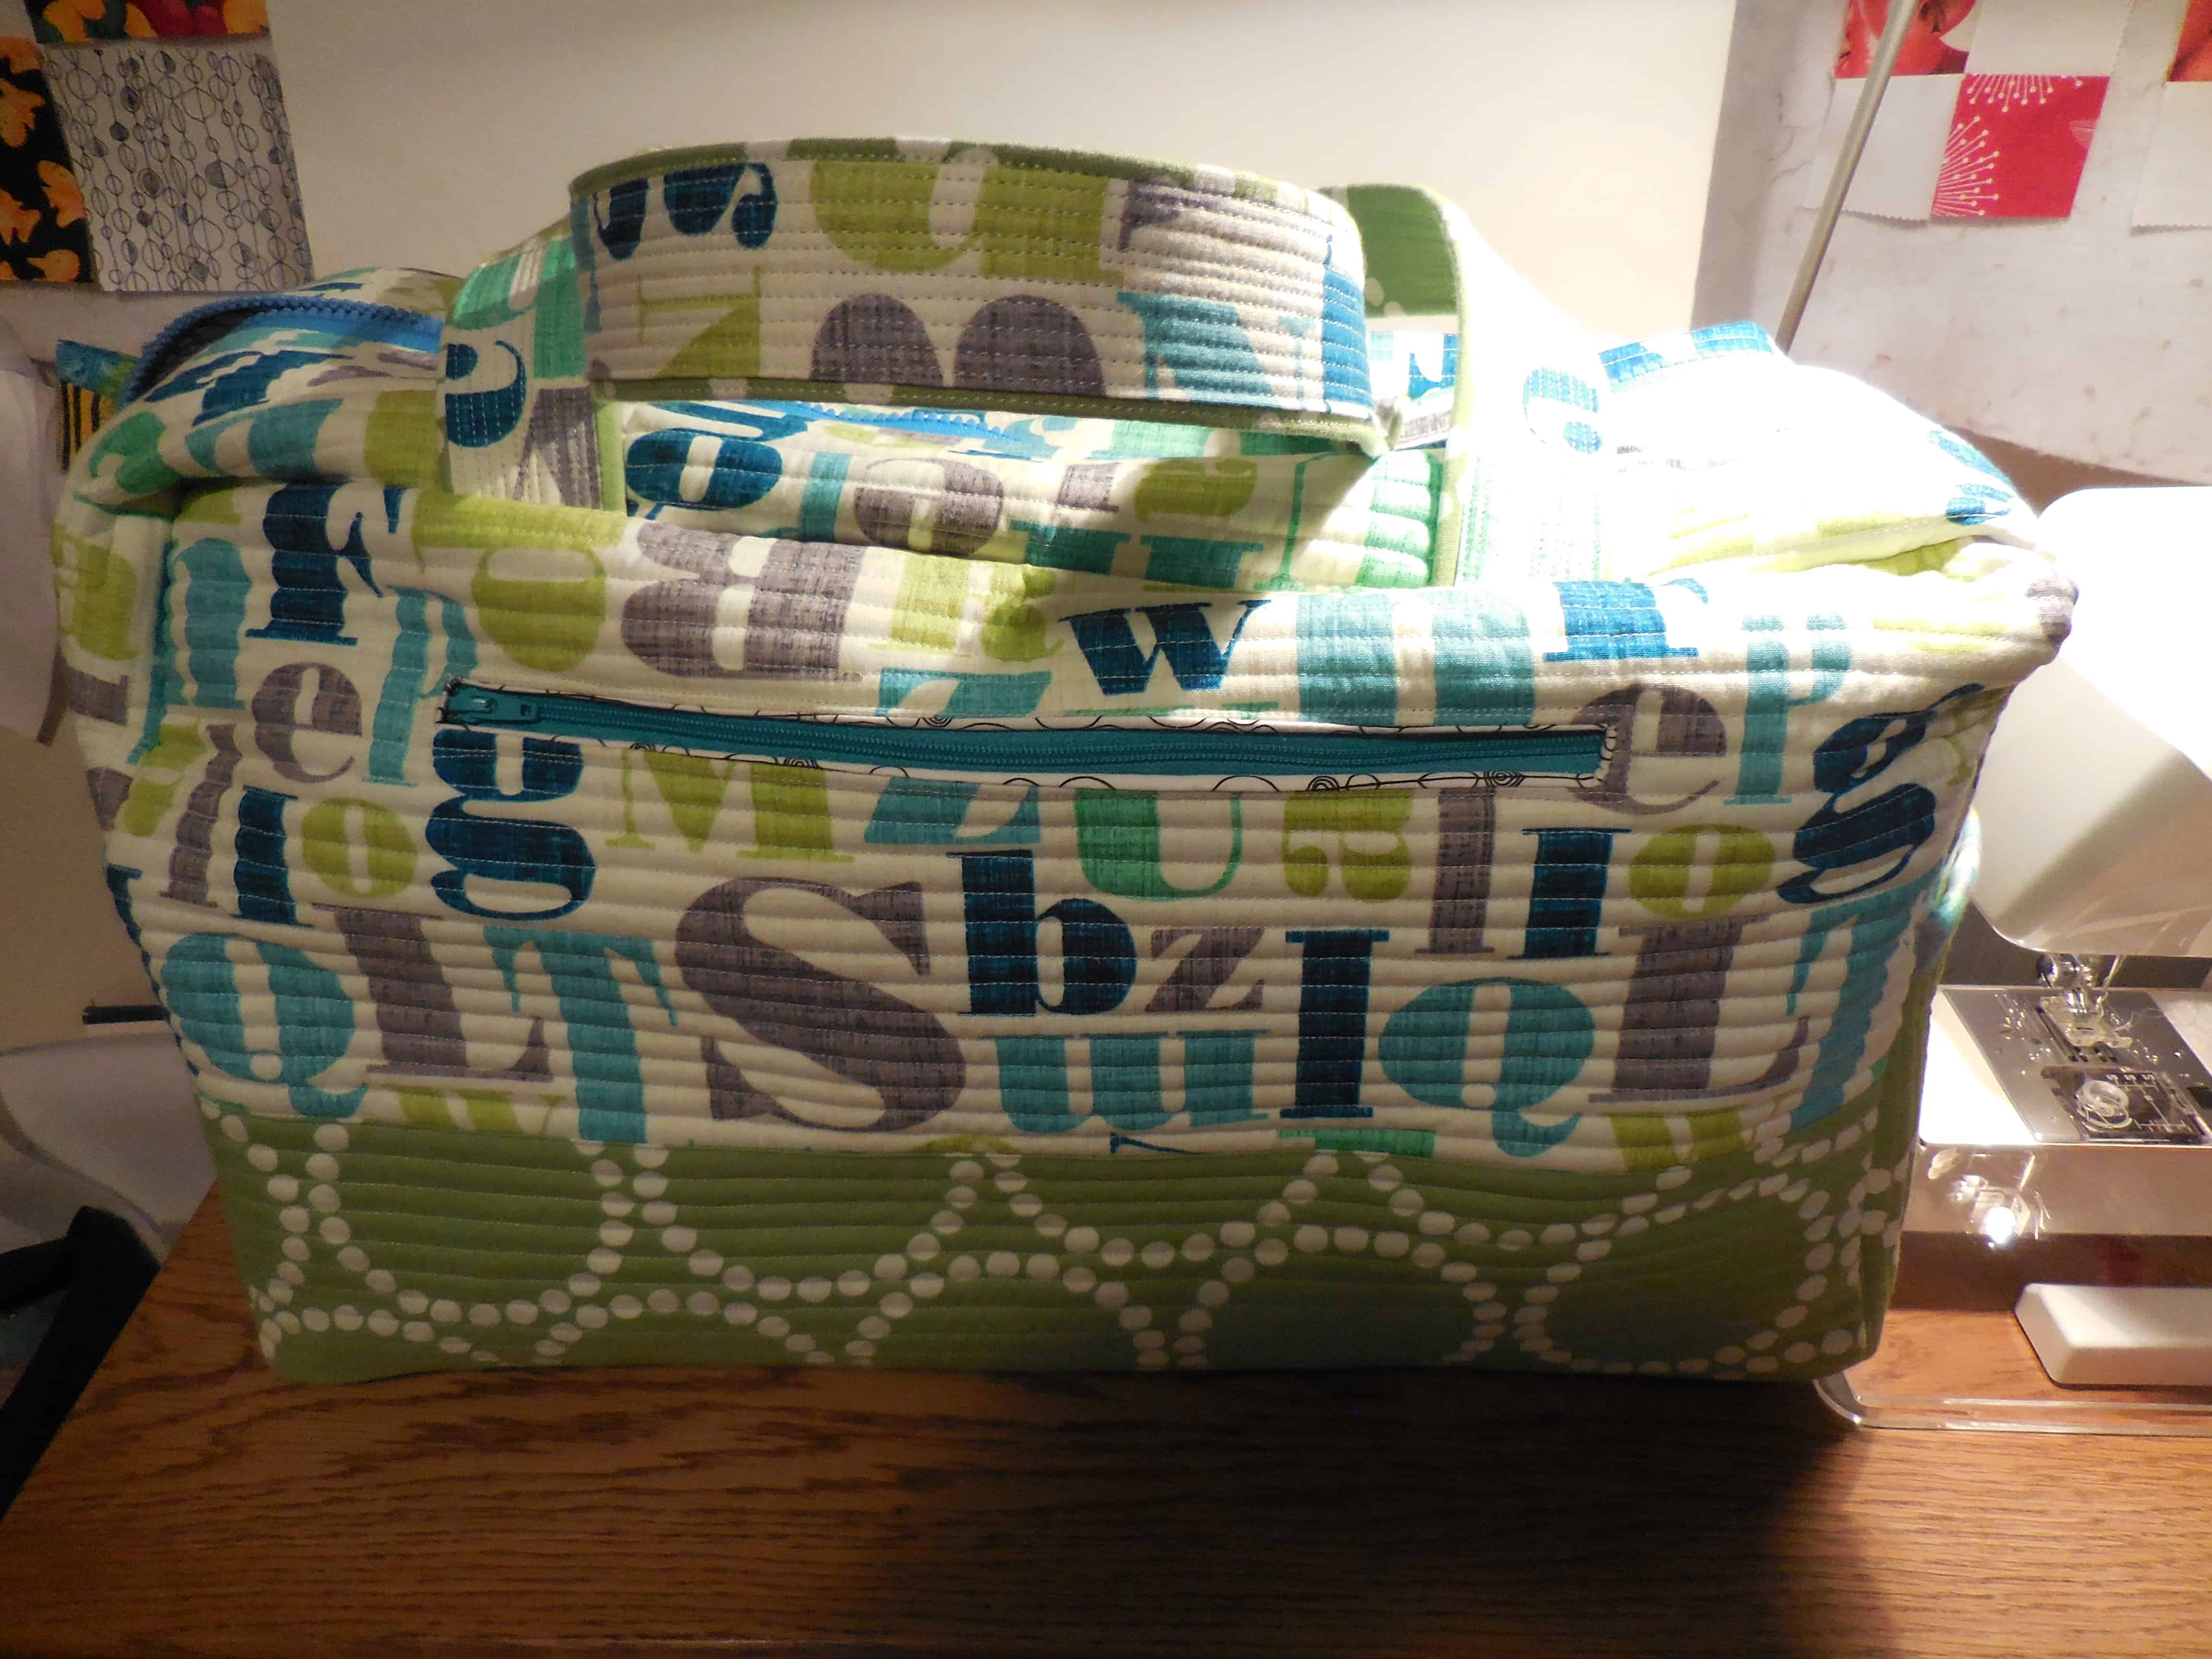
Poolside Tote: lining bag fabric (tote 1)
The other thing that was a surprise was how loosely woven the AGF text fabric was. It was actually kind of a pain to cut because it kept shifting because of how loosely the fabric turned out to be.
Still, I got the whole thing cut out. I just focused and did it. I started to think I could do a second one, then I realized I probably didn’t have enough handle fabric and I had forgotten to cut the handles out anyway!
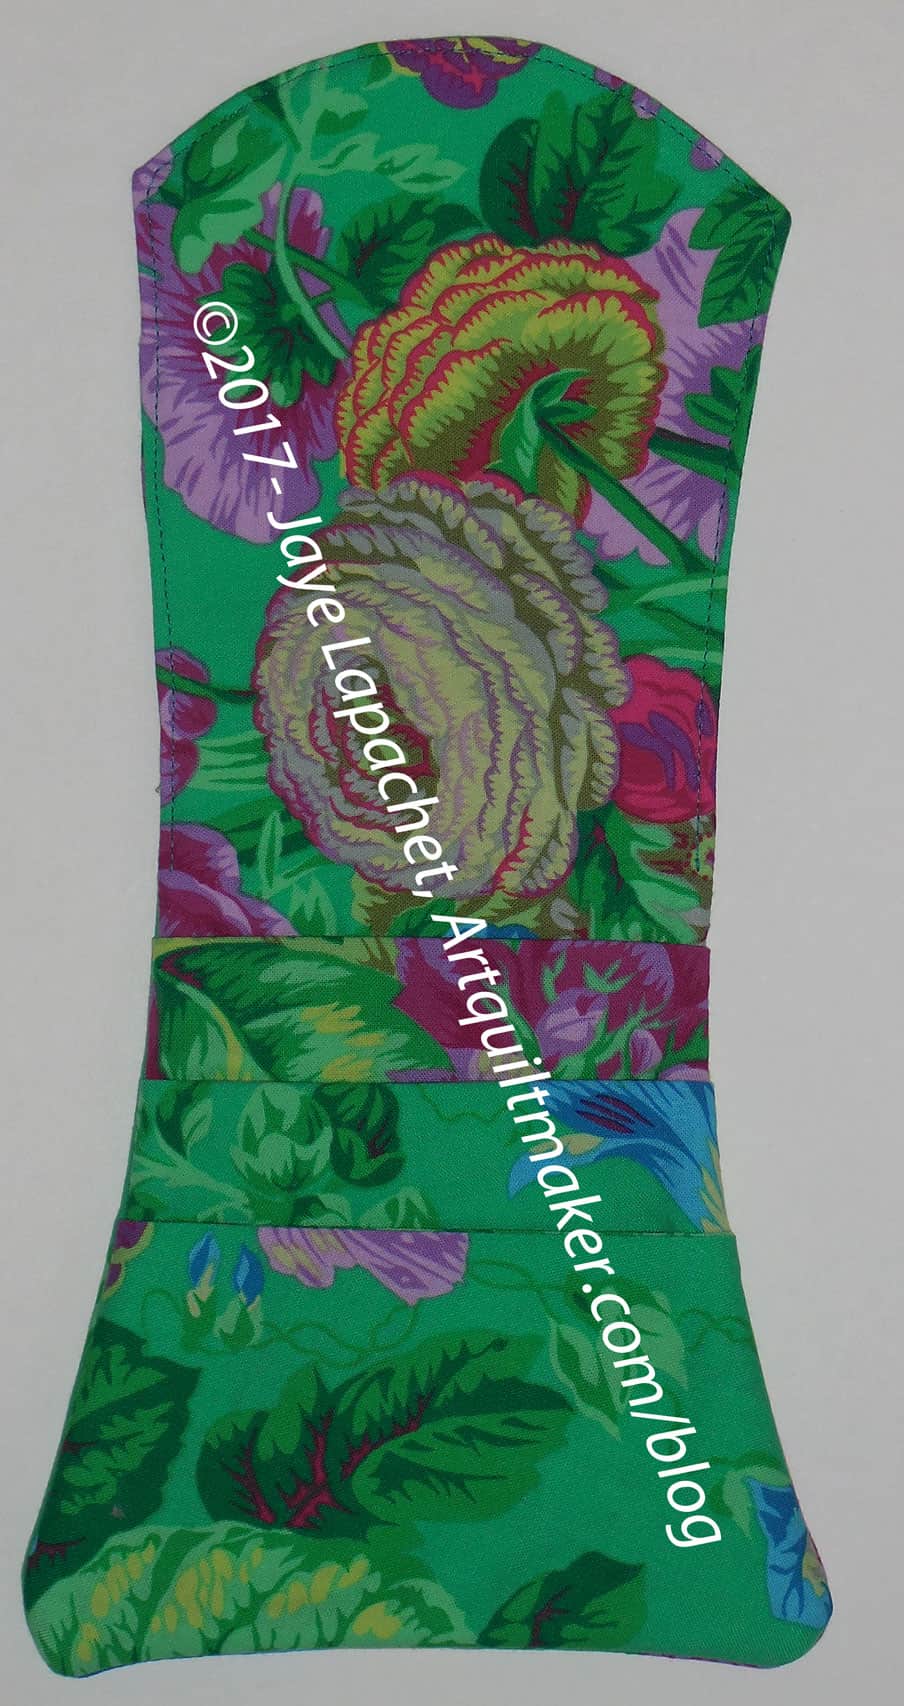
This was another almost finish that I finally did finish. I need these cell phone wallets to wear with dresses that have not pockets. This means that I had to finish a few of them before Grand Parlor. I knew I would be wearing the dresses and tunics, so I had to get sewing. You know I finished the Red Dot Cell Phone Wallet and the Habitat Cell Phone Wallet. Just before we left I finished the Emerald P. J. Cell Phone Wallet as well.
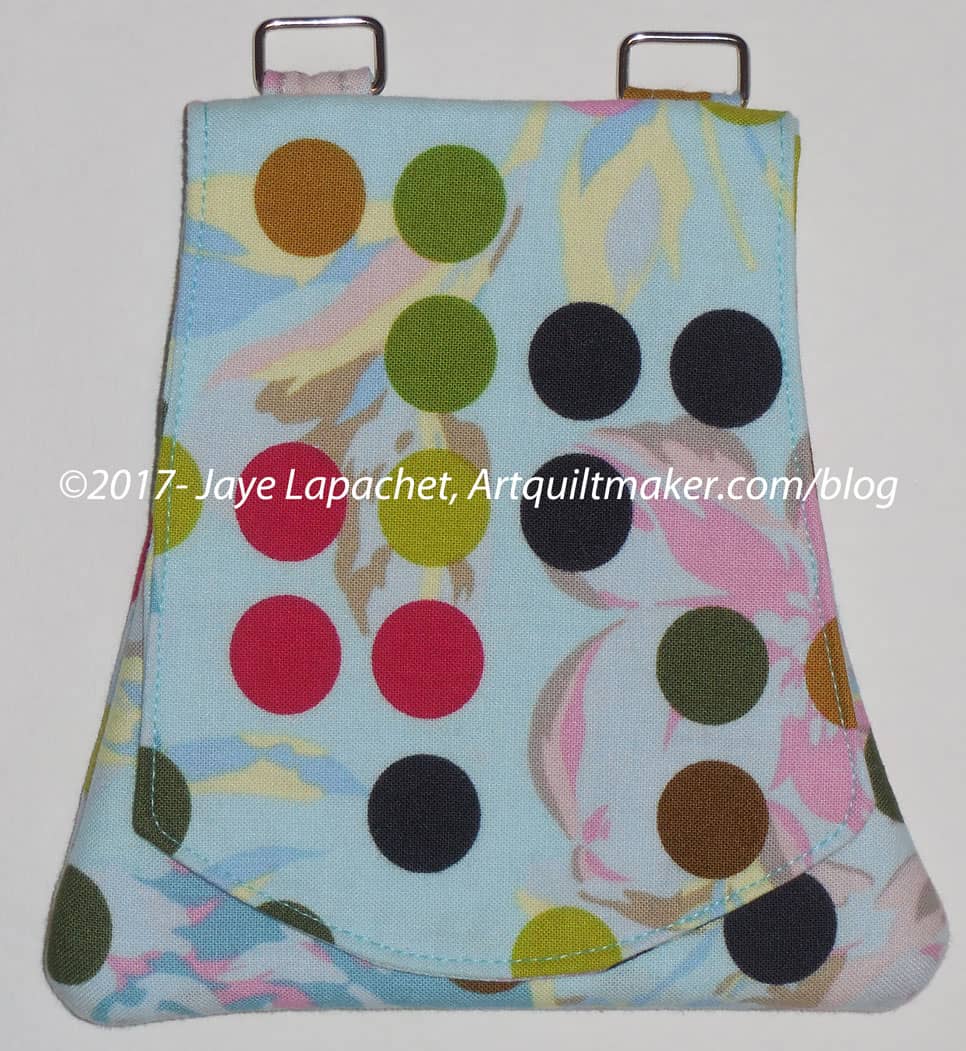
Emerald P.J. Cell Phone Wallet – closed
I find it hard to determine where the fabric will end up when I use the pattern. On this one, I really wanted to the flowers you see to end up on the outside, but they ended up on the inside.
The leaf that did end up on the outside is nice looking, but it isn’t the flower that I wanted.
The pattern calls for a snap on the flap (photo above right), but I haven’t put one on any of the pieces yet. I don’t feel like I need one.
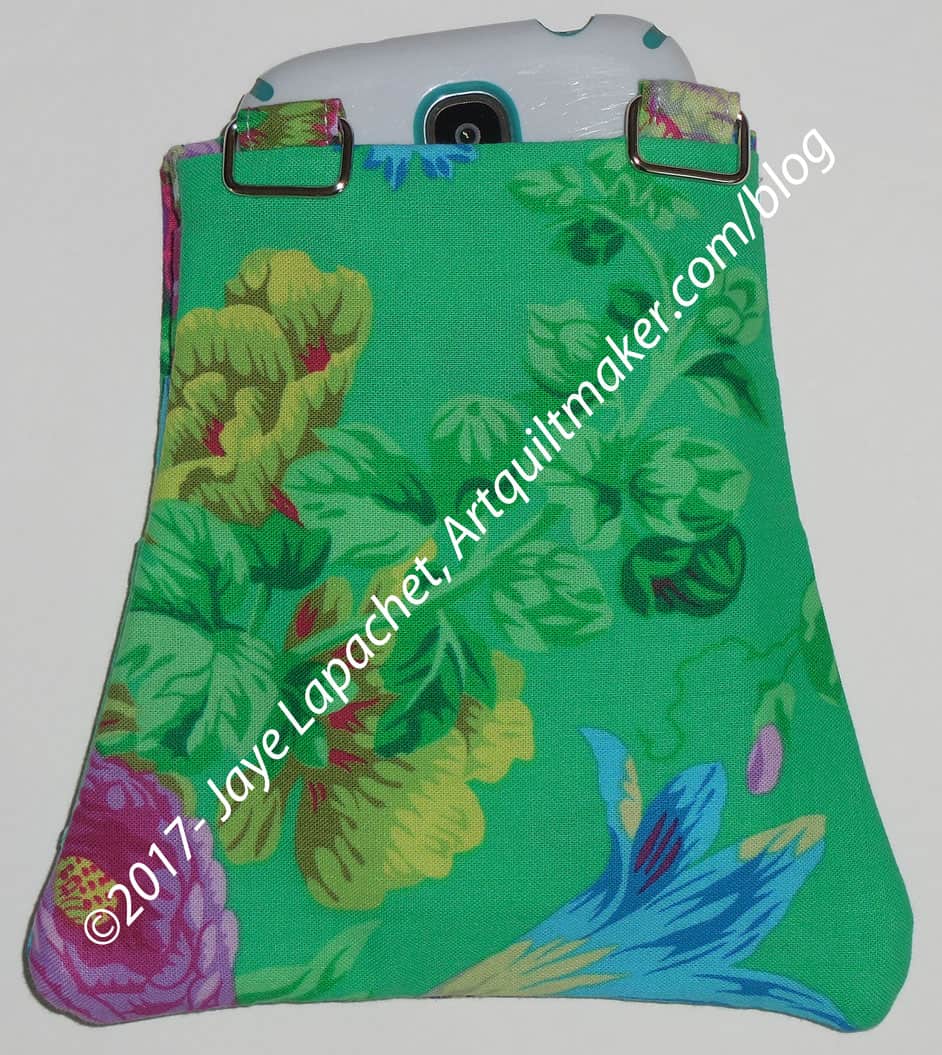
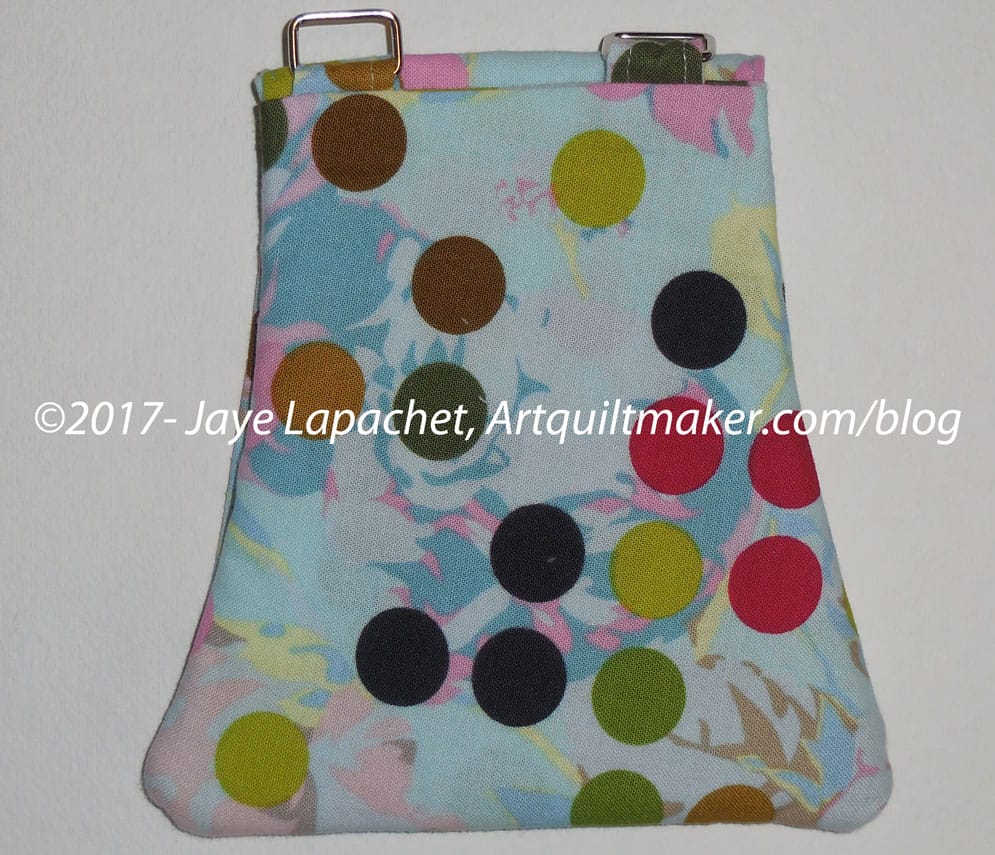
Emerald P.J. Cell Phone Wallet – closed with phone
These bags are so helpful when I am at an event and don’t want or need a full purse. I keep my phone and hotel key in it. I can also put a few other small things in each one. I try not to stuff them too full so they stay flat-ish.
The last photo shows my phone in it. The design is such that I don’t have to open the flap to get my phone out.
I really like this pattern even though it gave me a few fits before I finished it.
I found this pattern somehow. It is free (for personal use only) from Zen of Making*. I wish I had thought of the name, because there is something zenlike about making and the name is cool.
Anyway.
The travel kit is part of a three part series, which includes a lesson on making the hexie flowers. The final piece is making a pincushion out of smaller hexies to use with the EPP Kit. I had plans to make that as well, but ran out of time.
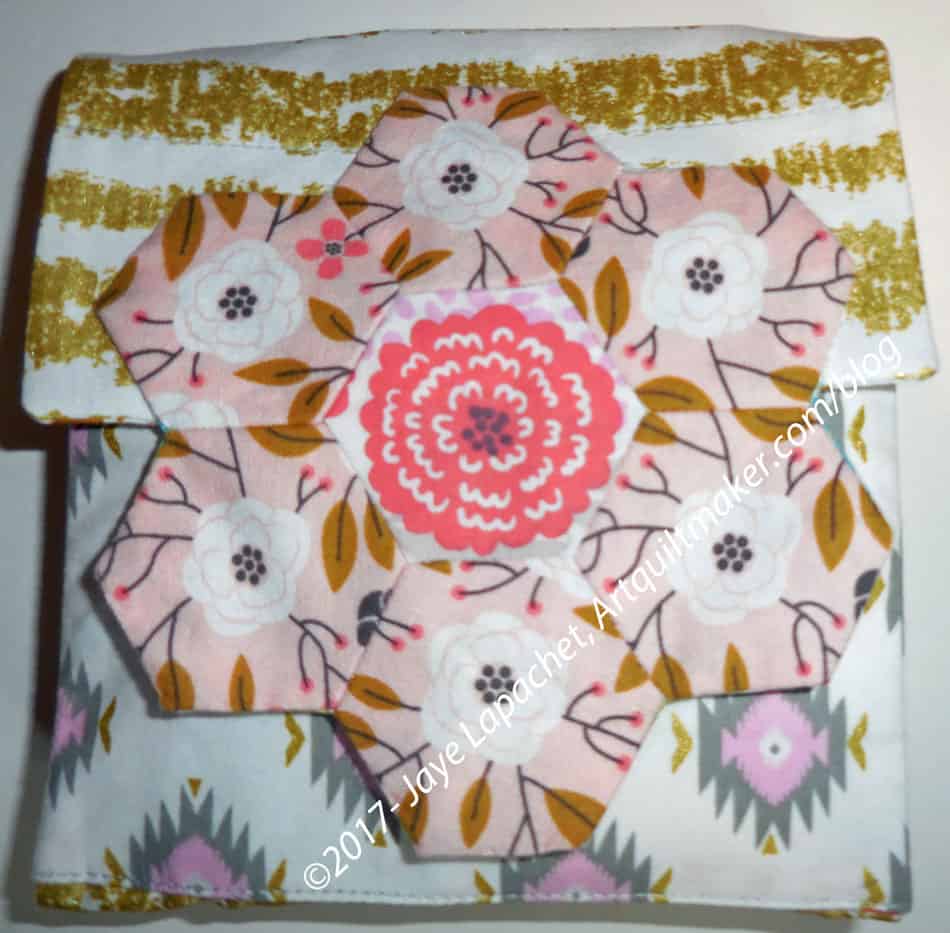
EPP Travel Kit – open (front)
This travel kit is awesome and the problem I had really had nothing to do with the pattern, but with the supplies I had on hand. I hand on hand, and wanted to use, some sew-in invisible magnet closures. Sara of Sew Sweetness uses these in a lot of her patterns and I find I have better success with them than the models with the ‘legs’ used in this pattern.
The closure is pretty awesome. I love the way the hexie flowers stick together. Very clever.
Once I figured out how to get the sew-in magnetic closures oriented in the right direction, the assembly went pretty smoothly. There is a lot of handwork in this pattern, which I wasn’t expecting.
The open look (right, slightly above) is a little odd. I think it might be because of the scrappiness of the whole piece. I think I should have used a backing for the flap hexie flower that matched the hexie flower (the one with leaves and a turquoise center). I do kind of like the scrappy look. I think I will make one that looks like a Dia de los Muertos celebration for a different friend. I definitely want to try different colors.
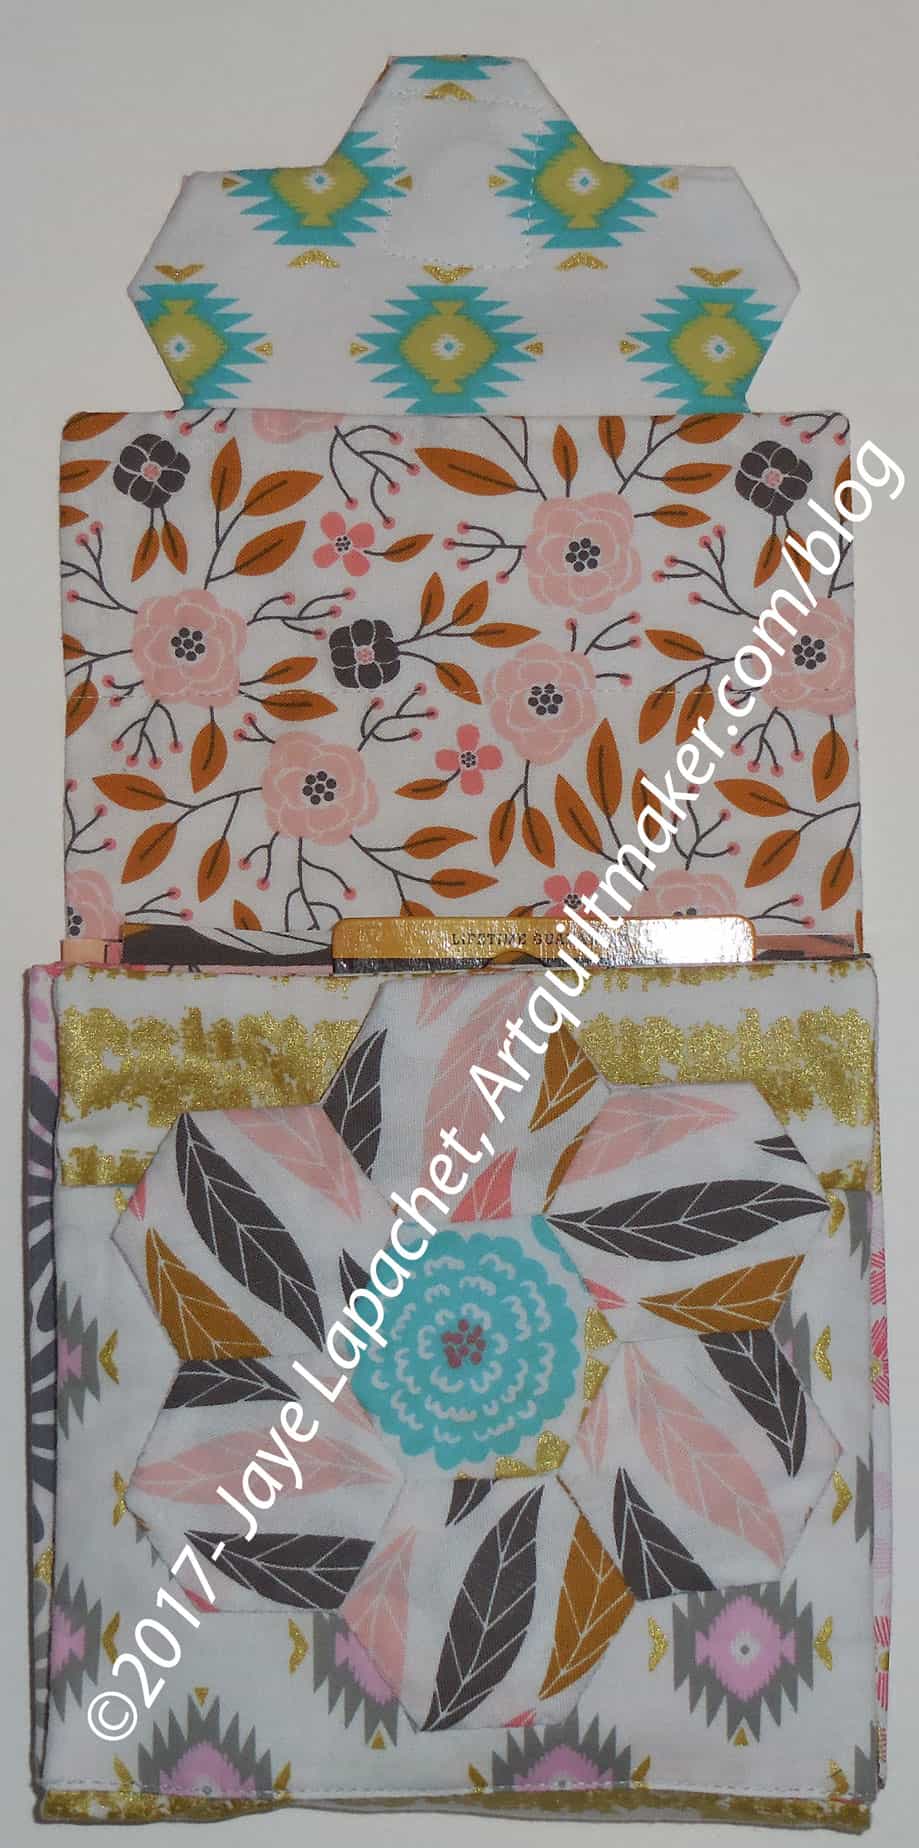
EPP Travel Kit – inside view
Altoids tins fit nicely inside and Haley (blog owner/designer) calls for two of them for this project. I had to scrounge them up. I put a piece of felt in the bottom of each tin to make them less rattly and a little nicer.
I cut and added some 5″ squares, and an EPP book to make the kit look full and fun.
*It appears that the name of the blog has changed to Red Handled Scissors. Not sure why, but the pattern is still there.
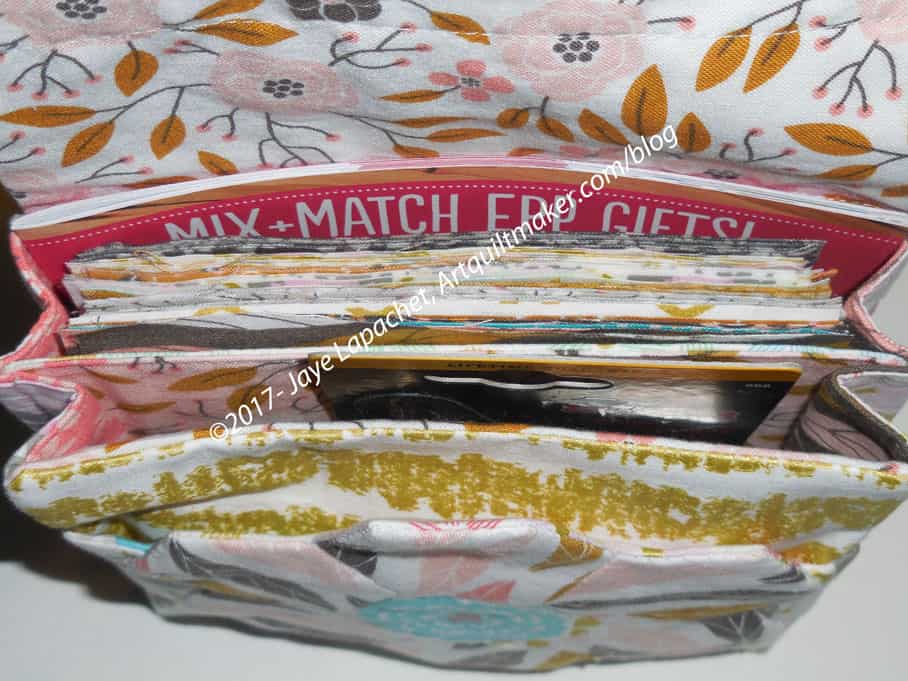
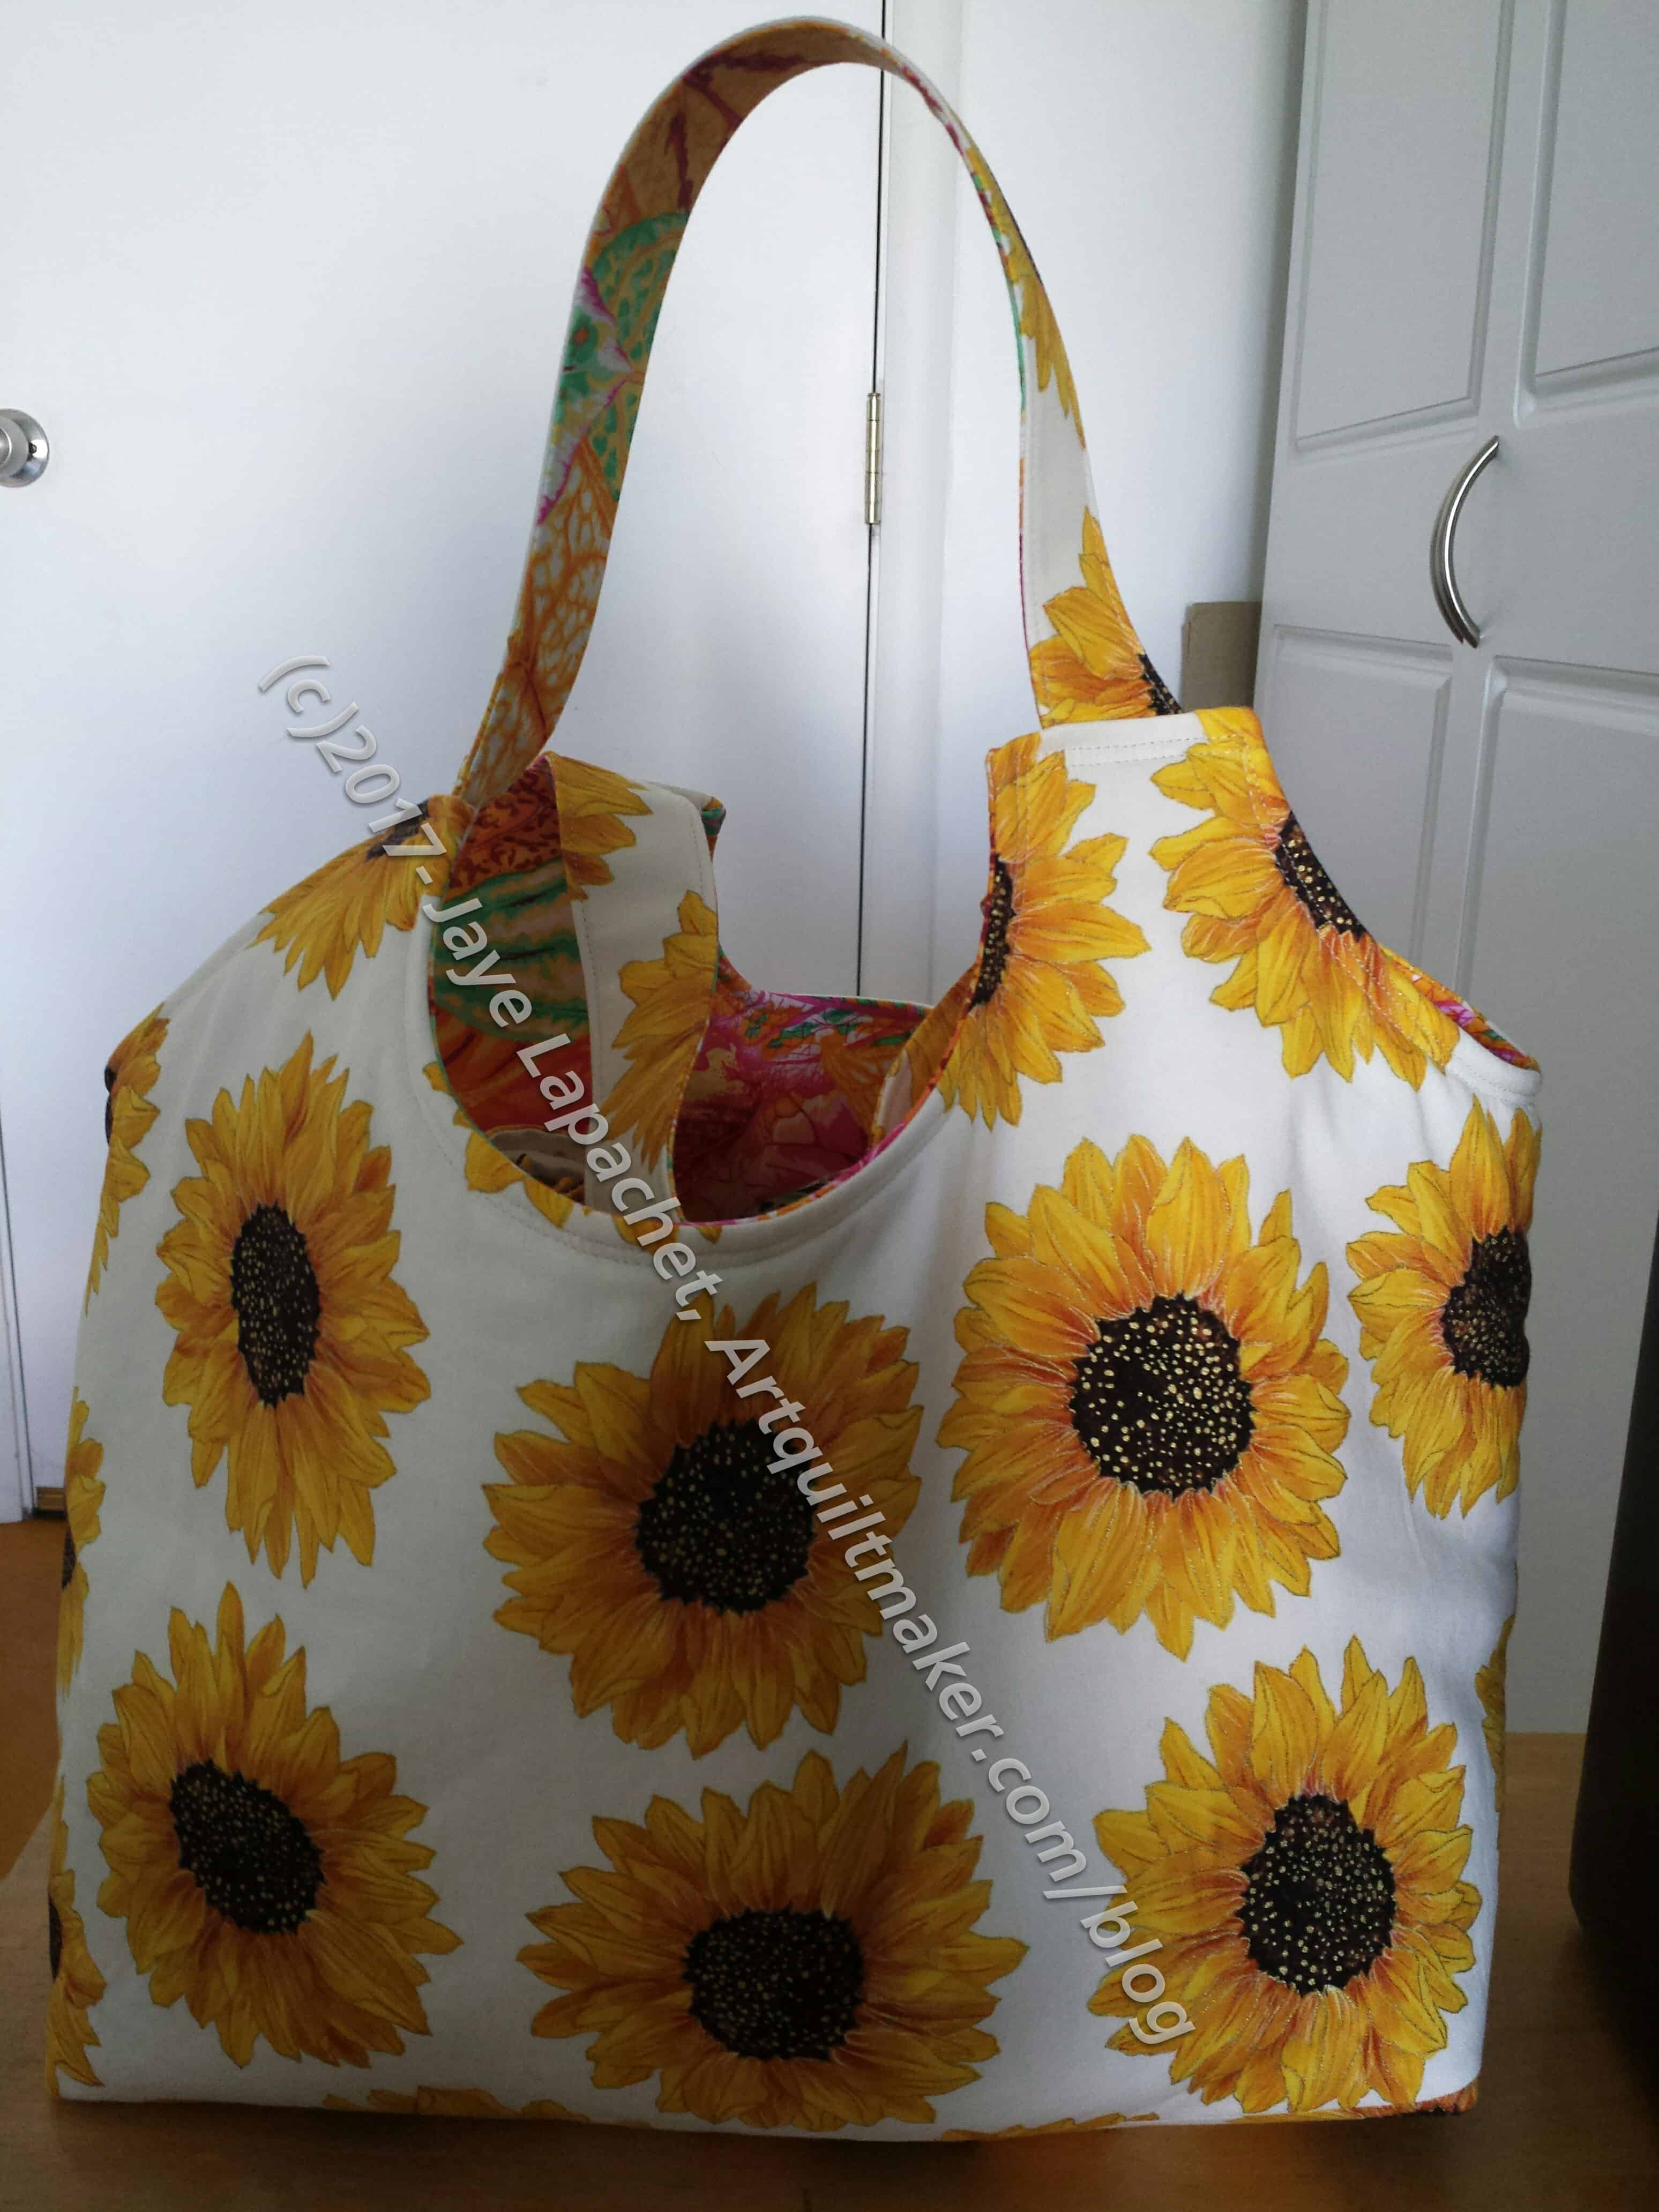
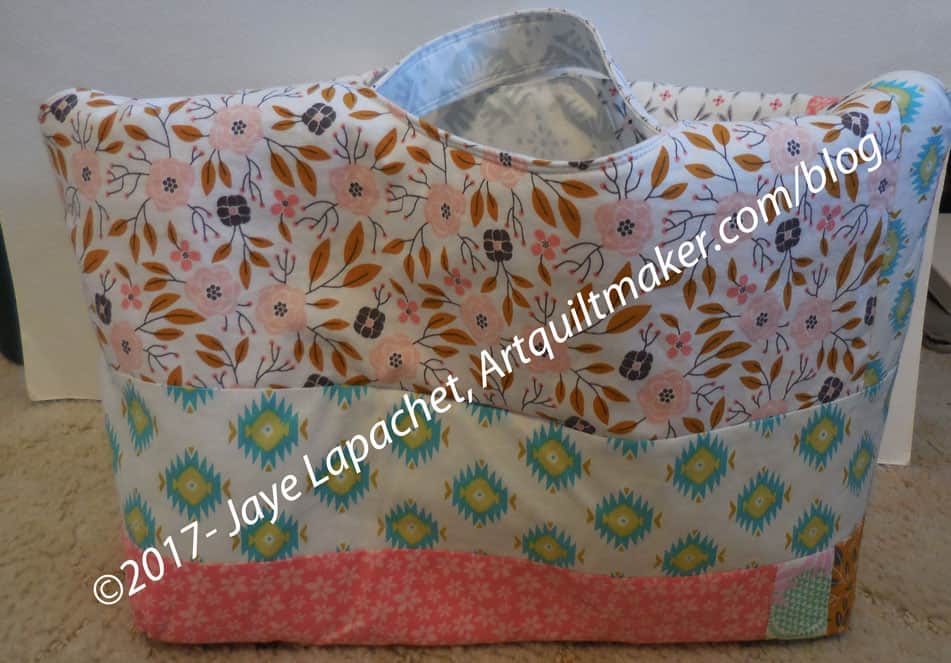
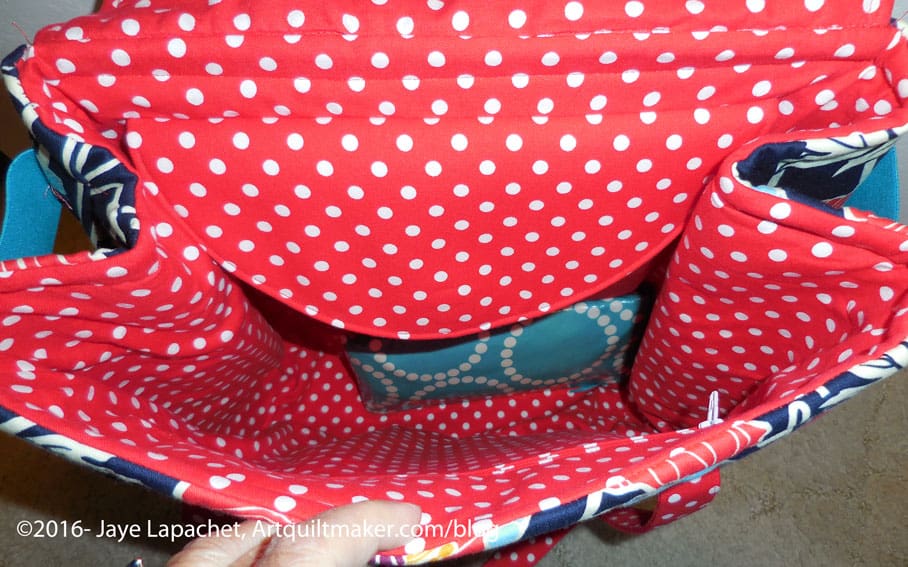
I have decided that I like that Big Tote pattern from the Make It Take It book.
This will be the carrier for the other gifts, such as the cloth napkins I talked about earlier this week, DH will present to the NDGW Grand President. This is the first one I made with just two fabrics. No mosaic piecing. The bold print works very well, but I think smaller prints would look better using the mosaic piecing method I used for the second one I made.
There are some things I would like to try, e.g. pockets. In my mind pockets are essential. This isn’t a huge tote, so I envision it being used as a handy bag to put a few things in when you weren’t planning on buying anything.
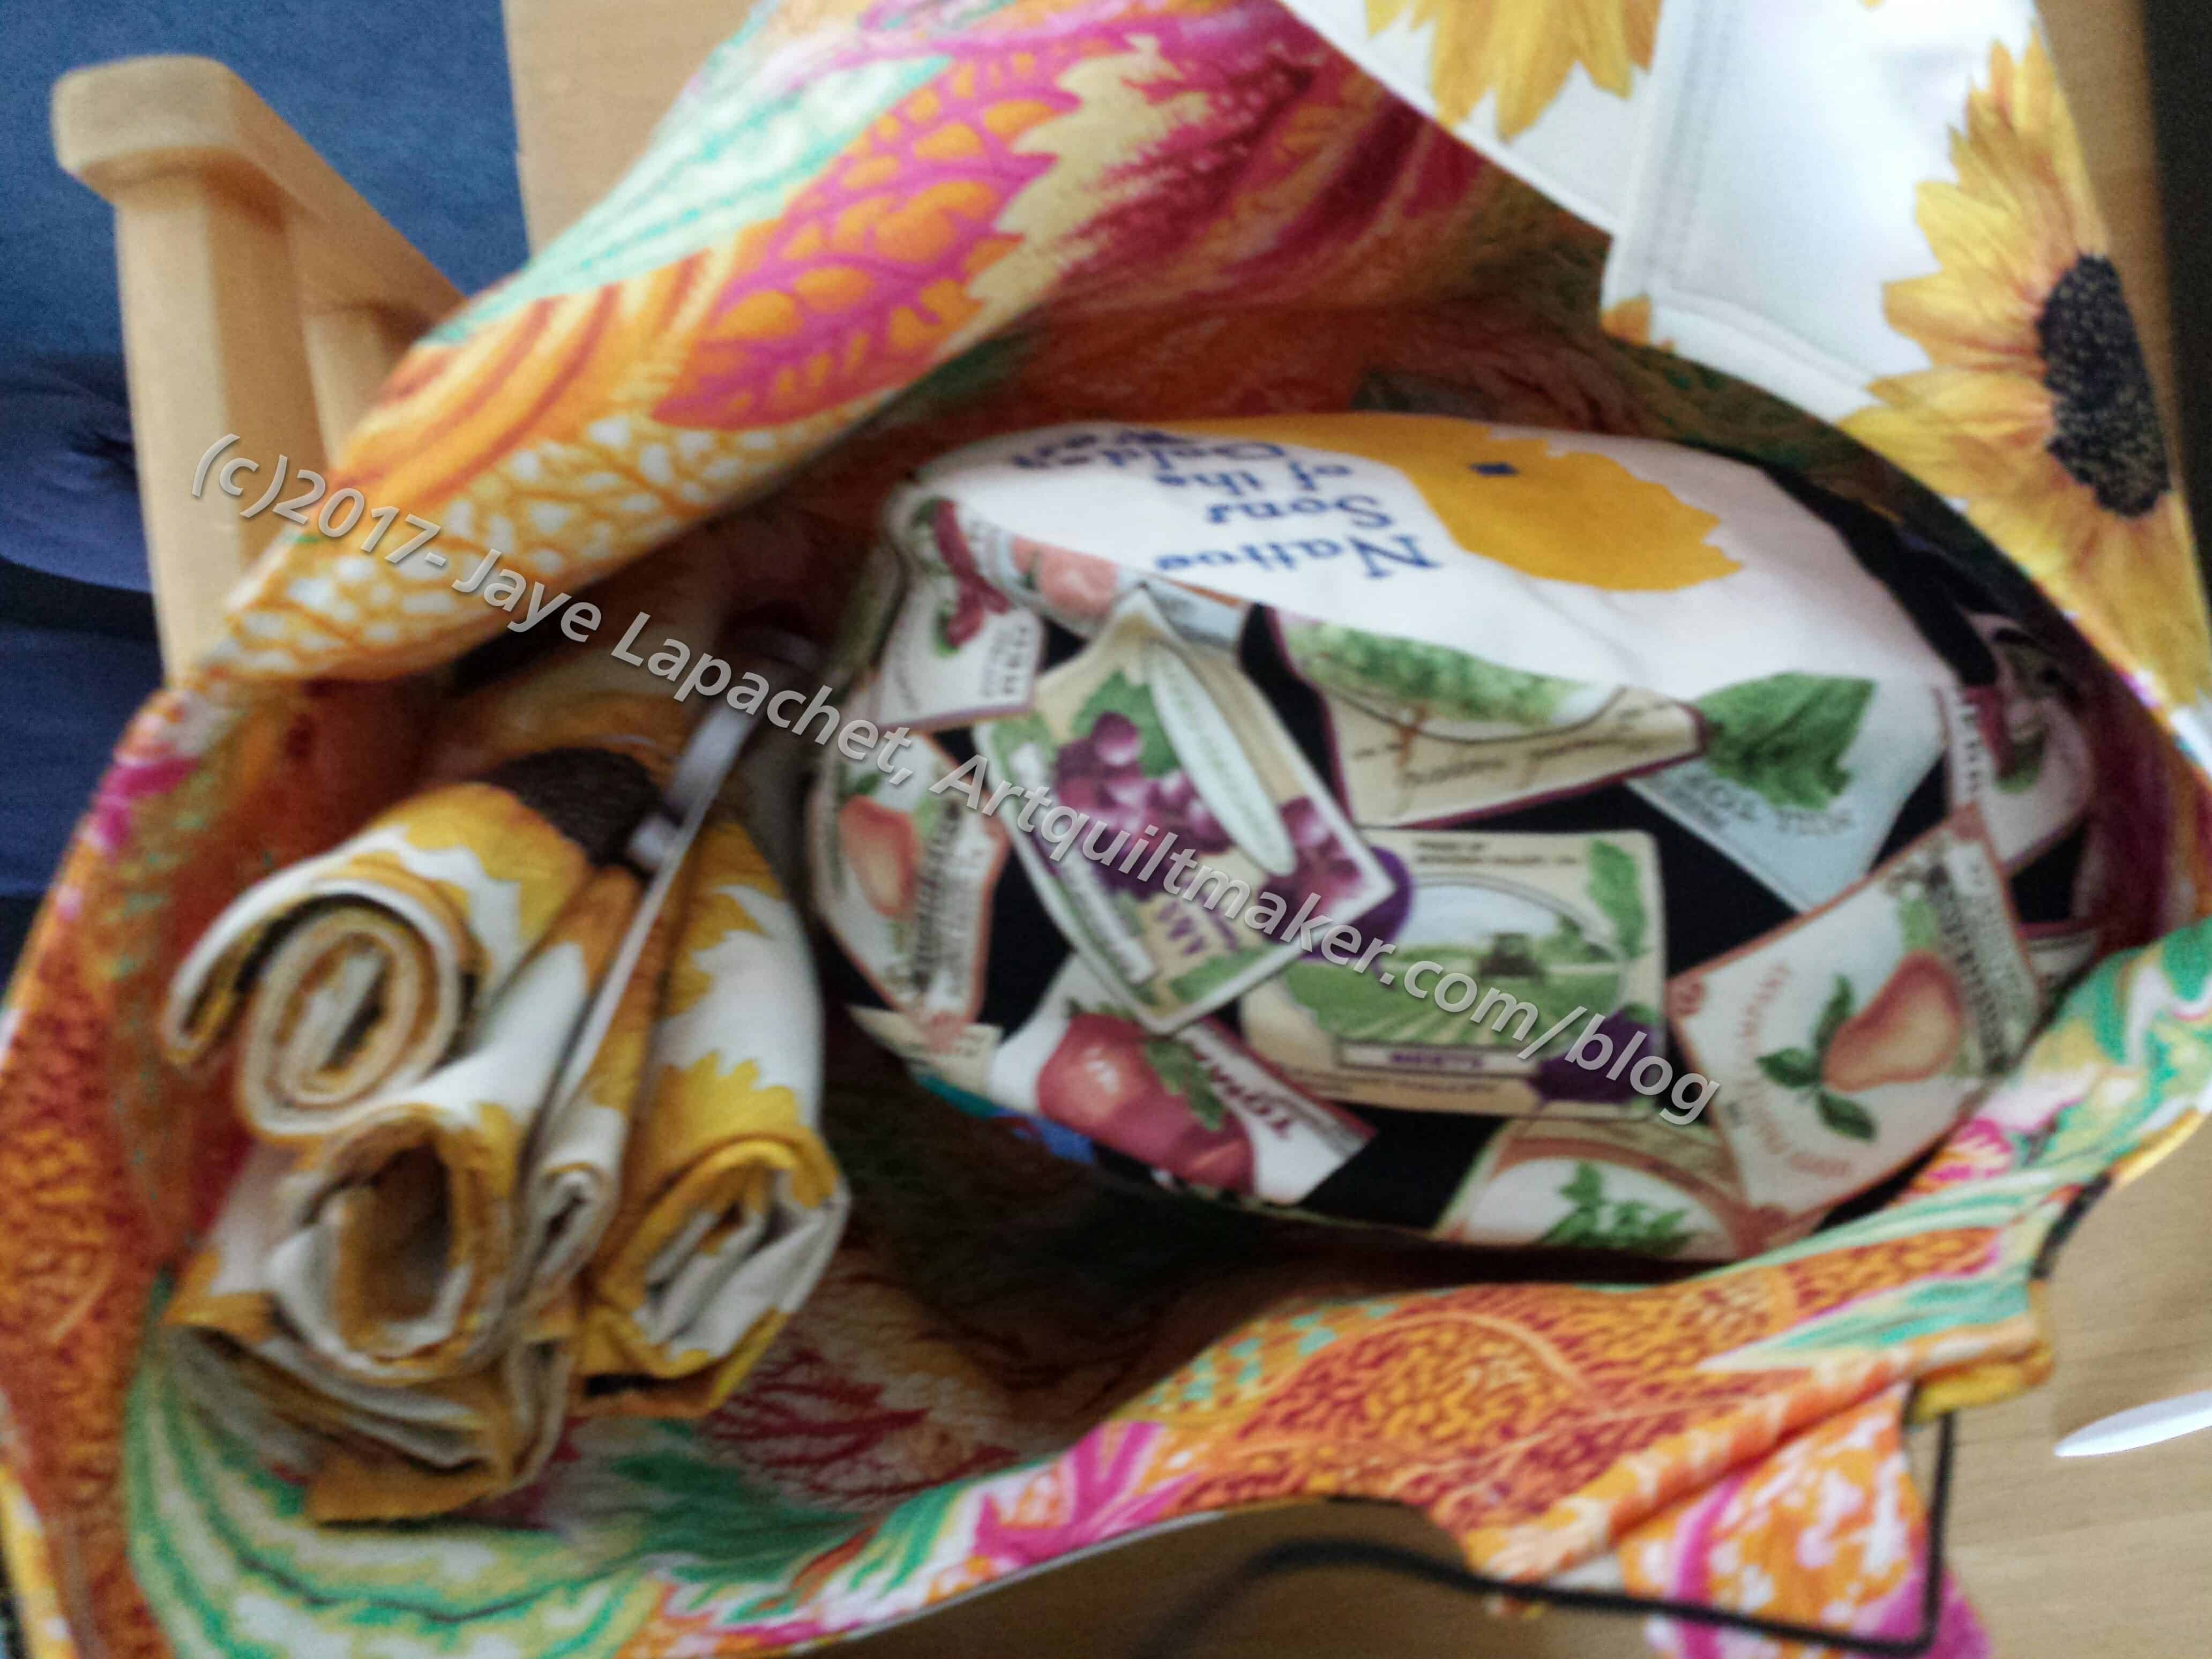
Kaffe print inside
I couldn’t resist adding a little of my own personality to the inside.
You can see some of the other gifts inside the bag.
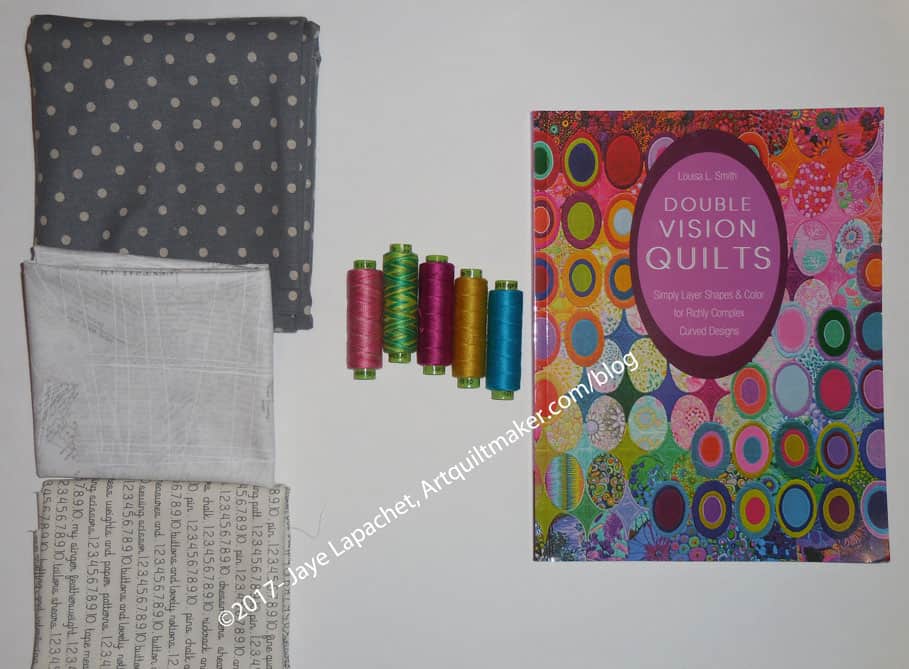
In Portland, I bought some fabric for the Poolside Tote. And the pattern. I thought I had the pattern, but I didn’t, so I bought that as well.
I really found the perfect fabrics for two totes. The text print is home dec weight and will be the inside.I hope my machine can handle it. I’d love this fabric for some chairs in my living room.
Stitch Purchases
The dots are scheduled to be used for the outside of the totes. I have some grey already that will make great straps. It might be too many dots or it might be super cheerful.
I was on a roll after yesterday’s finishing of the Red Dot Cell Phone Wallet. As a result, I decided to add to my fabric usage report by finishing the Habitat Cell Phone Wallet.
I forgot to mention that this goes with the other pattern by Valorie Wells called Little Wallet. I have made a few of these as they are really useful when giving gift cards and don’t take very along.
Habitat Cell Phone Wallet – open
This goes with the same dress pattern as the Red Dot version. No pockets in a dress or tunic is something I will avoid at all costs in the future.
This fabric is an older one by Jay Carroll and I had enough scraps from the dress to make this. You can see the details of this version much better because of the asymmetricality of the fabric motifs. The piece has four pockets (one of which is in the back and you can see in the last photo), all with graduated sizes.
I did not put a closure on the flap, though the pattern calls for one, because I wanted easy access and wasn’t expecting to keep anything of great value in it.
Habitat Cell Phone Wallet – back
I find that I do not need to interface all but the covers. The rounded corners are quite bulky and difficult to turn. I did not topstitch the bottom part of the piece. I stuck to the flaps as my needle would not go through those corners no matter what.
I have a black one I want to make and may try the fabric strap. I also have a green one in pieces. I need to find the pieces and sew that one together.
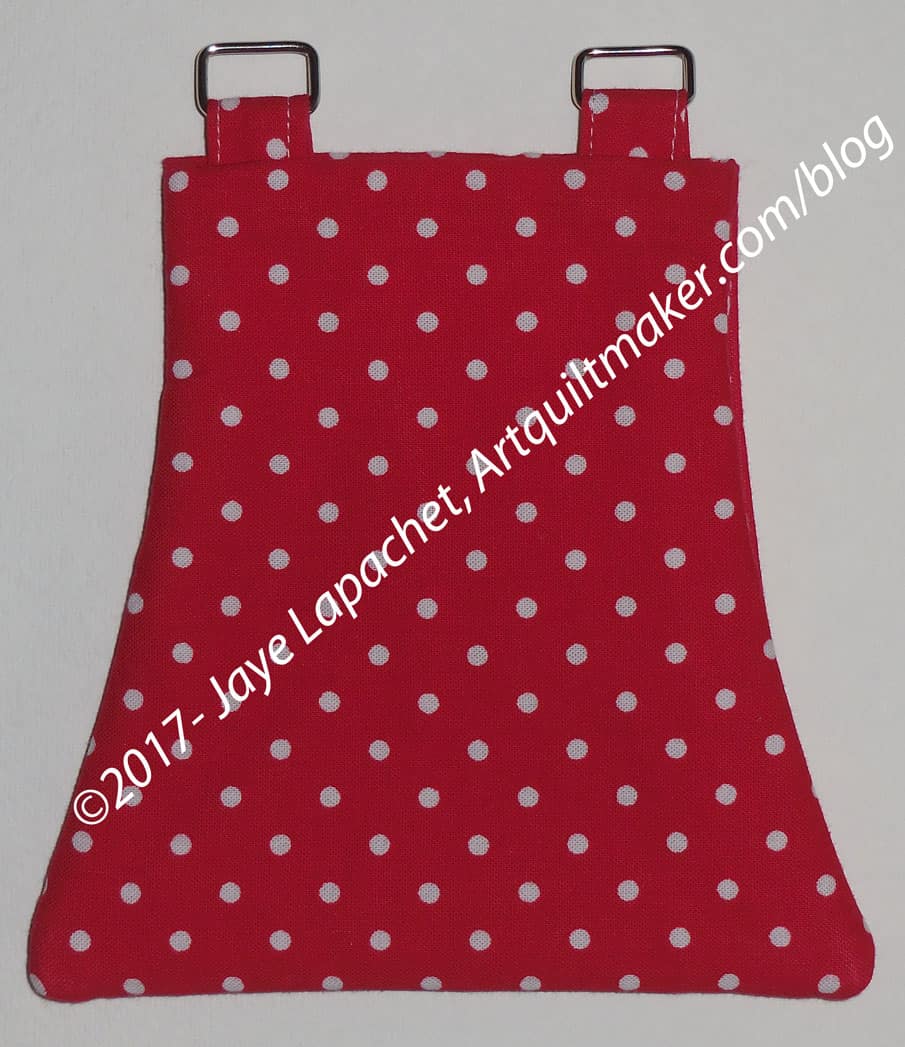
I decided to wear my red dot dress to Easter, despite the rain. That meant no pockets so I needed to finish the Red Dot Cell Phone Wallet. It had been languishing for months and only needed some topstitching. I sewed the topstitching and sank the threads really quick Easter morning before we left for the party.
My SIL noticed right away and I was pleased to have finished the bag. It was very useful for its intended purpose.
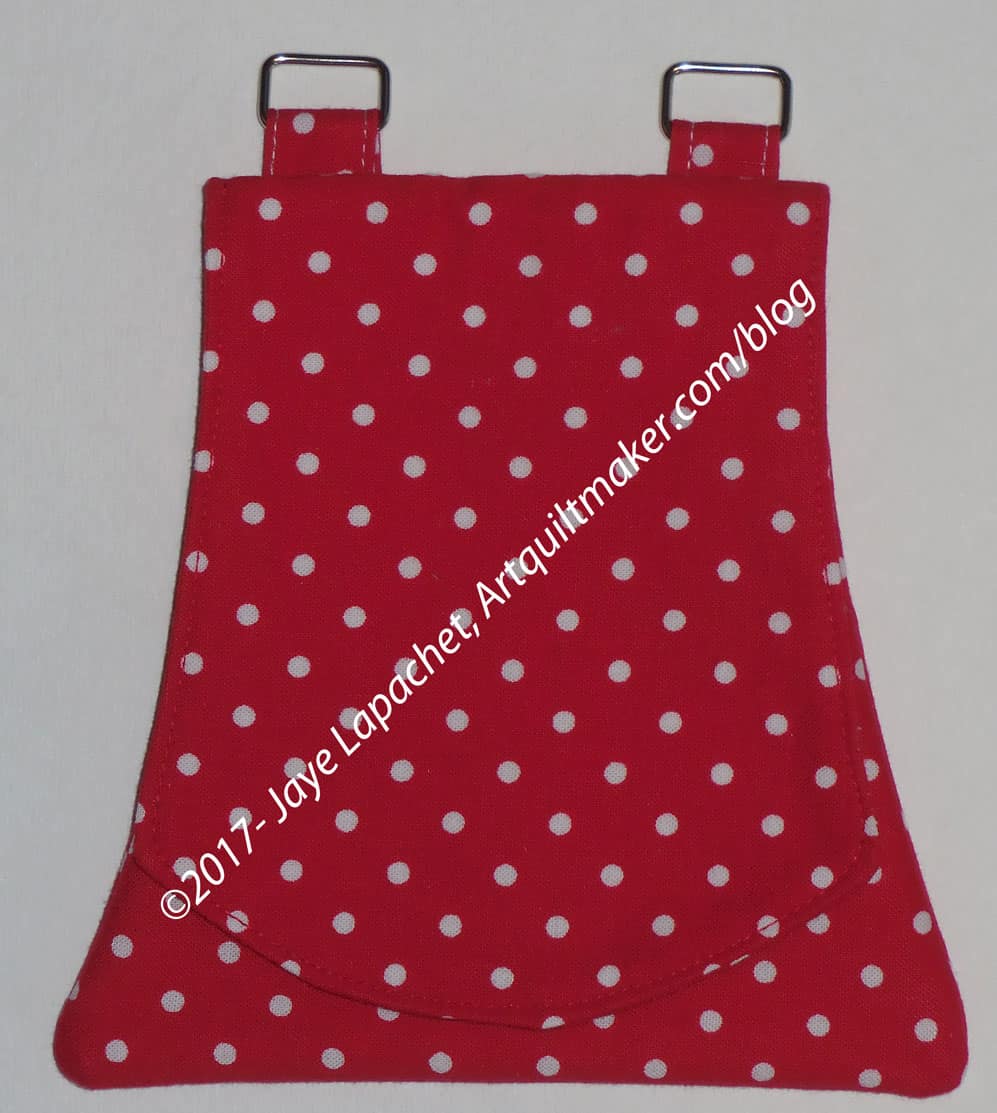
Red Dot Cell Phone Wallet – open
The pattern calls for a strap made from fabric, but SIL gave me the idea of an interchangeable strap. I bought those small rectangular ‘rings’ and a long chain, which I use for this one and two others I have. There are two things I don’t like about the chain. First, it stands out from the dress when I wear it. Second, it is of a sufficiently intricate nature as to get caught in my hair when I am not careful or needing a haircut. If I make more, I may make straps. We will see.
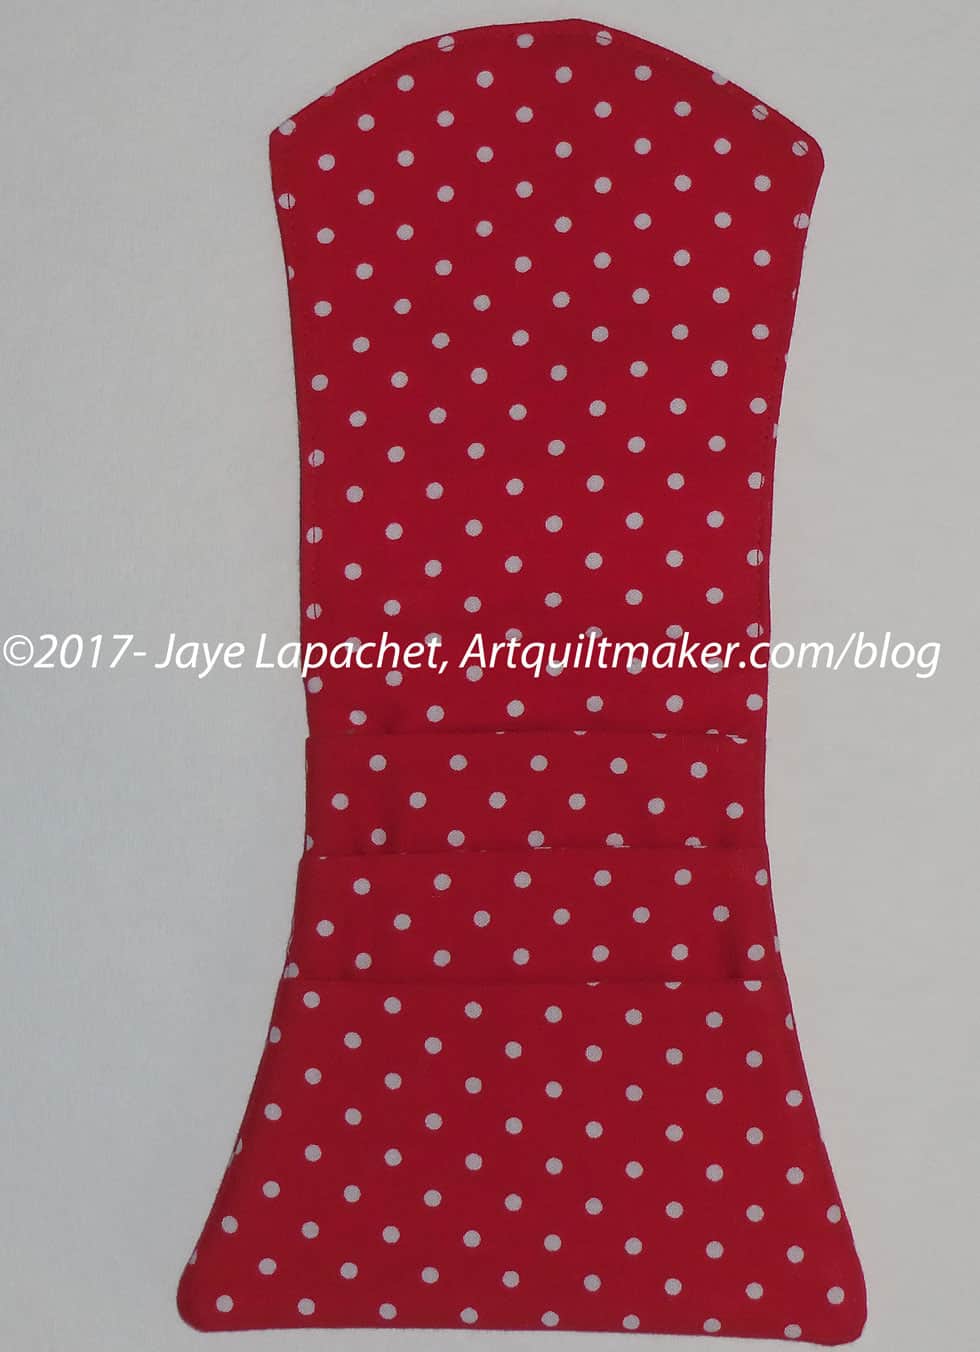
Red Dot Cell Phone Wallet – back
It is a pretty easy pattern and useful for the purpose of providing a pocket in a dress whose pattern does not lend itself to pockets. There are several pockets for cards, though I only use it for a hotel key and cell phone. I have put my keys in there, but my car keys are too bulky because of the clicker for DH’s car. I toss them in and they ruin the slim line of the bag.
After wearing the dress, I think I will bring it with me to Grand Parlor to wear at one of the less official events.
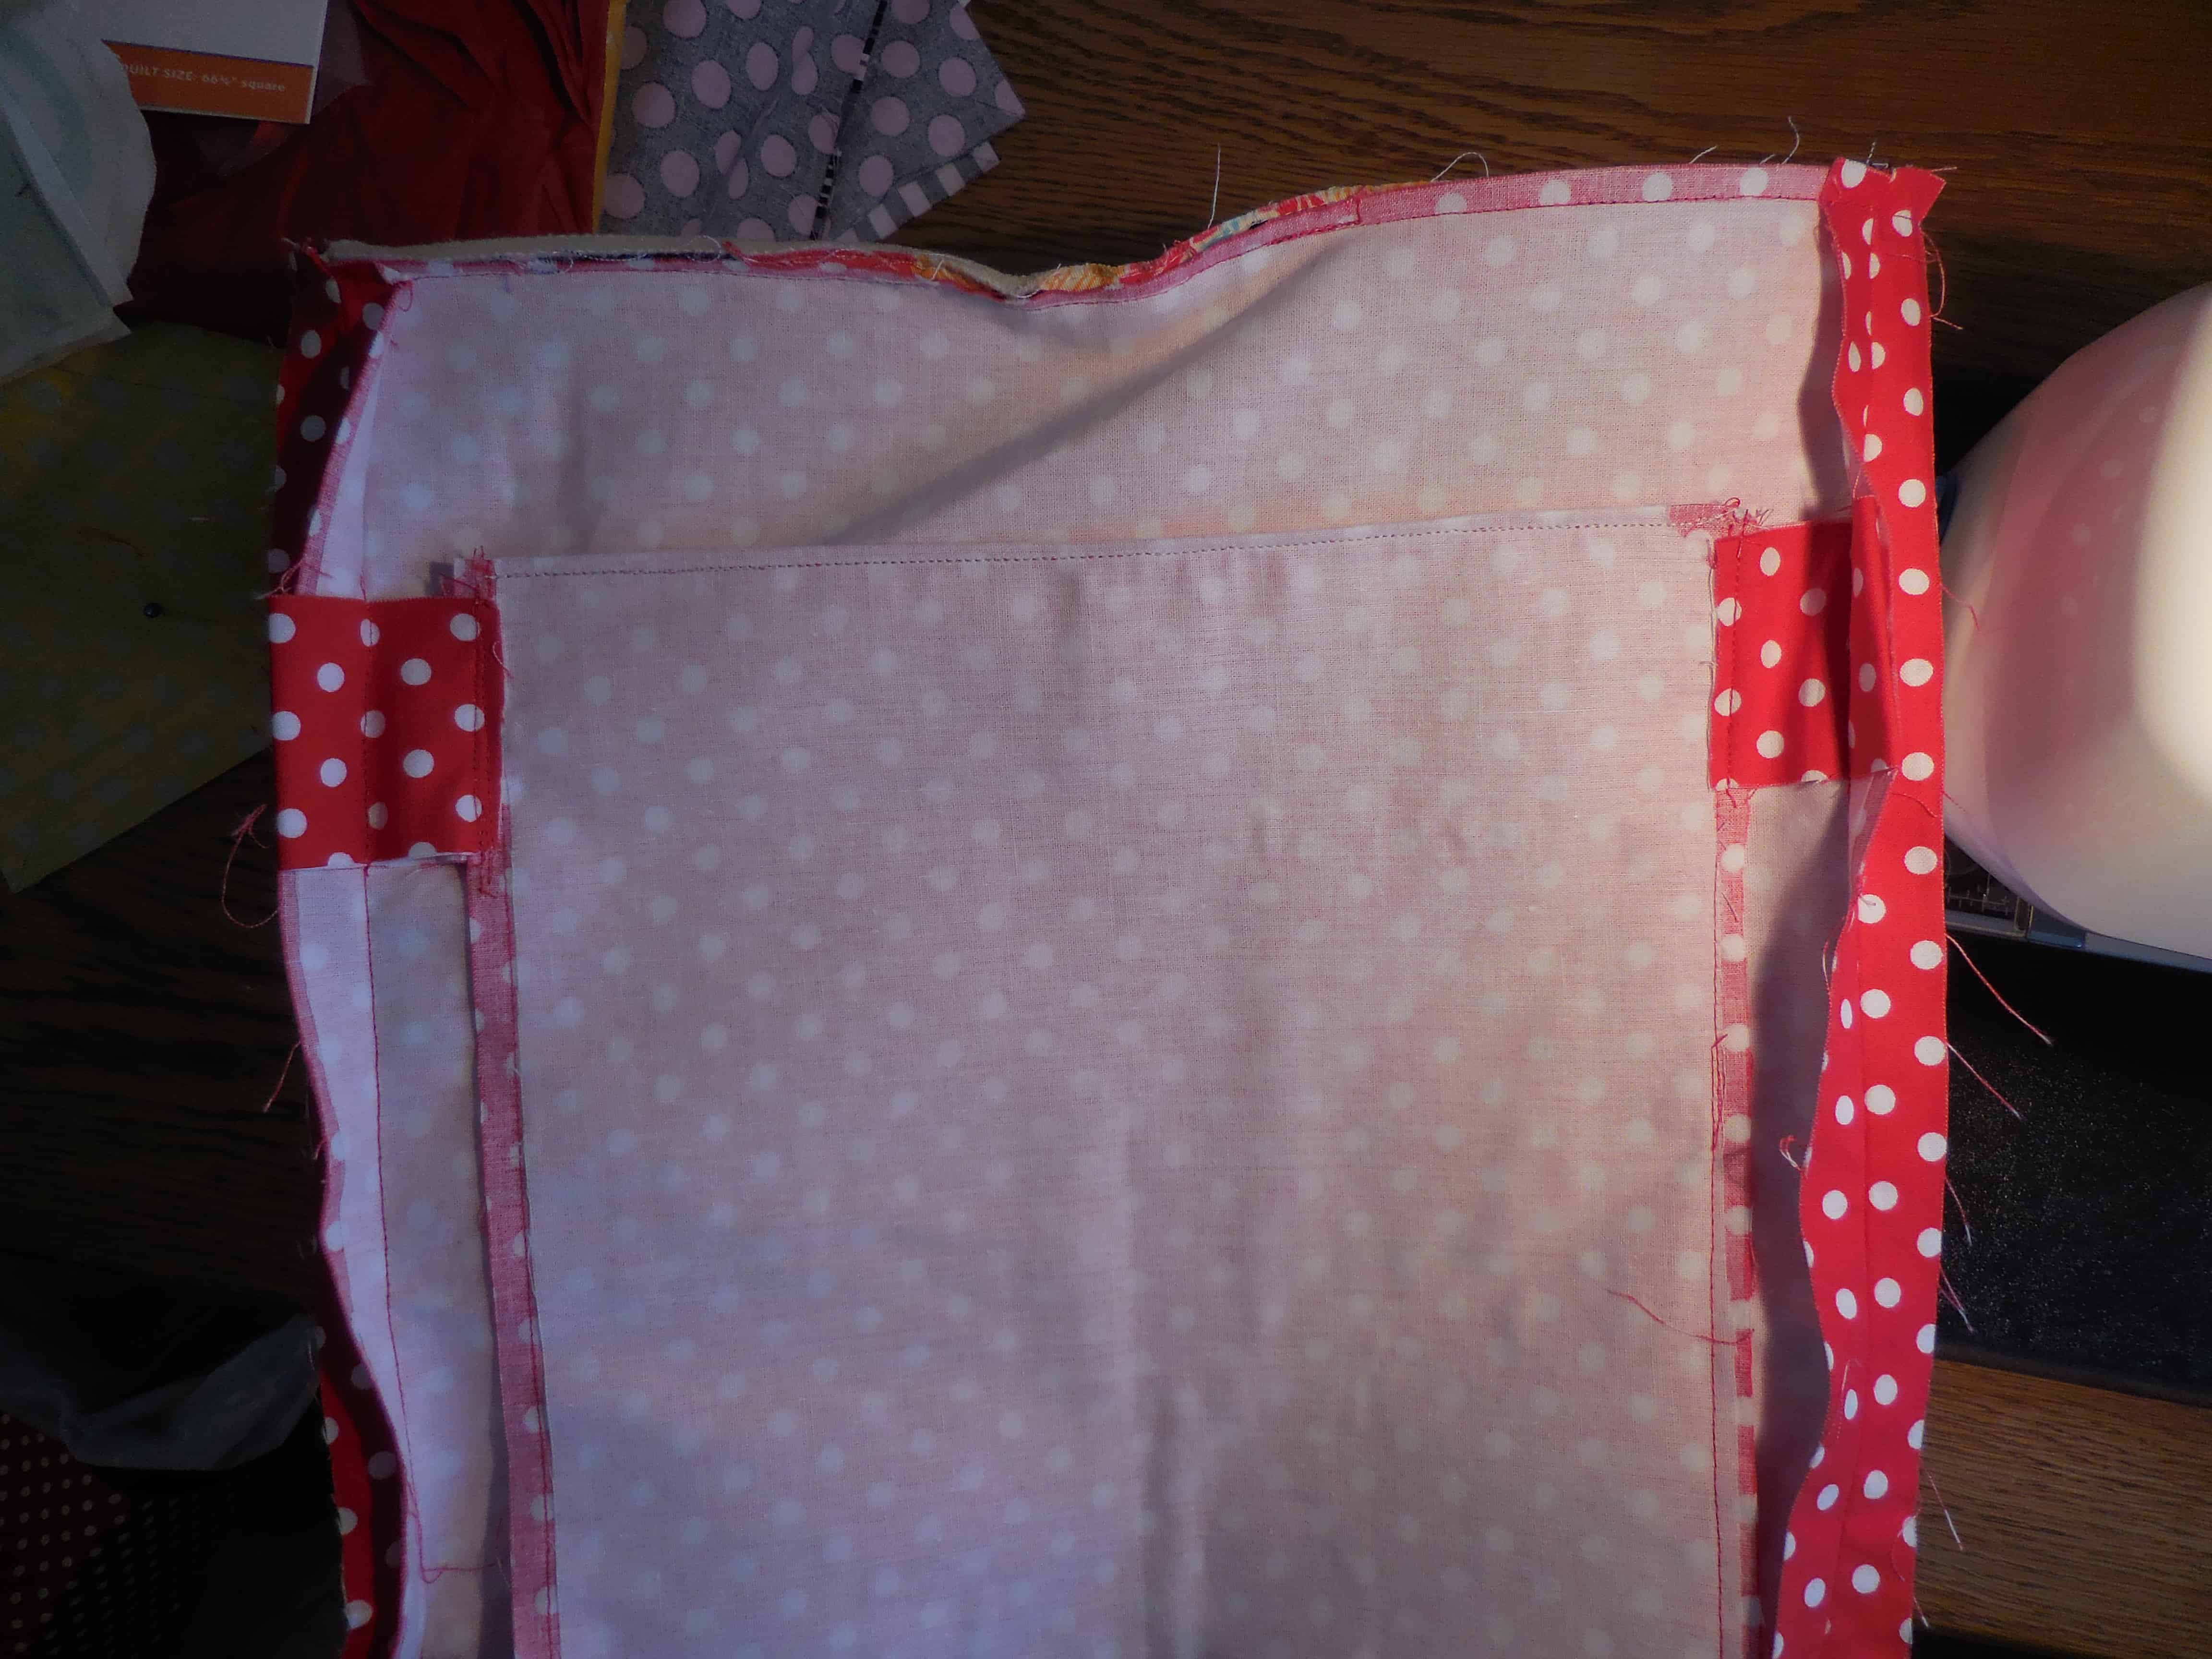
I thought I would write a little more about this pattern as it is a pretty good pattern and has interesting construction techniques.
The bag pattern is included in a book called Make it Take It by Krista Hennebury. The bag is a cover girl and is what attracted me to the book.
I had a gift to make and thought this would be a perfect opportunity to try the pattern. I made the Little Patchwork the first and was a little disappointed at how little it was. I hadn’t planned to make both, but I needed a larger tote for my gift. From the photos in the book, I thought the little tote was more of the large tote size and the Big Patchwork Tote was larger – almost the size of a Chubby Charmer.
Big Patchwork Tote – 2
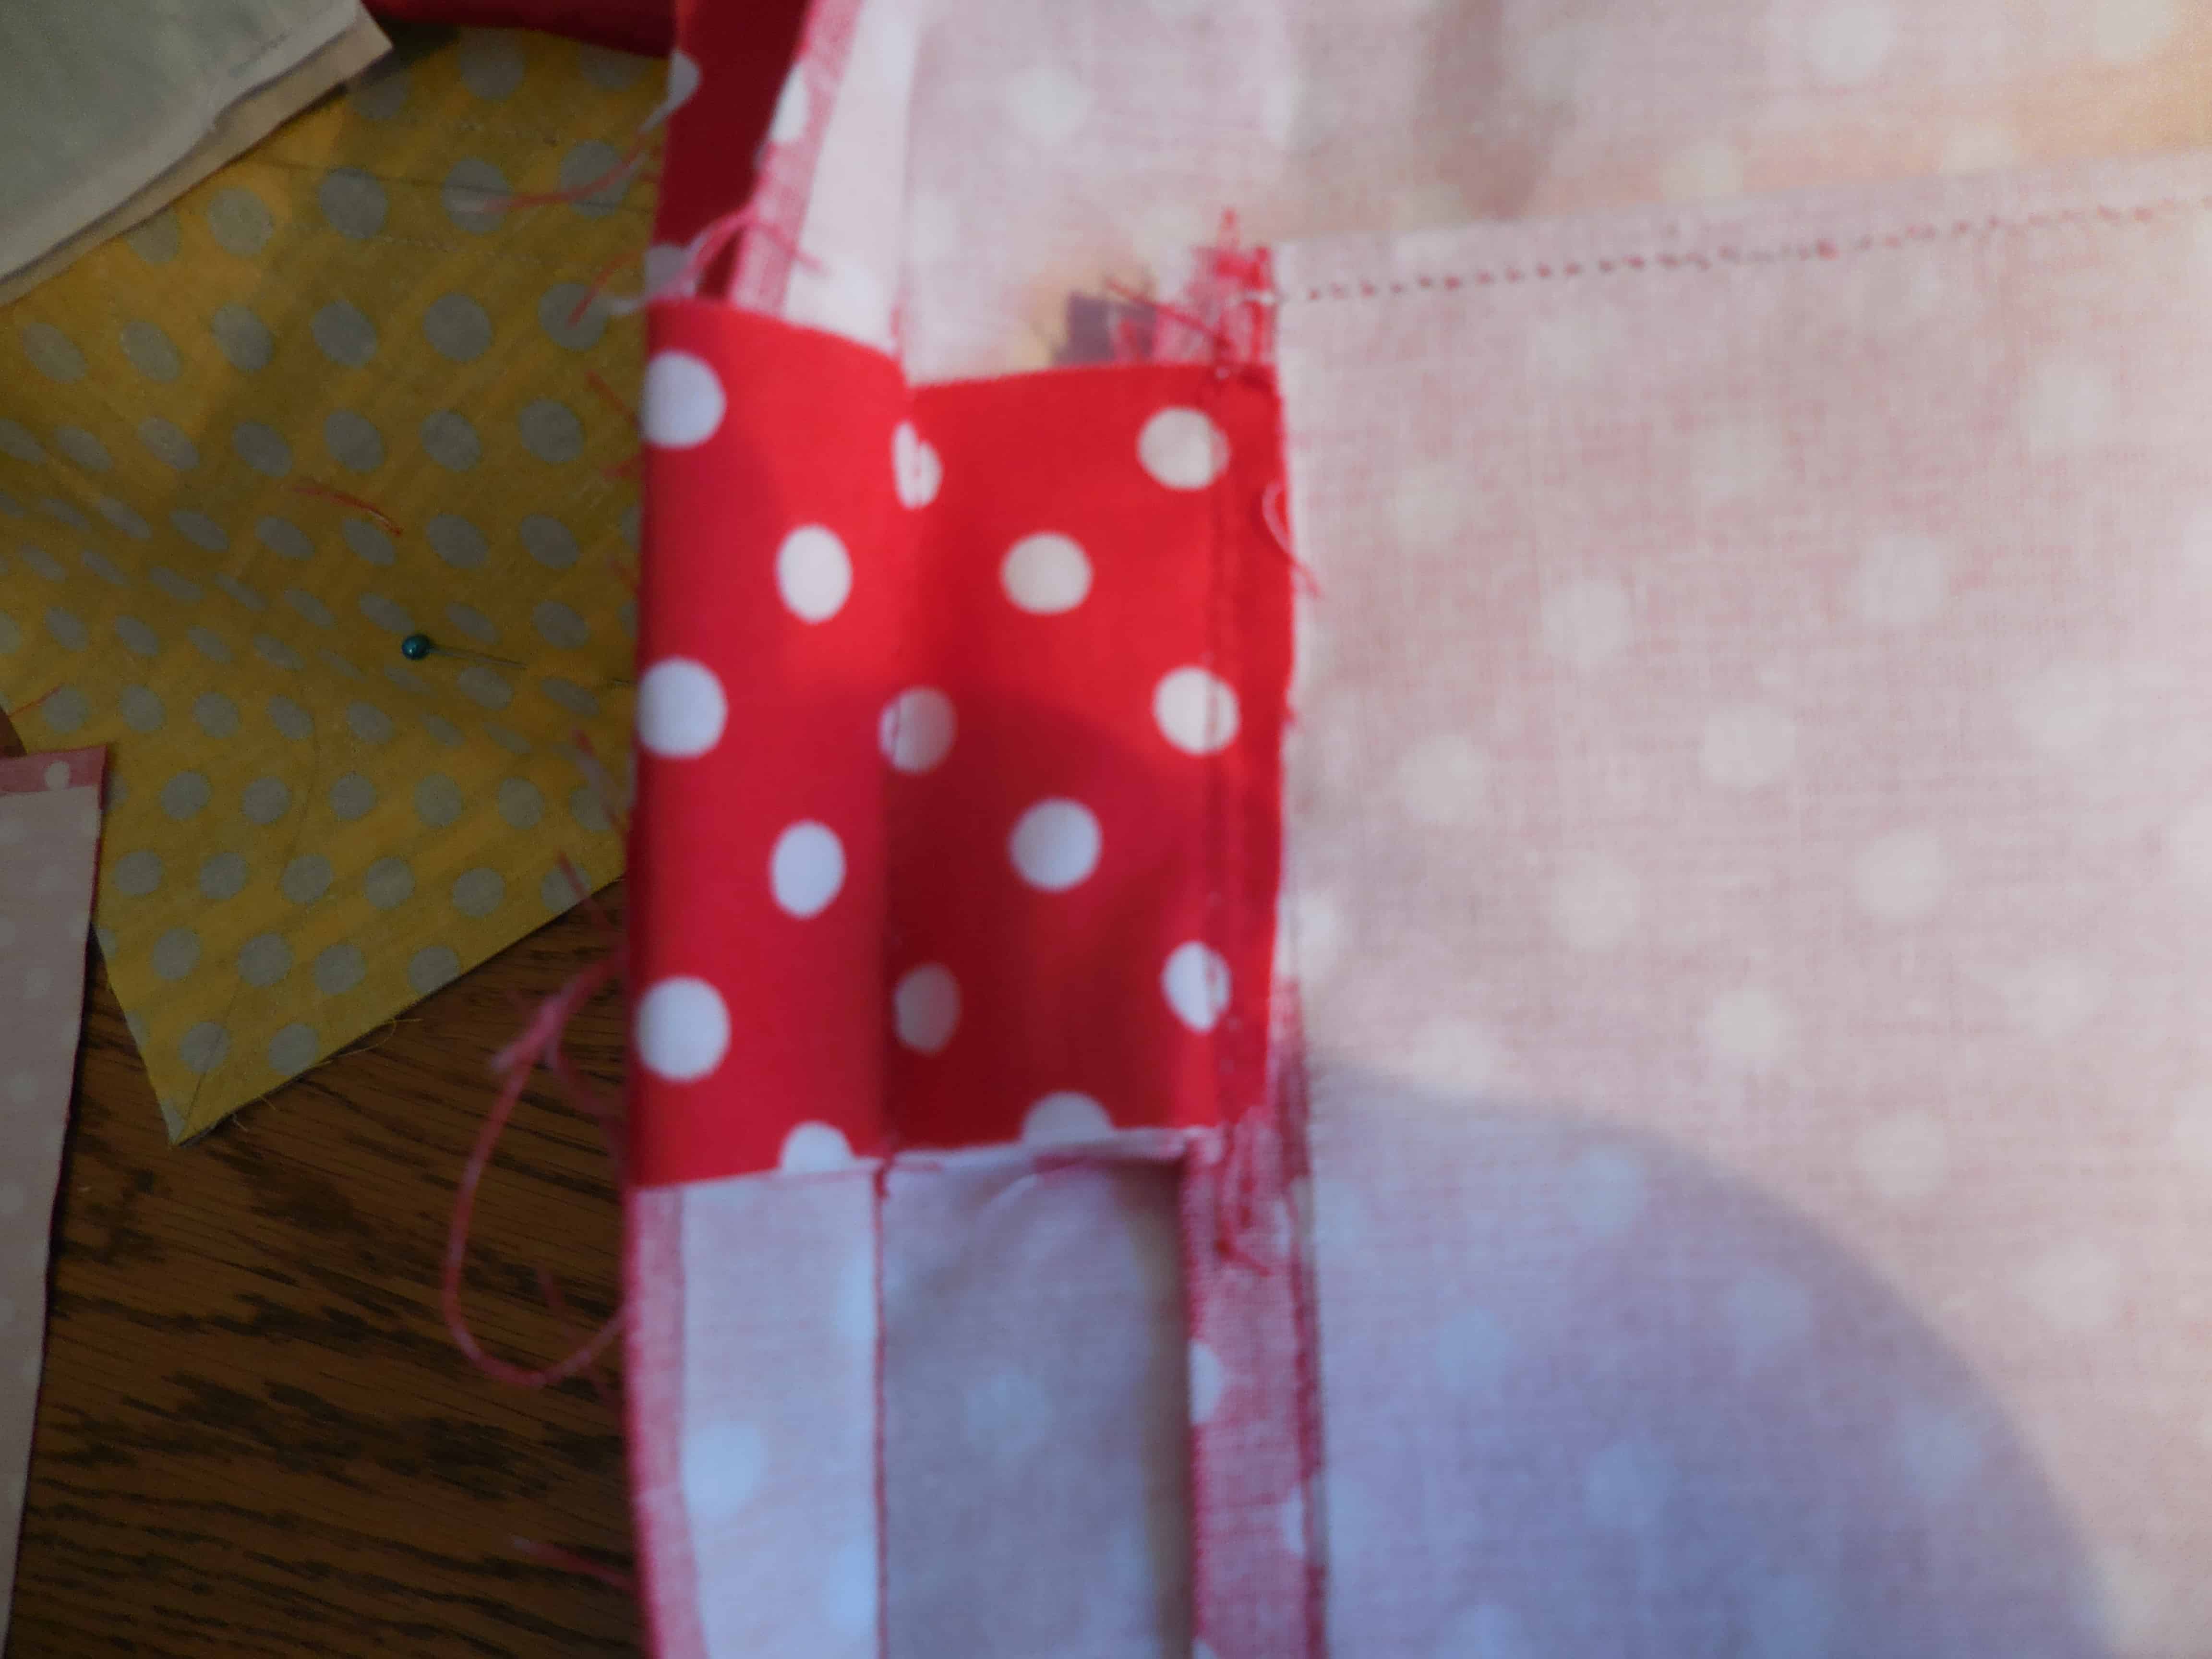
The pattern calls for patchwork sides and gives instructions for making a strip set. Fortunately, the pattern also gives the desired final size of the strip set, so the maker can cut the piece from one piece of fabric, if desired. This dimension also allows one to use something like mosaic piecing techniques if strips are undesired. Since I am using a fat quarter stack for this project, I didn’t have pieces large enough for the strips. I pieced strips together and used those. You can see that in the photo above if you look for vertical strips. I recommend piecing the desired fabrics together well in advance of the deadline for this bag as that takes a lot of time.
I used fusible fleece on the small bag and Soft and Stable on the larger bag. Both work, but I found the fusible fleece to be easier to deal with. Of course, if I had remembered to attach the Soft and Stable before I put the bag together, that would have made a difference. 😉 In the future, if I plan to use Soft and Stable, I will attach it (in the ditch stitching, perhaps) to the exterior before I put the bag together.
The interesting part is how the bag goes together. Instead of putting the exterior inside the interior, right sides together and sewing around the top, as the maker does in most bags, this one asks the maker to fold and press the interior and exterior in half and layer them. It is an interesting method that seems to work, though is hard to understand until you do it.
The problems with this bag are: no pockets, no closure. Considering the method of construction, I am trying to figure out if I can add a pocket or sew-in magnets as closures.
All in all this bag has an interesting shape and lot of room for creativity in making the exterior. I encourage you to buy the book and try it.
The Winter Extravaganza Palooza swap was yesterday at the BAM meeting. Being the blog editor, I had compiled a giant list of tutorials and patterns a few months ago for inspiration. It is an impressive list, so take a look. 😉
My swap partner wanted a bag, so I pulled out one of the bag patterns I have had sitting around and tried it out. I know I could have used one of the tutorials I just crowed about, but I didn’t. I wanted to plow through some of the bag patterns I have purchased and this was the perfect opportunity.
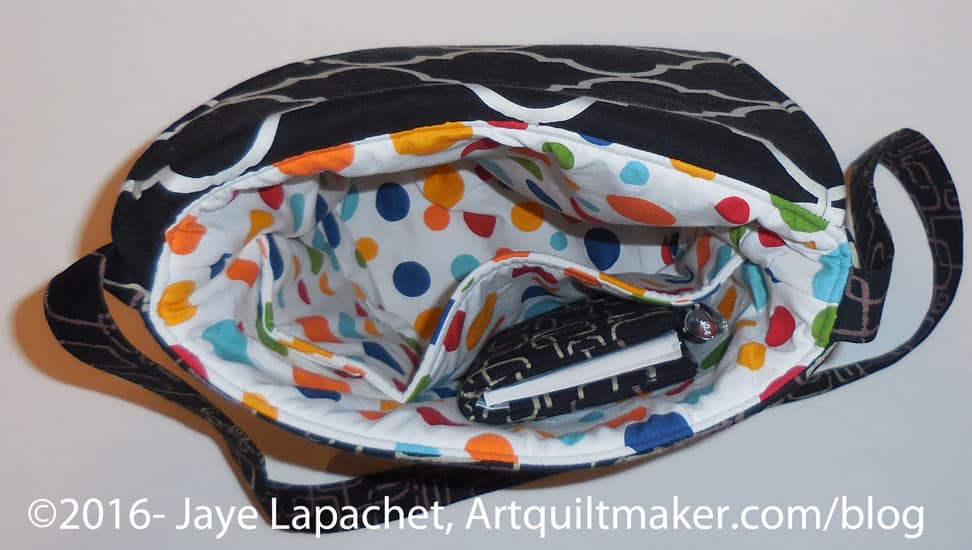
I wasn’t hopeful that this bag would be successful (unlike me, I know!), so I was pleasantly surprised to find that this bag came out pretty well. The flap is a great opportunity to do some machine embroidery or applique’ or other type of embellishment. I chose some interesting, if black, modern fabrics for the outside, so it wouldn’t show the dirt.
The pattern is Flip Flap bag from Totes by Sandy. The pattern is not 100% clearly written, though the interpretation could have been my problem. I had some trouble with some of the steps, but it all came out in the end. I would have made the lining section much smaller. I did make it a little smaller, knowing from past experience that it didn’t need to be the same size as the outside. I didn’t make it small enough and the inside sags a little. 🙁 I don’t know what the normal reduction is for linings – half inch? a whole inch? I could experiment, but probably won’t.
Flip Flap Bag inside view
I made the inside light so my partner could see her stuff.
I am thinking about making this again, as I think it is a good size. I wonder about adding more pockets. The handbag I use now has a section at the front for cards, lipstick, etc and I wonder if that could be incorporated into this design. Perhaps not with the asymmetrical flap.
My third Petrillo bag has been on the To Do list for a long time. Before I went on my trip, I decided to sew it, as I mentioned when I enumerated the bag hacks. I also worked on it, because the Peacock was acting like a beast and I wasn’t feeling the quilt love, in general.
I really was almost done cutting it out. I felt kind of stupid the whole time I finished the cutting for letting it lie so long. It took me a few days to sew it, longer than it should have, because I had to rip a few seams and make a new main flap.
Petrillo Bag #3 Inside
I have used it a few times and am linking it. I haven’t filled it to overflowing, so I don’t know if it will really work for a long conference where I can’t easily return to my hotel, but so far so good.
The hack I sewed to the stabilize pocket makes a huge difference when I carry things around. The zipper pocket doesn’t sag. I am mad at myself for not adding vinyl to the bottom. I have to worry a lot more about where I set it.
I spent some days on the weekend finishing the Petrillo Bag #3 (Buy the pattern from Sew Sweetness). I have a few threads to weave in before I can say DONE, but it is close.
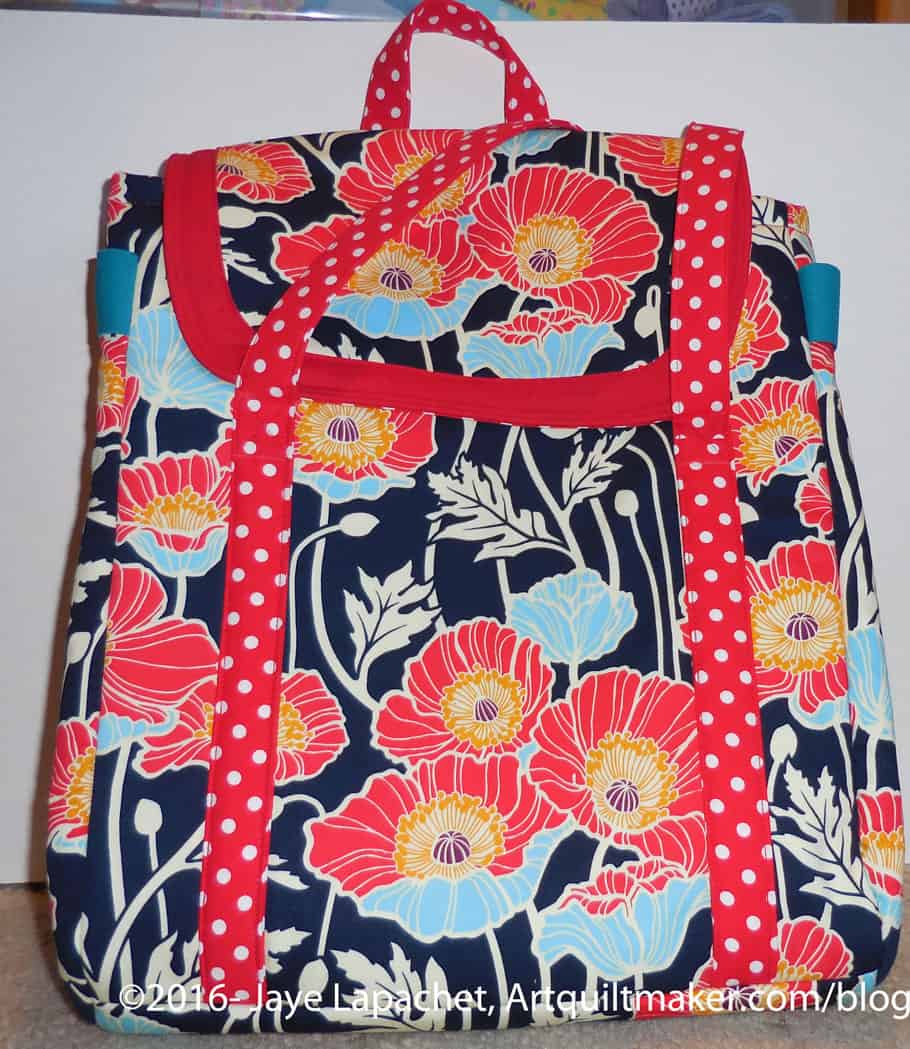
In this bag, I made a few more changes to the original pattern.
Elastic sides
First, I made the bag larger again, but instead of using clips like last time, I bought some wide elastic and used that. The reason I need to use something rather than let the bag be free is because I want the front closure to still work. It is a magnetic closure and probably wouldn’t be strong enough to keep the bag closed if the shape weren’t similar to the original bag. I want it bigger to be able to get stuff out easier (this bag is GREAT for conferences) and be able to stuff a sweater in for cold conference rooms.
I didn’t have enough of the sew-in magnetic closures that Sara of Sew Sweetness recommends, so I bought one more at Joann. Big mistake. Use the ones that Sara recommends; they are MUCH better.
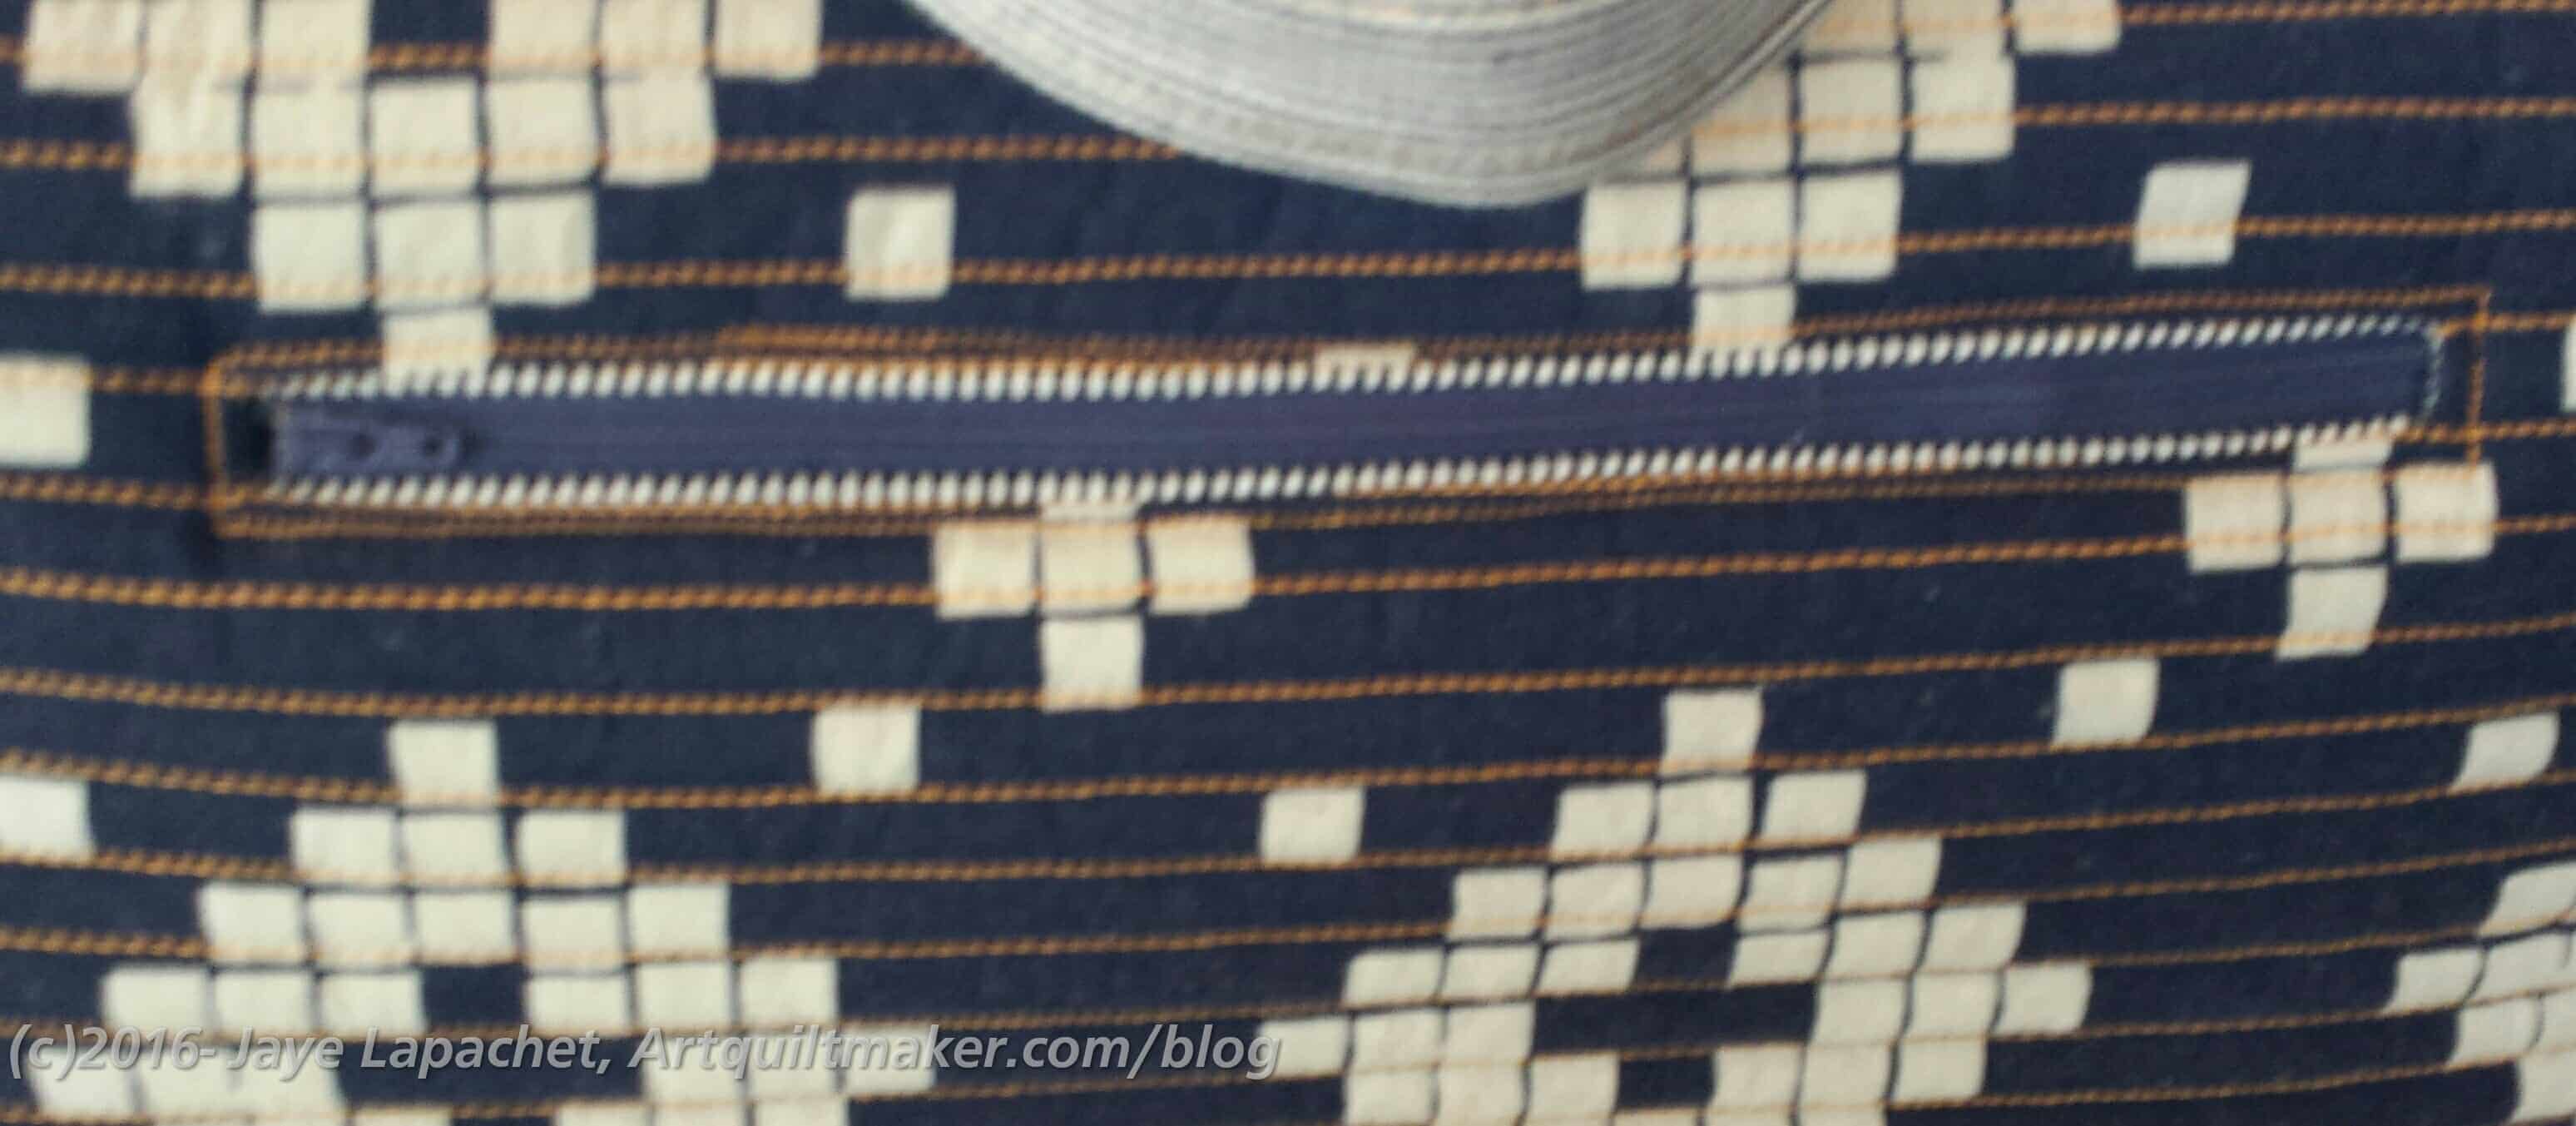
Saggy zipper pocket from Petrillo Bag #2
Next, I needed a way for the interior zipper pocket to be stabilized. I use the zipper pocket a lot and it was completely saggy. You can see the outside folded over to the inside from the weight. One solution was to lessen the amount of stuff in the pocket.I do like my stuff so I sewed close to the edge on the top of the pocket as one possible solution to keep the pocket stable.
Stabilize zipper pocket
However, I thought of a solution that would allow me to keep the same amount of stuff in the pocket and not be saggy. I thought of this at the last minute when the bag was almost completely together, so my options for making it super nice were limited. I sewed tabs on to the ends of the zipper. They were sticking out just enough to allow me to do so, then I sewed the tabs into the side seam.
Stabilize zipper pocket – detail
I didn’t finish the tabs, but I figured it wouldn’t matter much since the stablizers were on the inside. I would finish the edges and make real zipper tabs if I were making the bag again.
Petrillo Bag Slip Pocket
In a further effort to stabilize the interior zipper pocket, I also added a slip pocket to the outside of the padded pocket. I got this idea from making the Cargo Duffle. I hope to put the pens in this pocket instead of in the zipper pocket, which should help the stabilization. I divided the slip pocket into two sections using my phone as a guide for size.
The slip pocket isn’t in exactly the right place. I should have put it down a little further, because in its current location, it interferes with the padded pocket flap. Thinking about this made me realize that I probably don’t need a flap over the padded pocket.
I think I will have to make this bag again with further refined hacks.
The 3rd Petrillo Bag has been cut out and on my to do list for awhile. Last Sew Day was the day to start it. I worked on the donation and when I finished that, I started working on this bag. I decided that I needed to clear off my To Do list and I also want my first Chubby Charmer back. I have been using it as a storage space for the pieces to this bag.
I really don’t know why I waited. It has gone together fairly easily thus far even though I have had to do some ripping.
Petrillo Bag #3 in process
With this bag, you get a lot of bang for your buck quickly. Within a few seams, you get something that looks like a bag.
Is it finished? No, but I am making progress.
I had some trouble with the flap and after ripping a few times, I decided to remake. I am also making a couple of adjustments. I am making the bag larger again, but using elastic this time. I wasn’t careful when I sewed it in and needed to rip it out and sew it more securely.
Mom had a great idea, which I will also do. I have a pen problem. I always have several with me. I have been using the hidden zipper pocket to hold them and everything else, which makes the bag sag. She suggested I put a slip pocket on the padded pocket and put the pens there. Brilliant!
I am still trying to figure out how to stabilize the hidden zipper pocket. That is a bit of a holdup, but not terrible.
Pattern: Petrillo Bag by Sew Sweetness Fabric: Home Dec, Pristine Poppies by Joel Dewberry; various dots for trim and Art Gallery Red (not sure this is the name of the colorway) solid for some of the pockets and other trim.
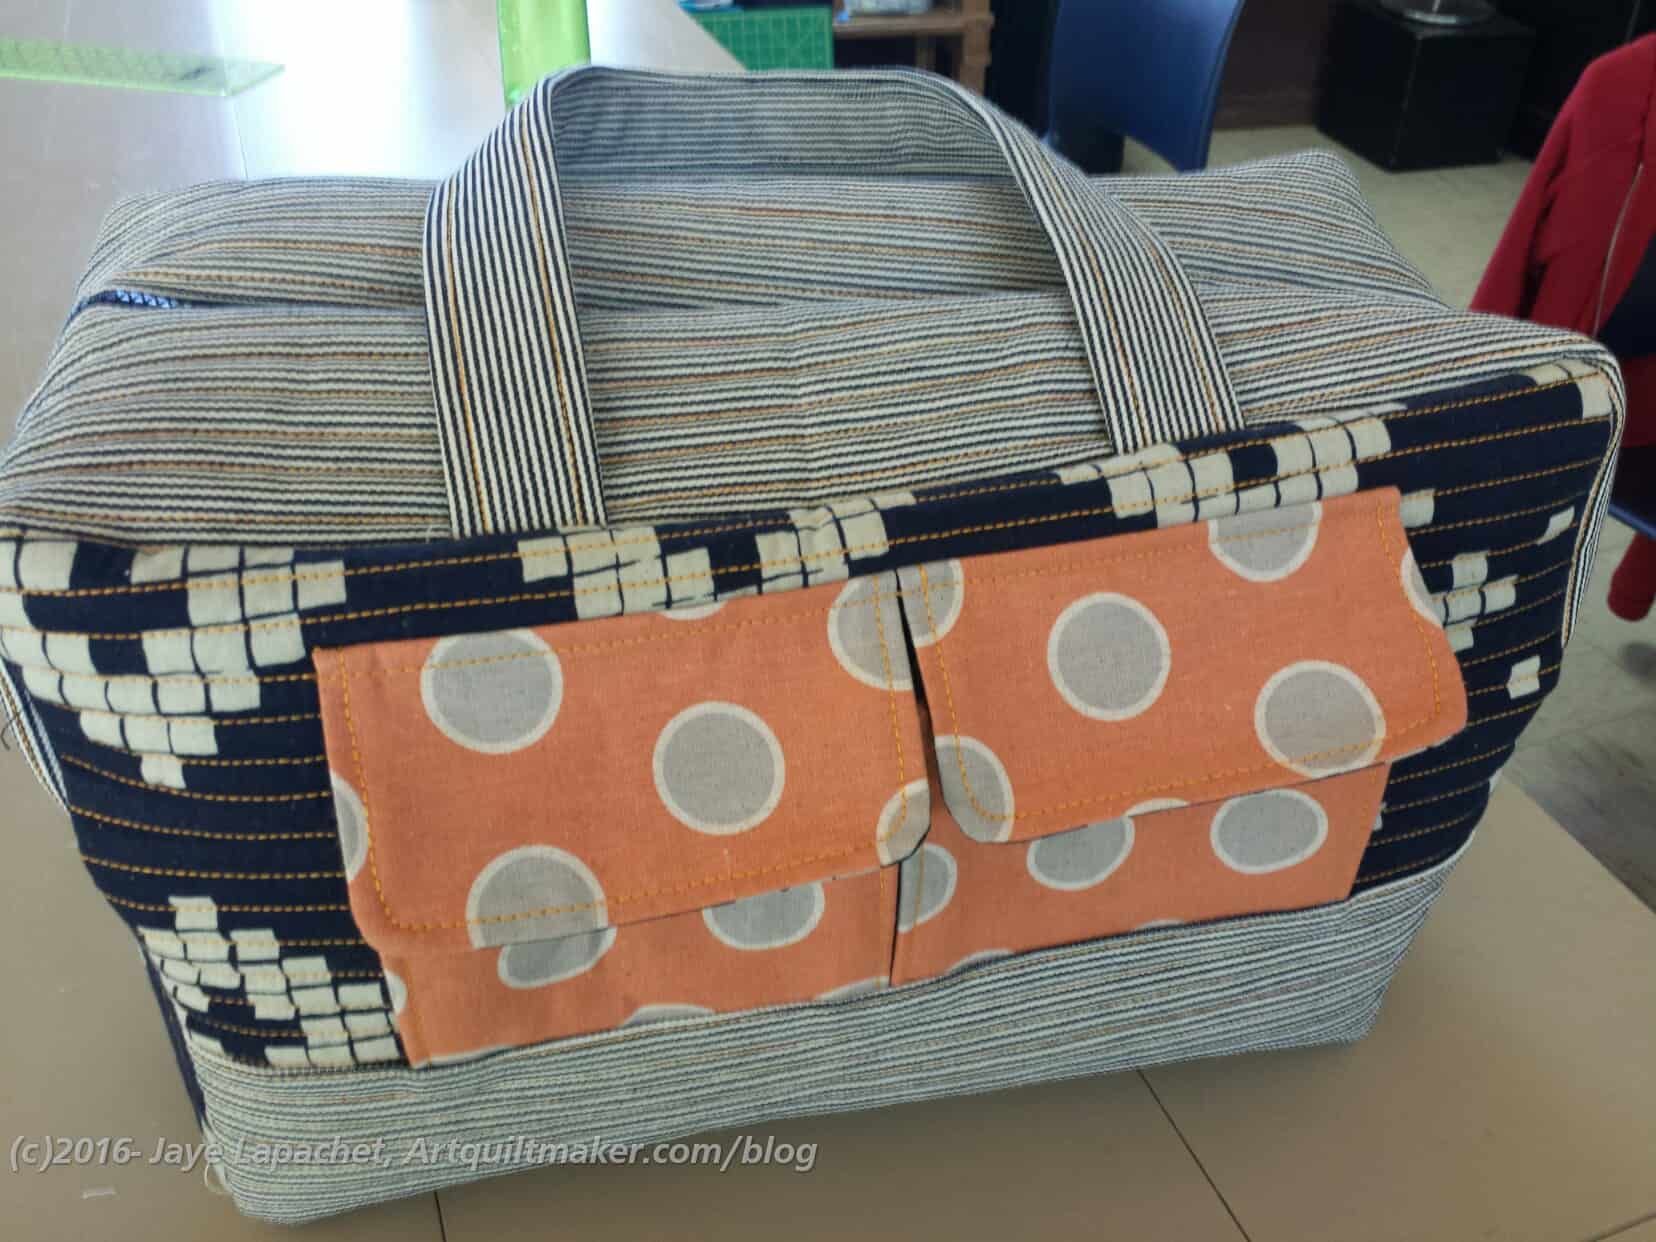
I spent the Sunday after the workshop finishing the Cargo Duffle.
I really, sincerely disliked all the prep work, but was thrilled to see how this bag turned out. it has substance. I was going to give it away, but I am keeping it. I really like the fabrics I chose, even though I chose the green because I thought I would give it away. I love that text fabric.
Cargo Duffle – Finished (interior zipper pocket)
I am also thinking of making another one. I know. I know. I am crazy, but I keep thinking about how I would make a second one differently. I want to see if I can do it again better. ALSO, I do have to make a bag for one of the guild officers.
For example, after cutting out the straps, I would just sew them. After cutting out the pockets, I would sew them to the lining. I think it would be less confusing. Yes, I would still have to quilt a bunch of pieces and panels,, but I think it would be easier. It might not have worked when I didn’t know how to make the bag, but now that I have an idea, I think it would work better for me.
I am behind in posting, but I also don’t want to bore you by posting on one project or topic day after day.
You know that I have been prepping for the Cargo Duffle. It seemed interminable, but paid off. On the first Saturday in August I went to the BAMQG workshop and worked on assembling the Cargo Duffle. I arrived in good time after only getting a little lost*. 😉
Gerre arrived right after I did and we quickly decided to sit together in the back of the room. That way we could have a whole table to ourselves. There was a bit of table shortage because their day camp program was using the long rectangular tables we like. We ended up with two tables, mostly because I decided we needed a separate table on which to layout all the pieces we had prepped. It is always great to work with Gerre. On the day of the workshop, I was on edge (not sure why – a lot going on, maybe) and she kept talking me down off the ledge. I reciprocated the favor by keeping her calm when parts of the bags weren’t going as planned.
It was also good to see that some people had done less of their homework than I did, not to be mean to them; it just reduced my stress a bit.
We started out with the slip pockets and my first problem was with what pieces needed to be used. Jaime helped and once I got that problem sorted, the “which piece was which” problem sorted itself out. Even though I had all the pieces labeled, with this bit of help, I had a frame of reference.
Seeing what other people were doing and having access to a teacher also made me calm down quite a bit.
Cargo Duffle lining with interior slip pockets
My first huge accomplishment was finishing the lining. Yes, I finished the interior slip pocket and the interior zipper pocket, which help to make up the lining, but seeing a real 3D item made from all that prep work me very happy.
I made mistakes and had to rip, which I am sure others were doing as well, even though I didn’t see them. I also had to change the way the main zipper worked, which Gerre talked me through. I may post the steps for you later. Not sure, but stay tuned.
Sewing Cargo Duffle Exterior Together
Still, it was a super long day and I didn’t finish completely, but made really good progress. By the end of the day I only had to sew the rest of the exterior together and then insert the lining. I really don’t have a lot to complete and feel like I accomplished quite a bit by the time the day was over. Do I wish I had finished? Yes, of course, but I have to be happy with what I was able to do.
Gerre’s Finished Cargo Duffle
Gerre’s Finished Cargo Duffle
Gerre’s Finished Cargo Duffle
Gerre’s Finished Cargo Duffle
Gerre finished her bag and it looks great! Cheryl, Amanda and Karen all finished their bags as well.
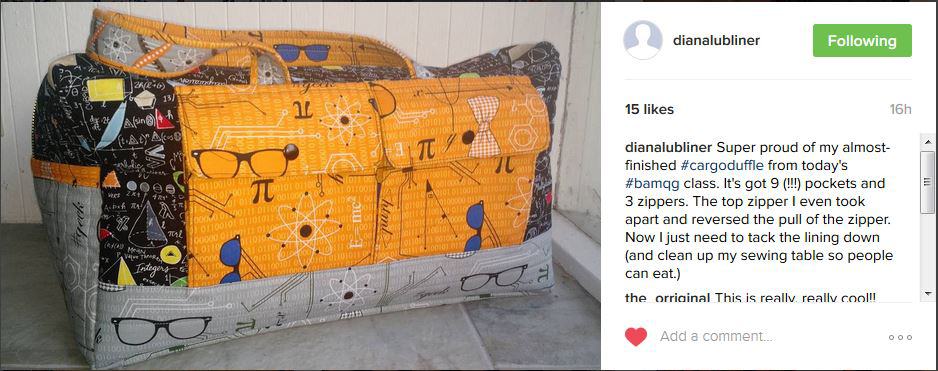
Diana is so close to finishing hers. I love her fabrics.
*I don’t normally get lost a lot, but I seem to always get lost on the mid-Peninsula and in the South Bay. I go there quite a lot and still don’t have a visual map in my mind. Someday, maybe.