After finishing the Retreat Bag on Friday, I have FINALLY finished all of the projects in the Crafty Gemini Organizer Club.
This club started in the 2018, so it has been awhile in the making. I really did pretty well with the first few projects. The last three were the ones that took me longer than I thought they should. Still, life gets in the way.
I have so much more experience now with bags. I suspect that Vanessa, of Crafty Gemini, does as well and she would make these projects differently if she were designing the club again.
I haven’t used all of the projects. For some reason, I was saving them until all were done. I don’t know what that was about, but I am going to put them into circulation.
I keep looking at the Zip Away Organizer and thinking that the construction is similar to the Day Trip Wallet from Sew Sweetness. The Day Trip Wallet is a project I have been putting off because of the tight curves required in the construction.
These are the projects in gallery form. I don’t have all of the projects anymore.
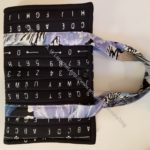
Roadtrip Bag – front
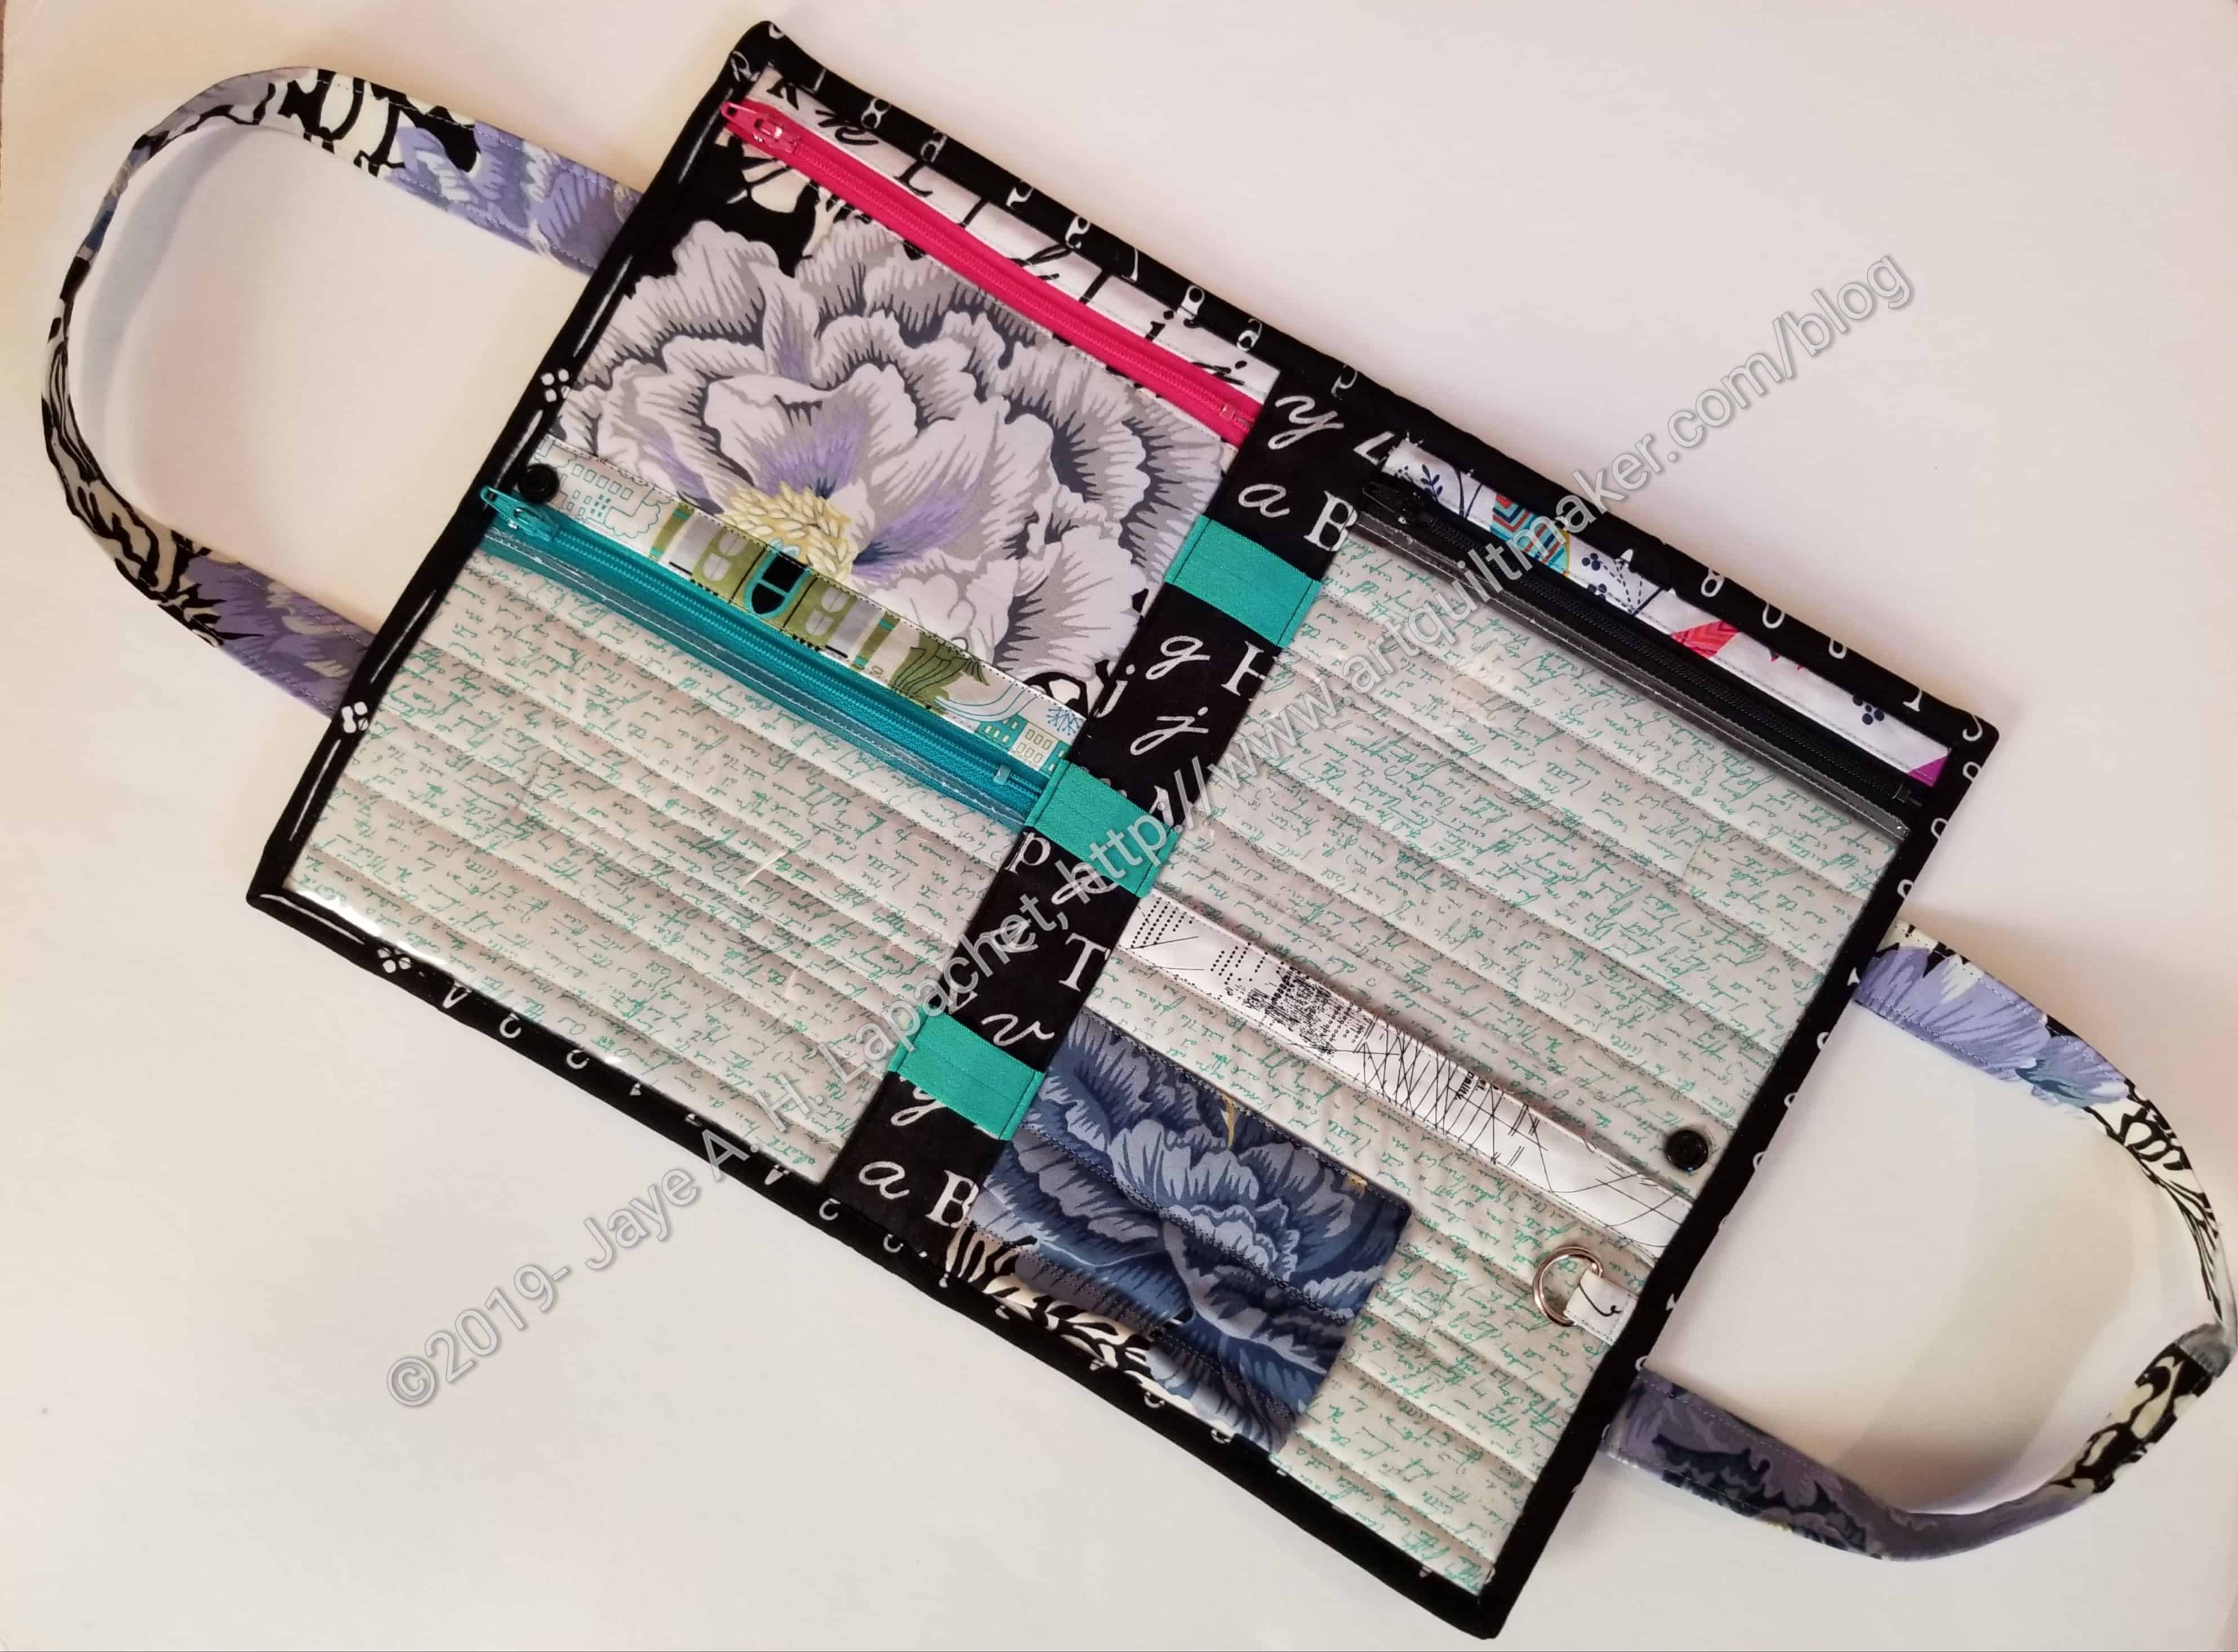
Zip Away Organizer – open
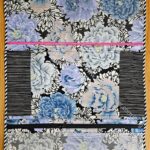
Crafty Gemini Sewing Machine Mat
4 Zip Organizer: closed
All Rolled Up tote with handles: open
Ultimate Project Bag – interior – with Road Trip bag
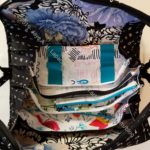
Crafty Gemini Retreat Bag -full interior (finished)
I am not sure which ones I will make again. I think I will make the Project Bag again, but with some modifications. I am finding project bags to be very useful. Not only do they use up fabric, but they keep all the pieces and parts of smaller projects together.
I won’t make the Road Trip bag again, though I like the size. It is very similar to the I Spy pouches from Sew Sweetness and I like the I Spy pattern better. I like making a window of the vinyl and not having it in a seam that needs to be turned. Of course, I have better vinyl now. I do like the leash on the Road trip bag, but I don’t like it next to the zipper. In fairness, I could have put it on the wrong side.
Yes! After YEARS I finally finished the Retreat Bag from the Crafty Gemini Organizer Club. WooHoo! I can’t tell you how excited I am to cross this one off my list.
Why? I think, mostly, I am glad to have it done. I have not found a bag yet that I am SUPER excited to use and this is no exception. I hope that it will be a good bag to use, but I am not optimistic. Sad but true.
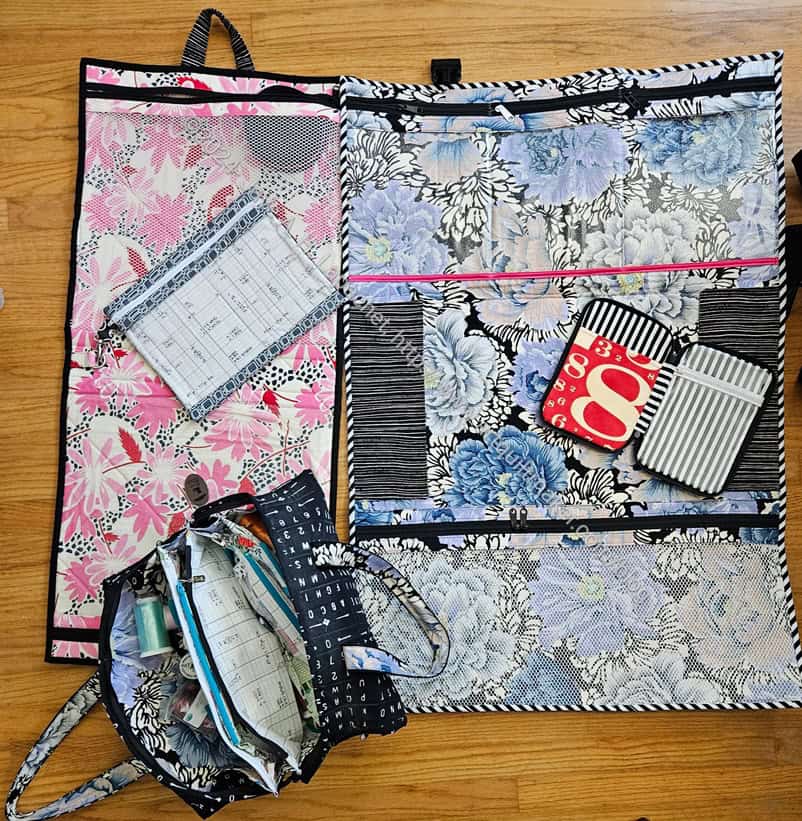
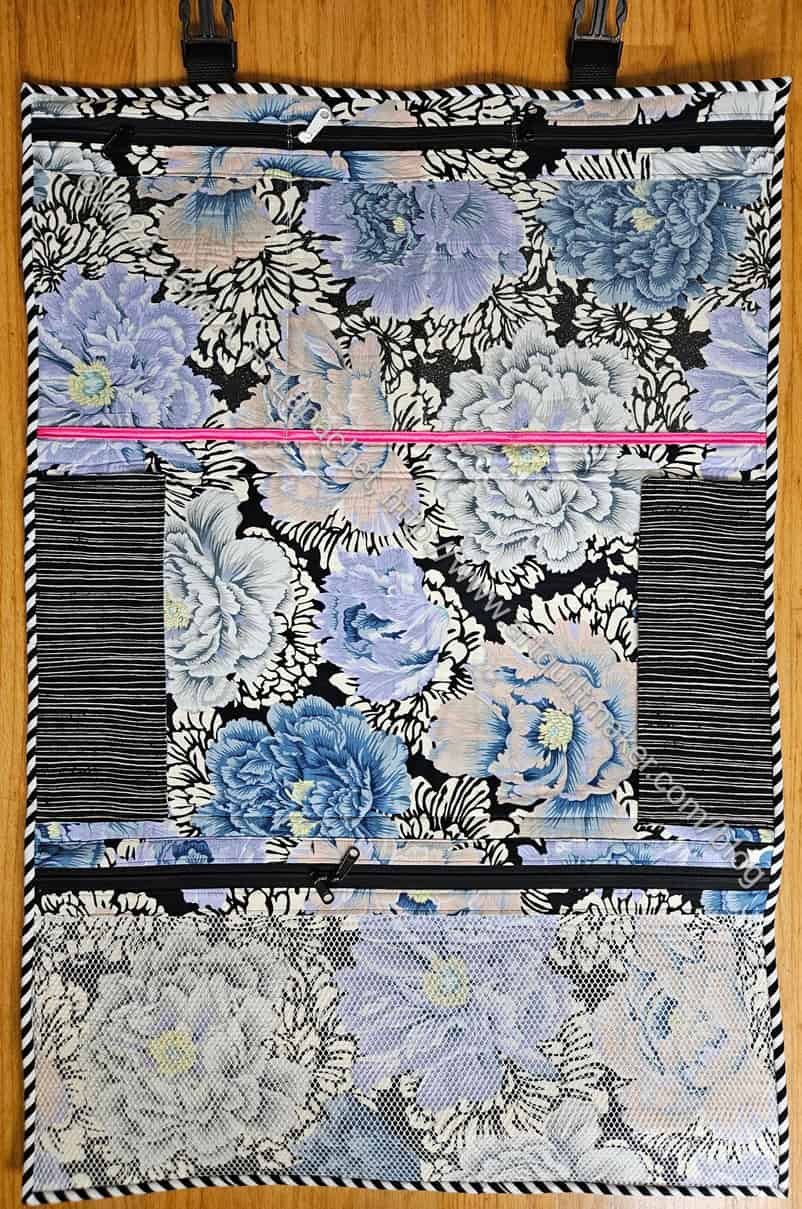
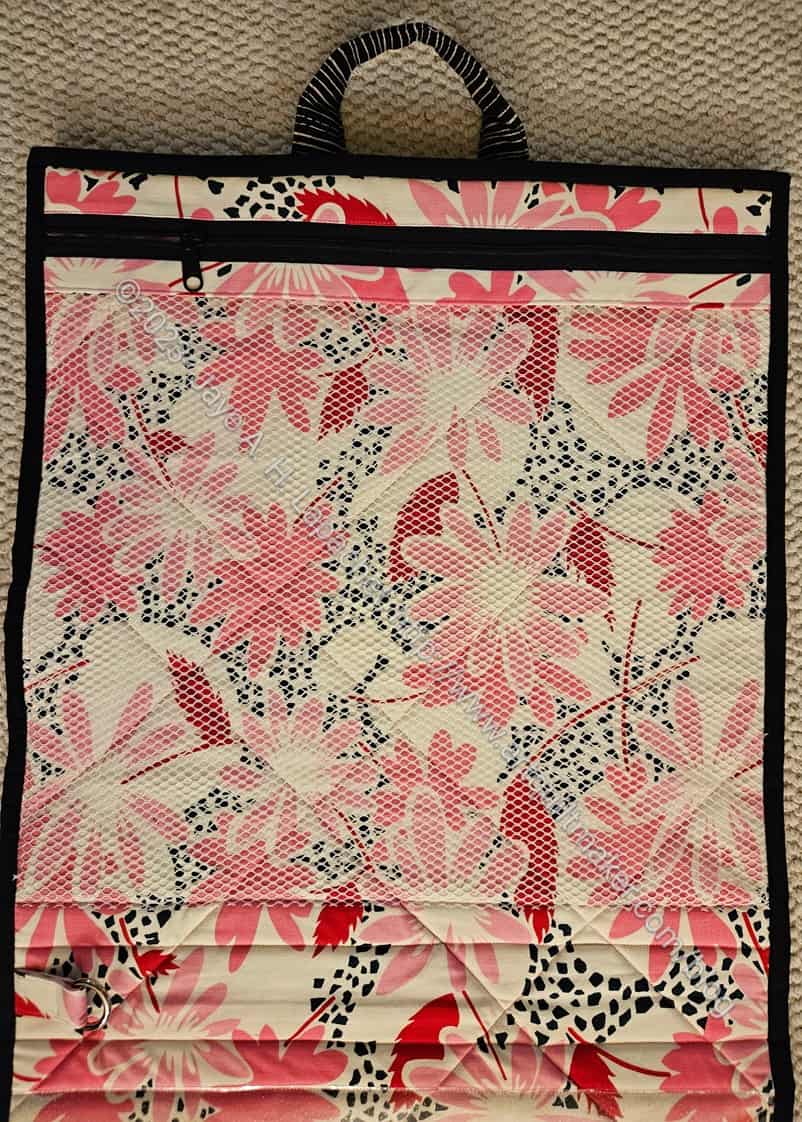
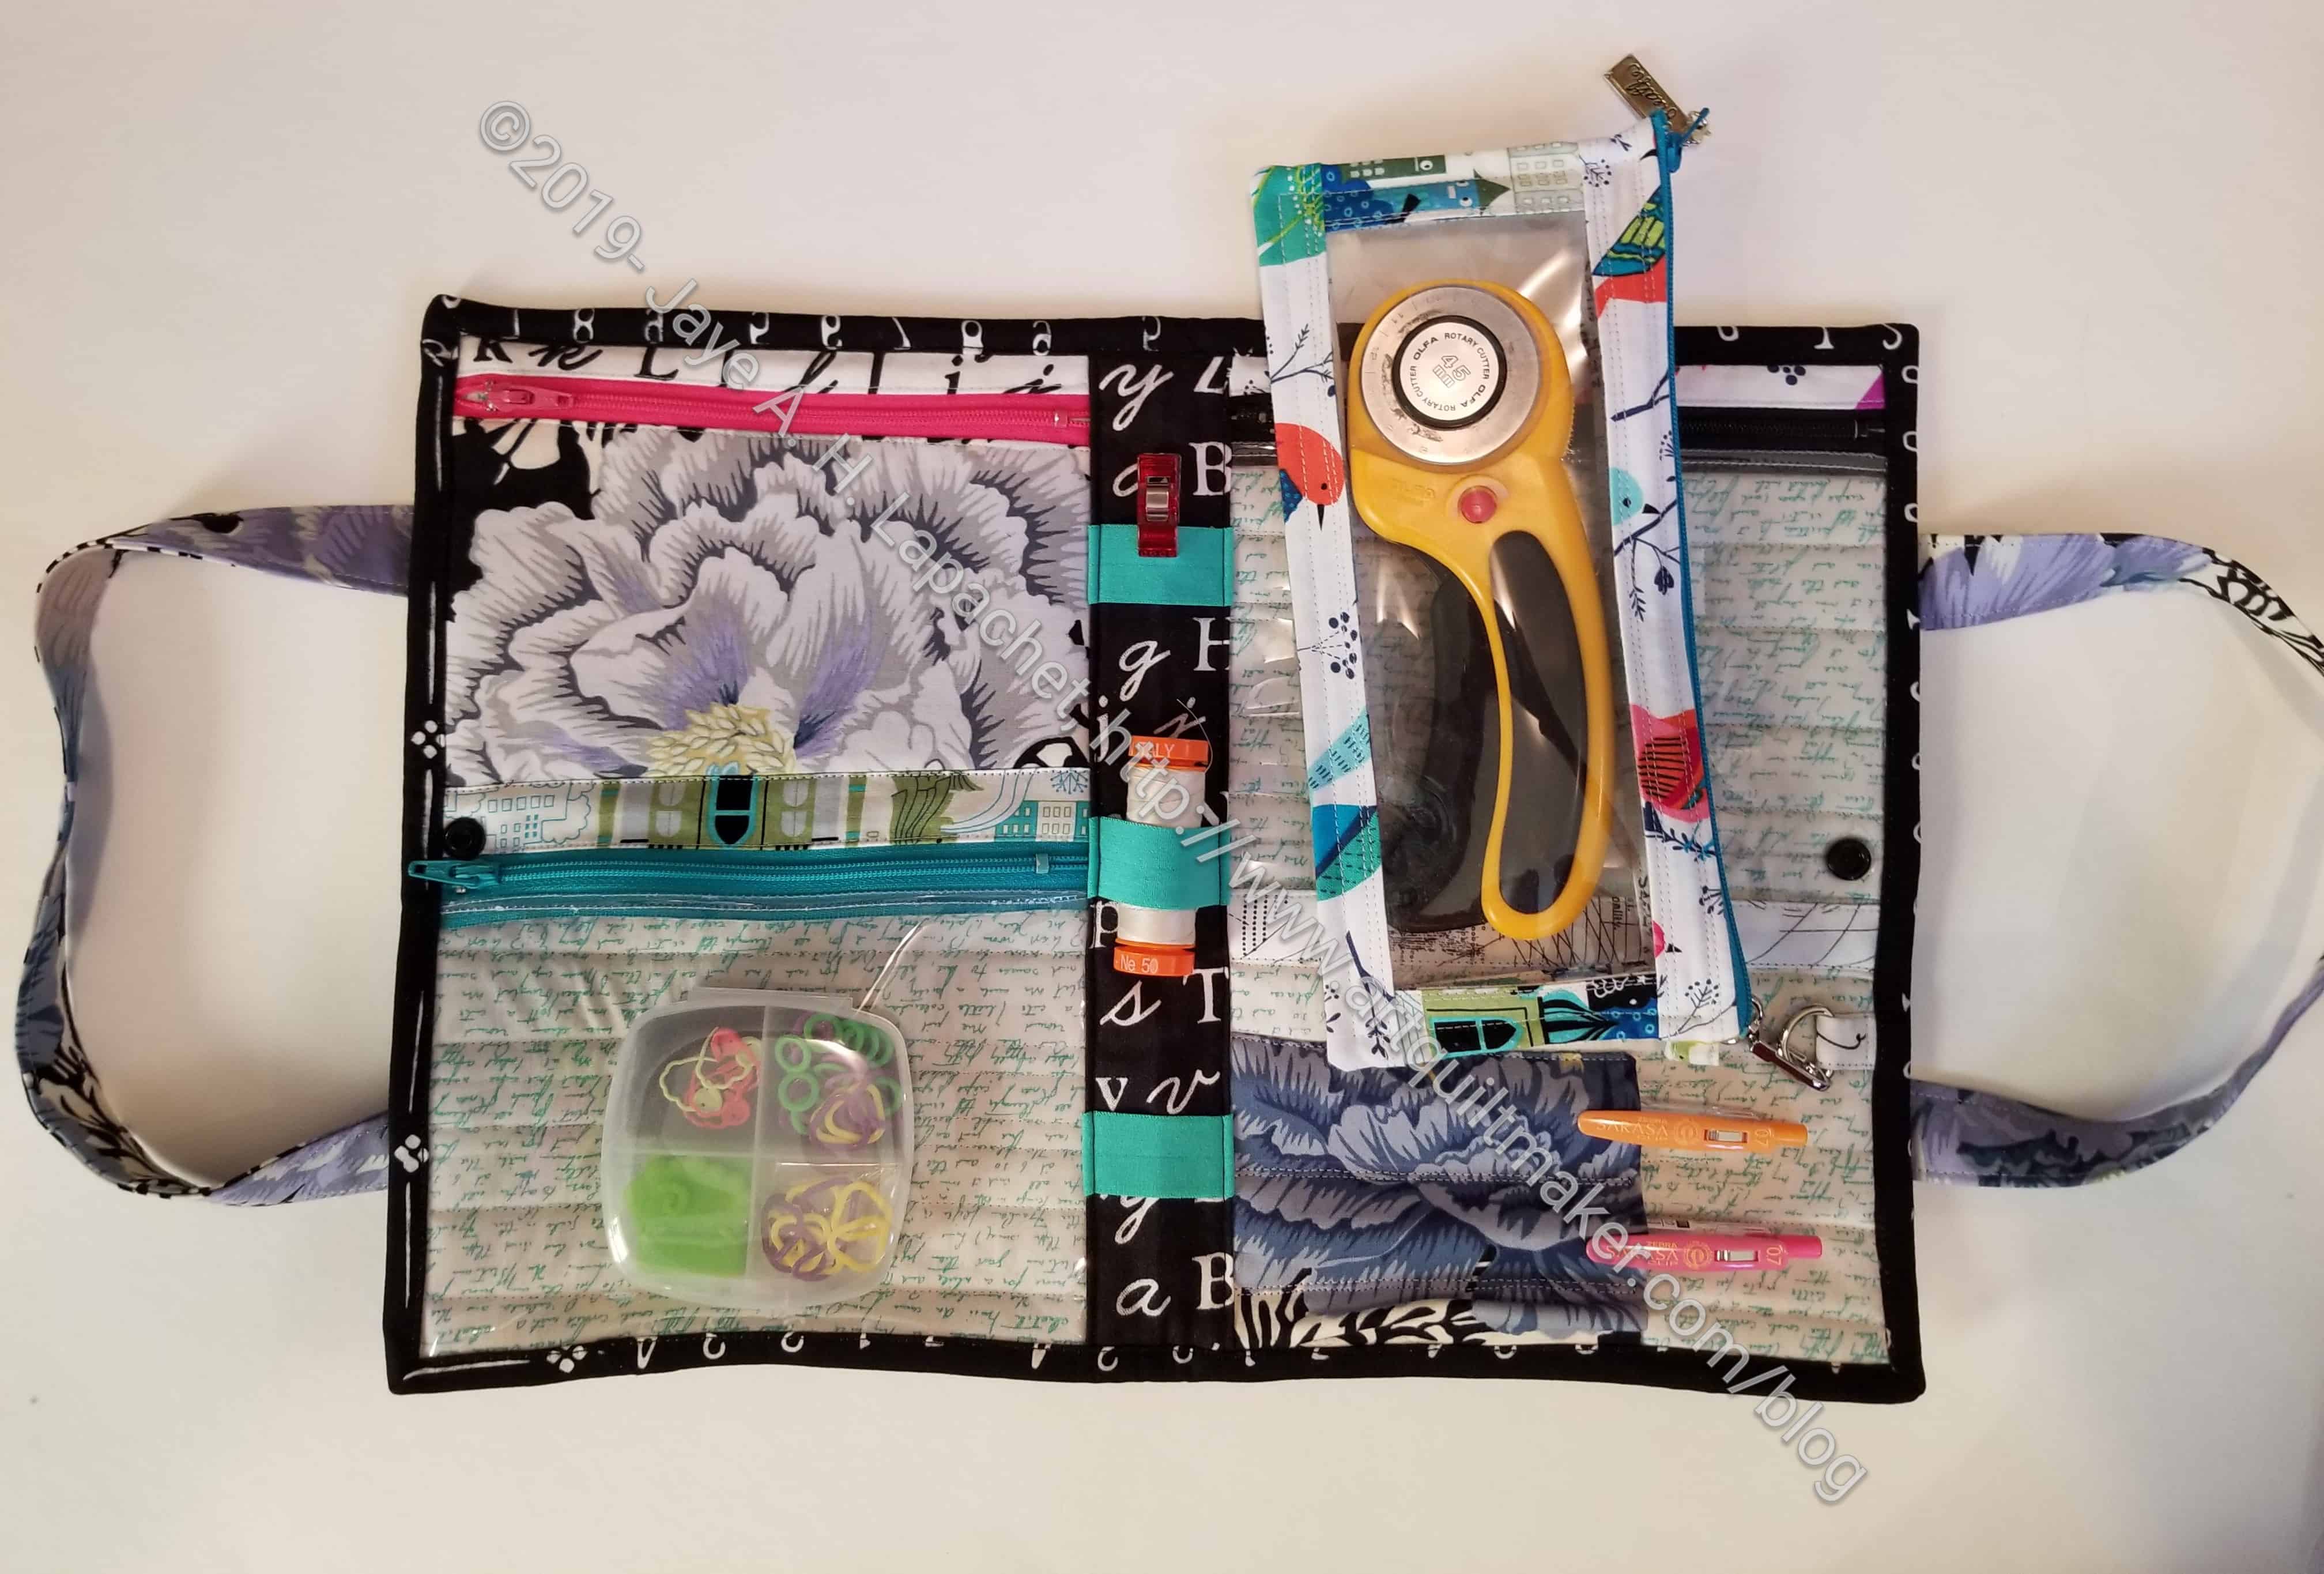
Crafty Gemini Retreat Bag -full interior (finished)
The inside uses that fabulous Brocade Peony fabric from Philip Jacobs. I LOVE* that fabric. I have a lot of it, because I love and have used it quite a bit, but have never found the exact perfect project for it. I’ll keep looking.
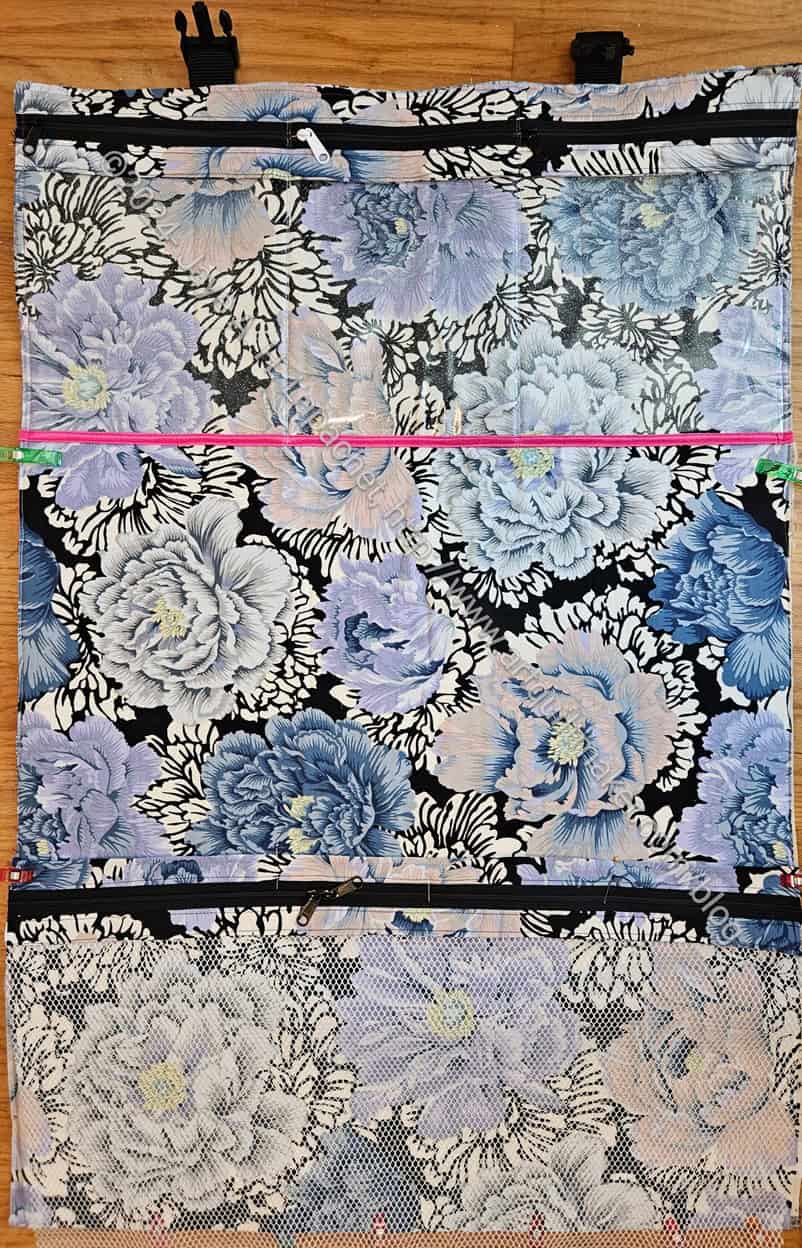
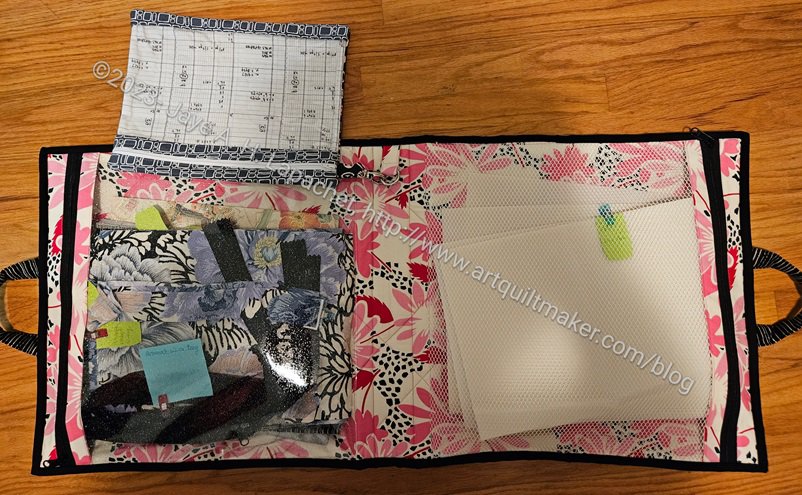
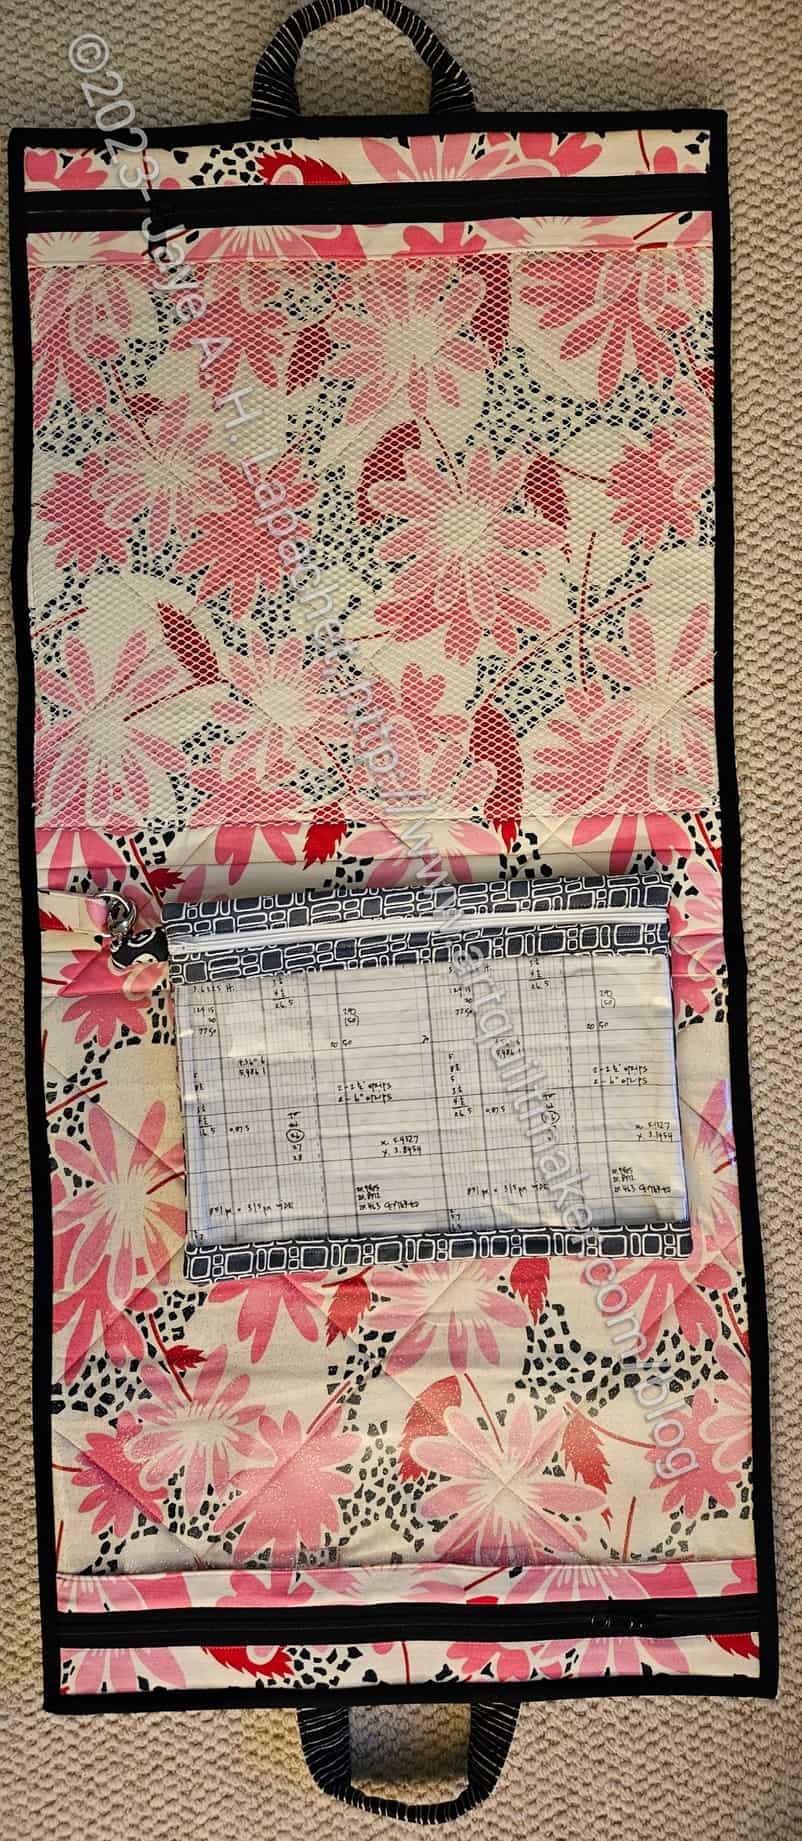
As you can see (and I partially showed before), this bag has three interior sections. The top section is divided into three pockets. The middle section is open with pockets on the edges to hold a long ruler and other long things. The bottom is a mesh pocket. The mesh pocket is the one I sewed on upside down and had to rip out.
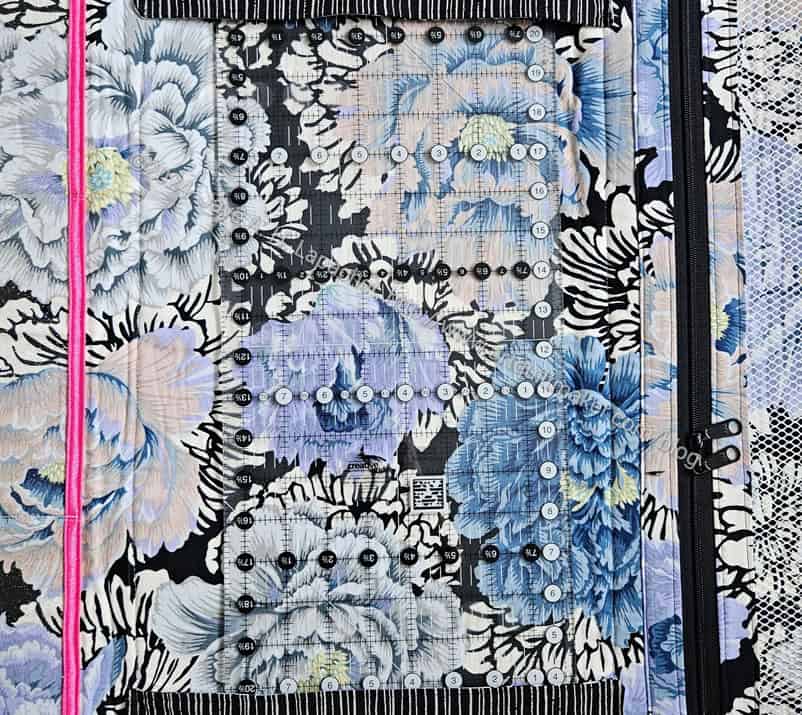
Crafty Gemini Retreat Bag ruler pocket
As soon as I finished the bag, I tried the ruler pocket, because I like that idea. Predictably, it is not sized well for Creative Grids 6.5 inch x 24.5 inch rulers.** I was able to get the ruler into both pockets, which holds it very well. It wasn’t easy to get it in and getting it out meant straining the pocket seam almost to ripping. As you know, Creative Grids rulers are half an inch longer than most Omnigrids rulers and that half inch makes all the difference in this project.
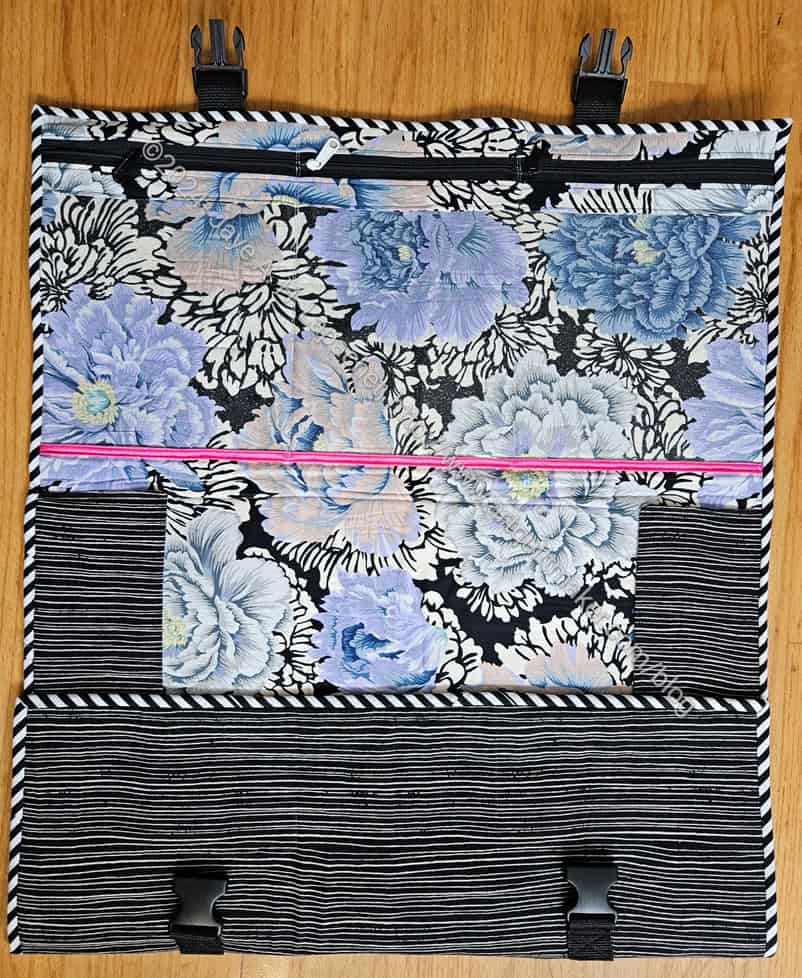
Crafty Gemini Retreat Bag – partial interior (finished)
Now, I should have known that this would be a problem and constructed the pockets differently. If I were to make this bag again, I might make one of the center pockets a flap with Velcro.** This would mean that I could slip the ruler into the top, then press the flap over the rest of the ruler. I’ll have to look at that pocket and see if I can still do that. I have an Omnigrid 24 inch ruler**, but I almost never use it. Frankly, it probably doesn’t matter as the long ruler I bring with me to Sew Day is the Karen Kay Buckley Adjustable ruler**. It is less likely to get broken in transit, because it breaks down into 4-5 pieces. Really, I don’t even really need this pocket. Again, I should have thought about that in advance. It is possible that I could remove the “ruler pockets” and add another zipper pocket to the center even with the binding already stitched down. If I don’t do something, then that center area is just wasted space. Bleah!
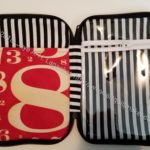
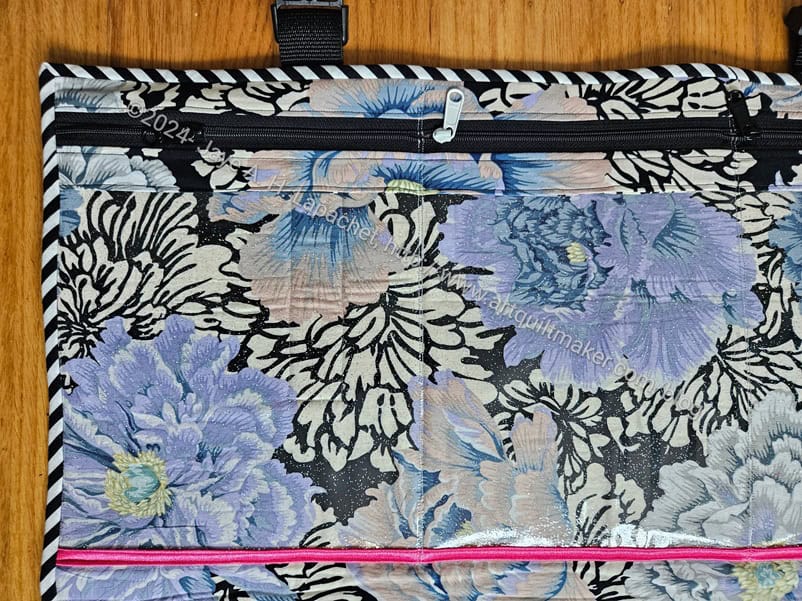
Crafty Gemini Retreat Bag – top zipper pocket
The zipper pocket will, I hope be useful. It will definitely be more useful made out of vinyl than it would have been made out of fabric. The “out of sight out of mind” adage is alive and well in my life.
I think dividing it into three was a good move even though I can’t put larger items into it. I think packing a large pocket full would have made it misshapen eventually. I am not sure what I will use this bag for, so that could also never have happened.
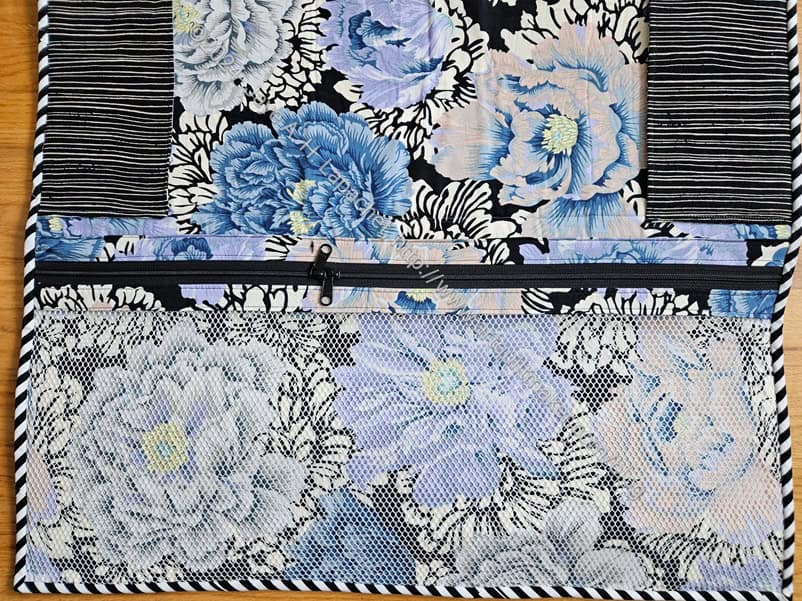
Crafty Gemini Retreat Bag – mesh pocket
The mesh pocket is one large space. The problem described above might happen below. Oh well. I don’t want to worry about it until I have to worry about it.
I like how the white mesh works with my Brocade Peony fabric. I can still see the design, but it tones down the Brocade Peony colors (motifs?) just a little.
In general, this pattern was pretty straightforward to put together. It was on my list for 1,000 years, because I just didn’t get around to it. As is usual with Crafty Gemini patterns, the written instructions are very basic and, for me, almost unusable. There are no pictures, because the videos that come with the Clubs and projects are very detailed.
*What is it with me and CAPITAL letters today?
**N. B. : Obviously, you should shop at local quilt shops and small businesses. However, if you are too busy or can’t find what you need there, I use Amazon affiliate links and may be paid for your purchase of an item when you click on an item’s link in my post. There is no additional cost to you for clicking or purchasing items I recommend. I appreciate your clicks and purchases as it helps support this blog.
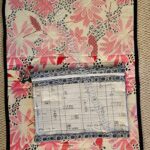
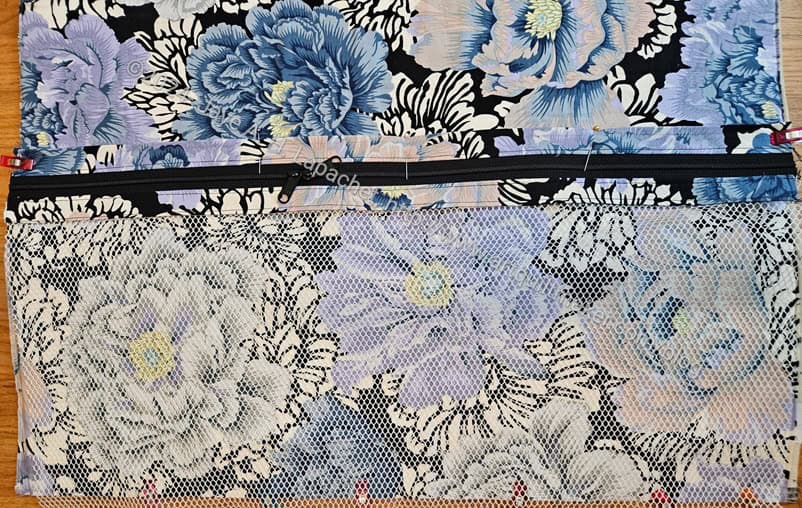
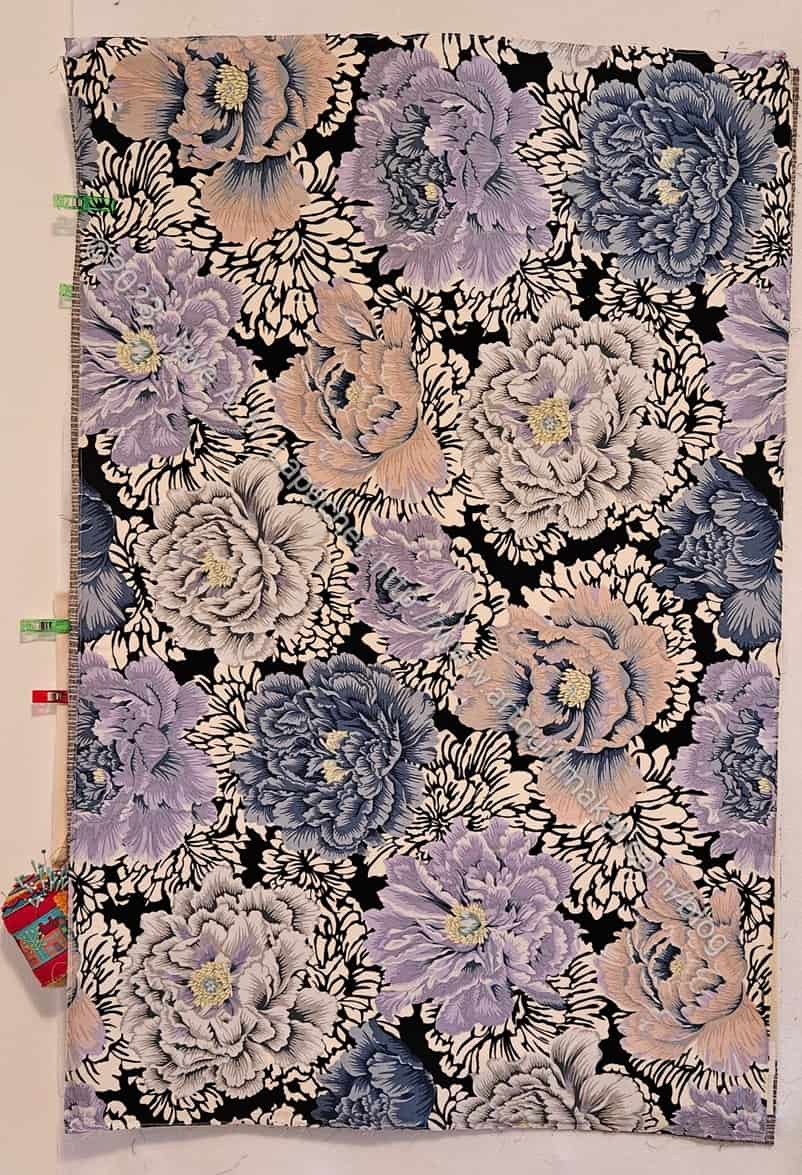
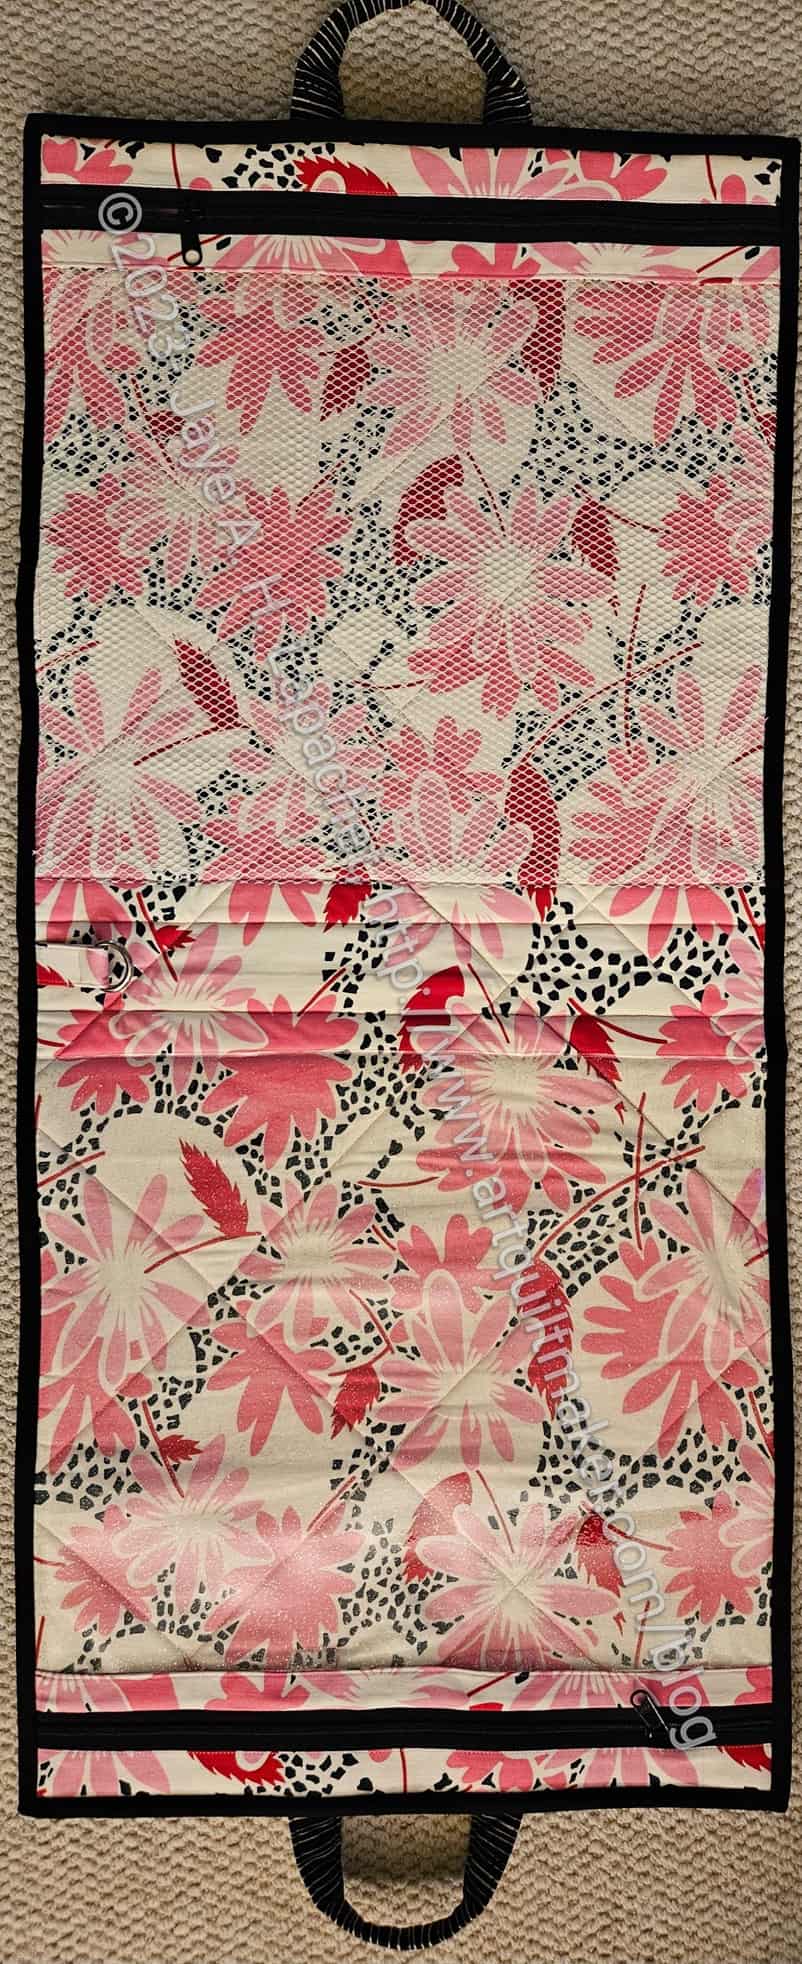
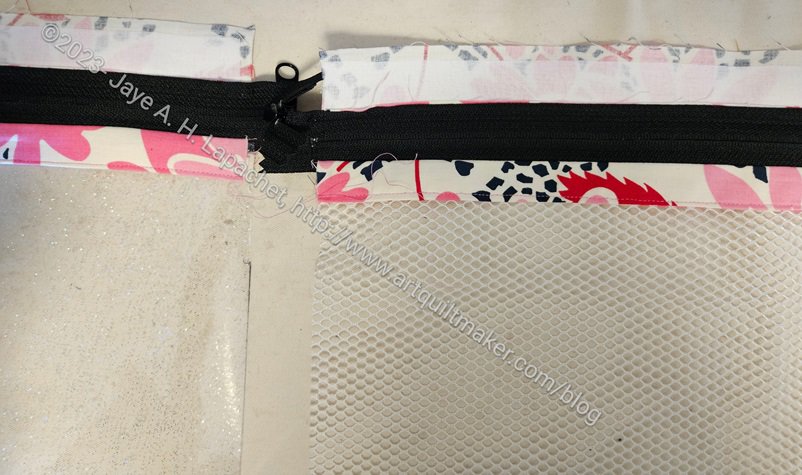
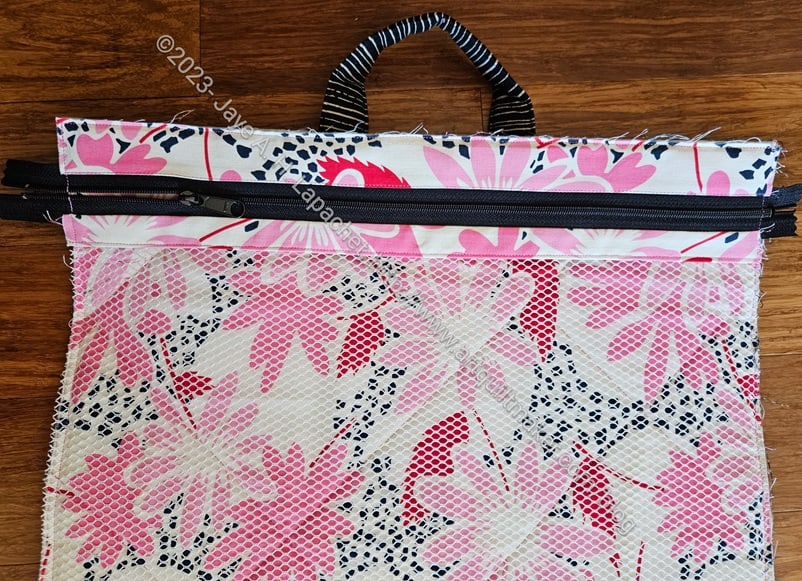
I made some progress on the Retreat Bag over the last few days. This is the mesh pocket shown where it will go on the bag. You can see where it is if you compare the Brocade Peony fabric on the top and the bottom.
I used white mesh, so the colors in the bottom of the photo are a little duller.
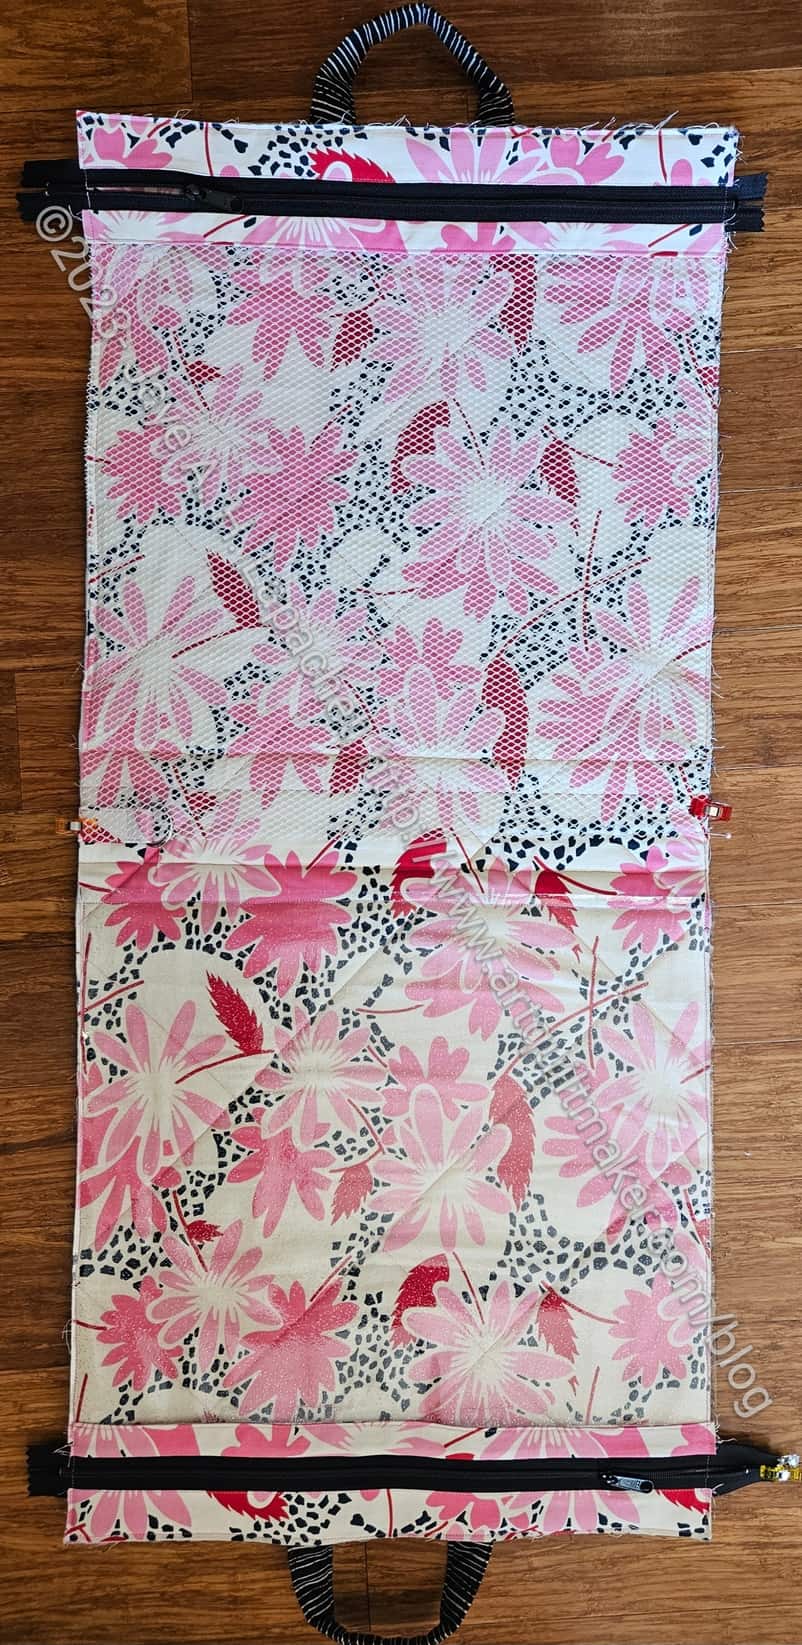
Retreat Bag interior
I actually sewed this on to the main part of the Retreat Bag, but I sewed it upside down, so I had to rip it out and now it is just clipped where I want to sew it.
I thought about not ripping it out and opening the bag like a book, but decided it would be handy to be able to hang the bag up and not have the zippers on the bottom.
I had to clear the Retreat Organizer off the design wall, which encouraged me to start working on it. I made small amounts of progress after work each night last week. I feel well into now and was sad not to be able to work on it yesterday.
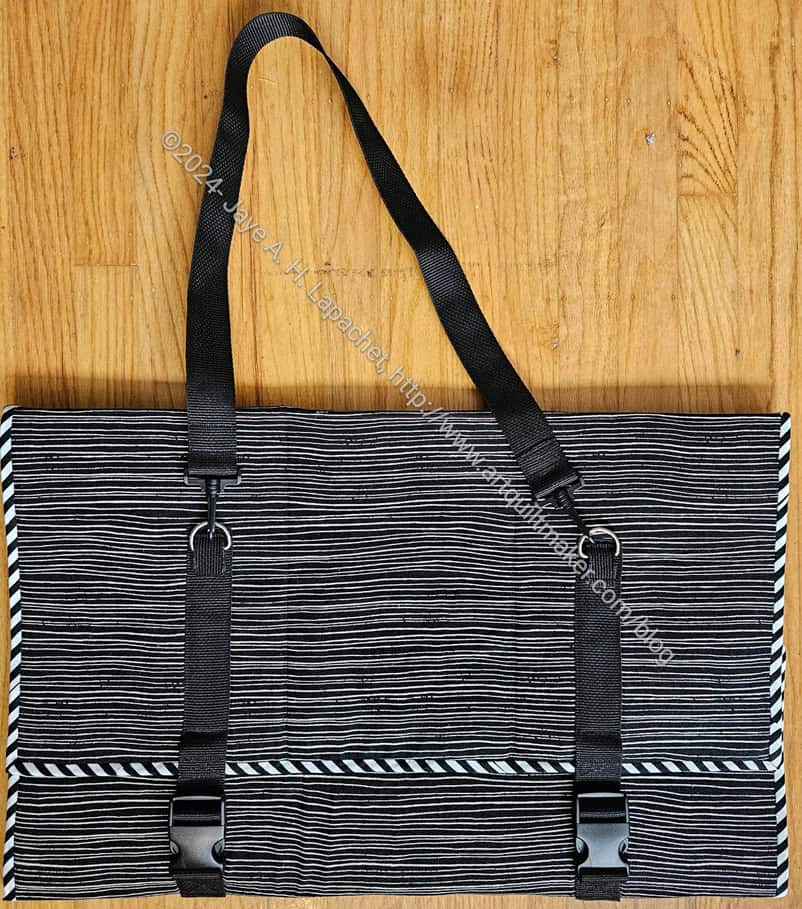
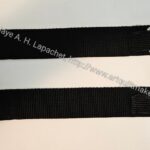
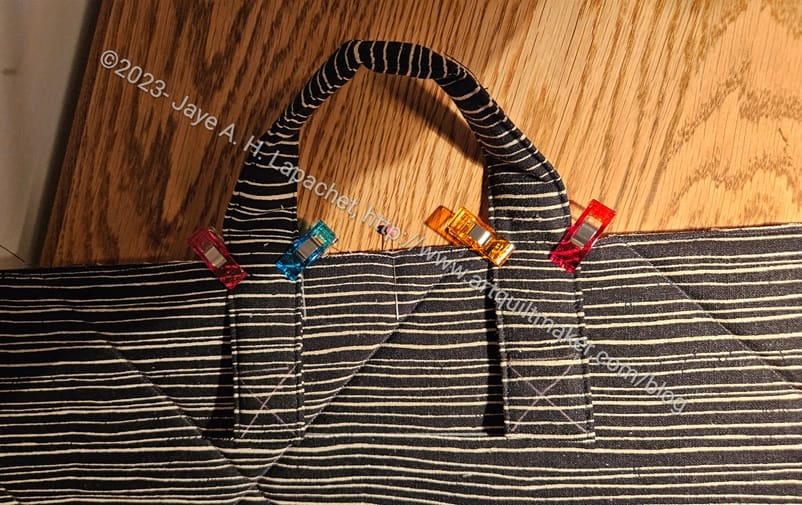
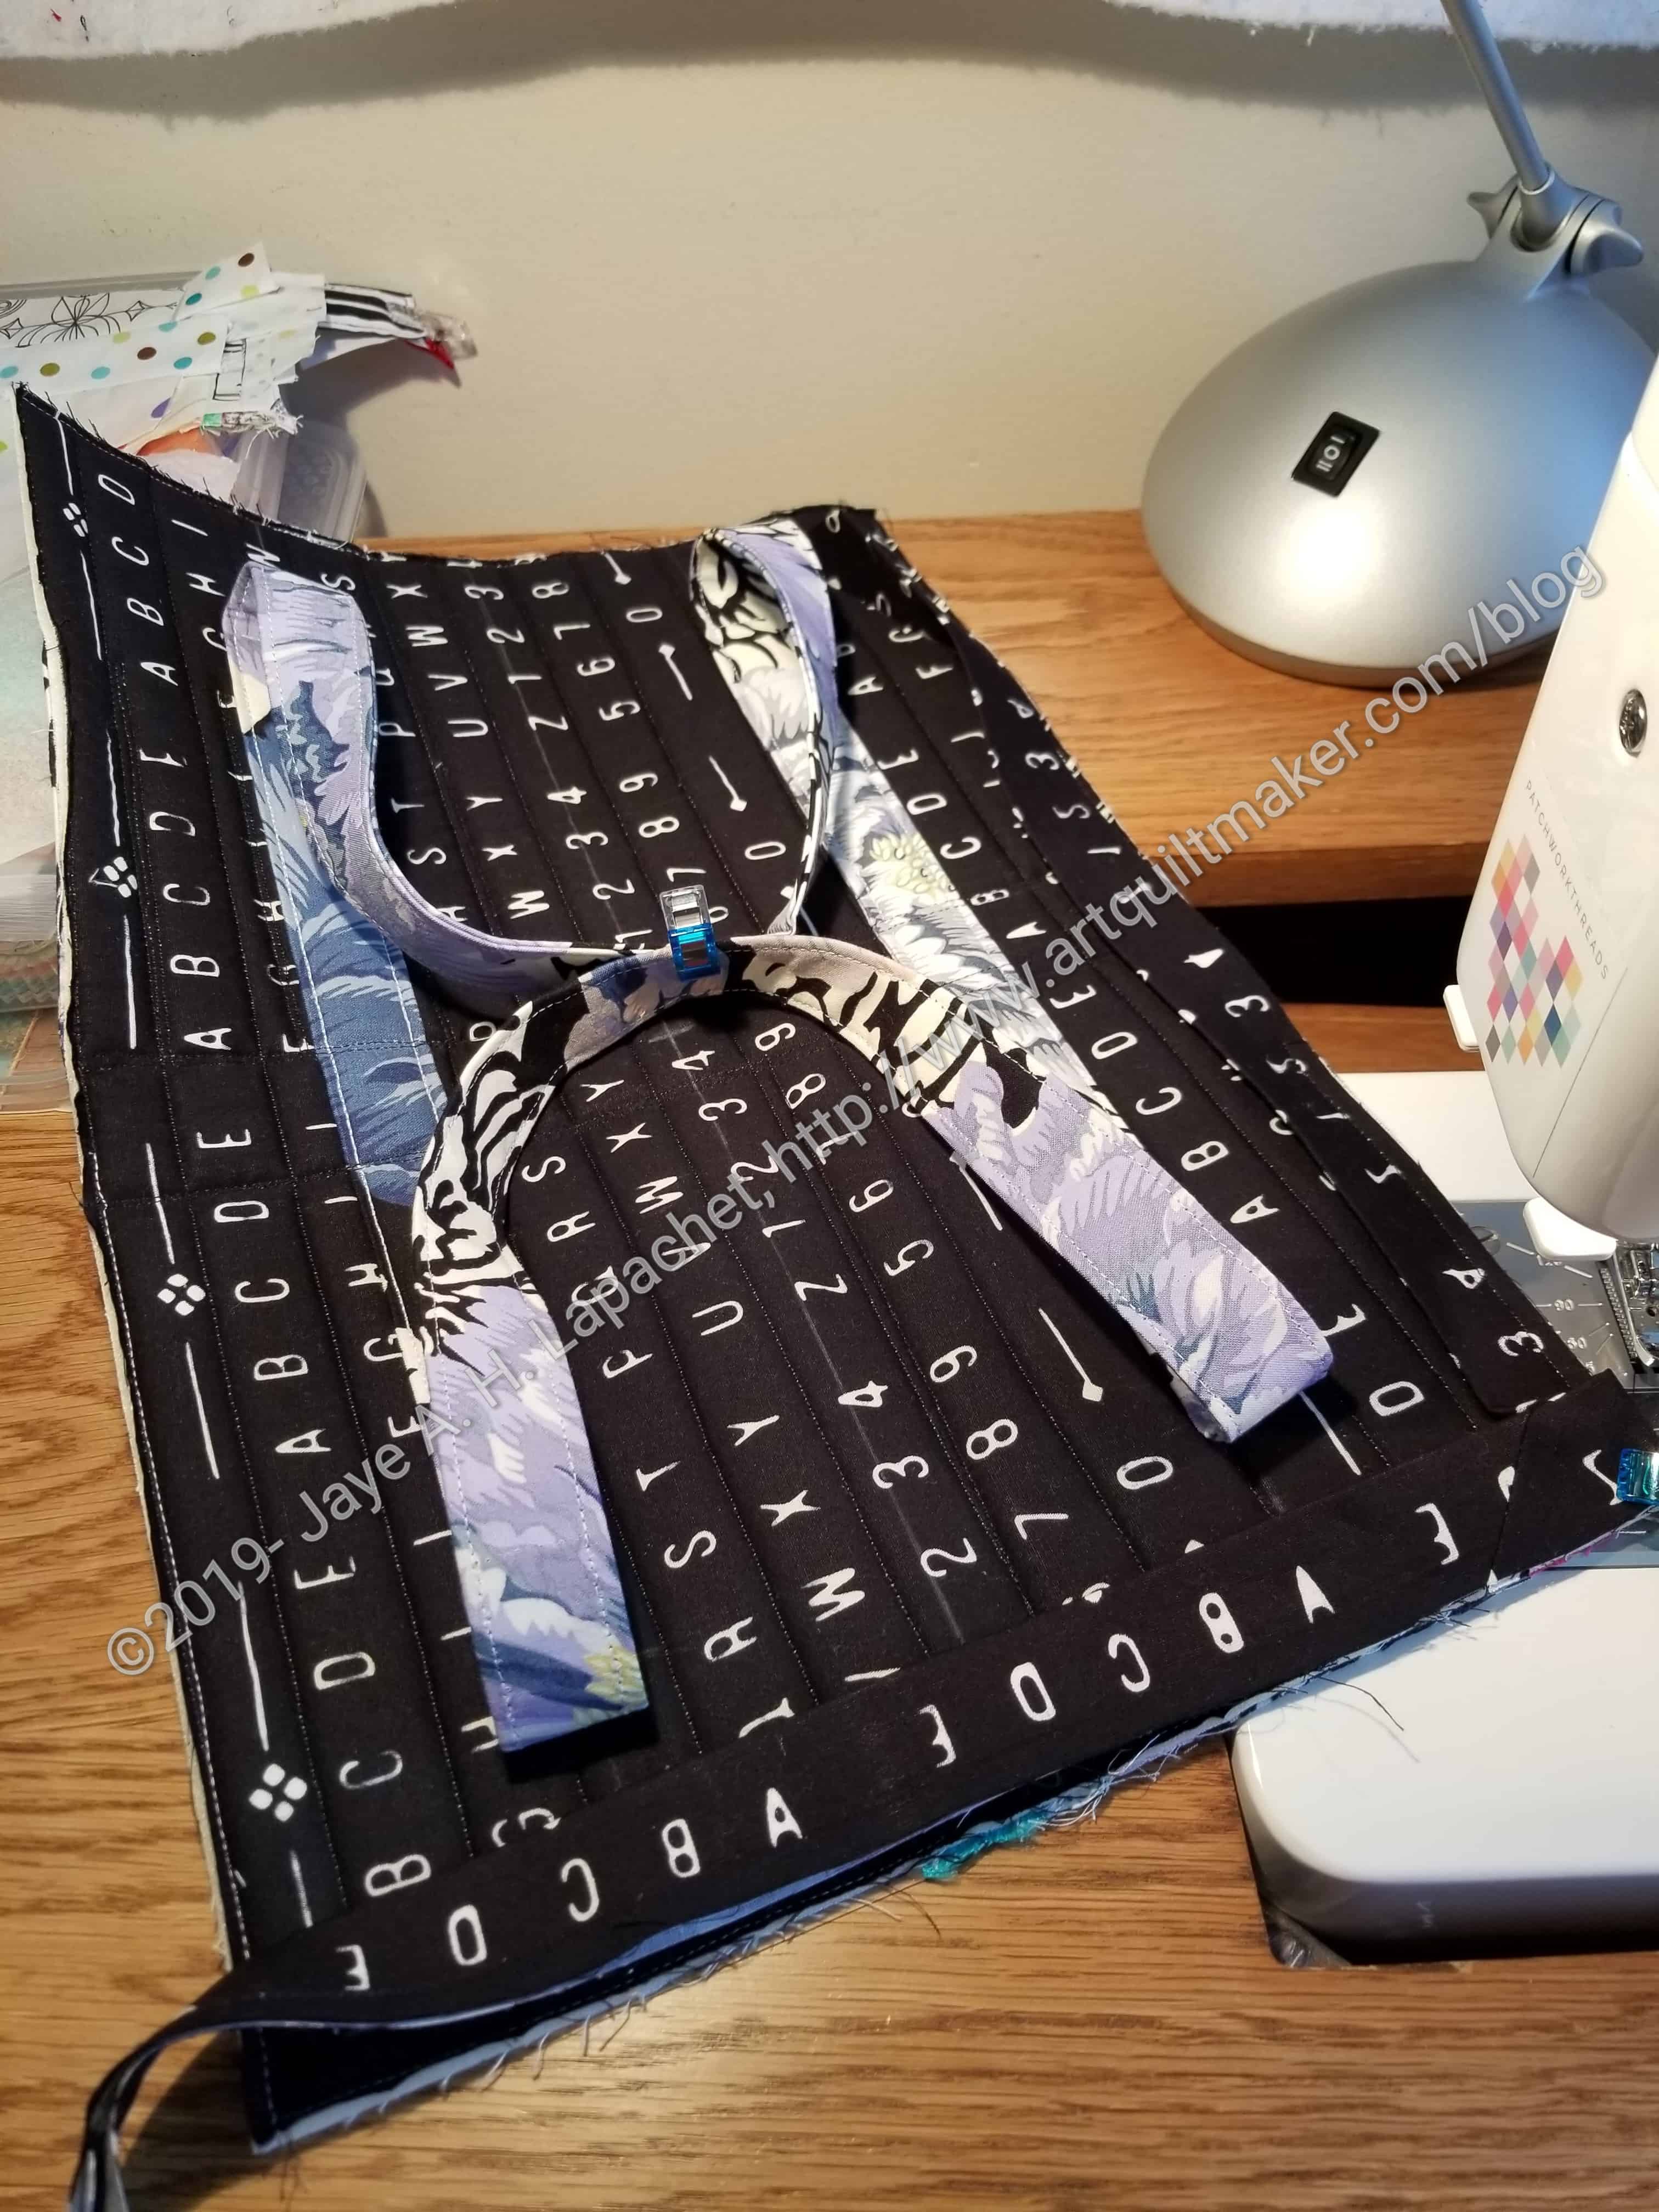
Retreat Organizer exterior with buckles
Retreat Organizer exterior buckles
First, I was on the hardware step, so I added buckles and made straps. In the photo above (left) I have the female side of the buckles attached to the exterior. On the right you can see the male side of the buckles with the straps attached, but not attached to the exterior of the bag.
In this pattern, the straps are appliqued to the exterior not appliqued and sewn into a seam.
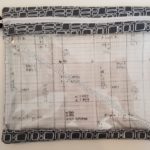
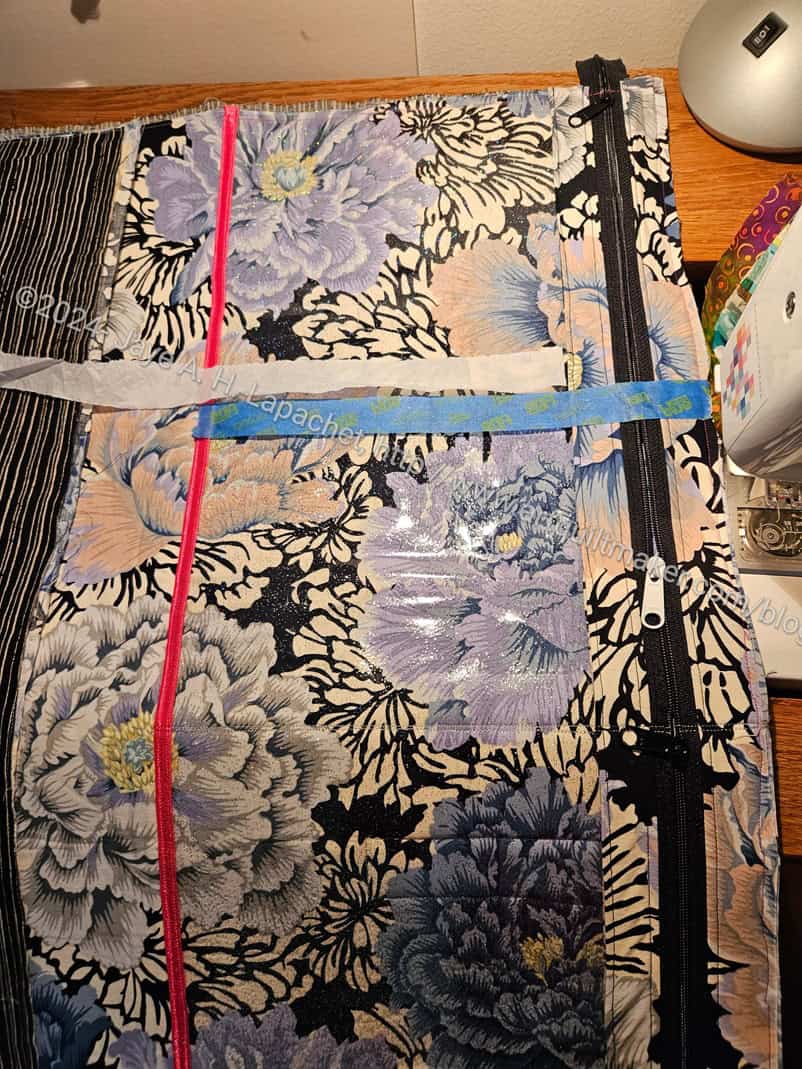
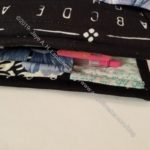
Retreat Organizer interior vinyl pocket
I also worked a little on the interior. This is one large pocket that has been divided into three.
This was originally supposed to be a fabric pocket. For me, out of sight is out of mind, so I made the pocket(s) out of vinyl. I put some fold over elastic** over the edge to avoid looking a raw edge.
On the picture you can see some tape and tissue paper, both of which I used to sew the dividing lines on the vinyl. These are pockets you could customize. I almost left one big pocket, but decided even a vinyl pocket might become a black hole of doom.
This project is off the design wall, which is great, but it is now spending most of its time on my ironing board. I really need a larger work table.
You can find this pattern with all of the videos on the Crafty Gemini website as the Retreat-in-a-Bag project.
**N. B. : Obviously, you should shop at local quilt shops and small businesses. However, if you are too busy or can’t find what you need there, I use Amazon affiliate links and may be paid for your purchase of an item when you click on an item’s link in my post. There is no additional cost to you for clicking or purchasing items I recommend. I appreciate your clicks and purchases as it helps support this blog.
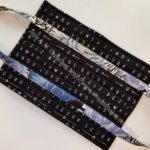
Yes, I made a start on the Crafty Gemini Retreat-in-a-Bag project. In the 26 Projects list, I call it the Retreat Organizer. It doesn’t look like much because it is only two large pieces of fabric sandwiched together with Soft & Stable**.
I stopped working on it so I could finish Christmas gifts and haven’t gotten back to it yet. This may be the oldest bag ever. I really have to finish it.
In addition to Christmas gifts, I was also stalled because I was trying to decide whether to embellish the webbing like I did with the handles for the All Rolled Up bag. I finally decided just to finish the %$#@ bag. once I get back to it, I will just put the webbing handles on as is. If I decide to make another one, then I’ll think about embellishing the handles. I am not sure fancy webbing was available in 2018 when I bought the kit. Now, I can choose from Tula Pink webbing and the various webbing offered by Sew Hungry Hippie. I am sure a lot of other places have fun webbing as well.
One of the things about this project is that very large pieces of fabric and foam have to be cut. With my small cutting table, it is a big challenge. I could have used the dining room table, but didn’t think of it at the time.
Perhaps I’ll have time to work on this project next weekend.
**N. B. : Obviously, you should shop at local quilt shops and small businesses. However, if you are too busy or can’t find what you need there, I use Amazon affiliate links and may be paid for your purchase of an item when you click on an item’s link in my post. There is no additional cost to you for clicking or purchasing items I recommend. I appreciate your clicks and purchases as it helps support this blog.
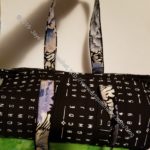
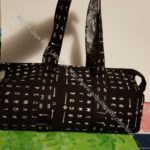
I am still not happy with the Road Trip pouch, but haven’t done anything to fix the position of the clip. At the time I took the photo above, I wasn’t using the pouch for anything. I am not sure where the hardware is for this project, but have another box with all of the 2018 Organizer Club bits and pieces in it, so will look there later.
I finished the Ultimate Project Bag! After 5 years, I finished it. I am annoyed, because this was not a difficult project. It may have been more difficult 5 years ago, but my skills have improved tremendously since then. I was also swayed by the other members of the club saying that it was such a difficult project.
I am pretty happy, not only to have it finished, but also with how it came out. I have some ideas for changes, (of course!), if I make this again. I should make it again just to remind myself that it isn’t a very difficult project. It could be very useful for toting around bag projects in process!
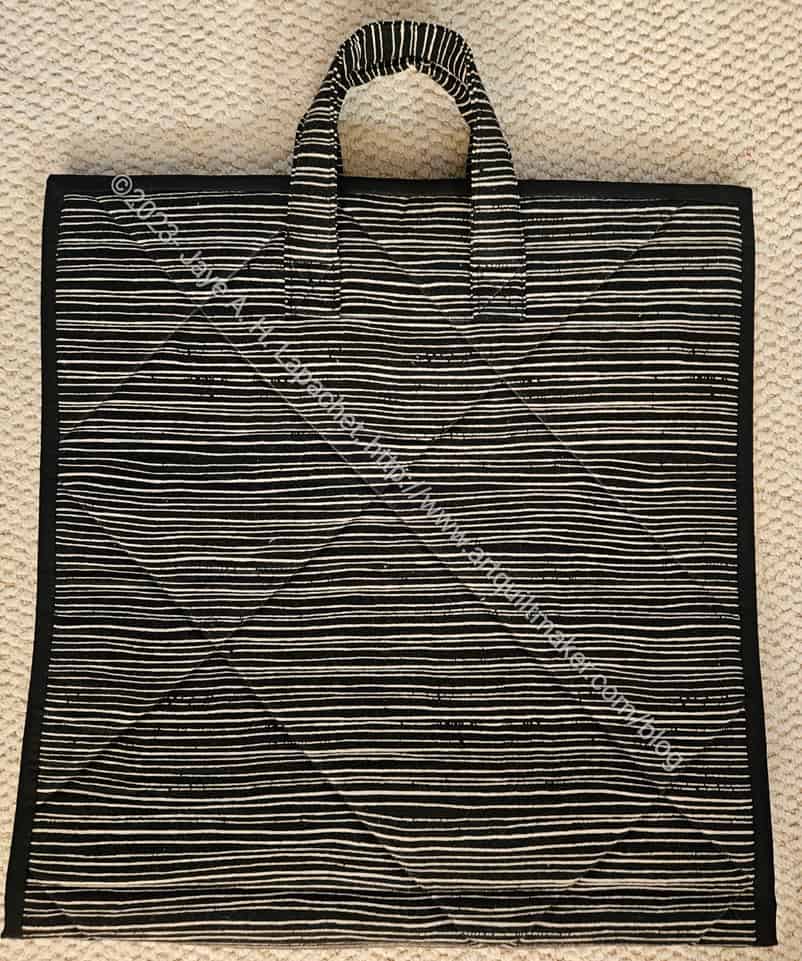
This is the exterior and you can see the quilting pretty well. I talked about it a little in the in process post I wrote a few weeks ago.
The exterior is like an Essex Linen, but by Figo. It feels like a very lightweight canvas, though drapey. It looks like the photo above on both sides when closed.
Ultimate Project Bag – interior
When opened it is about 39 inches long. I don’t know why 39 inches and not 40. ~\/0\/~ On one half of the bag (top in the photo, right) is a zippered mesh pocket.
In the middle is a tab with a D-ring.
On the other half in a vinyl pocket where I used glitter vinyl (because I love it). The vinyl pocket also has a zipper.
The pockets are quite large – around 16×16 inches, which definitely holds blocks.
Ultimate Project Bag – interior – with Road Trip bag
As I mentioned, this was part of the Crafty Gemini Organizer Club and one of the first projects we made was the Road Trip bag. The Road Trip bag was designed, from the beginning, to be attached to this Ultimate Project Bag. It is a good idea, because I often need a place to store bag hardware I have collected as I am assembling supplies to make a bag. I put a Lobster Clip on the Road Trip bag and a D-ring in the Ultimate Project Bag, because I prefer to be able to clip the smaller bag to larger bags. Crafty Gemini designed the patterns to have the D-ring on the Road Trip bag and a Lobster Clip on the Ultimate Project Bag. It is really preference. Neither is right or wrong. I try to remember to put a leash/tab and a D-ring on my larger bags just in case I want to clip something to it.
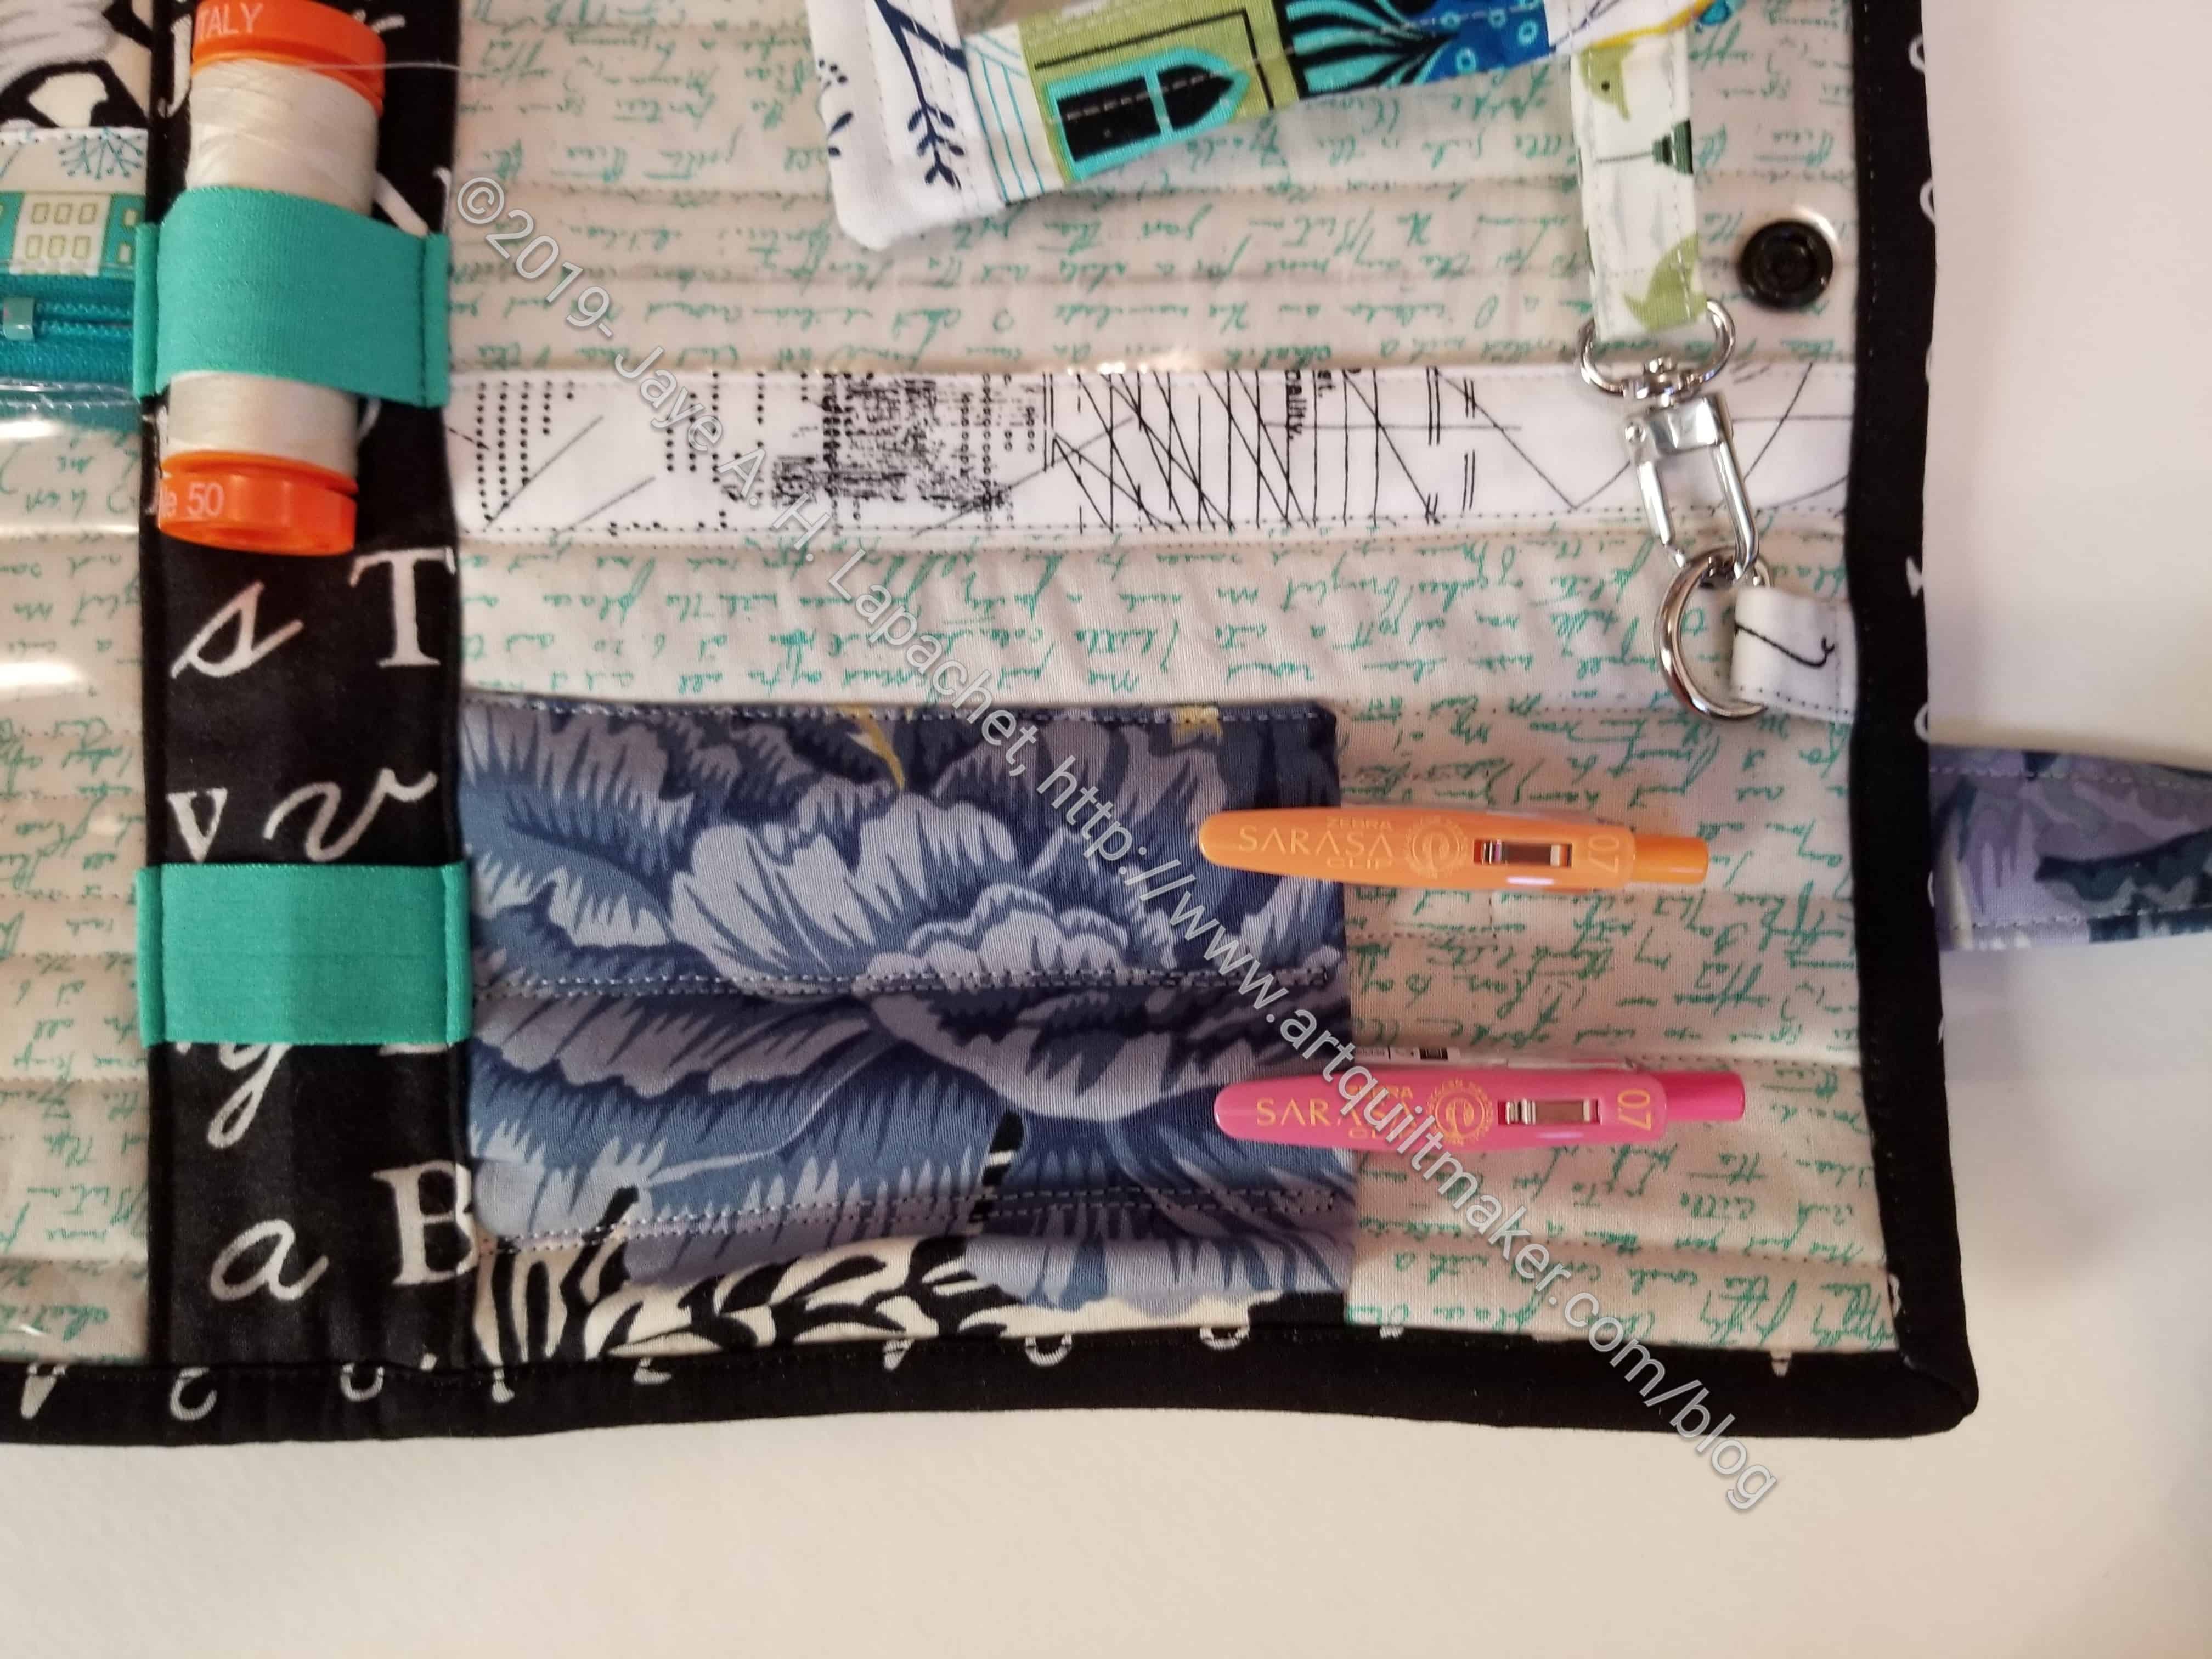
Ultimate Project Bag: detail-mesh pocket
I am not happy with the position of the clip for the Road Trip bag. As I carry the Ultimate Project Bag, the Road Trip Bag falls out and drags on the floor. I am thinking of adding a separate tab and D-ring to the top side, under the zipper, of the mesh pocket. If I do that the Road Trip Bag will still jut out a little bit, but at least it won’t drag on the floor.
Taking the binding off the mesh pocket, will be less destructive than taking it off the vinyl side.
I was pretty excited about this bag and my reward for hosting 27 people for Thanksgiving was working a project on which I really wanted to work. That is the Ultimate Project Bag.
I said in my previous post that there wasn’t much to cut out. That was true, but there is a lot of prep. I had to quilt it, but I took my lessons from when I visited Mary M and used the automatic cutting feature on my machine. OMG! even on my machine it makes a huge difference. I really don’t know why. Something about not having to pick up my snips, I guess.
The quilted piece is made up of lining, foam and exterior. Vanessa (Crafty Gemini) suggests quilting a big X over the whole piece. I didn’t want to do that, so I drew some random lines on the exterior.
Do I say that about all bags? The prep never gets easier. I know I said was Zen with it one time. I have to get that feeling back.
Exterior with handles ready to sew
I didn’t really like the way Vanessa told me to make the handles, so I made them the way I usually make them. I cut the fabric 15×5 and folded the pieces into quarters the long way. I did put a piece of foam, which she suggested, inside and that was a good idea. I usually forget to do it. Now, the handles are nice and comfy.
Zipper pockets in process
I also worked on the zipper plackets. I am not excited about how she says to make the zipper plackets. As I have said, I like my zipper tape covered. Only part of the zipper tape is covered. Granted, you can’t see the tape, because it will be too high up, but still.
Pockets on lining
The pockets go over the lining. They are sewn down at the bottom and then the excess is trimmed. Vanessa goes into a long explanation about why she adds extra to the end of the mesh and vinyl. She just trims them and leaves the edges raw. I was a little shocked by this, but I don’t really like raw edges. I think what I would do next time is sew down the pocket on the top, then mark the spot on the vinyl or mesh where the piece will be topstitched, then trim and put doublefold elastic over the edge. Finally, I would sew that edge down. I am not sure if it would work, but the edge would be bound. I guess I have to figure out if the stitching line for the bottom of the pockets has any wiggle room.
Vinyl pocket sewn down
I was able to get the mesh pocket sewn on. I worried the whole time I was working with mesh that everything I put in that pocket would get stuck in the mesh. If I make this project again, I can make two vinyl pockets.
As mentioned previously, this is one of the projects from the Crafty Gemini Organizer Club. I find that some things don’t age well with these videos. For example, many people use Sew Tites** now, especially when working with vinyl. There is no mention of them in the video. I think they must have been released after, though I thought maybe it was at a QuiltCon in 2015 or 2016. I don’t know. If you make this project, definitely get some Sew Tites**.
I made good progress and will be able to finish soon. This isn’t a difficult project. I am a little angry at myself for not getting to it sooner.
You can still buy the club (no affiliation). Check out the video showing all the projects.
**N. B. : Obviously, you should shop at local quilt shops and small businesses. However, if you are too busy or can’t find what you need there, I use Amazon affiliate links and may be paid for your purchase of an item when you click on an item’s link in my post. There is no additional cost to you for clicking or purchasing items I recommend. I appreciate your clicks and purchases as it helps support this blog.
I spent some time at the November Sew Day cutting out this bag. I am kind of shocked at how little there is to cut out.
These are just the fabric pieces. I have interfaced some of them with SF101, but not all. I need to cut out the foam and do some quilting (sad face), but I am kind of excited to get this far…..finally after YEARS. This club was in 2018. Apparently cutting this out made me so excited that I want to push aside some of my other projects and get this done! I need to control myself, or do a little and then get back to making gifts.
The black and white fabric is intended to be the exterior. I bought it at Sew Creative in Ashland the first time I visited with Mary M. It is a cotton-linen blend and kind of thick. It isn’t quite canvas, but it is tending that way. I always intended to make bags from it. I just haven’t gotten around to it until now. I also have the same fabric in grey.
The interior fabric was used a thousand years ago on one of the first bags that I made. I think it is a reproduction of a 1940s print. It shreds like crazy, so I think it must be a Moda, but I love the design.
I went on another organizing rampage this morning. I decided to gather all the fabrics and supplies for several bag projects I have planned. This task has been on my list for awhile, so I decided today was the day. In the course of this effort, I tidied up some project bins that were stuffed full of fabric, patterns, etc.
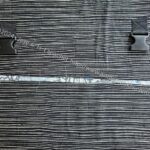
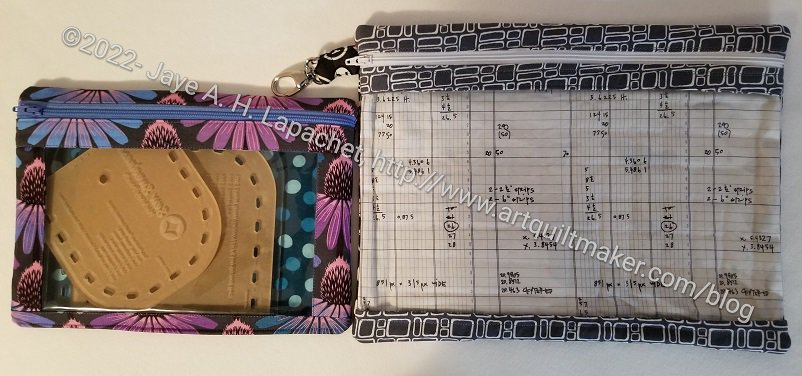
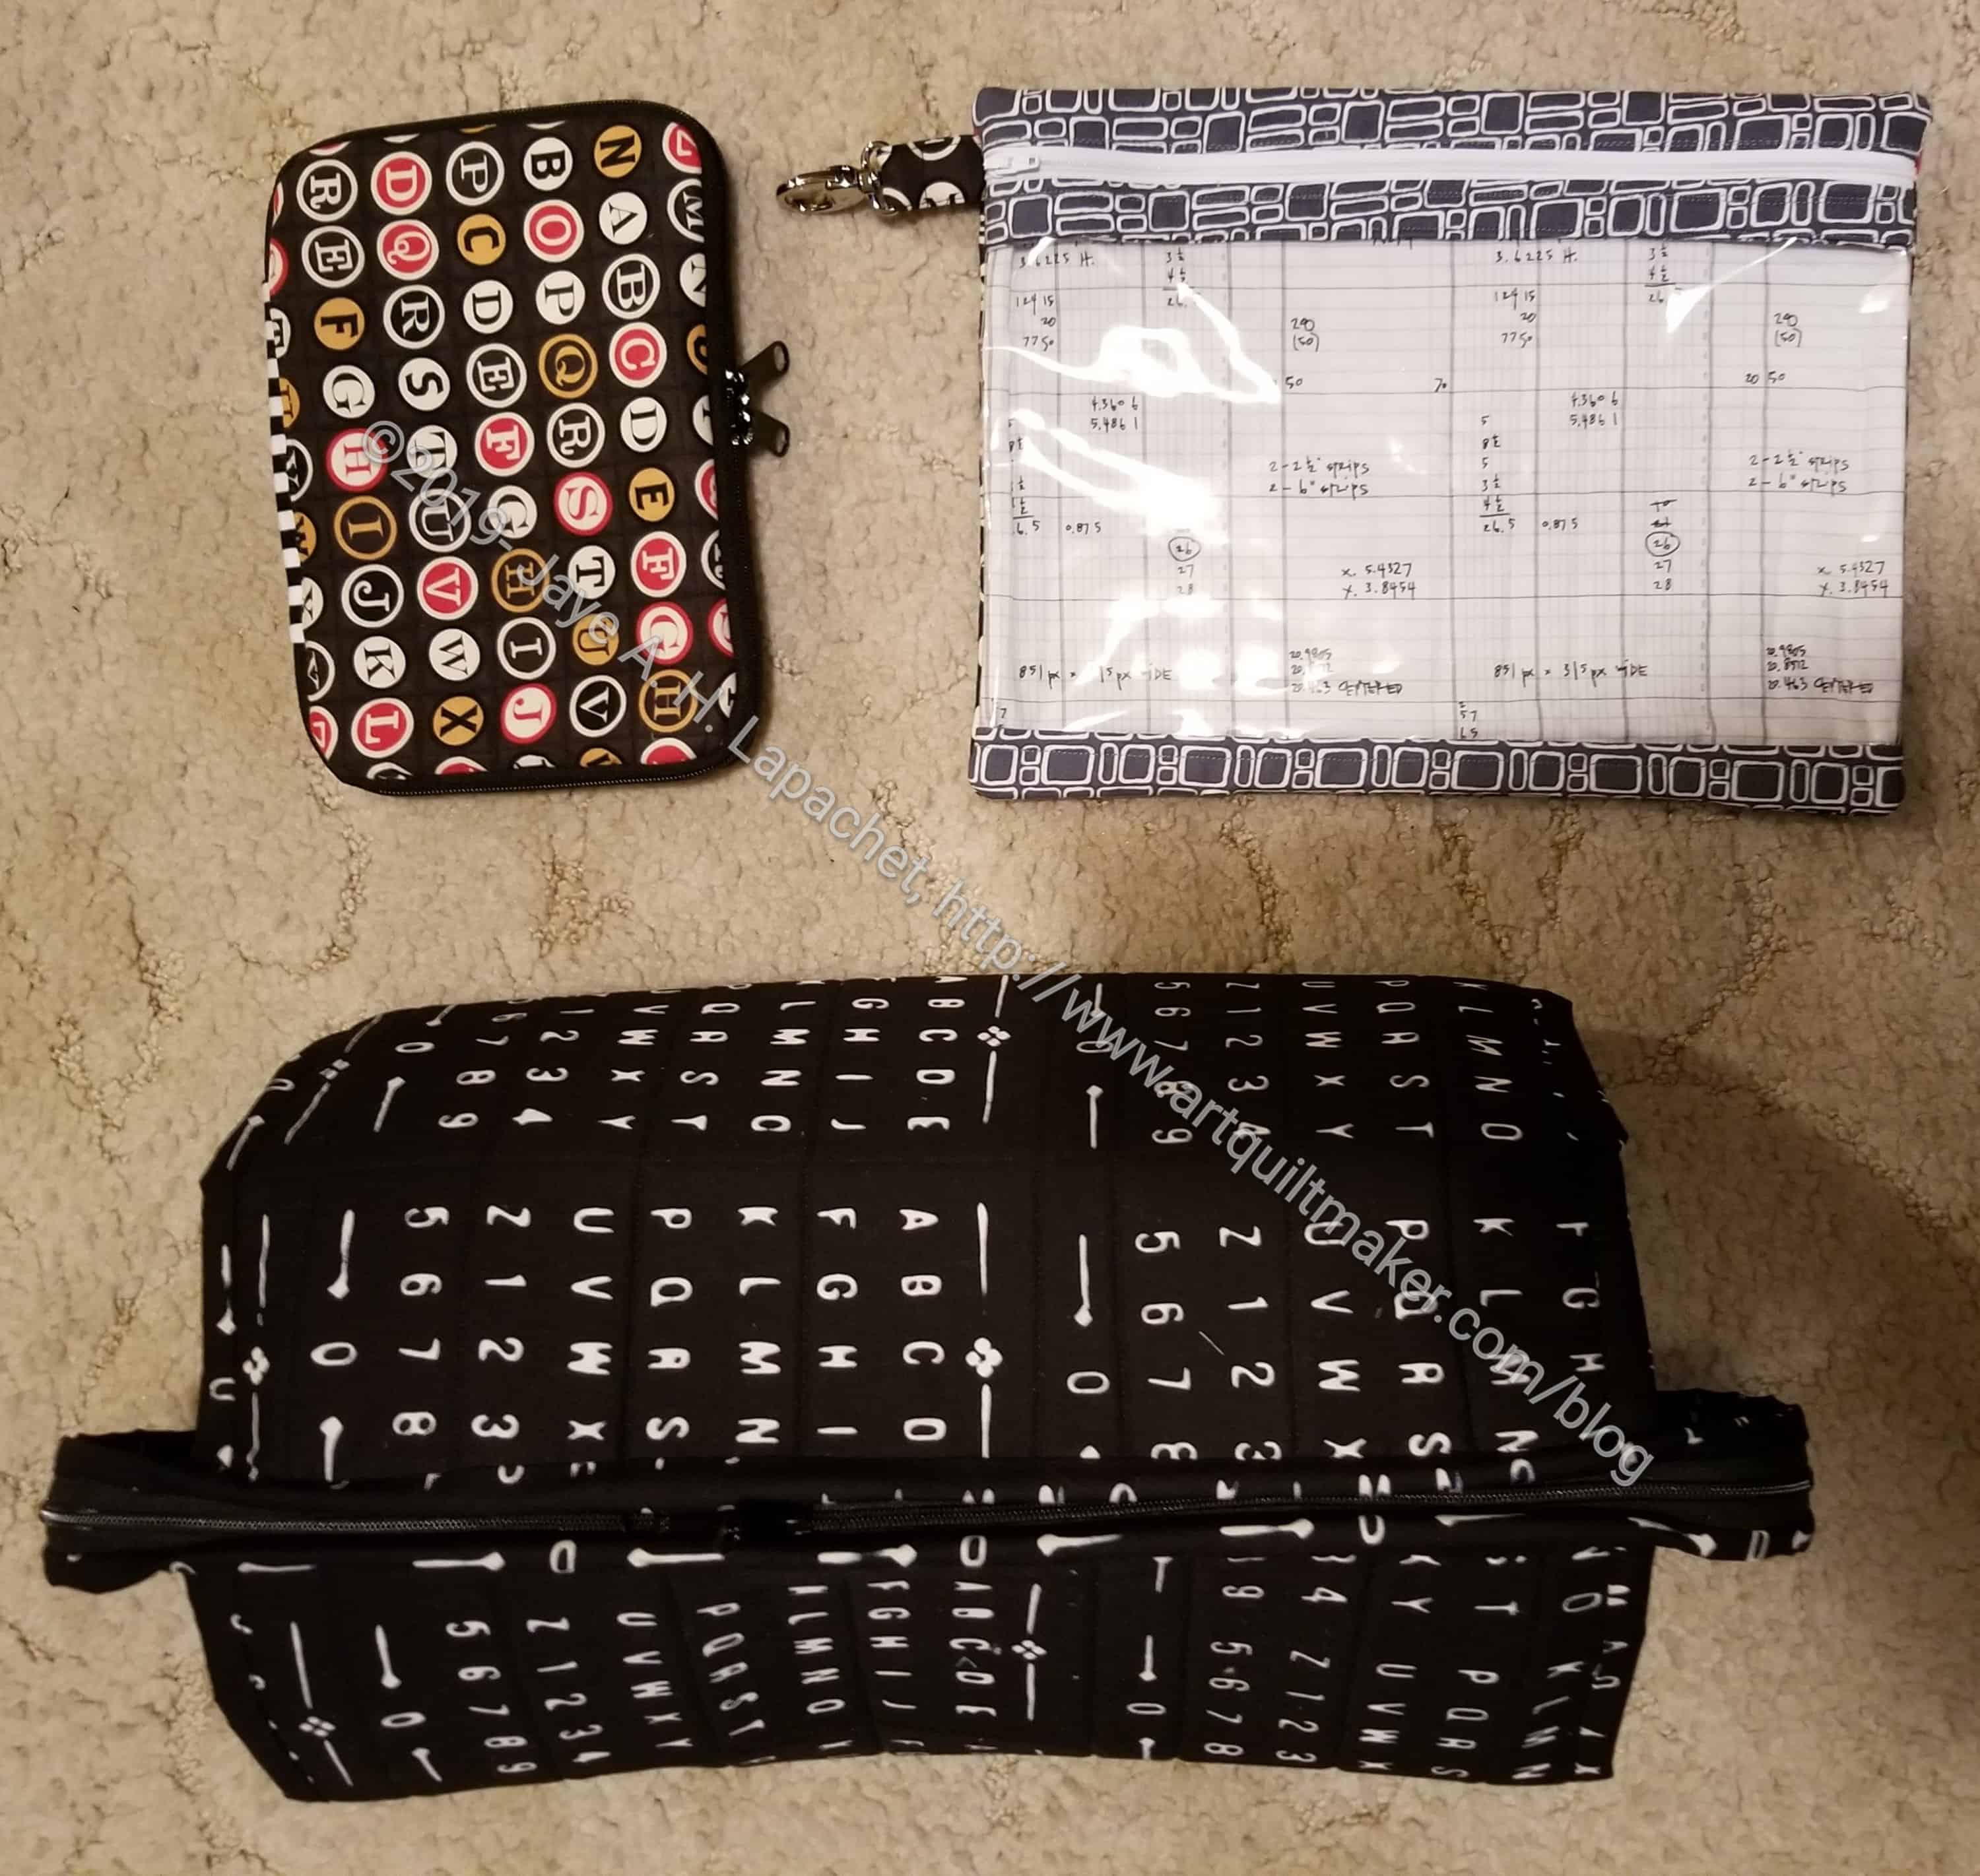
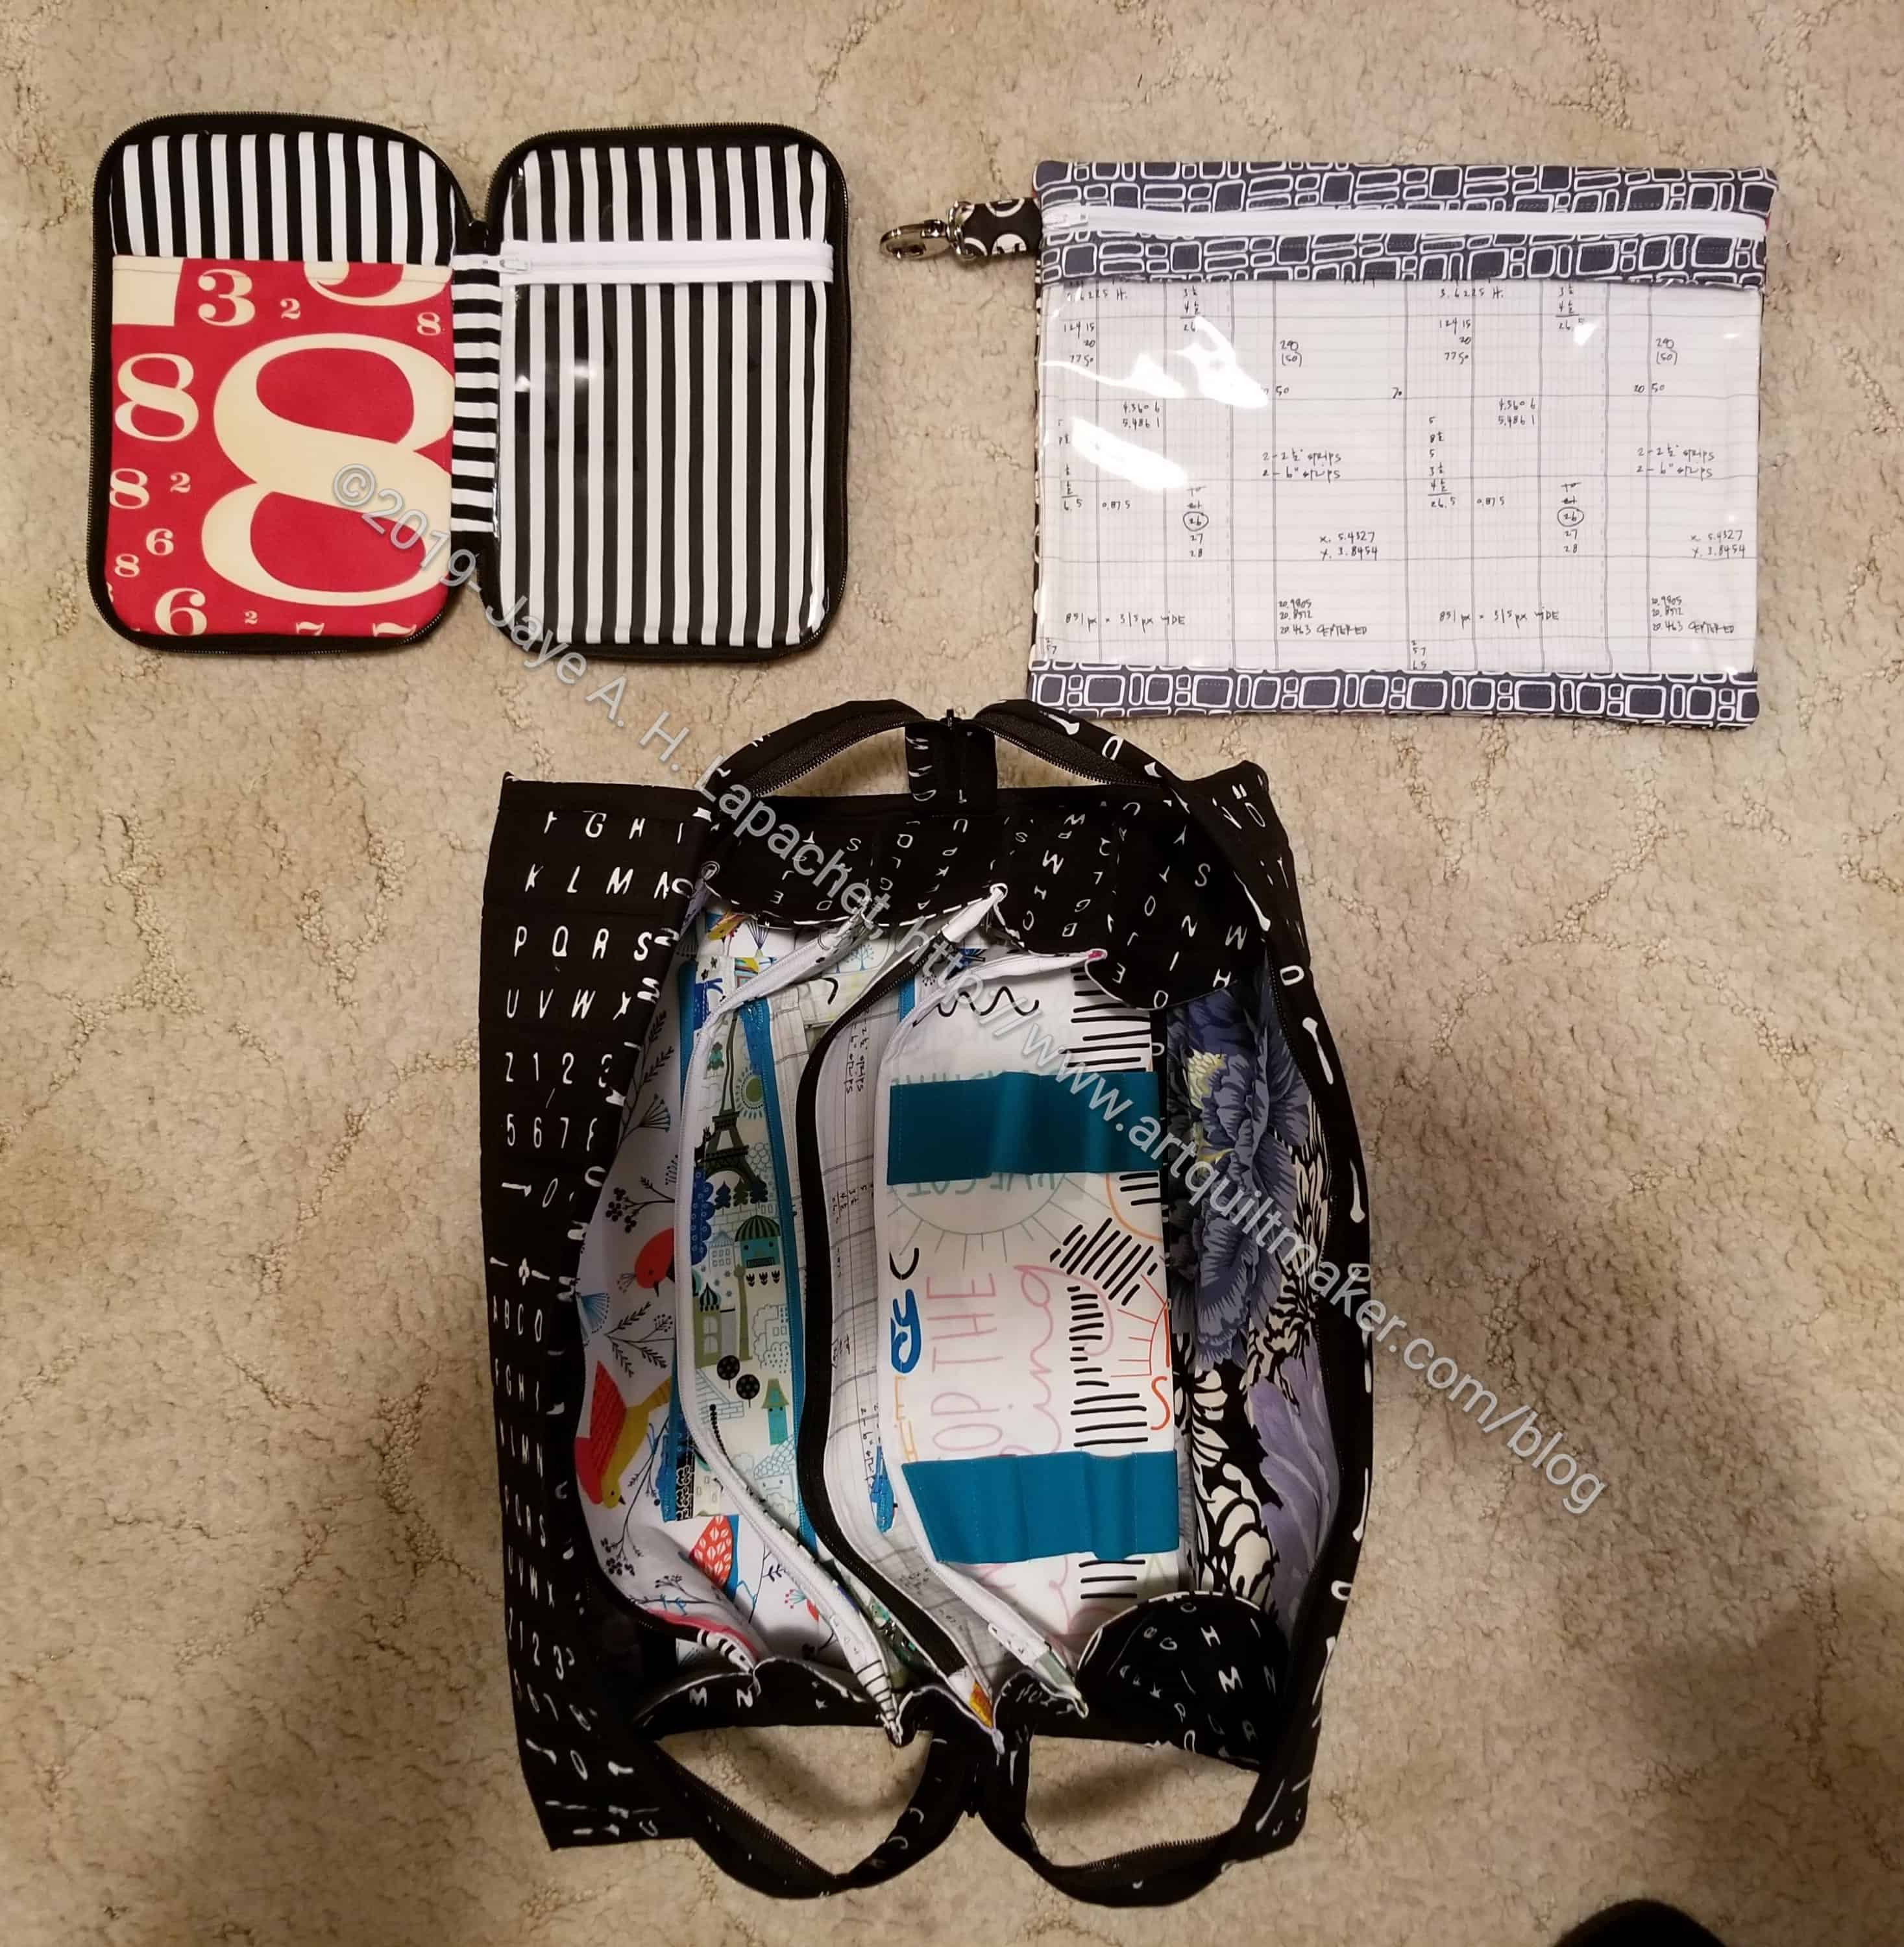
I-Spy / Roadtrip pouches
In one of the project bins I found two of the smaller, completed Crafty Gemini Organizer Club projects. I know I left them there so I could put them together with the last two projects. The last two projects, the Retreat in a Bag and the Ultimate Project Bag have not yet been made, but are on the list. Thus, they were two of the projects for which I gathered supplies and materials.
One of the projects I found, which will be clipped into the Ultimate Project Bag was the Roadtrip bag (right, photo above). Seeing this project again made me think of the templates for which I made a number of pouches.
The Roadtrip bag (pouch) was not used for the templates, but it could be. It looks very similar to the I-Spy pouch by Sew Sweetness (left, photo above), which I did use for the templates. Not counting the size differences, the main difference is the side strip on the Sew Sweetness bag. I made several of the I-Spy pouches for acrylic templates.
The reason I am talking about these is that I thought I would make a larger one, adjusting the size, to suit two sets of templates which don’t fit in the sizes given in the pattern.
The Sew Sweetness I-Spy pouch comes in 3 sizes. The largest size is 10.5 in x 8.5 in high, which is great except that it will not fit the larger templates that need a home. I want to make a pouch for the Chickadee Backpack templates I bought last year when the pattern came out. The templates need a pouch that is about 8 in by 19 in.
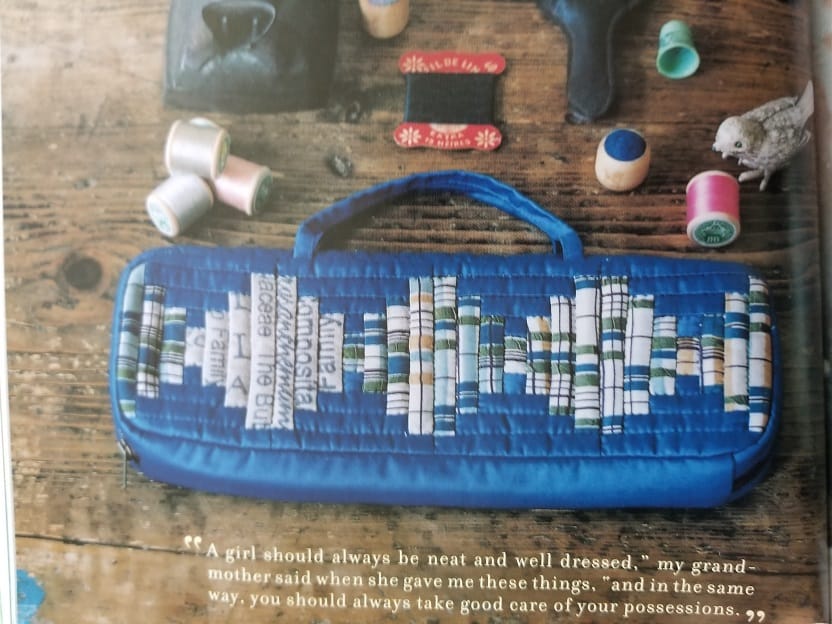
Yoko Saito’s Natural Patchwork bag
I know I talked about the bag from Natural Patchwork**, which I still want to make, but I don’t think today is that day. I do like the idea of handles (makes me think of the Grab & Go pattern, also from the Minikins patterns) and I may use foam instead of batting since the templates are quite large and I don’t want them to break.
What did I gain by today’s organizing effort? 1. I have everything ready when I decide to cut new projects out; 2. I have zippers on order, which weren’t already in my bin of zippers; 3. I have more of an idea for securing some templates; 4. Bins with less junk in them.
**Obviously, you should shop at local quilt shops. However, if you are too busy or can’t find what you need at quilt shops, I use affiliate links and may be paid for your purchase of an item when you click on an item’s link in my post. There is no additional cost to you for clicking or purchasing items I recommend. I appreciate your clicks and purchases as it helps support this blog.
I told you that I finished this project back in January. According to the pattern, I did finish it. However, ever since then, I have been contemplating handles. Mostly, I have been thinking of adding handles because of the way Vanessa (Crafty Gemini) stuff the thing full of tools, notions and everything sewing imaginable in the video introducing the Organizer Club**. I just couldn’t imagine how I could carry this thing around.
So, the bag sat until last weekend. Post Flying Around, I am finishing up bag projects. I talked about the 4 Zip Organizer and the Running with Scissors tote. On Sunday, I turned to this bag and decided that Sunday was the day this bag was getting handles.
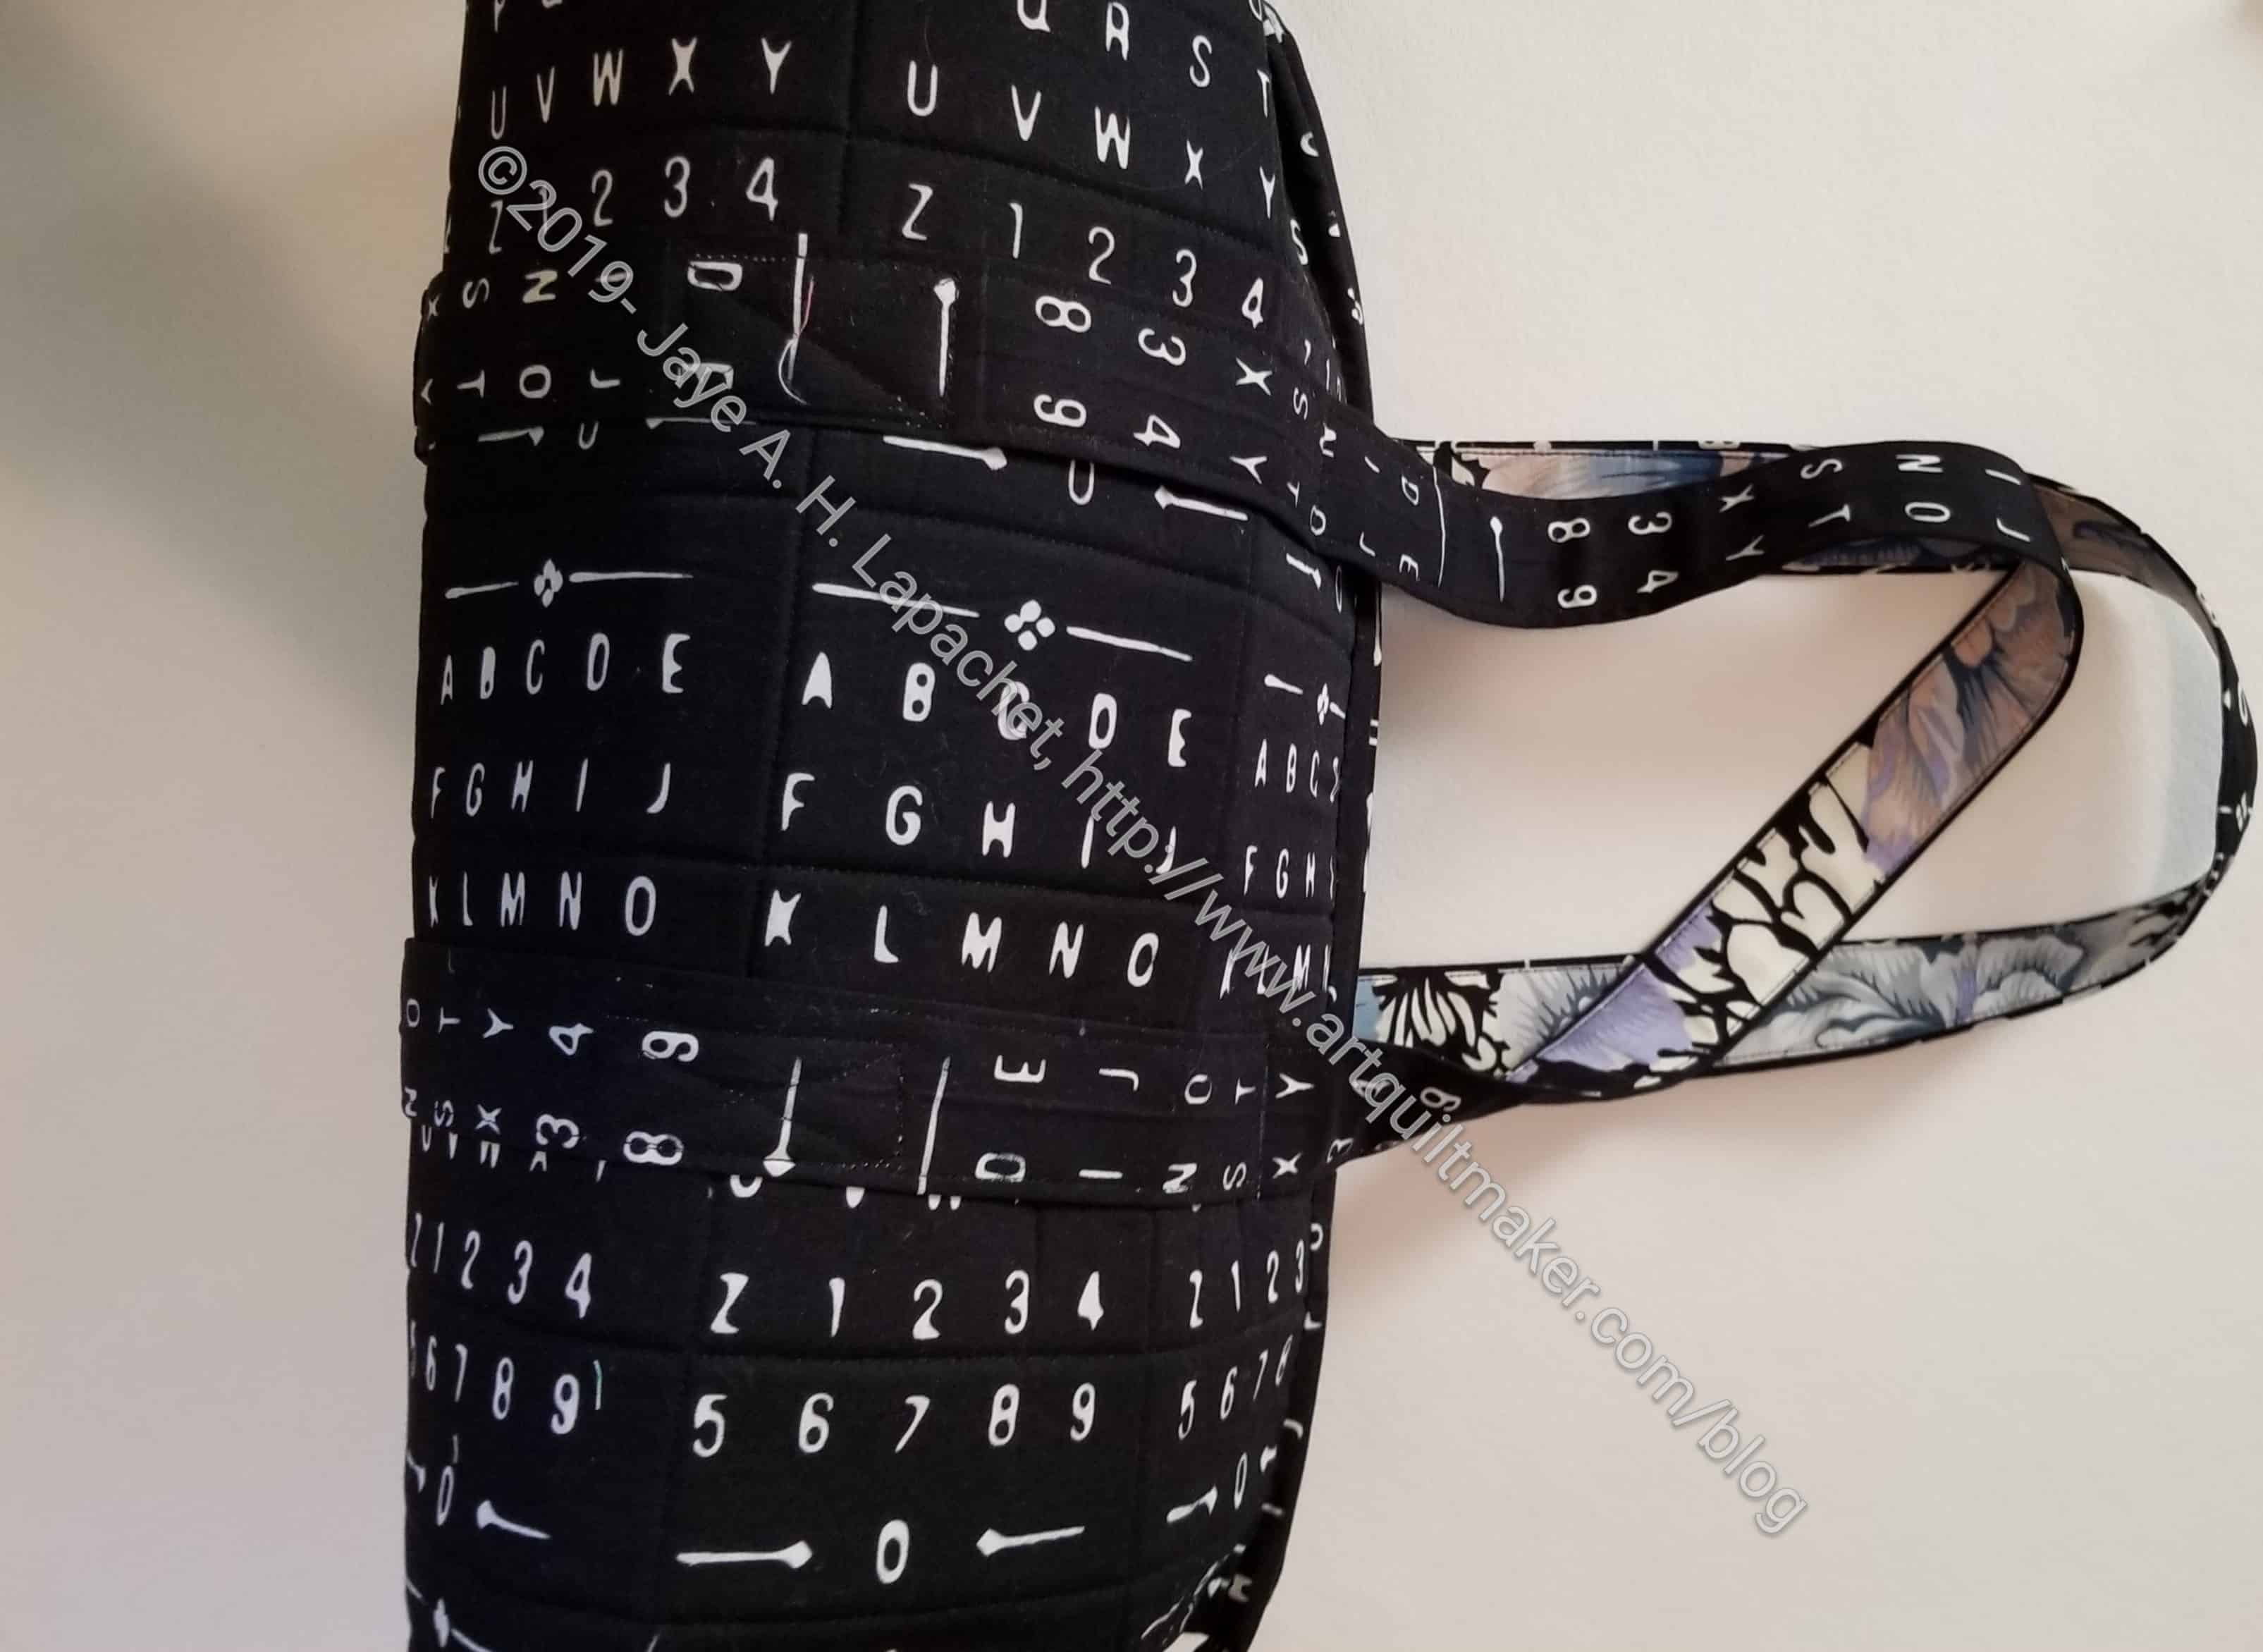
All Rolled Up tote with handles
I thought I would make really good progress on the Poolside tote I am making, but I spent most of the day slowly working on the handles for this bag.
For some reason, I am convinced that these bags need to be supported. Part of it, again, is the videos showing how much stuff can be stuffed into these bags. The other part is that I don’t want to be trying to repair bags whose handles have ripped off. Thus, you may see some similarities between the handles on this bag and the handles on the 4 Zip Organizer.
Taking good photos of these handles was a challenge. In the above photo, you can see how far they extend off the top. I made the initial strip about 80 inches long. The black & white Peony Brocade fabric acts as an enhancement, but the outside of the strap is meant to blend into the outside of the bag itself.
All Rolled Up tote with handles: showing accent fabric
All Rolled Up tote with handles
All Rolled Up tote with handles: open
Adding the handles also made the bag have more of a defined round shape. I tried to install the handles so they wouldn’t interfere with the wide opening of the bag. I think I achieved that. I think, though, that the bag takes on a different shape once holding the bag by the handles.
I am still not sure how I am going to use this bag. I wrote a dissertation about that before so I won’t got into it again. I do think that I will put Wonder Clips in one of the pouches.
**N.B. The Organizer Club is still available for purchase, but this is the club that was new in 2018, so any announcement of early bird specials is no longer valid.
I finished the 4 Zip Organizer on Saturday after a nice long day of sewing! I am pretty excited about the recent finishes, and this one in particular because it has been hanging around for so long.
I used fabrics that went with the All Rolled Up Tote. I am trying to create a matching set of bags and totes, but I keep switching fabrics!
4 Zip Organizer: Pen/pencil holder, D-Ring
As you can see, my Organizer has 3 pockets and a pencil holder. The pattern talks about making 4, but I used the directions from the Classmates tote to make the pencil carrier instead. I had to add another facing to the vinyl pocket above it. Though, Vanessa’s video didn’t say to do this, I figured it out from how she explained what pieces were covering others to finish them. I had an extra zipper facing, so I was all set.
4 Zip Organizer: D-Ring in action
While I was taking photos, I decided to try out the D-Ring. I grabbed one of the vinyl pouches I made for the All Rolled Up tote and clipped it on to the 4 Zip Organizer. I filled it a little too much for this bag, but it will work.
I didn’t want to put any fabric pockets in this bag, but somehow the bit of vinyl I had left disappeared after the Retreat, so I made one fabric pocket. I fussy cut the flower and think it looks nice.
Kam Snaps tools & Supplies
After watching Vanessa’s video about snaps, I was shocked when I opened the KamSnaps supply bag. The device that secures the snaps was included! I knew I bought some snaps, but was convinced I had forgotten the device. It took me a few tries and some wasted snaps, but I finally was able to install the snap closure.
4 Zip Organizer: Thread Holder
The Running with Scissors tote had thread holders on the center facing. I decided that I would add the same thing to this bag. Why not? I know I said I would use it for knitting, but who knows? I may need some thread or storage for Wonder Clips is always needed. Fortunately, the center is kind of round when the bag is closed so it can accommodate some thread or Wonder Clips. I bought the double fold elastic from ByAnnie.
I used a variety of colors of zippers from the selection I bought recently. I was pleased that I had a few extra for this project. I thought the zippers I used would be too small, but I had to trim less zipper tape on these.
4 Zip Organizer: outside with handles
4 Zip Organizer: closed with pen holder in view
4 Zip Organizer: closed
I am pleased to check another Crafty Gemini Organizer Club project off my list.
After finishing Flying Around, I needed a little break from serious quilts. I didn’t want to start a new quilt yet, though I have some fabric lying around waiting for their time in the sun. I decided to work on some bags that were hanging around. I am almost finished with the Running with Scissors tote and the Poolside Tote is cut out.
The 4 Zip Organizer won out. The last time I worked on this project was with Gerre back in June. Then, I quilted the pieces I needed to quilt and put it away to concentrate on Flying Around.
Friday was the day. I started working on it and got excited about it again. This was one of the bonus projects for the Crafty Gemini Organizer Club. Ever since I started knitting the Lightweight Raglan Pullover, I have wanted to finish this bag, so I would have a carrier for my notions.
4 Zip Organizer: Long Handle
I decided to do some different things with this piece. I made a long handle put it all the way around the bag, so it would support the weight if I stuffed the bag full. It was kind of a hassle, because I forgot and sewed all the way to the edge. That meant I had to rip, but eventually I worked it out.
Since this handle worked, I have more of an incentive to finish adding the handle to the All Rolled Up Tote. I know! Yes, that bag is still hanging around waiting for me to deal with the handle. Perhaps soon, now that I am on a Bag Binge.
4 Zip Organizer: Thread Holder
I had to add a center facing anyway, so I added some thread holders. I learned how to do this by doing the same thing on the Running with Scissors tote. I thought it would make a good addition, especially since I had that seafoam elastic, thought I think it will only hold small Aurifil spools. I am able to also use that elastic feature for Wonder Clips.
In making this, I found that the large Wonder Clips came in handy. I have only ever used them to keep my design wall under control, but they were useful in putting this bag together.
I also added a pencil holder and a D-Ring to the bag instead of one of the pockets. I thought I would like to have a pen handy (and under control). Also, I think i mentioned, I am adding a D-Ring to all of my bags, so I can move the small vinyl bags around as I fill them with critical supplies. I first came across this with the All Rolled Up Tote.
Sewing at Gerre’s house was great. In addition to progress on the gift bags, the Lobster and another Flapper apron, I also made a minute amount of progress on the 4-Zip Organizer.
Outside of 4 Zip Organizer, quilted
My next step was to quilt it. Quilting is always a step that stalls me on a project. this was such a small amount of quilting that it shouldn’t have been a problem. It wasn’t a problem this time and I did the quilting at Gerre’s while chatting. It doesn’t look that different now – just quilted. I have to trim the quilted piece to its correct size, but that part is done.
I wanted to work on this project over the weekend, but I was absorbed by Flying Around. Also, DH and I went out to the movies. Still, I am thrilled that I have made some progress.
After completing the All Rolled Up Tote, I thought I would layout the massive number of projects in the Crafty Gemini Organizer Club that I have completed.
Crafty Gemini Organizer Club completions, February 2019Sewing Machine Mat from front
Four.
Yes, I have completed 4 projects. I still have 3 more projects to go to complete the club. I do want to make all of the projects since I did sign up and pay for them. I did not sign up for the subsequent clubs since I have not yet finished the three projects left in the club. Also, I have a lot of other bags and organizer type projects I want to make.
I also want to make another Roadtrip Bag that has a vinyl window rather than using vinyl all the way across the front. I realize that is not the design, but I want to try my design change in order to not have to turn the vinyl. I am not sure how I will use the Roadtrip bag, but I like the design.
Crafty Gemini Organizer Club completions, February 2019-open
You can still buy the club (no affiliation). Check out the video showing all the projects.