Selecting Sauterne

Selecting fabric for Sauterne

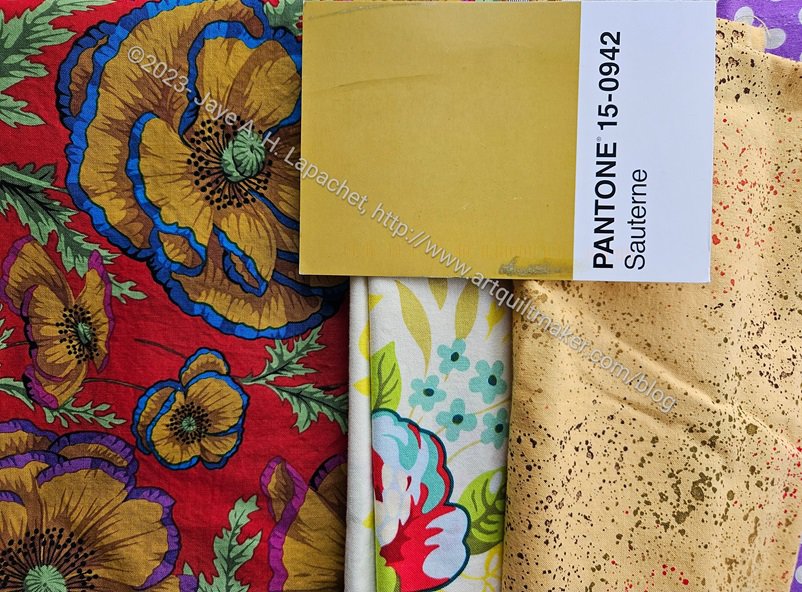
I received Sauterne with a heavy heart. Not for the message, which I always anticipate, but for the color. Another color I almost never use and never buy. Amazingly, I found a Philip Jacobs print with that color used for some flowers. It was almost perfect.

This print was the third one I found. The speckle gold is a good type to use for this project, but definitely the wrong color.

In the middle is a Heather Bailey print. Again, those tiny leaves right under the postcard are the perfect color, but so small. I didn’t think it was right.

Pantone: Sauterne in Half Night & Noon

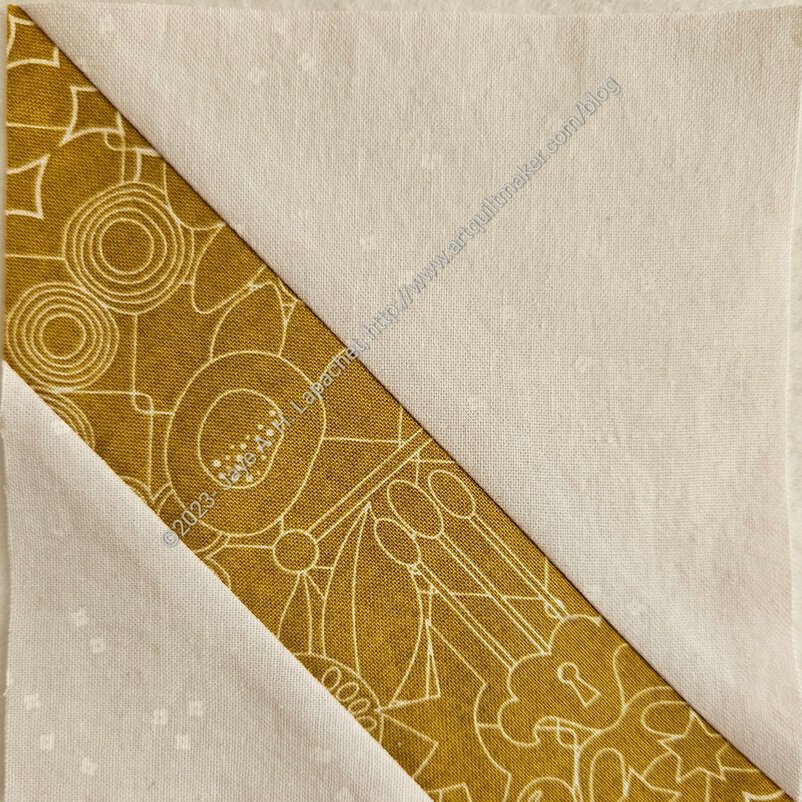
Finally, I found a 10×10 square (I wonder where that came from?) of an Alison Glass print that actually was the perfect color and also the perfect type of print – a tone-on-tone.

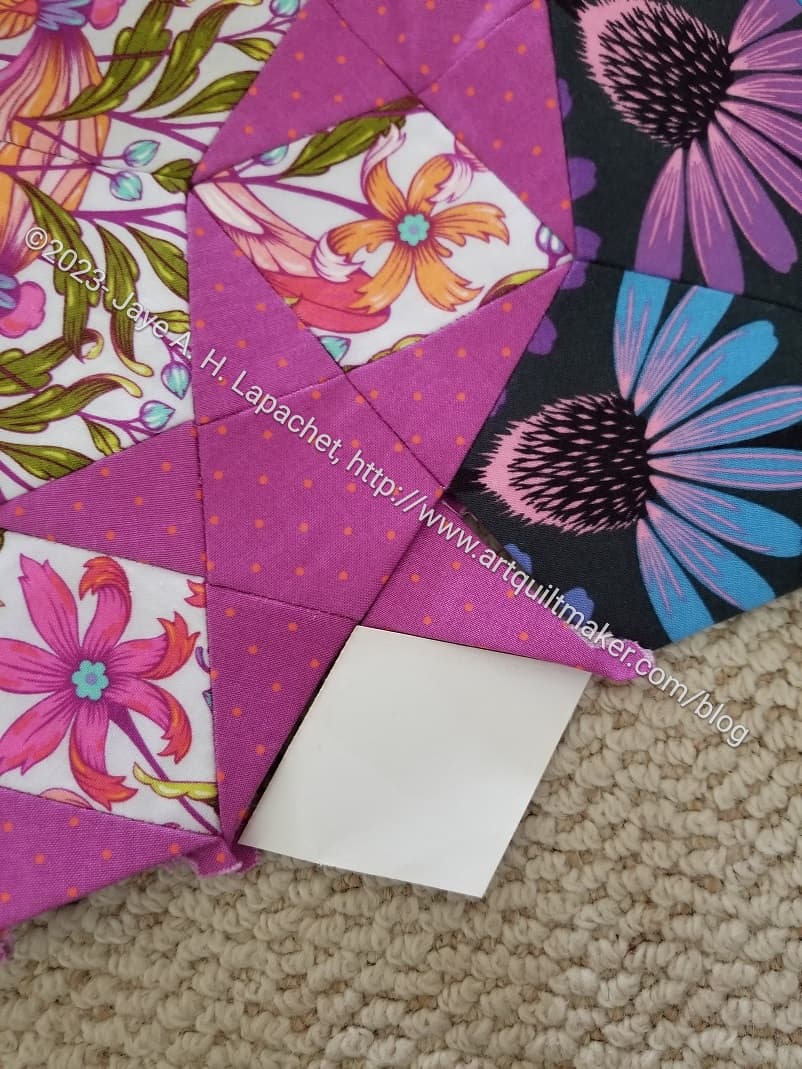
I received another postcard today, so back to the fabric closet for more hunting and gathering.


Finished Black Strip #2 Donation Top

Black Strip #2 donation top

This quilt is off to the guild for someone else to quilt and bind.

I added a larger border on the sides to make it less obviously rectangular. I didn’t want people to think only super skinny folks could use it.

This quilt was popular after listening to Christina Cameli give us her Big Ideas lecture. Get her to come to your guild! That is a great lecture.

More New Pantone Blocks

I spent most of the Sunday of MLK weekend working on the latest batch of  Pantone blocks. I dug into some old fabric to find good matches.

Pantone has a lot of browns and I am digging deep to find anything that looks close to the colors on the postcards. I found some brown fabrics I had forgotten I had. The exercise is making me think about shades and tones that are missing from my fabric palette.

Black Strip #2 Donation Top Continues

Black Strip #2 in process

I am using this project for leaders and enders, so it isn’t progressing as quickly as it might otherwise. Still, progress is good.

These are the additional blocks I made, some of which were rejected from Black Strip [#1].

It has that weird shape again and I don’t have enough additional blocks to make it wider. Not having additional blocks is a good thing in terms of scraps as it means I am working through my scraps (making room for more!). On the other hand, it is a not ideal situation for actually using the quilt. I might have to go with wider sides and narrower top/bottom when I do the borders.

Scrappy Celebration Ready for Quilting

Scrappy Celebration top

Scrappy Celebration is finished. Well, my part is finished. Today I will bring it to Colleen for quilting.

This quilt was nowhere near ready to give to Colleen, but except for one mishap, it went together quickly and fairly easily (knock wood). I am pretty pleased with the way it came out. It is a lot more interesting to look at than it was to piece.

Scrappy Celebration back

As usual, I used a lot of the leftover fabrics for the back. Friend Julie said the look of the back is energetic. I hope that is good and not just a nice way of saying “what were you thinking?”

Notice that I didn’t use the Philip Jacobs chrysanthemum print on the back. I wasn’t ready to use it up yet.

Grey Strip Donation Top Finished

Grey Strip donation top - finished
Grey Strip donation top – finished

I was able to finish the grey strip top at Sew Day, then work on the back at home. I am pleased that this top is finished and am already working on the next black version.

With the back, it is another 3 yards used for a good cause.


Grey strip donation back

I have now made 14 of these quilts, with the help of my guild colleagues.

See the other colors on the Color Strip page.

Scrappy Celebration Towards the Finish Line

Scrappy Celebration - all the blocks
Scrappy Celebration – all the blocks

The last time I talked about this quilt was in September! Since then I have been moving the blocks around my workroom in a desultory manner. I last had them all on the design wall in August and they don’t look great. I decided I needed to finish it and my deadline is on Friday. I have a date with Colleen and knowing my work schedule, will be unable to make another any time soon. So, I needed to get it finished.

Scrappy Celebration -what I had

I actually didn’t start from a bad place. I just needed to figure out where I was and where I needed to go.

The photo on the left is what I had when  I put all the blocks up on the design wall. I ignored the block labels I had put on based on where the blocks were in the pattern. I rearranged blocks so they looked more appealing and, then, decided what I additional blocks I needed to make.

I worked on it last weekend and made good progress. I am now ready to sew the piece together.

Finished Black Strip Donation Top

Black Strip donation top with border

I was able to finish this quilt on the 29th. I was happy to get it finished before the New Year.

I probably should have put another border on it, but I was just too lazy. I think it is big enough without one. It just doesn’t look quite finished.

Metro Twist Ready for Quilting

Metro Twist top with borders

Yep, I finished the top and back. I feel much lighter now that it is done.

I am also pleased with how it turned out. I don’t know if I will make this pattern again, but it is possible.

I am sure I said somewhere when I worked on the Metroscape quilt or the Mod Lights tablerunner that the Quick Curve ruler projects come out really well. Not all of my points match up in this quilt, but they are close enough in most cases.

Metro Twist back
Metro Twist back

I put the back together relatively quickly. The label is a little lower than I normally sew it, but I wrote Colleen a note about in case I forget to tell her if I ever see her again. 😉

Another project off my list. My pile of quilts for Colleen is growing.

QST 16 Patch Quilt

The other day, I talked a little about my design process. I also inferred that I wasn’t going to waste time designing when I could be sewing, so I went and started this quilt for the BAM Community Quilts project.

QST 16 Patch #1 - start
QST 16 Patch #1 – start

I did start sewing and I made a good start with some of the blocks I showed a few days ago. I thought I might as well use them, after all.

I was pleased with the black and white stripped fabric. I think it looks unexpectedly good.

So far, I am having fun with this design.

Even More Metro Twist

Metro Twist - blocks sewn
Metro Twist – blocks sewn

I am still piecing this top together, not because it is difficult, but because I haven’t had enough time to focus on it.

Finally, I am able to say that the blocks are all sewn together. I have decided to put a border on it and that is not yet done.

More La Pass Border

I have the feeling that the border might take me as long as the top of the quilt. If it weren’t for that one fabulous rosette, I might just cut off the edges and move on with my life.

Finishing points and adding background

I did do some organization the other day, which gave me almost a week of evenings with hand sewing ready to go.  I know there will be an end, but I haven’t seen it yet, so it seems to be an ever ending process.

I do get small bonuses, which include finishing some points, like the green ones shown in the photo, that I didn’t expect to finish. They will be sticking into the background, so will show up nicely.

At least I hope they will.

Finishing up a star
Finishing up a star

There is a certain amount of hunting and gathering that I have to do at least once a week. I have to figure out which rosettes to finish and which to cut off, then how I will deal with the background.

I just have to get some straight edges, then I can sew larger pieces of fabric to those edges and be done.