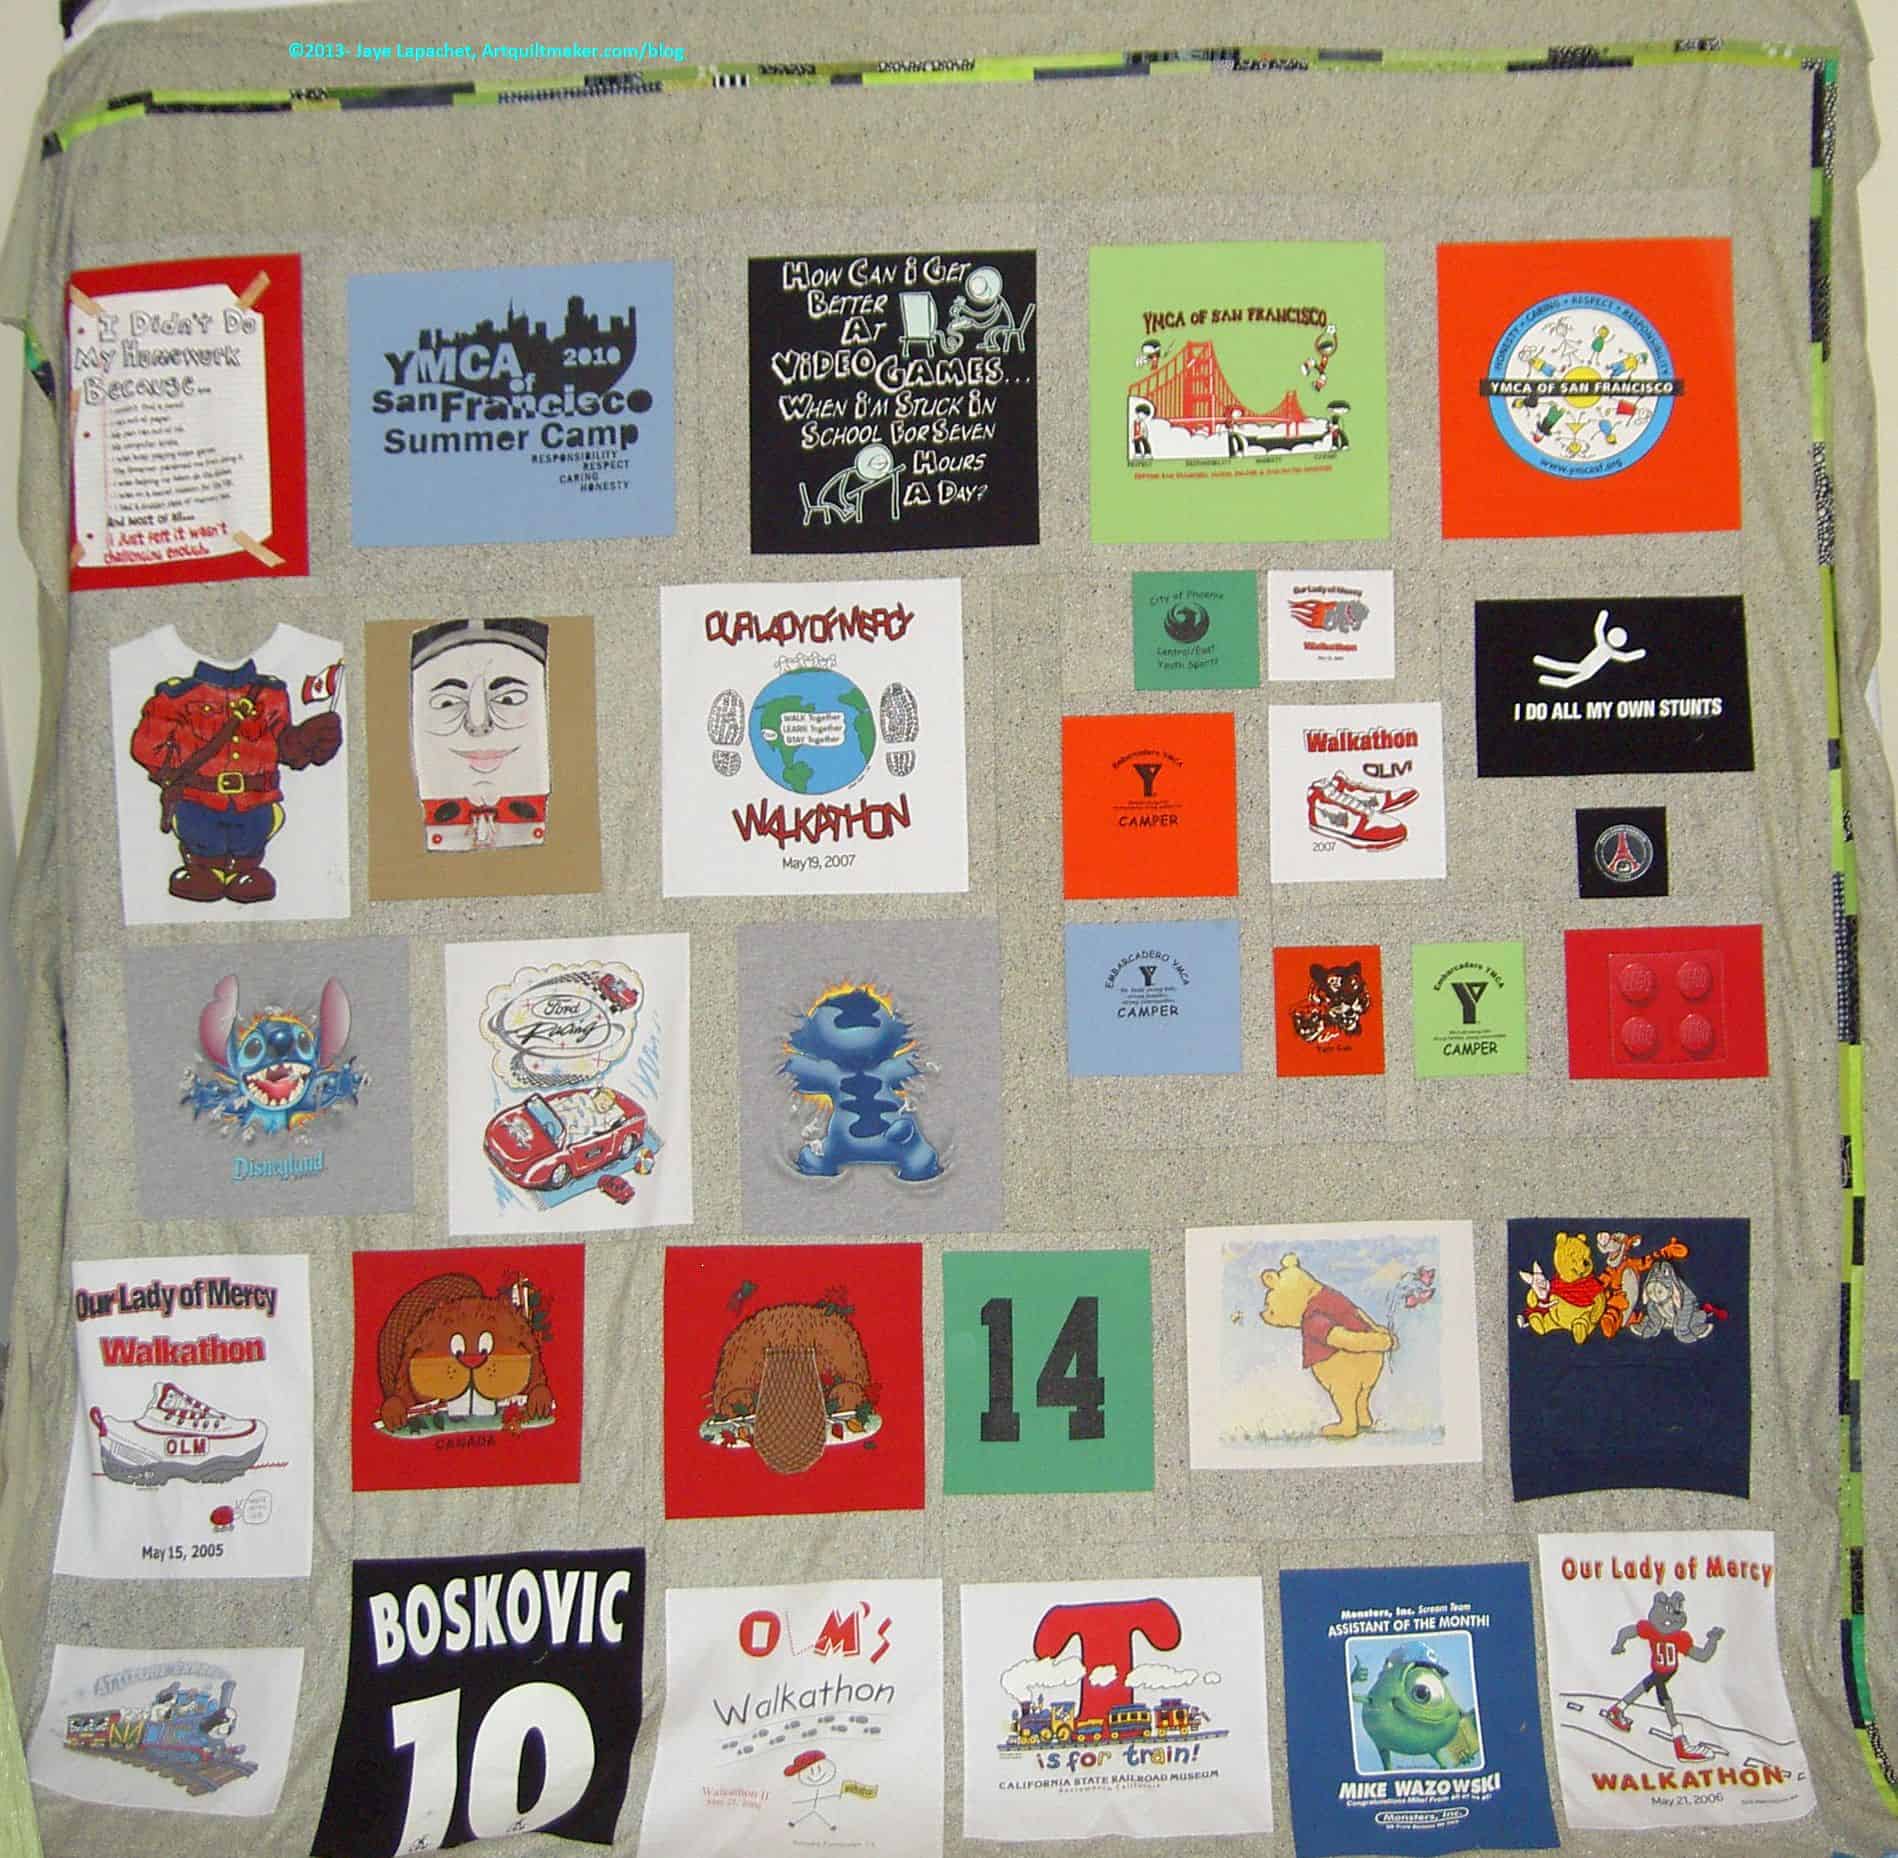
I finally was able to get some people to hold up the T-Shirt Quilt so I could photograph it. I finished it at the beginning of November, I think.
The boys would have held it up for me, but I did want it to be a bit of a surprise for the Young Man. He knew I was making it, but I don’t think he knew it was finished.
My BIL and nephew are both over 6’2″, so it was pretty easy for them to hold it up. They are inexperienced quilt holders, though, so I had to keep reminding them to get out of the photo, hold the quilt straight and taut, etc. It was kind of funny.
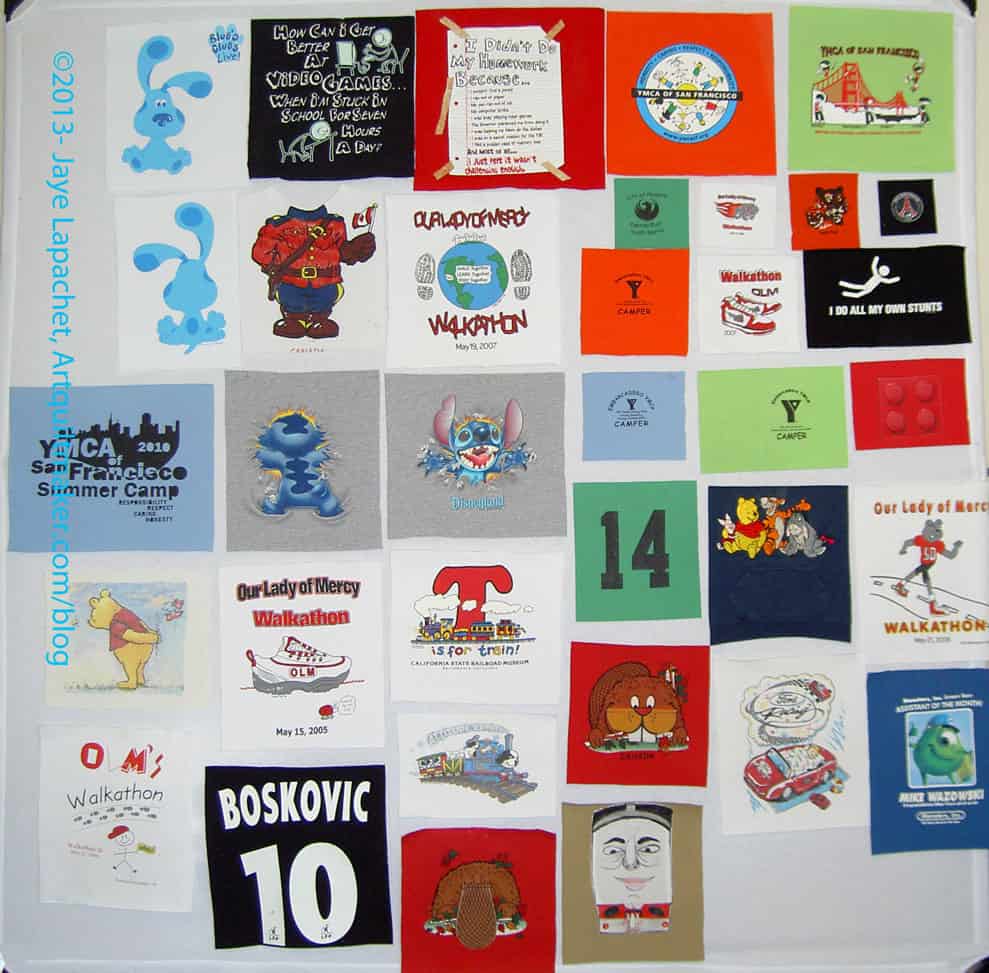
T-Shirt Quilt Back
I was very glad to have waited to give it to the Young Man at his family party. His face registered “ho hum another quilt” but the adults oohed and aahed and really looked at it closely, which was gratifying.
The only design choice the Young Man suggested was that I don’t put the Blue’s Clues t-shirt on the front. I could work with that, thus it is on the back.
One friend can’t get over my backs. 😉 This one is fairly tame, but she has seen other quilts, which have much more piecing. She loves them and that makes some of the drama of piecing the backs worthwhile. Some day I’ll make her a quilt.
I hope that, later this week, you will see another finish.
I went and got two quilts from Colleen last weekend while we were out car shopping in her neighborhood and both are ready for binding. I decided to sew the binding on the Original Bullseye first since that project has hung around much longer than the T-Shirt quilt. Also, I am planning to give the T-Shirt Quilt to the Young Man for Christmas. He hasn’t noticed it has returned, which means he isn’t clamoring for it, which means it will be a great gift.
Original Bullseye detail
Colleen did a really nice job on the quilting of this piece. It is flat as a pancake despite all of the bias edges of the circles.
T-shirt Quilt detail
Colleen sees a lot of quilts so I was very pleased when she, and her Mom, Elaine, complimented me on the border. That is a border that is a pain to make, but very effective. I discussed the making of it in a previous post.
I wanted to show the detail, because of the quilting. I told her to do something basically all over, but not to ignore the difference between the t-shirt ‘blocks’ and the sashing. I am pleased with what she did.
After he returned from Scout Camp, the Young Man was happy to hear that I finished his T-shirt Quilt top. After writing several book reviews that were overdue, I spent quite a bit of time working on the back.
It is finally done and I just have to make the binding before I move on. I don’t have anymore of the grey left, so it will have to be green or black or some other color the Young Man chooses.
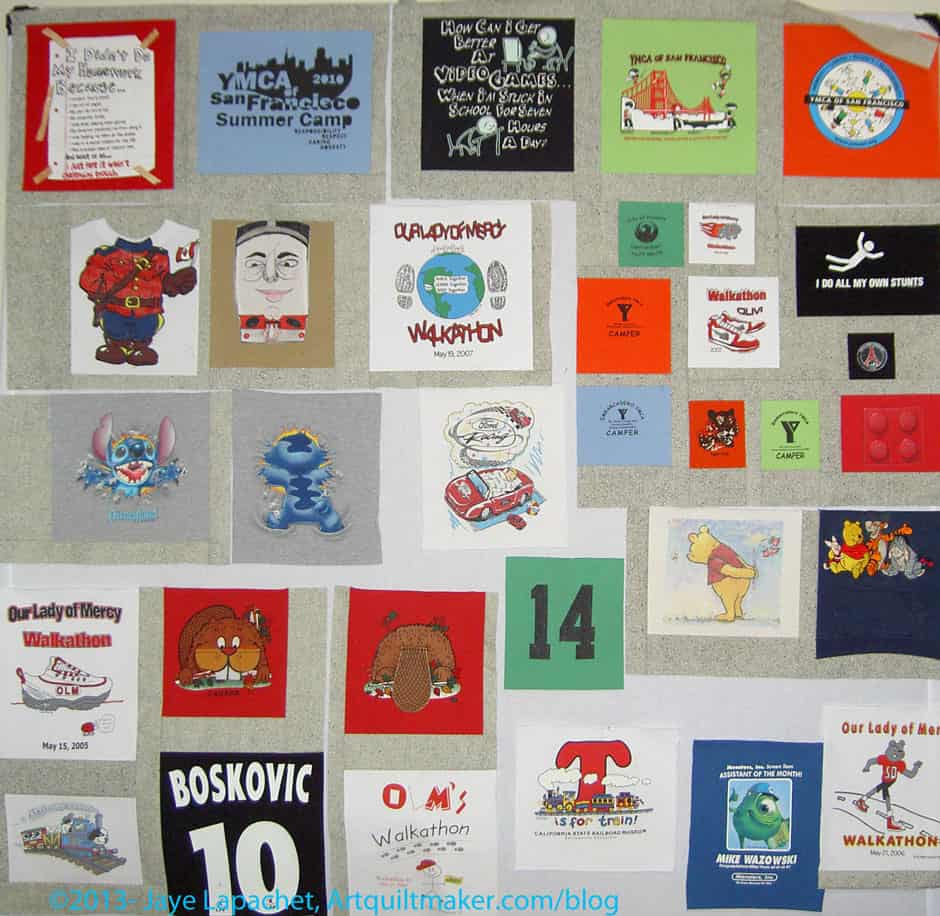
T-shirt Quilt top
The pictures are terrible, because the boys didn’t have time hold the top and back up for me. I don’t have a picture of the back, though I hope to get one once the quilt is quilted.
That means that the T-shirt quilt has be OFF the design wall. I am not folding it up and putting back in the UFO area. It has to be ready to go to the quilter. And THAT means that I have to work on it.
Thin borders take forever to build
So, I am working on the border. The green border is made up of 1″ wide strips, alternating green and black, of varying lengths. which is very thin.
Thin=tricky. Tricky because when chain piecing or sewing using the leaders/enders technique, there isn’t enough thread between the pieces to help keep them from unravelling. At 1″ wide, there are only a few stitches to hold the black and green pieces together. Not chain piecing feels awkward and wasteful. Thus, the strips are very fragile. I pulled several apart as I was sewing them to the larger quilt. Of course, I fixed them, but what a pain. I could have solved the problem by back stitching at the beginning and the end of each border piece, but that would have been tedious, too.
Why put up the with drama, you ask?
Once completed, the border is very effective. The border is intended to “float” in larger borders on either side. You can see the floating effect in the photo above. In this case, the two thin green & black borders will “float” in the grey. Such a border adds interest to the quilt as well
It is, however, really a pain to make. Did I mention that the strips are 1″ wide?
I am pretty sure you will sincerely dislike me when I say this, but I am going to say it anyway. Thin borders need tightly woven fabric.
Yes, thin borders need tightly woven fabric.
Why?
Some fabrics tend to unravel and some of the fabrics I am using seem to be unraveling more than others. The Modas are particularly bad in this area. You may love the Moda designs, pre-cuts and designers, but their fabrics are somewhat loosely woven, which means that they tend to ravel.
If you have a 6″ square and one thread frays off the edge, who cares? It won’t matter, because you can easily account for it. With a 1″ strip one thread fraying can make a difference in how straight the border is. I could have used Fray Check, but didn’t think of it.
Tightly woven fabric tends to fray less and, thus, be easier to use when working with thin pieces. Kona cottons seem to be tightly woven as do a lot of hand dyed fabrics. It is pretty easy to tell tightly woven fabric, because it isn’t as easy to see through.
I have only a bit to go to finish the top, then on to the label and the giant border. Wish me luck.
I worked on the border for the t-shirt quilt on Sunday. I have about 8 really long seams left before I can start on the back of this quilt. I really dislike long seams so putting the borders of this quilt together is some kind of torture.
The Young Man designed the border. I was all ready to make a floating square border when the Y.M. told me what he wanted, which was two thin strips of fabric surrounded by the grey.
I did a border like this on the Water Kaleidoscope quilt, so I showed it to him. In that quilt, the thin strips are a variety of oranges, pinks and yellows (I don’t have a picture of this quilt. Sorry).
After looking at it (and he really did contemplate), he decided that he would rather have black and green strips alternating than the blues, greens and red that he, initially, selected.
The fickle mind of a creative in action!
T-shirt quilt border
The middle photo is a detail of the corner. The piece is very heavy and won’t stick to the design wall, so I have it pinned.
The Y.M. told me he wanted the rows to line up up so the black in the first row touched, but was slightly offset from the black in the second row. I told him that I would use random sizes and see how it went. I think I can, mostly, accommodate his wish, but it won’t be as precise as he imagines.
T-shirt quilt border
I gave him my scrap bin to rummage through. This was my way of having him pick out the greens and blacks. He came up with some nice blacks and greens, which were very different than those I would have picked. The greens were all very much in the same chartreuse color line (I am thinking of Joen Wolfrom Color Wheel when I say line, rather than a fabric line). I don’t have enough of the types of greens he chose in the scrap bin for the second colored border. I’ll have him pick some fabrics out of my green bin. I am sure I have more of that chartreuse color.
This quilt feels like it is taking me so much longer than it should. On the other hand, I think I sew faster than most and have higher expectations of myself.
The Young Man is pleased so far. That is what counts.
For those of you who do not follow me on Twitter (@artquiltmaker, if you are so inclined) will not know about my commuting woes. Our local interurban train system is on strike, which makes for longer and more tiring commutes. As a result, I have not had much inclination to sew after work or even write much. I don’t often sew much in the evenings anyway, but occasionally I will cut or press fabric, sew a seam or two or do something.
Still, over the last week, I was able to get the center of the T-shirt quilt mostly together. I need to put on a couple of borders to anchor all of the stretch, but, essentially, the main part is done.
I am also considering a pieced border. I am thinking about 4″ squares surrounded by the grey speckle, but we will see.
The biggest problem with this quilt is keeping the &^%$#@ thing square. I have, actually given up, because each time I trim, I have to trim somewhere else. I can see the sense in sashing all the blocks first.
I started this quilt a long time ago, so when I pulled all of the t-shirts out last week, I wasn’t sure where I was or what to do next. The top photo shows the pieces to use as a start.
I had already trimmed off the colors, cuffs and backs, so I trimmed the other t-shirts in prepartion for interfacing them. That was a trip down memory lane. The small sizes of the shirts are hard to reconcile with the giant boy-Young Man who lives with me now.
I spent most of the day on Saturday trimming the t-shirts and pressing interfacing onto the back of each t-shirt panel. I chose a grey pebbly print that I bought before the Young Man was born to make the shirts a uniform size. After sewing sashing to a couple of the panels, I found that that technique was not working for me. I decided to just fill in between the panels. I had thought about sashing each panel and making little stars as the cornerstones. I am not sure it is going to work, though. I think I just need to fill in between the t-shirts and have stars quilted into it.
T-shirt panels
When I cut the t-shirts, I was forced to cut them all to a different size based on the design on the front, which is the main part of the quilt’s design. Looking at the all the designs and brands, while working through this process, made me think of the Young Man’s interests and how they have changed. I do think I will offer to make him another t-shirt quilt to encompass his current t-shirts, which reflect his current interests. However, his size won’t change as much during the 4 years of high school as it did during the K-8 period.
In a way, this quilt is about the fabric. The stretchy t-shirt fabric. It is not terrible to sew once the interfacing has been applied, but the cutting is tricky. I also find that sometimes the design sticks to my sewing table as I sew.
I really thought I had more t-shirts, but I guess I was brutal about the ones I chose. the Young Man also wore a lot of plain colored t-shirts as he got older, which are not interesting in a t-shirt quilt.
I almost didn’t cut up the Winnie-the-Pooh sweatshirt (dark blue, lower right) as it was so adorable and I remember chasing after the Boy trying to put it on him when he was super tiny. There are bits of schmutz on some of them, but I guess that just means they were used and well loved.
T-shirt quilt, after the weekend
The boy came in and looked at the layout Sunday afternoon, as I was working on it. He liked what I had done so far. He did, however, ask me to remove the Blue’s Clues t-shirt, so I will put that one on the back. It is probably a good thing as my design wall is full and I would like to keep the size of the piece to the size of the design wall.
The bottom photo is what I ended up with after working most of the day Sunday on putting the piece together. I am particularly proud of the section with the smaller pieces (middle right).