Gabrielle Swain Class Day 1


Another teacher to add to your ‘must take’ list. This woman knows how to teach! She knows her stuff, has confidence in her teaching and has an opinion, which I like. I don’t have to agree with the opinion, but wishy-washy “well, what do you think, dear?” kind of comments from a teacher, make me crazy.

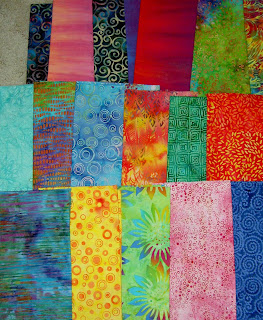
Above are the fabrics that I brought to class. Not being a hand-dyed girl, I chose batiks in a palette that I like. Her suggestion of 3 yards was a wild shot in the dark, IMO. I would improve the supply list by asking for 20-30 FQs evenly divided among all the colors. In this case, I was able to find some fabrics out of my small batch to work with, but other people were having a really hard time. Even people who had brought a lot of fabric with them.

The first part of the class was all about design. No sewing. Some people were completely mortified. I was thrilled. I actually got to spend time on my design and try out a couple of different things. One thing that Swain said, which resonated with me, was that people find their materials first and then try to find a design to fit the fabrics. I Think it is true in a lot of cases, but I don’t think it is true, mostly, for me. It is definitely something to consider and keep in mind.
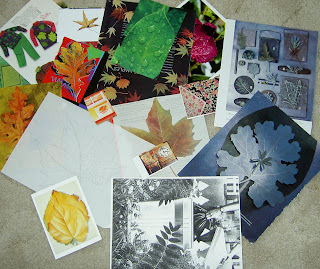

The theme of the class was leaves. Mom went through my inspiration file and pulled out many of the pictures containing leaves. Talk about a hero! I went through the pictures a few times before I started the design and whittled down the group. I finally settled on a Georgia O’Keeffe postcard of a painting called Yellow Leaves (bottom left). Apparently the real painting is at the Brooklyn Museum of Art. In surfing the web, I found an image of another of her leaf works that has to be in the same series called Pattern of Leaves.
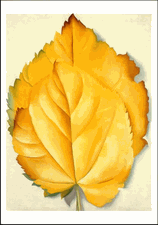
Swain gave us large format patterns, which we could have also used, but I don’t think anyone did.
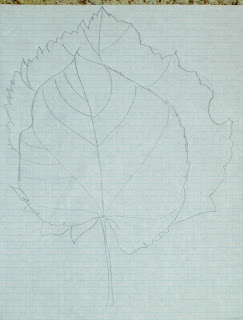

This was my first attempt and , frankly, it is pretty much a copy of the O’Keeffe work. Swain said to add another leaf (rule of odds) and turn the leaves so they were going in different directions. I had a hard time understanding what she was suggesting. She ended up explaining it by saying to align the leaves so they hit various points on the letter C. Finally, I got it and set to work.
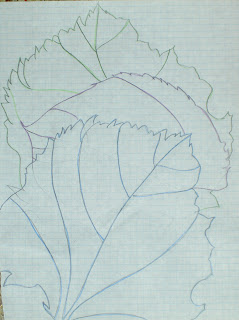
This was my second attempt. After finishing the draft, I was concerned that not enough of the two upper leaves were showing.
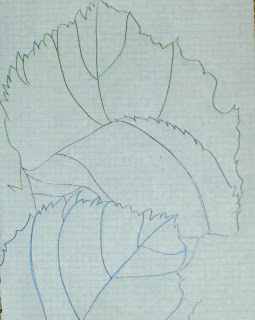
I traced my second attempt, but shifted the paper slightly to modify the spacing. It ended up with too much spacing.
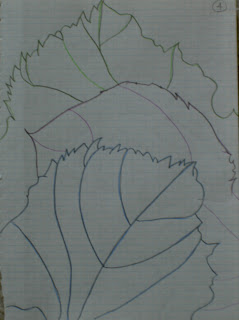

Above is my fourth attempt, which I liked. Again, I modified the spacing.
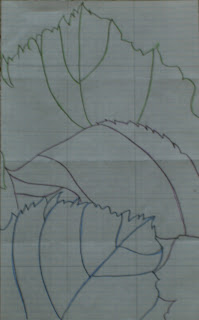
This is the final design for my project. It is the third drawing, which Swain thought was better than the fourth.

I think the above process is a good example of why spending the time on the design is worthwhile.
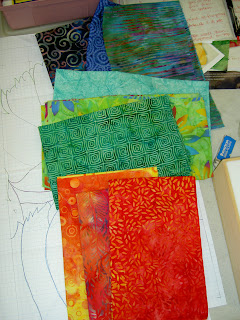
My first thought was hat I would make each of the leaves out of a variety of different fabrics. Above is my first pass at fabric selection. I was thinking that more fabrics would add interest.
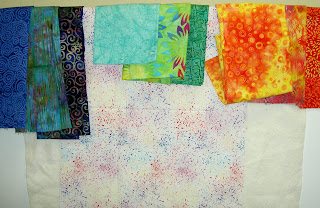
Here are my choices with the background.
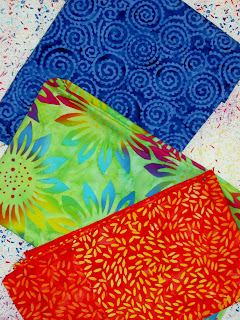
This group is good, but Swain was concerned about the strong print on the middle fabric. She thought, when cut up, the petals of the sunflower would draw the viewer’s eye in an unintended direction. She is very much about careful choices in both fabric and seam lines. There were a lot of things she said that reminded me of Ruth McDowell’s work with seam allowances.
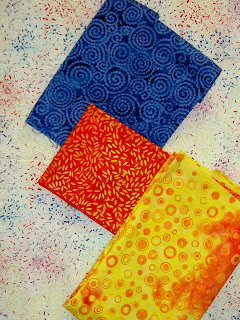
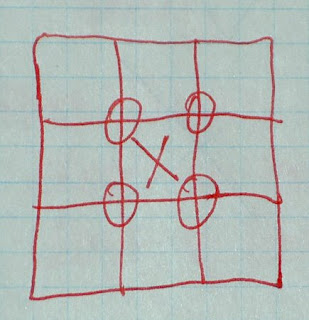
Here is my final selection. I guess it is ok. I may work on it a bit more later just to make sure I am happy with it. I like the fabrics, but the combination as leaves is a bit of a stretch. I am, however, willing to work with the colors to see how Swain’s advice works. Here is one example Swain had for a design principle. Think of a tic-tac-toe board. Put an x in the middle, because you don’t want to put anything exactly in the middle. The Os at the intersection of the squares are where she suggested we place our images, if doing this kind of a design.
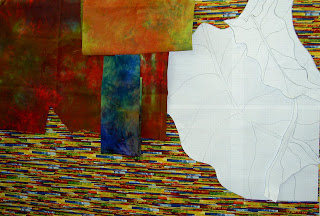
Julie’s fabric selections and pattern. Julie is Swain’s star student as Julie took her 6 month creativity class earlier this year. Sadly, none of the glow is rubbing off on me. 😉

Supply List Suggestions

I am taking a class with Gabrielle Swain tomorrow. I hadn’t ever really heard of her until Friend Julie took a 6 month long one-on-one class with her. I decided to take the class because Julie really got her creativity juiced. She did a lot of work during the first few months of the year.

Lo and behold, I am completely prepared for the class. I have all the stuff sorted, piled up and ready to go. I am thrilled. No running around like a chicken with its head cut off at the last second. I’ll even bring the bags down to the car tonight so I just have to walk out with my handbag tomorrow morning.

While I was getting ready, obviously, I had to look at the supply list. One thing I realized was that teachers don’t always explain why they want you to bring something to class. It would be very helpful if the teacher put the name of the class along with a brief description of the class at the top of the page. This should be followed up with the normal supplies such as pencil, notebook, basic sewing kit, scissors, etc.

While ‘normal’ is relative, I think that there are some standard supplies. It would be great to explain anything beyond the standards. I realize that teachers are busy and that they have a lot to prepare. However, a little explanation can make the students feel more secure in the supplies they choose and help the students bring better supplies.

Ms. Swain’s supply list was relatively straightforward. I often wait until the last minute to get the supplies together, thus I am really resentful when there is something strange and unexplained on the list. Of course, my procrastination is not the fault of the teacher. I have a lot of supplies. I even have a lot of strange rulers and materials, so it doesn’t seem to much to ask for someone to explain why they need a certain brand of this or that.

I really am not complaining about Ms. Swain’s supply list. Reading over her supply list just made me think about supply lists in general. The only thing on it that I couldn’t supply out of what I have at home was hand-dyed fabric. I am not a hand-dyed fabric person; I just don’t have very much of it. If she had explained why she wanted hand-dyed fabric, I might have gone out and bought some. Instead, I chose some lovely batiks that I think will make great leaves.

Stay tuned!

Nance O’Banion Workshop

I will be taking the Nance O’Banion workshop on Saturday with EBHQ. It is a little different than the normal quilt workshops, but I thought it would help with the visual journaling theme that I have been dipping into of late. I also hope that it will give me some ideas (and freedom???) to do more of the visual work. We’ll see!

clipped from www.ebhq.org
  • Nance O’Banion
  • Saturday, April 26, — Cloth Books and the Creative Process

    (Supply List)
    Combining found materials and cloth in an experimental setting;
    we will work to discover a meaningful narrative in the book format.
    Two sewn book structures utilizing cloth as a basis,
    a simple transfer technique, collage, rubber stamps, and
    more will all be a part of the game. Come ready to play.
    < /br>
      blog it

    Finding Teachers and Shows

    Someone asked about resources for finding teachers and shows on QuiltNet. A few links were provided. I thought this would be useful, so I am providing the clips here.

    Quilt Teachers

      blog it

    Quilting Related Links

    The following links are for the convenience of our guild members. Empire Quilters does not endorse or recommend any particular entry or entries. Guild members are welcome to submit their favorite quilting links for inclusion in this listing. Submit your requests to: info@empirequilters.net. Enjoy the online surfing!

    OrganizationsMajor ShowsFabric
    SuppliesGifts, Cards
    Books, Magazines, SoftwareSewing MachinesHoops & Frames
    Quilting on TVOnline groupsArtists, Teachers, Authors
    Quilt Guilds Online (separate page)

    blog it

    clipped from www.ncqc.net

    Northern California Quilt Council Teacher Members

    Teachers by City or Name

      blog it

    Reflections on Pamela’s Class

    I know I overloaded myself with photos posted to Artquiltmaker blog on Saturday after the class with Pamela, so I must have overloaded you all as well. This post is about focus and reflection on the class.


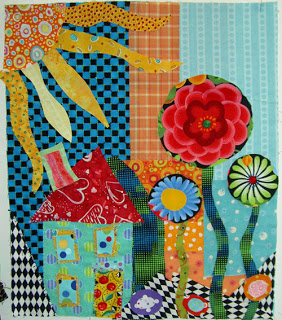
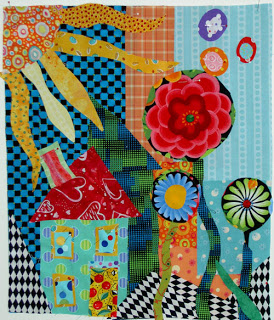
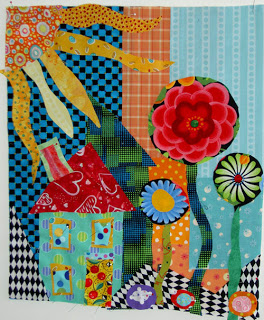
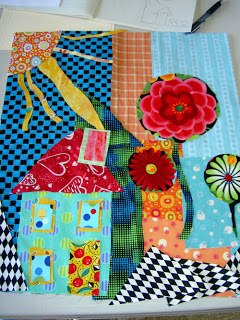
    Here is my first draft, so to speak. I had looked at my previous effort, from the first class with Pamela, before this class and had an idea that doing a related quilt would be a good idea. I was also looking at Collaborative Quilting by Freddy Moran and Gwen Marston last week, which made me think about houses. The sun and the flowers are in common, I think.

    One thing I realized is that I have not been working with scale much lately. The Pineapple, the various square pieces including Thoughts on Dots did not require me to work with scale in any meaningful way. I did pay attention to dots were in the various prints I used for Thoughts on Dots. I didn’t have to worry about scale overall in terms of the elements of the quilt. So, this piece made me stretch. When Pamela came around to help me the first time, scale was what we focused on. I needed larger flowers and larger rays of the sun.

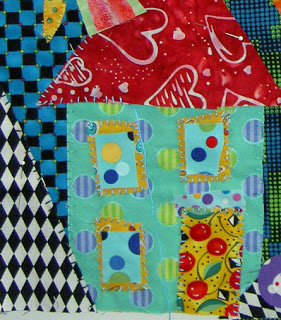
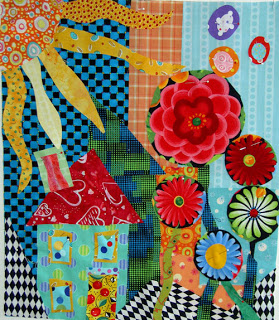
    Final piece (sans quilting)

    It wasn’t quite so easy as making some elements a little bigger, though, because I had the previous garden quilt (below) on my mind as well. Some of the intermediate “drafts” of this piece had many more flowers. You can see the various drafts in Saturday’s post.

    I brought scraps per the directions, so I didn’t have a lot of choice of background. I had a lot of variety in fabrics, but not a lot of variety in size. My scraps are relatively small in general, so I put some darks in (per Pamela’s instructions) and really had trouble working with them, as I also mentioned. I have not been working with black and the checkerboard is interesting, but it doesn’t read as a cheerful fabric to me. I have gotten some feedback that it isn’t too dark, so I am considering it stretching and moving on.

    Pamela’s technique of cutting directly into the fabric is a very freeing way to quilt, however, and I think it is good for me. Now that I have two of these garden type quilts, I might try to make two more and have a quartet. We’ll see.


    I enjoyed her handstitching techniques with Perl Cotton as well. One of the things about this is that it doesn’t have to be perfect. The stitching adds to the charm, but I don’t think it looks like the fake folk art kind of look. I could be wrong, of course!

    My 2006 Pamela piece. I am more excited about getting back to it now. I machine stitched some of it down, but plan to go back and work some more with the Perl Cotton on the flowers, especially.

    I highly recommend Pamela’s classes. She is a quilt teacher, but she has been trained in art and knows about design principles. That is the focus of her class with fabric as the medium. She seems to truly want people to do good work. I am glad she directed me, in her gentle but firm way, to scale, because that is what I needed to work on.

    A Day with Pamela

    I made it to the Pamela Allen class at EBHQ.

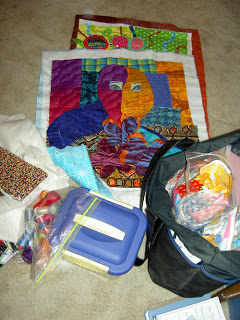
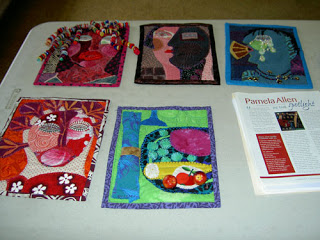
    This is all the stuff I took to class, except my sewing machine is not in the picture. (above). The pieces you see are pieces that I made in a previous class with her at Quilting Adventures.

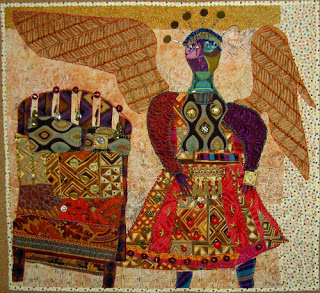
    Pamela’s work (below)


    Tooth Fairy


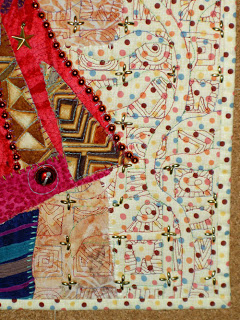
    Tooth Fairy (detail)


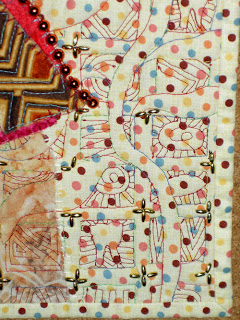
    more Tooth Fairy detail


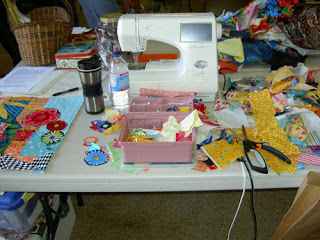
    This is what it looks like when I work in a class. (above) What a mess!


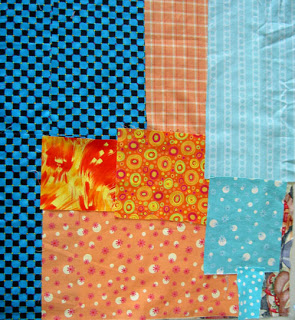
    My background for the House & Garden quilt. I really can’t help starting new projects in her class.


    First draft


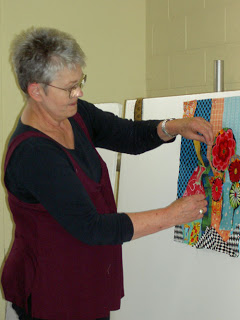
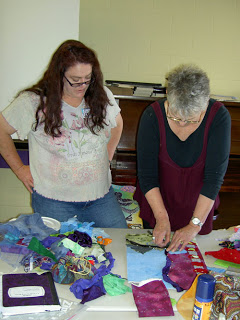
    Pamela working on my piece


    Lots of flowers and flying dots.


    Not so many flowers and flying dots.


    Not so many flowers and no flying dots.


    Final composition. I like it, but I have to admit that I had a very hard time working with the darker colors (the black around the flowers and the blue/black checkerboard. All I could think of was that I wasn’t used to it. I haven’t been using much black lately and, as you know, have been trying to make cheerful quilts. This quilt-let seems a little dark to me.


    Pamela working with Julie


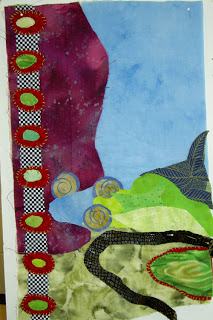
    Julie’s piece. I love the line up the left hand side.


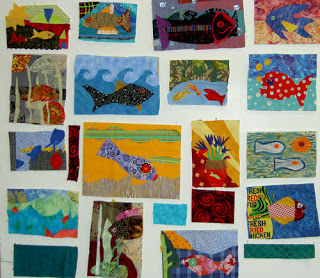
    Group Sampler project. We had 15 minutes to make our part of this piece.


    Julie’s two fish. Can you find the second one?


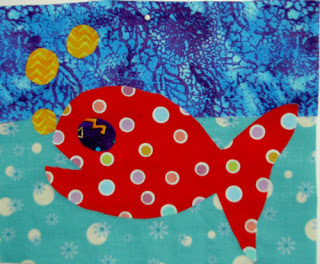
    My fish – with dots, of course!

    I am tired and about to sign off, but I thought I would put up some photos for all of you to drool over while I go recover from a FAB day. More tomorrow.

    Stitching High!!!!

    I spent two fantastic days studying with Libby Lehman in two different classes that basically boiled down to using your sewing machine. One class was called Primadonnas and the other was called Super Machine Stitching.

    Stop what you are doing (after you read this blog entry!) and then RUN don’t walk to the nearest Libby Lehman class. Do whatever it takes. You won’t regret it! She is a fantastic teacher and I would take another class from her in a hot minute.

    Good things about Libby Lehman’s teaching:

    1. Dry sense of humor.
    2. Knows about more machines than just her Bernina and shows what foot to use for the major brands. Doesn’t treat non-Bernina owners like second class citizens.
    3. Willing to take requests.
    4. Willing to repeat herself if you weren’t paying attention and explain something again in a different way, if you didn’t understand.
    5. No problem with letting students take pictures of her quilts and samples (I do ALWAYS ask).
    6. Knows her stuff and can teach it.
    7. She uses pieced backgrounds a la the Pushed Neutral idea that Mary Mashuta teaches.
    8. She uses any fabric; e.g. she is not a hand-dye only person. YAY! I admire those who can hand-dye, but I don’t want to hand-dye. There is lots of great fabric in this world and I want to use ALL of it.
    9. She likes quilts that make her want to look at them some more. She said to keep her intersted.
    10. Down to earth and not holier than thou.

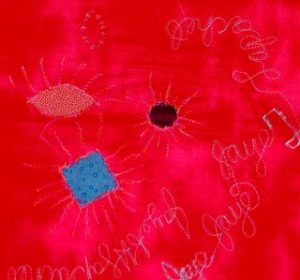
    In Primadonnas, we learned to couch, bobbin-draw, and use sheer fabric. This is one piece that I made:

    Libby Lehman Class sample
    Libby Lehman Class sample


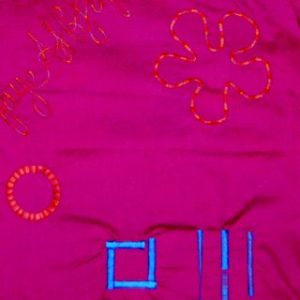
    In Super Machine Stitching, we did things with satin stitching that I would not have believed possible. This is a techniques class not a project class. You have to think about how you would use the techniques. These are the samples that I made:

    Libby Lehman Class sample
    Libby Lehman Class sample

    I am very proud of the writing as well as the freemotion satin stitching. It is fun, even though I don’t know what I would use it for. I am not planning on making any earthquake quilts in the near future. I was thinking that I could finish See, the piece I started in the David Walker class, using this technique, though not quite as messy, perhaps.

    Libby Lehman Class sample
    Libby Lehman Class sample

    I am particularly proud of my “hippy-dippy flower” (as Libby called it) and the circle. If I have the right threads, I may stitch some of these circles on the Thoughts on Dots quilt. We will see. It would certainly add a bit of interest and dimension. Also, a lot of work.

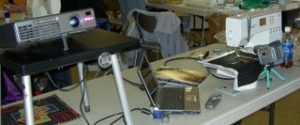
    Libby also has a fantastic teaching set up.

    Libby's teaching setup
    Libby’s teaching setup

    She uses Powerpoint for her presentation as well as video camera projected on the screen to show the details of what she is doing with her sewing machine. It was refreshing not to have to run up to the teacher’s sewing machine every other minute. No more standing around trying to jostle for position behind the tall people who are trying to see what the teacher is demonstrating. No more crowding the teacher. I think it helped provide a relaxing environment for the class and allowed everyone to see the demonstration equally. She has really moved the bar up a notch for quilt teaching. If you are a quilt teacher, step up to the plate.

    In all the goodness there is also badness. This may be the most expensive workshop of my life. I want to buy a new sewing machine. My sewing machine performed flawlessly, was wonderful, did not break any needles or cause any thread blobs in the bobbin area. BUT. It also could not keep up with those newer machines and, especially those Berninas (Libby uses a Bernina). They can do things that my machine can’t do, like right and left justify their tapering satin stitch. I never wanted a Bernina before, but the thoughts actually crossed my mind. I feel like a traitor. I tried to assuage my guilt and make my machine feel better by buying two new feet – an open toe embroidery foot (the better to satin stitch, my dear) and the Beading Foot set. I wanted a couching foot, but, apparently, Janome doesn’t make one. I will try the Beading feet for couching and see what they do. I intend to add a lot more couching on my quilts. 😉

    PameLALA Teaches at Quilting Adventures

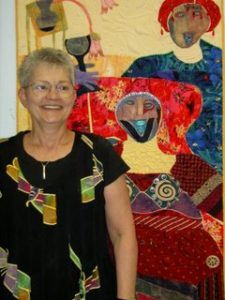
    Pamela Allen
    Pamela Allen

    Pamelala is Pamela Allen, an artist who has come into her own in recent years using fabric and through quilts. Pamela came from a painting and assemblage/mixed media background. Her background includes classes that many quiltmakers never take: college level design classes. She brought this background and shared it with students at Quilting Adventures on Staples Mill Road in Richmond Virginia.

    If you haven’t been to Quilting Adventures, make the trek. Joyce and her team have done a fantastic job selecting fabrics that speak to those of us who don’t do reproductions, small calicos or brown. You won’t see these varieties of fabrics at Quilting Adventures. If repros and brown are what you are looking for, Joyce and her staff will cheerfully direct you to other stores in the area that have the fabrics you need. There are lots of bright fabrics as well as many, many tone-on-tones. I could have bought the entire store. I did my best.;-) In addition to fabrics, Joyce also carries a nice selection of fabric alteration supplies: dyes, paints, fabric crayons. She carries the supplies, but also has samples of what happens to the fabric when you use the various supplies.

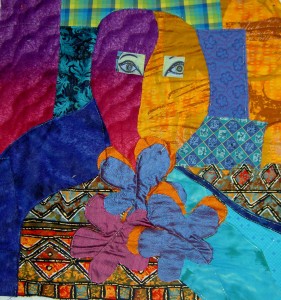
    I took two classes from Pamela. The first, a fabric portrait class, was an exercise in negative space. The portrait I made is NOT a self portrait. We were given the assignment of working with the negative space first and later filling in the details. It was interesting to think about the fabric of the negative space defining the portrait. I have a hard time seeing the negative space, but I got some practice in during this class. I was able to use the Glitter thread from Superior on Joyce’s Babylock machine to appliquilt the pieces down. I have to figure out the hair (if any), the mouth and the nose (OH GOODNESS!!!). Pamela has a gentle manner in directing her students without being a doormat. She also has firm boundaries, which I appreciate and takes care of herself. I probably could have spent a week with her working on this piece. Of course, I didn’t finish, but am well on my way.

    Self Portrait, in process
    Self Portrait, in process

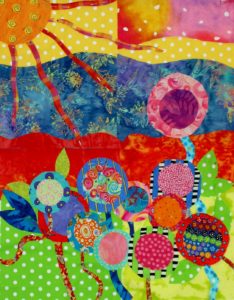
    The second class was a class on composition. My piece is a garden and was limited by the distance I had to travel and the supplies I was able to bring. It also helps to remember to bring your supplies. 😉 Mrs. Kristen, a fellow Mavette, was quite generous in sharing her stash with me, so I was able to make a small piece.

    Jaye's Garden
    Jaye’s Garden

    First we assembled the background and then we laid our design on top of it. I used some of the leftover circles from the bullseye quilts and created a garden. This piece lends itself to hand stitching and I hope to be able to do some and complete this piece. During this time when the machine is better left under plastic, the timing is perfect. I’ll try to get to it. The piece is on its way to completion, but also not completed.

    I would recommend classes with Pamela. She is a teacher who forces her students to think, is diplomatic about student work and gives the class the opportunity to work in a positive critique situation. She is an artist and also a teacher, not an artist who thinks s/he can teach. You can find more of Pamela’s work at her website.

    Another quilt class attempt

    Saturday CQFA had a members only workshop on design with Liz Berg. She was a good teacher. Informative, fun, well prepared. I thought I was insane to try another design class from a quilt teacher after I signed up for this one, but it turned out fine. She wasn’t familar with Pentak & Lauer’s Design Basics book, but I was still impressed with her teaching.

    She went over the basics of design – line, value, etc and then had us do exercises. Some of the exercises were similar to the ones we did in the other class I took, but they made more sense this time, because of the preparation.

    One thing she said was to keep a sketchbook. Her sketchbook has magazine cut outs in in it as well as her own doodles and drawings. I am going to try to at least condense my doodles and drawings, but I may have to just do them in my journal as I can’t imagine carring a sketchbook as well as a journal. Still, I did get the cool sketchbook with colored pencils for Christmas so perhaps I will have to.

    I would recommend her as a teacher. I’ll post some of my exercises later. See Liz Berg’s work at

    Quilt Teachers and Teaching Quiltmaking

    In my last post, I said that one of the things I was thinking about was quilt teachers and/or teaching quiltmaking.

    I think it is important, when teaching a class to do the following:

    1. Know your subject : study the subject before you go to teach. Are there articles or books you can include in a bibliography? Have other people taught this subject? Can you review their work and incorporate salient points?
    2. Be well prepared : people are busy and they are giving up their valuable time and money to take your class. Make you give them the courtesy of having everything (handouts, lecture, slides) organized and ready to go.
    3. State your goals at the beginning of the class : Students will be much happier if they know what points you cover, what you plan to accomplish and how the timing will be in the class (when is lunch, when can they run to the restroom without missing a critical point).
    4. Have handouts (with pictures, if appropriate) : people learn in different ways, so having a handout that describes (even with only bullet points) what you are saying will help students who learn by reading. It will also help jog the memories of those who learn by hearing or by being shown. Students will also be able to take notes on their handouts.
    5. Don’t assume that since you can quilt you can also teach : teaching is a difficult profession and just because you make fabulous quilts doesn’t mean that you can teach others how to make fabulous quilts. Take classes where the teachers are GREAT and watch how they teach. Mary Mashuta and Ruth McDowell are both great teachers. Read up on how people learn. Teach a class or two for free to practice.
    6. Manage students : if someone is hogging all of your time or all of the discussion time, cut them off and call on someone else. Don’t let students interrupt others. Students get frustrated if you let the class get out of control. Also, no teacher’s pets! If you like someone’s work, talk to them after class or contact them after you get home.
    7. Don’t assume that people are there to hear your opinion : just because people are taking your class doesn’t meant they ONLY want to hear your opinion. Spread the wealth and give all sides of the story. This will also allow you highlight why your ideas/methods are better.
    8. Acknowledge that people cannot absorb information for 8 hours: give students breaks (1 in the morning, 1 in the afternoon, lunch), but also give students time to work on their own after you teach them something new. Ideally, teach one or two new things, then let students do a short exercise to cement the information into your students’ brains.
    9. Be professional : dress up if you need to feel professional to like a professional, but don’t become “one of the guys”. You are the teacher not a student, you are in charge, so act like it.
    10. Make sure your handouts are well organized or track your lecture : nothing is more frustrating than a teacher whose lecture I cannot follow, but if the handouts are well organized, it makes it better. Try to synch your handouts and your lecture. Don’t write your handouts the night before. Start months in advance and keep revising and updating. Think of your lecture and the associated notes as a work in progress.
    11. Consider whether you need a helper : this could be someone who passes papers out, gets your slides in the carousel, etc.
    12. Walk around : look at what your students are doing. Look at their supplies. Make comments on everyone’s work. Some people won’t ask questions and you won’t know they are struggling unless you look at their work and their face.

    People rate teachers and tell each other what they thought of teacher. Make sure you are thought well of by using the tips above.