Admin
The design series came up after the CQFA meeting a couple of weeks ago. I went back to look at the posts and found a number of the images broken. They are now all fixed. Go and take a look.
Projects, Patterns & Tutorials
AllPeopleQuilt.com has a list of bag patterns. I am pretty sure some of these are repeats – perhaps new fabrics or names – but it is still useful to have a list of free bag patterns in case you need a quick gift.
FreeSpirit, like many fabric companies, has a page of free projects. Need something to make? Check out the projects from FreeSpirit designers.
I know Easter is still a few months away. I saw these cute little Easter themed zipper pouches on the Edgestitch site. Adorable!
LilyElla, of Undercover Maker Mat fame, has a number of tutorials on her website. There are three that I thought would be of [particular interest. I have not tried these yet, so report back:
- Modifying a two way zipper – this is good if you need a zipper with two pulls that opens from the center
- Sturdy fabric basket – this tutorial is similar to the One Hour Basket and has directions for making them in any size. For those of you organizing for your New Year’s Resolution, this is a great project. Not only will you use up fabric, but you will also be able to use the basket to organize.
- Mini-Maker Station – this would be a great gift for someone who hand sews a lot. I like the little box on the top.
Media
I very seldom join round robins or online swaps. Quality of sewing is something that concerns me. I have also been a member of many, many swaps, bees and round robins and I don’t find that the group project stimulates me the way it once did. That’s me! As a young quiltmaker, I loved them and encourage you to find your people. I found an article on quilting bees that provides a list of things to think about when considering joining.
Friend Julie has started to post on her blog again. She is posting A LOT! She has a different style than me, but is also very grounded and real. Go take a look and leave a comment. I think you will enjoy her work and recent product reviews.
All of the Why Quilts Matter episodes are available on the KET site. Frances of QuiltFiction and the Off Kilter Quilt has some interesting thoughts about the series.
If you need a creative break from your sewing machine or are recovering from an illness, OpenCulture has a collection of coloring books available developed by their partner institutions. There are a wide variety of institutions and many of them have collections you would not normally see as part of a coloring book. They may be just thing if life has too much pink in it.
Tools, Supplies, Notions and Fabric
Friend Julie has posted a review of the SteamFast iron.
Oliver+S posted a link to a new type of sewing machine. It is definitely cool looking. It was, however, clearly designed by someone who doesn’t make quilts. I may have to get one, however, so I can keep sewing when the power goes out. No free motion, however.
I seem to always be in need of zippers. Atkinson Designs has some.
Friend Julie has posted a review of Magic Pins.
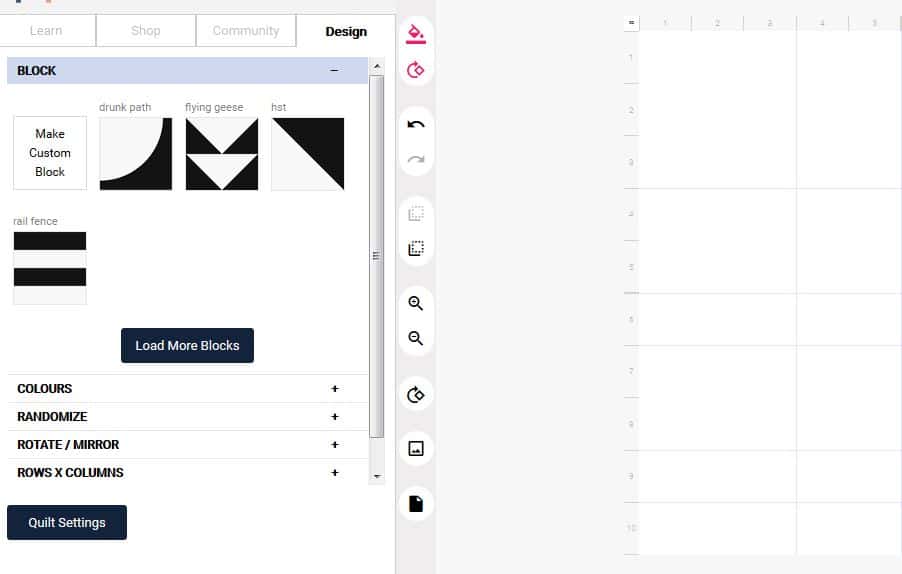
PreQuilt is a new quilt design tool. It is described as “a free design tool for quilters. Include PreQuilt into your design process and you can cut your fabric with confidence that the design you have is the one.” I looked at a it quickly and found that you can create blocks on the design screen. It doesn’t seem to have a library of blocks unless you signup. I didn’t do much more than take a quick look.
The Moda Cutting Table blog has a post on block dictionaries. The author calls them ‘block books’. She uses some of the same and some different ones that I do.
If you haven’t see Summersville, a fabric line by Lucie Summers, you need to take a look. She has some iPhone and Samsung Galaxy cases that are fantastic looking.
There are a lot of places to get zippers. Atkinson Designs is another. Lots of colors.
History
This isn’t a regular category of my Various & Sundry posts, but a few sites came up this time, so I am adding it.
I have been on a mission to find a collection of quilt patterns from Workbasket magazine. Periodically I look at Google and see if anyone has published any or if there are any images of the patterns. Recently, an organization came up called The Antique Pattern Library. It is described as “Antique Pattern Library is a project of New Media Arts Inc, a nonprofit organization, tax exempt under IRC Sec. 501(c)(3), EIN 27-2500171.” I took some time to look through some of the results of a search and found at least one interesting pattern. I see many more hours of interesting research to come.
Someone posted the history of the term ‘polka dots’. Right up my alley!
Frances posted a link to a blog post about baby and doll quilts. This post can be found on the Quilt History Reports blog and was written by Karen B. Alexander. The blog has not been updated since May of 2018, but has many interesting posts to peruse until updating resumes.
Research & Information
If you want to know about yarn dyes, Weeks Ringle has posted an article on Craft Nectar. It is weighted towards the Modern Quilt Studio line of yarn dyed fabrics, but also provides some basic information.
I have been hanging around Julie’s blog quite a bit. She found and wrote about a color picker that is different than the one I used in the ColorPlay posts. Friend Julie wrote quite a bit about it and talked about using it to pick fabrics for the Good Fortune quilt. Check out her blog.
I know we don’t use markers much for our quiltmaking, but I suspect we are all concerned about trash on the streets. Crayola sponsors a marker recycling program and it is open to everyone.