I have been tired all week, but FOTY 2017 is progressing. I am sewing so I can arrange further. As per usual, the design wall is too small, though I think DH is happy otherwise I might make a quilt as large as the house. 😉
The piece shrinks a lot due to some trimming and also the seam allowances.
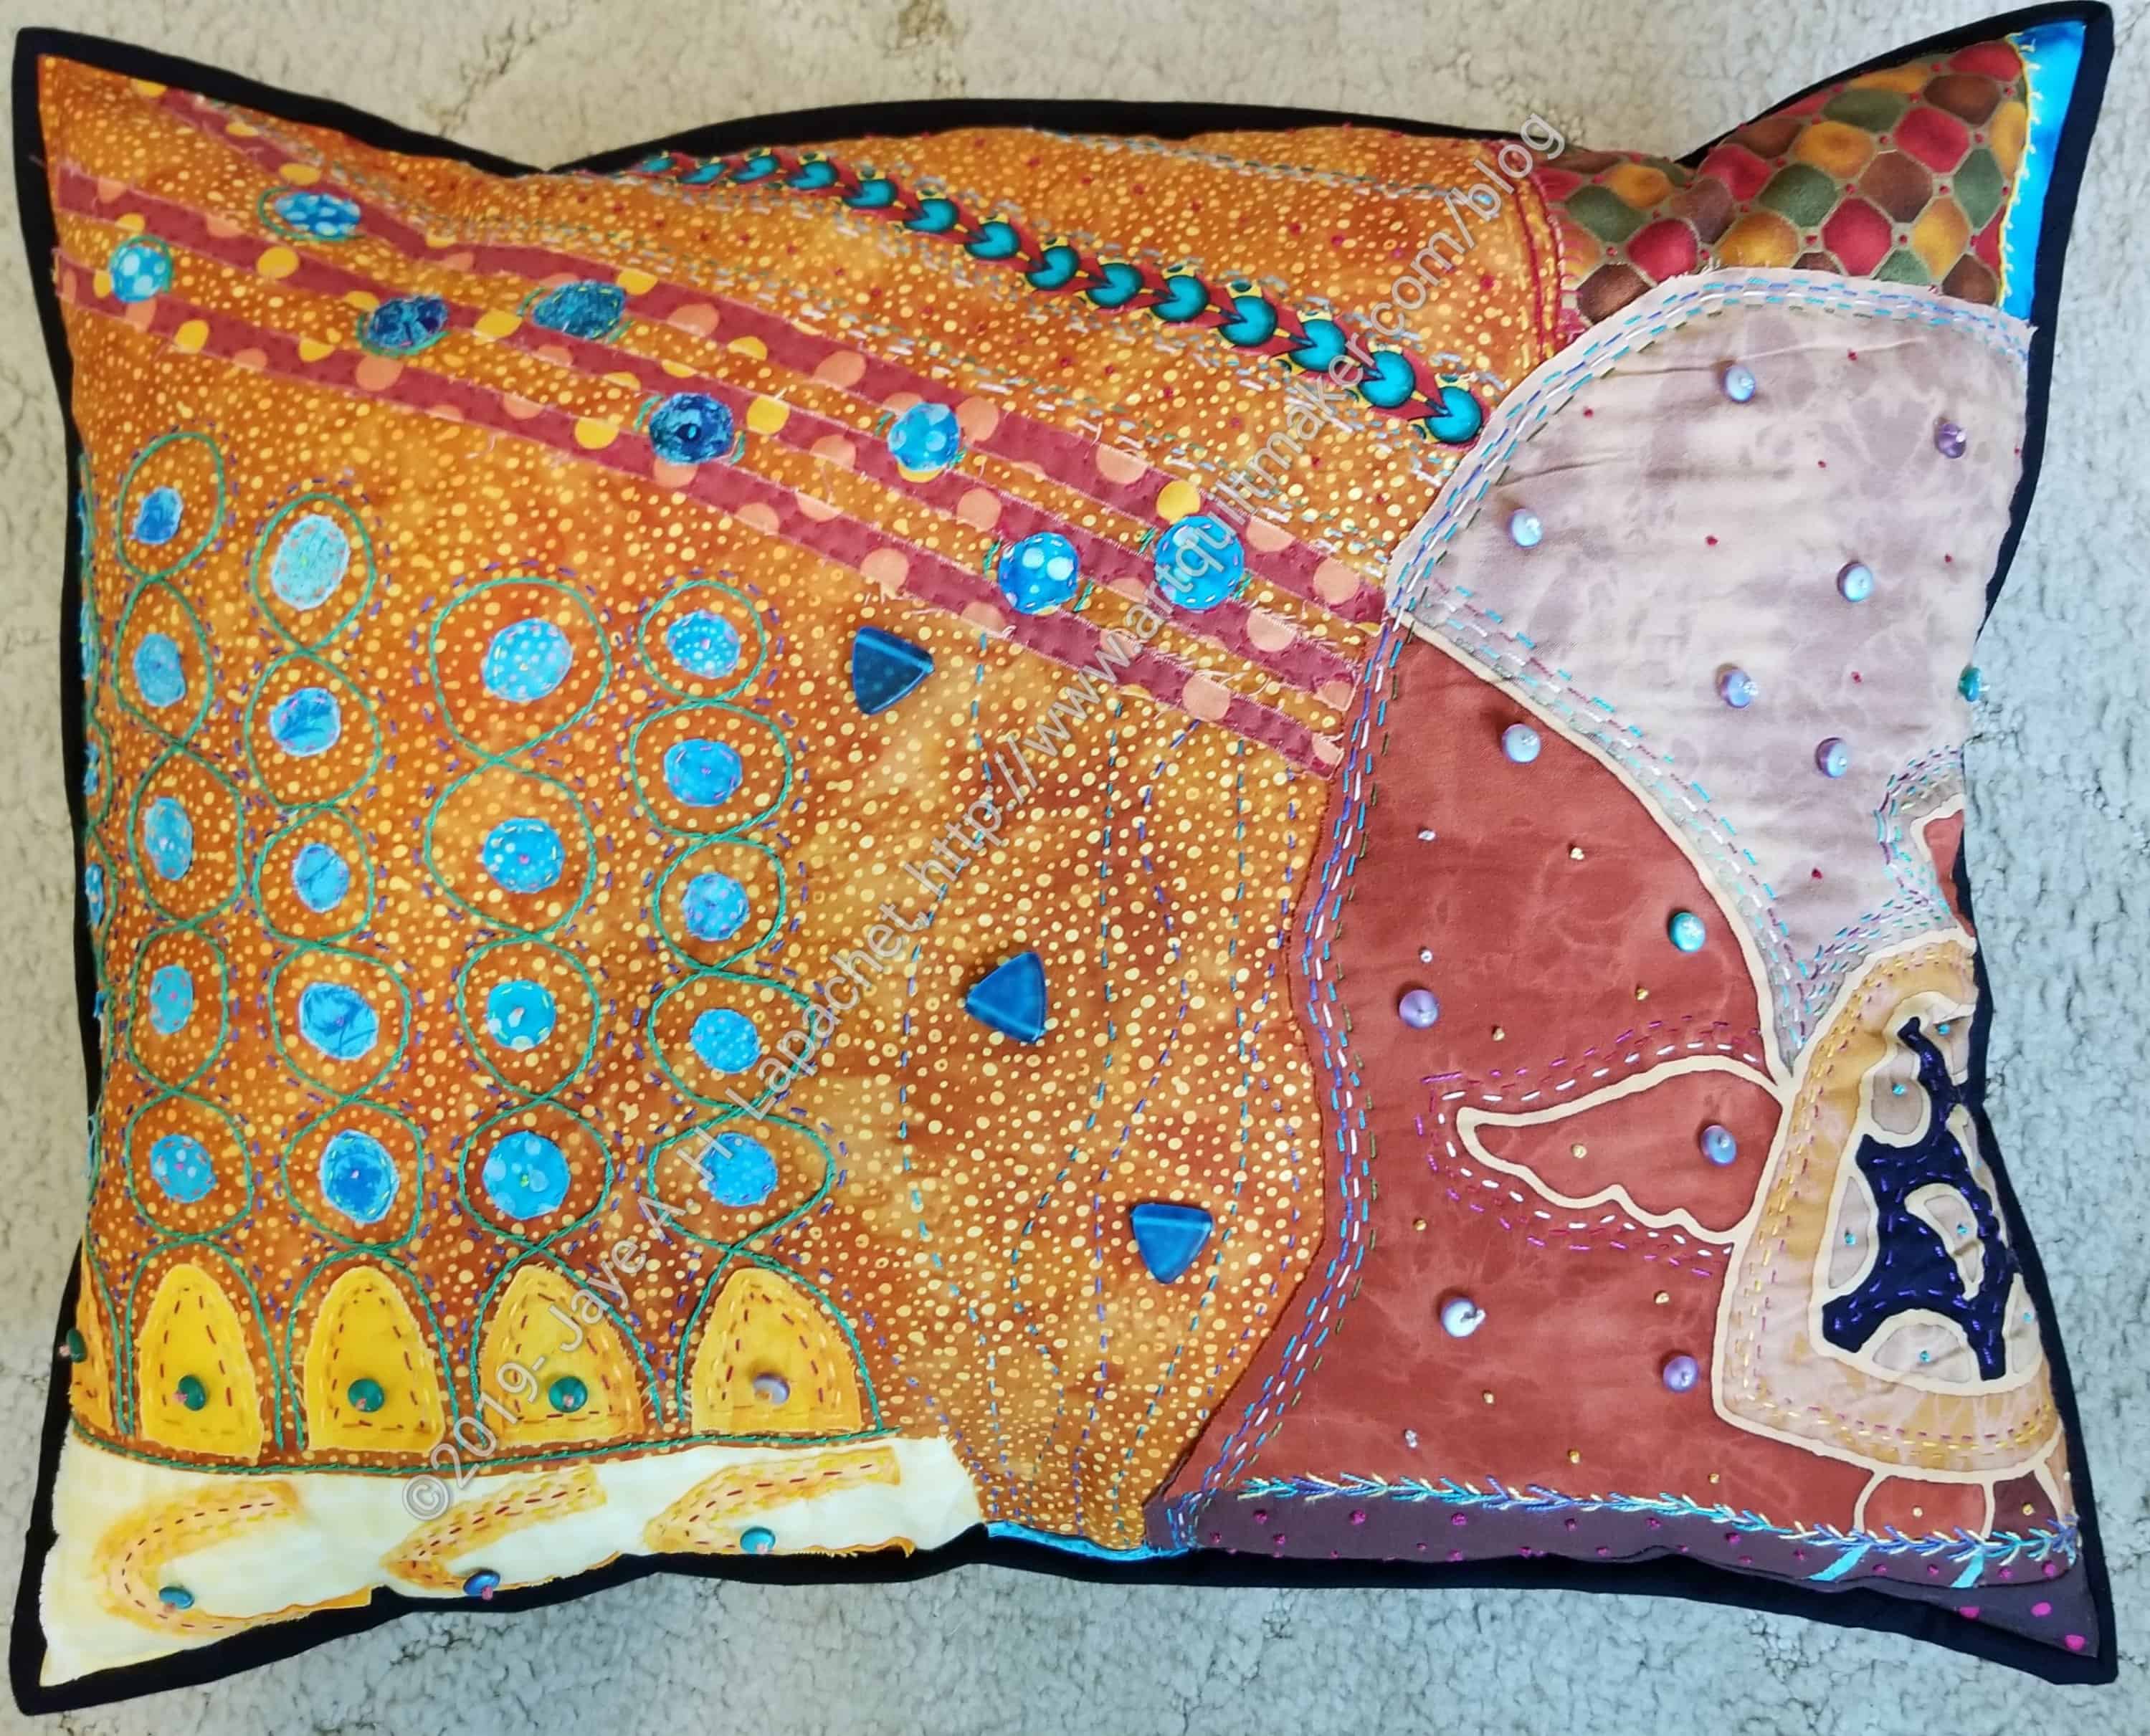
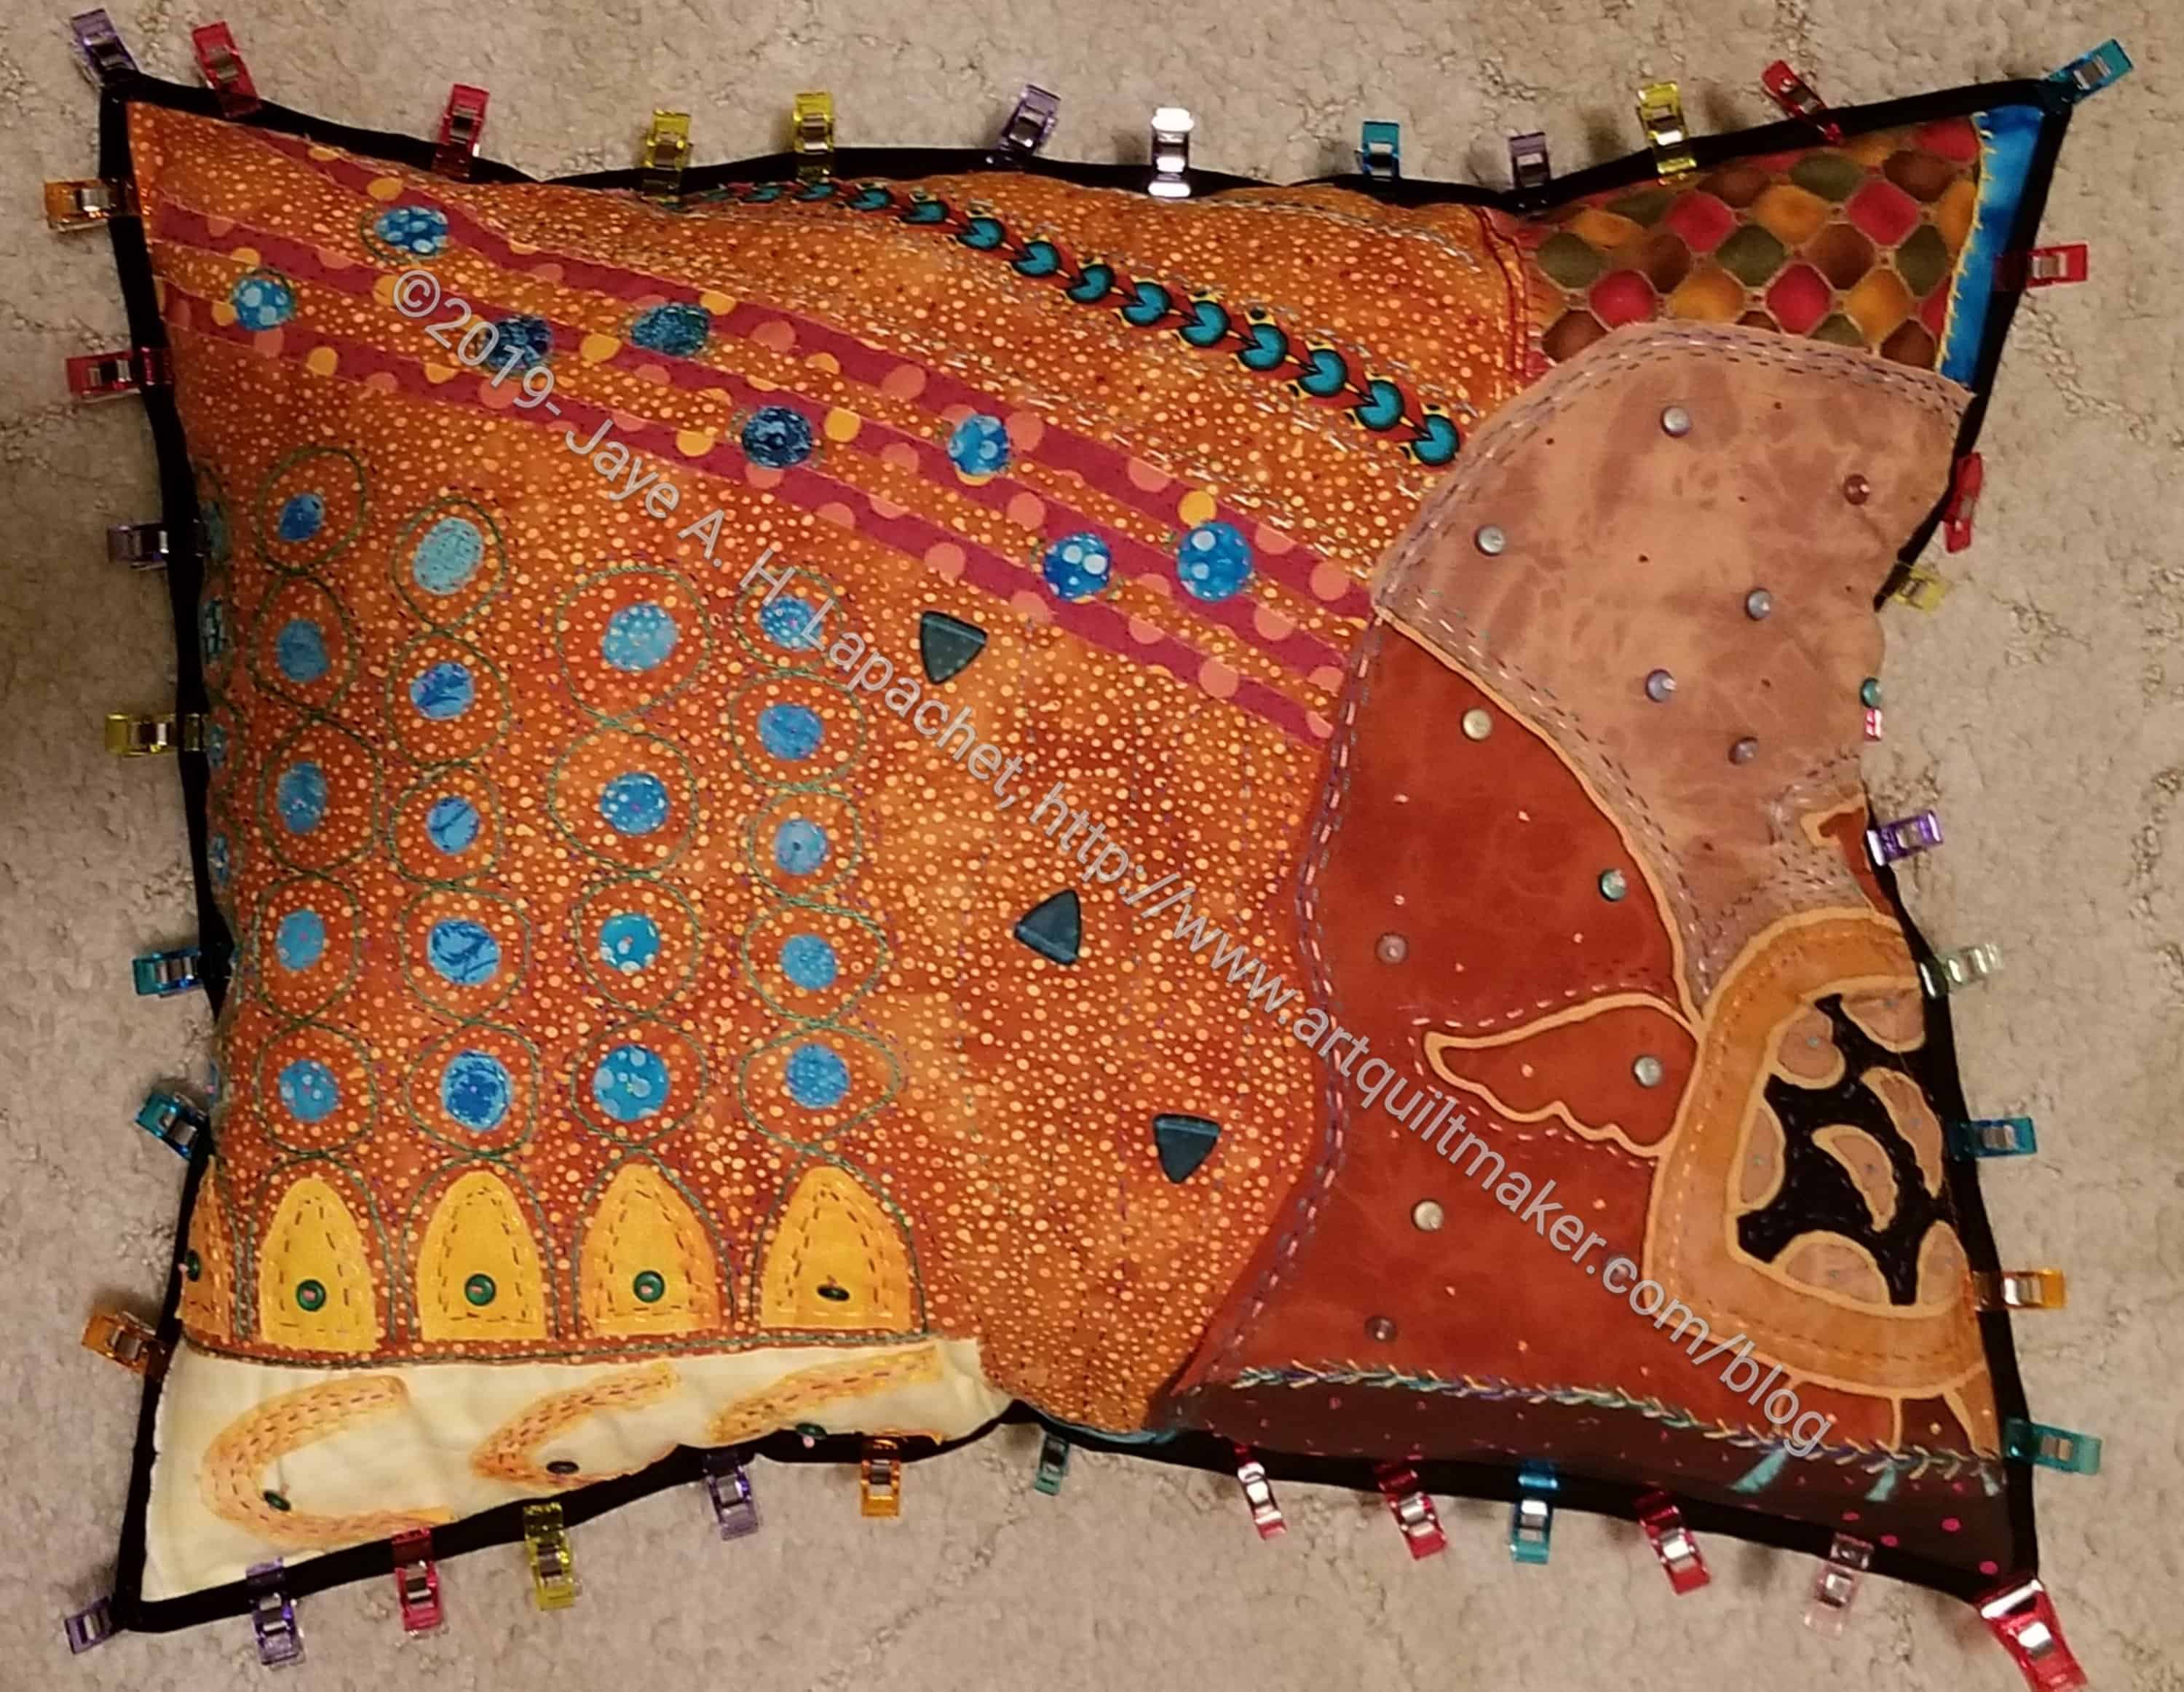
Yep. It’s true. I have finished the Under the Sea piece after many years of working on it. I can hardly believe it.
I am so thrilled that I have one hand project that is finally done. Granted, I could have just said “this is done” and moved on, but projects speak to me and this one was very chatty. I finally feel like it is really and truly done – enough embroidery, enough embellishment, enough stitching.
The London Portfolio fabric seems to fit the front pretty well and I am pleased with the black binding.
This was not an easy project to finish and included a lot of ripping out, but like Beach Town and the Flower Garden, I am pleased with the style of working and the results. Pamela Allen is a design genius and if you want to learn to design quilts, she is a great teacher.
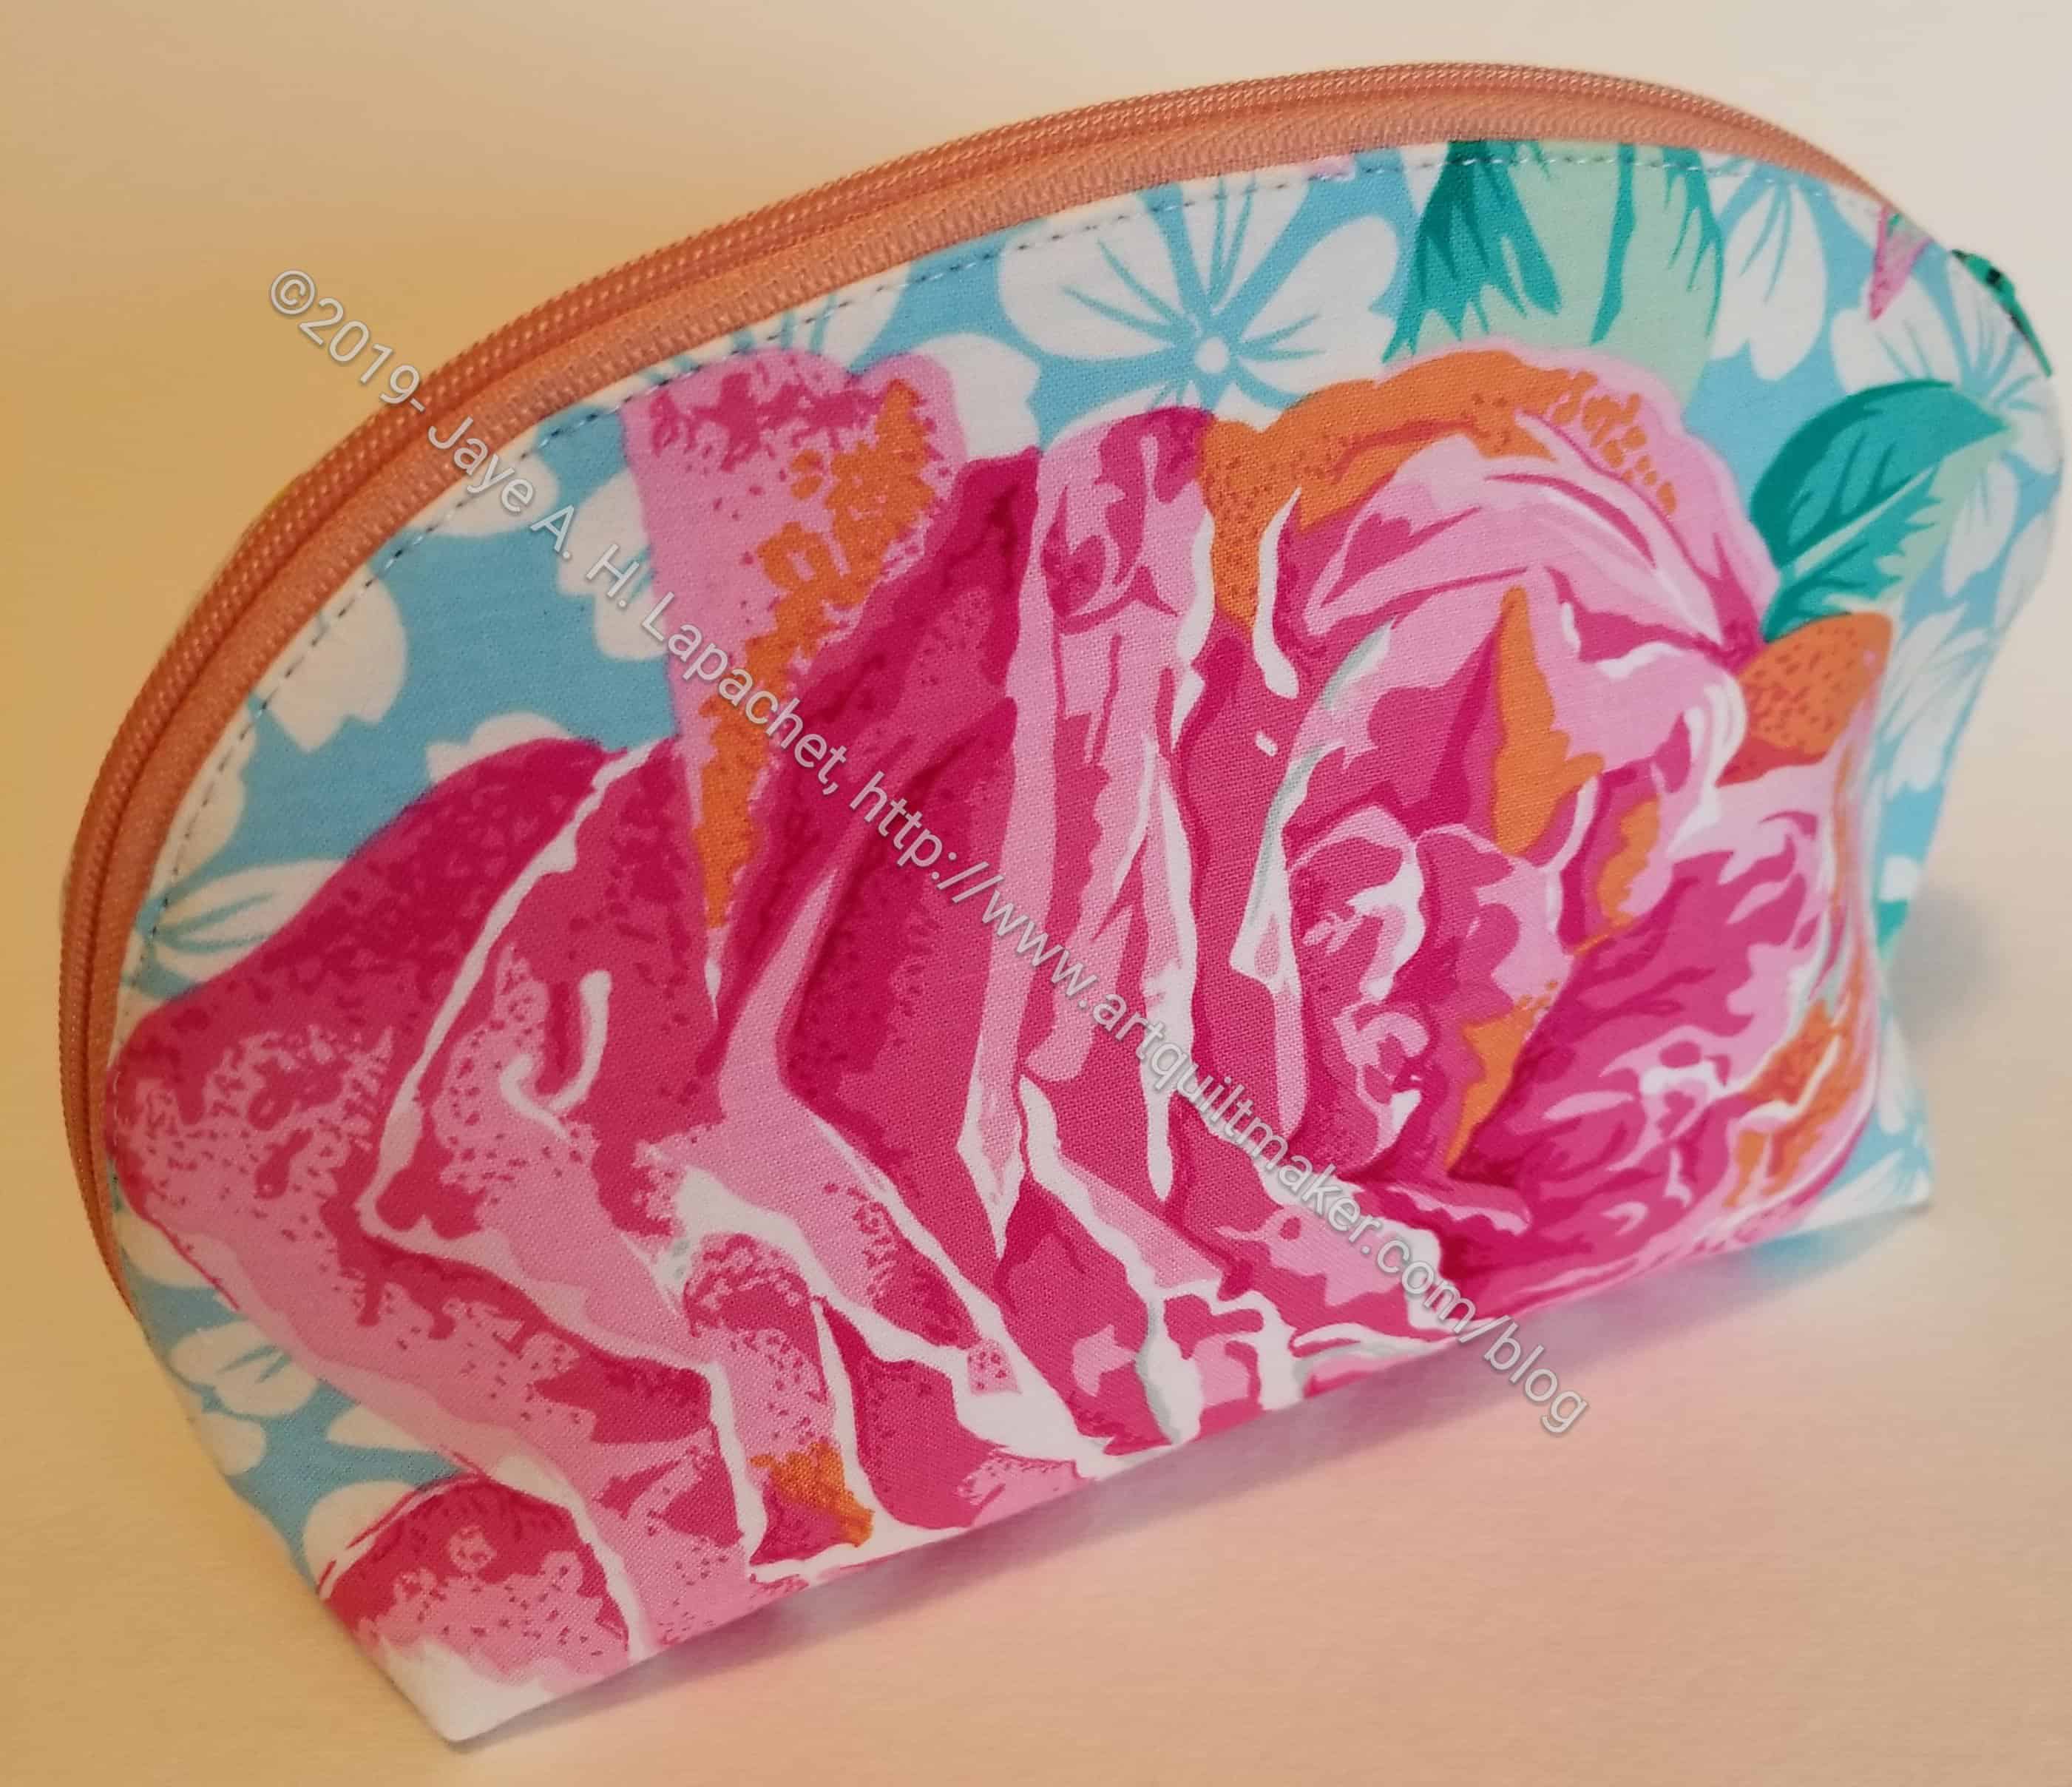
I was pleased and very surprised to receive this belated Christmas gift from Angela. It meant a lot to get it on a random date in March instead of with the onslaught of other Christmas gifts. I am not sure what I did to merit such kindness, but I love this pouch and am very appreciative.
She made the Trixie Zipper Pouch from one of the Crafty Gemini most recent bag club. I am not a member and making it never crossed my mind. Still, I am so pleased to have received it
You will notice how well she knows me when you see the fabric. That is a Philip Jacobs print and I love the way she fussy cut it so the flower is the star of the pouch.
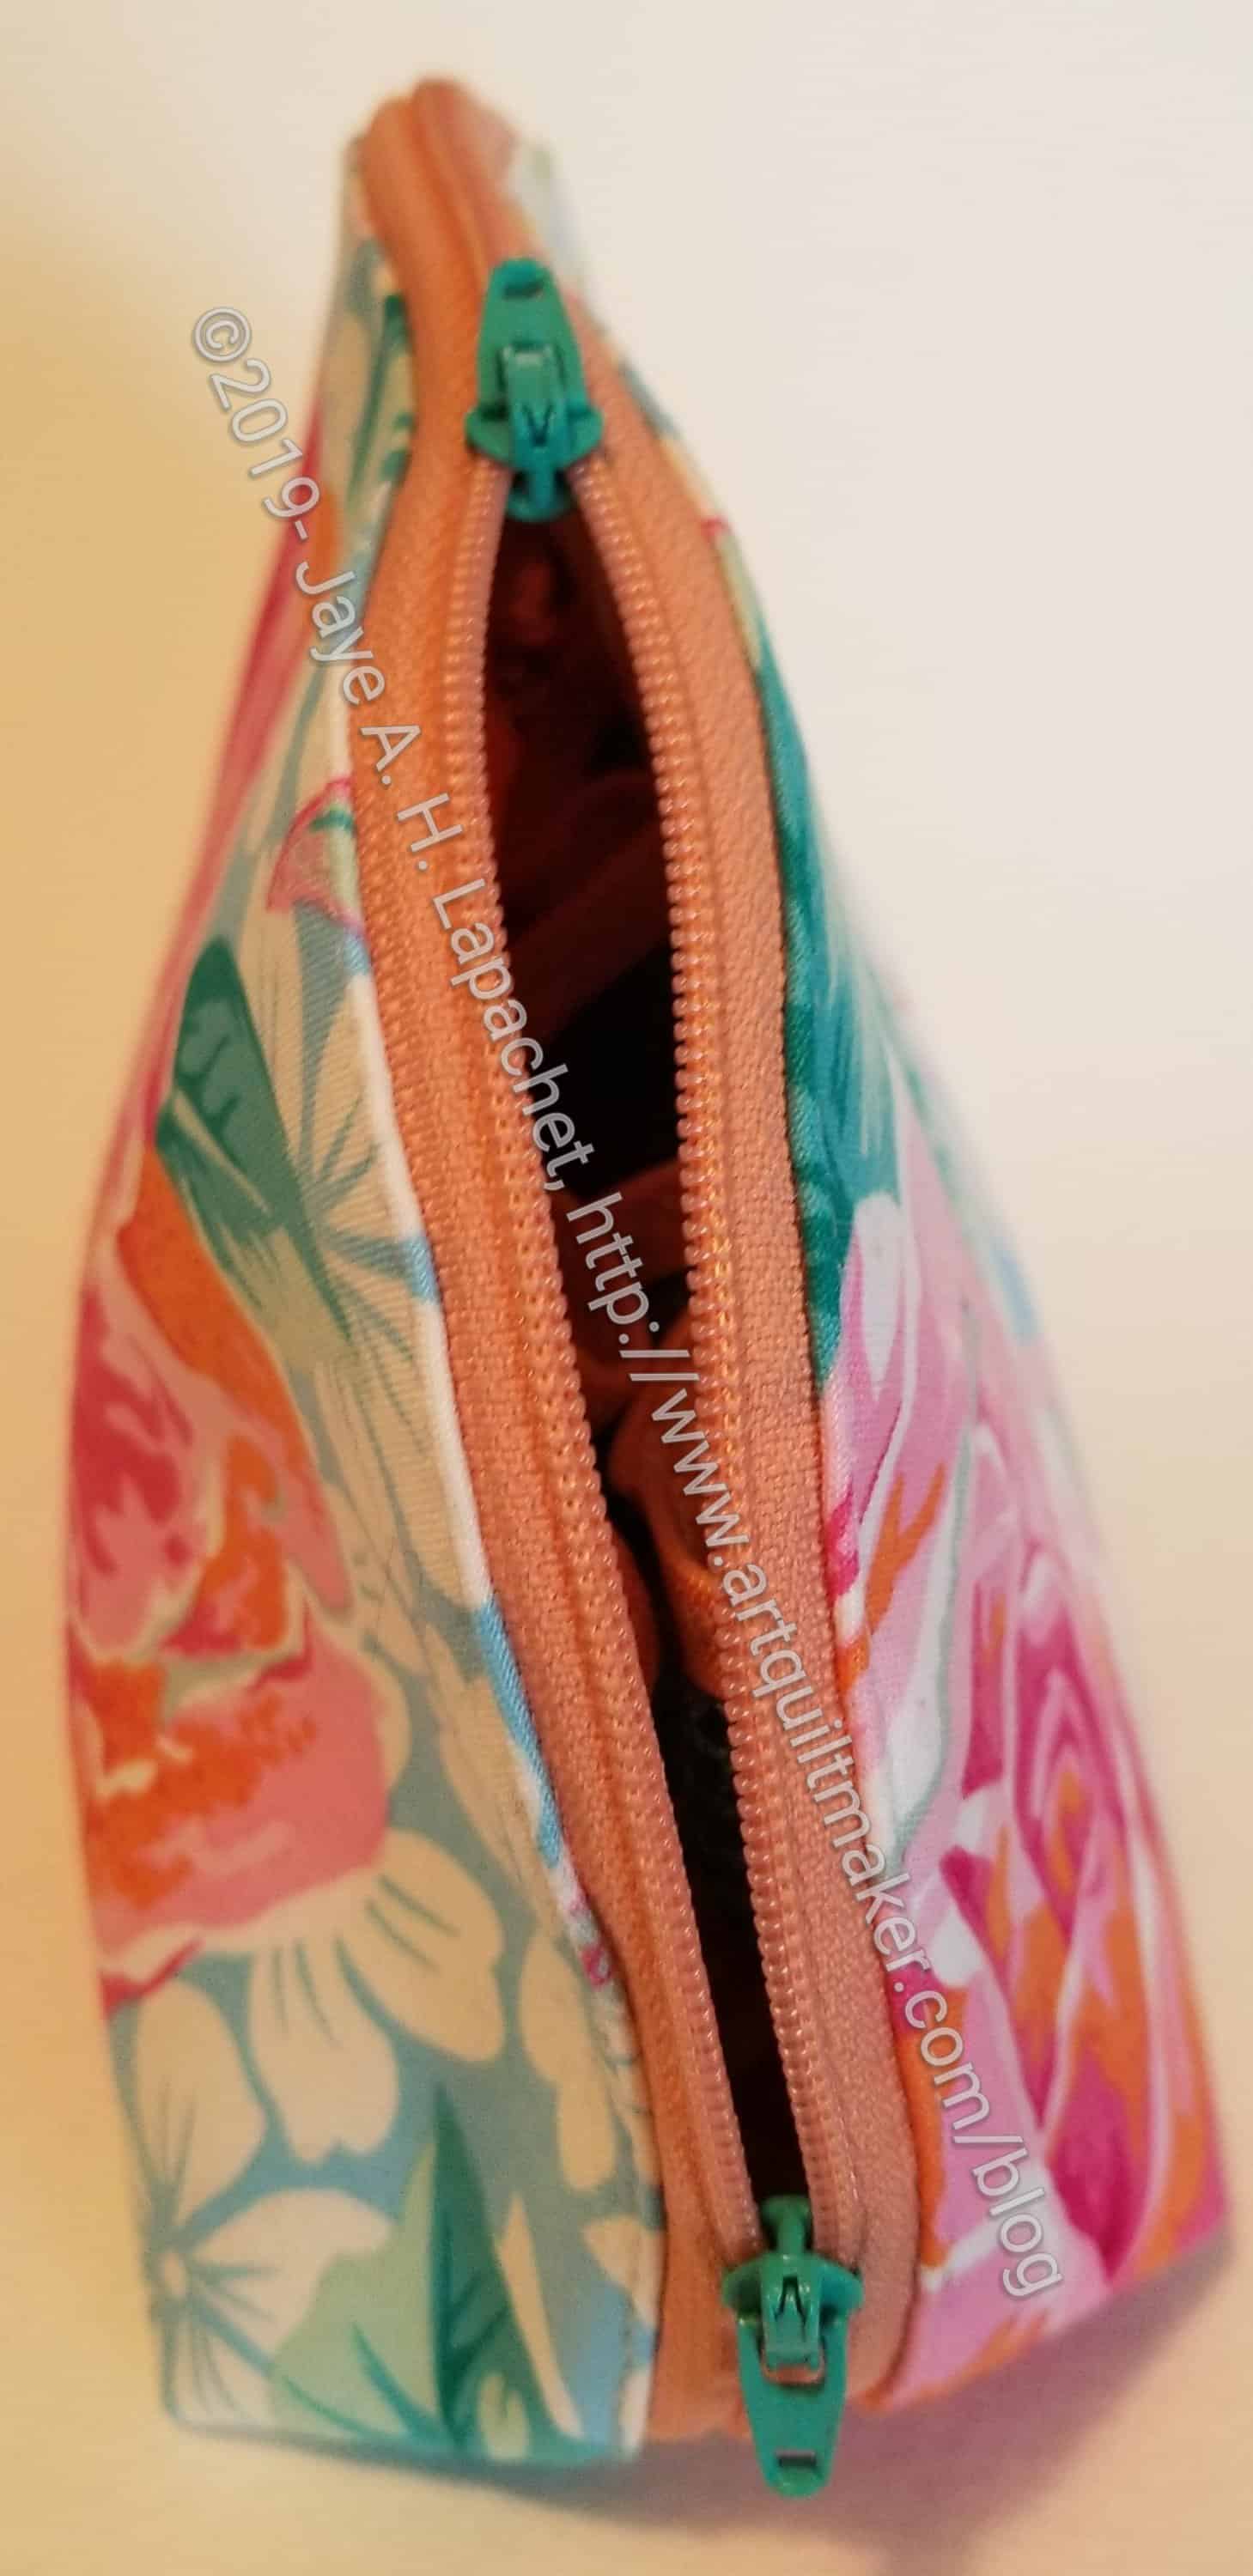
Trixie Pouch open
Angela also said she adjusted the size of the netting on the inside so that spools of Aurifil thread would fit. This is so great, because I can fill it with Aurifil I may use on a project (e.g. the Tarts Come to Tea uses a lot of different threads) without hauling my giant thread box with me.
And, yes, the fabulous Angela put a spool of thread in there for me as well.
Also, look at those stripes!!! Aren’t they awesome? Great use of fabric and the light fabric makes it easy for me to see inside the pouch.
Zipper Pouch from Angela- zipper pull detail
Angela also changed the zipper pulls. I know there are tutorials out there to do that, but I have never tried it and am really impressed with the attention to detail. I found video tutorial by Crafty Gemini that includes changing a zipper pull, but also has other tips for zippers such as resizing them.
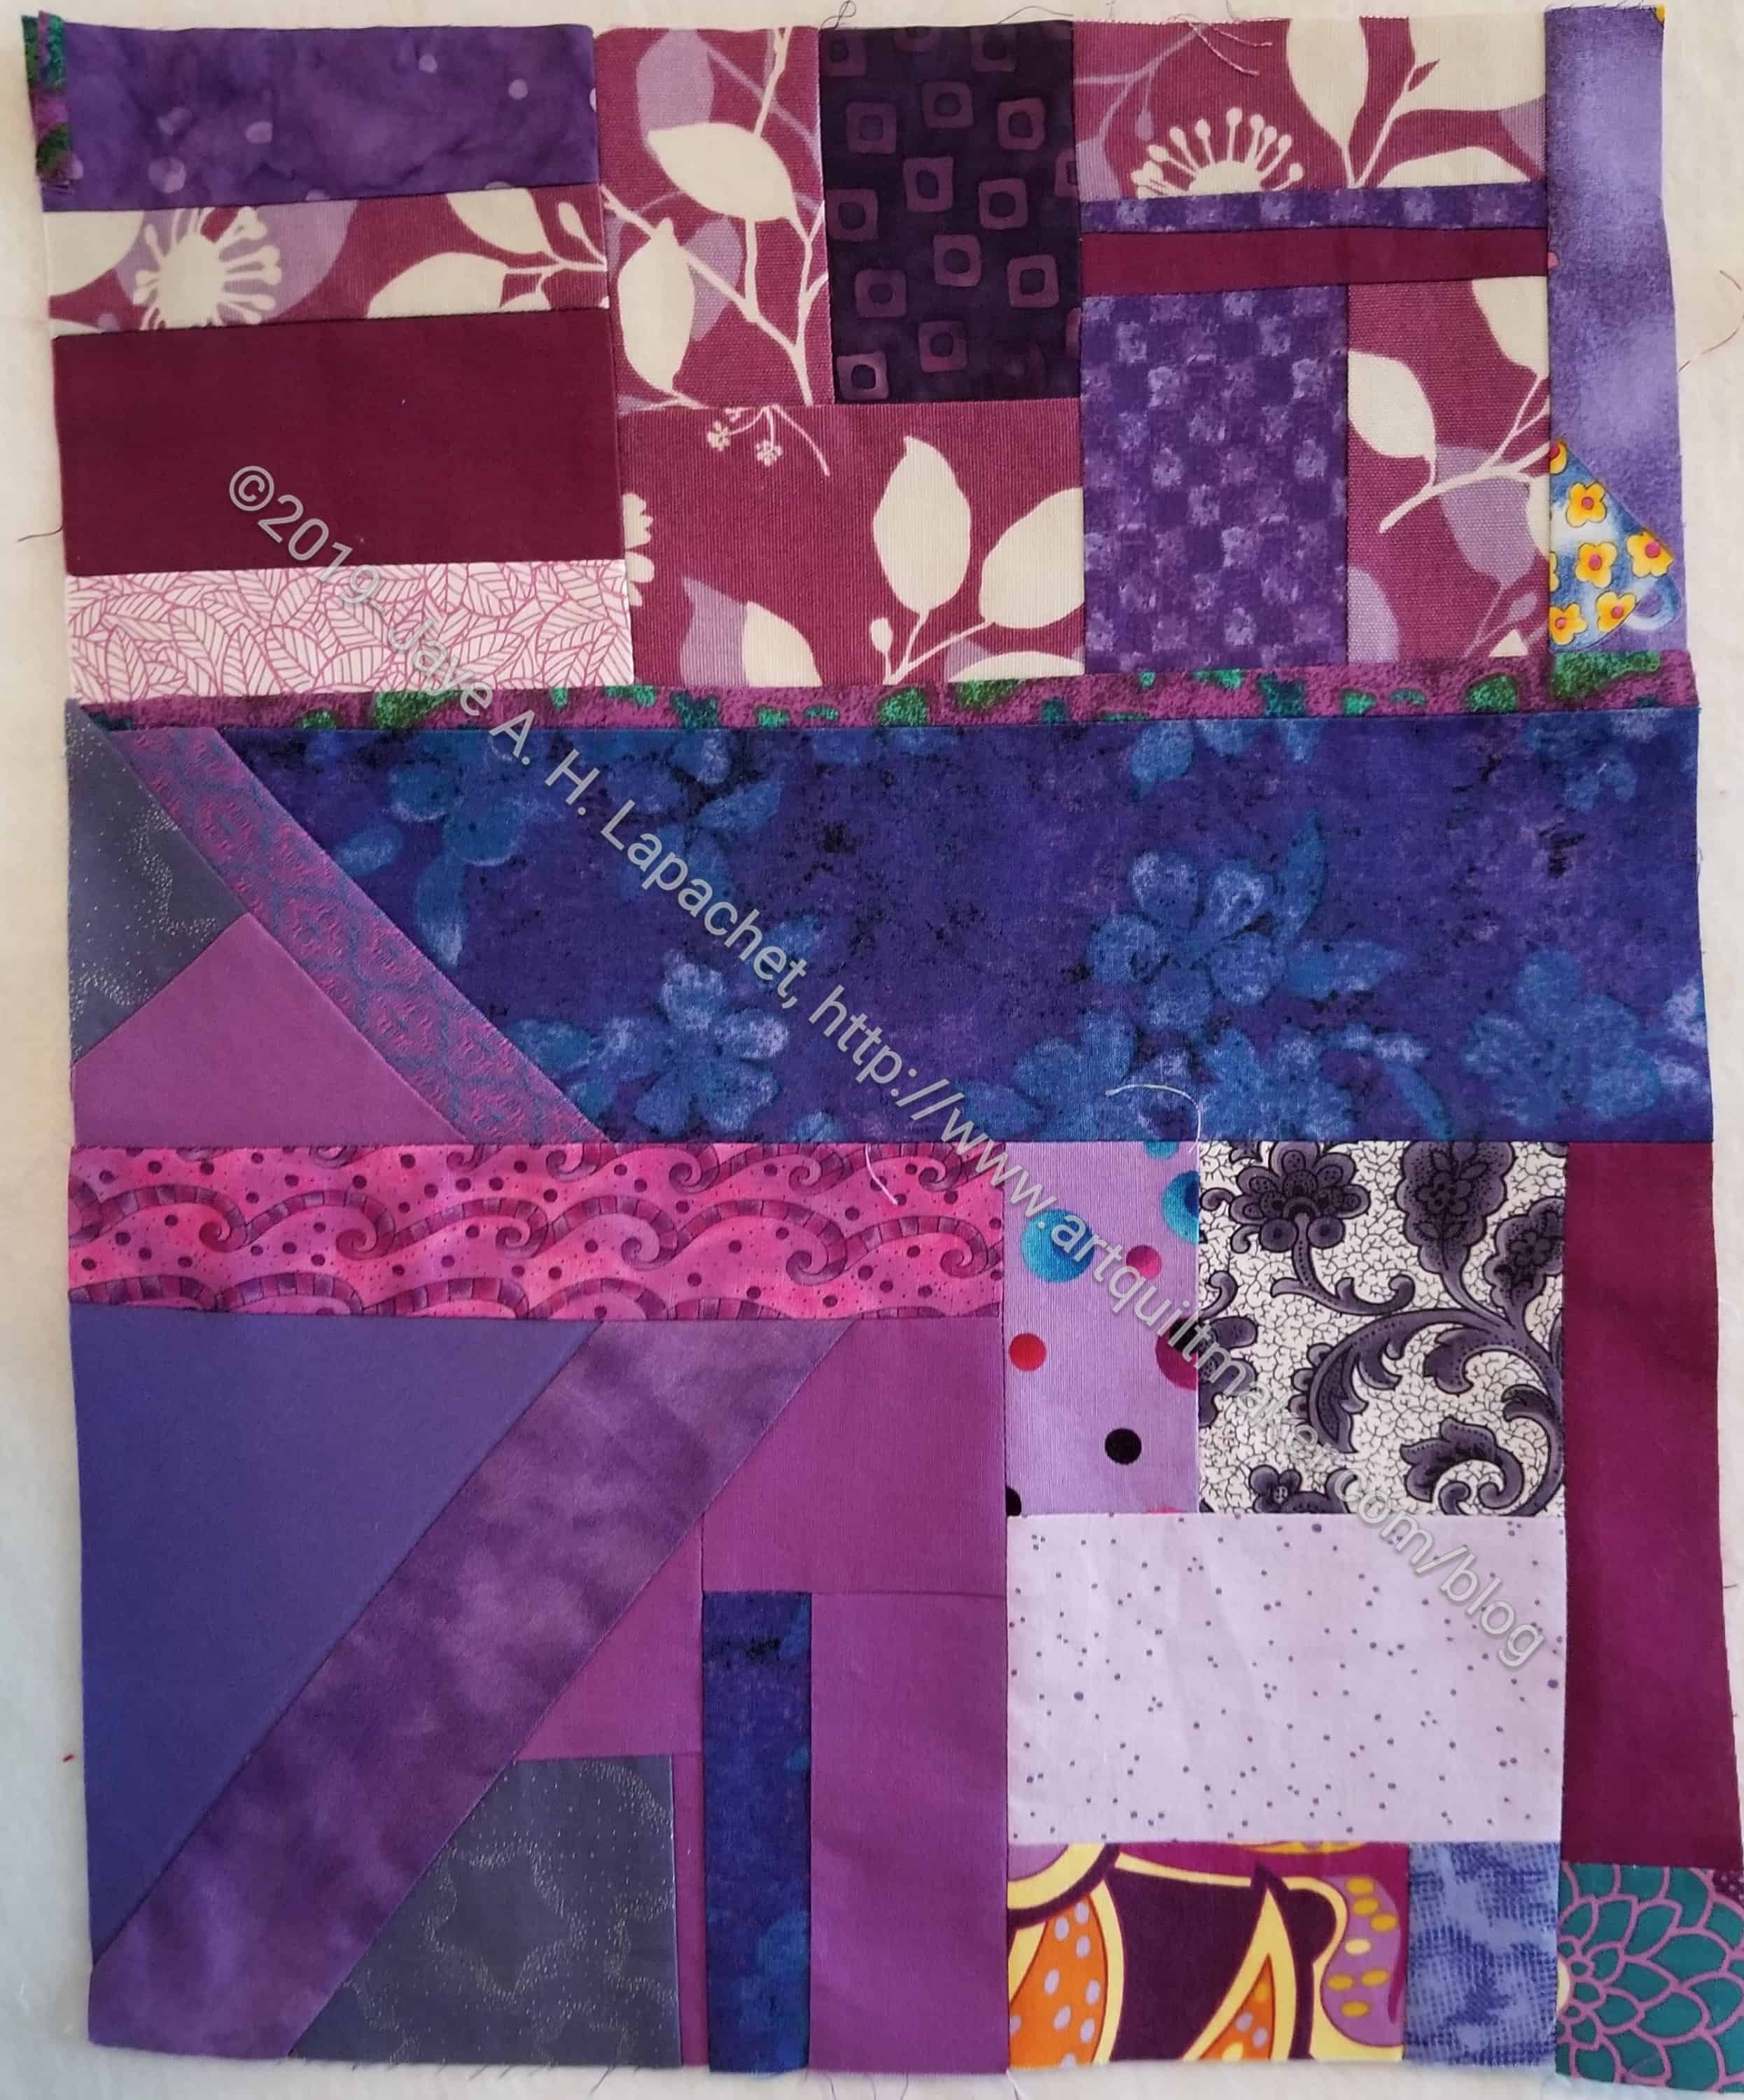
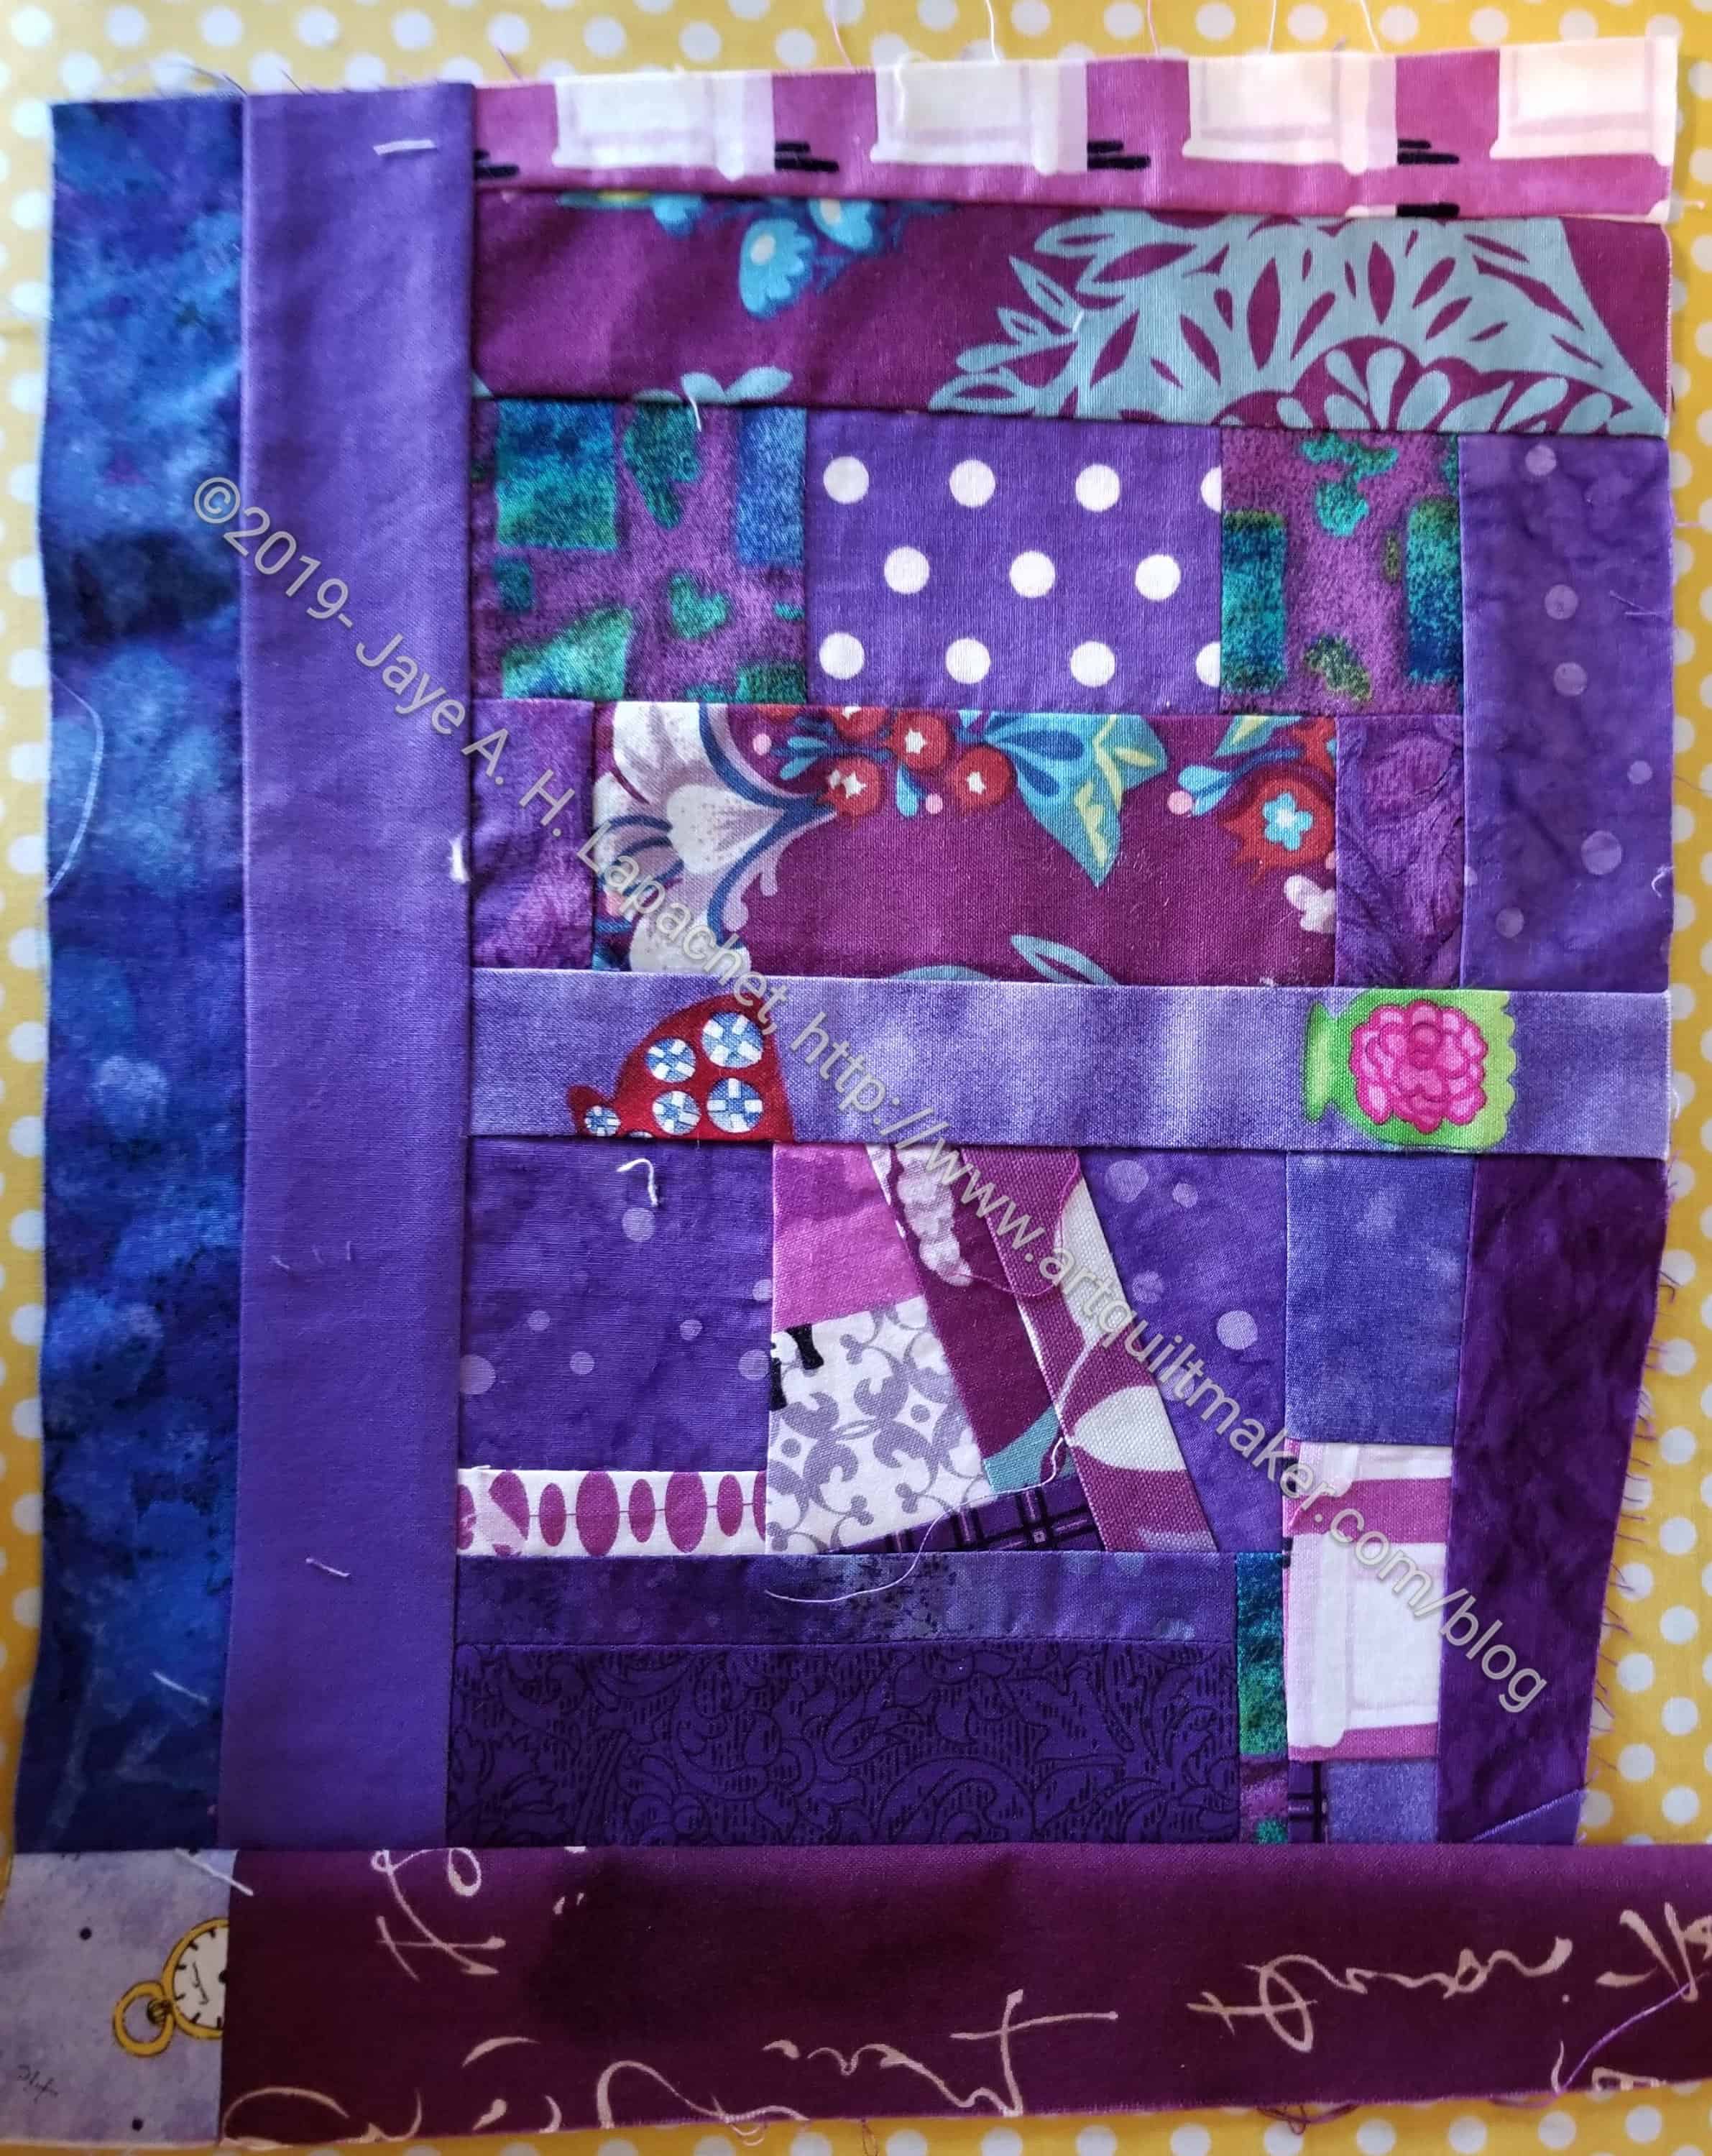
This is what I am making in order to clear out some more purple scraps after finishing the Purple Strips donation top. I started with some shards that I had made for some forgotten project. I have added to the original pieces quite a bit.
Because of what I started with, this is less like the Green Thing in that it is less of a medallion style. It may end up a little like that, but we will see. I don’t yet know where it is going except that I need to add some larger chunks or strips to the piece to provide some breathing space.
I wanted to finish Under the Sea by now, but I had to backtrack and do some repairs, so finishing will take longer.
I made the piece into a pillow. To do that I used up the polyfil I had leftover from the dolls I made for my little niece. I didn’t have enough, so I cleared out my batting scraps and used bits of batting for the rest of the stuffing. I would have preferred all polyfil, but as a lot of this project was from reclaimed materials, I thought the batting scraps were fitting.
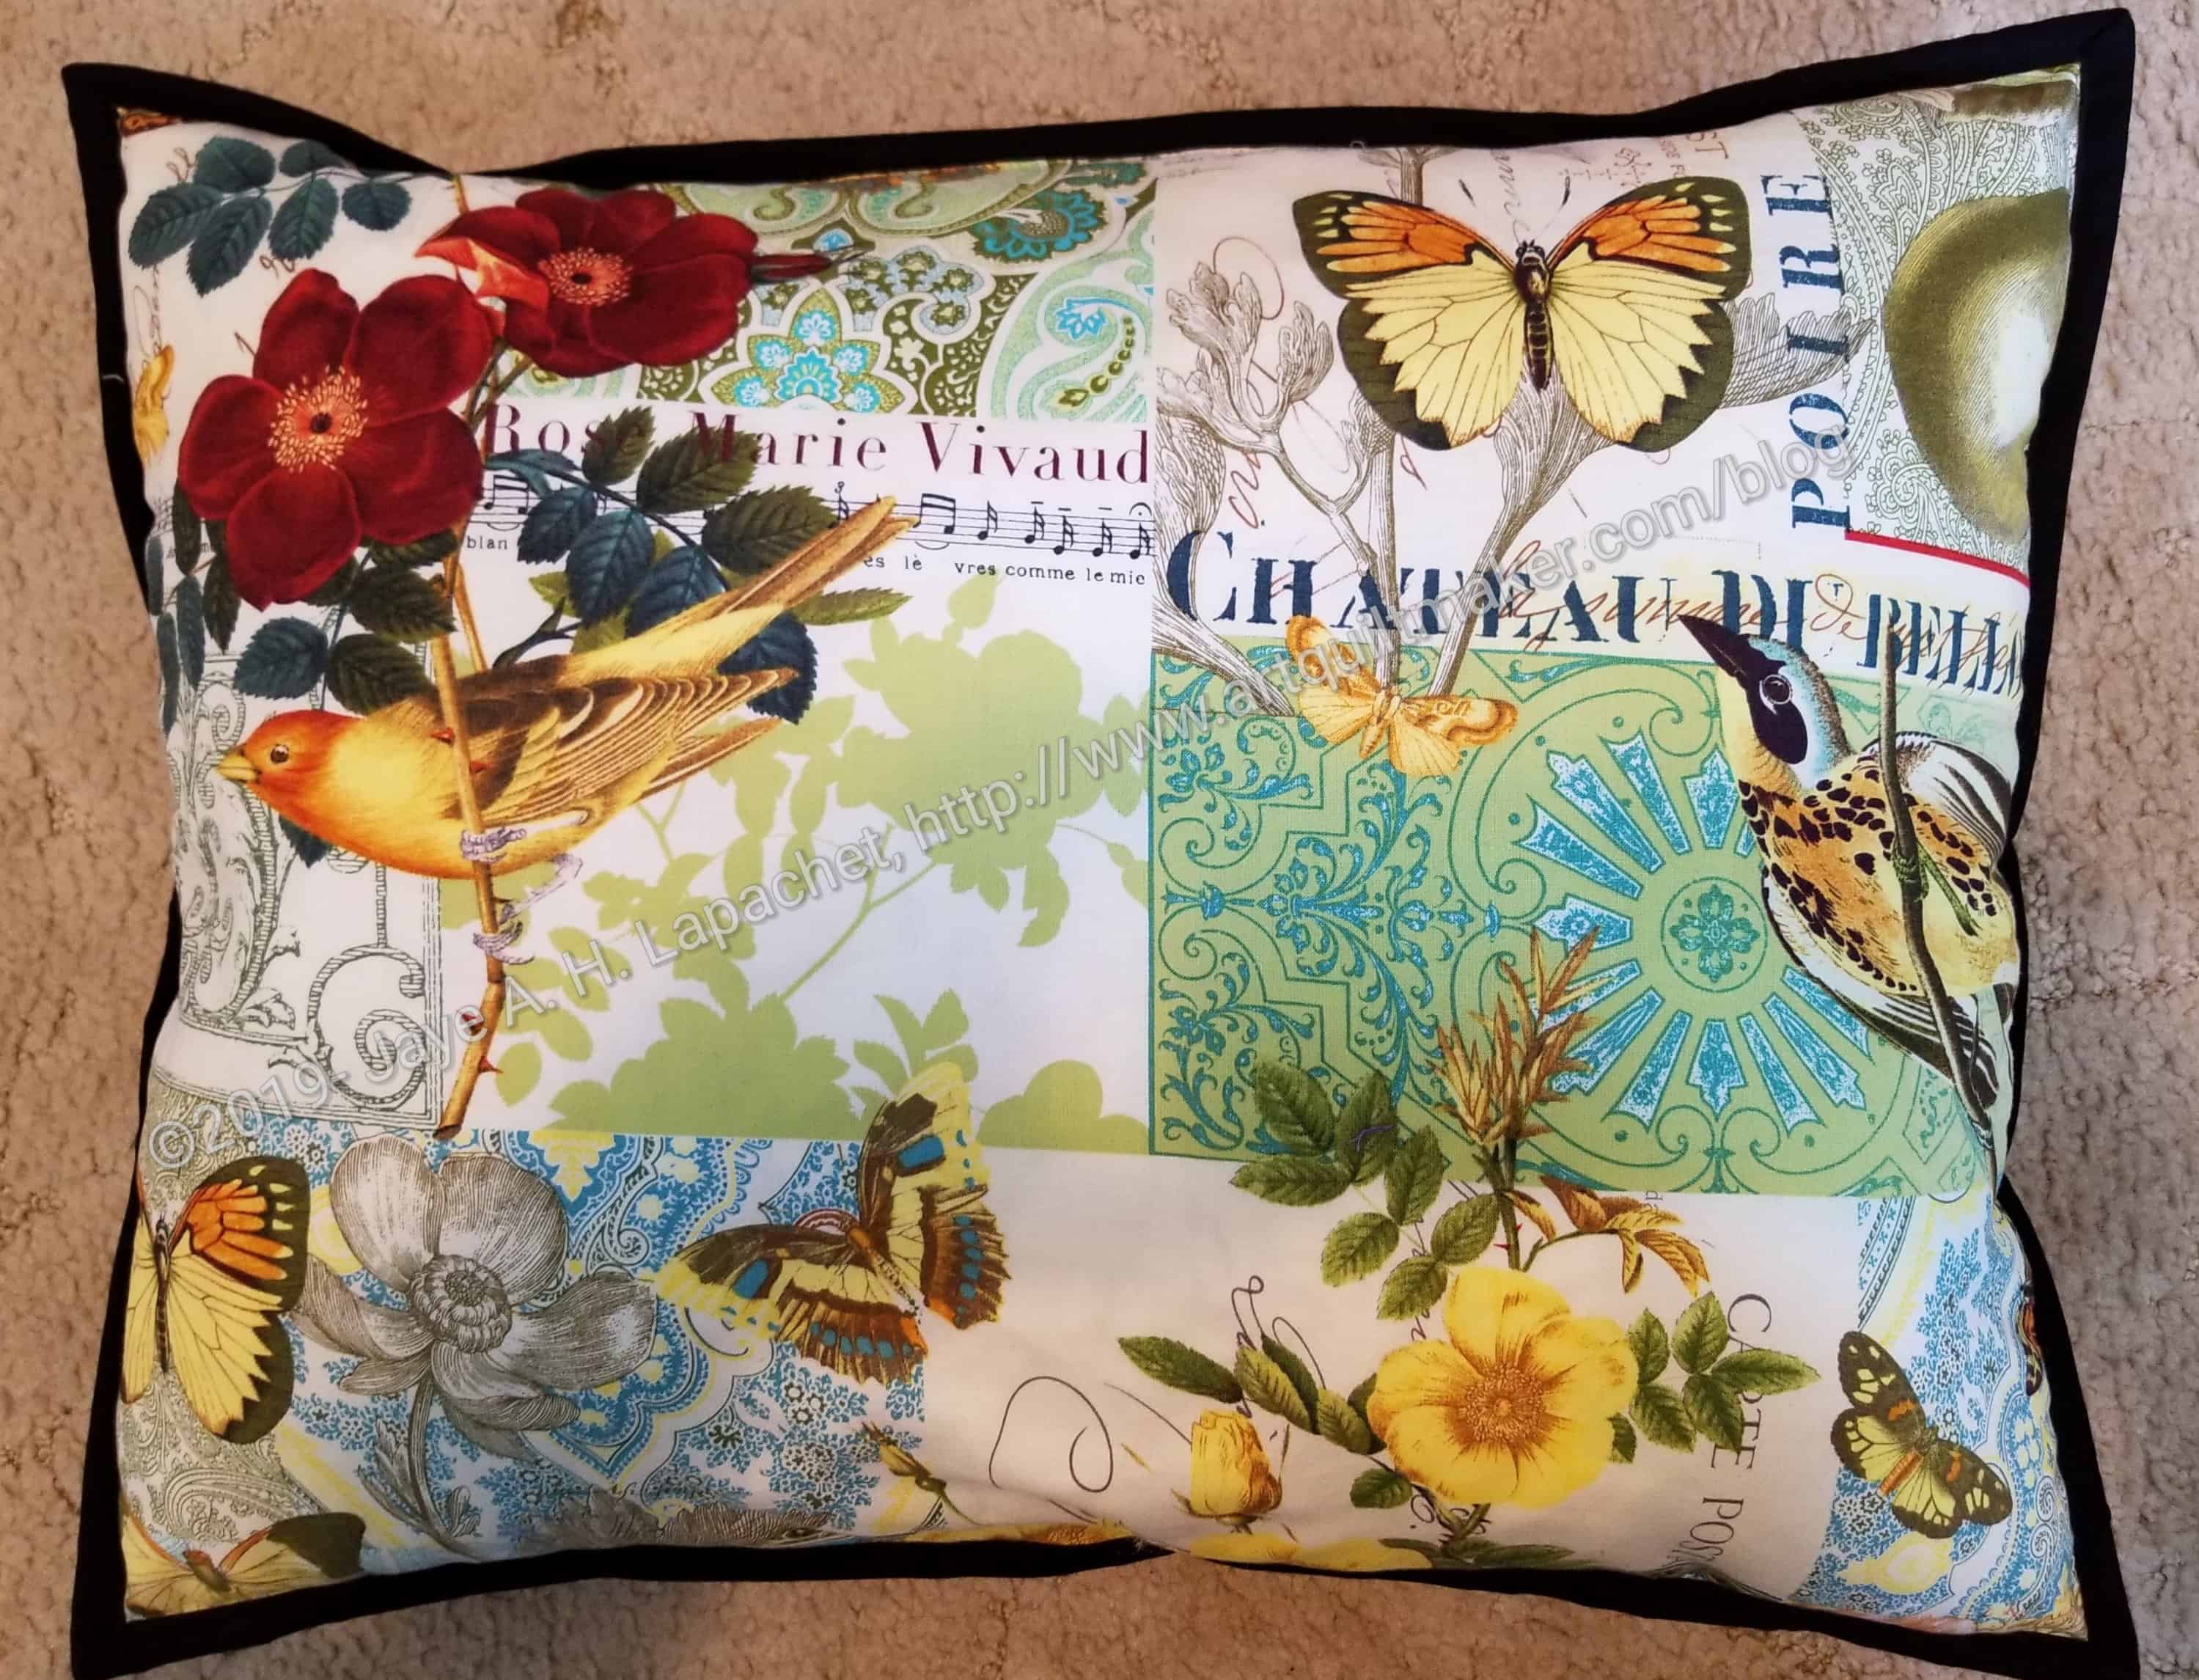
Under the Sea back – Michael Miller print
I wanted to control where the stitching went, so I didn’t plan on sewing right sides together and turning the piece. I sewed wrong sides together, then left an opening I could use to fill the pillow.
The backing fabric is from the Michael Miller London Portfolio collection. This particular print is called Anjou Pour Vous. I don’t know why it would be called that if the collection is called London Portfolio, but I am sure the designer has a reason. I have a number of these prints and will have to use one for a backing.
I also wanted to put a black binding on. I did that to cover the raw edges, then machine sewed the back down. I ran into problems with the black thread catching some of the pillow top and also showing in the corners where it didn’t quite match up with the top binding. Again, I ripped and replaced the bobbin with Aurifil monofilament and restitched the binding so the mismatched binding front wouldn’t have a black line around the corners on the actual top.
Also the larger glass beads are coming off. For some reason, my French knots are not strong enough to hold them with the stress of handling. Again, I am using Aurifil monofilament to secure the beads and not disturb my overall design. The Aurifil monofilament is a hassle to use, so that is also a thankless task.
I will be so glad not to see this project on my to do list when I am finished. I know I will like it again, but right now I don’t.
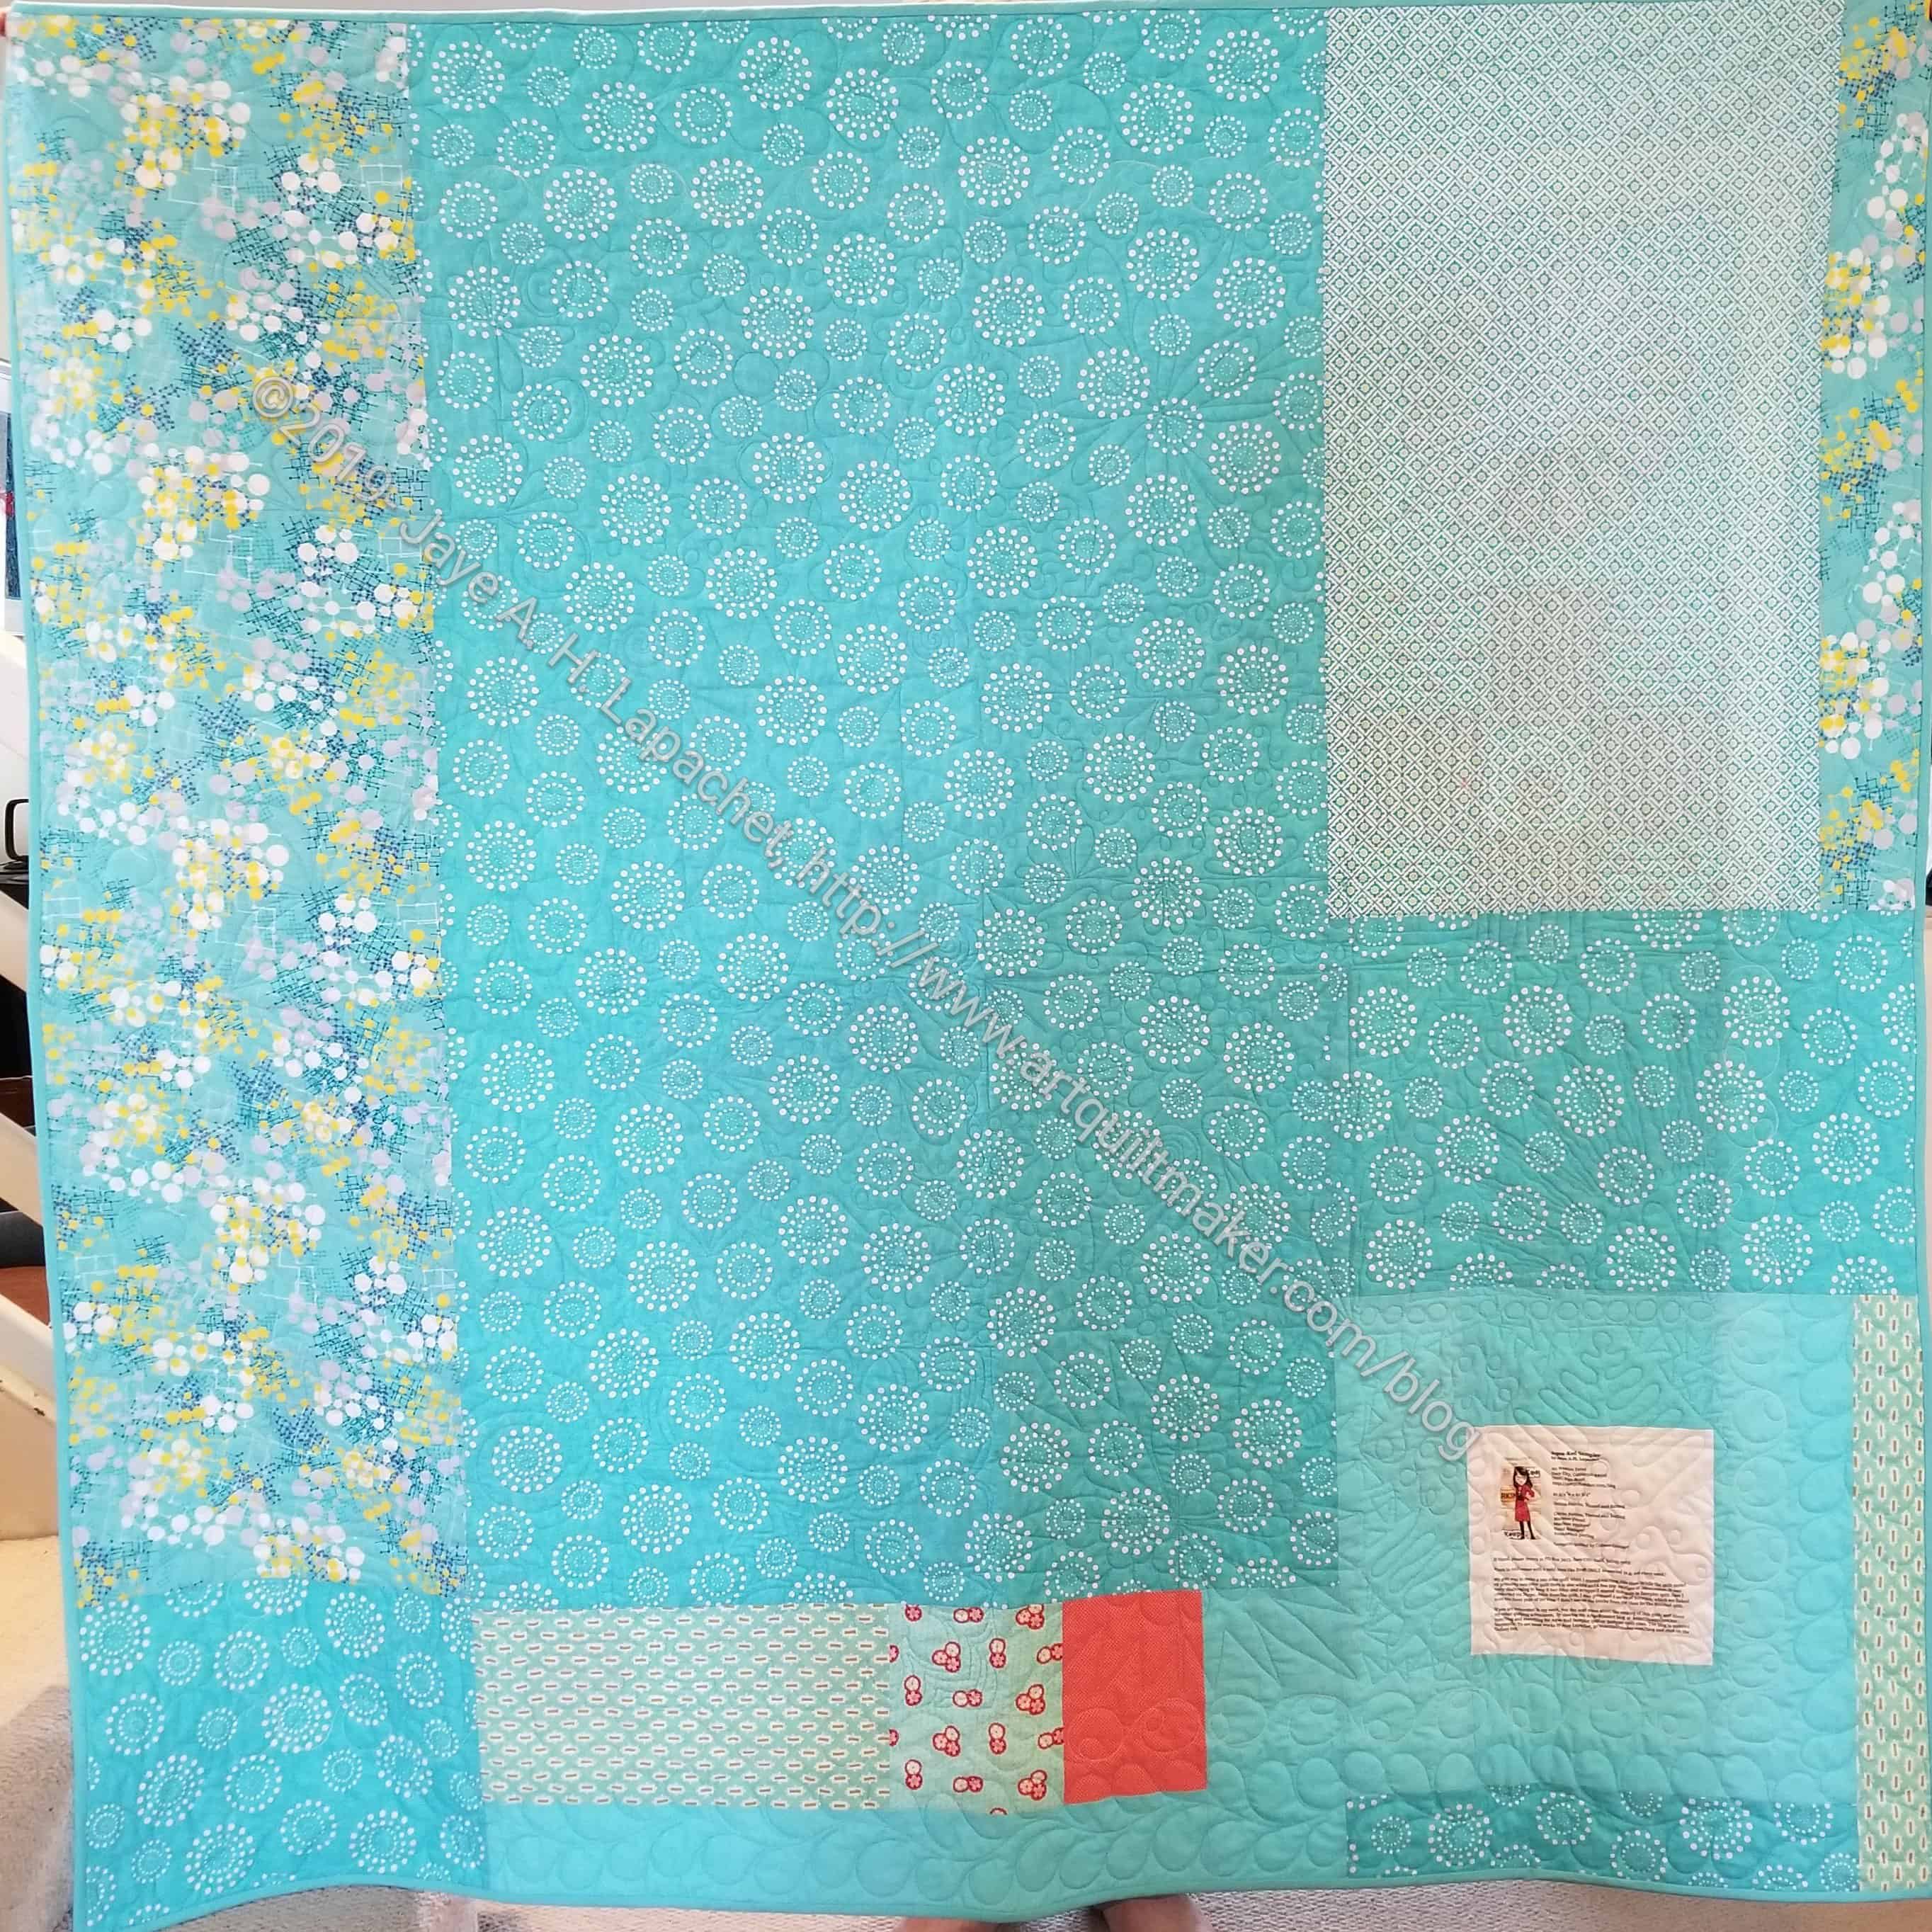
Last Friday, I finished the back of the Purple Strips donation quilt. It is ready to go to Tim for his magic quilting.
I am pretty pleased with the way it turned out, though Mom vindicated my thoughts around using green. I might try something else in purple and green. Right now my purple scrap drawer is much reduced. I am hoping to reduce it more with the purple Improv donation quilt, but we will see.
Yes, I started to sew. Yes, I started to sew even though not all of the patches are on the design wall. I don’t have the space and am letting go of a little bit of the control.
FOTY 2017 – Sewing start
I am fairly pleased with the overall layout. I think the colors are pretty much in the right place except for the light blue/blue-green. The gradation seems ok at the bottom, but might not work towards the top. I still have time.
I do end up having to trim blocks. It is fine as I will do it a little at a time. I am still figuring out the math on this one – what size to cut, so I don’t ruin anything.
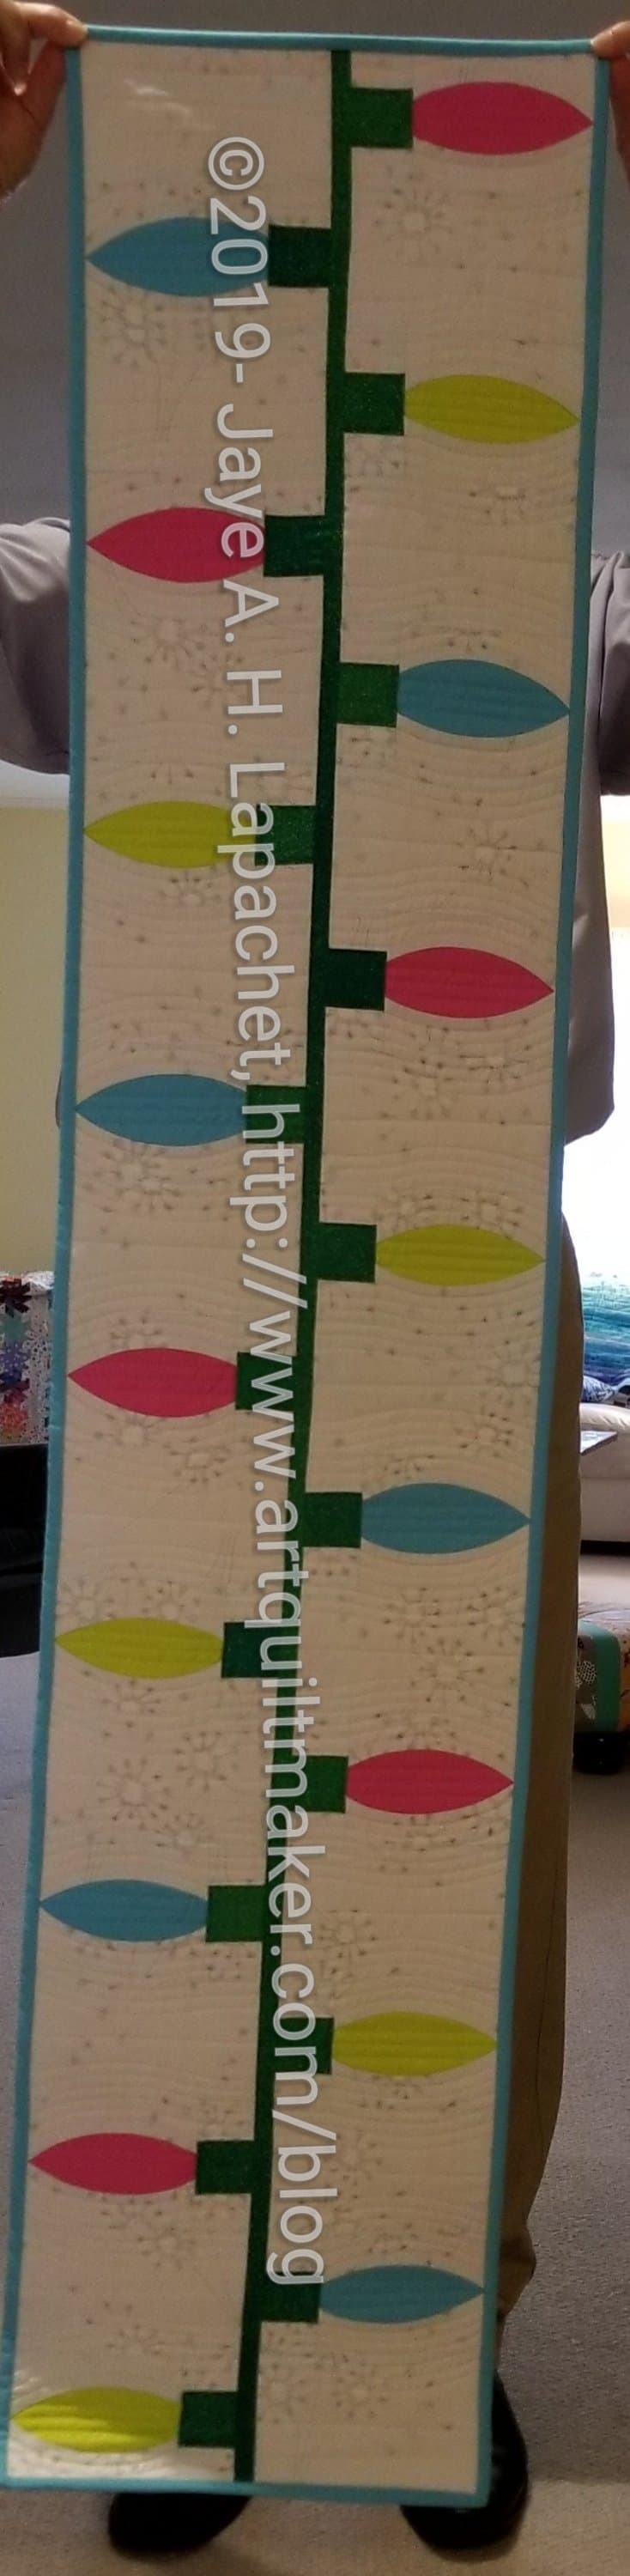
This tablerunner (buffet runner) is finished and I couldn’t be more pleased.
The photo, left, shows where it will go in my house during Christmas. I am pleased because I had to adjust the pattern slightly and it worked! The runner fits perfectly on top of my buffet.
I used some Free Spirit solids bought at QuiltCon in 2018. They were lovely to work with-not much fraying and great colors. The green is a Pointillist Palette ombre I have had for awhile and the background is the same background I used for Metroscape.
I also did the quilting myself. I don’t do much quilting, but I decided it was too small to take to Colleen and I could do it. Also, I wanted it done, so I spent a Saturday quilting it very slowly. My body is still complaining a bit from the exertion.
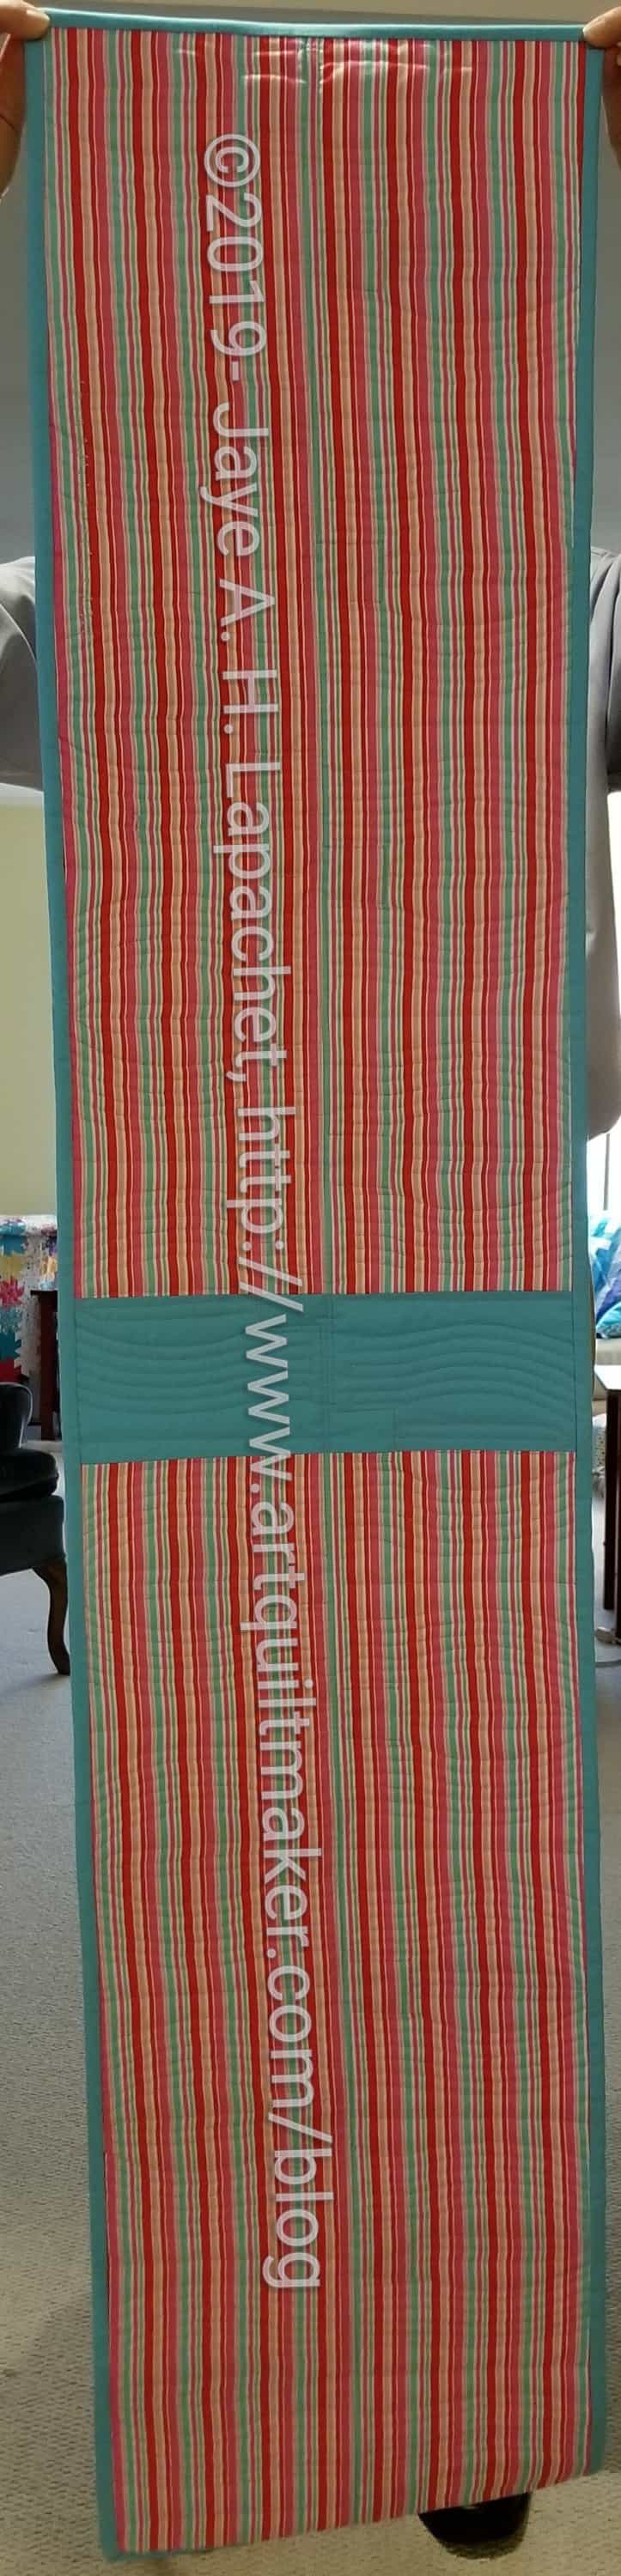
Mod Lights Table Runner – back
I had some tension issues, but learned a bit about my machine in working them out. I didn’t see the computer display change as I adjusted the tension, but I did see a difference in the stitching, so I guess it worked.
You know that I often like to make projects multiple times to get the hang of the process. The other day, avoiding FOTY 2017 and having some time at Craft Night, I started on the Mondo Bag. I bought the pattern at Golden State a few weeks ago when I was in San Jose.
I have been wanting to make the larger size of this bag since I took the Scruffy Quilts Midi Bag class. I like the Midi bag and wanted to cement the process in my head. Recently I was thinking that my, as yet unstarted, new knitting project would fit better in a larger bag. Thus the perfect opportunity presented itself.
Mondo Bag start
The process is that you press 2.5 inch squares on to an interfacing pattern, then fold and sew until you have a panel. Since I was at Craft Night, I pinned the squares to the interfacing. I did this for convenience, but also so I could contemplate the design before I pressed everything down permanently.
I am using Flow and Basic Mixology mini-charms. I had some packs from QuiltCon, I think, and they seem to go together well. Not perfectly, but well. So far, I am pleased with the results. The mini-charm packs have been hanging around for awhile. I was waiting for this project to come along so I could use them.
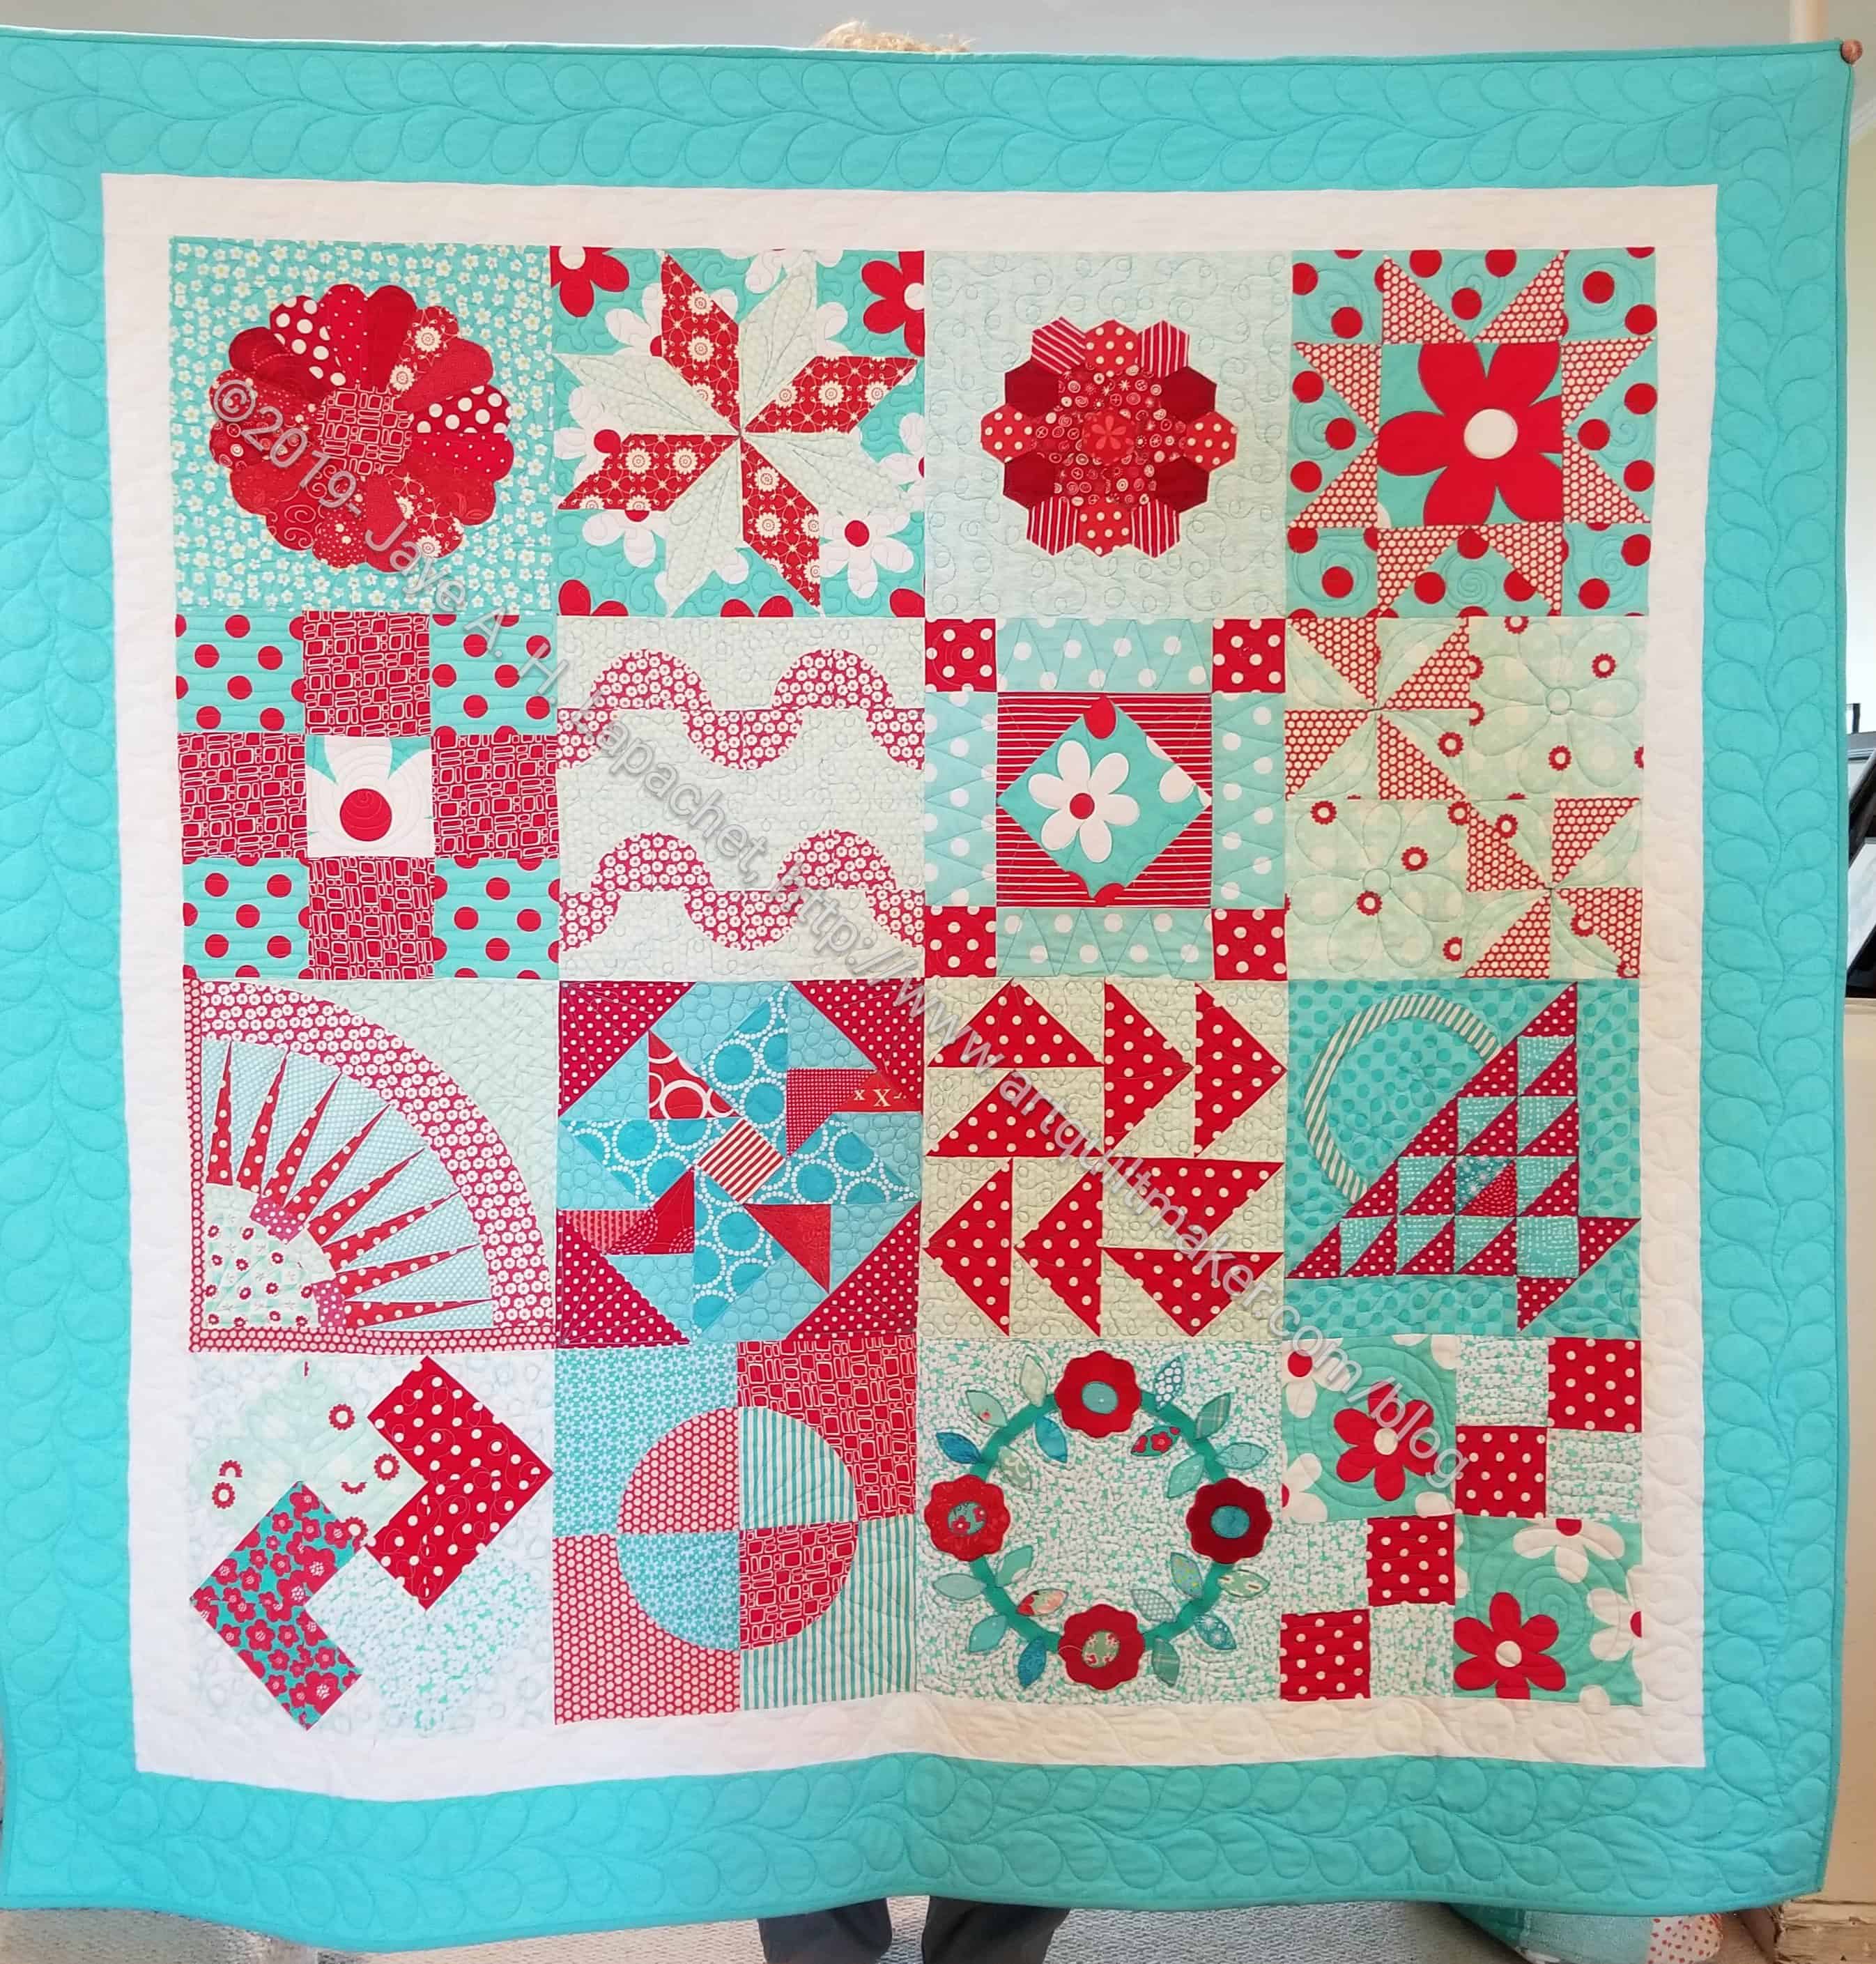
Shortly after I finished the binding on Metroscape, I started and finished the binding on this sampler. I am pleased to have another finish! With this finish, I am crossing something off the list that has been on it for a long time. That feels great.
I showed it at BAM last Saturday and I was gratified at the response. I don’t think this sampler looks fuddy-duddyish, but I wasn’t sure how that more modern audience would take it. They liked it and it makes me want to pull out the Handbag Sampler and get back to it. I do think I would like to make some smaller blocks to go in a new sampler I might start, like the Star Sampler.
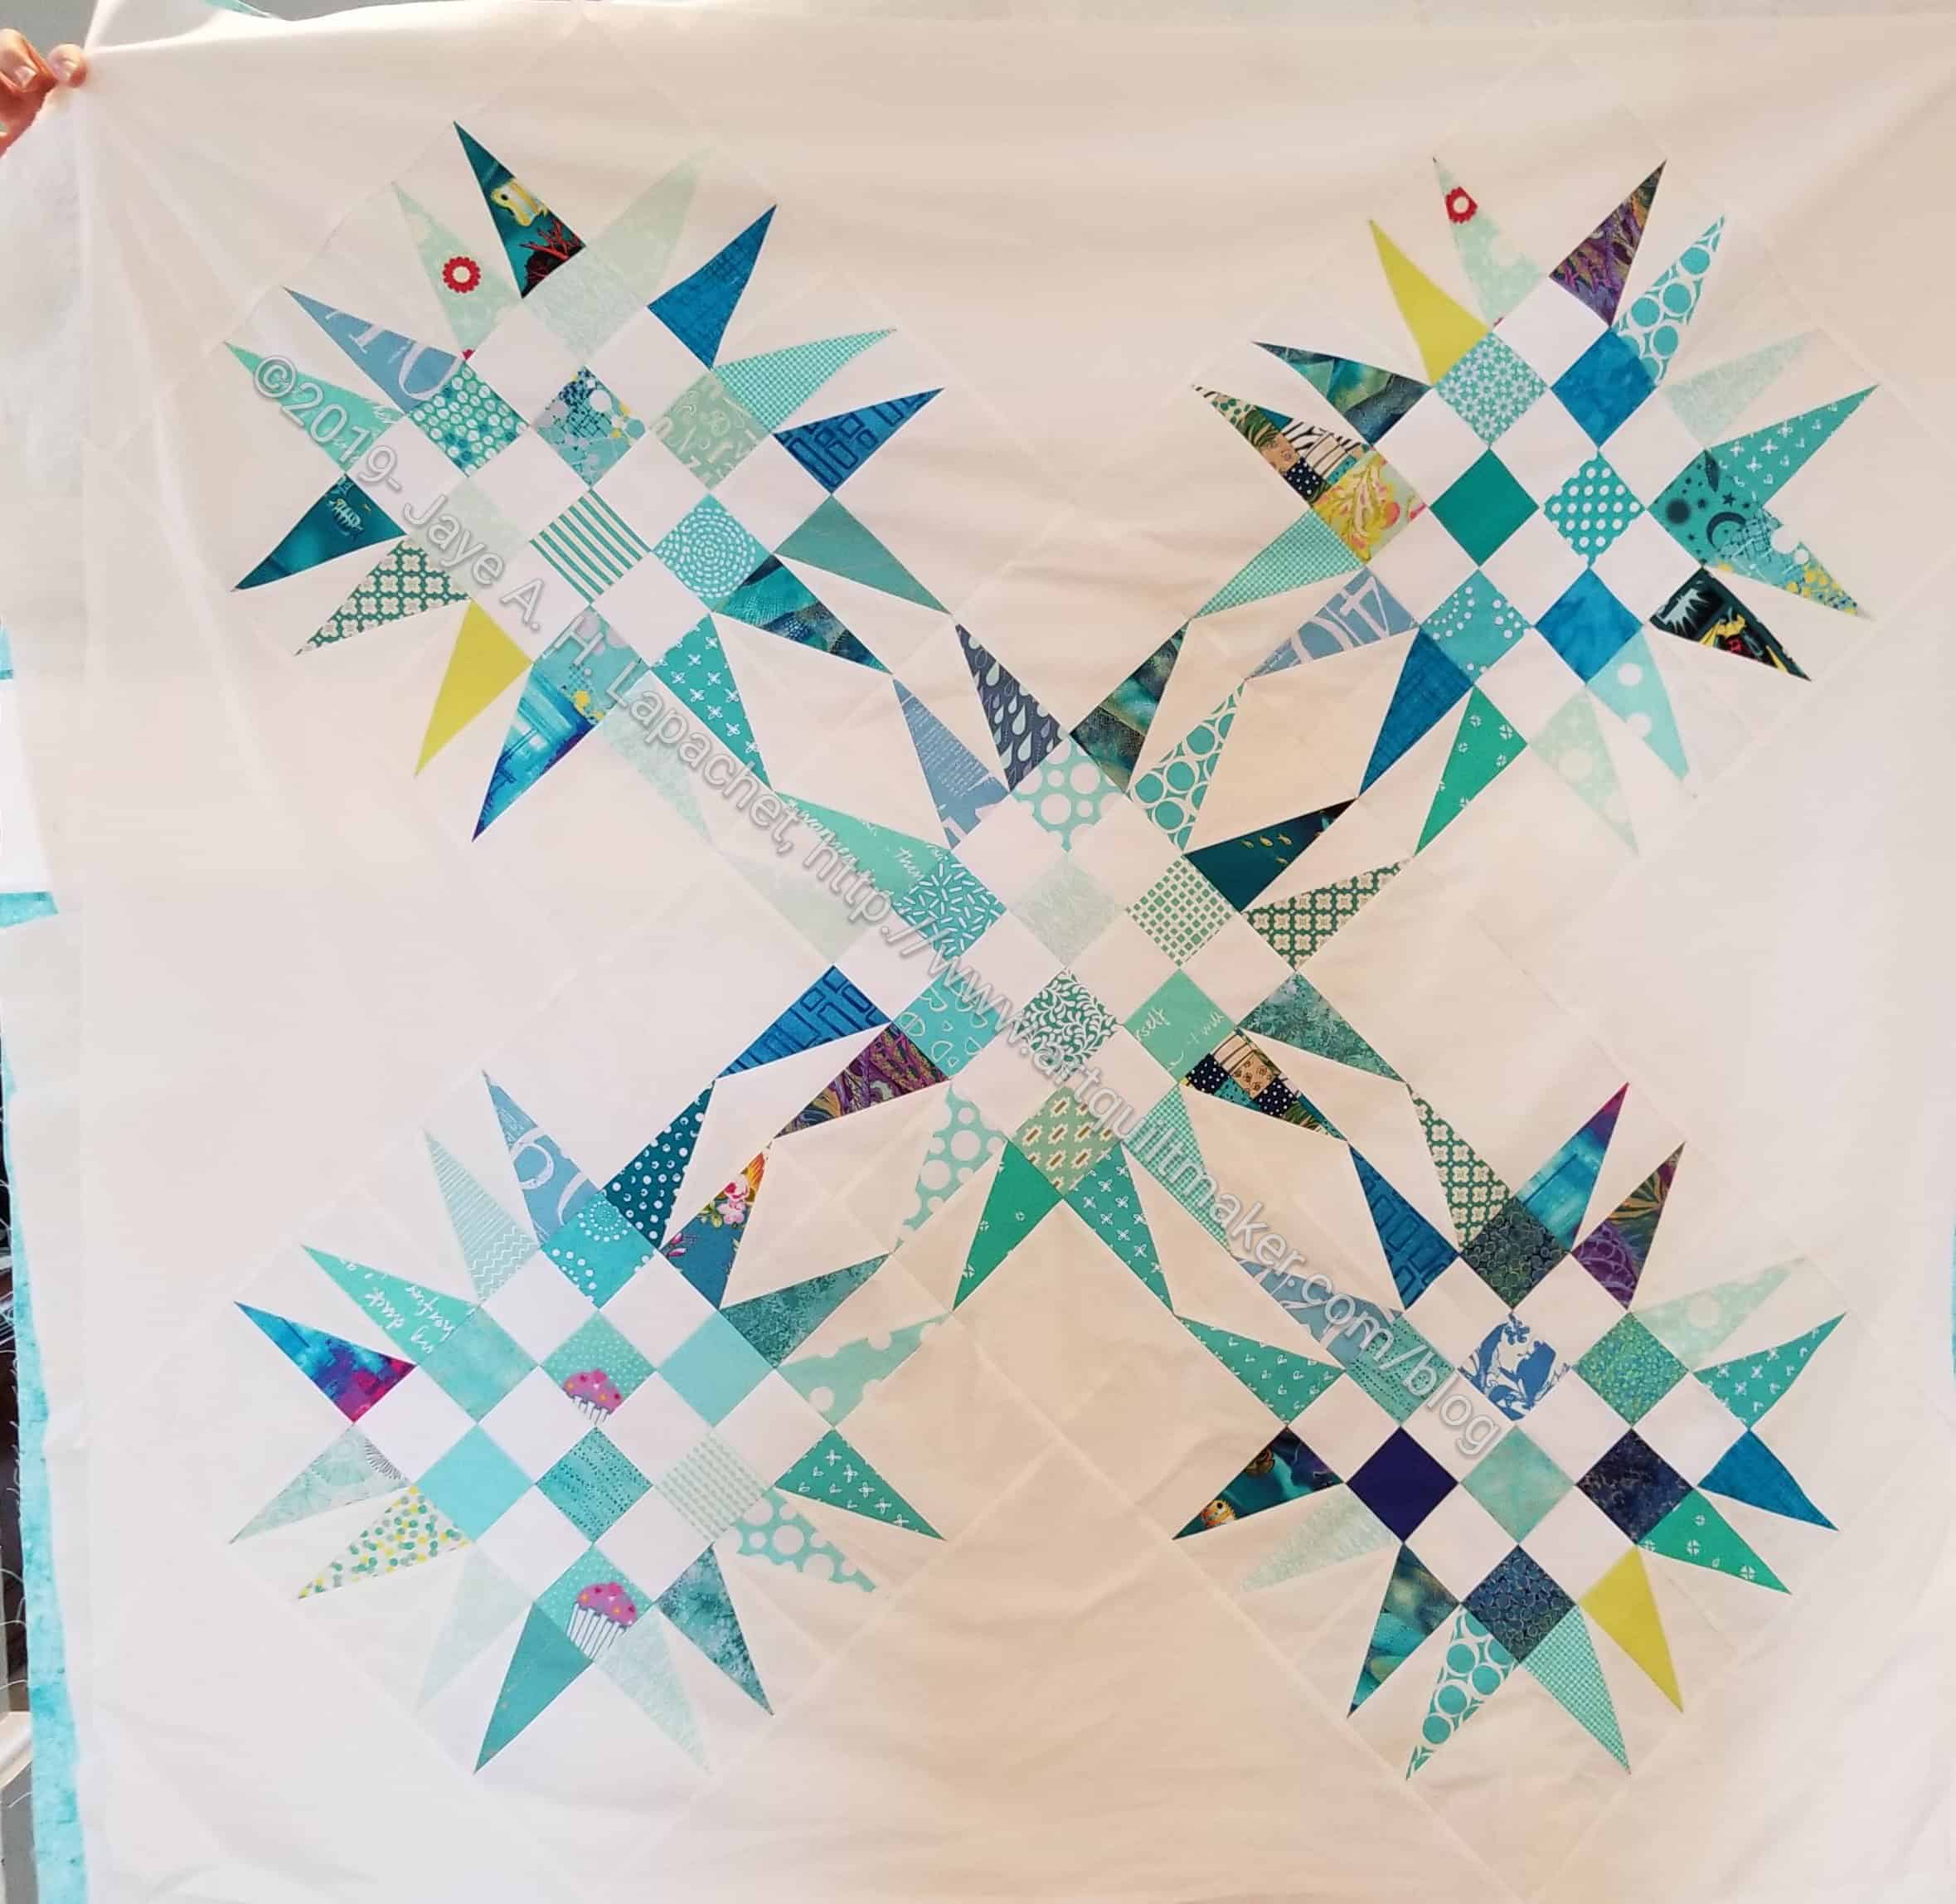
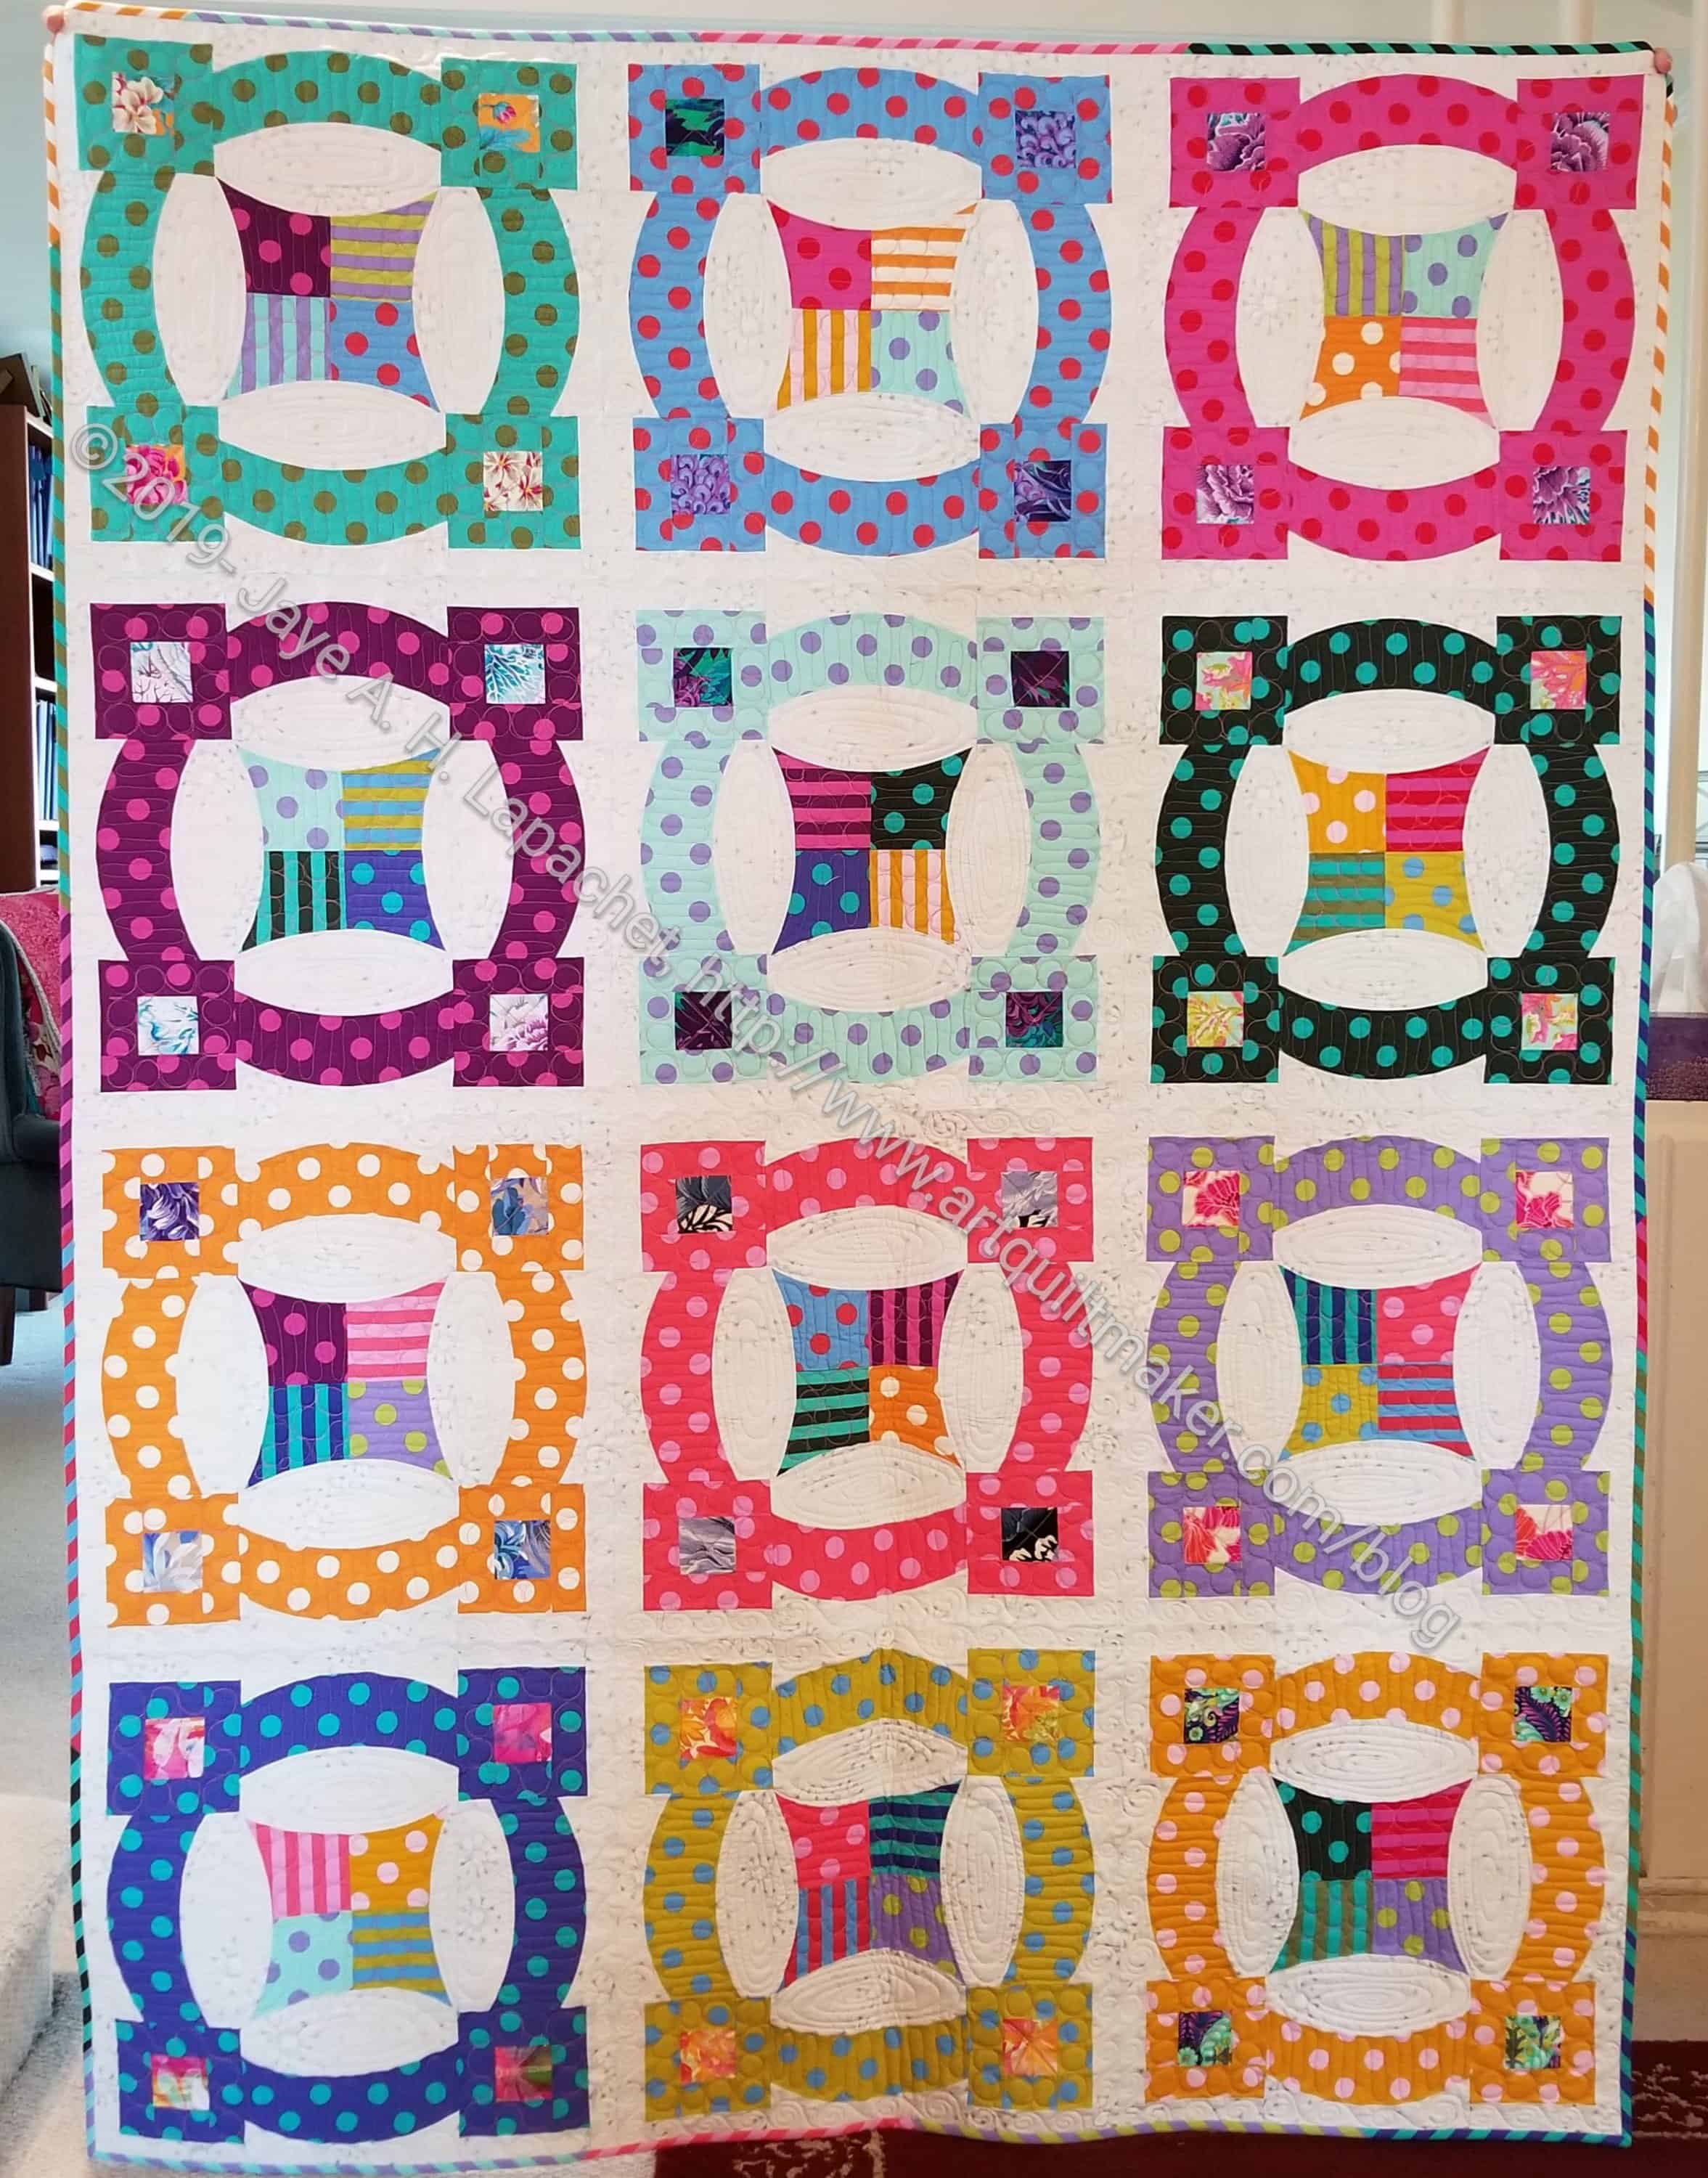
I finally finished the Spiky 16 patch stars into a quilt top! This is the 3rd one of these quilts I have made. I have an idea for another one, but since I am working on scrappy strip quilts right now, they may have to wait.
It isn’t exactly 100% stellar but only because I could have arranged the blocks differently. It looks great and I have already handed it in to be quilted.
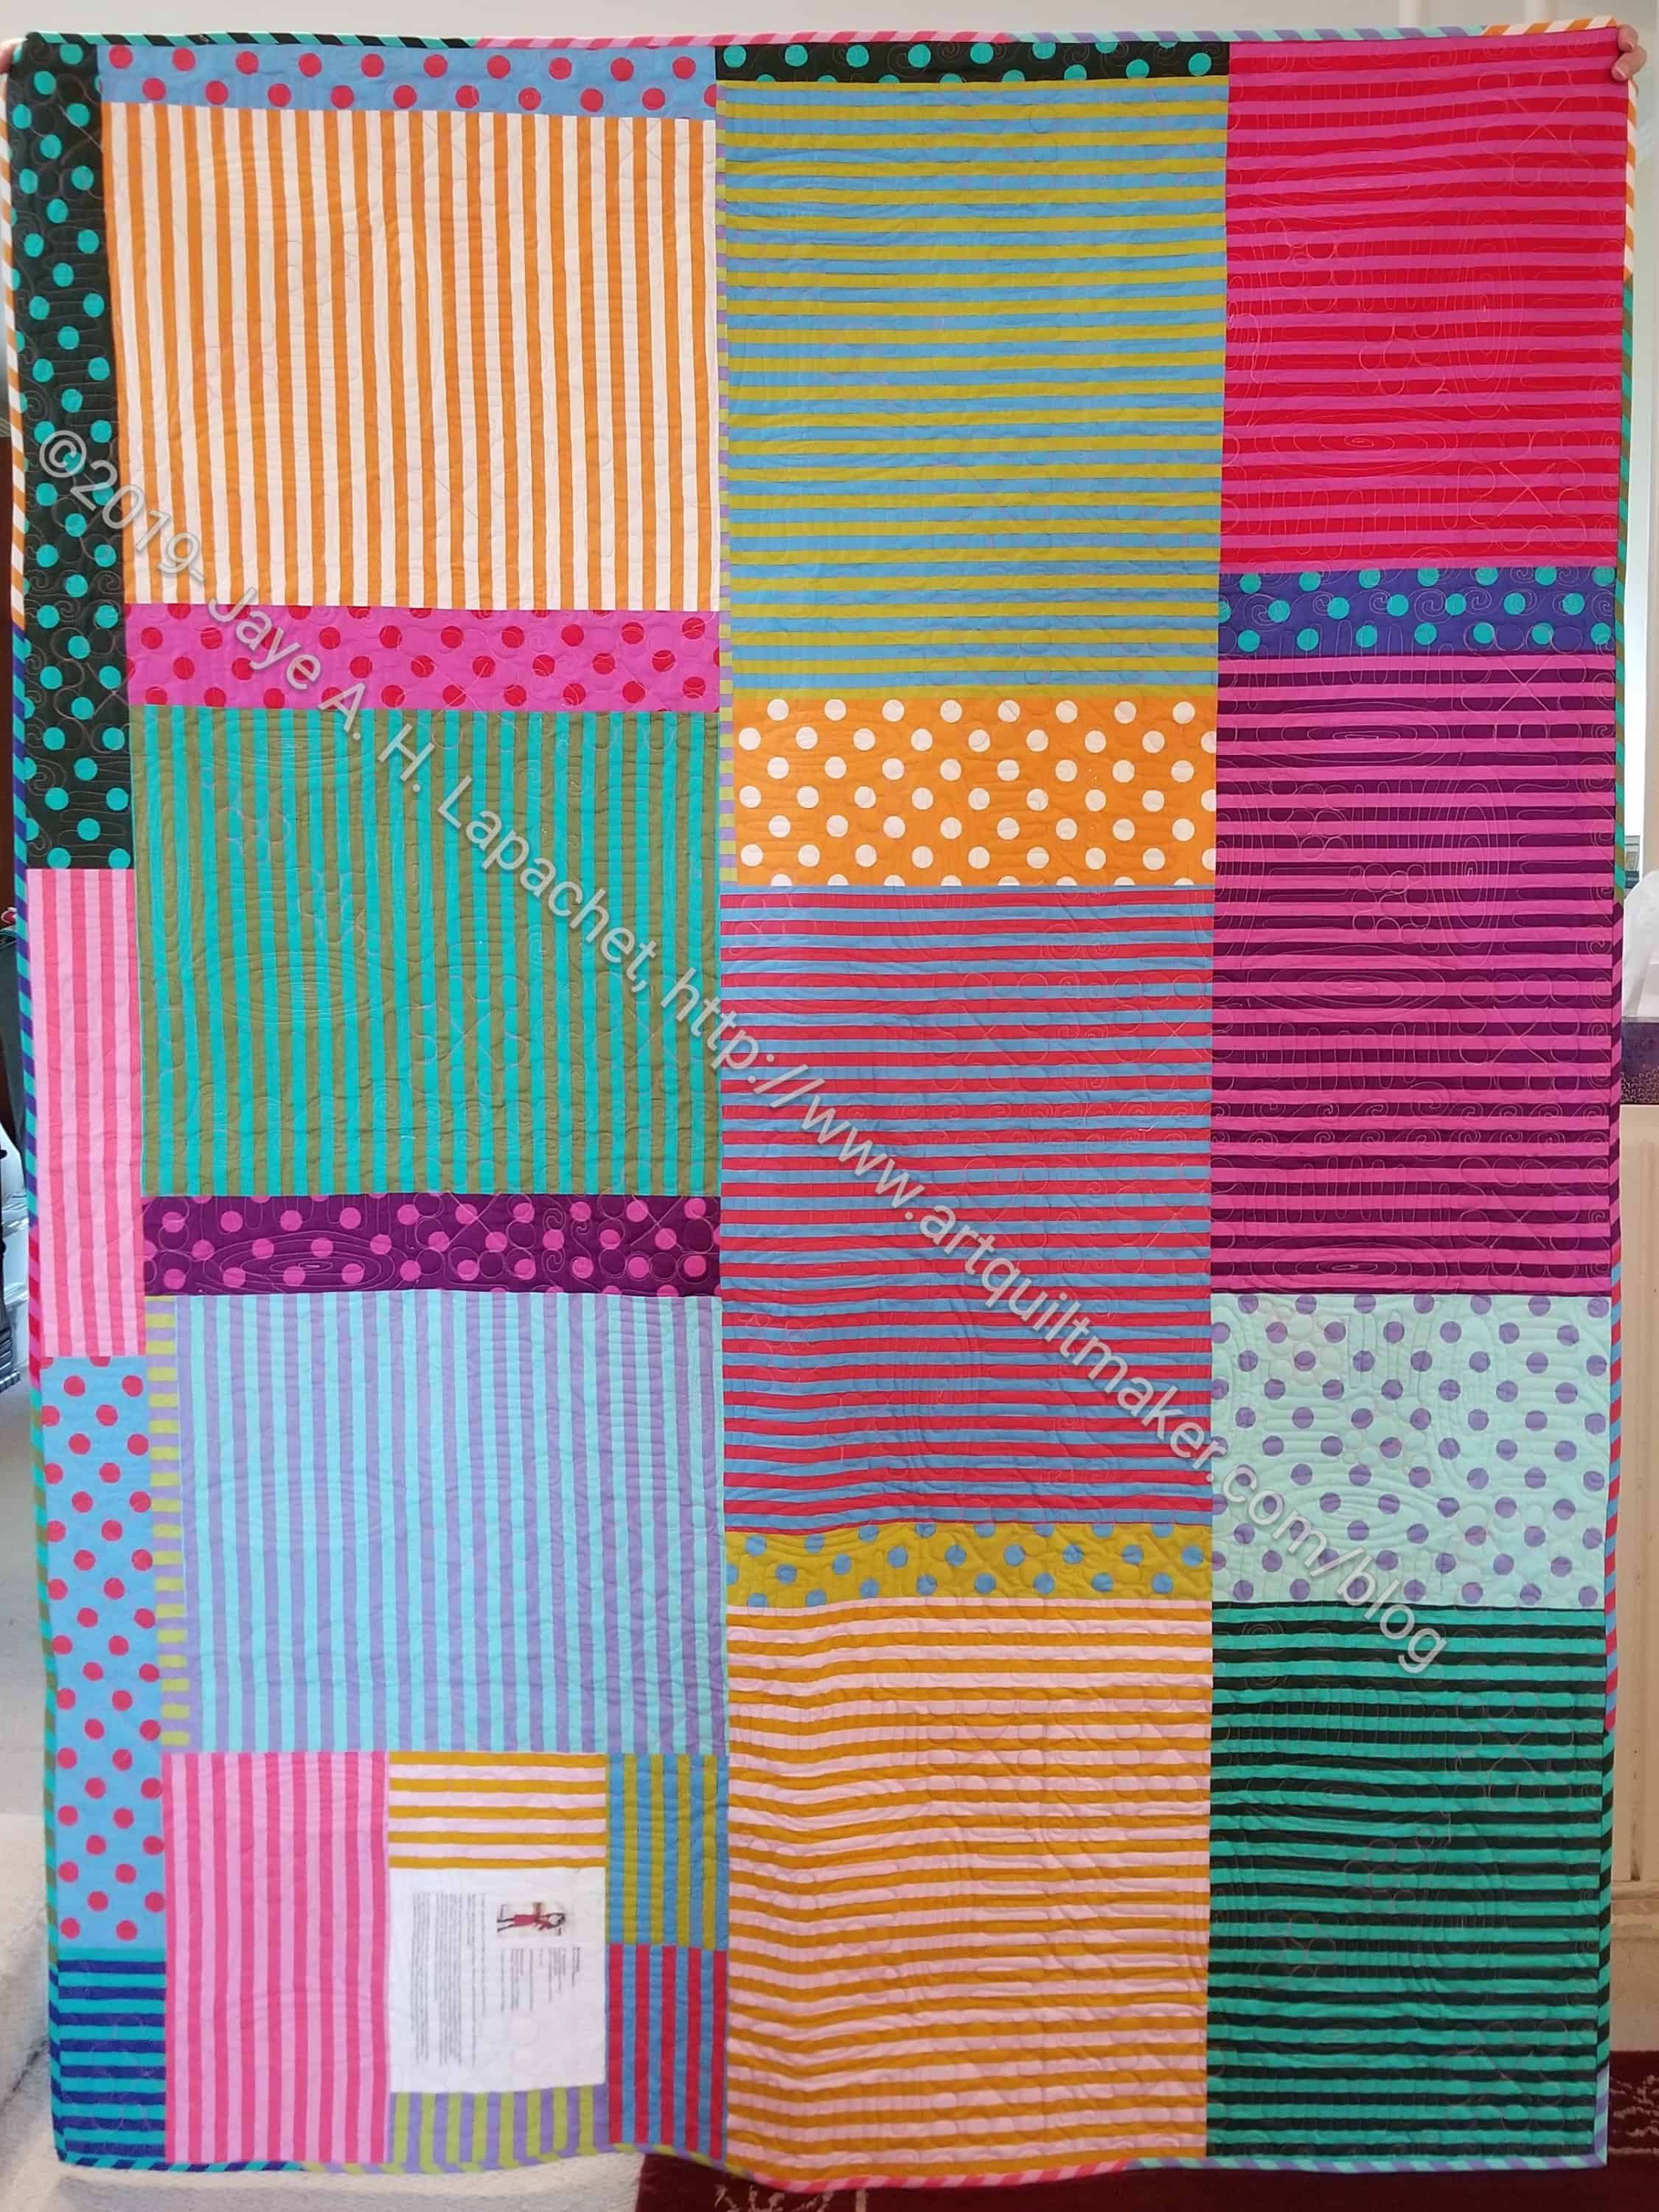
Spiky Star donation quilt n.3 -back
I am pleased that it went together so quickly. I was rearranging the Tutorials page and there were the directions for setting blocks on point. I took the bull by the horns and made the top. It really went together very quickly. I also found the perfect piece of Stonehenge that only needed a little piecing. Since I couldn’t finish the purple strip quilt, I was glad to have a donation top to hand in.
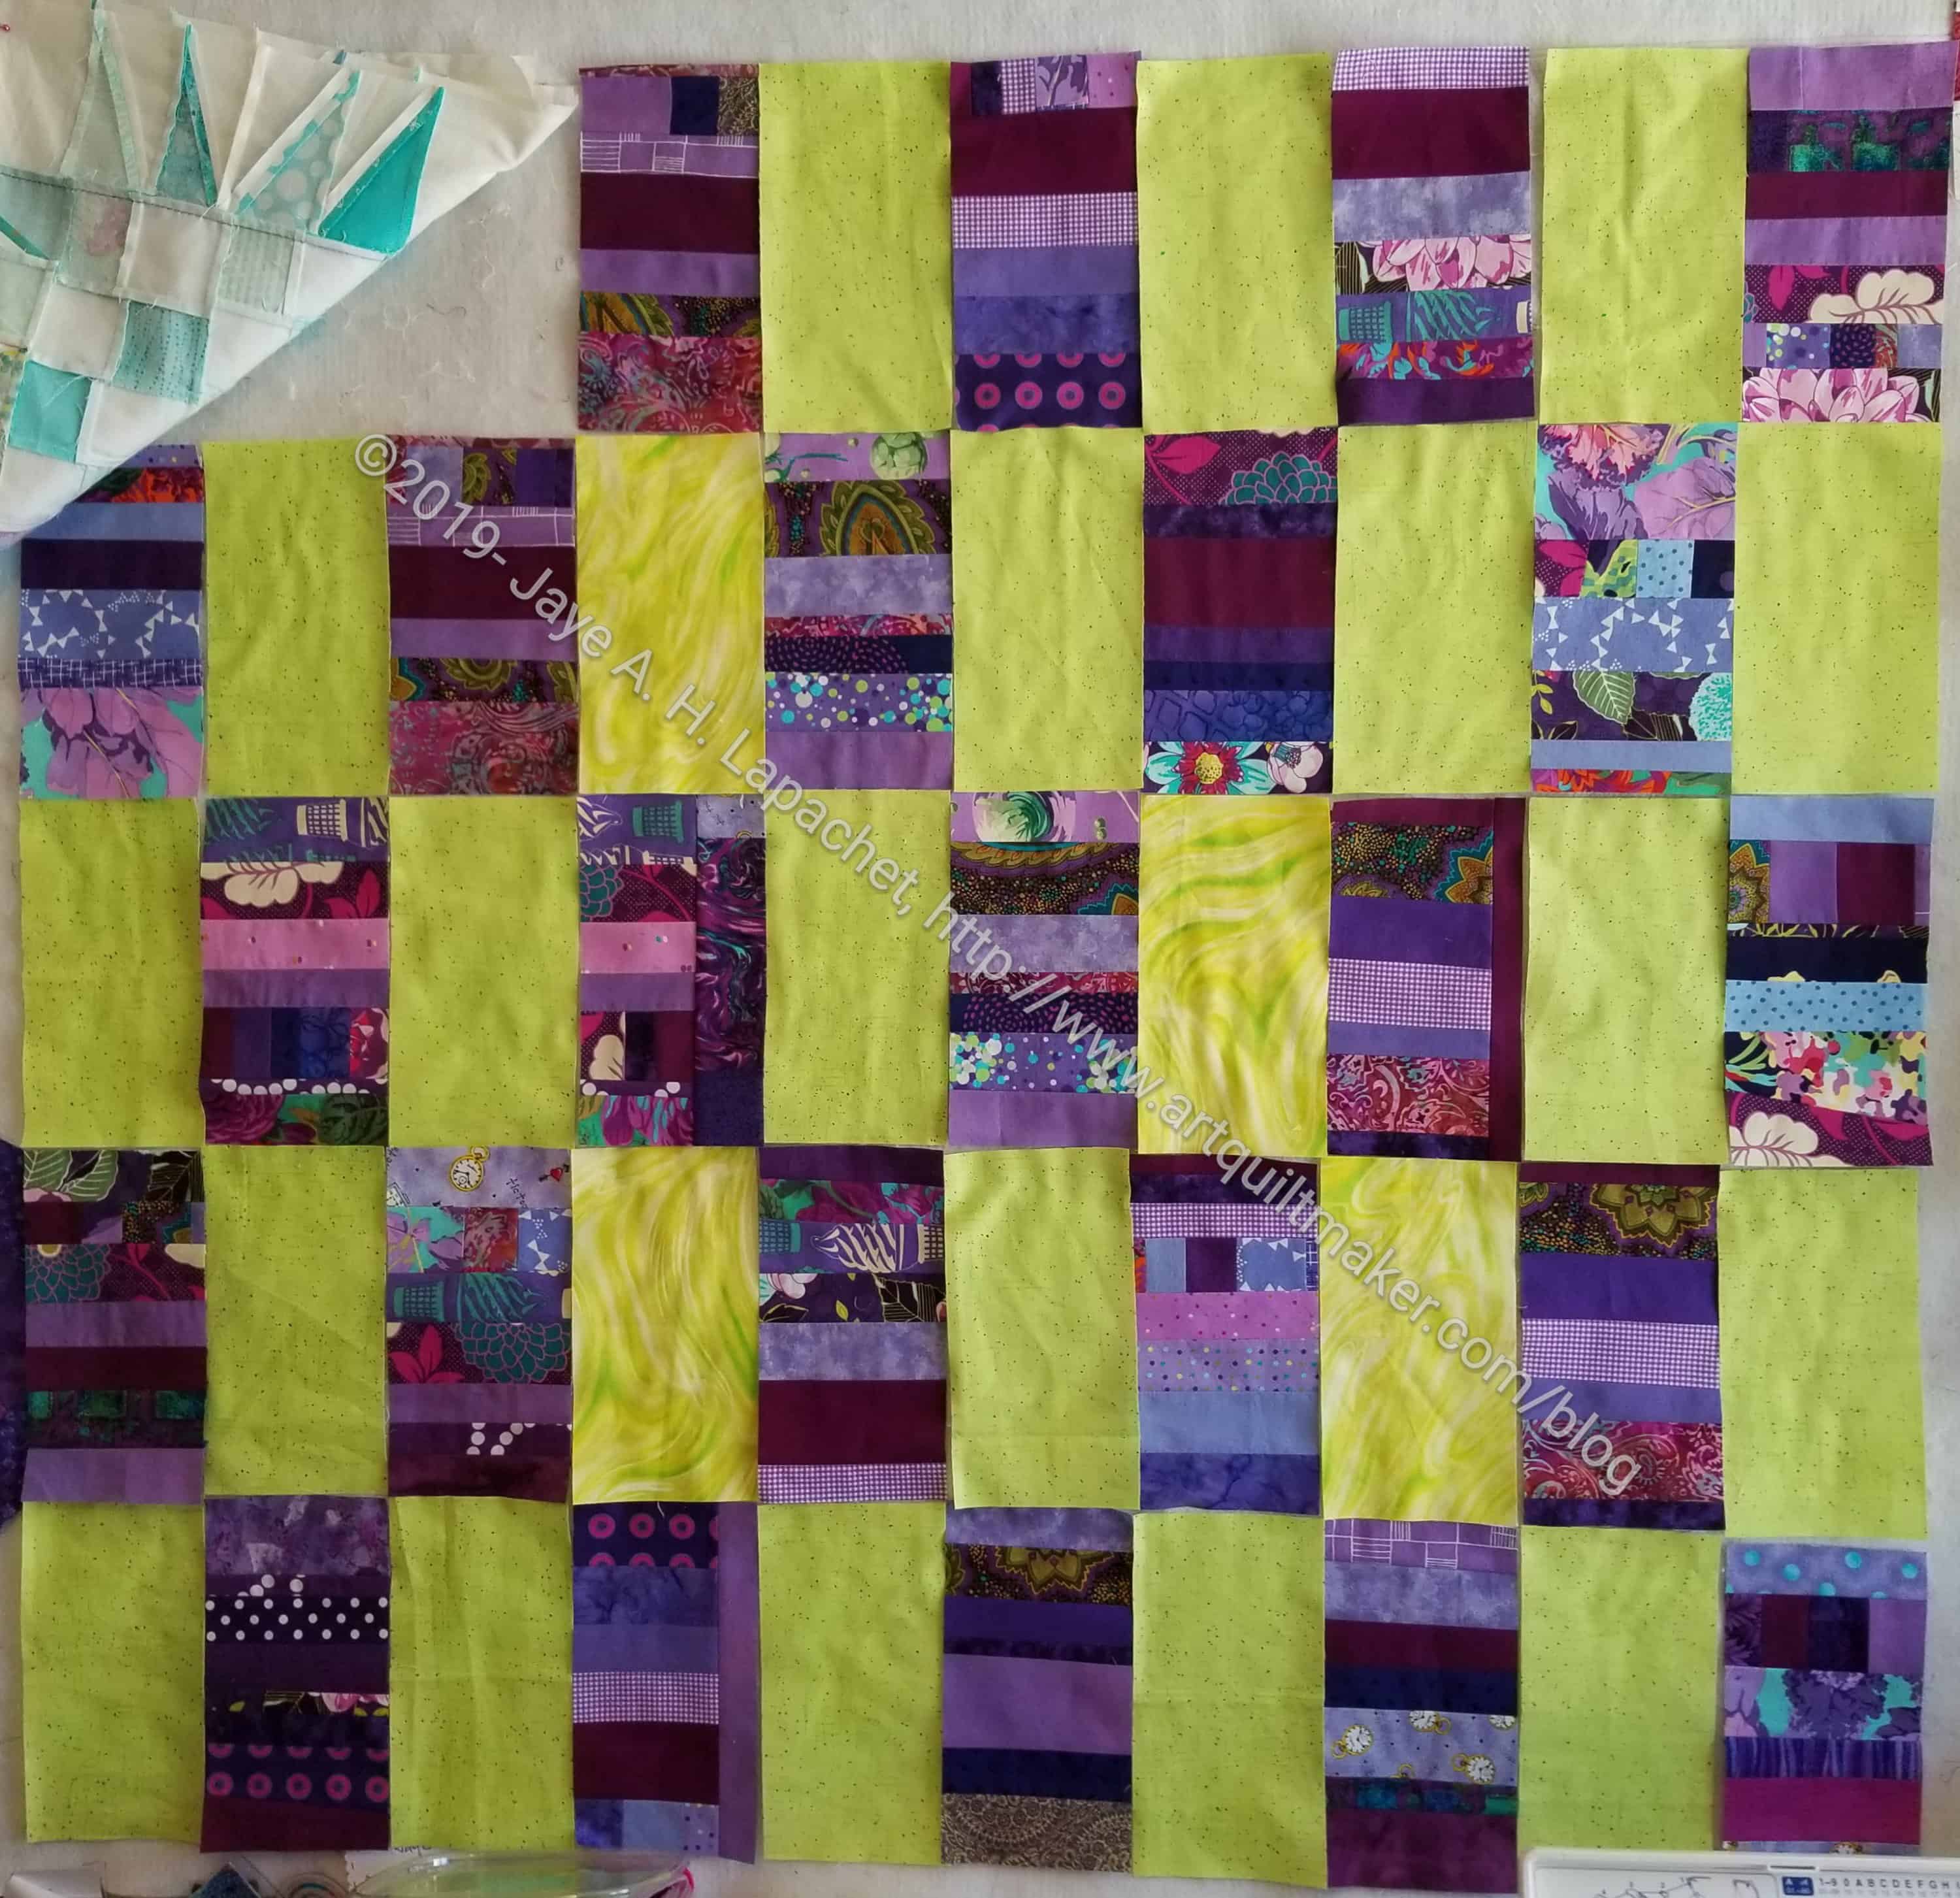
I finished all the blocks and began to think about the color of the plain blocks. Tim doesn’t like white backgrounds and since he will most likely quilt this top, I decided to look for something else.
Purple strip donation quilt with yellow-green
Across from purple on my Studio Color Wheel is chartreuse. I admit this is a bold choice and I was thinking about it quite a bit before I went hunting for fabric. Finally, I decided that I needed to make visual decisions visually and cut up some fabric.
I like the boldness of the color combination, but something wasn’t quite right.
Grey solid background #1
Grey solid background #2
I was just about to sew it together when Tim saw the photo and suggested grey. Purple is hard for me to work with, because it really darkens my workroom to a depressing state. Adding grey made me think it would just get worse. I knew the yellow-green was the right color for the purple, so I found a couple of greys and tried it.
I chose the greys based on fabrics I didn’t think I would use for something else. These were both in that category because they have a taupe cast too them, which is not my preference for grey. I prefer the cooler white-greys.
Purple strip donation quilt with grey solid
Immediately, I knew that the grey solid (#1) was a much better choice. It will be suitable for a boy and isn’t too depressing.
I have begun sewing the plain blocks to the strip blocks.
I finished Metroscape a few weeks ago. I didn’t post it sooner because I just had the chance to snap a photo before I took it to guild last week.
I am still pleased with it and was encouraged to enter it into the fair, which means adding a rod pocket. I don’t have much else to add so I just might. It will, at least, impress a few people because of the curves. The machine quilted category is a tough one, but with the curves and the bold fabrics, this one might have a chance to win.
Metroscape back – finished
What this quilt makes me think about now is what to do next with the Quick Curve Rulers.
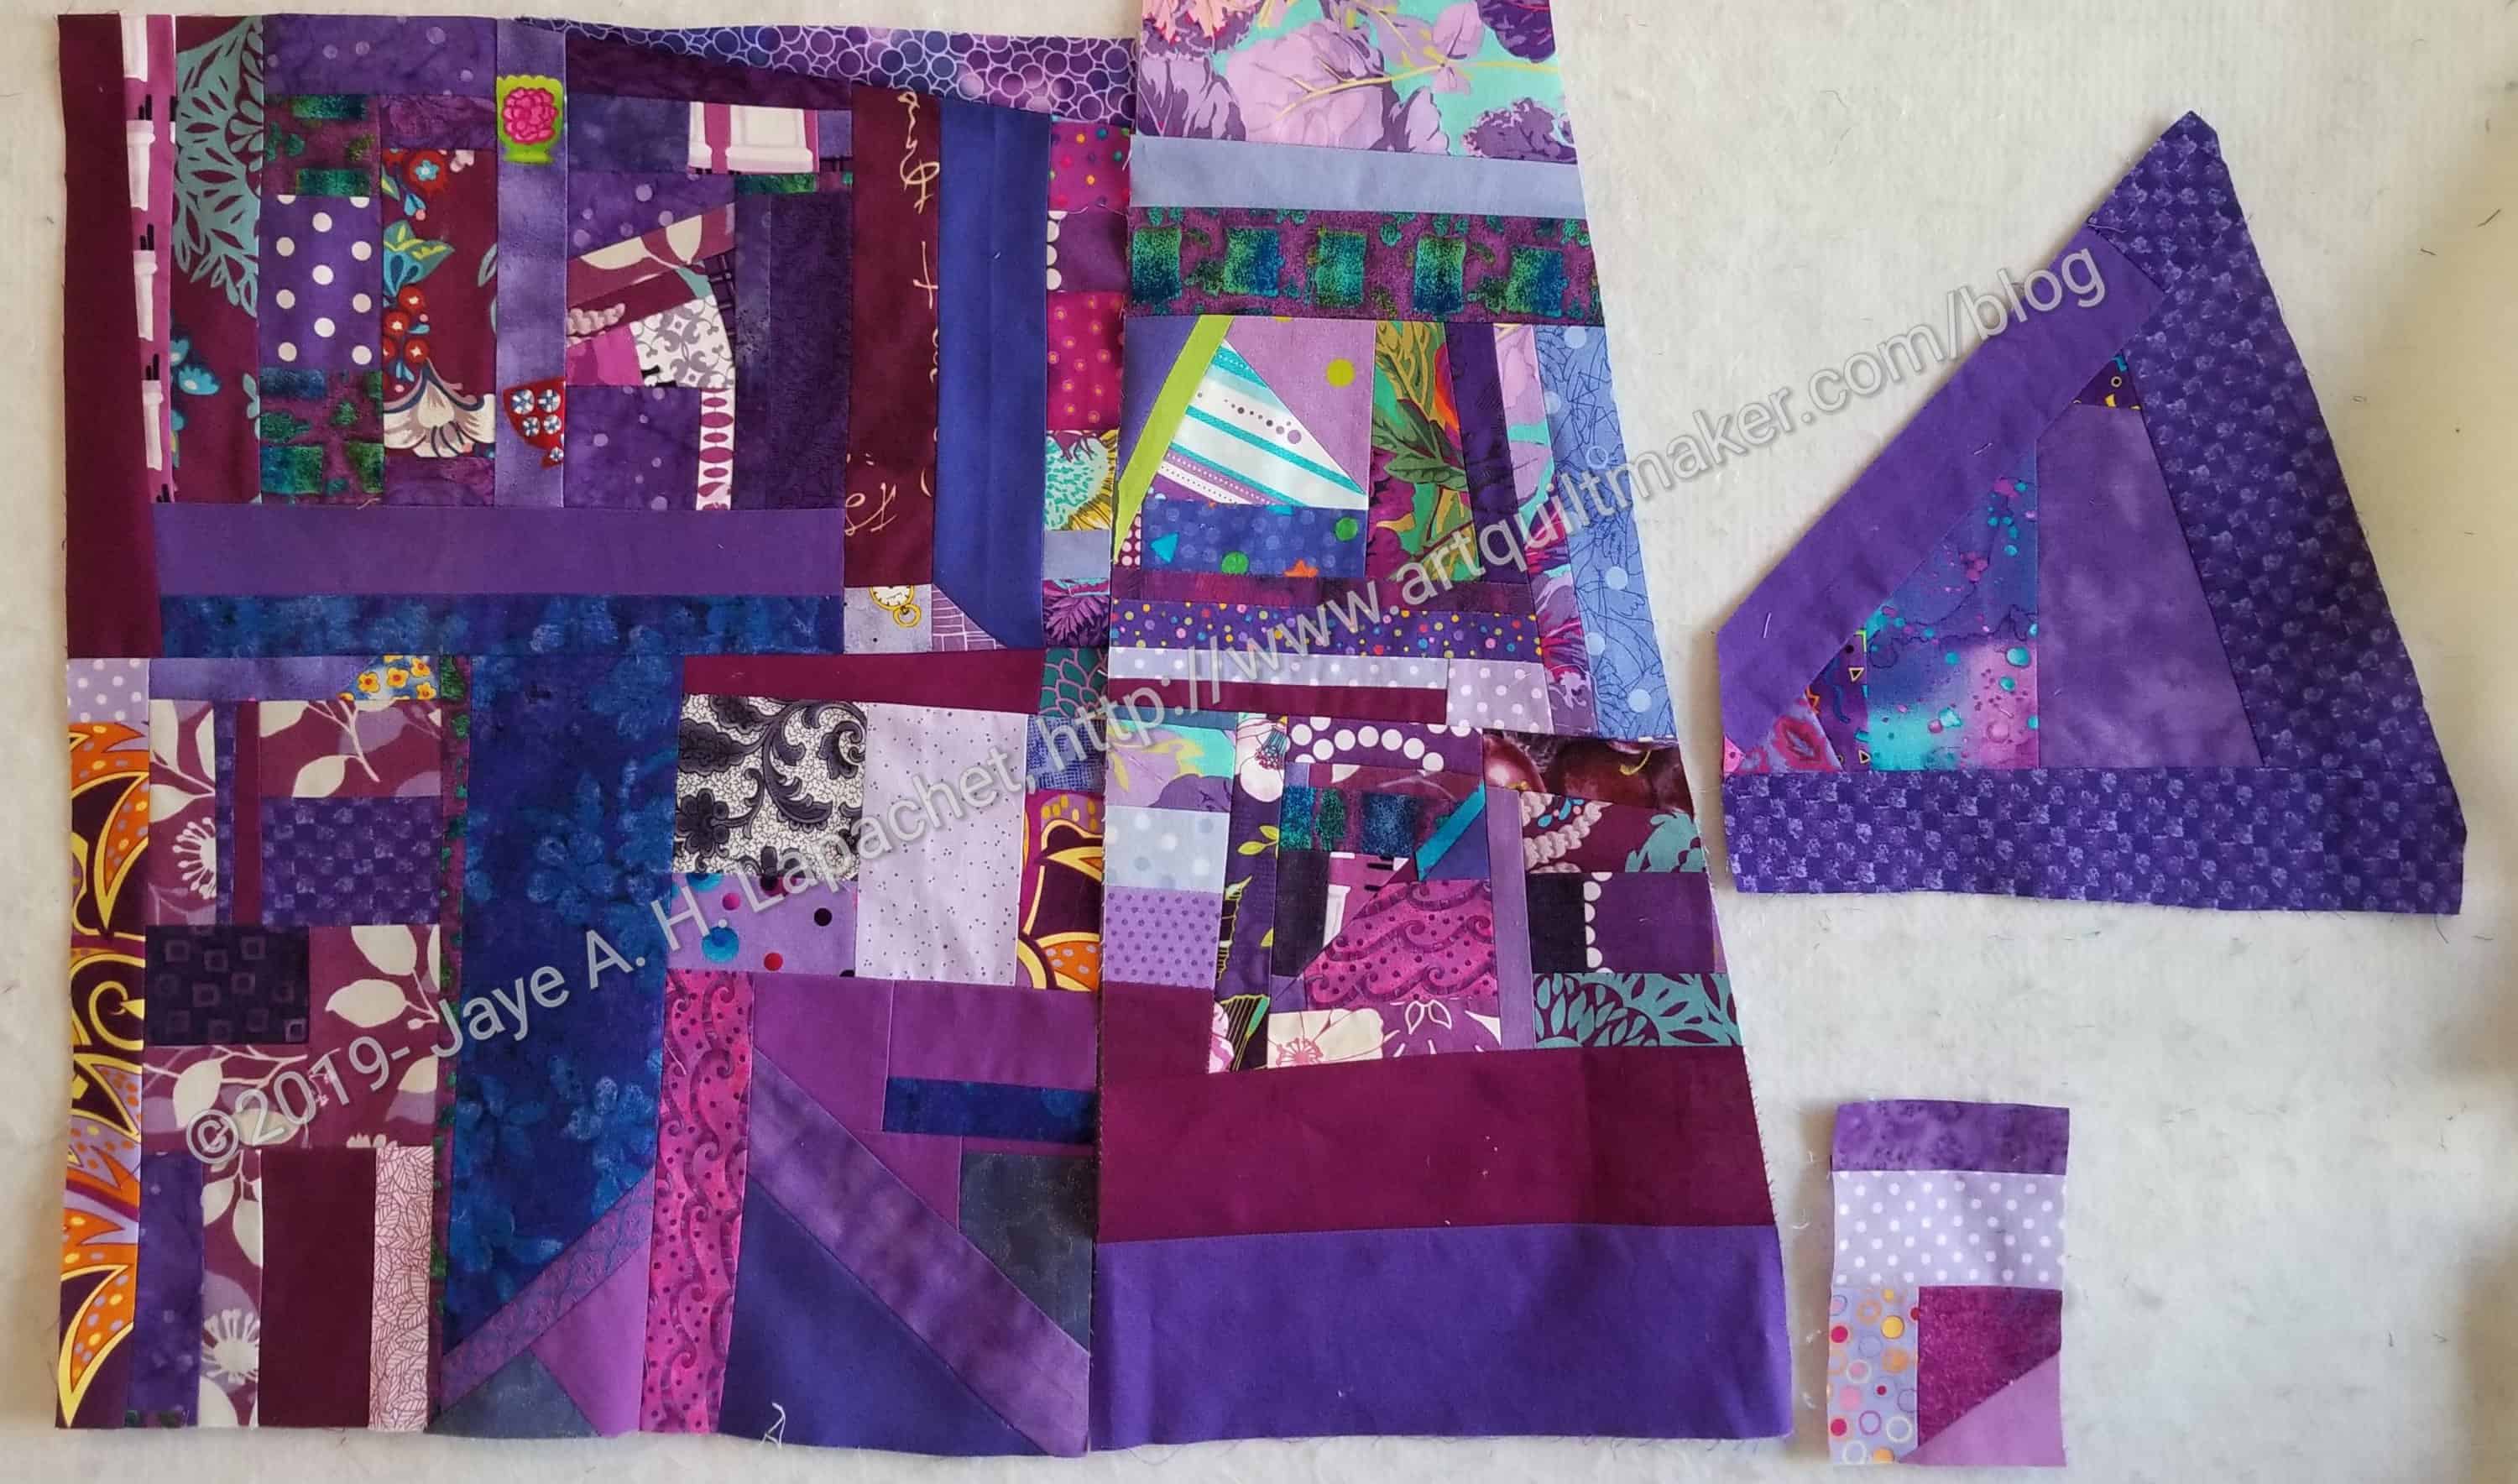
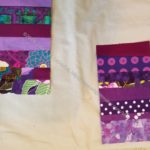
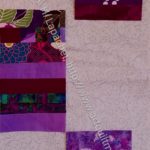
As I said the other day, I still have a lot of purple scraps. I also found some large purple shards in my purple scrap bin. I immediately pulled these out and have decided to use them for another improv donation top like the Green Thing. I can’t say I’ll make a companion quilt to each strip quilt I make, but I have a lot of scraps and this seems like a good way to use them up.
I know these shards probably started out as potential journal covers. I don’t know why I didn’t finish them, but now they can go to a good home.
Purple improv shard n.2
The triangular shard is really strange. I wonder what I was thinking when I made it. Of course, I have to make it into a square or rectangle, so I can use it. I do like it. If I can use lighter purples and lavenders around the triangle, I can preserve the triangle quality of the piece.
I have already added to the smaller piece shown above the triangular shard, using it as a leader as I was getting towards the end of the strip blockmaking.
Purple improv shard n.3
The last shard is good sized as well. The three pieces make a nice start to a donation top. They are all purple and that is good, but I hope the shards go together well enough to make something cohesive.
I do know that I am finding all this purple on my design wall to be oppressive and dark. Perhaps that is my issue with the darker purples? I know I felt like this when I was working on the purple bullseye. I do know that I have a good start to the purple donation improv top and that pleases me.
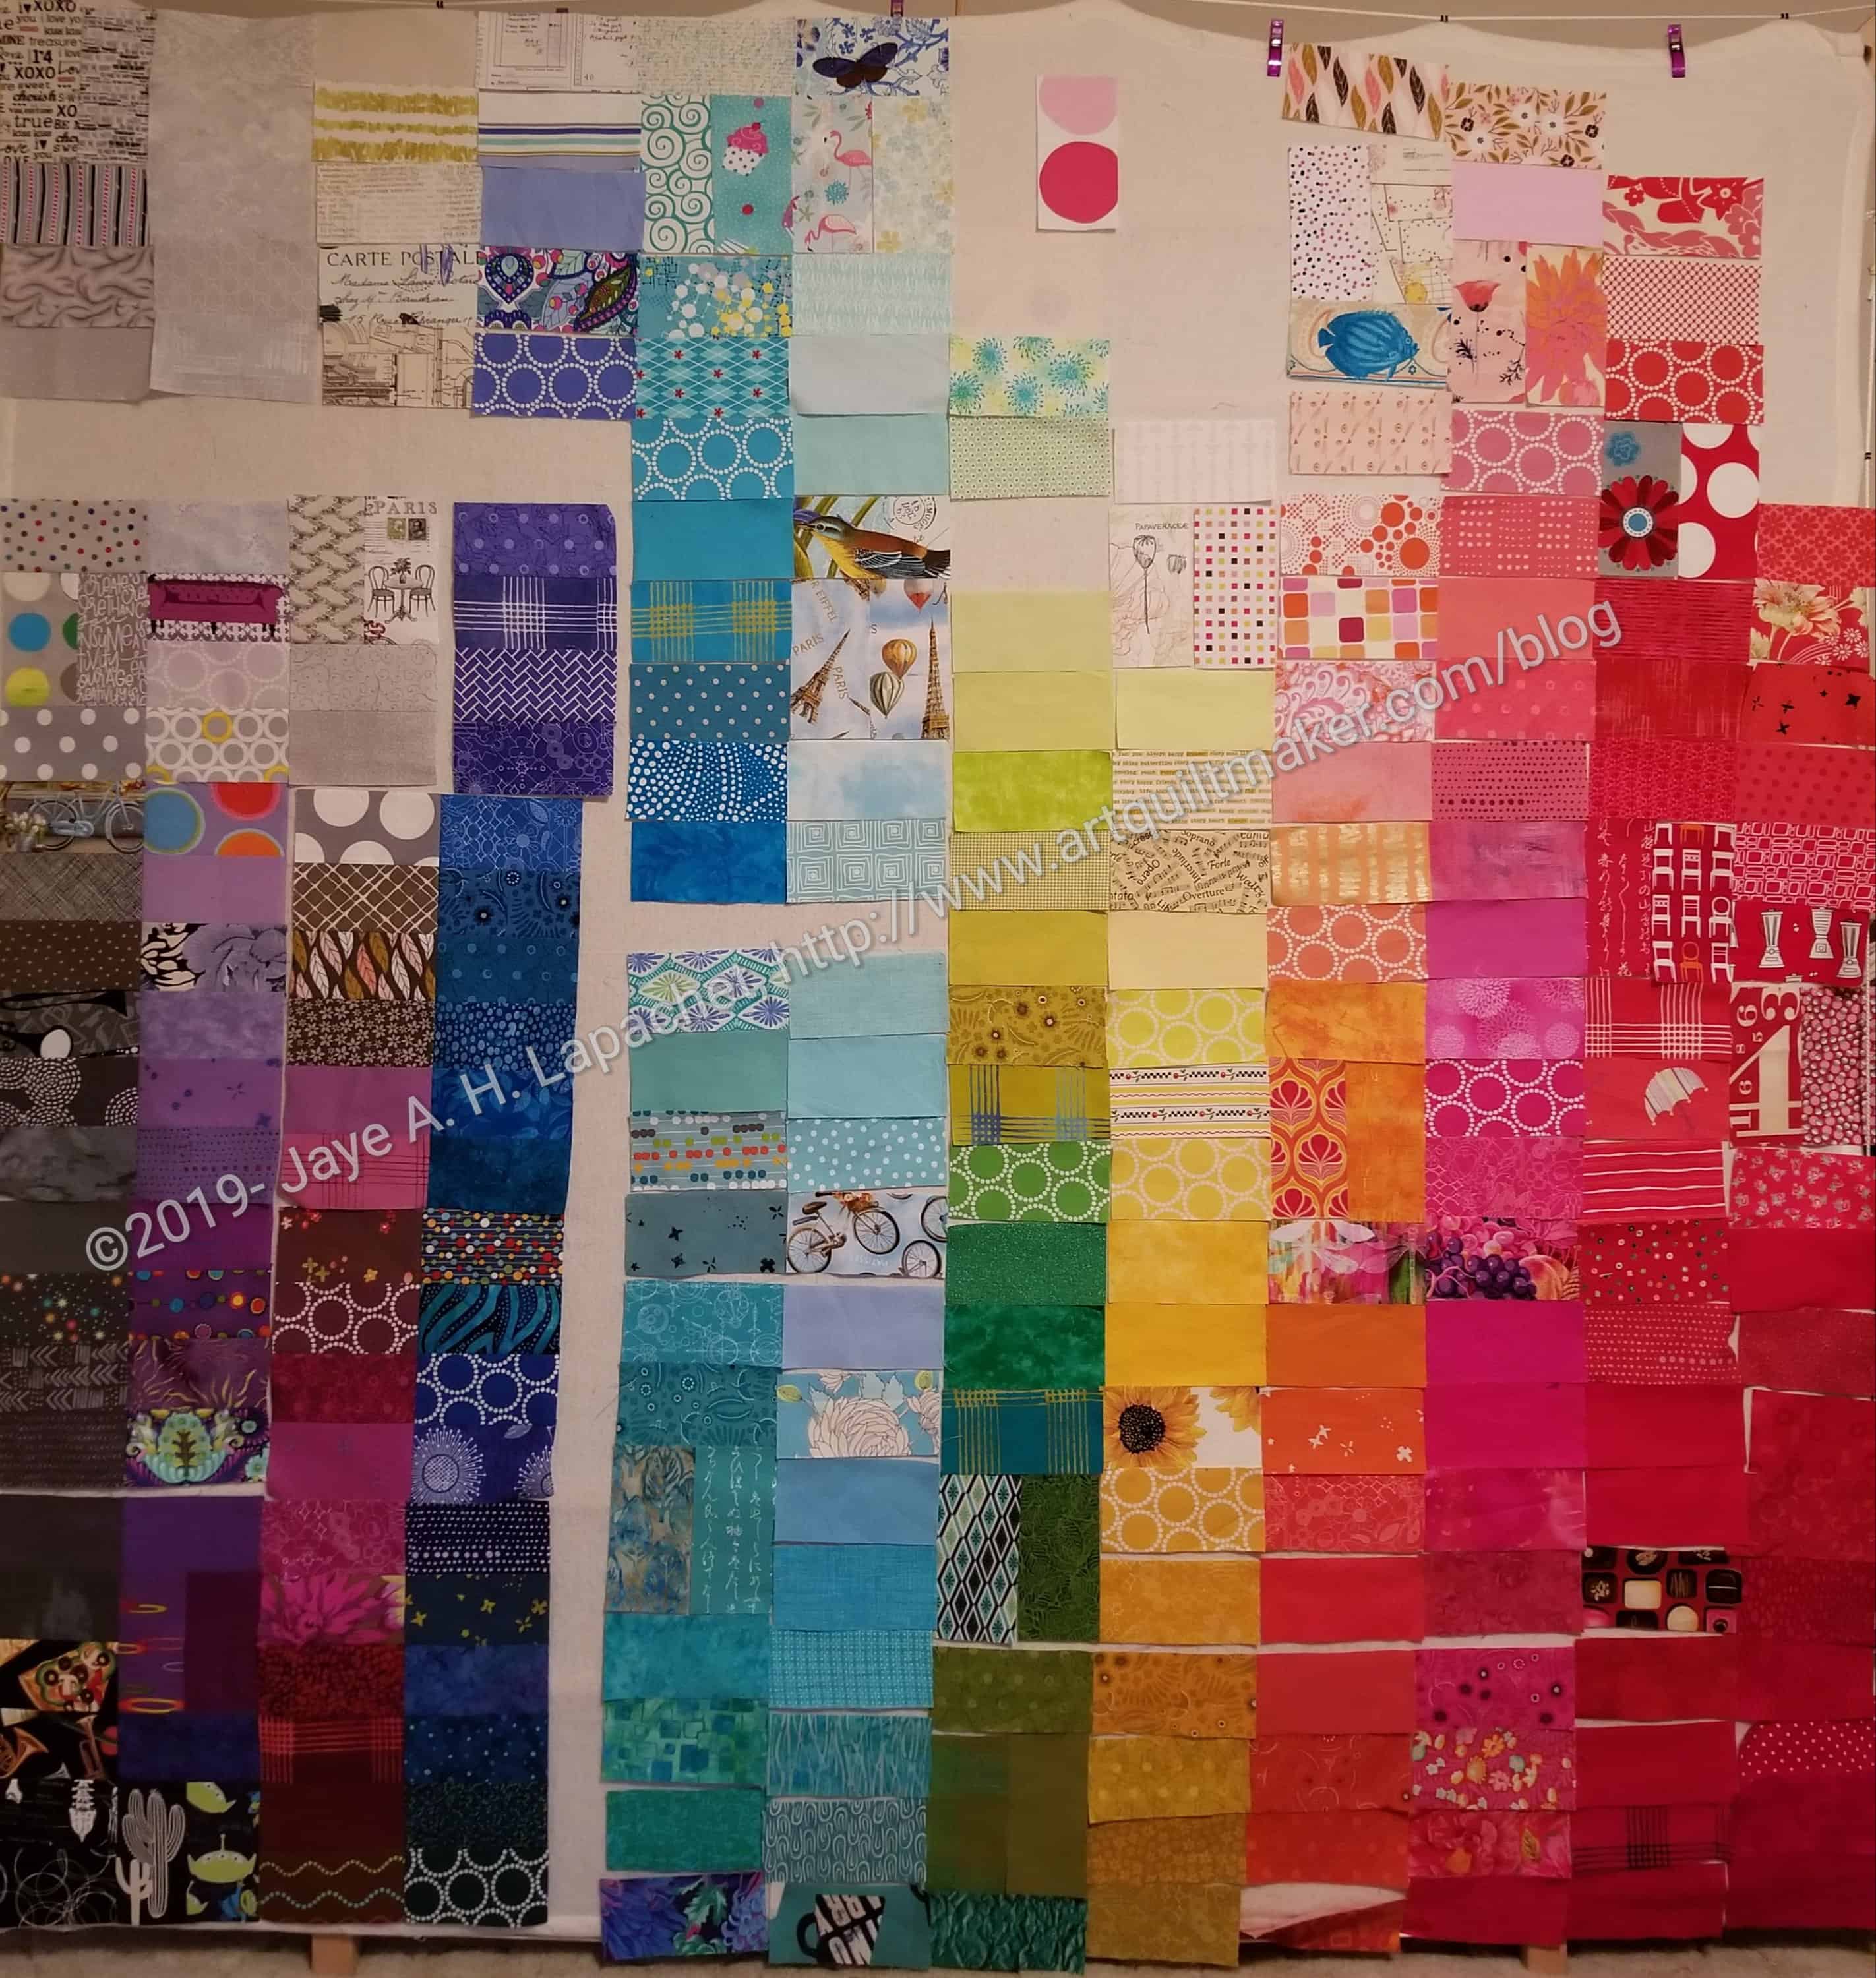
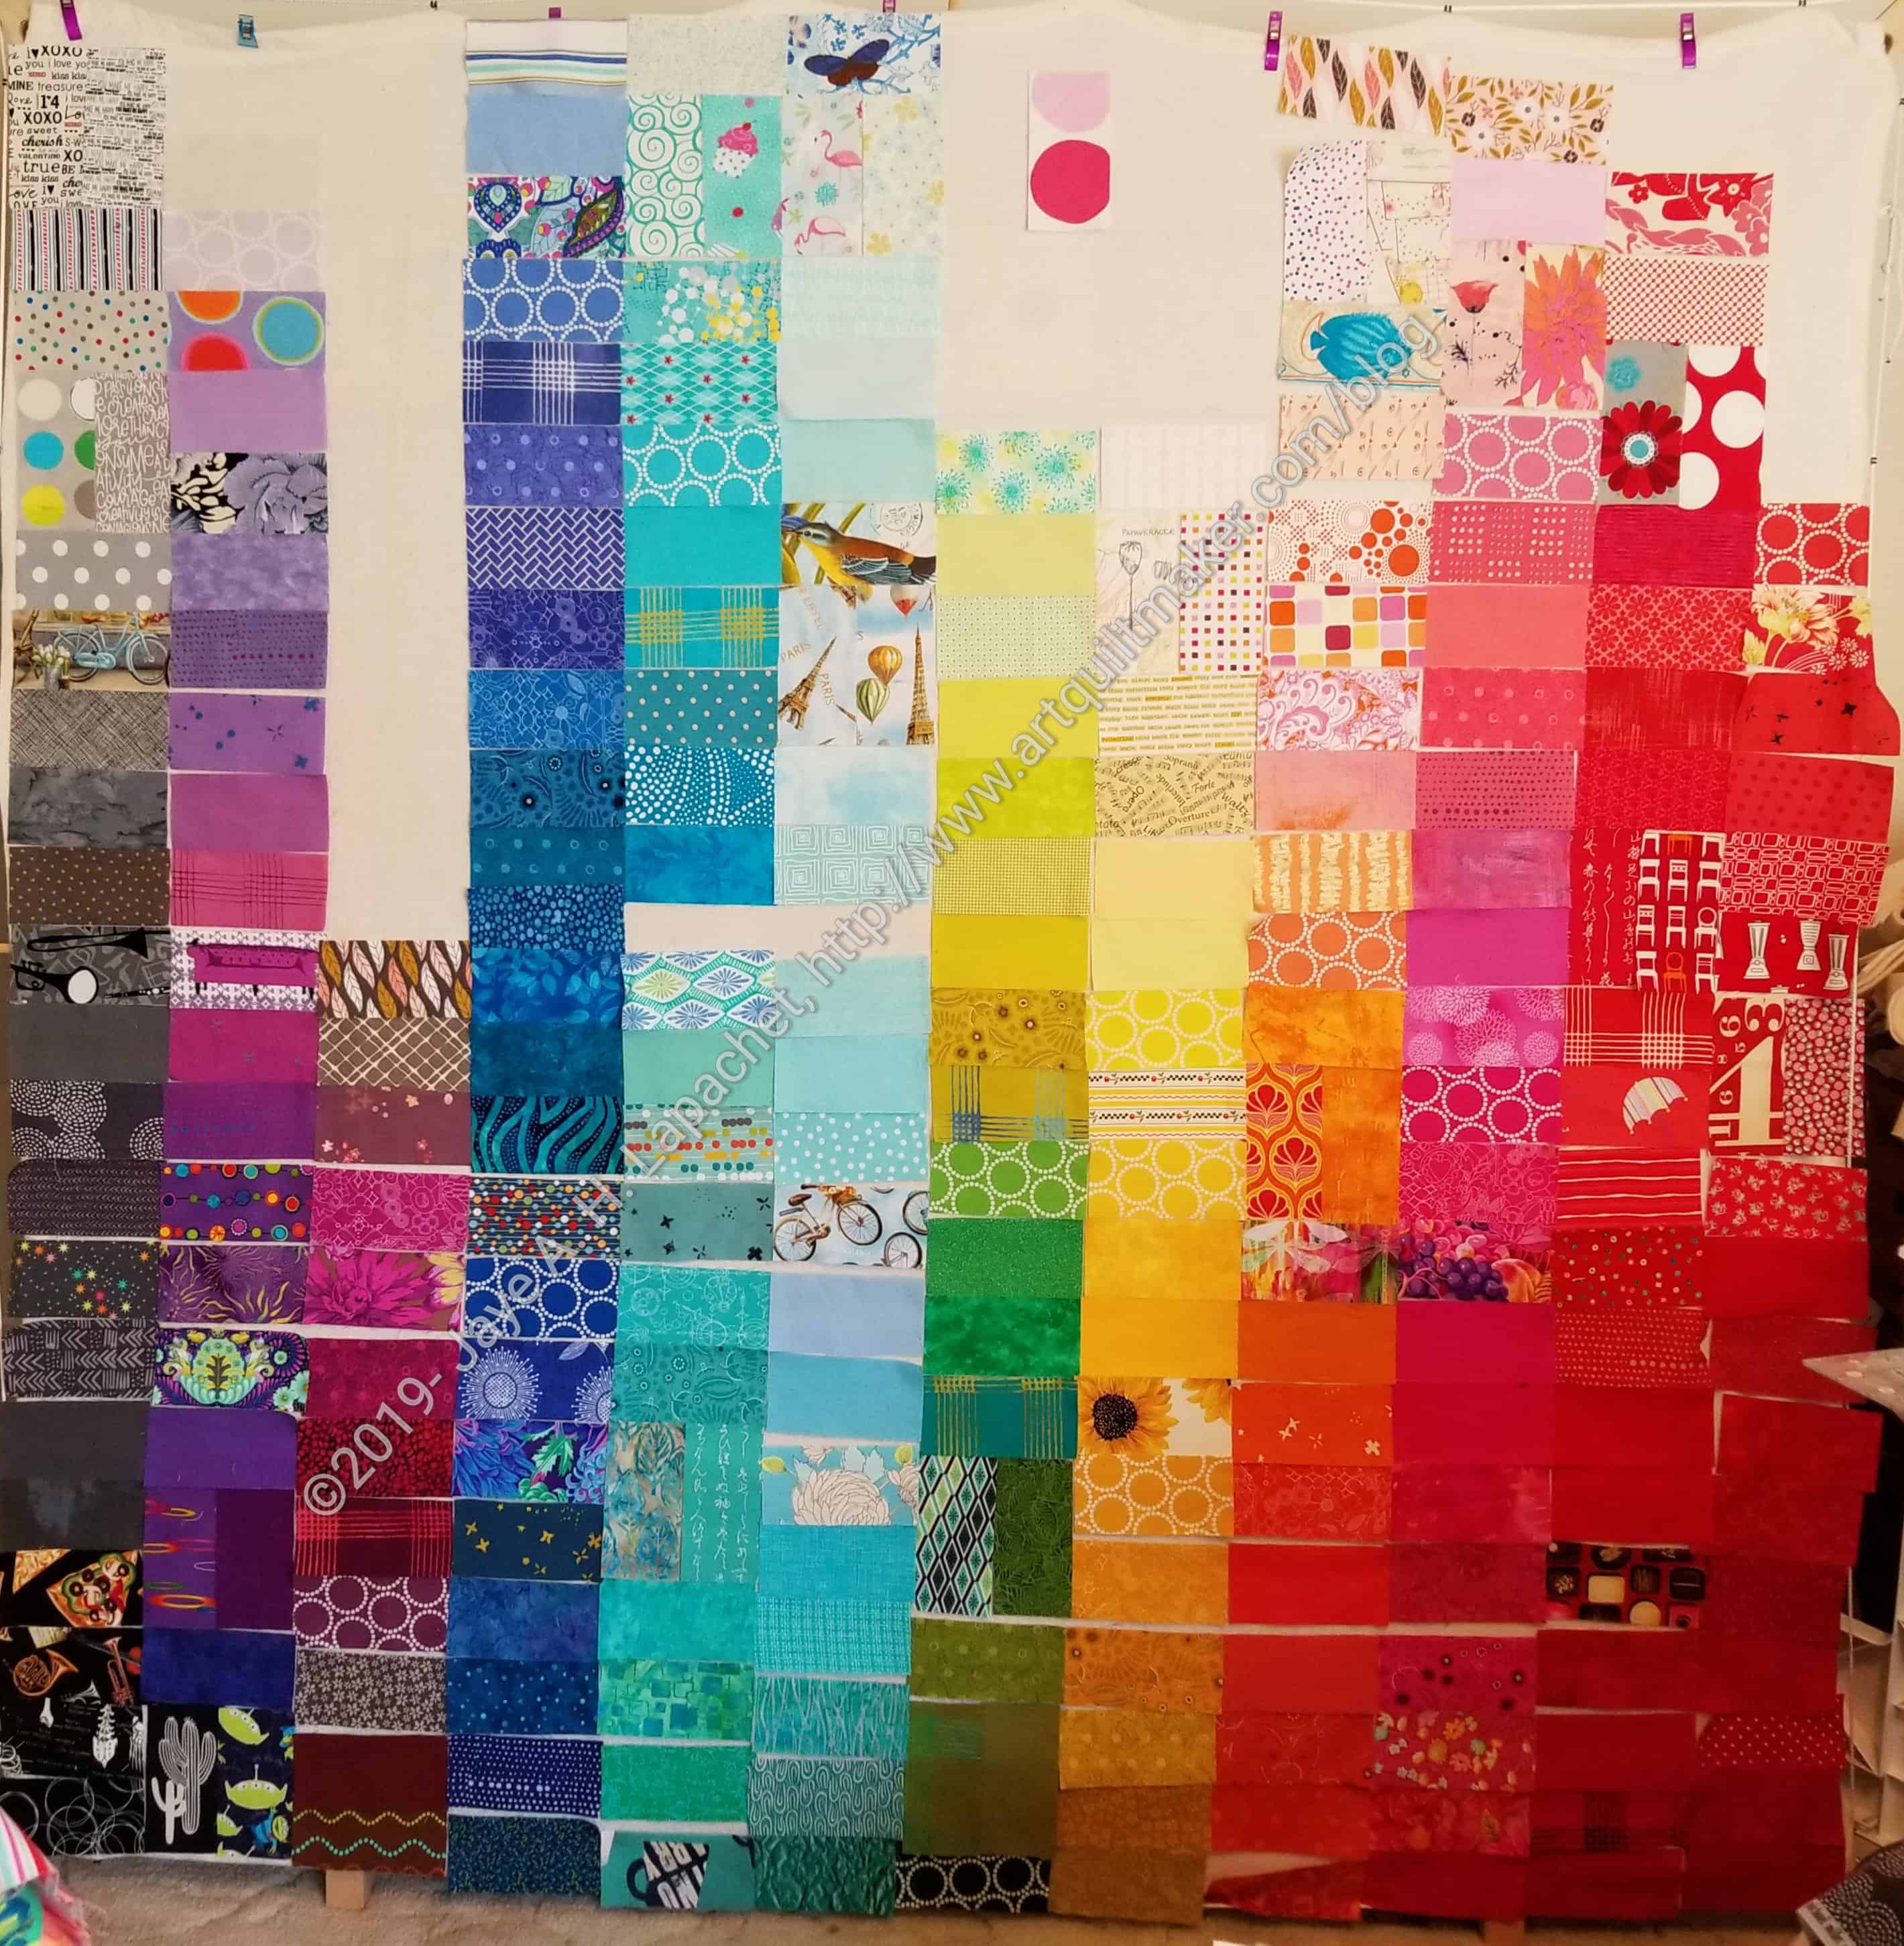
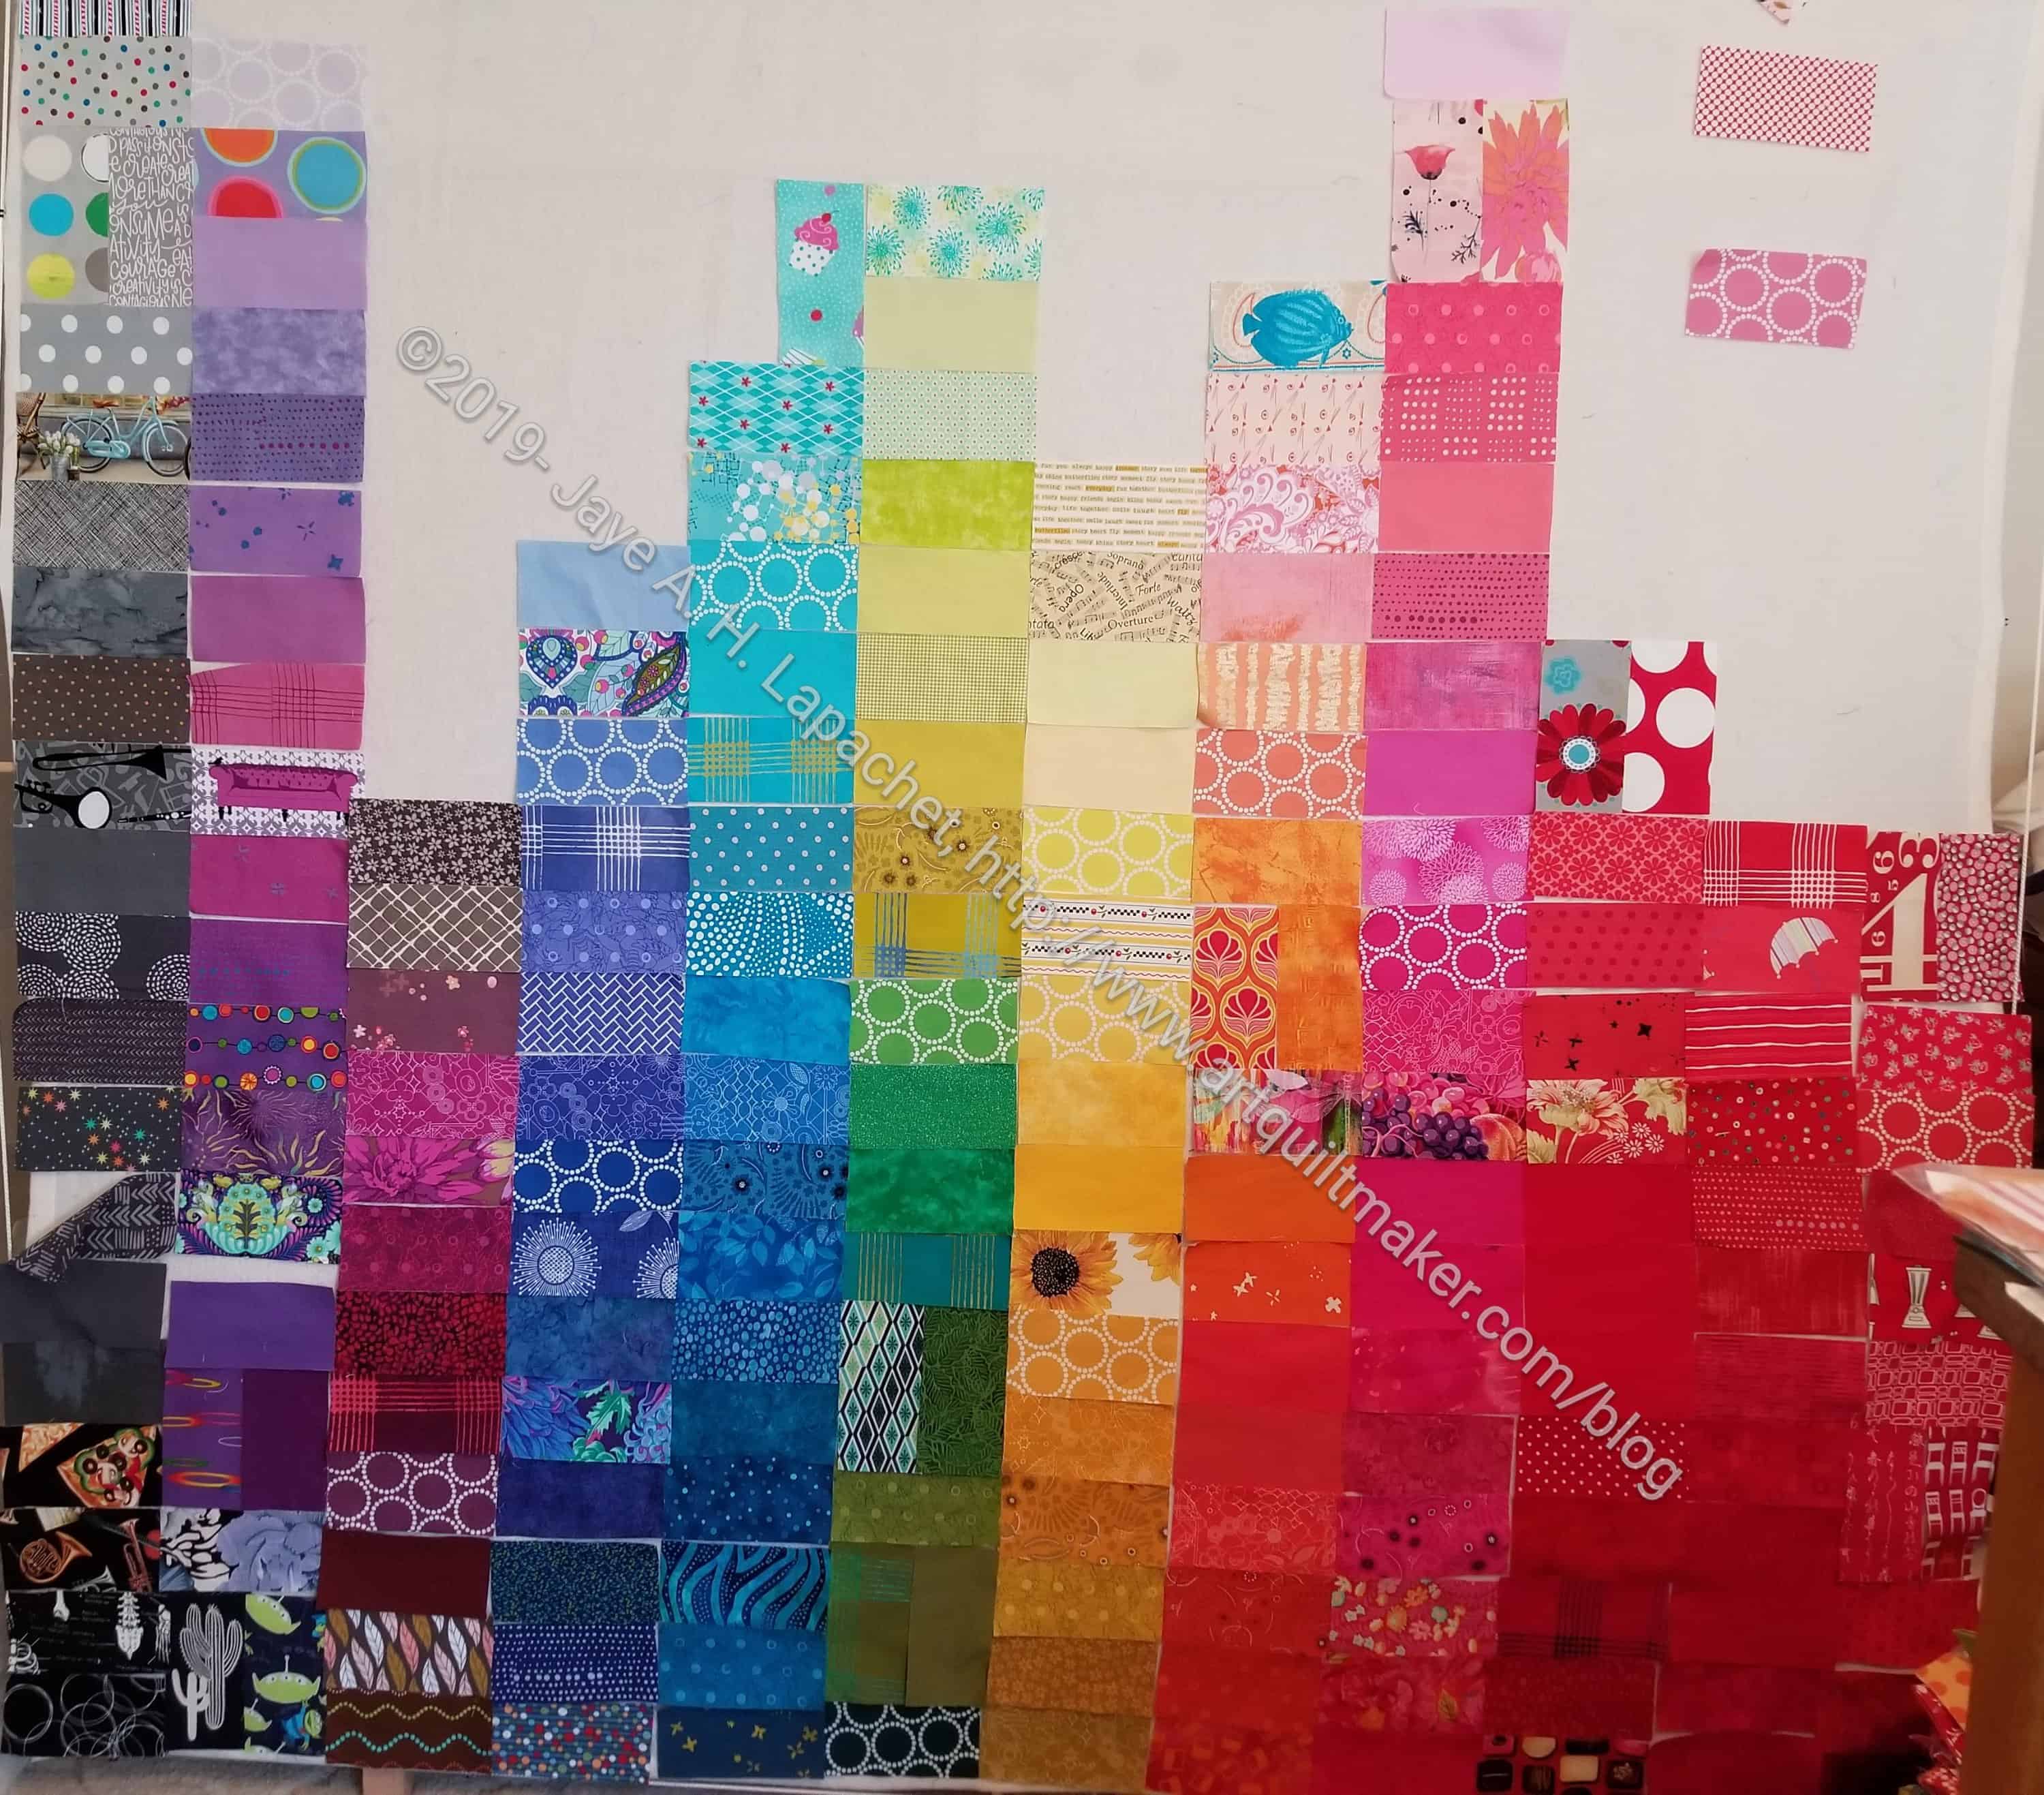
I rearranged all of the patches for FOTY 2017 and am feeling much better about the layout. I still have some design problems, but I feel like I am finally making good progress and am not feeling so much design despair.
The white and light patches will fill in the top of the piece to make it square.
Yes, colors need to be rearranged a bit and I need to slip in a column of turquoise, but otherwise I think this is basically the layout I will use. It is much better than my previous idea.
I know Angela loved the subway tile layout, but as a design concept, it wasn’t working. I may try that layout with smaller patches.
Again, my design wall cannot contain this series of quilts. I can’t tell you how frustrating this is. I have to figure out how to add 3 more columns to this piece without design wall support.