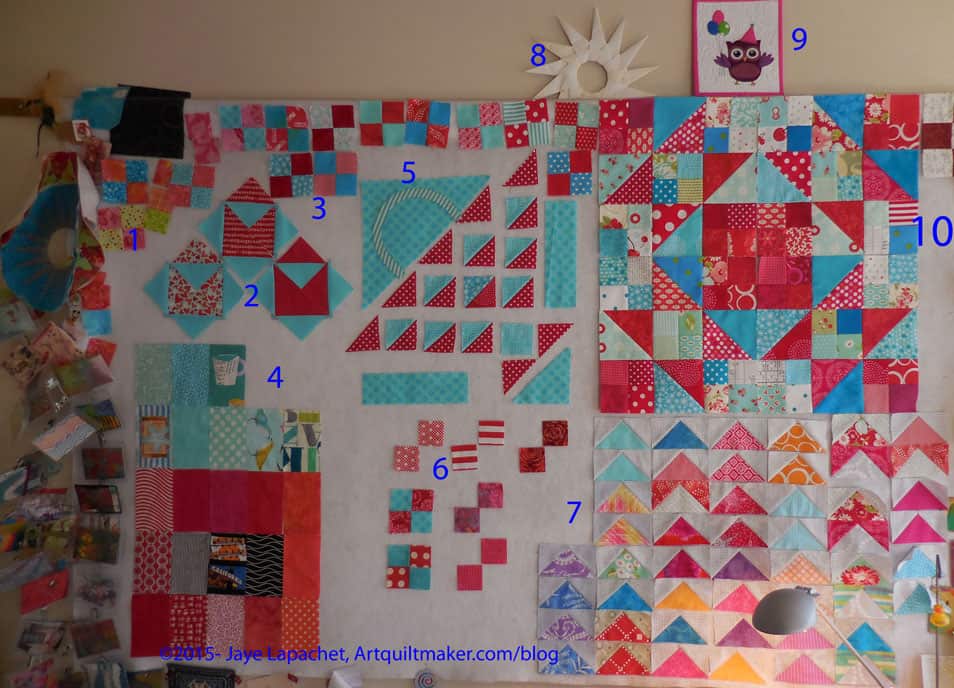
I haven’t done a post like this in a long time. A long time is about a month and a half. i wonder if it looks much different from my last post? You tell me.
Hot four patches. I want to make some kind of four patch quilt out of hot colors. This is a long term project that I am thinking about. It just came to the fore recently.
Love Notes quilt: this is a Missouri Star Quilt Company pattern. Someone told me it was boring, but I decided to make it anyway. I object to the bias edges, but there is something about it that I like. Perhaps the envelopes making people think of writing. I am not going to call it Love Notes. Look for a more comprehensive post later.
Red & turquoise four patches.
FOTY 2014 Patches: I have decided that this is the last batch of the FOTY 2014 patches.
Sampler quilt basket block in progress. I haven’t done more about the tutorial, but, see Frances, it is in process.
Red & turquoise four patches in progress.
Flying Geese project: TFQ and I are exchanging Flying Geese and these are the ones I have made and received so far.
Folded paper star: I made this with a friend and really wish I could remember how to make it. If you know, let me know. Each leg is made from a square piece of paper.
Four Stepping Stones blocks. I have a stack of fabric and various parts of blocks, but I haven’t made any new ones yet. No room on the design wall for another project.
I am linking up with Judy Laquidera at the Patchwork Times.
I finally took a little time to finish the larger piece.
I had sewn two sides of the yellow and red star segment onto the larger piece, but I hadn’t finished sewing the rest of the sides of the two piece segment onto the larger piece.
The folded over bits waiting to be sewn finally started to bug me. I took some time on Friday night to stitch the last remaining sides.
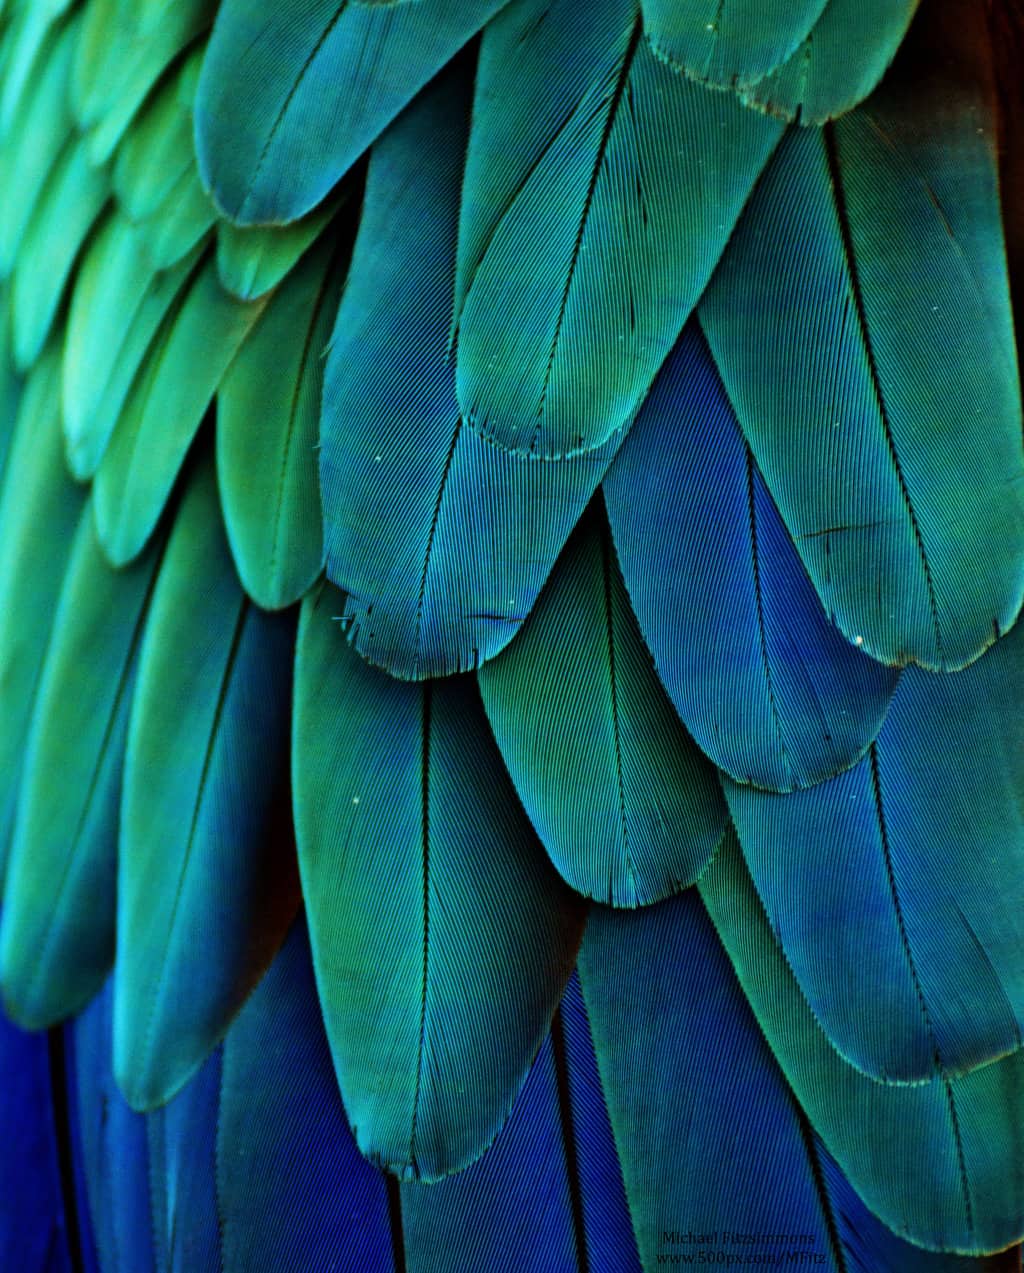
I have been thinking about birds on and off for the past couple of weeks. I watch birds out my window when I eat breakfast and there are a few different ones that like to eat the berries on a bush in my yard. I have been drawing wings and little fat birds in my journal. In the past few days I have specifically been thinking of peacocks. I do not actually like peacocks IRL very much. There are peacocks that stroll around our local zoo screeching and making a big mess. I do like to look at them in art, though.
Macaw Feathers by Michael Fitzsimmons
I have been thinking about peacocks because of Pam and the One Block Wonder quilt on which she is working. I saw a panel at Beverly’s of a peacock and really liked it. It made me think of Pam’s quilt, which she made with panels
While the feathers to the left are from a Macaw, the colors remind me of peacock feathers. The photo is a little dark for me, but there is something about it. I also saw the Majestic Beauties fabric by Wilmington Prints at the recent quilt show.
I was thinking that using the peacock panels might be a good way to use peacock fabric. I am hesitating because the colors are beautiful, but the fabric has a lot of beige in it and is not bright and cheerful. Still there are some companion prints that don’t have as much beige that might work. On the other hand the letters on the background of the Majestic Beauties fabric panel might make interesting motifs when put together in the One Block Wonder method.
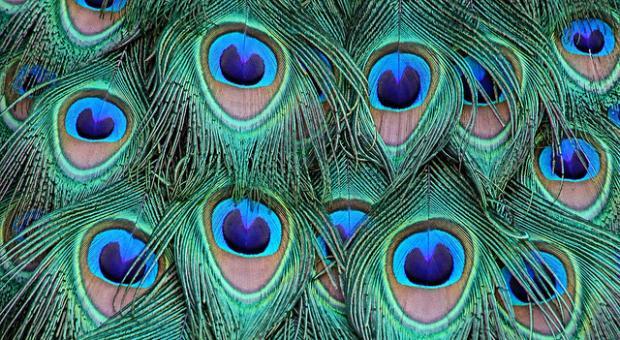
Peacock Feathers
I really just want to try the technique that Pam used, so perhaps I have enough repeats of a Philip Jacobs fabric to try it out without having to buy new fabric.
I know what you are thinking, because I am also thinking “OMG, Jaye! WTH? Another new project?!?” Yes, I am just starting new projects with wild abandon! 😉
Post the direct URL (link) where your drawing, doodle, artwork is posted (e.g. your blog, Flickr) in the comments area of this post. I would really like to keep all the artwork together and provide a way for others to see your work and get familiar with your blog or website.
The Creative Prompt Project, also, has a Flickr group, which you can join to post your responses. I created this spot so those of you without blogs and websites would have a place to post your responses.
We are also talking about this on Twitter. Use the hashtag #CPP
lobster tail
lobster bisque
Maine lobsters
lobstermen
Definition: “Clawed lobsters comprise a family (Nephropidae, sometimes also Homaridae) of large marine crustaceans. They have long bodies with muscular tails, and live in crevices or burrows on the sea floor. Three of their five pairs of legs have claws, including the first pair, which are usually much larger than the others. Highly prized as seafood, lobsters are economically important, and are often one of the most profitable commodities in coastal areas they populate.[2] Commercially important species include two species of Homarus from the northern Atlantic Ocean, and scampi – the northern-hemisphere genus Nephrops and the southern-hemisphere genus Metanephrops. Although several other groups of crustaceans have the word “lobster” in their names, the unqualified term “lobster” generally refers to the clawed lobsters of the family Nephropidae.[3] Clawed lobsters are not closely related to spiny lobsters or slipper lobsters, which have no claws (chelae), or to squat lobsters. The closest living relatives of clawed lobsters are the reef lobsters and the three families of freshwater crayfish.” (Wikipedia)
2015 film: The Lobster is an upcoming romantic science fiction thriller film directed by Greek director Yorgos Lanthimos in his English-language debut.
Lobster Theremin
Lobster is a game programming language. Unlike other game making systems that focus on an engine/editor that happens to be able to call out to a scripting language, Lobster is a general purpose stand-alone programming language that comes with a built-in library suitable for making games and other graphical things. It is therefore not very suitable for non-programmers. (Wouters Wiki)
I don’t usually do these type of posts, but this picture came up this week regarding some pre-college trouble the YM is having. He said that this picture described how he felt exactly.
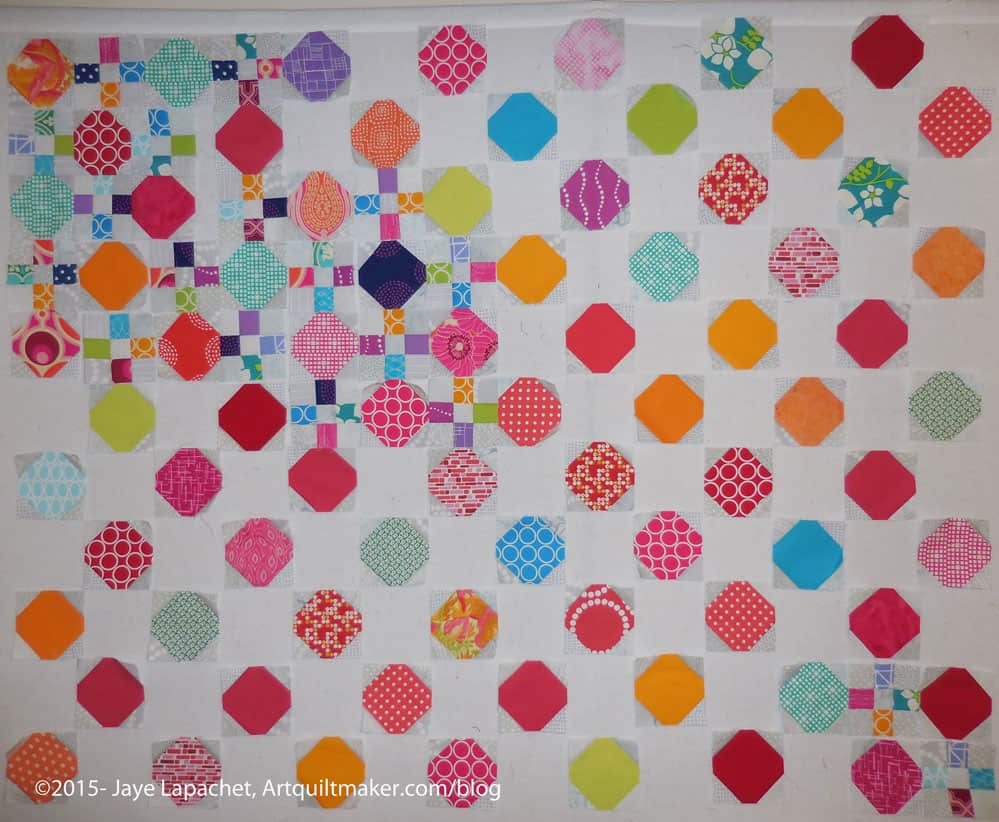
I don’t think I have made much progress but I am making some progress. I finished all of the extra octagons so the piece is much bigger. I have to make a few more just to complete one side. I also still have a lot of nine patches to make.
I am now out of grey squares and have to make a concentrated effort to cut a bunch more. It isn’t a big deal; I just have to do it.
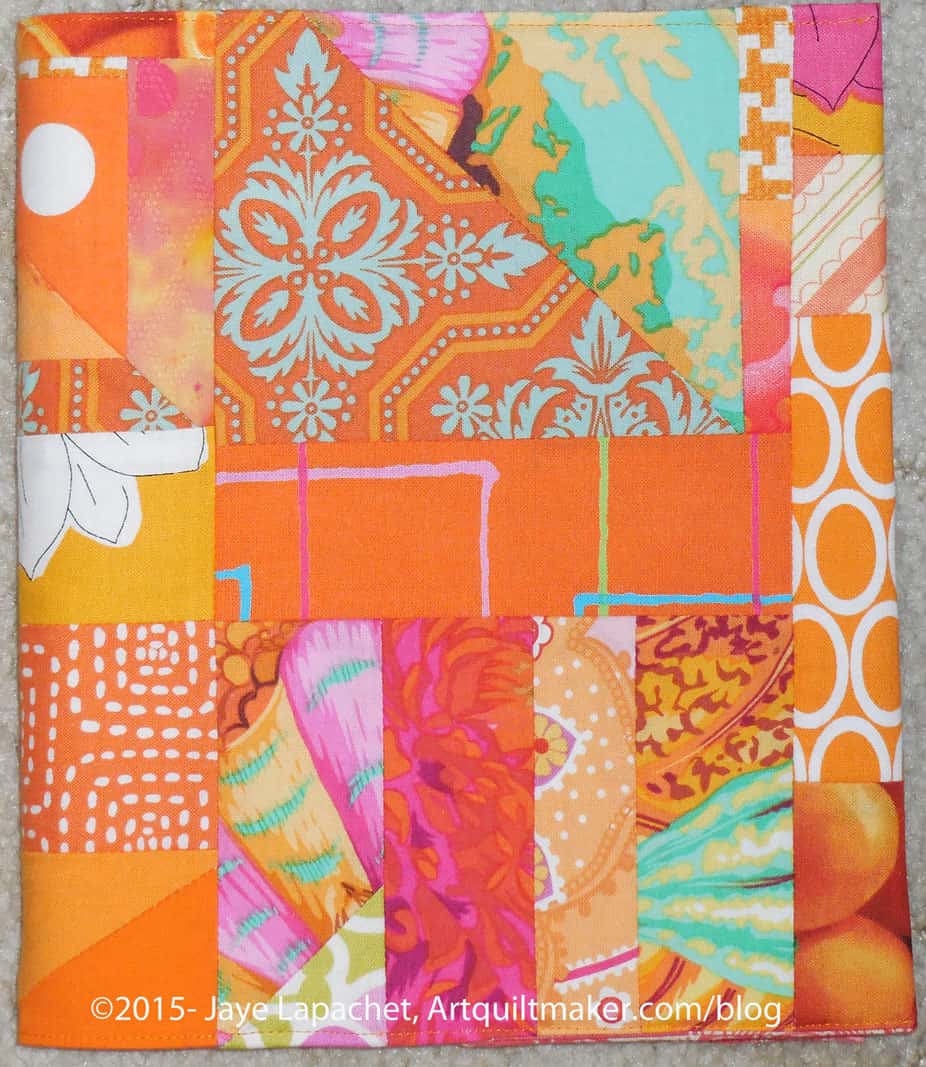
I started another journal cover using oranges pretty soon after I realized I wasn’t happy with the Pink Mermaid Tail Journal Cover. Last week I finished it and I didn’t even really realize that it was almost done. I really just had to put on one piece and had the top done. Gotta love those leaders and enders.
I went for larger pieces this time, so I wouldn’t have to deal with the seams that were so problematic last time. I still wanted to get small enough pieces so the piece wouldn’t be boring. In some way making these journal covers using mosaic quilting is a process of piece size, color, number of pieces, pattern, size of motifs. It may seem stupid, but somehow it feeds something inside of me. I can piece any way I want. I don’t have to worry about a block pattern; I can just piece and focus on color. Because I do these monochromatic – mostly – pieces I can also get rid of the worry about the combination of colors. All of these things boil the process down as far as I can right now.
Cover closed
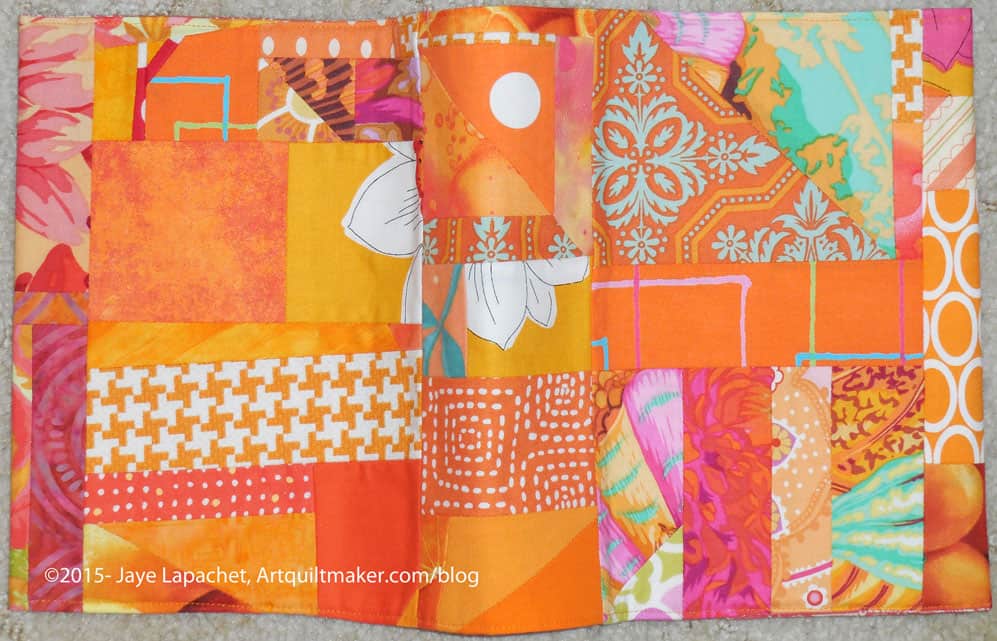
Looking at the photo above, the cover looks like a bit of a mess, but once the journal cover is put together, it looks a lot better. The piecing is moved into visually manageable bites.
A lot of these fabric motifs are large prints or bold prints. I used a number of different Philip Jacobs prints. Lots of modern dots and other modern prints. I also added a few fruit and veg prints from the Food Quilt.
All Outside
I never know how orange will act and I am always a little scared when I do a project with a lot of orange, then I am pleasantly surprised at how it turns out. I like this journal cover. It is bright and cheerful. It uses some of my favorite fabrics and the seams don’t bug me.
You can see how different the piece looks when it is sewn (left). It is still a little visually crazy, but much more contained than the very top photo.
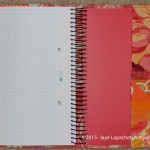
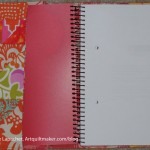
Inside Cover
You’ll have to click on the photos above to see the actual insides of the journal cover. I don’t have control over the thumbnails.
I feel like this is one of my most successful journal covers.
The vendors were setting up as well and I saw Colleen (Sew Little Time Quilting) there. She has ALL of the American Made Brands solids and I have to say it took incredible willpower not to order half yards of all of them from her. She also has two of her Labyrinth quilts with her at the show. The patterns are finished and available.
This show is held in the same location as PIQF, but in a different hall (I think). I went late, but got there in time to help finish hanging the BAMQG quilts. Amanda, Kelly and Michelle had it well in hand. I added an extra pair of hands and driving skills.
Putting up with Poles
There was some putting up and taking down, redoing and moving, but it went very smoothly. Kelly was well organized and Amanda has great project management skills. The quilt show has interesting tools for doing the hanging and some balance is required, especially for the larger quilts.
The biggest problem we ran into was the creases in the quilts. I know there isn’t much we can do about it in general, but Kelly decided we needed a steamer, but we needed a break and some of us were melting down from lack of food. We hopped in my car and went to lunch to decide on our next move. At lunch we decided that yes, we needed a steamer or a super duper steam iron. On the way back to finish our work, we stopped at Fry’s to see what they had.
Steamer
We ended up buying a Conair Steamer and by ‘we’ I mean Kelly. There were 3 choices. We eliminated the travel version right away, because they didn’t have any (the hovering salesman who didn’t really add to our conversation, but wouldn’t leave told us) and after about 10 more seconds of deliberation Kelly decided on the Conair. We also got water, Snickers and an extension cord.
I have to say that steamers are the way to go. They don’t, however, absolve all sins, but it did a great job with the folds, etc, from storage. Kelly was really happy that she got it. The quilts looked better.
Funnily enough, everyone else at the quilt show came running over when they saw the steam, thinking there was a fire. When they saw what we were doing and that there wasn’t a fire, they thought we were brilliant. A few others, including the featured artist asked to borrow it. Every quilt show management should have one.
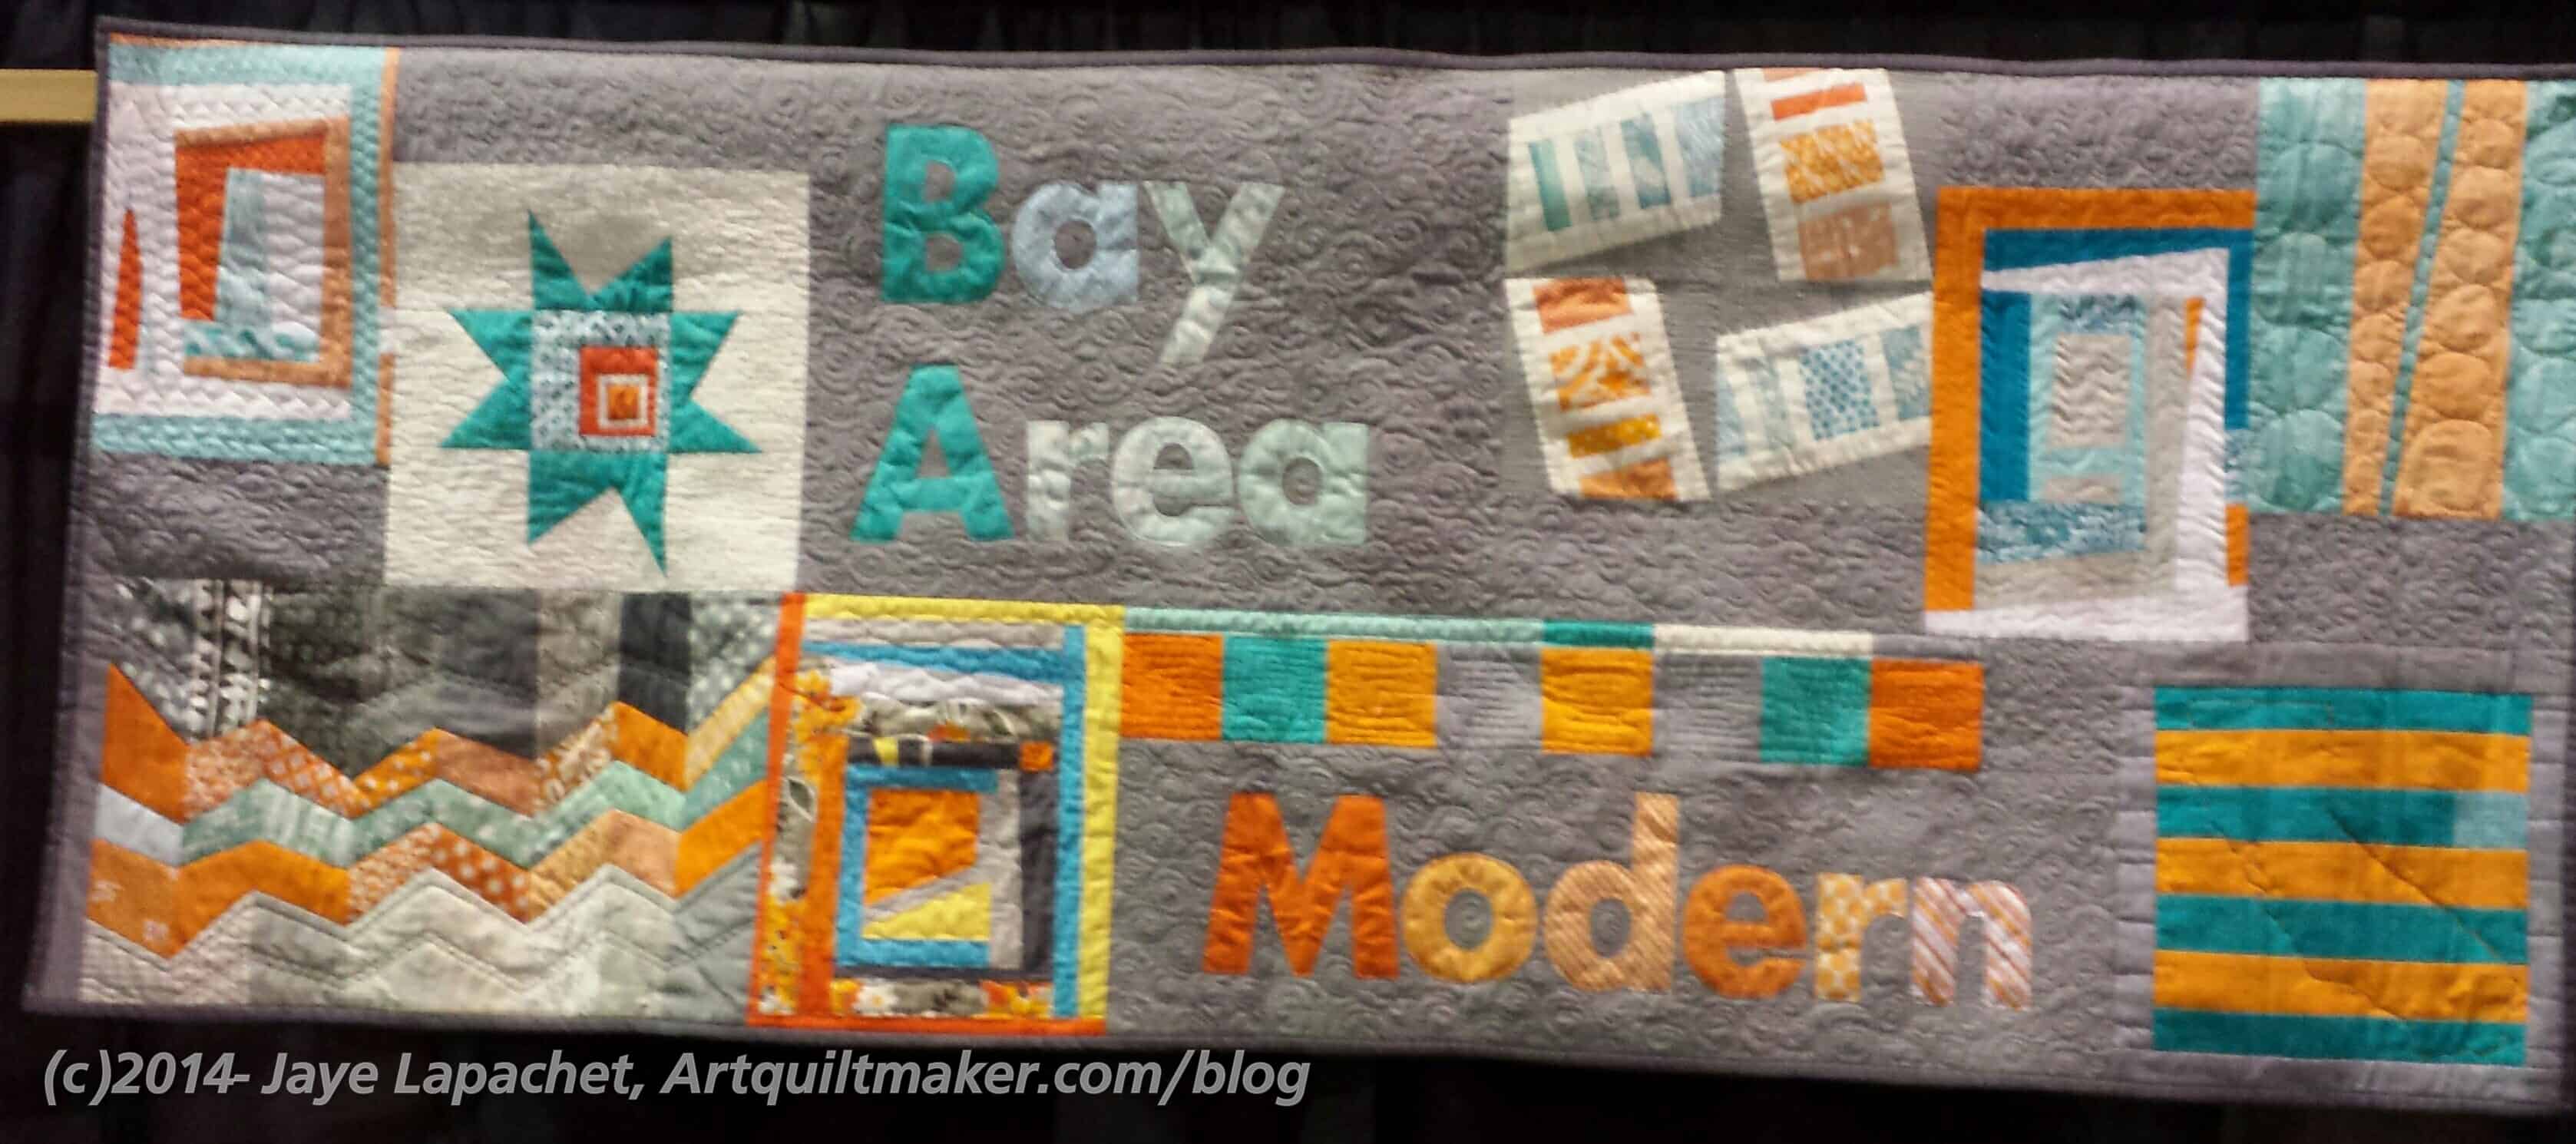
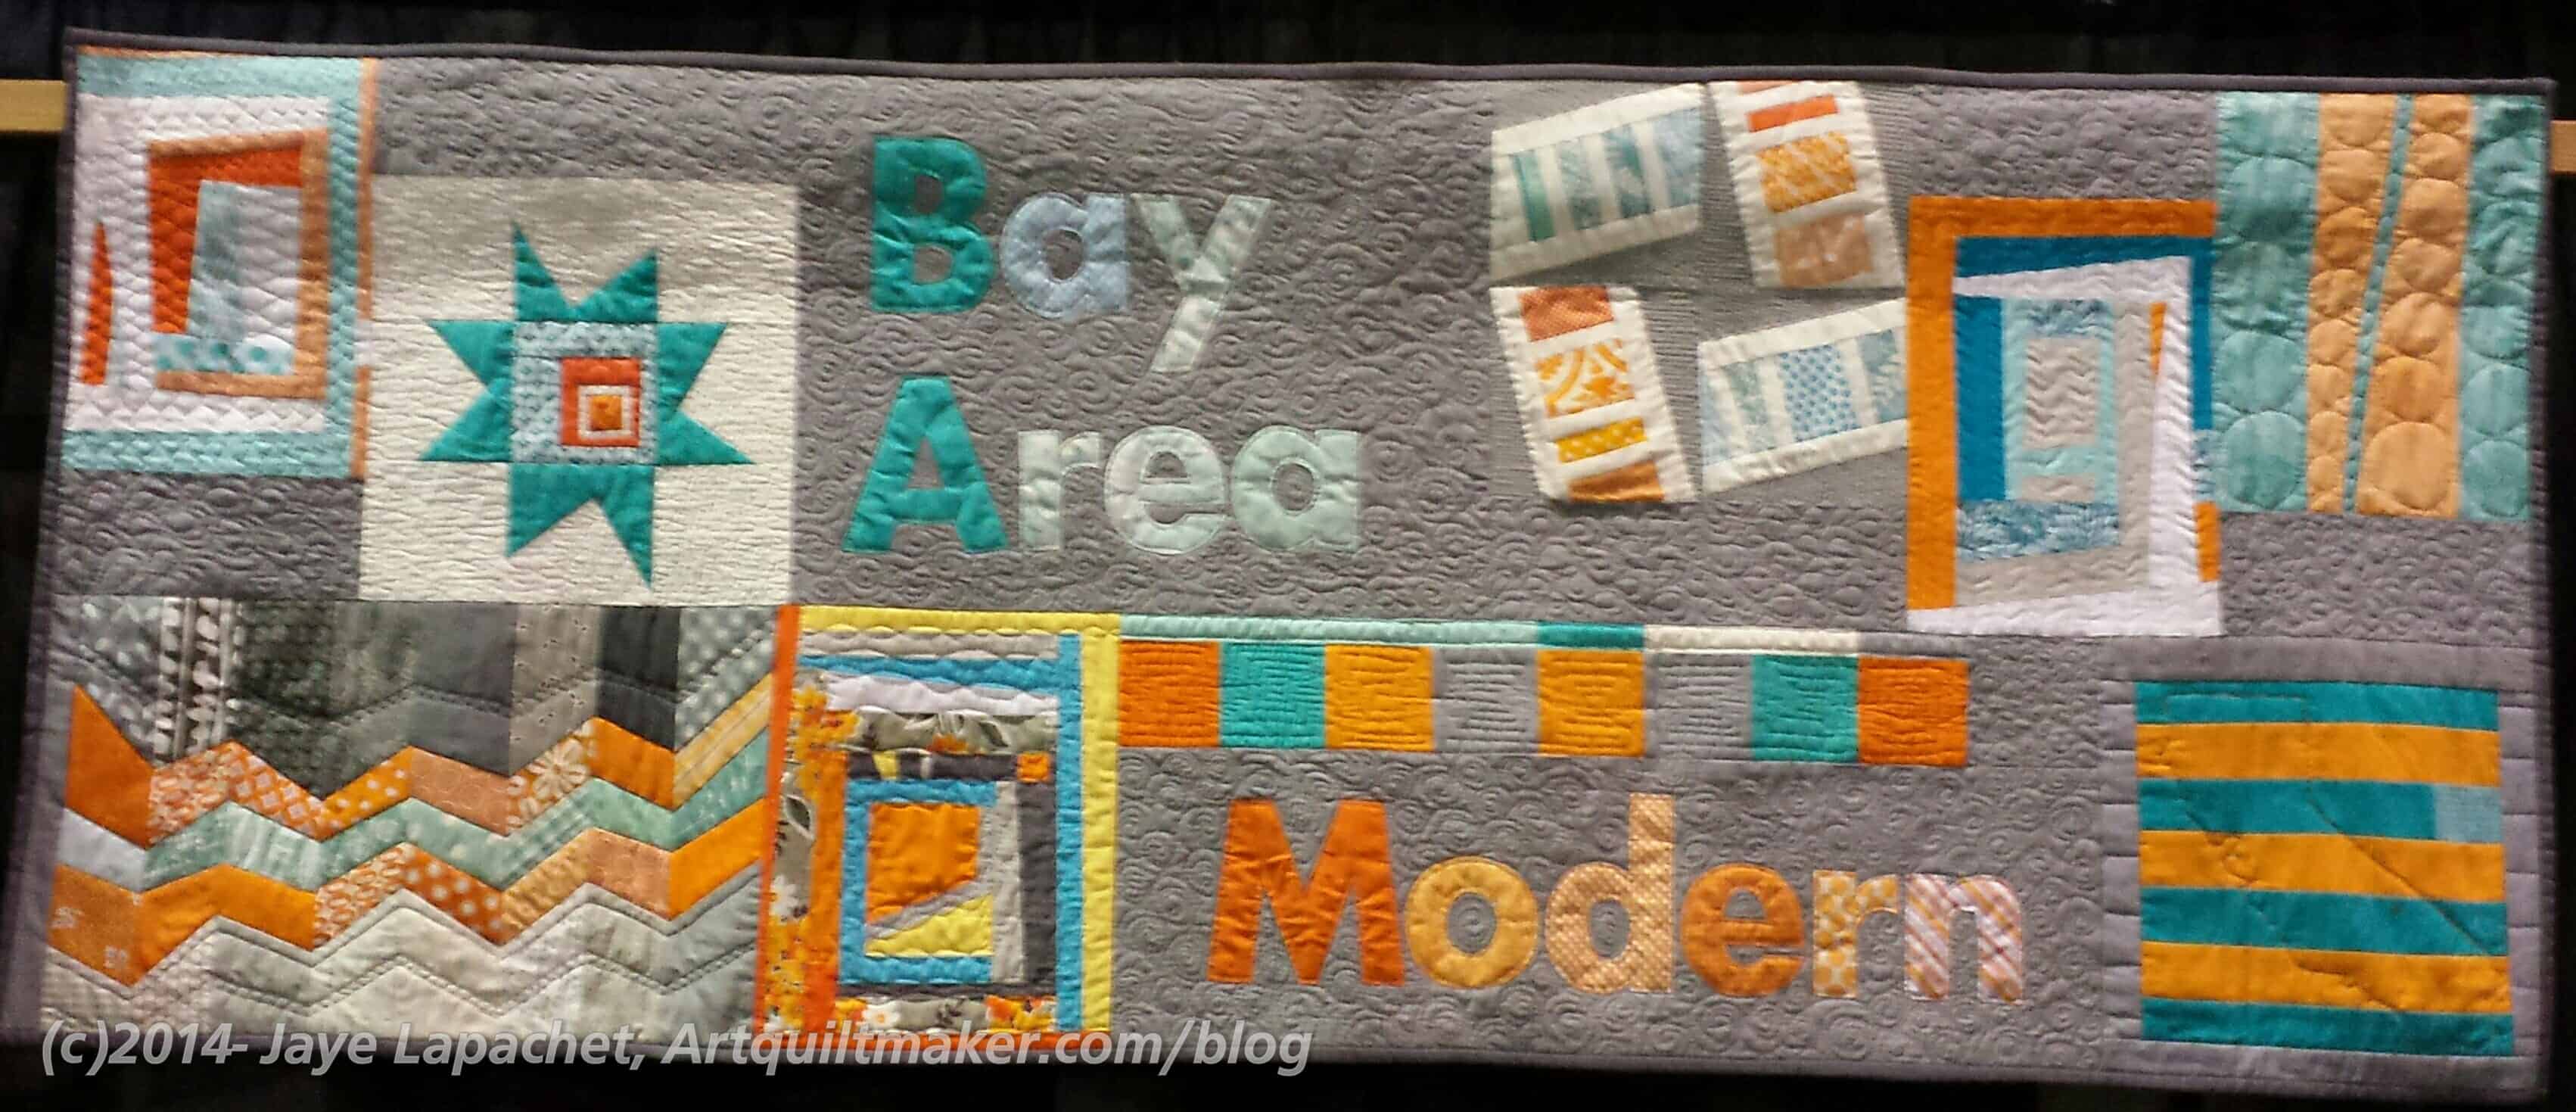
Bay Area Modern Banner Pre-Steamed
Pre-Steamed
Bay Area Modern Banner Post-Steaming
Post Steaming
We thought the quilting stood out a lot of more, though I think my phone photos don’t really do the work and expense justice.
Amanda as quilt hanger
Michelle hard at work
Steaming the quilts
All in all it was a good and fun day. I was glad I went despite the drive. I always enjoy hanging out with the BAMQGers!
DH has to plan his Grand Parlor. This is the annual conference of his statewide organization, The Native Sons of the Golden West. As part of that, I am in charge of organizing some events for the Ladies. I have to create or decide on the following:
Ladies Luncheon table decorations
Ladies Luncheon party favors
Ladies Tea decorations
Cocktail party invitations
Cocktail party decorations
Ball table decorations
Who knows what else?
I am not sure this is everything and I don’t have to have everything finished until May 2017. This, endeavor, however has been on my mind since I found out what I have to do. It is reiterated periodically when I am handed a file of random papers or a large envelope appears in my mailbox.
I was thinking of asking you all to make fabric flowers. YOU, of course, would do a fantastic job, but, as you know, the quality of the items received can vary quite a bit and the judgment factor on all of these things will be high. I also wasn’t that excited about fabric flowers looking good enough after transport. I need to do a stellar job. I just couldn’t think of anything else.
Kelly and I went to lunch and I was telling her about my half baked idea. She suggested we go to Michael’s. What a brilliant idea! Why didn’t I think of that? So off we went and we got about a million ideas.
Ladies Luncheon
This is probably the largest and most visible of the events. The Ladies Luncheon is usually a sit down lunch with assigned seating. There are table decorations, which are won at the end of the lunch, raffle baskets and party favors. The raffle baskets are well in hand as one lady already agreed to help. She has done it before and knows what the ladies like. I will have to see about that closer to the date. I should also start soliciting some nice things tht are more to my taste and style for the baskets just to mix it up a bit. Unlike with us, a basket of fabric or quilting supplies or sewing notions wouldn’t go over well. 🙁 Wine, food, kitchen supplies and chocolate are big winners. I am a big fan of nice soap, so I am thinking soap and bath things might be good as well. Cleaning supplies, which were big winners at the YM’s grammar school silent auction, might not project the right tone. I’ll have to get some more ideas.
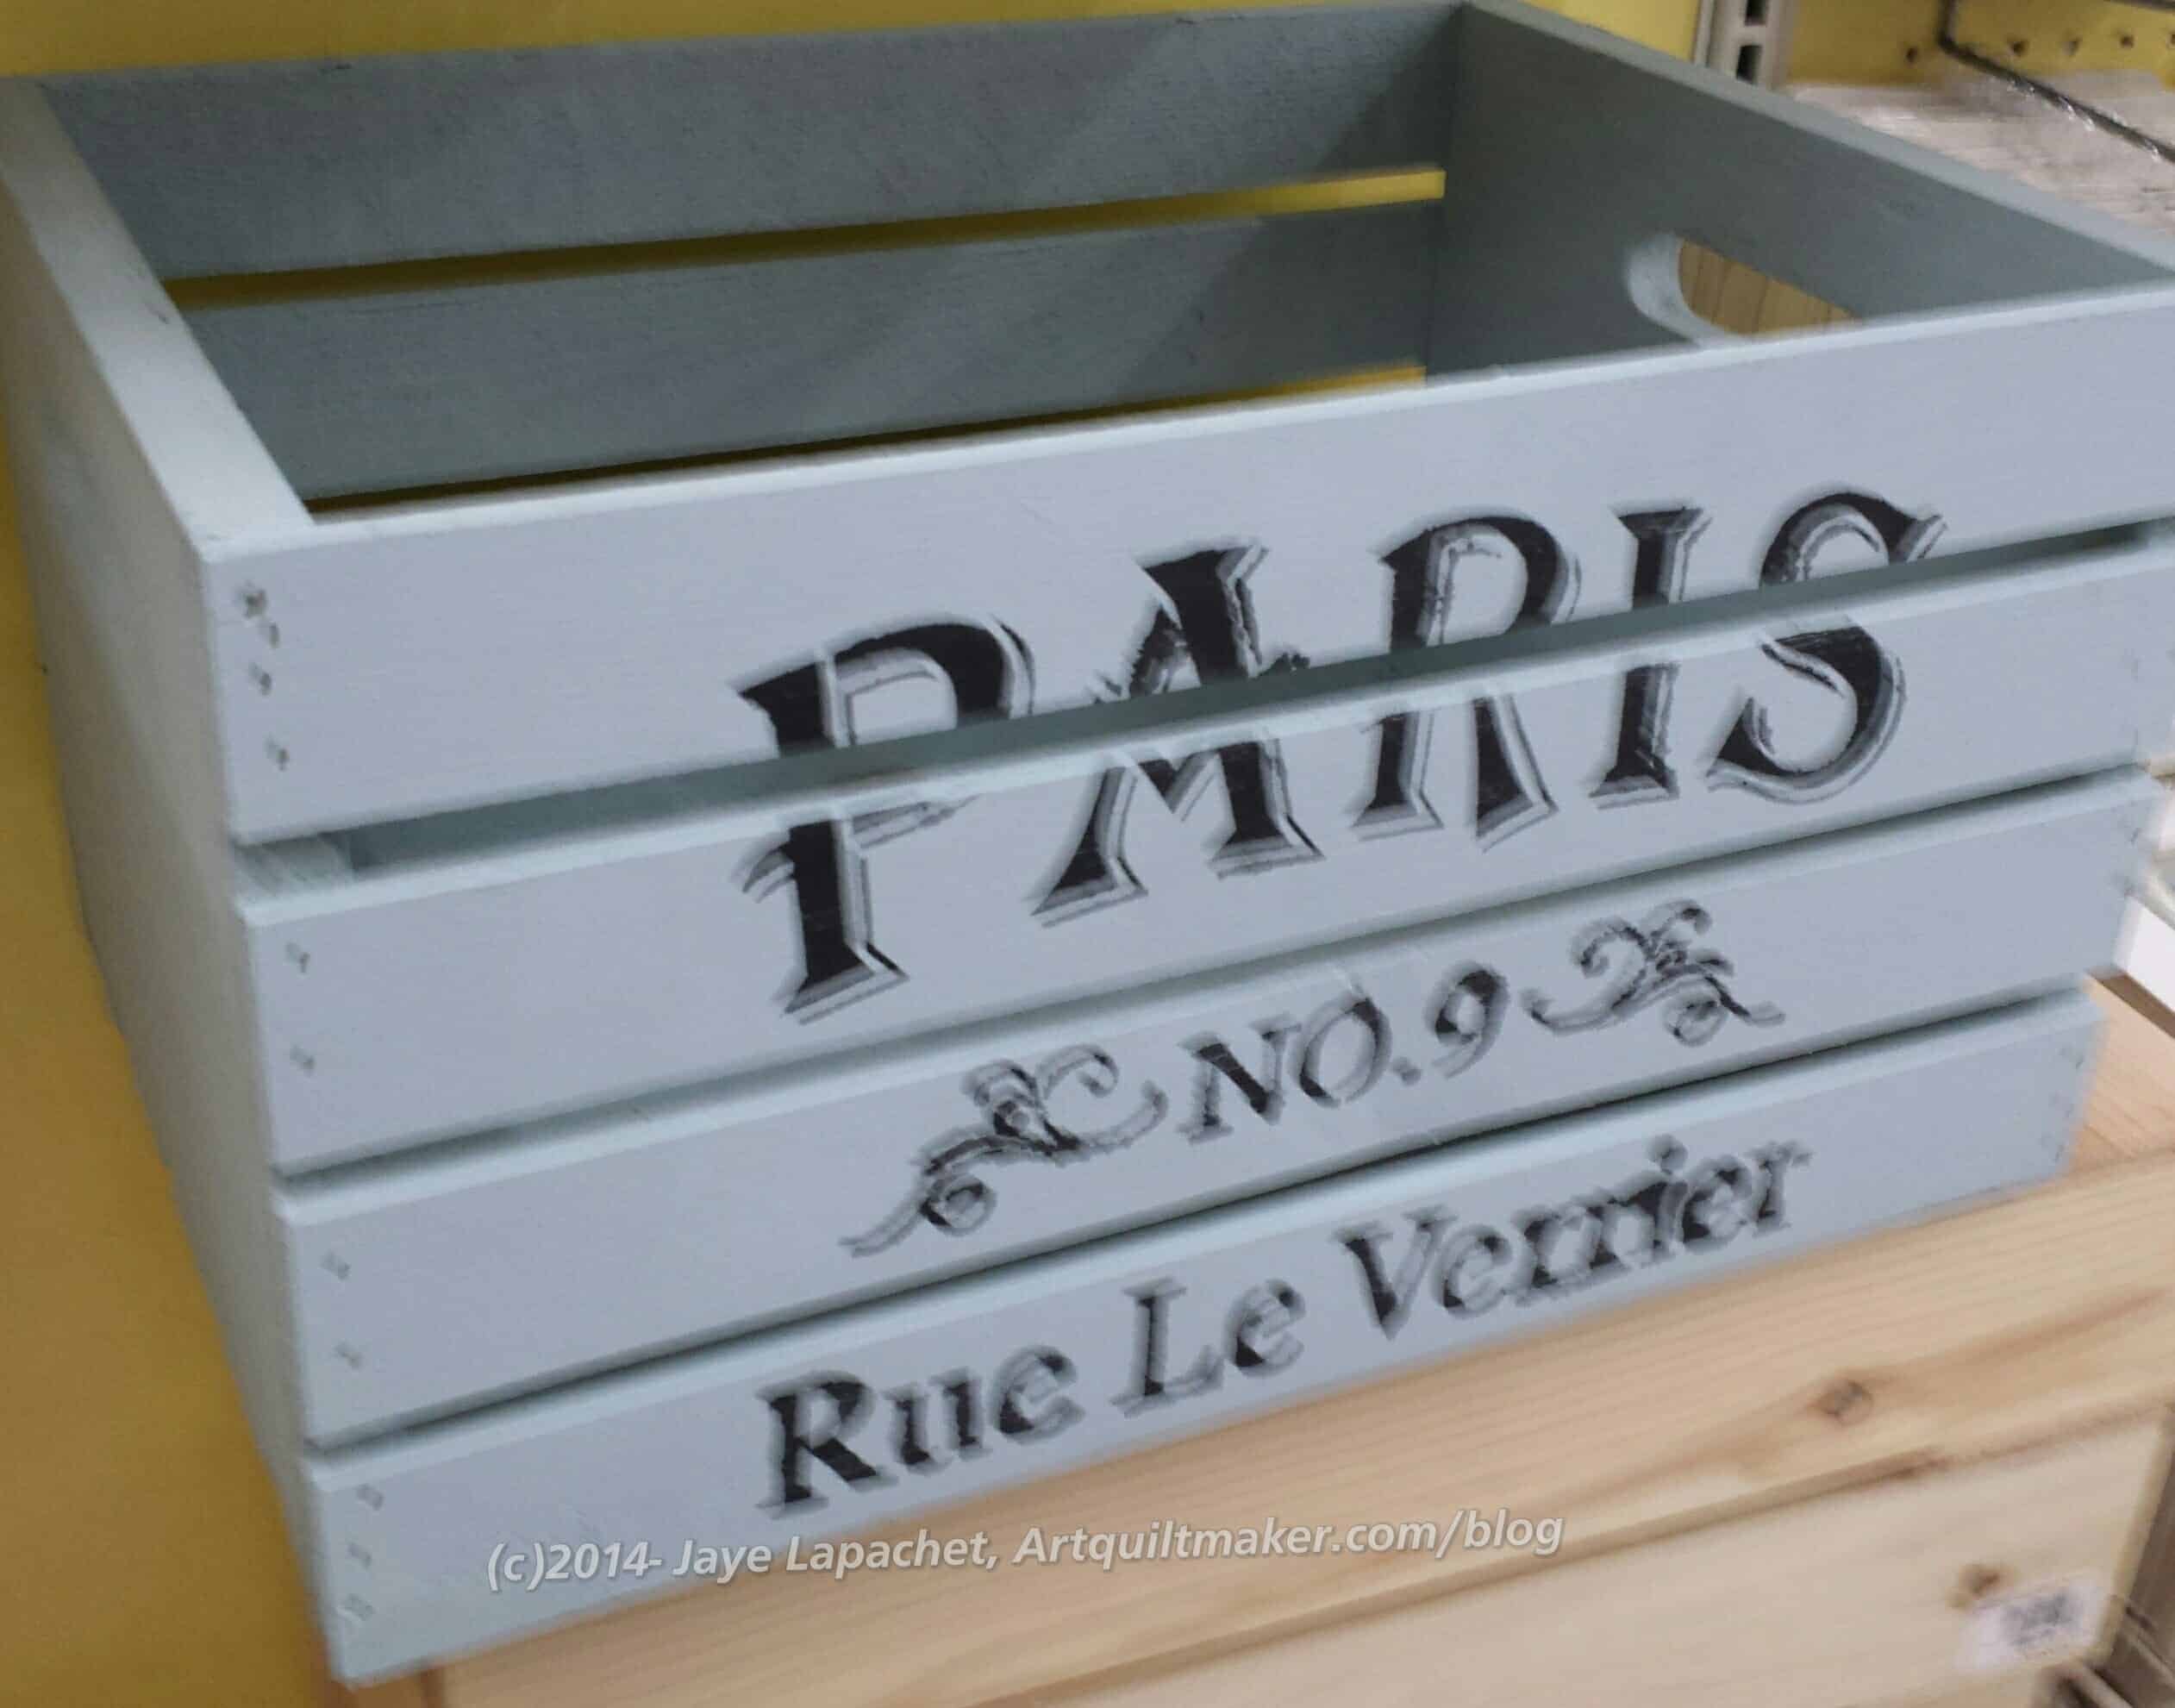
Fruit crate
DH wants his logo to be a fruit crate label (BTW, we need a Photoshop Pro to help us with this. Are you able?). I want to continue the theme, if possible, so first we headed to the Micheal’s wood area and looked at crates and things. This Paris crate was too big, but the painting looked like an idea that had possibilities. We could stencil all different California names onto the crates. UGH paint. Kelly, however, is not afraid of spray paint, so I put her in charge of the painting team.
Also, the Paris crate is too big. I would have to fill it with stuff and that is a lot of space to fill.
Michael’s: smaller crates
We talked about using flower arranging foam to stick things into, but that doesn’t change the fact that I don’t have good ideas about what I would put in these crates. Smaller crates were available and there are other stores, so the crate idea is not completely dead.
The other thing is that stock will change. I need to either be flexible about the actual items and make the style the most important. For example, I could think ‘crates’ and just worry about getting all crates of about the same size.
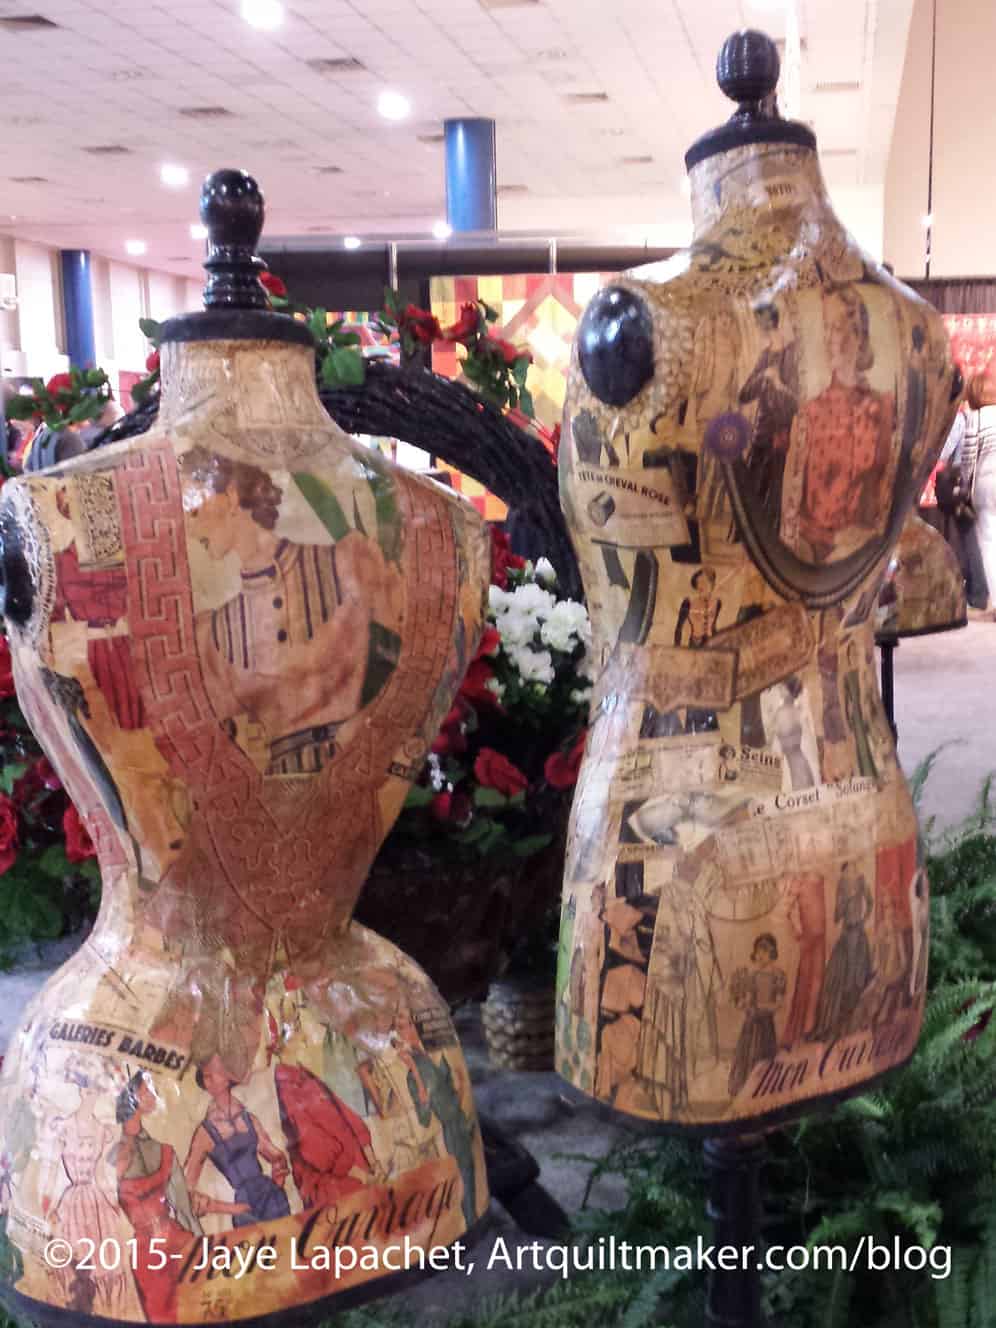
Houston Dress Forms
I saw the most awesome dress forms in Houston. They were full size and covered in vintage looking paper. I loved the shape, the decoupage and the artistic expression of the female form.
I really wanted to carry one off with me. I don’t have the space in my house, so I left them. I couldn’t find any information about them, which was a shame, but I enjoyed them all the same. I think Friend Julie and my mom got sick of me wanting to walk by them all the time.
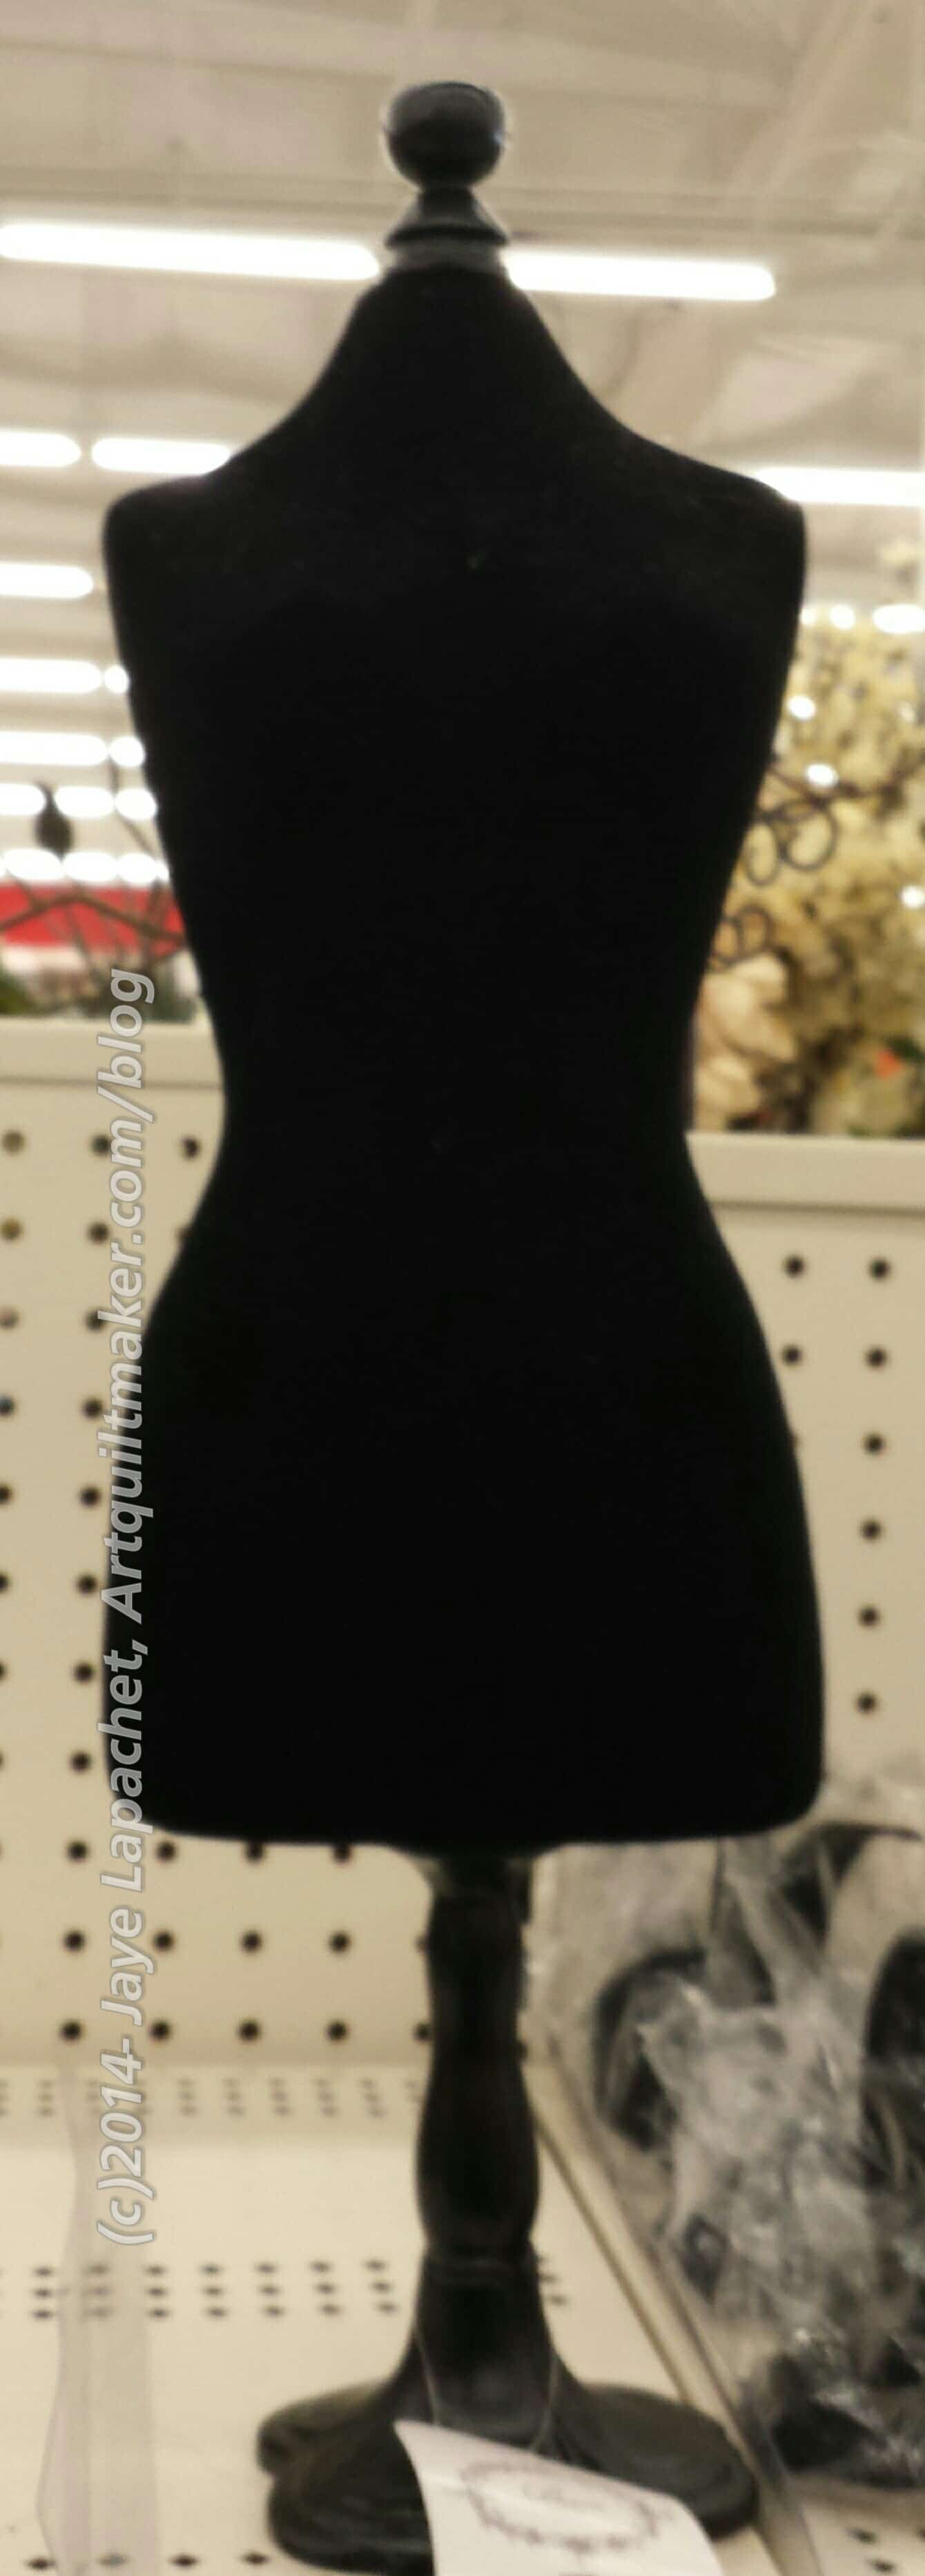
Michael’s mini dress form
When I saw this mini dress form, I remembered the Houston dress forms and thought that dress forms as table decorations would be perfect.
The black one I saw at Micheal’s was a good size, but covered in that weird, fake, short, toy fur, thus not perfect for decorating. Kelly, again, assured me that spray painting can cover a multitude of sins, but I don’t think the fur could be painted. Also, they only had one and I need 10-12. Of course, everything is available on the Internet, so I did a search and came up with a lot of hits. None of the sites presented themselves as those from which I could buy 12 paper mache’ dress forms between 12″-18″ suitable for decorating. I have some time and all hope is not lost. I am thrilled to have an idea that seems promising.
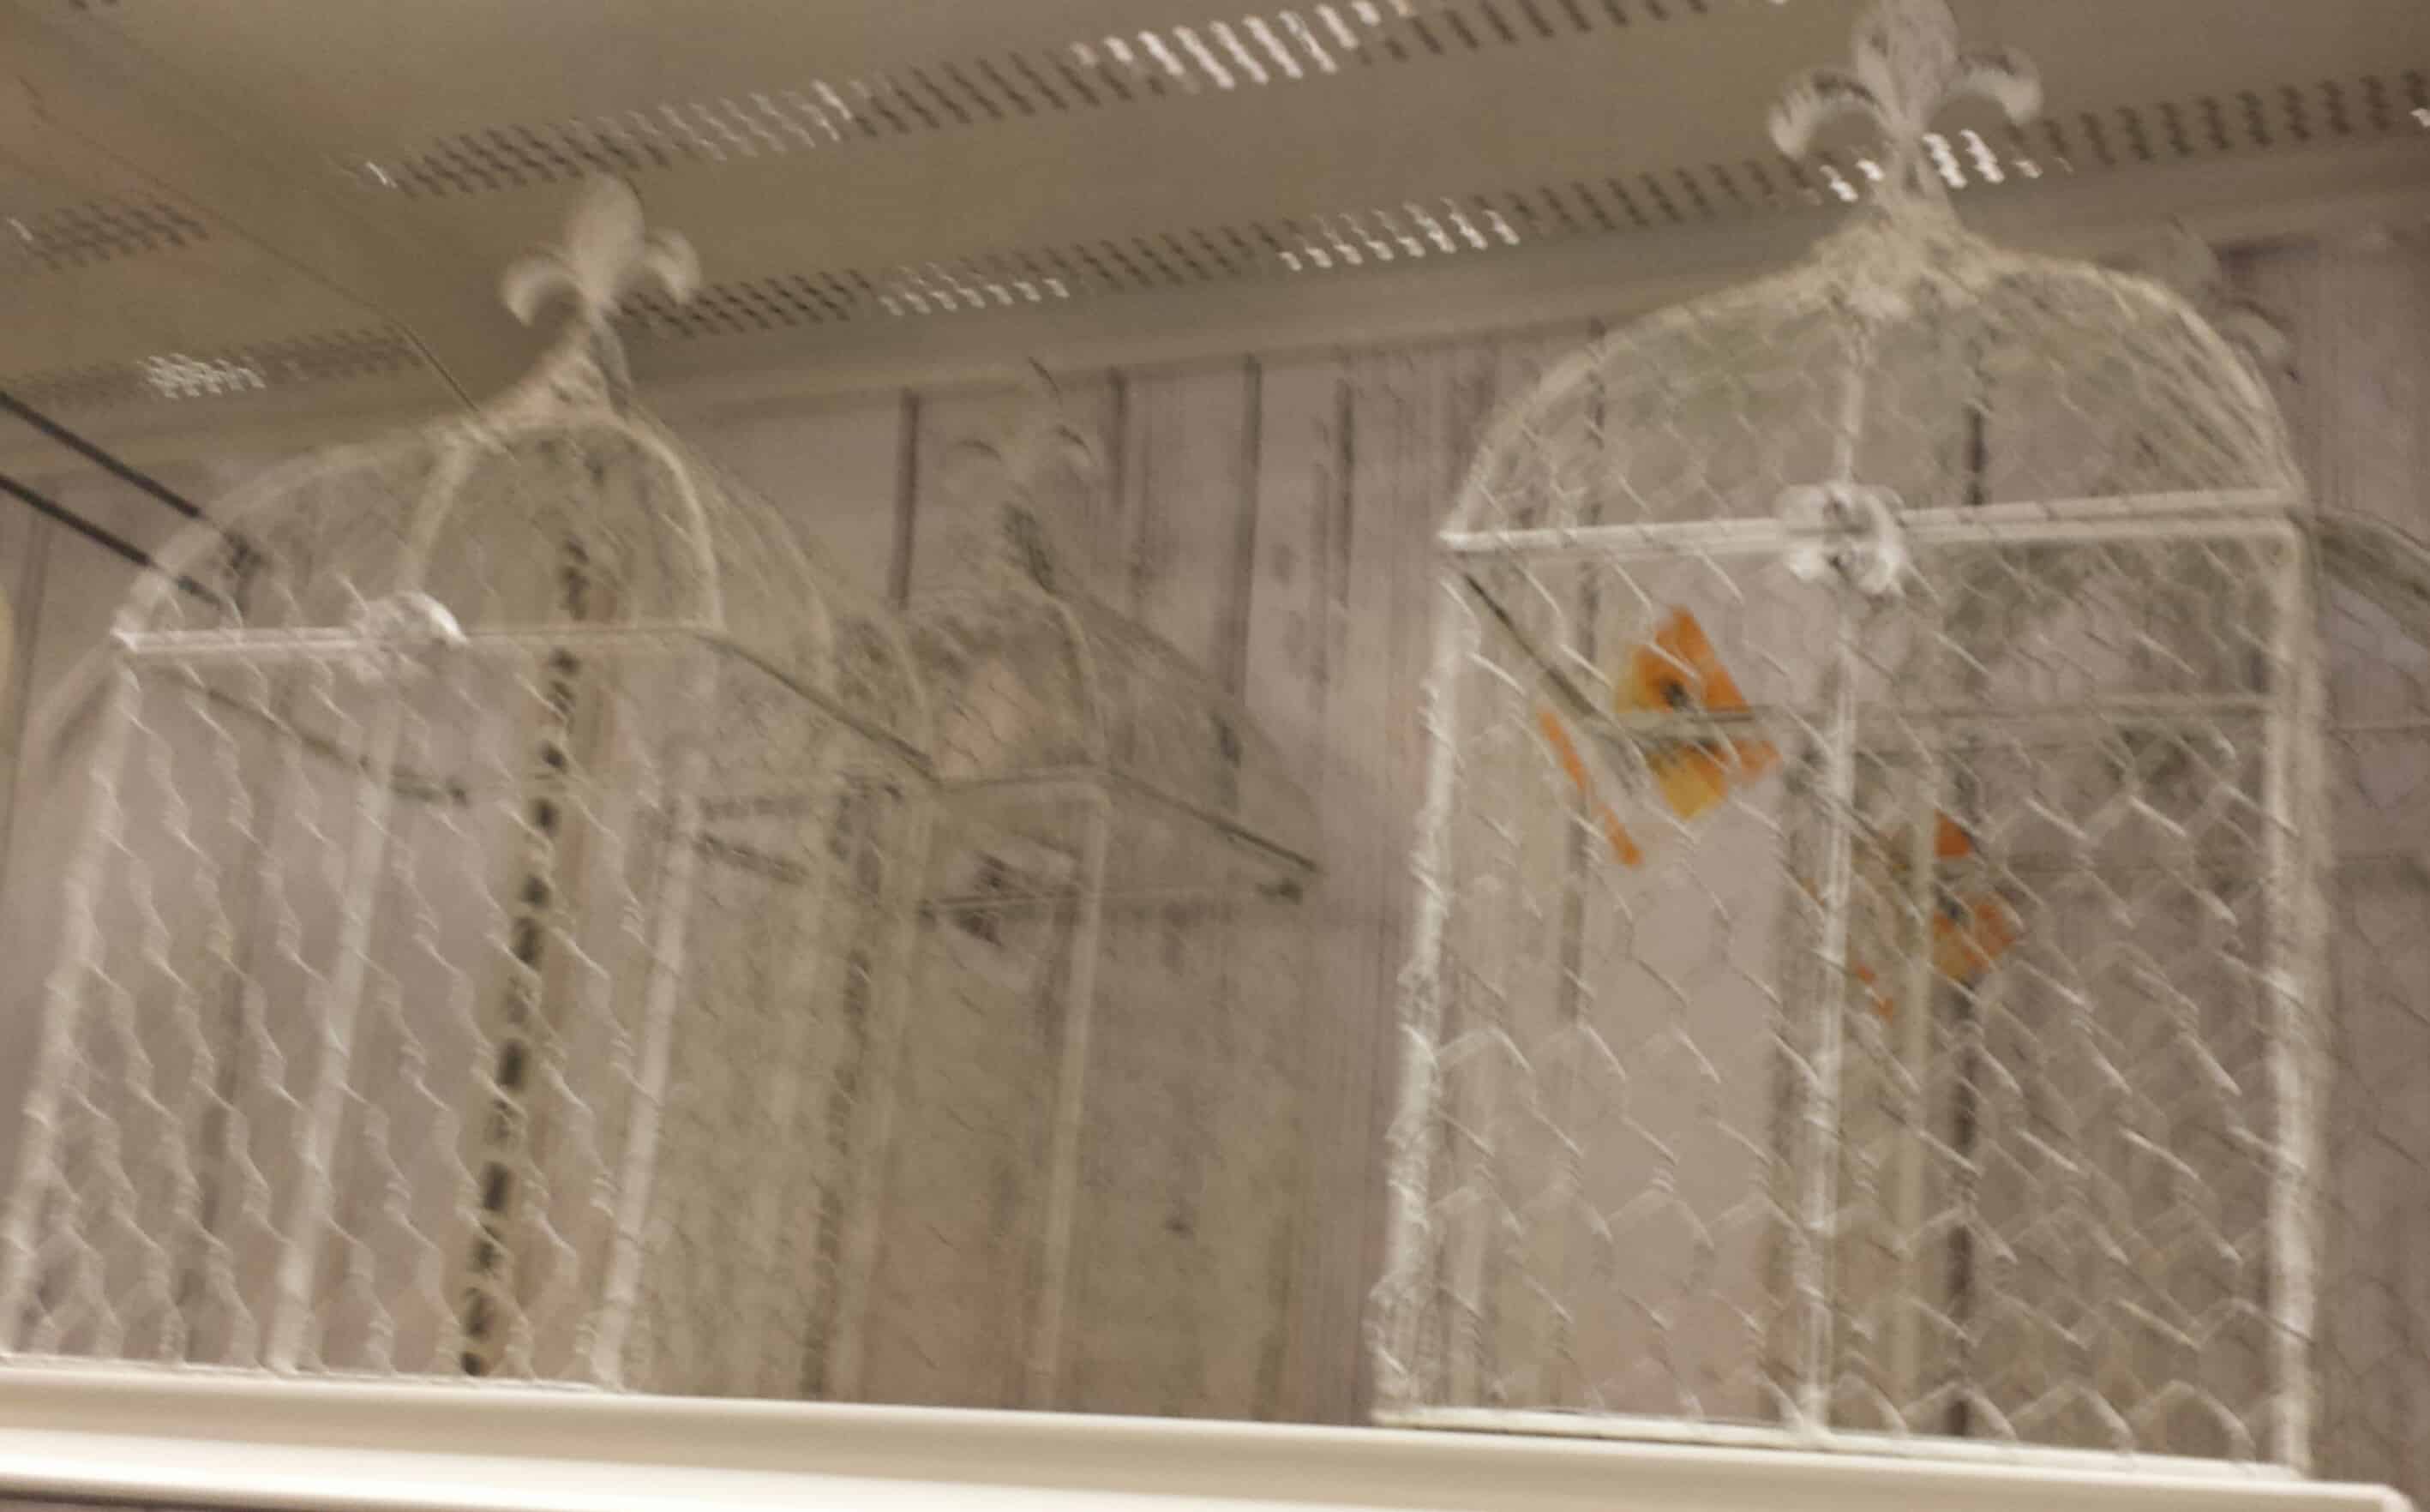
Possible Ladies Luncheon table decorations
It is probably unlikely that I will turn the cages into anything, but I did like them. The fleur de lis on the top adds to the charm. I would have to figure out what to put inside and how much space they would take up on the table. People still have to be able to pass the dressing and talk over the table decorations.
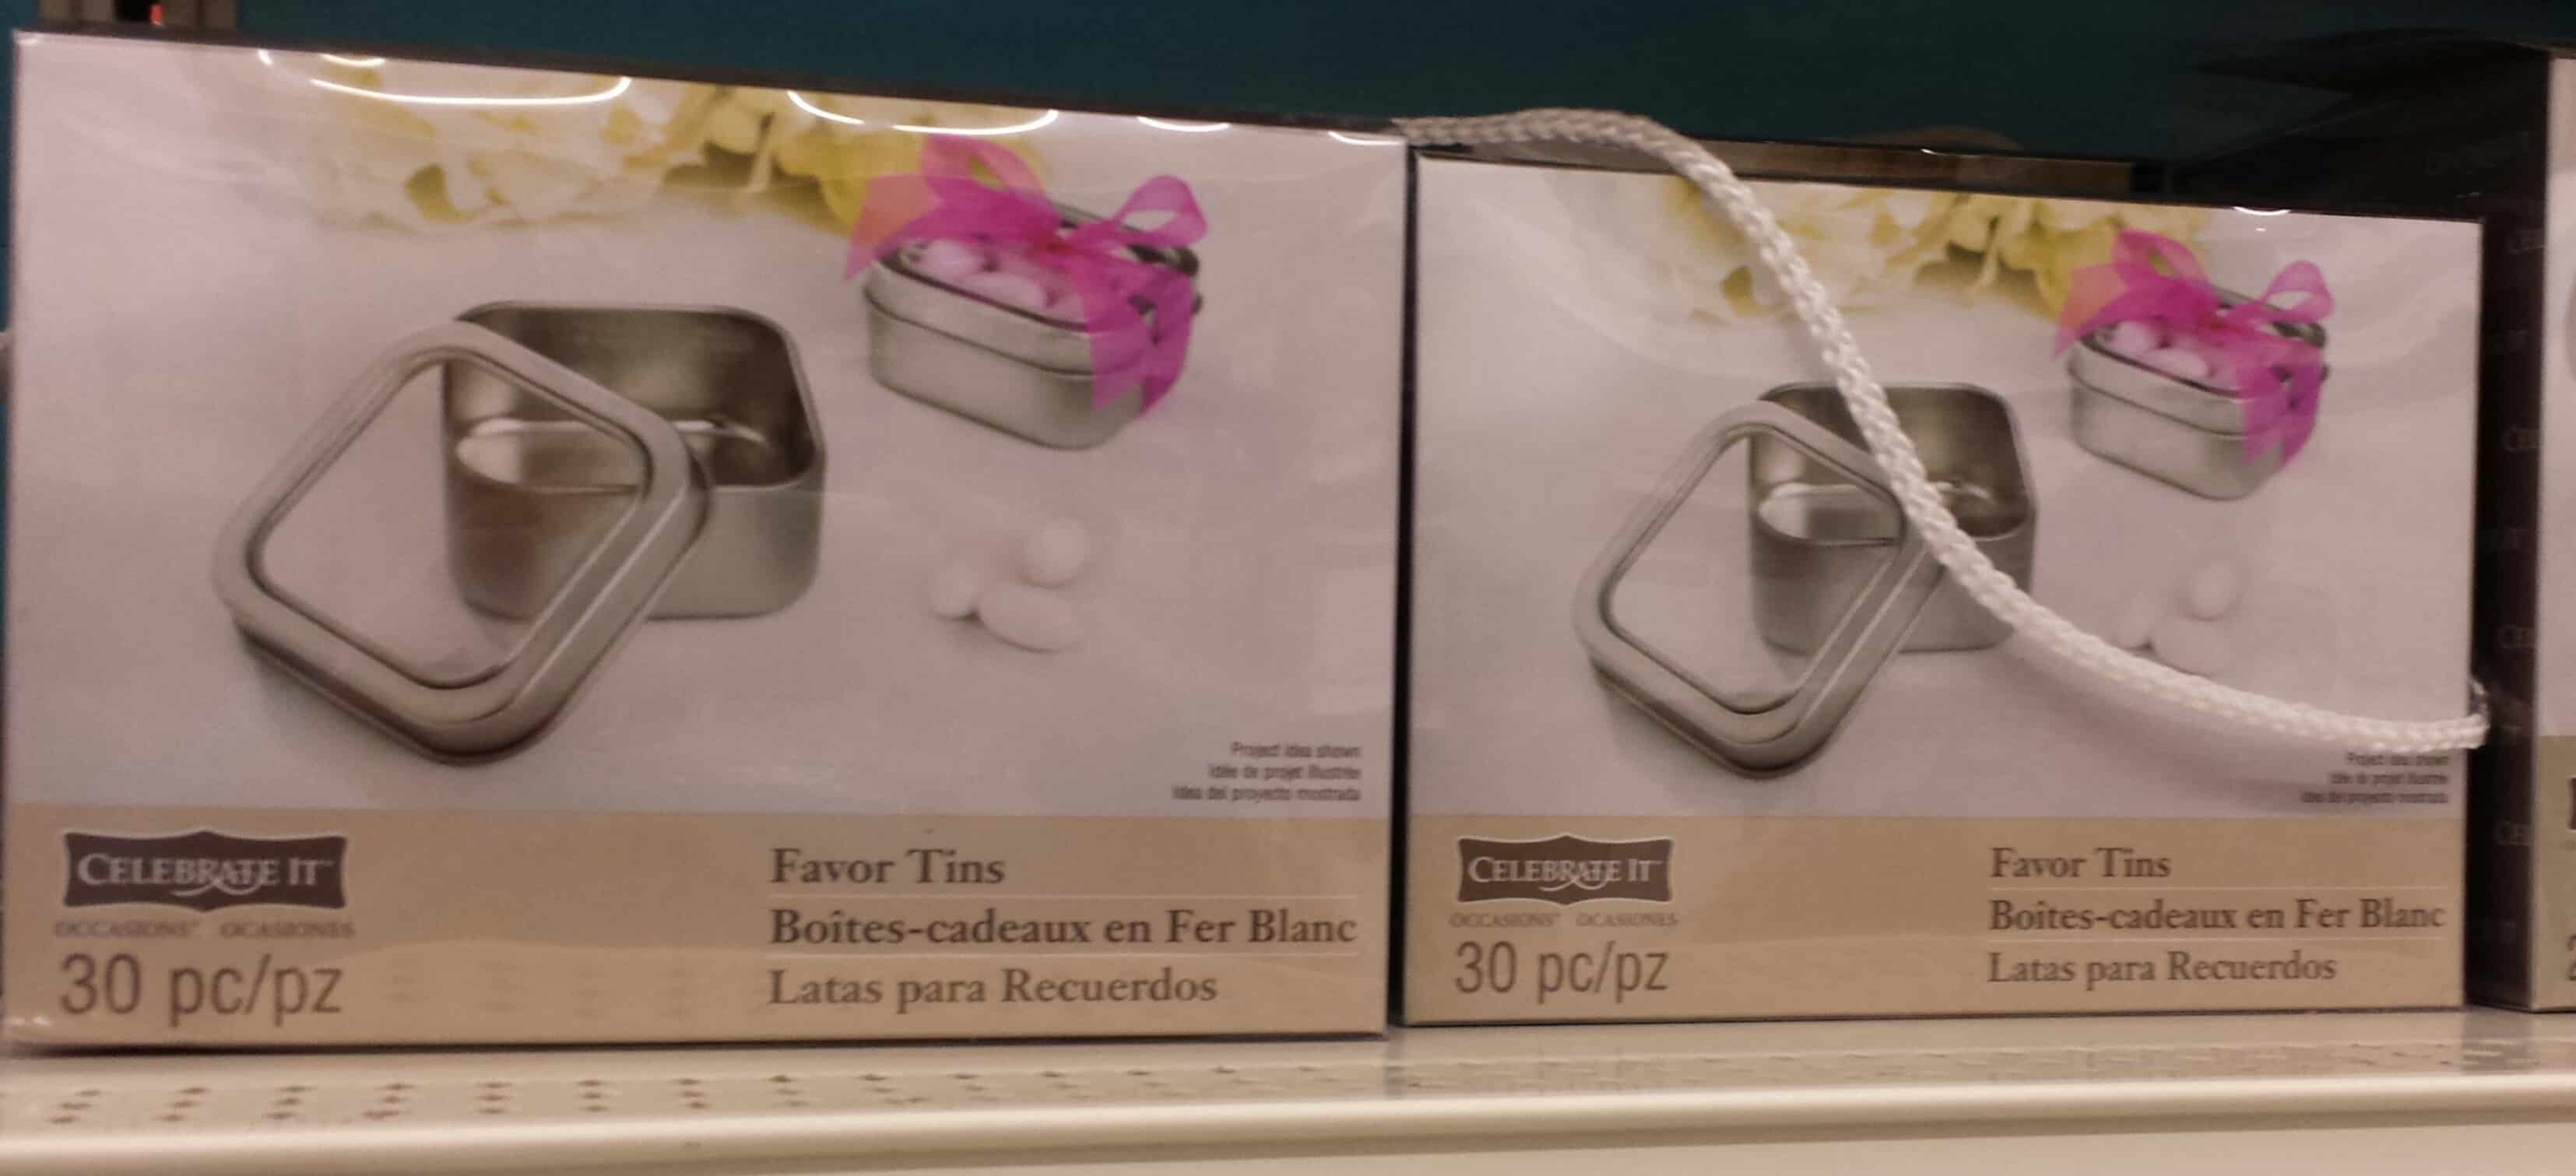
Favor cans
Party favors are another aspect. Everyone gets a little something so they don’t feel bad when they don’t win the table decorations or the raffle baskets.
We walked down the wedding aisle and saw these cans, which could be filled with something. At a wedding they would be filled with Jordan Almonds. Xanax might be good, but hard to get and an ethical challenge. Bath salts are a possibility. I am almost certain I will get these for the favors.
Ladies Tea
The Ladies tea concept is much more fluid, more like an open house. People come in, have cakes and cookies, drink tea, walk around. They might sit on a couch or chair, but there are no tables or assigned seating.
Wooden trays
I want it to be a fun atmosphere. These wooden trays could be painted and, perhaps, decorated with a California theme and then used for the cookies and treats. I think they are very elegant. I think if painted the right way, they could be fun and the elegance would add to everything not detract.
I saw pennant kits, pinwheel kits and paper lanterns. I think these will be colorful and great. I don’t need to buy a kit to make pennants. There is plenty of fabric in this house and lots of tutorials online. I can start with them and just keep making one long strand until 2017!
Pinwheels kit
Pennants/Garland
Using Flower Arranging Foam
The flower arranging foam could definitely be used to hold the pinwheels up. the example (right) also used the fruit crate.
I could also use chipboard dress forms to bring the theme from the Ladies Lunch forward to the Tea… somehow.
Cocktail Party
I don’t think anything pink or cheerful can be used at the cocktail party. Fortunately, the decorations are not that elaborate. I do want some kind of special table decorations. Perhaps more of the scattered around the room type and fewer? Perhaps the cages would work here?
As crazy as it sounds, I am currently enamoured with The Night Circus, a novel by Erin Morgenstern. I am thinking of a black & white theme for the decorations. Black and white stripes?
The trays from above could be used again for the canapes, but these would not be black and white, so perhaps sticking with a California theme would be best. Hollywood opening night type of feeling, if not theme?
I have to deal with the invitations, which need to be engraved (or similar). I don’t think they need to be personalized, but I need to know the time and location so I can get them printed in advance.
As you can tell, I am less sure about this. I have thought the most about the Ladies Luncheon.
Ball Table Decorations
Yes, there is a Ball. It is mostly black tie and my outfit is prescribed. I have to wear an all white dress. UGH! I don’t mind getting dressed up, but white? UGH!I had a brainwave the other day, though. I have a seamstress who has been altering clothes for me as I have lost weight. She could make a pattern and make a dress from it! This makes me feel much better, more hopeful that I won’t look like a big white puffball.
Perhaps the cages will work for the ball? There are many more tables, though, which means 30-40 (or more???) table decorations and those cages are large. I don’t know how we would transport the cages. We might need a U-Haul for all of the decorations.
Budget
One big thing is who is going to pay for all of this. There are notes in the papers I have been given and I just have to get the idea into my head and confirm who is paying for what. Having until 2017 means I can use the 40%-type coupons over time to buy various supplies. Of course, I have to pay attention to the stores still having the same item — or, again, be flexible.
If you ever wondered what in the world you would with a smartphone, now you know: take photos of ideas and possibilities so you remember.
I am constantly concerned that my style will raise some eyebrows. I am going with it, though. I am at least 20 years younger than most of the women who attend. I have to do what feels right as well. Regardless, I feel so much better that the decorations won’t be a complete failure and about this whole endeavor in general; I can’t even tell you.
Pretty soon this will no longer be relevant as spring is well and truly here, in California, and signs of spring are even showing in the depths of upstate New York. That means you should get out your watercolors, pastels, musical notation books and create something from this prompt.
winter hand covering
mitten string
Post the direct URL (link) where your drawing, doodle, artwork is posted (e.g. your blog, Flickr) in the comments area of this post. I would really like to keep all the artwork together and provide a way for others to see your work and get familiar with your blog or website.
The Creative Prompt Project, also, has a Flickr group, which you can join to post your responses. I created this spot so those of you without blogs and websites would have a place to post your responses.
We are also talking about this on Twitter. Use the hashtag #CPP
Definition: “a glove with two sections, one for the thumb and the other for all four fingers. (informal :boxing gloves)” (Google)
The Mitten by Jan Brett
Used in chat sites, like two thumbs up. A person who likes a response in a thread will post a picture of two mittens with the thumbs pointing upward.
Discover Mitten, a leading manufacturer and distributor of premium exterior building products for International customers in Canada, USA and Europe.
Koala mittens
mitten siding
Chinese Mitten Crabs
Christopher Mitten
#ifoundyourmitten
The Mitten Building
Mitten flask
Mitten Mavens roller derby
The humorous story retells the traditional Ukrainian wintertime tale of several animals squeezing into a mitten to stay warm.
Professor Mitten is the Director of theNational Sports Law Institute and the LL.M. in Sports Law program for foreign lawyers at Marquette University Law School.
Mitten Munch Trail Bars
The Mitten is a wintery blend of last season’s best cider aged in bourbon barrels with fresh pressed apple juice from the new harvest.
Mitten im Leben
Mercury Retrograde Body Mitten! Feeling wobbly, forgetful, and introverted during this Mercury retrograde cycle?
One of the things that makes me feel really good is when someone tells me that a project I made inspired them.
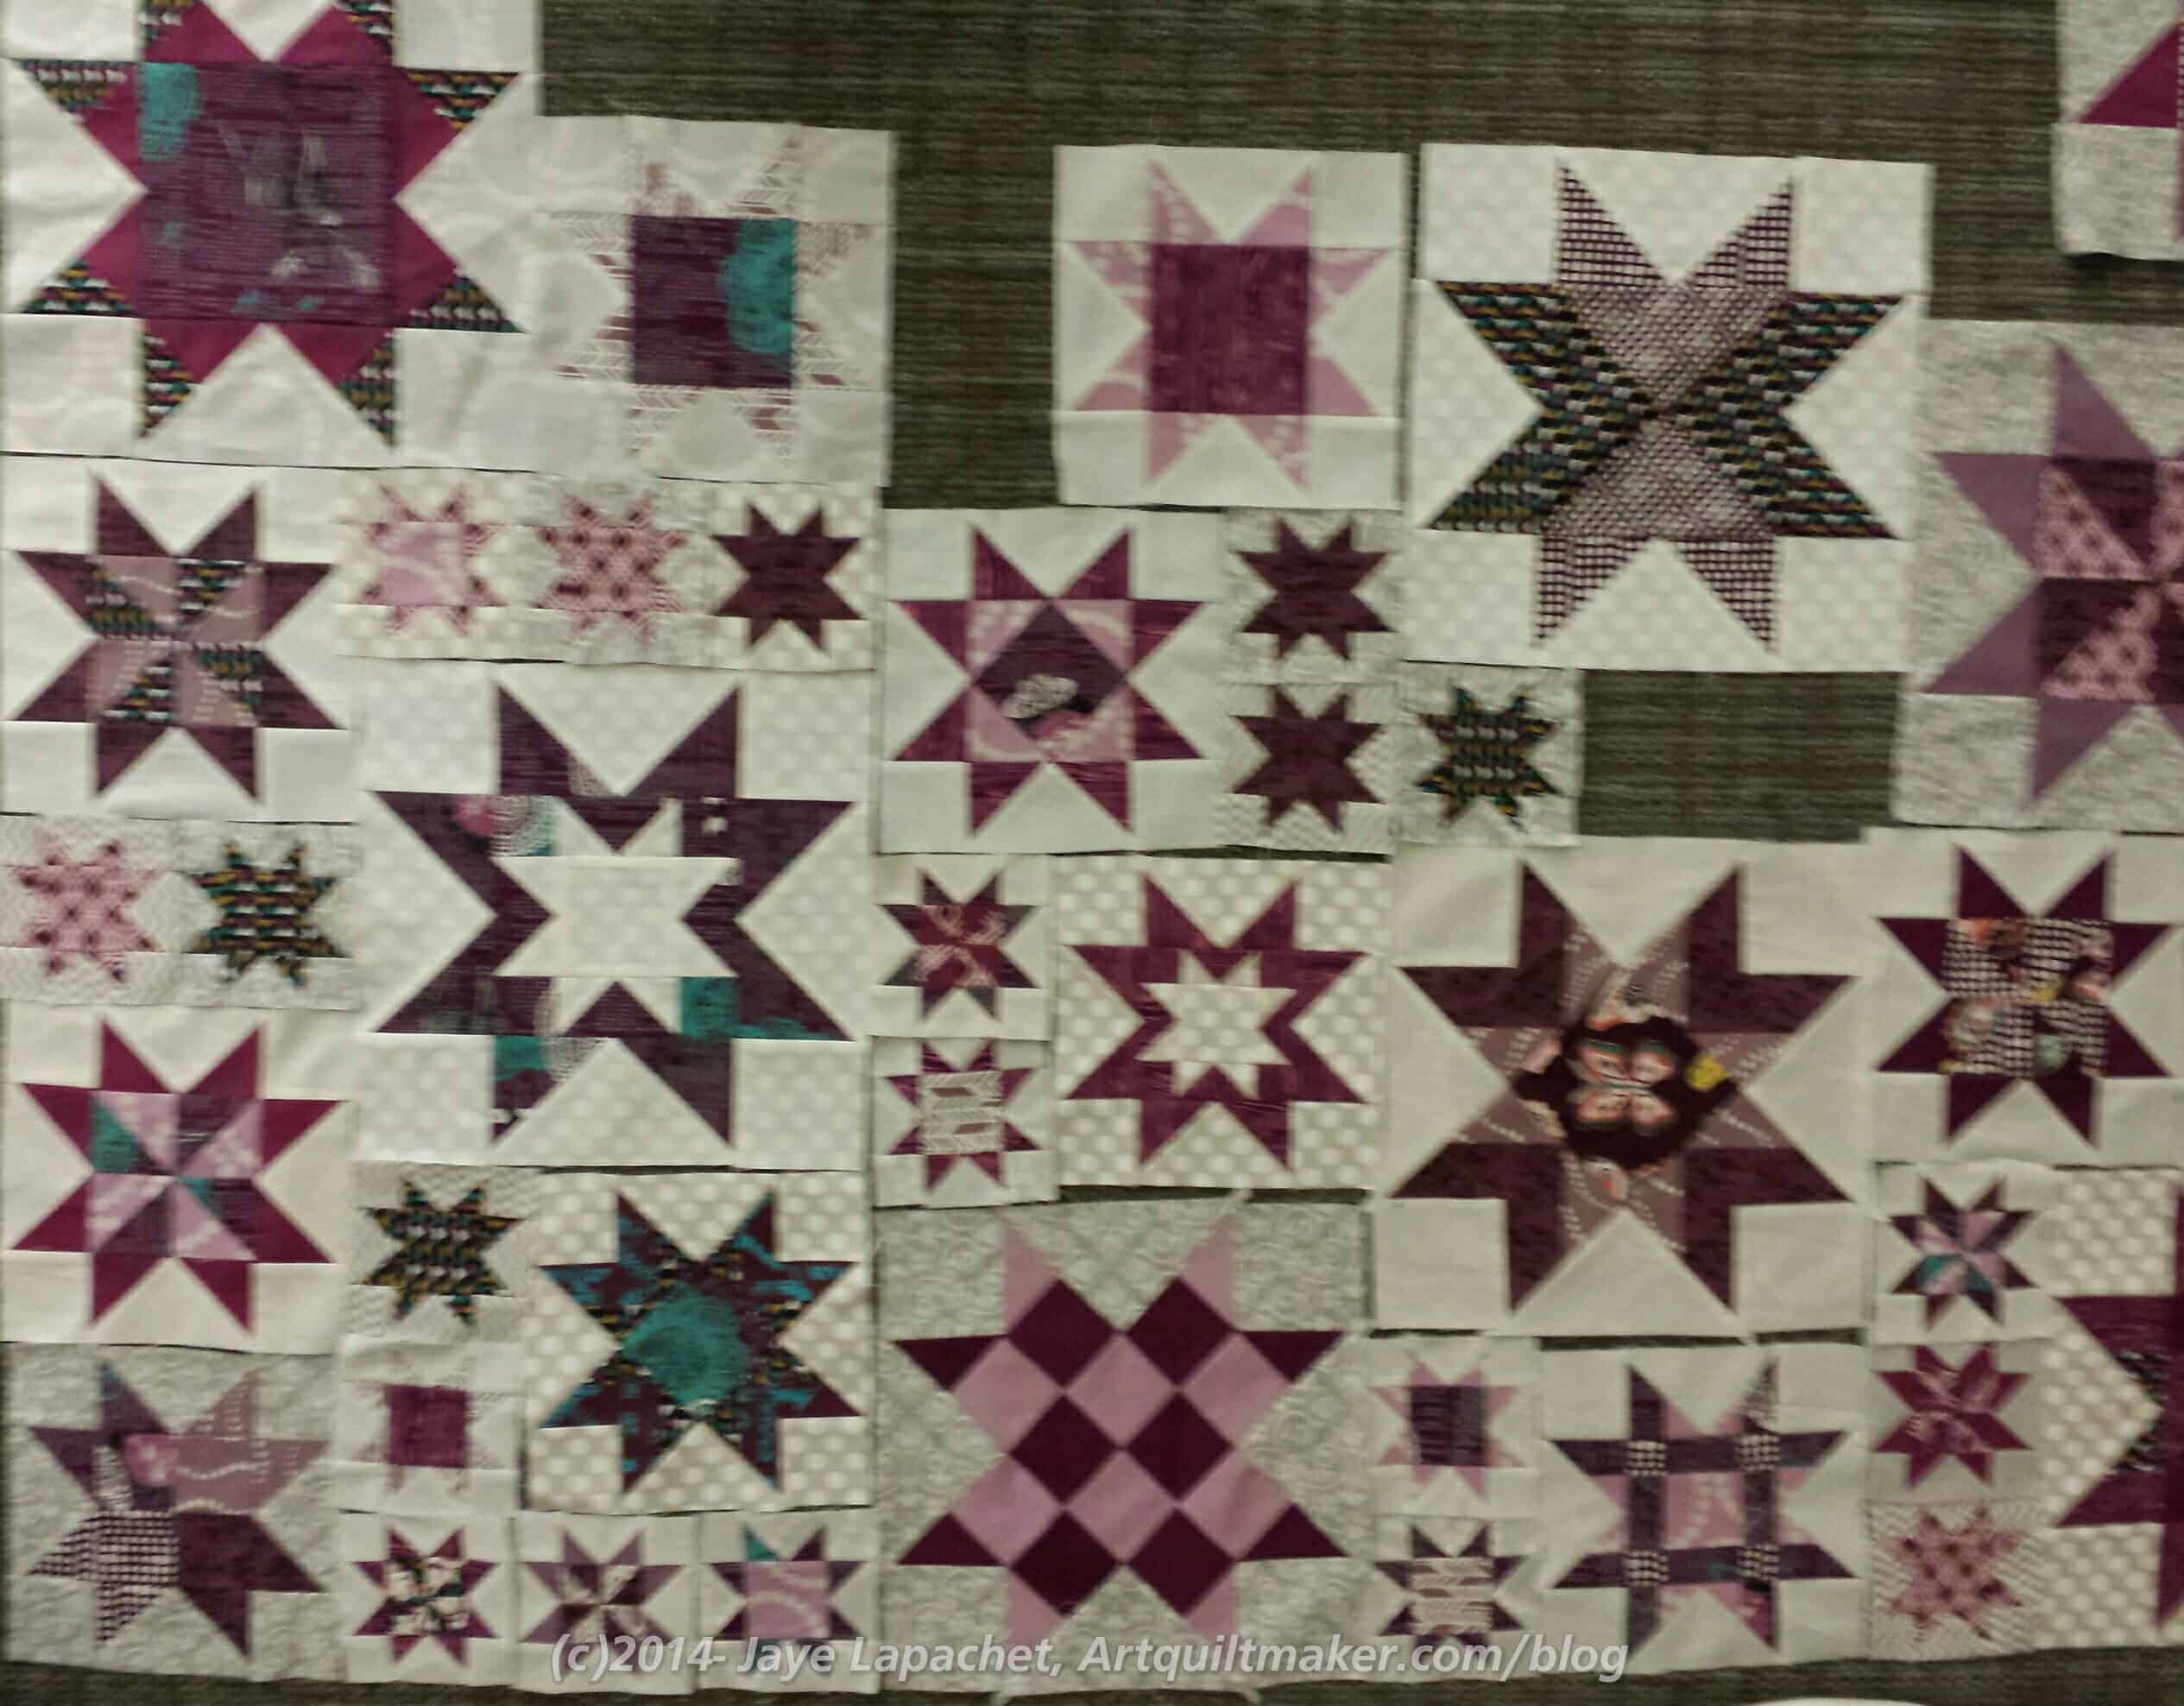
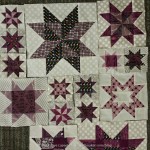
Lynnette’s Star Sampler
At a recent Sew Day, Lynnette was laying out star blocks that looked suspiciously like my Star Sampler, but in really awesome colors. She told me that my Star Sampler had inspired her.
Ooooh! I inspired someone. That feeling is awesome.
I know the colors are hard to see, but it is in shades of white, plum and grey. It will be a gift. That told me that Lynnette is a better person than I am. I am just thrilled to see another version IRL of the Star Sampler.
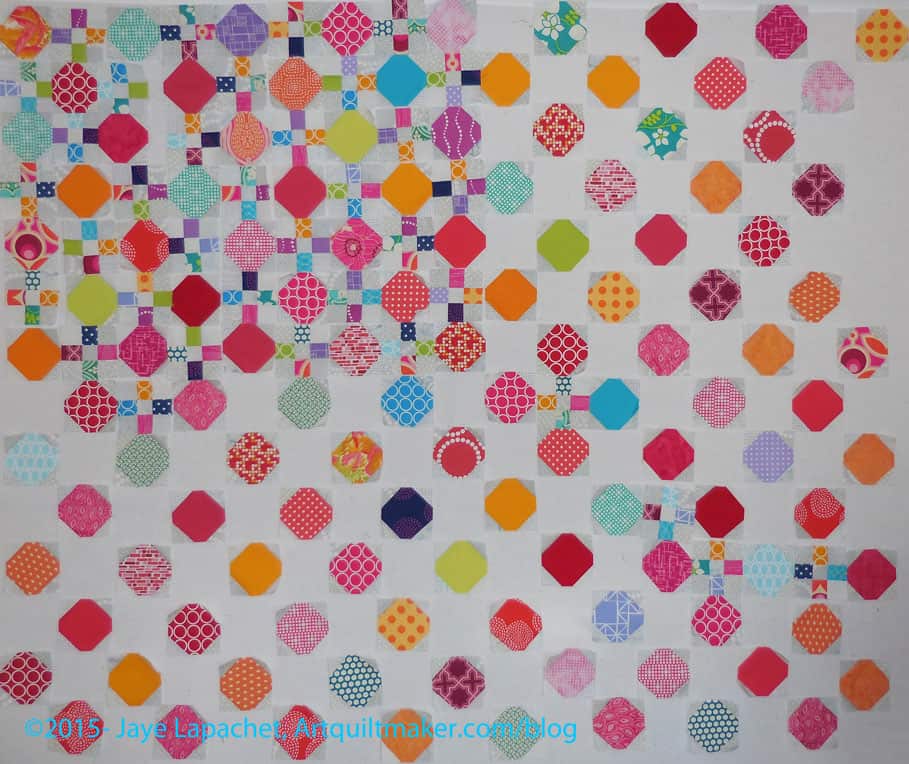
It looks so little. You know I make big quilts so this one just looks weird.
I could cut more octagons and make it bigger, but the pieces are really small and piecing the blocks takes forever.
I have a few more octagons that are in the process of being sewn into Snowballs, so the piece will be a bit bigger, but it won’t be bed sized.
I can add a border and I do have an idea for that already, so that will also enlarge it.
I could also just be okay with the size that it is.
Octagon 9 Patch – March 2015 detail
There are a lot of warm colors and I may need to cut a few octagons from cool colors, but I am not going to decide until I have more 9 patches completed and all the octagons are made into Snowballs.
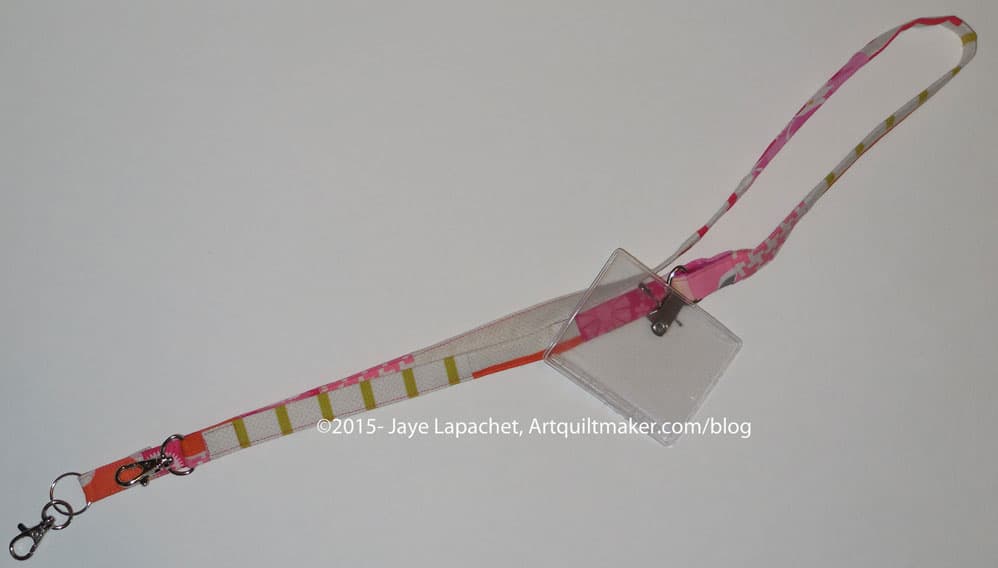
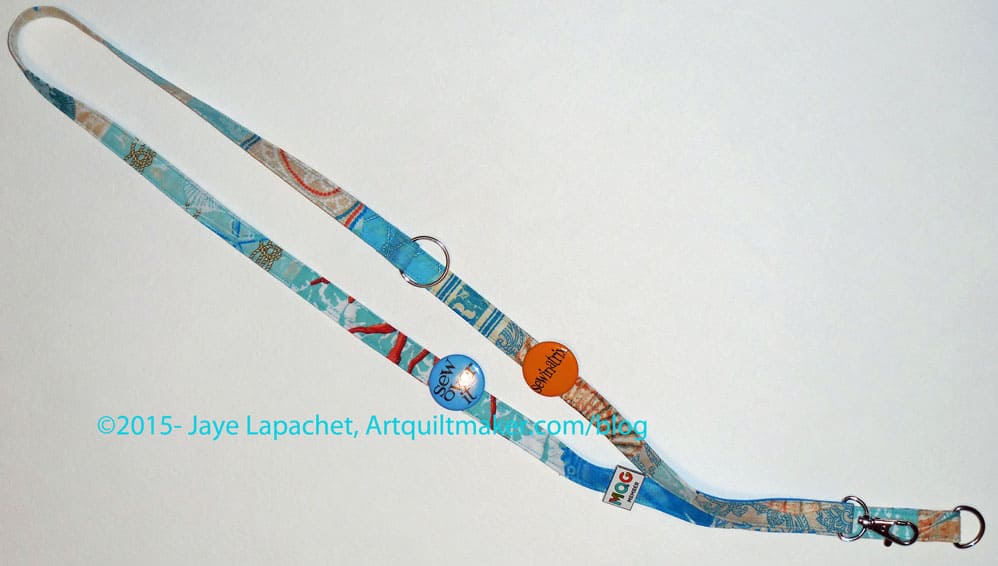
Awhile ago, I talked about the lanyard I made for a swap and put up a sort of tutorial about making it. That Orphan Block lanyard came out pretty well and I was pleased.
As BAMQG is part of the Modern Quilt Guild, I got a pin. It has been lying on my desk and I finally decided to make a lanyard. I didn’t want to do a complete orphan block lanyard this time, because of the seam allowances. To much piecing makes lumps. I wanted it to be interesting so I used some of the larger scraps from my cutting table.
Lumps and floops
It went together pretty well and relatively quickly. Still: UGH! I don’t like the way it looks.
Fresh Fruit Lanyard
It is cute and cheerful and not terrible, but the seam allowances made it lumpier than I wanted. I forgot to make the upper loop insert a smaller width than the main part of the lanyard, so the lump is even more prominent.
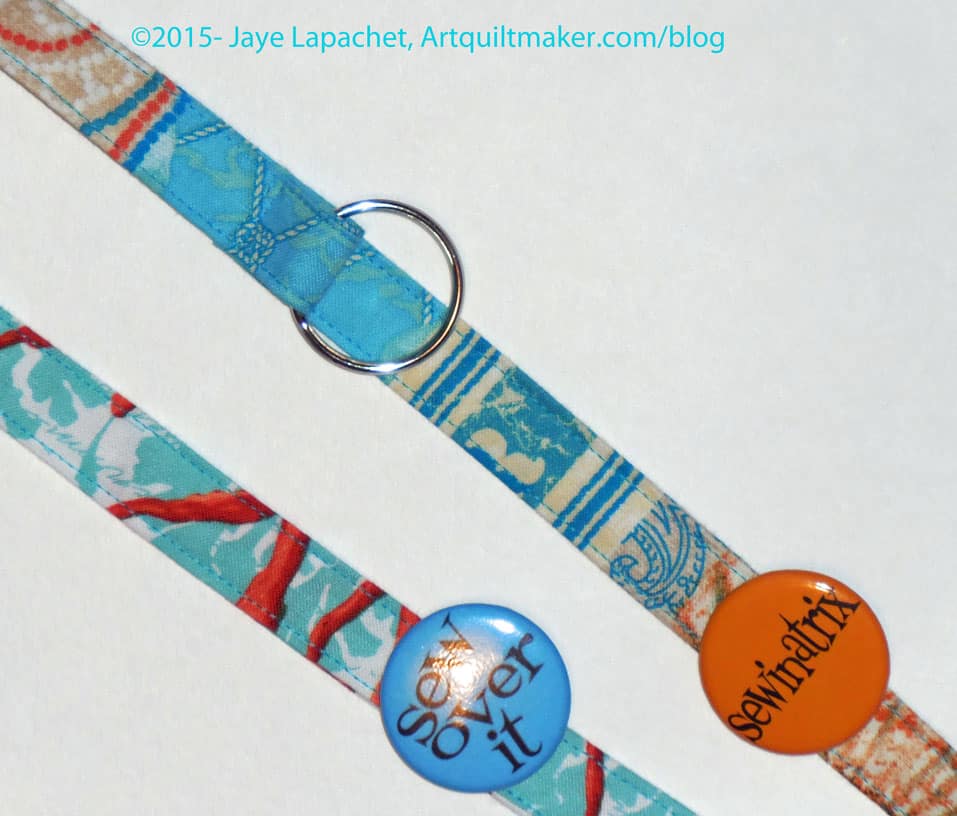
True to form, I let the process options rumble around in my head as I went about my business and decided to make another, starting much more simply: with just one strip of fabric. I used the By The Sea by Gillian Fullard/ London Portfolio Series by Michael Miller fabric. This is the same fabric I used in the recent Ocean Going Journal.
Ocean Going Lanyard Upper Loop detail
The upper loop, which I like so the name tag is near my face and not even with my belly button, confounded me for awhile until I realized that I could make it much smoother by making it from part of the hemmed fabric. I folded up the length of hemmed fabric rather that inserting a different piece. The loop also turned out to be much smaller.
The tricky part was to make sure the metal circle was in the right place. That took a bit of fiddling and trying, but wasn’t difficult.
Of course, using the length of original piece to make the loop led to length issues for the overall lanyard. I still haven’t quite worked out the best length. Still, that little trick made a much smoother upper loop AND, and as an added bonus, prevented the loop from being too long and floopy.
Ocean Going Lanyard
Now my BAMQG pins and things are ensconced on my new lanyard and I can’t wait to give it a trial run.
Of course, I have to make another just to perfect my technique and, possibly, write another tutorial.
Frances finally let me know she was ready to move on with her sampler quilt. We decided to make the Flower Basket Block, so I sent her the pattern, promised the tutorial and did nothing.
These directions use a quarter inch seam allowance. Check your seam allowance before you begin. If you don’t know how to do that, there are resources available, including one from Connecting Threads and another from Craftsy. You can search the web for others if you don’t like these.
You will be directed to use the Triangle Technique. Make sure you have the chart as well as the instructions handy.
Respect the bias.
Templates
You really only a need a template for the basket handle. If you are using templates for all of your pieces, then prepare all the templates for pieces in the patterns as directed below.
Prepare pattern for your basket handle template by printing two copies of the pattern. I am telling you to do this first so when you get into the throes of sewing you won’t have to stop and fiddle around with templates.
You will eventually place one copy of the pattern in your binder, but keep it handy so you can use it as reference.
Nota bene: You probably know how to make templates. However, I am including a quick refresher. Look for a comprehensive tutorial soon. (I’ll update this post and link it from here)
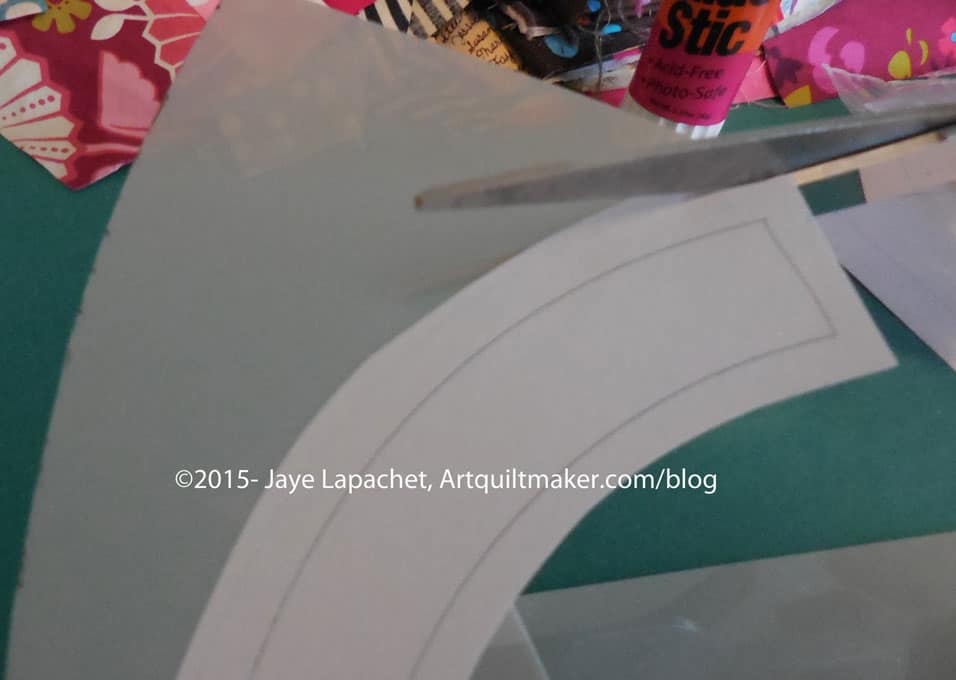
Rough cut* the handle pattern out of the second printout.
Rough Cut Pattern
Glue the paper pattern (with seam allowances) using the glue stick (or other suitable adhesive) to the template plastic.
Ok to use scraps of template plastic
It is okay to use scraps of template plastic. Put a piece of tape on seam lines to keep the joins stiff.
Fine cut templates
Fine cut** the paper pattern and template plastic you have adhered so you have an accurate template, cutting off any seam allowance that may have printed.
If you plan to machine sew the handle at all, you will want to prepare another basket handle template, in the same manner, without seam allowance.
Fabric
Gather your fabric and press it all. You can rough cut some pieces and press it with Mary Ellen’s Best Press to help deal with the bias. Consider this step for the large background triangle and the basket handle.
Cutting
Flower Basket
Basket Handle
In my example basket, above (same as at the beginning of the post), this fabric is the medium blue.
Lay out template piece
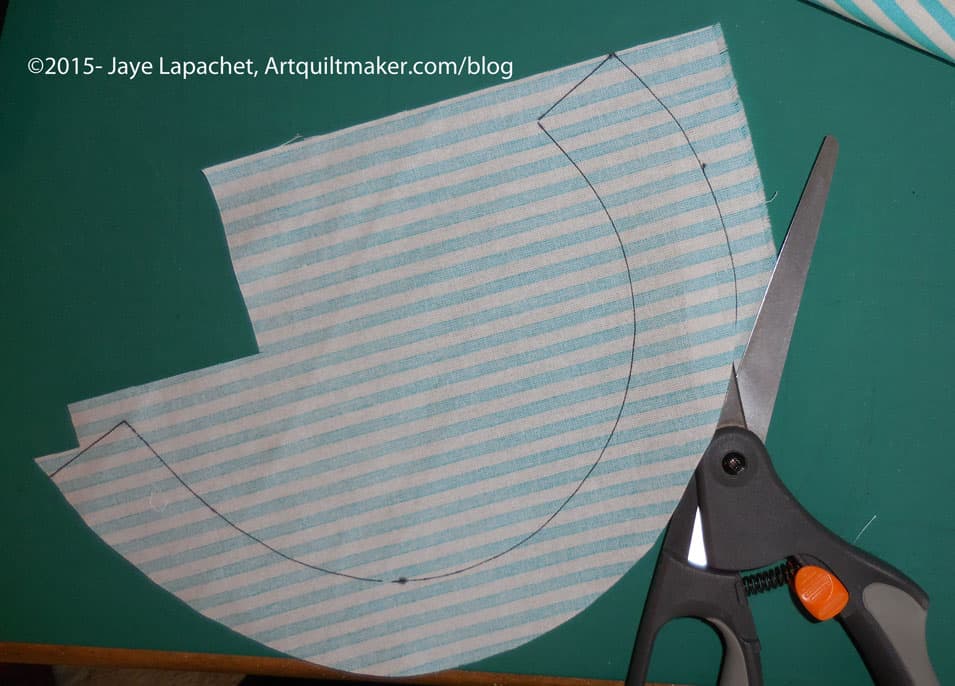
Draw around the template with your black fine tip marker. Rough cut a piece of fabric large enough for your basket handle.
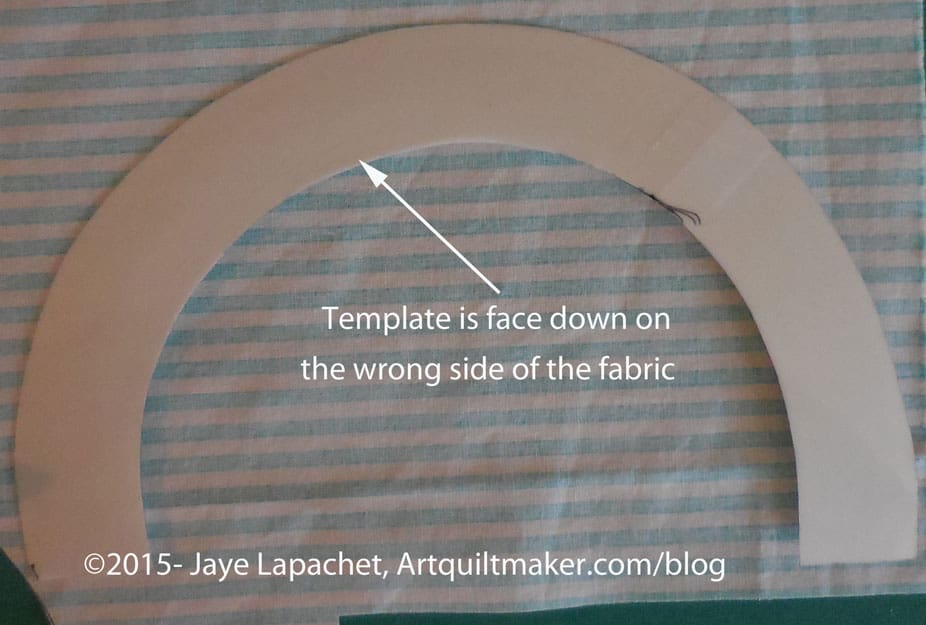
Place template face down on fabric
Place your handle template right side down on the wrong side of the fabric. Trace around the template carefully with your Pigma pen. Trace carefully without pulling or tugging at the fabric. You will be dealing with some bias on the curves. You will need to carefully move your hand along the template to keep it in place while you trace. Use the Pigma pen with a light touch.
Cut out handle
Using your fabric scissors, cut around the traced image, cutting the drawn line off. If you are using a template with no seam allowance, leave approximately a quarter inch seam allowance on all sides.
Background:
In my example, above, this fabric is the blue Michael Miller Ta Dot with white dots.
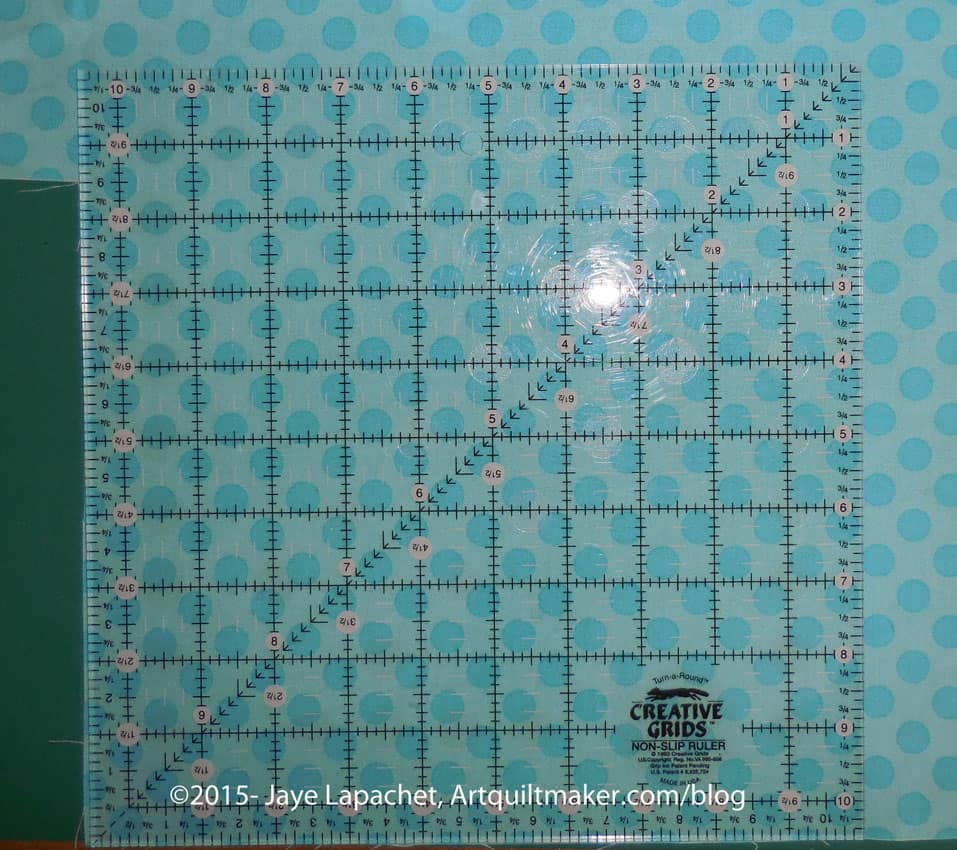
Measure background
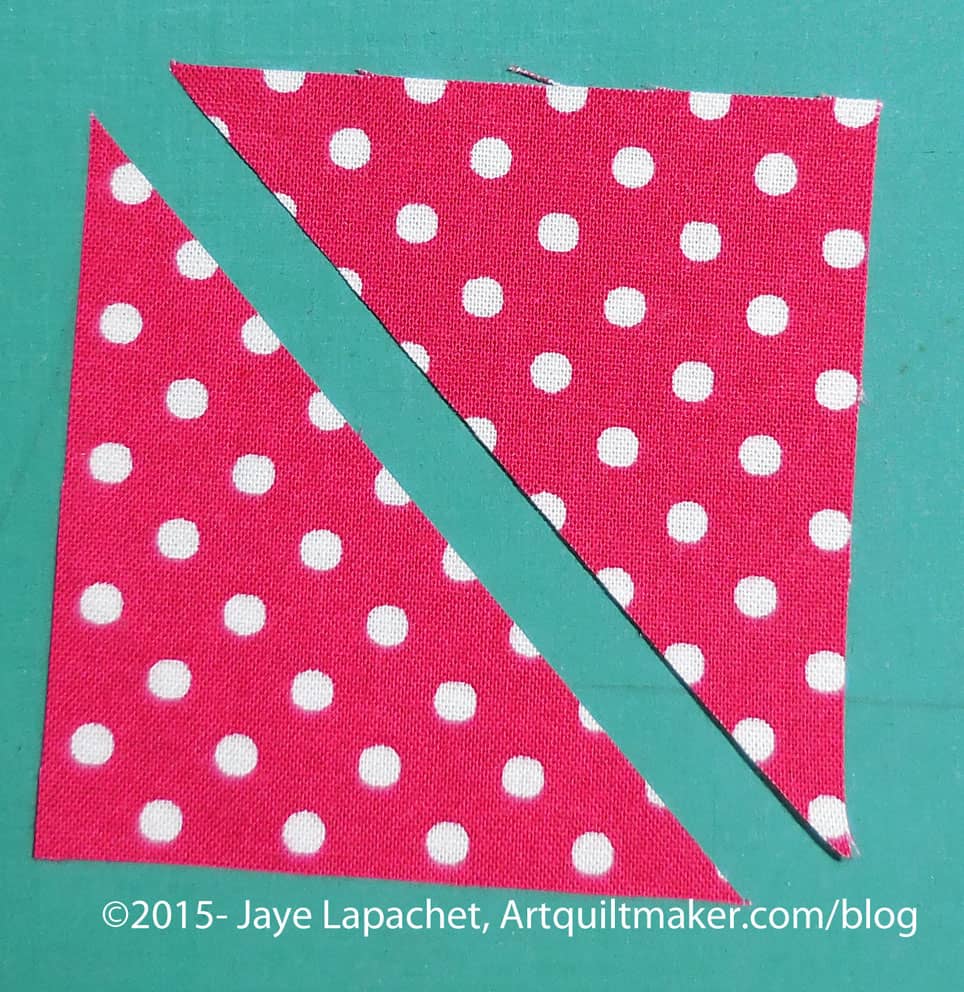
Measure the template for the large triangle of background fabric. It should be 10″ on each of the outside edges WITH seam allowance. Cut a square 10.5″ x 10.5″. You can trim it later. Better safe than sorry. Press the square with Mary Ellen’s Best Press.
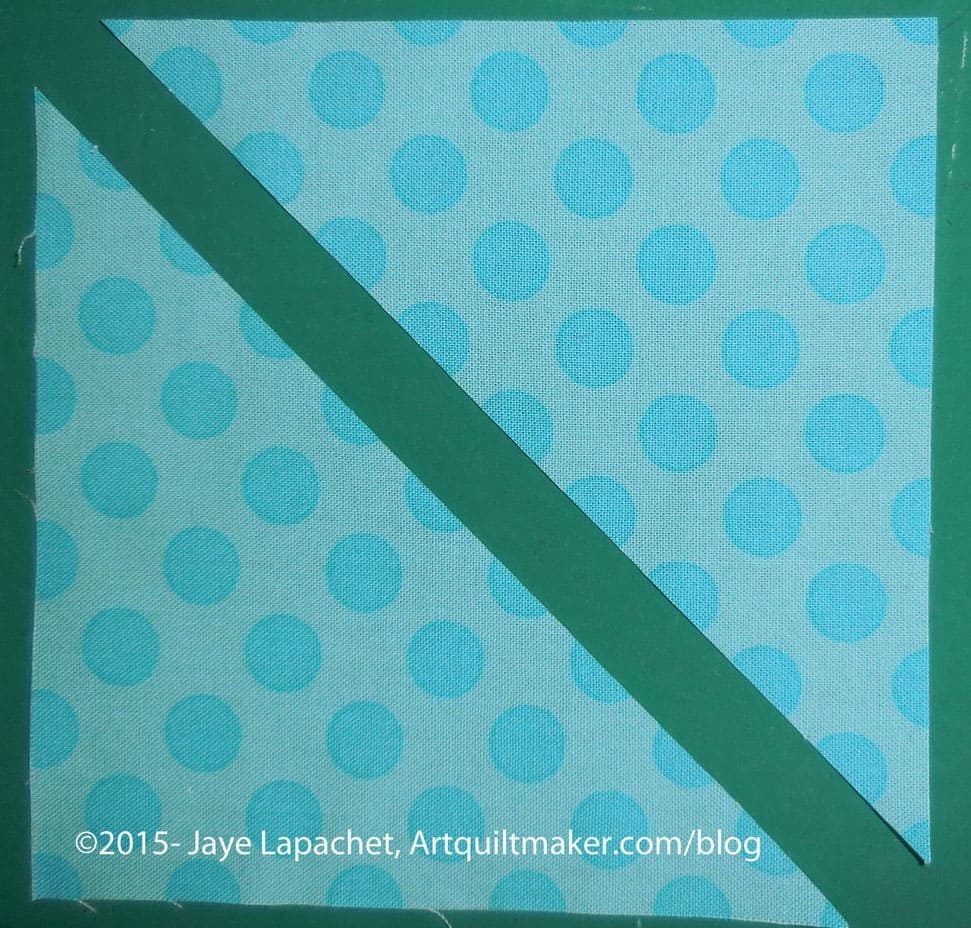
Cut square on diagonal
Cut the square in half along the diagonal.
Cut the following additional pieces according to the measurements given:
Background fabric:
2 patches: 2.5″x8.5″
Nip off Bunny Ears
1 patch: square 4 7/8″x 4 7/8″. Cut in half. Nip off the bunny ears with the Judy Martin Point Trimmer
1 square: 5″ x 5″. Cut in half on the diagonal and set your second triangle aside
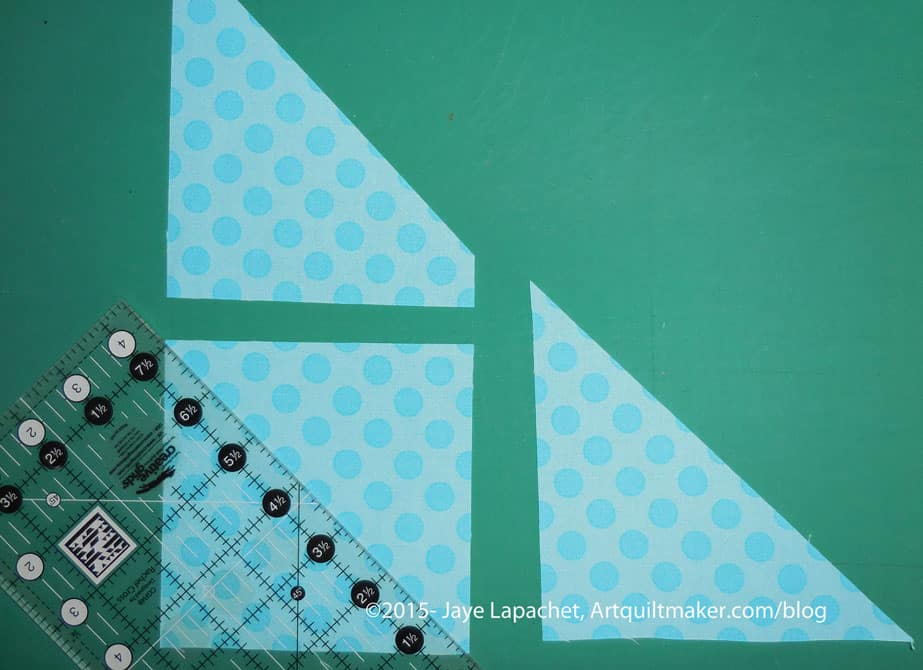
Remember: you have already cut the large background triangle
Cut some pieces from extra background triangle
You can cut some of the background pieces out of the leftover triangle.
Foreground fabric:
The foreground fabric is used for the basket. You will need at least two fabrics for this part. In my example I am using a scarlet red and a medium blue. See picture above for placement of foreground fabrics.
1 square: 2.5″ square
For the HSTs, you will need 2 squares, according to the Triangle Technique Chart, 6.25″ x 6.25″. Each square should be from a different foreground fabric. See the picture above.
Nota bene: The above Triangle Technique only yields 8 HSTs. You can make another set using the Triangle Technique directions and have some extras, or you can cut the triangles themselves
1 square 2.5″ x 2.5″
Cut trianglesCut squares in half
Cut 4 squares 2 7/8 in by 2 7/8 in the second background fabric (red in my project). Cut in half. These are the base and top line of your flower basket.
Cut Pieces
You should now have all of your pieces cut. Look for the next part of the tutorial on sewing the block together.
* Rough cut means that you cut around the outside line and a little away from it, leaving some extra paper. This helps to position the template properly and eventually cut it accurately.
** Fine cut means that you cut the template out very exactly and carefully getting rid of any extra paper and template material used when you rough cut. This is the shape you will use to cut your fabric so prepare this step with care.