Gift Pillowcases

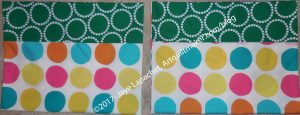
Some time ago (last fall??) Mom and I did a circuit of her local quilt shops. I bought some huge dots with the intention of making pillowcases. Finally, last week, I had got some inspiration.

Erin's Pillowcases
Erin’s Pillowcases

My niece will be getting married in April and her shower was this past weekend. In concert with two of her other aunts, we hosted a shower for our niece. I bought her a gift off her list, but had no suitable gift bags that were large enough in which to wrap it. DH tried out all the non-Christmas gift bags we have and none were large enough. He suggested a pillowcase. What a brilliant man!

Later, while plowing through some fabric, I found the pillowcase fabric I bought with mom. As happens with inspiration, I realized I could use this fabric to make two pillowcases and wrap the gift.

As I have said, the cuff is the pain for me, because I hack into fabrics as soon as they are washed for all the hunting and gathering pieces I need. I found some perfect green for my niece – Lizzy House Pearl Bracelets. It isn’t a perfect match to the green in the dot fabric, but I think it works.

My niece liked them, especially the dots and that makes me happy.

North Coast Inspiration pt.2

Misty scenery
Misty scenery

This post will make a lot more sense if you go and read part 1 first. That post has pretty pictures as well.

Down the street from the Humboldt Parlor Hall is the Clark Historical Museum. It is housed in an old Bank of Eureka/Crocker Bank building, which was purchased by Cecile Clark for her collection of items related to the area. The museum is small, but very well done. They had a special exhibit of 1960s fashion when we visited.

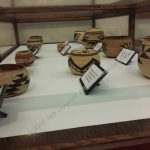
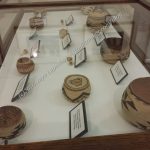
The museum also has one of the largest collections of Native American baskets in the US. I thought the designs on some of the baskets shared similarities with quiltmaking.

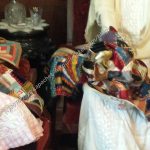
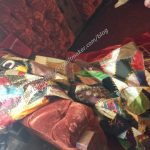
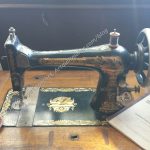
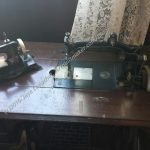
The museum also had a suite of rooms depicting a Victorian parlor and bedroom. Several vintage sewing machines were displayed along with a couple of quilts – two crazy quilts and a beautiful log cabin. I am concerned about the scrunched up display of the crazy quilts and hope they are replicas.

Eureka is a very nice city and there is a lot to do, wonderful restaurants and many historical sites. It is well worth a trip.

Part 1

Bunny Hop Quilt Shop Review

Stitch Quilt Shop Review

Ocean Waves Quilt Shop Review (previous review, not 2017)

Finished: Apron (FINALLY)

Apron Front
Apron Front

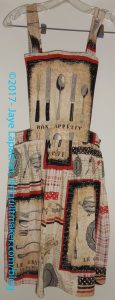
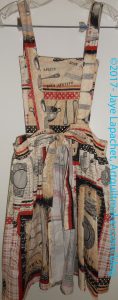
I finished this apron months ago and for some reason could never get myself together to take a photo. I finally gave myself a good talking to and got it done.

Apron Back
Apron Back

It is still in relatively pristine condition because I haven’t used it. I am saving it to enter in the San Mateo County Fair. SIL and I are trying to enter a number of projects so we can beef up the display area. If you are in the area, please enter something!

After not looking at it for months, I wish the colors had been different. I am not big on that beige or the rust. I really like the motifs and am really happy with the fussy cutting I did.

I had a lot of help with this piece. Kelly helped me cut it out about a thousand years ago and Mom helped me with the gathering, which was just about the last thing I needed to do to finish it.

I decided yesterday that I would give this apron to one of my nieces who needs an apron. I told her she wouldn’t get it until after it is exhibited at the Fair.

Book Review: Hack That Tote

Hack That Tote!: Mix & Match Elements to Create Your Perfect BagHack That Tote!: Mix & Match Elements to Create Your Perfect Bag by Mary Abreu

I received Hack That Tote for Christmas. I can always count on the YM to get me something towards the top of my wishlist. I hack bags, because I actually use the bags that I make. I wanted this book to help me be a better bag hacker. You have seen my attempts at hacking the Petrillo Bag pattern. I am happy with the results, but I thought a little additional understanding of the structure of totes and their patterns would assist me in my efforts.
This book starts with a basic pattern and gives a visual representation of the various hacking options (pg.6-7).

The first chapter is called “Anatomy of a Tote Bag” (pg.8). It only mentions the elements of a bag, but explains them thoroughly. For example, I never knew that “the square notches cut from the bottom corners dictate the shape of the finished project” (pg.8). I probably knew it somewhere deep down, but this book writes it clearly and puts it out there for my brain to chew on.

There is also a discussion of ‘drop,’ how pockets work best and how the “width and length of the bag work with the bottom corner notches in determining the finished bag size” (pg.9). All of the these structural tips in the information sections help with hacking a tote. Understanding the underlying structure of anything helps the maker to disassemble and reassemble their project, including bags.

The images are also helpful. Pages 6 and 9 have images that help understand the underlying structure – or how bags change as they are hacked. This structural information is brief but well written and useful.

The third chapter is called “Overview of Hacking the Pattern” (pg.10). The section starts with changing the size of a bag and gives the formula for scaling up or down. Changing fabric is really an easy ‘hack’. It is actually barely a hack and probably should not have been mentioned in the same context as changing the size of a bag. As a very basic hack, Abreu briefly discusses ways of using fabrics to change the look of one’s project (pg.12-13). This section makes me think of my mosaic pieced journal covers and how making such a large piece of fabric would use up a lot of scraps as well as be interesting if one could deal with all of the seam allowances.

Fabrics are discussed in an entire chapter of their own entitled, shockingly, ‘Fabrics’ (pg.14-). This section is different than the above in that it discusses particular types of fabrics and their qualities in relation to making bags. The chapter includes my favorite fabric tip. “I nearly always select light colored fabrics for bag linings” (pg.14). The author also discussed aligning fabric motifs (pg.14) and different fibers (pg.16-19) extensively. She provides for use of different fabrics and her opinion on their suitability for bags.

“Interfacings and Stabilizers” information is given space as well. The topic is illustrated with a page spread (pg.21). The chapter gives extensive help on why to use stabilizers and the author’s preferences such as “… to interface both the exterior and the lining, which allows the bag to maintain its shape over time” (pg.20).

Again, Ms. Abreu gives an illustration of various interfacing and talks about their uses (pg.22-24). I was pleased to read about buckram, which I have never used (pg.22). I was also pleased to get a short lesson on craft stabilizers, which Abreu describes as “beyond the heartiest of interfacings lies a category of products called craft stabilizers” (pg.24). I have never heard this term so I was pleased that she named some brands with which I was familiar so I could get context. The author also gave useful tips on sewing through them.

One thing I like about this section the “Considerations of Interfacings/Stabilizers” (pg.25). This part gives advice on when to use what type of interfacing. She uses projects in the book as examples. While this could be seen as self-serving, I think it is a great idea because there are a wide variety of projects which provide a variety of examples for almost any available pattern.

Handles can be hacked as well. Ms. Abreu talks about different types of handles (pg.26) with examples (pg.27). Pockets, decorative elements, bottoms, hardware as well as handles are all included in the Elements section (pg.26-35).

After a lot of great information, the patterns start with a basic tote. The patterns each run about 4 pages, depending on the complexity. I have seen some full sized quilt patterns in books on a shorter number of pages. The basic tote is the pattern on which most of the other patterns are based.

I originally saw this book at a store and one reason I put it on my list, besides the basic hacking information, was the Tubular Frame Purse (pg.60-67) pattern. I like the idea that I might be able to carry one bag for work rather than a purse and a tote or briefcase. I like the shape and the fact that it stands up by itself. The pattern calls for foam interfacing such as Soft and Stable.

Like many of the patterns, there is a sidebar called “Inside the Hack” (pg.60), which discusses how to accommodate different sizes of parts. There is a lot of cutting for this pattern and the design uses several different types of interfacing. Though I haven’t made the bag, the steps seem to be well written and clear. This pattern has a bag bottom, so the maker could use press-on vinyl to protect the fabric from wet floors. Keep the negative sides of press-on vinyl in mind when you use consider using it.

This pattern uses a tubular frame. It is definitely on my list to try out. I just have to find some proper fabric, assemble the interfacing and supplies.

The Boat/Pool tote (pg.68-73) would be a great project in which to use a large print fabric for the outside. alternatively, I might use a laminated fabric for the outside, especially if I planned to use the bag around water. This pattern doesn’t have a separate bottom piece so press-on vinyl isn’t an option.

The Laundry Duffle Bag (pg.94-98) could be a great option if you want to include a storage bag for a gift quilt. One option (hack?) given for this project is using French Seams and a heavier fabric. This interests me and I want to think about how to parlay this into use for different patterns.

Hack That Tote doesn’t have an index, but it does have an illustrated Glossary (pg.99-102) and a Resources page. I find the Glossary helpful for techniques with which I am unfamiliar. I would have liked it better if projects that used the listed techniques were include with the entry.

A ton of photos were included, which makes navigating the instructions easier. I recommend this book.

There are a wide variety of patterns in this book of different shapes and sizes, including a messenger bag and a crossbody bag. Some look like patterns I have seen from other designers. There are a limited number of shapes for bags so, perhaps, it can’t be helped.

View all my reviews
North Coast Inspiration

The trip did not rest on my visits to Stitch and Bunny Hop. Eureka and the surrounding is beautiful. I found it to be especially beautiful on this trip because we have had enough rain to make the hills green and everything seem clean and fresh. Aside from the quilt shops, there is a lot of history and they have done a nice job making the downtown appealing, so it is well worth a visit.

Watercolor Sky
Watercolor Sky

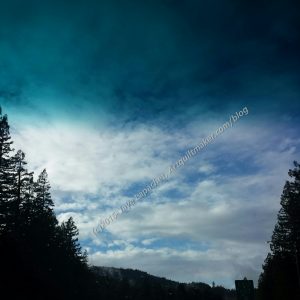
The drive up (about 6 hours) was beautiful after we crossed the Golden Gate Bridge with blue sky and green hills. We were pleased and a bit relieved to see some blue sky after the crazy hard rain we had on Thursday. We stopped in Willits for lunch and then it rained on and off the rest of the way to Fortuna. The rain clouds make for some beautiful sky photos.

I thought the blue of the sky in the first photo (right, above) looked like a particularly good watercolor.

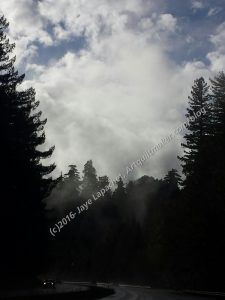
Trees and mist on Hwy 101

The area was known for logging at one time. There are tons of Redwoods that have grown back or been preserved. These trees with their mist also made for some nice views as well. As mentioned, the weather was rainy on Thursday at our house and the highway did not escape the pounding. there were a couple of places where we had to detour off the main highway to get around work being done.

On Saturday, DH dedicated Fire Station #6 on J Street. It is now a fire museum and the Friends are working on restoring the building and preserving fire equipment. It was a very nice ceremony, one of the best I have attended. Humboldt Parlor did a great job organizing the event and even had a TV reporter along side newspaper photographers.

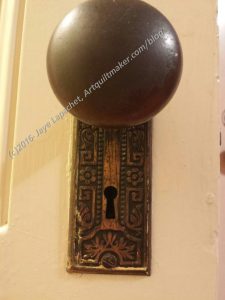
Parlor Hall doorknob

After the dedication we were invited for lunch at the Parlor’s hall, which is in downtown Eureka. I always wish DH’s Parlor had a hall, but there are a lot of issues with owning property, not the least of which is buying it.

One of the things I noticed was the artistry of the doorknob plate. This could be a quilt design with a little reworking.

I love this kind of detail and, though I wouldn’t want this exact doorknob assembly, I do think the plate would be fabulous.

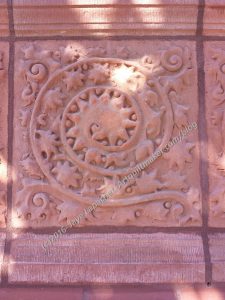
Building decoration, Eureka

We walked around a little bit on Saturday after the dedication and I saw various details that made my brain spin with ideas. The photo left is an interesting version of a spiral. It is one of  many that decorated one part of the building. It made me think of Friend Julie, as she is my spiral girl.

I am not sure what it is made of, but it looks somewhat soft, in terms of stone being soft.

Check back for part 2 in a few days.

ColorPlay Travel

View towards Fortuna

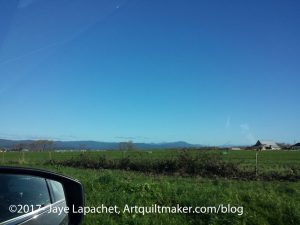
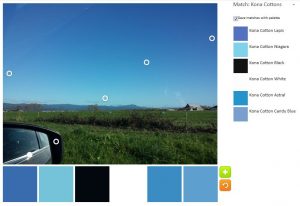
Last weekend we went on another #politicalwifery trip for the Native Sons. We headed up to the North Coast. After, what seemed like, days of pouring rain, Saturday dawned beautifully clear. DH pointed out a gorgeous view so I am using that view, on our way back from Stitch in Ferndale as today’s ColorPlay.

You can see why I picked this. Last time I was trying to get a nice blue palette. Today, I’ll be hard pressed NOT to get a nice blue palette.

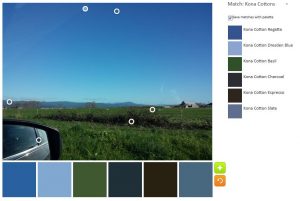
ColorPlay Feb 17 n.1

Today I remembered to save the ‘auto color’ image. The tool seems to cluster the images into the dark. It is interesting. This isn’t the perfect palette, but I do like the Kona Regatta and the Dresden Blue (top two).

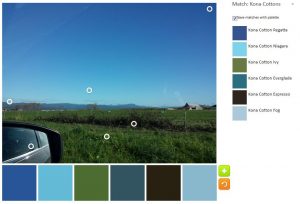
ColorPlay Feb 17 n.2

This might be my favorite. I am not 100% sure, but it has Kona Niagra, which is close to Kona Jamaica, a sure favorite. There are also a sufficient balance between light and dark.

ColorPlay Feb 17 n.3

N.2 was my favorite until I saw n.3. Still no Jamaica, but the Lapis with the Niagra work really well together. The medium blues really make this subtle.

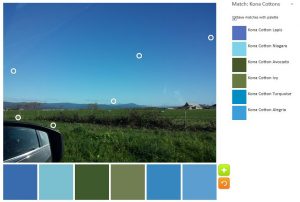
ColorPlay Feb 17 n.4

I added in the greens to see what would happen. they are more mossy than I like, but the balance works. I think n.4 is probably the most successful palette.

Try the Palette Builder out yourself and show me what make.


Shop Review: Bunny Hop – North Coast

Bunny Hop Quilt Shop

It really was a beautiful day on Saturday, but that meant that my poor phone was having trouble taking photos – lots of glare.

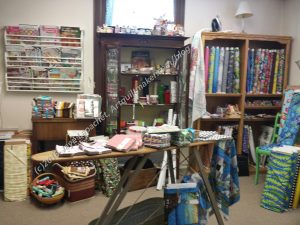
Bunny Hop is located in an old Victorian. The inside does not appear to have been modified much, including the kitchen, which looked freshly painted and was decorated with a cherry theme. They made the inside work, which pleased me. I dislike it when historic buildings are chopped up without sensitivity. Eureka, Ferndale and Fortuna have some great Victorians.

Bunny Hop room 3
Bunny Hop room 3

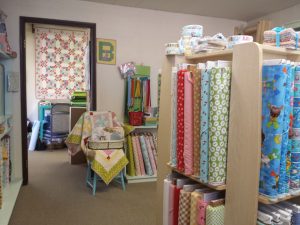
In contrast to Stitch, this shop’s decor was in keeping with the Victorian style of the house. They had a fair amount of 1930s repros but they also had other bright and cheerful fabrics that I wouldn’t categorize as repro, but not Modern either. The fabric they had was similar to Scruffy Quilts (normal??). The decor definitely tended towards repro.

Bunny Hop: Room 2
Bunny Hop: Room 2

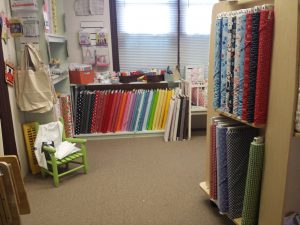
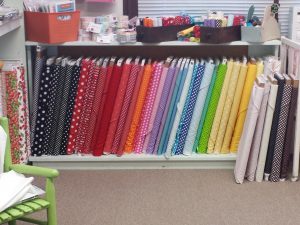
They had some precuts – mostly charm packs and mini-charms. On the ironing board were some Uppercase charm packs, which tempted me. I resisted. They had a great selection of dots and had they placed together. There were patterns and notions and samples everywhere. I realize now that I didn’t really get a good look at some of the notions they had away from the cash register (DH was waiting in the car).

Bunny Hop: Room 2 dots detail

The rooms were on the large side – or well laid out so the place didn’t feel crowded. The shop owner seemed to have a good FQ policy and they were placed near the like fabric on the bolt. I bought a couple of text fabric FQs for the Carpenter’s Wheel and one of the Studio E blue to which I am attracted.

Bunny Hop Main Room
Bunny Hop Main Room

They also had a nice selection of white on whites, which made me think of TFQ. I bought one called gingham for a background. It had a white printed (a la Blueberry Park) grid on it. Not sure what quilt I will use it for, but there is no shortage of options. Bright white is something that I find goes well with the bright colors I use.

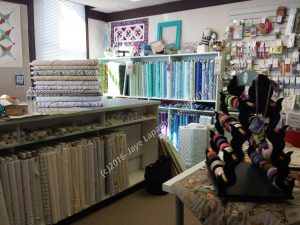
The main room was also where they had notions, including a nice selection of scissors, Renaissance Ribbons and their blue fabrics.

Bunny Hop: Room 2 detail 2

The project on the wall of their workroom was appealing. I couldn’t get a closeup view. It was 16 patches set with lozenges so it looked like the 16 patches were Sawtooth Stars.

The photo, left, was taken in the same room as the dots (above). They had some kids prints along with the repros in this room.

Bunny Hop: Room 1
Bunny Hop: Room 1

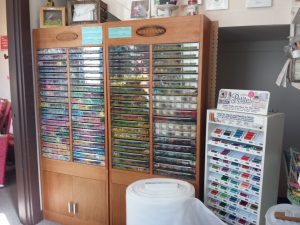
In, probably what used to be, the Service Porch Bunny Hop had their interfacings, fusibles and a lot of Sullivan embroidery floss.  The floss was mostly in hanks rather than spools like the recent Sue Spargo and Aurifil purchases I have made. There were some in balls. I haven’t heard of this company and didn’t buy any. Isn’t that a GREAT cabinet?

Bunny Hop Project Area

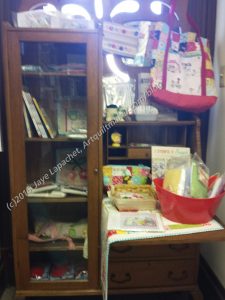
Finally, of course, throughout the shop, they had samples and projects. This area was particularly cheerful. You can see the red, yellow, green and white theme they had going. This was another area with a number of books and patterns, which I did not take the time to explore in depth. 🙁

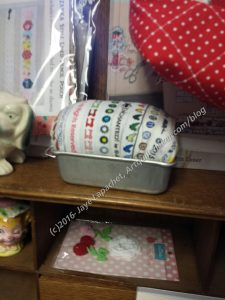
There was a pincushion made from selvedges in a small bread loaf tin (second shelf under the bag and to the left) that was fun. I am not sure how it would be to put pins in, but it would make a cute decoration for someone who enjoys selvedge projects. It is also another way to use up those selvedges.

Bunny Hop selvedge pincushion idea

I enjoyed this shop, not only because it was new, but because of the cheerful quality of the projects and the fabric. I was also pleased when the cashier told me about Stitch. It is well worth a visit, especially if you are in town visiting a number of quilt shops.

Visit Bunny Hop Quilt Shop
Address: 1809 Albee Street, Eureka, CA 95501
Phone: 707-497-6356
Email: info@bunnyhopquiltshop.com
Website: http://www.bunnyhopquiltshop.com/

Book Review : The New Hexagon

The New Hexagon: 52 Blocks to English Paper PieceThe New Hexagon: 52 Blocks to English Paper Piece by Katja Marek

I bought this book because it was a block dictionary and the cover was very appealing. I think I also liked the cover’s color and was in a weak mood. Still, I do love block dictionaries and this is a great one for new a way of looking at hexagon blocks. I have never seen a grouping of hexagon ‘blocks’ before and these are really unique. I am really excited about English Paper Piecing right now and can see myself starting several projects using that technique. I am trying to restrain myself, especially since I plan on making the La Passacaglia quilt.

This book was paired with the Marti Michell Perfect Patchwork Templates set G. I thought they would be great for cutting the fabric. The sizes of the rotary templates don’t match the sizes in the book so that is a problem. However, as creative people I know that most of us can adjust the blocks to the size of the templates since they make cutting fabric much easier.

Predictably, the book starts out with a table of contents. After the table of contents, the author presents us with her view of paper piecing. The method I use (thread basting) is considered “truly laborious” (pg.4), though in fairness to the author, I do buy paper templates rather than cutting them out myself. Marek advocates glue basting fabric to cardboard over thread basting.

The author discusses the advantages of EPP, including its portability. I do agree that English Paper Piecing is portable, as you have seen with my half hexie project.

The Tools and Equipment section (pg.6-7) is compact but information filled. I was thrilled to see that Ms. Marek goes to the level of telling her readers what weight of paper (pg.6) she uses to print her EPP papers. This is very useful information if I decide to print templates rather than buying my papers. In addition to the tools, Marek also describes her “on-the-go box” and what it contains. I am a huge fan of Go Bags as having a bag ready to take on trip means I don’t have to rummage for supplies and possibly forget something. It also means I might actually get something done on a travel weekend where I might otherwise get no time with a needle.

The fabric in this book looks like Kate Spain’s Terrain, another appealing aspect to the color scheme of this book. It is well suited to the examples as there is opportunity for fussy cutting from some of the motifs.

English Paper Piecing Techniques (pg.8-11) follows the chapter on tools. This section has everything you need to know about paper piecing. Keep in mind that this is the author’s method and variations you use are not wrong. While I haven’t tried the glue basting method, the complete directions given do encourage me to give it a try. I normally only wash my quilts as needed so I worry about the lasting effects of the glue on the fabric. She talks about removing the papers but not about reusing them or washing the glue out of the fabric.

There is the ubiquitous section on “Quiltmaking Basics” (pg.12-15), over a page of which is concerned with binding the quilt. There is no talk of quilting the quilt beyond following the manufacturer’s instructions. Of course whole books have been written on the subject so I am not surprised.

One of the most interesting chapters is called “Working with Patterns” (pg. 16-18). One thing this section shows is why the reader should prepare the templates in the way the author recommends. “The following is the so-called ‘fine print’ — the little details that are often glossed over. You may never choose to changed the size of the blocks in this book, and you may never need to calculate the height of a hexagon. But when you become inspired to start designing your own quilts using the blocks I have provided, these little tidbits are here to help you. The size of the blocks in this book is determined by measuring the length of one side (in this case 3 inches) (pg.16). Even I, who glosses over directions with wild abandon and to my shame, can see the wisdom in Marek’s words. This section also gives tips on fussy cutting and provides ideas on layouts. Study these pages carefully and you will benefit greatly. I did and found a variation of Jack’s Chain which has my head spinning with thoughts on that layout.

Over 71 pages 52 hexagon blocks are presented (pg.19-52). The author has named all of them with women’s names. Carol is the most basic divided hexagon, being made up of 6 triangles. Most of the other blocks have smaller hexagons and diamonds, some half hexies (Lorraine is similar to my EPP project), triangles, parallelograms, and kite shapes all rearranged into hexagon shapes in very clever ways.

Finally, the book has a few projects. Because of the nature of EPP, I think this is a book that will inspire quiltmakers to design their own quilts. All of the projects, especially those made in Terrain are very appealing. My favorite might be the Rain Chain Nursery Quilt. It reminds me of the modern donation quilt our color group made a few years ago. There is a lot of background, but the layout is very appealing. Sadly, the Jack’s Chain variation is made from unappealing beiges.

There is also a list of resources and a gallery. This book has a lot of scope for inspiration

View all my reviews
Shop Review: Stitch – North Coast

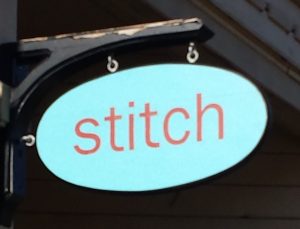
Fun Stitch sign
Fun Stitch sign

This is a fantastic shop. I wanted everything and bought more than I had planned. I am so glad I went and wish this shop was in my neighborhood. I am probably lucky it isn’t.
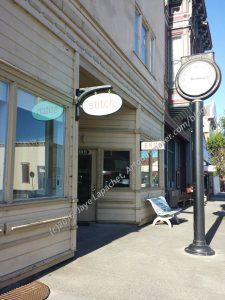
Stitch: view from the street

I was directed to Stitch by the kind lady at Bunny Hop Quilt Shop, another shop I missed last year. Stitch opened in January 2016 and I didn’t visit last year. DH reminded me that we spent the day wandering around Fortuna trying to get a library card. I don’t remember anything about quilt shops last year and I can’t find anything on the blog so perhaps I didn’t visit quilt shops last year? I must not have been feeling well. 😉

Stitch: view from the street

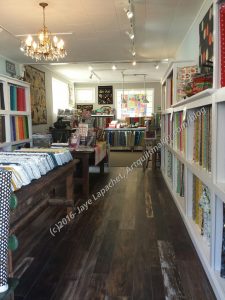
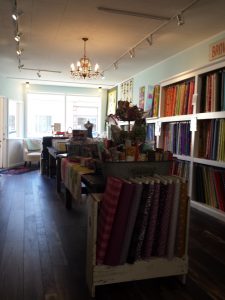
The outside of the building isn’t anything to write home about. It needs a good coat of paint and some glossy white trim. The inside of the quilt shop is a paradise. It is small, but has a great feel, wonderful fabric, lovely displays and a general air of things happening. The fabrics were all modern and current. I never liked light blue, but after seeing it on the walls of this shop, I might change my mind. The shop had the feel I want for my bedroom.

Stitch: View towards the street

While I was there two ladies were in the small classroom making modern Dresden Plate type blocks that made me want to sit down and make one as well. The owner was calling out encouragement to them while she helped me.

The shop is compromised of one large room (photos left and above) along with a small room behind the cutting counter that had a design wall with interesting blocks on it. As mentioned, there was also a small classroom. In the classroom was a wall of sale fabrics.

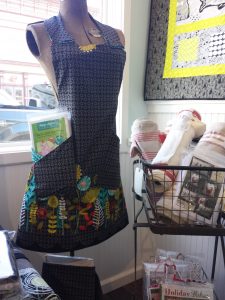
Stitch: Apron idea
Stitch: Apron idea

The displays were also wonderful. Why didn’t I ever think of using a border print for an apron? Genius.

The whole front corner made me think of Friend Julie as it was grey and yellow themed. In addition to the tea toweling, of course. The apron pattern is the Church Ladies apron that I made, but shorter. And better looking. The fabric is great.

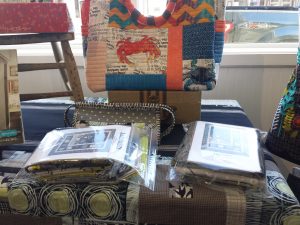
Stitch display detail

Also in that corner was a display that included a tote bag and a Sew Together Bag. The kits are for the quilt on the wall in the photo above.

I saw the crab fabric on the Hawthorne Threads site and almost bought it. I think it is interesting, but, after seeing it, am glad I didn’t.

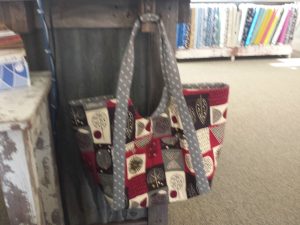
Stitch: Poolside Tote

Finally, they had an example of the Noodlehead Poolside Tote (sorry, slightly blurry). I LOVE the grey dot straps and the bold print. I bought some of that grey and am thinking of making something similar with one of my man Phil’s (Philip Jacobs) flower prints. I think a larger bag might be better, but we will see. I need another tote (and project, for that matter) like I need another hole in my head. Still, the idea of using that grey with a bold print is very appealing. I really, REALLY need some serious sewing time.

The cherry on top of the ice cream sundae was the Sue Spargo AND Auriful embroidery threads. They didn’t have as much Sue Spargo as Thistle Dew, but they had enough to keep me happy.

I really wish this shop well. I also wish it were in San Francisco. It is an incentive for me to go to this Native Sons event again.

Visit Stitch!
385 Main St
Ferndale, CA 95540
(707) 786-5007


Stitch Envy
Stitch Envy

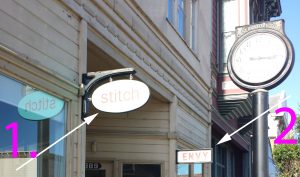
This is a funny view of the front of the shop.

Carpenter’s Wheel – First Piece

Carpenter's Wheel - first piece
Carpenter’s Wheel – first piece

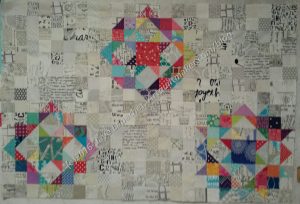
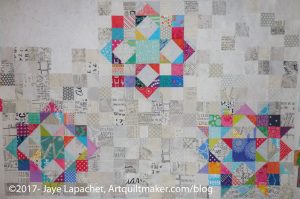
Hard on the heels of the Peacock was a deadline for the Carpenter’s Wheel. Since I had started thinking of the background for each block in terms of low volume prints, there was a lot of text fabric included.When the text Challenge was announced at my modern guild, I immediately thought of this piece. It wasn’t exactly made specifically for this challenge, but it fit the theme and the blocks were just hanging around, so Text challenge quilt it was.

That meant that I had to get some of it done before the big reveal, which was Saturday. I couldn’t be there due to #politicalwifery. Still, I had options for showing it.

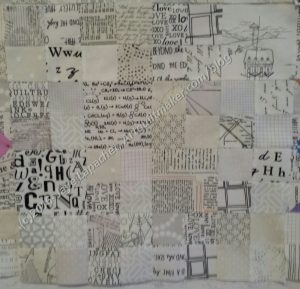
I used some mini charms, which I bought in Oregon, to get the ball rolling, but picked up other text fabrics along the way as well. A few weeks ago, I spent some quality time with the Accuquilt and the 2.5 inch die cutting, what I hoped were, enough squares to make 3 background blocks.

Carpenter's Wheel - Feb 2017
Carpenter’s Wheel – Feb 2017

I refused to compromise my vision, which started with the layouts I worked on in the spring of last year. I wanted some good texture int he background, so multiple squares, rather than big squares of fabric it was to be. I began using the 2.5 inch squares as leaders and enders as I finished the back for The Peacock. I made a stack of 4 patches, which later turned into 3 background squares.

Carpenter's Wheel background block
Carpenter’s Wheel background block

I wanted to see how 4 inch squares would look mixed in. I chose the fabrics carefully and fussy cut in some cases. I thought they fit in and didn’t scream, so I used a couple in each block. This make the piecing go a little faster and add a little relief to the background.

I had to sew into the evening on Thursday in order to give it to my SIL on Friday to take to the meeting. I succeeded and still got to spend time with DH. I have gotten some very nice comments on Instagram and hope, even if unfinished, it is well received at guild.

Following up on Grace

The other day I wrote about grace. The part that has been on my mind, some from Carrie Bloomston’s book, The Little Spark, “I am still trying to get a firm image of grace in my mind. Bloomston provides several metaphors which inch me closer. “Grace is the hinge between effort and effortless. There is a moment in our creative flow in which we are utterly absorbed, content, focused, and present with the moment and everything in it” (pg.42). This is the place I strive for. I do think, however, that we can get snatches of it within each project when the stars align, but that actions we take outside of each project, though including each project help make those moments more and more frequent. For example, how we tidy up, where we find that one scrap we need, etc.”

The main part that has been on my mind is the last couple of sentences – how we prepare for grace. For me, organization is key. I don’t feel that my workroom is optimally organized, but I always work on it. I was on the phone with a friend yesterday and filed random papers and sorted scraps while we spoke. These types of things make way for the creativity. If I don’t have to worry about where something is hiding or where I put that certain piece of fabric, I have more space for creativity and, perhaps, grace.

Part of that is space. I need more space, but have a lot and am concerned that if I get more I will just fill it up. Thus, I am clearing out fabrics I won’t use and trying to keep projects from stacking up. This isn’t always easy as I have to balance having enough to work with having too much spilling over into my workspace.

I’d like to have an organizer come in and make a plan for more shelving and cupboards and a better organization system in the Fabric closet. That expense will have to wait until the YM is finished with college or I win the lottery.

I don’t let this discourage me. You can see the work that I do by reading the blog. Culling fabric also helps even if it is a little at a time. One yard gone is one yard less taking up space. I appreciate the incremental progress. This is my process. This works for me. It might not work for you. Don’t wear my coat. It probably won’t fit.

Hansel and Gretel

Hansel and Gretel
Hansel and Gretel

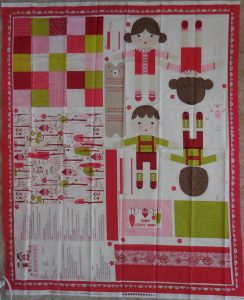
I received the Hansel and Gretel panel for my birthday, which resolves whether or not I will make it for my niece. I looked at the panel and found that there is a pet, two dolls and a quilt. There is also a skirt and a pillow. Brother and sister will be very cozy together.

I am still not very confident making the skirts. Coral didn’t need one, but Gretel does, so I will get some more practice. I also need some more stuffing. I might try bits of batting. I have a lot of thin strips, which might be appropriate. I am not in the mood to store a giant bag of stuffing. If I knew Moda would come out with new dolls every year, I might change my mind, but for now I will make do. If the batting doesn’t work, I’ll get some stuffing.

Creative Spark #9: Grace

Grace is something that I skitter around when I come across it. Grace is, of course, a name – a name used often in our family, by the way, though not in my branch – but I am talking about the personality trait. It is also a trait, or, perhaps, a series of traits that seems old fashioned in our fast-paced, car driving, mobile phone wielding, kid juggling life.

The definition of grace from Merriam Webster online is 1a :  unmerited divine assistance given humans for their regeneration or sanctification; b :  a virtue coming from God; c :  a state of sanctification enjoyed through divine assistance.

I prefer the American Heritage definition. It is more what was on my mind. It came up when I performed a search for ‘grace definition’:  “n. Seemingly effortless beauty or charm of movement, form, or proportion. n. A characteristic or quality pleasing for its charm or refinement. n. A sense of fitness or propriety.” This is more of what I was thinking. I think of well bred English ladies from the Edwardian and, possibly, the Victorian era who were strong, but had pleasing manners, welcomed visitors warmly, etc. I don’t mean this in a judgmental way.

I also think that thinking about grace and striving towards it as individuals is important -right now more than ever. Bloomston writes “we are programmed to think that work has to be hard to be valuable – that we are supposed to struggle in order to yield the most prized outcome….Creativity is a flowing thing. You can’t white-knuckle it into existence. Loosen your grip and give some space to flow” (pg. 41). I find a physical manifestation of this when I am doing balancing exercises in Pilates. If I am standing on one foot and completely tense, I tend to teeter and am more likely to fall. If I concentrate on loosening my muscles one a at a time, not only does the time of the drill melt away, but I am more stable.

I have felt tense and uptight as I worked through The Peacock. Mostly, I wanted the piece done and off the design wall so I could move on to something else. I was having a hard time giving myself over to the process. I talked a little about working on too many projects at once, trying to make sense of it. Stopping that, and finishing a couple of tops by a self imposed deadline helped a lot. Feeling tense and uptight does not make for good work. After The Morass, I tried to focus on the piece. First, I thought about what I was trying to achieve. Second, I thought about whether I wanted to finish it; whether it was worthwhile. Third, I recommitted to the piece and the process. For me, this was a glimmer of grace.

Bloomston writes “grace comes from not only being filled with purposefulness and spirit as we work, but also enjoying the moment and being present with the process” (pg.42). Of all she says in this spark, this hit me the hardest and has a lot of meaning for me. I often think about what is next, leaving the moment for the future. This makes moments go by unnoticed, which is sad. My interim talk with myself (above) for the Peacock helped me to find the purpose in the piece and be in moment as I worked on it.

I am still trying to get a firm image of grace in my mind. Bloomston provides several metaphors which inch me closer. “Grace is the hinge between effort and effortless. There is a moment in our creative flow in which we are utterly absorbed, content, focused, and present with the moment and everything in it” (pg.42). This is the place I strive for. I do think, however, that we can get snatches of it within each project when the stars align, but that actions we take outside of each project, though including each project help make those moments more and more frequent. For example, how we tidy up, where we find that one scrap we need, etc.

There is also an element of coats in this spark. “I told her that I was afraid to design my first line of fabric (and write my first book) because everyone I spoke to said it was hard when they did it. She looked at me, with her water-clear blue eyes, and said, ‘That’s their story-their experience: Each time someone tells you her story, you put it on and wear it like a coat. Many of those coast don’t fit you and yet you are wearing them. Why are you wearing everyone else’s coat?” (pg.42). This is amazing! How much do we not do because someone else had trouble with it? This reminds me of some of the technique tutorials I have in my quilt sampler class. I worked hard to show how to do Y seams, how to do machine applique’, how to put hexagons together and many other techniques. *I* feel these are valuable and can help when one wants to make a vision into a quilt. So often I hear that they are too hard so the quiltmaker won’t try. I suspect she has heard from her friend, who heard from another friend that Y seams are too difficult. Wear your own coat. Figure out your own story.

Like others, this spark has some worksheets.

Nota bene: we are working through Carrie Bloomston’s book, The Little Spark. Buy it. There is a lot more to each spark than what I am writing and the original chapters will help you. Go buy Carrie Bloomston’s book, so you get the full benefit of the fabulousness! You can see my book review, which is what started this flight of fancy. Also, take a look at Carrie’s website.

You can find the last spark on the blog about a month ago.

Doing Good

As mentioned briefly, the BAM Charity Sew Day was Saturday. I was busy with CQFA in the morning, but went on my way home. I made myself available as a general dogsbody since I didn’t bring any tools or supplies and was set on the task of basting quilts. My job was easy since there was a high table and the quilts were small. People kept coming up and helping me so it was pleasant as well.

We made about 32 quilt tops.

We totally finished about 6 of them – binding included.

February Donation Blocks

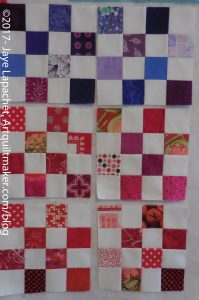
A few people stopped by and brought additional donation pieces, like me. I brought some blocks.

As usual, I have been using these as leaders and enders. I have another 3 on the design wall, but am working on the 4 patches for the Carpenter’s Wheel so there will be a break in donation blocks.

I think these are cheerful and fun. When I get to making more blocks, I have some pink squares that will end up as blocks. I also have some boy colors, which I will need to make up.

People also brought tops and backs they had done at home. I think there were about four of these. I brought the Bits and Bobs top.

Yellow Donation Quilt #2 - Feb 2017
Yellow Donation Quilt #2 – Feb 2017

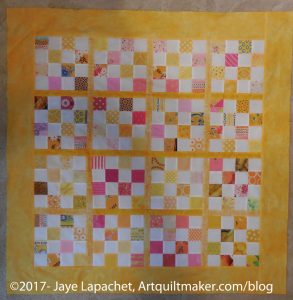
I also brought Yellow Donation Top #2, which I should be calling lemonade. Twilter Diane (DDRQuilter) said it looked like that I was disappointed not to have thought of it myself. I really like the little bit of pink I added to the blocks. I think it makes it not as ….yellow. Not sweet exactly, but tones down the yellow and also doesn’t make it scream pink.

Carpenter’s Wheel Moving Forward

Carpenter's Wheel - Feb 2017
Carpenter’s Wheel – Feb 2017

I am trying out a new concept for the Carpenter’s Wheel blocks. It is not a completely new concept because the idea comes from the layouts I tried back in April when I was playing with layouts.

I still like the circle layout and am moving in that direction. As mentioned, I wouldn’t put the two blocks in the middle.

I was relieved and pleased to see, when I put the blocks up on the wall, that the foreground pieces were not overwhelmed by the background. The Carpenter’s Wheels stand out well. I do think I need to cut some larger pieces to mix in. It will take me a thousand years to sew so many 2.5″ squares together and I think larger squares would add interest. I’ll have to try it out and see, of course.

I hope to get these 6 sections sewn together so SIL can take the piece to the meeting. I have a lot of work to do to get there, so we will see.