I have been working diligently on the Black Improv. Surprisingly it is getting quite large. Not king-sized or anything, but large for one of my donation quilts.
After having this piece languish for a long time, I thought it would be a chose to finish it. Even though I am not finished yet, I am having fun working on it. So many stripes!!
I am using the strips I cut for color strip blocks to make the quilt bigger and to make the piecing a little easier. I know I will make more black scraps at some point, so why not?
At the widest and tallest points in the photo above, the piece is 38w x 35l. It is getting to be the size I like giving to the Community Giving project.
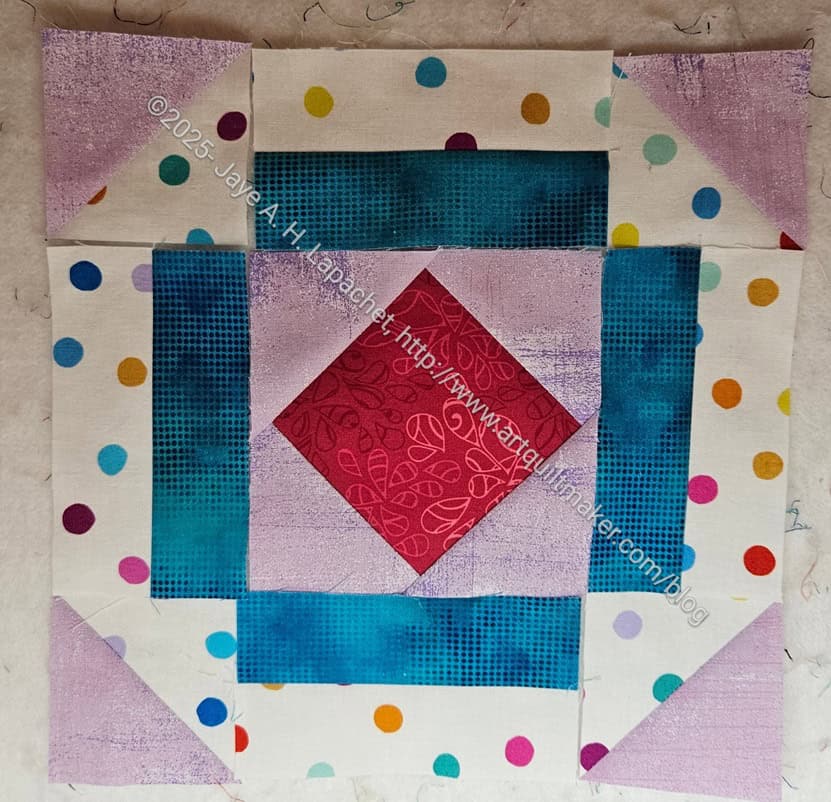
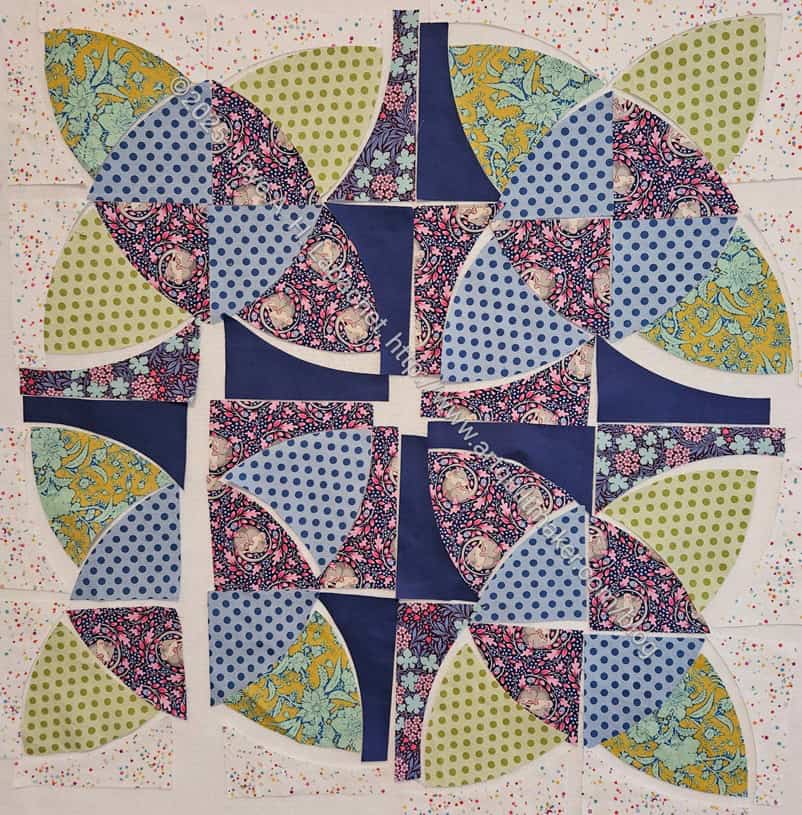
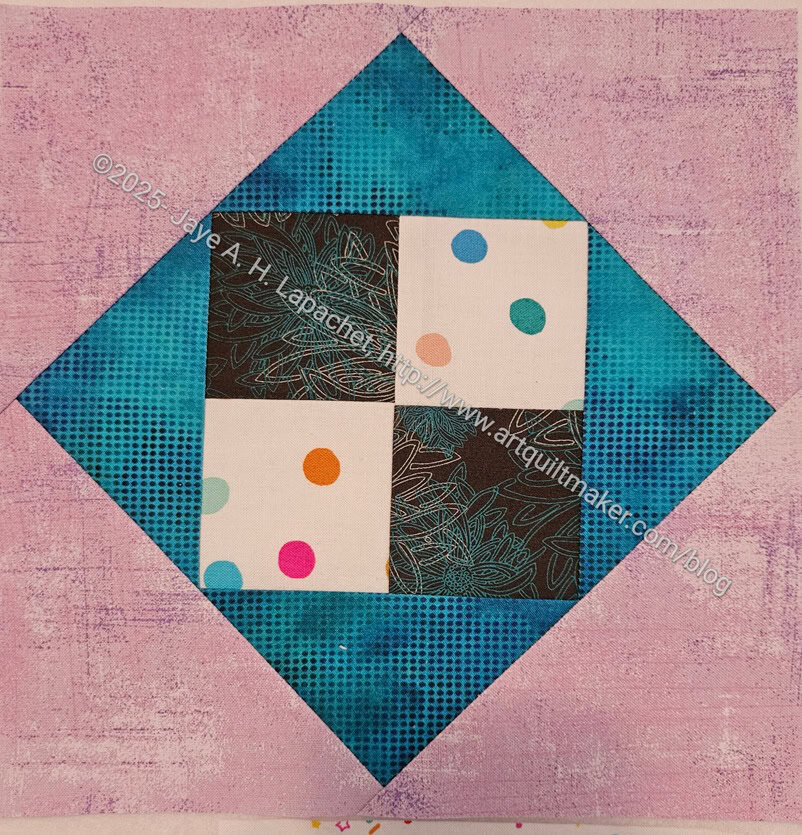
Once I cut out the pieces I messed around with them to see how they would look with the colors in different places. First, was the suggested layout.
The basis is, basically, a standard Monkey Wrench, also called Churn Dash. It is enhanced with a square in a square in the center. Barbara Brackman’s Encyclopedia of Pieced Quilts** calls this construction an ‘Unequal Nine Patch’. That is a category in her book.
In Jinny Beyer’s The Quilter’s Album of Patchwork Patterns, this block is a slightly simplified version of Triangles and Stripes from Ladies Art Company, 1897. See page 85 for other names and references.
Light Keeper alternate
Anyway, I thought the layout above looked good. The Churn Dash part (dotted strips and triangles) looked good. However, since I had the pieces, I wanted to see how it would look with blue in the center.
I think it also looks good, but has more of a circular effect. Maybe I need to do both?
**N. B. : Obviously, you should shop at local quilt shops and small businesses. However, if you are too busy or can’t find what you need there, I use Amazon affiliate links and may be paid for your purchase of an item when you click on an item’s link in my post. There is no additional cost to you for clicking or purchasing items I recommend. I appreciate your clicks and purchases as it helps support this website.
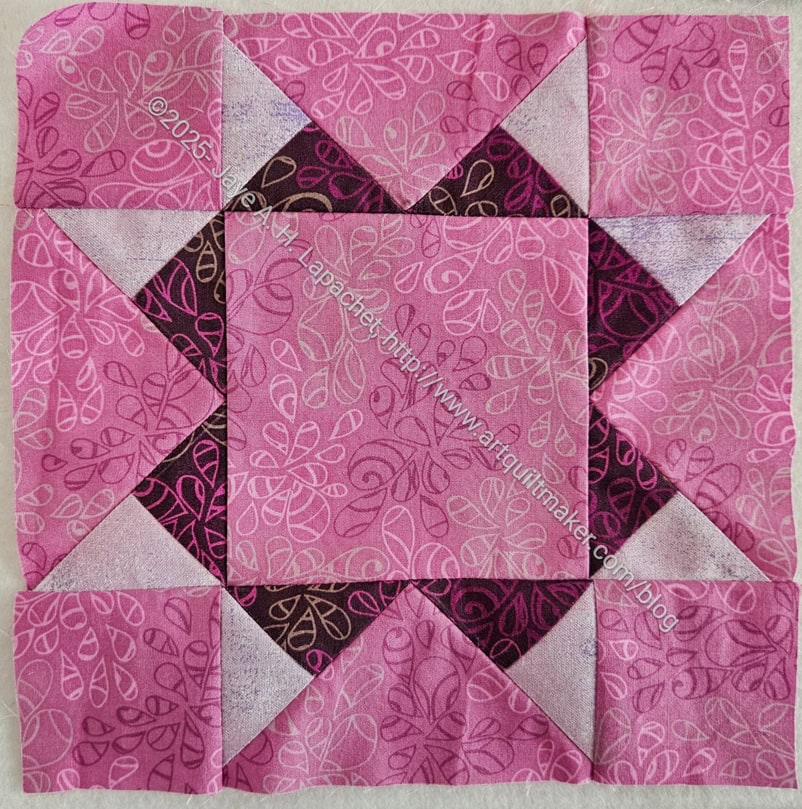
I am still working through my Half Hexie Star strips, though I am almost out of lights, so I’ll have to cut a strip to make some backgrounds.
I have about 32 of these so far.
**N. B. : Obviously, you should shop at local quilt shops and small businesses. However, if you are too busy or can’t find what you need there, I use Amazon affiliate links and may be paid for your purchase of an item when you click on an item’s link in my post. There is no additional cost to you for clicking or purchasing items I recommend. I appreciate your clicks and purchases as it helps support this website.
I wanted the darker pink on the outside of the star points, but got the pieces mixed up. I am not super fond of all of the medium pink and might make this block again so I can change the center. We’ll see once I have caught up with the blocks I missed.
**N. B. : Obviously, you should shop at local quilt shops and small businesses. However, if you are too busy or can’t find what you need there, I use Amazon affiliate links and may be paid for your purchase of an item when you click on an item’s link in my post. There is no additional cost to you for clicking or purchasing items I recommend. I appreciate your clicks and purchases as it helps support this website.
**N.B.: Obviously, you should shop at local quilt shops and small businesses. However, if you are too busy or can’t find what you need there, I use Amazon affiliate links and may be paid for your purchase of an item when you click on an item’s link in my post. There is no additional cost to you for clicking or purchasing items I recommend. I appreciate your clicks and purchases as it helps support this blog.
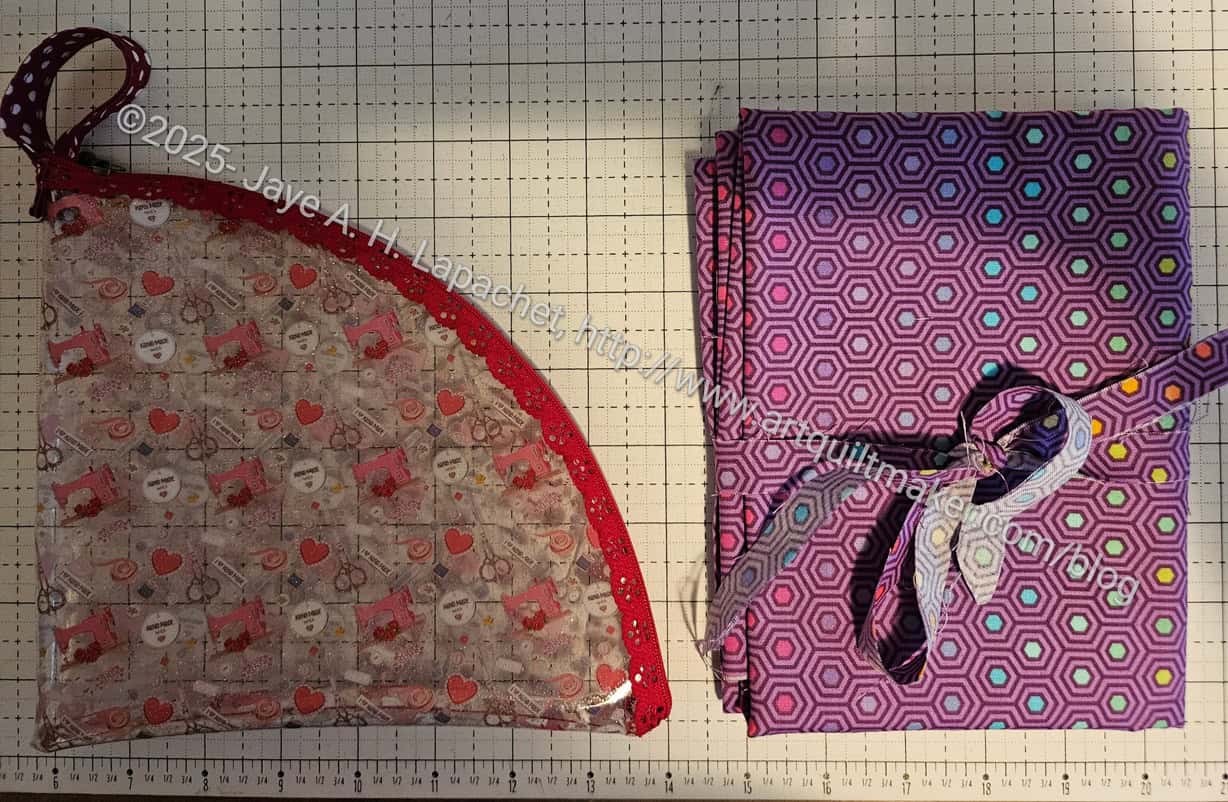
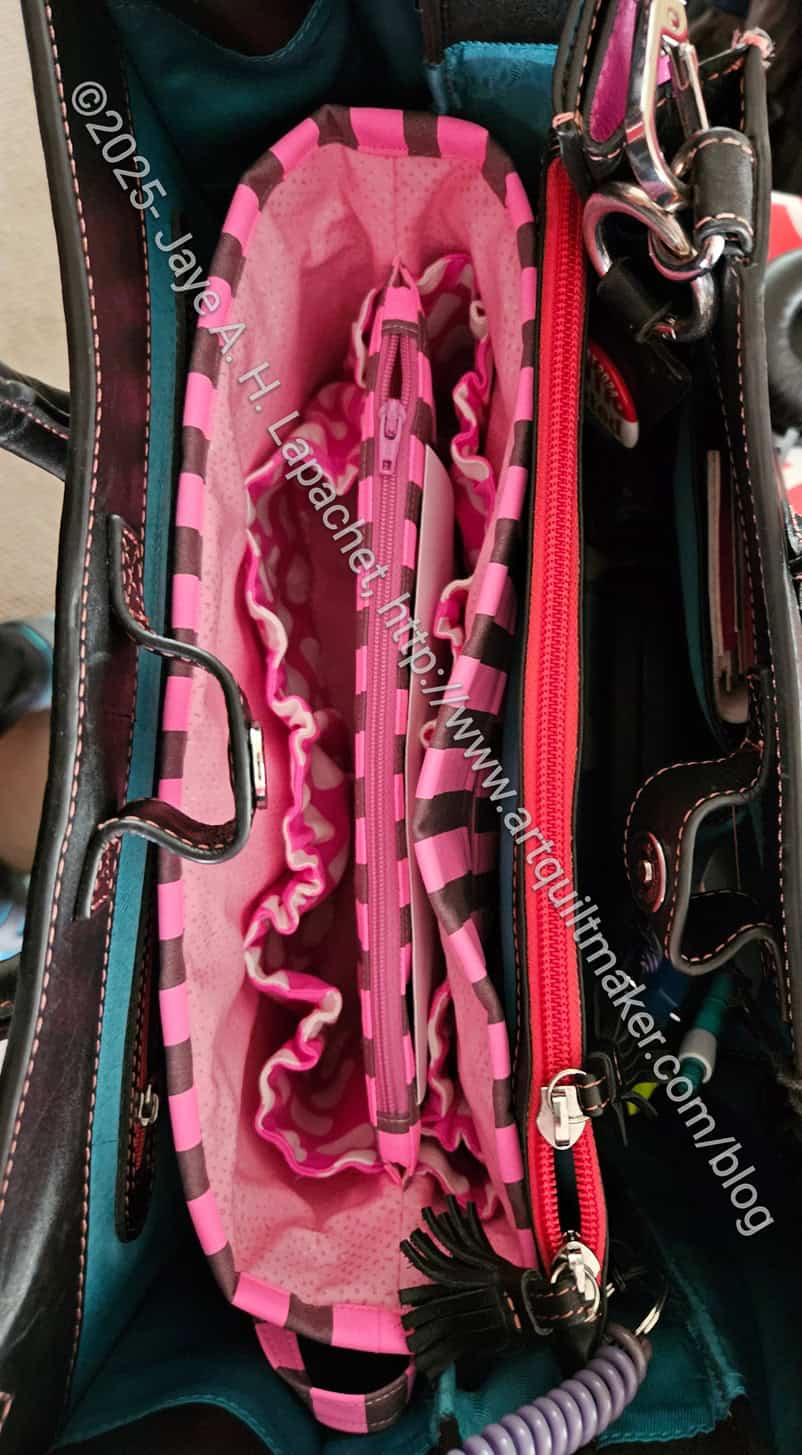
Carrie is always trying something new and I love to see what she is working on. We went out to lunch the other week and she gave me a lovely pouch and some fabric.
One of the best parts is that we dissect whatever pouch or bag she has made. In this case, she told me about the video she used and I told her about the Sew Sweetness Live Show Bag Lab where Sara showed how to finish a zipper. This finish is used in her Dogwood Pouches pattern. We always have a great time talking about bags. I feel like it is ridiculous, but I enjoy the exercise so much. Perhaps it is part of the mental challenge of making bags?
The fabric came from the recent fabric sale that SCVQA held. It was so nice her to think of me.
I have mentioned several times that Carrie took a beginning quilt class and followed up with the design class from me during the Pandemic. She has become a fearless bag maker and it makes me very proud.
After finishing the first Multi-Pocket Organizer, I wanted to make another. Over the weekend, using some of my favorite fabrics, I cut one out for me. Finding out that it would fit and work well in my handbag helped me decide to take the plunge. Yes, I need to get working on Christmas gifts, but occasionally, I need a break.
I cut everything out and used some bits of fusible fleece to interface certain parts (as indicated in the pattern). I wanted to use up pieces I had laying around and making something for myself was a good use of them. If it didn’t work, I wouldn’t give a substandard bag to someone else.
Multi-Pocket Organizer #2 front pocket
After the cutting, it took me a few days to get back to it, but then I was able to make the front pocket. It took me two tries, but after following the directions (rather than remembering), it worked out fine.
As you can see, I cut out the corners despite my session with Lynette on anchoring the lining. I have an idea for anchoring the lining on this bag and will try it. Boxing or not boxing the corners makes no difference in my idea. Stay tuned for more on whether it worked.
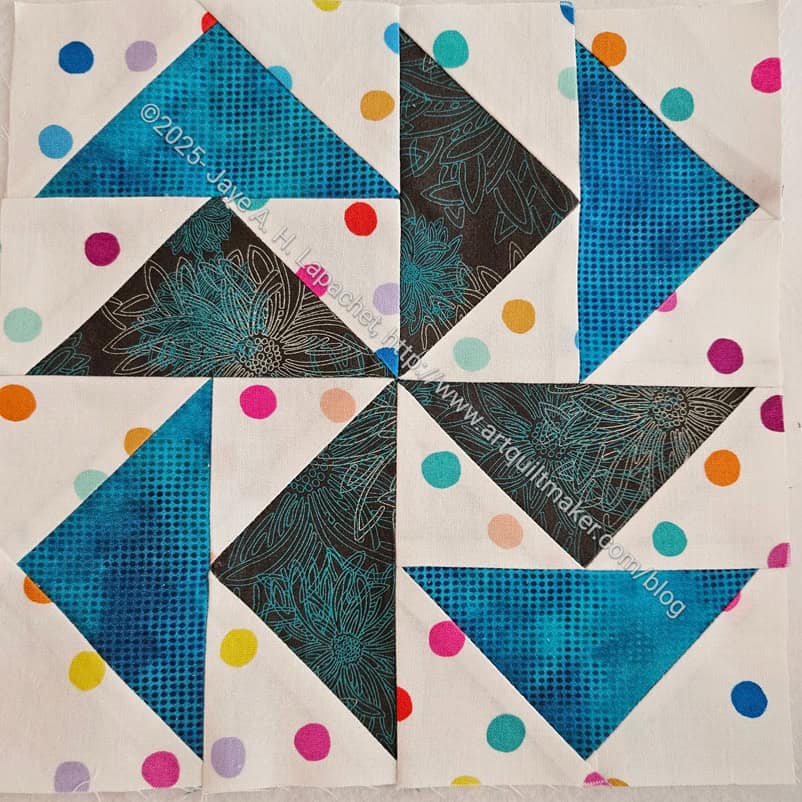
I made Block 10 almost as soon as I received it last week. I am trying hard to keep up.
The Patchwork Palooza project calls this block Turn, Turn, Turn. It is, however, a classic Dutchman’s Puzzle. This is one of the blocks I use when I teach my Sampler class. It is a great block and using the 4-at-a-time method for making the Flying Geese makes it easy to put together. I pressed some seams open in order to lessen the bulk. I haven’t done that before, but might make it a habit.
To trim, I used the Wing Clipper ruler by Studio 180 Designs**. You can easily use any ruler as long as you are careful. As you know, I love that ruler and the lines on it make lining up the ruler to trim super easy.
**N. B. : Obviously, you should shop at local quilt shops and small businesses. However, if you are too busy or can’t find what you need there, I use Amazon affiliate links and may be paid for your purchase of an item when you click on an item’s link in my post. There is no additional cost to you for clicking or purchasing items I recommend. I appreciate your clicks and purchases as it helps support this website.
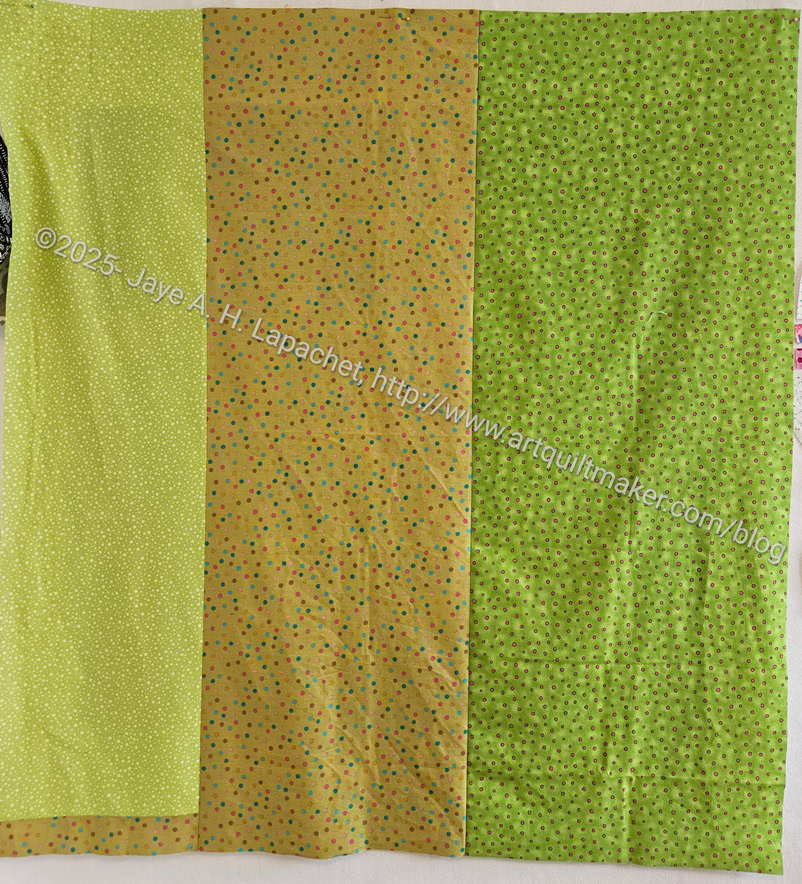
I haven’t made much progress on this piece, but I haven’t given on it either. After I posted about the most recent Color Improv finishes, I got some nice feedback and decided to get back to this piece.
I had a couple of the strip blocks and I decided to add them to the piece so as to make it larger sooner.
I quickly completed Cosmic Crazy over the weekend so it would be ready when I went to Sew Day. I didn’t know how much time I would have to sew after my mom’s surgery.
I didn’t have the kind of gold fabric I was imagining, so I used this yellow with red dots. I hope that it isn’t too ugly.
Cosmic Crazy Back
I used some greens as the back and am calling this one done. Not a great work, but someone will like it. At least that is what I am telling myself.
We all get excited about quiltmaking and want instant success. A lot of the current patterns are set up for that. I wholeheartedly agree that making a quilt or two out of the gate can set someone up as a life long quiltmaker.
Limiting yourself to patterns only limits your own creativity.
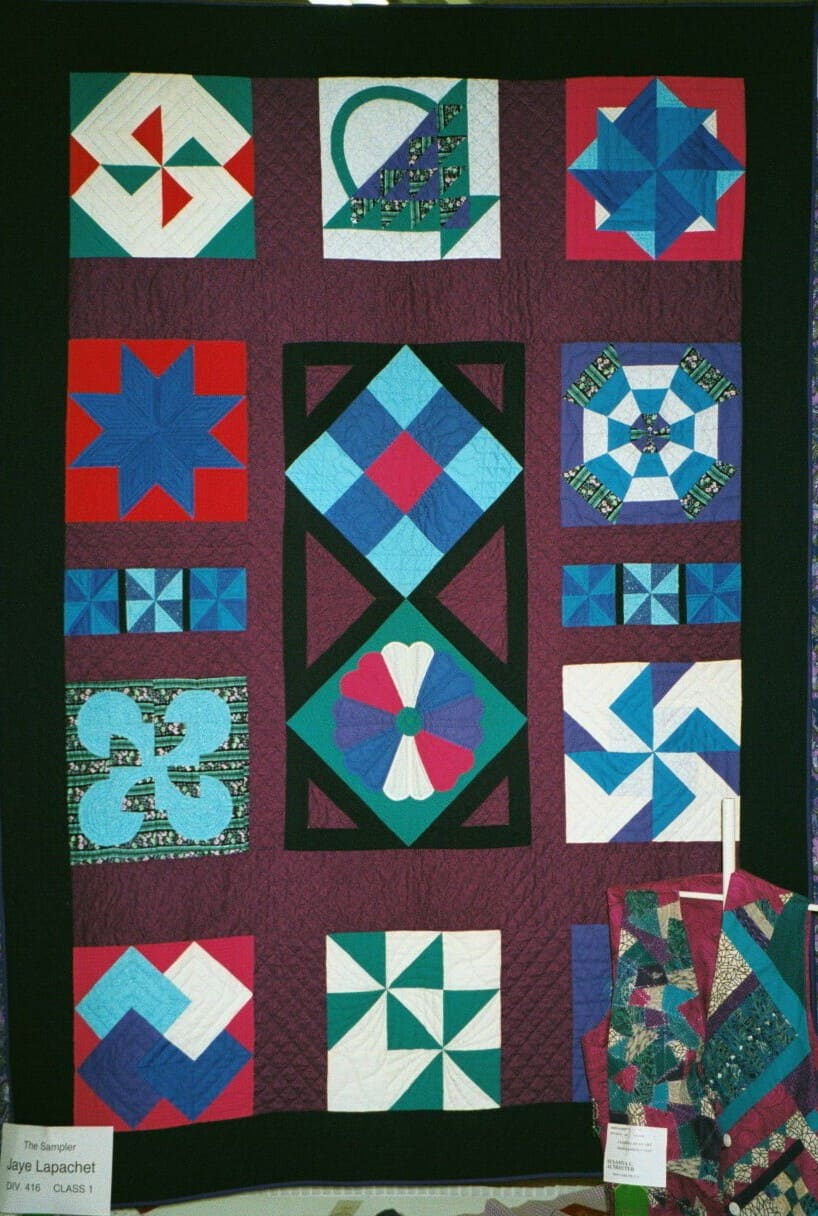
Sampler
At some point, however, we want to go beyond making patterns. This is when making a sampler quilt or taking a sampler quilt class can add to your skills in a positive way.
A sampler is a quilt made from different blocks. The blocks can be anything, but in a good class each block represents a different skill. As you work through each block you add new skills to your quiltmaking toolbox. Once you have learned the basics, you have the skills to make your own designs, make quilts you see or make changes to patterns with confidence.
Handbag Sampler – all the blocks
Even if you have been making quilts for awhile a sampler class can help you learn about block grids, resizing blocks and choosing better methods of construction. You also get a sense of when to press open and when to press to the side.
Making a sampler is also fun. You don’t get stuck making the same units over and over. Each block or section has something new. You can place fabrics in different places and get a break from chain piecing the same units.
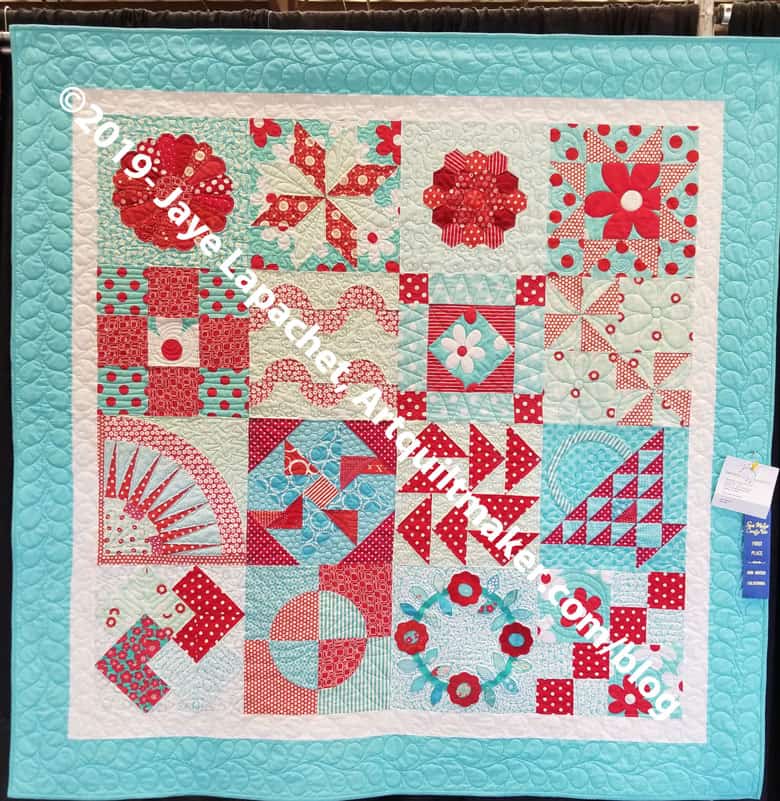
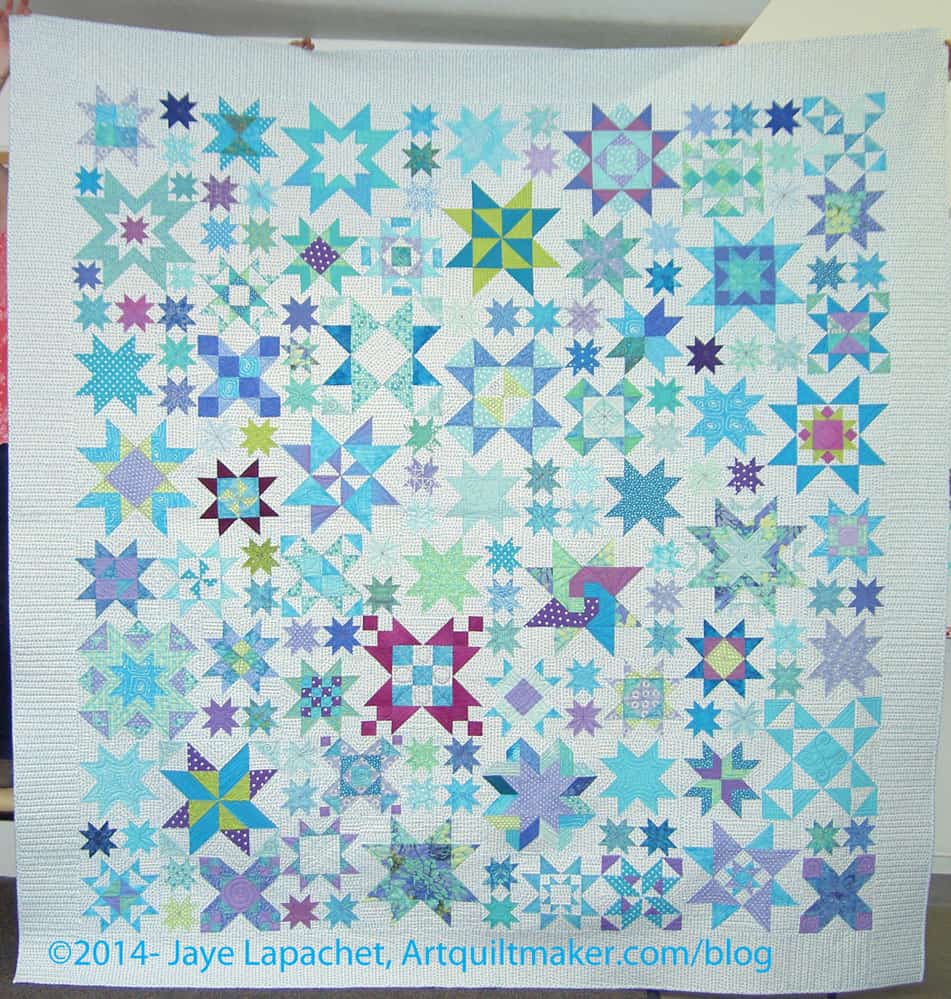
Finished: Star Sampler
Samplers can have themes as well. Star Samplers, like the one I made, are very popular. Samplers with curved blocks or using a certain specialty ruler can also be great learning experiences.
Look into a sampler class as your next workshop. You can also contact me about teaching in person (locally) or via Zoom.
My Mom has been using it for a few days and she loves it. I am so relieved. I won’t tell her about the trials and tribulations.
It is a good thing I didn’t add that mesh pocket I discussed in the progress post! This was a challenging bag to put together. The final seam, as mentioned, was more than a bear.
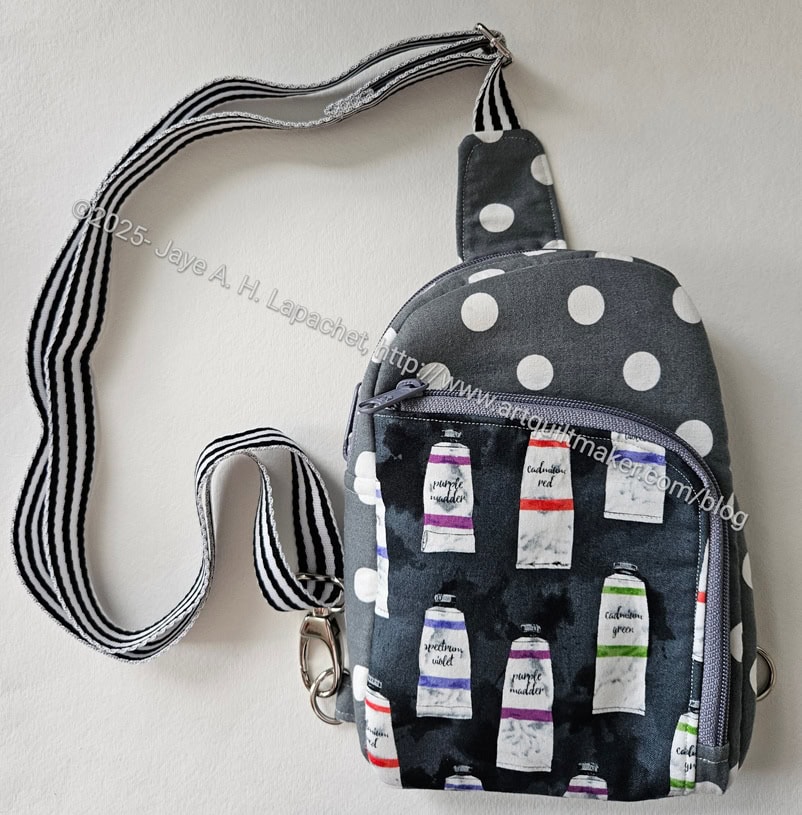
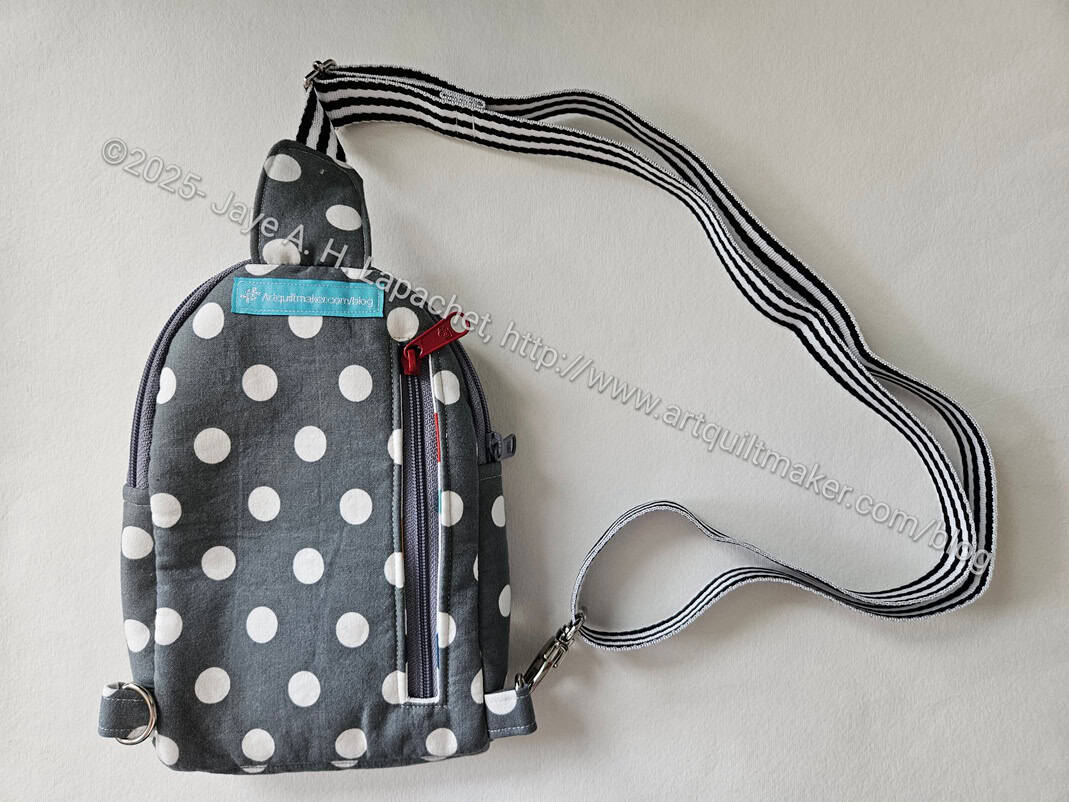
Pearce back
I like the features that Sara added, such as the vertical pocket in the back.
I was able to use a leftover piece of zipper that I had laying around, thus the odd red zipper. Hopefully, it will add a visual cue to where my mom puts stuff. She uses that pocket for her glasses as it is too small for her phone.
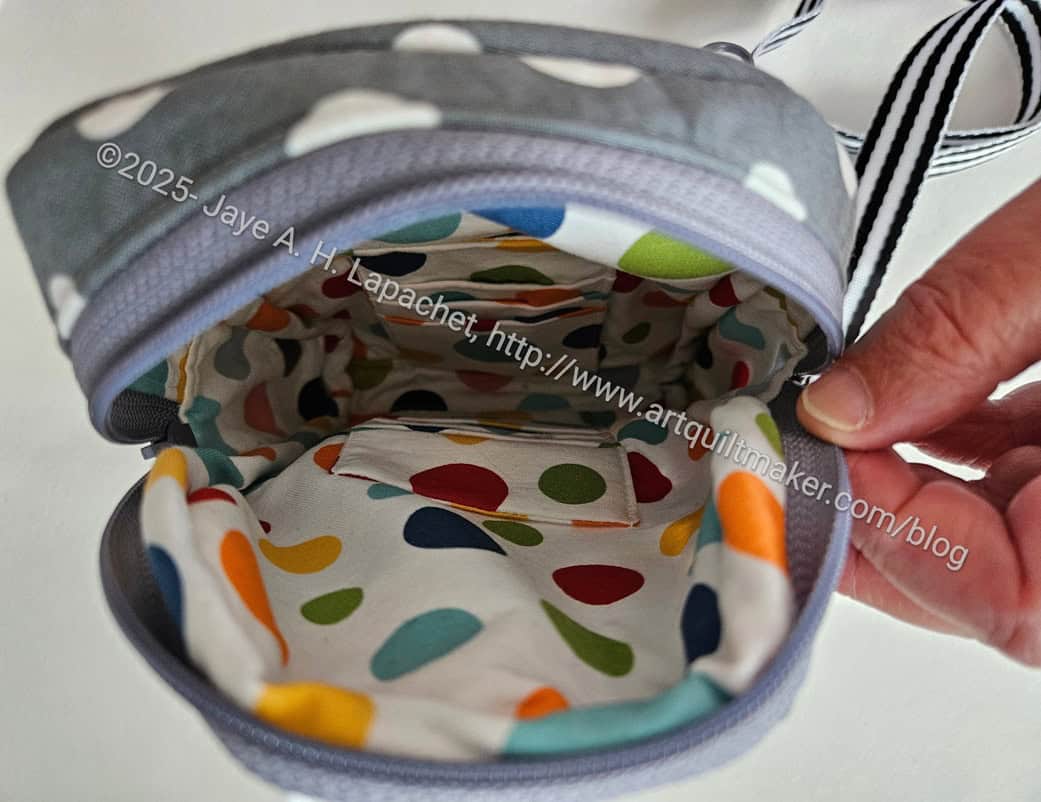
Pearce large pocket
I am running out of the Paint Tube fabric, so I had to find some other fabric that would coordinate. The dots are leftovers from a dress I had made for Politcal Wifery. It worked pretty well, I think. No complaints anyway.
The bag has two pockets. I added vertical credit card slots to both. I am glad I did and I would do it again. She uses the large pocket for her phone as well as various cards.
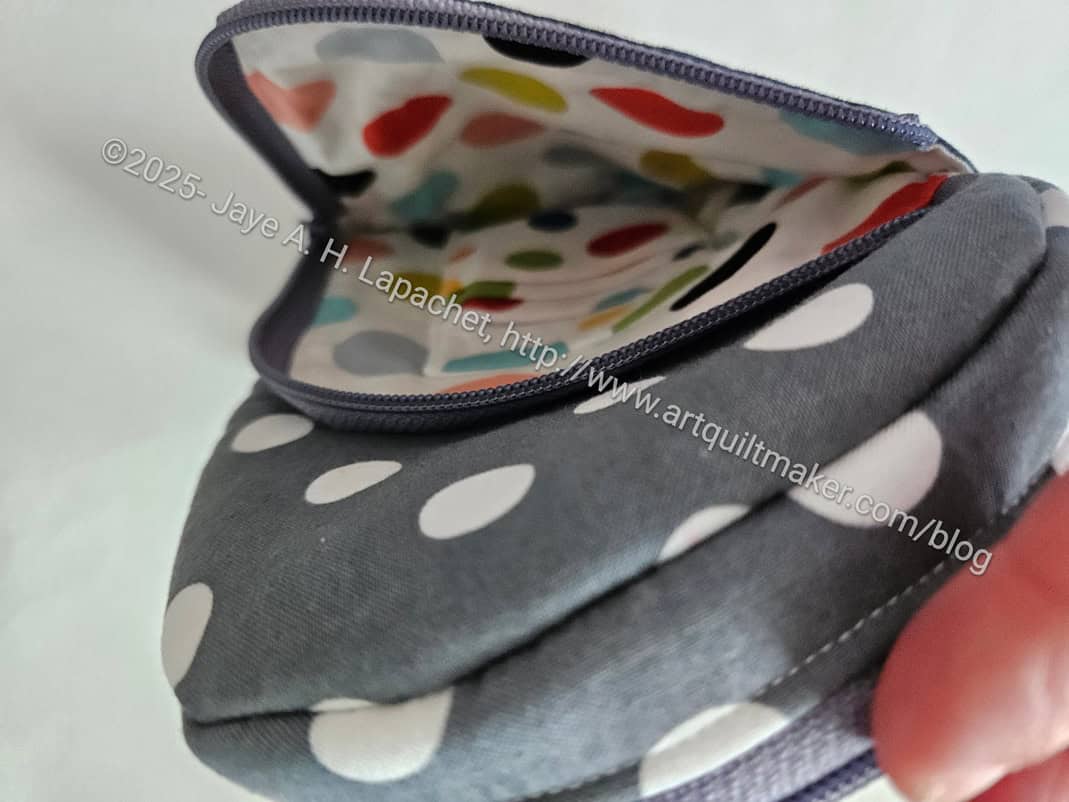
Pearce small front pocket
The small pocket is accessible, too. I think she uses this for her insurance card, driver’s license, etc.
I am pleased that she likes it. I feel like I should make another one, but am reluctant to take on that bear of a curve again.
I finished the Multi-Pocket Organizer over the weekend. It is already off to its new home. I am kind of sad, because I would have liked to look at it a little longer, but birthdays are on a certain day and I wanted my friend to have it on or before the day.
I am super pleased with how this project came out, the directions and everything.
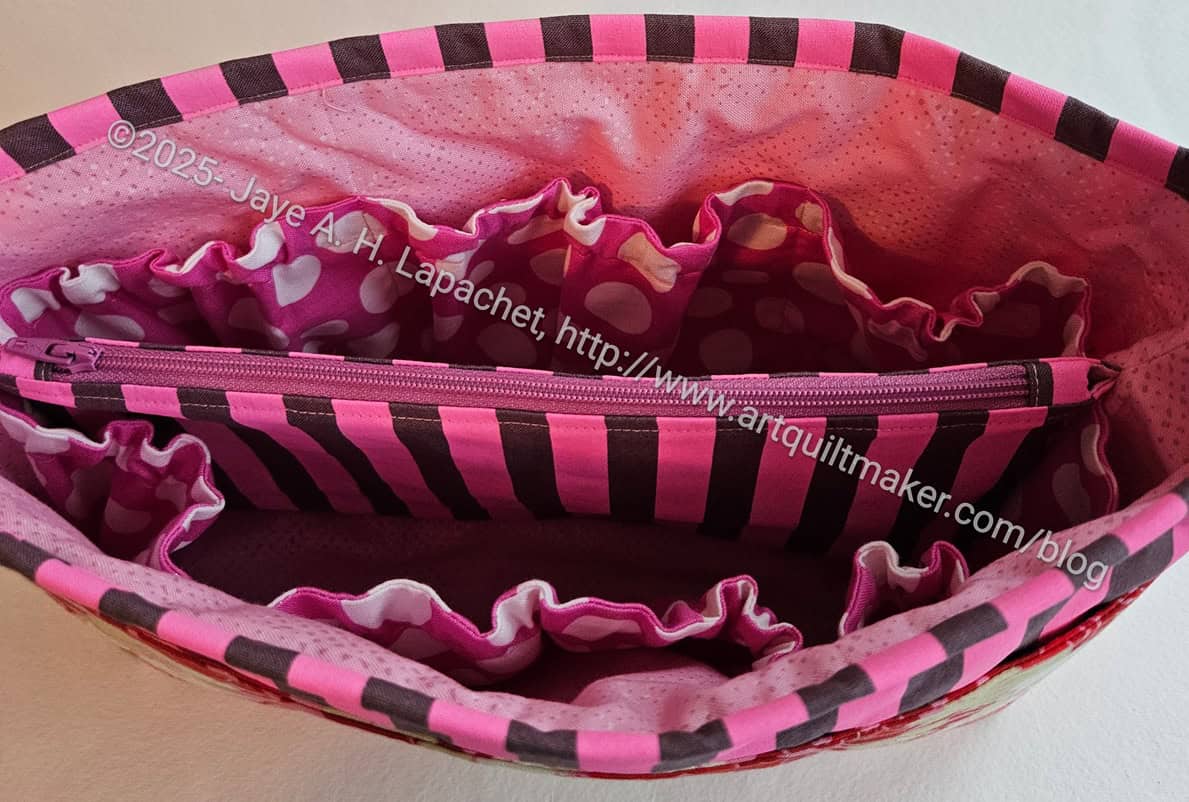
Multi-Pocket Organizer zipper pocket
I think it was a great a great project to work on when I needed a break from the Pearce. The pattern is very straightforward and easy to follow. The skills required are somewhere between beginner and intermediate. I had never added an elastic pocket, so that was fun for me. The hardest part was the interior zipper pocket and they aren’t hard, really, just fiddly. If you have done one they are relatively straightforward. If you haven’t done one, then the directions in the pattern are great!
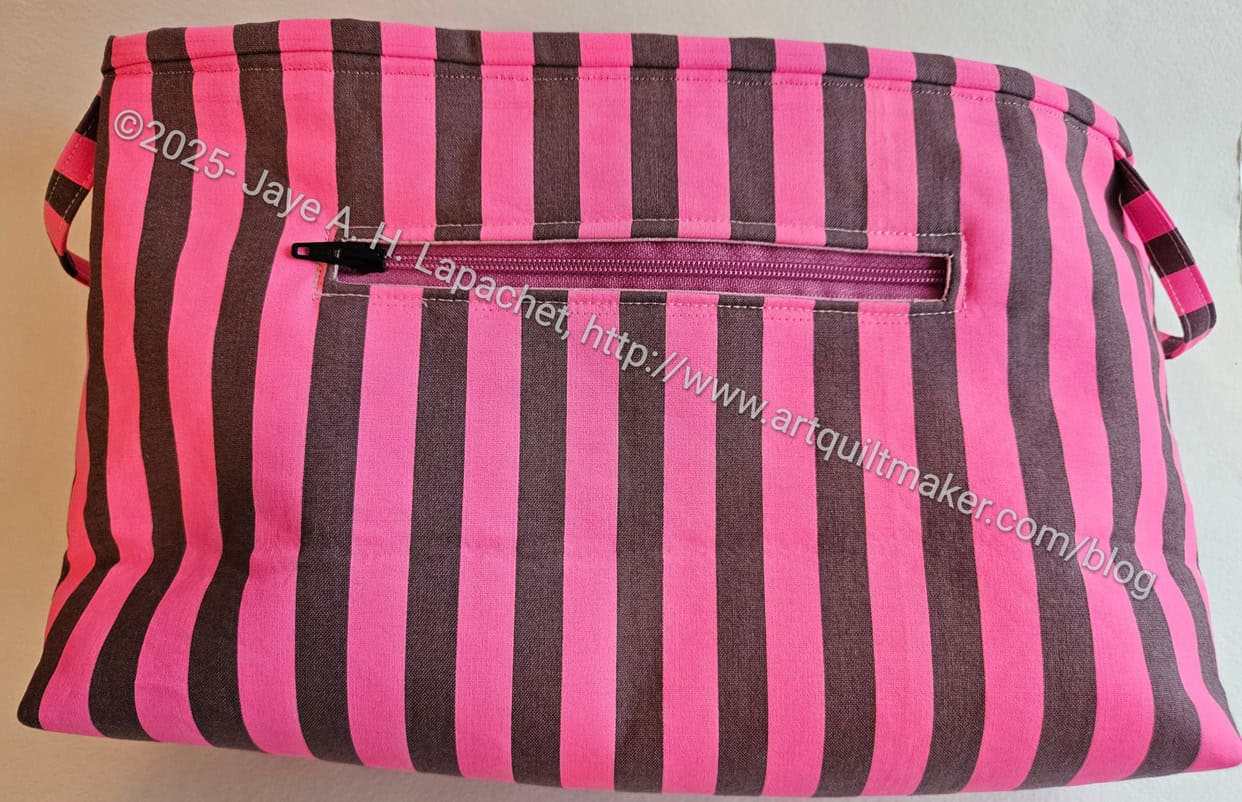
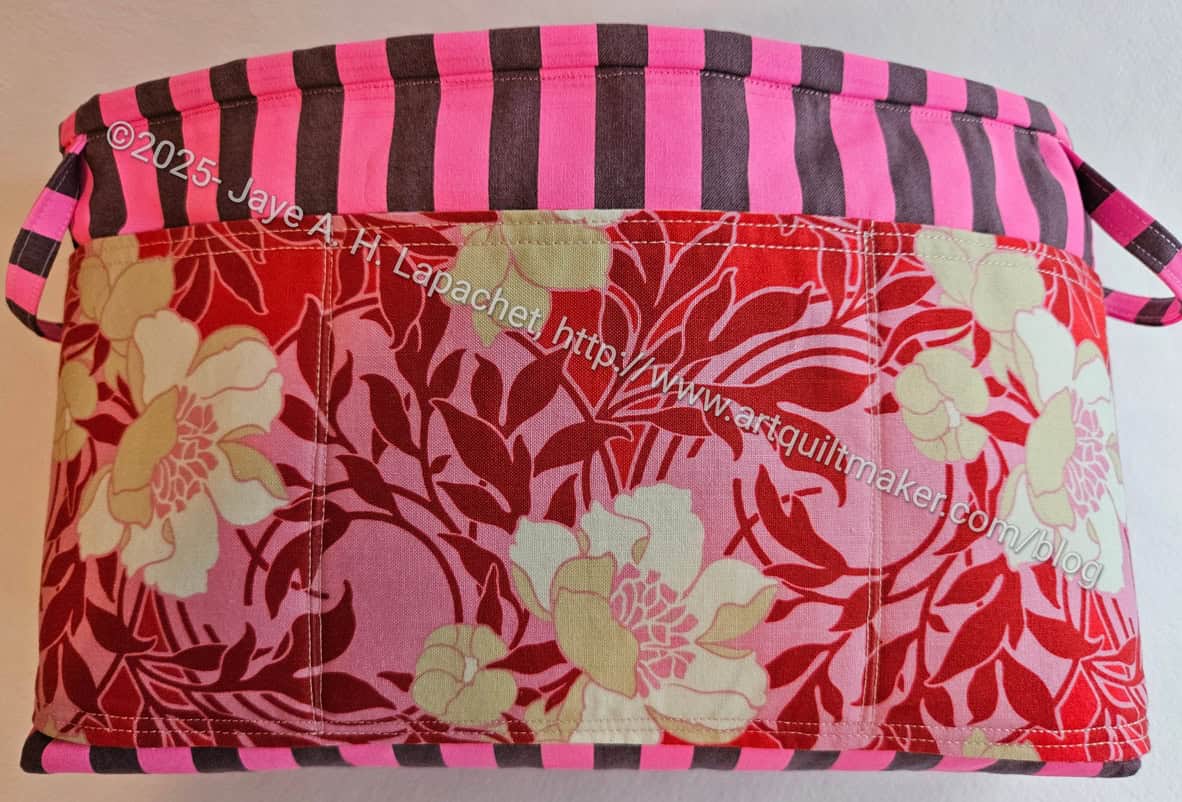
Multi-Pocket Organizer front
I don’t use fusible fleece** much for bags, but it works really well in this pattern. I didn’t quilt the pieces, which should come as no surprise, but quilted fabric would work in this pattern.
I might try foam one time if I make one in the future.
I am not sure I chose well when I picked that floral as it doesn’t go well with the neon pink stripe. Still I like both fabrics. For the next one, I might choose a solid for the fabric under the pocket and use the pocket fabric for the back as well. The pocket covers up so much of the exterior, as is often the case with a front pocket, that I like to use a fabulous fabric for the front pocket.
Multi-Pocket Organizer in my handbag
Half of my handbag is a mess! You know: lipgloss and a mask and two granola bars, a pad of paper, etc, etc. It needs an organizer. Before I sent off this bag, I tried it out in my handbag. It’s a bit of a squeeze and might not work when full, but maybe worth a try. I can always use it in my Kit Supply Tote, if it doesn’t end up working in my handbag. Perhaps I should see if I still have some of that Butterfly fabric. It might make a good pouch regardless of where I use it.
I really like this pattern and will probably make one for myself. It might be a good addition to Mom’s Sewing Date Traveler, which worked REALLY well in the hospital. I am definitely not done with this pattern yet.
**N.B.: Obviously, you should shop at local quilt shops and small businesses. However, if you are too busy or can’t find what you need there, I use Amazon affiliate links and may be paid for your purchase of an item when you click on an item’s link in my post. There is no additional cost to you for clicking or purchasing items I recommend. I appreciate your clicks and purchases as it helps support this blog.
Ooops! I skipped block #2. I’ll have to get back to that one!
Also, today block 10 comes out. EEKK! I need to get sewing.
Patchwork Palooza Block 3
Block 3 took a long time after I cut it out, because I sewed it using leaders and enders while I worked on something else. I am pleased with the way it came out.
Of course, I am not sure how it will look once I start making the setting blocks, but for now I am happy.
Another year and I don’t think things are better. I blame Geo. W in general for the way the world is now. If he had acted differently, things might be different now. Fewer post 9/11 dead, fewer wars, less nationalism and hatred. Of course, some of the post-9/11 Presidents haven’t helped the situation. Easy for me to say, I know.
The same old men are still in charge. There are still people dying in the Middle East. I am not excusing the radicals; I just don’t know if there is anything that can make everyone tolerate everyone else, stop killing each other for religion and stay in their lane. It is depressing to think about.
There are now adults who weren’t even born on that day, which I know I said last year. Now they are in the workplace and don’t even react when September 11 is mentioned. There are even more adults who were too young to remember. Do they even care?
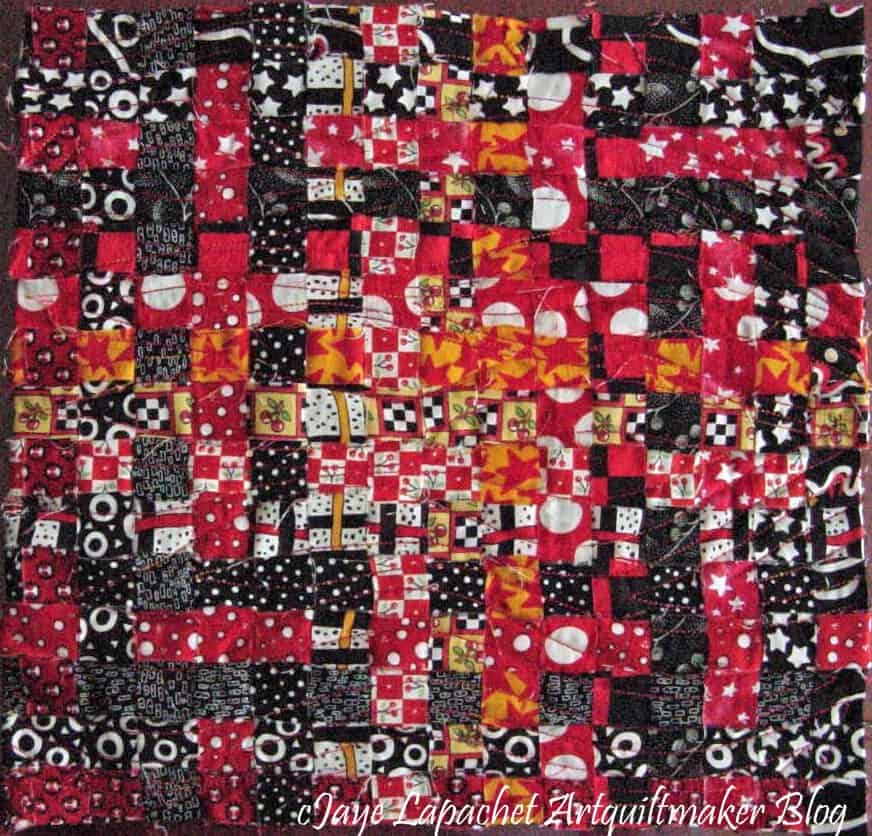
Fireball, 2001
I made two quilts to commemorate the lives lost during the destruction of the Twin Towers. The first one was Fireball, which is the imagery I saw as I sat and watched TV the week after the event.
I was doing woven art pieces at the time and this is one of them. It is chaotic, reminds me of smoke and flames. This is a small quilt, maybe 12×12, and I was able to channel the pure emotion into this piece as I made it very quickly. The quilt was shown at the Houston Quilt Festival in 2001.
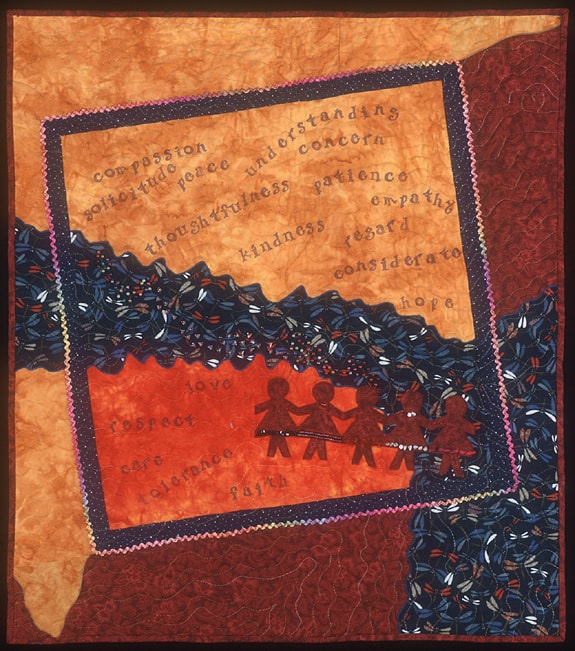
The quilt I really wanted to make took longer. I wanted to plead for something different than what ended up coming out of that terrible day. I wished for something different than a 20+ year war. People just want to fight when they are attacked; they don’t want to talk. What Comes Next is above and is one of my favorite quilts even though it had no effect.
This is a hard post for me to write. I had to force myself once again to write it this year, to get the message of What Comes Next out there, so, perhaps, people will think and do something different next time, though I hope there isn’t a next time.