La Pass Border Weirdness

La Pass: larger border pieces

I have been dabbling on working on the border. The other day, I tried putting a bunch of pieces together to make a larger piece. I wasn’t sure it was right, so I asked Lindsay, who said it looked pretty normal to her.

I laid this out on the coffee table close to the time I was finishing up for the night. I didn’t want to start anything new right then, but I took a photo so I could remember what I had laid out.

La Pass: larger border piece ready for fabric

After Lindsay confirmed, I laid out the top and looked at it like that rather than bunched up on the coffee table. It looked like it would work, so I started taping the pieces together.

I have also been replacing some pieces where the motifs were never finished with background pieces. I don’t know if it will make the other motifs look better, but I think it will help them stand out.

Bristol Pouch Impulse

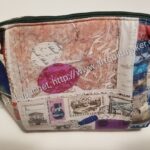
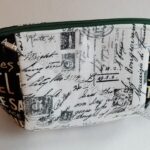
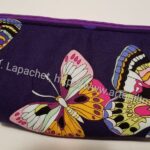
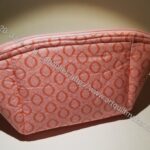
I saw this video (Reel?) by Center Street Quilts on IG and was really intrigued by the construction. I was especially interested in the way the bottom is folded before it gets stitched. I decided to try and make one.

Bristol - first fold
Bristol – first fold

I thought I could make it without buying the pattern, but I ended up buying it. She has a second video, which gives more information. If I had seen it before I started, I might have tried harder.

I didn’t really follow the measurements and I used my pre-quilted fabric, so I didn’t use the accent piece either. I also added a holder, though not a leash.

The first thing is to cut a piece large enough. I made that mistake before I had the pattern. If I make this again, I will make the pouch wider. I don’t like how tall it is turning out in relation to the width.

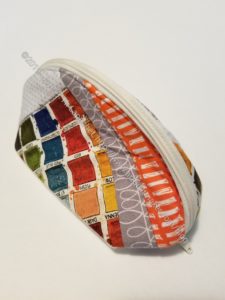
Bristol Pouch in progress

I followed the pattern and eventually got a pouch looking thing.

I used a piece of a zipper that I had leftover from something else. Yes, the end hangs down. That is how it is in the pattern. I don’t know if I would do that again, but it does avoid dealing with a zipper along the top edge where there is also a bound [formerly] raw side seam.

I put the zipper head on wrong and eventually had to cut off the zipper tab and redo it. Will I learn to pay attention to details like that? I don’t know. I was inspired to use this piece of a zipper by the box of Sew Hungry Hippie zippers in cool colors that I ordered.

It took me awhile to get this far. I could probably do it faster next time.

New Enigma Bag

Enigma Bag #3
Enigma Bag #3

I am going to sew with a friend tomorrow and we are working on Enigma Bags. Mine will be a Christmas gift, so you’ll see the finished product in a few months. I am happy that I got everything ready to go.

I am using some zipper tape that I bought, but didn’t try until last weekend. The zipper heads I bought to go with it didn’t fit, but I have plenty of zipper heads. I found one for a new Hackney I am making and will use the same kind of head on this one.

Butter vs. Margarine?

Pantone 7548: Butter vs. Margarine

Friend Julie sent me another Pantone Project color postcard last week. On the reverse she wrote that she thought of the color as ‘butter’. I completely lost my mind. I started thinking I was in line for cataract surgery or something, because to me the color looked more like margarine.

As a result, I started running around the house taking photos. I know that all sorts of things -lighting, weather, etc – affect how the camera sees the color, but I have to say that the color in the photo (left) looks pretty true to the color on the postcard.

Living room ceiling and walls

My living room has, what I think of as, butter colored walls. It was hard to tell unless I took a photo of the ceiling (white) and the wall (butter yellow). I was pleased to see that I could see a contrast.


Pantone 7548 against living room wall

Then I took a photo of the Pantone postcard against the wall. I wasn’t thrilled with the way the paint looked in the second photo. The yellow/butter paint looked white compared to Pantone 7548, but what can a person do? I wasn’t about to set up studio lighting.


Pantone 7548 with butter

I actually have butter (as in the food), so I went into my kitchen and compared the postcard to actual butter. Unless I am in need of cataract surgery, I think the yellow in the postcard is brighter.

I don’t mind Friend Julie calling this butter. I am just glad I don’t have any eye problem at the moment.

Sew Day Amy

Amy's blocks
Amy’s blocks

Amy belongs to another modern guild. That guild does block exchanges. People design or select a block and others make them, so the recipient can make a quilt. Amy has been talking for a few months about selecting a block. At Sew Day, she finally showed the blocks she received.

She had people make two and was working on them at Sew Day.I think the blocks look good together, though not 100% matchy-matchy.

She plans to give it to the Community Quilt team as a donation quilt.

EPP Ball #3 Finished

EPP Ball #3 Finished

Shortly after finishing EPP Ball #2, I finished Ball #3. As I said in the recent La Pass post, I was in desperate need of handwork. Yes, I have knitting, but I seem to have lost the directions and can’t find the name of the project, so I am stuck for now.

Thus, I quickly sewed up the gap for this EPP Ball.

As I said in the previous post for Ball #2, I will give this one to Dameon or Alita. I haven’t decided yet.

September 11…Once Again

I almost didn’t post about that horrific day this year. There are now adults who weren’t even born on that day. There are even more adults who were too young to remember. I still ask myself if anything has changed. The same old men are still in charge. There are still people dying in the Middle East. I am not excusing the radicals; I just don’t know if there is anything that can make everyone tolerate everyone else, stop killing each other for religion and stay in their lane. It is depressing to think about.

Fireball, 2001
Fireball, 2001

I made two quilts to commemorate the lives lost during the destruction of the Twin Towers. The first one was Fireball, which is the imagery I could see as I sat and watched TV the week after that event.

 I was doing woven art pieces at the time and this is one of them. It is chaotic, reminds me of smoke and flames. This is a small quilt, maybe 12×12, and I was able to channel the pure emotion into this piece as I made it very quickly. The quilt was shown at the Houston Quilt Festival that year.

What Comes Next, 2001-2002

The quilt I really wanted to make took longer. I wanted to plead for something different than what ended up coming out of that terrible day. I wished for something different than a 20+ year war. People just want to fight when they are attacked; they don’t want to talk.

This is a hard post for me to write. I force myself to do it every year, to get the message of What Comes Next out there, so, perhaps, people will think and do something different next time, though I hope there isn’t a next time.

Sew Day Round Robin

Rhonda's Round Robin
Rhonda’s Round Robin

I was stunned to see Rhonda pin this amazing quilt to the design wall. I really love the design and the colors.

I went and chatted with her about it. It turns out that it is a round robin with Amanda’s center. I believe those are Swoon blocks, like I used in my quilt, Swoon.

Rhonda has had the quilt for awhile and brought it to get started on her border.

I was really pleased to be able to see it. It is gorgeous.

EPP Ball #2 Finished

EPP Ball #2
EPP Ball #2

I was able to sew up the gap in the second EPP ball and it is ready to go to its new home. The birthday isn’t until October, so I have a little time.

I really enjoy making these. If I had some space, I might make one for myself. As it is, I will give this one to Dameon or Alita. I haven’t decided yet.

Sew Day Velvet

Rosie Lee Tompkins 'Lines' quilt
Rosie Lee Tompkins ‘Lines’ quilt

A month or so ago Gerre asked me to help her think through the construction of a velvet quilt similar to one in the Rosie Lee Tompkins exhibit. We talked about foundation paper piecing the long strips that would make a quilt to look like the Rosie Lee Tompkins exhibit entry way quilt.

I don’t remember how this quilt was constructed, but I am pretty sure Ms. Tompkins didn’t use FPP. I could tell Gerre wasn’t 100% on board with the idea. At the time, I couldn’t think of anything else.

Gerre's velvet blocks
Gerre’s velvet blocks

Therefore I was pleased to see that she and Mary had come up with a plan to make the quilt in blocks using the quilt-as-you-go (QAYG) method. What a great idea! They are sewing strips of velvet on to batting, then will sew them together. This technique really helps keep the velvet under control as it is sewn.

At the beginning of the day they had a few blocks already done. I really like the blocks 2d from the right with the white squares. I also like that Gerre is not copying the Rosie Lee Tompkins quilt. I think it is great that she is making it her own.

Gerre's velvet blocks End of the day
Gerre’s velvet blocks End of the day

By the end of the day, they had most of the blocks made. The photo (left) may not show all of them. In this case I really like the black with the silver. I prefer the blocks that use the color as an accent. They are all really beautiful. The sheen of the velvet gives them an amazing lustre.

La Passacaglia Border Pt.1

My project for Sew Day was starting the border of the La Passacaglia top. The reason was twofold. Now that the Half Hexie Star is well in hand, I really need a hand project to work on in the evenings.

I started out thinking I would, finally, cut out the Retreat In A Bag Organizer and the Ultimate Project Bag from the Crafty Gemini Organizer Club. I actually had all the fabric and directions by the door and ready to go. When I got up in the morning, I decided that I needed to work on La Pass. I don’t want that lingering, but I also need some hand work. Also, I really wanted to work on it. I have several bags cut out, so I didn’t need to cut out another one.

Month 18 Rosette
Month 18 Rosette

I had some help folding the top into quarters and then started working on the top. The top, for me, is the side with Month 18. I don’t really know what I am doing, but my goal is to get some straight edges of border fabric that I can trim to a real border. Where possible, I’ll sew in larger pieces normally. I still intend to check a couple of books and see if they provide any advice.

Month 18 with Zen Chic border fabric

At first, I started clipping paper pieces to the edges with a note as to which fabric I needed. As you can see (photo, above), I stopped that and just clipped paper pieces with the border fabric basted to the spot where I wanted to add them.

This meant that I had pieces ready to sew on to the quilt.

Month 18 finishing detail

The month 18 rosette will be the hardest part, I think, because it is the largest rosette sticking out of the quilt. It means there is a lot of space next to the rosette that needs to be filled in. Lindsay had an idea for her quilt to add a star or other small motif in the middle of a large piece. I am going to do one thing at a time and will figure it out as I go along.

Creating weirdly shaped pieces

Part of the deal with the border is that I want to use large pieces. I need to follow the tutorial I wrote with Kelly Pena on creating center medallions. There are no center medallions, but the same principle applies.

In this case, I added a skinny triangle to a pentagon to make some other shape whose name I couldn’t tell you. This will fill in a larger space and alleviate the need to sew a bunch of small pieces together using the same fabric.


Sew Day Donation Projects

Sew Day was Saturday and it was great! There is a lot to tell you, but I’ll probably have to spread it over a few posts.

First up, community quilts.

Ends n.17 (Plaid) finished

Friend Julie finished the Ends n.17 (Plaid). She even did the binding! What a star!

I am so thrilled that this will soon go to a good home. I really hope that it will provide comfort and nice snuggles for someone who needs a hug.


Julie's community quilt
Julie’s community quilt

Julie worked on a second quilt, which I did not make. My first comment, upon seeing it was that it was a weird shape. I quickly realized that it will be a great crib quilt. It is just the right size and shape for a crib, or a toddler bed for a slightly older child.

More Pantone

One reason I am making so much progress, aside from taking the time to select the fabrics, is that I don’t mind the (almost) paperless foundation piecing as much as I mind regular foundation piecing.

You can see also that the fabrics are relatively bright and cheerful.

More on EPP Balls

EPP Ball #3 Open
EPP Ball #3 Open

This project went way too fast. Not that I want to spend my life on one project, but I do like projects that I can grab and go.

As you can see, I have only the gap to stitch closed. I have the clips on the edges, because I wasn’t sure how else to keep them under control. I really have to look up how to work with the edges of the an EPP quilt or project. This research will be good for the Half Hexie Star project, which is waiting for a back.

I just used regular Fiberfill** to fill it. I was pleased to see that the Fiberfill**, brand name Poly-fil, was made from recycled materials. I didn’t stuff in any Beanie Baby pellets** in case one of the kids decides to chuck the ball at their parents. Beanie Baby pellets** are actually called Poly pellets or ‘weighted stuffing pellets’.


**N. B. : Obviously, you should shop at local quilt shops and small businesses. However, if you are too busy or can’t find what you need there, I use Amazon affiliate links and may be paid for your purchase of an item when you click on an item’s link in my post. There is no additional cost to you for clicking or purchasing items I recommend. I appreciate your clicks and purchases as it helps support this blog.

More Scrappy Celebration

I am determined to make progress on this quilt, so I have been working on blocks, even when I only have a few minutes. The work adds up.
I plan to rearrange the blocks once they are all done. For the moment, I am putting them on the wall according to the plan in EQ8.