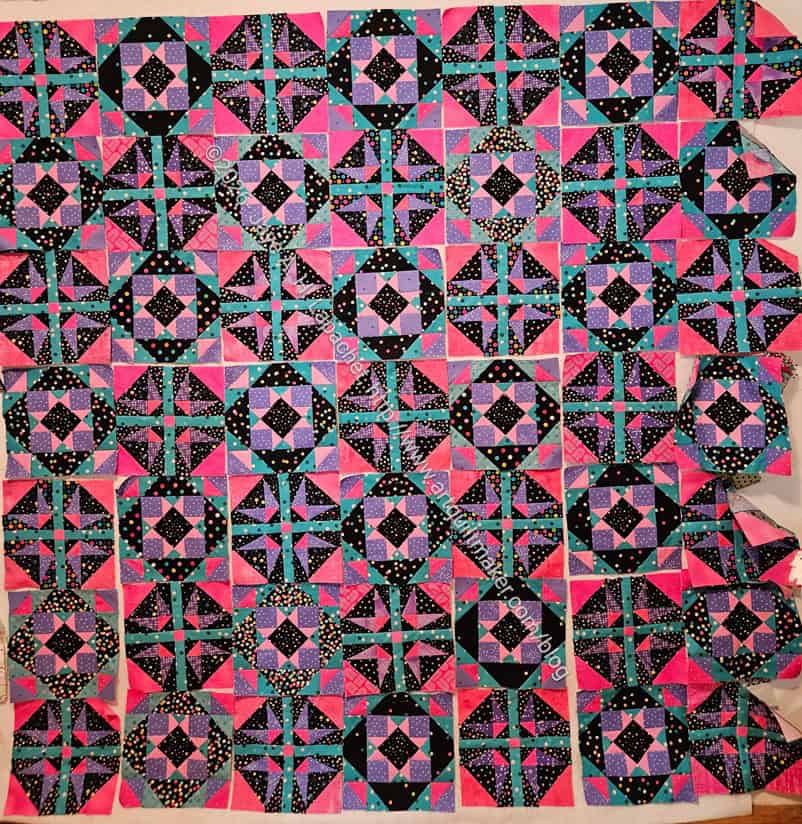
I had to stop chunking when I realized I had to fix a couple of block mistakes in Lupine. I fixed those quickly and got back to chunking, which is easier than putting a quilt together in rows, but still tedious. It seemed to take me forever. Finally, I got all of the blocks together! Yay!
I was worried about the density of the dots in some of the black background, but looking at the quilt in the photo, I think it looks ok. I can see a couple of places where the dots are really dense, but the background pieces don’t make the blocks look wrong.
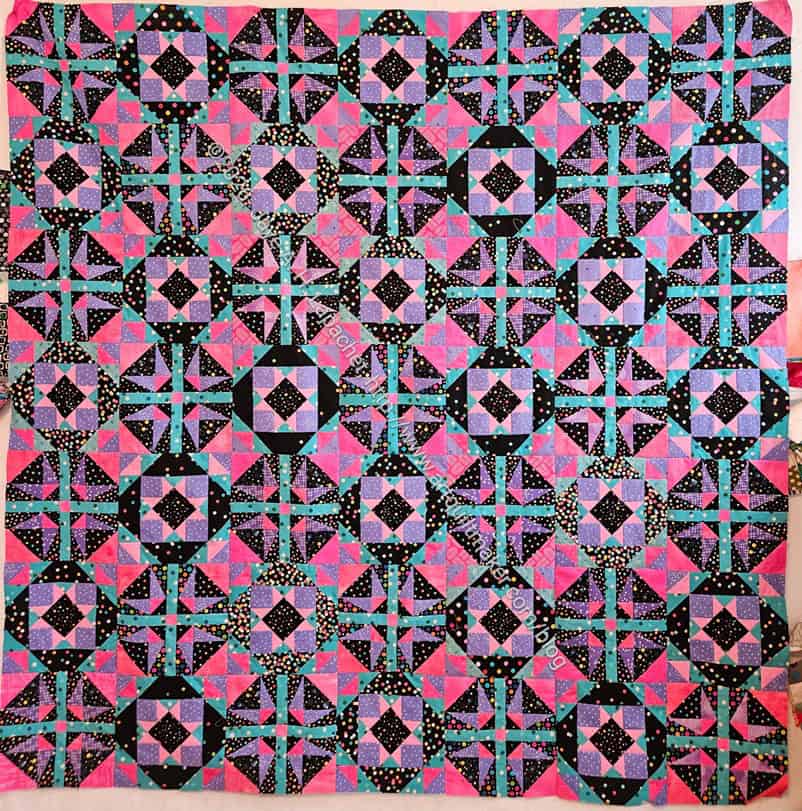
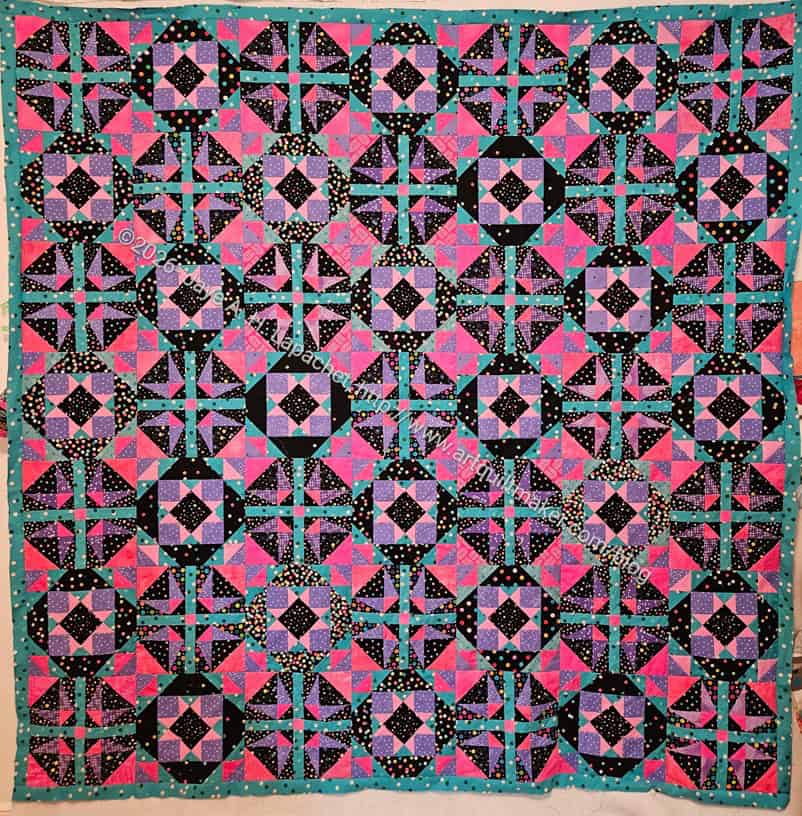
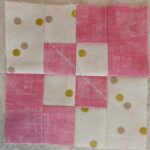
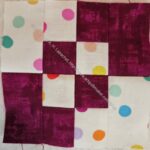
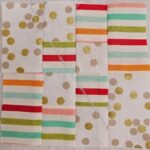
Lupine with spacer border
After the blocks were together I put the spacer border on. Also, tedious, but necessary.
I really like that Melody Miller Carousel blue. I am glad I bought more of it so I have enough for the borders.
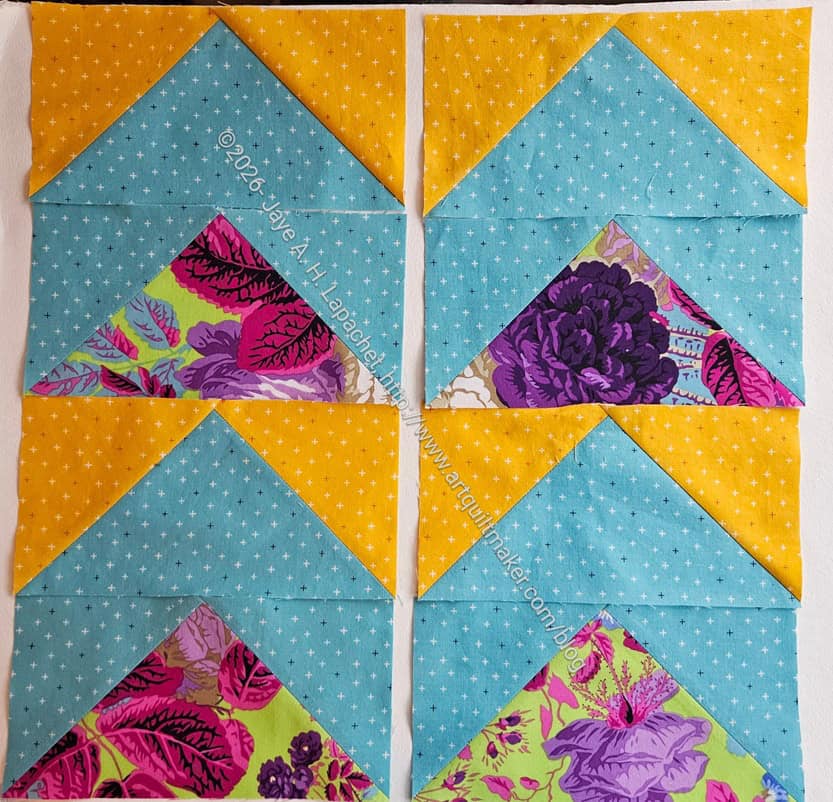
Now I am on to the Flying Geese border.
I noticed that Bonnie has taken down the directions on her blog for this quilt. I almost had a heart attack when I clicked on the link to look at the border directions and it was broken. Fortunately, I had saved the PDFs.
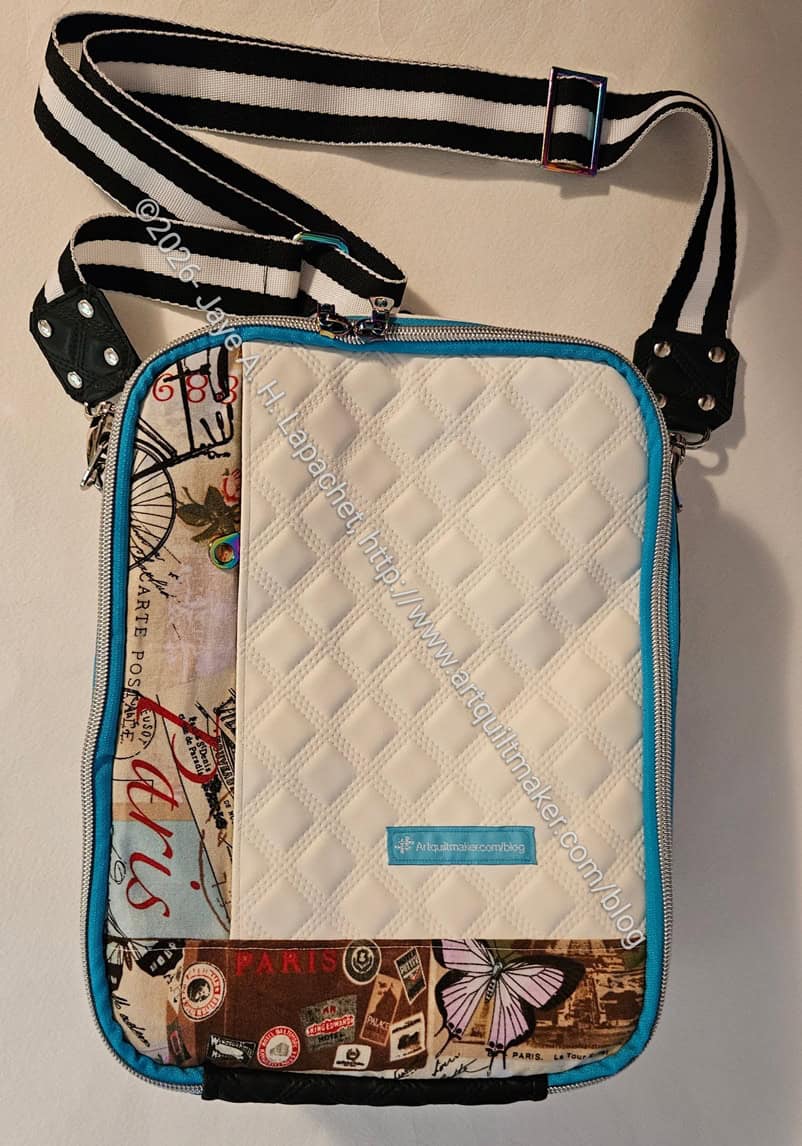
As you know I completed the Pandora Charisma. It was a learning experience mostly because, if I categorize my thoughts, it was a pattern by a new designer.
One of the things I explored was new substrates. I used the Diamond Quilted vinyl, which feels like leather, as mentioned, for the first time. I had some challenges sewing it, but not as many as I expected. I did buy and start using a Teflon** AKA Ultra Glide foot. It wasn’t as magical as I hoped, but it worked better than the tissue paper I normally use with vinyl. The tissue paper went straight into the holes made by the needle and wouldn’t come out. 🙁
There were lots of eighth inch measurements. I thought it might be because the designer is from Singapore and uses metric measurements to start, but in one place there was an eighth measurement and the metric was x.1, so I think it is just the way the pattern turned out.
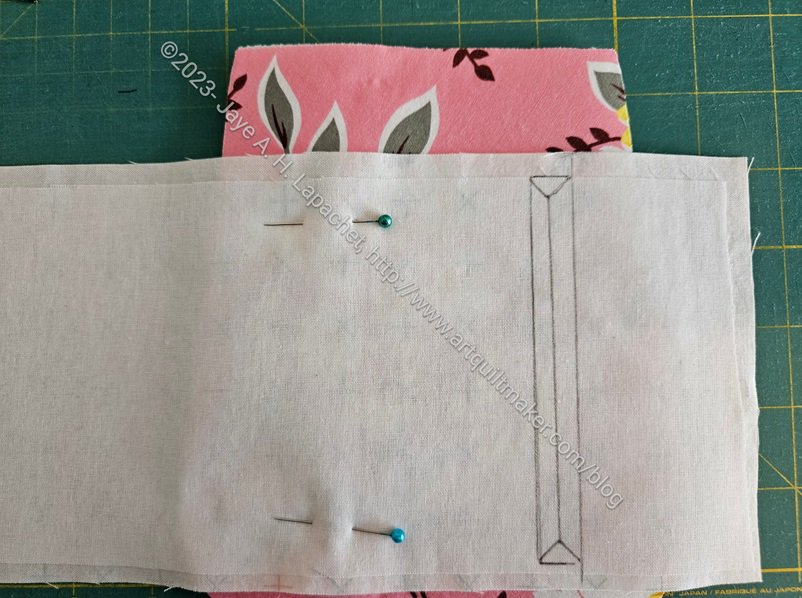
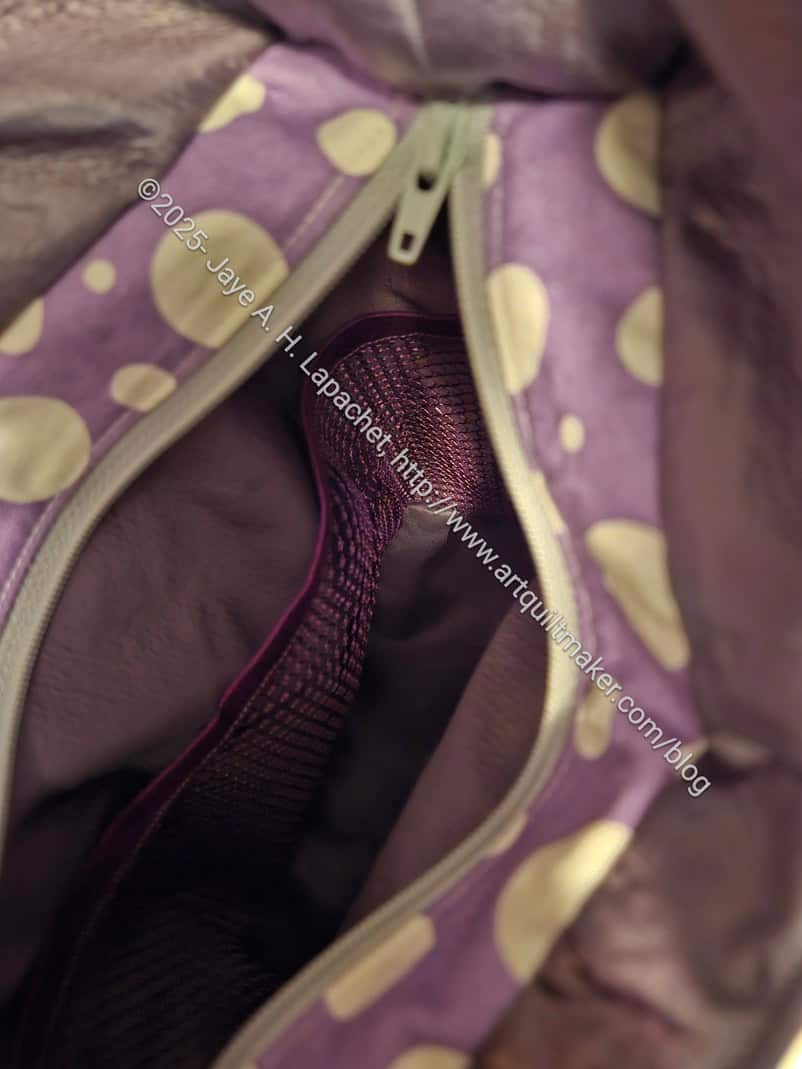
Sweetbay zipper pocket in progress
I thought the pattern was well written and pretty easy to follow. One of the good things about using a pattern from a new/different designer is that I learn new ways to complete general bagmaking steps, such as sewing the hidden zipper pocket. For an internal/hidden zipper pocket, Jessie (owner of Sewfisticated) only sews along the two long edges rather than all the way around the box. This prevents puckers in the corners, which is something that has always bugged me. The picture of my Sweetbay project shows the box drawn and ready for sewing, so you can see the box. One of the reasons this works is that later in the process the maker top stitches the whole zipper pocket when finishing the zipper pocket.
I was also confused about the internal/hidden zipper pocket directions, mostly how far down from the top the zipper pocket needed to be on one of the steps. I don’t know if I missed or didn’t understand the directions, but I didn’t have quite enough seam allowance at the top. I made it work, but will do the step differently next time.
I loved that the pattern listed the exact pieces I needed for each section. I was able to cut the pieces I needed for just that section as I worked through the pattern. This helped me keep organized and not have a whole bunch of pieces sitting around for a month. I also liked not cutting everything at once, which I find to be the worst part of bagmaking. In general, it broke the pattern down into manageable bites, which helped my brain, but also my hands.
Center markings
Center points are often marked on a pattern piece when you have to assemble a gusset to a side of a bag. In the video I watched, the maker snipped the center marking then could leave the pattern piece in place (pinned or clipped), lift up one side of the pattern and mark the center line. Genius!!!
I learned about stick-on interfacing. I had never heard of this before I found this pattern as part of the Bag of the Month program in which I participated at the beginning of 2025. When I saw the pattern I knew I had to make it and went looking for the supplies, which led me to the Sewfisticated website. The supplies have been sitting in my workroom and I was pleased to have them on hand so I could use them. I didn’t have all the thicknesses, but I made it work and the stick-on interfacing is awesome. I can’t wait to use up my Decovil** and replace it with this product. It is a lot easier to use than Decovil and works with substrates that cannot be ironed. Genius!
Pandora Charisma: label sewing
I like the labels for each, which were included with the pattern, piece as well. This is a good feature and I would love to see it as a standard for all bag patterns.
Jessie also tells you where to put the label, which I really appreciate, if for no other reason than I don’t forget to add one.
There were a couple of places I found confusing, but managed. I didn’t understand the use of some language, including the divider pocket. I couldn’t understand what they were trying to achieve, but then I watched one of the videos available and it all became clearer. They were calling the pocket a divider pocket whereas I am used to calling it a divided pocket.
There were somethings I didn’t like. The pattern has a whole section on interfacing, which I found to be really confusing. This is where cutting and interfacing all the pieces upfront works better. I didn’t know whether to interface a piece or not and the pattern didn’t always say. I plan to make this again and have been making notes about where/when I want interfacing.
They pattern suggested making zipper tabs in a way I don’t like because it doesn’t come out well. I have to find my preferred method and make sure I know how to do it without thinking. There are so many methods for everything. The way that works is the best for the bag maker.
The bag requires a lot of hardware, particularly zipper pulls. It makes me think that I need to find a small bag or container to use for all the hardware I need for one bag. All of my hardware goes into the Quilts Illustrated Tool Tote I made years ago. I have it mostly sorted in that bag. I am talking about a smaller bag where I can sort just the hardware and zippers(?) I need for one project. I’ll have to think about the right bag. Maybe a smaller version Sara’s Nuthatch? It’s part of Minikins Season 4.
All in all, this pattern provided me with a huge learning experience. I enjoyed the learning and I am pleased with the way the bag came out.
**Obviously, you should shop at local quilt shops and small businesses. However, if you are too busy or can’t find what you need there, I use Amazon affiliate links and may be paid for your purchase of an item when you click on an item’s link in my post. There is no additional cost to you for clicking or purchasing items I recommend. I appreciate your clicks and purchases as it helps support this website.
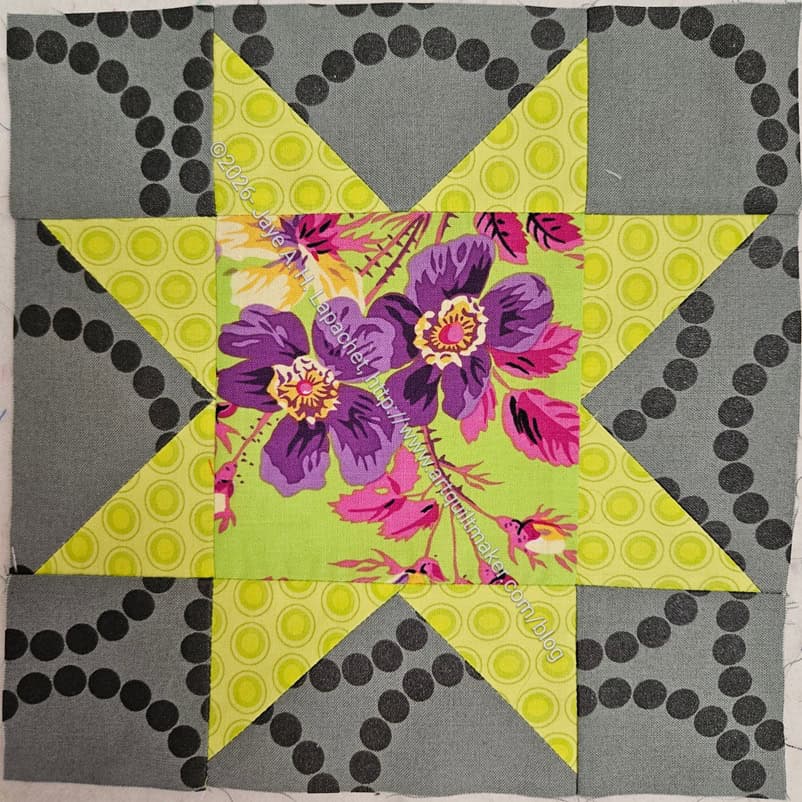
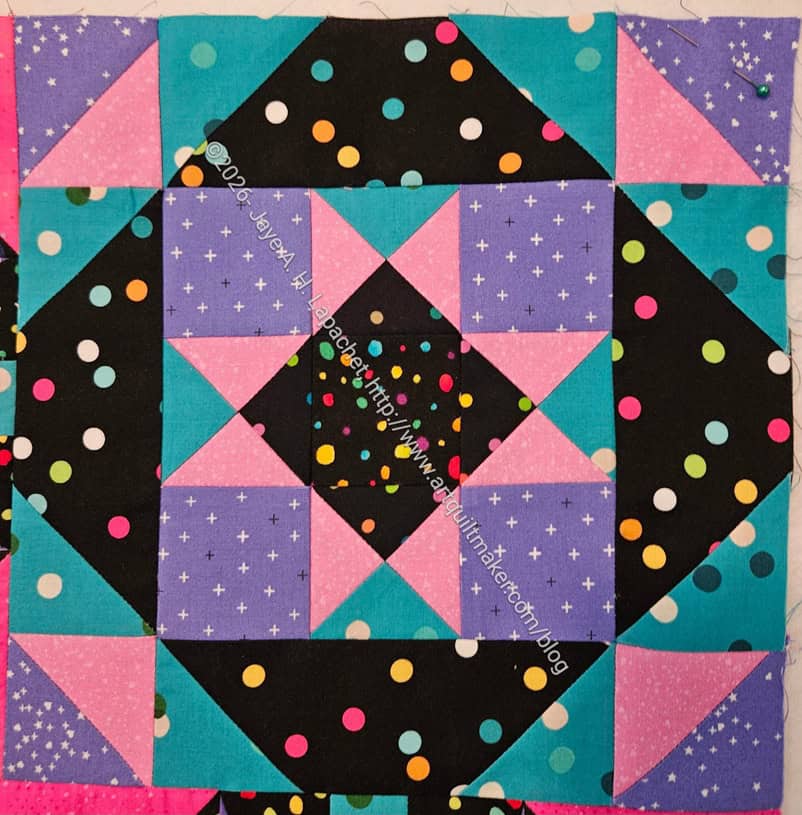
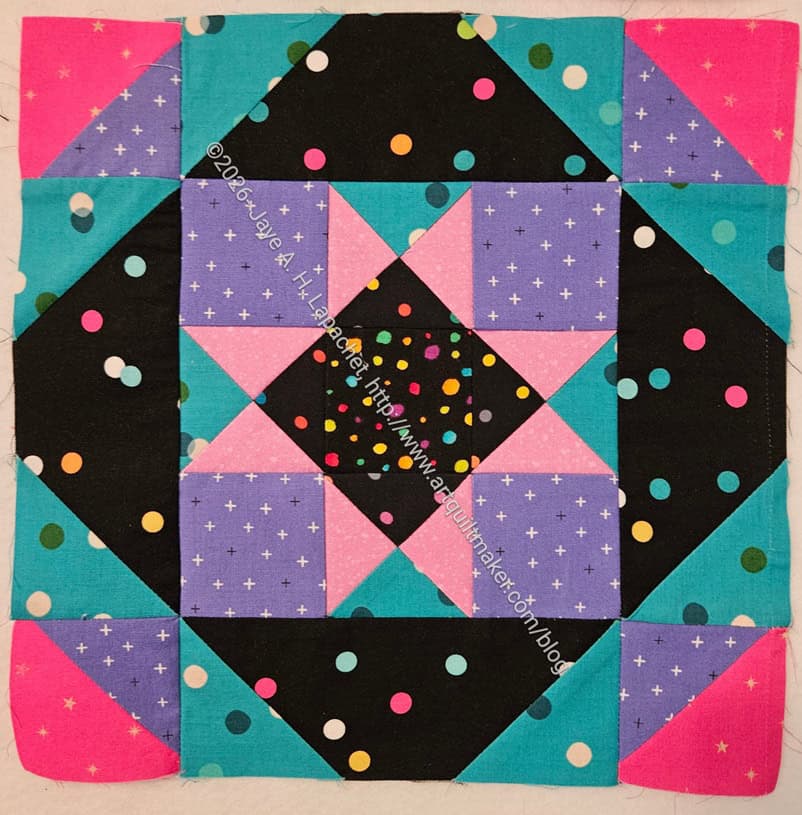
The next block in the series, which was announced yesterday is the Sawtooth Star. It is one of my favorite blocks, because it is incredibly versatile.
I am kind of just going with the flow when I make these blocks. I am using fabrics as the mood strikes. I’d love to use that grey Pearl Bracelets as my background, but I don’t have enough of it. I’ll have to do something about that as that is an old fabric and there is little chance I will find more. I’ll look in my fabric closet and see if I can find some. The yardage I have with my project materials came from Rhonda’s stash.
I forgot to post about the lunch bag I made for Friend Julie for Christmas. This was a project from Minikins Season 1. Season 1 includes the I Spy pouch pattern, which is one of my favorites. The Cotton Candy pouch is another of which I have made several. I knew that I had this pattern when I decided to make her a lunch bag.
I noticed that she was carrying her lunch around in a plastic bag. There is nothing wrong with plastic bags, especially with messy food. I thought it was odd. I thought I would try this pattern and hope it was a useful bag.
Morsel Handle
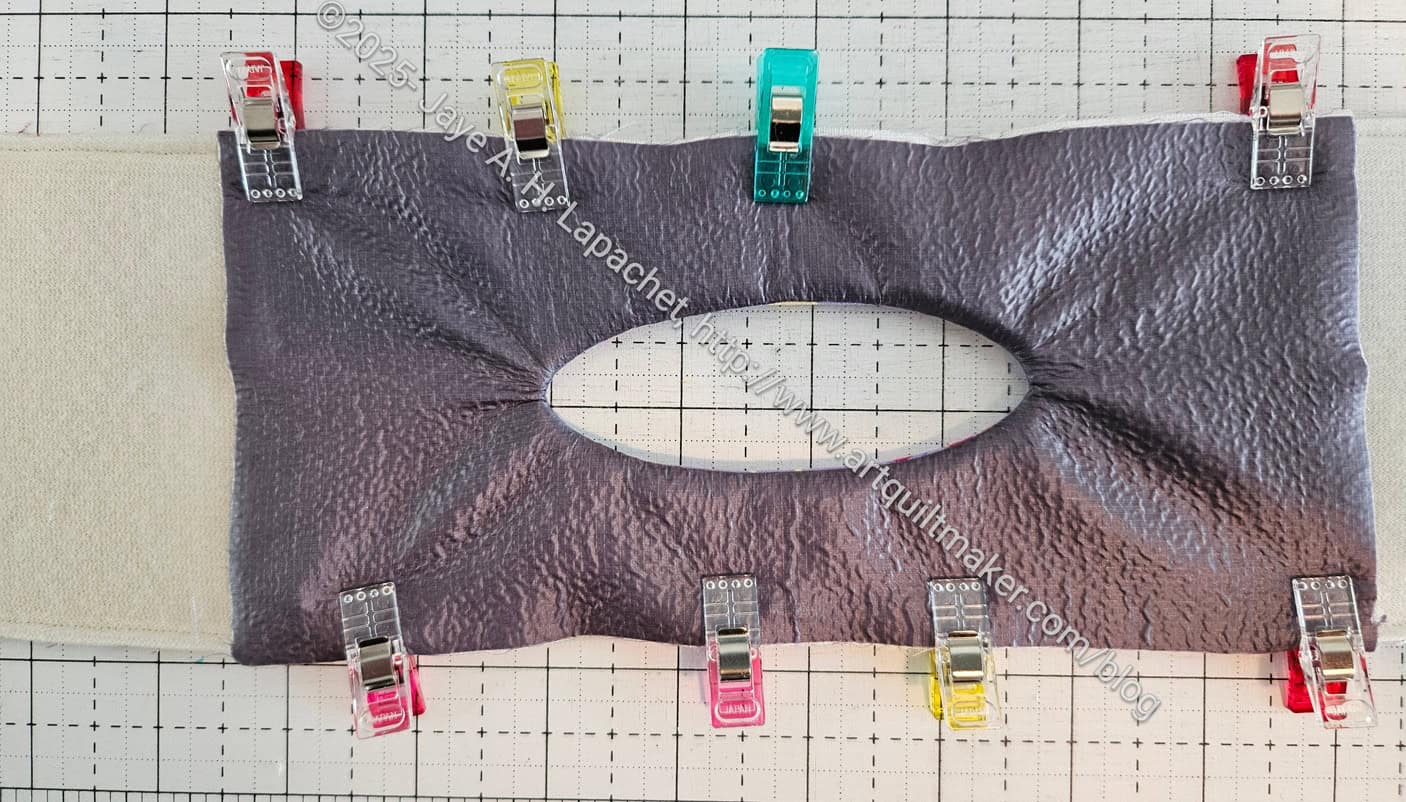
The first thing I did was get some ripstop nylon in order to make the inside sort of water resistant. I was inspired by Lynette using it for her Oxbow. Hers came out flat and beautiful. Mine came out bubbly and lumpy despite using Lynette’s tips. I have a feeling the ripstop I used was lesser quality than what Lynette used.
Morsel lunchbag interior
The pattern had no interior pockets. I guess a person just tosses all their lunch items in and pockets aren’t really needed.I keep thinking of regular bags and pockets are always useful.
I decided, based on my lunch bag, that I needed to include an ice pack. I added a mesh pocket for an ice pack. I thought a mesh pocket would better for something that might sweat. I included an ice pack (not shown) before I wrapped the gift.
Morsel Lunchbag top
The bag is on the small side, so no 5 person picnics.
The top has a recessed zipper, so the contents are out of the way of the handles. It might have been useful to include a shoulder strap, but I didn’t think of it.
In general, I am pretty happy with how this bag came out. Julie has brought it to a couple of Sew Days and that is really nice to see. I am definitely happy that I was able to use another Minikins pattern.
It’s a dreary day here as I write this. We are waiting for rain which seems poised to pour down any minute, but hasn’t gotten around to it yet. This means that my workroom is a little dark and grey. It makes me really happy that the life-sucking beige is gone.
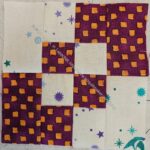
Fixed Lupine block
I ripped them out while I watched TV one night and then re-sewed at them at a Sew Day I had with SueS, Lee Ann and SueG. I spent a bit of time over a couple of days doing random quilt tasks and this was one of them.
Now I am ready to continue chunking the center of the quilt.
I know I have talked about MaryC’s rivet press quite a bit lately. I thought I would do a post about it, so you could learn more.
You can see Mary’s rivet press in the photo, left. It is about 2 feet tall and not very wide. In order to make it work, you have to insert a die into the top (under the spring) and on the bottom (under my black fabric). Before inserting rivet, it is important to make a hole in your fabric. Mary has a leather punch tool for that (see photo below), which makes it very easy. Then the rivets are easy to insert through the fabric. They click together, so they don’t fall apart as you insert them into the rivet press. Then the fun part: smash them with the press. We put a piece of fabric between the rivet and the die to keep the rivet from getting scratched. That’s an after market tip. 😉
Leather punch
The leather punch can make different sized holes by turning the wheel on the top.
I used Chicago Screws once and sincerely disliked the look. They were not tight in the fabric. Once rivets have the fabric pressed between them, the fabric is not going to move. The rivets are tight against the fabric.
Mary’s hardware box
Mary got all different dies when she got her rivet press and I think this makes sense. Yes, it is more money, but then you have all the dies you need and you don’t have to figure out which one you don’t have. Or worse, you find you don’t have the one die you need to finish your project.
Mary uses the same system for her hardware that she does for her rivets and dies. She puts different sizes in smaller boxes, then they all go in a larger box. This keeps everything together and available when needed.
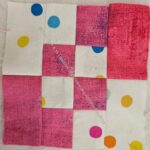
I slowly worked on chunking the Lupine top together. I had to do it before putting on the border, because Bonnie has us put on spacer border, which prevents me from chunking the border. C’est la vie.
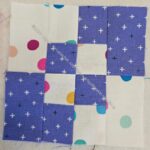
Lupine Alternate: wrong!
As I was working away I saw one block where I put the corners on wrong. The purple needs to be on the outside.
🙁
I looked at the blocks on the design wall for awhile to decide if I could stand the mistake and decided it had to come out. I ripped out the corners, flipped them and re-sewed them.
Yay! No problem. Stuff happens. I was done and could move on.
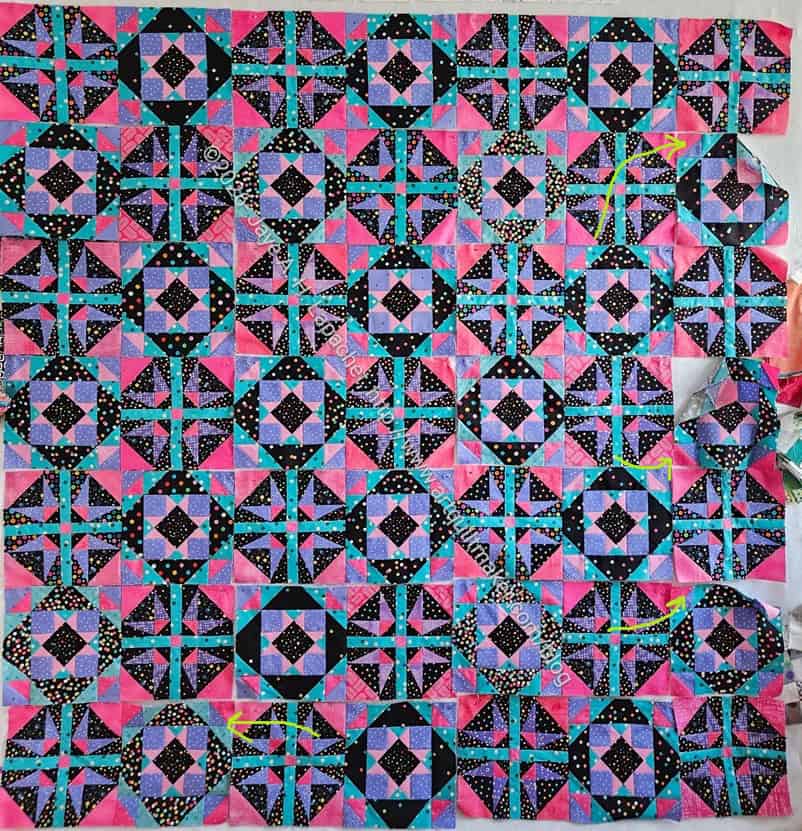
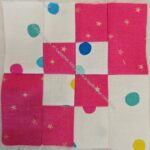
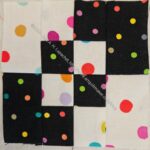
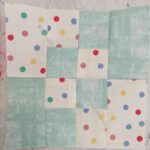
Lupine blocks: wrong!
Then I noticed another one. And another. 🙁 I have indicated the wrong blocks with arrows, but you’ll have to make the image (right) larger to see the arrows.
Now I have all the blocks that are wrong unsewn from the chunks. Next step: rip out the corners and re-sew them.
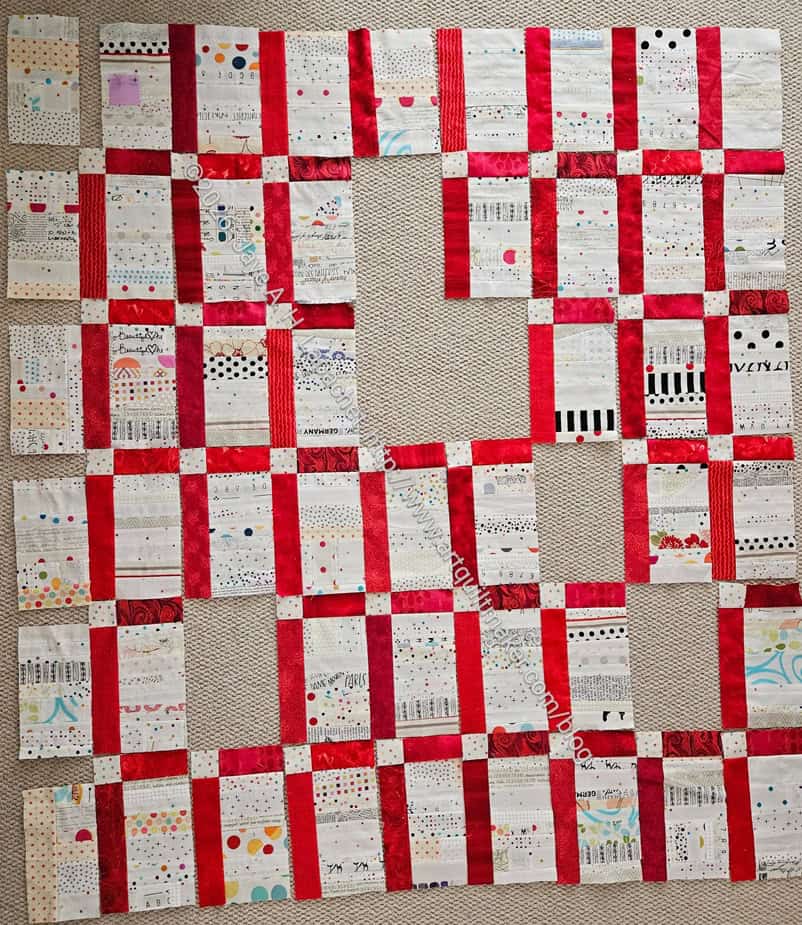
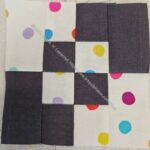
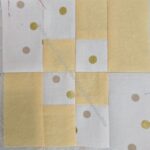
Without putting the blocks on the wall, I added sashing to my white strips blocks. I don’t have any design wall space and just had to go for it. I have a few donation quilts I need to make and this one will help me free up some design wall space.
As you can see, not having the design hampers my process. Somehow I missed adding top sashing to 6 blocks.
Yes, I used red. Dangerous, I know, but all my fabric is washed.
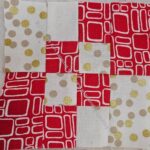
Finishing the Pandora Charisma was great! It freed me up to work on other projects. I made my BAM BOM units, worked on the last Four Patch Fun blocks, made a donation block, got back to my normal leaders and enders system and FINISHED the last of Lupine blocks. YAY!
The quilt isn’t done by any stretch, but this is a huge achievement IMO. I am really pleased about it. Now I get to sew all of these blocks together and then start work on the border.
I am not cutting any more foreground pieces for this quilt. I am trying to finish blocks for which I have foreground cut. Thus I have a few more blocks made.
I made my Flying Geese the other day. I am not ahead of the crowd this time, but in time for the meeting next week.
I made 4 using the blue and yellow fabrics. I wanted the blue to be on the outside, so decided I needed to make a few more. Once I made the second set with my wonderful flowered fabric I realized I could make chevrons! Voila!
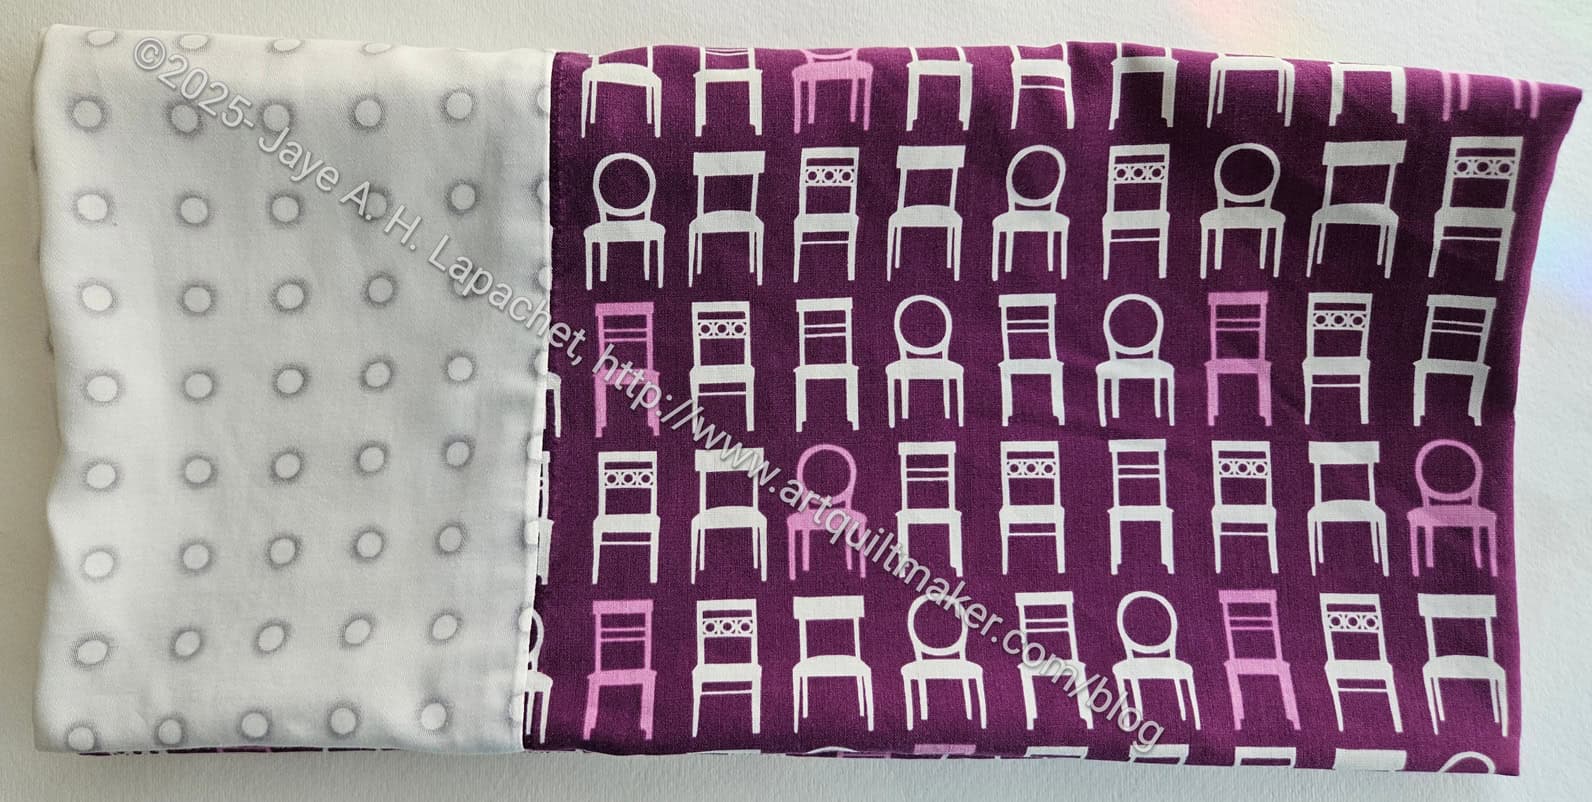
I finally finished repairing my niece’s Tufted Tweets pillowcase! Hooray! It took me awhile to get to it (Pandora Charisma!), but now I just have to take it over to her. This has been hanging around since December 12-ish.
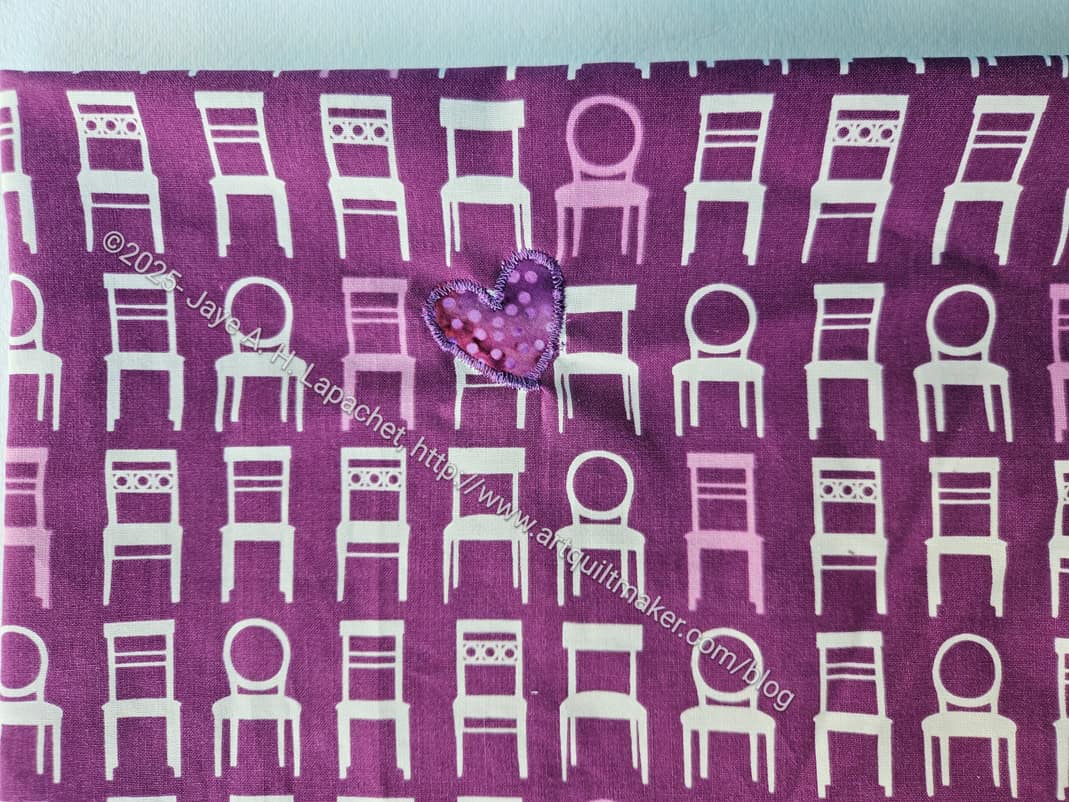
Tufted Tweets (chair) pillowcase -heart
Not only was the cuff ripping off, but there was also a hole in the fabric, so I covered it with an appliqued heart. The heart was a quick and dirty job.
I am into sneak peeks lately! You got one the other day about this finished Pandora Charisma.
Yep!
Finished! Done! Complete!
I powered through a lot of the finishing steps, which were the hardest, on Friday so the bag could be done for the Month 1: UFO challenge reveal.
When I brought it to Sew Day, as mentioned, I wanted to add some additional rivets, but for all intents and purposes, it was done before I did that. I am pretty pleased with it, though I know there are things I could do better and want to do better.
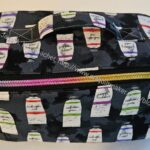
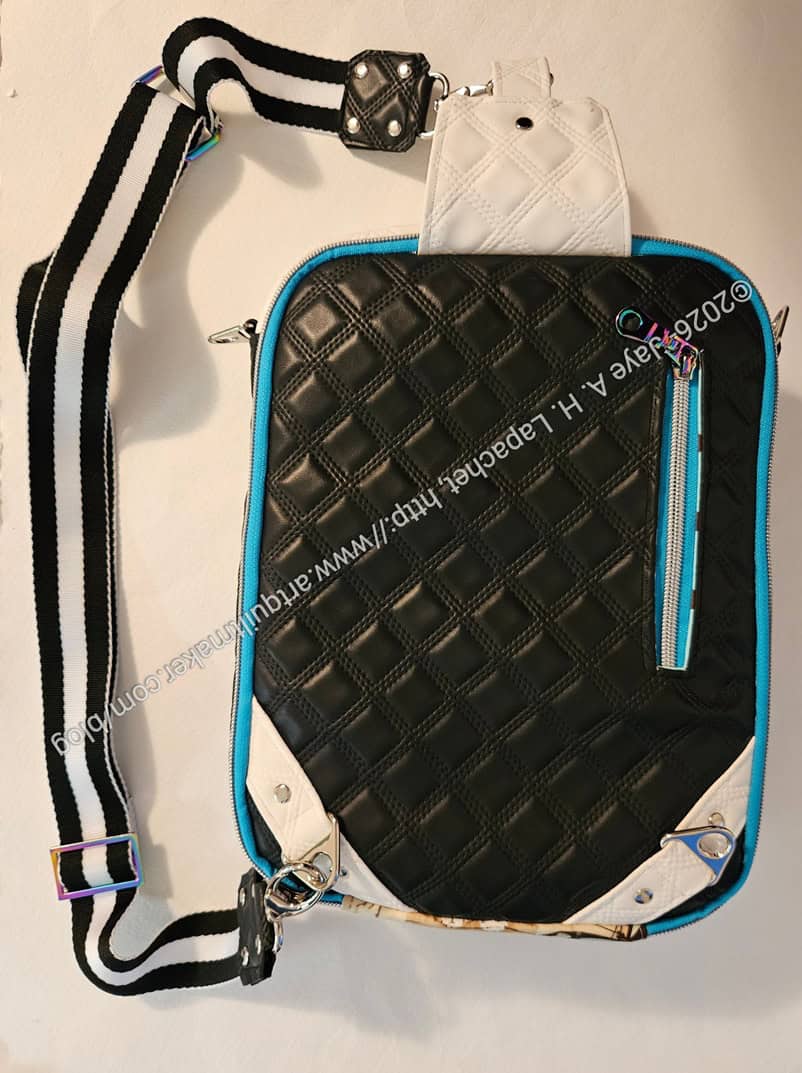
Pandora Charisma – back, finished
I am really pleased with the back. I think it looks awesome and I can’t really believe that I made it using all the weird substrates.
The zippers look good, but I wasn’t happy with the way the teeth were so high up from the zipper tape (the teeth were not flush or flush-ish with the tape). Also, there was something strange about the zipper tape. I am going to use a different brand when I make this bag again, maybe Wawak or ByAnnie continuous zippers next time. Using the continuous zipper was good for small zipper areas like the back zipper shown on the photo, right. The teeth were too high, but I had to secure the zipper with fabric, so the stitches looked ok. In general, though the high teeth kept me from making nice straight stitches. It was good that I had enough continuous zipper yardage to have the same zipper tape on all of the many zippers required for this bag.
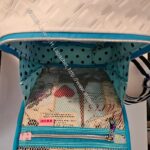
Pandora Charisma – large pocket, open
Pandora Charisma – large pocket, open
There are a lot of pockets and places to hold stuff in this bag. The front pocket is like a regular purse area. the main area has a mesh pocket, which will keep things safe but handy and a slip pocket. The leash is very useful for keys, but also for attaching anything you don’t want to lose. That leash could be made of ribbon, tiny webbing or leather.
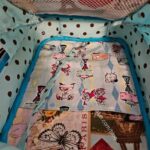
Pandora Charisma – tablet pocket, open
The back pocket has a small tablet sleeve, which is padded to keep your Kindle, iPad or other type of tablet safe. The pocket opens a lot more narrowly, so you have to use that side for items that can be slipped in and out.
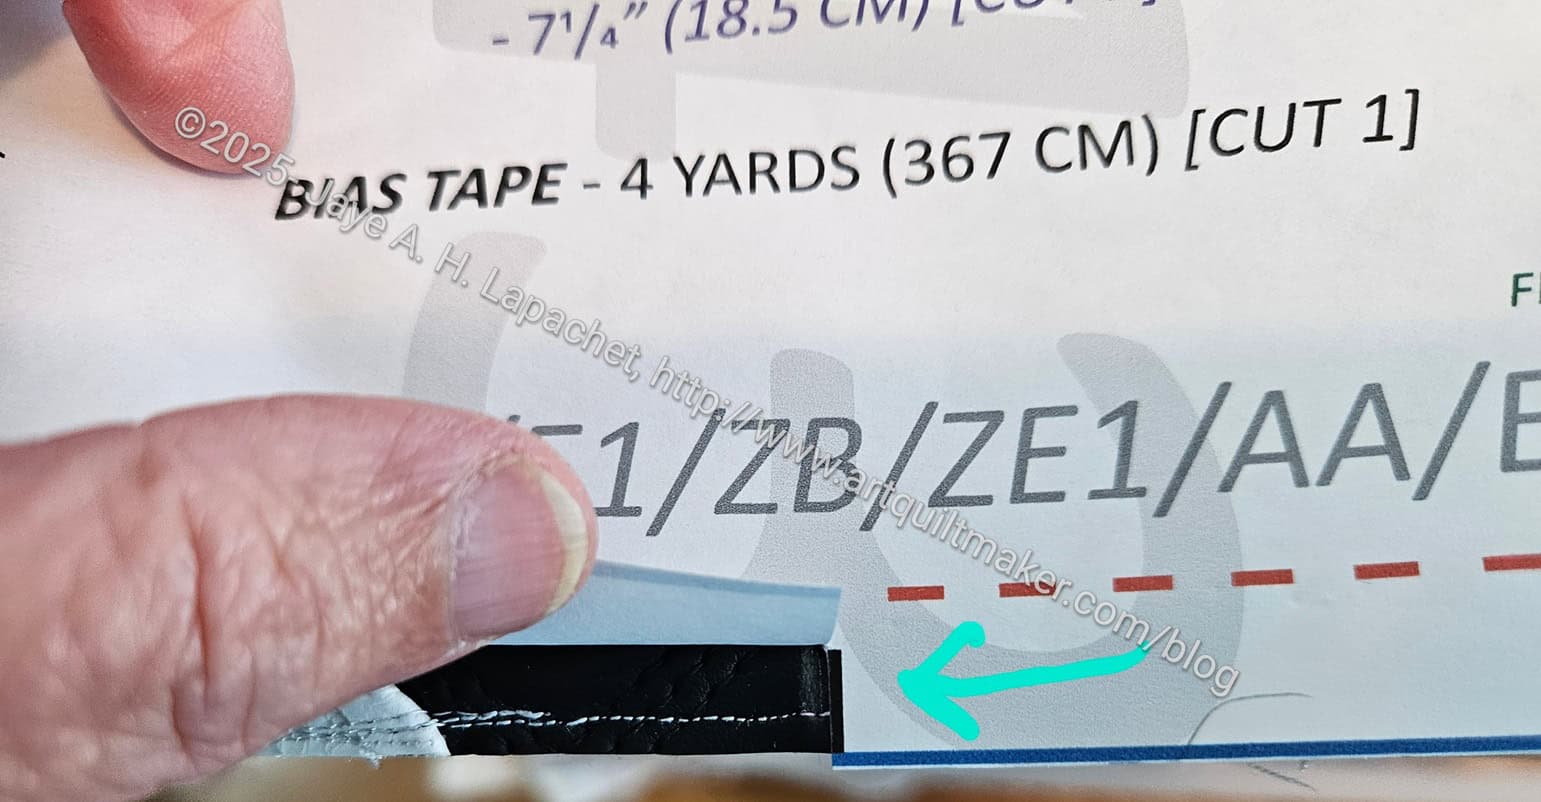
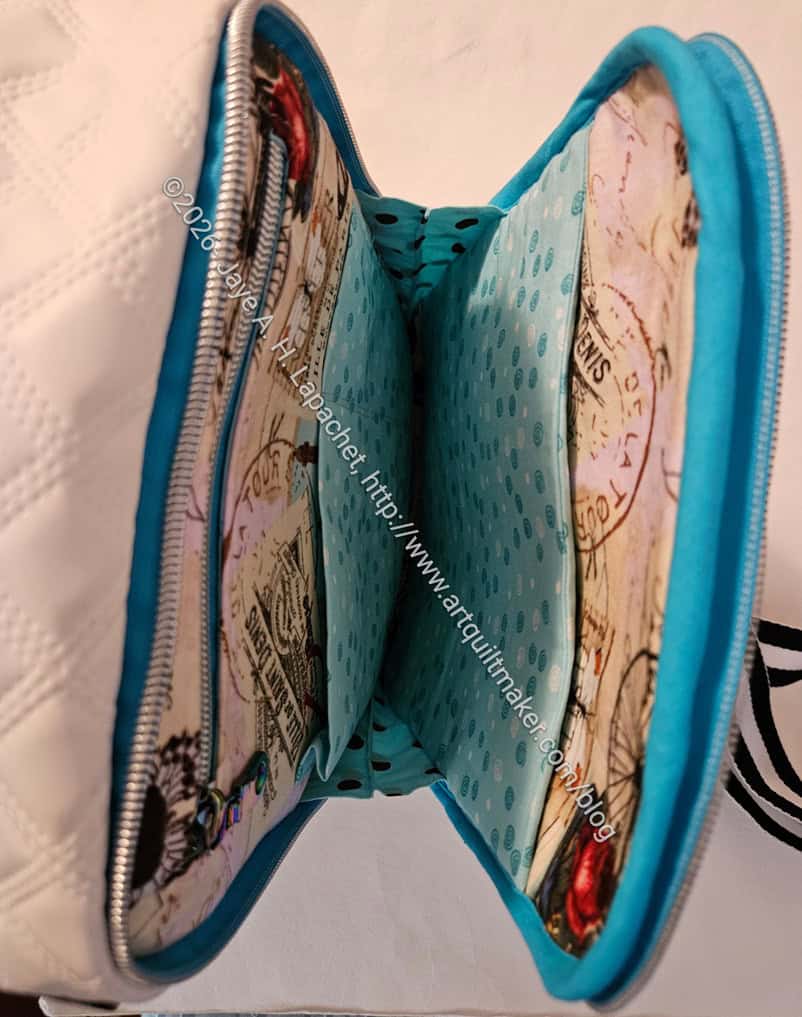
The most challenging part of this bag can be seen in the photo, left, and that is the binding. The final step, which, seriously, almost made me give up, is putting the bag together then binding the edges. It is really hard to shove so many layers under the needle and get it to look ok. I did one side of some of the bindings by hand, which was a big effort, but looked a lot better than my first binding by machine. My binding effort is not stellar, but I was able to finish.
I do want to make another. I plan to borrow my mom’s 1960s Emdeko machine, which is one of those all metal machines that can sew through anything. I also plan to go through the pattern while I have the bag at hand and decide which pockets I can sew in vinyl, which need more interfacing, etc, so I am more prepared next time. I also want to count up all the hardware I used so I have matching hardware when I make the next one.
I am really pleased that I finished it and plan to take some time to relax with some easy projects.