We had an amazing Sew Day over the weekend. At the peak, we had more than 30 people sewing and socializing. We get that many at our holiday party, but I am not sure we have ever had that many at a regular Sew Day. I knew we might have some new people, so we set up some extra tables in advance. We still didn’t have enough seats. I guess the message is that people need to show up on time if they want a seat. 😉
We had the 8YO son of our Founder join us. He is working with his mom to make a quilt for his bed. This means we are encouraging the younger generation to get into sewing. He was very focused!
We had another parent/’child’ team as well. Roberta is a new member who brought her daughter Michelle. They intend to work on projects together, which is a great way to get together.
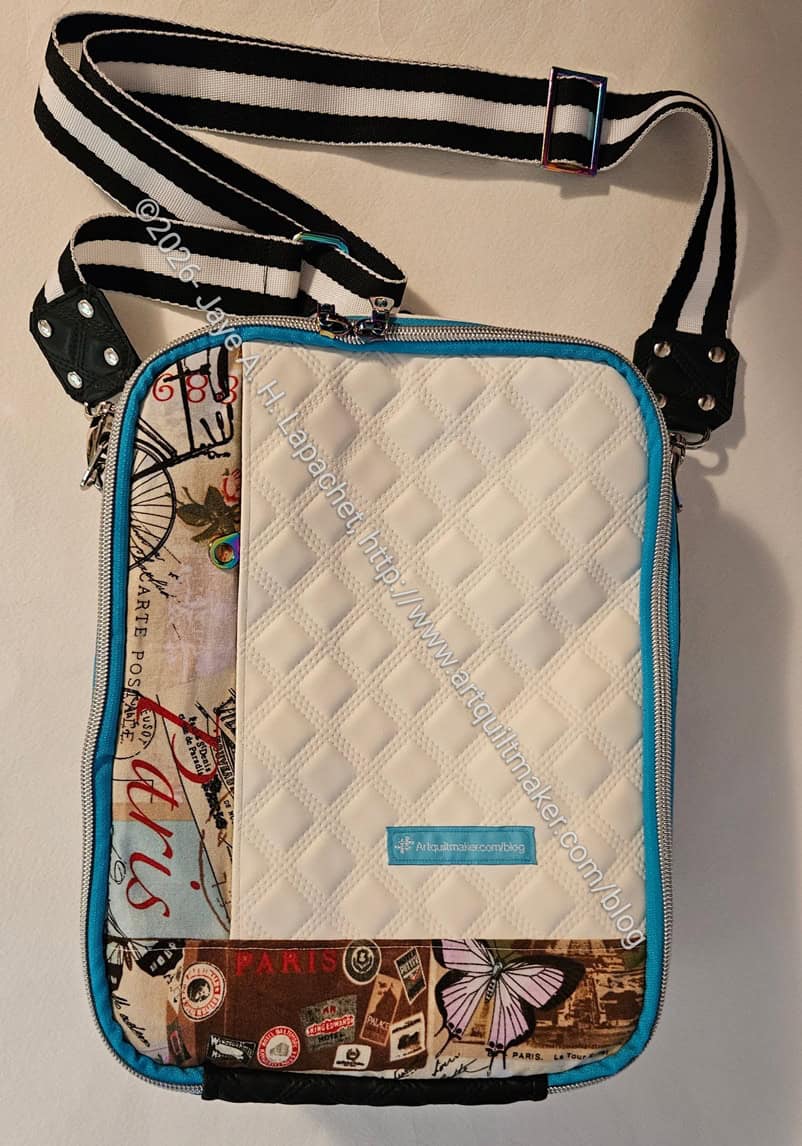
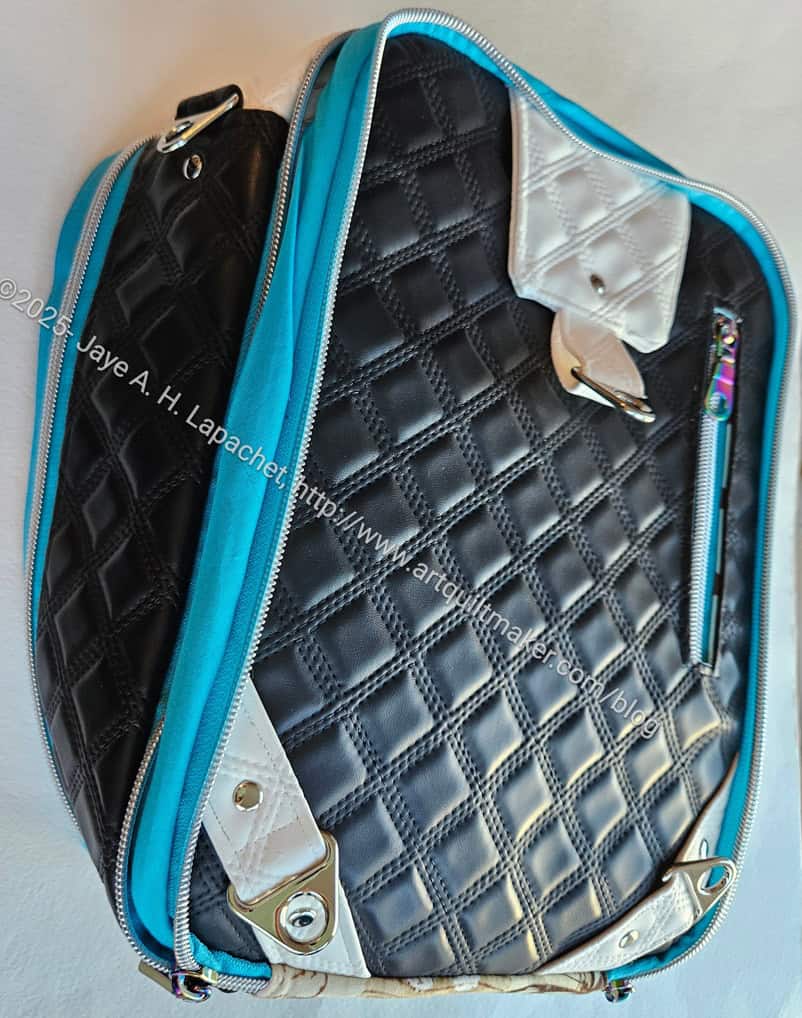
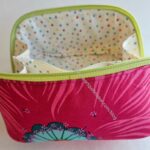
Pandora Charisma – front, finished
I brought the Pandora Charisma, which needed a few more steps, some of which were riveting. Mary helped me use her rivet press to add a few more rivets to various places on the bag. I am super happy with the riveting.
News Flash: the Pandora Charisma is finished. People were really impressed. I just felt tired after struggling with it for so many weeks (which feels like years!).
SueS is having a problem with her hand, so I offered to cut some pieces out for her. She was very well organized, so the task was easy. She also stood with me and kept me on track, which was great. I brought a ruler that was the exact size of the pieces she needed, which made the task easier. All-in-all a good effort.
The UFO Challenge Team had a mini-show and tell where finished and in-progress #12 items were shown. Not everything got finished, but everyone was inspired to work on a project that had been sitting around for a long time.
They also drew the next number, #9 was selected. For me, that is an extra large project bag. I have the fabric quilted, but need to cut out the other pieces and put the whole thing together.
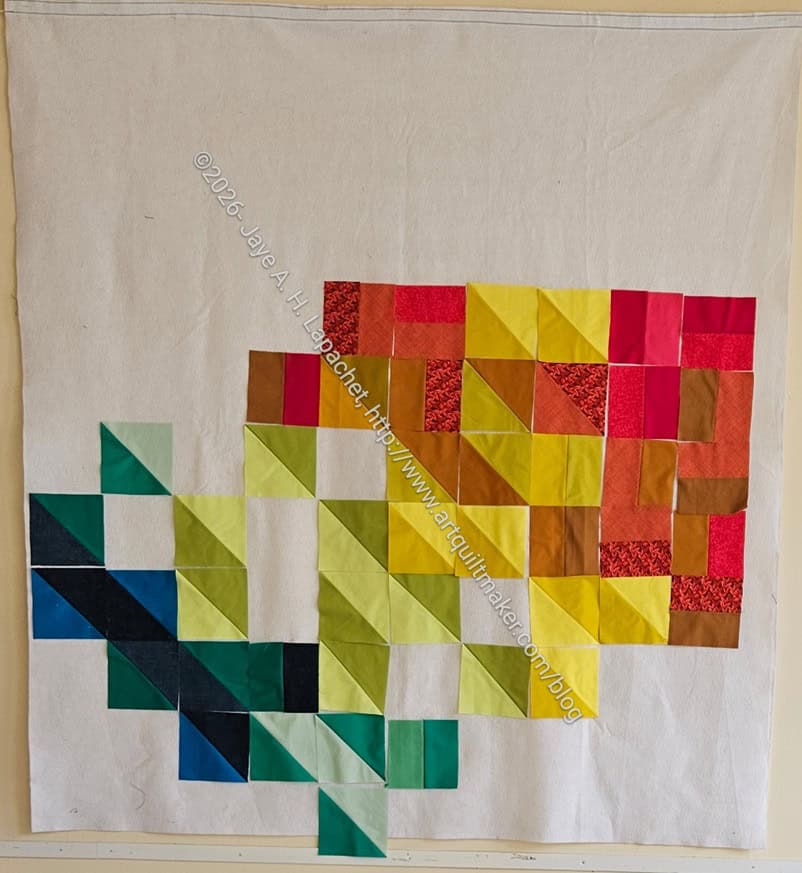
Tim’s Jittery Wings quilt
Later in the day, I also started cutting out the Tadpole pouches. Now that I am done with the Pandora Charisma, I am going to work on some easier projects. While I was doing that Tim was working on one of his Jittery Wings quilts.
The picture shows the start of it and it just got better the more he put up on the wall.
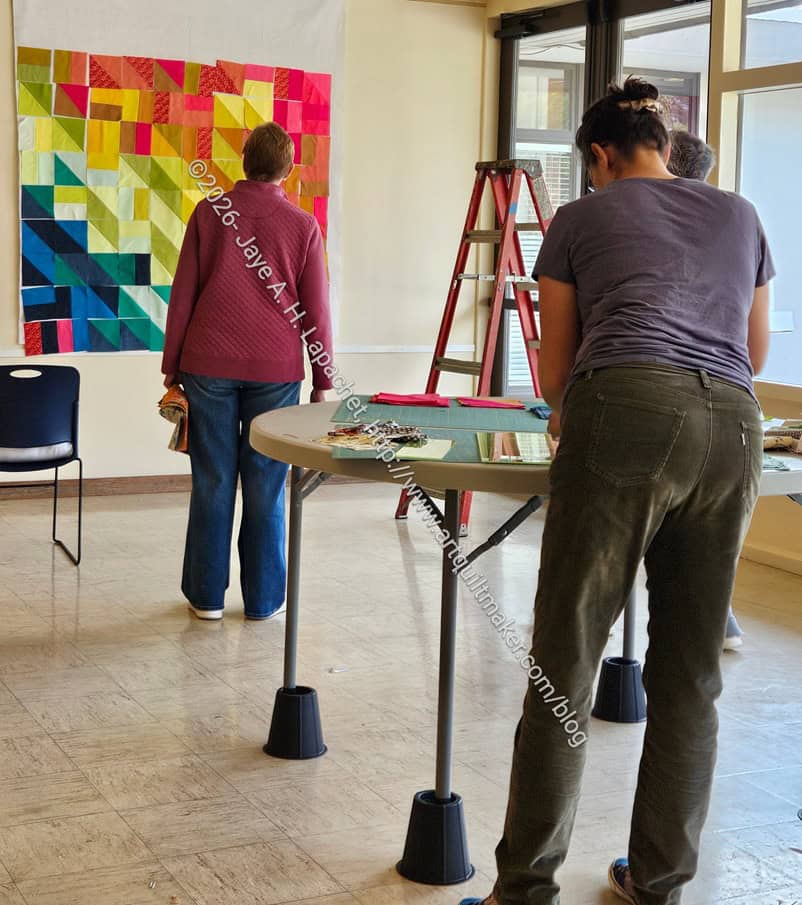
New guild design wall
Mary decided a few weeks ago to create a design wall that we could put up and take down. She came with a big piece of Velcro and installed it. The next step is making a piece of felt big enough to cover the space. We only had a small piece of felt, but Tim agreed to make a larger one. It will be great and the location is awesome: right next to some large windows.
I raced around so didn’t get time to catch up with many people, but I chatted to some and that was great.
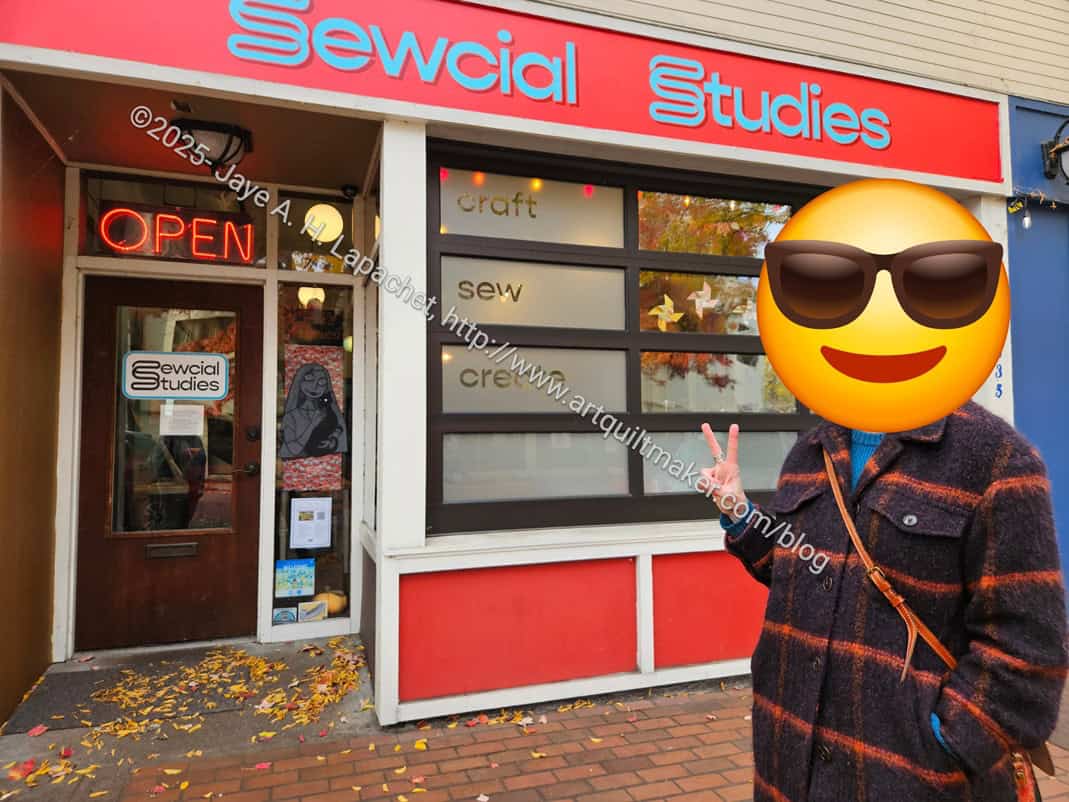
I never got around to talking about Sewcial Studies after I returned from Portland in the Fall.
I went with Cheryl and Amanda. Sewcial Studies is in Milwaukie on a cute little street with a variety of shops including a chocolatier and a bookstore.
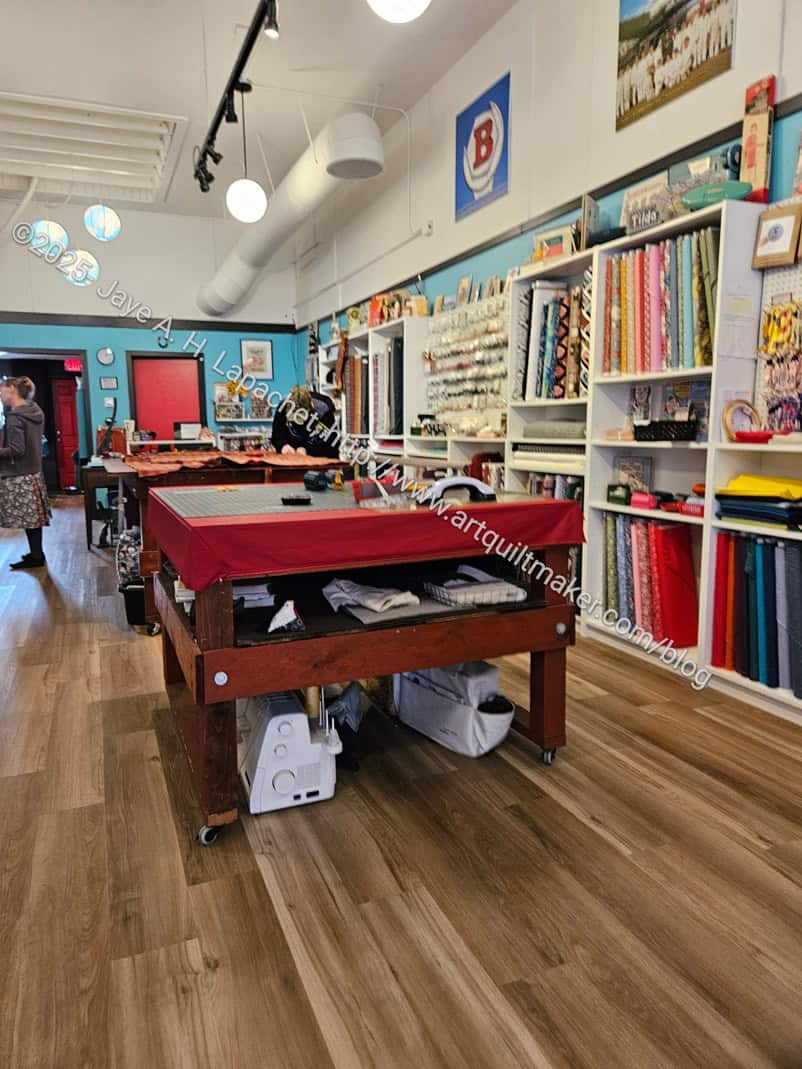
Sewcial Studies: front to back
Sewcial Studies, a very small store, describes itself as an ‘art and craft’ store. While we were there, a woman was learning how to make a shirt, or some kind of garment.
One side of the store (shown, left) houses supplies you can buy: fabric, notions, etc. The collection of items isn’t large, but everything is high quality and a little unique. The red table in the center of the photo really intrigued me. I couldn’t help but think it looked like a billiard table.
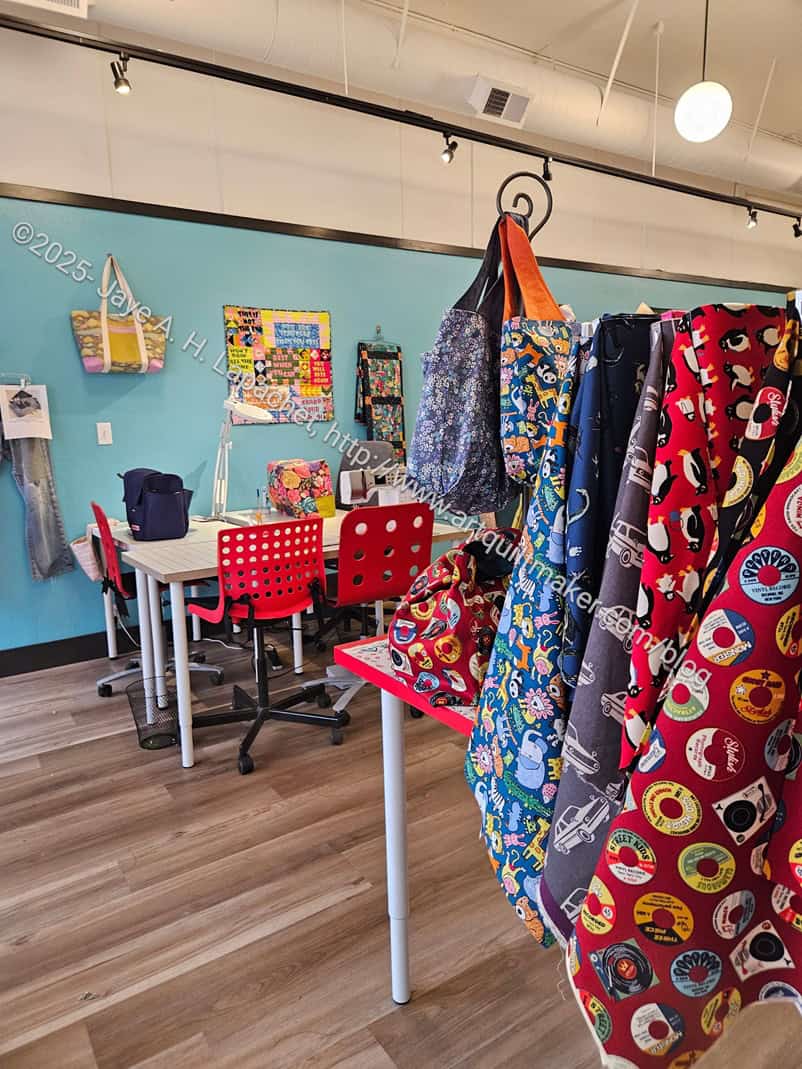
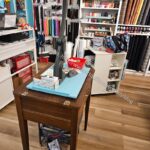
Sewcial Studies: sewing table
On the other side of the store is the class/lessons/sewing side. I didn’t take a good picture of the whole side, but you get an idea of what it looks like. There were 3-4 tables with sewing machines where people could sew. I was intrigued to see different brands, models and vintages of machines. While having the same machines would be good for troubleshooting, getting used high quality machines might be more cost effective.
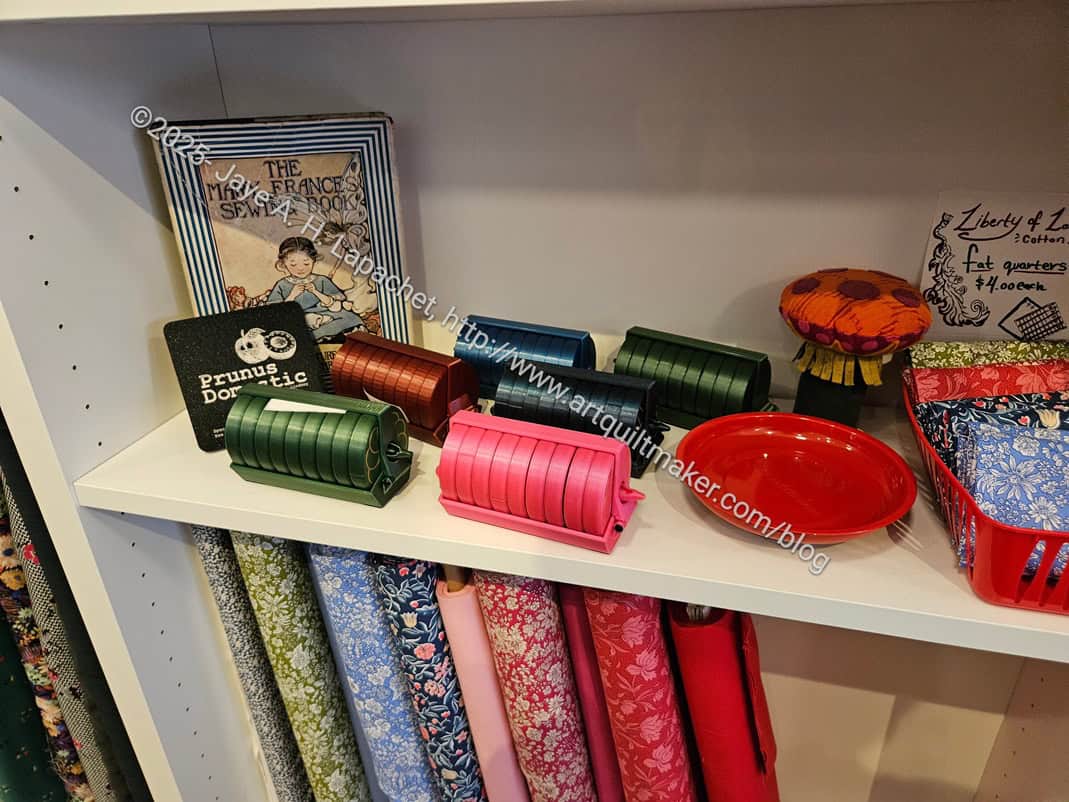
Sewcial Studies: pattern weights
I really wanted to buy these pattern weights even though I didn’t need them. They were so cool looking and would have been great for shapes I needed to cut using a paper pattern.
They were on the pricey side, though, and I decided not to spend so much on an impulse buy. I don’t see them on their website so either they are too pricey to mail or I missed my chance.
One cool service they have are Open Sews. The charge is only $10/hour and they happen everyday the shop is open. You get to use their tools, machines, and get help if you should need it.
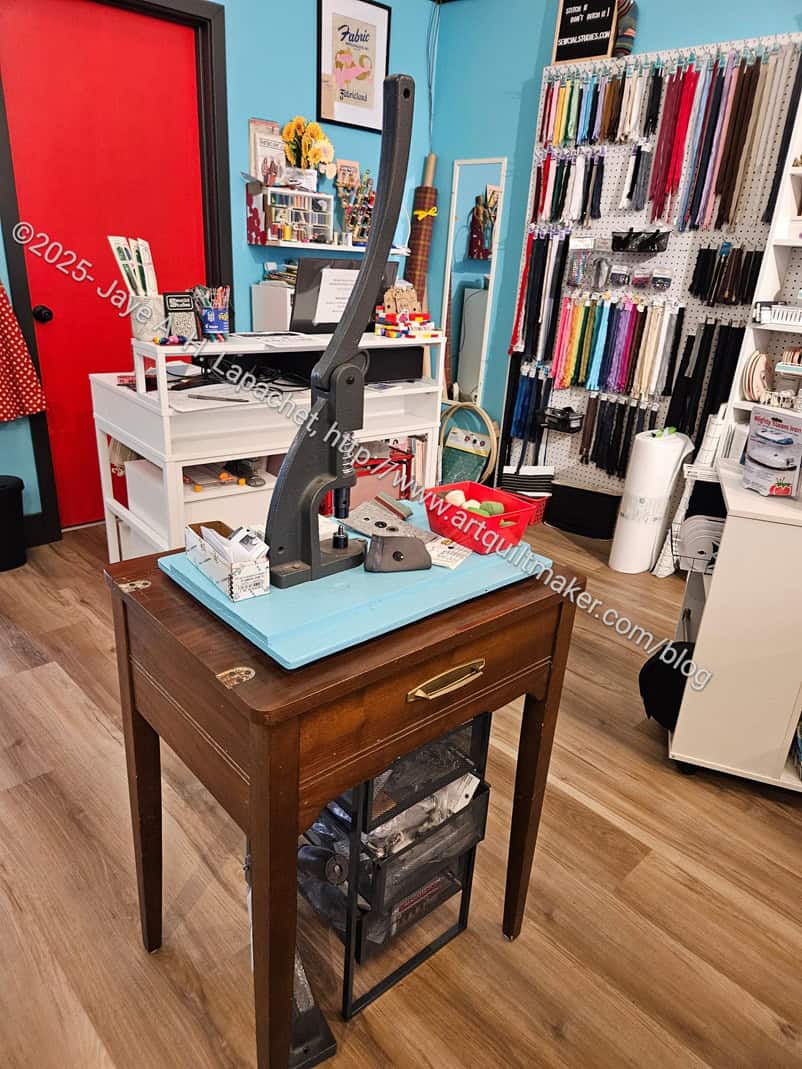
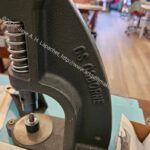
Sewcial Studies: rivet press
The coolest thing in the shop was their rivet press. I know I am obsessed with rivet presses right now, but this one was super cool the way it was embedded (inserted?) into an old sewing machine cabinet. OMG! Such a great idea. Also, the turquoise ‘plate’ is awesome.
I don’t think the sewing cabinet top opens anymore, but it would be great if the rivet press could be stored inside the cabinet as well. I think the height prevents it.
Sewcial Studies: rivet press
Sewcial Studies: rivet press
Sewcial Studies: rivet press
I wasn’t as focused on the store as I normally am, but I still saw enough to know that I like it. It is also a GREAT idea! I love the idea of dropping into to sew with others when it fits into your schedule.
I was fortunate to get a number of fabulous gifts for my birthday, which was in January.
2026 BD gifts from Julie
Julie topped up my fabric supply with some mini Pearl bracelets plus a couple of other pieces (far right) that were used as wrapping. I have an idea for the teal Art Gallery Round Elements.
2026 BD gifts from Julie
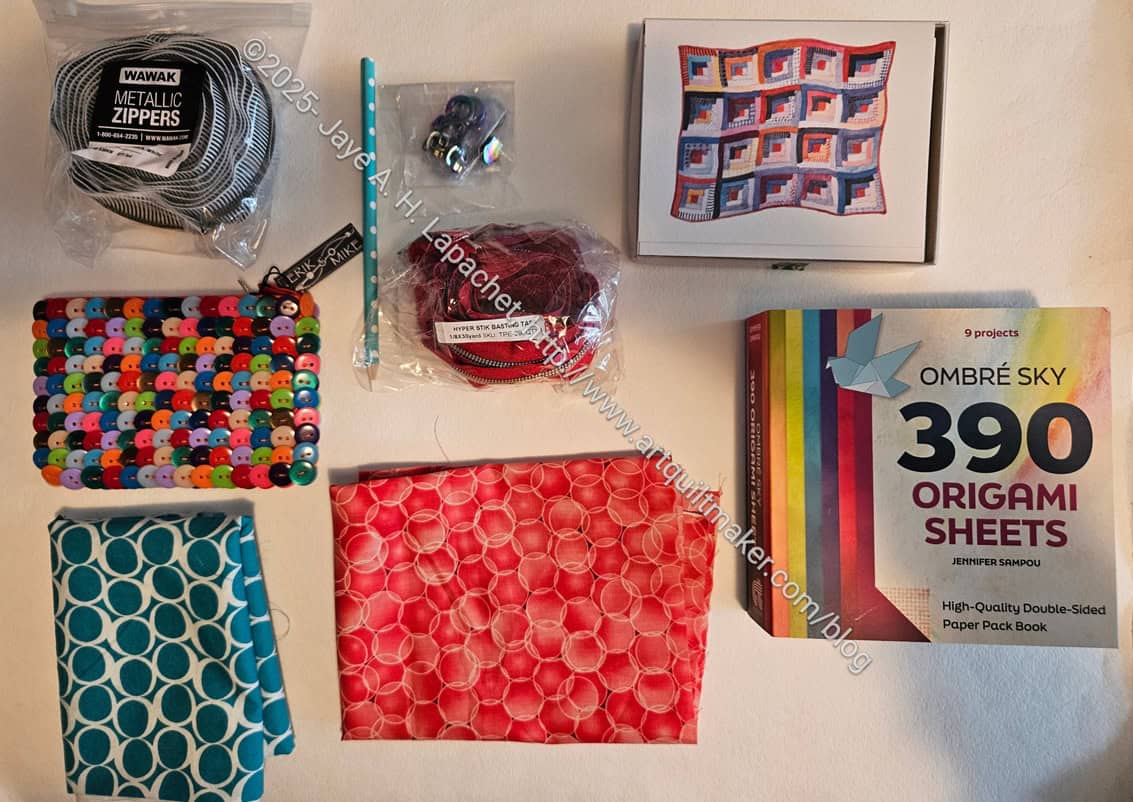
There were other gifts as well. I can always use cards (also from Julie) as I send a lot of them out to friends. Mary gave me a couple of packs of continuous zipper tape while Tim found a wild button pouch that is super unique.
You know I like paper folding. The origami paper might help me finish the Mette Rings I started as a Fair entry last year (?)
Gifts from Carrie
Gifts from Carrie
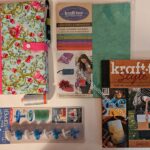
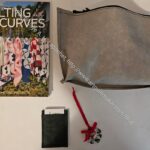
Recently, I received a lovely bunch of gifts from Carrie, both Christmas and birthday at the same time as we haven’t been able to get together. Carrie has been experimenting with Kraftex and I am always excited to see what she has made. I was fortunate enough to receive a pouch (upper right) and a business card holder. I have also been reading about Kraftex in the book she gave me and am planning a journal cover or two.
I bullied, a little, Carrie into making journal covers for composition books as raffle prizes. I wanted people to have something to make notes on at guild meetings. I was the fortunate recipient of a composition book and cover, too!
I received a few other things, which was very nice. The best was the calls, cards, and messages from far flung friends and family. Thank you!
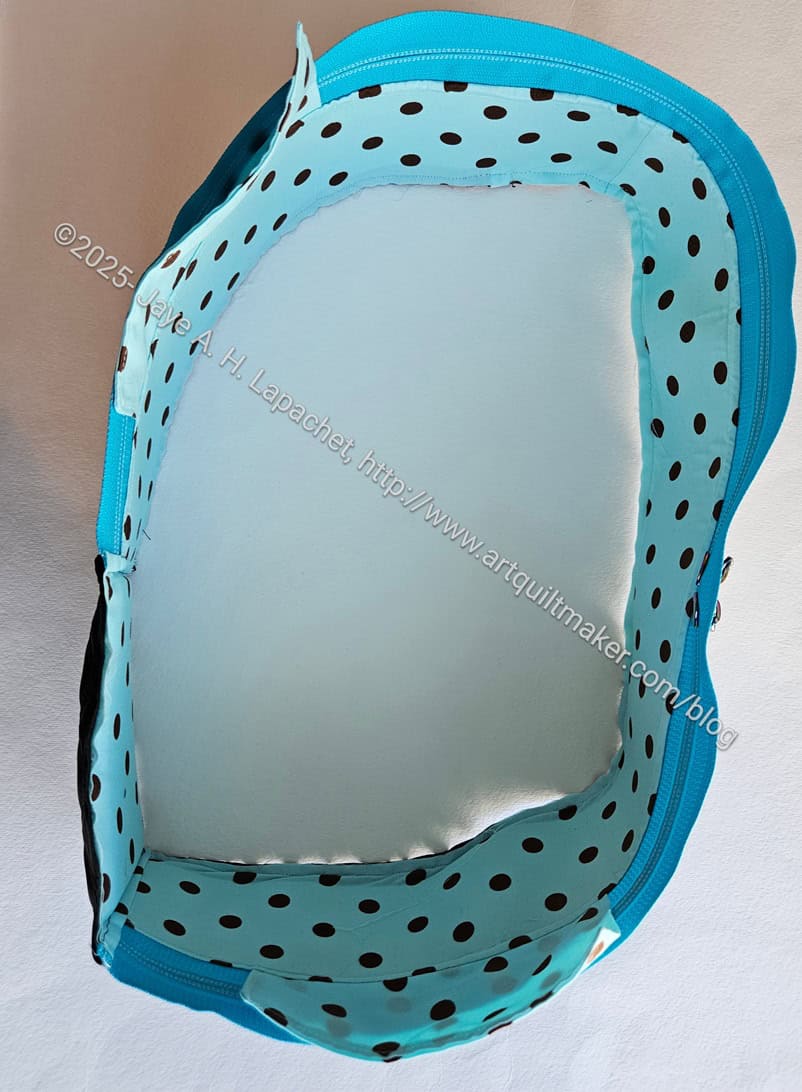
I worked really hard on Wednesday to get this project to this state. The process went a lot better than I expected. I have to finish it today to make the UFO Challenge deadline. Fingers crossed, but I am patting myself on the back for getting this far.
The photo shows two sections and two zipper gussets sewn together. There is still quite a bit of assembly required, but I was excited when I saw how the bag looked.
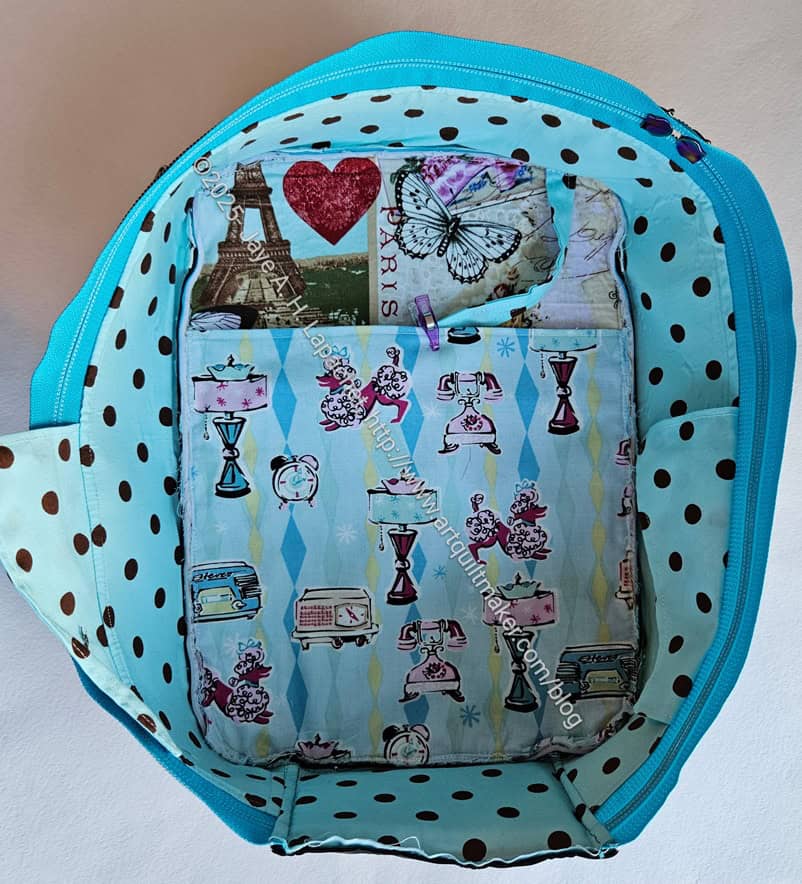
Pandora Charisma top into small section
It is always hard for me to imagine the size, shape and elements of a bag when I only see it on paper. Seeing it put together is awesome.
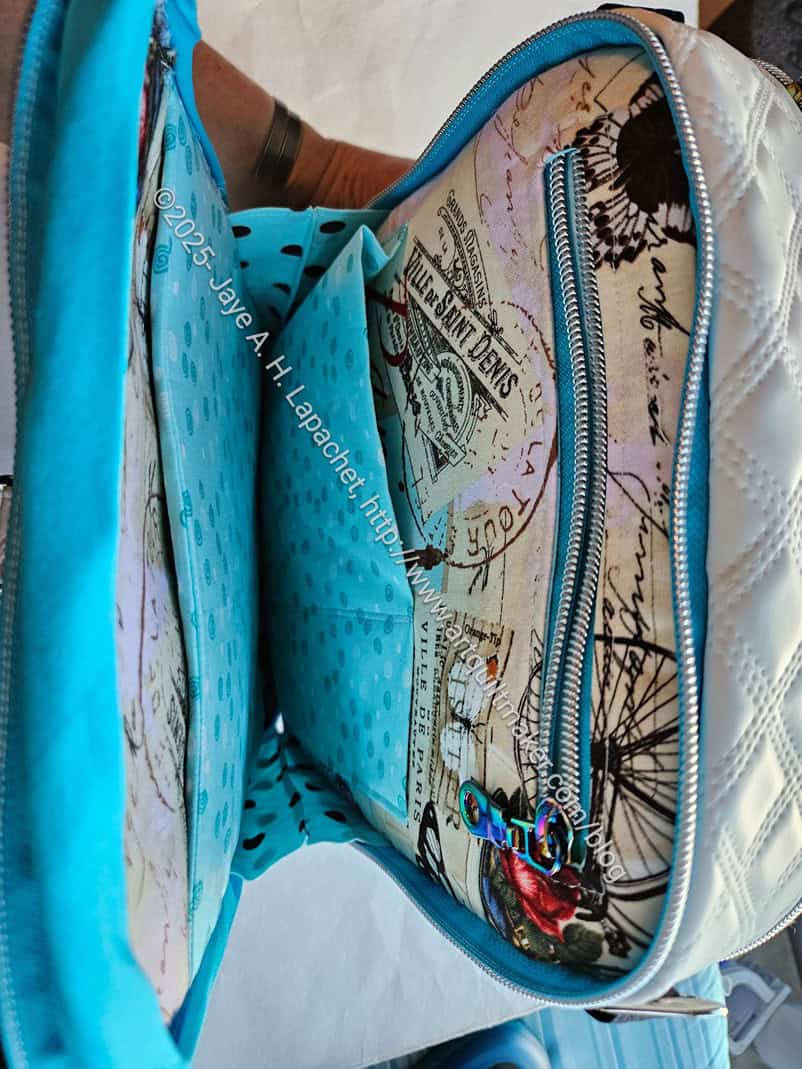
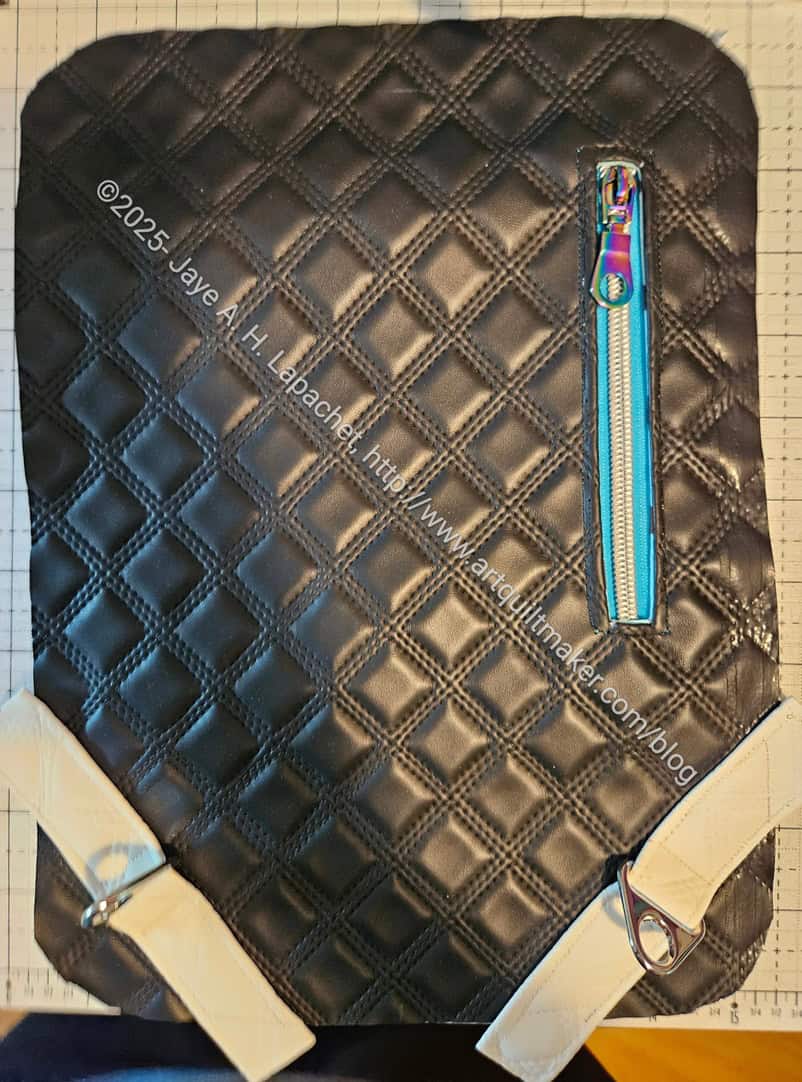
There is one small (thin) section (photo, right). This is good for a tablet plus pens and other things. The pocket on the right is a really good idea. There is an internal zipper pocket with the divided slip pocket on top.
As I saw the finished parts, I started to mark pockets that could be made from vinyl in future versions. Vinyl would make the bag thicker, but would also conserve focus fabric, if necessary.
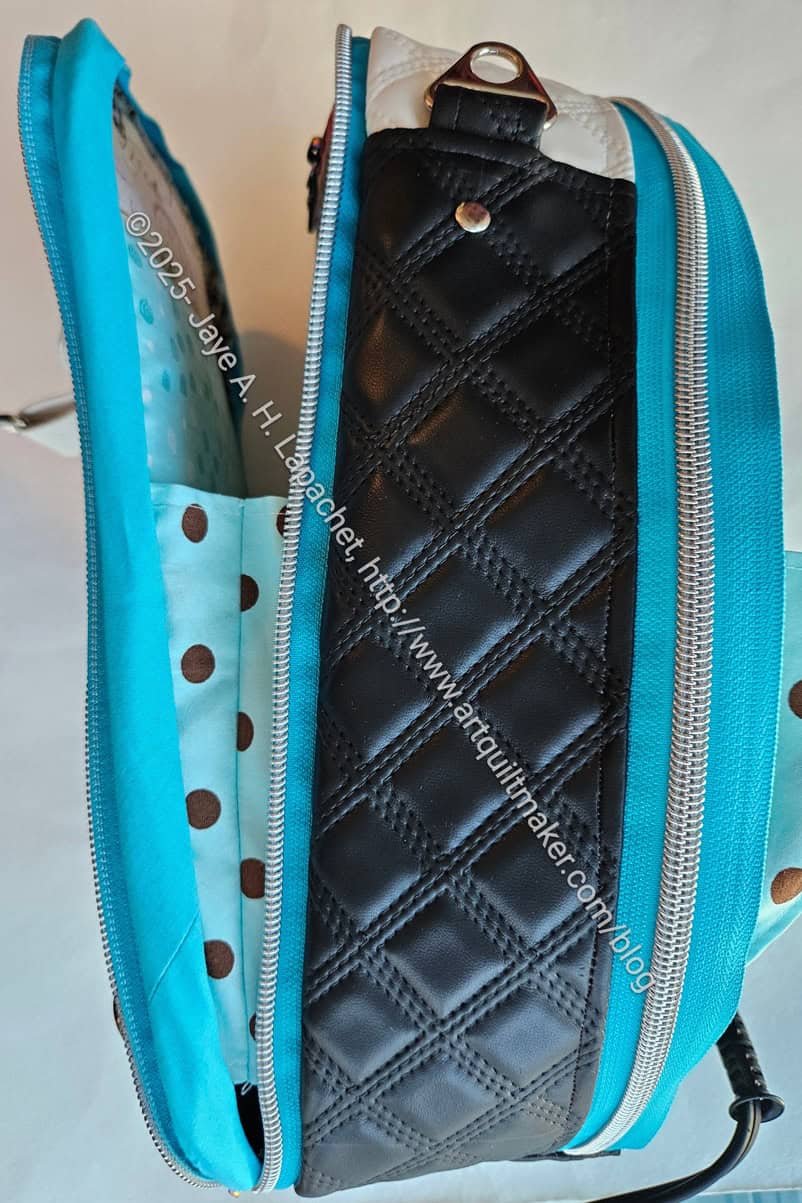
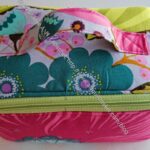
Pandora Charisma side view
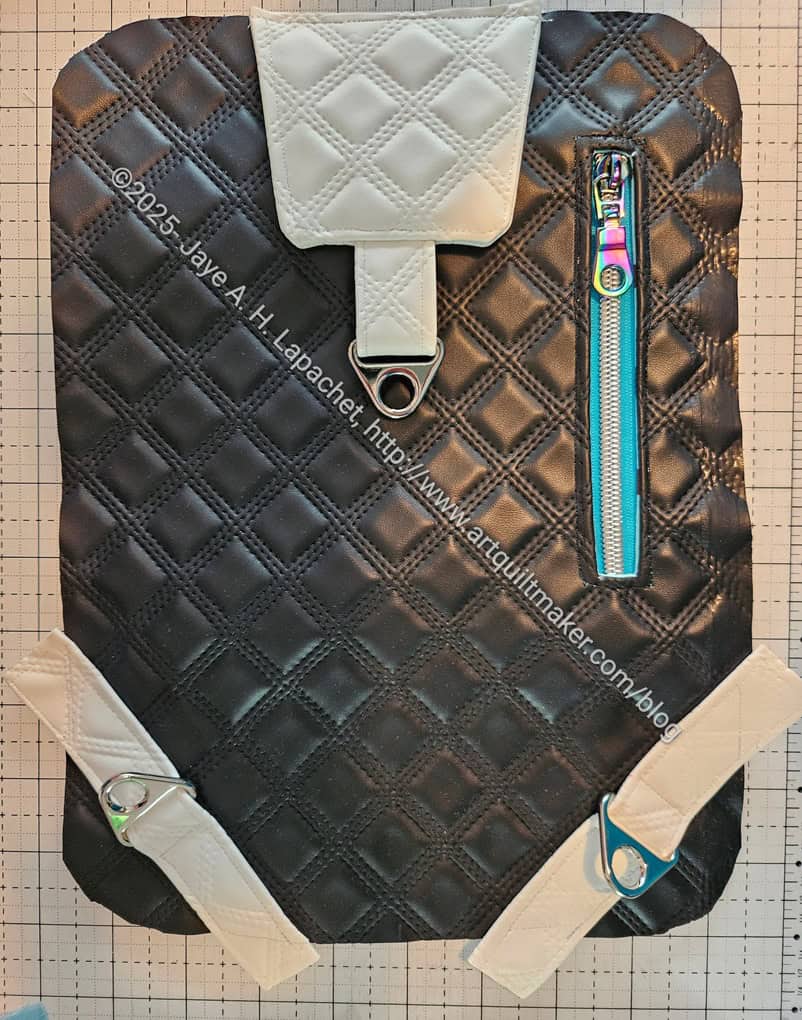
I will add another section that folds down diagonally on the left. That section is larger (fatter) than the one described above, so the user can put things that are more 3D (wallet, water bottle, etc) inside. It’s not huge, but large enough to use as a handbag.
I really had to watch the video in order to get to this point. Making sure the sections/pieces are oriented in the correct direction is super important and the pattern alone wasn’t doing the job. It really makes me appreciate the way Sara and Danny of Sew Sweetness mark their videos to coincide with the steps in the pattern.
Pandora Charisma side view – large section
The same section can be viewed from the top so you can see how big it is.
That pocket with the lamps and the poodles could definitely be vinyl. It would have to bind the top with doublefold elastic and then I could see the fabric behind it as well as what was in the pocket. Alternatively, I would use a solid or tone-on-tone for the back panel piece and a focus fabric for the pocket. There is a lot going on in that section, which could be toned down a bit. 😉
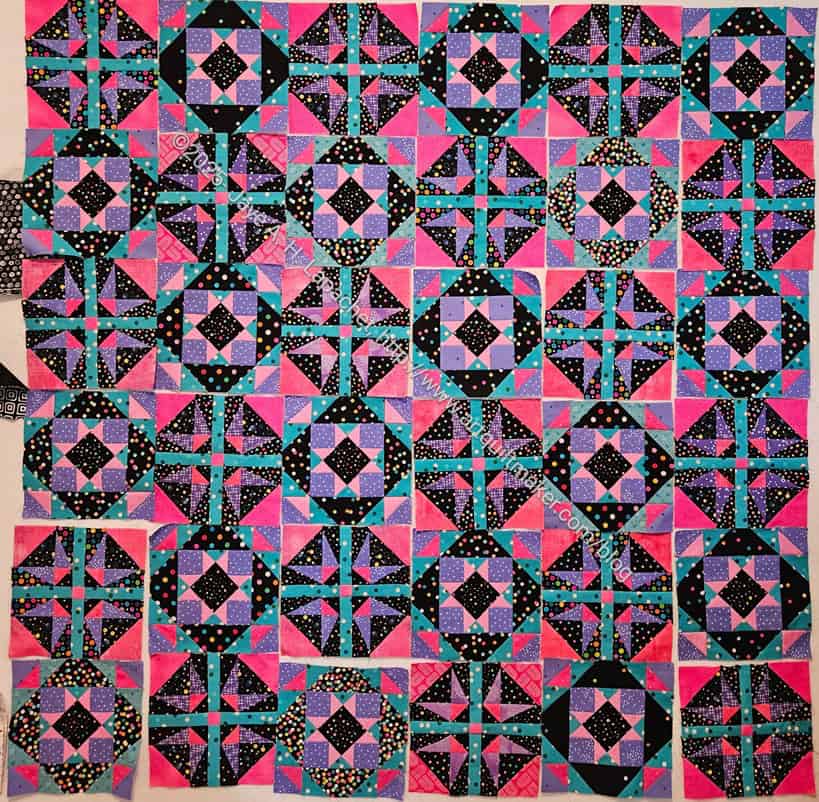
In between trying to finish the Pandora Charisma and working on other bits and bobs, I am sewing blocks together as well. I have about 5 more of each of the blocks to make before I can start on the border.
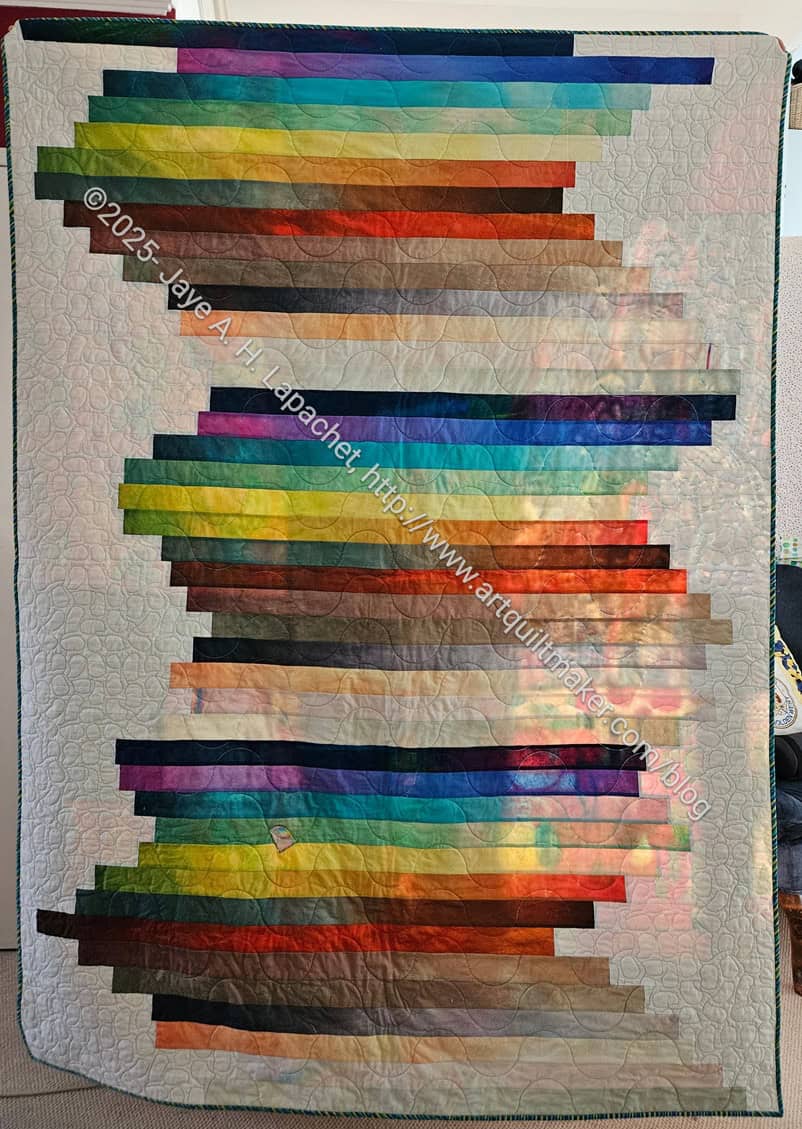
This is a really dramatic color scheme and I LOVE it.
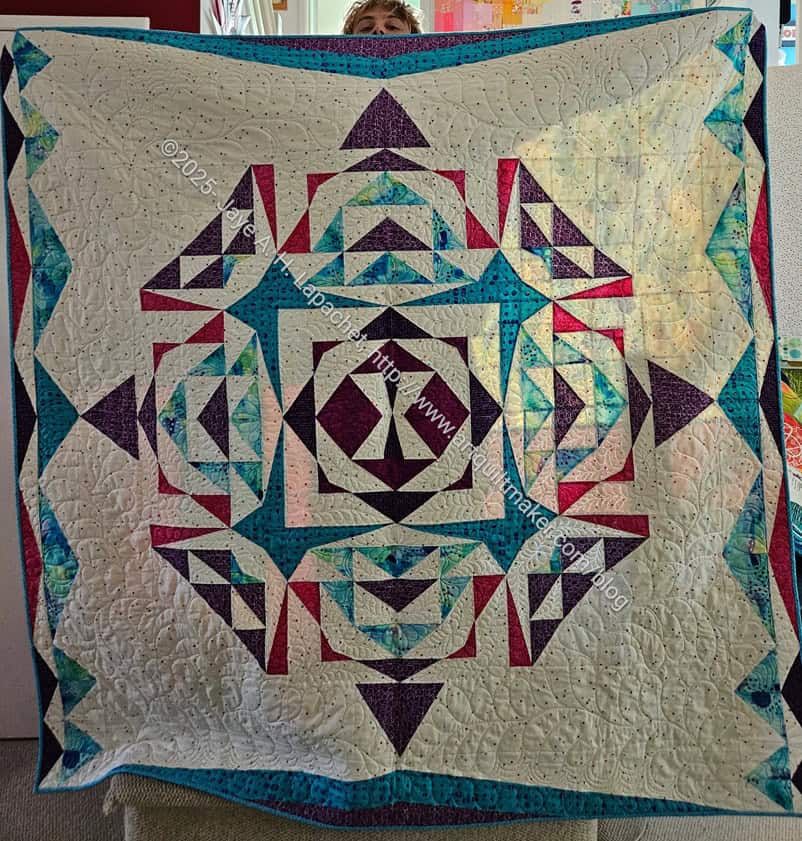
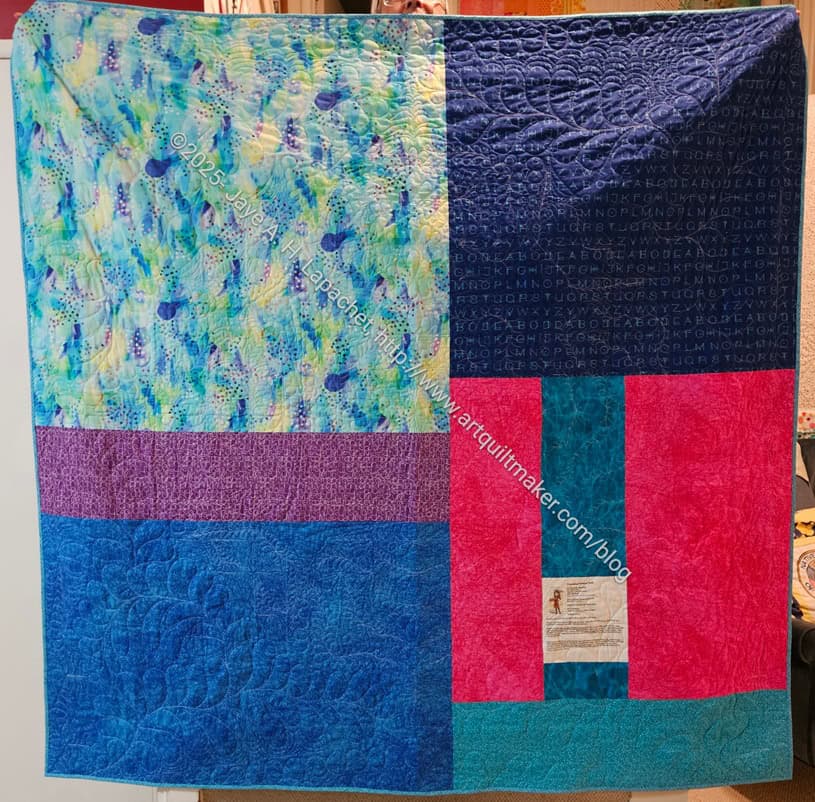
You got a sneak peek the other day that I had finished this quilt. I plan to enter it into the Fair, so I need to start working on a sleeve. I could have made it when I made the binding and prepared the quilt for longarming, but I didn’t think of it so here we are.
My quilt holder is my youngest nephew. He spends at least once a week with me doing yard work, though the day I took this picture his duties expanded to quilt holding. This was his first outing as quilt holder and he is as tall as the YM or DH, but you can see the quilt pretty well.
Triumphant back – finished
I used much of the leftover fabric for the back, which I really like.
I made good progress over the weekend on my ongoing project. I finished all the ‘panels’. After all the work, they are combined into the 3 panels: front, middle and back, which are 2-sided.
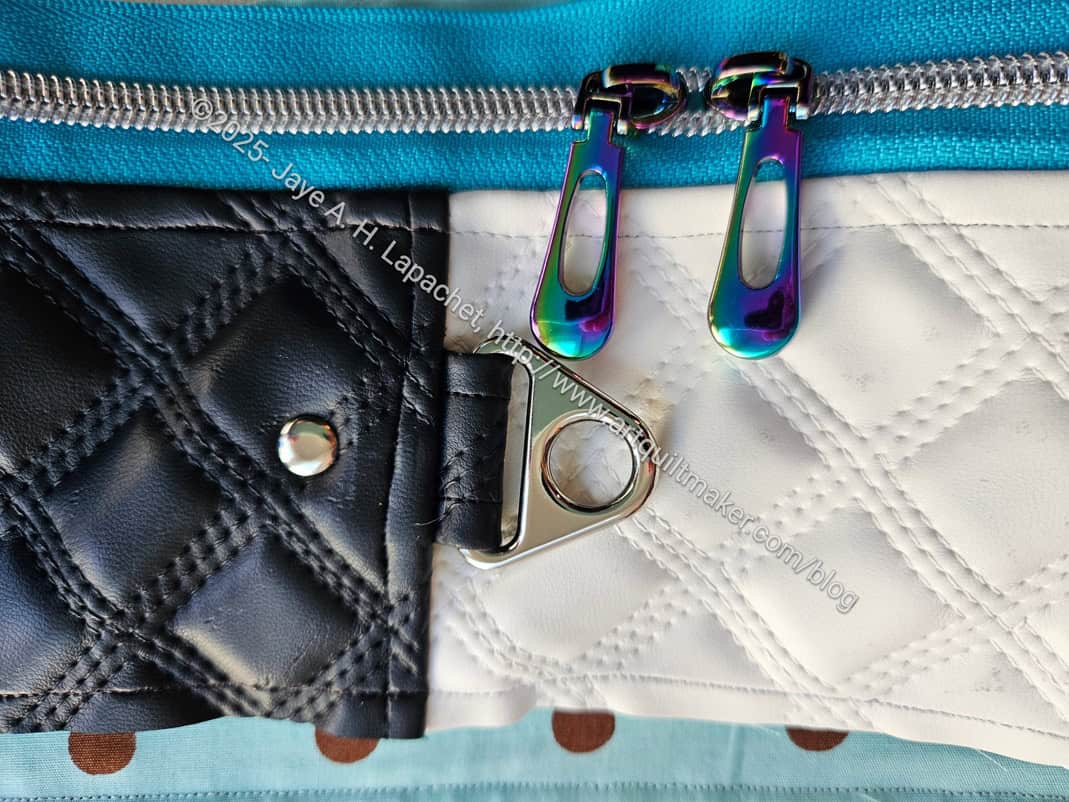
Pandora Charisma: rivets
With the panels done, I can now start assembling the bag. The first thing was to make the zipper gussets. I started over the weekend, but then, almost immediately, had to rivet the D-rings. I haven’t done much with rivets in the past, but I think that this bag will get harder usage and my machine is struggling, so off I went to MaryC’s again for more rivets.
Pandora Charisma: zipper gusset
The zipper gusset is one of the largest I have made. Fortunately I had enough of zipper by the yard (from my various purchases at Sewlarium) to use for all of the small and long zippers.
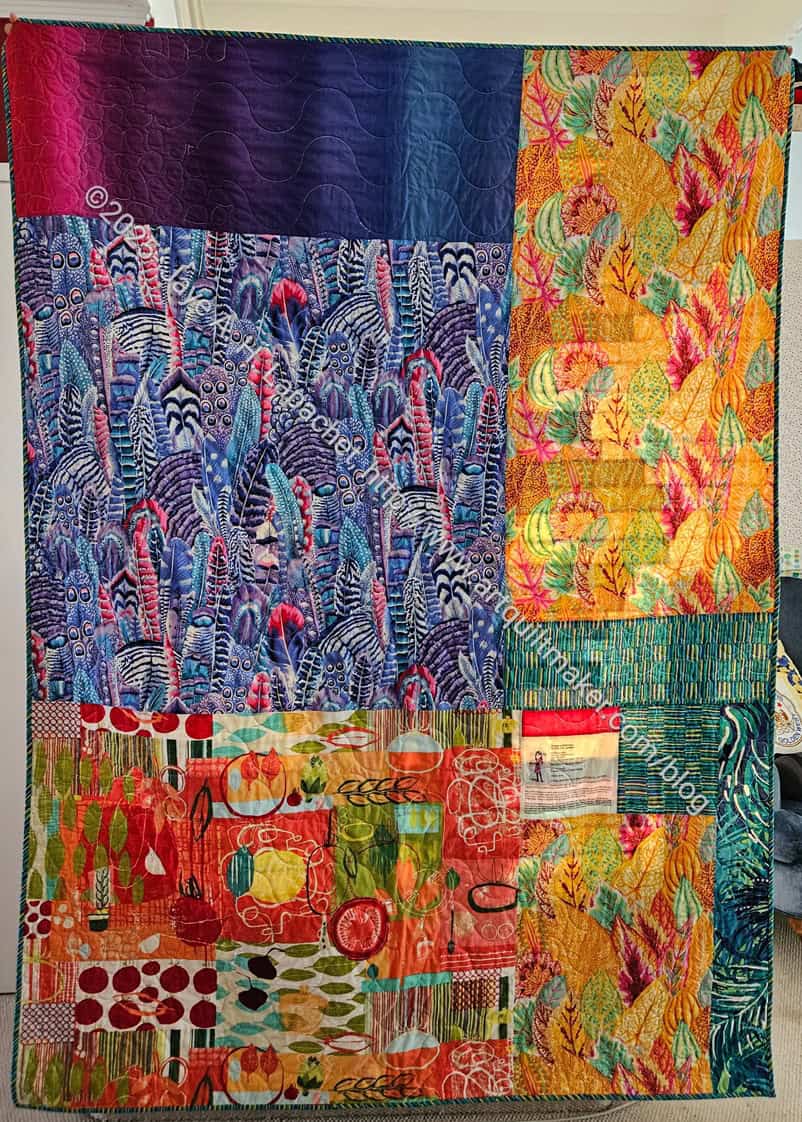
This was a great quilt to finish, because I’ll be really happy to see how the recipient likes it.
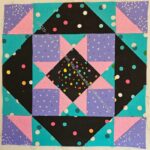
I think I am calling this quilt Gelato, because of the style in which I pieced the first one, but more because of the name of the fabric I used for the first quilt.
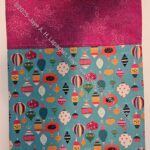
Gelato #2 back
The back is pretty wild, but I also like how cheerful it is. This is what happens when I pull out all of my backing fabrics and pull out ones I haven’t seen in awhile.
I know many of you sincerely dislike January, but I LOVE it! It is my birthday month, which is awesome. More importantly, however, it feels fresh and new and full of possibilities. Thus, today, February 1, is the end of January for another year and one of the saddest days of the year for me. People have told me to buck up followed by their stories about Fabulous February. I haven’t been able to shake off the sadness of no more January for another year. Thus, I wanted to do something fun and cheerful.
EPP Ball #11
After finishing the binding on Triumphant, I felt the lack of a hand project. I need another big EPP project, but haven’t committed to one yet. I need to finish La Passacaglia, but am at a point where I need to fish or cut bait on an idea. As a result I started another EPP ball. These are pretty fast to make, which isn’t great for my hand sewing needs. It is however, keeping my hands away from an addictive game on my phone.
I pulled a few 5 inch squares from my 5 inch square bin and began sewing. 5 inch squares are one of the sizes I cut when I am scrap processing.
I don’t have a baby to whom to give this one, but I am sure one will show up in my life.
Pantone Project – it has been more than a year (where does time go?) since I worked on this. I need to get back to it.
Cut Out & Stopped
EPPic – This is all cut out and I have made tiny steps towards starting
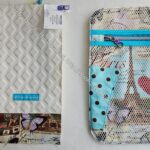
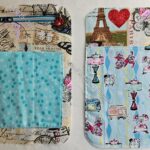
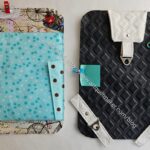
Paris Cell Phone Wallet – This is all cut out and really a small, quick project that shouldn’t be on my list this long.
Rose Petrillo bag – I found the pieces for this bag cut out, but not sewn.
Still UFOs
I still have UFOs. Who doesn’t, after all? A project in the ‘UFO’ category means I am stalled, it hasn’t been worked on in awhile or it is waiting its turn to be worked on. The list is a lot shorter and the projects are newer, for the most part.
I am annoyed that some of these are still UFOs. This is the year to fish or cut bait: some of these will be tossed.
Something changed. I am not sure what. Understanding? Small success? I don’t know, but something clicked into place and I am back on track to make progress on the Pandora Charisma.
First, I have been reading the pattern and watching the video to help move me along. This should be the magic combination, but the video’s sound wasn’t working so I had to read the closed captioning. First world problem, I know, but something was missing. It could be the way I learn.
Pandora Charisma back panel with connector
The other day, the video’s sound magically started working! This was so helpful.
I have been using the Diamond quilted vinyl from Sewfisticated and I am pleased with the overall look of the back panel. I was concerned with the white and the black combo when I put on the bottom D-rings, but the connector at the top made the whole thing look good.
Next, I was confused about the interfacing. Decovil was one of the options. The designer provides several different options, which is awesome, but also confusing. The presenter on the video talked a little about the stick-on Sewfisticated interfacing. I have some and decided to try it. Magical! I don’t have to iron it or sew it on, which is important for the exterior I am using, which cannot be ironed.
Also, I bought a Teflon foot for my machine, which really works well.
Finally, seeing what the presenter did with the D-rings (mine are triangles on white strips in the above photo) and using the Teflon foot made the sewing so much easier.
So, I think I am back on track. Fingers crossed! I have 8 days to go before the UFO challenge deadline. Will I make it?
LillyElla has some great free tutorials including a Mini Maker Station, a fabric basket, the Undercover Maker Mat as well as the Hold Tite Folio.
Jeff Rutherford shared a couple of cool looking quilt patterns / older QAL projects in a post. The first is Between the Lines. This is a modern row quilt and he obliges by showing us his progress. He also shares Sugaridoo, another older Bernina QAL that is also a row quilt. Since this is old and you don’t have to wait for the next week’s pattern, check the overall page for all the patterns and information.
The Retreat Bag Pattern by Emmaline Designs has been updated and the updated pattern is on their site. I have made this bag a few times and think the updates look interesting.
Libs Elliot is teaching Chaos with a Twist and there are only 2 more days to sign up.
I searched Potato Chip quilts after my post the other day and came up with this great version. The post talks about what potato chip quilts are, how to make them, etc. I like how the example starts with a larger square and then, essentially, sashes it with the potato chip patches.
I found a wide selection of toweling on the Fabric Essentials website. I like toweling for gifts. Who doesn’t need a good tea towel? Fabric Essentials also has an interesting selection of books, including one of my favorites, Around the Block**. I haven’t seen this book for sale in ages.
My friend Laura has an Etsy Shop. Who knew? Check out her collages.
Tula Pink’s Prince Charming Deja Vu is now available for pre-order. This line is not one that I will buy on pre-order. I’ll wait to see it in stores. I really wish Free Spirit would do a Deja Vu line for Martha Negley. I love her vegetable prints.I have some with a purple background. I should make a bag out of it so I can enjoy it regularly.
Bloomerie Carousel Fabrics
As mentioned, I bought a couple of yards of fabric from Melody Miller’s Carousel collection from Bloomerie Fabrics.
I saw this HRT paper at Boerma’s when I was looking to use my birthday coupon. I had never heard of that particular paper before, but thought it was really interesting. The foundation paper is also a great way to bust your stash.
I also saw the Quilt Genius Design Tool Kit at Boersma’s. I am a huge advocate of designing your own quilts and this kit looks like a good way to get started. They also have the graph paper as a stand-alone option.
My sister asked me if I used a binding gadget/foot like in this video to bind my quilts. I have tried it, but don’t use it regularly. You?
**Obviously, you should shop at local quilt shops and small businesses. However, if you are too busy or can’t find what you need there, I use Amazon affiliate links and may be paid for your purchase of an item when you click on an item’s link in my post. There is no additional cost to you for clicking or purchasing items I recommend. I appreciate your clicks and purchases as it helps support this website.
I spent most of the day on Sunday making blocks for the Lupine quilt instead of working on the Pandora Charisma. The white strips blocks have been on my mind and I wanted to sew some sashing on to them, so I worked on the Lupine blocks and made the white strip blocks my leaders and enders.
I am quite ready to sew this quilt together. Though I am nearing the end of block making I still have some to sew.
The following is a lesson on different methods of selecting fabric. This is a lesson I give as one of the first classes when I teach beginning quiltmaking.
Color Choice Basics
Use what you love
Use the good fabric
Don’t be boring
Splash Out – be bold
There’s always more fabric
Using fabric you love or your really good fabric means that you will enjoy working on the quilt as well as using it or looking at it once it is finished. Since there is always more fabric, be bold in your choices. Take chances and try new color combinations. Yes, quilts take a long time, but you can always make another.
Fabric Selection
Fabric selection is personal. Think about what you like not what is trendy. Don’t copy the fabric choices of your friends. Quilts take a long time to make so don’t make a quilt that has already been made.
Colors should bring you joy. Don’t use colors because you think you should, such a ‘on trend’ colors or fabrics.
Your opinion matters. Like your fabrics
What you choose at the start is not the final selection.
Add and delete throughout the process
You will gain insight as you work with the fabrics
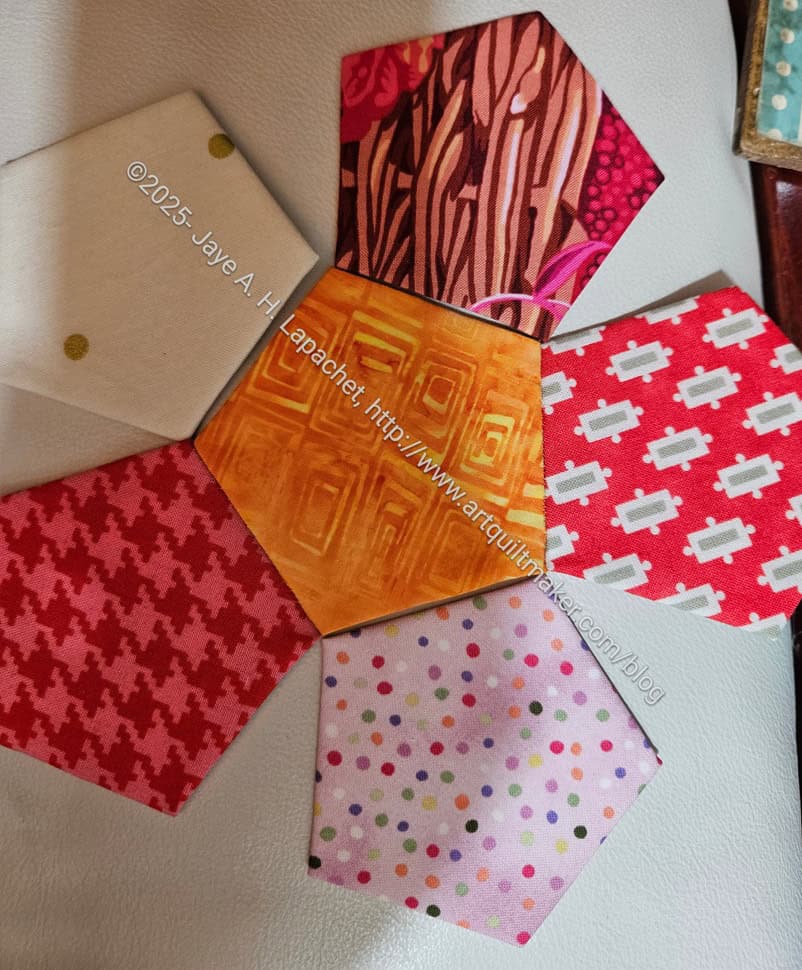
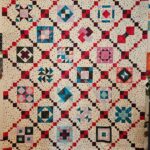
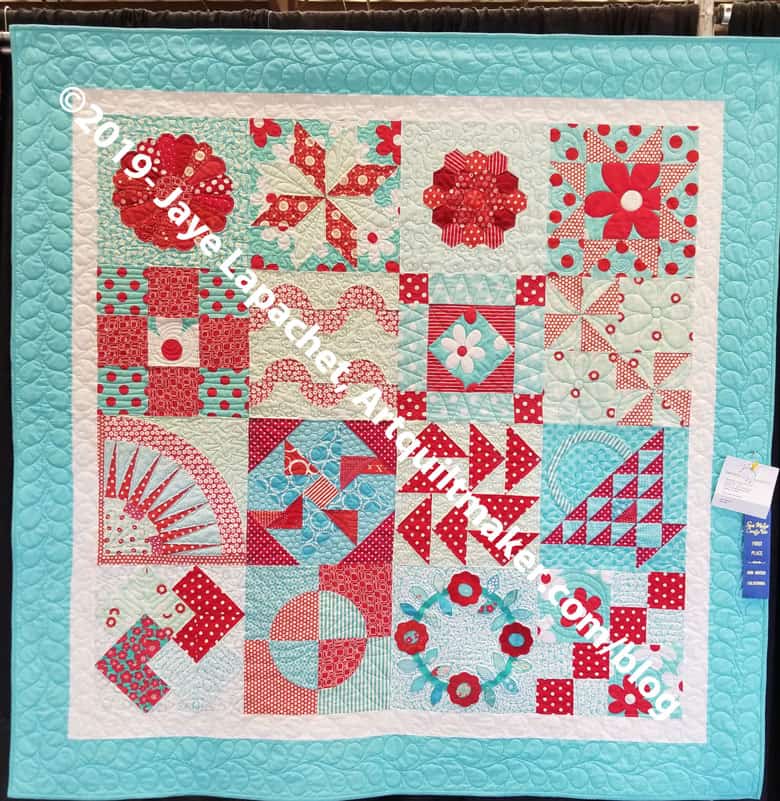
Aqua-Red Sampler with prize
Start with ¼-1/2 yard of 8-10 foreground fabrics
Select background fabric as well
Often background fabrics are neutrals (grey, white or beige)
Splash out! Use yellow, blue, green, pink, or black as backgrounds. They can be effective, exciting and wonderful choices. Also, they can be unusual when the fashion is to use neutrals
Revise (add or delete) fabric choices after you have made a few blocks
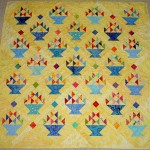
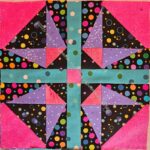
Cheerful Baskets
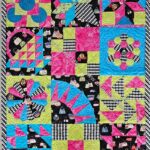
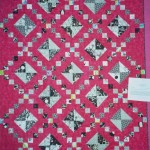
Punk Rock Quilt
Cheerful Baskets still has a light background, but looks nice and warm with yellow instead of white. Also, yellow is across from blue on the color wheel so the baskets play nicely with the background.
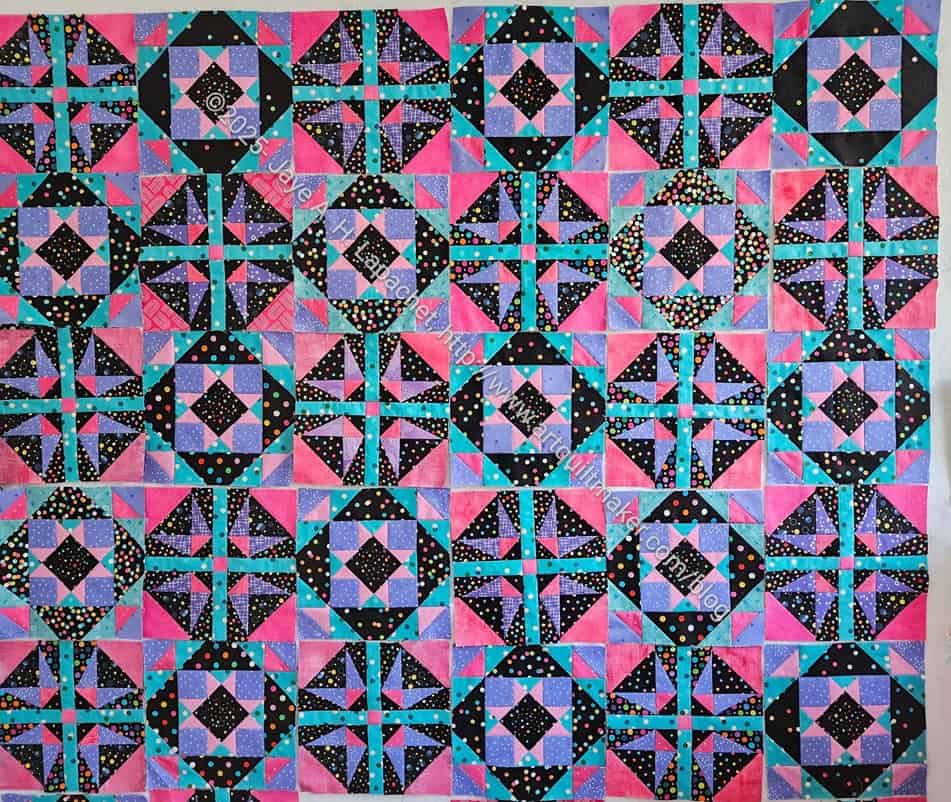
I turned background and foregrounds on their head in the Punk Rock Quilt, using pink for the background and black and white prints for the foreground.
Design Wall, Labor Day 2017
Stand back and squint
If some of the fabrics blend together, you will not be able to distinguish between them in the quilt.
If you like or want a blendy effect GREAT!
If you want to see each of your fabrics very clearly, then remove some of the fabrics that blend together.
If you love each of the fabrics you have chosen, move the fabrics around so the ones that blend are not next to each other.
8 Methods for Fabric Selection
Method #1: Selecting by Value
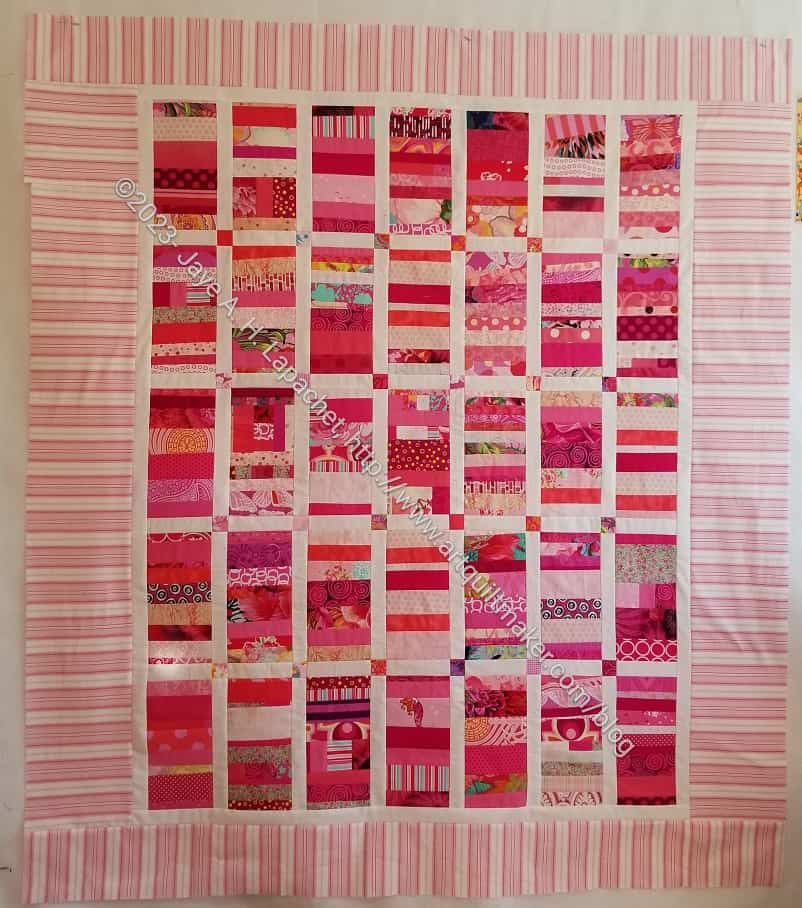
Pink Strip donation top – finished
Select one color to be your main color
Tone-on-tone or solid colored fabrics work well for your main color, but don’t limit yourself if you love a, for example, red and white print. After you have selected your color, then you will choose a light, medium and dark of that color, e.g. light blue, medium blue, dark blue.
Value is important. There are lots of quilt fabrics that have a medium value. Choose enough lights and some darks, so that the piecing of your blocks shows up and the eye of the viewer moves around the quilt.
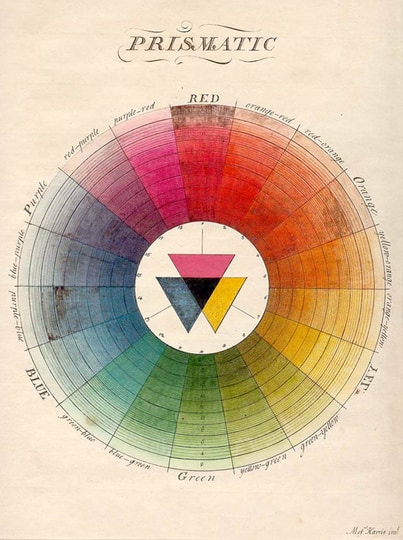
Use a color wheel to help you.
Apartment Therapy Color Wheel
Color Wheel selection
All of the hues in one of these groups will be your palette
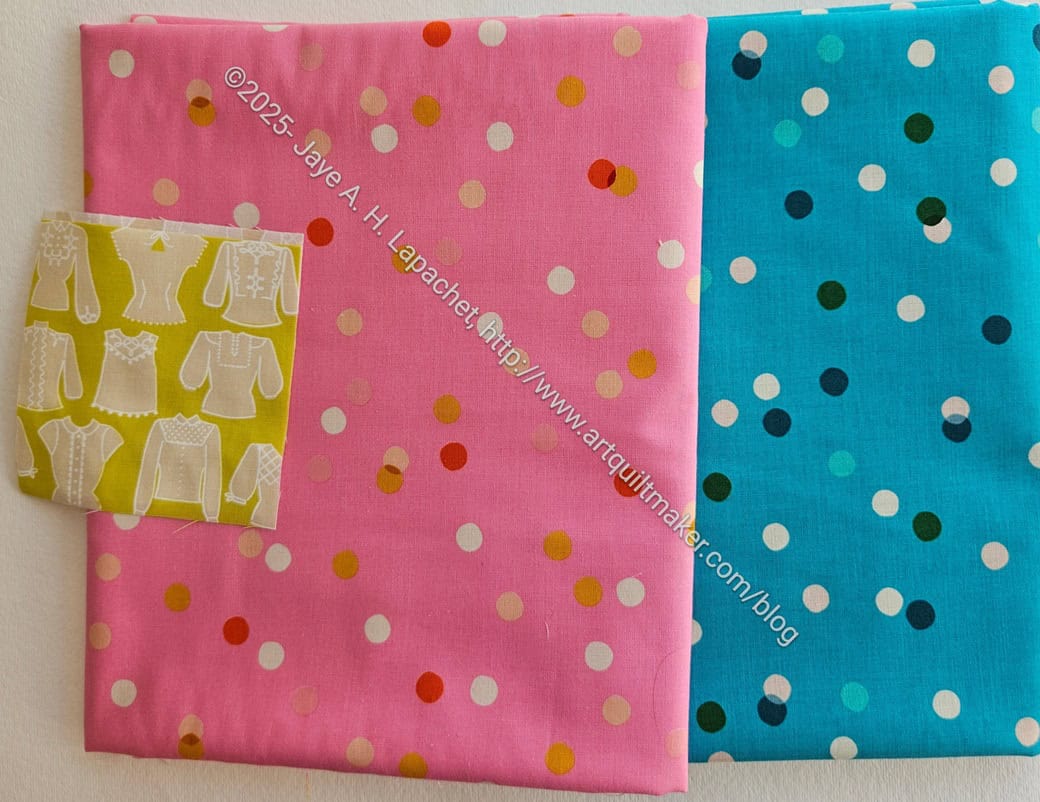
Method #2: Heroine or Focus Fabric
Select a lovely, busy print with more than 2 colors.
Large scale prints work well
Lots of colors gives you a lot of colors from which to choose. All of the colors, or a selection can be used to make a successful quilt.
Note: Many large scale prints are the main fabric in a line of fabric.
Once you have your focus fabric:
Handbag Sampler – ready for binding
Choose fabrics that have the colors you find in the focus fabric
Select some solids or tone-on-tone fabrics to give the eye of the viewer a resting place
Vary the size and scale of prints.
Try not to match up the colors exactly. It will add interest if the colors are slightly off the color in your main fabric.
Include the complementary color to the focus fabric’s main color to pop that main color
If you want each of your fabrics to shine, make sure you have lots of contrast
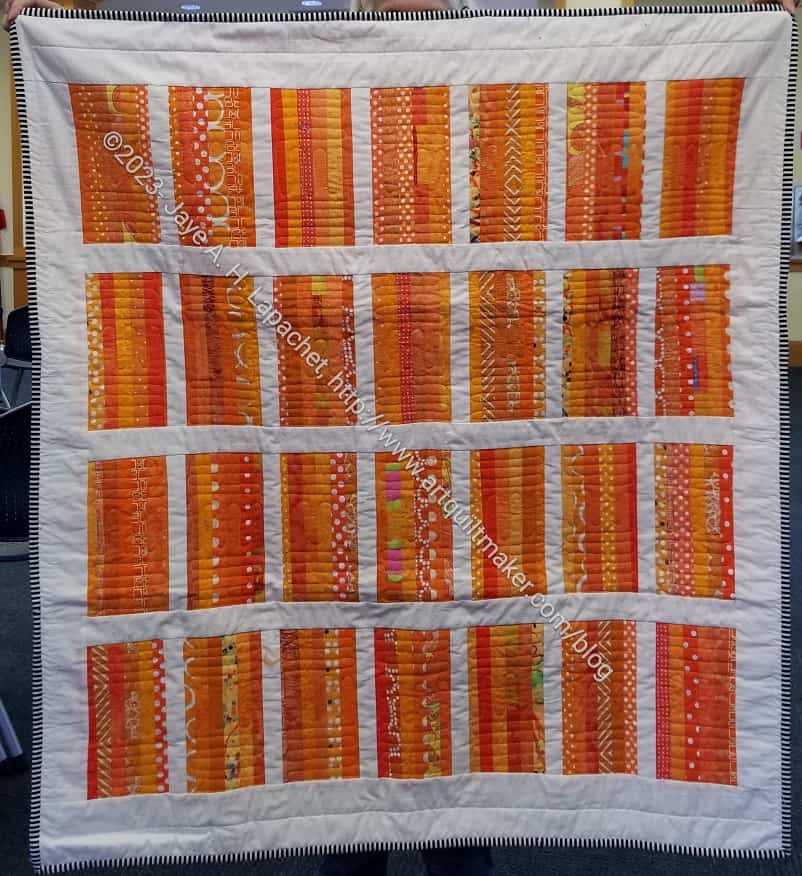
Method #3: Monochromatic / Two Color
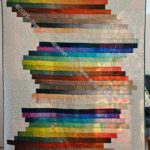
Finished: Orange Vertical Strip
Monochromatic is a method where you choose one color and include many different fabrics in that color.
You can also choose a variety of different fabrics in the same color family and one background.
Monochromatic and two color quilts have a long history in quiltmaking. Think of red and white quilts.
If you pull from your stash, usually these quilts come out well since most quiltmakers buy tones and shades of colors. For example, clear orange versus dusky orange. I am a clear orange girl.
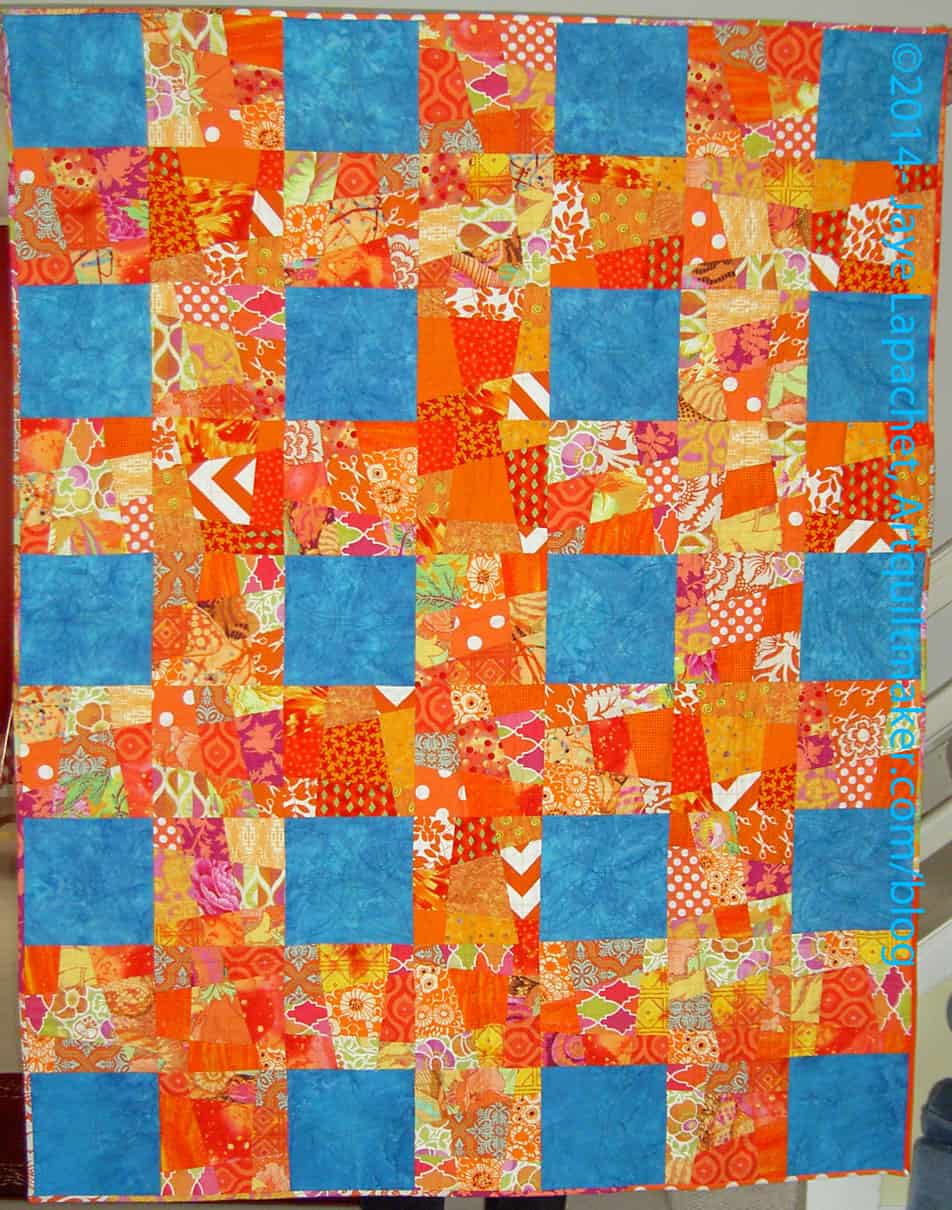
Finished: Wonky 9 Patch
The two color method is a slight variation of the monochromatic method
Choose one color and a background fabric (red+white or blue+white are popular examples).
Using the complement of your main fabric can be super striking. This orange and blue quilt is one of my most successful quilts.
Method #4: Dealer’s Choice
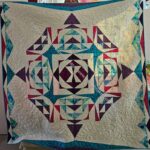
A-B-C Challenge with 1st Place Ribbon
Dealer’s Choice is the method by which you choose whatever fabrics you like.
These could be the newest or the most recent you have bought.
Put all the colors you like together
You can control the look by choosing a type of fabric like solids or all dotted fabrics.
Method #5: Scrappy
Scrapitude Carnivale Finished
This is similar to Dealer’s Choice. The difference is using scraps. There are often more fabrics and fewer duplicates using the scrappy method.
This can be a very serendipitous method
Use a lot of fabrics.
Use a variety of colors
Make sure there is a variety of contrast
Use a variety of motif scales – big prints, small ditsy prints, etc
Use fabrics, colors and prints you like
Curate your fabrics so the overall quilt appeals to you
Have a good mix without too many of one color or value
Scale means that you think about having different size motifs
Solids and tone-on-tone fabrics to provide resting spots
Distribute similar colors across the quilt; try not to concentrate one color in one area unless you are trying to gradate the colors
Flowering Snowball Finished
Using a similar background (dots on white in the example above and black on white in the example, left) creates success through lack of confusion. Not having a defined background can make the quilt look confusing to the viewer.
I also curate my scraps. If I think a patch will look ugly in the quilt, I don’t use it. I don’t use the ‘paper bag’ method, because I am a grownup and can choose fabrics without a gimmick.
Method #6: Whole Line of Fabric
Using a whole line of fabric can be a stress free way of starting your fabric selection process. A whole line provides a starting place.
Choose a line that has a lot of fabrics in it. Some current lines don’t have enough different fabrics for an interesting quilt. For example, the Parisville Deja Vu line by Tula Pink has only 8 fabrics. One thing that can help you overcome such a problem is that many fabric designers use similar colors in their lines. In Tula’s case, you can use several lines to make up the fabric selection for your quilt, because all of her fabrics coordinate.
Remove between 10-25% of the included fabrics. Collections tend to have a lot of medium colored fabrics as well as a lot of fabrics with a similar scale in the motifs. You need variety
Replace the removed fabrics with lights and darks
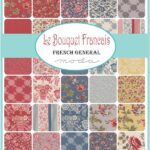
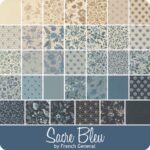
French General whole line
Sacre Bleu whole line
These lines are an example of mostly medium fabrics, which would make a beautiful blendy quilt. However, if you want contrast, you need to add fabrics.
I think that one dark dark on the bottom right of the Sacre Bleu photo would stick out like a sore thumb, though, which is why I like 10-25% lights and darks.
Fresh Fruit: San Mateo County Fair 2014
Shops also create curated packs of fabrics.
Using someone else’s color choices can be a good way of learning about color.
It is also a good way of learning what you like and what you don’t like.
Adding a background that isn’t included in the line can make the quilt more interesting.
It is a good learning experience to use someone else’s fabric selection so that you can learn. This is where a tool can come in handy. You can compare the designer’s color choices to palettes in the tool to get an idea of what they were thinking.
Method #7: Inspirational Image
Kirkham & La Playa house – color inspiration
Magazines, blogs, websites, Instagram all pay a lot of money for great photos. If you find one you like, you can use it to select colors for a quilt.
Use a photo you snap as you move through the world to create a color palette. It can be an exercise even if you never make the quilt. Choose a photo, choose fabrics similar to the colors you find in the photo. Decide if the exercise is successful. Learn from the exercise.
Nature can help out, especially with monochromatic quilts. Next time you drive through the mountains, check out all the different greens you find on the hills where there are forests.
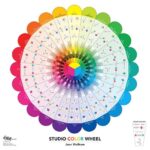
Method #8: Use a Tool
Studio Color Wheel
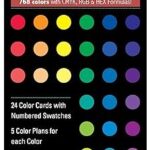
Ultimate Color Tool
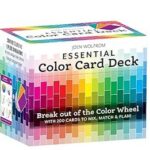
Color Card Deck
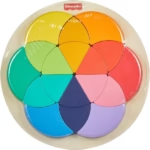
Fisher Price Color Wheel
Tools are a great way to learn, though try not to rely on them long term. Tools are great for solving a problem. When you have a quilt on the design, but feel something is missing, pull out your color wheel, or other tool and see what you can add or delete.
Important things to think about when picking fabric:
Do I like these fabrics?
Do these fabrics appeal to me?
Will I enjoy looking at and working with these fabrics?
Do they feel good in my hand?
Do I like these colors?
Is the value correct?
Is there enough contrast?
Do I have a variety of large and small prints? (Scale of prints)
Amounts of the fabrics is not as high priority, because there is always more fabric.
If you are trying to add or remove fabrics, check out the post I did when I was working with Frances.
The Bottom Line
The bottom line? Make visual decisions visually.
This means hang your fabrics on the design wall (or lay them on your design floor or pin them up on your clothesline) and then stand back and look at your choices. Leave them up for a few days so you can see them as you walk around.
If anything bugs you, make the piece smaller. If it still bugs you remove it. Add new fabrics in and remove fabrics until you have a palette you like.
I used piecing the Lupine blocks veg a bit. Now that I know what the two blocks look like I am able to piece them pretty quickly. I mindlessly pieced about nine of them one day when I needed a rest, but also needed to sew.
Lupine blocks- end of Jan 2026
I know I keep bouncing between the Pandora Charisma project and this project. These are the two that are front and center at the moment.