Pretty Little Mini Quilts by Ray Hemachandra
My rating: 3 of 5 stars
This book was sent to me for free by Lark Books unsolicited. I was pretty excited to receive it! It is part of the Pretty Little Series, which also includes another book about pillows. The ‘mini’ part of the title is defined, in the Introduction, as projects that are less than 36″ square. This size is appealing to people with small spaces to display their works and those that want to try a lot of different techniques.
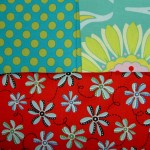
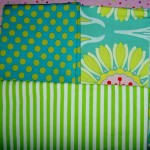
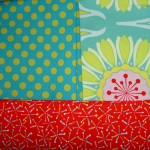
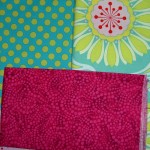
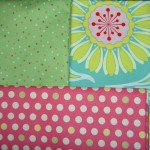
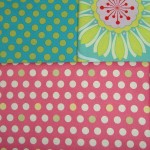
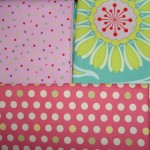
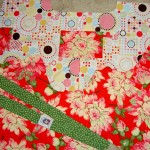
This is obviously an inspiration book. The colors, shapes in the projects, and design of the book all make my mind swirl. The book has a high level of eye candy from the beginning. The photography is very well done. The layout and graphics were noticeable right away. What drew me in, immediately, was the hexagon piece, called Spanish Flowers (directions on pg.102-105) on the inside front flap. The colors are really vibrant and the piece has an interesting shape. It is different from the other hexagon pieces I have seen. Another element I really liked were the different colors on the page edges. The color for each chapter is different, adding interest and giving the reader an additional visual cue as to where they are in the book. The images of spools and stacks of fabric seen before page 7 are appealing as well.
This is another project book which tries to go it alone. It devotes the first quarter of the book to basics including information about different types of fabric and tools, what a fat quarter is and how to make a quilt. For the size of the section, it is a relatively comprehensive section. The paragraphs on tools are entertaining. For example, under the section entitled needle threader, “Folks with perfect eyesight and rock-steady hands can skip this tool. Otherwise, save yourself some frustration by using a needle threader.” The section continues and I like the tone. It isn’t dull and a bit Mark Lipinski-esque. I wonder if that is a new style of writing?
I didn’t like the references to “…thoughts of a quilting bee near that little house on the prairie” or “Unless you’re stitching up petticoats, nothing you’re sewing has stronger ties to the past than quilts” in the Introduction. Once I read the second paragraph I got joke, but the first couple of sentences put me off. I think clothes were probably made before quilts and I prefer not to read assumptions like the above without references to the source. This isn’t a historical tome, so I shouldn’t demand it, but such statements can perpetuate untruths and questionable “facts” and there are enough of those going around the quilting world.
I do think this book is one that can open the minds of readers to the possibilities of quiltmaking. the different stitching, both hand and machine as well as the colors and variety of techniques all show that quiltmaking is not boring. The book does show a 9patch (pg.45-47), but it also introduces the idea of scanning a photo and turning it into a quilt (pg.77-79). I am not that interested in photo realistic quilts, but I do think the photo of the “Portrait of Velma” piece shows a quilt that is pretty well done.
I really wish that major publishers would each write a basic sewing/quiltmaking book and refer back to it rather than recounting the same basic quiltmaking information over and over in every book they write. The idea of a book like this teaching a new sewist to quilt from a list of supplies and 12 steps in a project is crazy as well as potentially frustrating. I know little to nothing about the costs of producing a book, but I do know that publishers are under fire and want to appeal to as many readers as possible, which is why they use this kind of tactic. I would keep the layout the same, but refer back to a book with much more detail on how to make a quilt. A direction such as “Quilt the quilt using diagonal lines that run through all the large white squares and diagonal lines that run through all the checked squares” seems so easy. After all, whole books are written about machine quilting, such as those by Diane Gaudynski, Harriet Hargrave and Sue Nickels. The beginning section, as noted above, does have more information about the mechanics of quiltmaking, which are a big help. I think it would be a service to add a comprehenisve beginning quiltmaking book to a publisher’s line that they could keep in print over a long period of time and revise as needed. Such a book would also have an appeal to new quiltmakers over time.
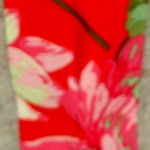
There are a number of appealing projects in the book. My favorite is the Corner Store pattern (pg.51-53). This is the first pattern, which I noticed, that acknowledged that there is a quiltmaking community outside of this book. The designer refers the method of piecing as Gwen Marston‘s ‘liberated piecing’ technique. I think the book would have benefited from other references to the quiltmaking community. I like this project because of the red background. I also like the line drawing that was included to show what the designer meant about adding triangles to a squares. I have a lot of triangles which work for this project from cutting the FOTY 2010 diamonds and seeing that line drawing inspired me.
I liked the ‘Have a Cup’ project as well. The style of it gets ideas related to my various House and Garden quilts flowing. One thing I would have liked to see, in this quilt in particular, is a couple of versions of the quilt made in different colorways. My mom and I had a discussion about several of the projects and the discussion centered around the colors. I kept reminding her that she didn’t have to make the project in those colors, while she insisted that colors drew her in or repelled her. Again, I know the cost of the book is a factor, but that would have been a nice addition.
“Give me a Hand” (pg.114-117) is a good reminder that we can make our own patterns and redwork is especially conducive to family type quilts.
One project “Star & Cross” (pg.126-129) includes paper piecing, which is interesting. This book really tries hard to give the reader a full quiltmaking experience.
The other inspirational part of this book is the “about the designers” section. There are two pages worth of designers in this book and the editors have included a brief bio as well as links to their websites or blog. Really nice to be able to look up more of their work. I have heard of a number of the designers and am actually Internet acquaintances with two of them.
I was sorry to see that I would need to take the book to a copy store and enlarge the patterns. I prefer to have full sized patterns in a pocket in the back or download them from the publisher website.
The book also gets high marks for including an index and a comprehensive table of contents.
All in all I like this book for its inspirational qualities. I think it has the potential to help quiltmakers think outside the box.
View all my reviews, including non-quilt book reviews