I don’t really know if I should count this as a finished project as:
It is a ‘doing good’ quilt
I pieced some and bound it. Gerre did the quilting and Peggy did the choosing of fabrics and the cutting
I suppose that #2 is kind of irrelevant since I don’t quilt my own quilts anyway.
I don’t know. Somehow I just don’t feel like I did much on this quilt.
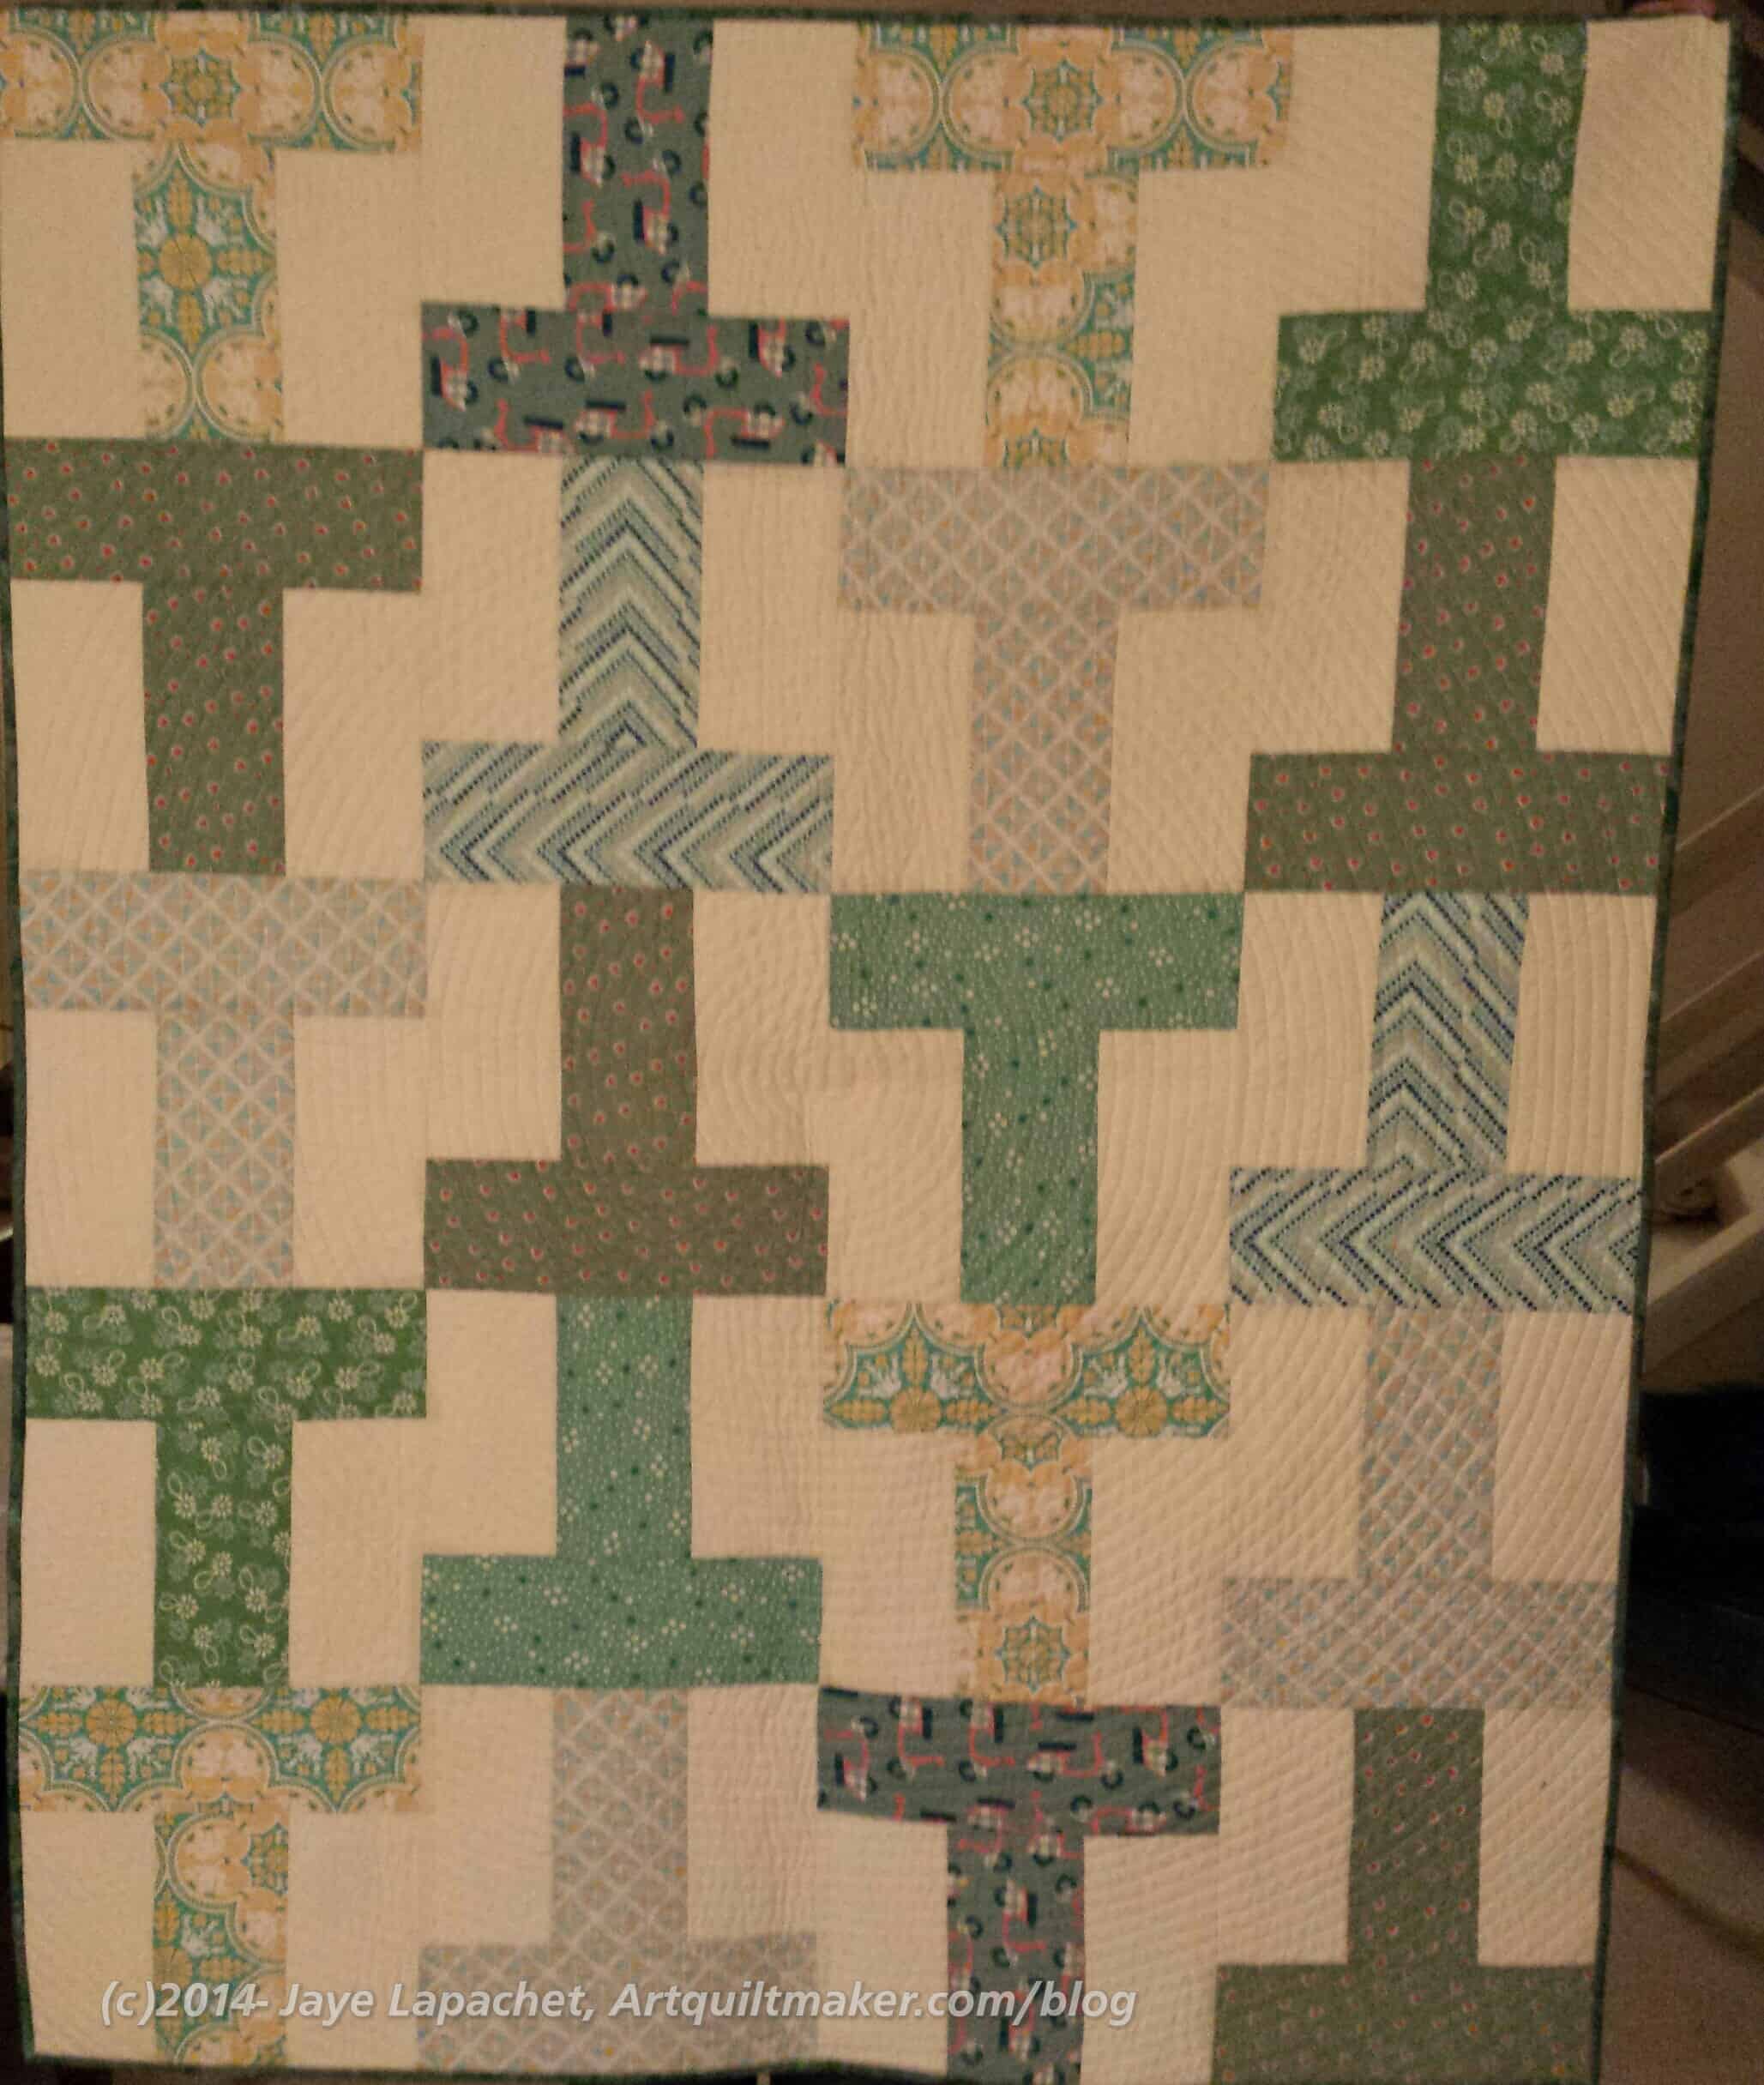
I really want to work with Gerre again. I think we made a good team. I am tempted to cut up some fabrics to make another T quilt, but I need to finish the Teenaged Boy Black & Grey Donation Quilt. I do think I would like this quilt better if the greens weren’t so dull. Still someone will love it.
Still, it is done and someone will enjoy it. I hope.
Pam, over at Hip to be a Square, was saying on a recent podcast, that we aren’t supposed to call donation quilts or charity programs ‘charity’ anymore. It is too offensive to those who are financially challenged. I suppose I can understand that, but I hope the quilts the guild makes are still appreciated.
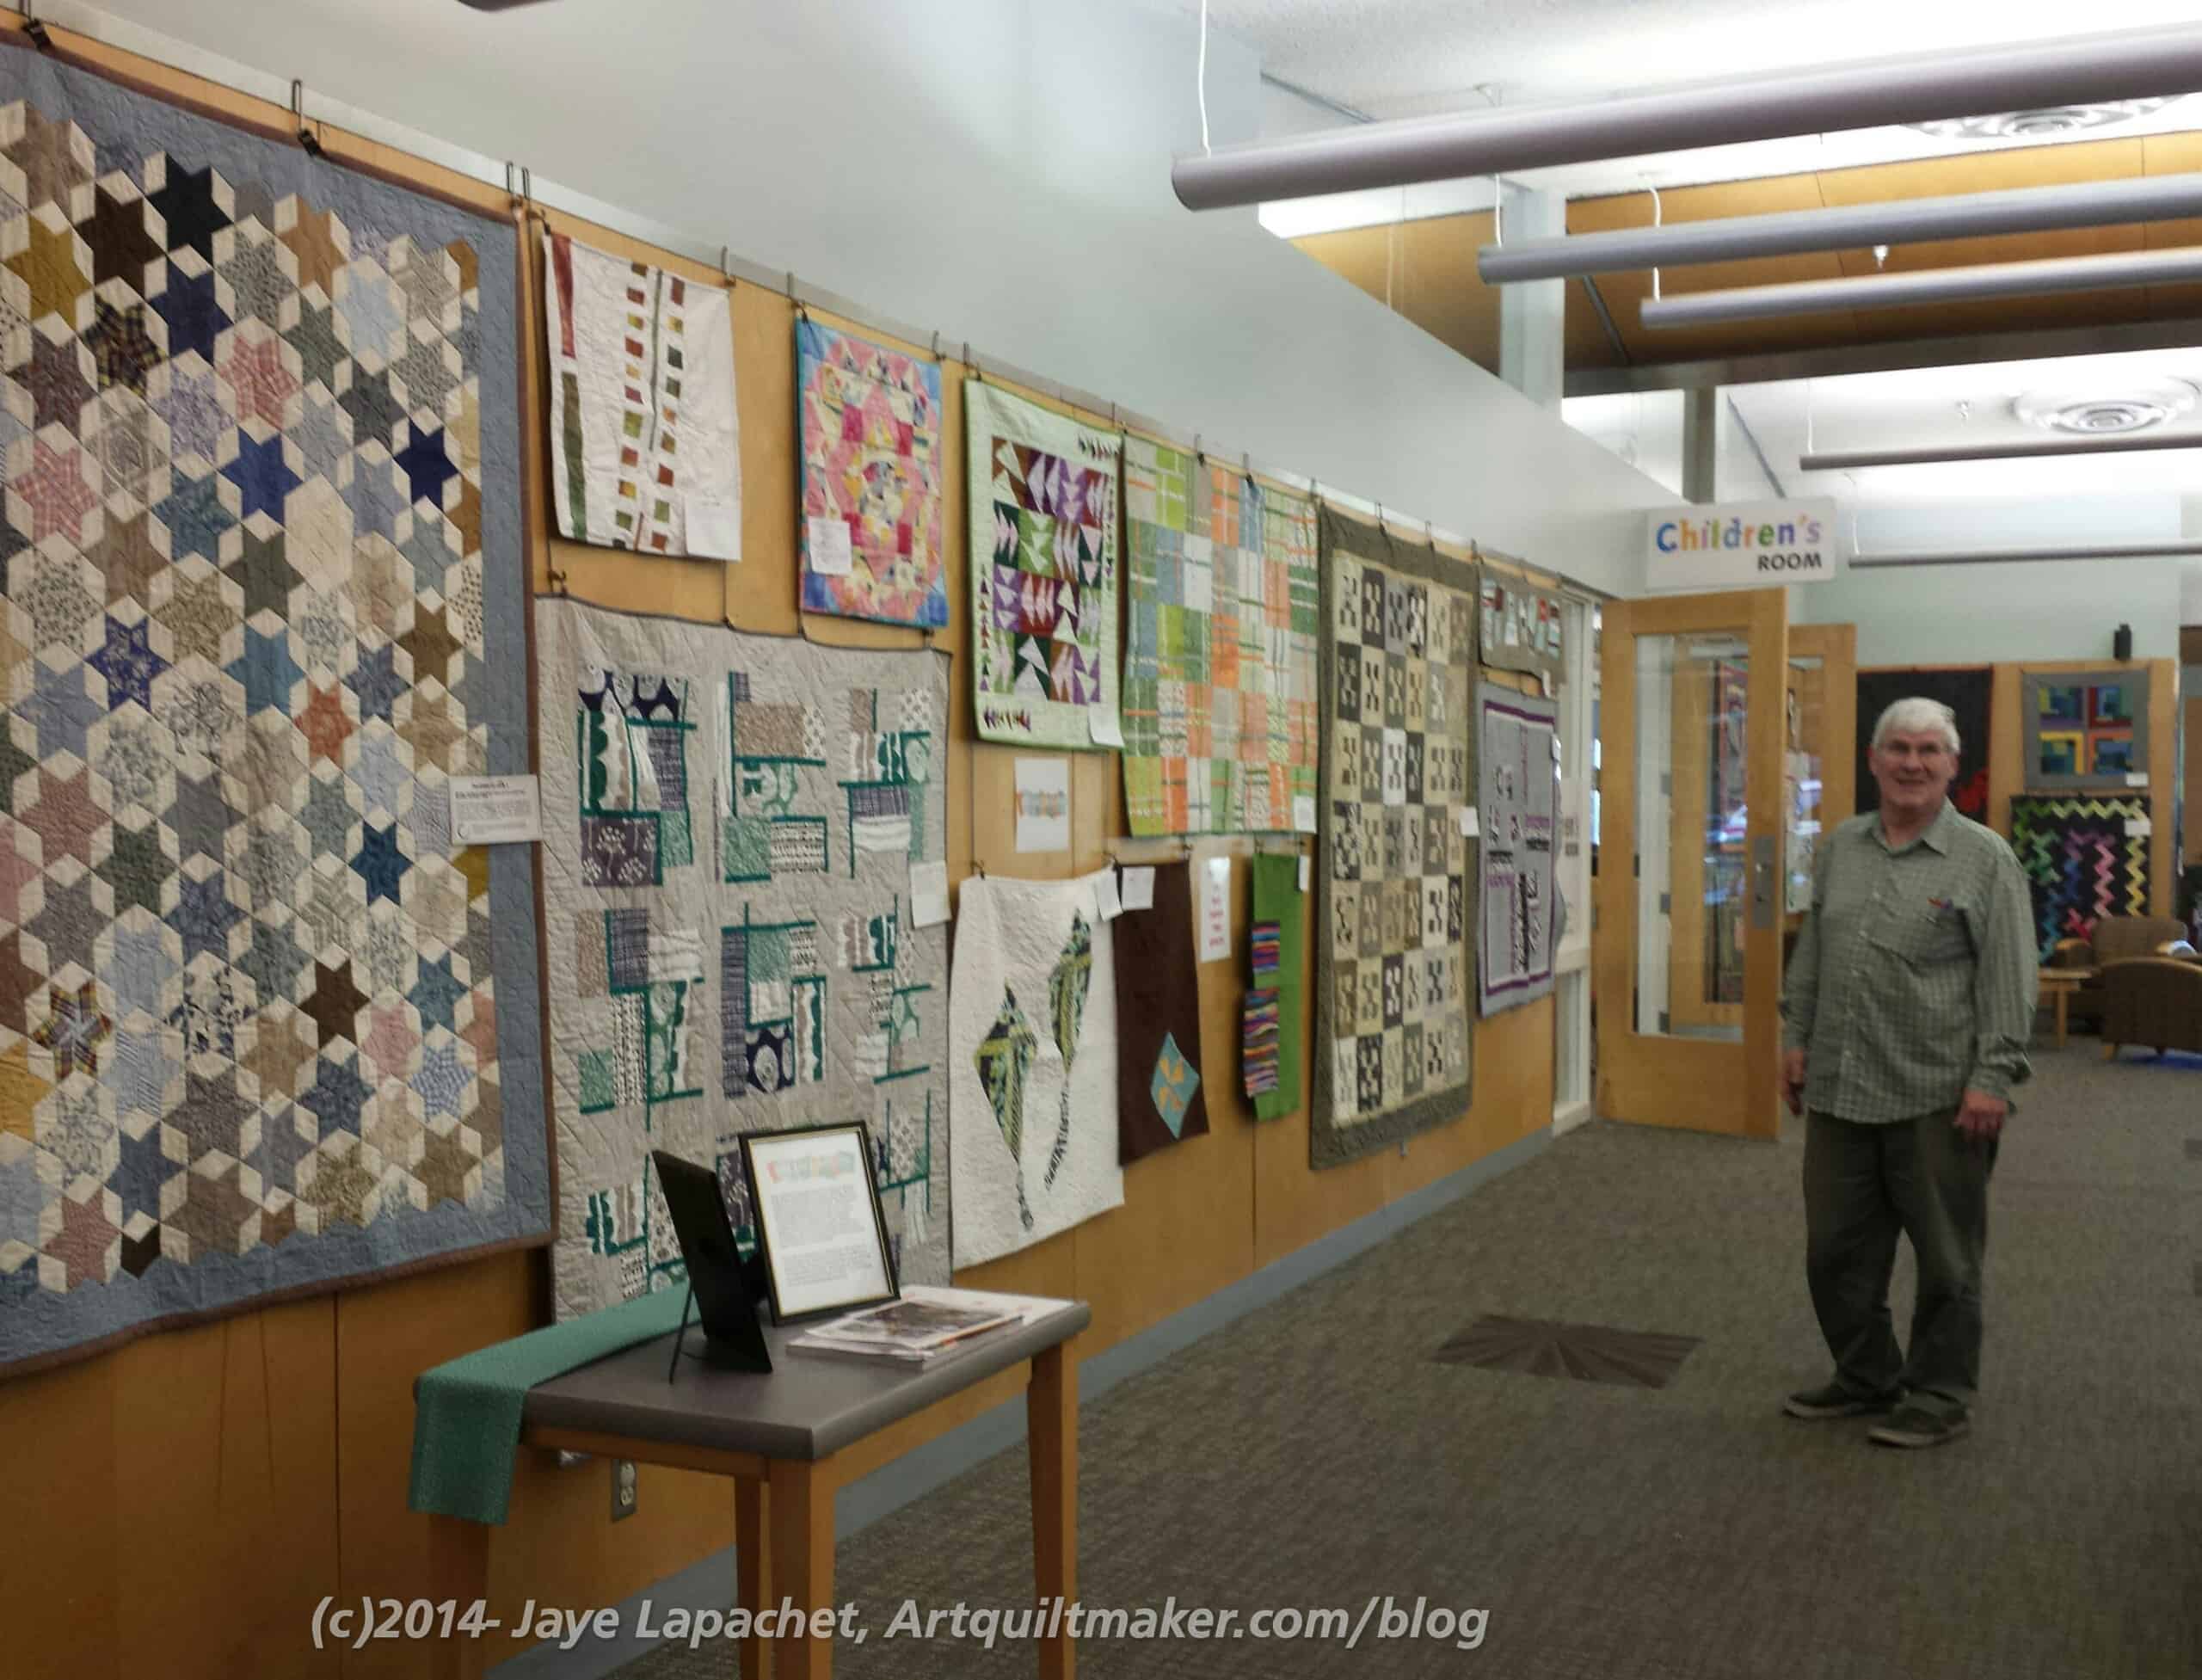
Peggy the Fantastic Energizer (TM) Bunny and pals hung the BAMQG quilt show on Monday and we were all able to view it at the meeting/Holiday Extravaganza on Saturday. Jim, one of our members, was kind enough to stand in as an interested viewer for me. 😉
BAMQG Library Quilt Show 2014
The show is not your regular quilt show, which was nice as it really gets quilts out to the public.
No, I did not enter one. I think the patrons seem good about touching, but I wasn’t sure at the time and didn’t make the time. Maybe next year.
I thought it was a little strange that some of the quilts were hung so low, but then I realized what a great view I would get of them if I sat in the chairs. And I would get a sore neck. Win-win!
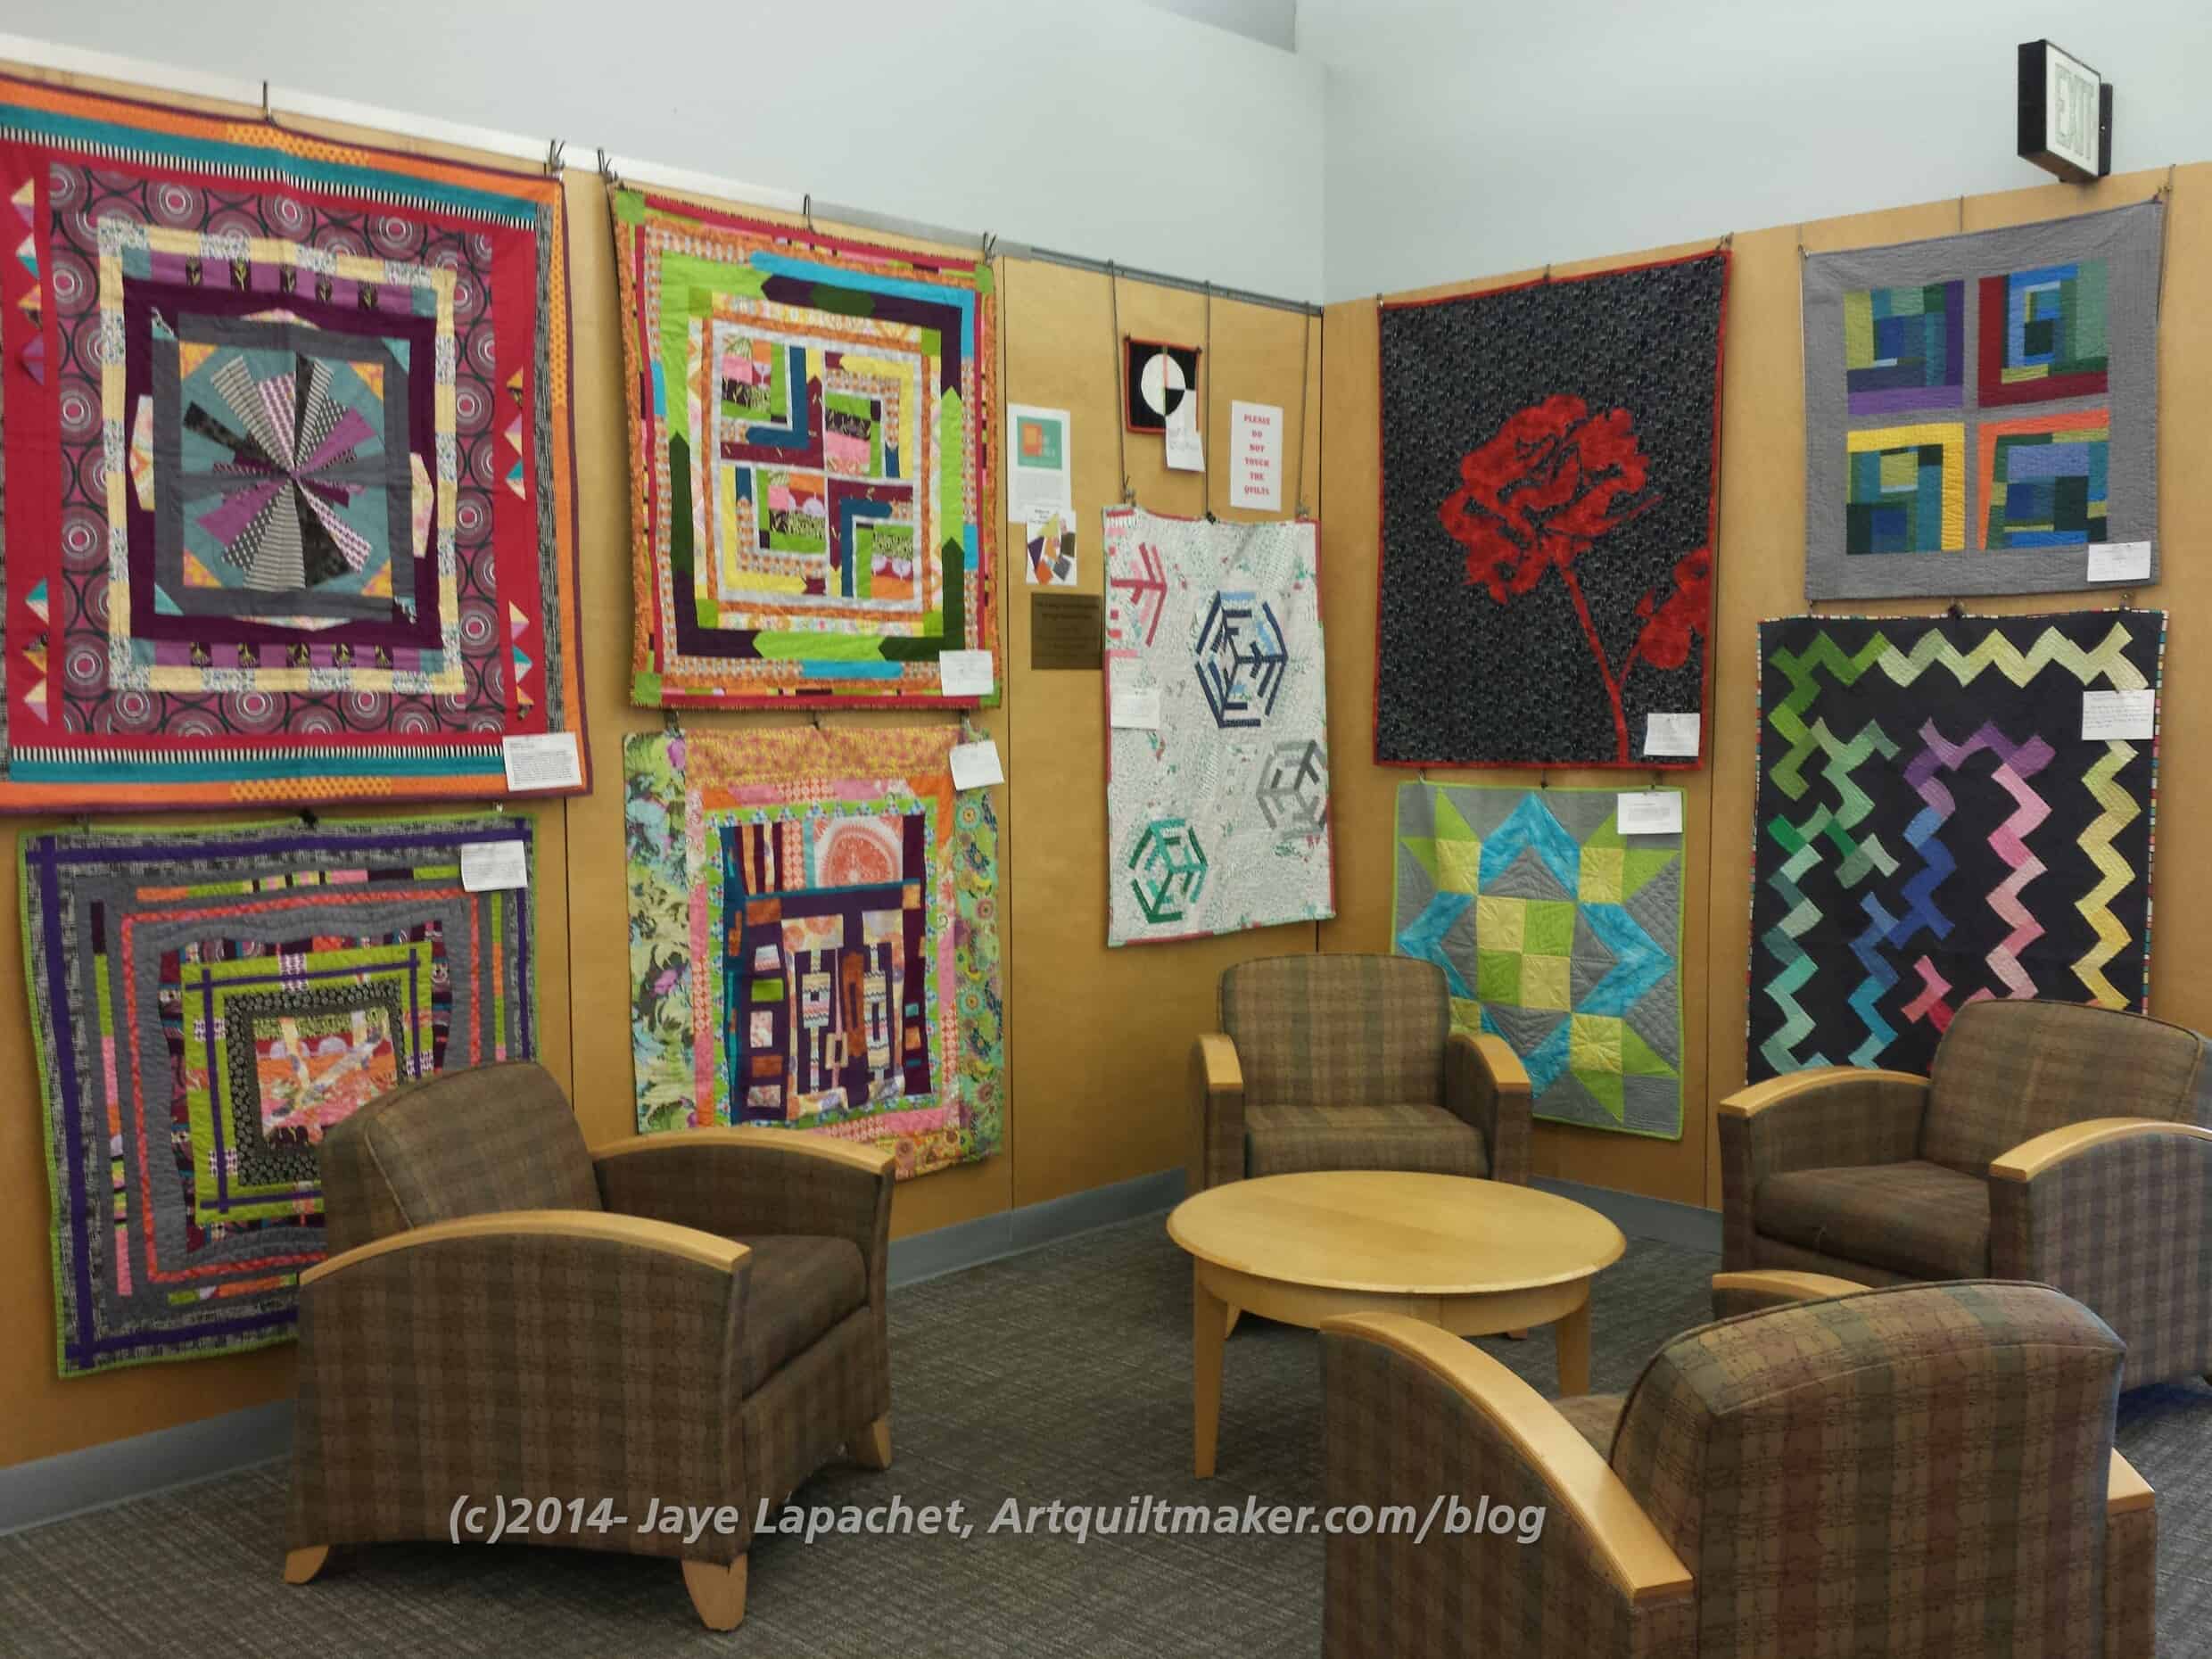
BAMQG Library Quilt Show 2014
There certainly is a wide variety of quilts. I don’t know if they are all modern, but I guess they are now!
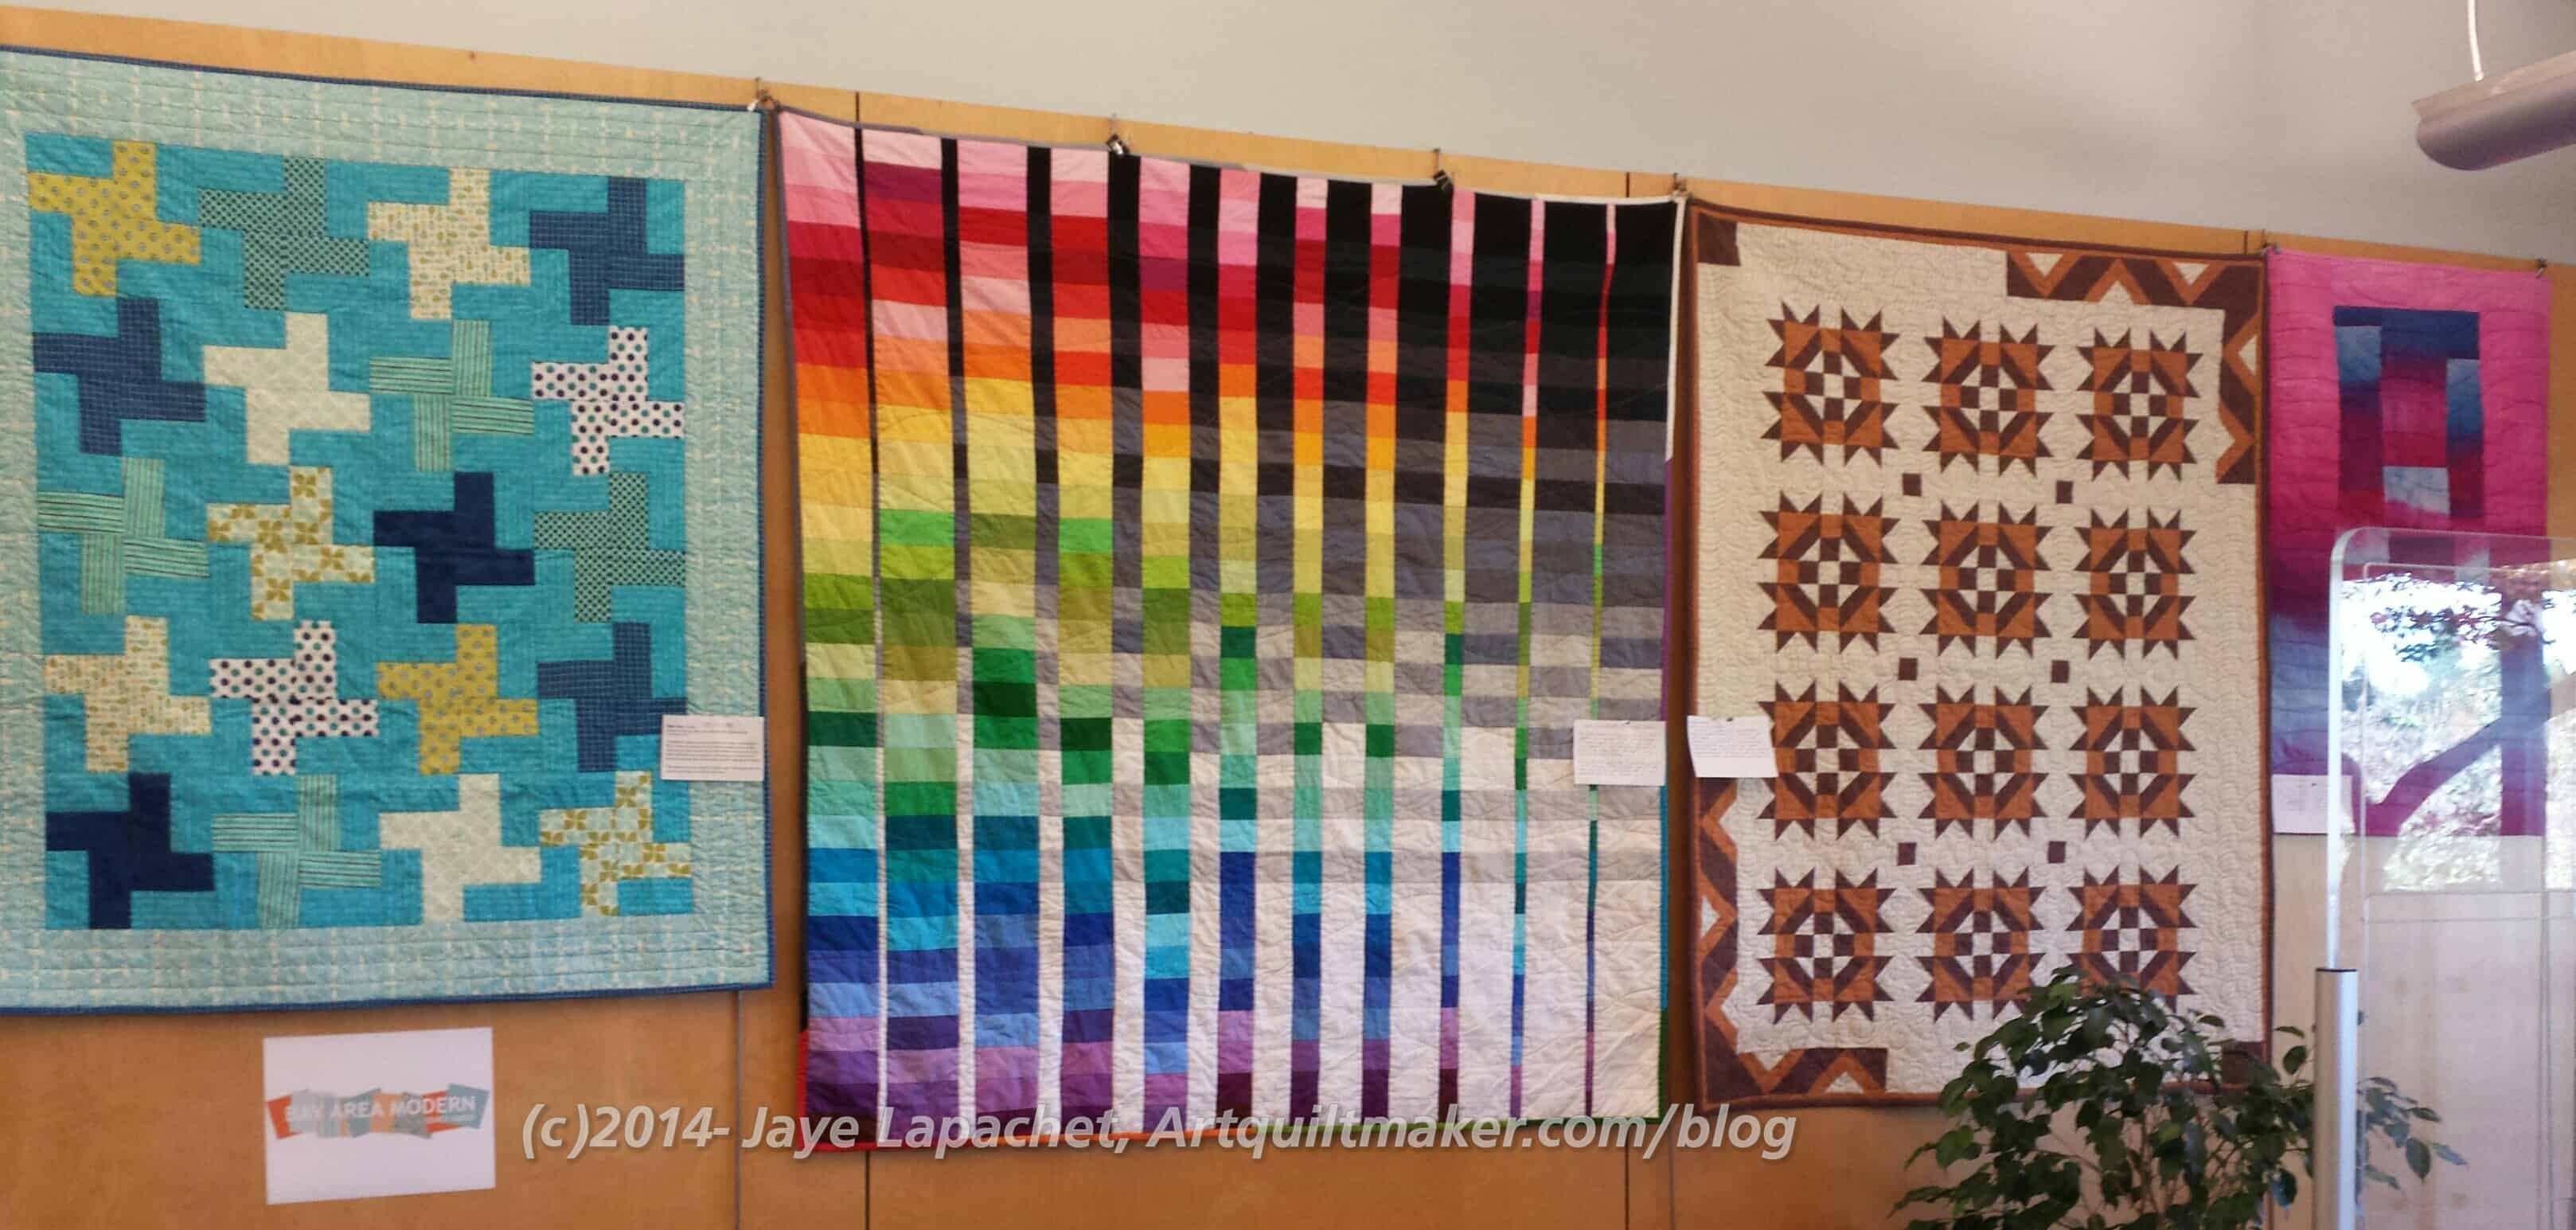
I really like Nicki’s quilt, which is the turquoise quilt on the left. Are you surprised? 😉
I am really scraping the bottom of the barrel for posts and I don’t know why. Too many demands on my time, perhaps? I suspect not enough sewing, but this means you get the BAMQG report ASAP! Aren’t you excited?
Claire told us that the 501(c)(3) paperwork has been put in. That is a ton of work and GREAT news.
Quilty Happenings
Amish Exhibit at San Jose Museum Quilts & Textiles. Reception is on 12/7/2014 from 2-4, though SJMQT members and the artists are welcome to a walk through starting at 1pm.
BAMQG members have a show up at the Los Altos Public Library through December 31, 2014. It is open during library hours
CQFA Members have a show at the Main Branch of the San Francisco Public Library in the Wallace Stegner Environmental Center. I have 3 quilts there! Through April.
Santa Clara Valley Quilt Association show will be in March or April and the BAMQG will have a big presence, both in quilts and helping out.
Meetings
The meetings in 2015 are all scheduled to be at the Redwood City Public Library Community Room. The one that might change is the December Holiday Extravaganza because of the Redwood City parade that usually coincides with our meeting. Stay tuned on the BAMQG blog for updates.
Sew Day: January 3, 2015 at Los Altos Public Library
Charity Sew Day: February 2015 at Los Altos Public Library. Probably the first Saturday. Stay tuned on the BAMQG blog for updates.
Events
There will be three speakers next year, Stacy Lynn Wood, the lady from Peppermint Pinwheel and another, as yet to be named, national speaker. Buy or renew your membership to join that fun.
There was a prize drawing for the UFO Challenge and I won a spool of Aurifil thread! Yay! I can totally use that. There is a super prize in January and I can’t wait to see what that is. I hope I don’t have to be present to win as I can’t make that meeting.
BAMQG 2014 Swap Items
The Holiday Swap was awesome. I didn’t participate beyond admiring all the gifties.
I didn’t take a picture of the food, but the committee did an awesome job. There are now five of us who eat a GF diet, so there were plenty of GF goodies of which to partake. I had some yummy chocolate thing that Claire made. Yay for chocolate!
After that I just chatted with people. I found out that Michelle S has a blog. I had never spent time talking with her, but we were sitting next to each other and just got to talking. She does a lot of handquilting and doesn’t have many UFOs, which is quite envious, I have to say. She is also using the Hoffman Challenge fabric to make her City Sampler/Tula Pink blocks. I have to say that Michelle’s blocks made mine look terrible. 🙁
I also had the chance to discuss bindings with Annemarie. She has a large hexie made from Kaffe Fassett (and friends) fabric. She was thinking of cutting off the outer hexies and I encouraged her to either fill in the edges with triangles to make them square a la the Eye Spy or to bind them around the outer hexies, leaving them in tact like I did, sort of, with Flower Sugar. I really wish these designers would stop telling people to cut off their hexies.
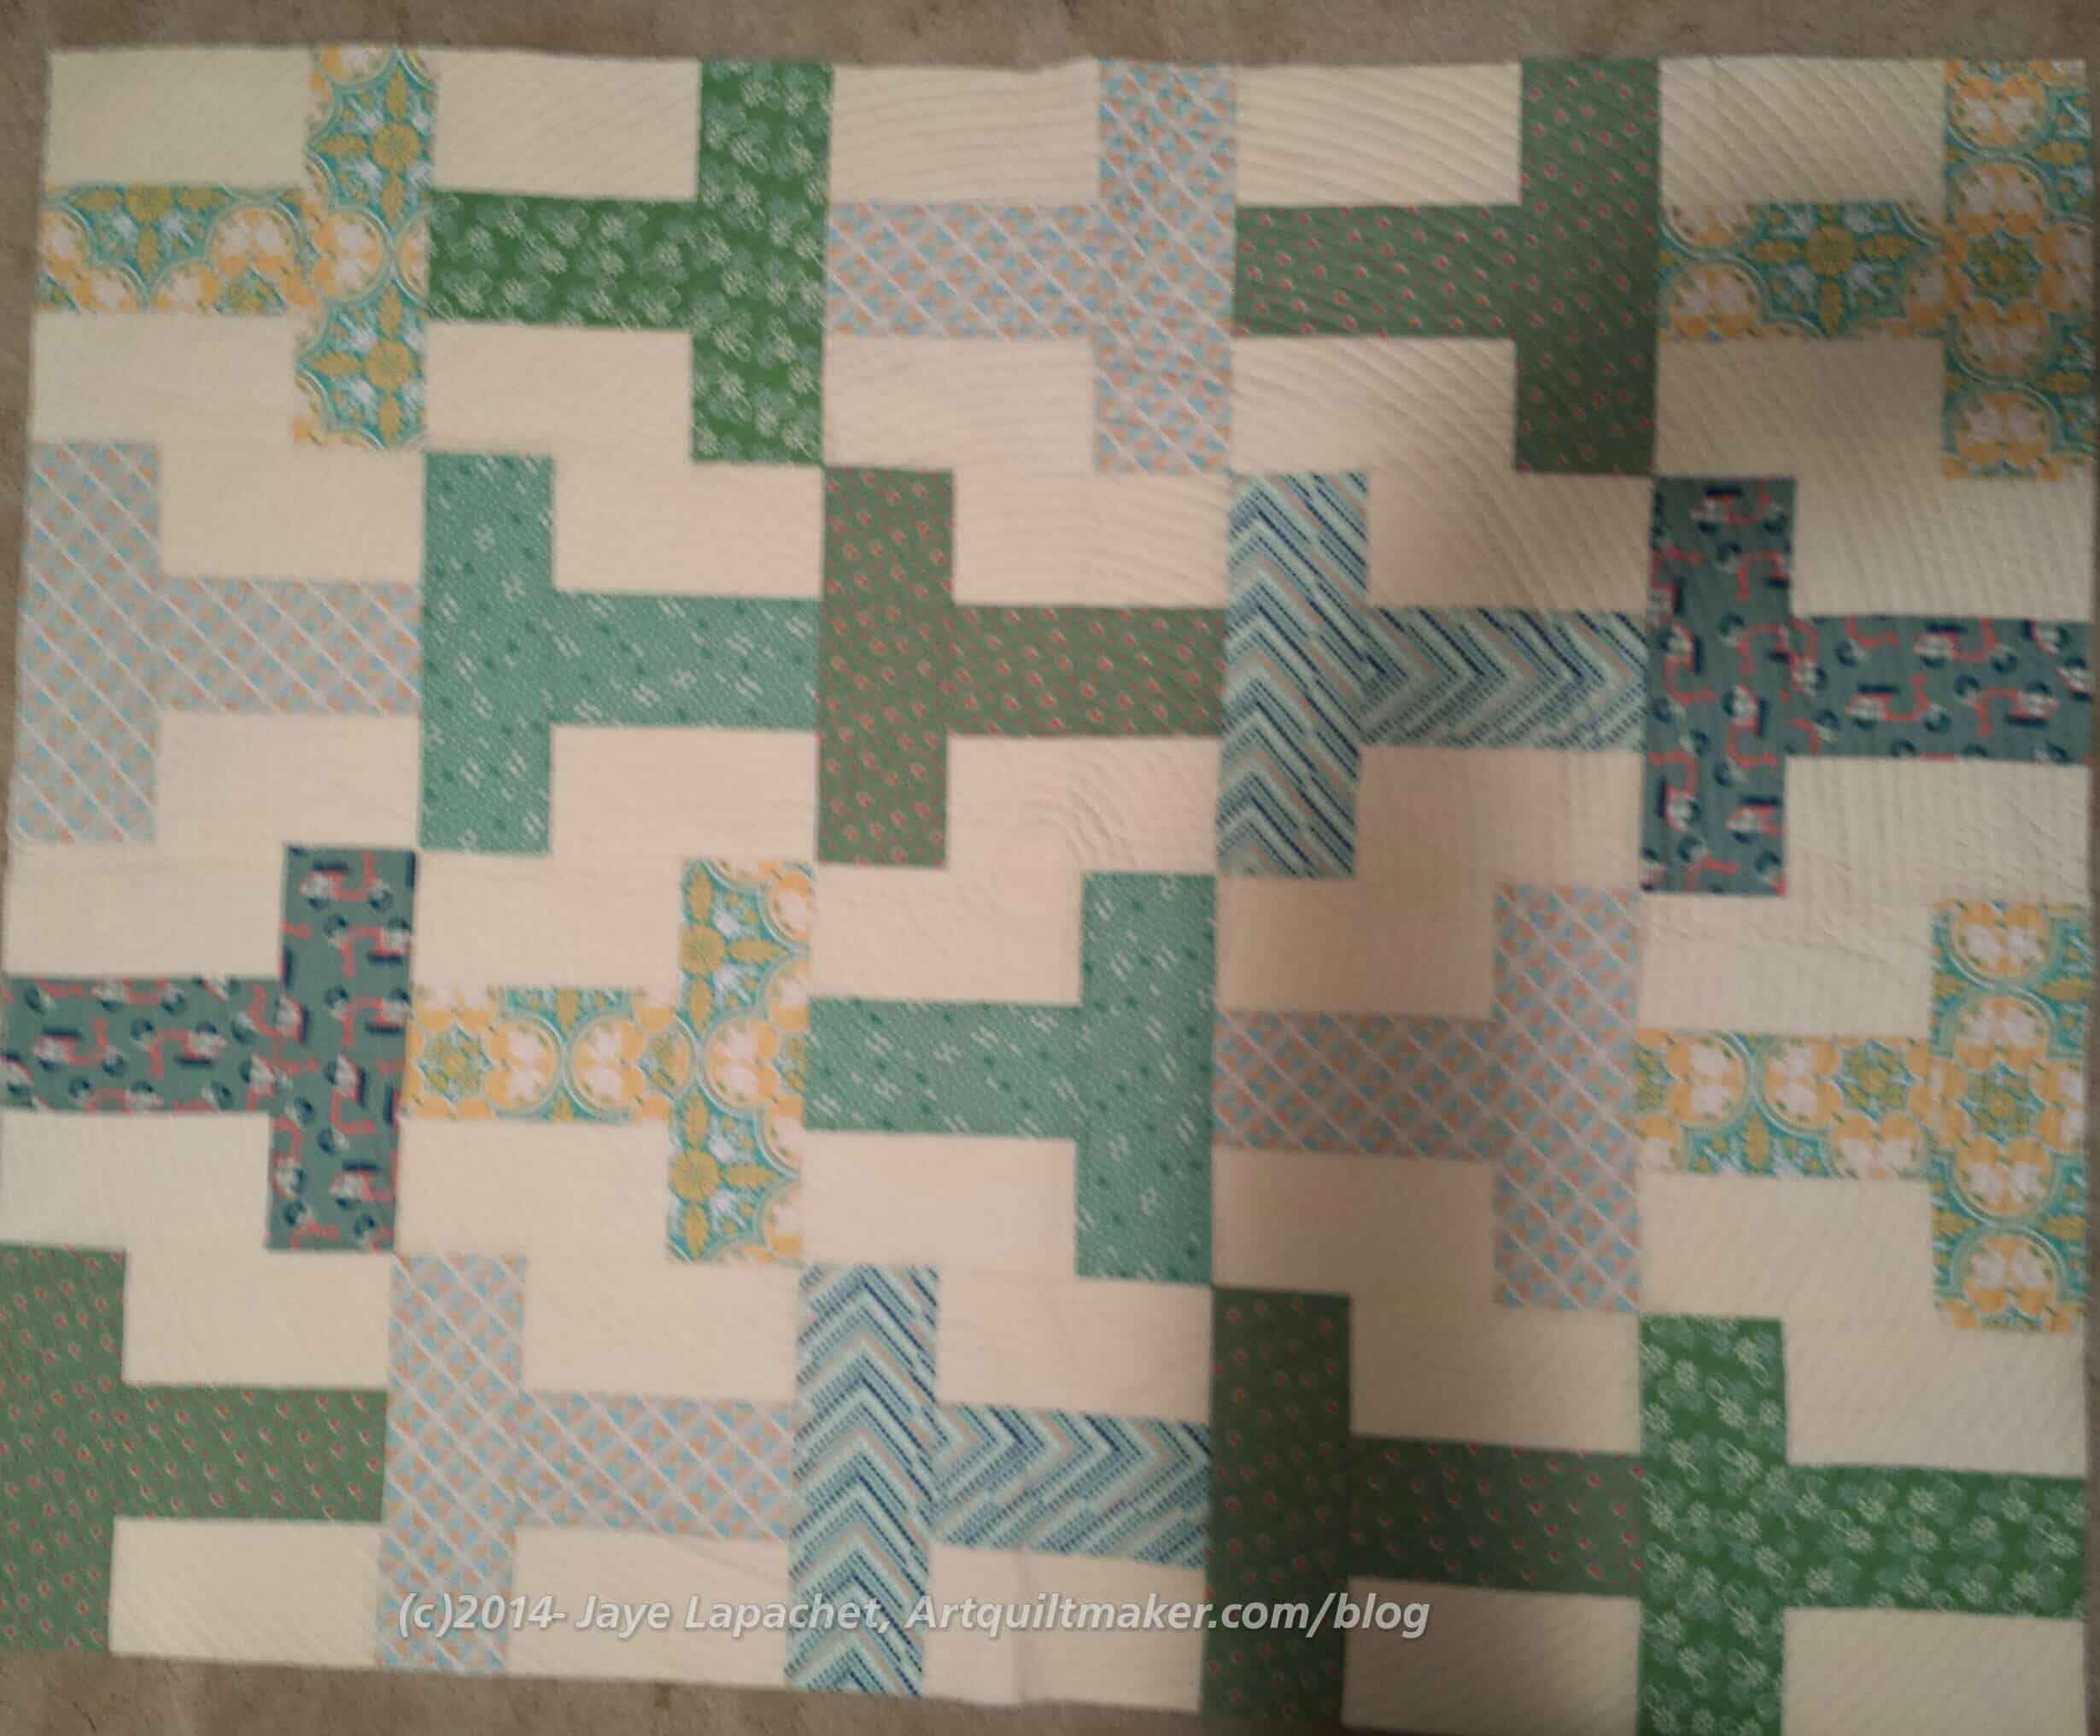
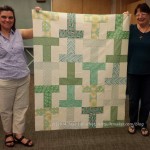
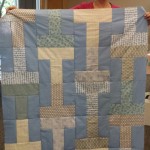
I have the Green T quilt in my possession and I am applying the binding. This is the quilt that Gerre and I worked on together at the last Charity Day. Gerre quilted it and did a fantastic job!!
She quilted in a big circle and it really looks fantastic. I used the Reflections fabric (RJR, I think, from the Dark Ages) in a kind of olive green color. It is a little mottled, but I think it fits well with the variety of greens in the quilt.
Gerre and I make a good team and I told her so. I told her I want to work with her again. She is working on quilting the postage stamp/16 patch, which I will bind as well.
I really liked working with Gerre. I am thrilled that we have made this quilt together and I am proud of how it has come out. Yes, I know it is not finished, but I am thrilled with the way it has come together.
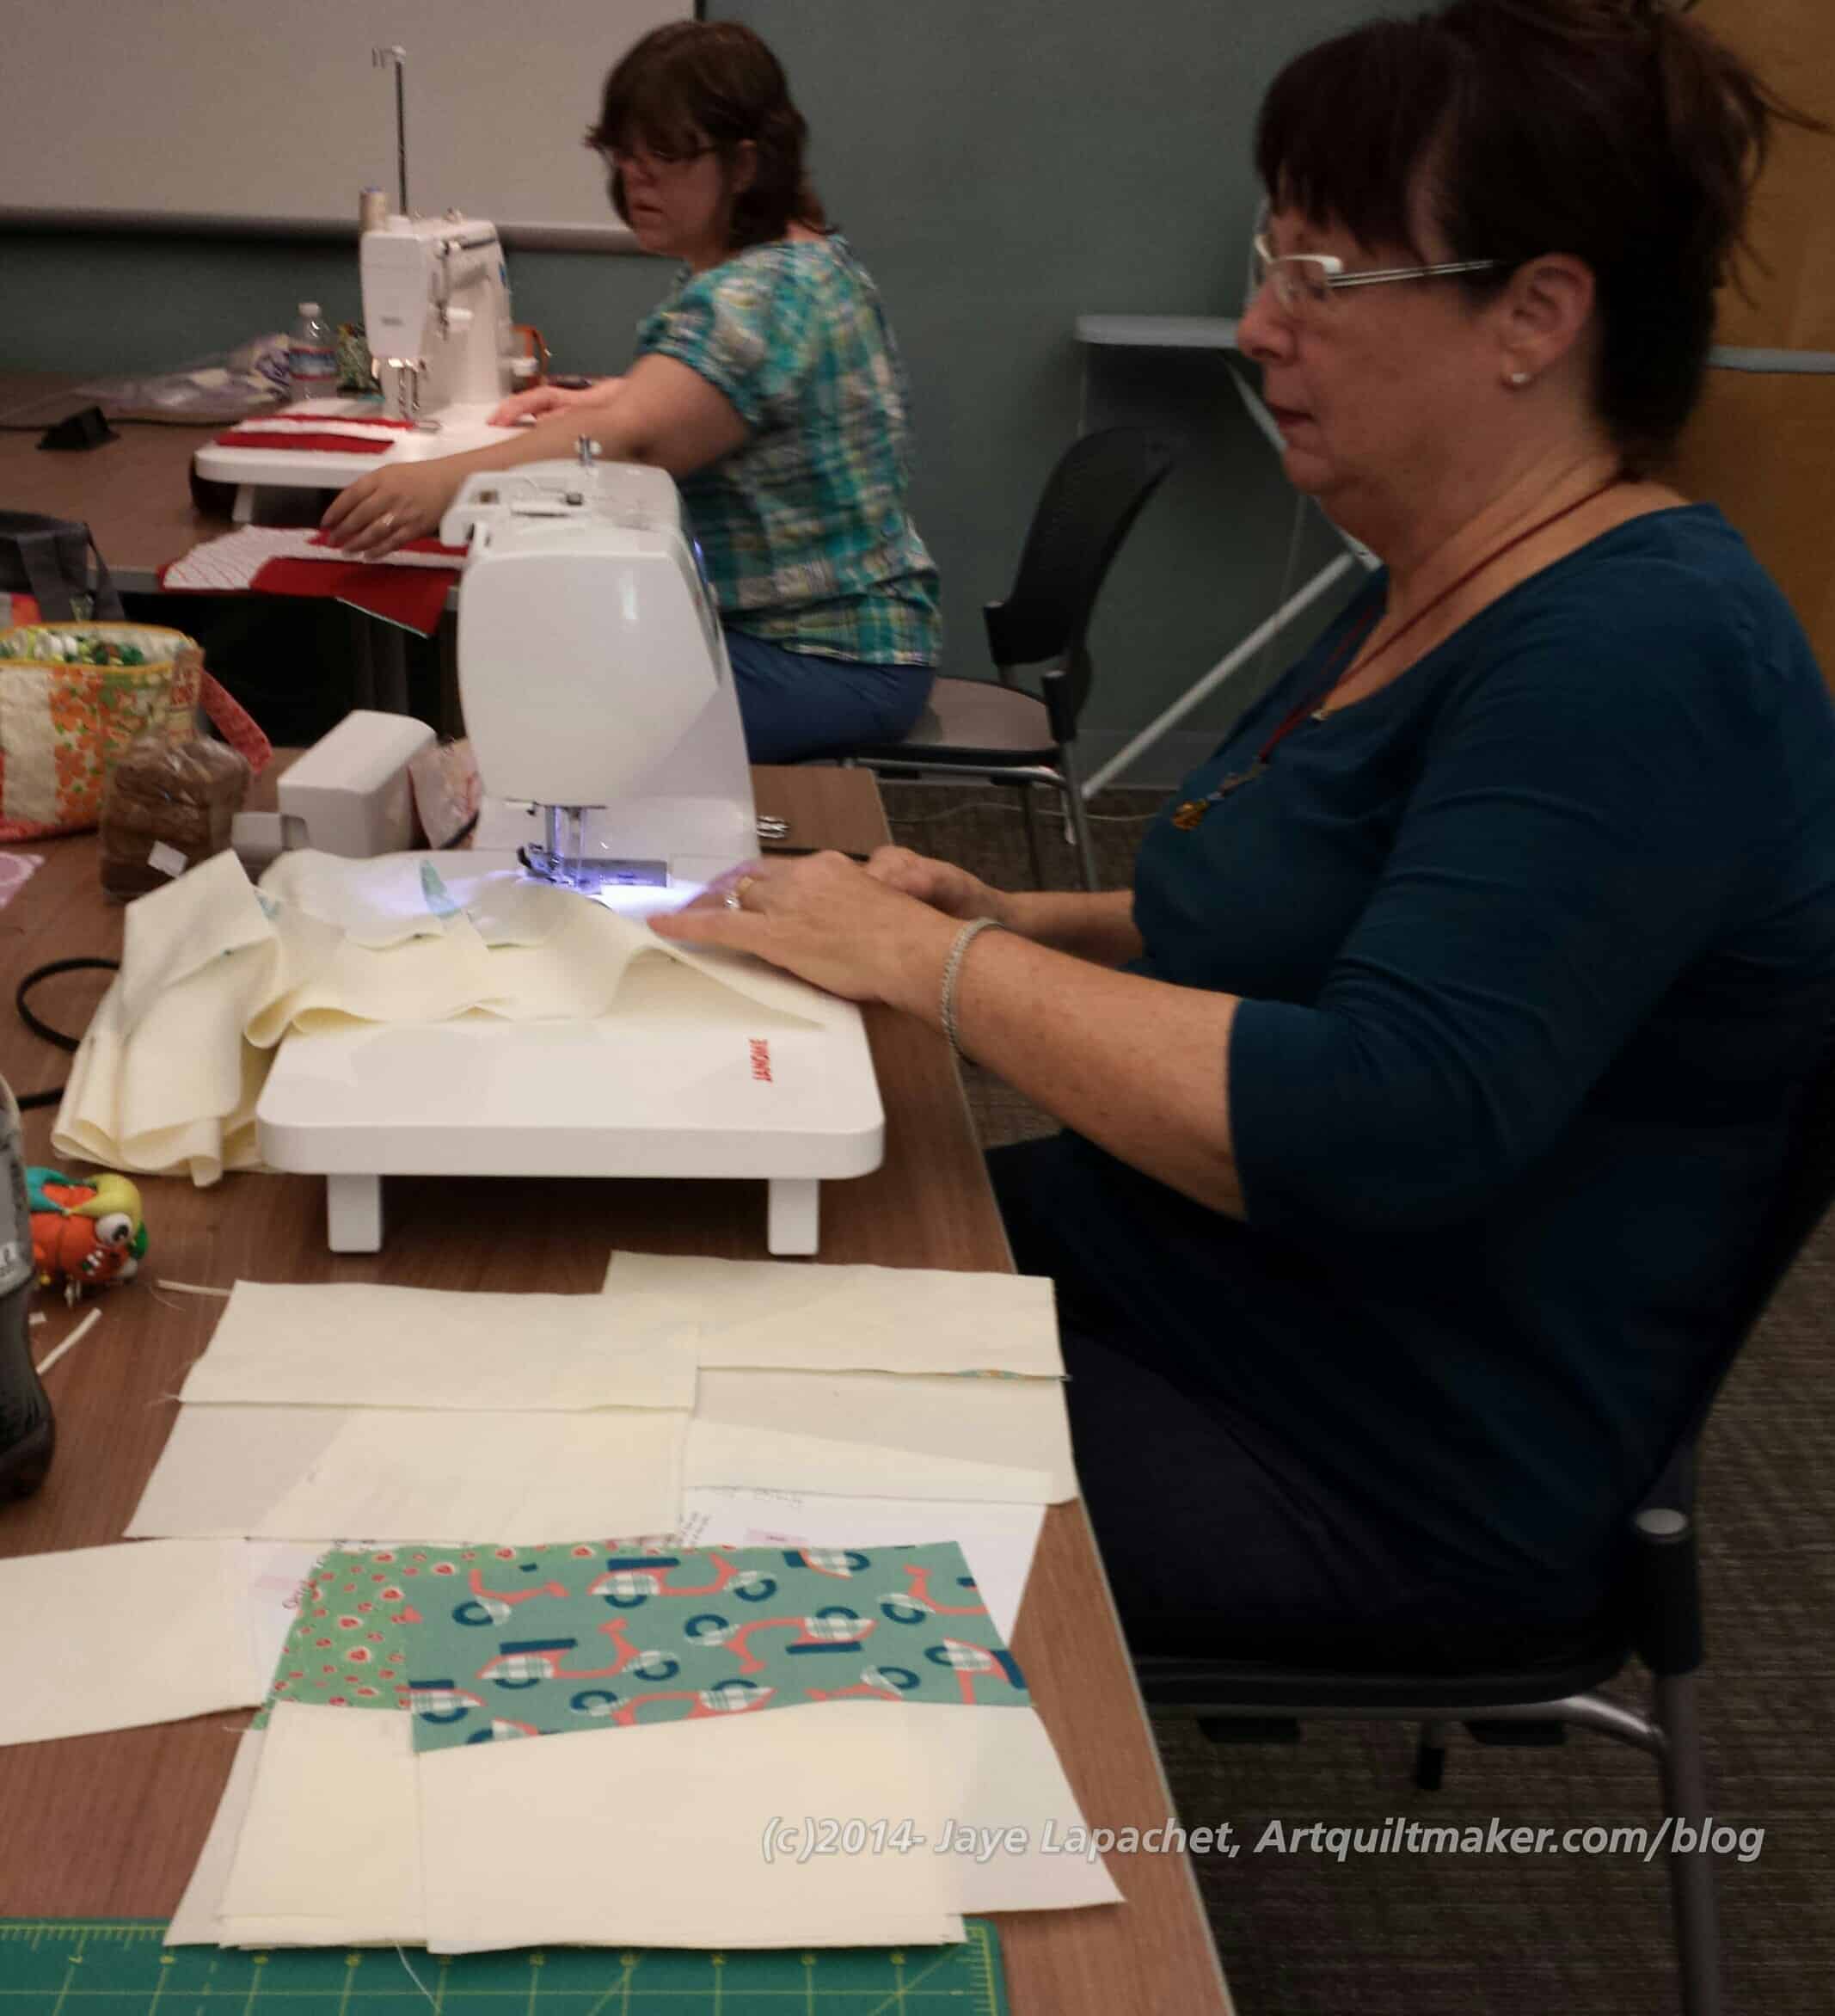
As I mentioned yesterday, Gerre and I teamed up for the Charity Race Sew Day. we were 4th in line to pick fabric and ended up with a variety of green colors. Gerre and I looked at each other in disappointment, but knew that the recipient would like it and got to work.
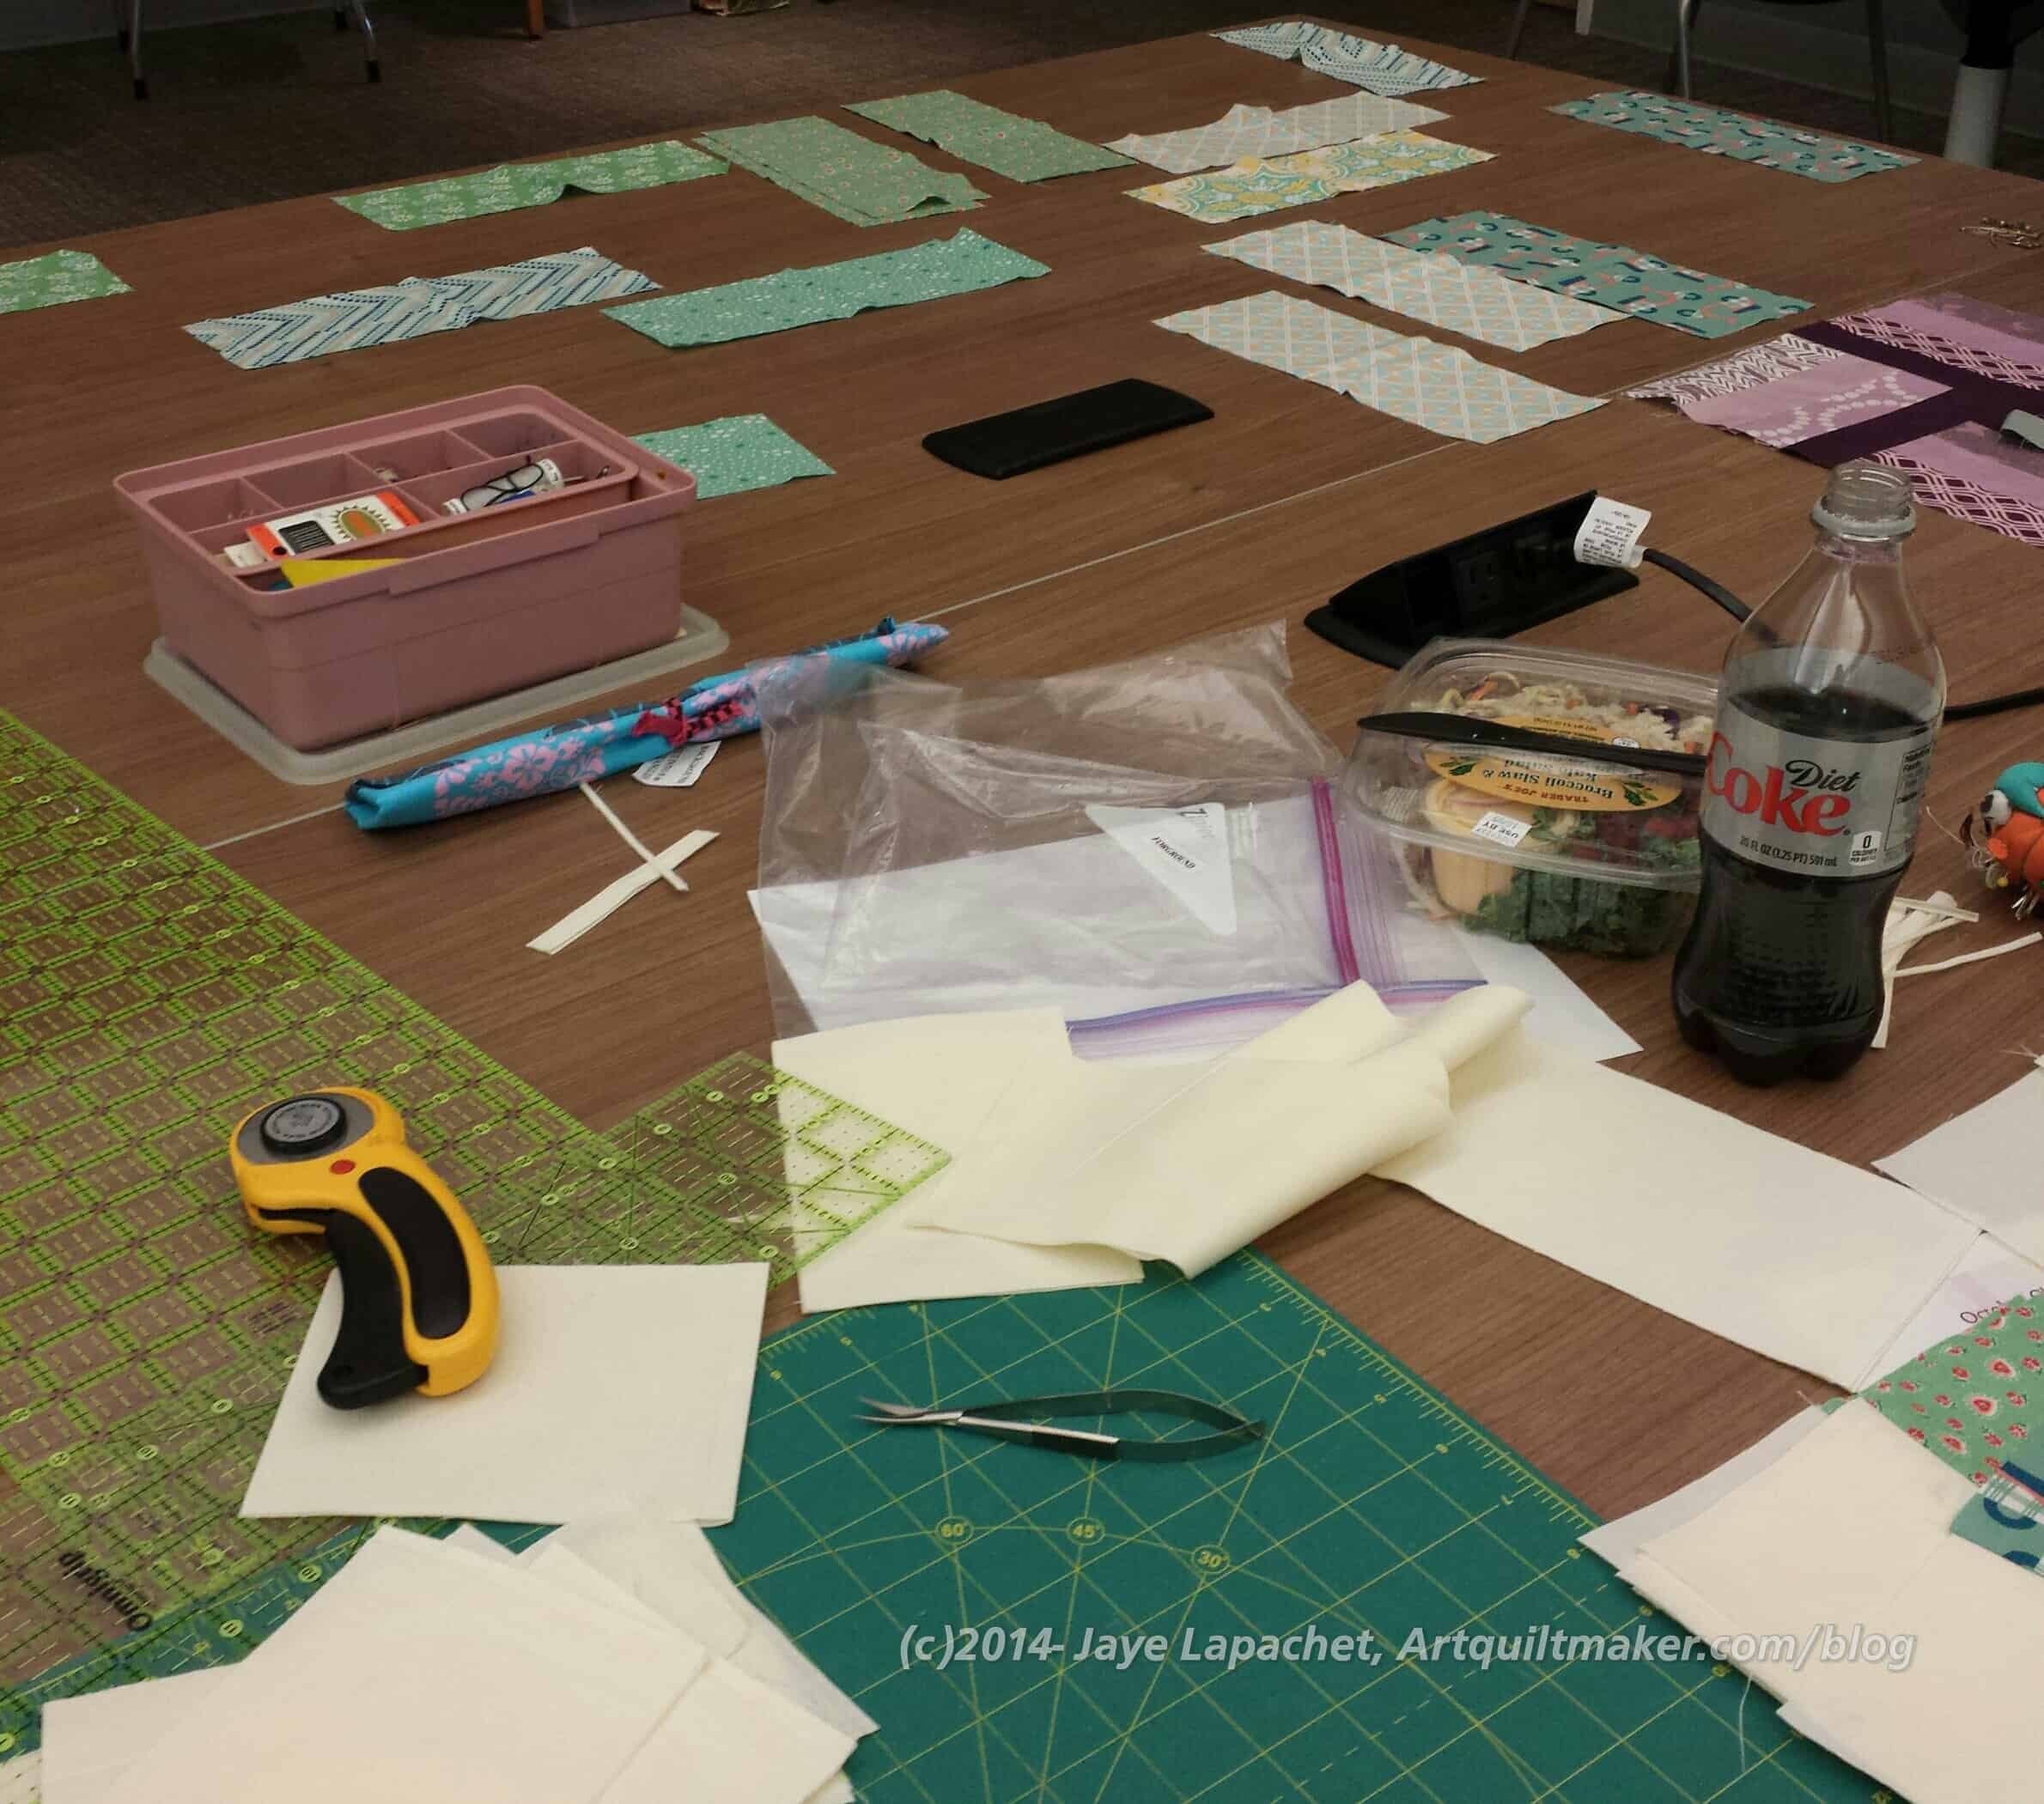
We pushed two tables together and used that as our workspace. We laid out most (the table wasn’t THAT big) of the pieces, cut the background and Gerre started sewing.
Gerre & Jaye Blocks
After cutting the background, I paired up pieces and parts and handed them to Gerre. She put them through the machine. I cut them off, pressed them, then paired them off again with other pieces and handed them back to Gerre to sew.
I thought we did very well and sewed pretty quickly. Still, we weren’t first with a finished top. I don’t sew very quickly in general, and, though I wasn’t sewing, I was pleased that we were able to finish as quickly as we did with little or no drama. I was organized and got Gerre the pieces she needed efficiently. She was a sewing rock star. Our system worked.
After we finished the piecing, we found a vintage sheet that was large enough for the back and layered and basted the top. I thought we were being nice for some other guild member, but Gerre said that she will quilt it. I offered to bind it so the piece will be done when we hand it in.
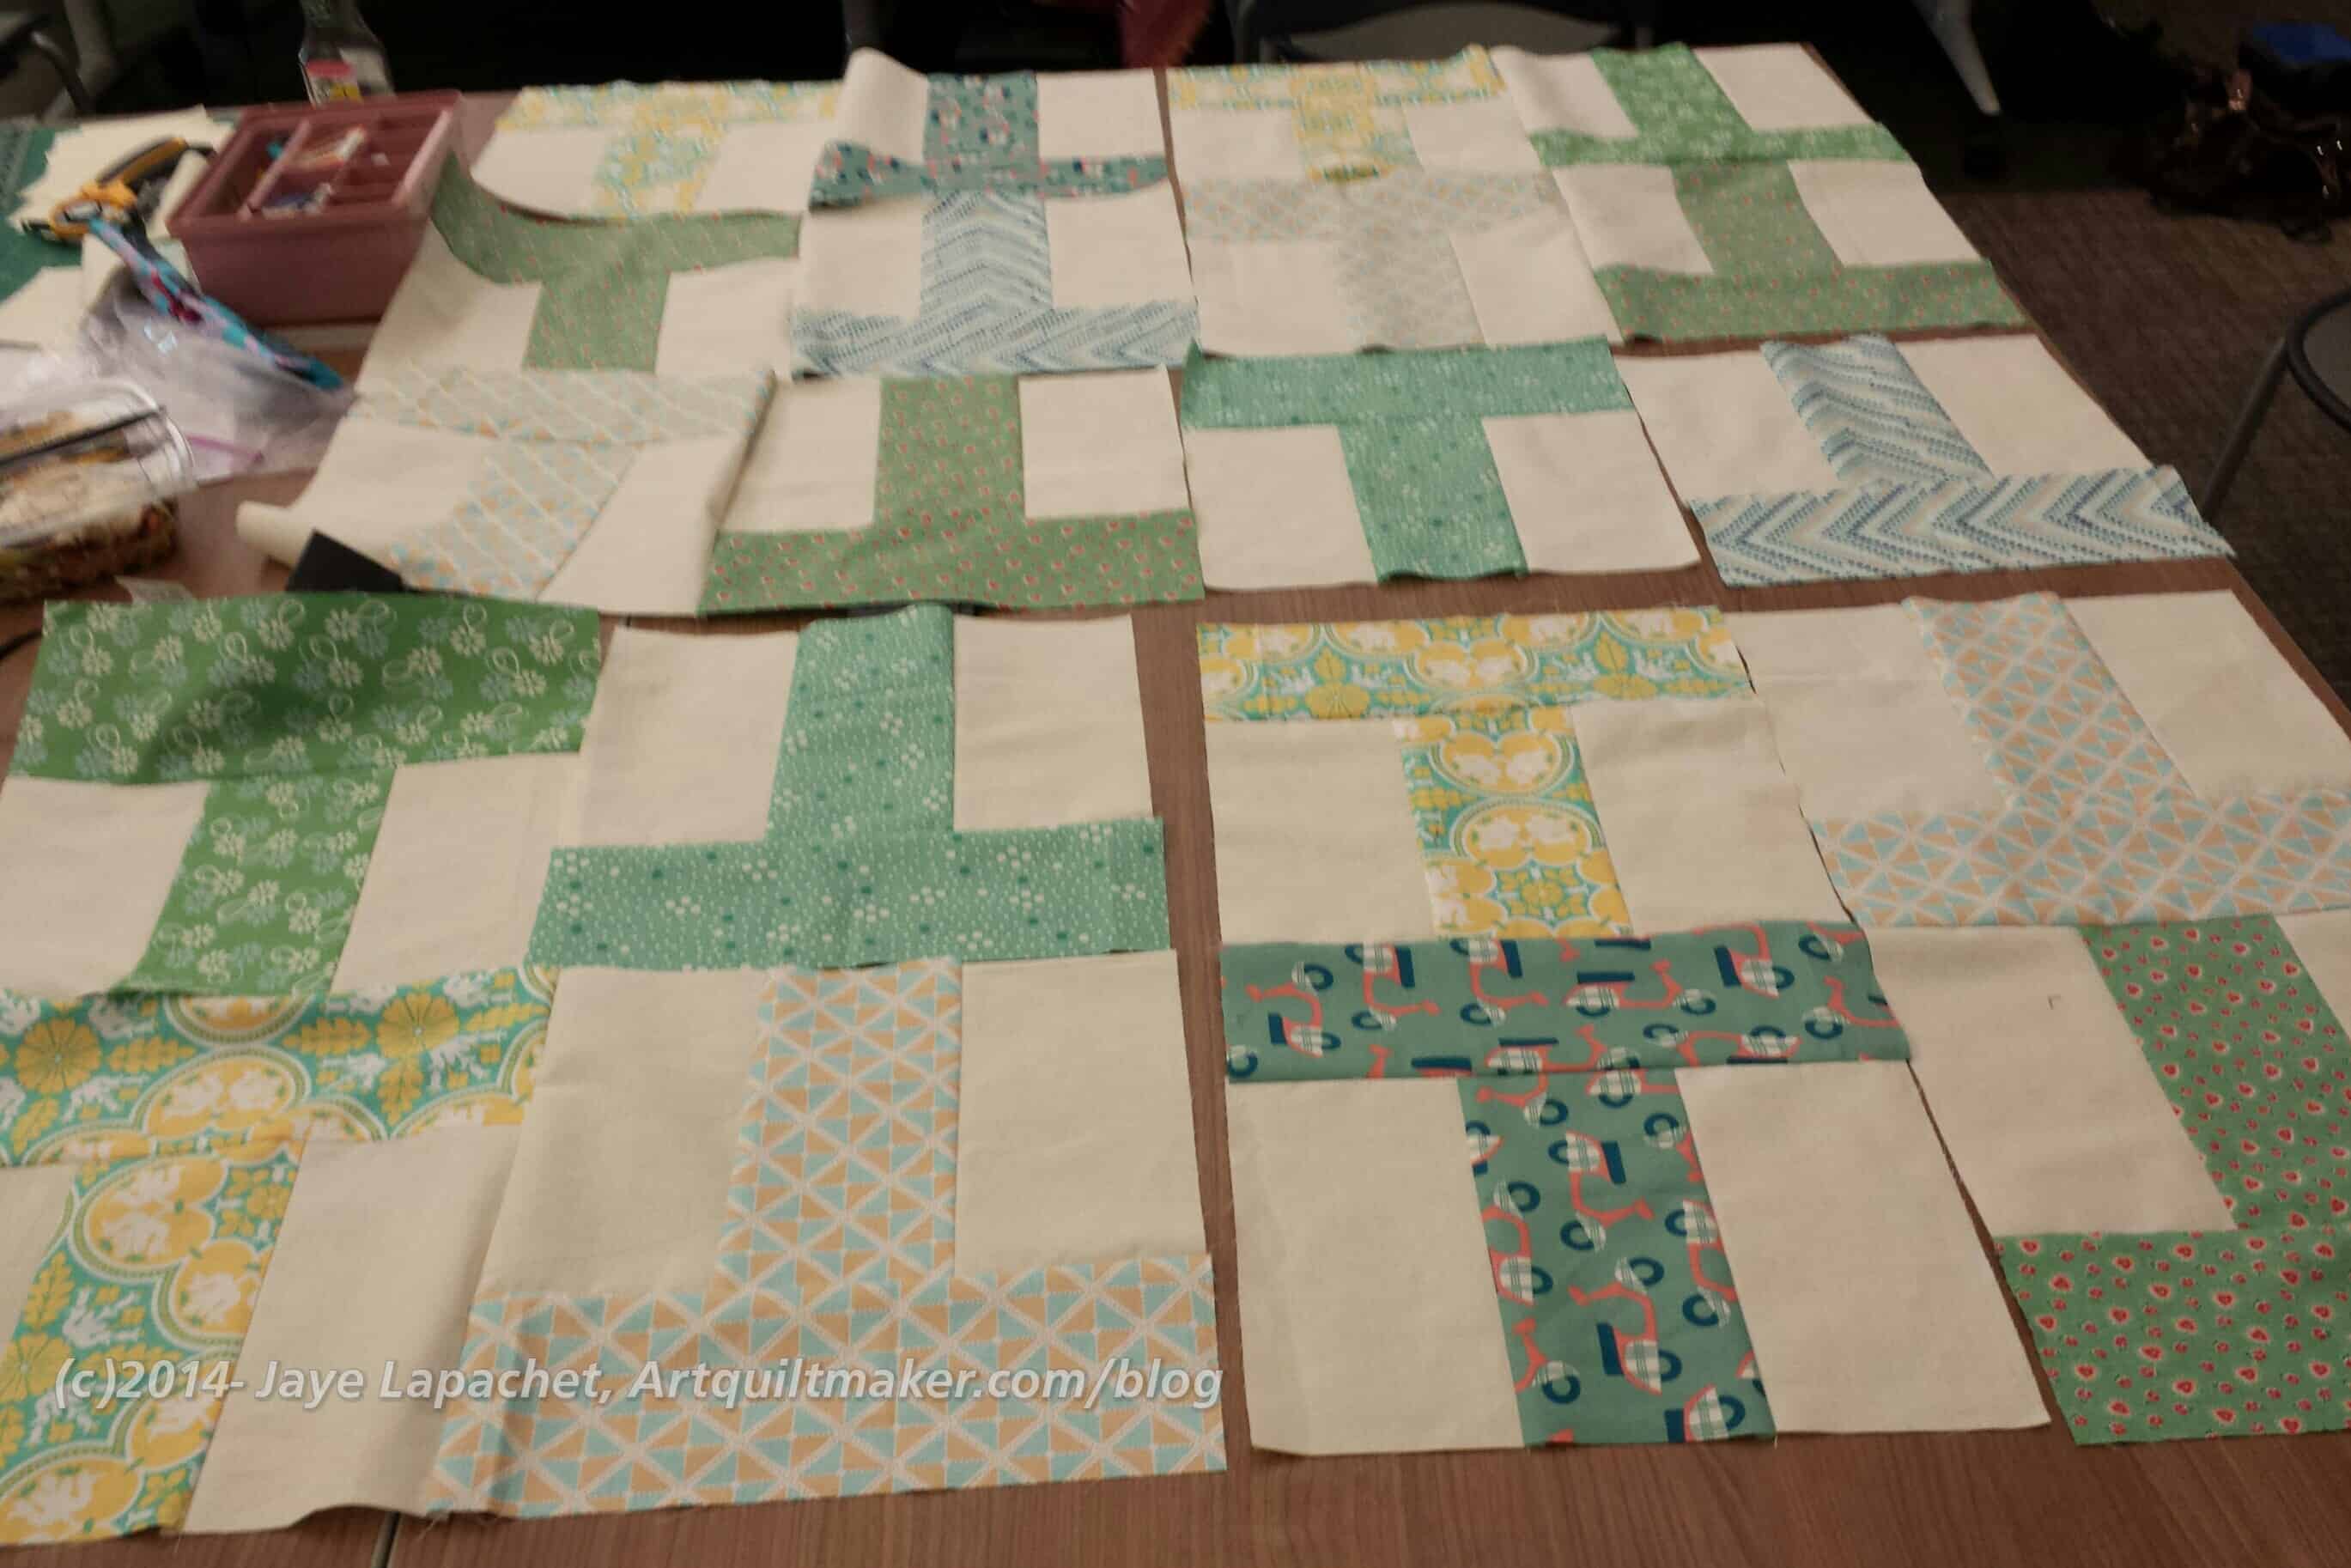
Gerre & Jaye Blocks: Chunking in Process
I showed Gerre how to “chunk a top.” It is harder if you don’t have a design wall and lots of leaders and enders. That plug lump in the middle of the table didn’t help, though it was useful for making the machine work. We started making postage stamp blocks in between to try and keep the T blocks in order.
I really think this is a great pattern for charity quilts. It is interesting. There are lots of ways to put it together and it comes out well. I want to work with Gerre again.
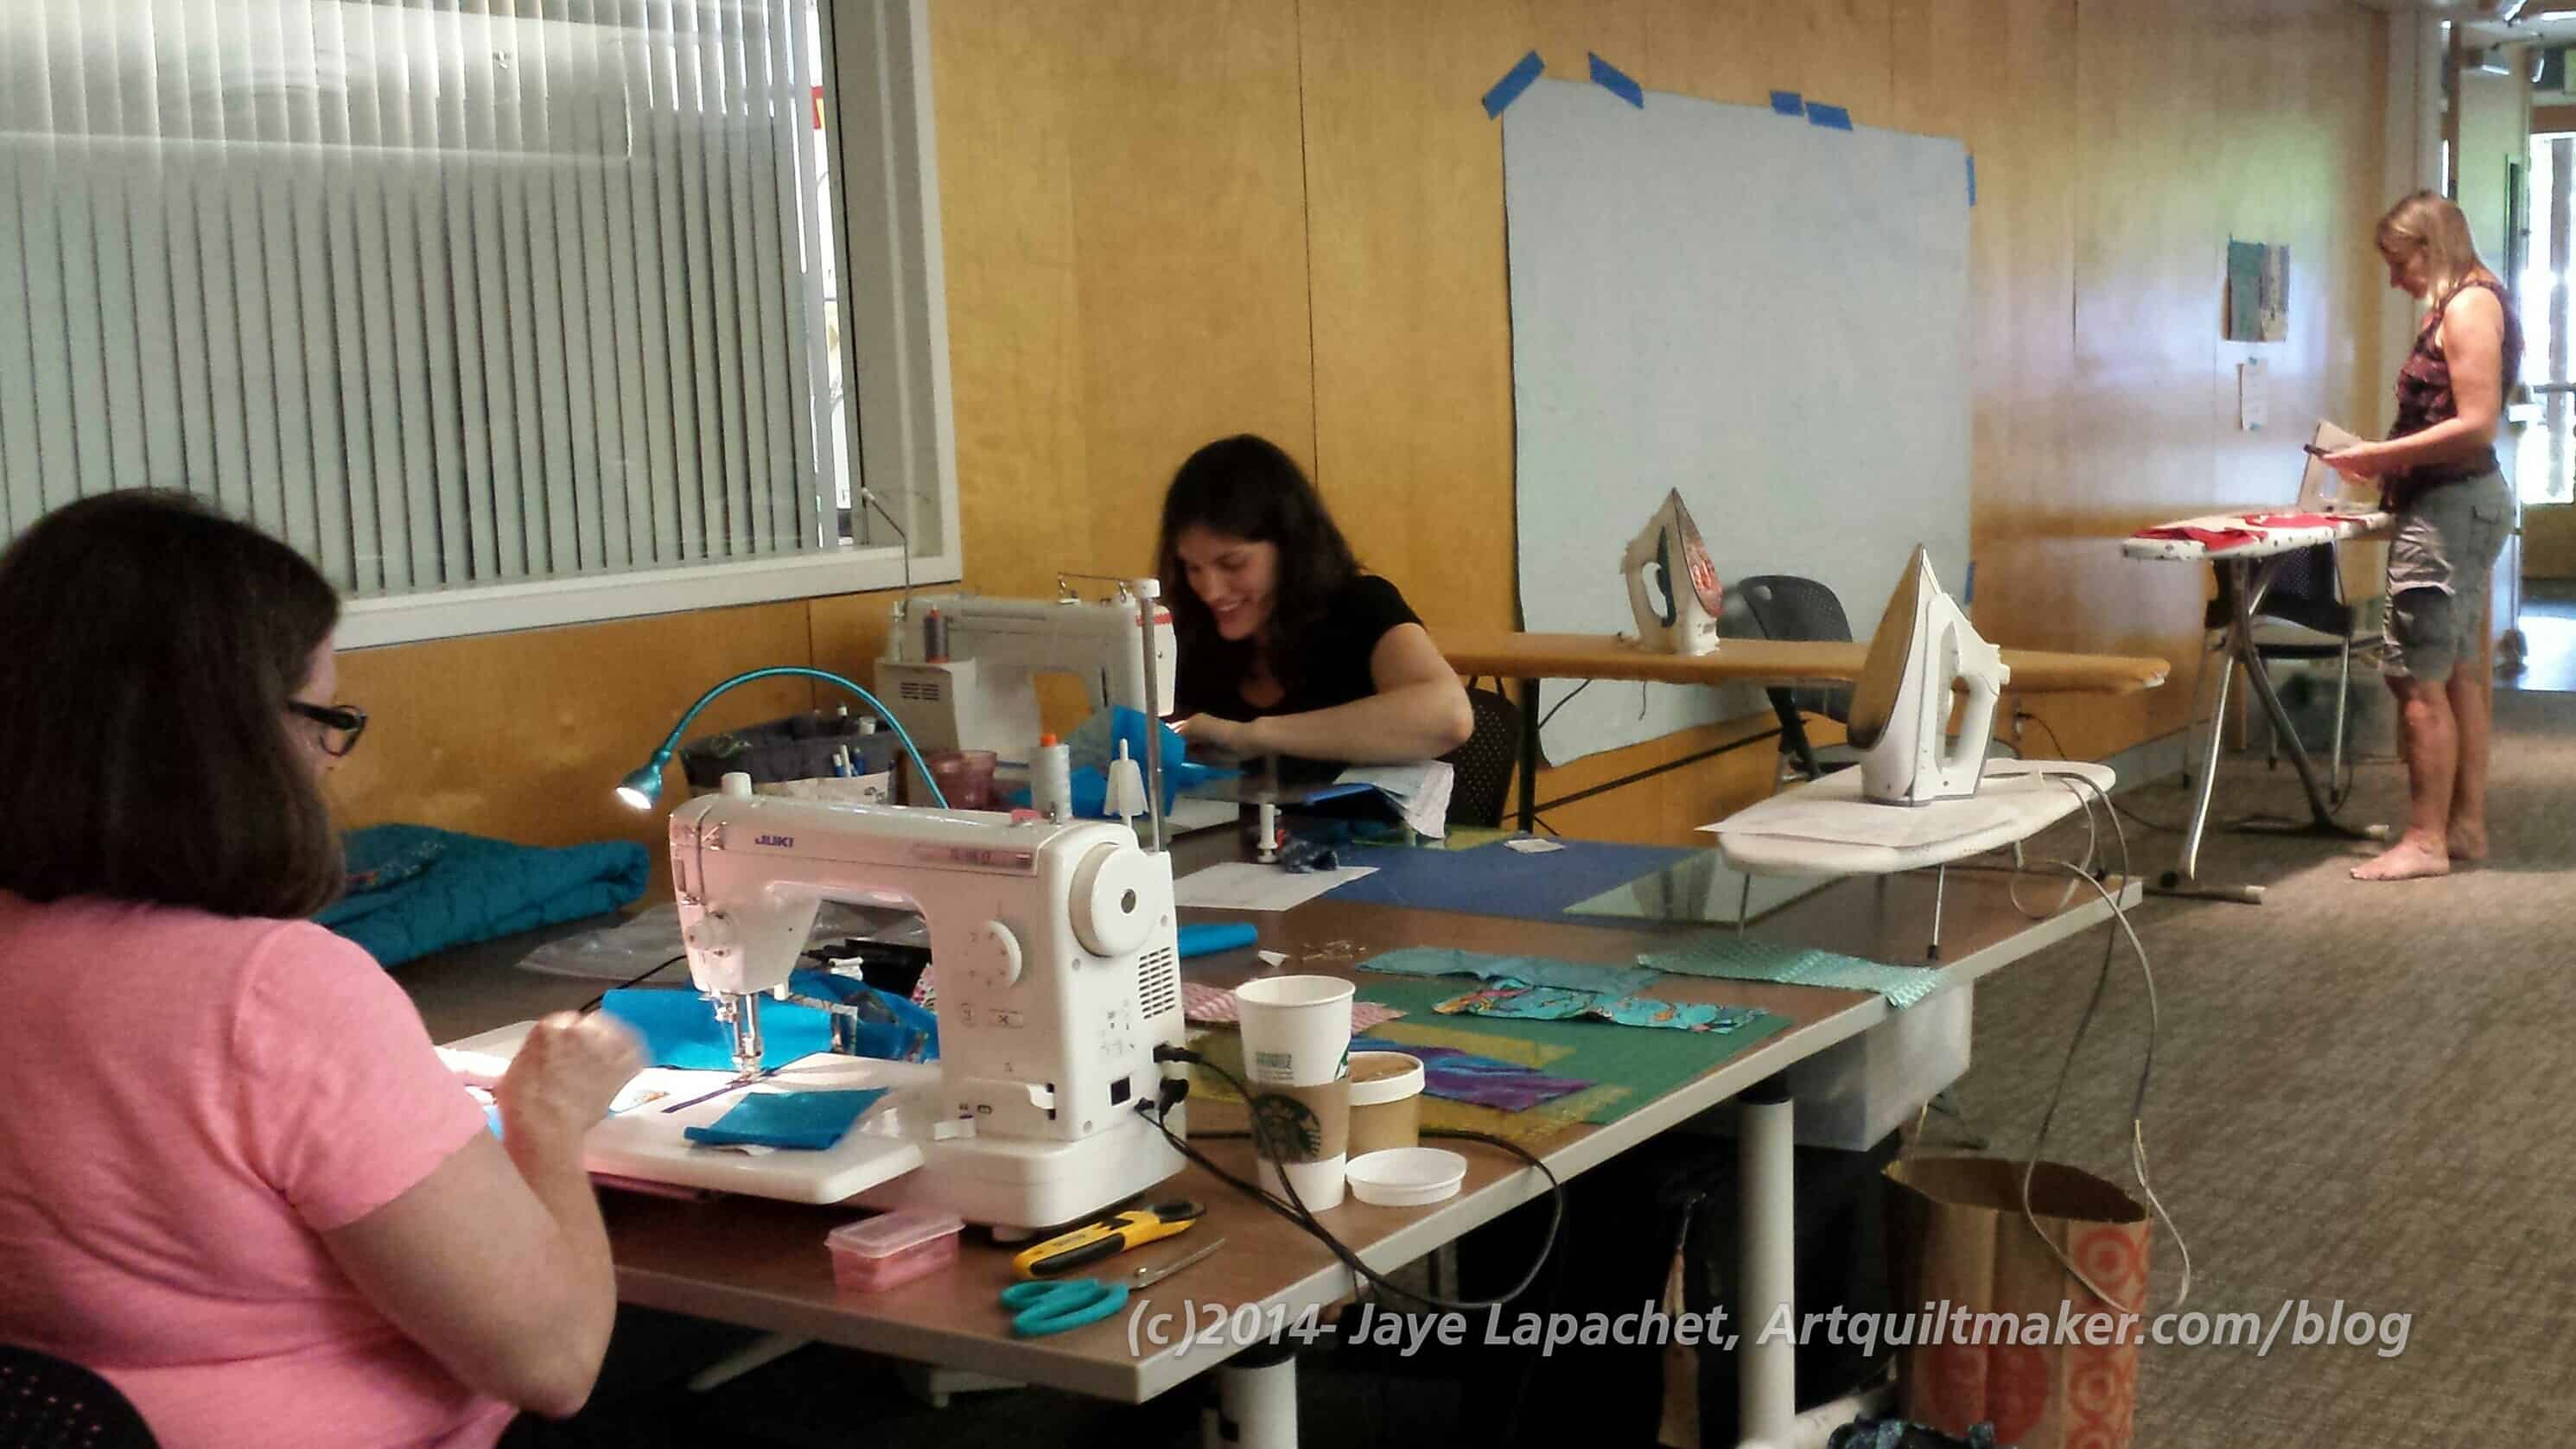
Peggy and Michelle did a great job organizing the Charity Day Race Game and 8 of the quilts we made were from the kits Michelle and Peggy put together before the event. They are awesome, dedicated and well organized.
Worker Bees
We all got kits and set to work. Peggy had done a lot of the cutting already, so we all only had to cut backgrounds and sew.
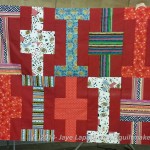
Michelle and Jennifer worked on a red version of the T quilt with a lot of Joel Dewberry Notting Hill fabric.
I was on a team with Gerre and she took the first sewing shift. I wasn’t really paying attention to how other teams organized their sewing and cutting and pressing and pinning, but our organization worked very well.
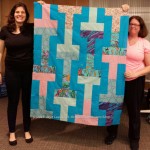
Rhonda and Ruth worked on a turquoise version with some Pearl Bracelets and a lot of fish fabric.
Diana worked on a pastel version with some Aneela Hoey fabrics and Jennifer finished a second green top that really looked like light in a forest.
Karen and Joelle finished another red top with a lot of card game fabric that they joked they would give to Kenny Rogers. Peggy made a brown version that looked like candy and Michelle finished a second top with a blue solid background. Gerre and I finished a top with green Ts and a light background. the quilts all used the same pattern, but were so different and fun.
Jennifer & Michelle
Ruth & Rhonda
Joelle & Karen
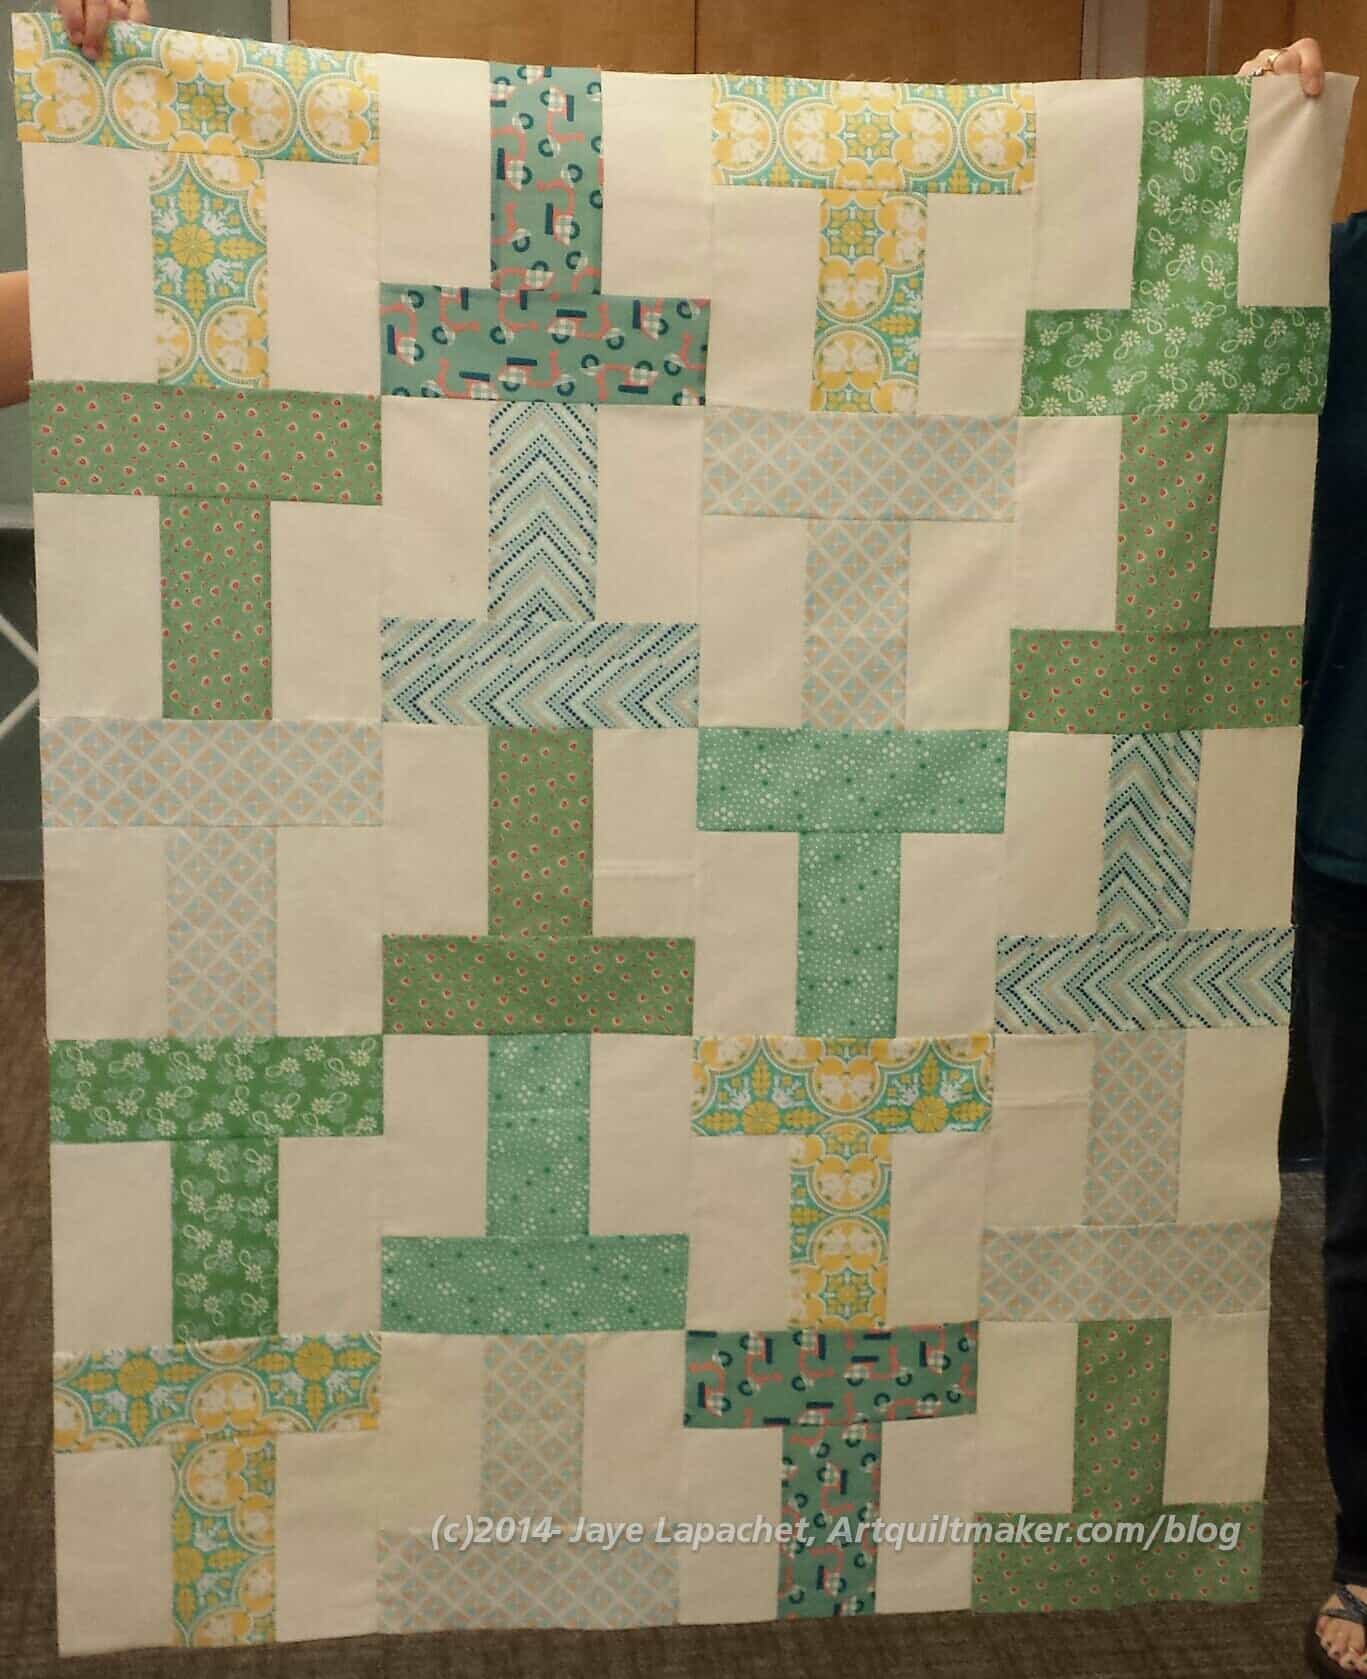
Jaye and Gerre
Peggy
Michelle 2
Diana
Gerre & Jaye’s Bonus Quilt
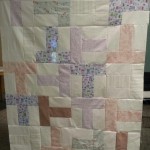
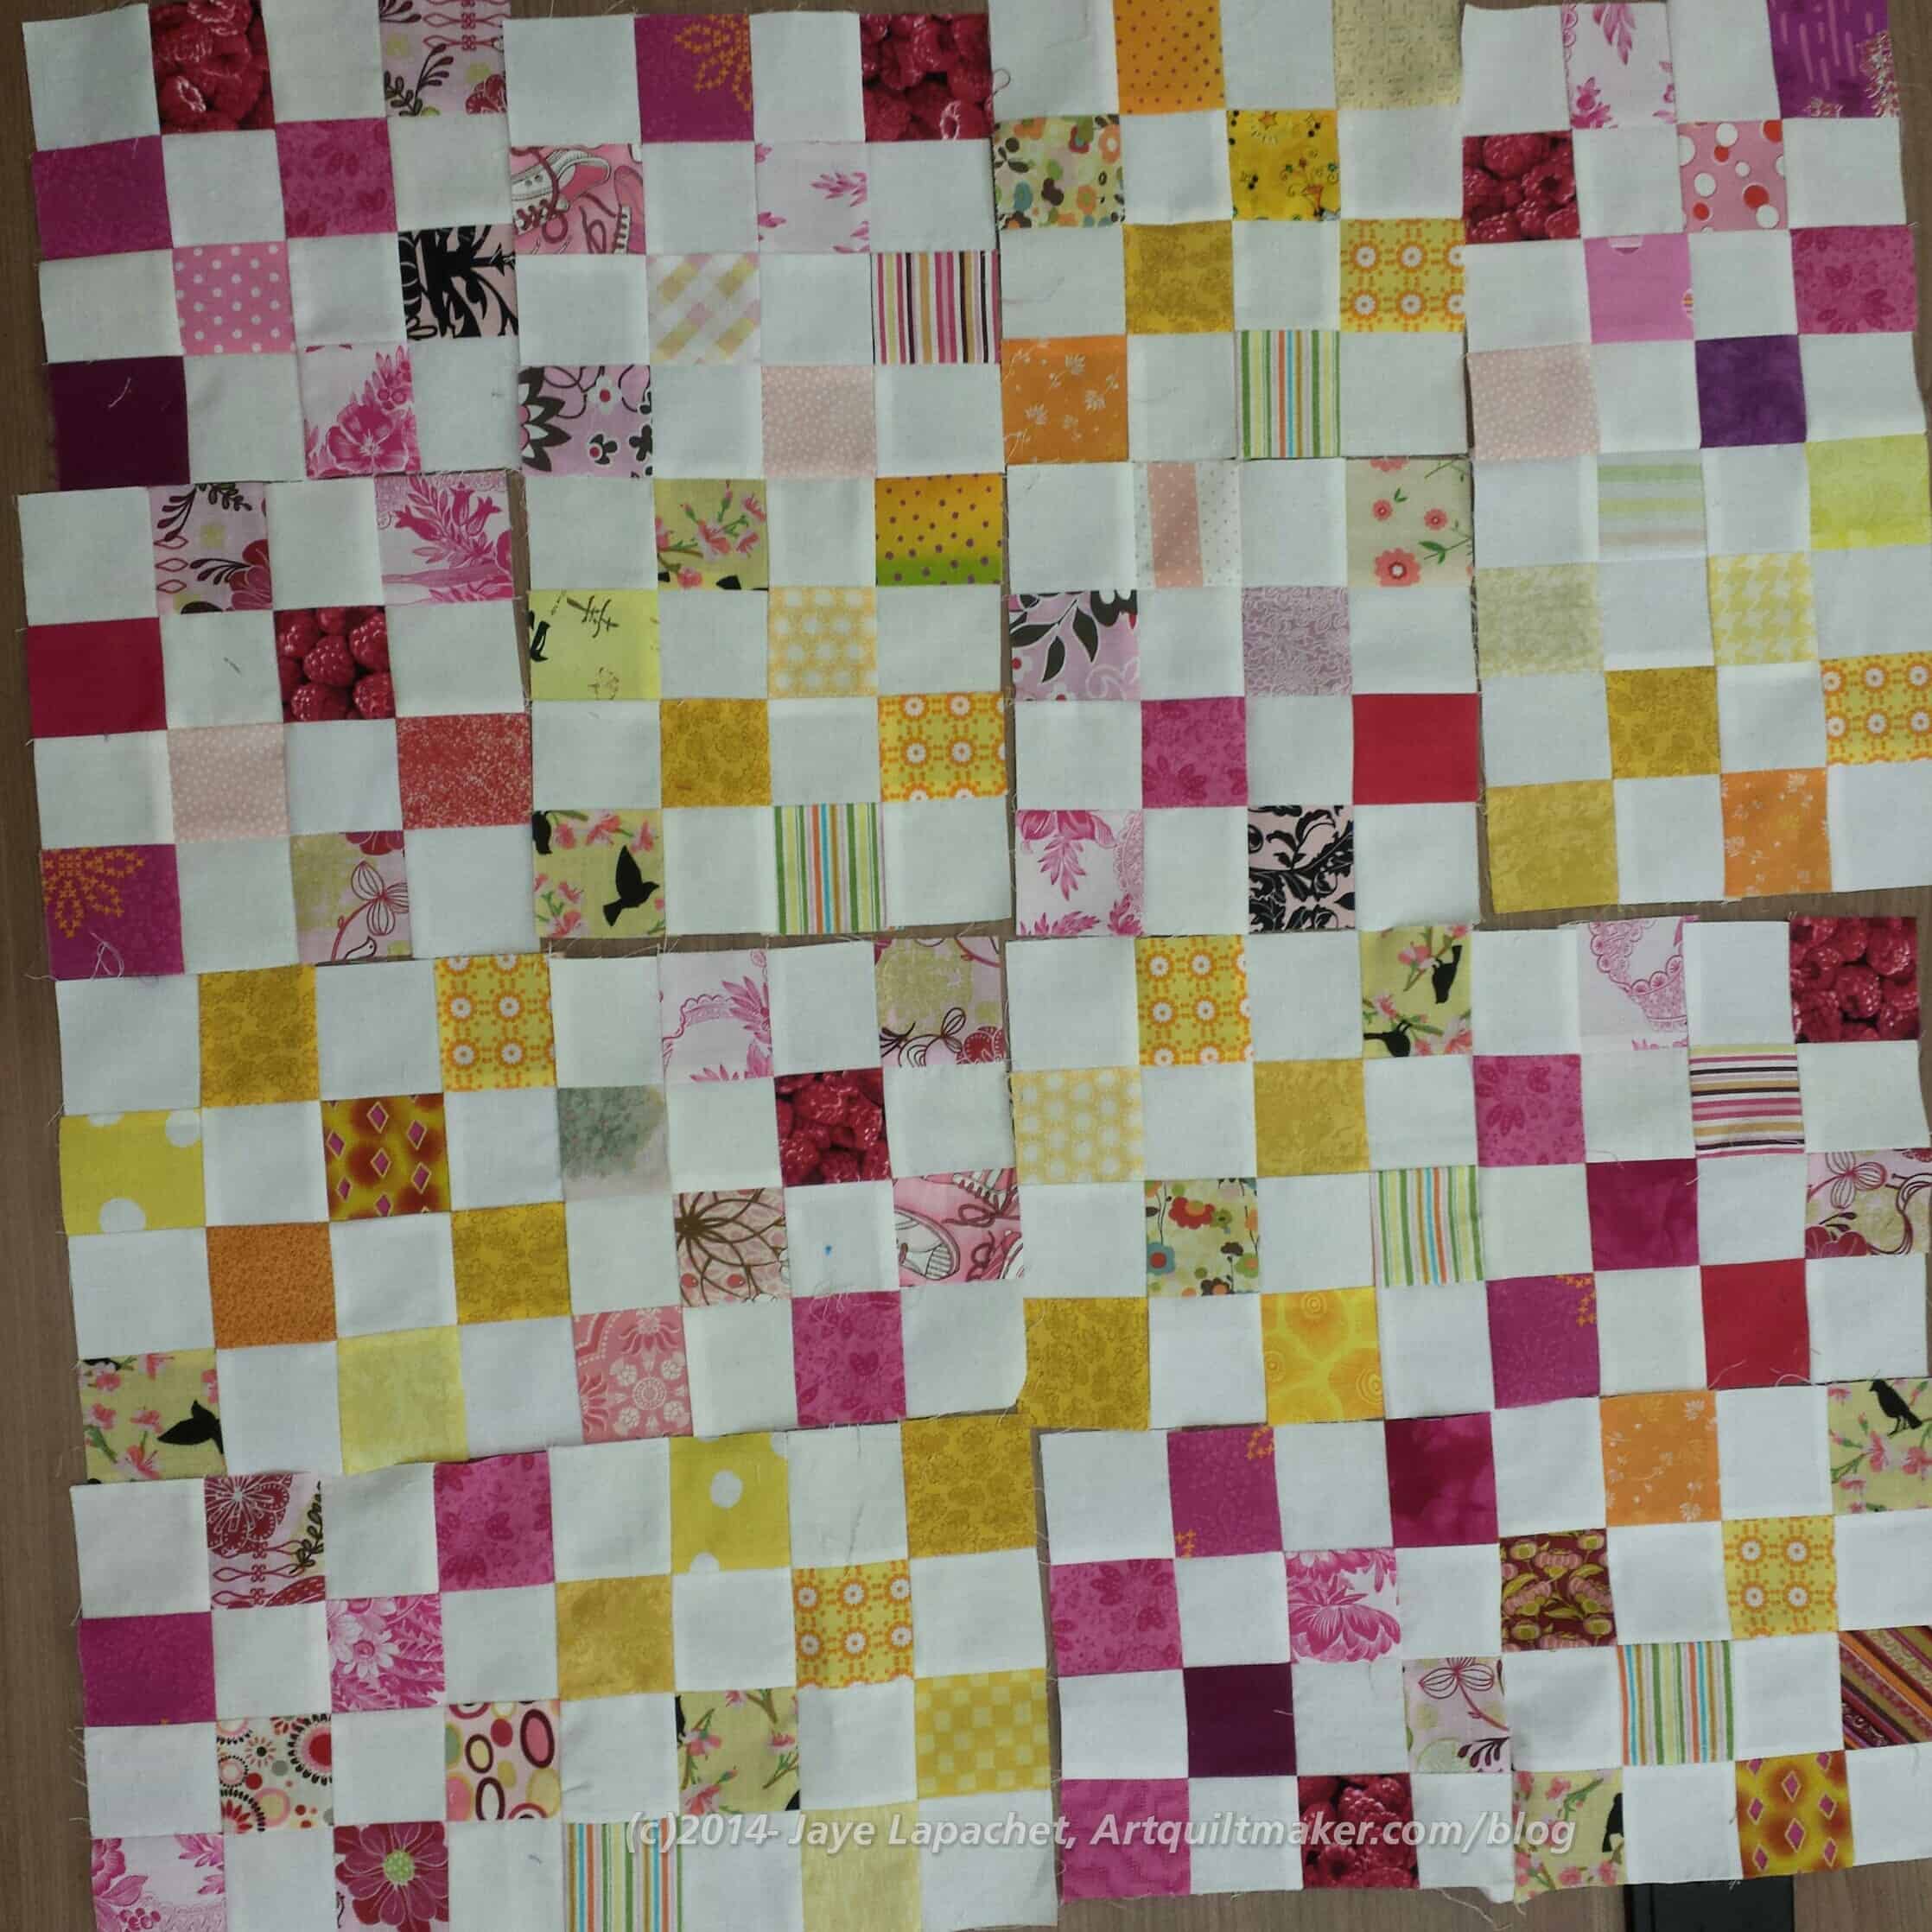
After the T quilts were done many people worked on making postage stamp blocks, including Gerre and I. We made as many pink and white postage stamp blocks as we could, then we added in some yellow and white blocks in to bring the quilt up to size. We didn’t finish it. Gerre put me in the sewing driver’s seat and I kept screwing up when sewing the blocks together, so we pinned the blocks together and Gerre will finish the top at home.
You have seen a number of donation blocks and quilts I have made for BAMQG using the postage stamp pattern. I wouldn’t have called it a postage stamp pattern; I would have called it a 16 patch, but postage stamp was what the Charity Girls called it, so we’ll move on and fight about names later.
The most recent quilt (still in process!) is the Black and Grey Teenaged Boy Donation Quilt. You know it; you have seen it 100 times. I make those blocks as meditation and to do something good for others. There is something about making those blocks that feels infinite. Infinite possibilities. I think simple blocks have that quality.
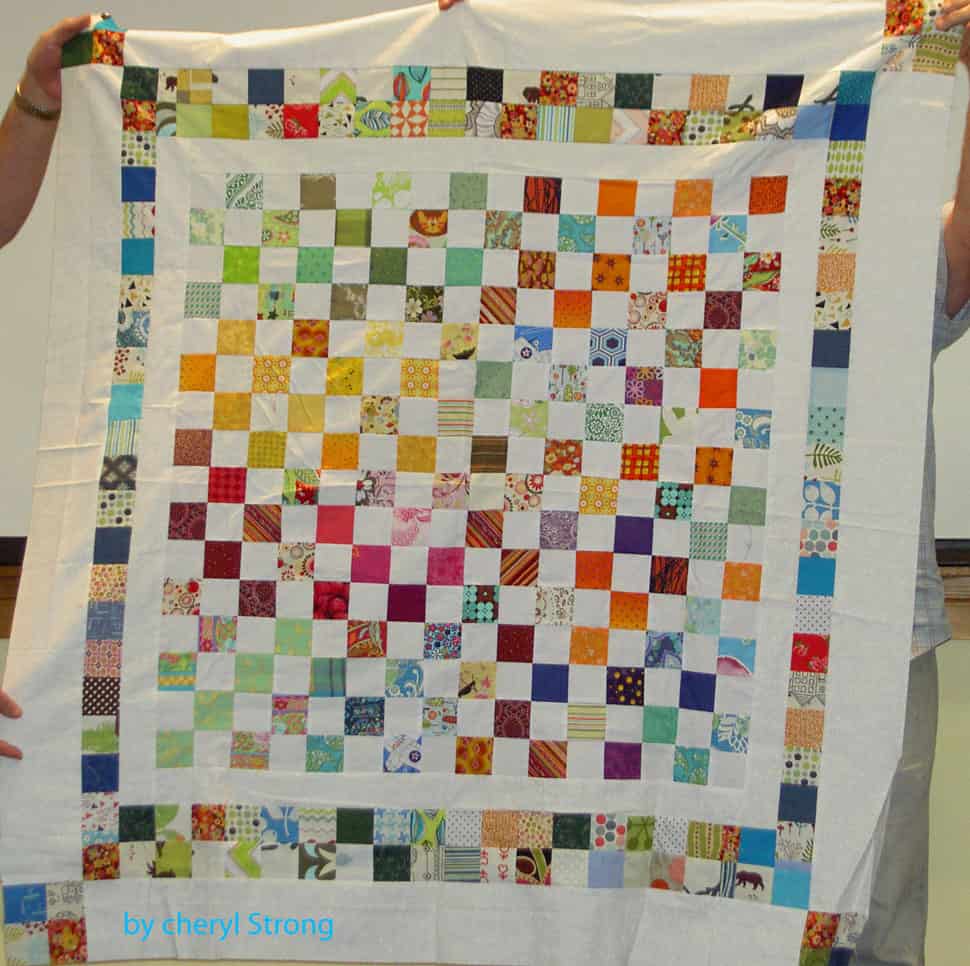
Cheryl’s Postage Stamp Quilt
Cheryl’s quilt is a perfect example. She took a number of different blocks, put them together and added an awesome border to make this donation quilt.
One thing is that I could use a lot of different scraps. I could use a similar border idea to finish the Black & Grey Teenaged Boy Donation Quilt. Perhaps I will use this idea when I make the next donation quilt.
A little while ago I participated in Kelly’s monthly BAMQG Challenge, which was to quilt a half yard fabric sandwich. The goal ended up being to make a bag from this piece. I wasn’t entirely happy with the quilting, but I didn’t sincerely dislike it either. The quilted piece laid around for awhile, but it was on my mind. It is only recently that I made time to start the bagmaking part. Part of the delay was because I couldn’t understand and extrapolate out from Kelly’s excellent directions. You know me. Sometimes I can read and read and the words look like gibberish. She was very patient with me and agreed to give me one step at a time. Broken down I could do it.
Supplies:
1 yard of fabric (2 different half yard pieces will add interest)
1/2 yard of fabric for straps and other fiddley bits
12″ x 42″ (or WOF) ShapeFlex
12″ square of coordinating fabric for binding
batting slightly larger than 18″ wide to accommodate the half yards above
Sewing machine and supplies to machine quilt/free motion quilt
Layer and sandwich 2 half yards of fabric with batting
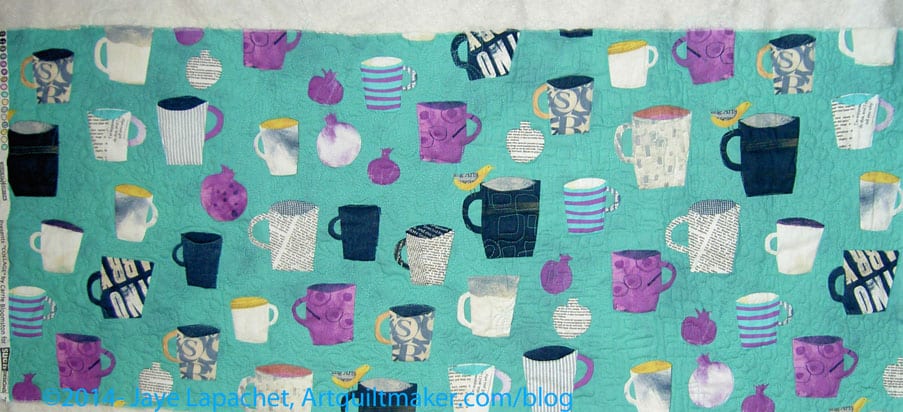
Full Piece Quilted
Free motion quilt piece as desired. Shown is the piece that I did back in April. I know pieces of fabric don’t magically quilt themselves and I am not saying they do. It took me some time, but it is good practice and this is a good use for those practice pieces. Go back to the previous post and look at the different quilting designs I used.
Kelly didn’t have me make the straps until after the bag was put together. I like to make all the fiddley bits first, so they are ready to go when I am on a roll making the bag and ready for them. That means: make the straps whenever you want. You should make them your favorite way. Here are the directions for making the straps that I used for this bag:
Cut 2 strips 6″ wide by WOF. You could make them 5.5″ and they would be a touch skinnier.
Cut 2 strips 5 3/4″ x WOF from ShapeFlex (If you make the straps skinnier, you need to adjust the size of the ShapeFlex. I cut it smaller to reduce bulk in the seams, which can get quite hefty without trying.
Press ShapeFlex to wrong side of fabric, following the manufacturer’s directions.
Fold each 6″ fabric backed piece in half and press well.
Open the pieces you just pressed and fold raw edges to the center.
Press folded edges.
Fold entire strap on original center fold again. Raw edges should be inside and strap should measure about 1.5″.
Optional: Depending on what you want to use the bag for, you can further line the straps with something like Timtex or Soft & Stable.
Topstitch along both edges very close to the edge. You can use a decorative stitch or two lines of straight stitching to add interest
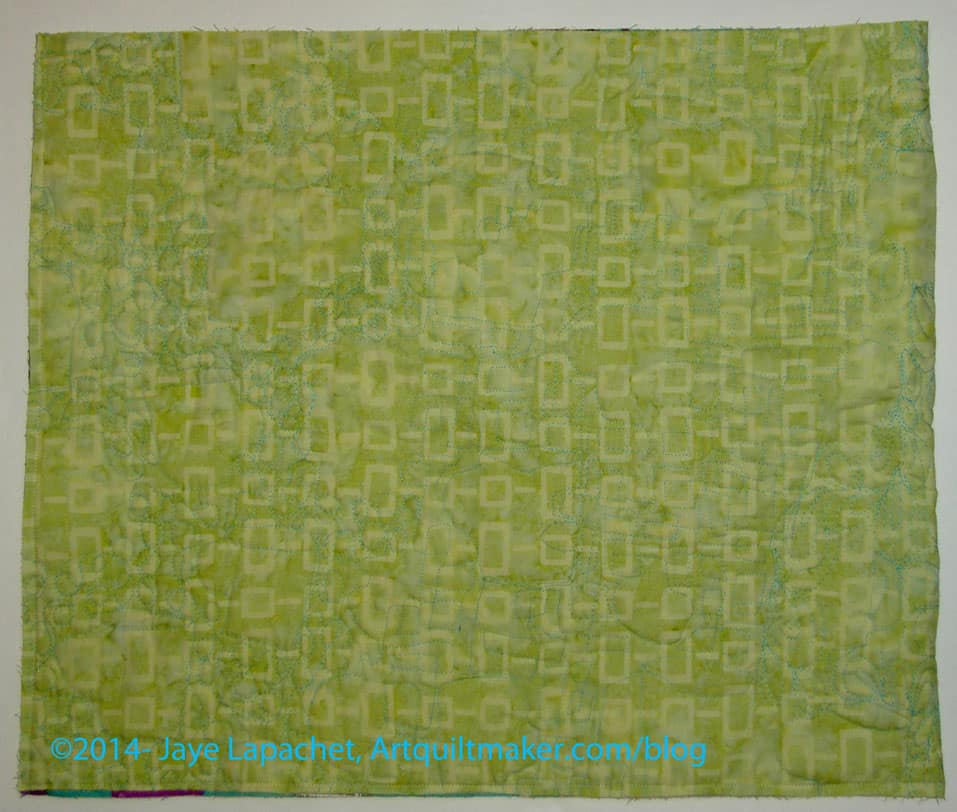
Squared up Quilted Piece
Square up your quilted piece by trimming the excess batting and raw edges.
Fold trimmed piece in half RST* and sew along side and bottom edges ONLY. Only the top will be open. You will have a flat piece that looks like an oversized iPad cover.
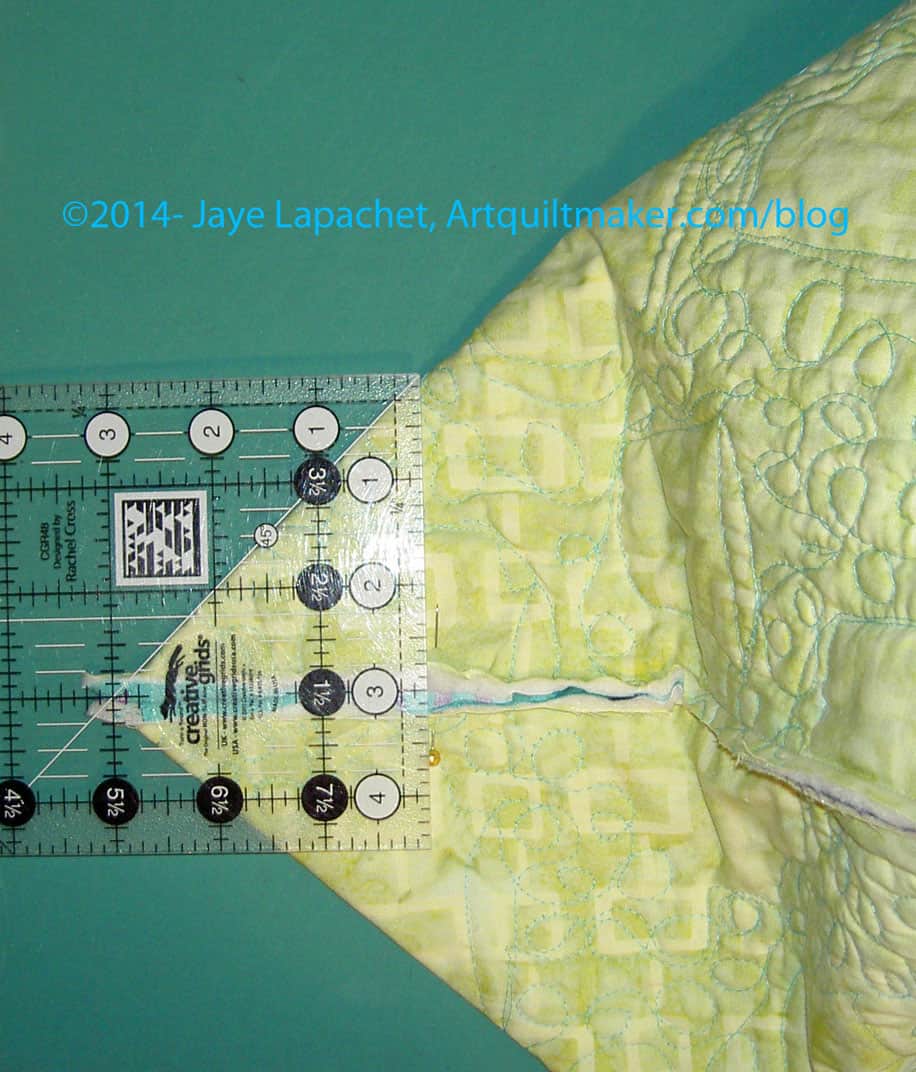
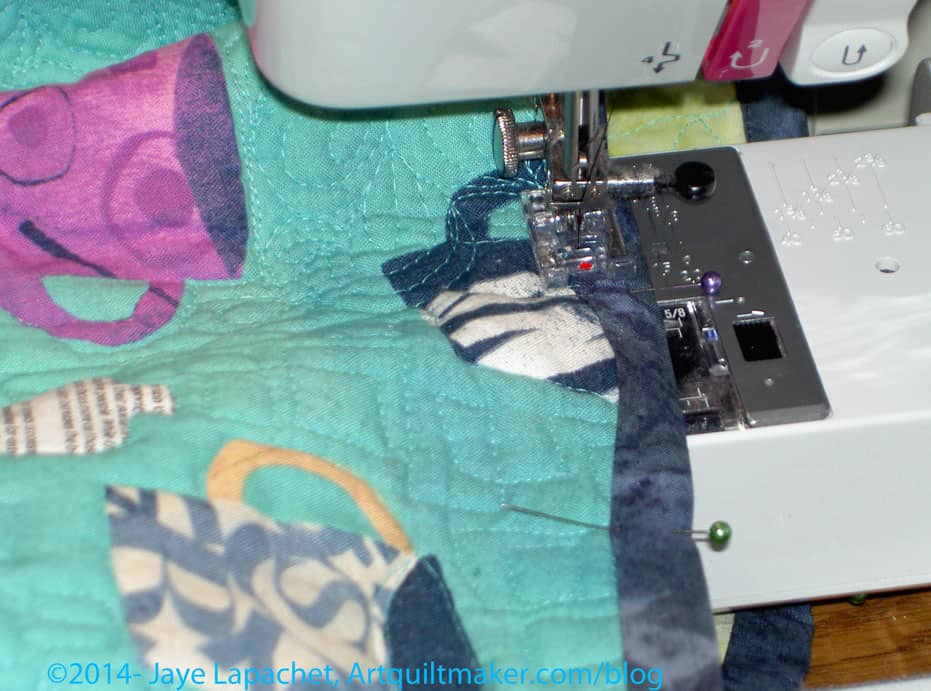
Measure to Box the Corners
Box the corners. Kelly does a minimum of 2″ from the side seam. FYI: there is no seam on one side, so I pressed the fold and treated the folded part as a seam. I used my Creative Grids 4.5″x8.5″ ruler to try out different corner sizes. I ended up doing a 3″ box, using pins to try out the size and see what I liked. You can see in the photo that I was able to use the side and bottom measurements to help decide. I had to see how big the bag would be and how it work as a bag I actually used. Once I decided on the size of the boxed corner, I drew a pencil line across the corner to know where to sew. I placed a couple of pins across the drawn line to hold the bottom in place. Then I sewed on that line to make the box. in the picture, I sewed along the short end of the ruler from diagonal line to diagonal line using the center seam as the straight line.
Corners Boxed
Optional: Trim off the excess corners to reduce bulk. I like to do this because I don’t like the excess to interfere with my stuff once I start using the bag. Also, small stuff that migrates to the bottom of the bag gets tangled up with them. Since this bag doesn’t have pockets, small stuff will migrate.
Press raw seams open. You’ll have to stick the iron inside the bag.
This is the point where, when I make the next version, I will sew binding over the raw seams. If I knew someone with a serger, I would serge them, but I don’t, so binding it is. I could just leave the raw edges, but that just seems wrong. On this version of the bag, I did this step later, but it makes sense to do it after the corners, so there is not a lot of other stuff to worry about and you won’t have to fold the ends of the inside binding over, because you can cover the raw edges of the inside binding when the top binding is sewn.
Make a bias binding like you would for a quilt. You will need about 50″. I cut my square (see list of supplies) into 2.25″ wide strips on the diagonal. The Judy Martin Point Trimmer ruler makes it really easy to sew the strips together. I suppose you could use straight of the grain binding, but I think a bias binding works well.
Add binding
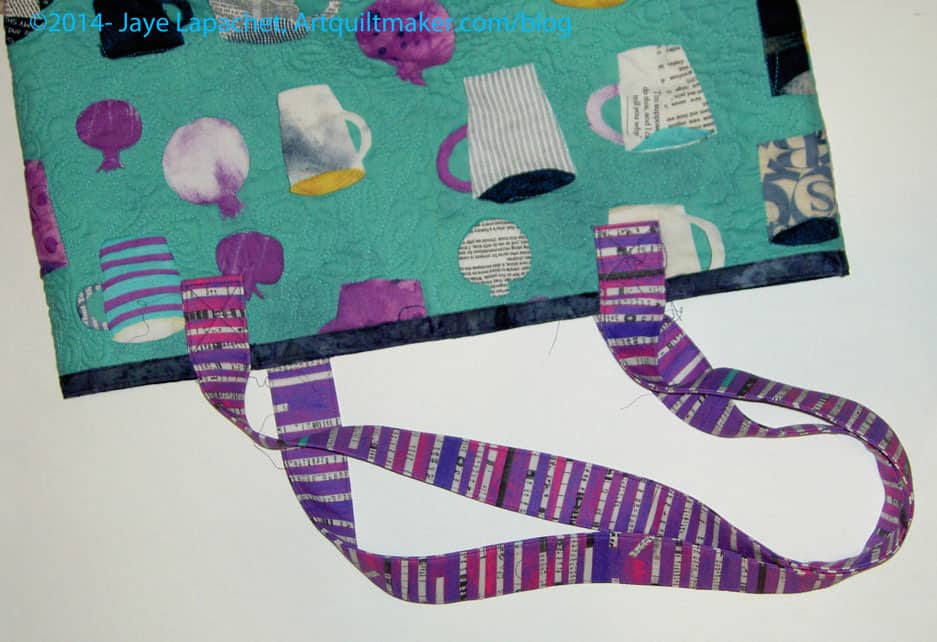
Bind the top, covering the edges of the binding that covers the inside raw edges (step above). I sewed along the bottom first, making sure I caught the underside as well as the top. When I finished I sewed along the top of the binding as well. I thought it made the bag look more finished and added some interest (must be my favorite term today). I used an extra piece of binding leftover from the Spiderweb quilt and I am glad I used something that mostly matched. On another version, I would plan ahead better and use a coordinating fabric or the strap fabric.
If you haven’t made your straps, make them now.
Test the length of the straps until they are right for your height. I used WonderClips at different lengths to find the right length, then I trimmed the original length to my custom length, which was about 36″.
Flatten the bag carefully so the edge of the side is folded. This means that the edge of the side measures an equal amount from the side seam to the edge of the side as is the top. Measure two inches from this fold.
Place a pin at 2″ that you just measured.
Measure 2″ down from the top and place a pin parallel to the top of the bag. This makes a half square where you will place your strap.
Fold the end of the strap 2″ up and place the folded edge right beneath the bottom of the binding.
Sew the straps to the bag, making a box with an X in the middle. Go around the edges and the X a few times.
Optional: After you sew on the straps, sew along the fake edge of the side (see step 14) from the top to about 4″ from the bottom. Do this on all sides to make the bag into a box.
You are finished! You have made the bag. Hooray!!!
A Variety of Notes:
Crazy as it sounds, I am now thinking of fabrics I can quilt that would look awesome in bag form. I know. I think I have lost mind.
I like my bags to have pockets, but I also don’t like the stitching to show through, so I didn’t put any in this bag. You could make a lining and add it before you sew on the binding, then you wouldn’t have to cover the raw edges with a binding. You could sew the pockets to the lining. You’ll have to figure the measurements out yourself. Of course, your beautiful quilting would be covered.
Every time I turn around, I am kind of shocked that it is September. Even in my journal, I keep starting to write June when I write the date. I don’t know why. I did that all through last year as well and had no good reason then either.
Anyway. Lots of BAMQG this week.
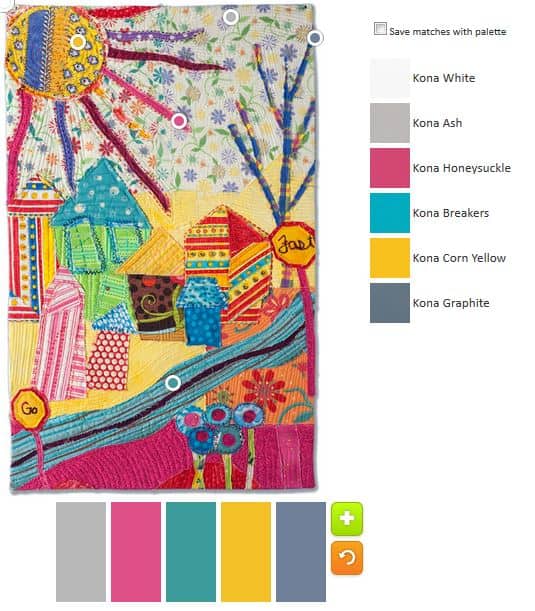
Play-Crafts Palette Builder
The meeting was awesome, as usual. The best part was the talk by Anne Sullivan of Play-Crafts.com. She gave us all a lecture on Color Theory. I know a couple of things about color theory, but I learned quite a few things. There are things called color models, which I have heard of before. One of the models is called Hue, Saturation & Value (HSV). It is a color model created to be more intuitive and show color relationships.
Anne also talked about the basics of color theory, contrast, and color schemes. Anne has the passion of someone who loves color. She has clearly done the research of a person dedicated to something she loves. I looked at her website and found nothing on color until I went to the patterns and tutorials section and there were some tutorials on color there.
We had some business as well.
Elections are next month.there will be a couple of new positions available: liaison with MQG and the Opportunity quilt coordinator
Charity will host a Sew Day on October 4. We will work in teams to create charity tops.
Amanda still has no reliable source for Cat Bed donations. She had a few that were already made, but not stuffed, so people took those. I gave in the neon orange bed. It got a few laughs. [BTW, I forgot to take a photo of that cat bed, but it was just neon orange, so nothing interesting. Also, I was able to cut a top and bottom, but not a gusset from the remaining Polartec. I hoped that Amanda would have a bit more fabric, not in neon orange from which to make the gusset]
The quilt display at the Los Altos Library will happen Dec 1-31 and Peggy has forms to fill out.
There were a few more packs of fabric for the 2014 Opportunity Quilt. The blocks are due at the October meeting.
PIQF is during the next meeting. 🙁 Poor planning on the Mancuso’s part IMO.
Retreat dates are still in process.
Amish exhibit – quilts are due. I didn’t do one, but people have to arrange for a dropoff with Kelly. People showed their quilts during show and tell, but no photos were taken as people were concerned that others wouldn’t attend the show if they had already seen the quilts.
I don’t know if the small groups met, because I was busy and missed mine.
I thought about posting this under “Doing Good”, but while I think I am doing good for the guild, it isn’t really service to the community. At least I don’t think it is. Hhmm. Philosophy so early in the morning. I am sure you appreciate that.
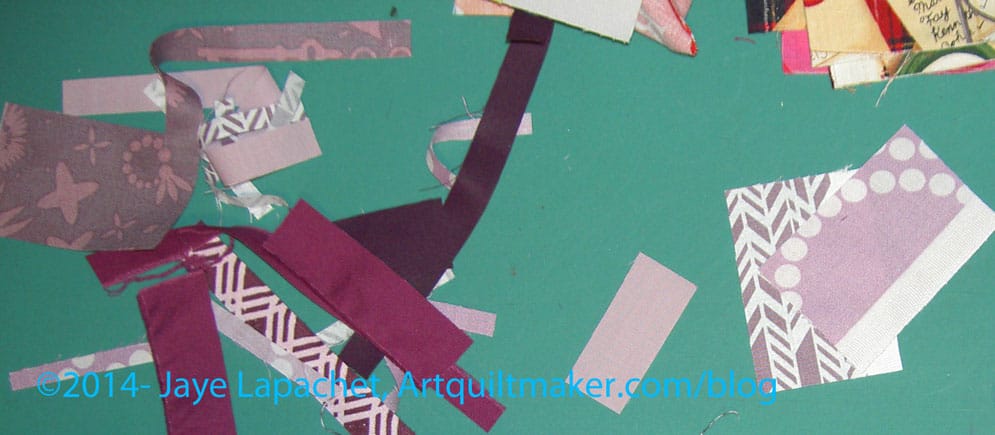
I wasn’t at the August meeting to get my block kit. Since I definitely wanted to contribute to the support of the guild, I asked for a block kit and Ruth was kind enough to send me one. Sadly she didn’t have any turquoise kits left so I ended up with mauve-y colors. That’s what I get for not being at the meeting.
I left the fabric laying around near me for a week or so. I kept meaning to do it before I went back to work, but didn’t so the weekend before the meeting, I decided it was time. I decided to make a test block for my Tale of Two Cities quilt using the Opportunity block as the tester.
Tester is the wrong word. I knew I could make the next blocks. It was more of kick in the rear end to get me back in ToTCi gear. Just what I needed.
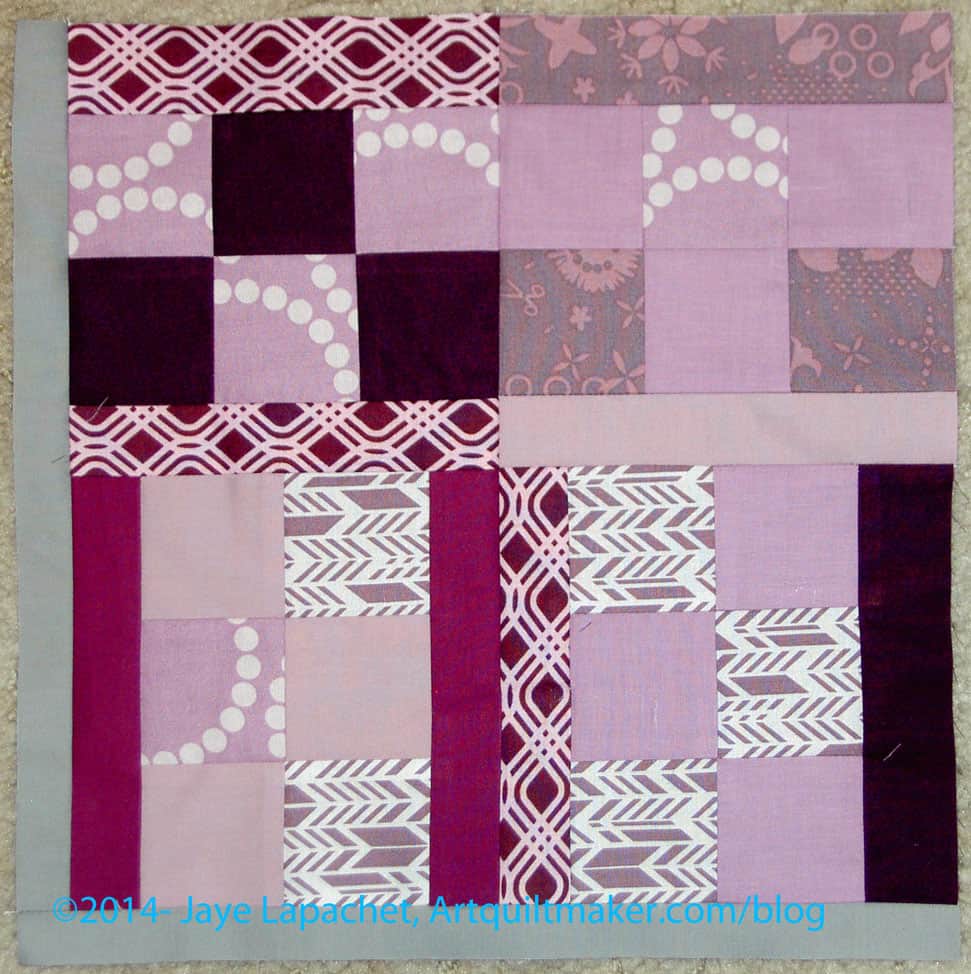
The idea, as I understand it, is everyone makes what ever blocks they want in a 6.5″ size, heavy on the squares and rectangles, and then sews them together into a 12.5″ block. Ruth has a plan and will put them together.
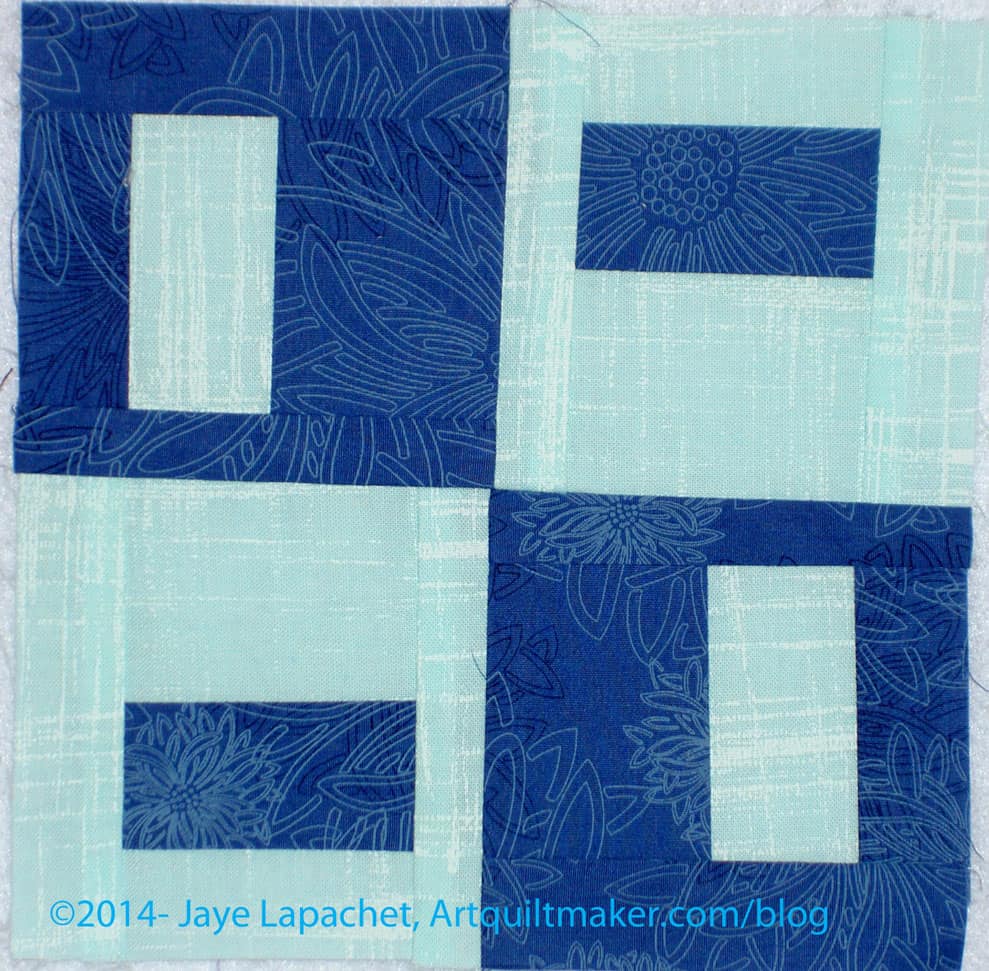
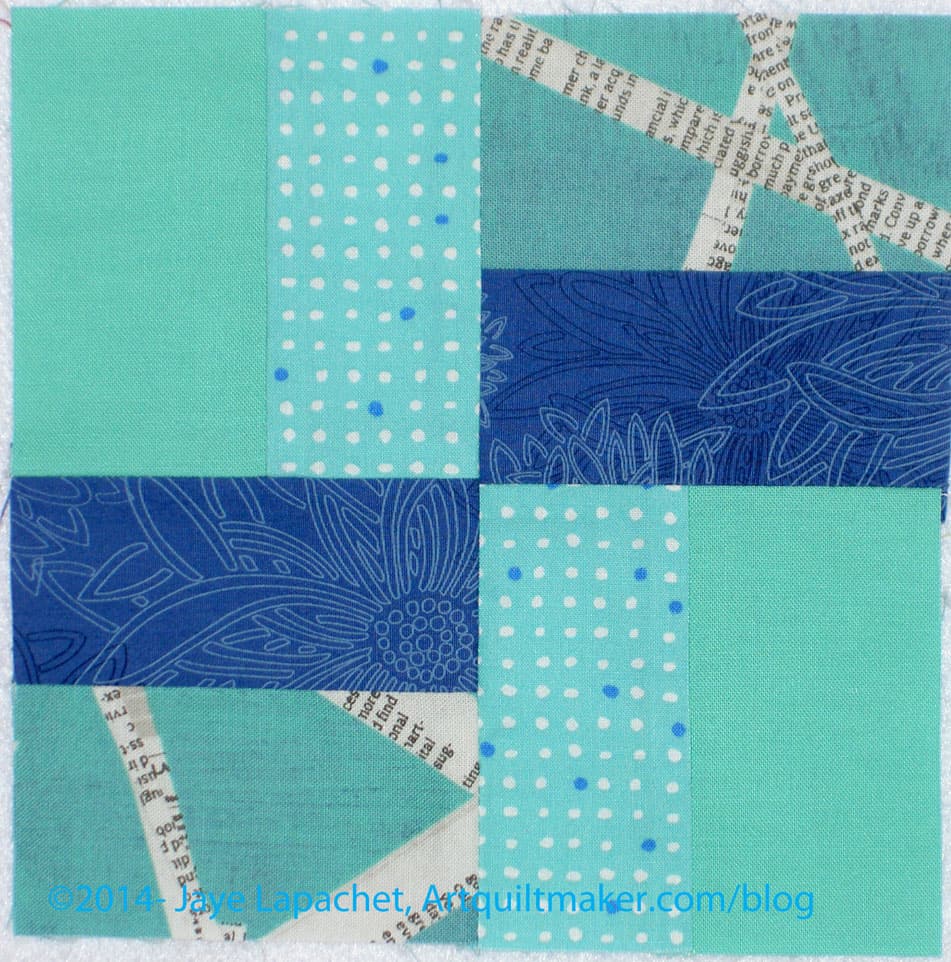
BAMQG Opportunity Block
She must be a master, because I had just enough fabric. The photo (left) shows how much fabric I had left. I should have put a quarter in with the shards so you could see how little was left.
I didn’t make a bunch of different blocks and put them together; I just made one and repeated it. Repeating the structure not the fabric, because I didn’t have enough to make all of the blocks the same.
BAMQG Opportunity Block
This one block design makes up four blocks into a new combination. The block looks different made up from four blocks
Right after CQFA, I hot-footed it, with Gerre, to the BAMQG Sew Day. It wasn’t packed, but we had to set up new tables when we arrived so we could work. It was a kind of a holiday prep day with demos on small gifts to make for the all-too-quick-approaching holiday season. I was there for the pencil case and grocery bag demos.
The pencil case is one that, using elastic, is slipped over the cover of a journal. It can also be used as a bookmark. I really liked the idea and Jolene’s way of making it.
Kelly did the demo for the grocery bags and they were like the shape of the plastic grocery bags. It has curvilinear shaped handles, which is a nice difference to some other bag patterns I have seen.
Gerre’s Log Cabin
Gerre brought a piece to work on, but ended up thinking more about the quilting than anything else. It is a great piece and I can’t wait to see what she does with it.
Angela brought her opportunity quilt materials and Ruth provided input on making up the blocks. It was good to see what Angela was doing and hear what Ruth was saying about her vision of the quilt. I had a kit and the discussing inspired me to get busy on my block.
I sat, mostly, and finished up the binding on the Wonky 9 Patch.The binding seemed to take me a long time and I became determined to finish it.
Once I was finished, I worked a bit on the Serendipity Lady. I was only able to add a few pieces to that piece and have decided to approach it a little differently. Look for more on that in an upcoming post.
Diana’s Piece
I put my two cents in when Diana was trying to figure out what to do with her piece.
She had a limited amount of fabric and was able to make the pennant banners in the picture. There wasn’t enough to make a whole quilt so she got the blue solid and was trying to figure out a layout for the pennants. We laid out the banners a little differently than one would first consider. That brought up assembly issues, so we talked about applique’ and other options that might allow her to put this quilt together.
It was a long day, but it was also great to see friends and engage in quiltmaking.
We got an email just before school let out saying that one of the Band moms had breast cancer and she was being treated quite aggressively.
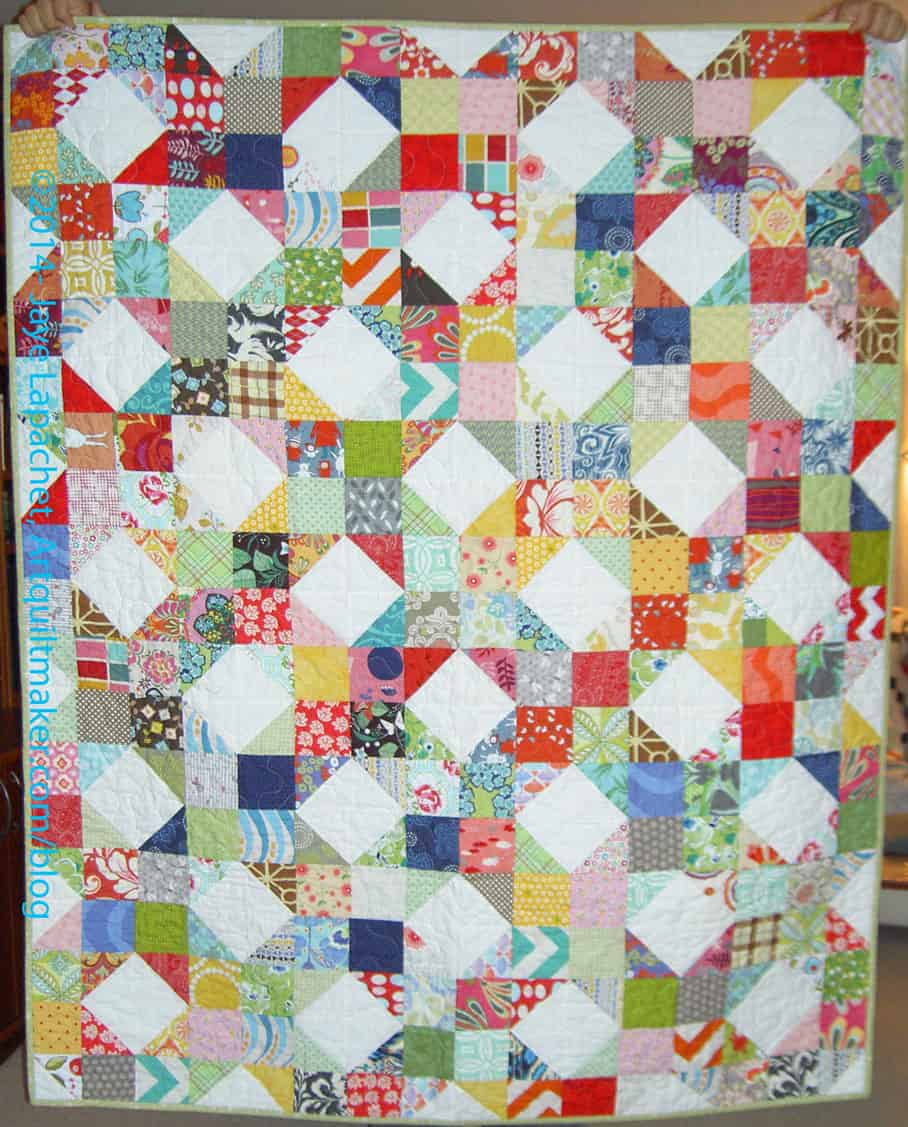
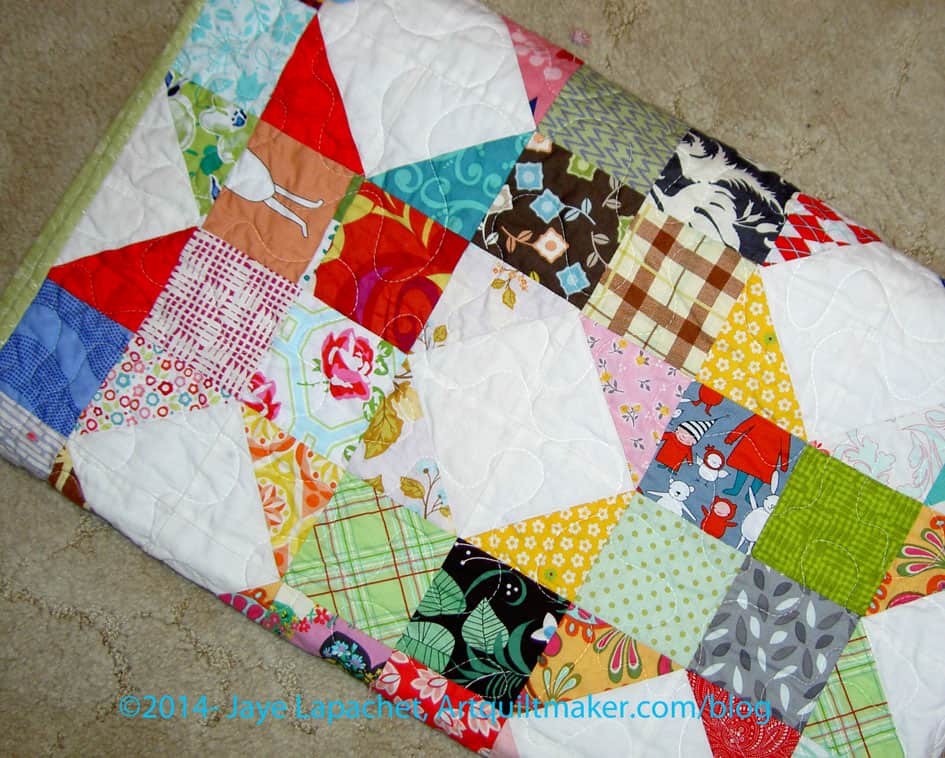
We got an update at Band Camp and I decided to ask for one of the quilts made by the BAMQG Charity Project. Michelle and I met on Friday and she gave me this quilt for the Band Mom.
I can’t decide if it is a star or some kind of ring quilt. I forget the name of the design. It is very scrappy and cheerful and I think will make the Band Mom feel better.
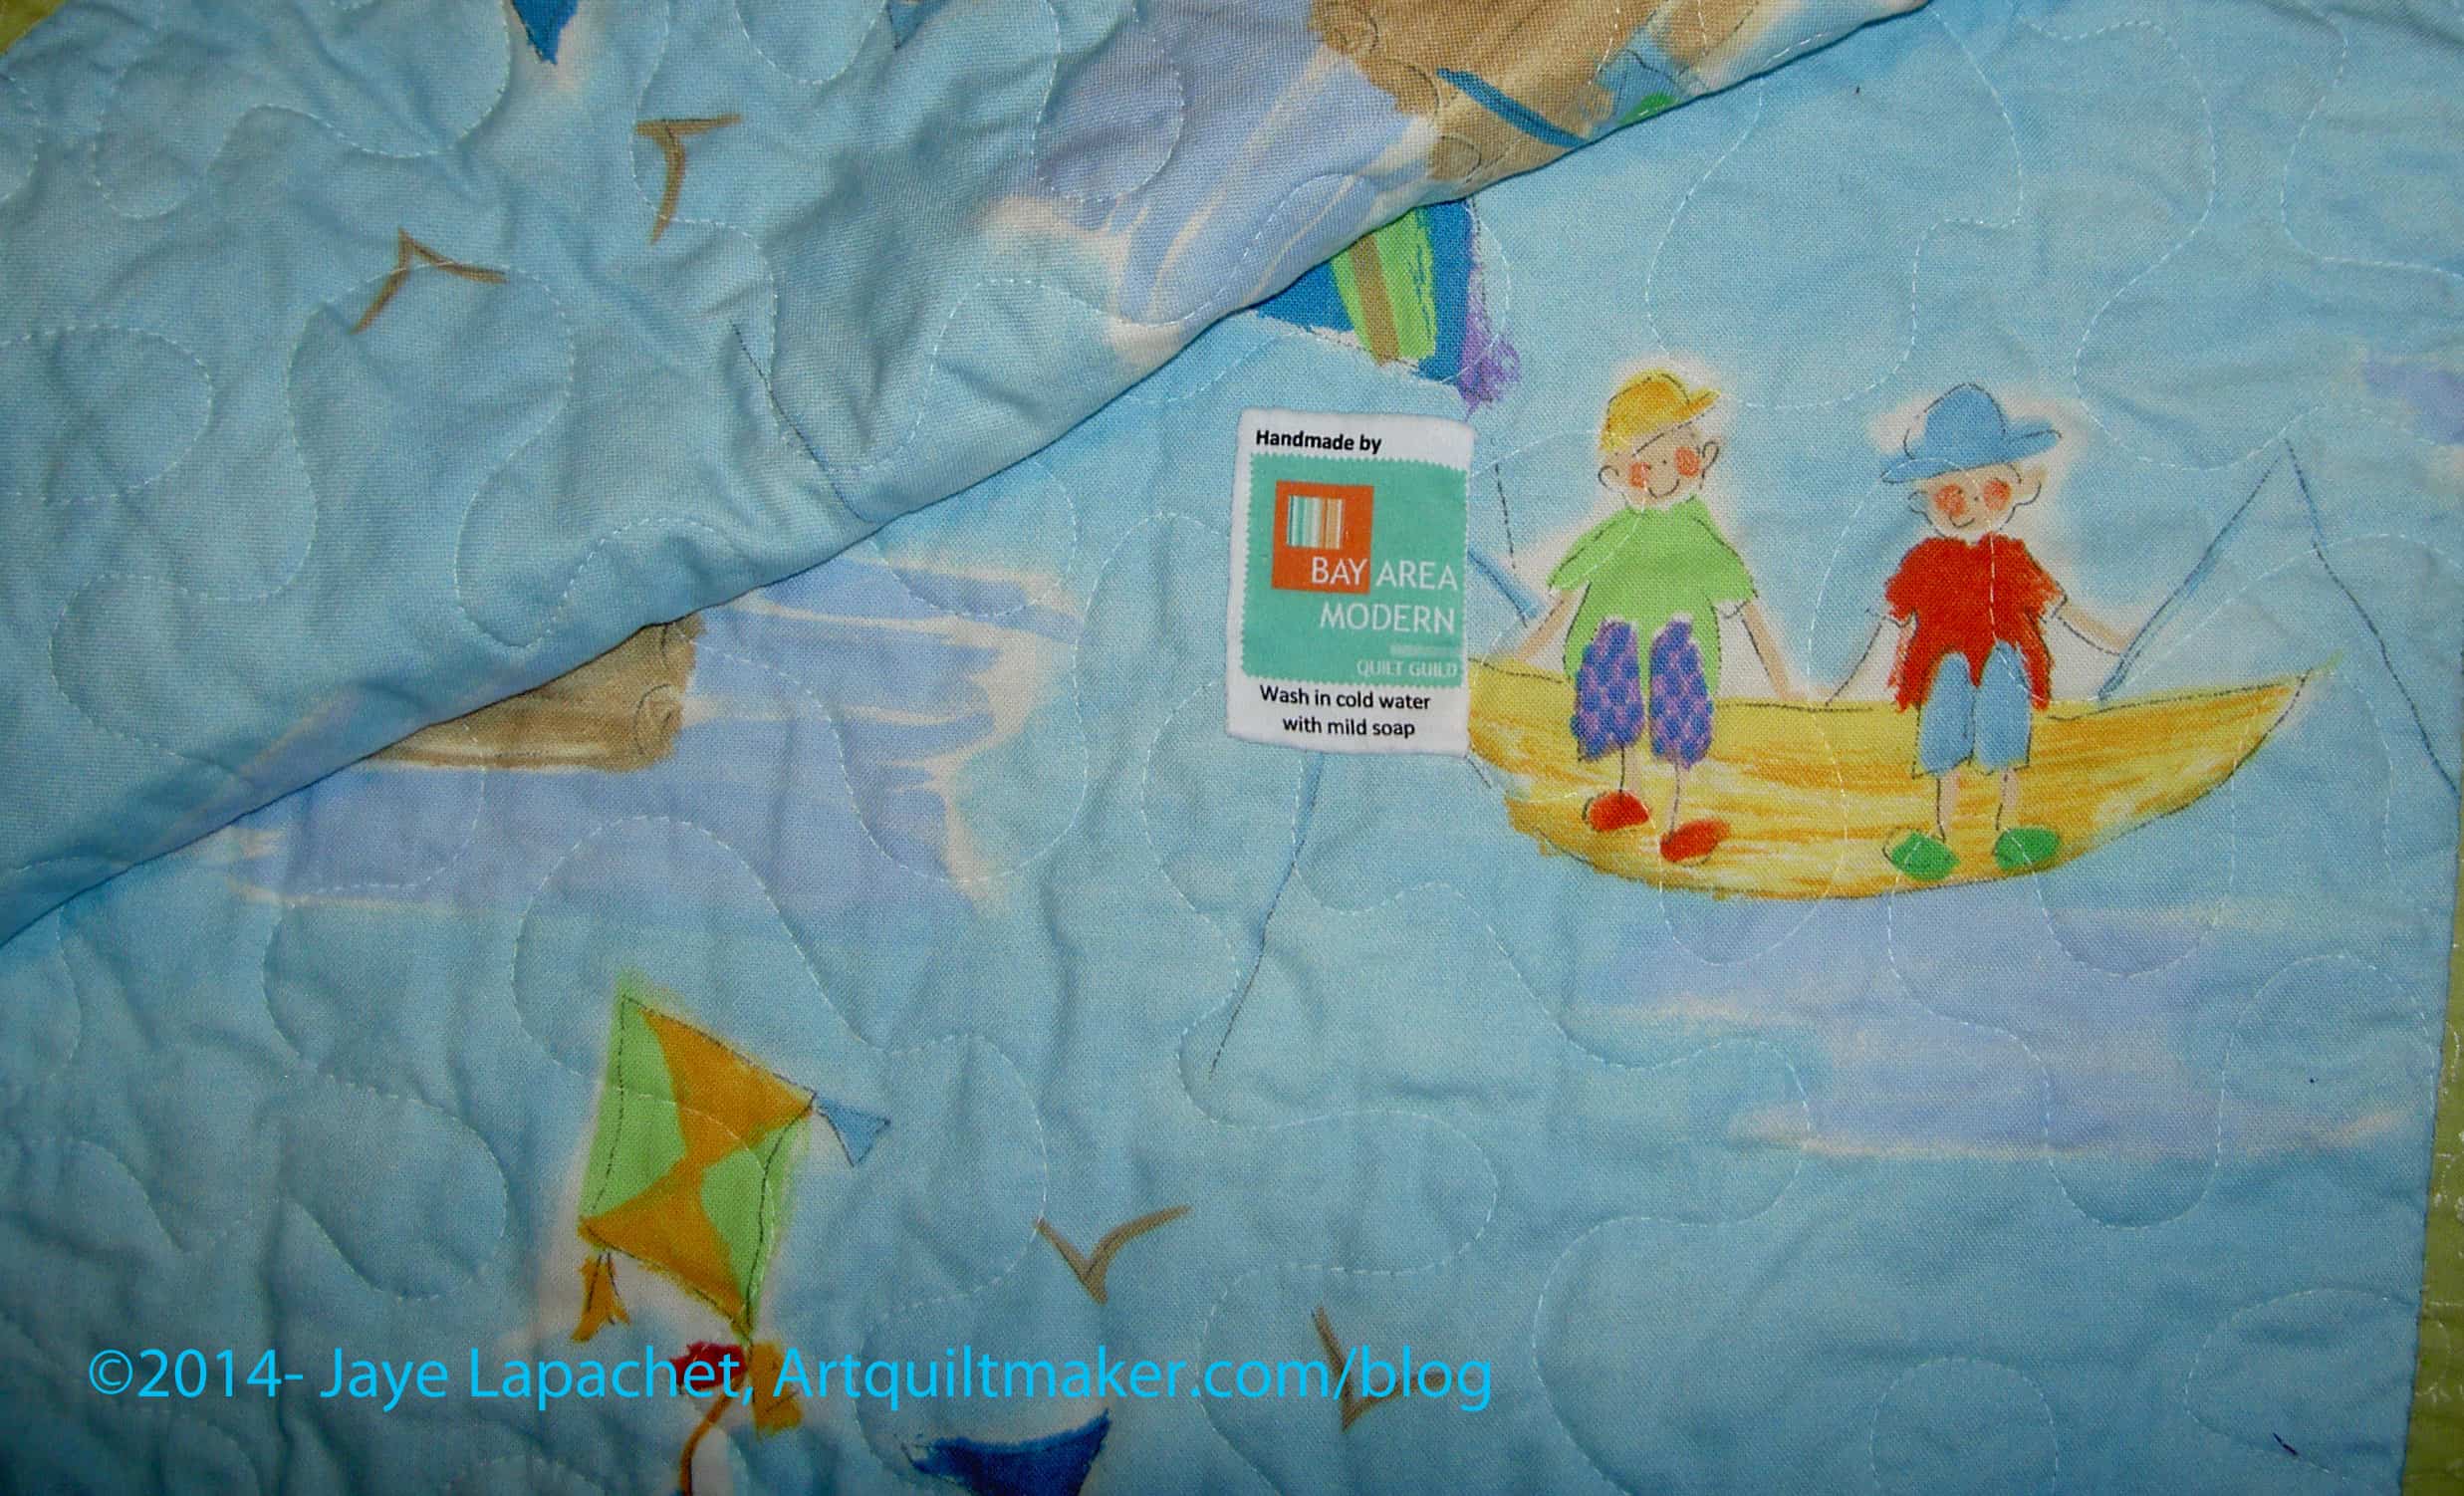
Star Donation Quilt Back
I sewed a small label on to the back for historic purposes.
I just have to wrap the quilt and will give it to the band director soon.
It almost feels sinful to enjoy sewing for charity so much. Odd, I know.
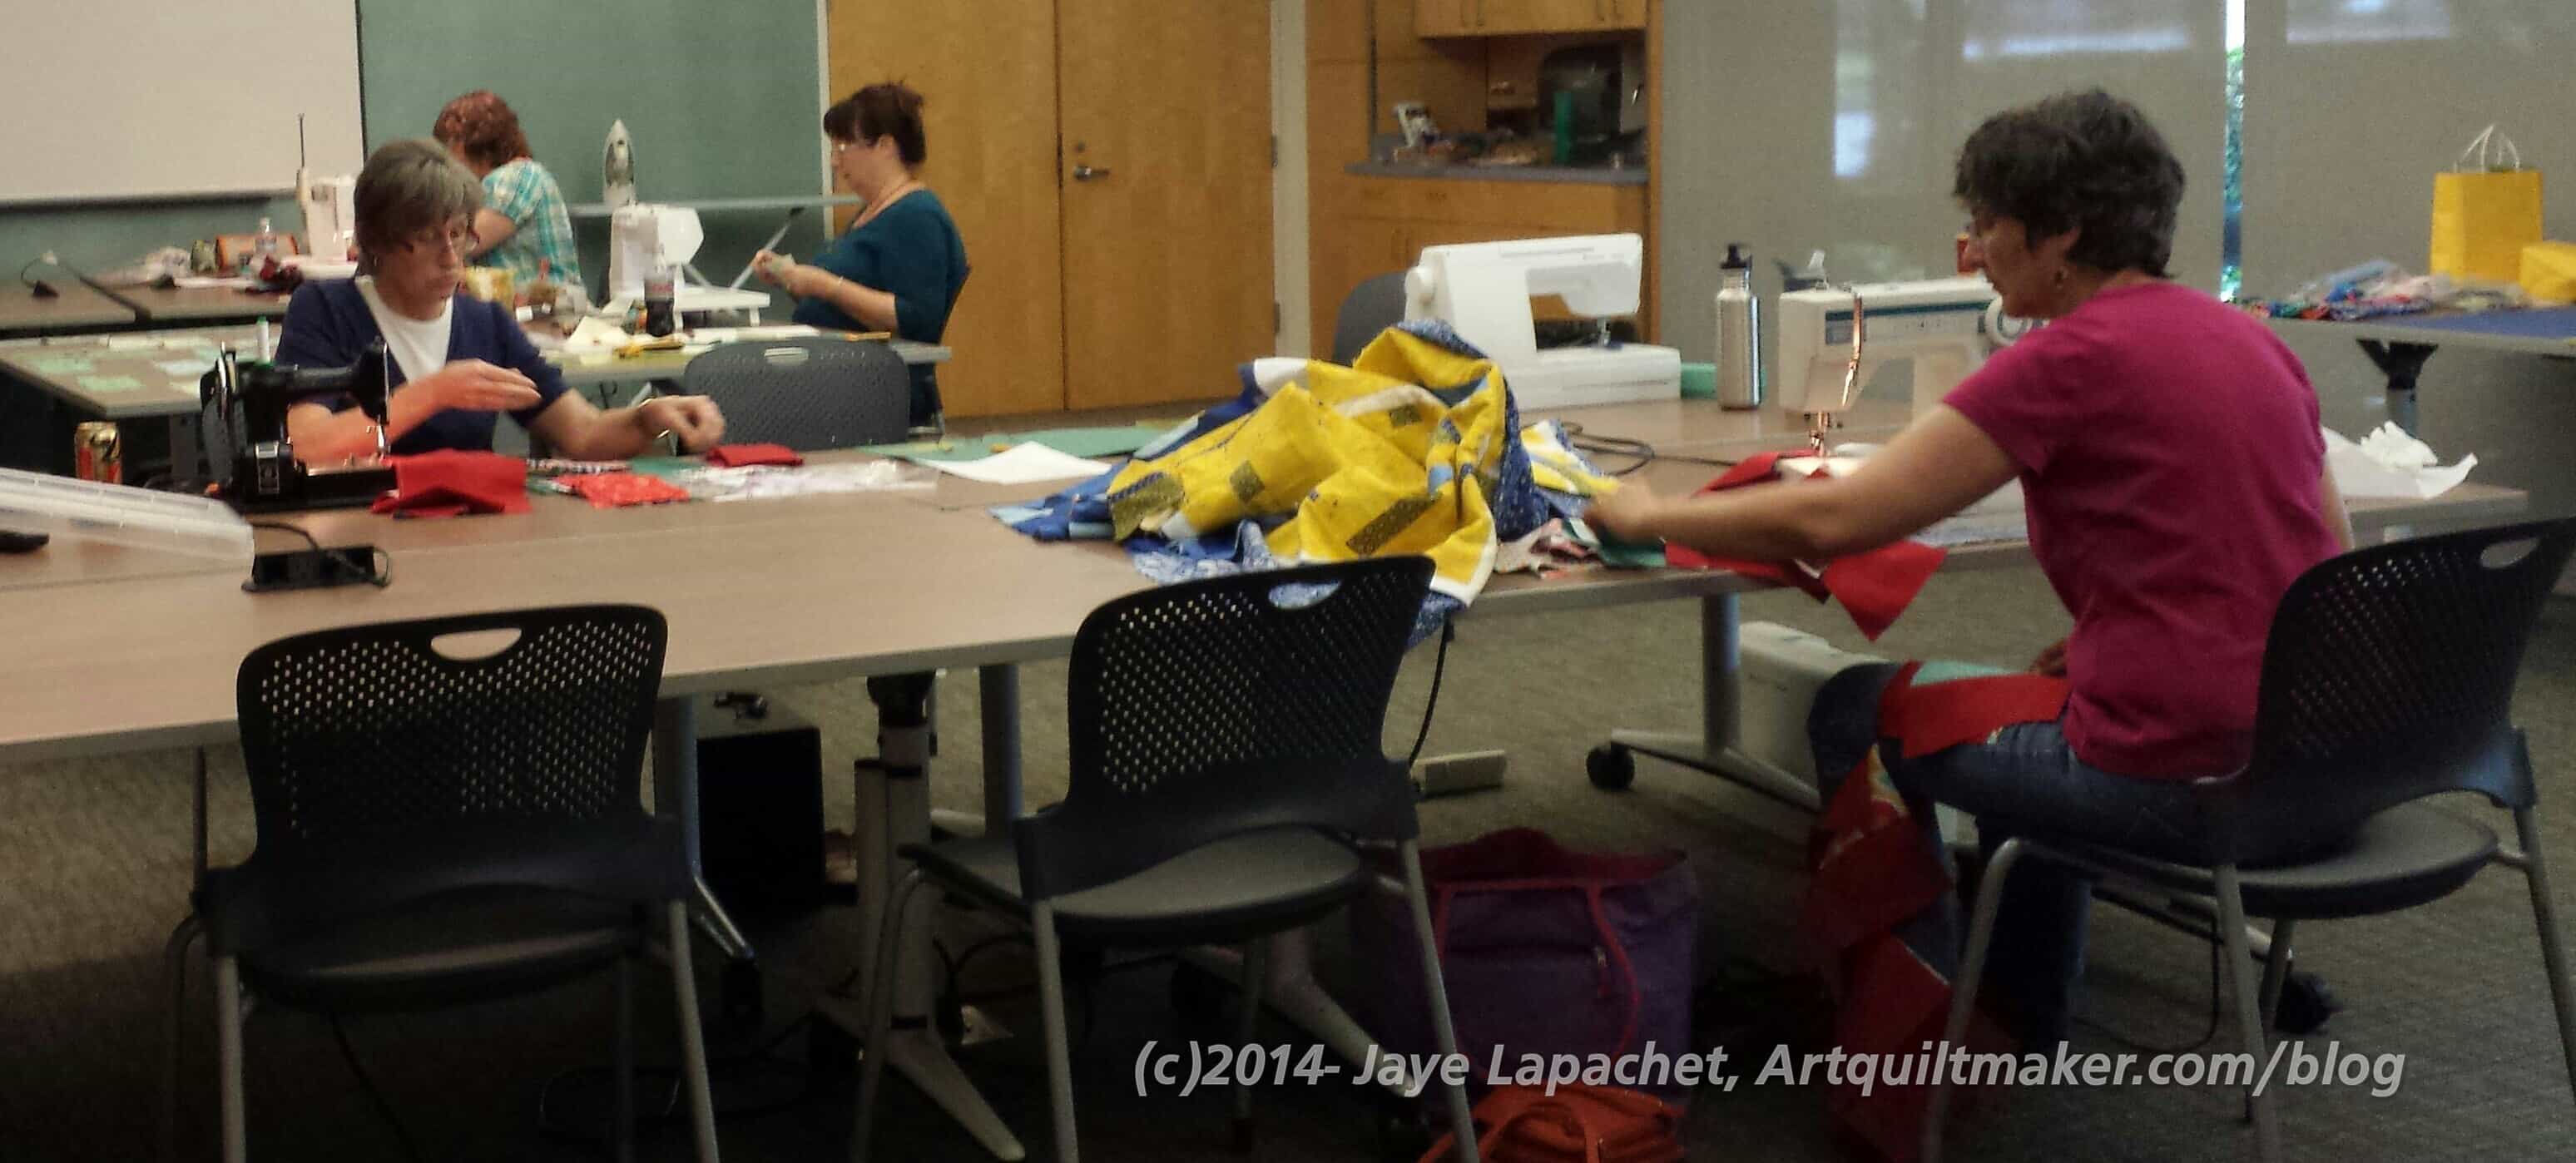
I spent all afternoon on Saturday sewing at the Charity Sew Day. At first, since I don’t like lugging my sewing machine around, I thought I would run around and cut and press for people. Nobody responded to my forum post about that idea so I brought my back up machine. What a waste! I forgot the foot pedal so I ran around and used other people’s machines while I was doing an improv quilt top, then Gerre let me use hers pretty regularly when I started on the second top.
One of the great things was showing Gerre how to do leaders and enders. She was charmed and made 2.5 blocks at least in between her Dr. Seuss wonky log cabin blocks. That means another person knows how to do leaders and enders and more blocks will get made.
Michelle and Peggy were really well organized, as usual, and had a number of different solids to use with our scraps.
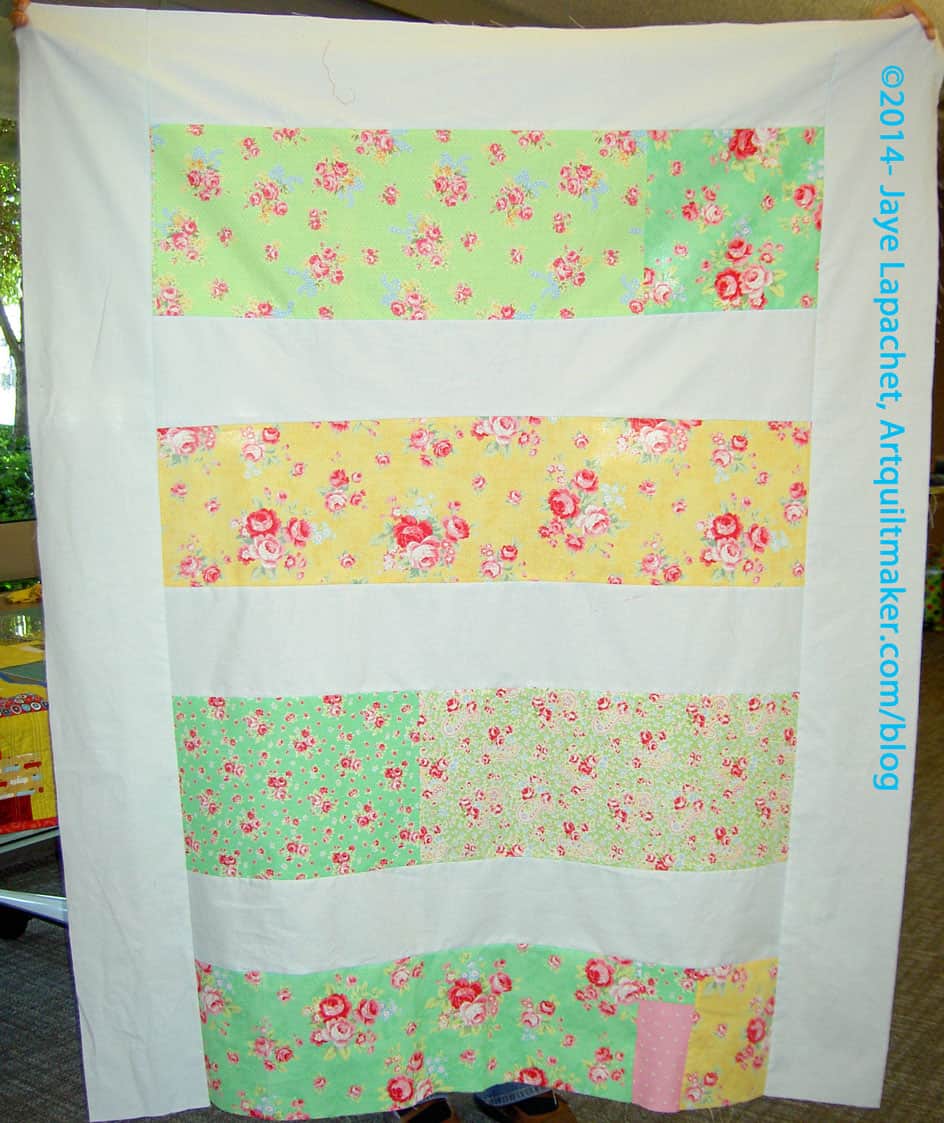
Flower Sugar Lap Top
I took the ends of quilt backs, which Colleen cuts off and returns to me. They aren’t much good unless I want to cut them up into squares or something and I never seem to get around to that. It occurred to me that I could make some Improv quilt tops with them so I brought them along. Two birds, one stone: gets the ends out of my house, adds comfort and, hopefully, beauty to someone else’s house.
The first top I made was made from the leftover back pieces from the Flower Sugar hexagon quilt. Edge pieces were quite large and I sewed them together relatively quickly. This is not great work of art, but it isn’t completely boring either. I brought it home to make the back for it. I’ll use some of the leftover Flower Sugar fabrics. I still have a lot of them and I am happy to use them for a good a cause. I may also ad something to the bottom. It looks a bit unfinished.
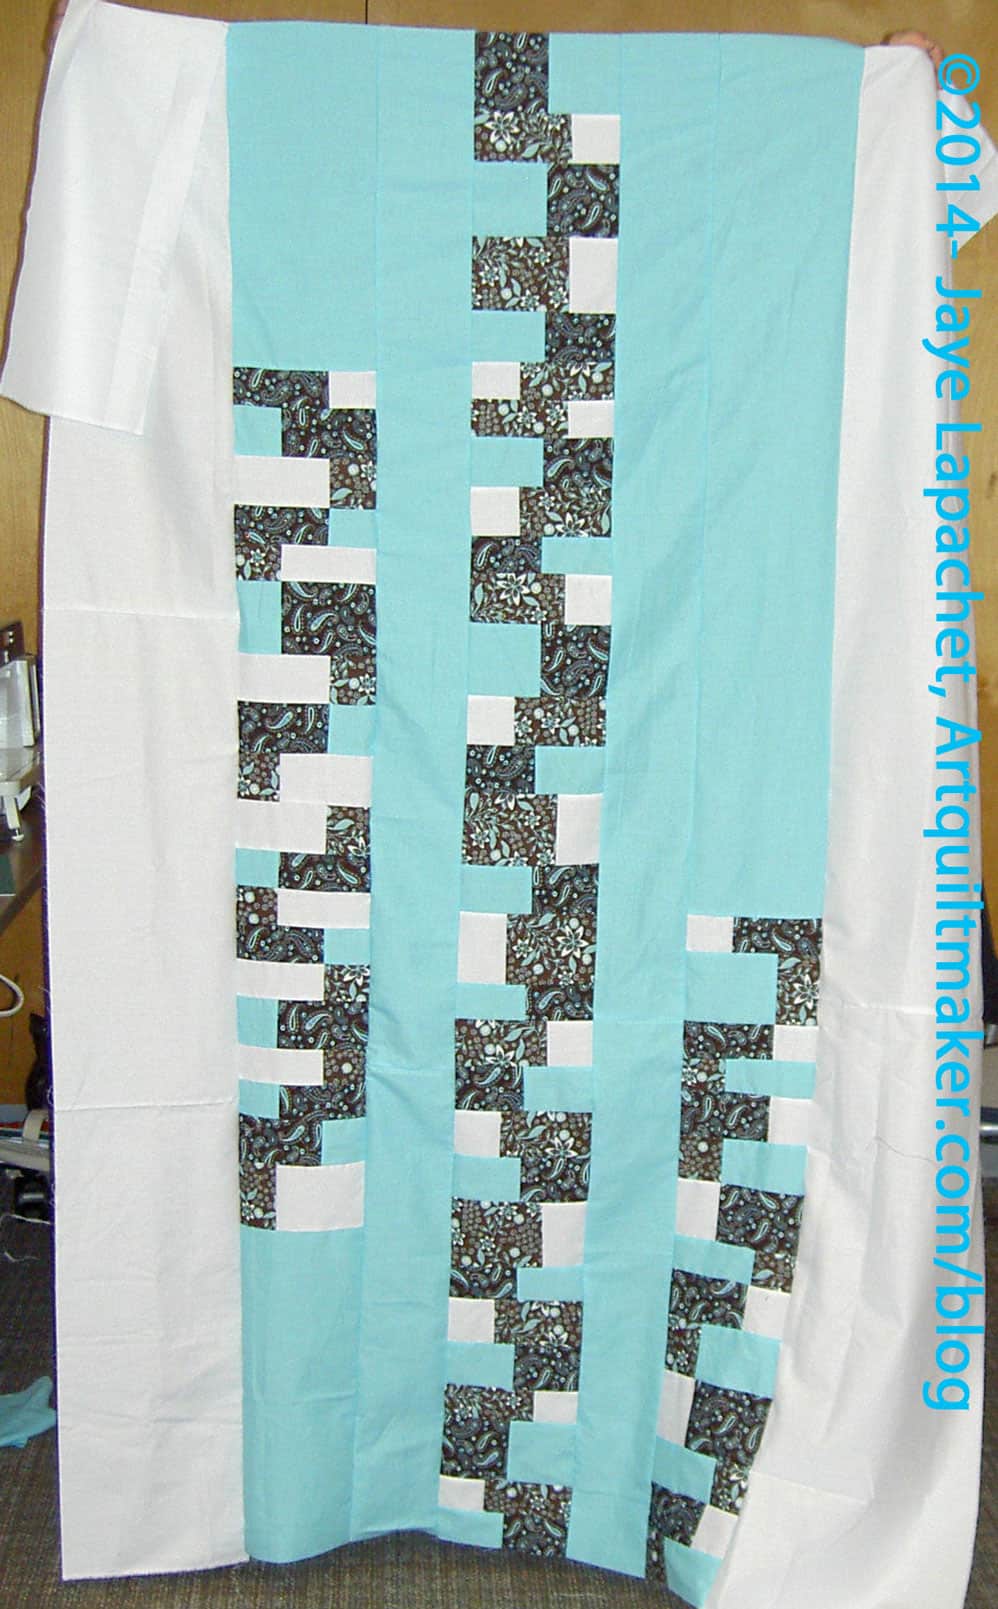
Star Sampler Charity Quilt
Next, I took the edges from the Star Sampler and worked with those. Michelle had an idea to make a sort of easy log cabin, but I thought the pieces were too small and I made them into rectangles. I got pretty far – to putting on the sashing – but I wasn’t able to finish the top, which would have been my preference.
I still have trimming to do and the sashing to finish. I will have used all the green fabric, from the charity stash, before I get to the two outer borders, so I have to figure something out about that. I don’t know what, but something.
I have two long strips of Philip Jacobs Chrysanthemums that I will put on the outside. I’ll probably put another border on after that, but we will see. I pinned a lot of it together so I could just sew on Sunday.
It was also fun being there with other people. Gerre, Rhonda, Susan, Leanne and Lindalee, with our bosses, Michelle and Peggy, of course, were all there sewing and we were laughing quite a bit. Kelly stopped by, but couldn’t stay.
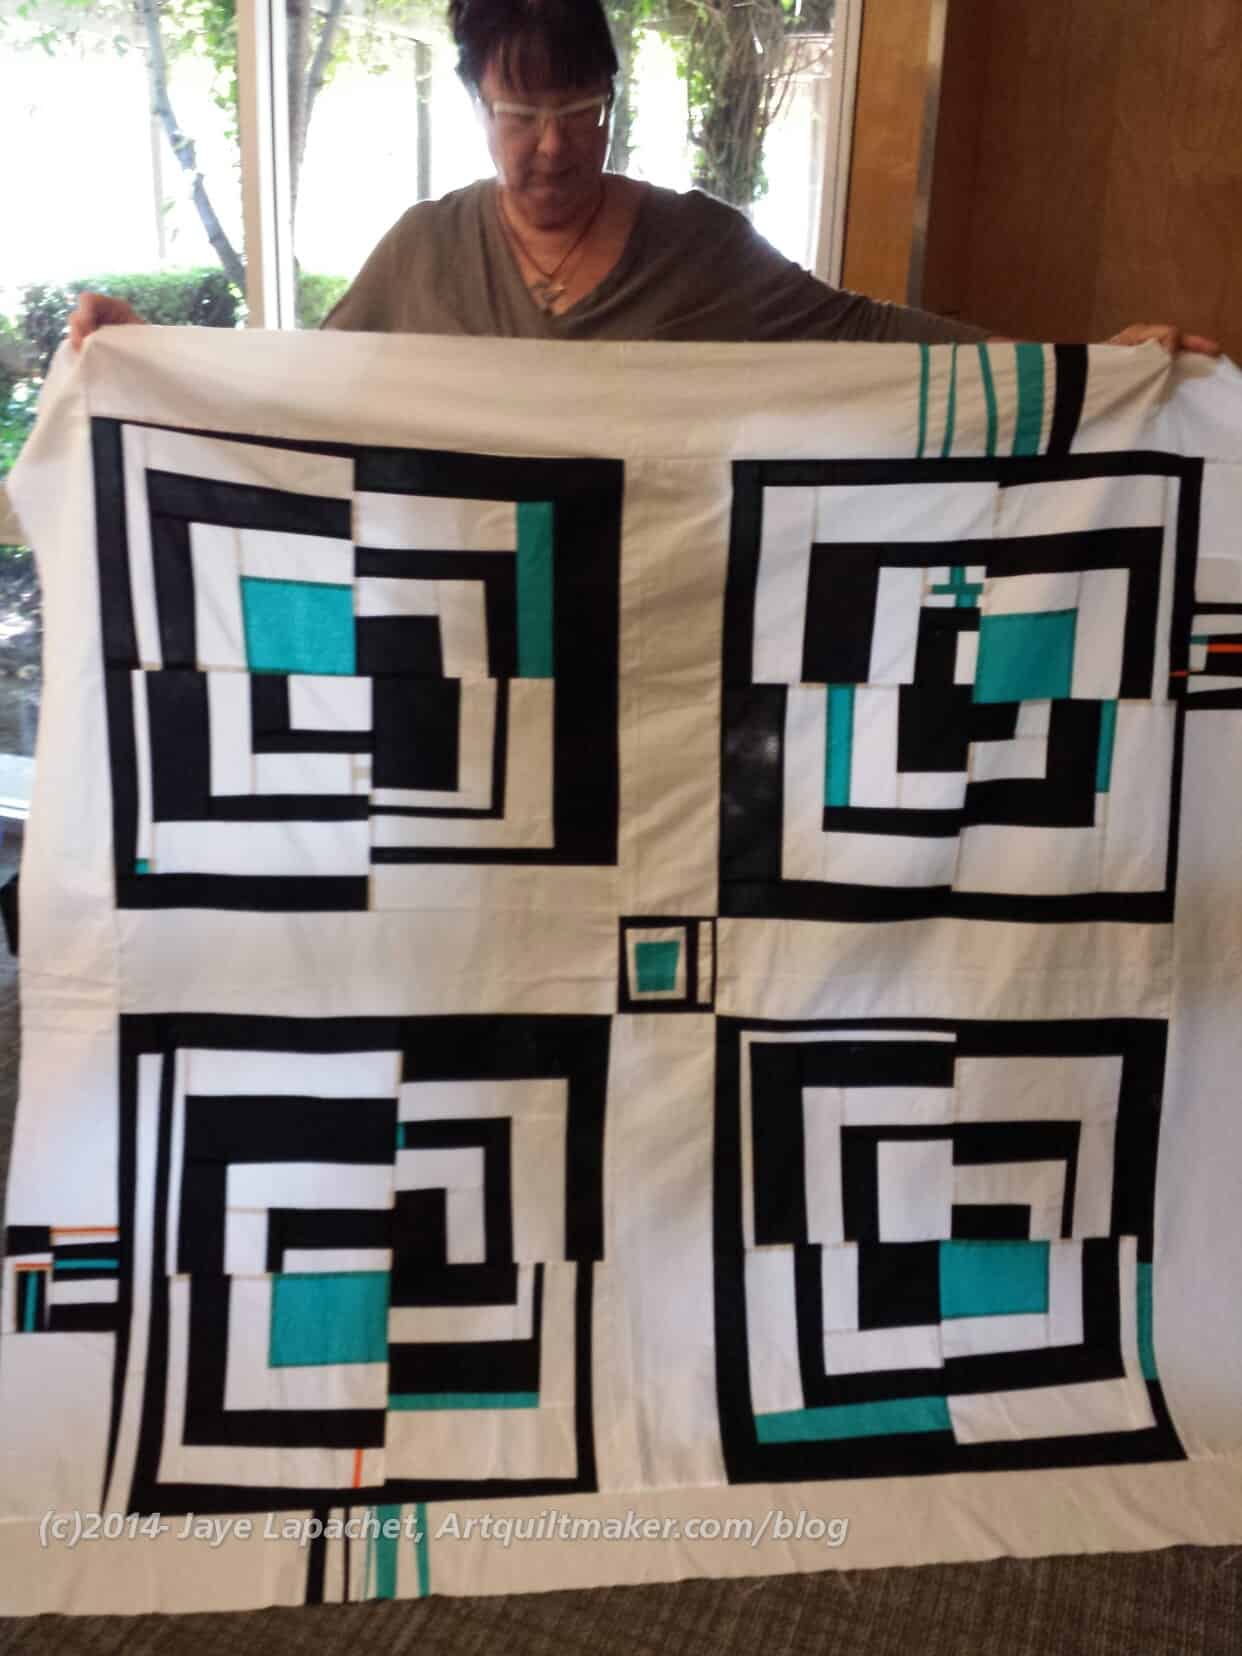
Rhonda’s Improv Medallion
Rhonda made a large house block quilt and then worked on an Improv medallion piece. The stripes were made by sewing 2 parallel straight lines the width of the black and white fabrics (right sides together) about an inch apart, then she cut 1/4″ away from the sewn line and had strips already sewn together. I want to try the idea.
We played around with the placement of the stripes – both width and direction. It was kind of a group activity and really fun to see how people interpreted the design.
That coffee cup fabric is really nice and in a colorway I haven’t seen. I have some with a teal background. This colorway goes well with Rhonda’s overall design.
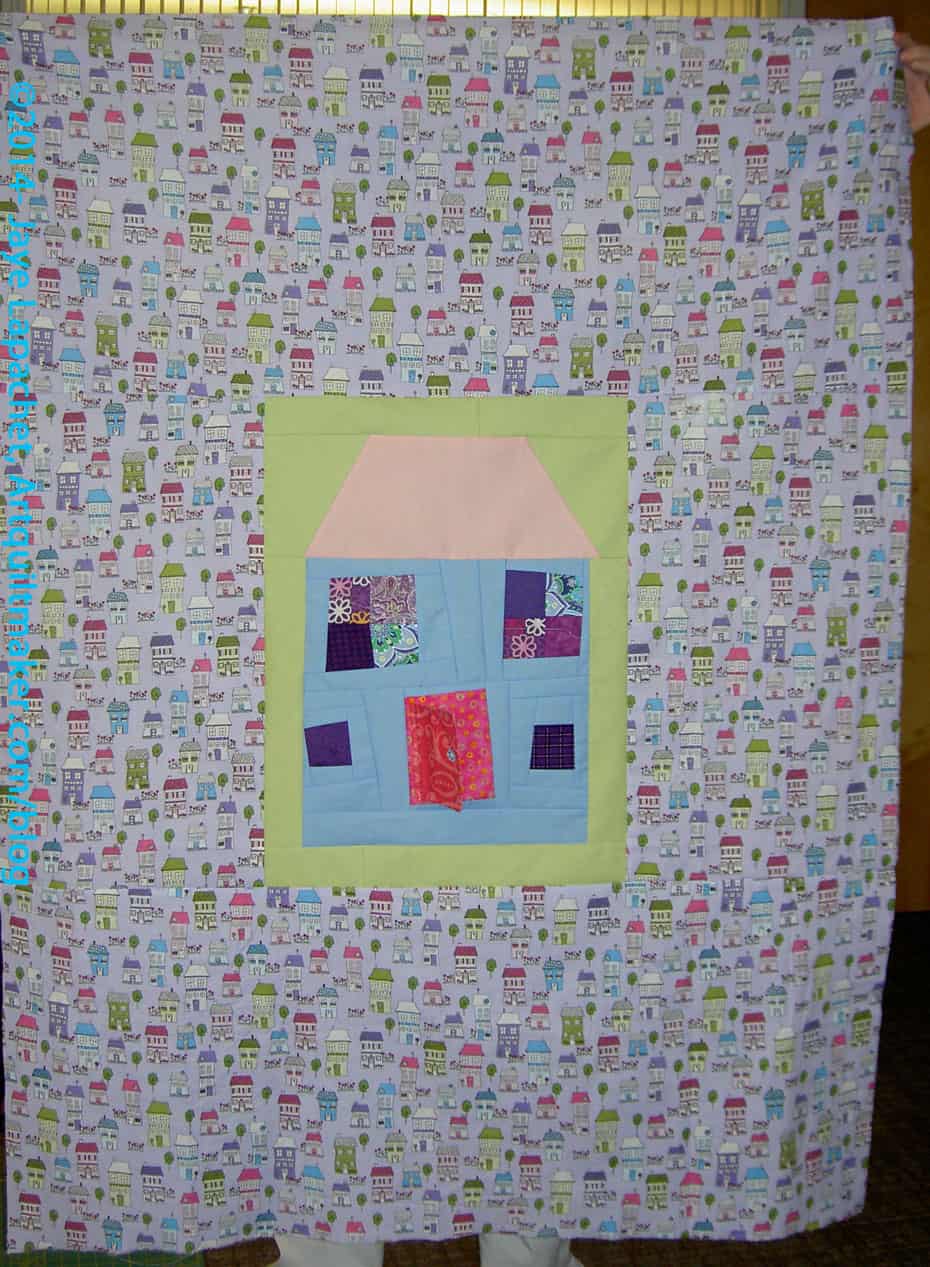
Rhonda’s House Block quilt
Rhonda has only been quilting for a few years and I am continually impressed with her design sensibility and what she chooses to tackle. The house block quilt reminded me of my house block quilt, mostly because of the placement of the house block.
In case you can’t tell, she made the door open, which is a really nice touch.
I also really liked the four patches she used as windows in the upper story.
Gerre was using Dr. Seuss fabrics to make wonky log cabin blocks. The red in that line of fabric is very primary, making the blocks really super bright. Working at her table made me feel very cheerful.
Leanne brought some fabrics that were not her style and she was trying to figure out what do with them. They felt as though they had never been washed even though she said they had.
Lindalee was making strip sets and ended up with two strip blocks, where the strips are on the diagonal. She does really nice and precise work.
Michelle was working on two really, really Improv quilts. One was blue and gold and had inset strips throughout the blocks. The other was a beige and purple piece with a lovely New York Beauty-like arc as part of the design.
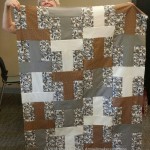
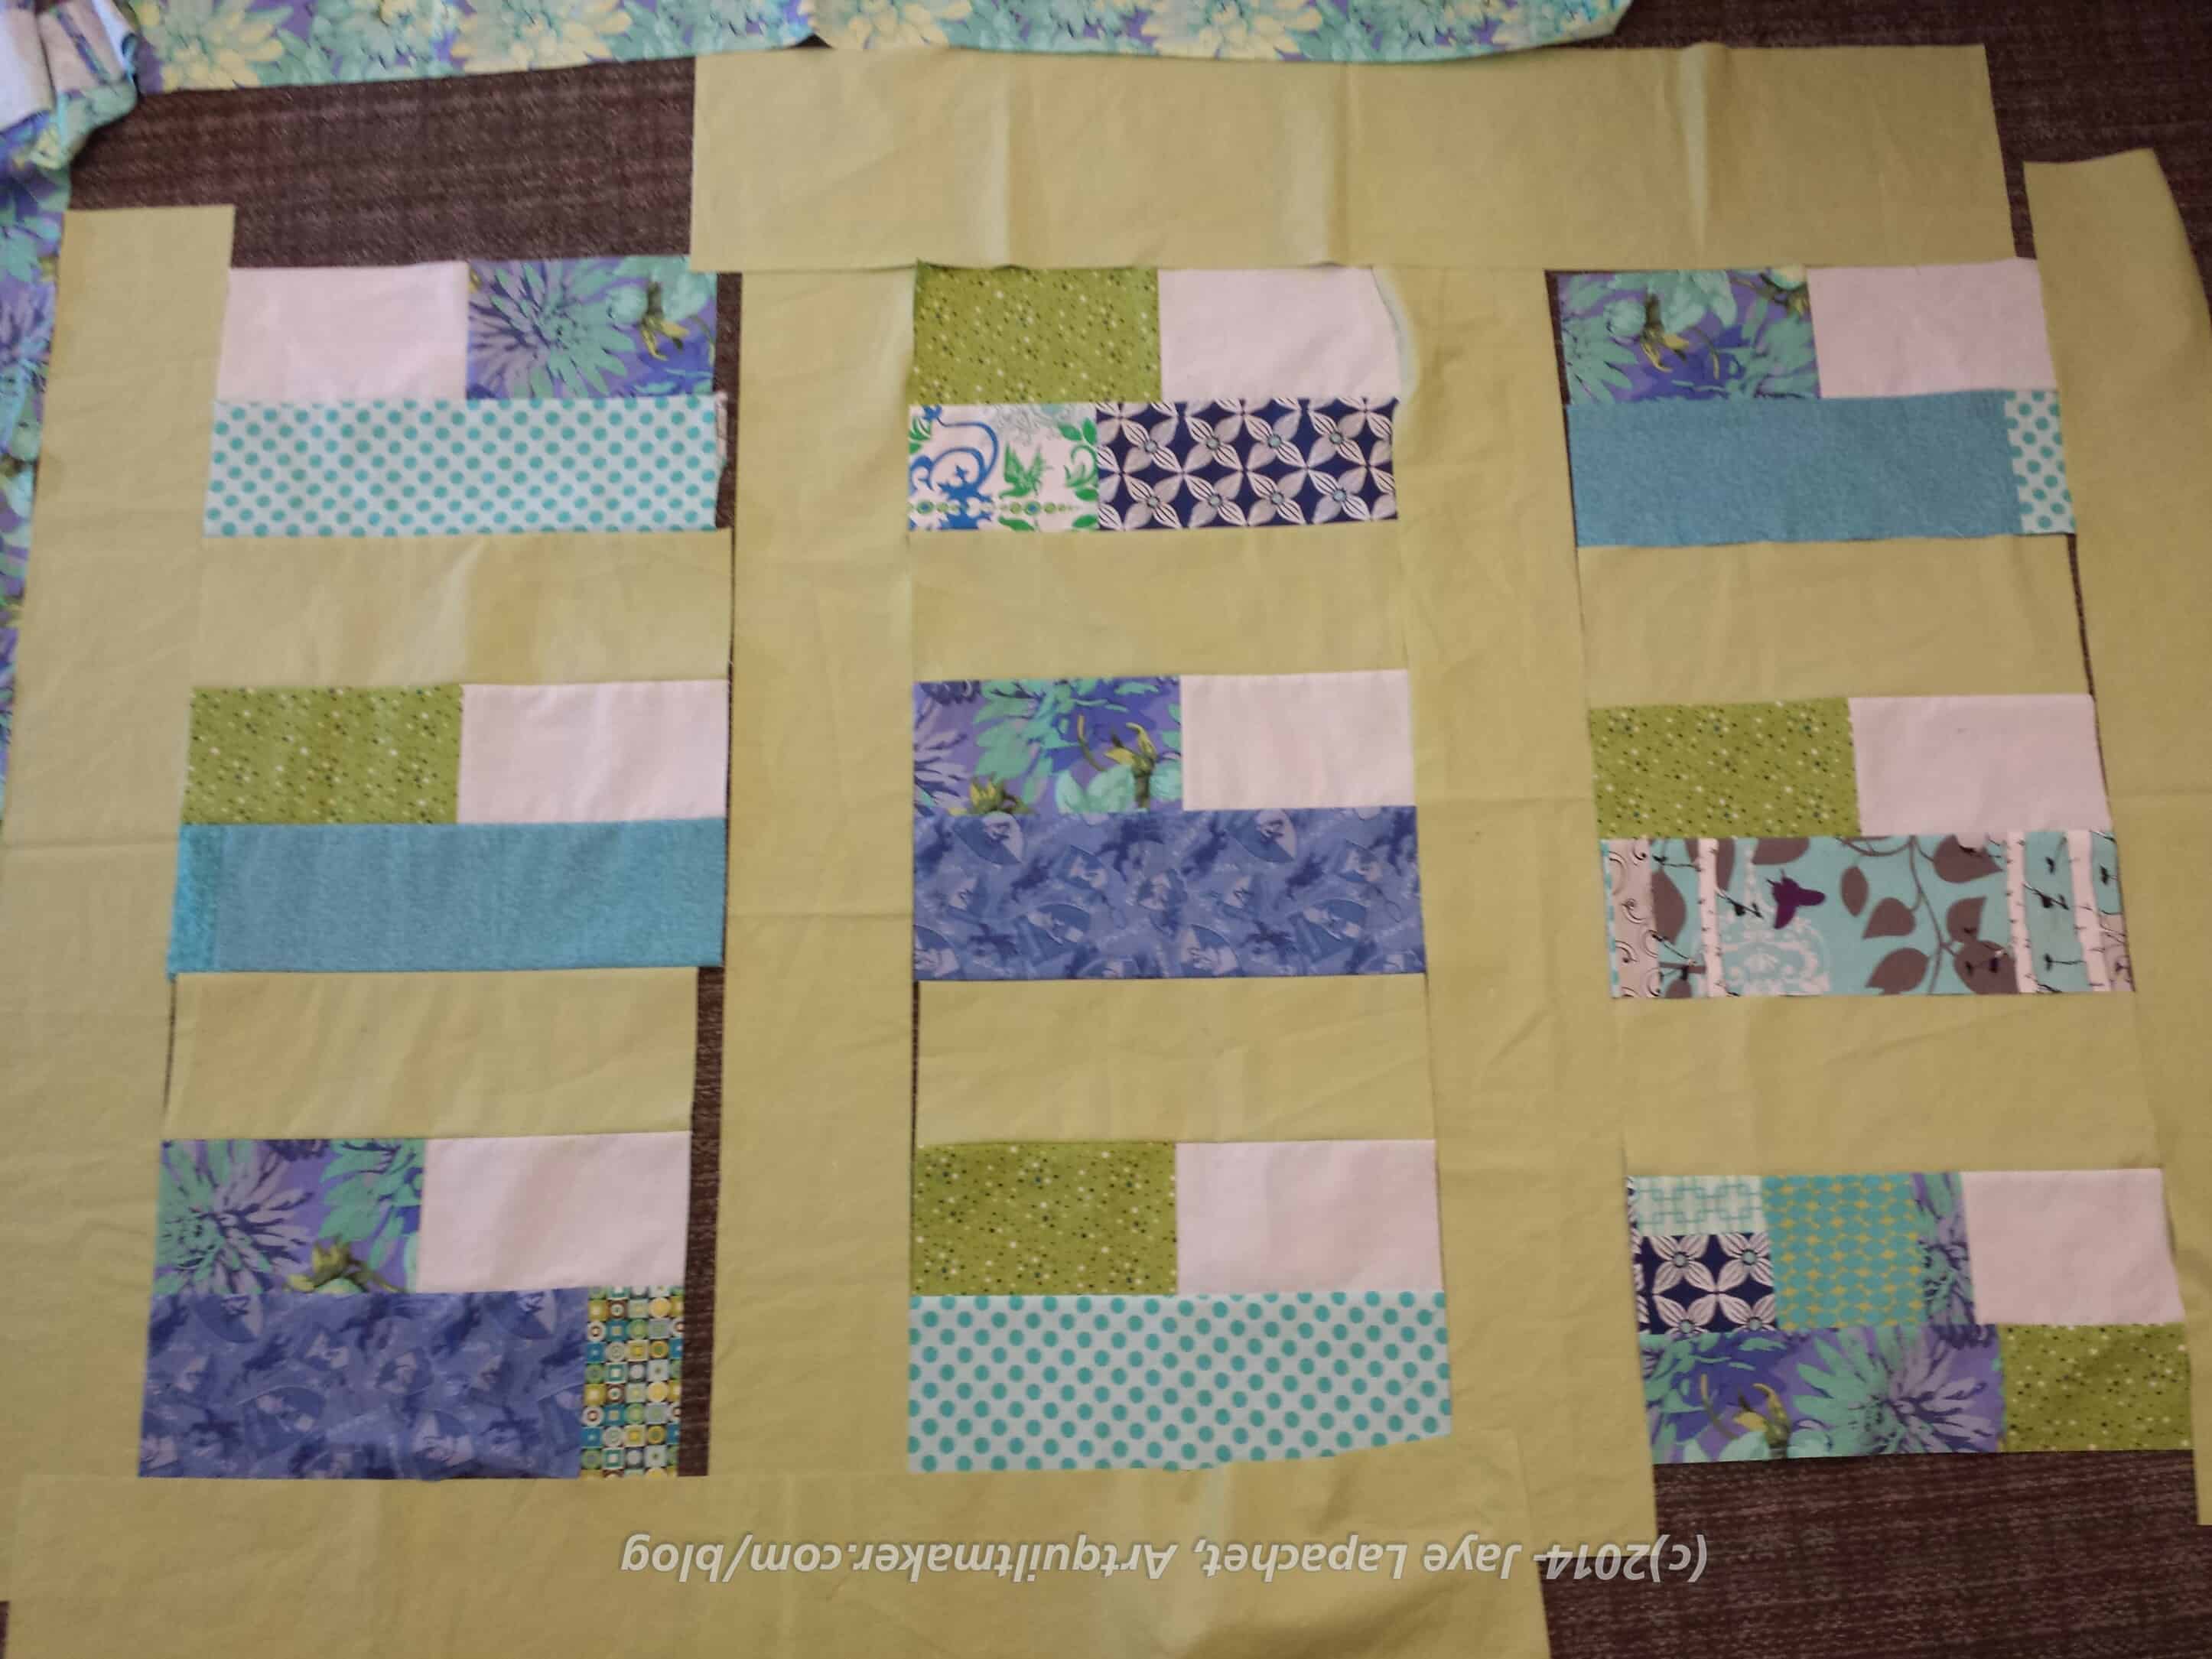
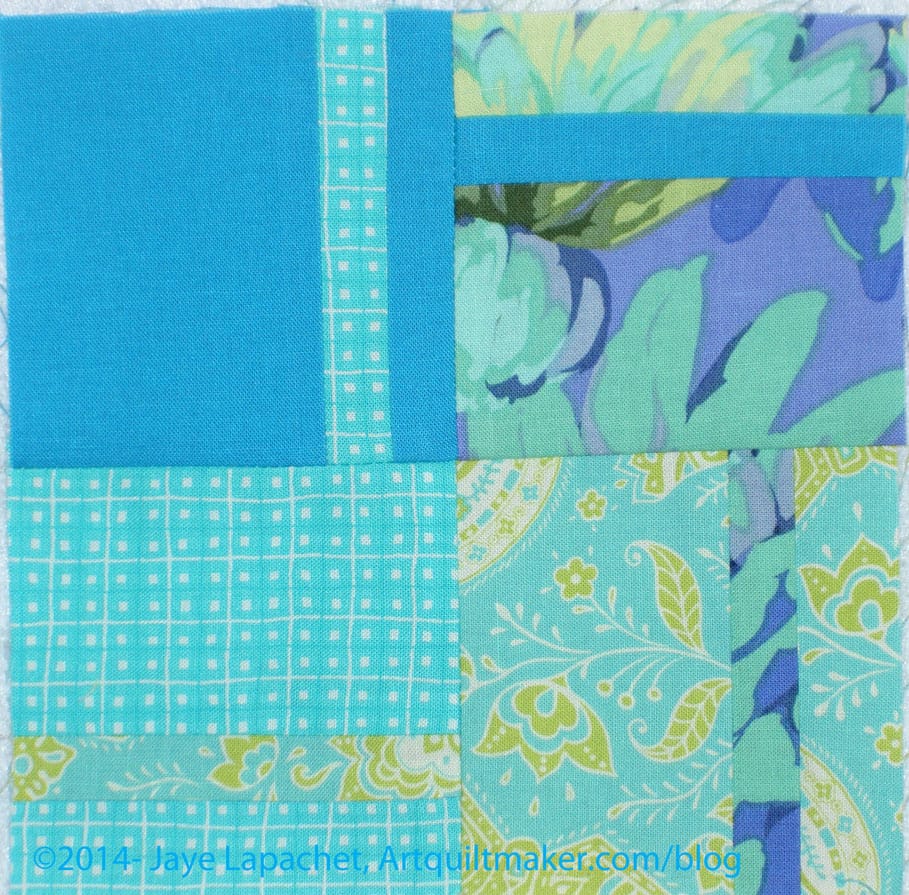
Peggy’s Brown & Turquoise Charity Project
Peggy was working with brown and turquoise and she did an excellent job. I really love the color combination and know that my sister would love it as well.
there was a lot of discussion about layout and at one point the two shorter sections were down at the bottom, placed symmetrically. I’ll let your imagination consider what the visual symmetry could have symbolized. Someone suggested moving one up and filling in top and bottom and that solved the problem. It is really a nice looking quilt and a good use of color.
Even though I sewed steadily, I didn’t get as much done as I expected. I have high expectations, but am satisfied with what I got done.
City Sampler No.20City Sampler No.19City Sampler No.18City Sampler No.16
I have been making more blocks; I just haven’t had a chance to post them. I only made it to 21 blocks, though I really tried to make 25 (1/4 of the total blocks) before the last meeting.
At least there is no real consequences for not making my goal except for a little disappointment in not trying just a bit harder.
At the meeting, we each showed the blocks we had made. I brought all of mine, though Patti, also in the small group, has seen a few of them. I have to try and remember not to show the same blocks again.
Patti is doing hers in batiks and I love the look.
Nicki joined us and is doing hers with scrappy fabrics choosing fabrics based on her whim of the moment. What a freeing experience!
I finished the crosses and am now in the rectangles. The small group is a great idea as people have good ideas on construction. I showed one of the rail fence type blocks at the meeting and both Nicki and Patti asked if I had made it using strip sets.
I was kind of shocked at myself that it hadn’t even occurred to me to use strips sets. I am not sure why, but it didn’t even occur to me use strip sets. Now that I am reminded, I will try to keep strip sets in mind.
I was looking for some pink fabric and, once I was finished, I rearranged my fabric bins. Now the aqua and turquoise bin was on the stop of the stack. I have a Leaning Tower of Pisa sized stack of fabric for this piece and yet, there is always the possibility that I will need more.
So, the project continues. How are you doing?
Previous Posts
June 5, 2014 – Various & Sundry #5 June 2014 (brief mention)
Back in December, I put a post up on the Bay Area Modern blog about making lanyards, which was a personal challenge that the president put out to the guild. I wanted to do it, but I haven’t done it for myself yet. It is on the list.
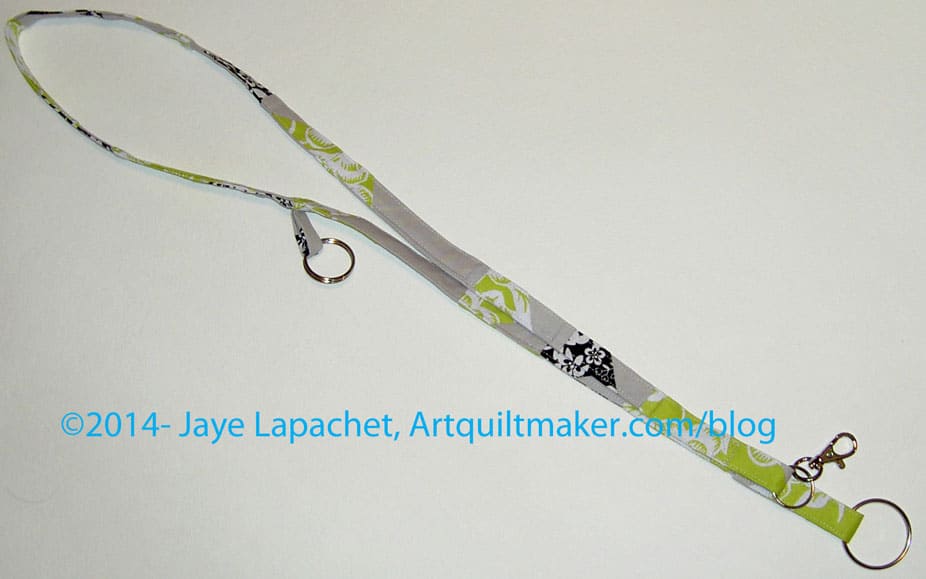
It took me some time to get around to making any kind of lanyard, but I finally did in response to the Orphan Block Challenge also put out by BAMQG. This one will be given in to a pool of small gifts and then I will get something back. I kind of like this lanyard, but am ok giving it away, too.The best part is that now I have a better idea about how to do it.
First I took a look at the Two Peas in a Pod tutorial. There are several tutorials listed. I picked this one, because it was the first one I looked at and I could follow it easily. Frankly, I already had an idea of how I was going to make the lanyard, but I needed to see how someone else did a few of the parts.
Then, I squared up the blocks a little bit to make sure the blocks to make them easier to cut into strips.
Since this was an orphan block challenge, next, I cut the blocks into 2.5″ strips. The blocks were 9″ or 10″ blocks (I don’t know -I didn’t measure) and I got about 3 strips from each one with skinnier bits leftover. It doesn’t matter what size they are as you can use regular fabric or a Jelly Roll strip and discard the leftovers.
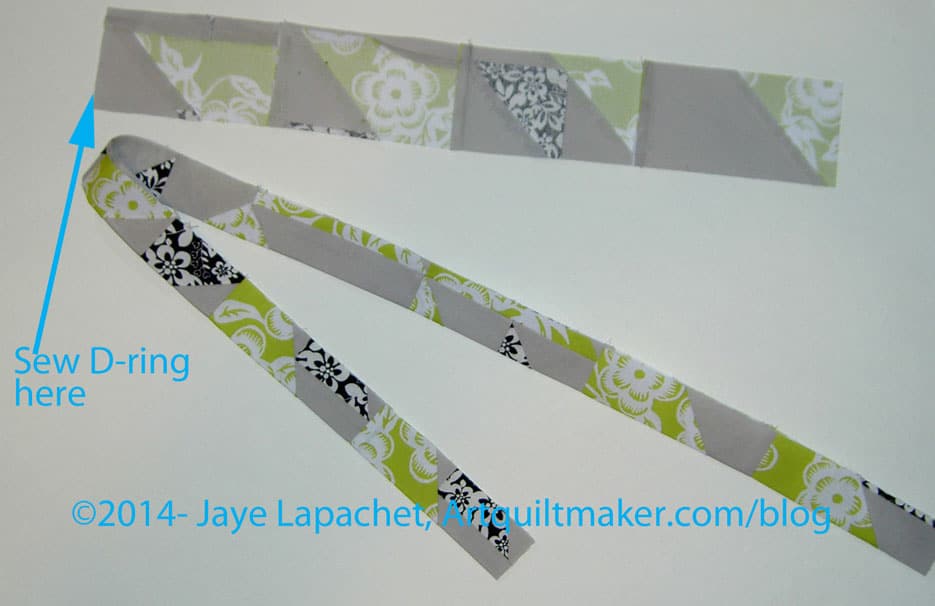
After cutting, I sewed the strips together until I had a piece that was long enough to go from my belly button, around my neck to right below my collarbone (about an inch below or so).
Sew another strip that is long enough to go from your collarbone to your belly button.
Take both strips, fold them in half and press. Open them up and fold the raw edges to the center and press.
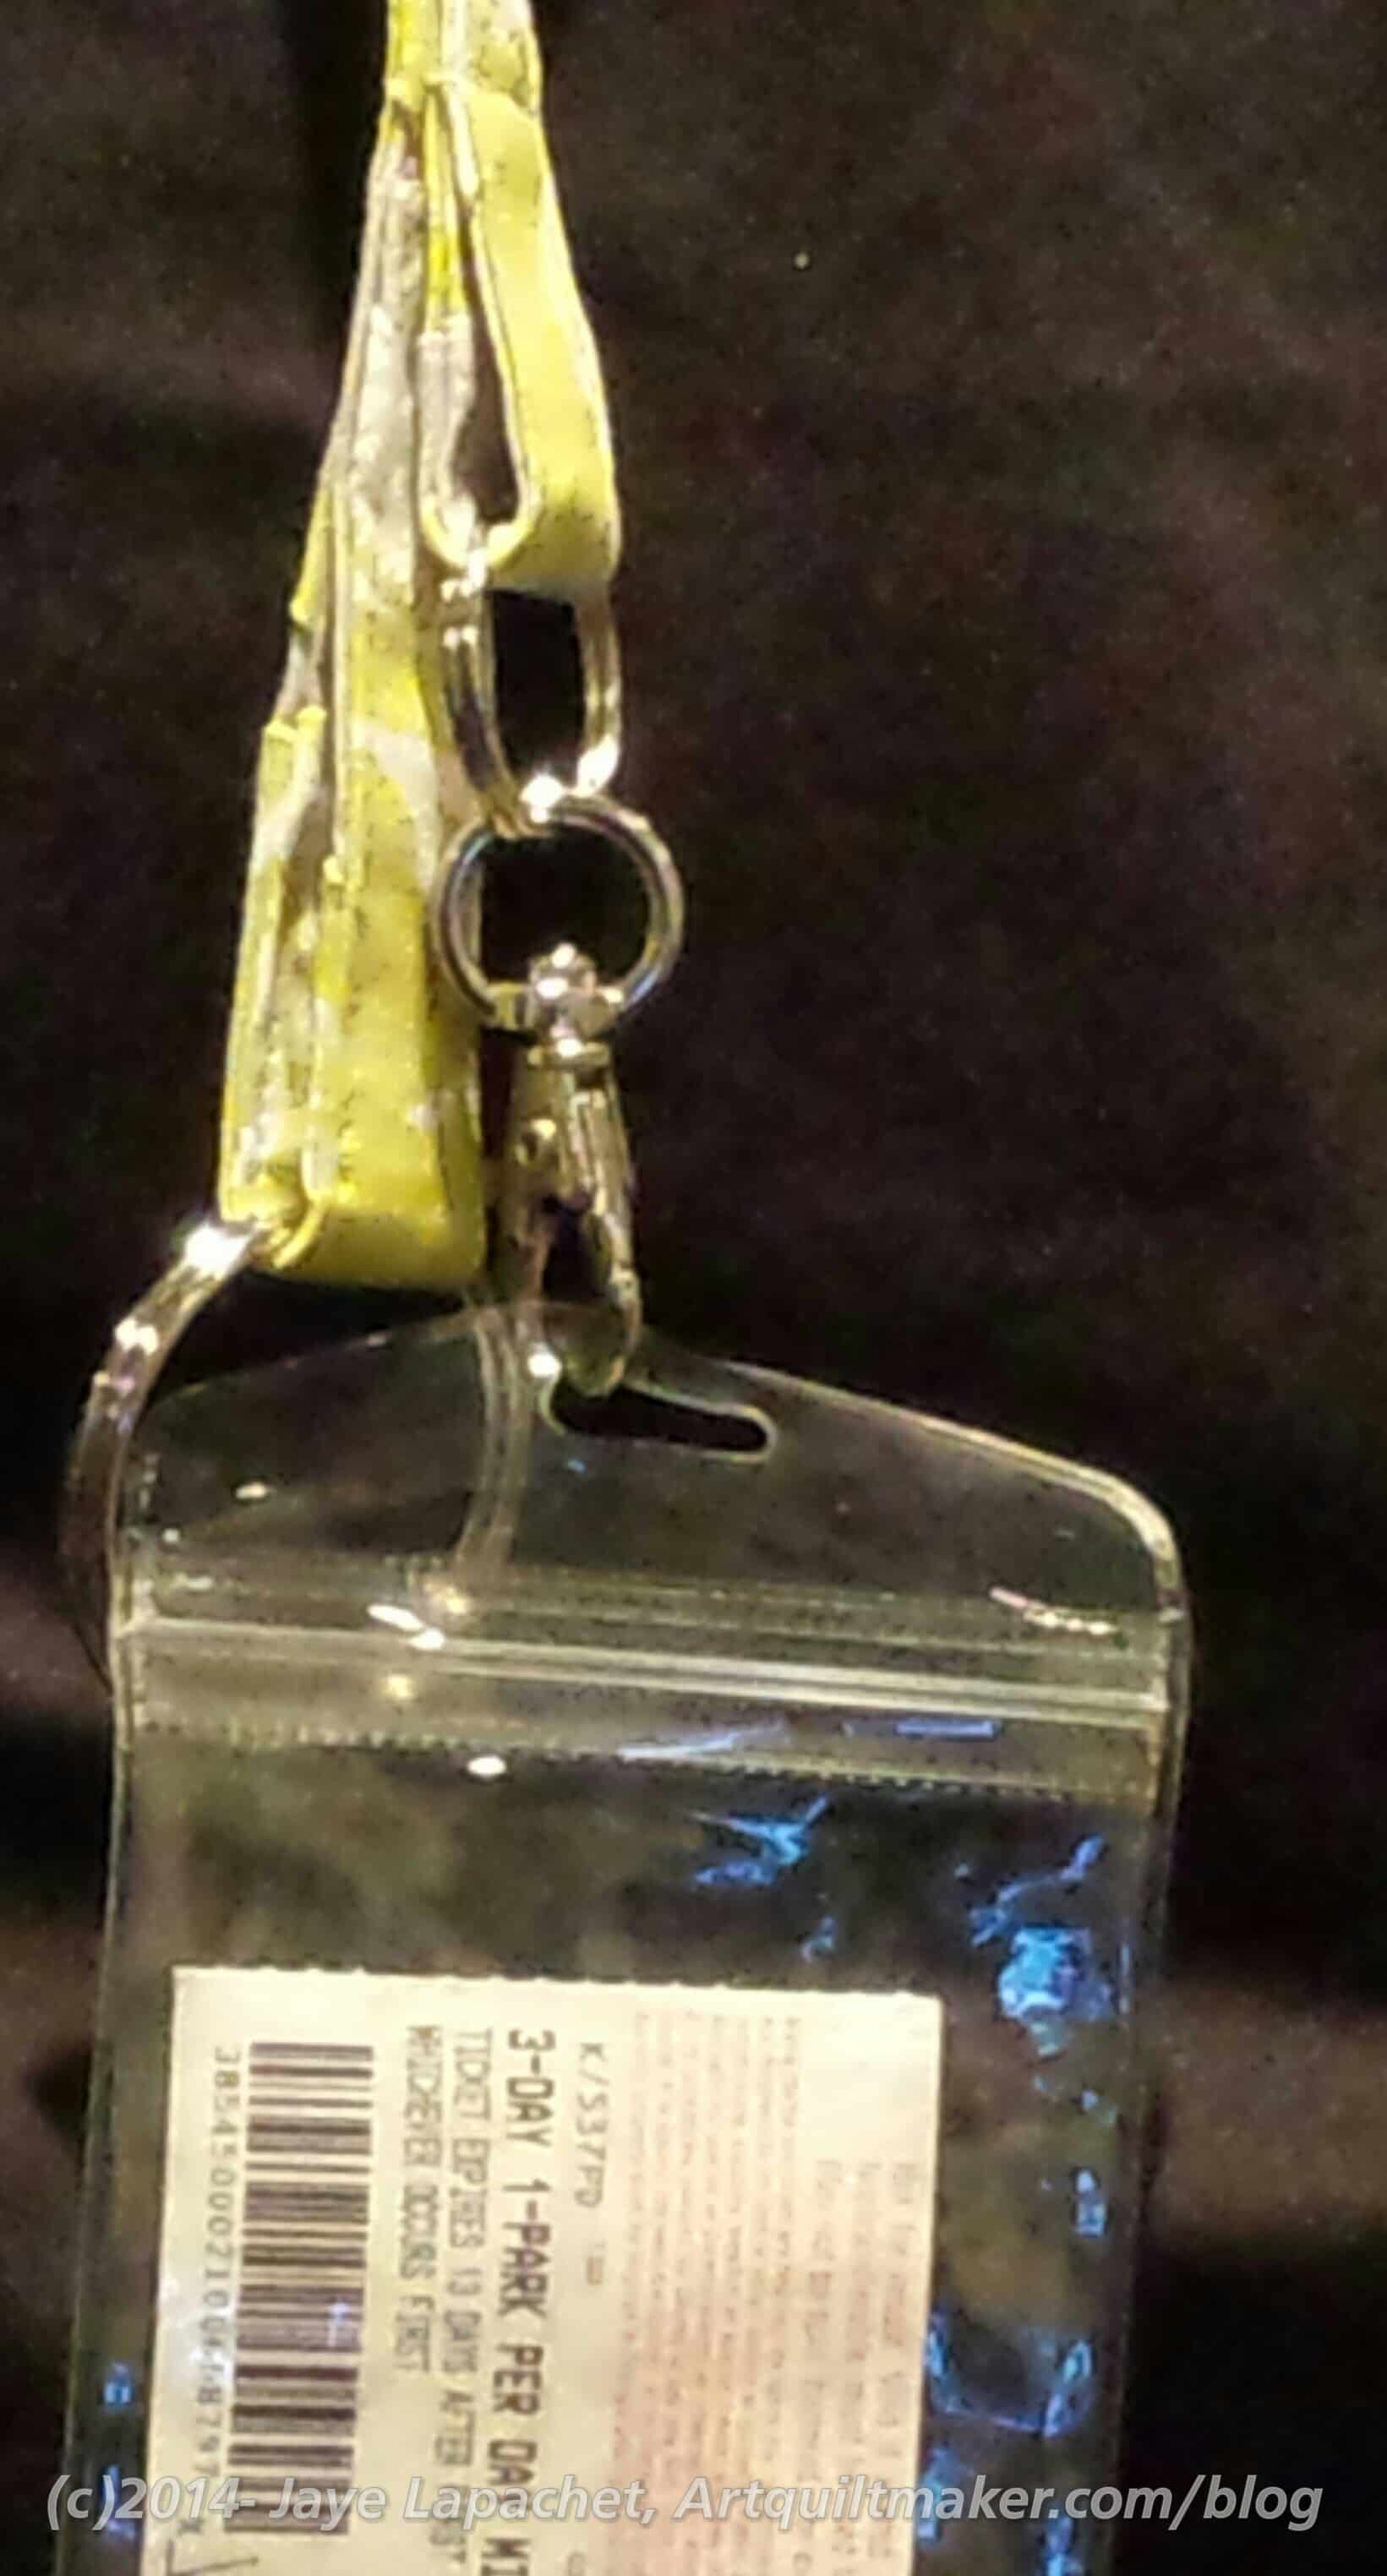
Sew D Ring Here
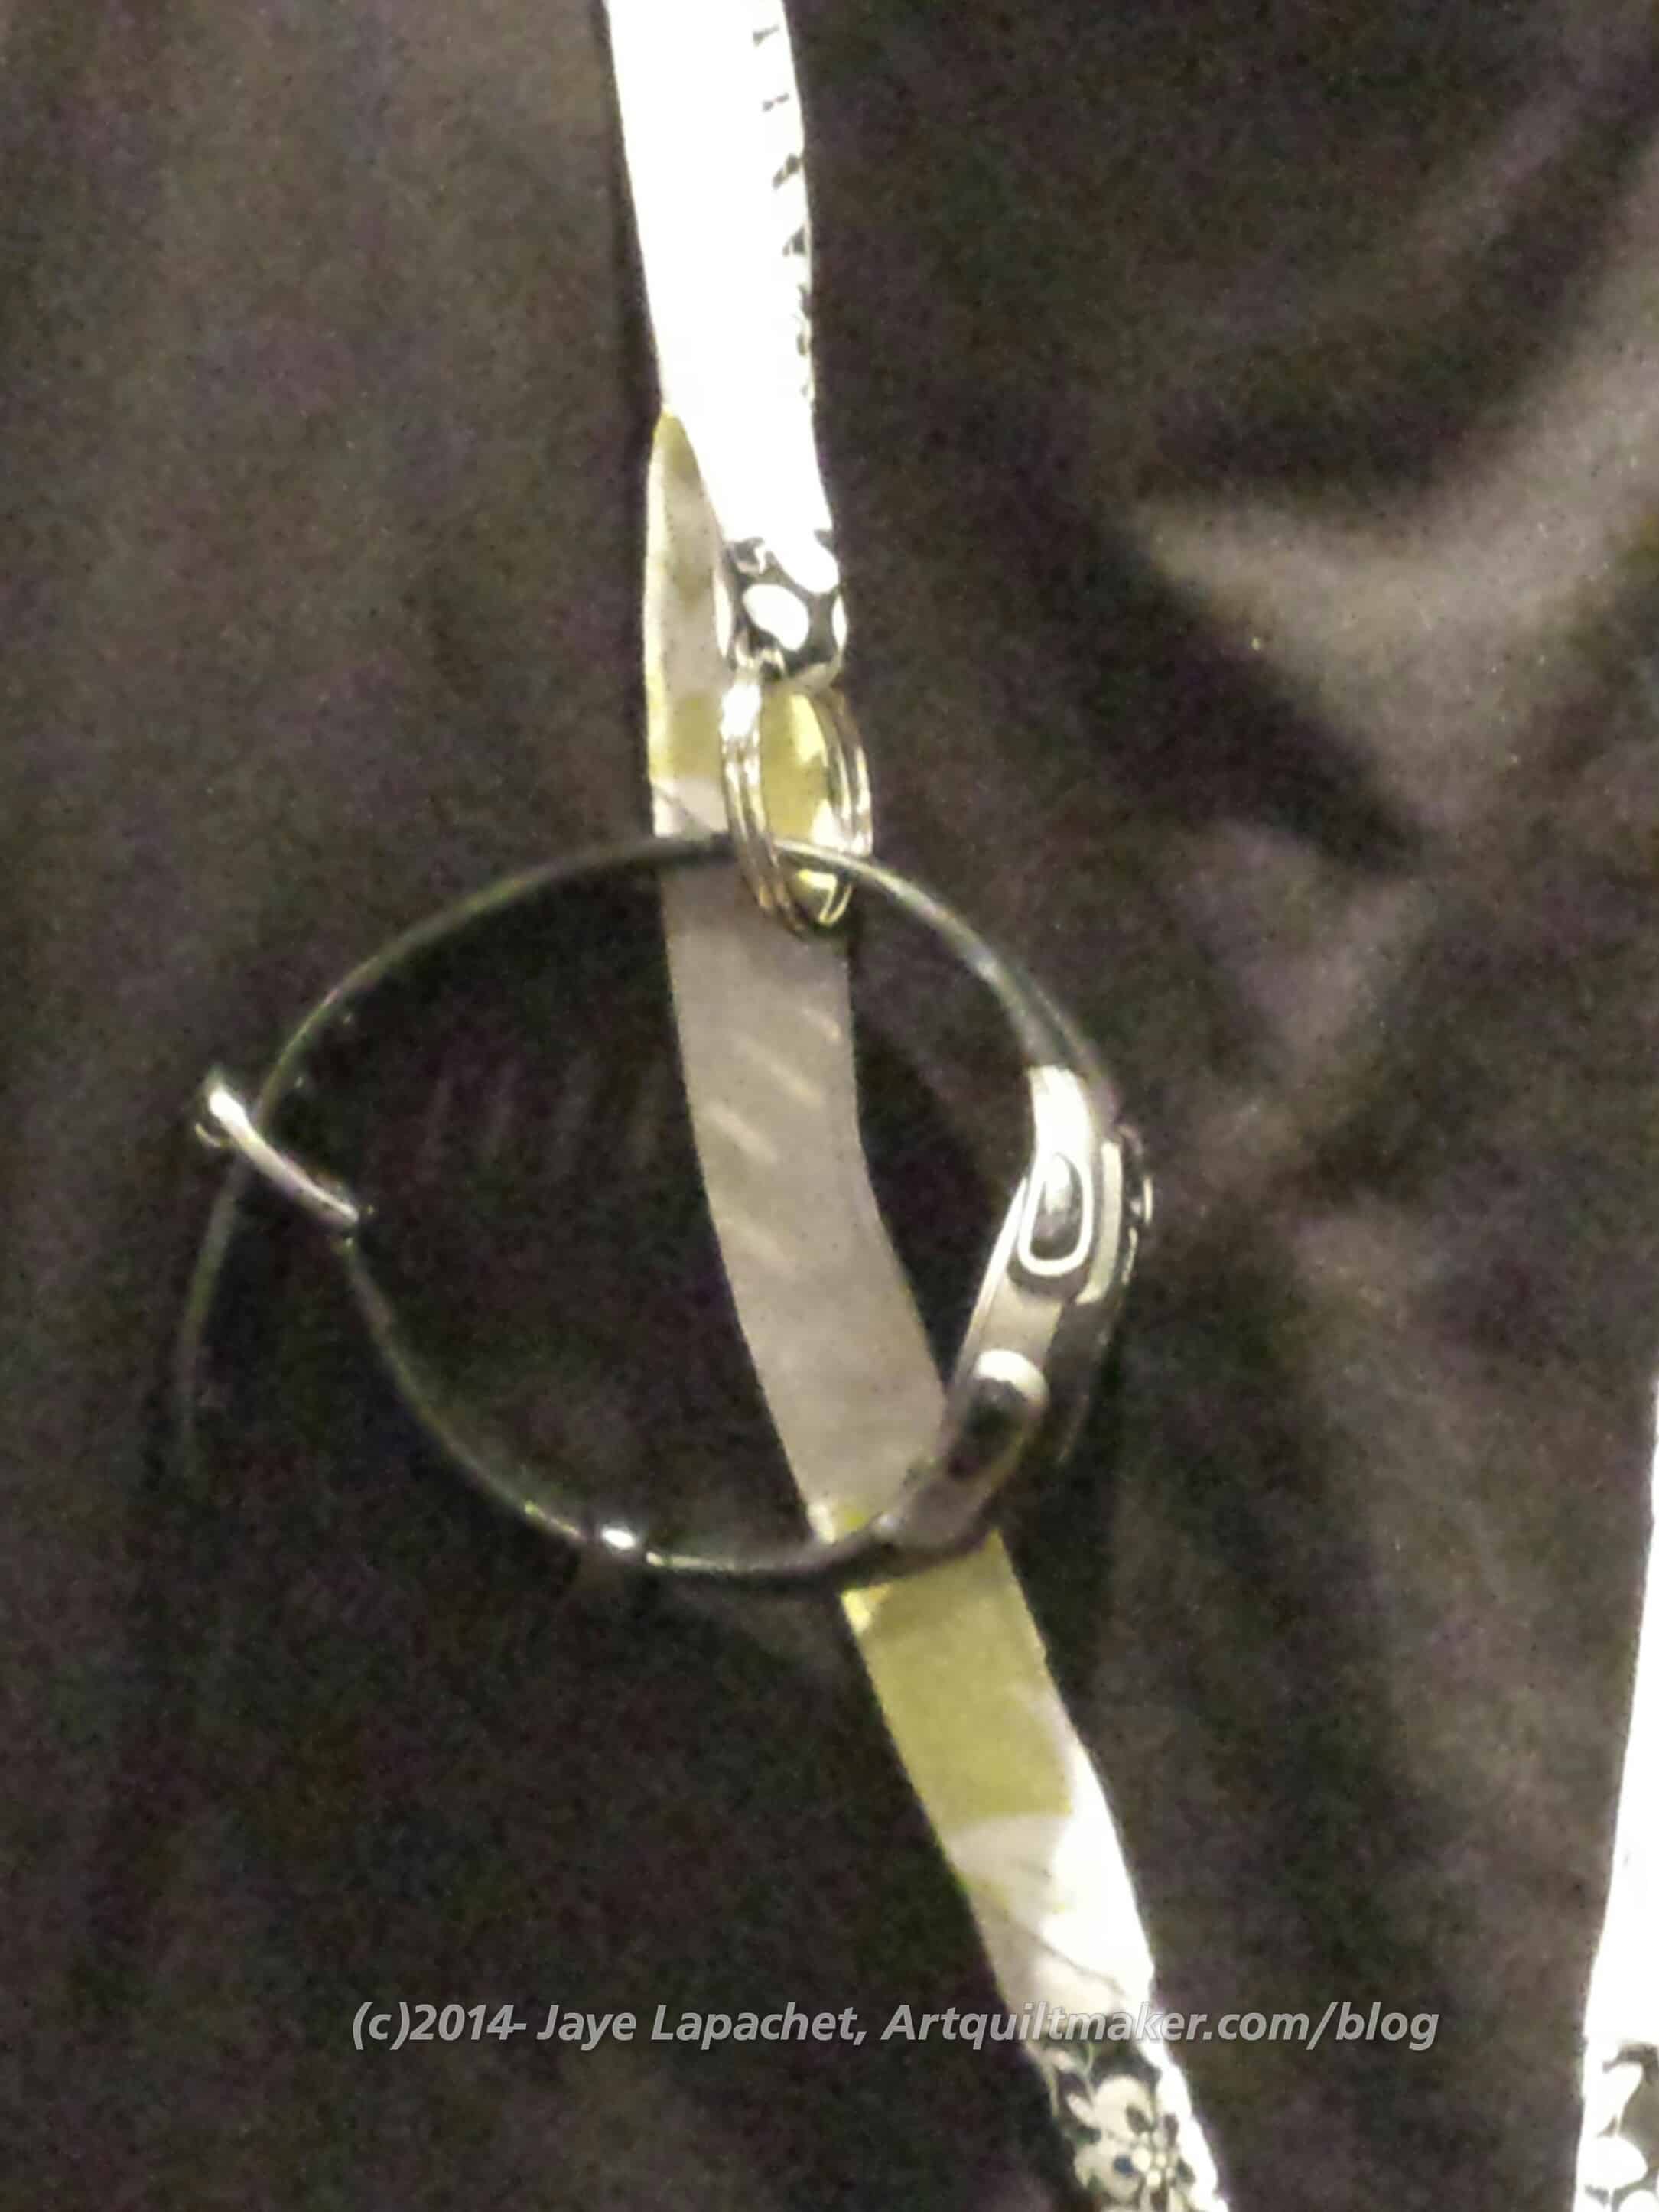
Then I wanted to add a loop at the shoulder so my nametag would be at eye level or I could use it to keep track of my glasses. Cut this piece about 4″.
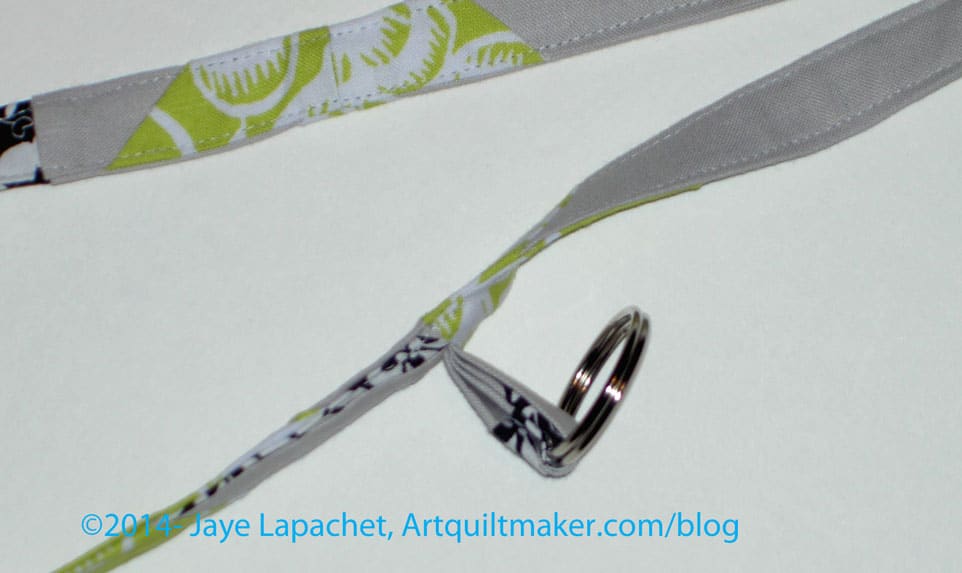
I took one of the leftover skinny strips (from the block above), folded it in quarters, top stitched both sides, slid the fabric piece through a ring and sewed that piece to the right side of a strip that had not yet been sewed. Once you slide the strip of fabric through the ring, you will have a U if you hold both of the raw edges, one in each hand. The ring will be dangling from the bottom of the U.
Collarbone Loop
Nota bene: In the picture, the strip to which you have to sew is upside down. Make sure you sew the the loop with the ring in the bottom to the right side of the strip. Nota bene due: In a subsequent step, you will fold the whole piece in quarters and top stitch. You may want to measure and sew this loop to avoid the folds that will take place later.
Collarbone Loop
After you have your extra loop added, you should sew the strip to the other strips and keep adding strips until the piece is long enough. You will need a bit of extra length to fold up to accommodate the Swivel hook and other loop, so don’t cut it off too short.
Now you have a long strip about 37″ long. This measurement is from the Two Peas in a Pod tutorial. I cut mine a little shorter to accommodate my height and torso length.
Fold your long strip in half and press. Yes, the glasses loop will be a pain. I haven’t figured out how not to make it a pain. If you know of a way to make it easier, let me know.
Open your piece and fold the raw edges towards the crease in the center. Once you have completed this the raw edges will be encased in the center.
Top stitch very close to the edges on both sides. If you want to be fancy, you can do a double line of stitching or a decorative stitch. Depending on the size of the ring holder, you may have to skip the area where the ring holder is, or go around it.
Now hang the strip around your neck. Trim the ends if you think they are too long.
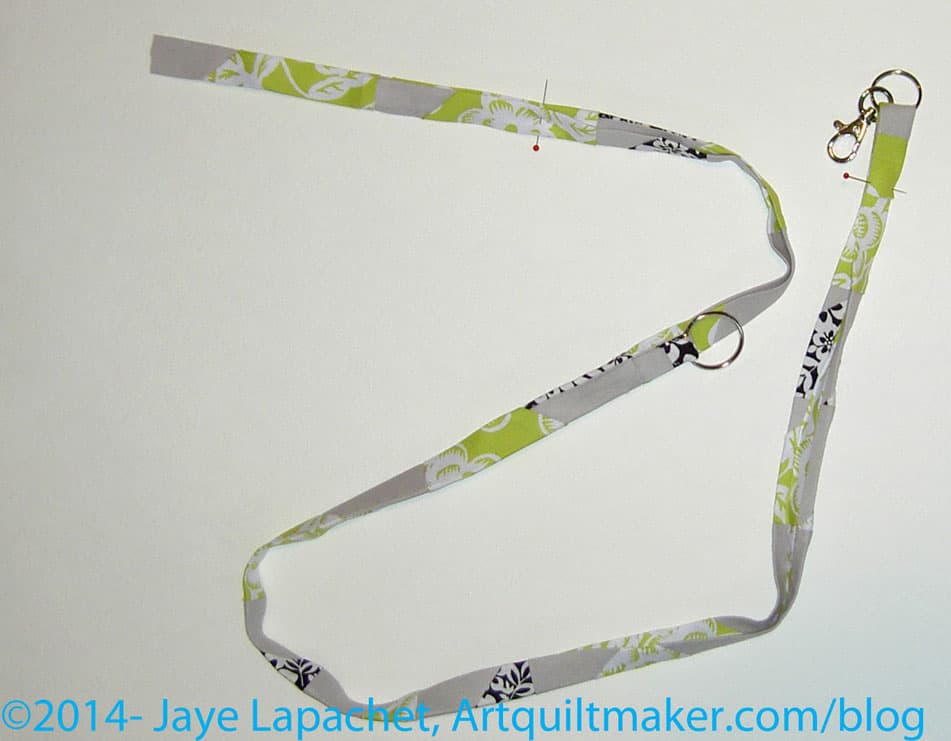
Take the loop and thread one end of your strip through it. Pin in place. WonderClips work well, too.
Thread Strip End Through
Take the other end of the strip and thread the swivel hook through it. Pin in place or use WonderClips.
Now you are ready to finish off the ends. The different tutorials tell you to do it in different ways. I went with the the way the Two Peas in a Pod tutorial suggested. I hadn’t really thought about dual hardware on the bottom, but it works.
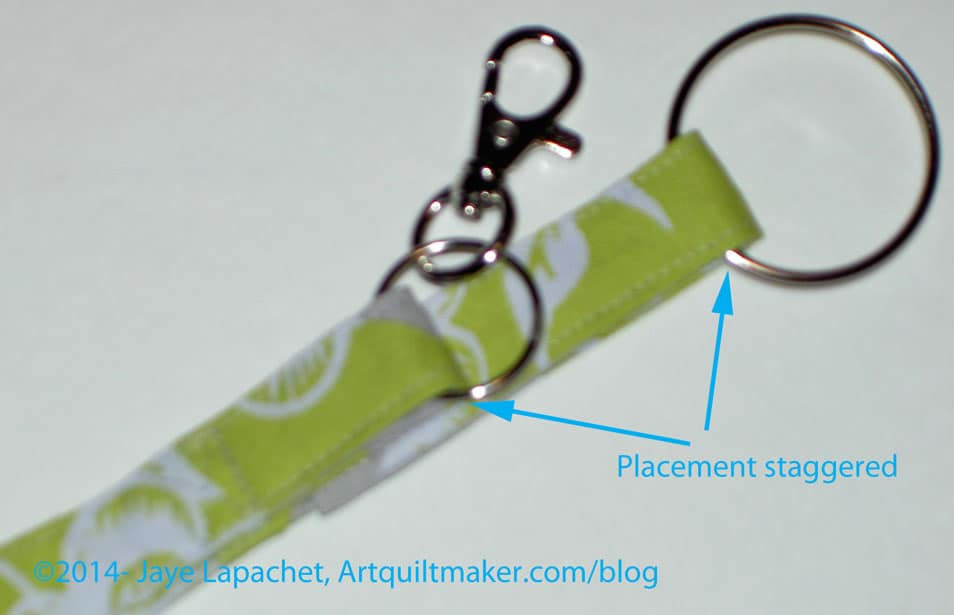
Staggered
I staggered the placement of my loop and swivel hook so they wouldn’t clank together as I (or the user) walked around. This means that I had to adjust the placement of the two pieces. It took a little bit of trial and error, but, ultimately, I am happy with the placement. As an added bonus, I had fewer layers to sew over as I finished the lanyard. That step is optional.
Think about what you might hook on to your loop and swivel hook before you decide on placement.
Place the lanyard carefully around your neck. Make sure to smooth out the twists, if any, so the lanyard lays flat around the back of your neck and on your chest.
Reinforcing Thread Box
Once you are sure everything is smooth, pin (or WonderClip) the two ends together and sew. I made “thread boxes” (the same technique you use to reinforce areas of stress when making a bag) out of my sewing line in order to keep the lanyard together and looking nice.
Change your needle so you are using a new and very sharp needle. Sew two reinforcing boxes, the top one going through all layers. Move the swivel hook out of the way to sew the bottom box to finish the lanyard.
Collarbone ring in use
Pain and Suffering
There are a couple of places that will be difficult. Using orphan blocks or mosaic piecing means that there will be extra seam allowances. With these comes the possibility of really thick seams [See above where I refer to the glasses loop]. To mostly avoid these thick seams, use 3 unpieced lengths of fabric for the neck and loop pieces. 1 Jelly Roll strip (2.5″ wide strip) will work.