Black & Red Improv Quilt

I was kind of shocked to realize that the last time I devoted a post to this project was back in September. I did mention it last week and meant to write a full post. I was out of town for most of the week for work and it never happened.

Red & Black Improv Top

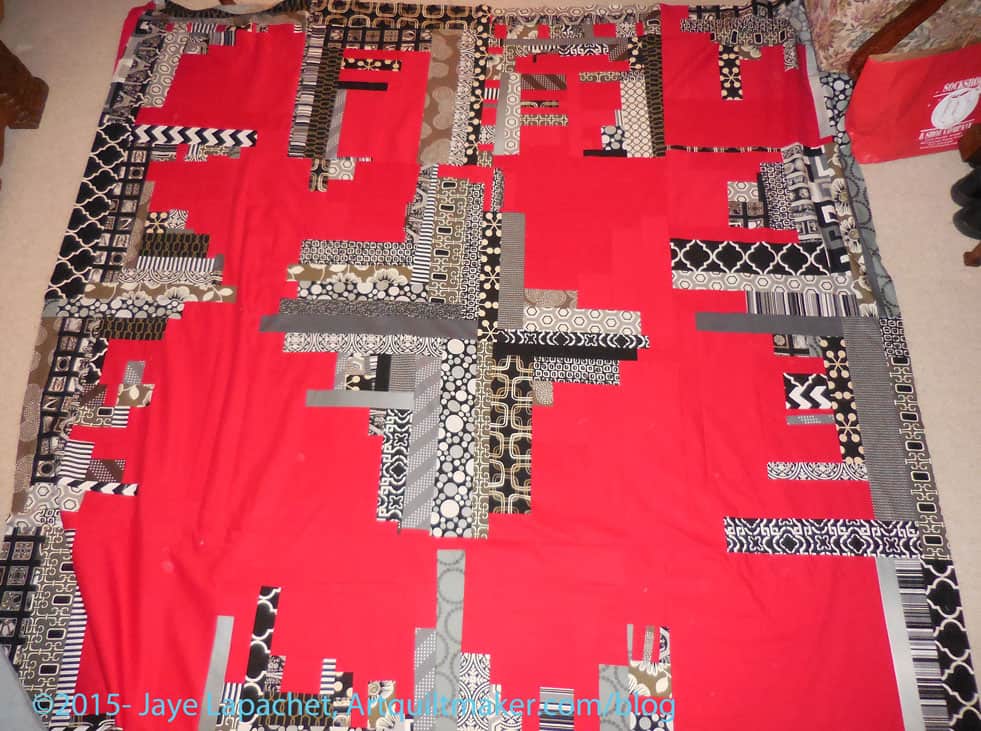
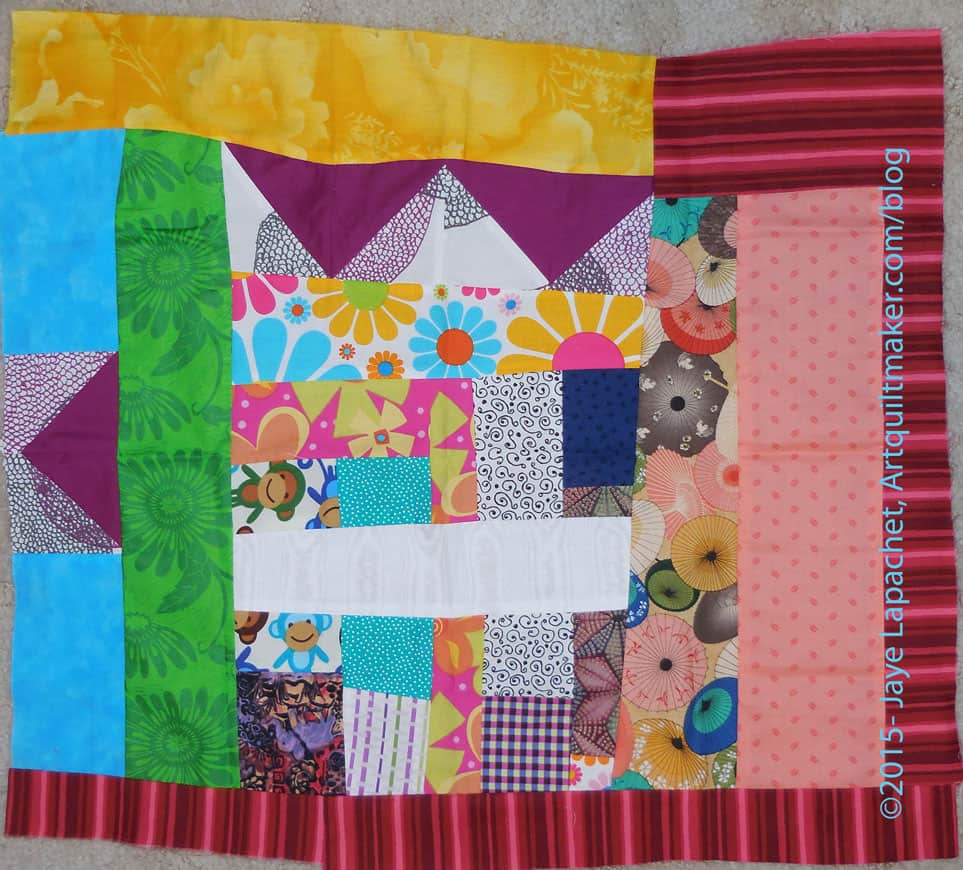
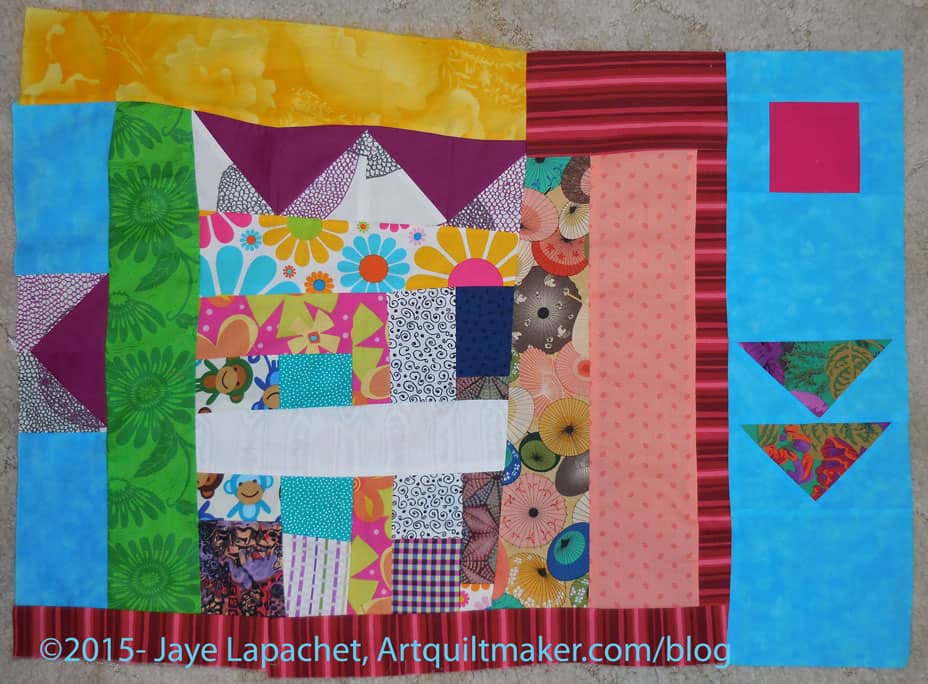
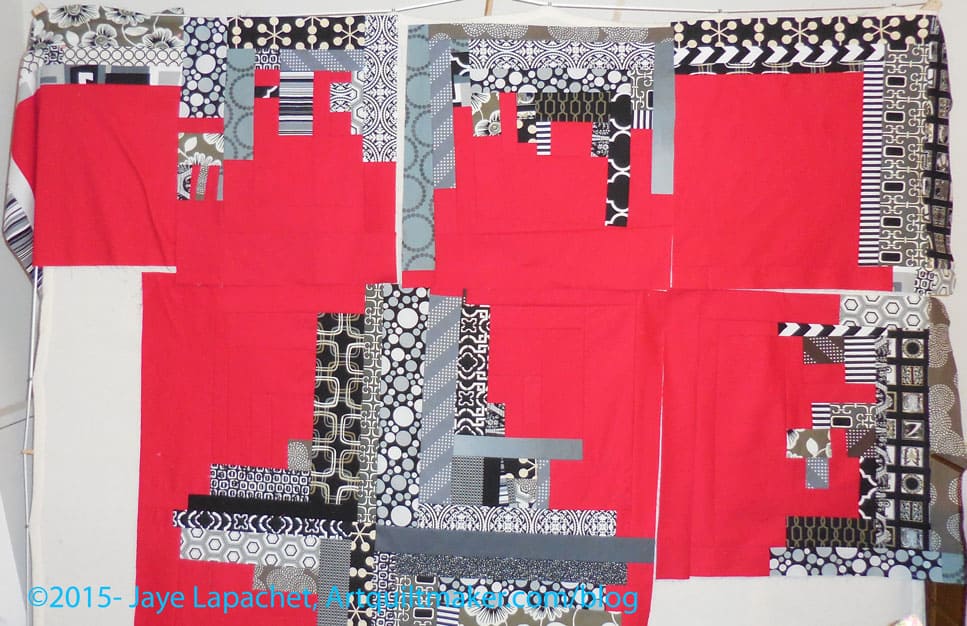
On Saturday, I got back to the machine. I worked on this top, in between other projects. For the Improv top, I seem to be able to make progress on this project, but only while working simultaneously with other projects. For some reason this project does not inspire me to buckle down and work on it by itself.

I tried Improv again and it still doesn’t inspire me. I guess I like the technical precision of regular blocks. Does that make me boring? Perhaps.

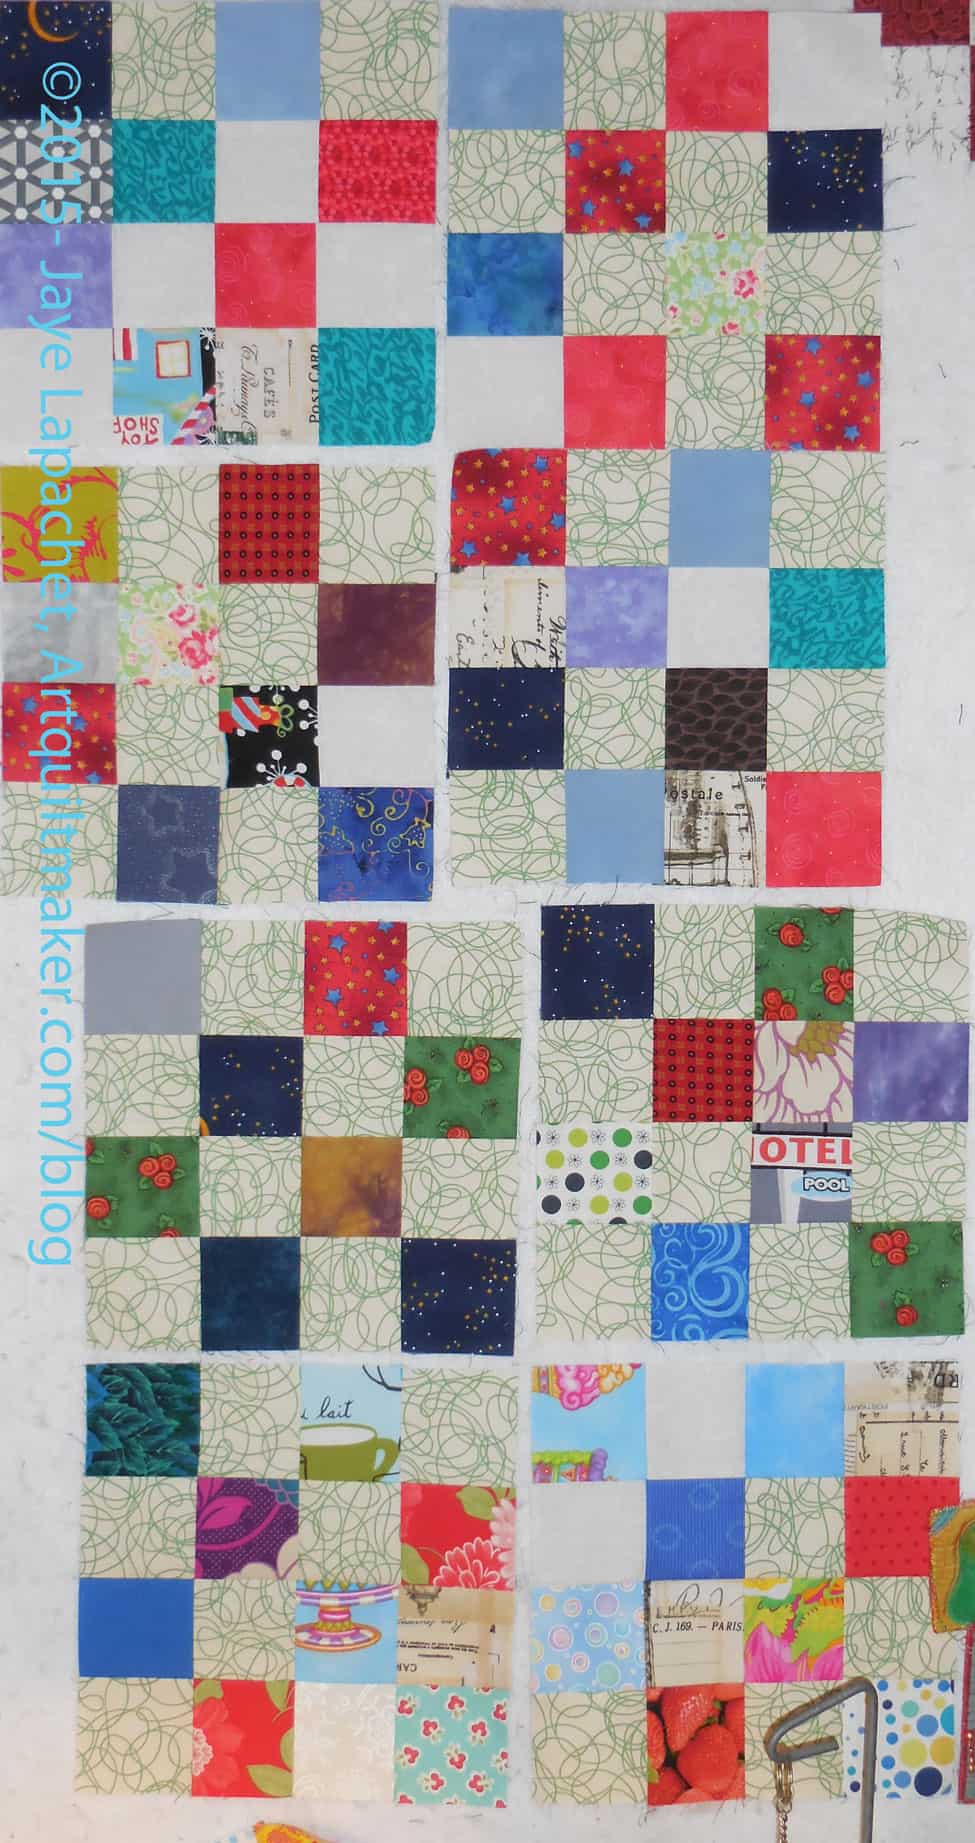
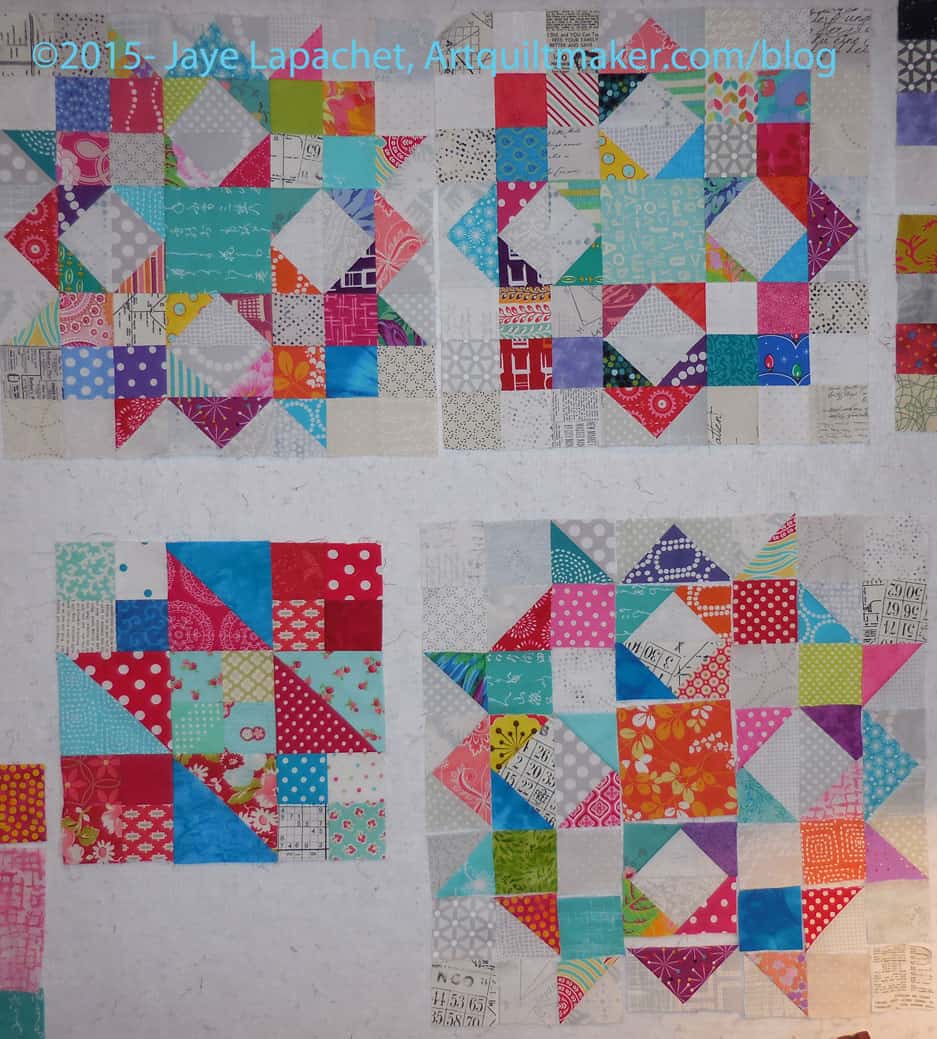
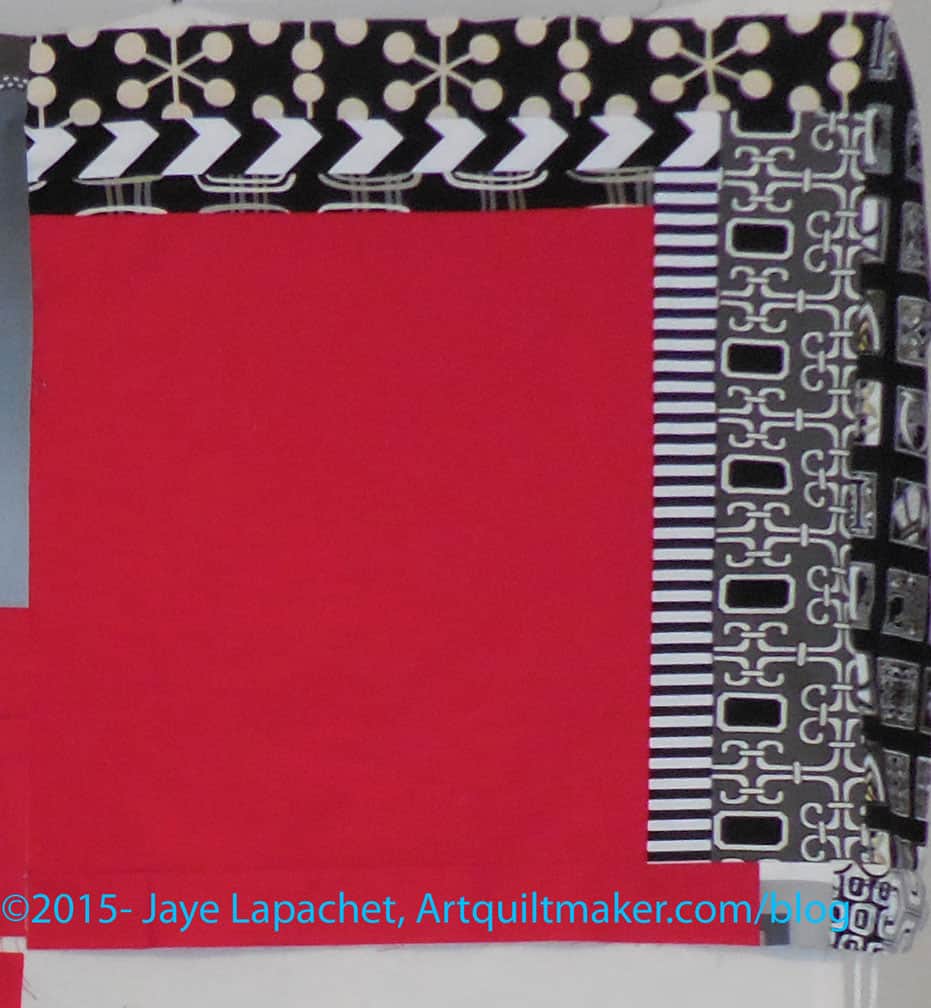
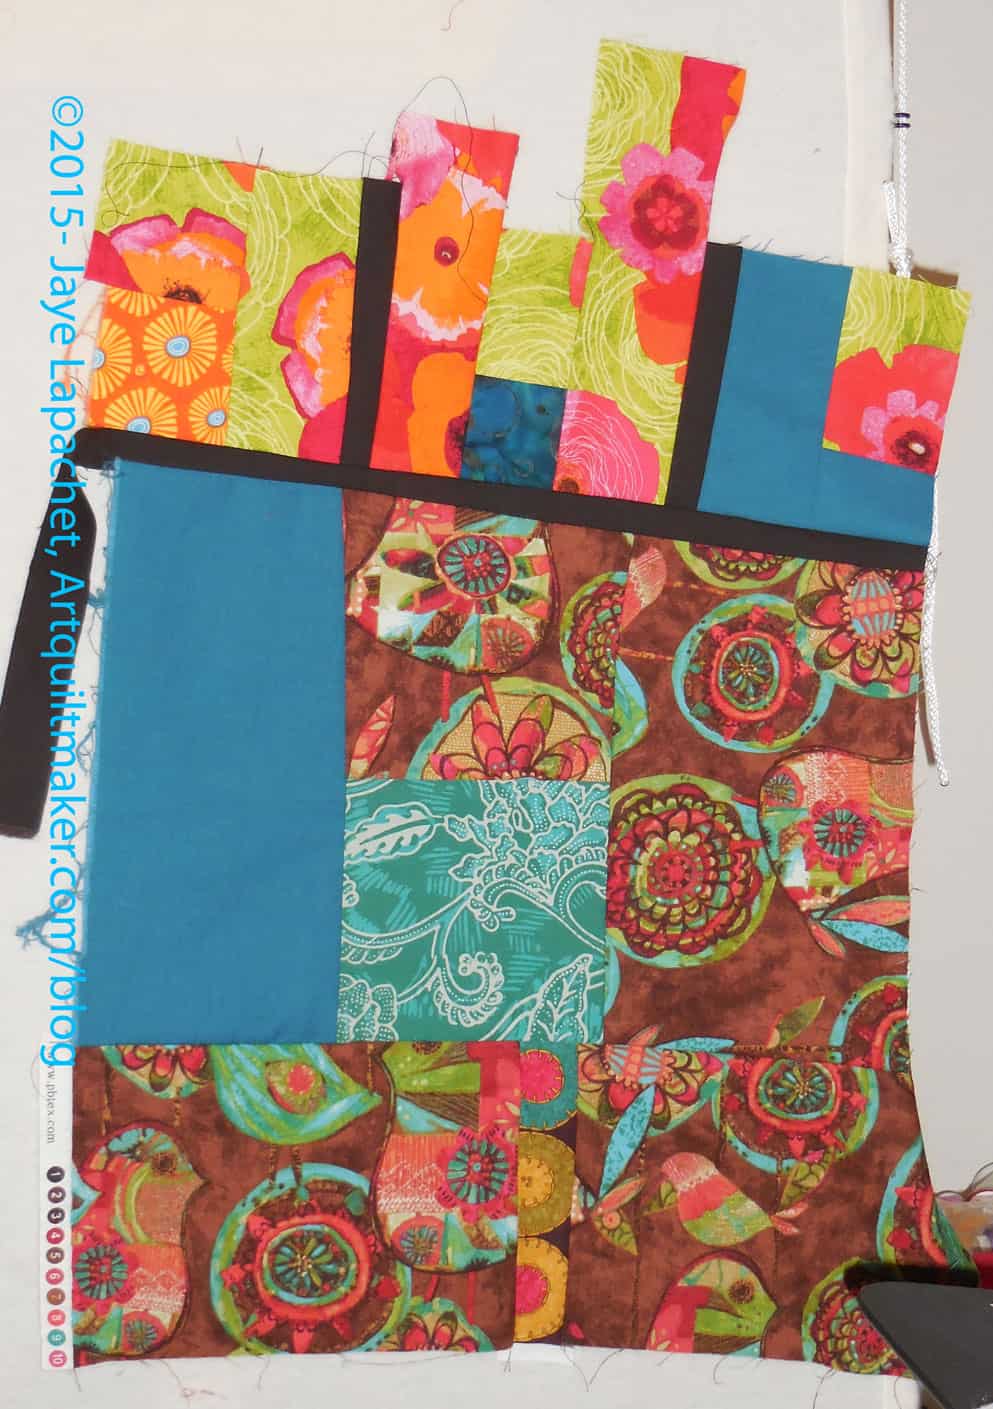
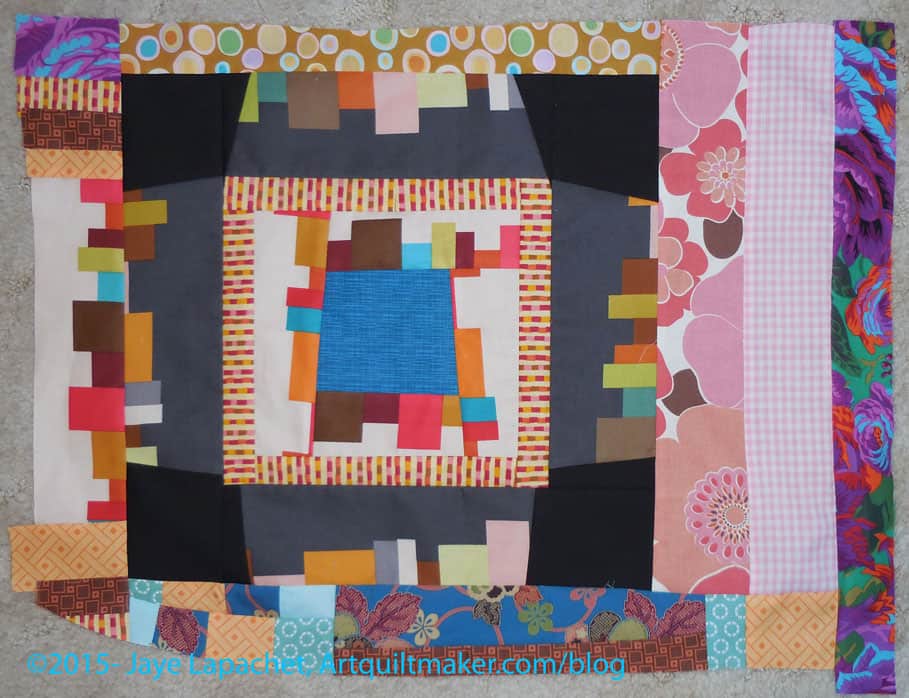
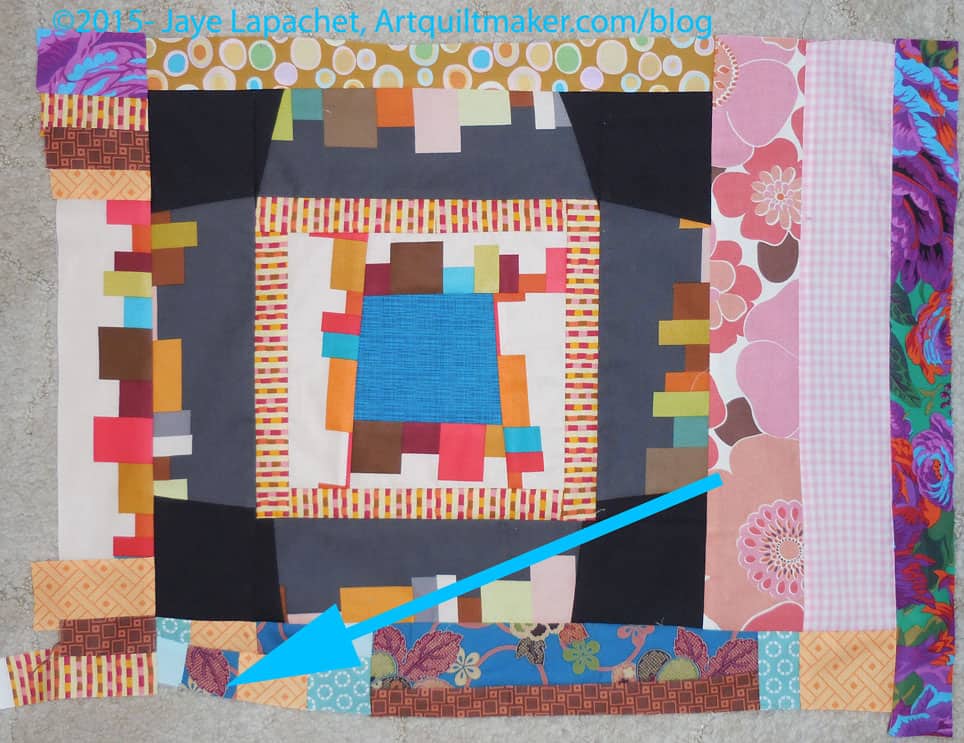
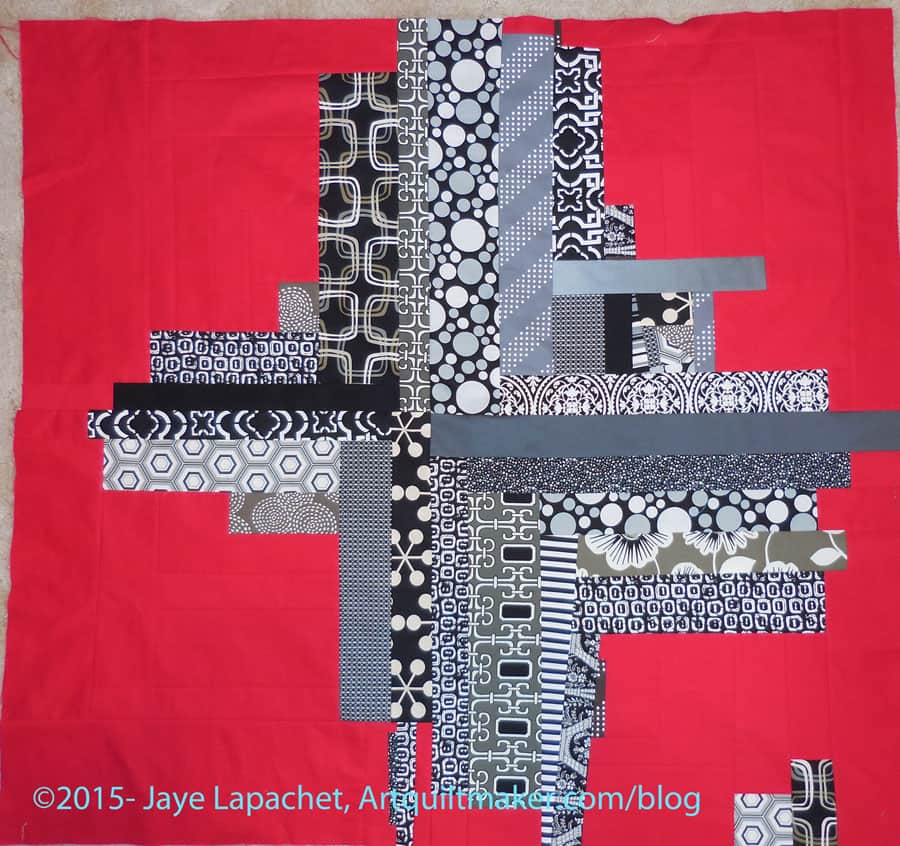
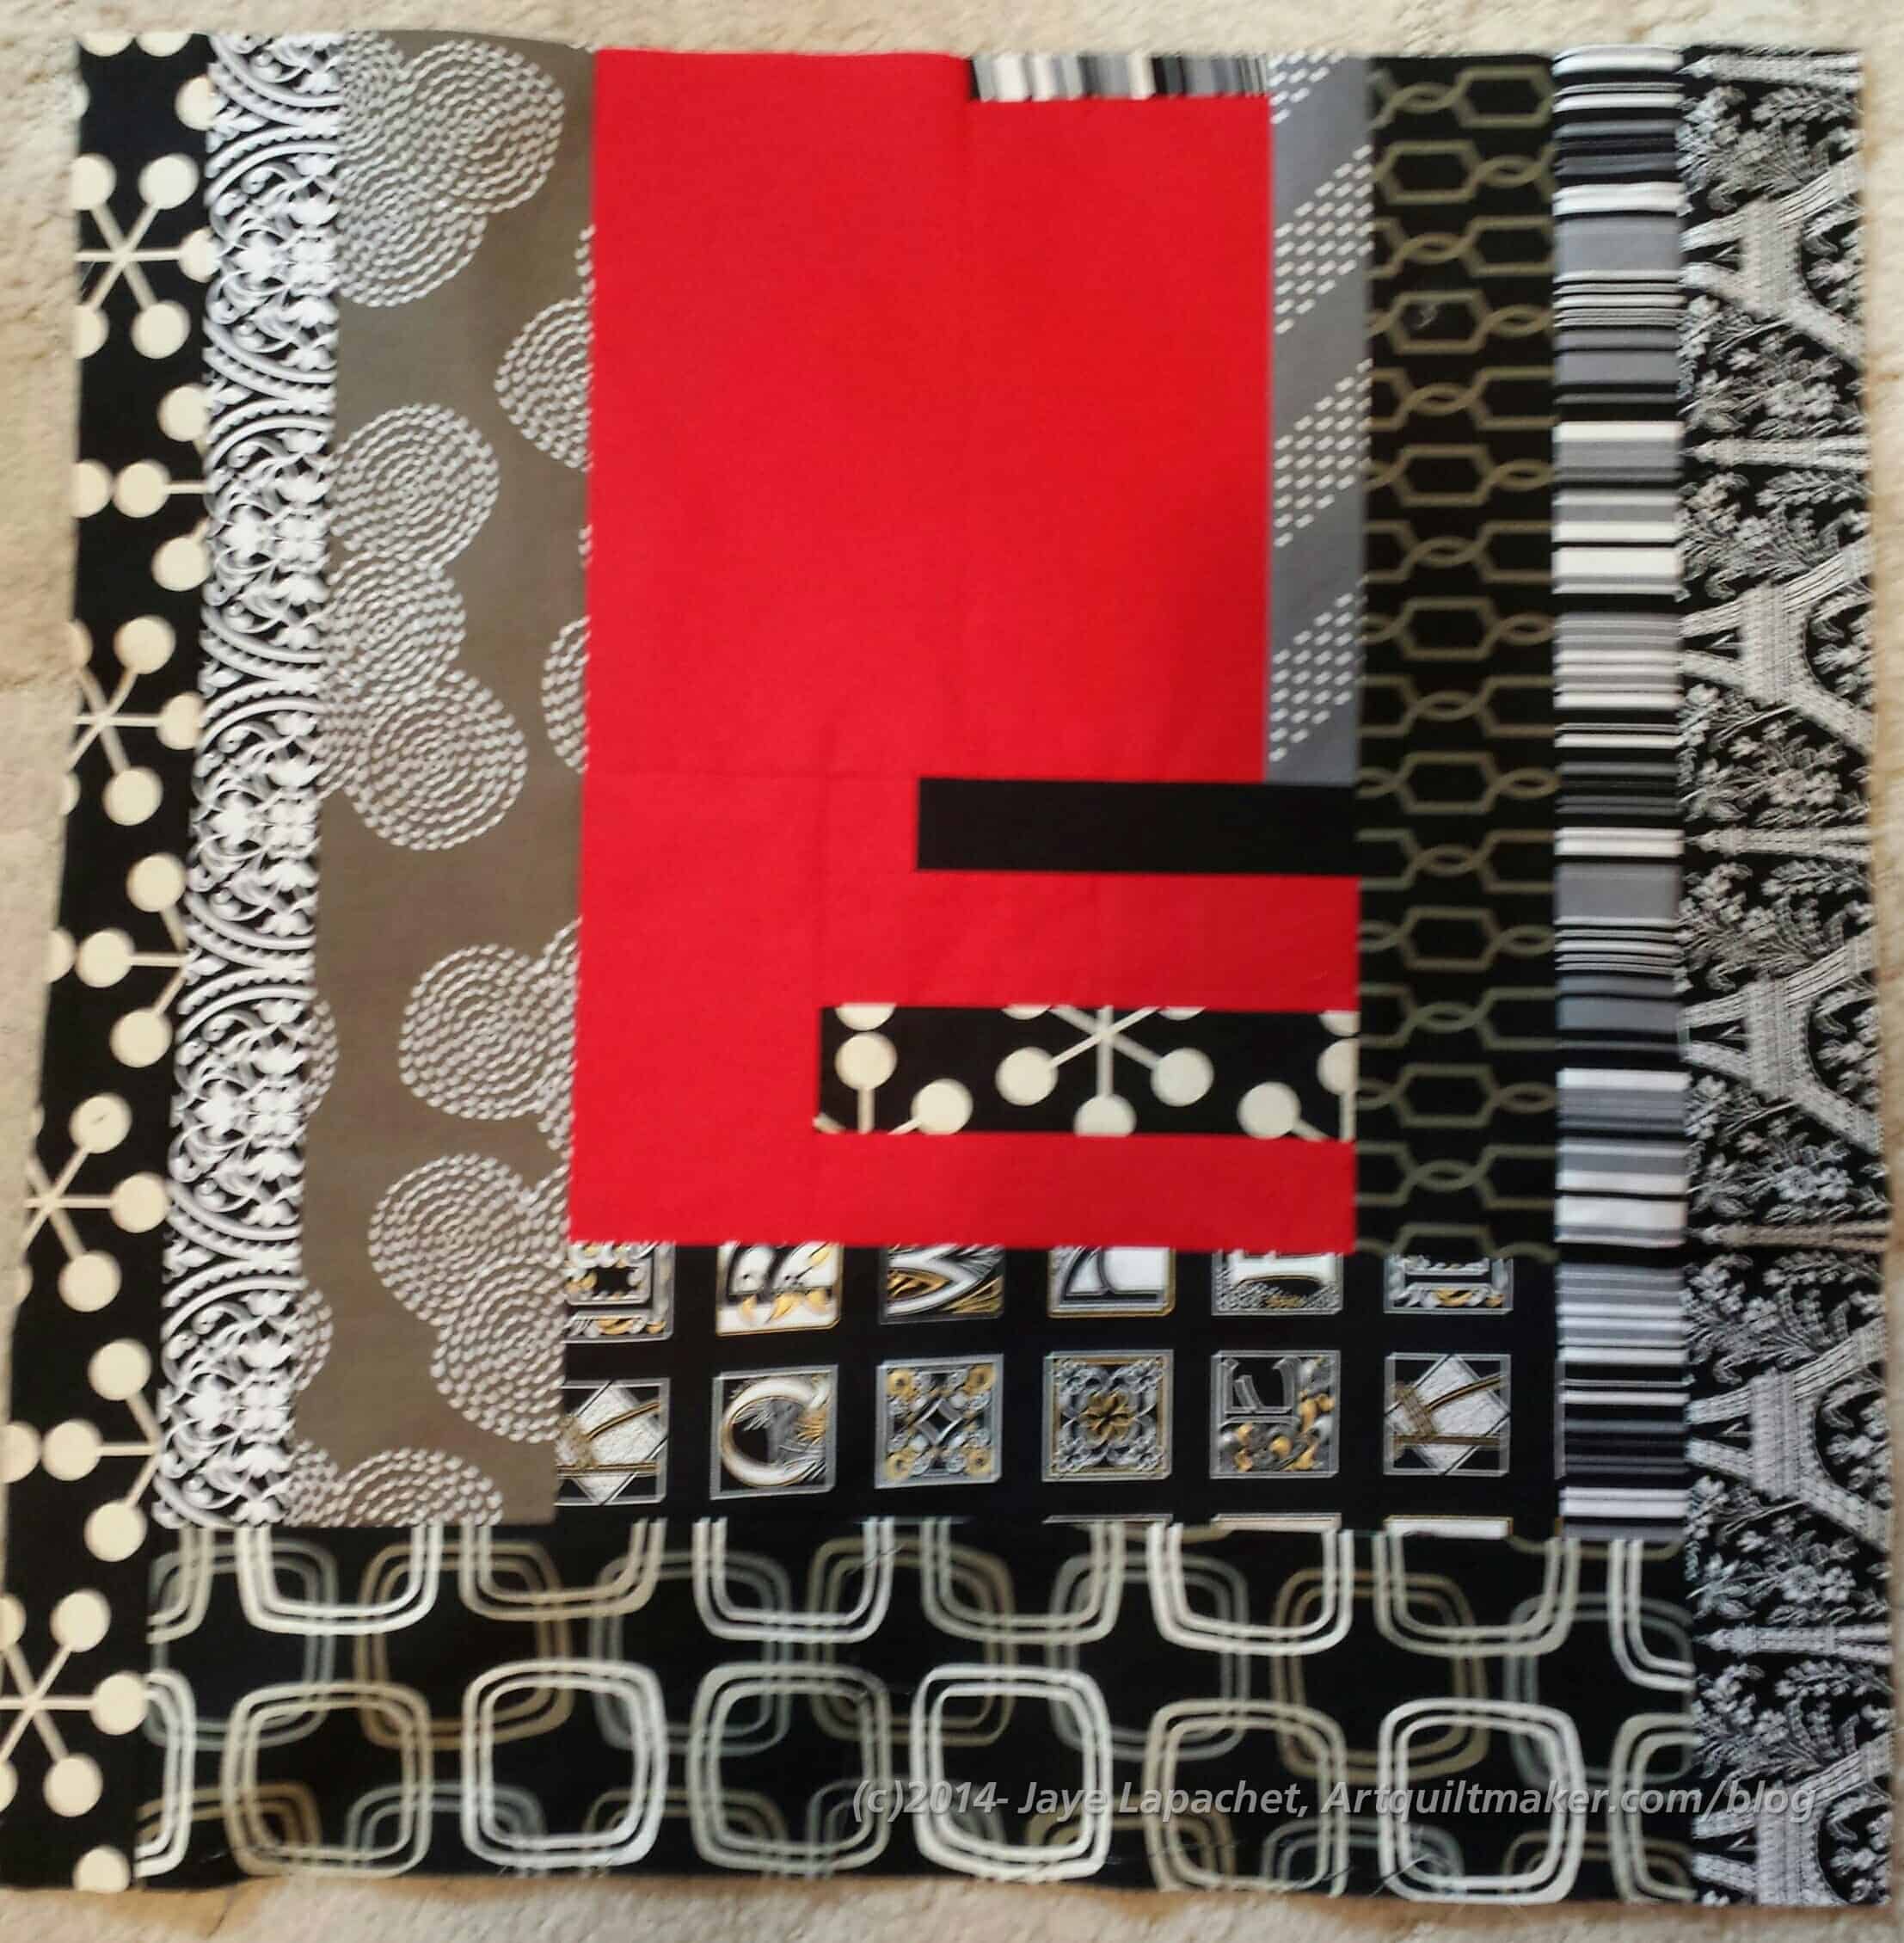
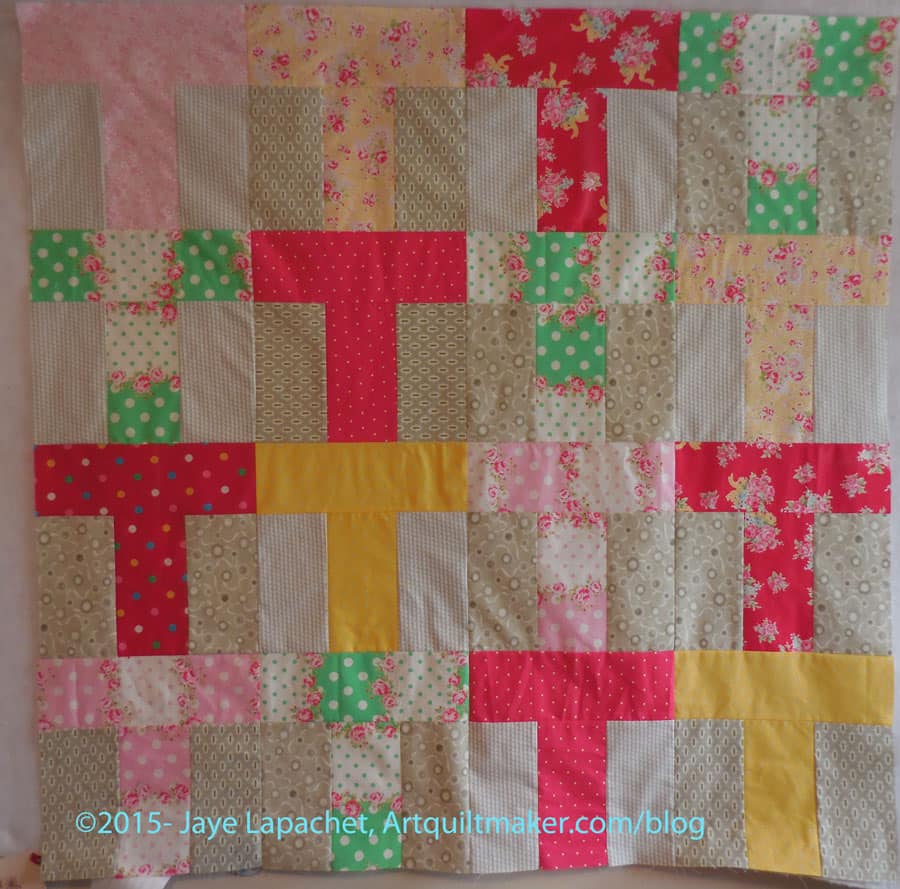
Three blocks was the sum total of what I needed to finish to put this top together. The end was in sight! (Let’s not talk about back or binding at the moment). I finished one block completely on Saturday and made major progress on two more.

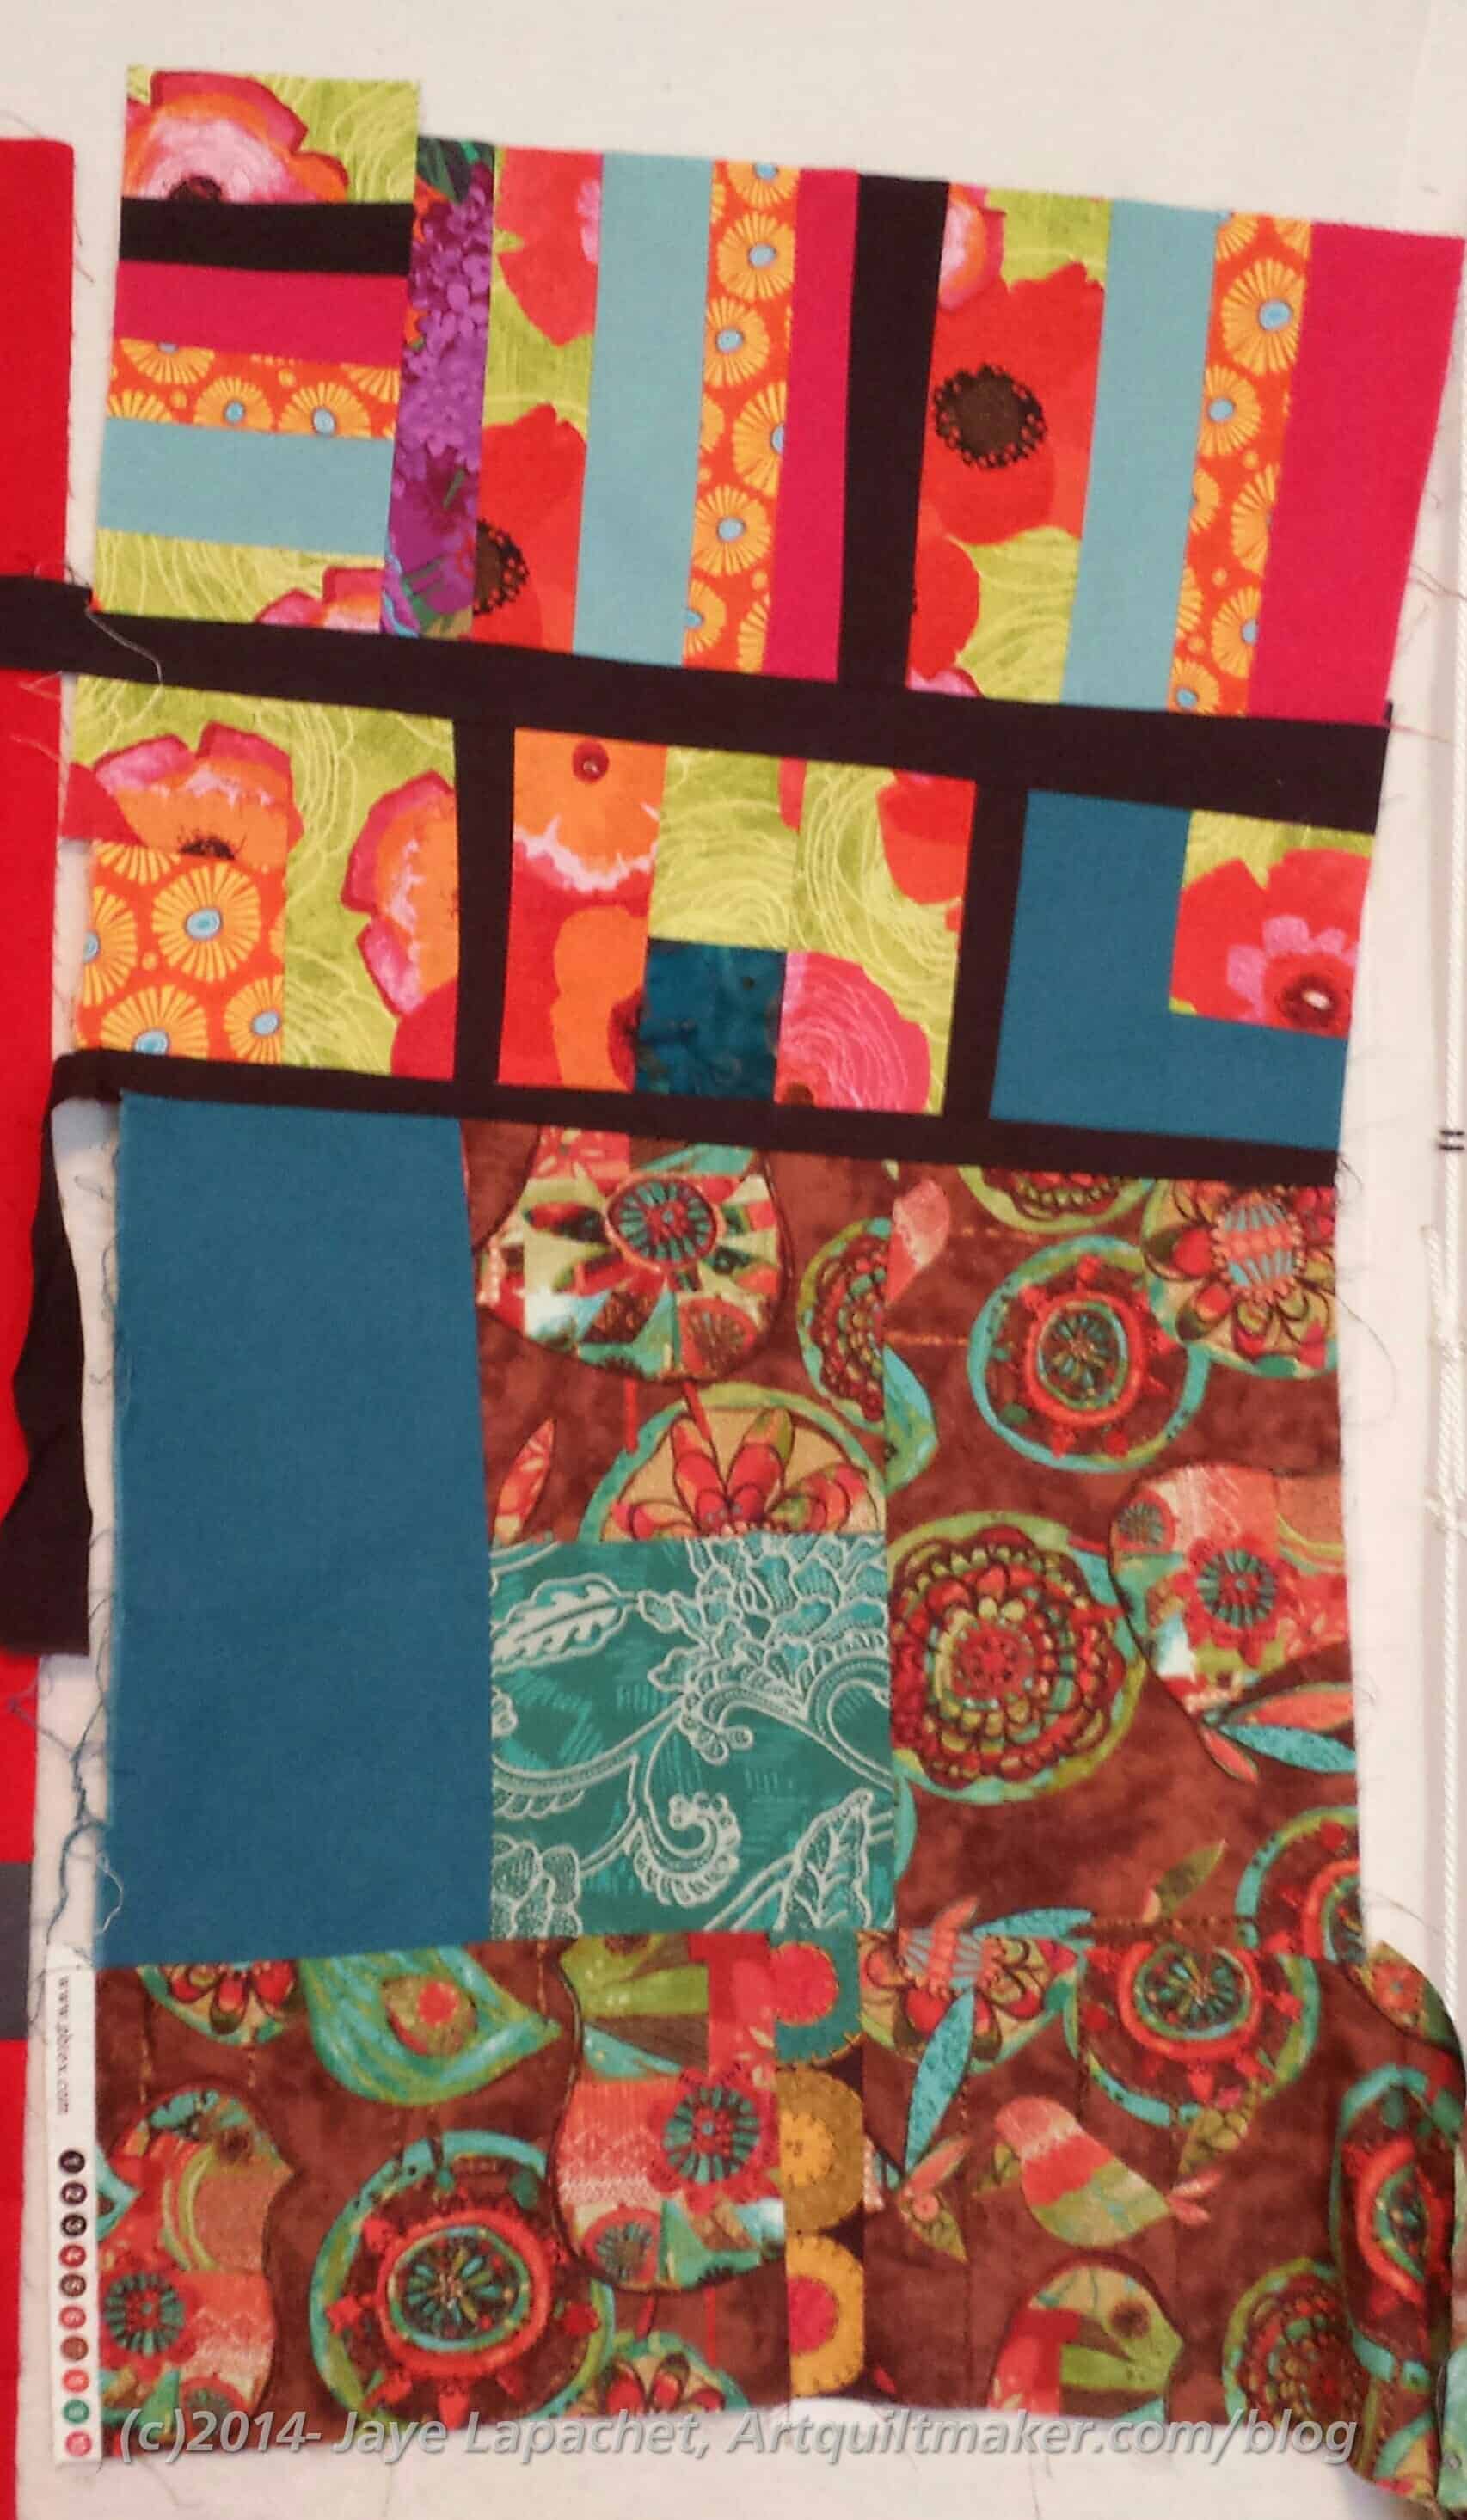
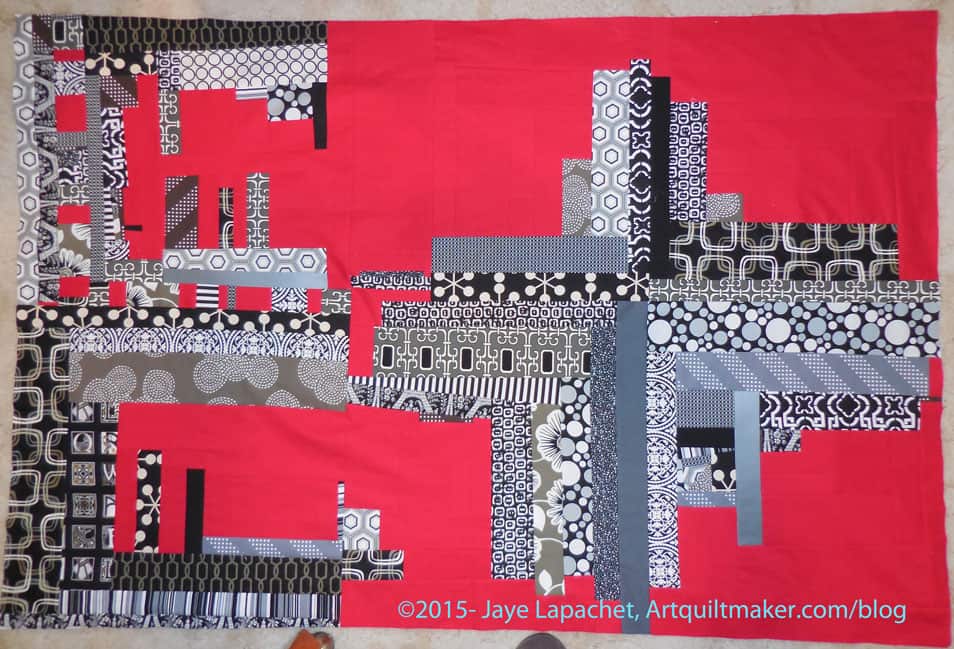
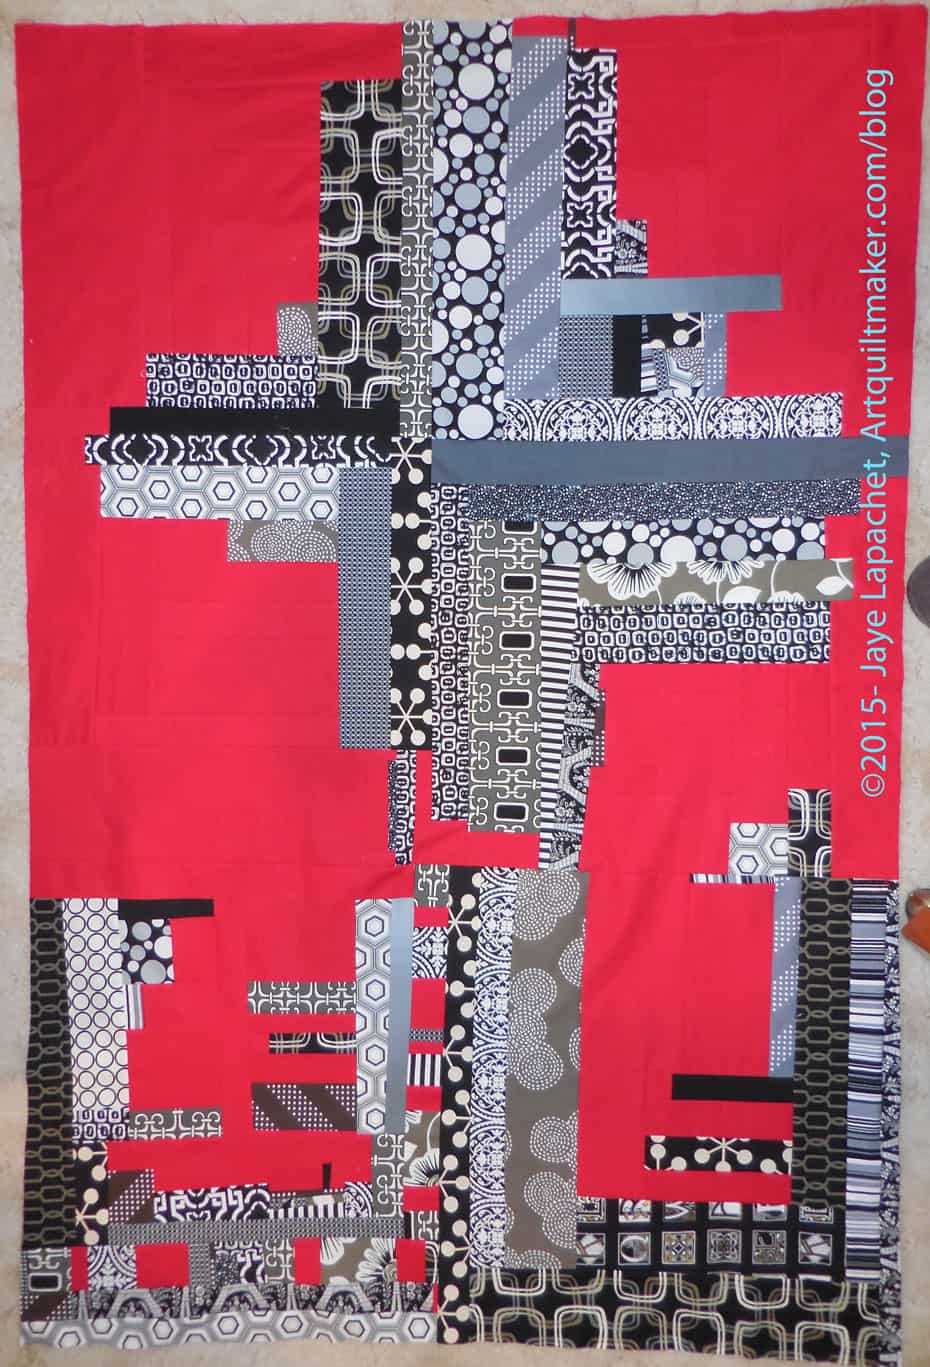
Sunday, I finished the blocks and then put all the blocks together into the top.

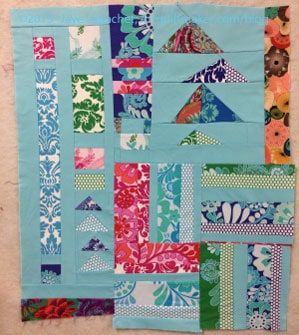
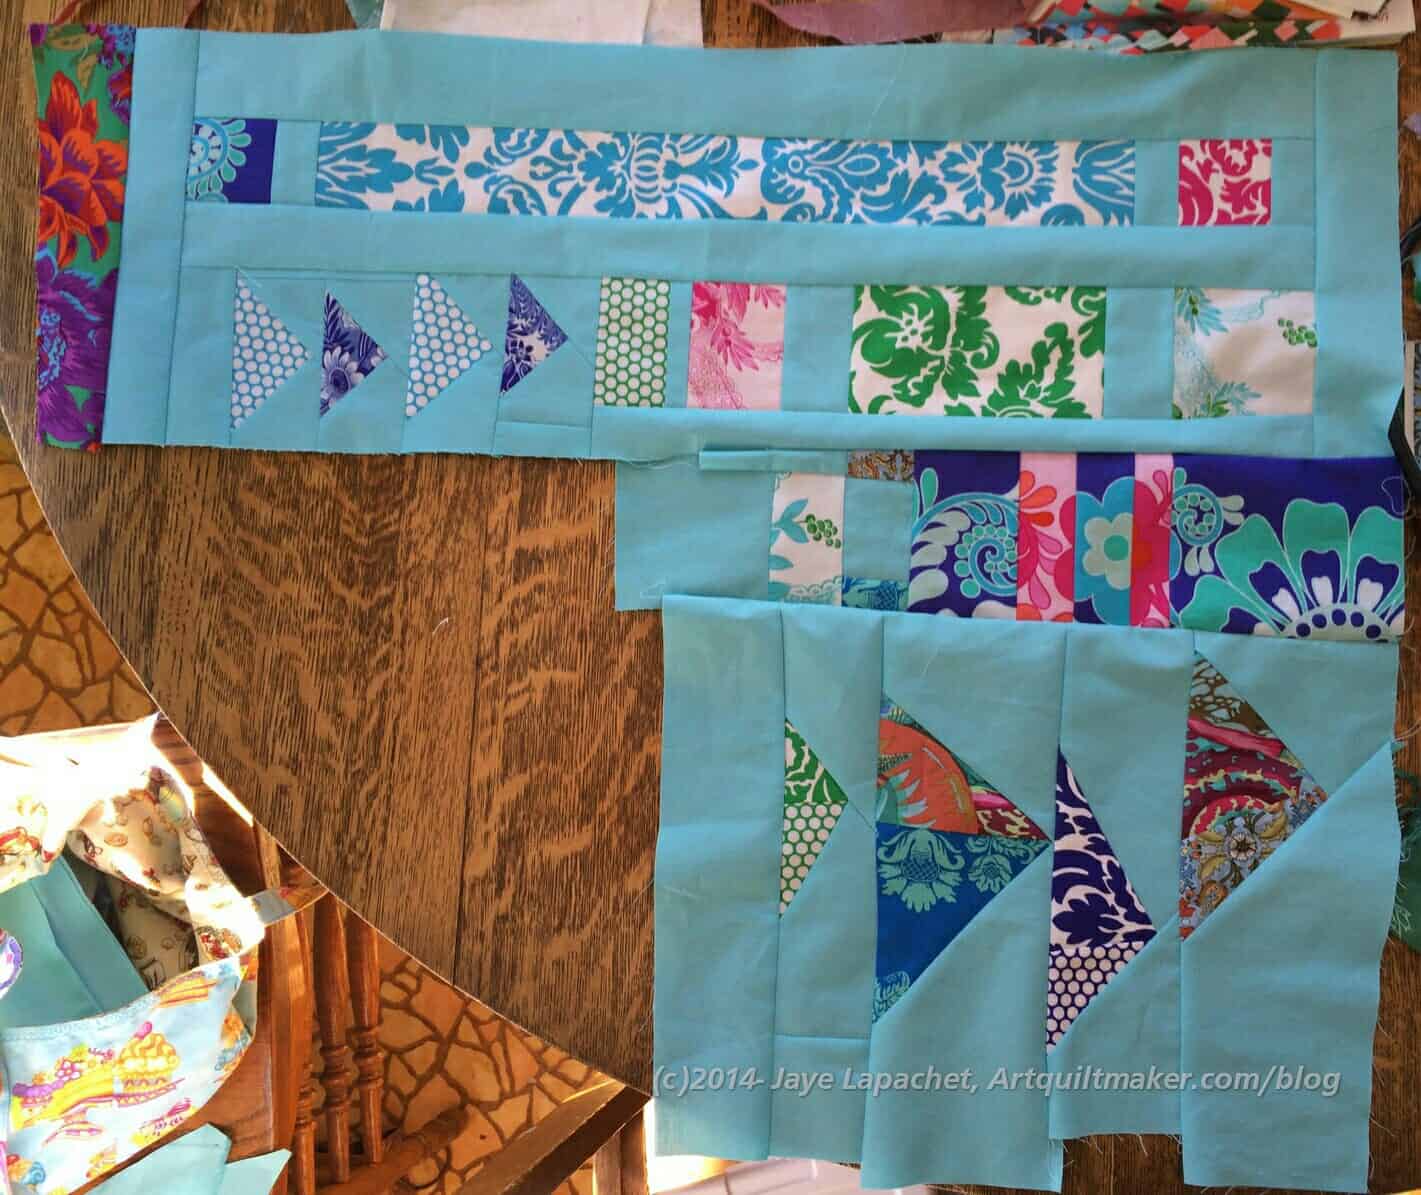
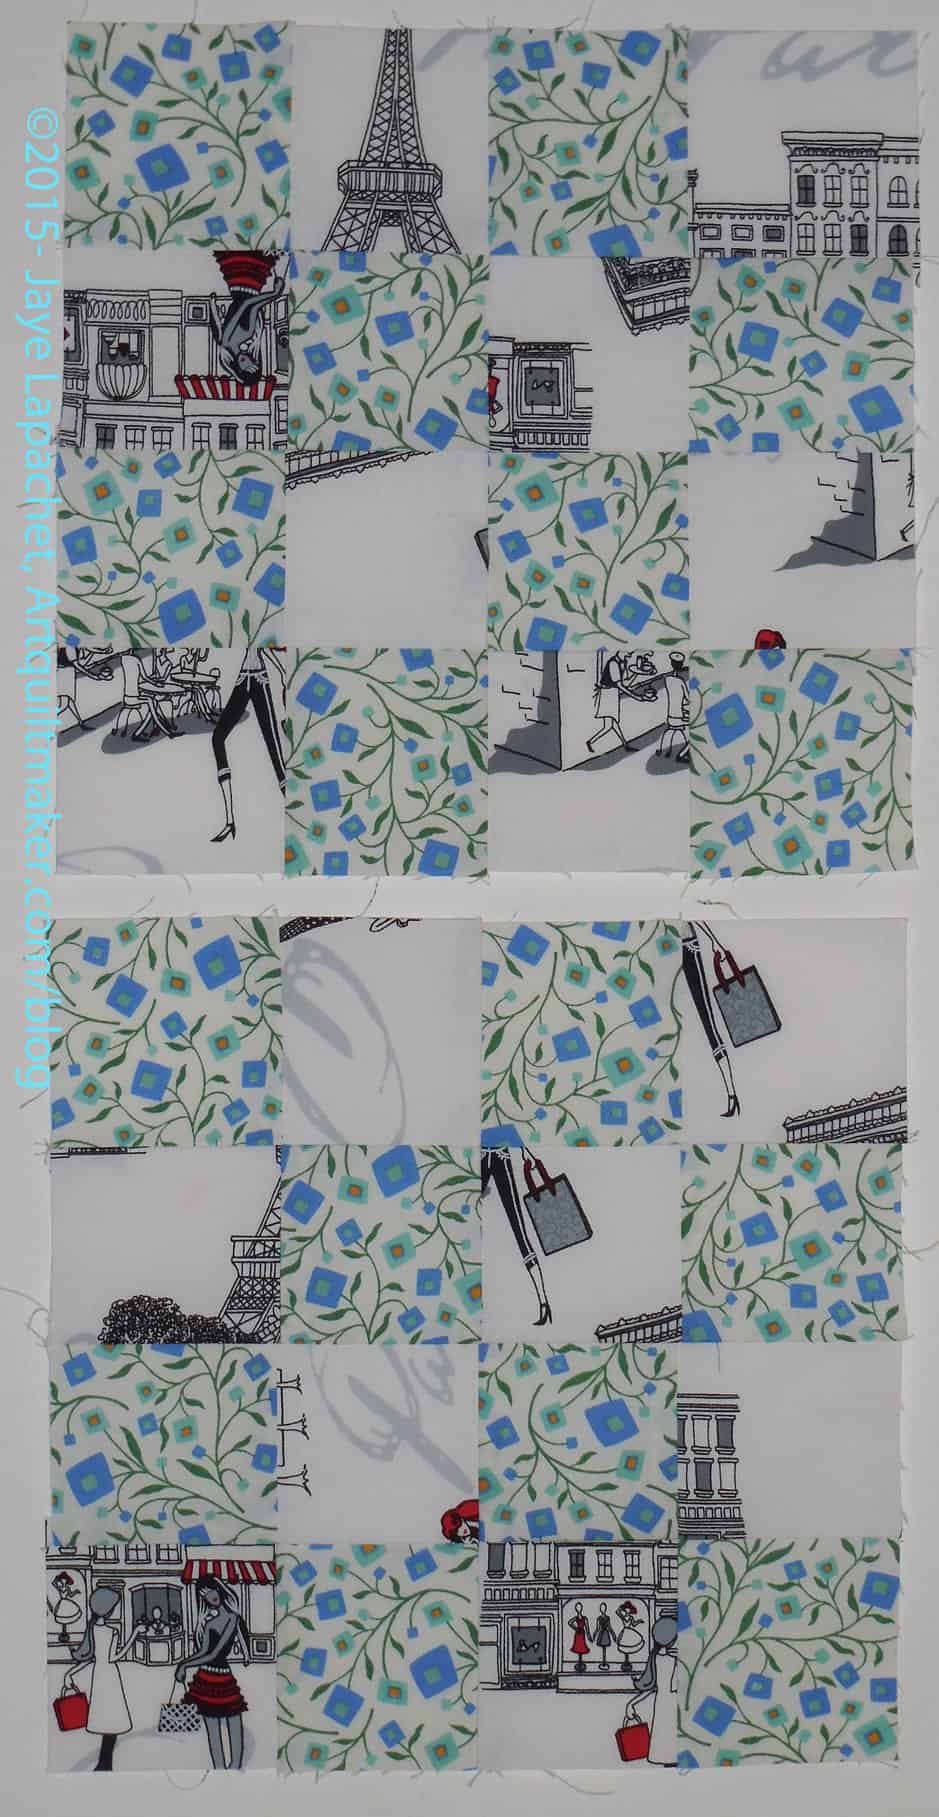
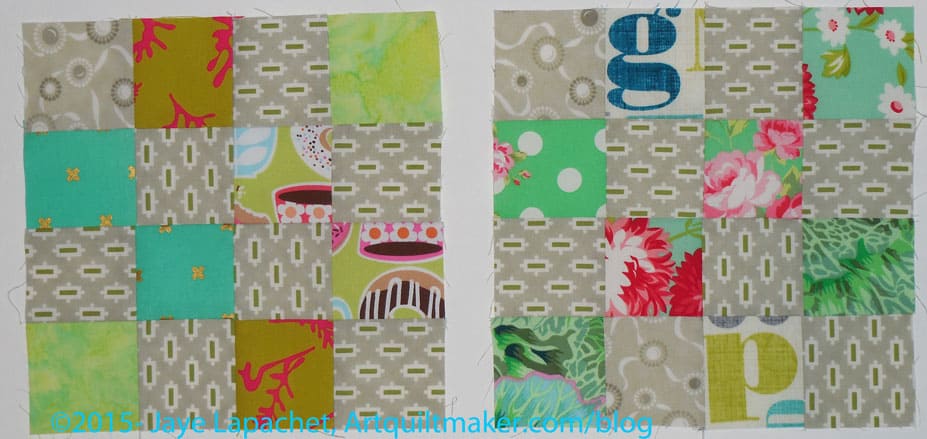
I started on the back, for which I am making different color choices just to give it a different feel. I am choosing some blues so that the back will have a different feel.

Almost there.

Donation Block Extravaganza

November Donation Blocks

Yes. More donation blocks. They were part of my sewing work over the past two weekends. I am now out of cut background squares so I will need to cut more. I have some blue dottish on white fabric scraps leftover from the Star Sampler, which I might use. Since they are scraps, they won’t go far and will be a stopgap.

These are on the dull side. I cut up a bunch of foreground fabrics some time ago. I didn’t feel like I wanted to use those fabrics in a quilt and am working my way through them for donation blocks. Someone will like them, right?

I am not doing that again. I decided that if I have fabric I don’t want to use, I’ll just donate it rather than using it like this. It isn’t enjoyable and I want to infuse these donation blocks good energy so that is my plan.

BAMQG IRR Progress

More progress has happened on the BAMQG Improv Round Robin. I worked on Cindy’s and then handed it off to Michelle. Jen posted in the guild forum that she worked on mine.

Cindy's IRR Before
Cindy’s IRR Before

The first thing I did with Cindy’s was look through all of the fabric she provided with the piece sitting next to me.

I thought it had a lot going on. I decided to use the turquoise solid (shown at left) as the background with my signature fabric to continue the Flying Geese motif already used a couple of times by other contributors. With a vague plan in place, I got busy cutting and piecing.

The piece I made was a little too short so I added a pink square. There was a  pink solid in the group of fabrics, so I used that.

Cindy's IRR After
Cindy’s IRR After

I really did, mostly, cut without a ruler, but my piece looks very precise compared to the rest of the sections. I know that my arm injury is affecting my cutting. Mostly I have to rotary cut much slower and, apparently that equals more precision.

I like my part. It balances the turquoise on the left side and the Flying Geese do bring repetition and continuity to the piece.

This is also a good exercise in what I can do in 20 minutes. I am not counting cutting, because of the injury, but sewing and designing. I think looking at the fabrics first was a good thing to do. I think it helped jumpstart my process.

My IRR after Jen's work
My IRR after Jen’s work

Jen posted about my piece. Michelle had worked on it and made it into a L. I was a little concerned about that, but only a little. I knew my Club Doodle (the name of our group) pals would come through for me. Jen did with flying colors.

It is still keeping that turquoise background feel, which I am happy about. There are more Flying Geese, which I am also happy about.

I am also glad that the Queen Street fabric is finally getting its day in court.

In terms of administration, I have worked on Jen’s, Michelle’s, and now Cindy’s. I feel like I have worked on more of them, but, perhaps, that is because I also worked on mine. I need to work on Claire’s, Diana’s and Rhonda’s.

Good Progress – Fun Progress

I spent almost the whole day last Saturday working on the Carpenter’s Wheel blocks and the Red and Black Improv quilt.

I was really struggling with the Improv quilt and it was taking up space on my design wall so I wanted to get it done and off. Done and off the wall meant making more blocks. Somehow making more blocks has lost their appeal.

3 Carpenter's Wheels + a Stepping Stone
3 Carpenter’s Wheels + a Stepping Stone

I decided as I worked on the Carpenter’s Wheel blocks that I would intersperse pieces and parts for the Improv quilt and make some progress at least. I am so pleased with the progress I made! And I had fun.

The Carpenter’s Wheels are very cheerful and that makes them fun to make. I sewed the second block together (top left) on Saturday and am enjoying looking at the two blocks together while the third block is in process.

Improv Quilt - Late October
Improv Quilt – Late October


I had started out on these blocks, but the Improv quilt was nagging at the back of my mind, so, as I said, I pulled out some black and red strips and started to work on an Improv block in between working on the second Carpenter’s Wheel block. When I finally pulled my nose away from the needle and assessed my day’s work, I found that I had completed a whole side of the quilt! I only have three blocks more to make to finish the top!

This quilt is a monster, which should surprise nobody, which makes it hard to photograph, but you should be able to see some of the work and the progress. There will be no border and sewing the blocks together should be a challenge, but not so much of a challenge that I can’t do it. The seams will be long, but over quickly, I think.

I was doing such good work that I was angry that I had to leave on Sunday for a work trip. I was looking forward to the work trip, but it just came at an inconvenient time and I was hoping I wouldn’t lose my momentum, especially with the Improv quilt.

A Few More Donation Blocks

Donation blocks - mid October
Donation blocks – mid October

My last batch will make a cohesive quilt. This group less so. I had one leftover from the previous batch. When I returned home from the meeting on Saturday, I decided to cut up some cream and green squares for a background and make more donation blocks.

I pulled out a small bin of 2.5″ squares that I cut up for donation quilts a thousand years ago and began using those to make more squares. There is a lot of blue.

Last Lone Green & Grey Donation Block

The blocks are interesting. They aren’t as cohesive, as I said, but they make an interesting group of blocks. I don’t know that they will all be put together in the same group.

I have more to make.


More Improv Progress

Saturday and Sunday, when I wasn’t working on Michelle’s IRR piece, I was working on the Improv Quilt. I know both are Improv projects.

Improv Progress, September 2015

The last time I made any progress on this piece was over a month ago. That progress felt forced and unsatisfying even though I didn’t know it at the time. I had the piece up on my design, which meant I had to look at it and that frustrated me. Frustrated me, because I wasn’t happy with the work as well as frustrated because it was taking up my design wall. I need to learn to make smaller quilts.

This weekend’s progress felt good. It was fast and intuitive and right. The piece is starting to look like something I won’t hate looking at.

I am not sure the blocks will end up where they are placed now, but there is a good bet some will stay where they are.

Improv Corner Block
Improv Corner Block

One thing that happened to jolt me ahead in the process was that I laid in bed one night, trying to get to sleep. I spent the time thinking about this piece and made a plan. I decided I would cut a big piece of red to use as a start to make some corner blocks.

I wasn’t completely on board with making ‘B’ blocks for the corners, so I made corner blocks, which are similar to the ‘A’ blocks. I did what I thought would look good. I can always make something different, right?

I like the corner block shown at left, but I wish I had varied the length of the neutral strips more. I did a bit, but not enough. It will be fine once the rest of the quilt is done and I am not going to worry about it right now. I do reserve the right to change it if the design needs it later.

New 'B' Blocks
New ‘B’ Blocks

I did sort of learn from this block and the first two ‘B’ blocks. I didn’t want all the ‘B’ blocks to be heavy, so I varied the length of the strips to give them less weight — or less perceived weight. I also made the centers a bit more interesting. I want people to be interested in looking at the piece.

I have about 7 more blocks to make on this monster. I have some slim hope I can finish it by next week and take it to be quilted. I am laughing, but you can stop. 😉 I know it is a pipe dream, but I would like to move this project along.

More IRR

As mentioned the other day, the IRR is going well. I worked on Michelle’s piece on Saturday. It is, as also mentioned, a 20 minute exercise, so I worked on it early and got it finished.

Michelle's IRR Start
Michelle’s IRR Start

I started with Michelle’s piece, by putting it on the wall and looking at it for a few days. That tactic would have worked better if I had taken a look at the fabrics she included. 😉

I decided, however, that I was going to work on it on Saturday and get it out of my hair.

I did loosen up a bit on Michelle’s. Even I can admit that mine was a bit more uptight than improv. I guess that is part of the process.

Once again, I have a shortage of design wall space. I really think I need a whole room with movable design walls all over it. OR I need to clear my mind of the jumble of projects in it. My mind is an insane mess right now.

Michelle's IRR with my contribution
Michelle’s IRR with my contribution

I should have balanced the piece out by putting my contribution on the bottom, but I wanted to continue those dark solid lines. I really do like the strips of bright. the top of the piece is very happy.

It is headed off to Jen next.

IRR Start etc

The other day I wrote about the Improv Round Robin, starting from the middle rather than the beginning.

The details of this round robin can be found in a blog post on the BAMQG site and in the book by Sherri Lynn Wood called the Improv Handbook for Modern Quilters.

IRR Start
IRR Start

The basic idea is that you spend 20 minutes on each round, including the start. I had to pick out fabrics and a signature fabric. I used Queen Street by Jennifer Paganelli and my signature fabric is a Philip Jacobs. You can see my signature fabric on the bottom of my starting piece.

The signature fabric is a fabric that we add to each piece we work on to know that we worked on it. I just had to use a Philip Jacobs as it is uniquely distinct to me. Many of the other modern quiltmakers don’t use Philip Jacobs fabrics that I have seen.

Wanting to try for a piece that was not square, I made my piece long and thin. Cutting is difficult for me at the moment, so I gave myself a bit more time on that piece, but then sewed like a demon so as not to break too much of the rules.

I kept looking at the Flying Geese TFQ and I have been exchanging. I decided to incorporate some of them into this piece, but the rest are just squares and rectangles. The solid is supposed to be the background.

IRR Start with Michelle's work
IRR Start with Michelle’s work

Michelle was kind enough to send me a photo of my start since I, apparently, forgot to take a photo of it.  She also sent a photo of what she added to the piece, so I can see how it is progressing.

I like that more of the Flying Geese have been incorporated.


IRR

I joined the Improv Round Robin at the last BAMQG meeting. I was really busy last week and didn’t get my stuff together until the morning of the meeting. I forgot the crucial thing: my starter piece. DUH! Fortunately everyone is really nice and I wasn’t the only one. I took Jen’s piece to work on and Michelle and I met near my house and we exchanged starters.

Jen's IRR Piece
Jen’s IRR Piece

After the meeting last Saturday, I came home and worked on Jen’s piece.

I thought there was no possible way she could have made her piece in 20 minutes (more on that later) until I saw that some of her piece looks like piecing, but is really part of the fabric. So that was her trick. 😉

I added the bottom, which I curved on one end to give someone else the opportunity to do some curved piecing. They may just cut it off or do an angle, which is OK, too.

One of the things about this project is that we each have to have a signature fabric that we add to all of the pieces. I had to use a Philip Jacobs print! It is the green and purple fabric on the right hand side. We are assured that everything will go together just fine.

Jen's IRR piece before trimming
Jen’s IRR piece before trimming

I added some more piecing at the curve, but cut it off. You can see what I did in the bottom photos.

You can see the kind of wonky piecing, which is what inspired me to cut off the end. I added the left side as well.

While I was trying to decide what to do, I pieced some strips of Jen’s fabric together. I ended up just putting them in the bin without using them. I kind of like the thought of adding something that someone can springboard off of.

More Donation Blocks

FOTY-made Donation Blocks

I made more donation blocks last Saturday as I worked on sewing together the FOTY 2014 patches. I thought green would be good and chose a lot of medium greens, though I had to use some darker pieces as my green scrap basket dwindled. I used, mostly, grey for the background. As you will, a little pink and some other colors crept in.

Using the leaders and enders technique, I just kept sewing the 2.5″ squares in between the FOTY 2014 patches and came up with all of these donation blocks. I joked about making enough for a whole quilt, never thinking I would be able to do it. I am close, though, especially with the blocks from the other day.

I saw a quilt on Valerie’s Twitter feed that has these blocks with Flying Geese on the outside to make them into stars. I am sorely tempted, but I have so many projects that I am going to force myself just to turn these blocks in and let someone else make a pretty quilt.

I am very pleased that this will be a quilt (or quilts) that will make someone happy.

Donation Blocks

September Donation Blocks

I was finally able to make some donation blocks!

Unlike Pam, I do not have piles of 2.5″ squares laying around, though I am starting to think I should. I cut the foreground squares from a FQ I found that I won’t use in a quilt. I decided to make the blocks, because I had some leftovers from a One Hour Basket I made. That fabric became the background. There isn’t a ton of contrast, but they are pleasant blocks. The best part is they will go to a good cause. I haven’t done as much charity work this year and it makes me feel good to add to the BAMQG charity pile.

As I started to sew the FOTY 2014 together on Friday (started last week, but got really serious on Friday), I realized that I needed leaders and enders. After I sew each FOTY pair, I need to sew something in between so that I can keep the FOTY patches in order. I have been using the Octagon 9 Patch as leaders and enders pretty regularly, but I am at a weird place with that project, so for the moment it won’t work. I gave away a bunch of my neutrals, but dug around and found some suitable greys for more donation blocks. I used leftovers of some Bonnie and Camille greys. They are a little too taupe for me, so I have been using them for projects I don’t plan to keep. Since I also have a lot of green scraps, which I don’t use much, I cut some random 2.5″ squares from those and made a couple of blocks.

Green & Grey Donation Blocks

Now I have a random thought to make 12 more and have enough for a quilt. I suppose it is possible since FOTY has a lot of pairs needing sewing, but the cutting of the 2.5″ squares – enough to make a quilt before next week is a little daunting.

I think it will be better if I get over my Octagon Nine Patch hump so I can make progress on that project, not that donation blocks are a bad thing.

Improv Progress

I am still feeling like I am in some weird in between place with my projects. There are projects where I am at a strange point that seems to be stopping me. I have to count up all of the FOTY squares and figure out how big I need to make the quilt. I need to cut some more squares for the Octagon Nine Patch, which has been languishing for, what feels like, a long time.

Improv Top in Progress

I decided to work on the Improv quilt again and get that project farther along.I finished a second ‘B’ and decided to sew it, along with the first ‘B’ block on to the quilt. I like what is happening and I can see where I go next, to a certain extent, but I think those 2 blocks look heavy. I might put them on the bottom, but I will see if I can lighten them up with more red on the three sides.

One idea I had from looking at the photo above is to make sure some red meets the red on the bottom and continues over almost to the corner. That will mean making that part of that corner side block last and making sure I remember. I think if I do that, there will have to be a bit of one of the black and white prints in the corner – or a strip of red alternated with black and white prints.

Improve top - turned
Improve top – turned

I also thought of making those blocks the bottom. Heaviness works on the bottom. The photo (left) is the same one as above, just turned so you don’t have to turn your head.

It looks ok, but I remembered that there will be other blocks on each side of those new ‘B’ blocks.

Yes, all the blocks are sewn together. I just wanted them sewn.

Improv Progress

Improv A Blocks
Improv A Blocks

After using some Flying Geese as leaders and enders, I switched to using the large Improv blocks as leaders and enders while putting together the T Donation quilt. The Improv quilt is not a good project for leaders and enders as I really should have it on the design wall and be looking at it all the time as I worked. I really wanted to make progress. This project has been shuffled from corner to corner of my workroom and I am forgetting my plan. My design walls were full of other projects, so it was what it was.

I added a few more strips to make the center (A) blocks more even then sewed the four center blocks together. This breaks my ‘Chunking It” rule, but I just wanted to see the four blocks together. Somehow with them together, I was able to start on the B blocks.

Improv B Block #1
Improv B Block #1

They look pretty good and I got excited about working the B blocks. I had bits and pieces that I made in class that I hoped to use, though I wasn’t sure what I was thinking when I made them, so I kept going. The first one went together relatively quickly and that helped me move forward with the others. I am working on about 4 at once right now and expect to have a big group of them done at once. We will see.

Flower Sugar Donation Quilt

Flower Sugar T Donation Quilt

I finished a donation top and back over the weekend. I thought I had posted something about this, but I couldn’t find the post. I think I must have only posted on Twitter and Instagram about it.

I wanted to use up the Flower Sugar fabrics from Lecien that I used for the Flower Sugar Hexagon (Attack of the Hexies) quilt. I thought a donation quilt would be a good opportunity.

I really want to make donation quilts that can be used for boys, but I also, as I said, wanted to use up this fabric. I don’t think I will use this fabric again, except for some of the blues, perhaps, which I really like. Also, the fabric isn’t really great in terms of quality. Some parts of the fabrics were sun damaged waiting to be used despite the fact that they were covered.

The other fabric I don’t think I will use again was some of the greys from a couple of recent-ish Bonnie and Camille collections. They turned out to be too taupe-y for my projects, so off they go to donation quilts.

I will making the binding and then bring this to the meeting to be quilted. I will see if I have enough batting parts to make a Franken-batting as well.

Hawaiian Quilt Binding

BAMQG Hawaiian Quilt #2

The BAMQG Hawaiian quilts are still in process. Several have been delivered to the family and they were beyond thrilled. The rest are due by the end of August.

A few weeks ago Kelly and I met for lunch. She gave me one that needed to be bound. In the thick of my injury I couldn’t do it right away and it languished. Angela needed to send me the binding, so I didn’t worry. She did and it was time to get to work.

Last weekend was the weekend of little projects: strip for the Food Quilt #2 back strip, journal cover, Stepping Stones blocks, a lanyard, etc. I added the Hawaiian Quilt binding to the list.

Emboldened by last effort at machine binding, I did a machine binding again as well. Also, with my hand in a brace, hand stitching takes abut 15x as long. Angela and Kelly were fine with the machine binding so I was off.

I did a much simpler machine binding this time. I just used a straight stitch on the back rather than a decorative stitch. The stitching shows on the binding, but isn’t obvious on the front, which is great.

Trimming for binding

The quilt came to me untrimmed, so I put the binding on and then trimmed. I used my regular Aurifil #2600 piecing thread to sew the binding on the front. It did not blend, but would be covered once the binding was flipped so I didn’t worry.

It occurs to me now that I could have trimmed, put the binding on the back and then flipped the binding to the front. I might try that next time just to see how it looks.

Hawaiian Quilt Back
Hawaiian Quilt Back

These are very bright and cheerful quilts. I am really pleased to be able to help the guild work on them.