I have more than plenty of the blue color strip blocks to make another Sidewalk quilt similar in size to the first.
This is the first block I have put together with the white background and I think the block looks nice.
Sidewalk #2, block 2
I made a second one using some darker blue strip blocks. It looks nice, too and the sewing is going pretty quickly in between the Chain Link and Triumphant piecing.
I need to finish something as finding the time to finish four projects is making my head swim a little! LOL.
I spoke about the pillowcases I wanted to make for ‘new’ family members that have joined since the last time I made pillowcases for the nieces and nephews. I gathered the fabric and was planning on slowly working through the 8 I needed to make when I had time.
Well, I had time at work when I had to listen to a meeting, but didn’t need to participate. I was able to cut and trim. It is really good, because my hands are busy which helps me pay attention.
Then, while I was sewing the endless bits for the Old Town borders, I used the pillowcases as leaders and enders. Suddenly, the pillowcases were done! More than 6 months early! WTH?
Now they get to hang around waiting for November. I plan to write cards and package them up now so they are ready to go.
I finished the Vervain belt bag the other day. This is definitely a bag I need to make again to improve my skills.
I did find that the bag went together more smoothly than I anticipated. It made me happy and it made me confident enough to try the Allium bag soon.
This bag is really making me consider buying a rivet press. I got the magnetic snaps in with no problem, but it was a bit of a struggle. What is stopping me from buying a press is space. Where would I keep such a huge piece of equipment? Not sure, so I need to clear some things out to make space.
Vervain: front pocket open
So this bag has a flat front pocket. The snaps are on the front and don’t meet when the bag is as it is shown in the first photo above. The snaps are uneven so the pocket can fit something with more dimension.
I was able to fit my phone in that pocket, but not very well. I wouldn’t store it there on a regular basis. I would use that pocket for lip balm, wet wipes and other flat items.
Vervain: back
The back has no pockets, though I could have included a vertical zipper pocket. I might if I make this again.
I also used a really nice parachute clip for this since it is for my aunt. The clip is a little heavy and that is a concern, but we will see. I hope it doesn’t prevent her from using it.
Vervain: interior
Inside is where I would put my phone, if I were using this bag.
It has a zipper that closes the bag completely and also an interior zip pocket for more security.
I finally finished the Butterfly Superbloom, but it is bittersweet. The organization to whom I planned to donate it has decided they have something similar and don’t want it, or the Dogwood Pouches, for their auction. 🙁
I have to figure out to whom to gift it or whether I can do my own raffle and send the money to the scholarship fund. Let me know if you want to buy a bag for a good cause!
I am happy with the way this came out. I like the positioning of the butterfly on the side.
Superbloom: Side pockets exterior
Of course, I love the side pockets. They are so fun!
I think I am done with the Superbloom pattern for awhile. I think the white of the zipper tape stands out a bit, however the rainbow teeth go well with the fabric. The side seams stands out a bit in the photo, but it isn’t as noticeable in real life.
Superbloom: Side pockets interior
I accidentally put a treat inside one of the side pockets. I hope whoever ends up using this bag will appreciate the various places where the butterflies are located.
I finished the two Dogwood pouches at the Retreat. This is a worthwhile pattern as there are multiple sizes, but also a couple of new techniques to use in making your pouches.
Pouch F is the larger one and would be great for chargers and other small electronics. It went together very quickly.
The zipper instructions were a little tricky, but I watched the video (glad I brought my tablet to the Retreat!) and it was clear. I was actually kind of excited about the zipper instructions. They make a very cool finish to the zipper ends.
Finished: Dogwood Pouch-J
Pouch J is the smaller one. It would be good to corral small items in your handbag.
I found that the boxing of the corners was a different technique as well. I had to watch the video (Yay tablet, again!), which made the technique clear.
These are already off to their new home. I haven’t had a clear answer as to whether the Angel Mama likes her set of bags, but I feel good having made an effort to thank her somehow.
I finished White Strips #2 and was able to hand it in to the Community Quilts Committee at the Retreat.
I was not surprised, but rather disappointed that my white scrap bin does not seem to be emptier. As I said before, I have a lot of plain white scraps so I have to decide what do with the plain white scraps. I am going to work on some other scrap quilts until I decide.
I finally finished this Superbloom. The Hindsight Superbloom was a high. This one felt like a slog. I don’t know why except that everything that could go wrong did go wrong. This is completely my fault, because I have been somewhat distracted by life. It was still frustrating.
Superbloom #3: interior
The outside looks fine and I am pleased by that.
My aunt loves irises and I found some iris fabric that I knew I had to use for her. The the fabric looks fine , but the lining is too saggy for my tastes, despite my use of a 5/8 inch seam allowance. I know the Muggles won’t know, but you’d think by now I could manage a non-saggy lining. 🙁
Superbloom #3: lining
Normally, I would use a white or very light fabric for the interior, but that iris fabric is so perfect for my aunt. I could have used it for the outside, but I really wanted to use the canvas I bought at Bolt for her for the outside.
Superbloom #3: top closed
I had to buy that ochre fabric after the fact for the zipper panel as I thought the iris fabric would look too chaotic. The ochre fabric is a weird color, but goes with the background of the iris print. Also, it was wonderfully soft.
I think it goes very well with the purple zipper. I don’t think it should, but it does.
Superbloom #3: side interior pocket
Superbloom #3: lining interior pocket
I did use some dots on white for the inside pockets as I thought they would be too dark if I used the iris fabric. I also think I want to make a pouch or a smaller bag with what’s left of the iris fabric.
Superbloom #3: side pocket
Superbloom #3: side pocket lining
I still like the design of this bag. The side pockets are especially cool. I haven’t ever used this bag as I don’t have one of my own, but maybe I need to try it out.
Once I got close to finishing this tote, I stopped working on the SMAP version. I needed to send this one off to my aunt and I wanted to get it done. now that it is finished. I can get back to that bag.
I was very pleased to make this Emmaline Retreat Pouch for Carrie for her birthday.
I decided to make one when I ran out of time to make her a Classmate Bag. The other thing that helped me decide was the several Retreat Bag frames I have stashed in Quilts Illustrated Tool Tote, where I keep my bagmaking hardware.
Retreat Bag for Carrie – top
I used the Color Theory fabric by Carrie Bloomston, which is the fabric I have been using for her gifts.I have some random pieces that are cut from yardage, but still good sized that I was able to use.
Retreat Bag for Carrie – side, frame detail
The whole project went really quickly. I made the whole pouch in about 3 hours while I cooked dinner during part of the making. I did finish the pouch later in the evening. It requires a frame so I had to prepare and insert the frame, then sew up the hole.
Retreat Bag for Carrie – interior
The frame means that this is an Open Wide or Wide Mouth style pouch. It is great for seeing everything you have stashed in the bag.
Carrie’s Retreat pouch – veer zipper
Carrie’s Retreat pouch – veer zipper
I am super pleased with the technique they use to veer the zipper. It made that process SO easy and it looks great. I have to remember it and try to use is on other bags. The only other pouch I can think of offhand that veers a zipper is the Cotton Candy pouch and that is a different sort of technique.
I thought it would take me longer, but am glad I was able to get it done quickly. Her birthday was a week after I made it and I had to fill and mail it as well. Carrie is super generous and I could never match her generosity, but I can make pouches and bags.
This is a free pattern, so go and take a look. Make one and tell me what you think.
I finished the Paint Tube Day Trip! Yay! This one went together a lot more quickly than the Hindsight Day Trip, but that’s the way it works, right?
I was thinking, as my Mom has started using the bag, that a slip pocket might be a good addition to the front. It would add to the layers, but would also be really useful.
I mentioned that I was making it so she could carry her cell phone with her and didn’t have to hold it in her hand as she moved around. That is working really well. She has also started using it as a wallet. When we go out, she takes it instead of her purse.
Paint Tube Day Trip
I was pleased, once again, that the cell phone pocket fits her new phone very well. I am also glad I reinforced the magnetic closure. I think it might have ripped already if not for the extra (Decovil Heavy**) reinforcement.
I also made the straps/tabs for the D-rings slightly longer. I did that because one pulled away from the edge stitching on the Hindsight Day Trip. I didn’t want that to happen again, but I noticed that the D-rings spin around now. The triangle hardware pieces would not have worked for this application, sadly. My mom doesn’t care, but I care. Another learning moment, I guess.
Paint Tube day Trip interior
The inside went together well and I love that I can turn this bag through the openings in the interior zipper pocket.
I used leftover zipper tape for the interior zippers. They are the handbag size, but it doesn’t matter.
I put different colored zipper pulls onto the the interior pockets to give a visual cue of the contents. The pulls are nice and large so easy to grasp.
I don’t really want to make a bunch of these, but I have the templates and some ideas, so I might make another one or two. One would definitely be a good Pink Project addition.
Check out all of the Minikins patterns I have made as well as some of the other Sew Sweetness patterns.
**N. B. : Obviously, you should shop at local quilt shops and small businesses. However, if you are too busy or can’t find what you need there, I use Amazon affiliate links and may be paid for your purchase of an item when you click on an item’s link in my post. There is no additional cost to you for clicking or purchasing items I recommend. I appreciate your clicks and purchases as it helps support this blog.
I am so excited about finishing this bag! I am not sure that is the right way to say it, but it has been a long time in coming. As mentioned, I bought Minikins Season 2 for the express reason of making this bag. Then, I was intimidated and didn’t feel up to making it.
A few years have gone by, and I have made several bags. This bag seemed right for a gift. I guess I was ready.
The bag was a challenge, but only because of the many layers, not because of the directions. The process is actually very easy. With the pattern and the video, it wasn’t hard.
Finished: Day Trip Wallet – interior
This bag is, basically, a small wallet that fits your cell phone. You could put this into a larger bag, but then take it out when you don’t need the whole bag.
This would be great for doing that since the strap is detachable. You could store the strap elsewhere or in one of the inside zipper pockets and take it out as needed.
Finished: Day Trip Wallet – exterior pocket
This is the first one that I have made, but I hope to make more. I wonder about the size of the flap for the cell phone pocket. I wonder why it is so small. It might interfere with stitching the zipper. I have asked in the Sew Sweetness group to see what others say.
I was a little worried that the pattern was designed when cell phones were smaller and a modern phone wouldn’t fit. I tried my large-ish Samsung phone in the pocket and it fits just fine. Whew! This is good as the bag is not that large and I wouldn’t want it to be enlarged so much that it wouldn’t fit in the larger bag mentioned above.
Finished: Day Trip Wallet – interior detail
The inside has two sides, both with a zipper pocket and several card slots. Behind the top card slot could be a spot for cash.
I added the optional D-ring on the spine so there would be a place to clip keys.
I also used two different colors of zippers in order to give the recipient a visual cue as to where she stashed something.
Hindsight Day Trip Cell Phone Wallet
I think I could probably have put another cell phone pocket on the other side of the bag exterior. I am not sure how useful that would be, though more pockets are always better.
I am pleased with how this came out and am cutting out a second one. This one will be for my mom who needs something for her phone so her hands are free to maneuver her walker.
I finally dug in last weekend and finished Ends n.21. Honestly, I needed the design wall space! LOL! Still, it is finished and ready to go to the meeting on Saturday.
This design is super easy, so there wasn’t really a lot to do. I just had to sit down and sew. Saturday was kind of a finishing up day as I didn’t have tons of time to sew, so I finished up projects that were already started and didn’t require a lot of thinking. I think this quilt looks fun. It is about 39 inches x 40 inches. Not huge, but a nice playmat size.
Ends n.21 back finished
I also grabbed a piece of fabric out of my backing fabric supply and made a quick back.
I finished Orangeade and turned it in at Sew Day. I was glad I had something to to turn in since I didn’t plan on working on the Community quilt project.
This was not a difficult quilt to make. I did play around a lot with the placement of the squares so that the eye roved around a little bit at least.
I am happy with the way it turned out and, as usual, am thinking of making more.
Orangeade back finished
I always want to make the backs as it means more fabric used. The pieces I have available to use are not as big as I have used most of the large pieces that didn’t have a purpose. I ended up piecing this one. I think that will become more the norm. I do have some backing fabrics, but they are a lot of large flower prints and I mostly don’t want to use them for donation quilts. We’ll see. More fabric out means I can buy new fabric.
Well, I did. Mom said she wouldn’t be using the walker long enough to warrant me making a bag for it. I waited about 2 weeks before making it, but finally made one the other night. She loves it and finds it very useful. I have to keep reminding her not to fill it up too much. She is limited to carrying 5lbs per hand.
I remember thinking the directions were confusing at the time. I made the same mistake this time that I made before: I sewed the Velcro inside the pocket. DUH! I hope the photos I added will help with that.
This time, I took the time to make some edits and add in some photos for next time. I hope I won’t have to use those directions again, but I am planning for the worst and hoping for the best.
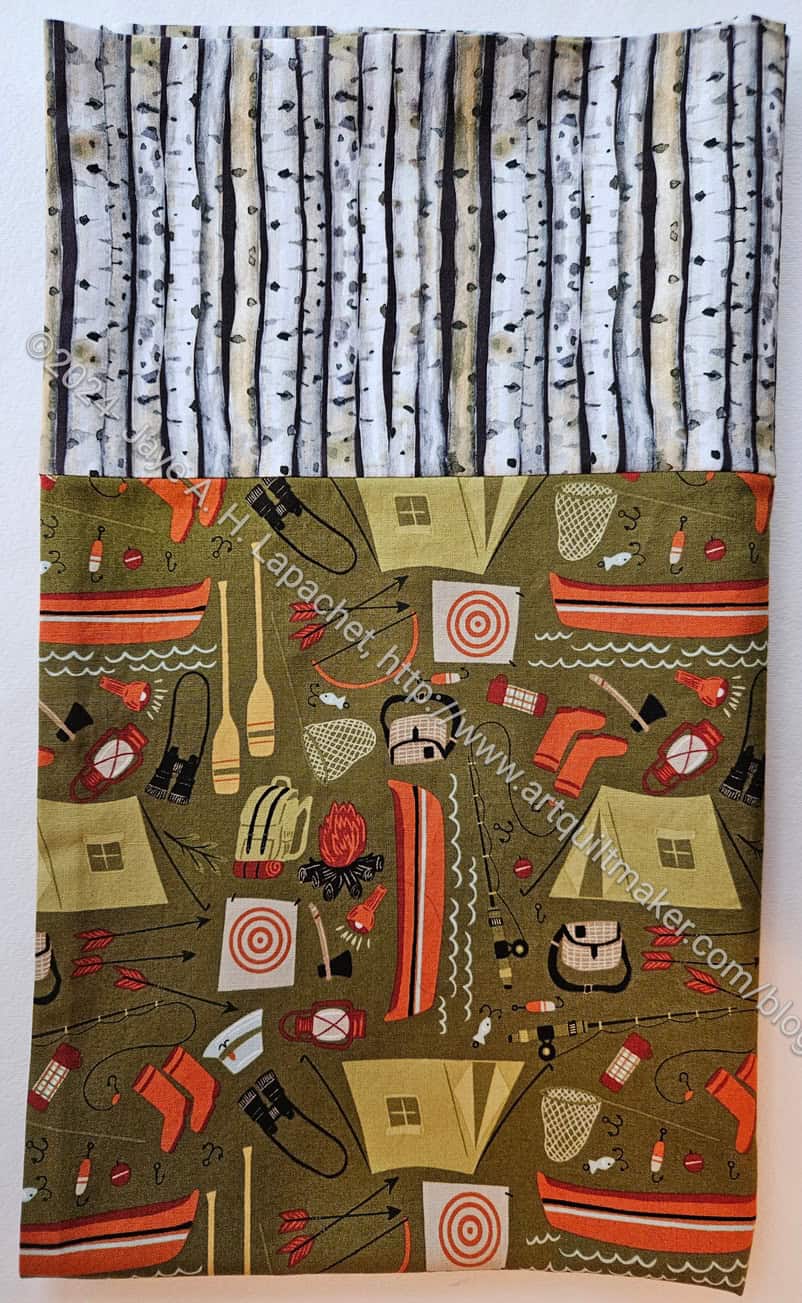
This is the last pillowcase before I have to buy more fabric. I have found some great fabrics and will have to go and buy them.
I don’t really consider camping mind expanding, but I guess it is. I like nature; I just don’t like the dirt and how hard everything is (washing dishes, showering, etc) when you go camping.
Still, the goal is to encourage this nephew to explore the world and get some non-school experience.
I know it seems like Christmas is lasting forever on the blog. I made quite a few gifts, but it is also taking some time to post about them all.
Tim admired all the project bags I made last year, so I decided to make him one from Christmas.
I don’t have a lot of dark greens and thought these bright greens would be too much, but he loved the bag and said that he loves all greens.
I am super happy with the way this came out and will make one for myself next. Well, maybe not the next project, but the next time I make a project bag. 😉